Leaderboard


Popular Content
Showing content with the highest reputation on 06/28/15 in all areas
-
You could always buy this http://www.ebay.co.uk/itm/Herrenuhr-Parat-ca-1955-Werk-PUW-60-Incabloc-OSKO-1060-/321649990063?pt=LH_DefaultDomain_77&hash=item4ae3d559af Probably cheaper than a new jewel setting! S2 points
-
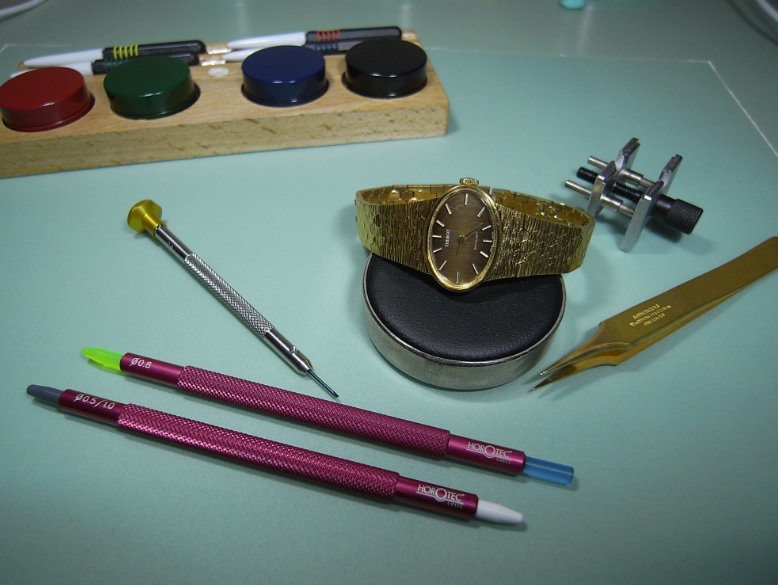
As I only get time to do a watch every couple of months I decided to go easy on the range of chemicals and equipment. 2 small glass pots with a little Renata Essence - one for cleaning and one for rinsing. A small, soft toothbrush, and peg wood. No baskets, I just move parts individually with tweezers. I dismantle the movement into an ice cube tray and clean the parts in groups just before fitting. That way I don't get anything muddled up. I leave parts to dry on plain paper which draws away the fluid and helps it evaporate. I also put cling film over the pots while not in use. This is sort of adapted from DeCarle. I don't clean my brush on a burnt mutton bone (leg or otherwise for those who have read that!), and I couldn't get hold of any cyanide either! I also don't leave the pallet fork in for too long for fear of softening the shellac. DeCarle says this should all take 45 mins to an hour, but I've never timed myself. S2 points
-
Hublot made a wristwatch version of the Antikythera mechanism. Limited to 20 pieces at about $300k a pop.2 points
-
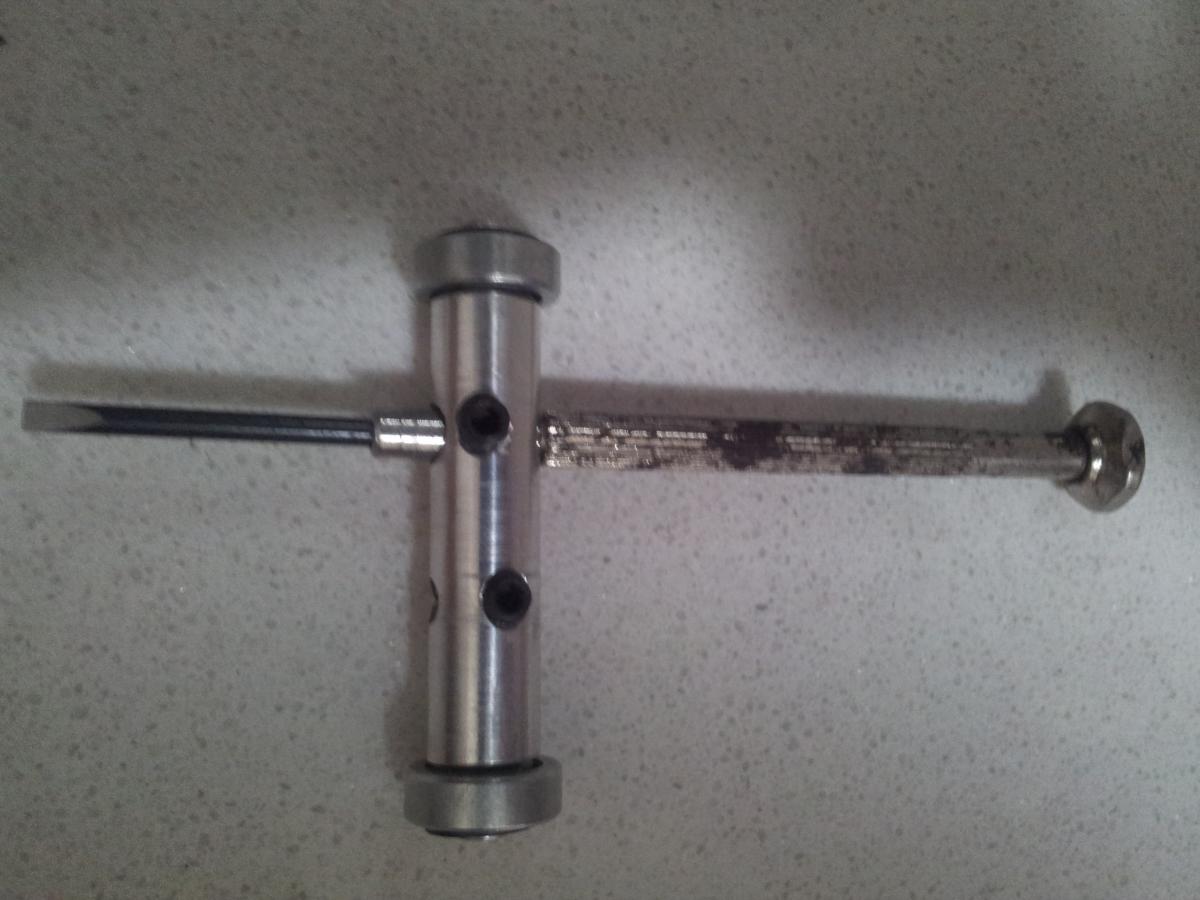
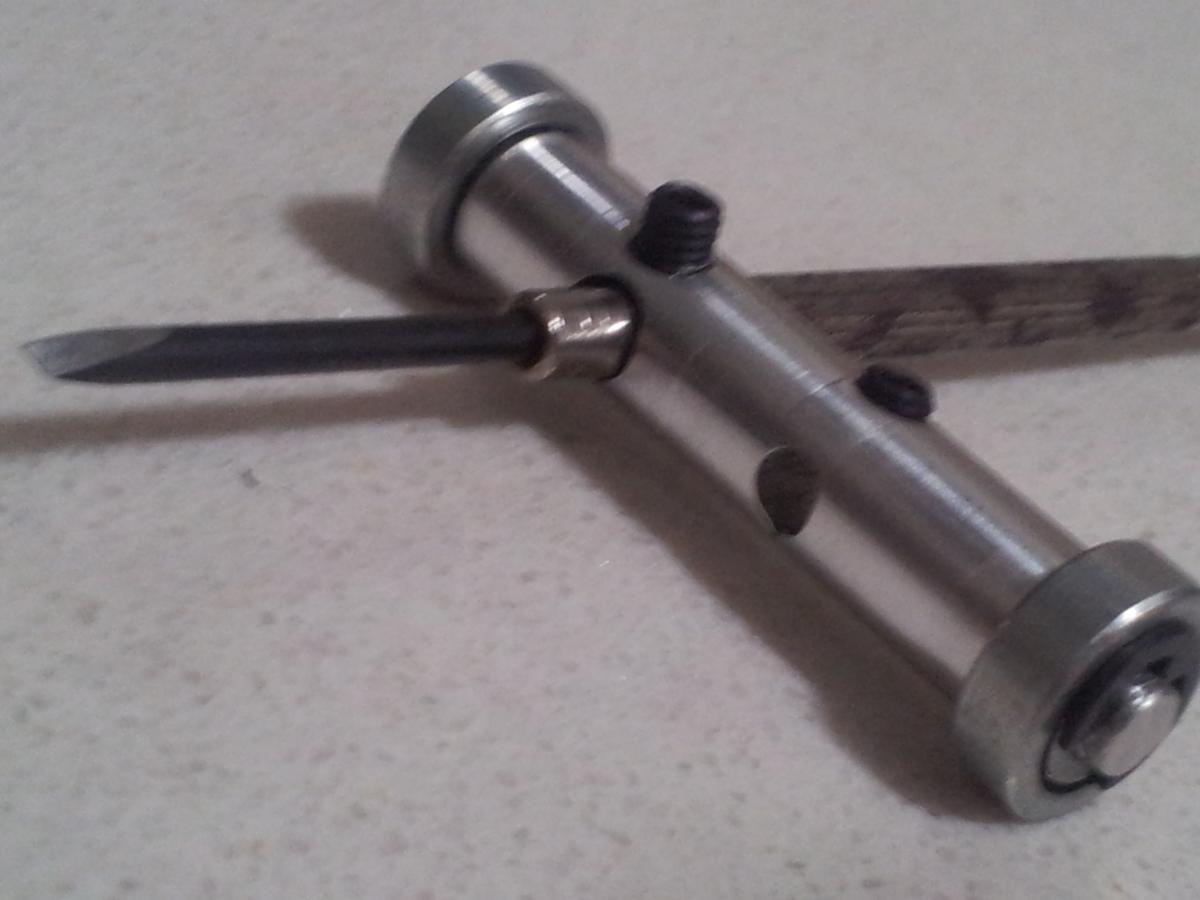
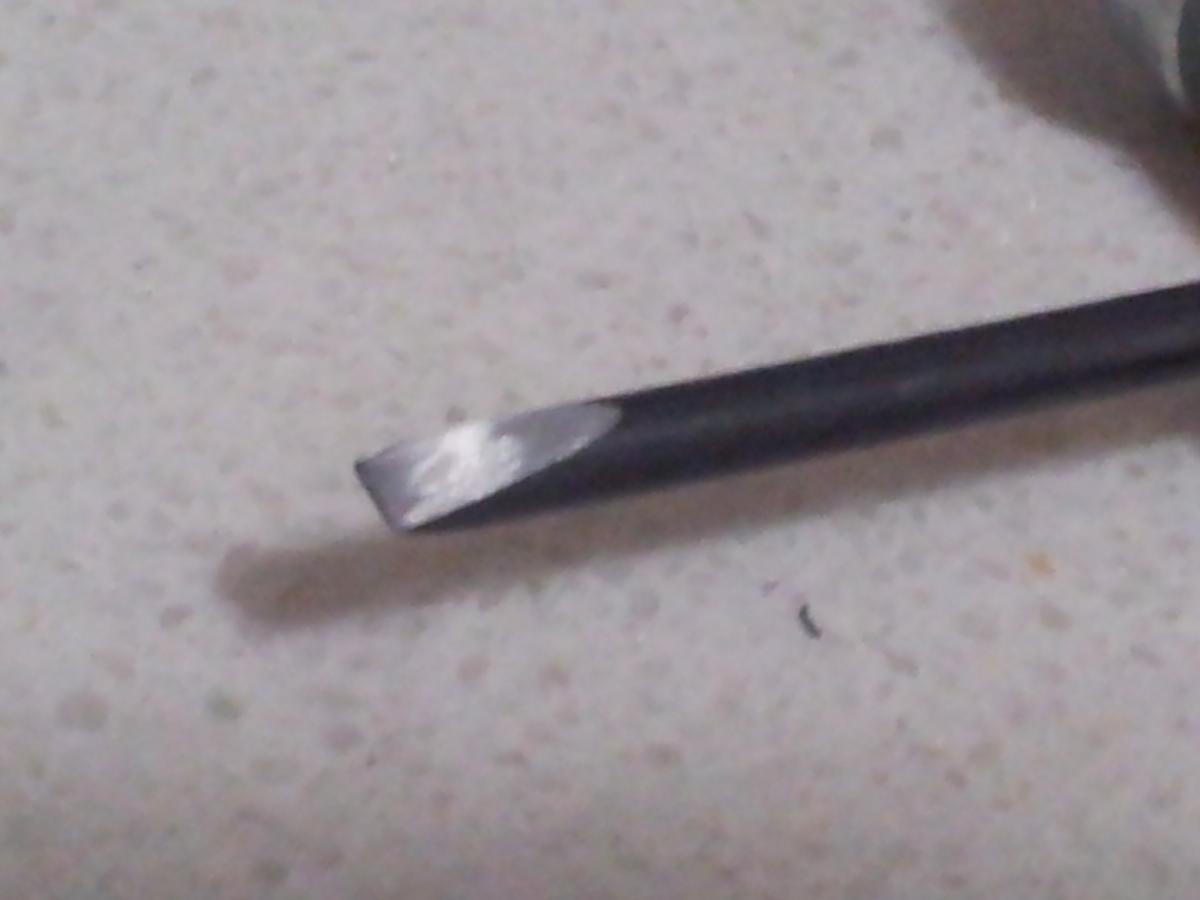
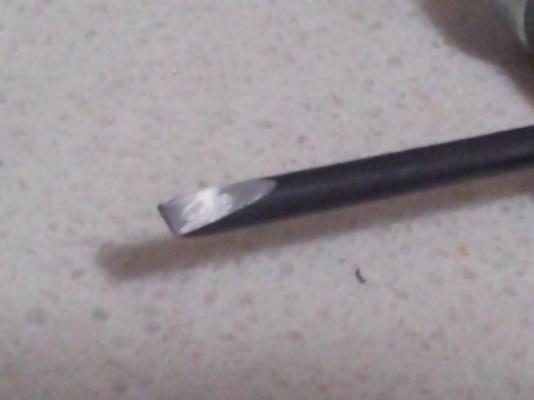
Hi, This is my home-made screwdriver polisher. Very useful and funny! :thumbsu:
 1 point
 -
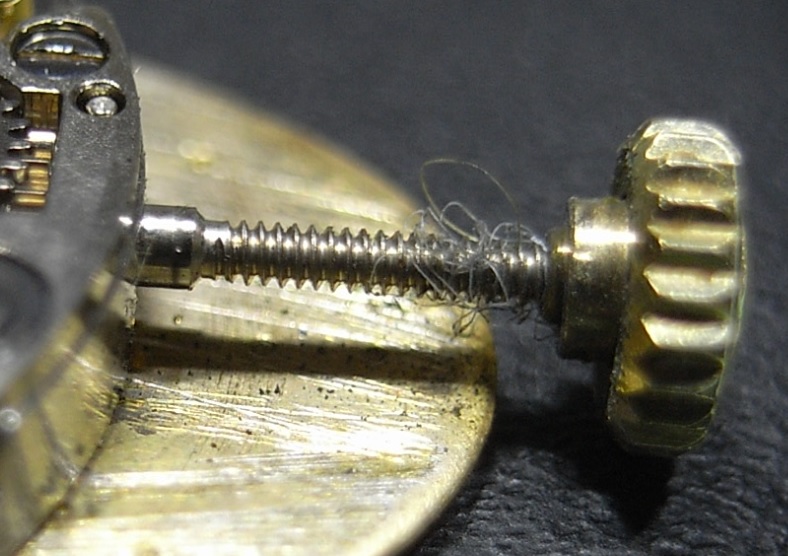
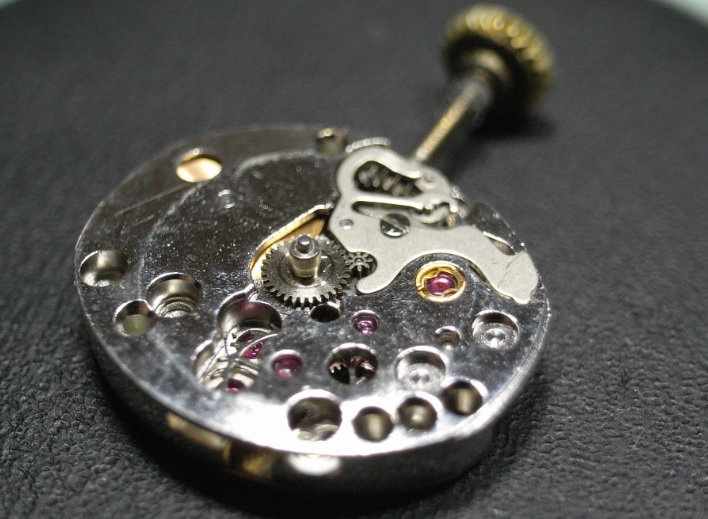
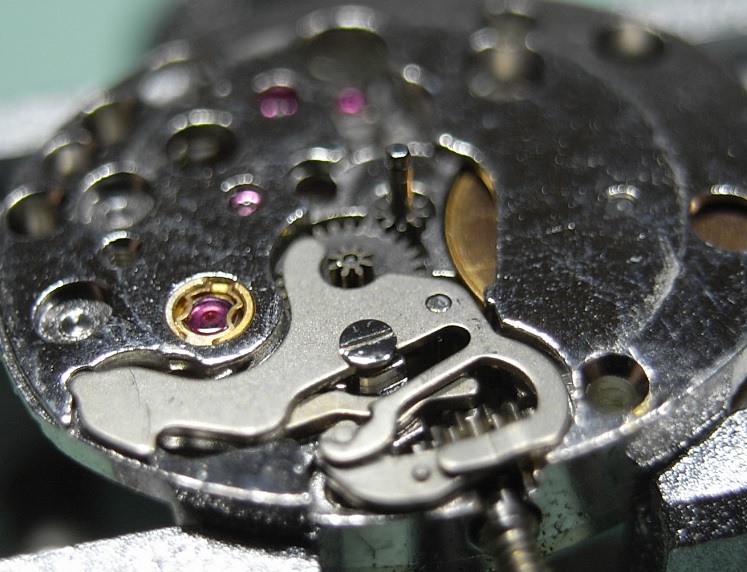
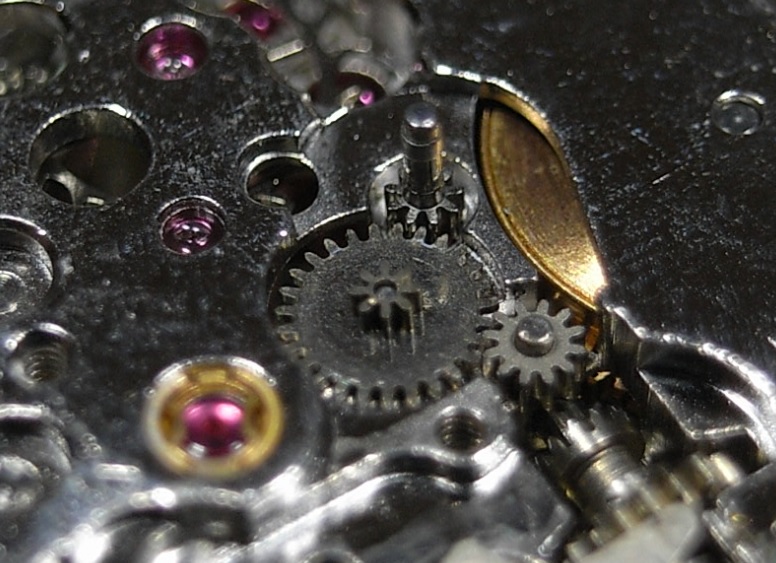
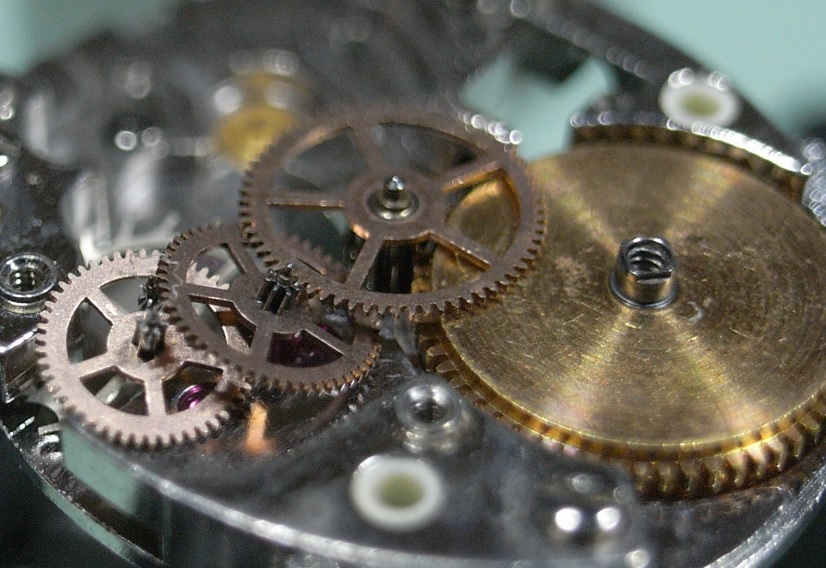
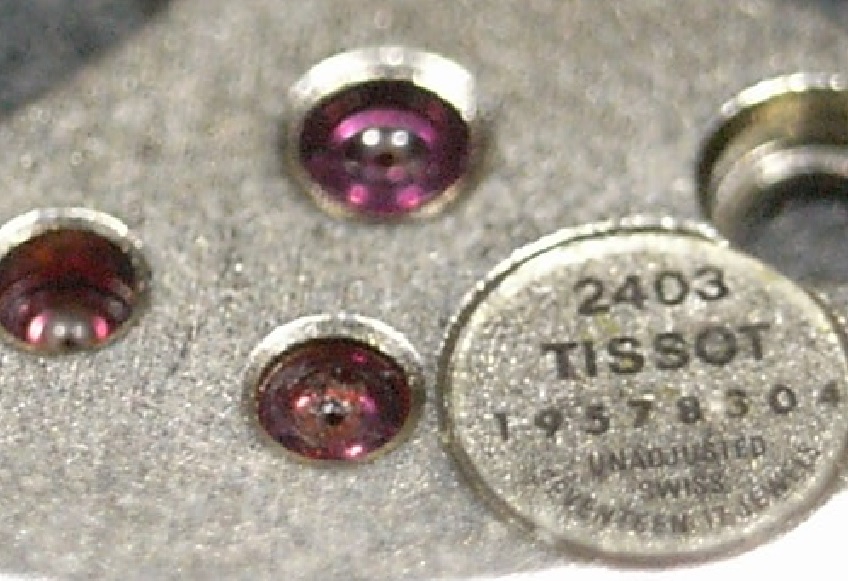
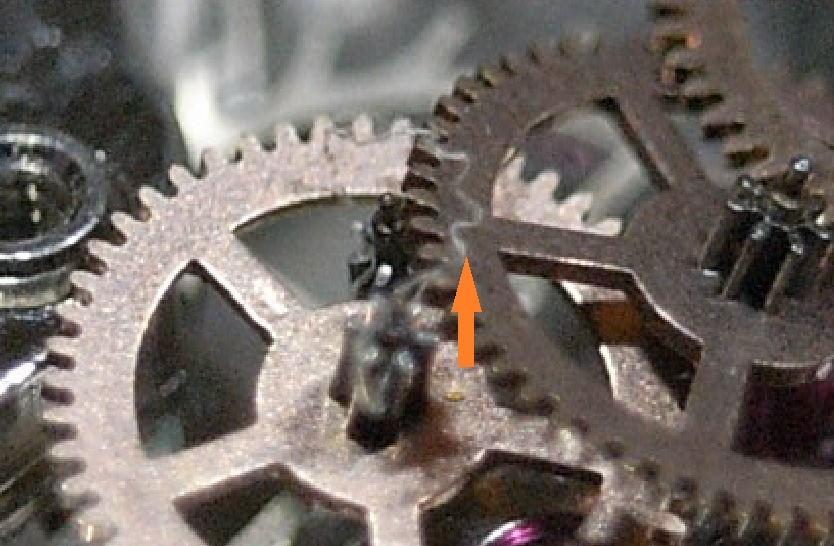
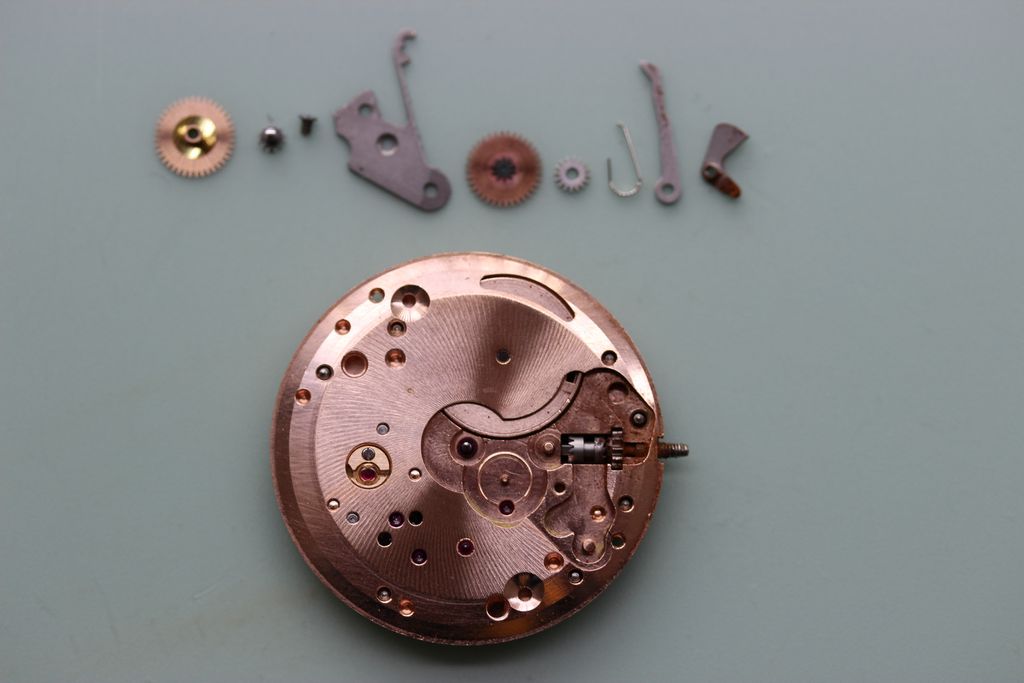
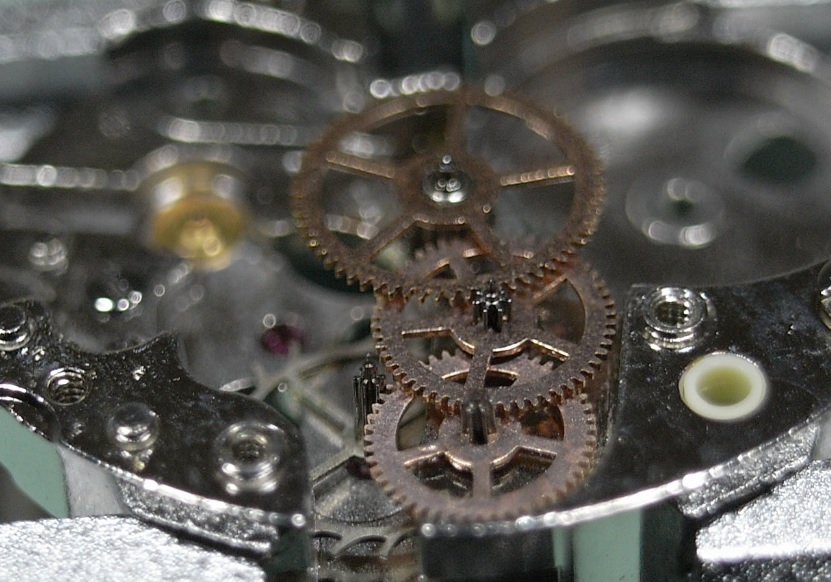
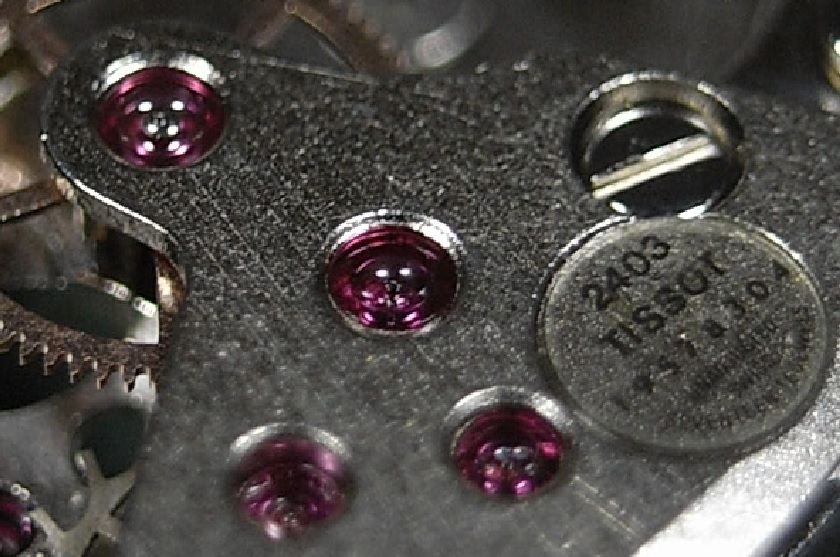
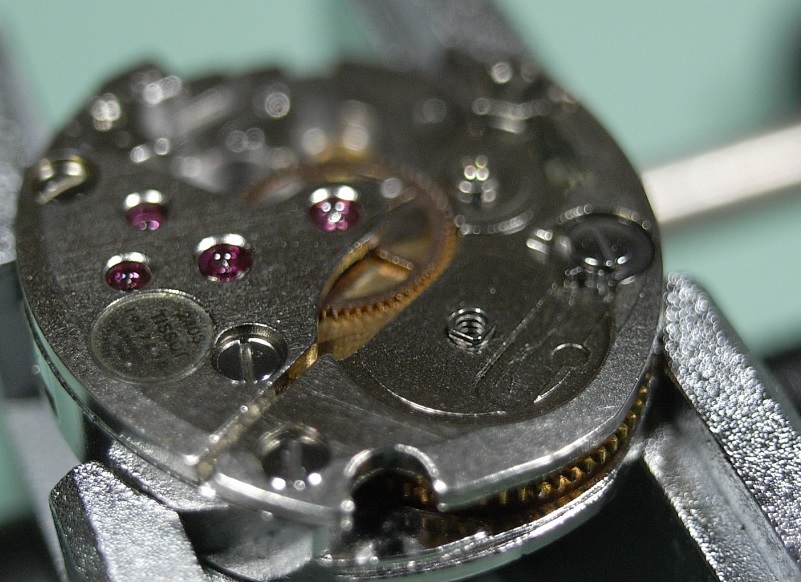
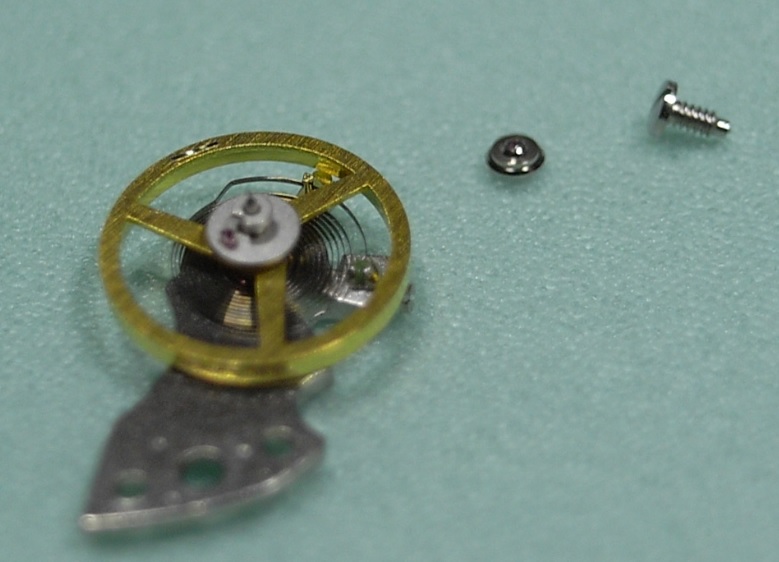
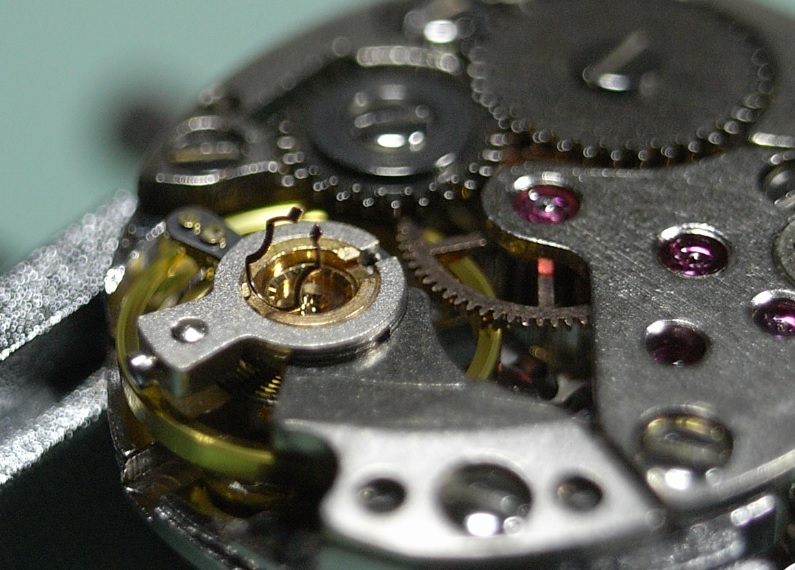
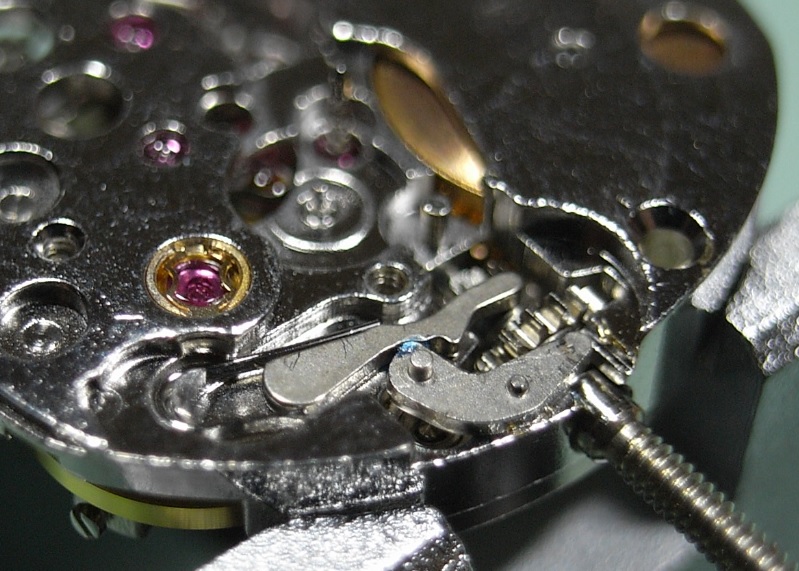
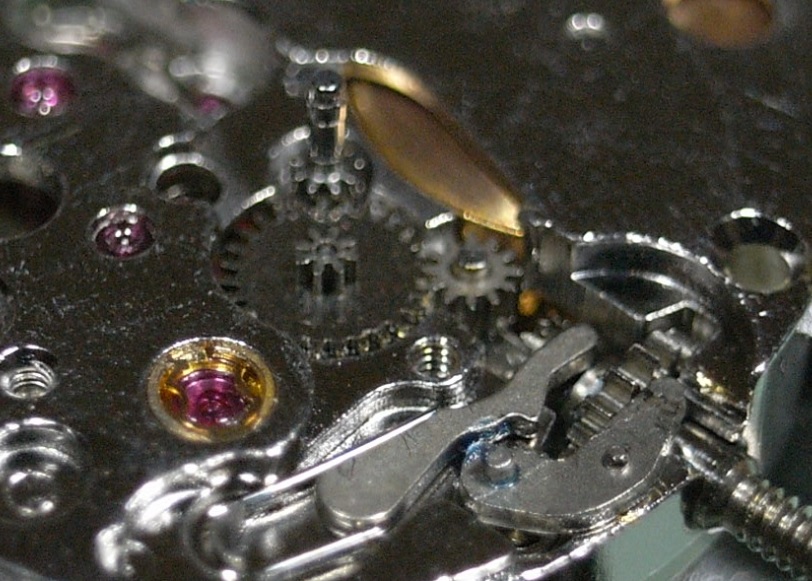
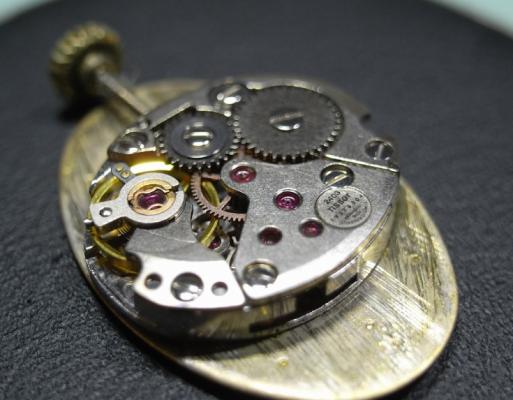
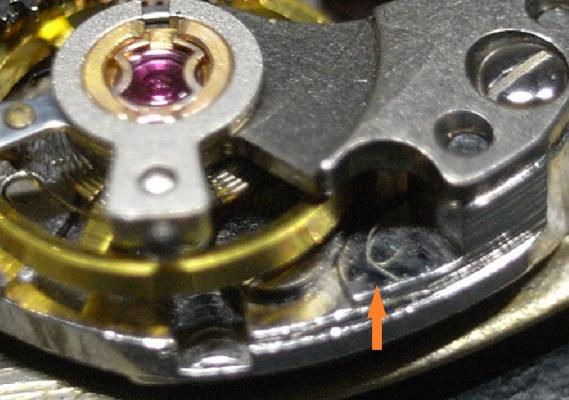
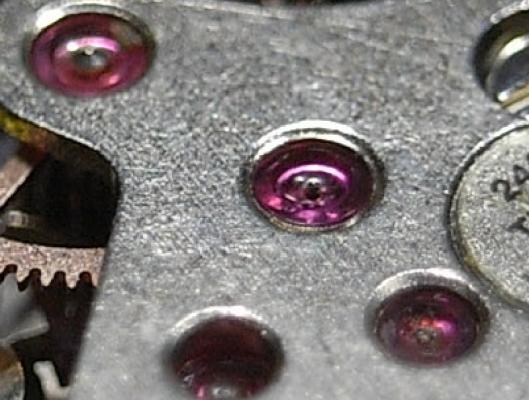
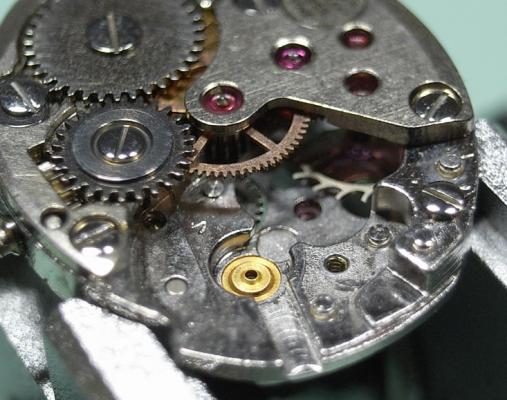
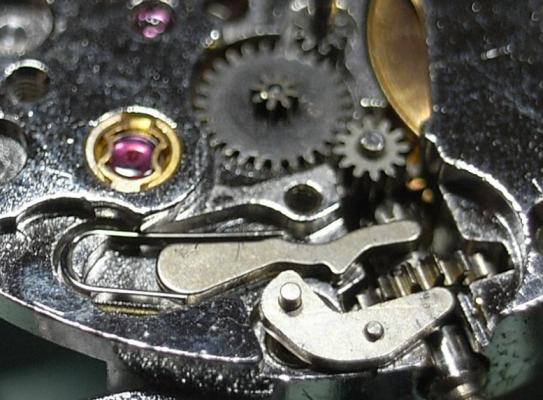
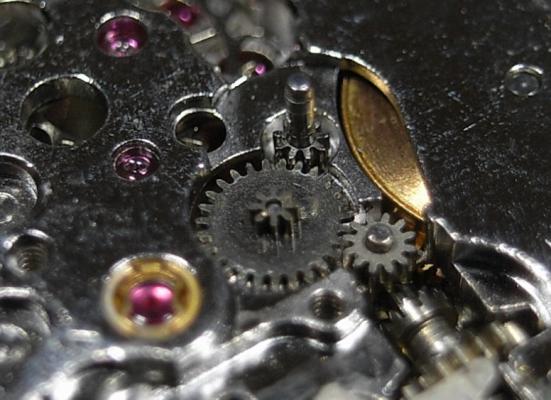
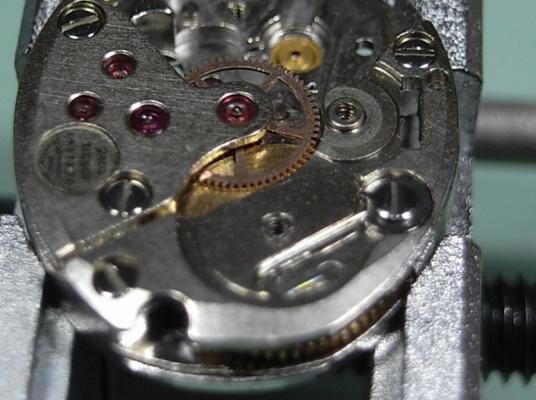
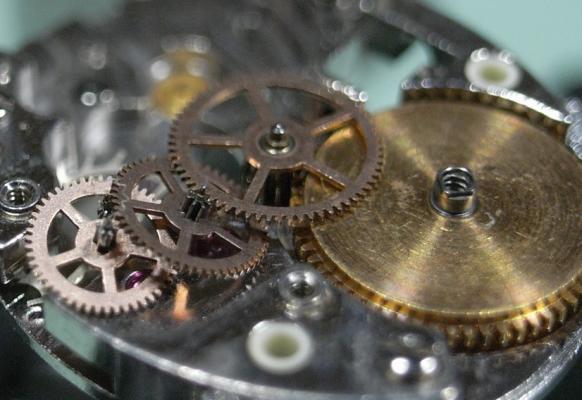
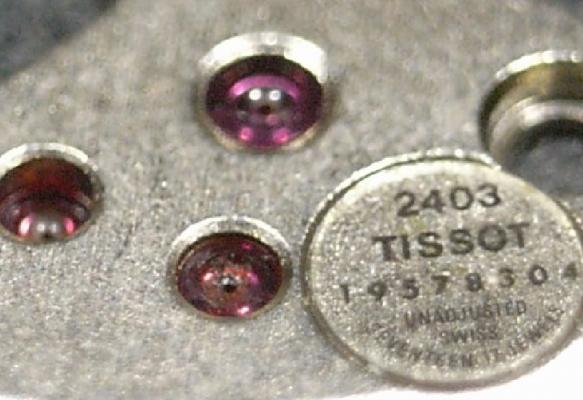
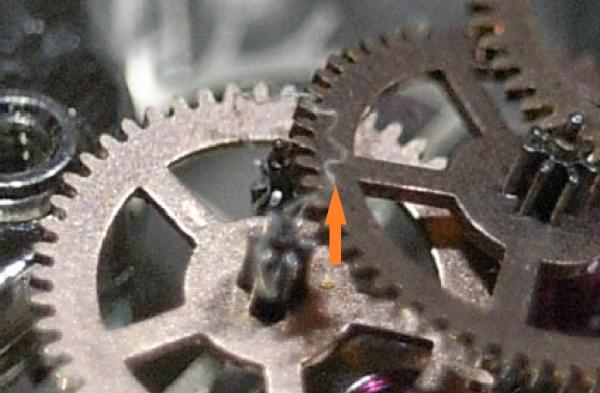
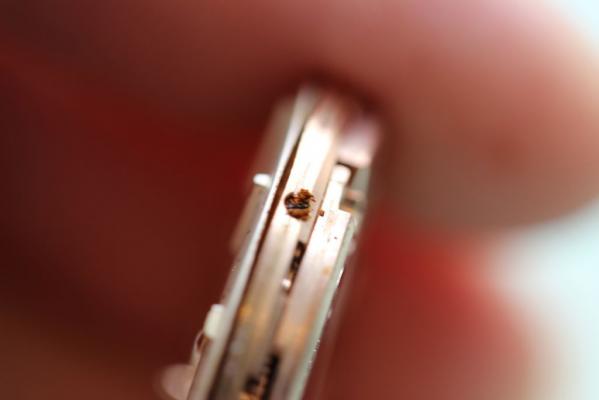
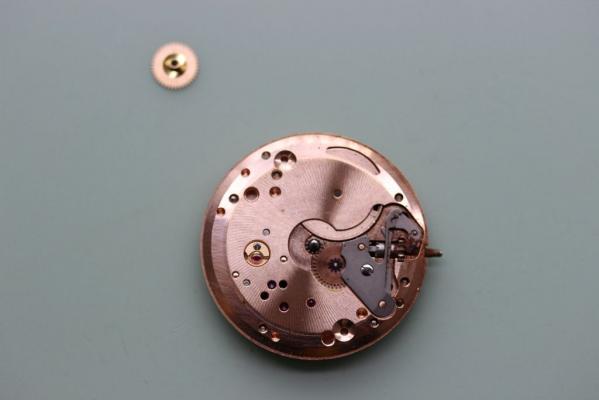
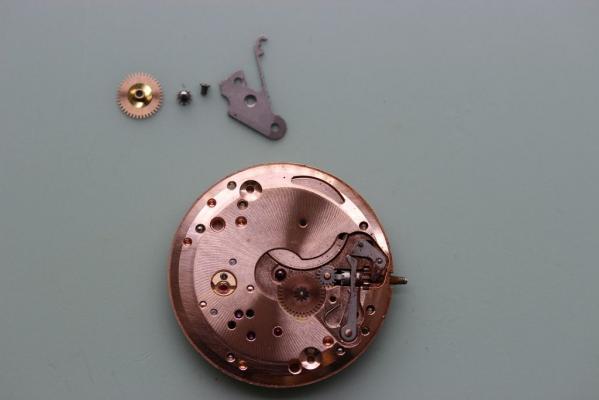
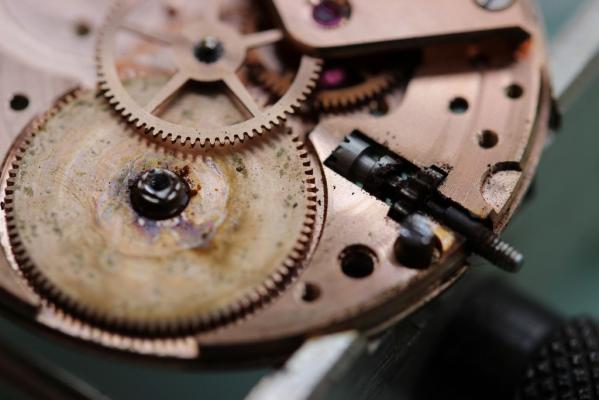
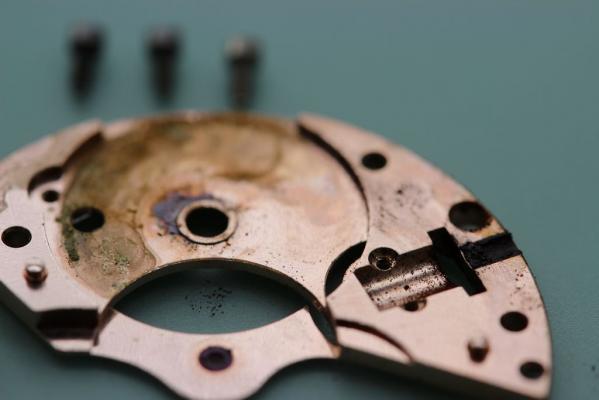
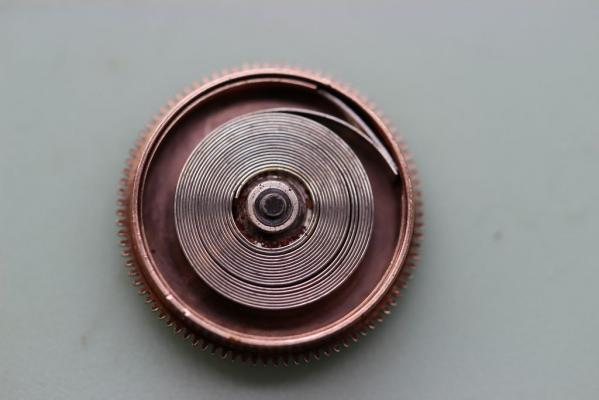
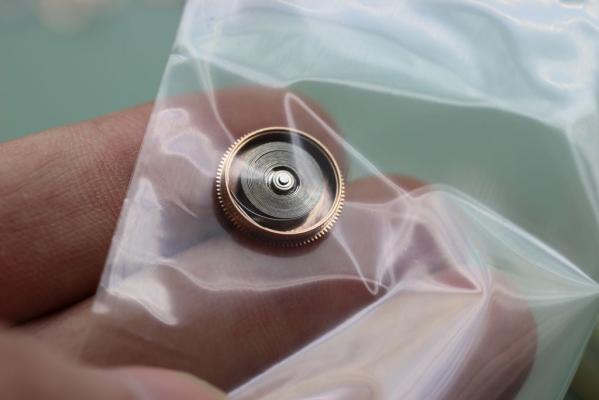
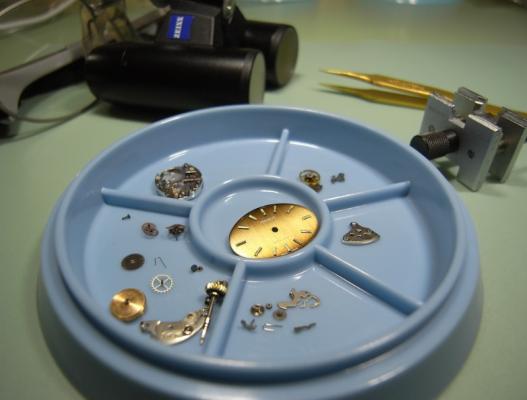
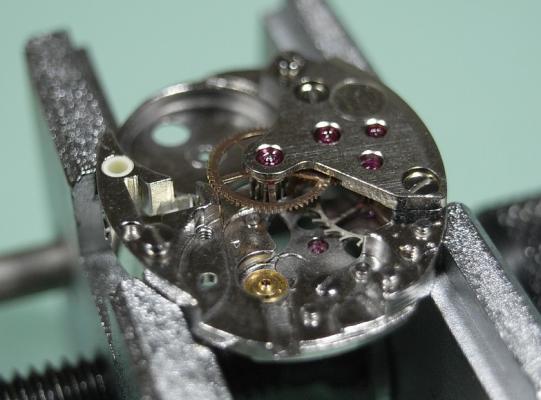
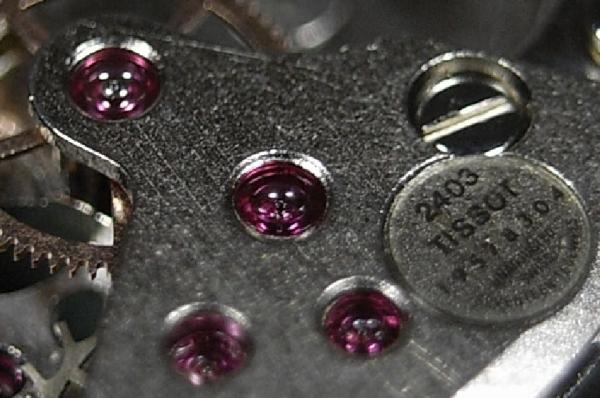
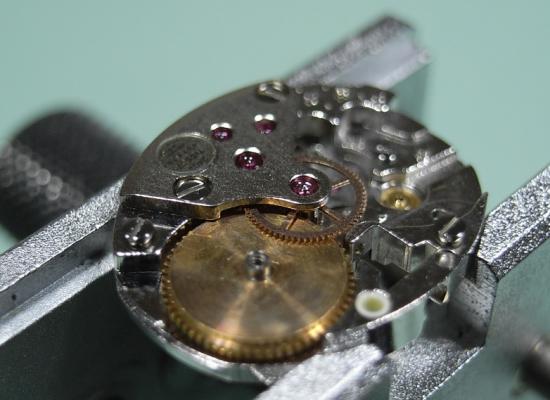
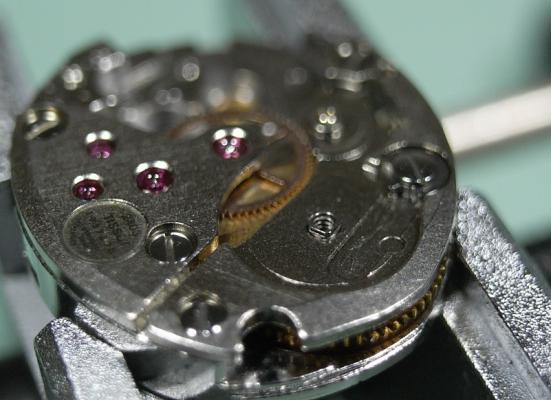
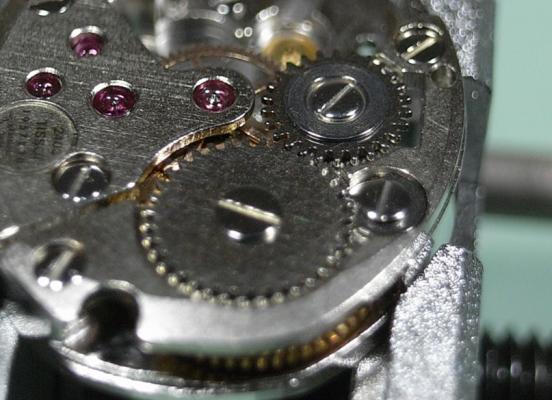
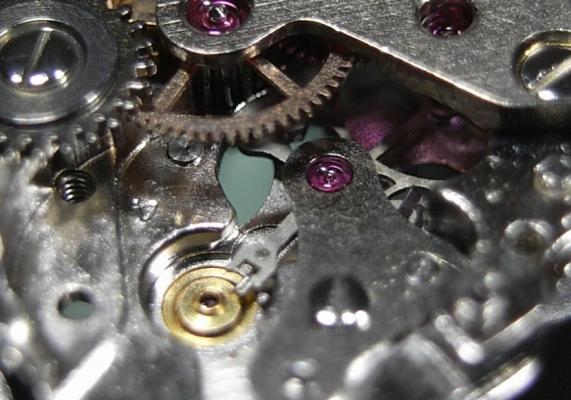
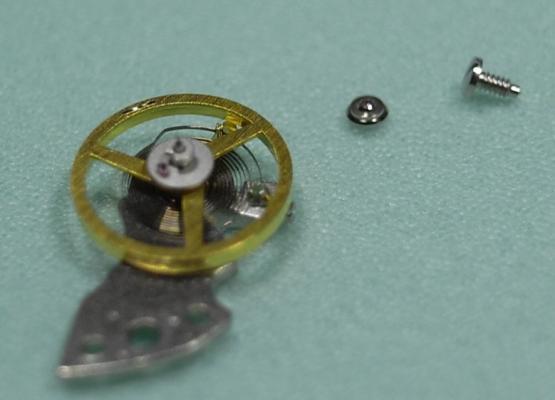
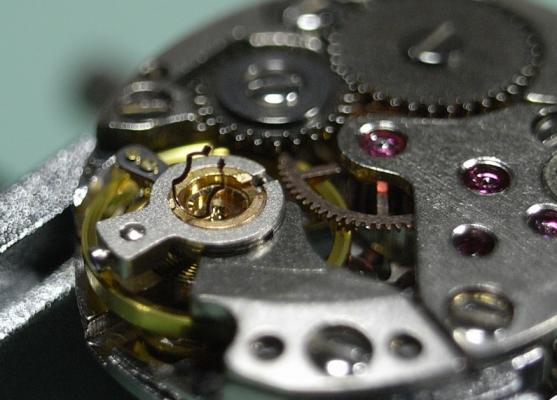
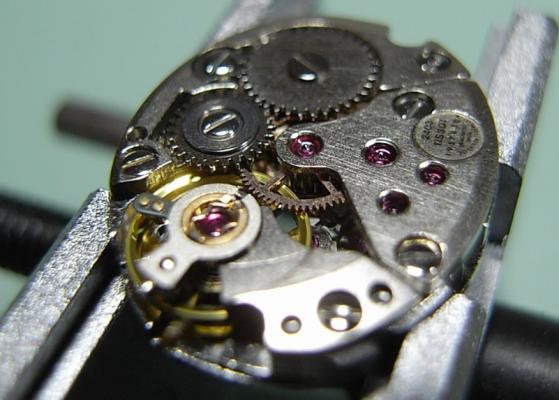
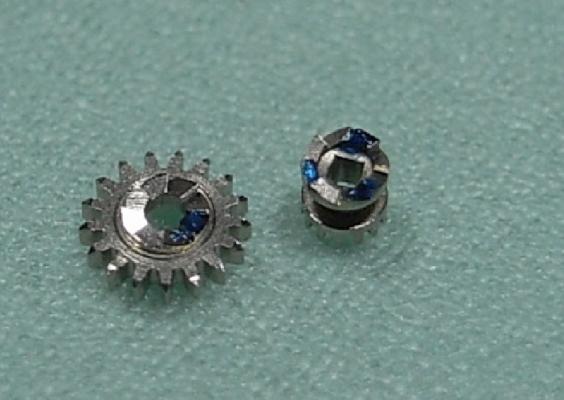
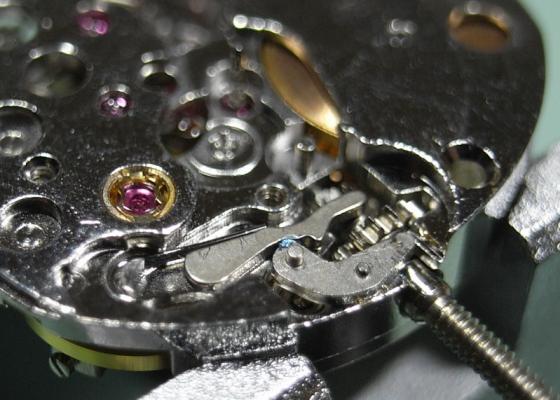
Tissot 2403 Service Walkthrough What is it with me and small movements?! I seem to attract them in absurd numbers. Oh well, here's another one to push my Zeiss optics to the limit, a Tissot 2403. My brother's father-in-law found this at the local rubbish tip, thrown away and unloved :( Upon initial inspection the condition looked dirty but not marked up, Canon Pinion felt good when setting the hands, and it seemed to wind smoothly. But alas it wasn't running at all. So to the bench I go, and de-case this little gem of a find. It removes like many ladies fashion watches, with the movement cradled in the Caseback. I removed it from the Caseback, and it looked remarkably clean. So I gave it a close inspection to see if there was something obvious that was stopping the movement. First thing that stood out, and is common on these types of movements, is the lack of a Crown Seal. As you can see there is a lot of contamination along the Stem, including nylon fibres ... perhaps from the sleeve of a sweater. I continued to look and found more of these fibres near the Balance. Continuing my inspection it was obvious that this watch was in desperate need of a complete service. Note the condition of the jewels. But besides a strip and clean, I couldn't see anything else wrong with it. No rust, nothing bent or broken; just some contamination stopping it from running. It's sad to see we live in such a throw away society today, 50 or 60 years ago this would have never been discarded on a tip. Ok, time to bring this watch back to life. First step as always, release the tension from the Mainspring, and remove the Balance and Pallets. Now the Balance and Pallet Fork safe, we can remove the Keyless Work. Start by removing the Hour Wheel, then the Setting Lever Spring. Then remove the Yoke and Setting Lever. Be sure to secure the Yoke Spring with Pegwood and note is orientation. Then remove the Minute Wheel and Setting Wheel. Then pull the Stem, and remove the Sliding Pinion and Winding Pinion. Flip it over and remove the Ratchet Wheel and Crown Wheel. Then you can remove the Mainspring and Train Bridges. As you can see, even if this watch was running, it would have not been giving accurate time. All the jewel holes are filthy! Here is a reference shot of the train on the 2403. Now, if you had good eyes you might have seen it. The object that stopped this watch from running. You guessed it ... a nylon fibre has found it's way into the wheels of the train, and gotten jammed between the Intermediate and Third Wheel. So know the mystery is solved, it's just a simple matter of cleaning and re-assembly. To Be Continued ......


 1 point
 -
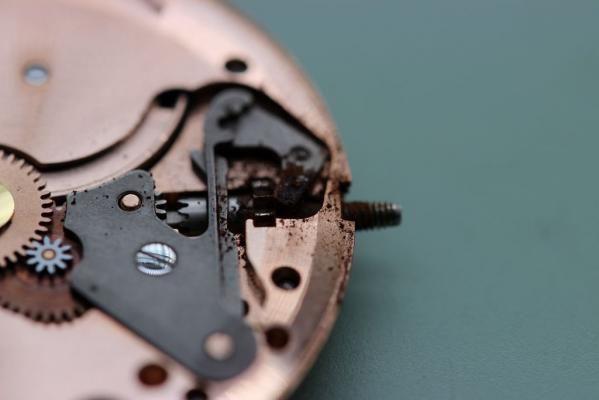
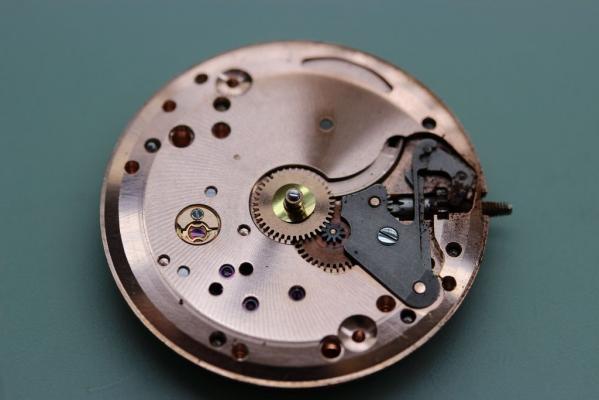
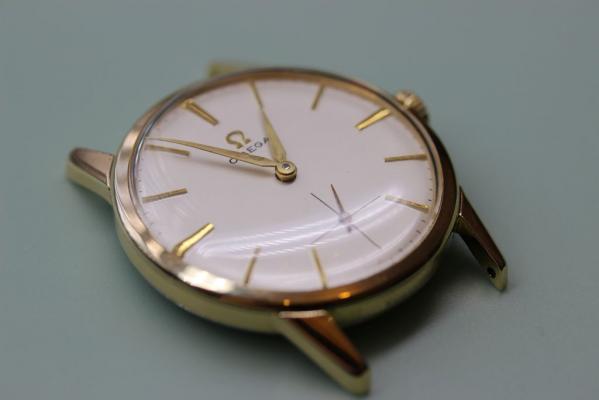
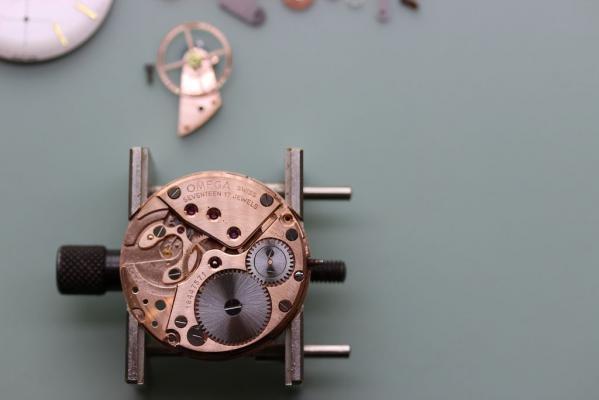
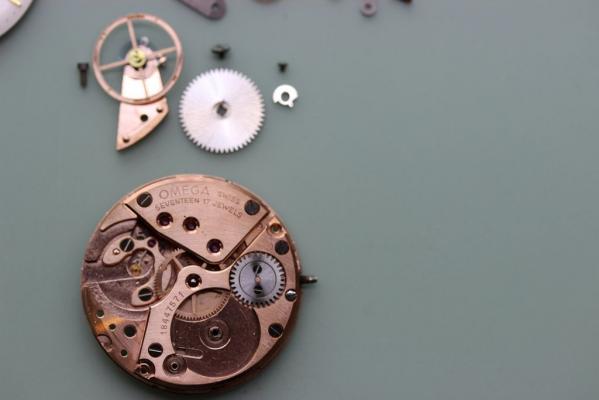
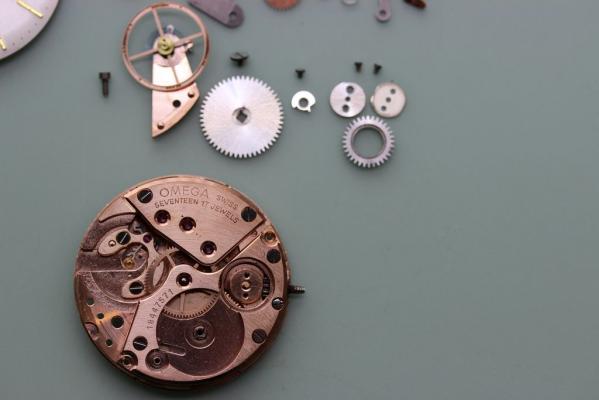
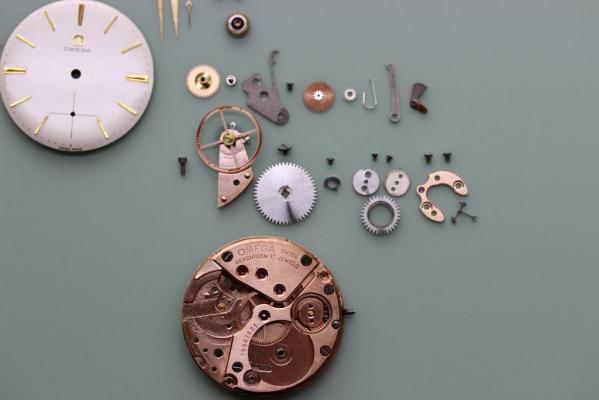
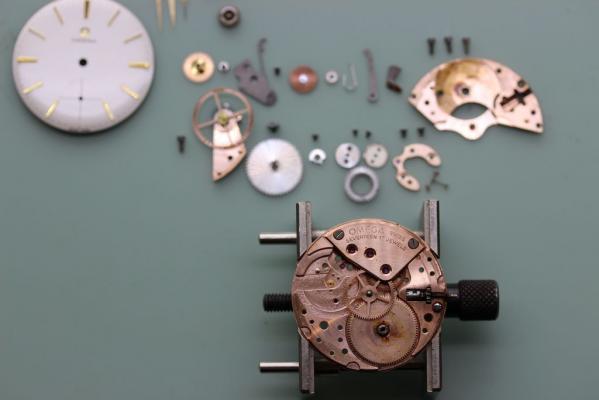
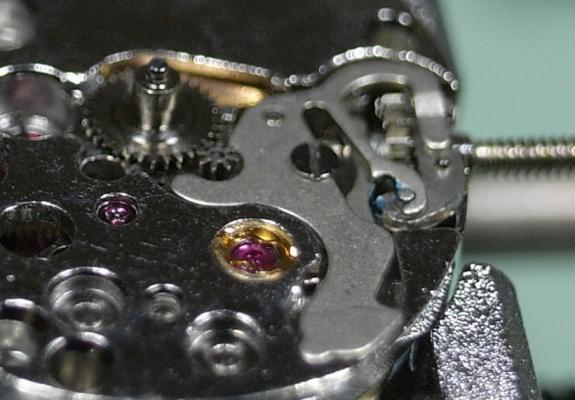
This nice Omega came in with a seized up keyless work. The crown could not be pulled out to hand set position and the watch could not be wound. I immediately suspected rust. Getting the movement out of the case was a challenge because the crown could not be pulled out. But luckily I could unscrew the crown from the stem as the stem was seized. With the movement out of the case, I can see evidence of rust. Time to get stripping (the watch). First challenge was unscrewing this dial screw which was rusted in place. A bit of oil and some gentle persuasion and it unscrewed. With the dial off I can see the extent of the damage which is quite bad - but not the worst I have seen. Off with the hour wheel: And the setting lever spring: And this is as far as I could get. That stem was not coming out, but I have an idea! ...


 1 point
 -
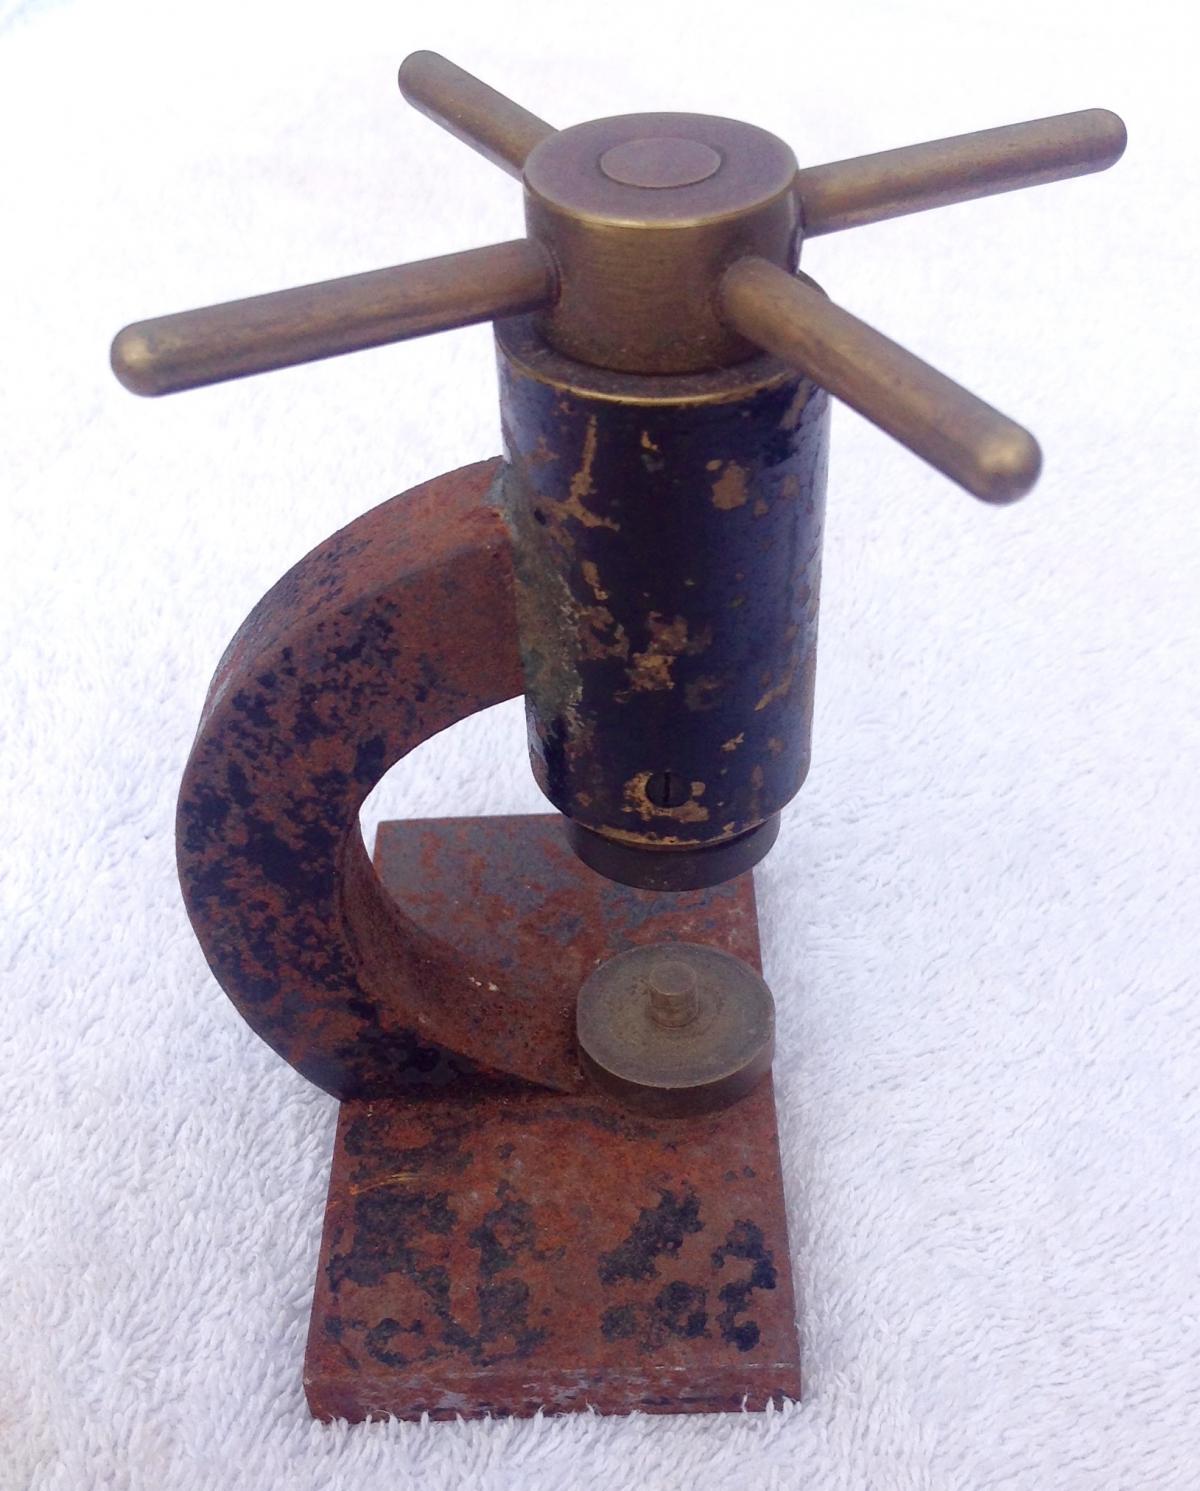
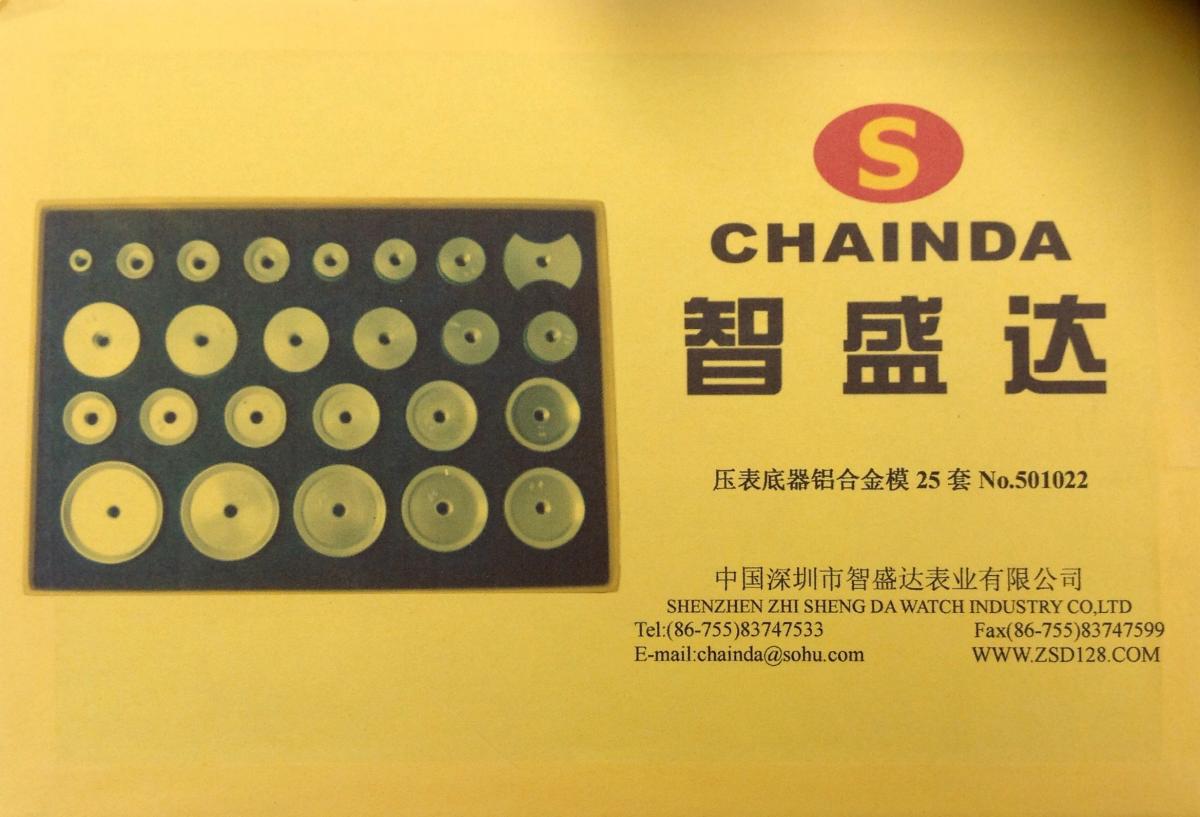
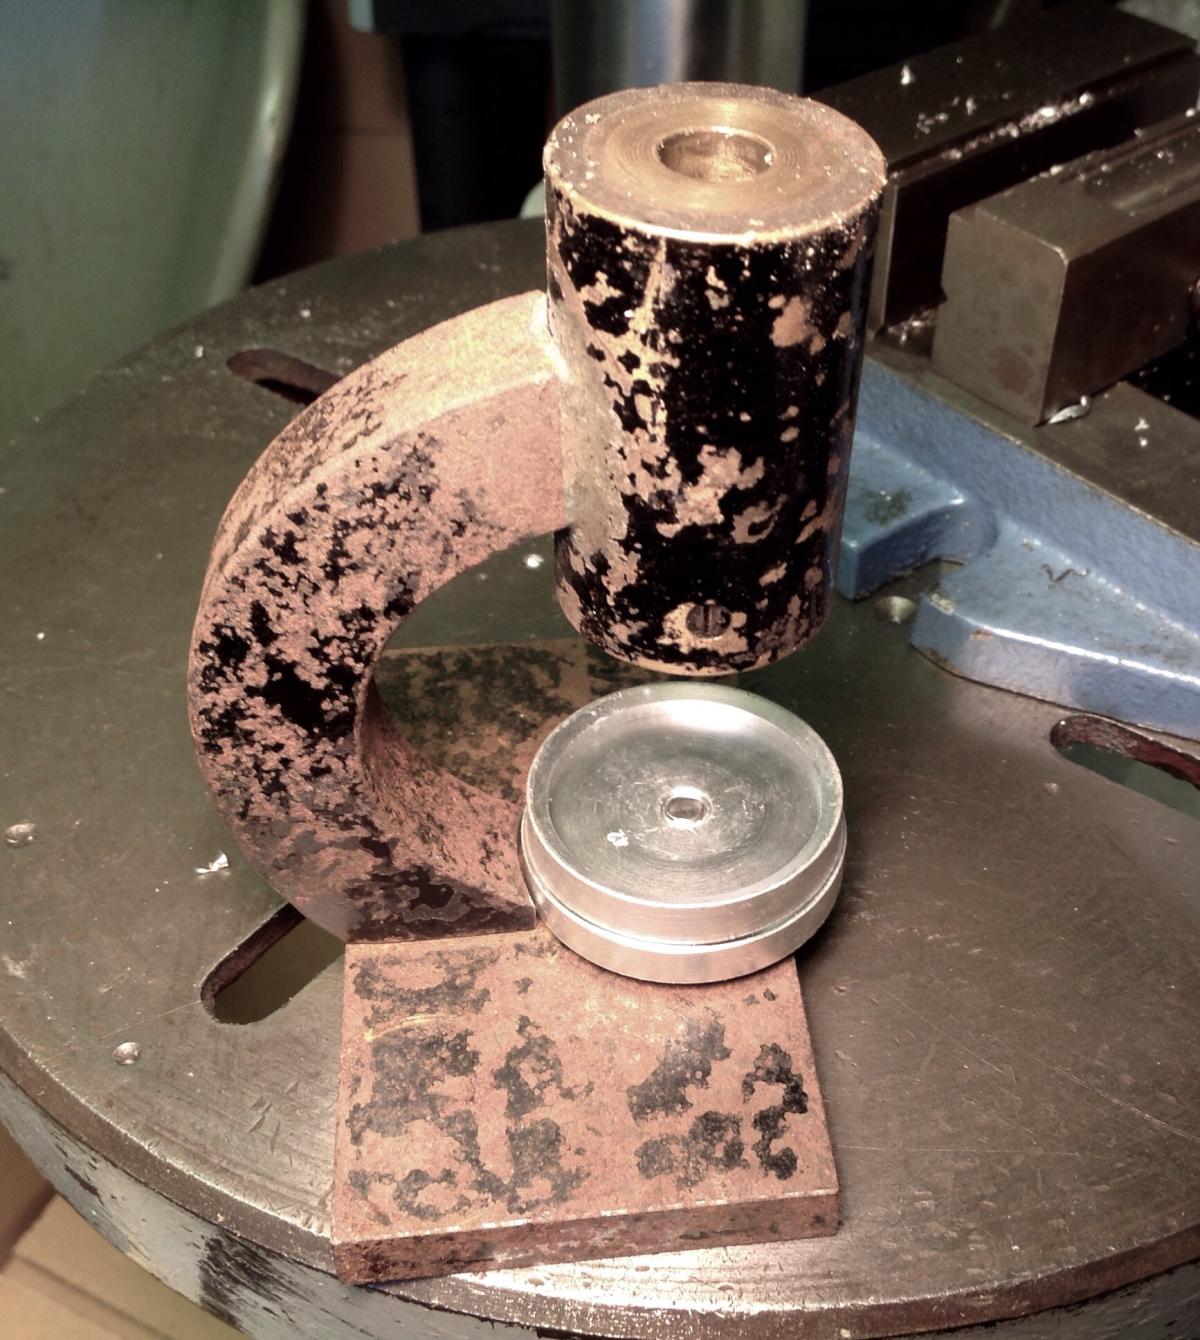
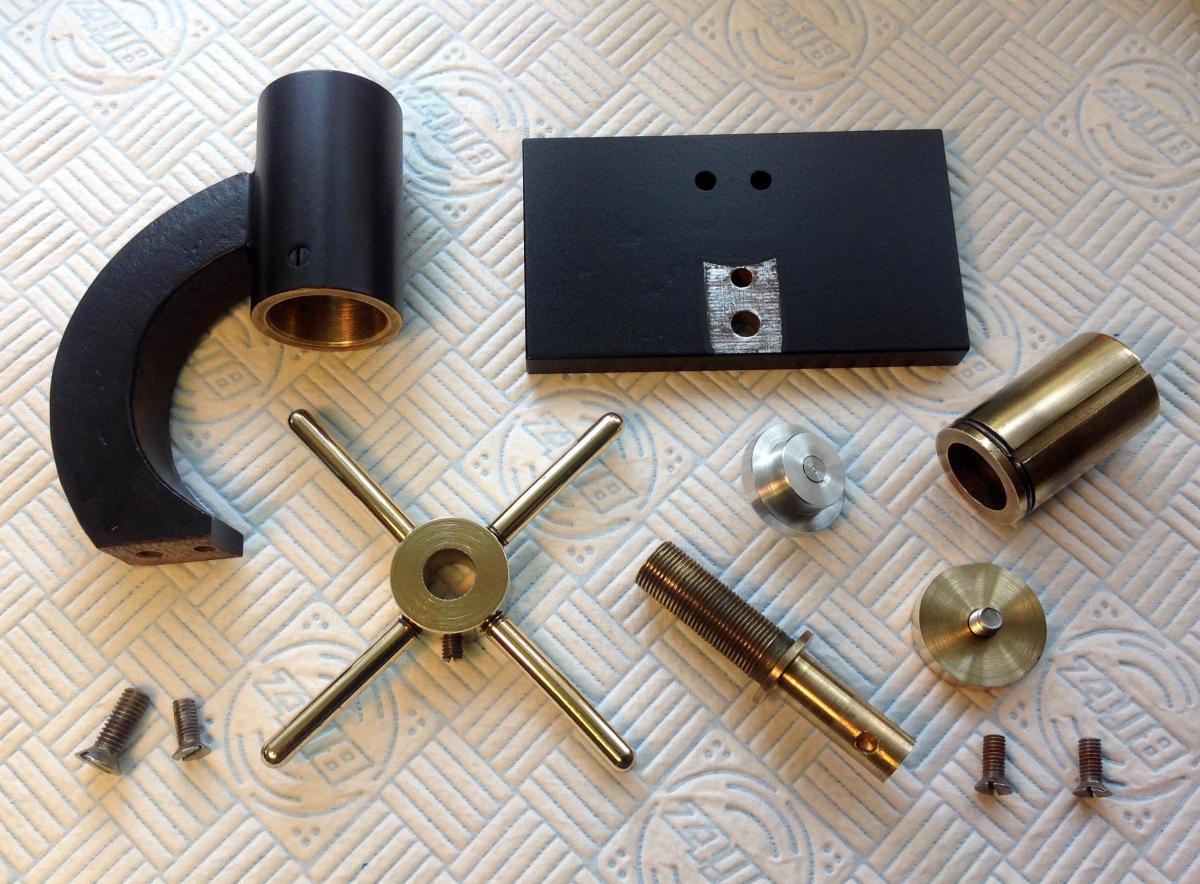
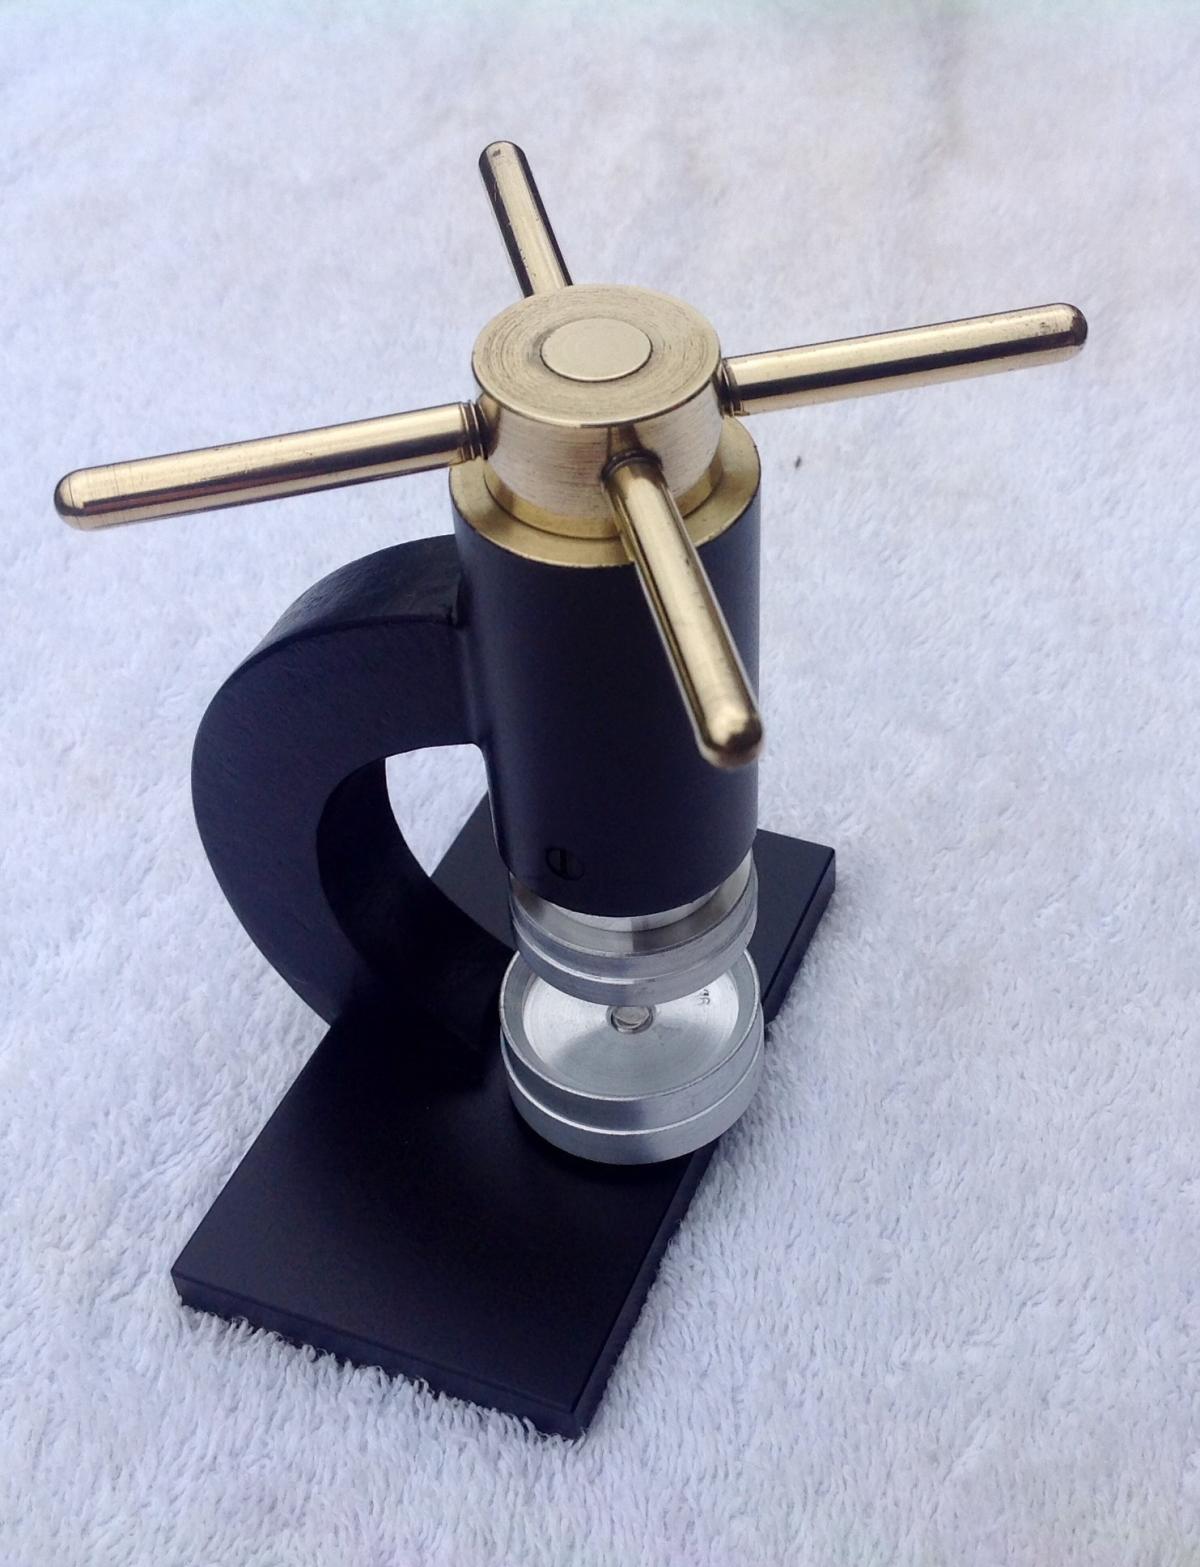
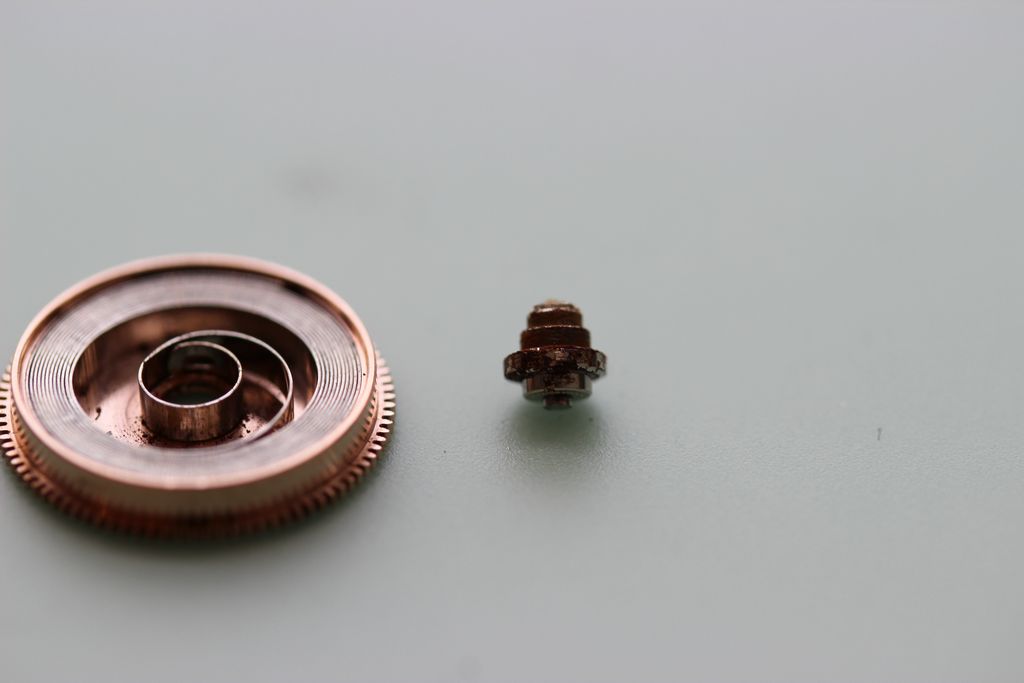
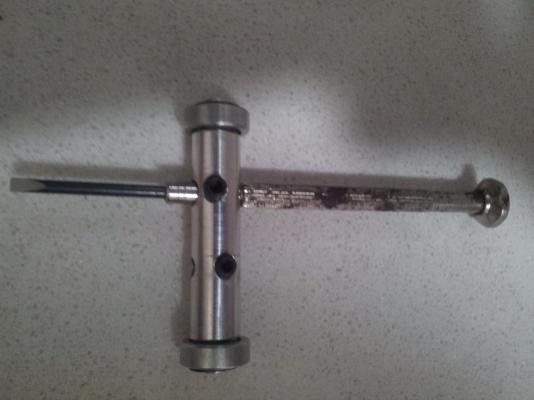
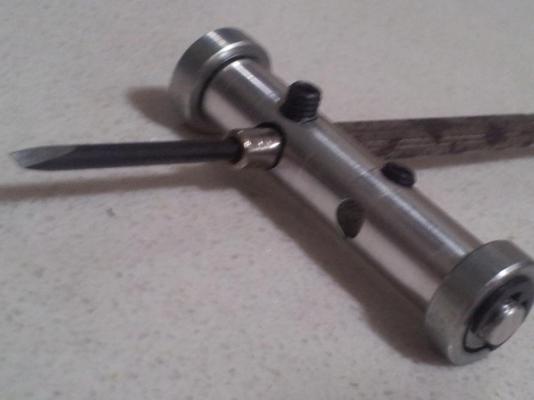
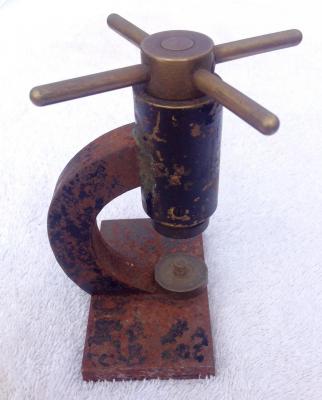
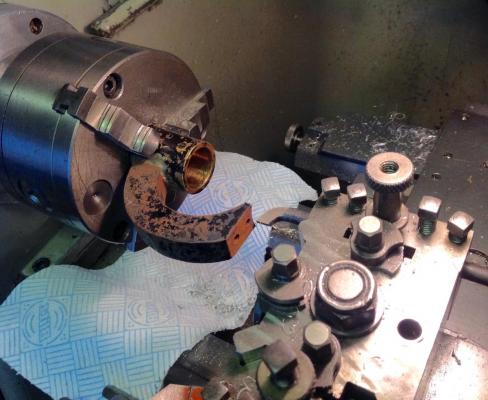
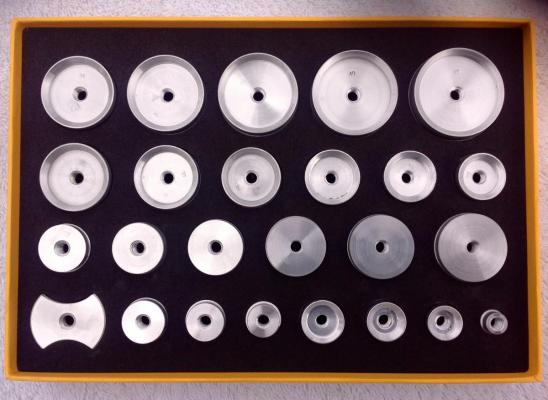
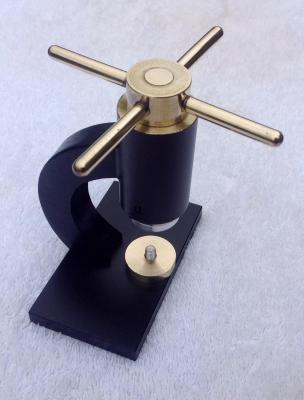
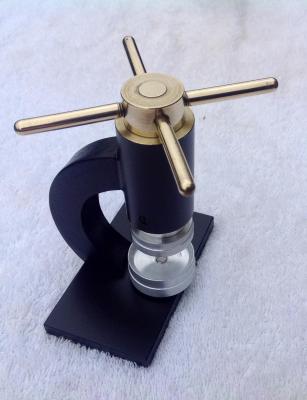
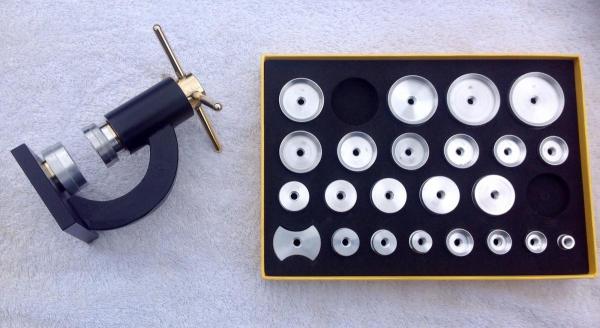
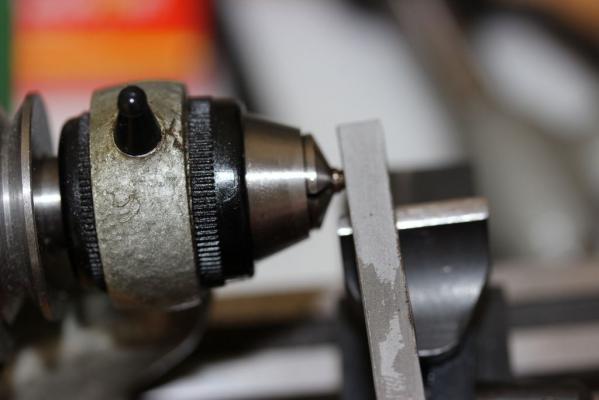
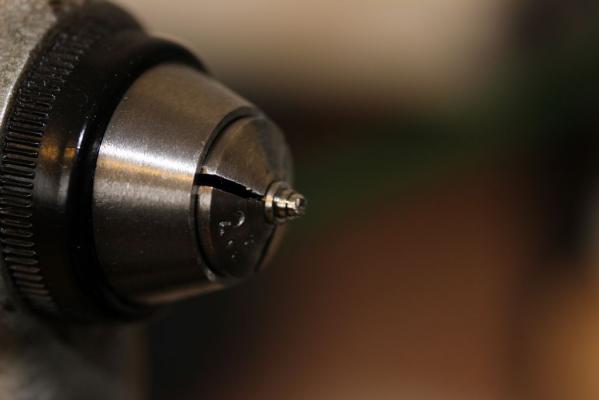
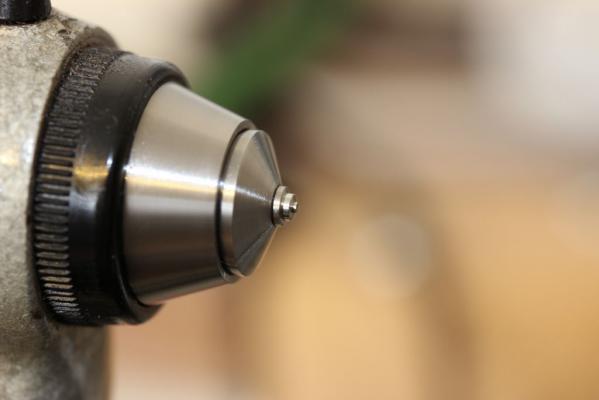
I purchased a cheap Chinese crystal press when I took up watch repairing/refurbishing a few years ago, this was one of the lever operated type with nylon dies. This has served me very well, but there are some jobs that a screw type of press is far better for because of the more sensitive control. Being a canny Scot, I kept an eye on eBay for a second hand Robur or Horotec and stumbled across this antique home made press for £14 delivered. The engineer in me immediately saw the potential, all it needed was stripped down, modified to take new dies and repainted. The other thing that was required was a set of new aluminium dies, so after a search on AliExpress I purchased these for £26 delivered from China. Right, down to business. (1) Modify the lower die holder to accept the 6mm threaded alloy dies. (2) Make an adaptor to fit the bottom of the ram with a 6mm thread to take the dies. (3) Machine the lower end of the pillar to give clearance for the largest die. (4) Accurise the dies to ensure that the faces are parallel. Many were slightly out of truth. (5) Remove paint and rust from press, paint and polish. (6) Reassemble. Total cost of complete set £40.................well pleased!


 1 point
 -
I'm going to see my butcher about getting a burnt mutton bone too.1 point
-
Maybe the blocks used by the Incas in South America? :) Good to be back and see your posts Colin! Cheers, Bob1 point
-
Finger trouble: when I type incabloc my right little finger always adds the k - I should re-read my typing. Of course incablock is something to do with the building industry!1 point
-
Agree with all above. Just because it's been through the cleaner in some cases doesn't make it 100% clean. I've seen some right bodge ups in my time not only with shims but also the brass looking foil washer that should go over the hour wheel shoved under the balance bridge.1 point
-
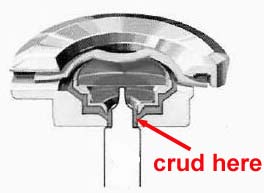
A shim under the balance bridge would be high on my list. Try this in any case - if you can find a thin-enough shim. Some watchmakers would bend up the bridge using a lever pivoting on the train bridge. Harold C. Kelly (Watch Repair for Beginners) even goes so far as to recommend this procedure. But if you try it go easiy because the upward bend has to be ever so little. Geo's suggestion is also worth looking into. My own experience of a similar problem turned out to be due to an accumulation of dirt on the narrow entrance to the incablock housing. There is very little space between the thick end of the pivot and the entrance hole to the incablock. A buildup of crud on the thick end of the pivot or the entrance hole itself can jam up the balance. I had to clean the latter with pegwood to cure my problem.
 1 point
 -
Right on Geo, it's very Elma like in structure and appearance. I really pleased about the condition, almost "NOS" in watch terms. Can't wait for it to arrive. And I can't wait until Fridayyyyyyyyyyy!!!1 point
-
Hope you did a pointy dance like in Saturday Night Fever. PS was it the Blue Oyster Bar, loads of guys with moustaches leather vests and trousers, some may have been wearing Native American head wear or white safety helmets or Stetsons - always a fun night :cool: If its embarrassing photo's we are sharing - unfortunately I am wearing the stetson Cheers, Vic
 1 point
 -
If it's a watch that you purchased not working and sold for repair, don't assume that everything is assembled correctly. Is there a chance that someone has fitted the cap jewels the wrong way? The curved surfaces should be away from the pivots. Just a thought.1 point
-
First swing of the balance has to be right up there, but what about that feeling when you finally track down that elusive part after 3 hours on the Internet? S1 point
-
Agree with John try another clean. Another thought by any chance when you stripped the watch was there anything under the balance cock because sometimes repairers after changing a balance staff & finding it a little to long put a shim under the cock. If the above does not resolve the issue it must be a damaged staff or jewel.1 point
-
So when you are cleaning the watch following Mark's method did you leave the Incabloc Jewels in or take them out before running them through the cleaning machine? If you clean the watch with the jewels in place you may still have remnants of dirty sticky oil on the balance pivots. Personally I prefer to remove the jewels before cleaning because I think it does a better job of cleaning the pivots and Jewels. Then at any time did you have both sets out simultaneously and mix them up? The reason for asking is they may look the same sometimes they are the same size other times their different sizes. So different sizing could main the diameter for the balance bridge is larger other times there is usually a thickness difference. Then before you cleaned the watch even with the sticky oil how was the balance wheel moving?1 point
-
Just bought this one, should arrive next week. Good British quality ;) Looks to be in excellent condition barring the vintage power cable. That's an easy fix though. More to come next week.
 1 point
 -
Turn the crown slightly in the winding direction to allow you to hold the flat click spring back with back with a piece of pegwood. Now let the crown spin under control between your fingers to let the spring unwind.1 point
-
I just joined the forum and saw this topic, so I"ll play. Numerous 2 stroke dirtbikes growing up. Ducati monster. My 1st streetbike and a lot of fun. Sold to get the next one. Ducati 848. My 1st superbike. More than I was or still am worthy of, but a lot of fun. Sold to get the next one. Ducati 1198s. My current bike. Way more than I am worthy of, and a real hoot. I just have to be careful, don't want to mess up my watch. I don't have anything like the bike with the tattooed girl, although those boots look interesting.1 point
-
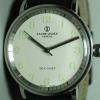
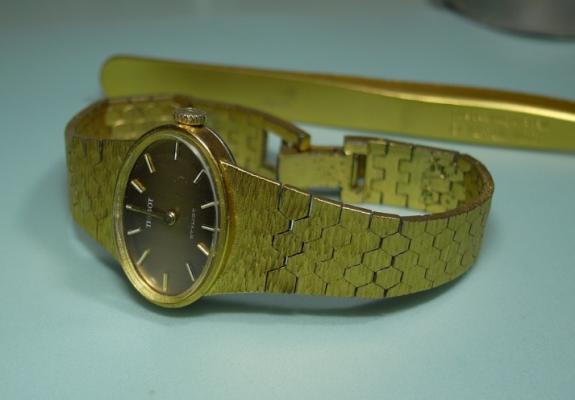
Since them this has happen . Found a donor watch on Ebay . So some oldnew hands has found it's way to a new watch .Looking original again .
 1 point
 -
No problem. I will send it when I get on my computer. Watching the new mad max at the moment Sent from my iPhone using Tapatalk1 point
-
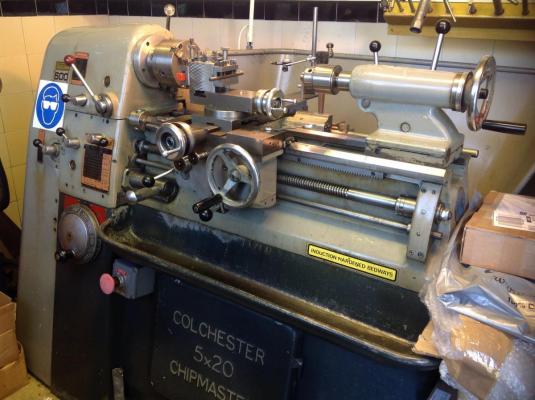
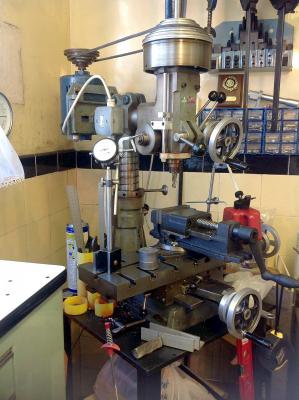
Wouldn't be without it CB, I also have a lightweight milling machine. I put together a machine shop when I was building target pistols many years ago, now it so handy for both my motorcycle and horology interests.
 1 point
 -
And with the escapement back in, the watch is flying... So now the watch is running fine, the keyless work is smooth like silk. Now ready to case up... It's a lovely watch... :)

 1 point
 -
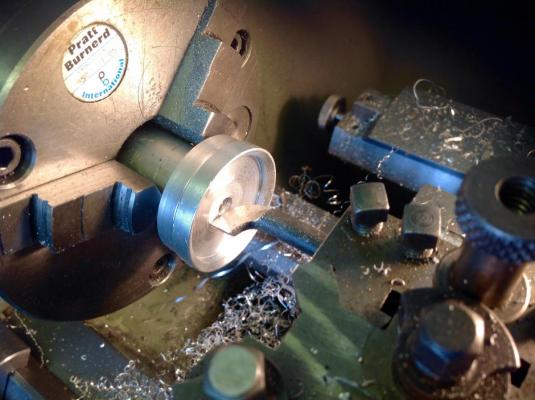
So next off is the main plate exposing the wheels. I was half expecting to find rust in the pinion leaves or pivots but all seems fine. Off with the wheels... A teeny bit of rust on the escape wheel pivot but luckily not attached - brushed off and left no stain. Now back to this bugger of a stem. The oil did not seem to help... But after heating it up with my spirit lamp, I grabbed it with my pliers and gave it a sharp pull. It came away just fine. The barrel arbor was quite rusty so I decided to burnish it - easiest way is to use the lathe... And it came out quite well... Just need to clean up the rest of the parts and clean the watch now. To be continued.


 1 point
 -
Well I decided that the first thing to do would be to dismantle the rest of the watch - can't risk damaging any parts. But first I drowned the stem and winding pinion with clock oil so it could start soaking. Then out with the balance... Then off with the ratchet wheel - does not seem to be any power there but I can't risk it so it's a good idea to remove the ratchet wheel and click work altogether. I don't like the ring of rust around the barrel arbor bearing... And the crown wheel... Now I am sure there is no power on the mainspring (but I was wrong) so I can remove the pallets... Off with the barrel bridge and surprise surprise... more rust :( Not looking good - but it seems to be surface rust so it should come off easy. Now to open the mainspring barrel. Remember I told you I was confident all the power was released? I was wrong: Yes - the barrel arbor was seized in the barrel and so the spring was stuck in a fully wound position!!! I have never seen that before. Time to improvise. I thought the safest way would be to put the barrel in a polly bag and push the arbor with my fingers. That way nothing flies across the room :) And that seemed to work well. With the tension off I am able to get the arbor out and inspect it. It's a bit corroded... More to come...

 1 point
 -
Mark, Geo will lend you his Bergeon Basher!
 1 point
 -
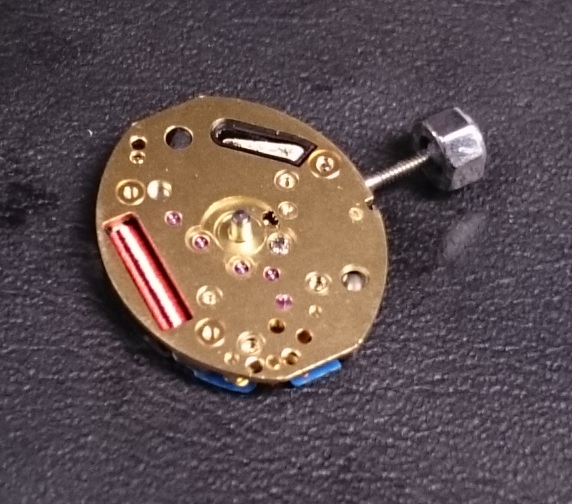
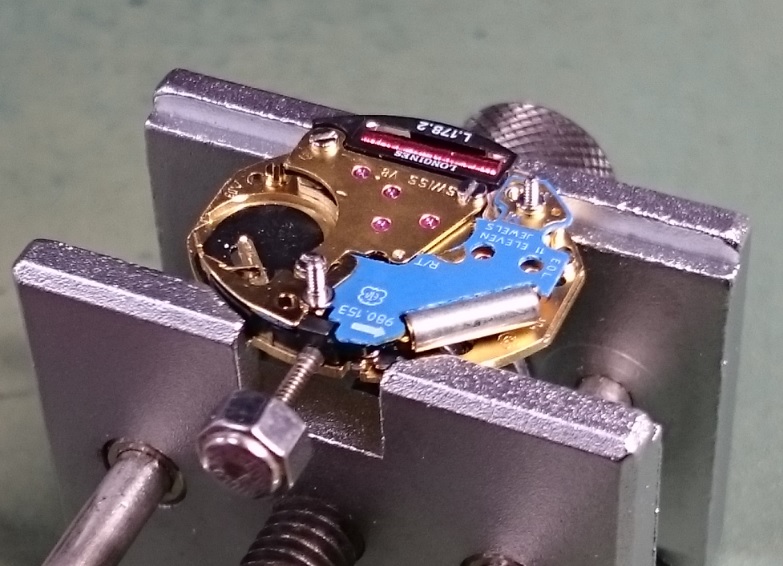
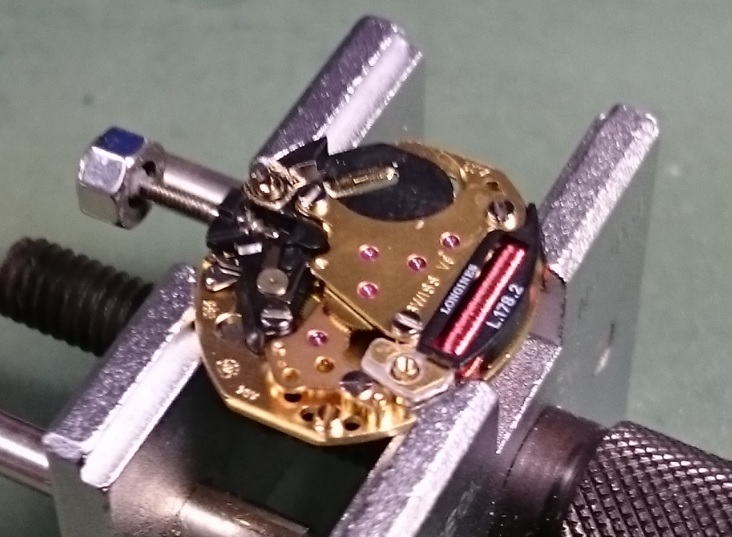
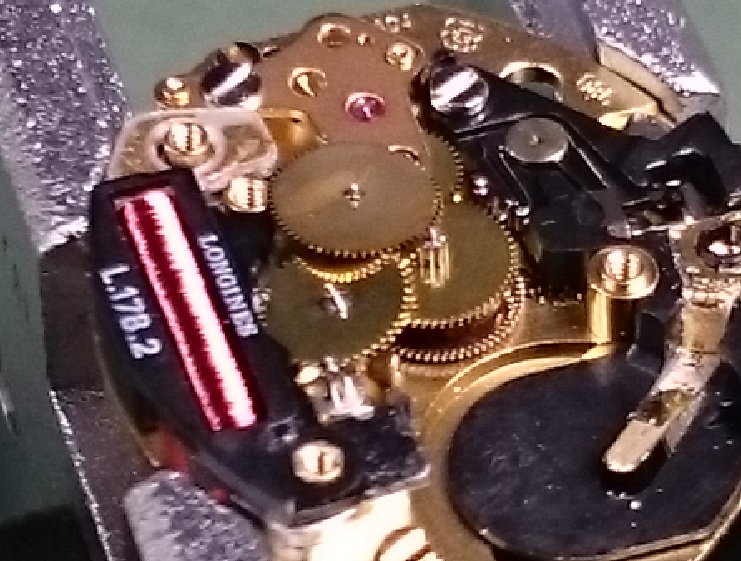
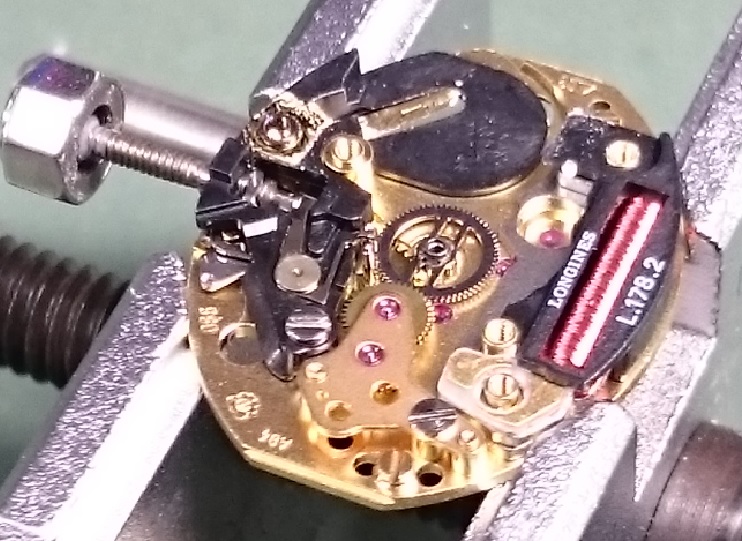
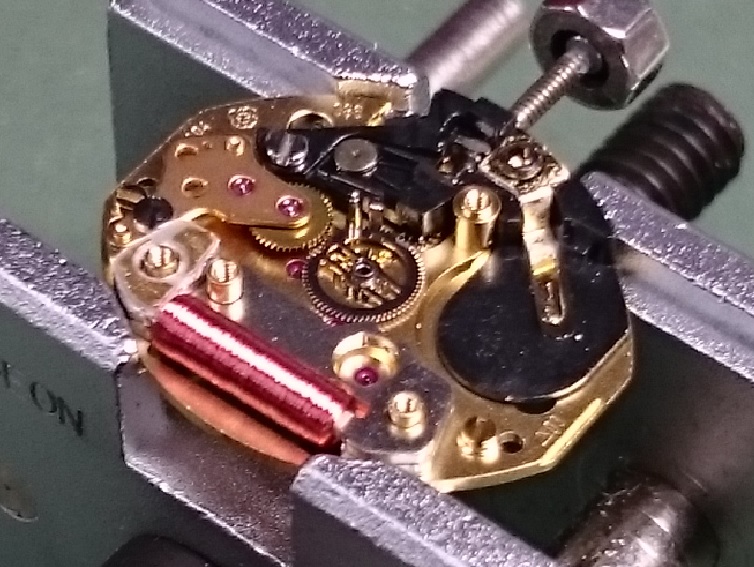
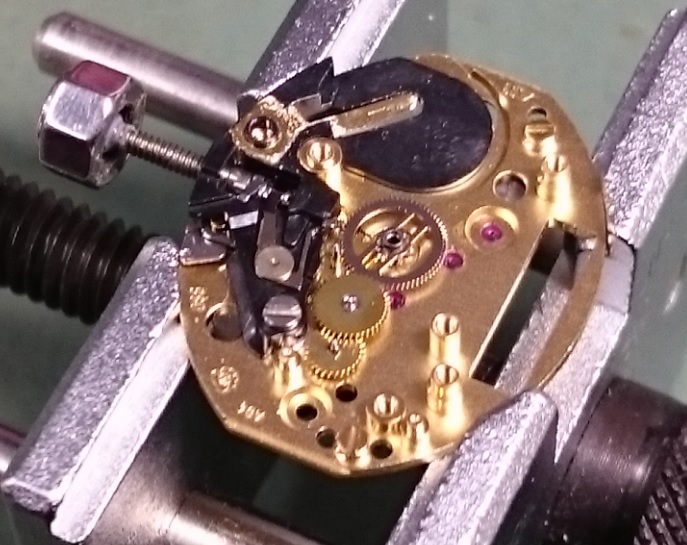
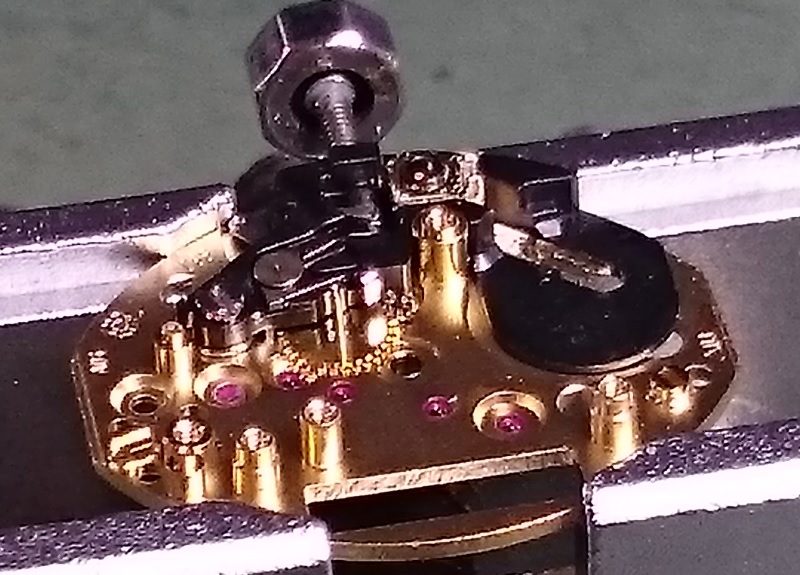
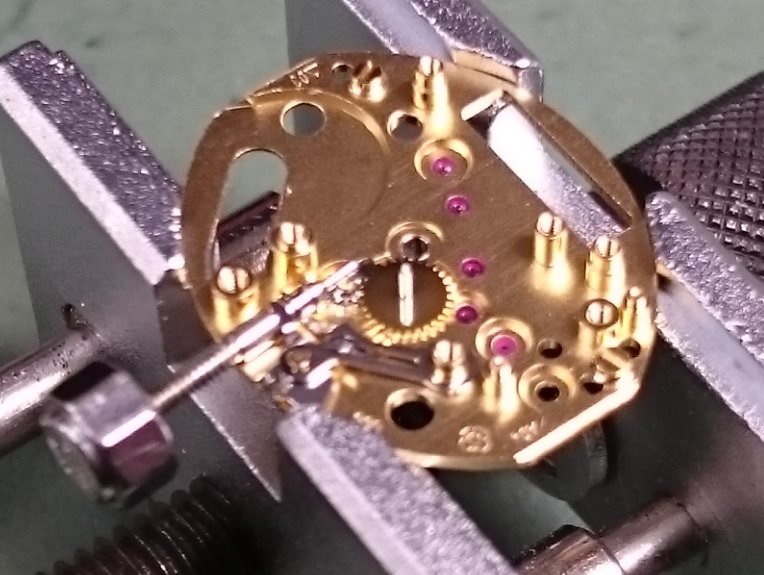
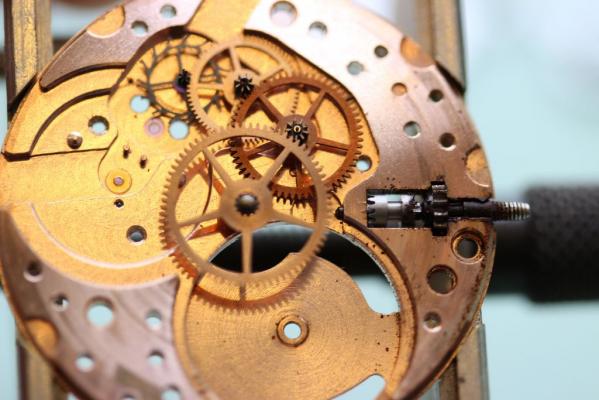
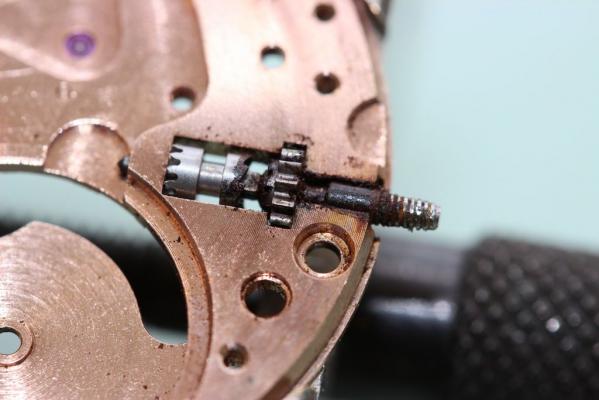
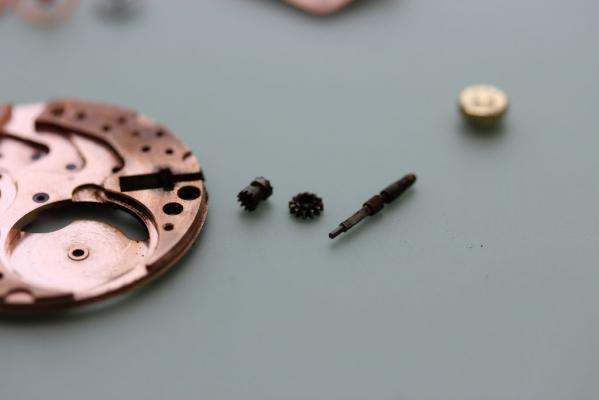
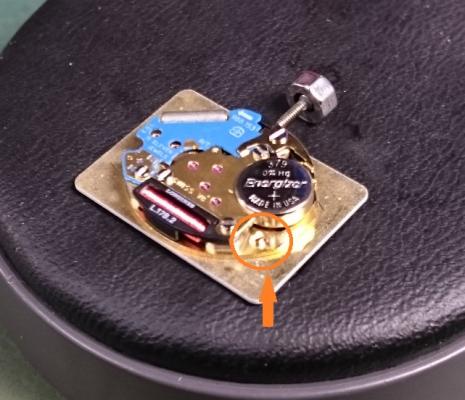
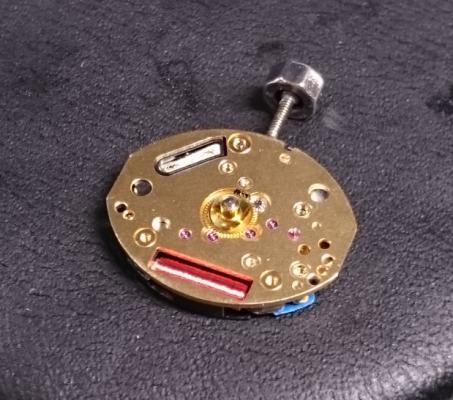
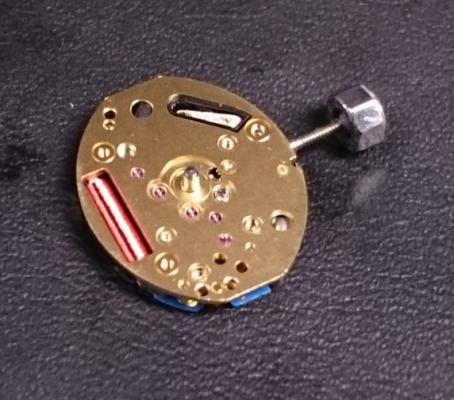
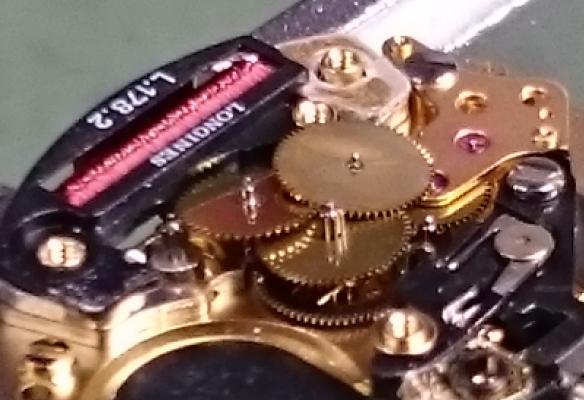
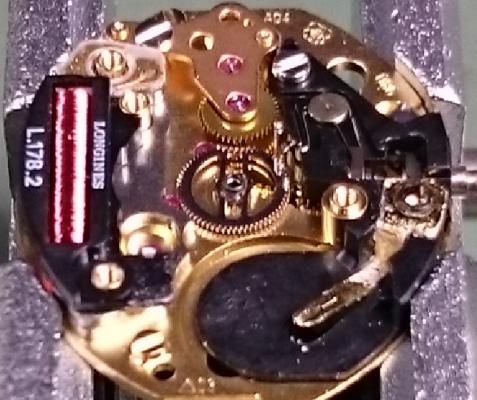
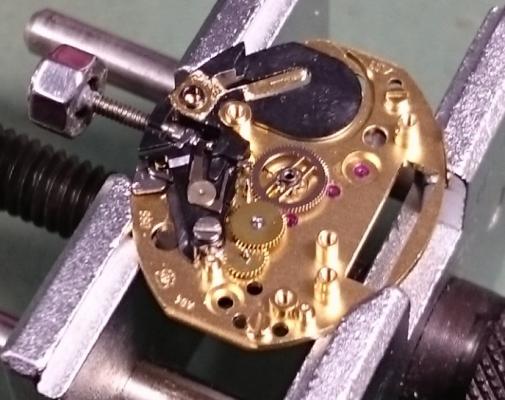
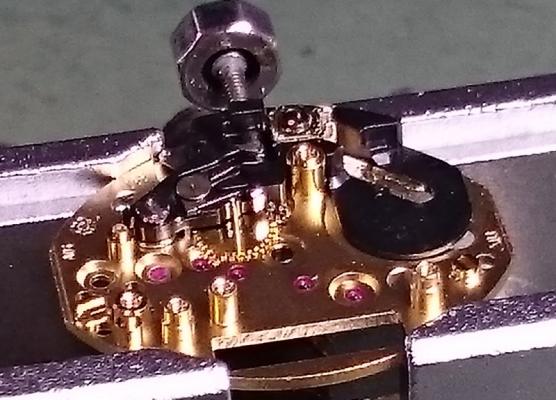
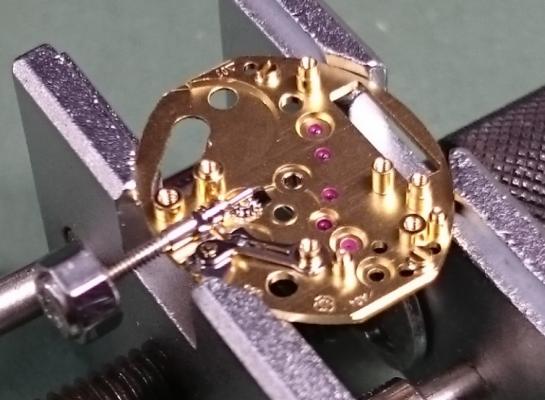
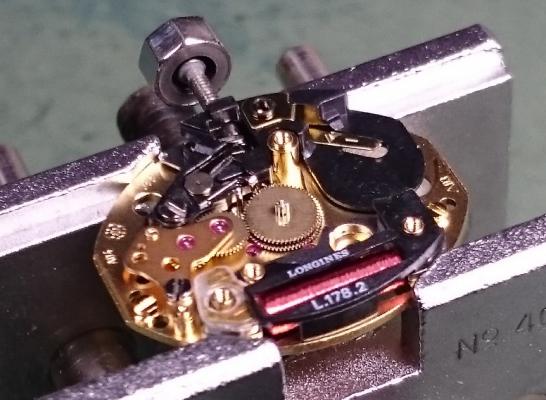
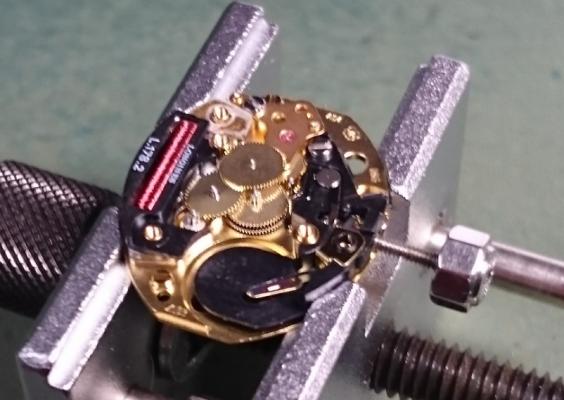
ETA 980.153 Service Walkthrough The ETA 980 Caliber is used mostly in ladies high-end quartz watches. The iteration for this walkthrough is the 980.153, which has the seconds subdial. ETA 980.153 - Technical Communication.PDF I thought this one would interest many of you, as it has a primary and secondary train bridge. Once the Hands are removed, turn the movement over and turn the fastening screws for the Dial Feet (circled in orange) until the flats are towards the feet. This will allow you to easily remove the Dial. Once the Dial is removed, you can take off the Hour Wheel. This is the only item to be removed from the dialside of the movement. Place your movement in the holder and unscrew the two screws holding the Circuit. Note they are two different lengths. Remove the Circuit and Battery Contacts and place the Circuit immediately somewhere safe. Next remove the three screws on the primary Train Bridge, and remove the bridge. Here are some reference shots of the primary train. Once the wheels are removed, you'll be able to see the Canon Pinion. DO NOT try and remove it at this stage! As you can see, it's slightly under the wheels in the secondary train for the seconds sub-dial. This will have to be removed before extracting the Canon Pinion. Before we get to removing the secondary train we must first remove the Coil. Remove the Coil Protector, then carefully lift out the Coil along with the Stator. Next remove the secondary train bridge. This is held in place with a single screw and two locating pins. The locating pins can be a little tight fitting, so very gently rock the bridge and work it slowly off these pins to avoid breaking a pivot or jewel. Now you can remove the two wheels under this bridge and the Canon Pinion. On to the plastic housing that the Swiss lovely refer to as the "Electronic Module Distance Piece" ... yeah, whatever! :rolleyes: Make sure the crown is pushed in, and NOT in the hand setting position, then undo the single screw and lift out the "Black Chuck of Plastic Module Thingie" :P Once this is removed, you can get to the Keyless Work and the Minute Wheel. You can then pull the Yoke, Sliding Pinion, Setting Lever and Stem out for cleaning. The disassembly is complete. After cleaning assembly is just the reverse operation. Here are some reference photos to help you along... I hope this has been an interesting walkthrough, and helps those wishing to tackle this wonderful little movement jam packed with wheels and bridges :)


 1 point
 -
Another really good walk through Lawson & really nice watch. Cleaning really dirty watches/clocks is a real pain. To save the solution I now pre-clean any suspects before putting them through the cleaning machine. Watches with a de-greaser and clocks with warm soapy water & then rinse & dry.1 point
-
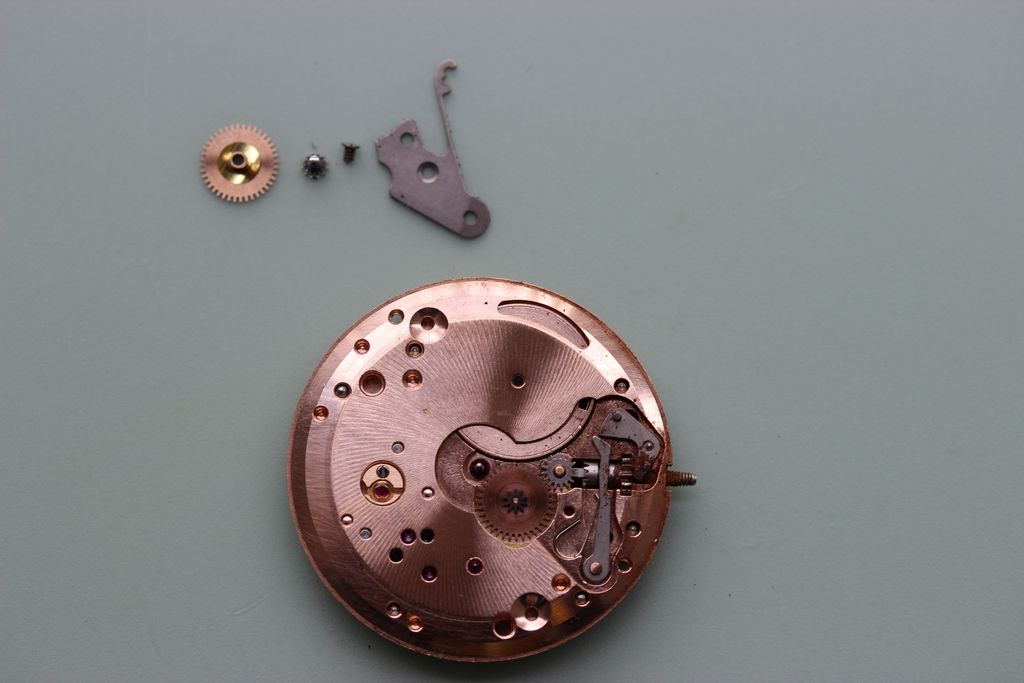
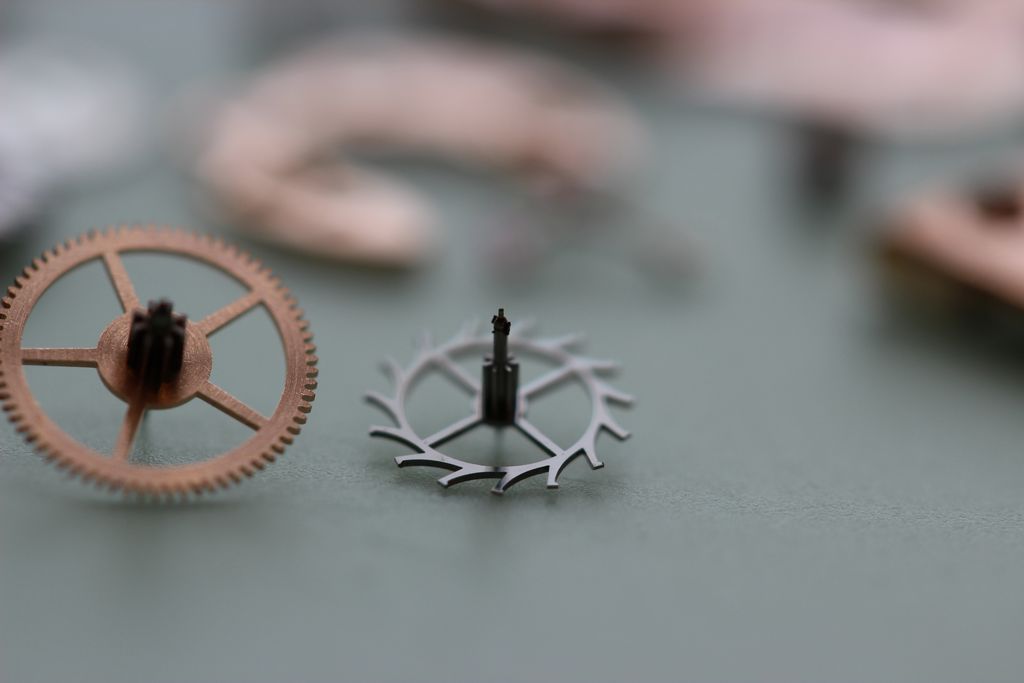
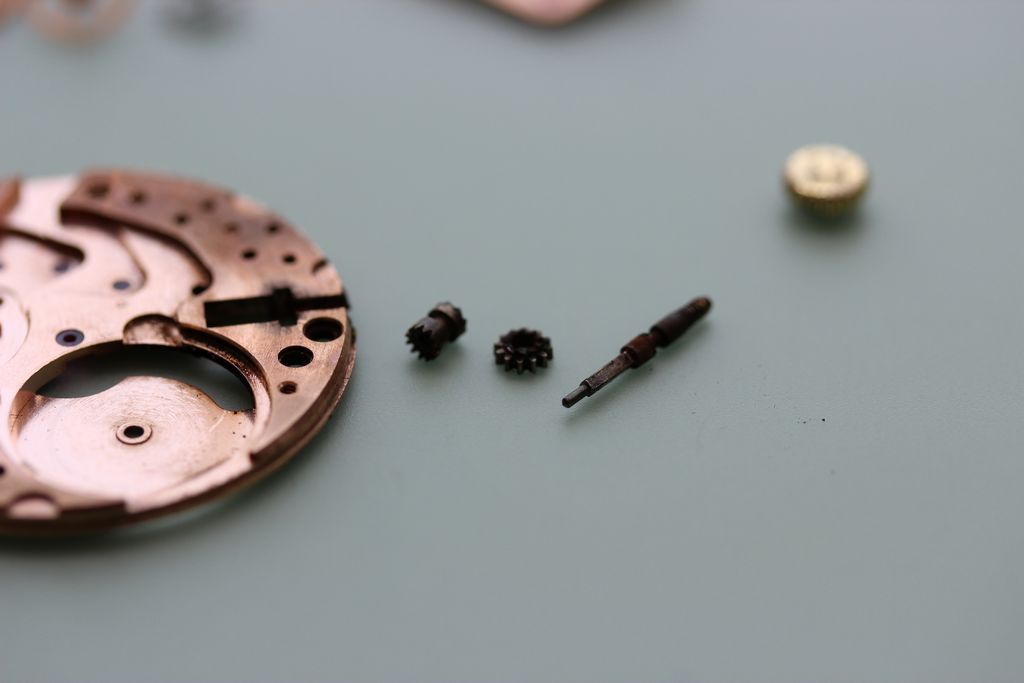
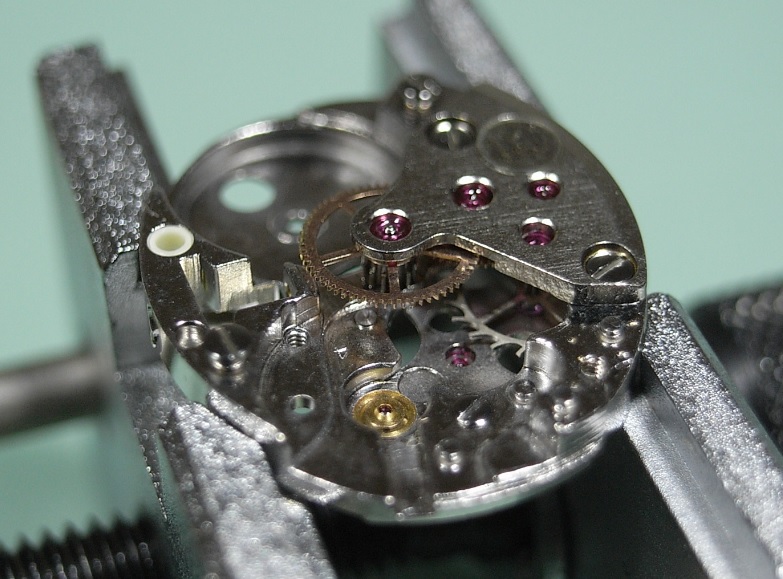
Tissot 2403 Service - Part 2 Tissot 2400,2401,2403,2404.pdf All the parts are now cleaning and ready to be assembled. I have to say that those Nylon fibres were everywhere!! Took me a long while to remove them off all the parts with an old piece of Rodico before cleaning, and even then, I STILL found tiny fibres after cleaning that I'd missed ... so my cleaning solution is now contaminated and needs to be changed @!#*%^# Arrgh!! :roadrage: Ok, I've clamed down :P ... on with the service. Secure the Main Plate in your movement holder and replace the Train. Then replace the Train Bridge and gently worry the wheels into their jewels. Then with a piece of Pegwood to hold the bridge in place tighten down the screws. Always continue re-checking that the train is running free as you secure the screws. It's good to see those jewel holes are now nice an clean. Once you've oiled with Mainspring and placed it back into the Barrel, replace it onto the Main Plate. Replace the Barrel Bridge, and Click. Replace the Click Spring, Ratchet Wheel and Crown Wheel. Then carefully place the Pallet Fork and Pallet Cock back into it's respective place. Once the Pallet is in place, give the Ratchet Wheel a few turns and check that the Pallet is operating correctly. Next the Balance and Incablocs need to be cleaned in Lighter Fluid. Once clean replace the Balance and Incablocs Now give the Ratchet Wheel a couple of good winds and check the oscillation of the Balance. It's now time to start on the dial side of the movement. Oil up your Winding Pinion and Sliding Pinion. Replace the Winding and Sliding Pinion, Setting Lever, Yoke and Yoke Spring. Replace the Canon Pinion, Minute Wheel and Intermediate Wheel. Then replace the Setting Lever Spring and secure it down. Replace the Dial and Hands, and your done :) Nothing left to do then adjust the timing and case it up. I hope these reference photos help those looking at servicing this movement, and I must say that it was a lovely movement to work on. Another watch saved from the rubbish tip.


 1 point
 -
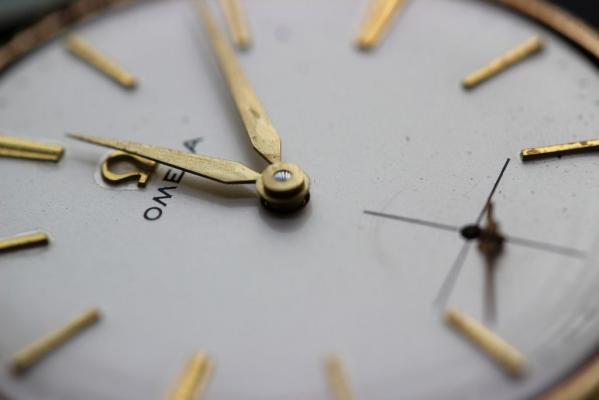
This is the result i came up with .Some old hands i had laying around . Relumed them in white and put them back on.More original then original .
 1 point
 -
There you go. Broke out the brut. Sent from my iPhone using Tapatalk1 point