Leaderboard


Popular Content
Showing content with the highest reputation on 06/24/15 in all areas
-
Id have to agree with Geo, that is always a guilty pleasure for me. Personally for me its discipline of patience, patience , and more patience. Perfecting each stage and giving my very best efforts & concentration into each part. Hand polishing alone can take days or even weeks, but results are worth it.2 points
-
Got lucky with this old timex, was dead as a door nail. I put a battery in and the balance was having none of it, I then tried to check the contacts, they looked fine, while playing around with the battery I noted that when half out it was working, simple fix just a bit of wax paper under the battery and she up and running. Not to sure the date but I'm thinking late 60s 70s2 points
-
I start to get upbeat on reassembly when checking the fork for locking/unlocking. The best part is when the balance is dropped in and starts vibrating even before the bridge gets screwed in.2 points
-
I would have to go with when you drop that balance in and it comes to life on its own.. the worst is finishing up a restored watch and as you rubbing off something on the train bridge with some rodico and your thumb hits the balance and you here a click and realized you just broke your balance staff... I walked away from my shop for a few days after that one..2 points
-
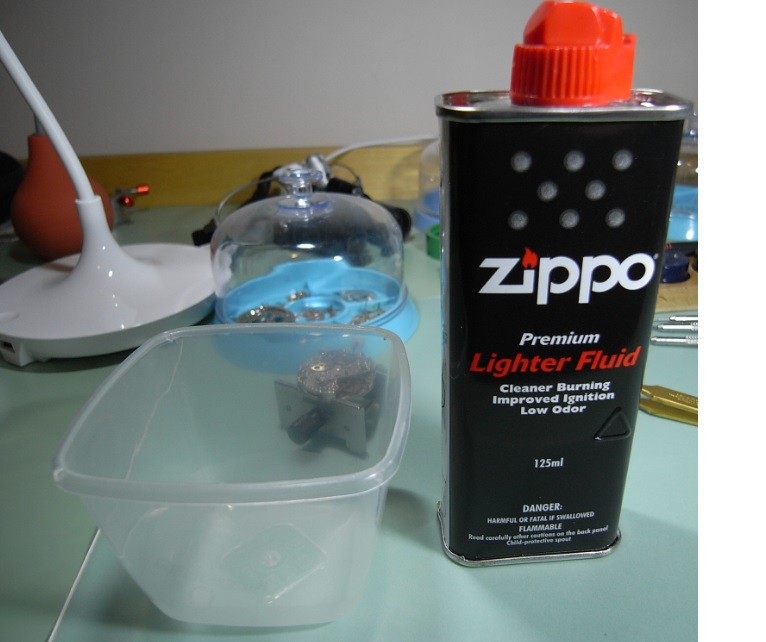
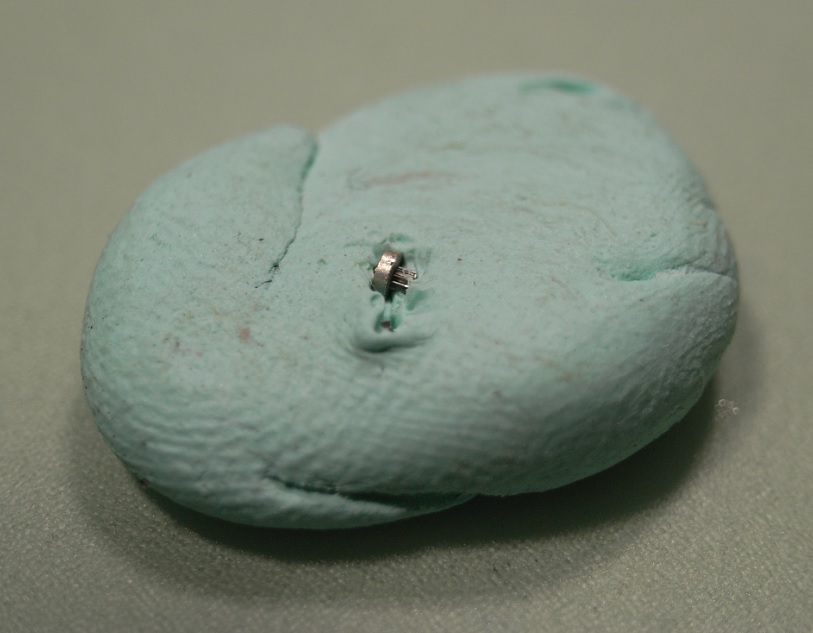
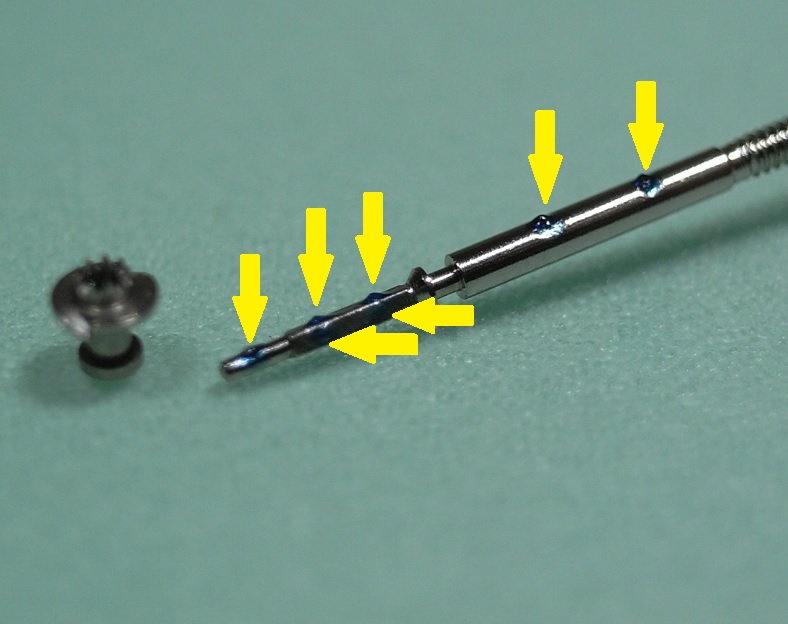
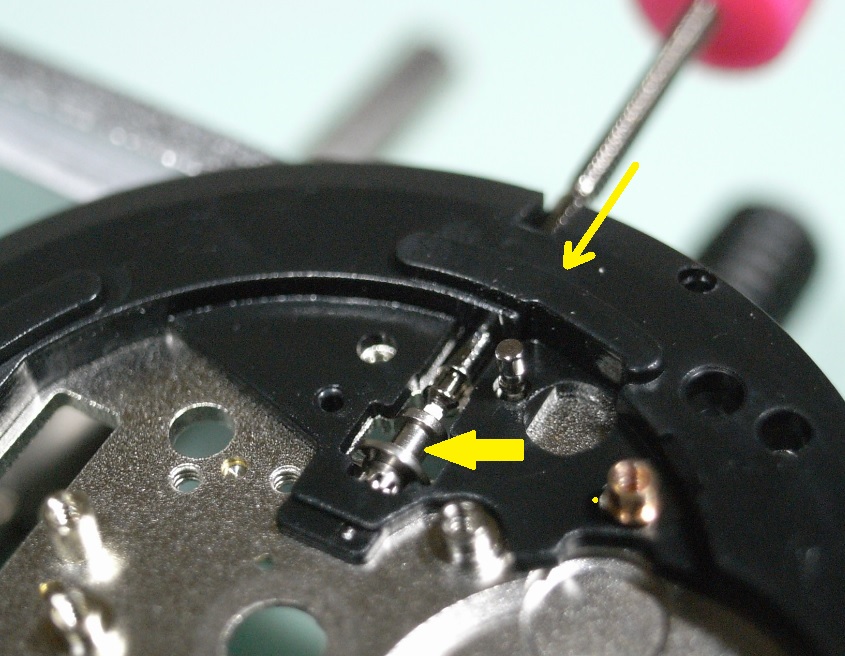
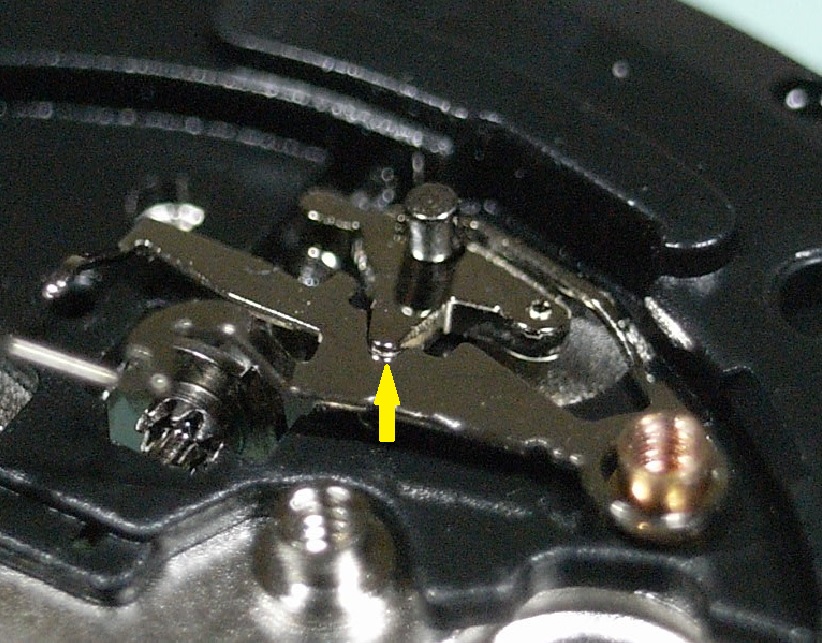
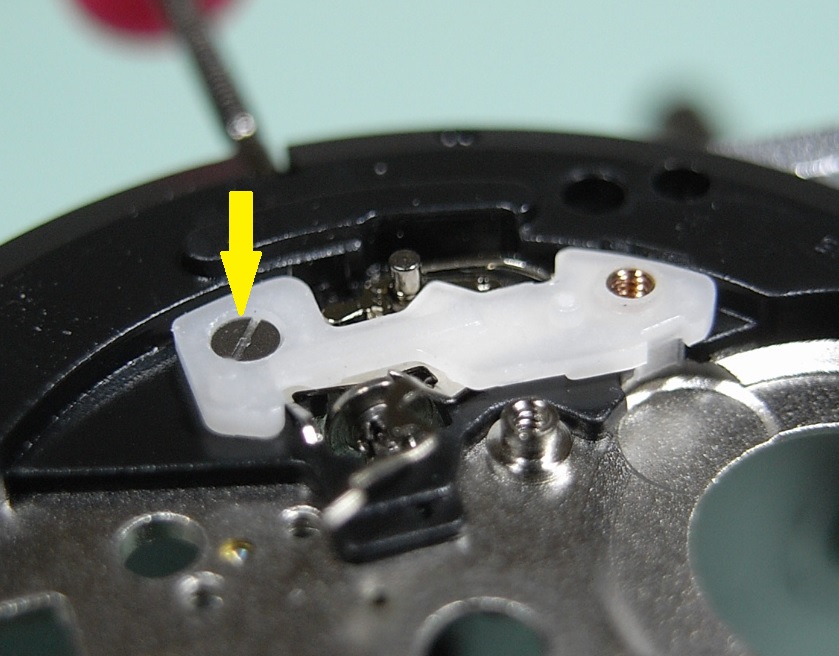
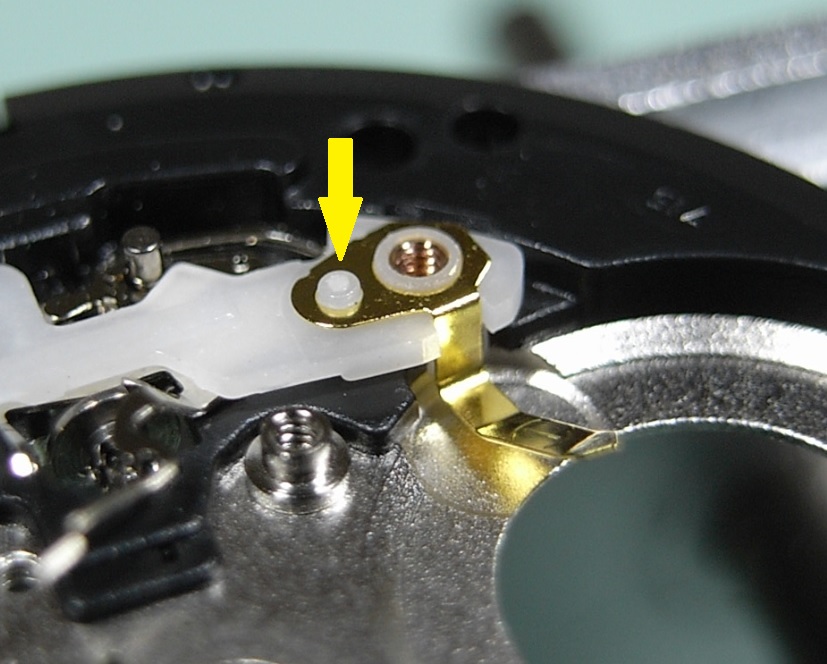
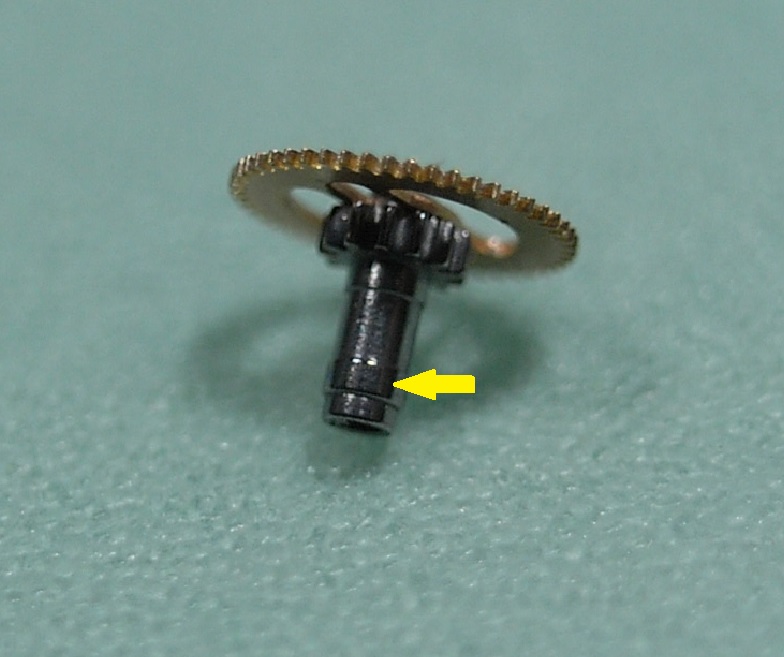
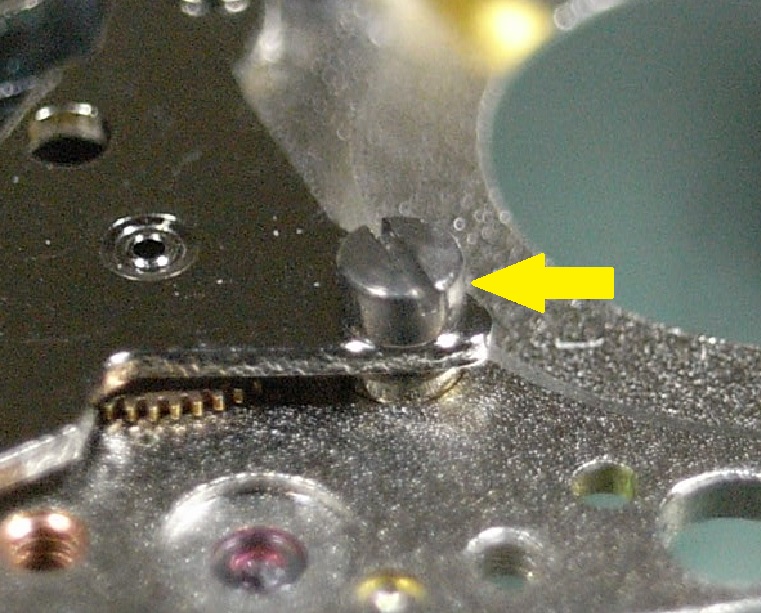
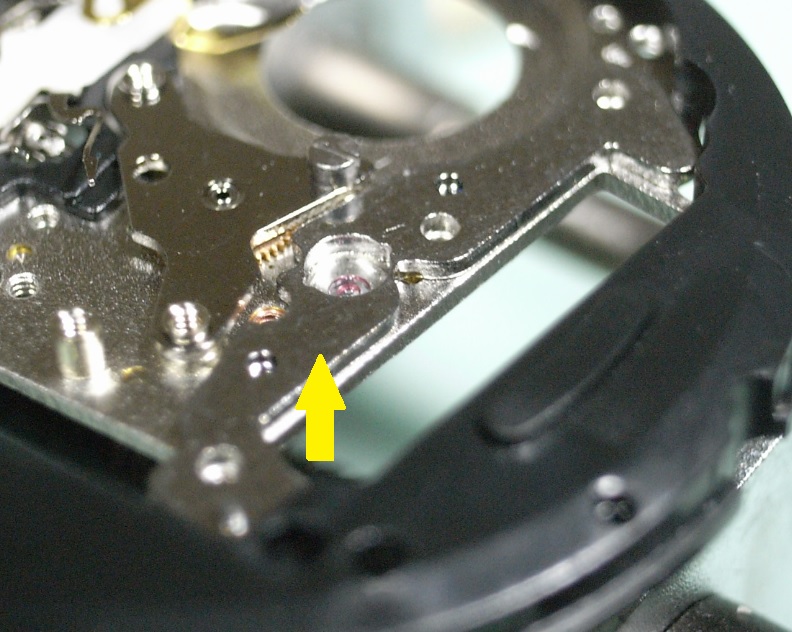
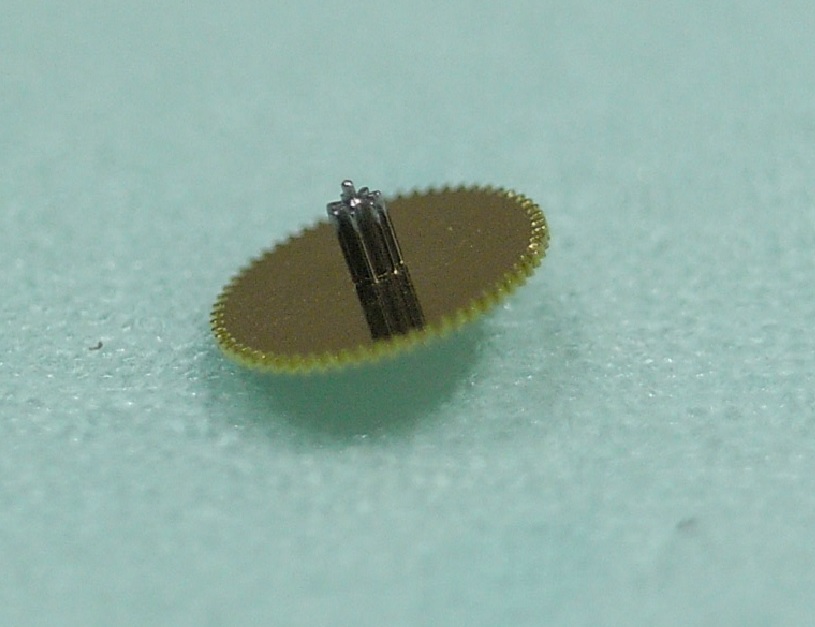
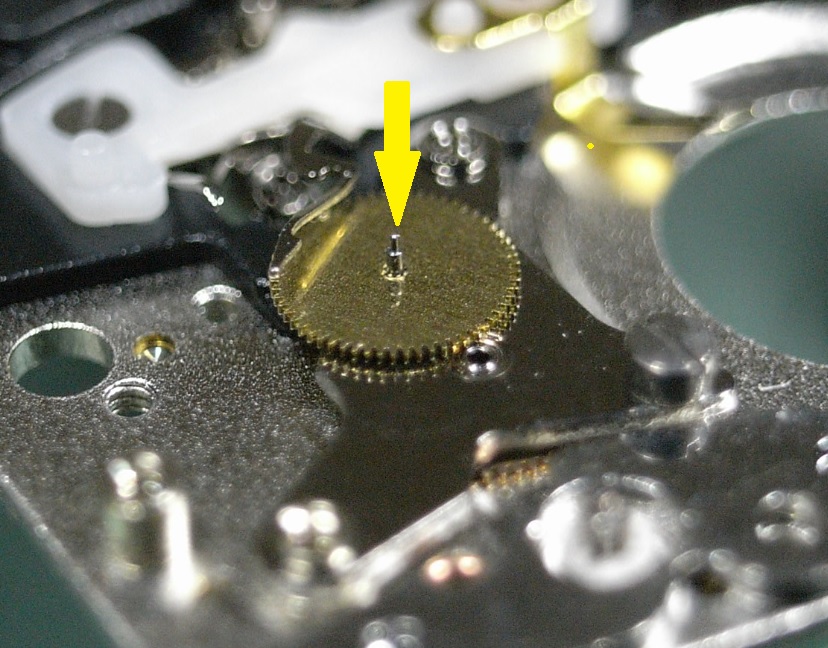
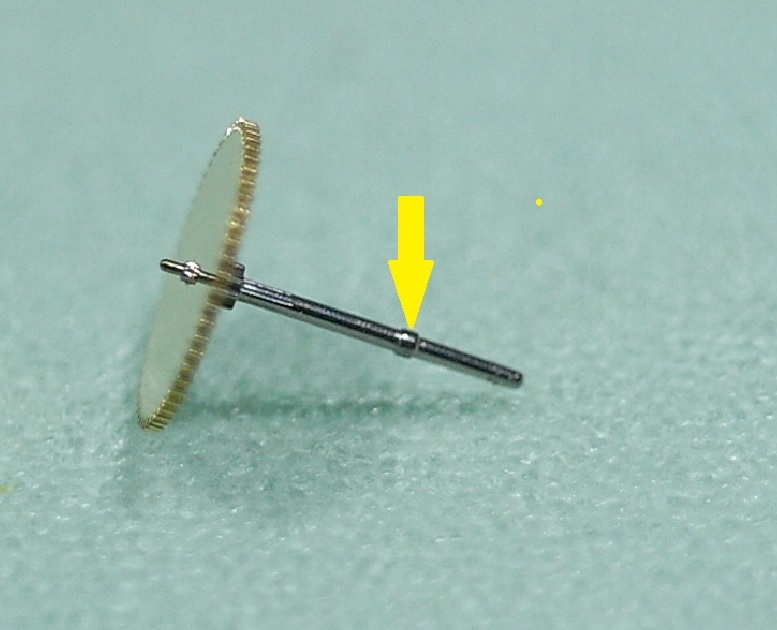
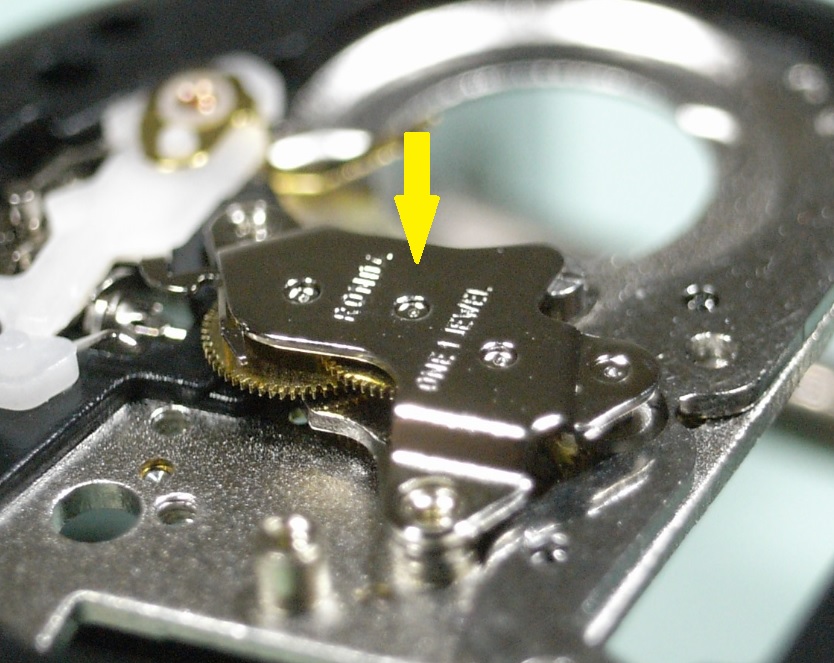
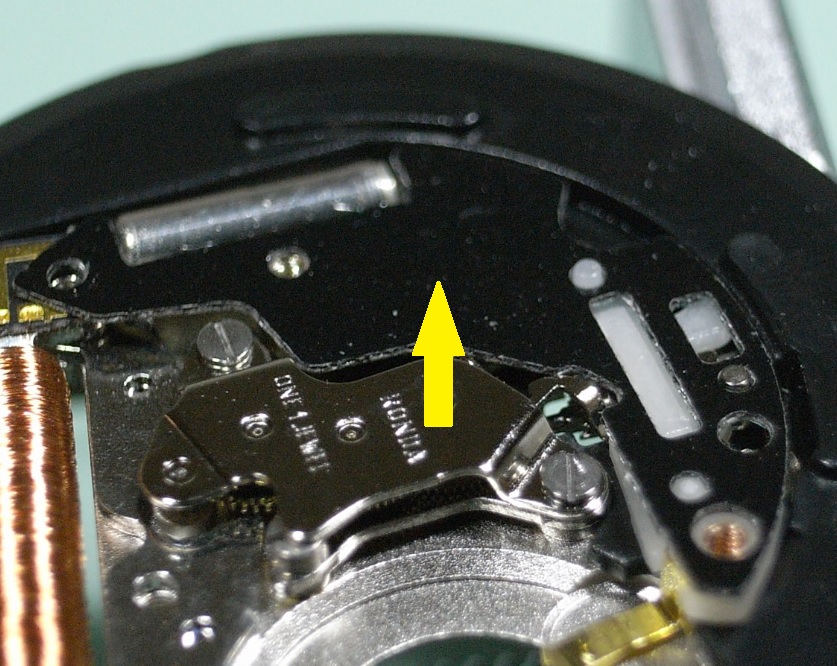
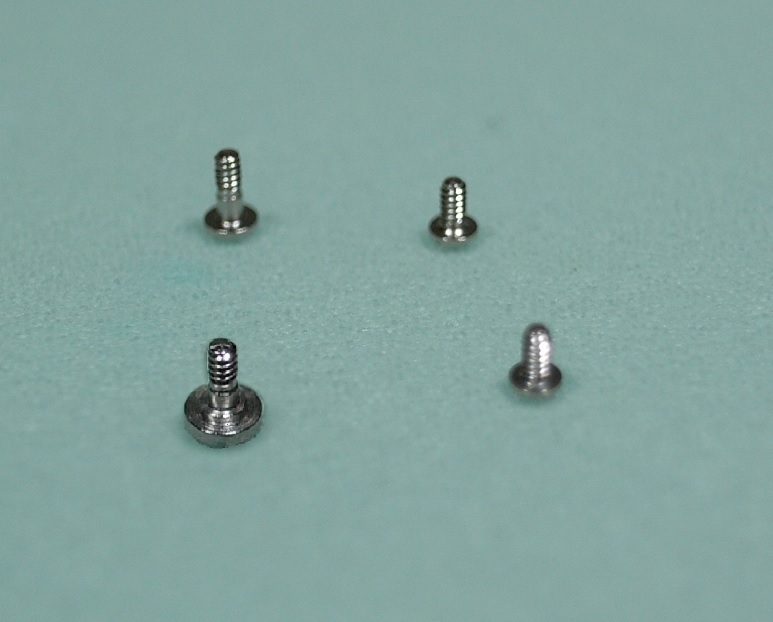
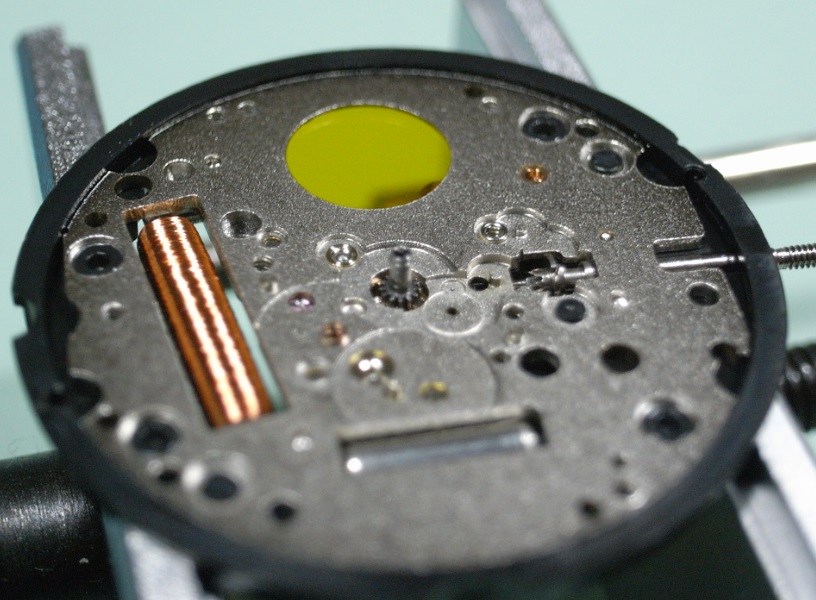
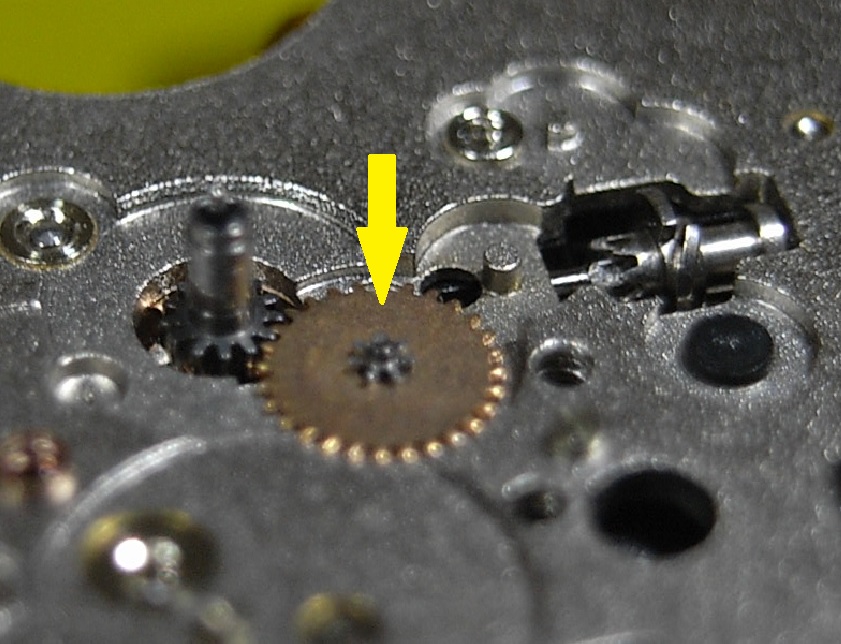
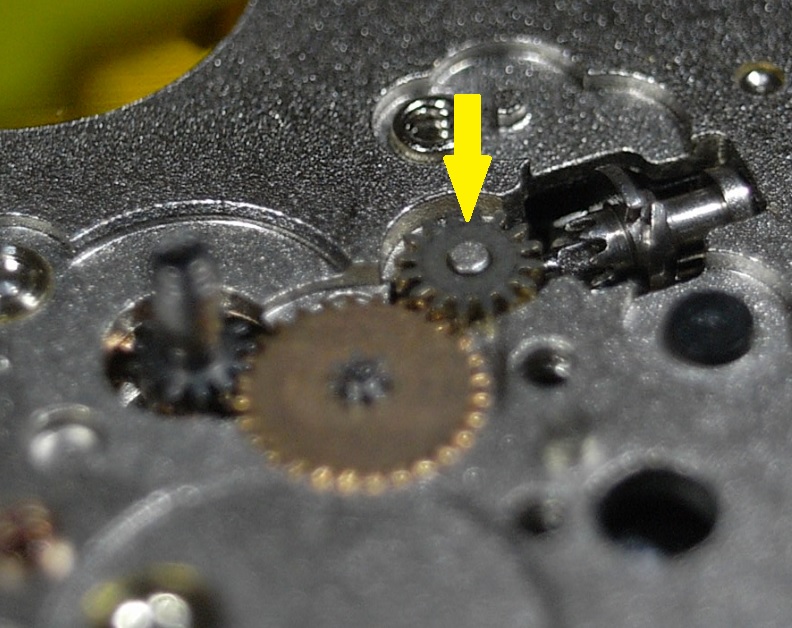
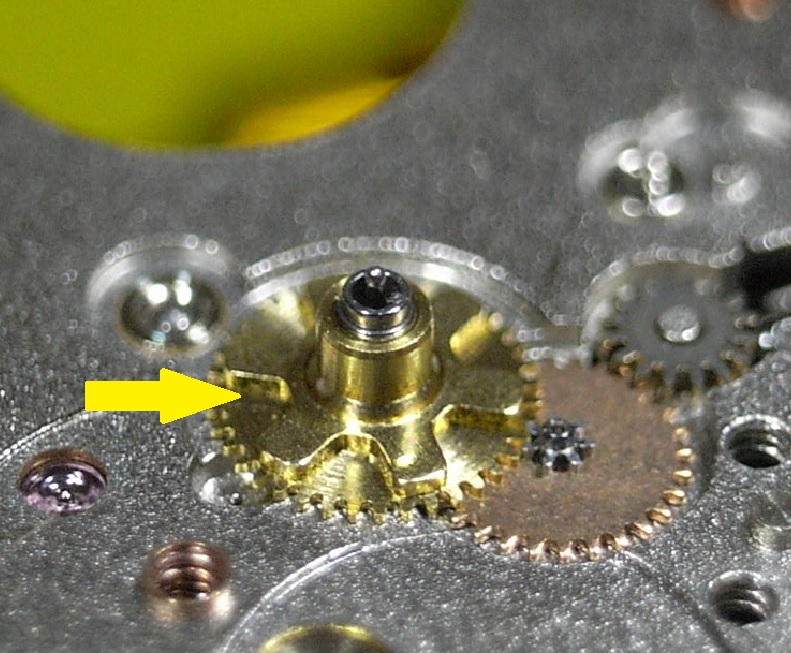
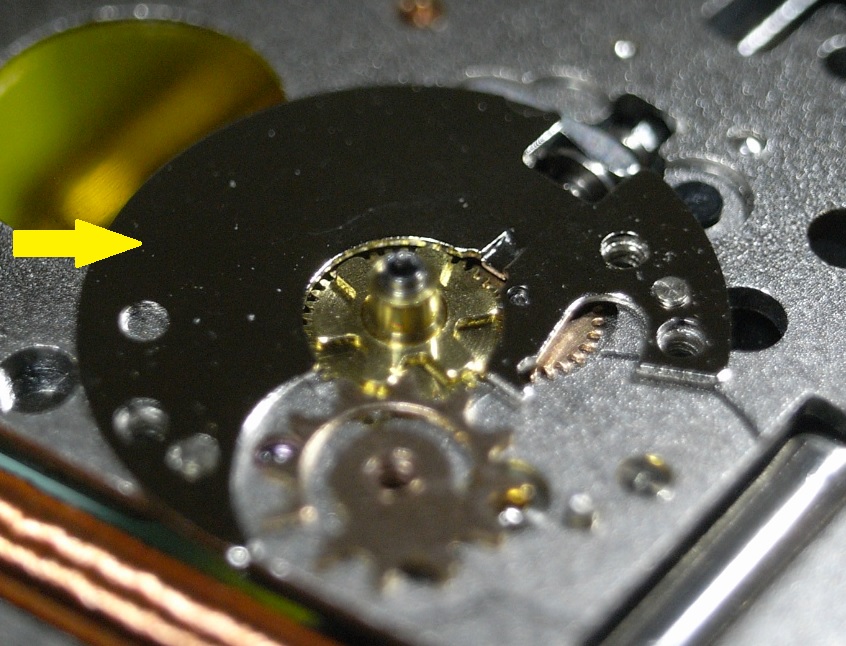
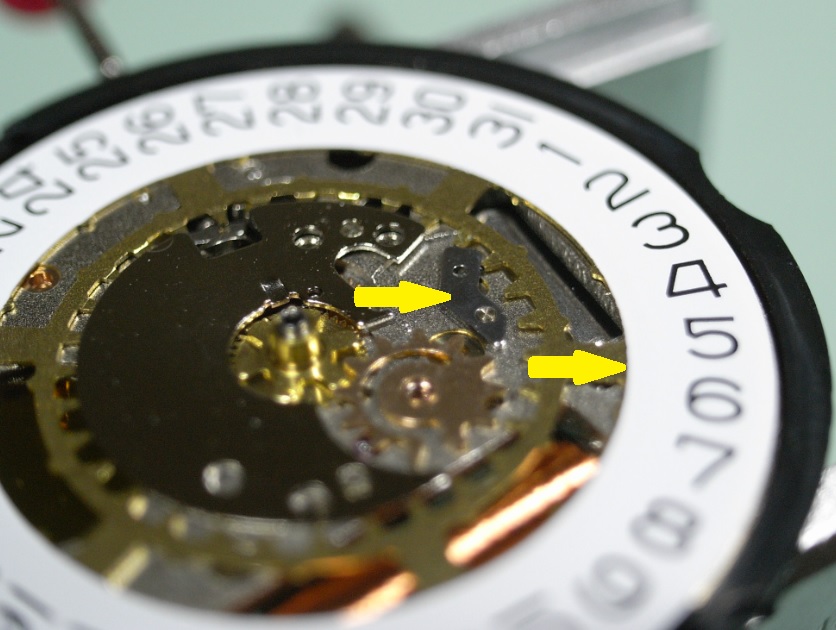
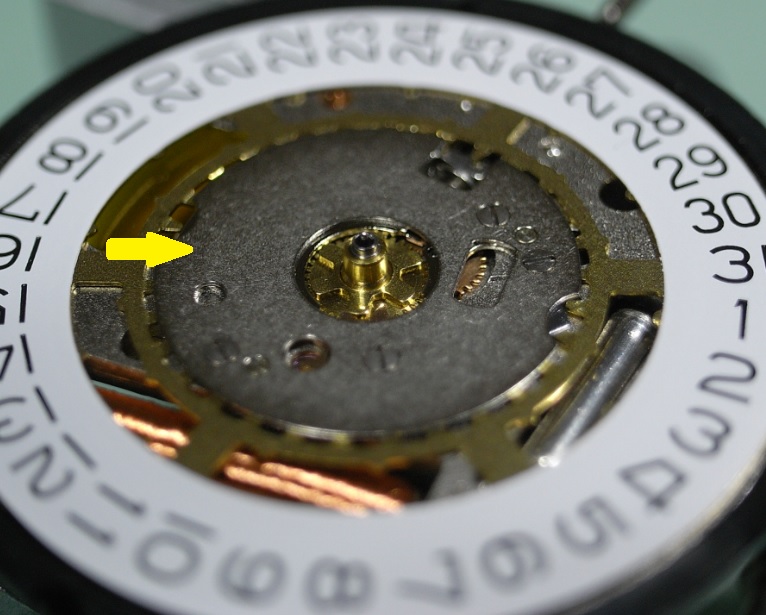
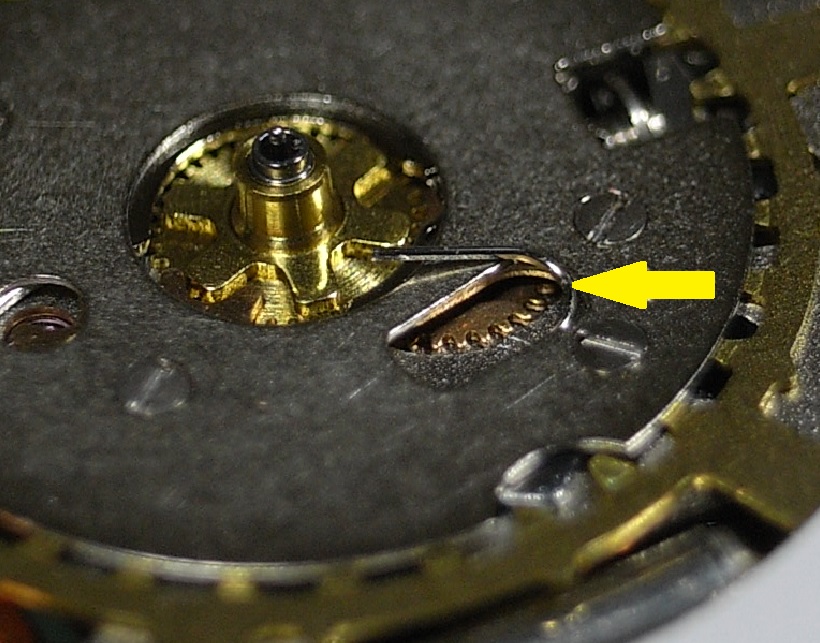
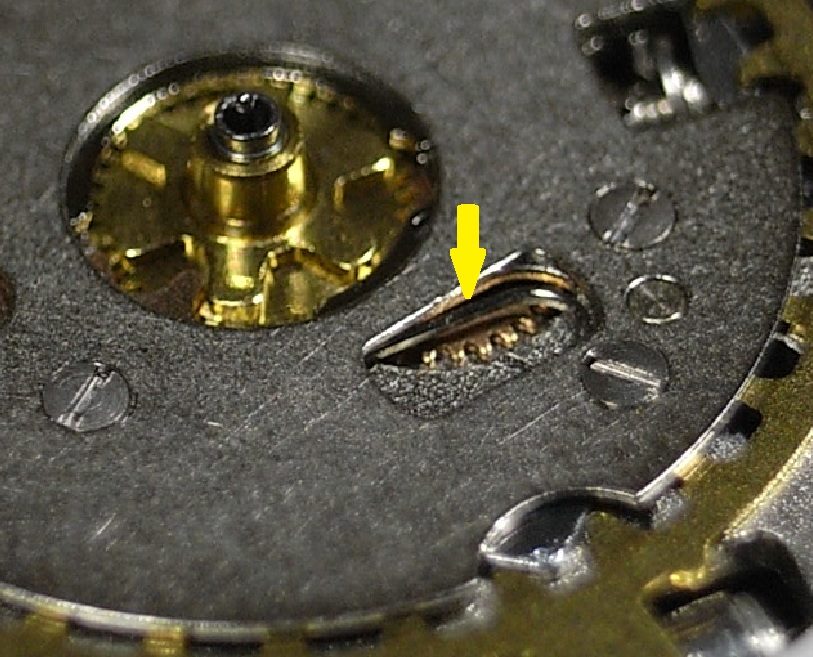
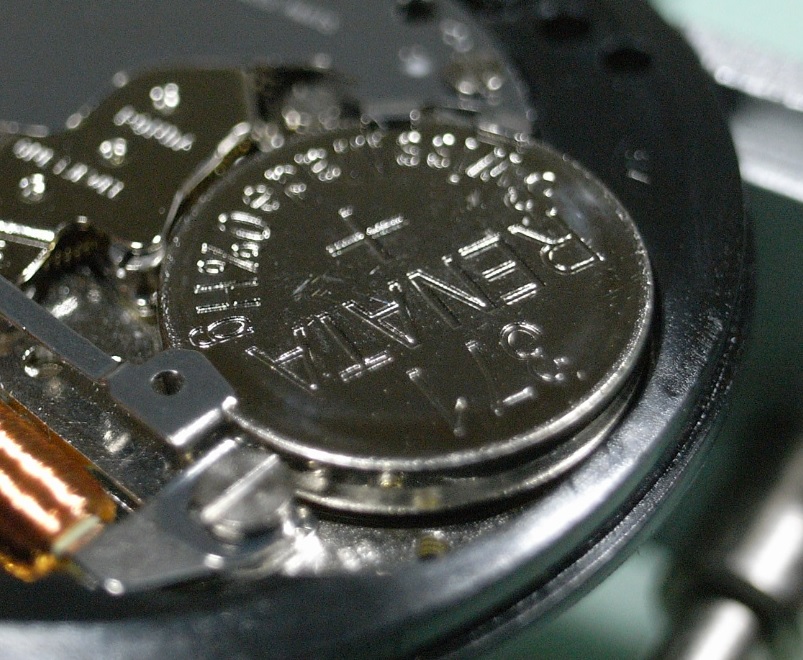
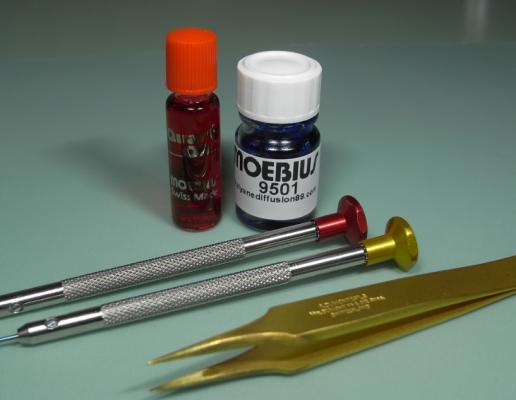
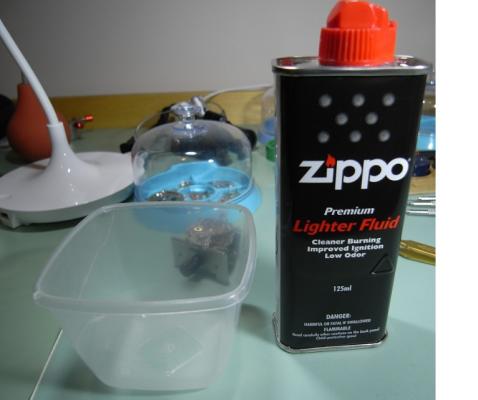
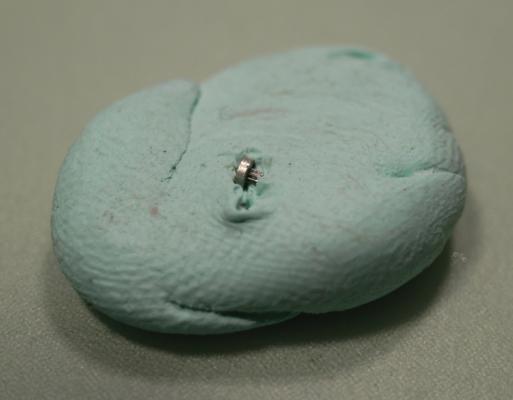
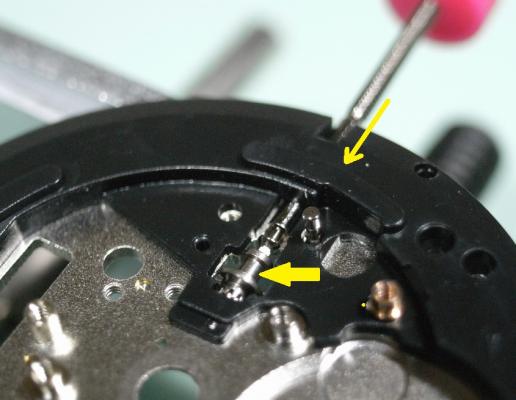
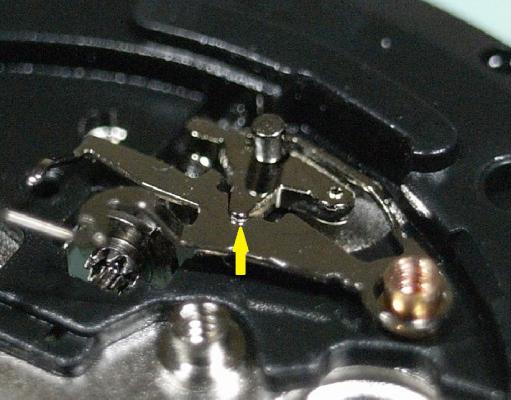
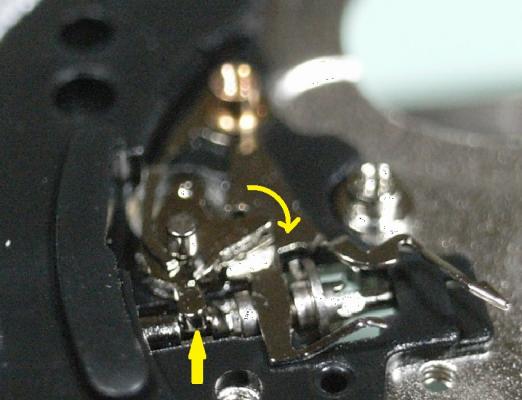
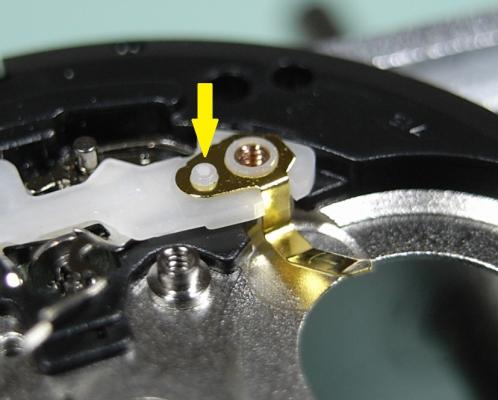
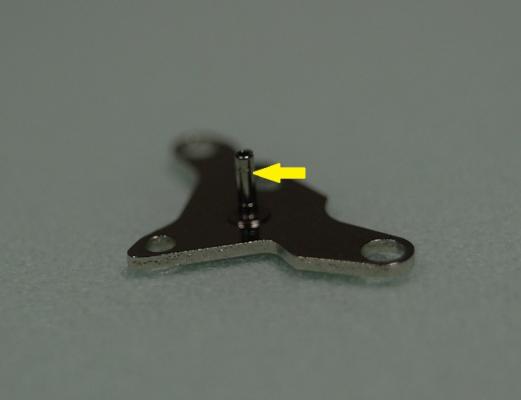
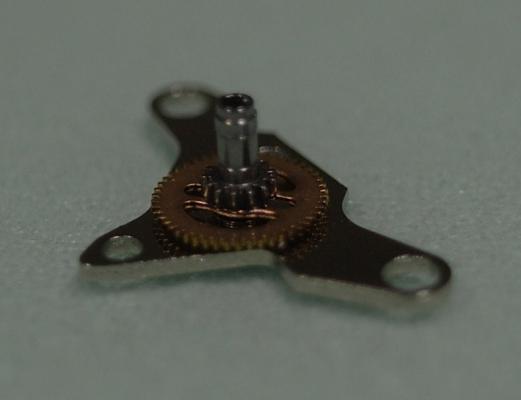
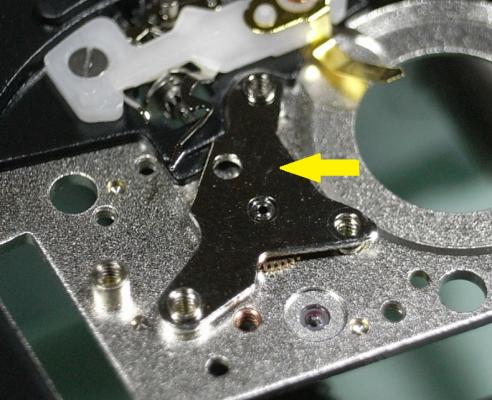
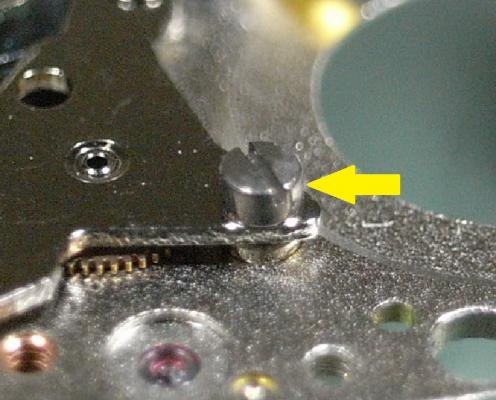
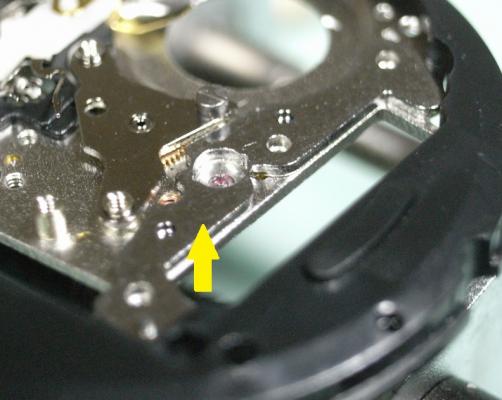
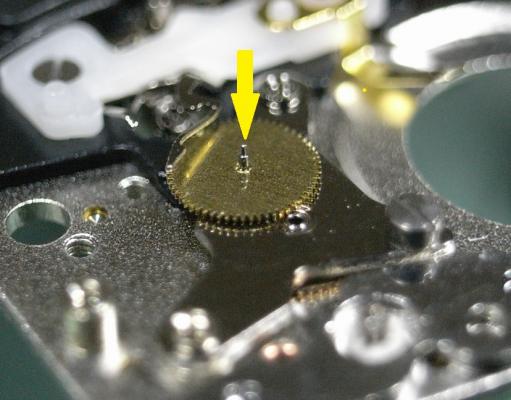
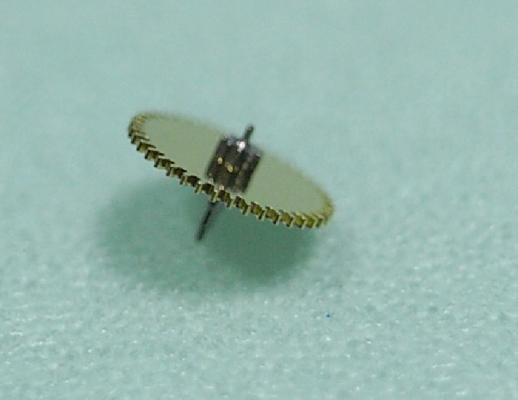
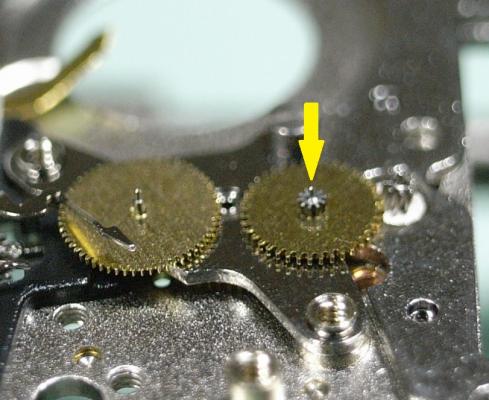
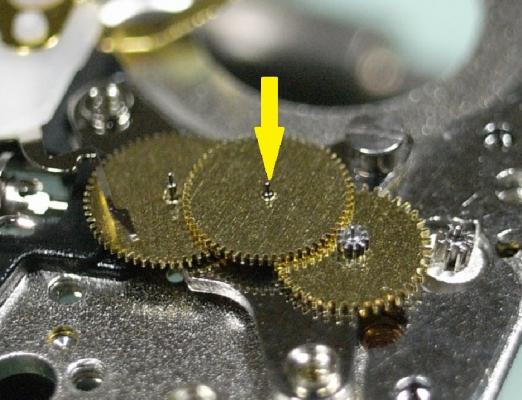
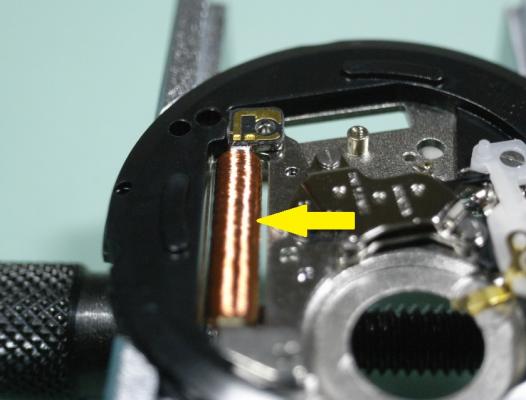
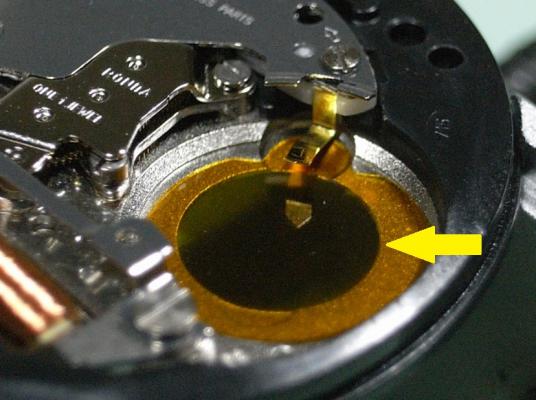
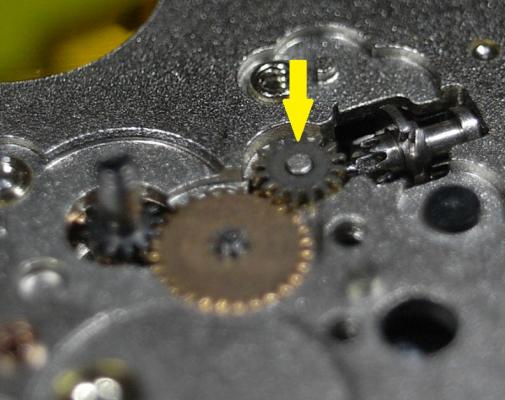
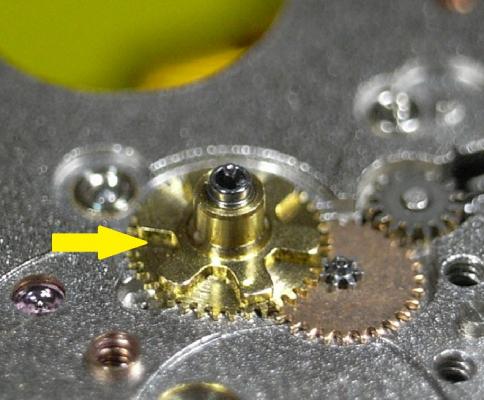
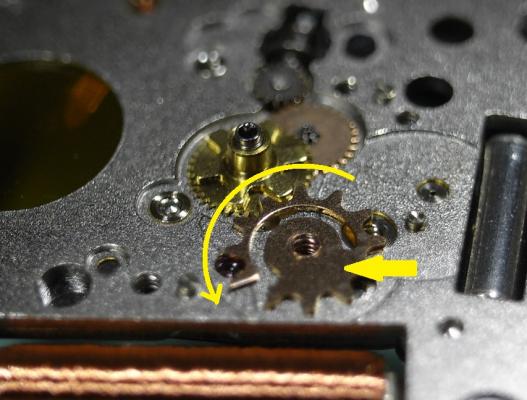
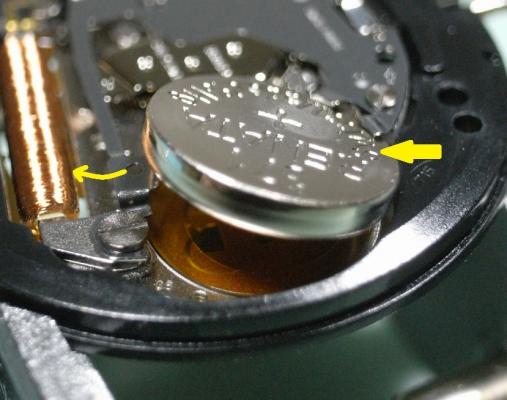
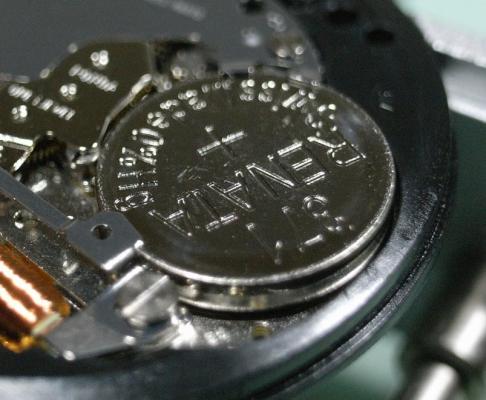
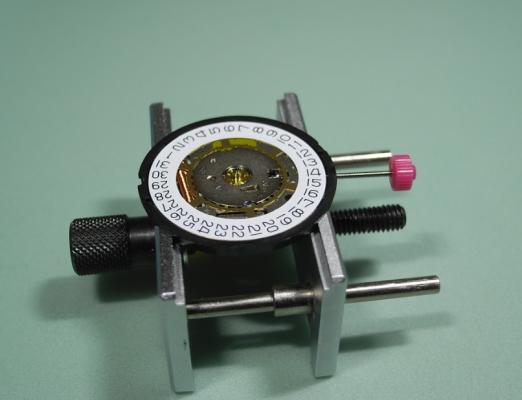
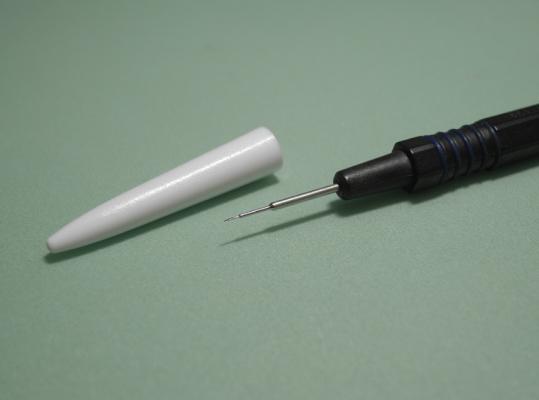
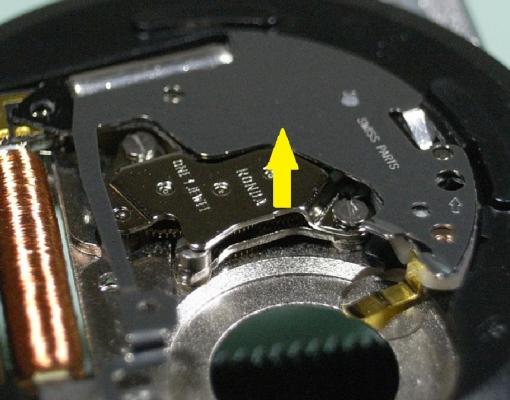
Ronda 715 Service Walkthrough Part 2 Assembly The 2 lubricants you'll need to service this movement are Moebius Quartz Oil and 9501. For an oiler I would recommend the "Blue" size oiler for this service. I haven't added all of the oiling points as I didn't want to clutter up the images and make it confusing. Please study the Tech PDF for all the oiling points, and replace their oil recommendations as follows: If you don't have an Ultrasonic Cleaner, or a Watch Part Cleaning Machine, you can simply use Shellite (White Spirits) or Lighter Fluid to clean the parts. To clean the Rotor use a piece of Rodico. To begin the assembly, place 9501 on the Stem as shown below. Hold the Sliding Pinion in place and insert the Stem. Then place some Quartz Oil in the yoke slot of the Sliding Pinion. Next we need to install the Setting Lever and Primary Yoke. Install the Setting Lever and then place the Yoke on top of it, so the arm of the Setting Lever fits into the slot in the Yoke as shown below. Press down the Yoke and turn the Setting Lever clockwise to slide on top of it. Make sure the Setting Lever is seated into the slot on the Stem. Replace the Plastic Setting Lever Cover, and secure using a 1.2mm Screwdriver. Install the Battery Contact. Place some Quartz Oil on the tube of the Cannon Pinion where indicated. Then place some Quartz Oil on the post of the Centre Bridge where indicated. Then install the Cannon Pinion on the post of the Centre Bridge. Place the Centre Bridge on the Main Plate, and secure the single screw using a 1.2mm Screwdriver. Note this screw is unique, with a thick head. Install the Stator. Install the Rotor The train is the next to be installed. We start with the Third Wheel. Notice it has the longer gear on the pivot. Install it on the Centre Bridge. Next is the Intermediate Wheel, with the shorter gear on the pivot. Install it on the Centre Bridge. Next is the Second Wheel, which needs a small application of Quartz Oil where indicated. Install it on the Centre Bridge. Then carefully install the Train Bridge and with your oiler gently adjust the wheels until the pivots locate into the holes on the bridge. Then tighten down the 2 screws with a 1.2mm Screwdriver Next place the Coil back onto the movement, being careful only to hold it on the end with no circuit tracks on it. Then install the Circuit; but DO NOT replace the screws. Place the Module Cover Plate over the Circuit. Then select the 4 screws to secure all these parts down. Note the longer threaded screw for the Coil, and the larger headed screw for the Battery Keeper. Place all the screws in place and screw them down half way with a 1.2mm Screwdriver. Once the screws are down half way, go back around the tighten them down. The reason we do this is to align all the parts with the Circuit, and so that no strain is placed on it. It also makes sure the connections between the Coil and Circuit Board are aligned properly. Install the Battery Insulation. Turn the movement over to the dial side. Install the Minute Wheel. Install the Setting Wheel. Followed by the Hour Wheel. Install the Indictor Driving Wheel, and make sure it's replace in the correct orientation. Replace the Secondary Yoke Replace the Date Indicator Plate Install the Date Jumper and Date Indictor Ring. ............................................................................... Now there are 2 ways to install the Jumper Spring. One way for the Novice and another way for the more advanced. Once you get confident with your tweezer skills I'd recommend to start practicing the advance method, as many movements will not offer the easier way to install springs. Method 1 (Novice) Install the Date Indicator Guard and screw down the 4 screw with a 0.8mm Screwdriver. Then slide the longer leg of the Jumper Spring into the inspection hole. Then grab the shorter leg of the spring and lever it into the inspection hole. Method 2 (Advanced) Place the Jumper spring into it's position, and use a piece of pegwood to secure the loop of the spring to stop it from pinging away. Then with your tweezers, grab the long leg of the spring and lever it across until its positioned behind the Date Jumper. Then replace the Date Indicator Guard and screw down the 4 screw with a 0.8mm Screwdriver. ............................................................................... Install the battery, hooking it under the 2 claws, and then lever the Battery Keeper back and push the Battery down into position. The service is now complete. If this was the first time you've serviced a movement, WELL DONE! I hope this has been fun and increased your confidence. I would now repeat servicing this movement over and over until you can do it without referring to this walkthrough. Also name every part as you remove and replace it. This is the road to increasing your practical skills and terminology.


 2 points
 -
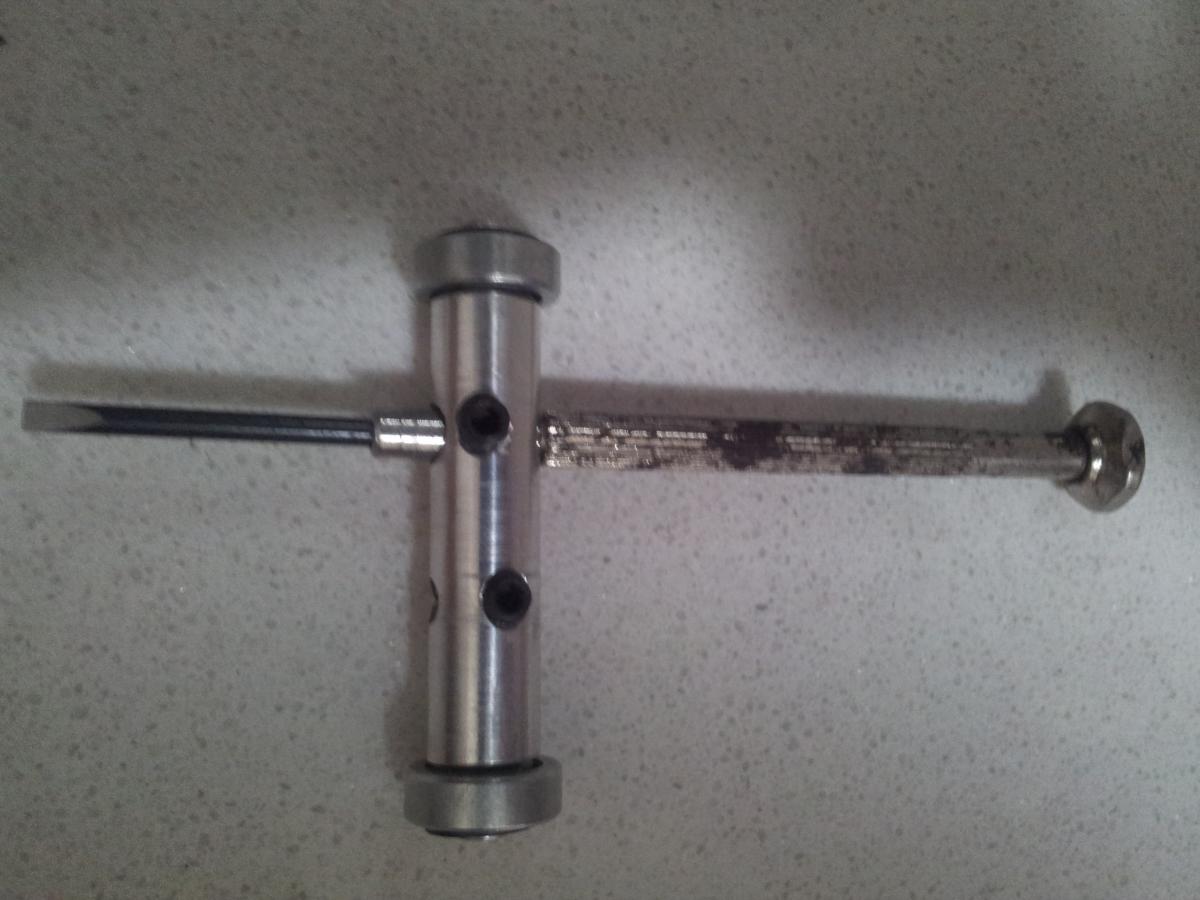
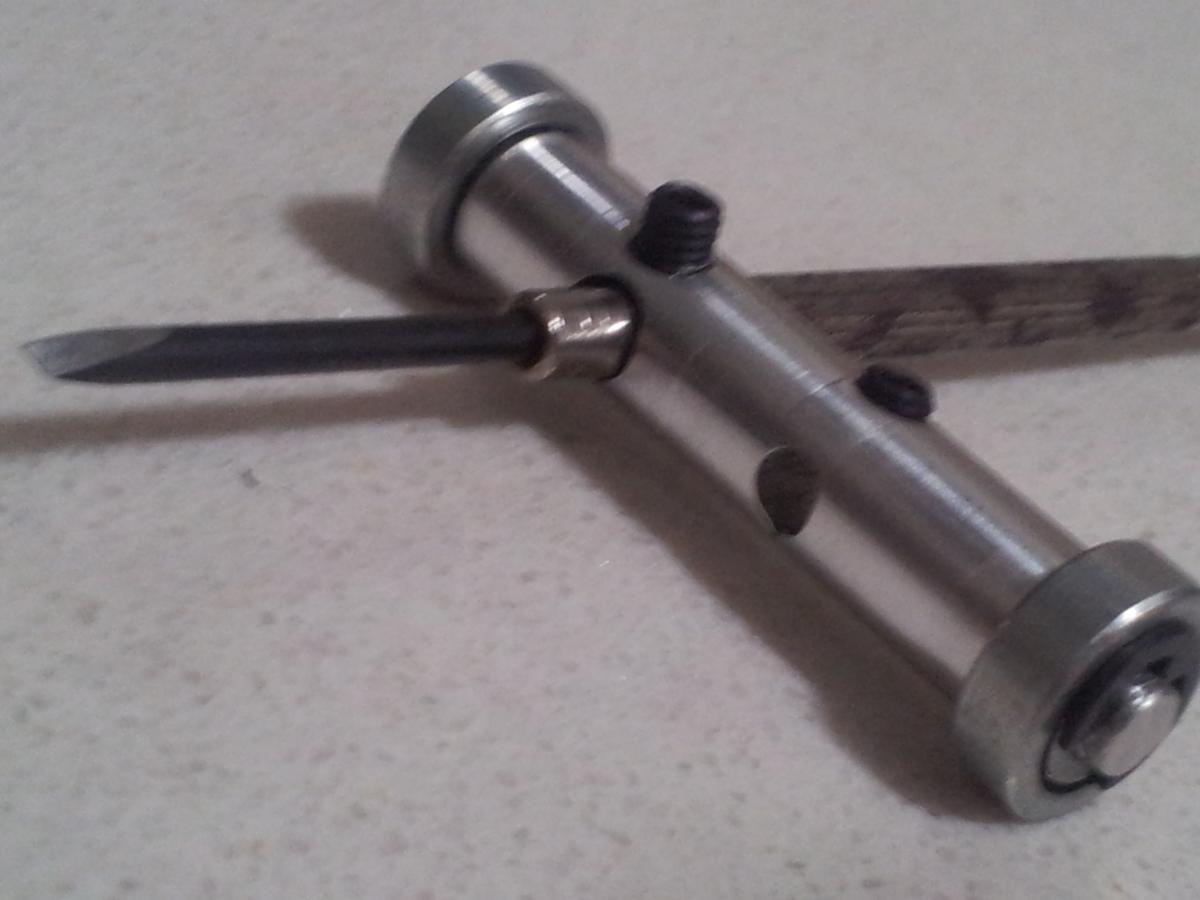
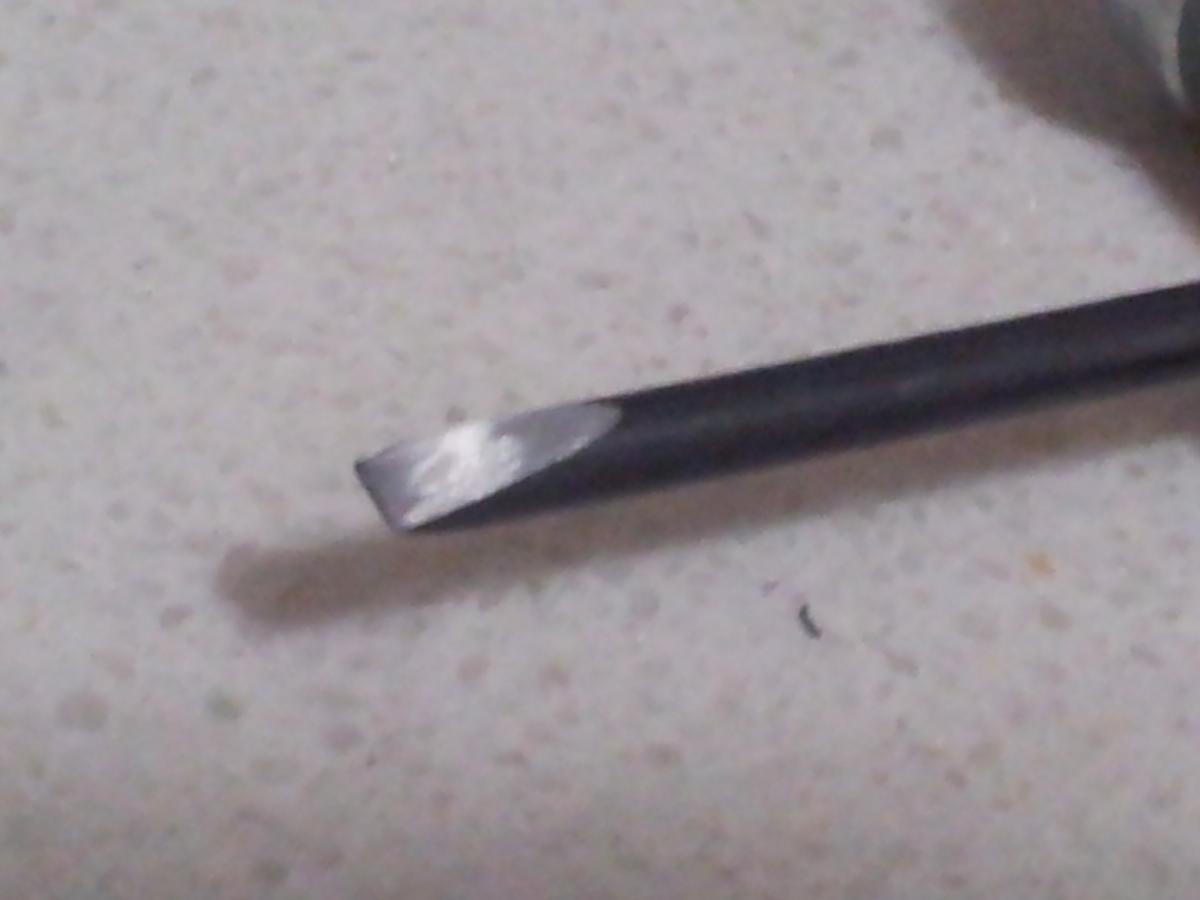
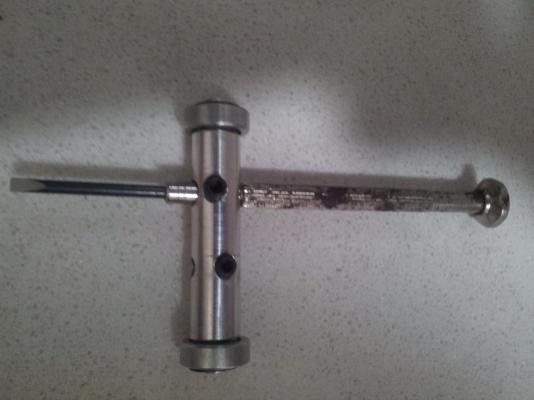
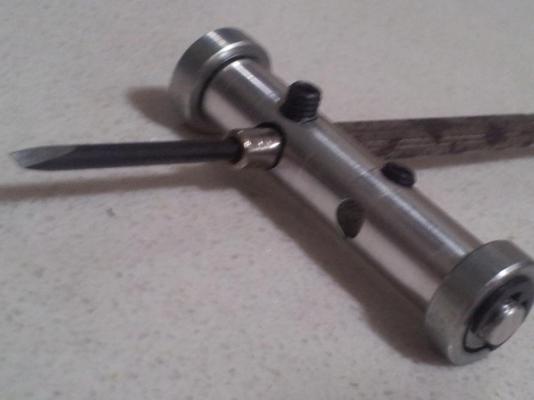
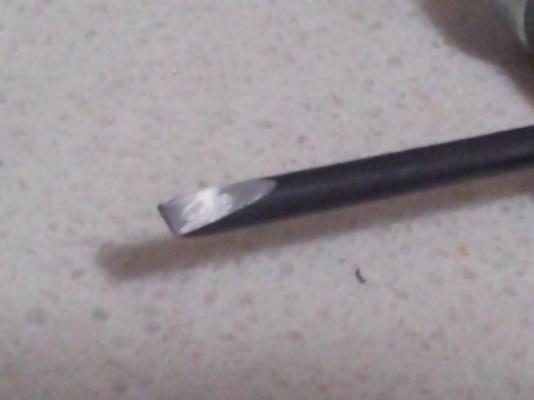
Hi, This is my home-made screwdriver polisher. Very useful and funny! :thumbsu:
 1 point
 -
Hello. Having just discovered these forums after looking over some of Mark's great videos and though I should take the opportunity to join up and introduce myself. I'm just starting to get into watch repair as a hobby and am mostly interested in working on old manual wind movements. As a starting point I've picked up a few cheap watches that are in need of servicing. Hopefully they won't end up destroyed along the way. My professional background (and other hobby) is in embedded software and electronics. I'm fairly hands on and have done quite a lot of fine soldering work under magnification. Hopefully some of these skills will be transferrable. At this stage I'm in the process of acquiring enough tools and oils so I can perform the basic clean and service work required. I also picked up this cool toy a while ago that I hope might help out in the hobby. It's a head mounted stereo microscope that was originally designed for surgeons and dentists. It quality unit with apochromatic optics, a good depth of field and working distance. It is able to auto focus and can zoom from 3.2x - 9.0x. It also has a co-axial light source and built in video camera. It was quite cheap but was missing the control box that drives everything. Fortunately I have been able to reverse engineer enough of the inner working to enable the auto focus and control the zoom. Mark's videos have been extremely informative and there seems to be some very generous people here who are willing share their knowledge with others. I'm sure I'll be here with many questions once the screws start flying. - Cheers, Tex1 point
-
All right, I got stubborn and gave it one last chance. I found the place for it. It sits with the crown wheel to prevent lag in the wind up motion. This became a monologue but hopefully it can help somebody at some point :). Have a good night.1 point
-
I'm in total agreement! :)1 point
-
That's very smart Roger, I'm sure he could sell quite a few if he wanted too. :)1 point
-
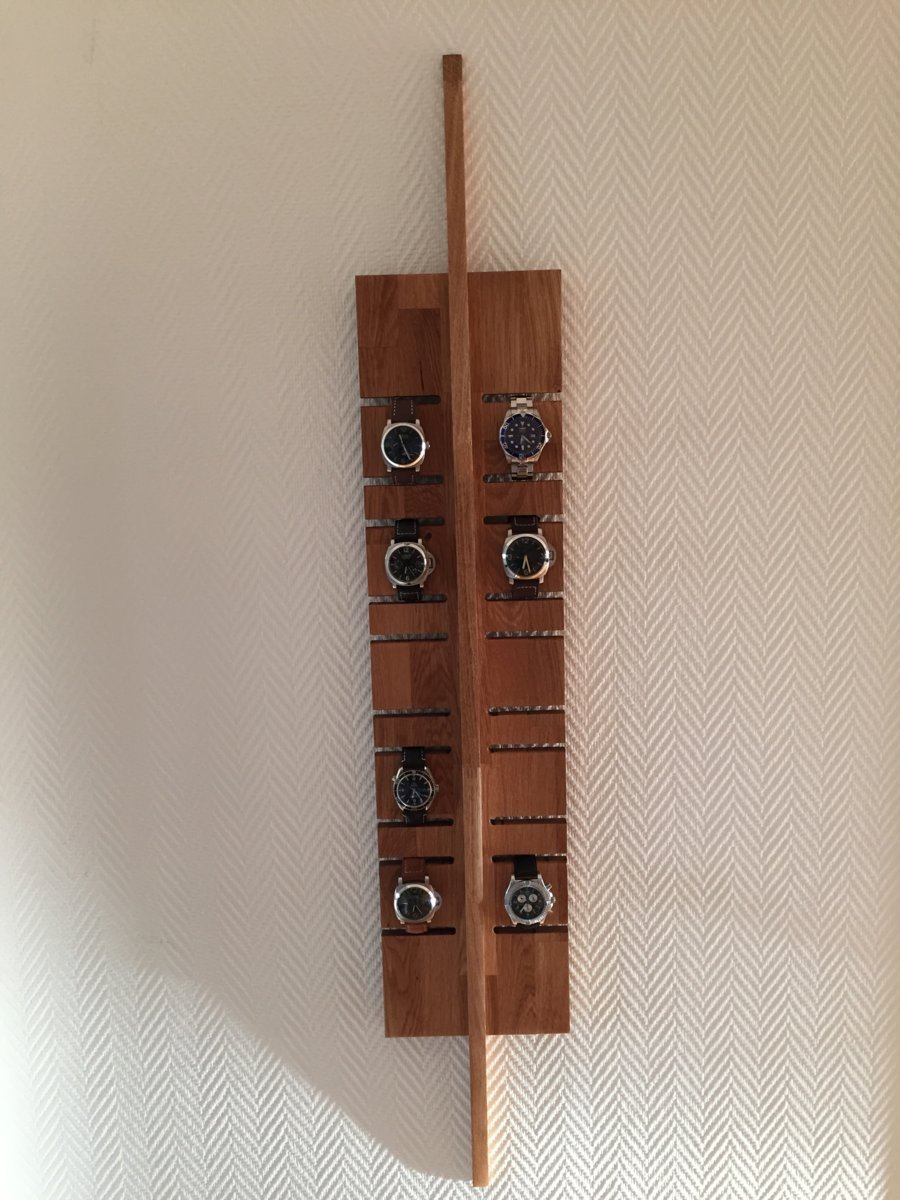
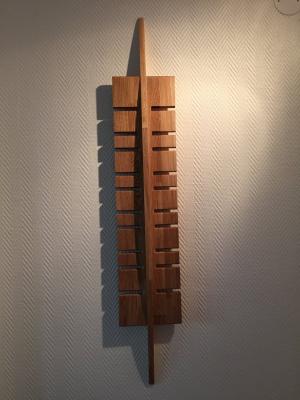
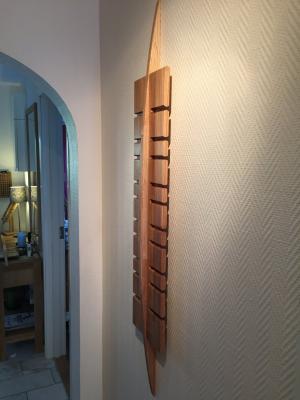
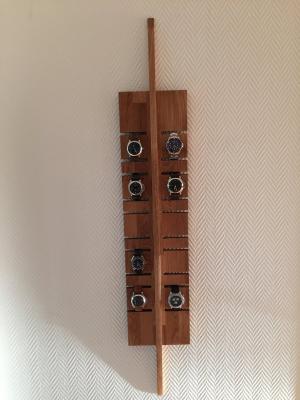
A fellow Swedish forummember has done this . If you are a good carpeneter you could do something similar ? Hope it is ok if i borrow his pictures . I myself also imported some nice watch stands from Japan . Costing $15 a piece plus shipping and handling cost .
 1 point
 -
Geo to my surprise it's working great. Thought I'd let it run for a spell.1 point
-
Hi guy's, inbetween bikes at the moment after a back operation. But history below. Yam DT50 WR250 2003 R1 Husberg 650 KTM 530 exc GSXR 1000 k8 As soon as the wife allows me to ride again, I'll be getting the new KTM 500 Sent from my GT-I9505 using Tapatalk1 point
-
Interesting question is it worth the time to service/clean the watch? I suppose it depends on how much your time is worth? So Seiko has a parts list which means the watch can be disassembled. Then at the link below you'll find the Technical guide everything you need to know about servicing this movement. http://www.phfactor.net/wtf/Seiko%20Files/4100A&4110A.pdf1 point
-
I wish I could help you Micky. :(1 point
-
I purchased one of these http://www.ebay.co.uk/itm/290865438546?_trksid=p2057872.m2749.l2649&ssPageName=STRK%3AMEBIDX%3AIT back in April and have kick started a couple of quartz watches with it. When checked with this it indicated that the oscillator was ticking away nicely but the movement wasn't running. This unit can put a burst of energy into the watch that frees off the movement and makes it spin very fast. The two watches I started with it back in April this way are still running and keeping perfect time. Even if you are not keen on using this technique to start the watch, you can still check that the electronics are OK with it before servicing the movement. This would save wasting time on a watch watch that cannot possibly run, even when cleaned.1 point
-
Geo, Riding the turbo was something like riding a two stroke ...you had that same kick when he boost came 'On'.. Built like a brick shithouse.! Only thing I didn't like was the tank got very hot after a while, this was because the fuel injection kept sending back heated fuel (via the pressure regulator) and this was not nice in Malaysia! Might be OK in cooler climes tho'. Anil1 point
-
your motor probably isn't the problem, green dialux is fantastic but keep in mind, like all compounds, it produces different results depending on what wheel you're applying it with, as well as how you're going about it. in polishing steel I'll generally stick to chamois and fluffy cotton mops, the chamois is a little firmer, it will take out light to moderate surface damage (depending on how persistent you are and hot you run the piece.) and finish up steel to usually a cloudy mirror, sometimes a good mirror, but usually some way cloudy or imperfect. So I have to switch out to the softer cotton, which needs to be run a good deal faster than the chamois (make no mistake it firms up with speed, so fair warning, it will take off skin if you're careless) But it's softness means it can be used as a final finish with the same compound, taking out the cloudiness and imperfections of the previous stage of polishing. For greater damage i stock felt and grey dialux, but you have to be careful with this, especially if it's a mini mop like it is for me, and not a bench motor, it goes either way but especially when you can only work on a small area with a mini mop, a mop as hard as felt can very easily distort a piece, leaving dents and ridges that the light reflecting in it warps around and betrays your mistake. I advise you work backwards, learn how to get a really good final finish, and progressively learn to take out more and more damage without putting your own damage in and still being able to get that same final finish. It's better to lean on and potentially misuse compounds/mops/techniques that are too gentle than to lean on and potentially misuse things that are too harsh.1 point
-
A lot of the compounds leave a waxy film & normally require further hand polishing to remove the residue. On stainless steel I use a Dremel with hard felt mop & blue colour final finishing compound, finishing off with a pink colour Selvyt silver cloth. The hard felt mop used carefully will keep the edges sharp. On silver I just use the Selvyt silver cloth & on gold & gold plate I use a bugundy colour Selvyt gold cloth1 point
-
Thanks Geo. The camera output is S-Video so the video resolution is limited to SD video. Judging from the amount of electronics in there devoted to the video feed I do expect the quality to be about as good as SD gets though. I don't think the video camera is magnified in the same way as the stereo optics but I haven't hooked it up yet to see if that's the case. I'm intending to get a USB video capture device and see what it looks like soon. Even at SD resolution it might be interesting to see a movement disassembled from the perspective of the person doing it so it's probably worth getting the camera up and running. This isn't my first foray into horology. I've designed and produced a few electronic clocks in the past. This has what has led to an interest in mechanical timepieces. They are beautifully made and I'd like to learn some of the skills involved. Some of my clock making efforts so far are below: - Cheers, Tex1 point
-
Indeed it is. I really do need to update that log as it doesn't have my latest progress. I stripped down the electronics and managed to get enough info to go on to get comms happening both ways. To dispel any rumours regarding my imminent planetary invasion I've updated my profile pic to show what it look like after I put the skin on over my glass head in the morning.1 point
-
Looks like they forgot to renew their domain name - happened to me before. They obviously quickly renewed it but it takes time for global DNS to propagate and that is why some of you were seeing the site and others were seeing the Network Solutions parking page. What I don't understand is why they did not renew it for the full amount allowable - 10 years. Look - they only renewed it for one further year: Expiration Date: 18-jun-2016 It's cheap as chips to renew domains these days - probably would have cost them about $80. Watchrepairtalk.com won't be up for renewal until 2023 :P1 point
-
How about this for steampunk ish?1 point
-
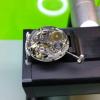
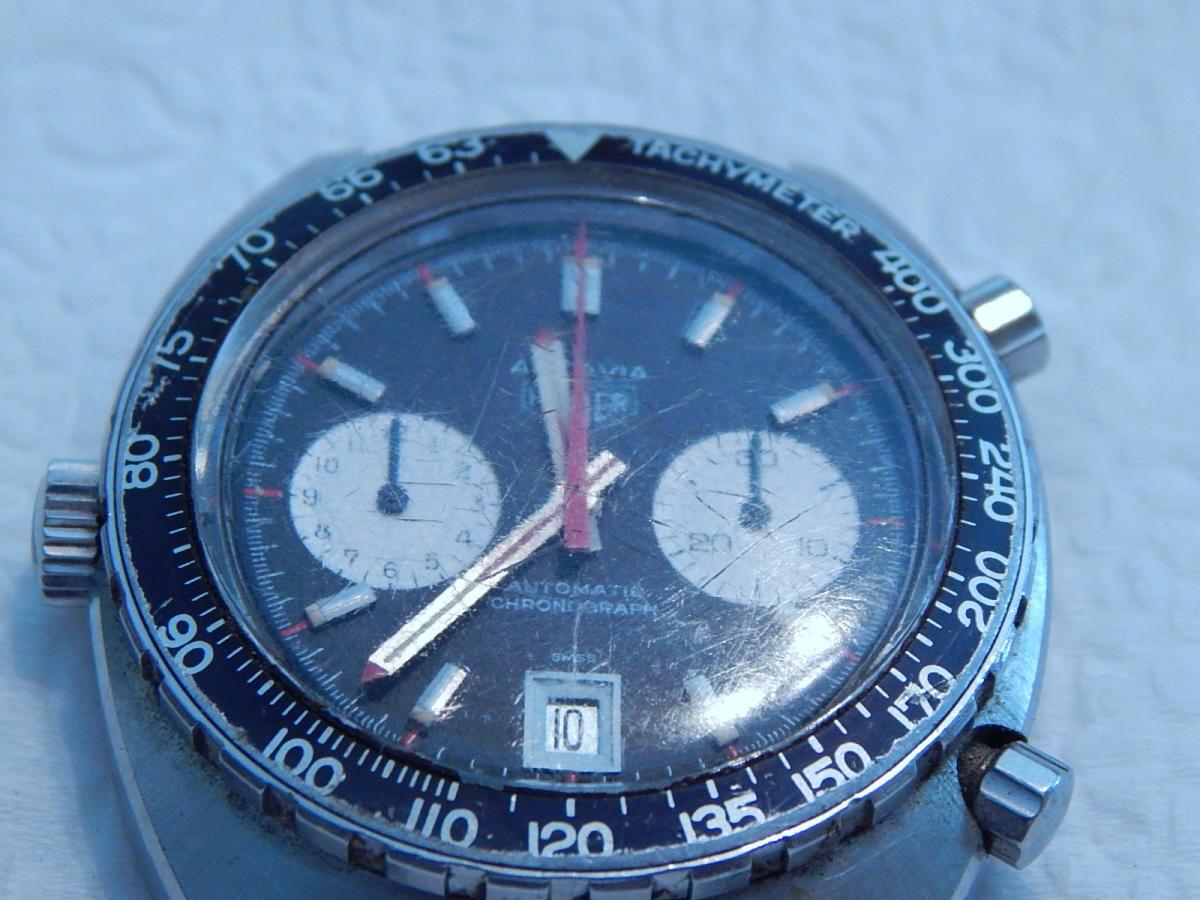
In case anyone is interested in the finished watch. I got the set lever screw in I needed Saturday. So I cleaned it and put it back together- twice. Got confused a bit and put dang set lever screw in backwards and didn't notice until I started to attach set lever. Just took it off my timing machine and it was running about +3 sec. I am attaching two more pictures, one of the second counter running and one where it's reset. I'm going to tell my son-in-law that I'll let him double his money on the watch real quick if he wants.
 1 point
 -
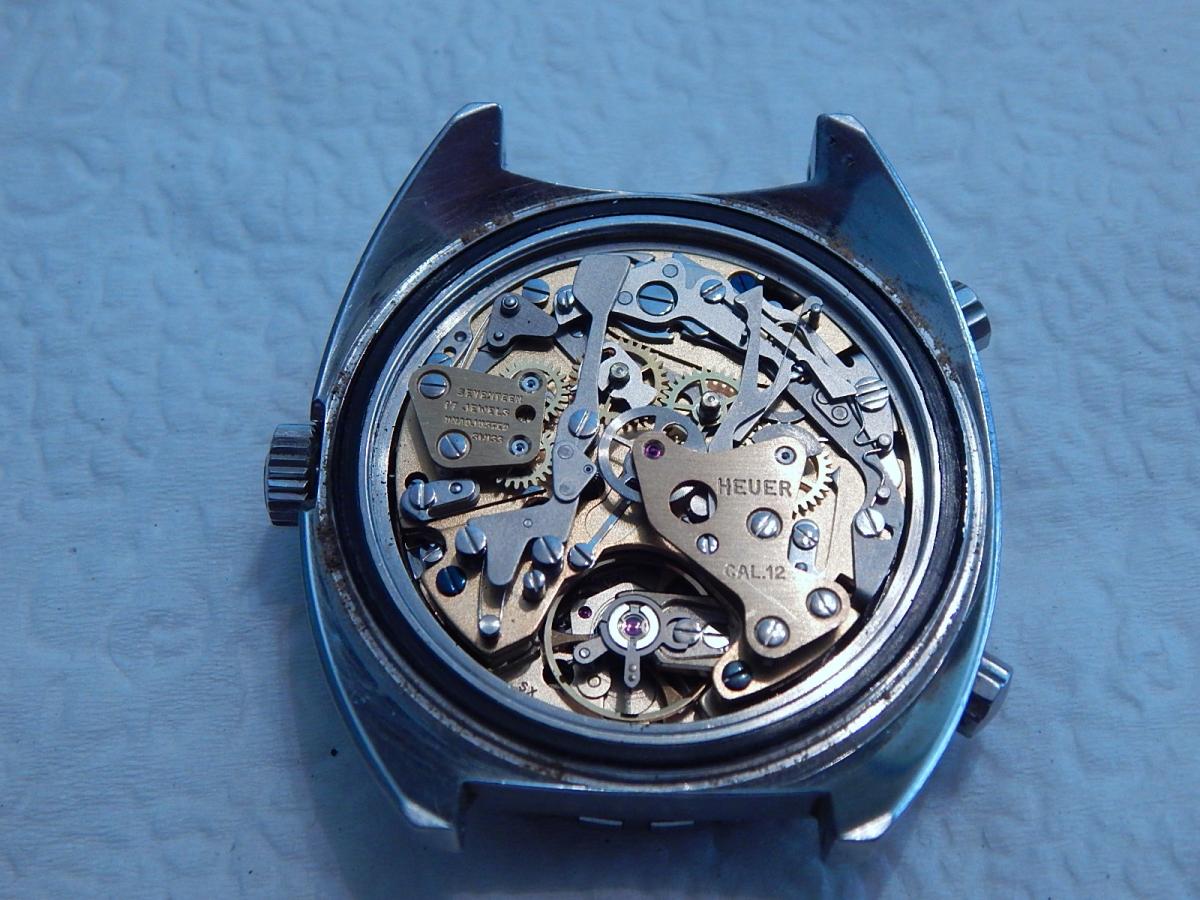
Nice watch :) Here is a break down diagram for parts numbers if it helps :)1 point
-
Here are the pictures I promised.

 1 point