Leaderboard


Popular Content
Showing content with the highest reputation on 03/26/15 in all areas
-
I think this is where you will get one see link below. Note No Ebosa 65 listed BUT 61 or 64 which is likely to be the same. This site does show the measurements (click on show more info) so you can check with the old one. http://www.windingstems.com/ebosa.php2 points
-
Repair and restoration of a Tissot pocket watch The watch arrived with a number of problems, the crown wheel was missing and so was the barrel arbor. The barrel arbor is a difficult part to make, because it has so many things all contained in a very small space, so I think my first task is to make a new one. Here are some of the critical parts of a barrel arbor: square boss has to have a hole drilled and tapped to accept the winding wheel screw a hook needs to be made on the arbor to fit and hold the inner part of the mainspring allowing the spring to be positively secured and the required clearance to the coil so it doesn't touch the hook there are numerous pivot surfaces, 2 to fit into the mainplate and barrel bridge, 2 to fit into the barrel the dimensions of all the pivots and spacing is critical if the arbor is going to fit and work properly the arbor needs to be hardened and tempered for strength and durability, and it's friction surfaces need a high polish and burnishing to reduce friction to the minimum Whenever you are making a part from raw stock, you have to have a plan and logical approach. My first task was to drill and tap the hole for the screw. Once that was done, the next step was cutting the 4 faces that would secure the arbor to the winding wheel and allow the movement to be wound up. I made these with a very slight taper, so that as you tightened the screw the wheel would be held more securely. Here is a view of the winding wheel being test fitted to the arbor. The next step was to fabricate all the various pivot surfaces and make sure that the heights were correct so that it fit into the barrel as well as between the mainplate and the barrel bridge. Here's the arbor ready to be parted off and the bottom pivot finished. Once the bottom pivot was finished, the arbor needs to be hardened, it is coated in boric acid to keep the oxygene away during heating, heated to a red heat and then quenched in water. Here it is after quenching. Next it gets a polish so that I can see the colour change as I temper it to a blue hue. Now it needs another polish of all surfaces, and I burnished the pivot surfaces for durability. [/url] Now the big test, fittin it into the barrel and the mainspring, it fits perfectly. And next is the installation of the cover, which also is a perfect fit. Moving along the whole assembly gets installed into the movement, end and side shakes are checked and corrected if needed. And finally I am able to re-install the winding wheel and it fits perfect with the required clearance to the barrel bridge and no end play. With that out of the way, my next task is the making of a new crown gear.2 points
-
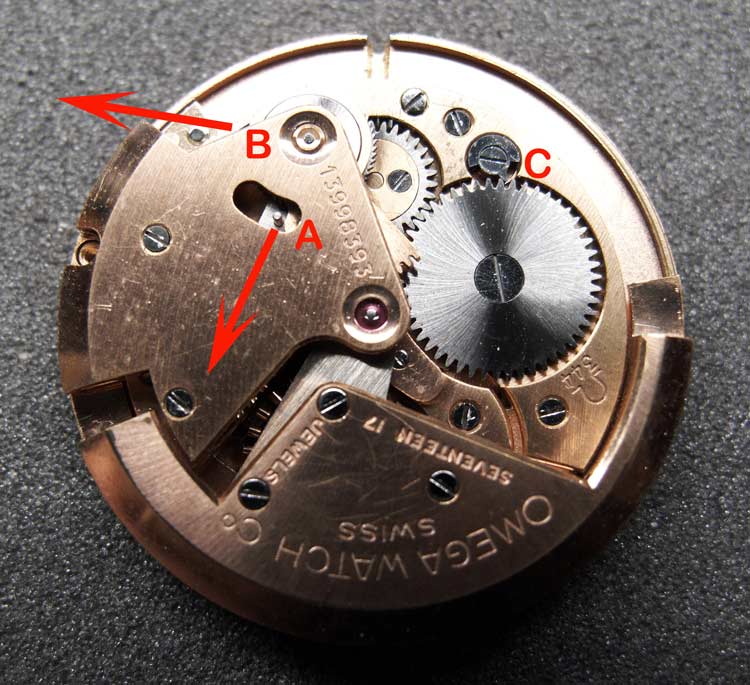
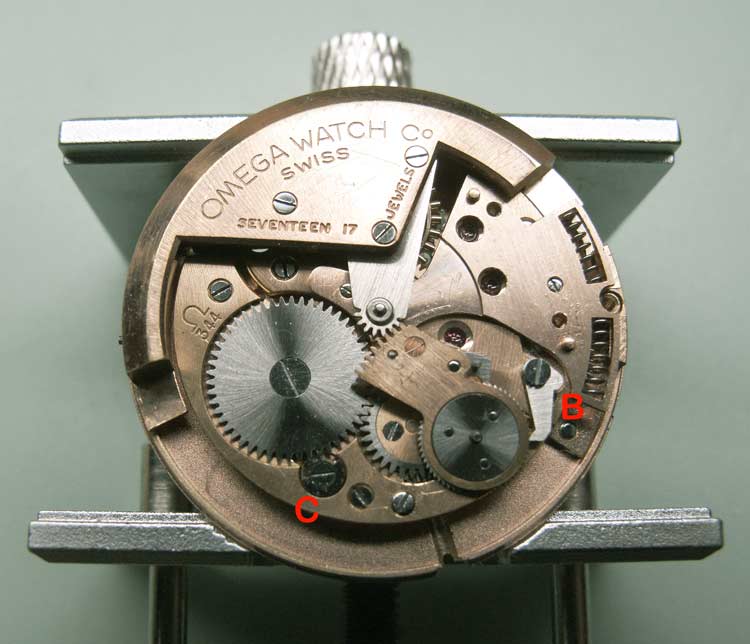
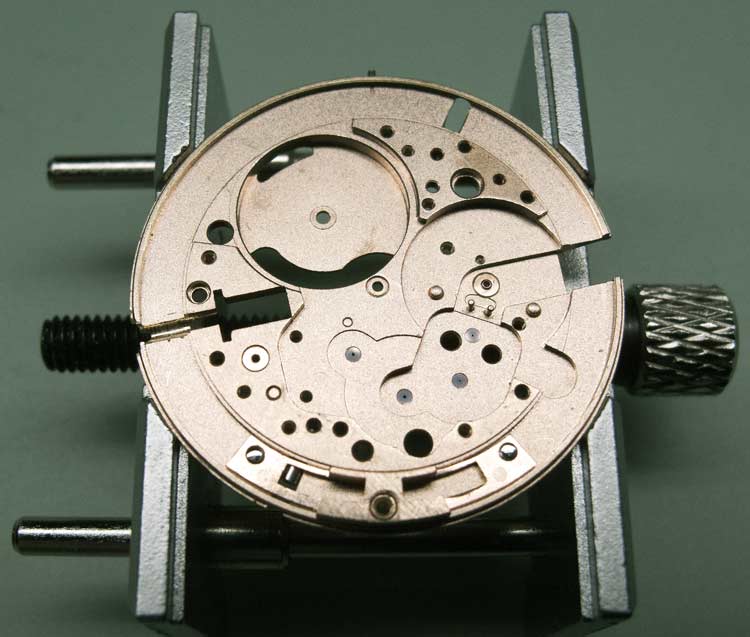
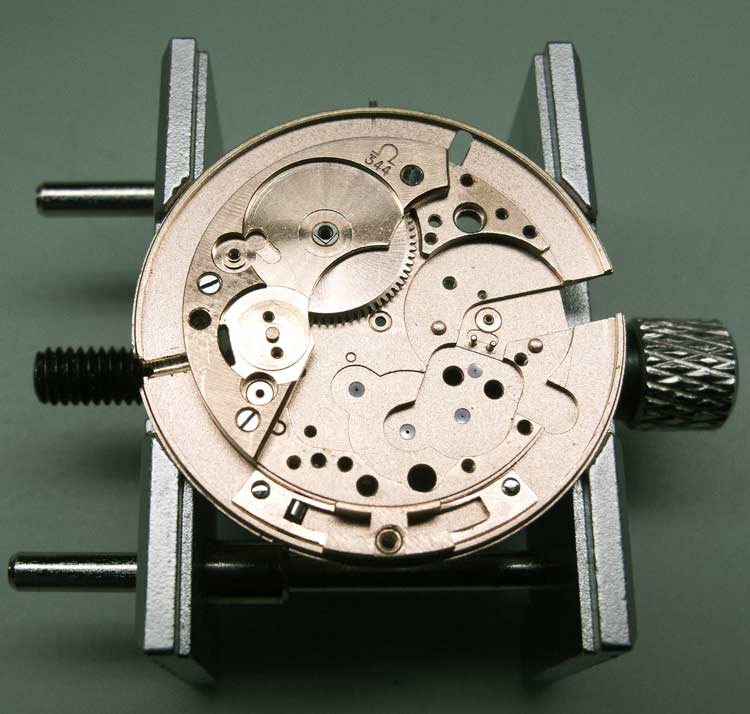
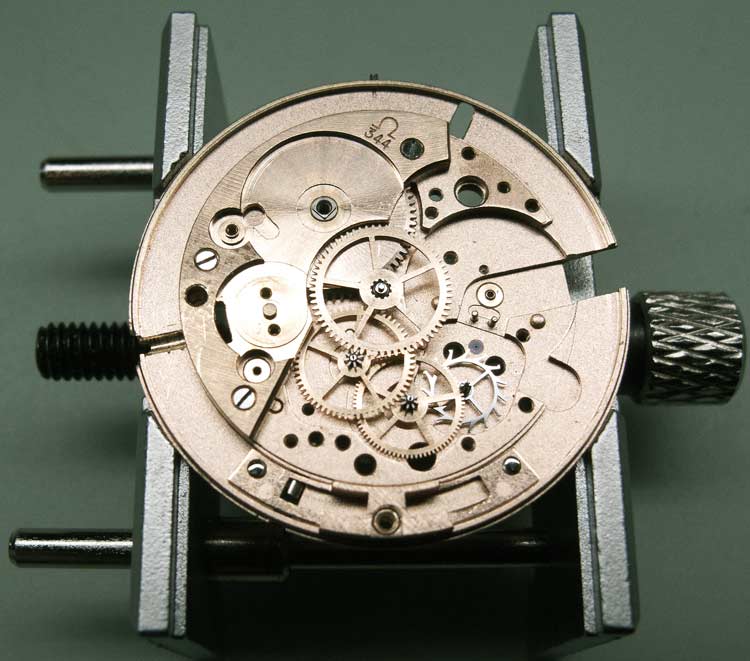
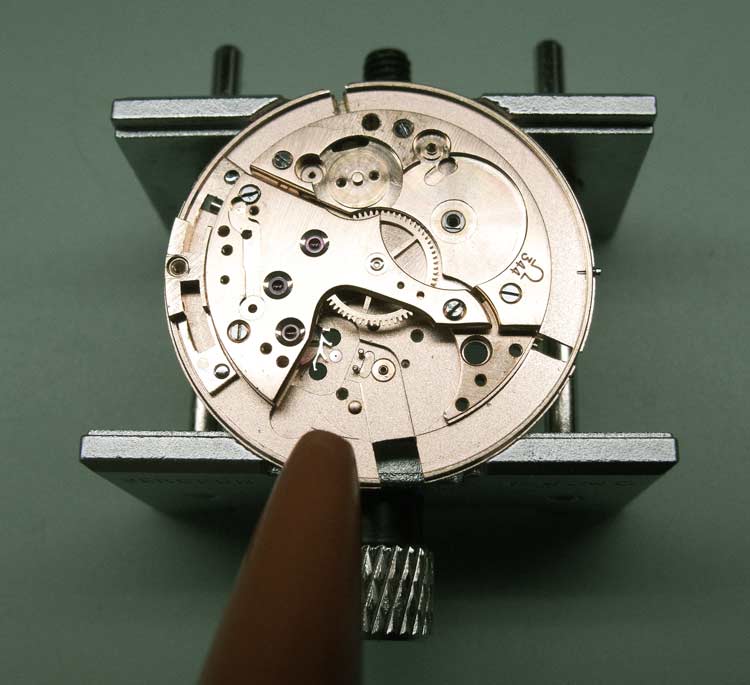
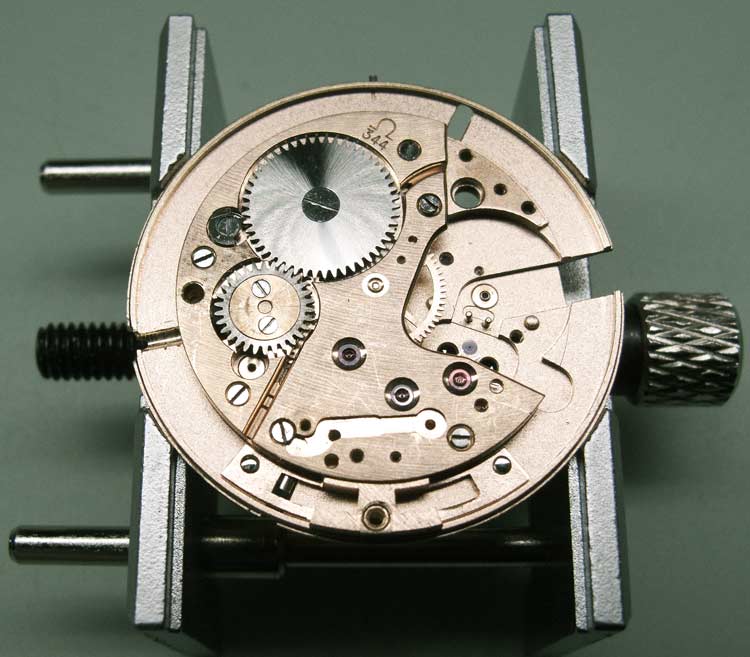
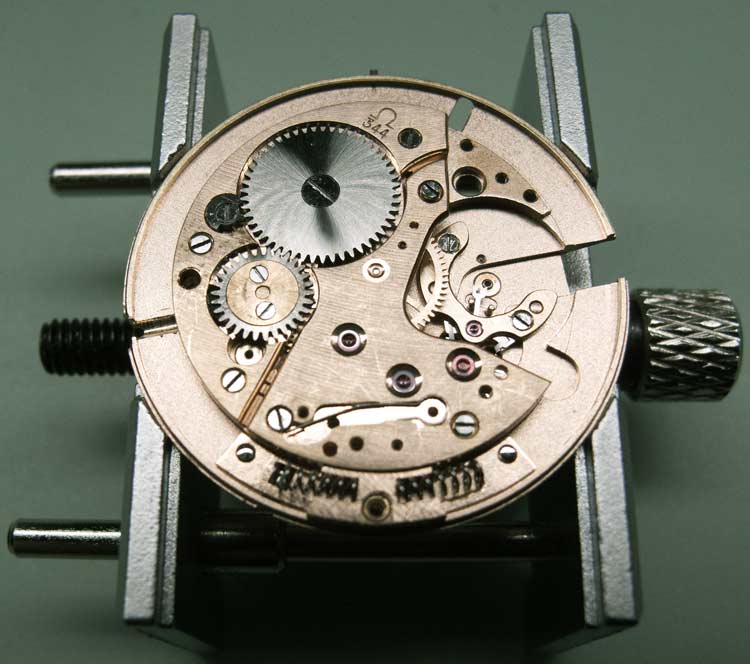
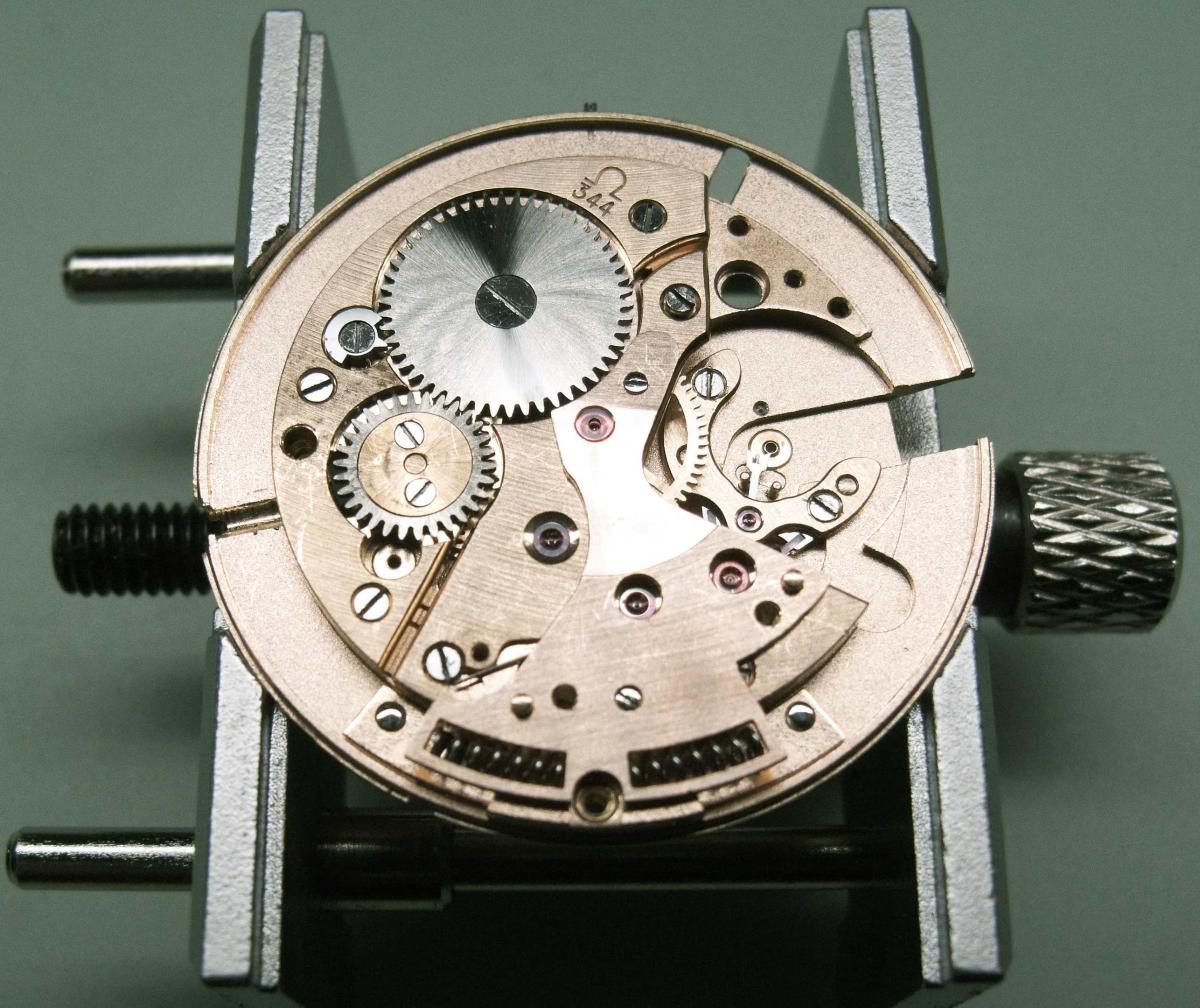
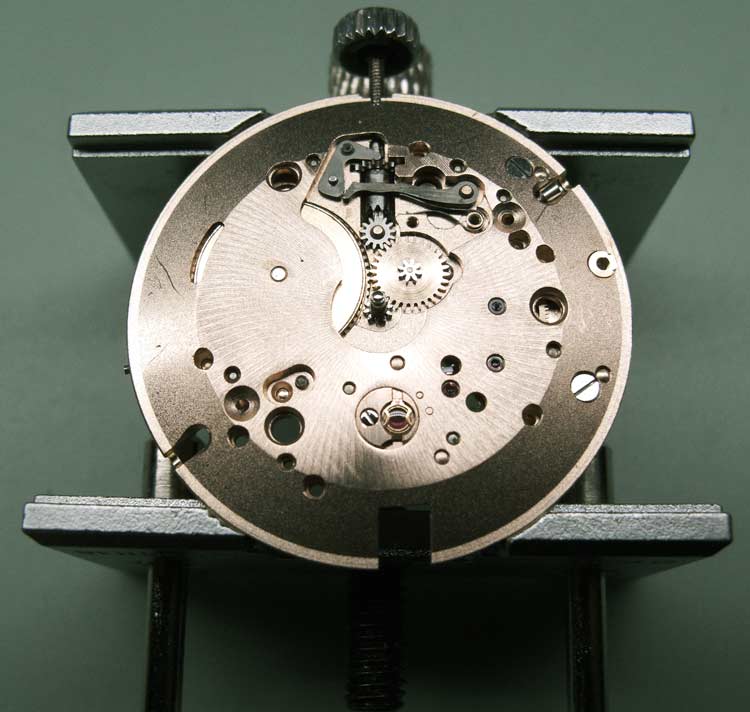
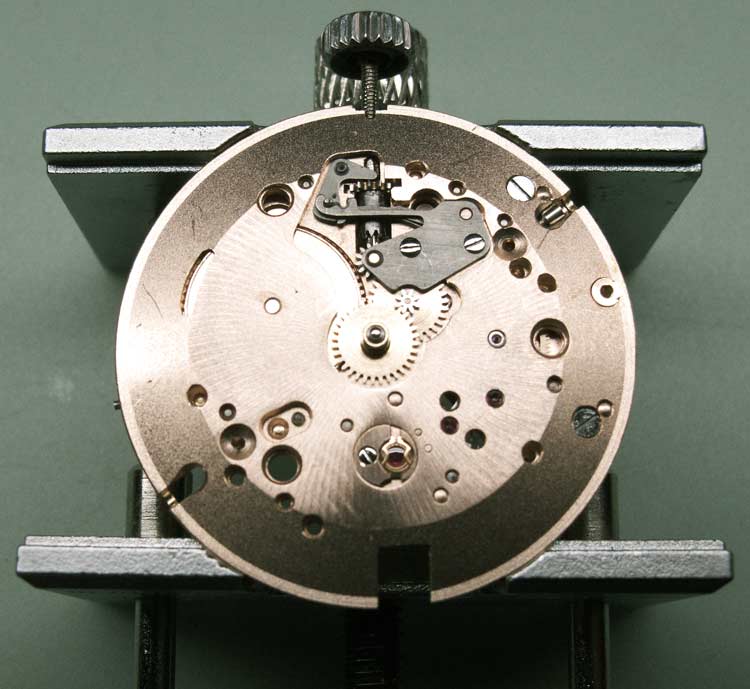
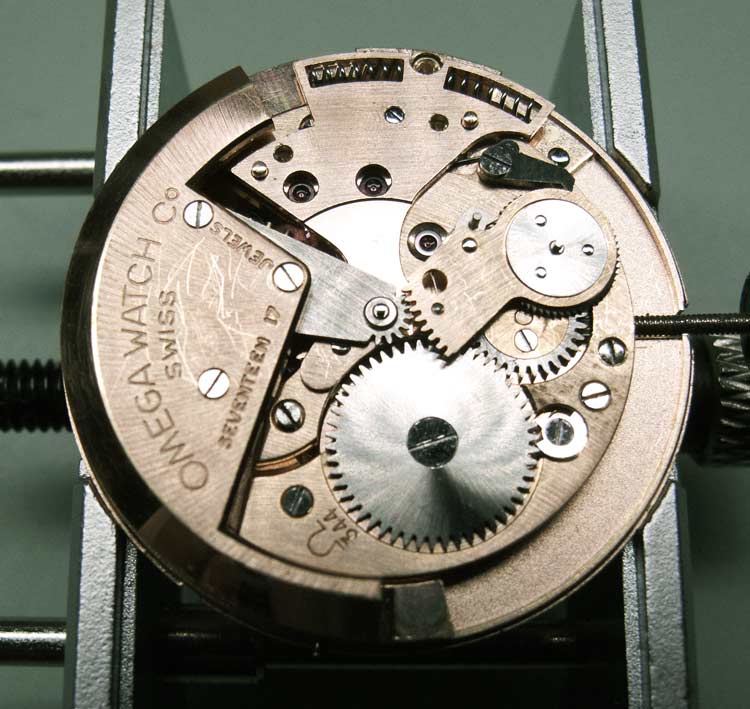
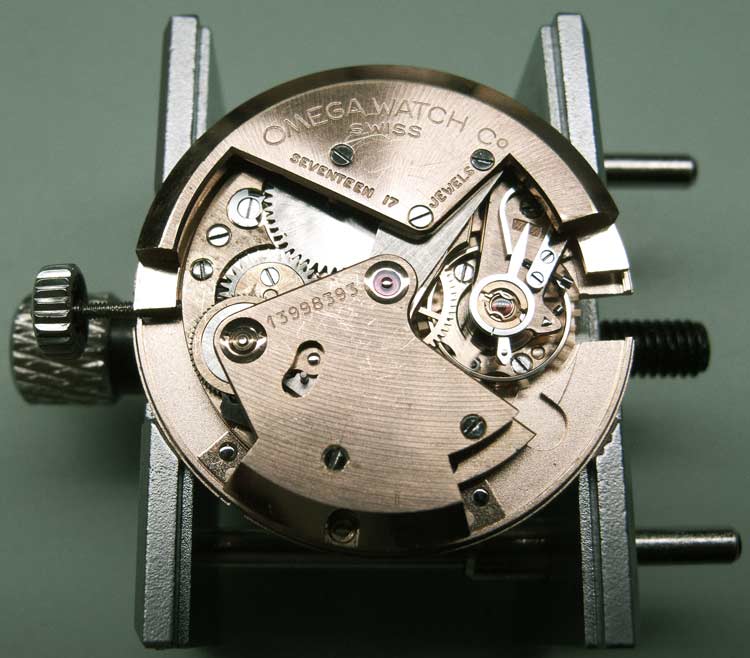
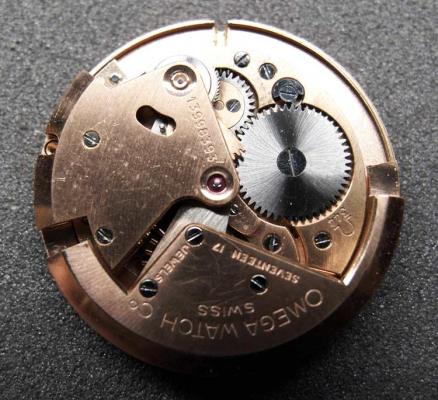
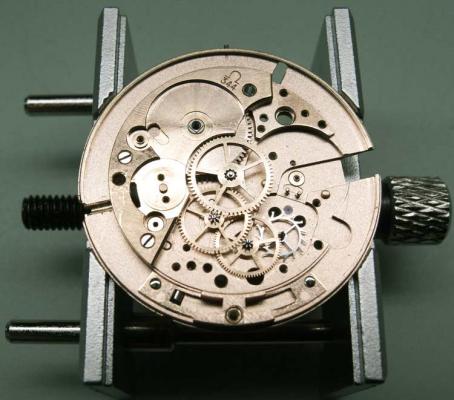
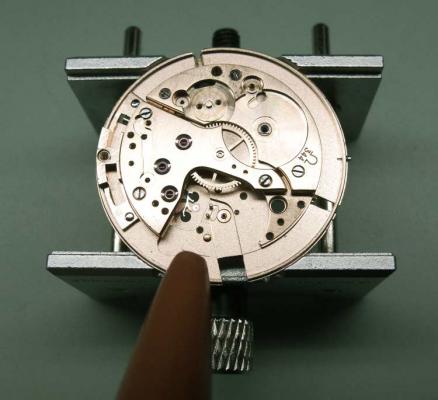
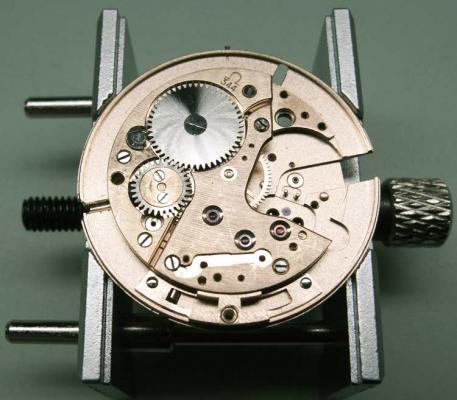
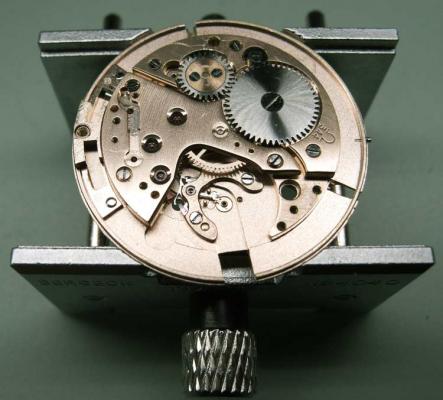
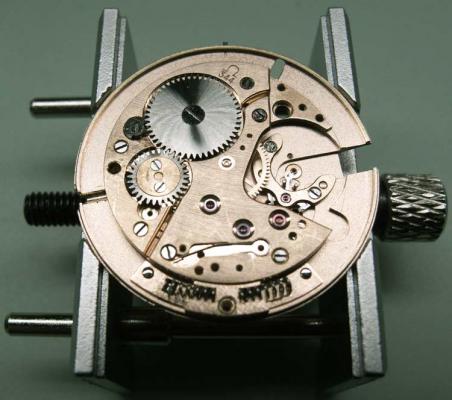
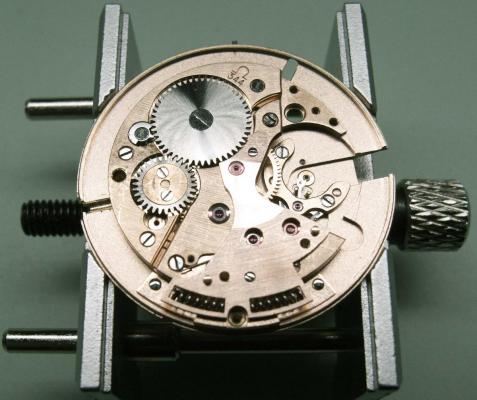
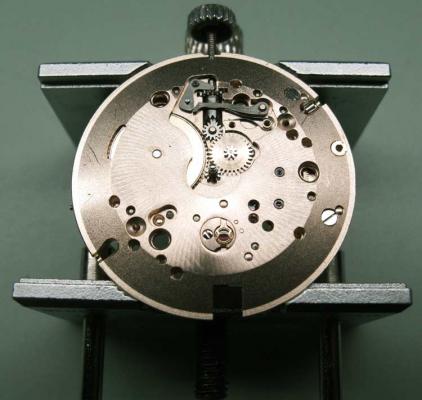
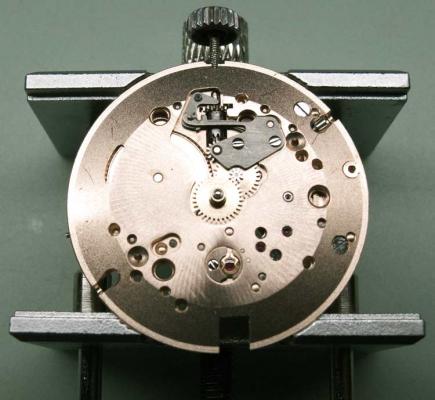
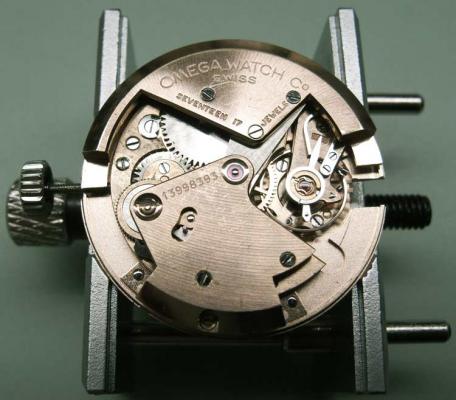
Here is an insight into the rebuilding of an Omega Seamaster bumper automatic 344 calibre movement from 1952. I am not going to give a step by step dismantling procedure. Apart from the auto-wind mechanism, the dismantling is fairly standard. I will however give a couple of tips on how to safely remove the auto-wind mechanism, before showing assembly of the cleaned movement. The Omega bumper mechanism has three clicks A, B & C. The first A is mounted on the ratchet lever and transmits force to the ratchet gear during winding. It also allows the ratchet gear it to index in one direction only. The driving force is produced by the oscillating weight and transmits force to the lever via a curved rack on the end of the lever. The second B is mounted on the Train Bridge and ensures the ratchet gear is held stationary when the ratchet lever moves anti-clockwise to the starting position of its clockwise winding stroke. Click B is holding the force of the mainspring during normal use. The third C is the barrel ratchet click. This is only really required to hold mainspring pressure when the auto mechanism is removed during disassembly. Disassembly Procedure When dismantling the watch movement the mainspring pressure must first be removed from the auto mechanism. Once this is done the auto bridge can be safely removed. To do this release both click A and click B to remove all mainspring force from the auto mechanism. This is done by pulling the clicks clear of engagement in the direction of the red arrows. The mainspring pressure will now be held by click C. Once this has been done the auto-wind bridge can safely be removed. This reveals the lever and ratchet assembly that can now be lifted from the movement. At this stage the mainspring pressure can now be completely released in the normal way. Use a screwdriver to control the rate of barrel rotation while holding click C clear of the ratchet wheel. Dismantling from here on is much the same as any other manual wind watch. Reassembly Attach the Bumper Spring Retaining Plate (at bottom of picture). Fit barrel and Barrel Bridge. Fit the Gear Train and Bridge. Blow the perifery of the escape wheel toensure free running of gear train. Fit the Crown Wheel & Ratchet Wheel. Fit the Escapement lever and Bridge Fit Bumper Springs and Retaining Bridge. Fit Keyless Work. Fit Auto-wind Mechanism. Ensure that the automatic lever is engaged to allow full travel of the rotor. The rotor should bounce of each spring at the end of its travel. If it doesn't, damage will result. Finally fit Auto-wind Bridge and Balance Assembly That’s all folks! PS. The new LED light from Cousins has greatly improved my pictures. Now shooing at handheld at 200ASA instead of 800ASA.


 1 point
 -
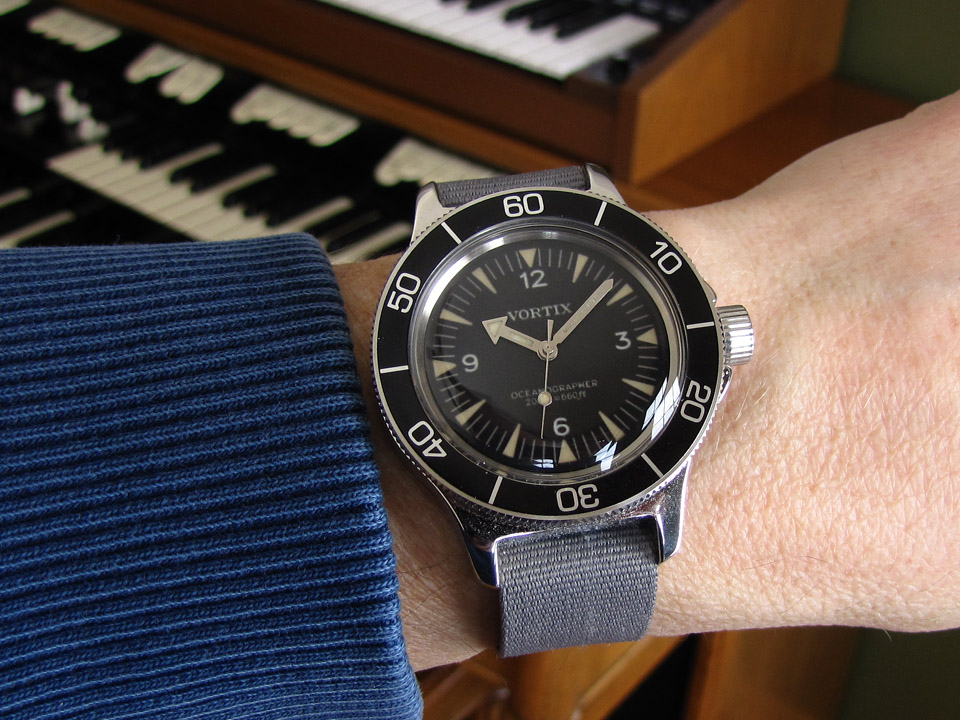
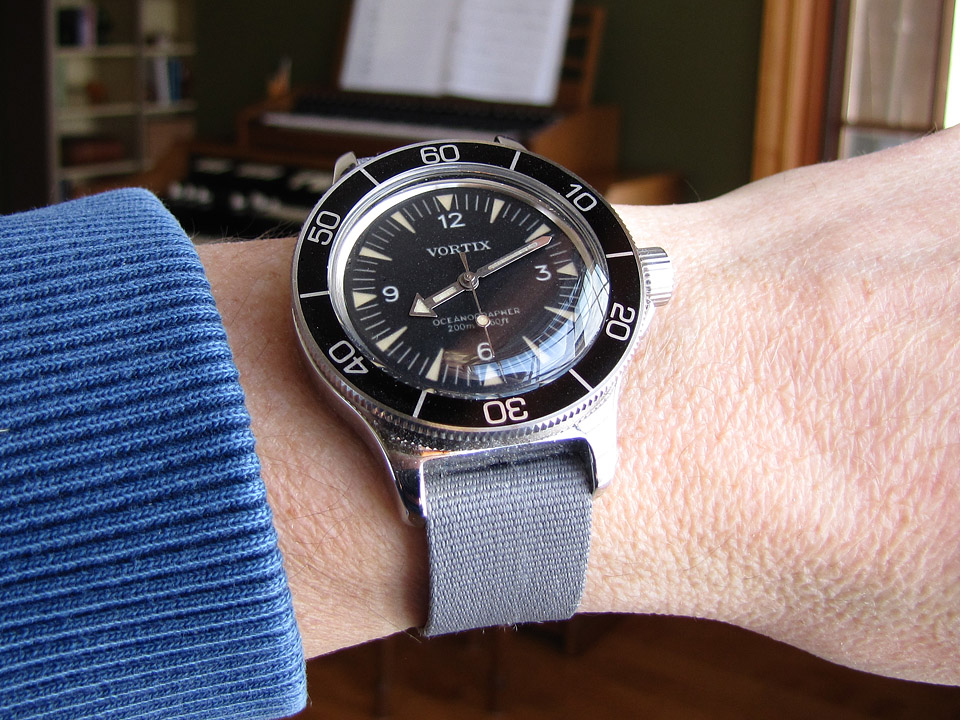
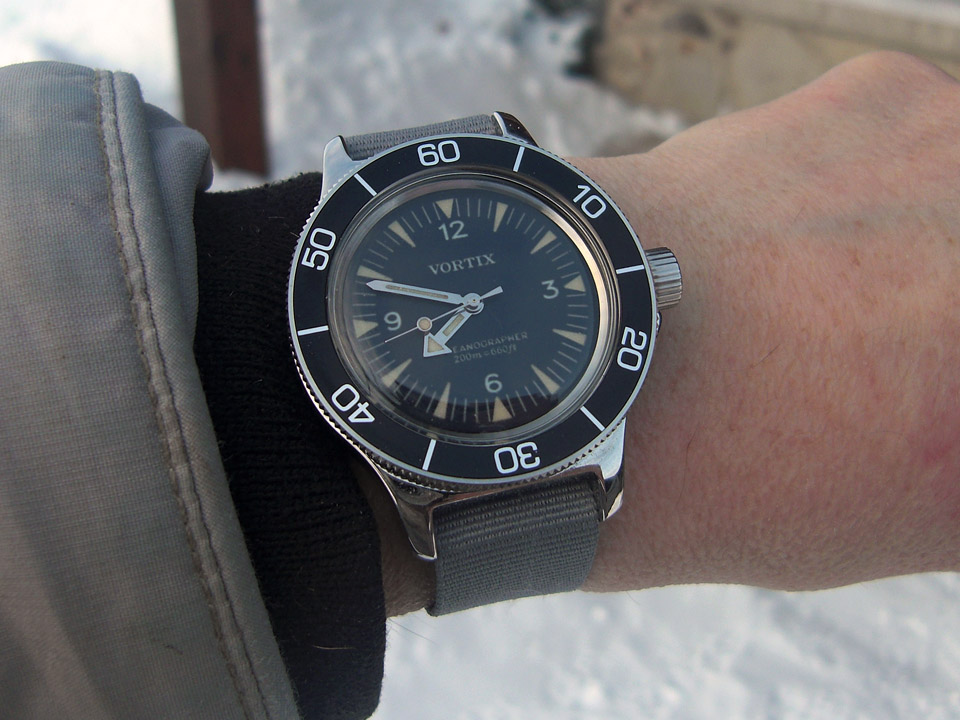
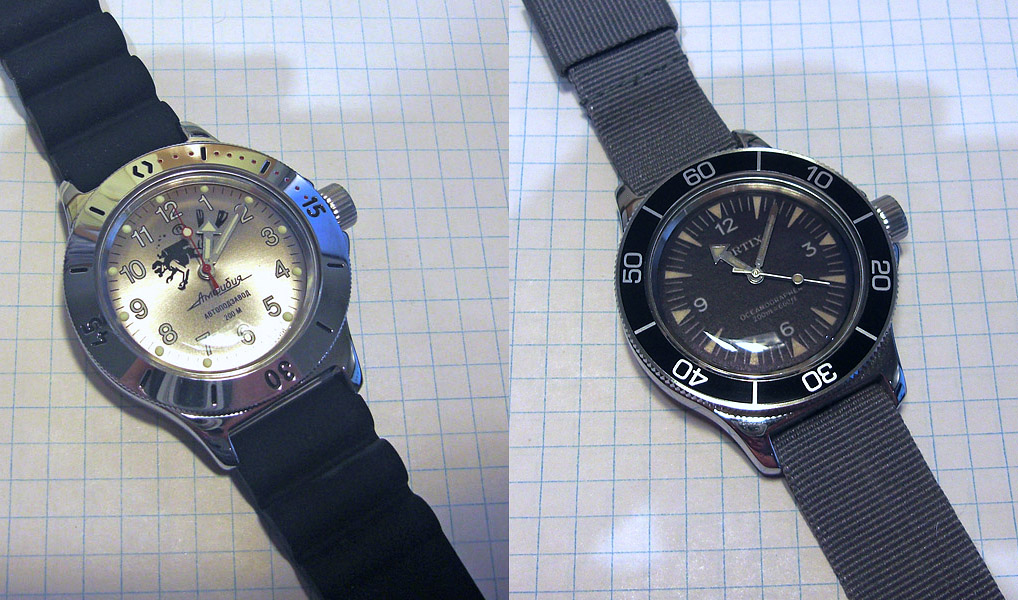
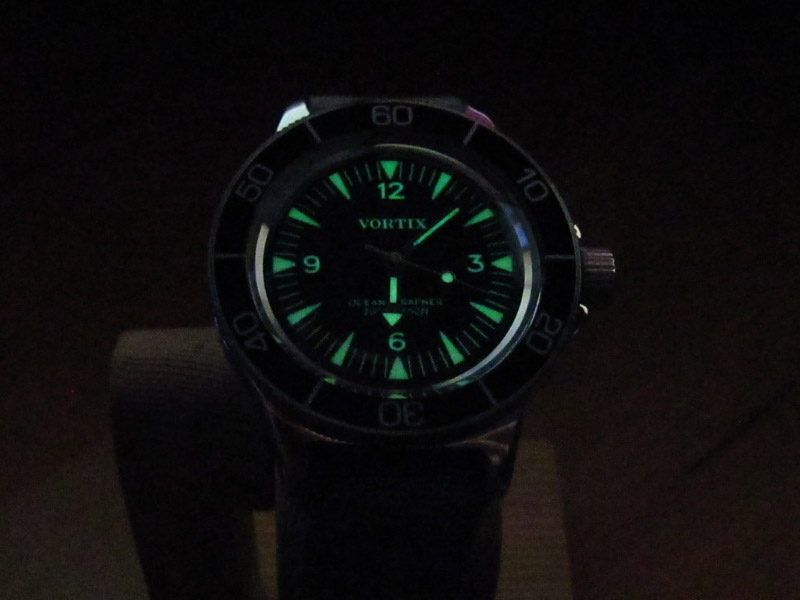
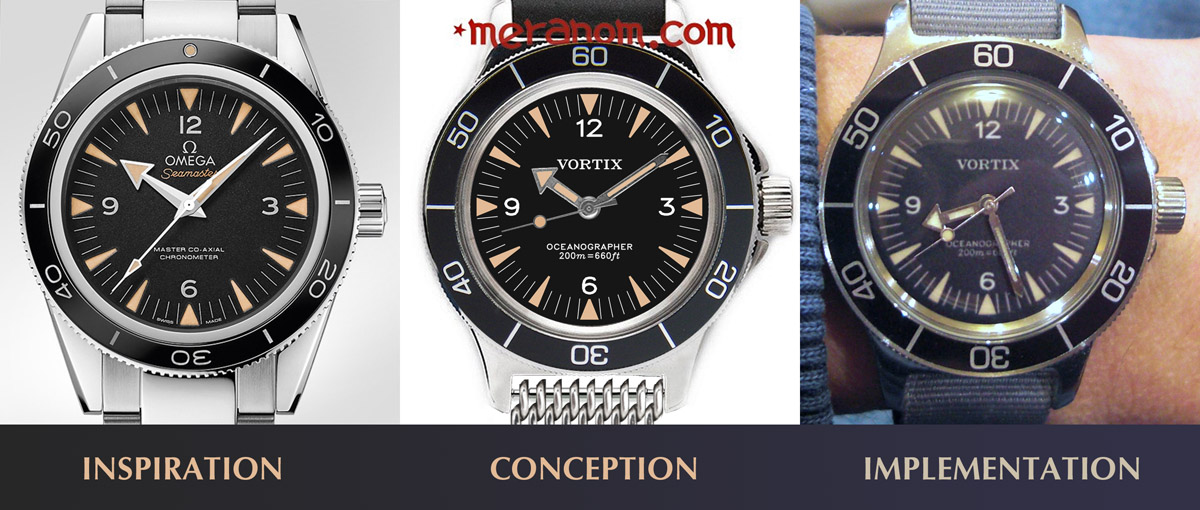
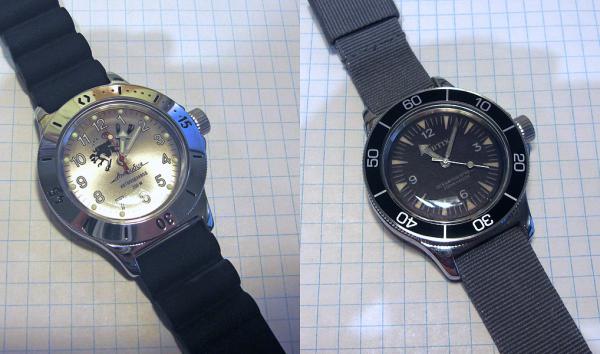
Last weekend, I completed my latest watch project, a(n) homage to the Omega Seamaster 300 Master Co-Axial, based on a Russian Vostok Amphibia, case style 120. I replaced the bezel with one from Dave Murphy that accepts Seiko-compatible inserts, added an insert from Dagaz watches, relumed the hands with a slight patina, and then made a new dial to match. Here is the finished result: Here's a before and after picture: The process for making the dial differed slightly from my previous project, where I had printed the artwork on photo paper which was glued to the dial blank. In this project, the artwork was done using transparent waterslide decal paper, applied in two layers to give a sufficiently dark black. The decals were applied on top of a layer of luminescent tape.


 1 point
 -
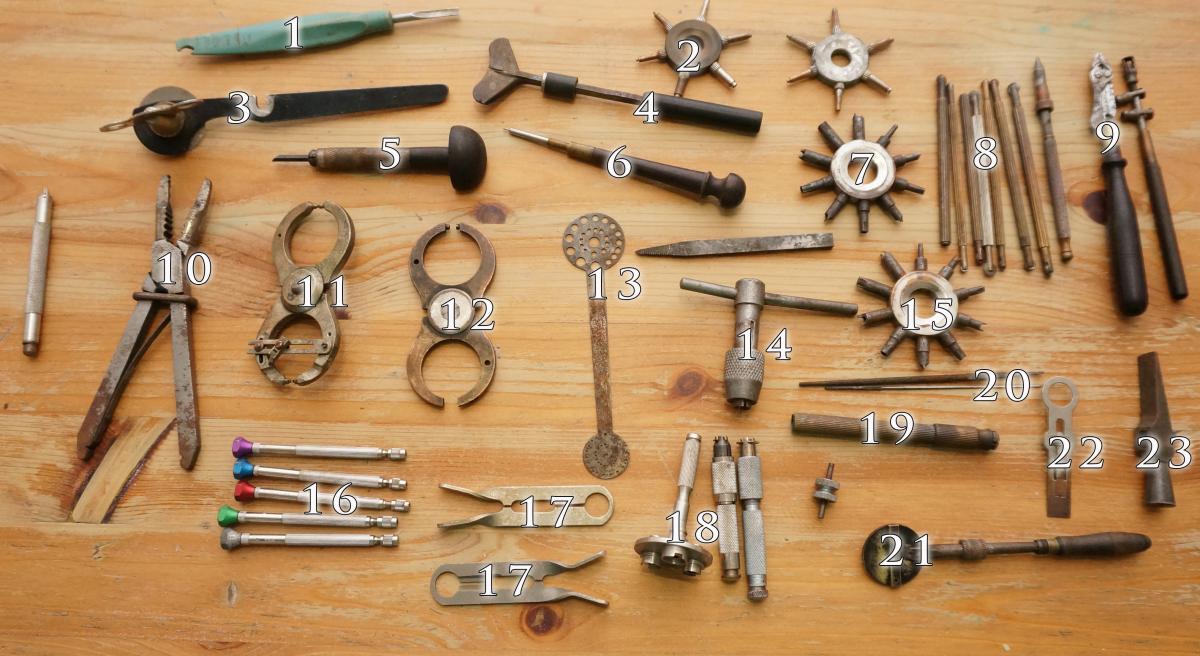
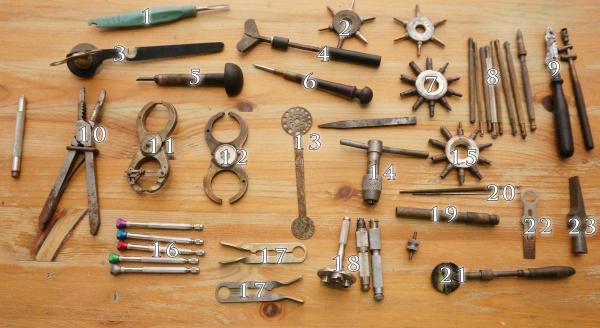
Looks like a gem setting claw tool Sleeve Wrench? Ring cutter (Broken) not sure Graver not sure sleeve wrench counter sinkers not sure custom pliers Wheel truing tool same Diamond gauge possibly Pin vice sleeve wrench screw drivers missing the blades roller removers mainspring winders pin vice broaches not sure not sure hammer head
 1 point
 -
Great pics Geo and Mark can now see how his goes back together!! :D1 point
-
Oh, you're even more cautious than I am, there's some food for thought.1 point
-
To start posting in this forum, I chose to show you my recently start project: the service of a nice Alpine Antimagnetic handwound wristwatch. I haven't started tearing it down yet, but will do so in the next days. This is the condition this nice cheap watch arrived to me: It only presents the usual biological gunk you can find in non-serviced vintage watches. The case is really nice, with a sunburst pattern that repeats the dial nicely. The crown is in a bad shape, thouth, but I think I will just keep it this way: Removing the back cover, I find myself loking at a very cheap-made movement, luckily ticking fine, though: A closer look at the movement: The movement is a UMF 24-32, with sweep seconds only, and according to Ranfft, these are the specs: Data: 10.75''', Dm= 24.0mm H= 6.1mm 0 jewels f = 18000 A/h power reserve 35h It was manufactured from 1963 all the way to 1990. Even if it is a cheapo-watch, as I call them, it is still a nice timekeeper due to the sunburst design on bothe the case and the dial. The project will include the following steps: tear down of the movement clean of case and glass glass polishing cleansing of the movement parts reassembly and oiling the movement polishing the hour, minute and seconds hands light polishing of the case sides (not the top) and the back side cleaning of the dial and polishing of the hour marks complete reassembly I know you have all problably gone already through these steps a million times and don't need me to mention them one by one, but I still need to make a to-do list with every watch I work on. And to take pictures along the way. Hope you like the pics I took, and if you will, there is more on my blog: <<Please see forum rules>>1 point
-
That's nice. Looks great. I'll have to look into that.1 point
-
So Fresh and so Clean! Outstanding. JC1 point
-
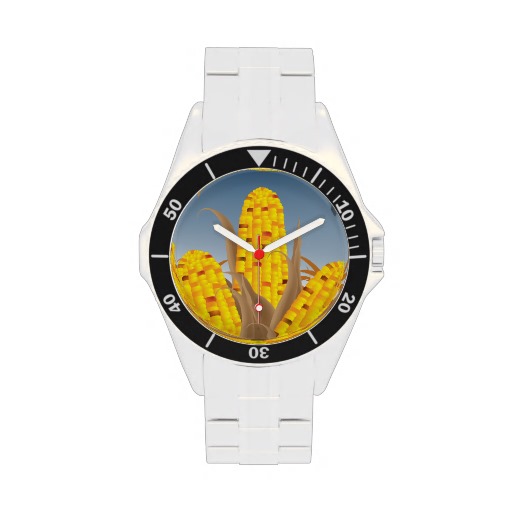
Nice logo and solution!1 point
-
Very nice!1 point
-
https://www.winehq.org Another free alternative is VirtualBox.1 point
-
Just using WINE - so it may even run on Linux as well through WINE.1 point
-
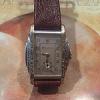
Sorry, everyone, had an issue signing in and then went on vacation. I have photos and will upload them a bit later today. I have been cruising the net to look for similar watches (based on case and face) but have not seen one with similar design. Geo, I have had the watch working in the past, and either something went "sproing" wrongly, or perhaps I do have jewel issues. I am still afraid to truly disassemble this watch without having a decent magnifier (got one and need to get space set up). so we shall see what comes of it....will also try to get better (close up) photos of area where balance wheel rides. Thank you all for your patience.1 point
-
The numbers on the dial looked well lumed and coupled with the 24hour secondary numbers, this is usually indicative of a 'military' styled watch. Therefore my thoughts are that the hands are not original to the watch as lumed dials need to go with lumed hands! I read that you tried to 'crimp' the hand tube using nail-cutters... Gripping boths sides on the hand 'tube' and squeezing will result in two tights spots around the circumference and the hand will pivot on these. What you're aiming for is good grip all round. A pin vise can be used to apply pressure equally around the tube but if you're stuck with nail cutters then grip one edge and give it a gent tweak inwards and work your way around. Only a microscopic amount of movement is required. If you can see it then it's too much! Ideally you would need new hands..it would make a world of difference! Anil1 point
-
Welcome to the forum. I am afraid I do not promote my repair business from this website. This forum is intended for the discussion of watch repairs and techniques. If you are only looking to have your watch repaired then I can recommend searching google for a local reputable watch repairer. :) Sent from my iPhone using Tapatalk1 point
-
That is very nice.1 point
-
1 point
-
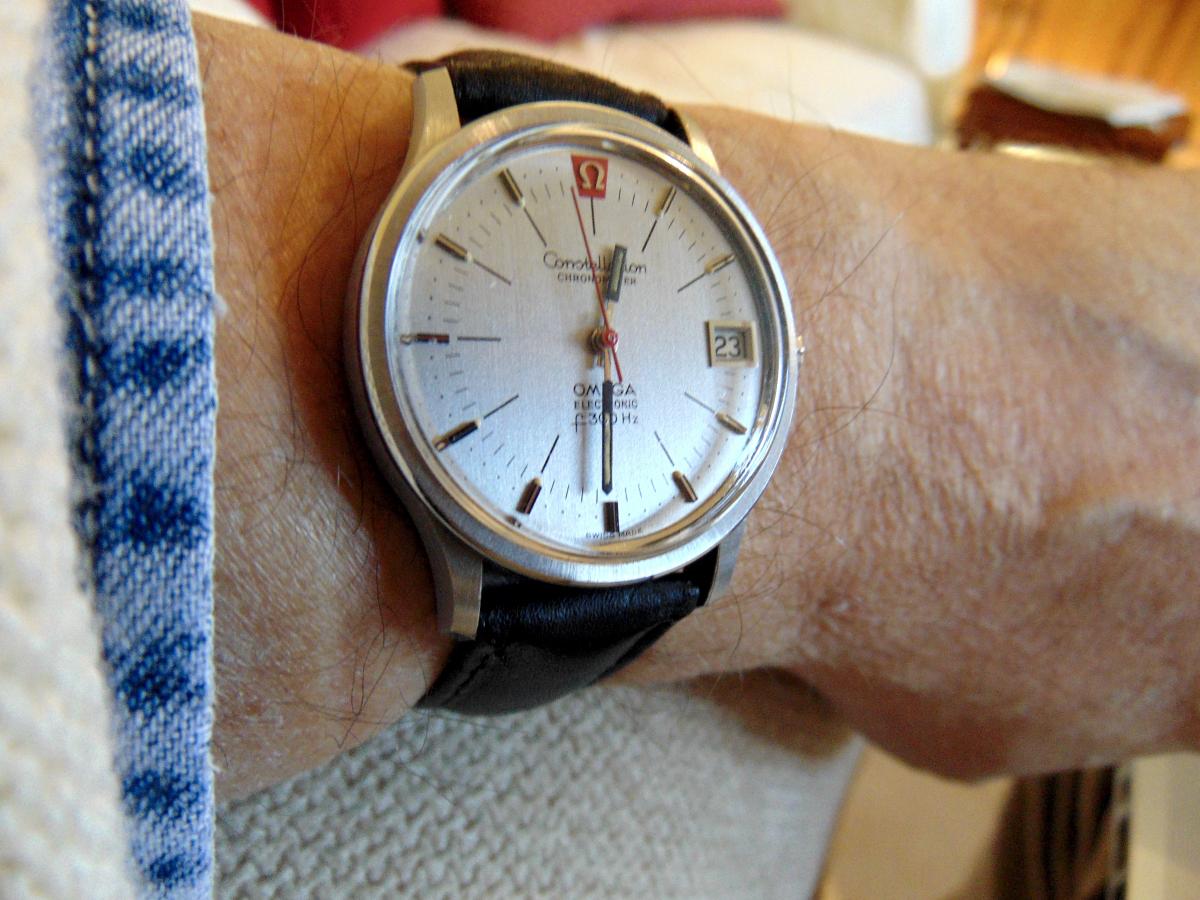
David, most of us would rather see a movement than a dial! :)1 point
-
Hi Scottster and welcome to the forum :) From the information you've given Marc is spot on. Tightening the canon is easy to get wrong, so as he suggested do it gently and in steps for your first attempt. Don't panic however that all is lost if you go too far with it ... spares for AS movements are still easy to get from Old Swiss Watches, and Sudarson will offer you the right part for the right price ... highly recommended. Remember, we only learn by doing ... and some of the best lessons come from our mistakes.1 point
-
I purchased my next project today, a 1913 trench watch, running but in need of service.1 point
-
That's lovely - a classic example of how a chrono dial can be clean, clear and uncluttered. Here's my current love:
 1 point
 -
Mark re-attaches the balance to the plate prior to cleaning in his videos, and the manually cleans the jewels after. Whipping around a liquid bath seems more violent and sitting stationary in an ultrasonic cleaner so I'd assume it's safe.1 point