
Leaderboard


Popular Content
Showing content with the highest reputation on 01/03/25 in all areas
-
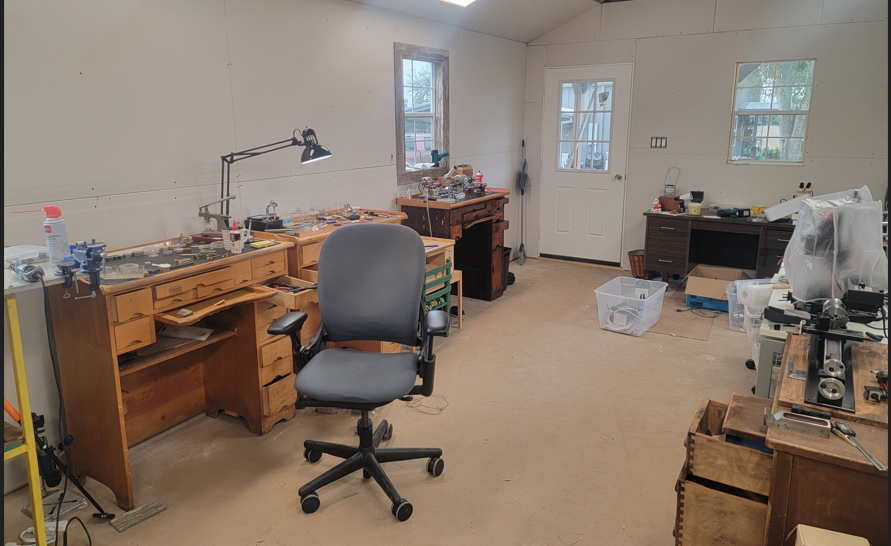
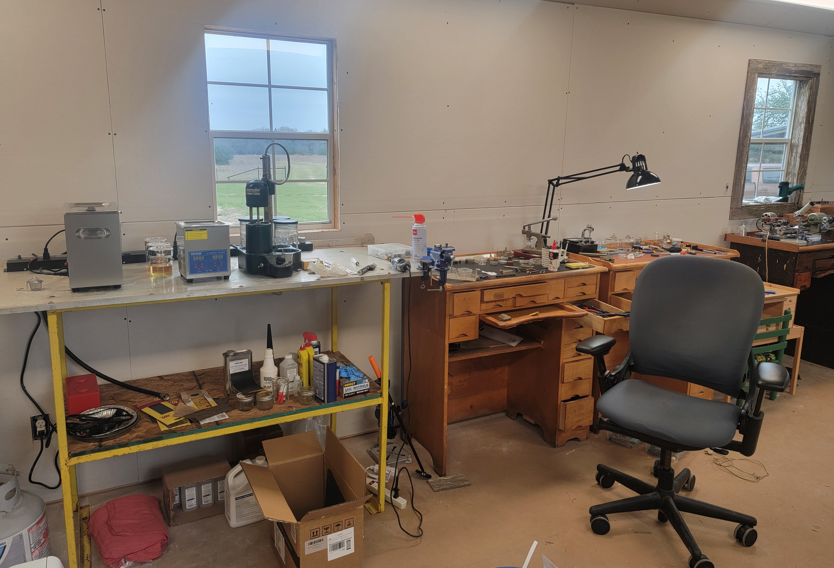
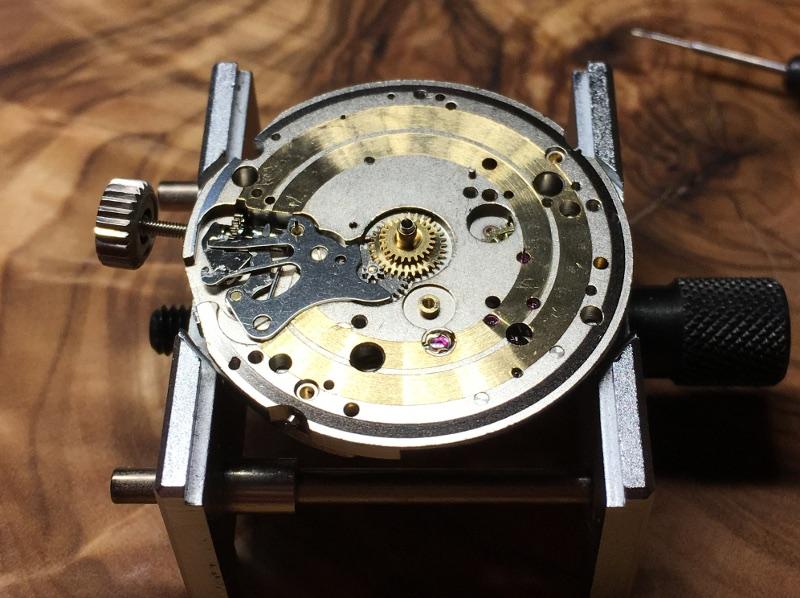
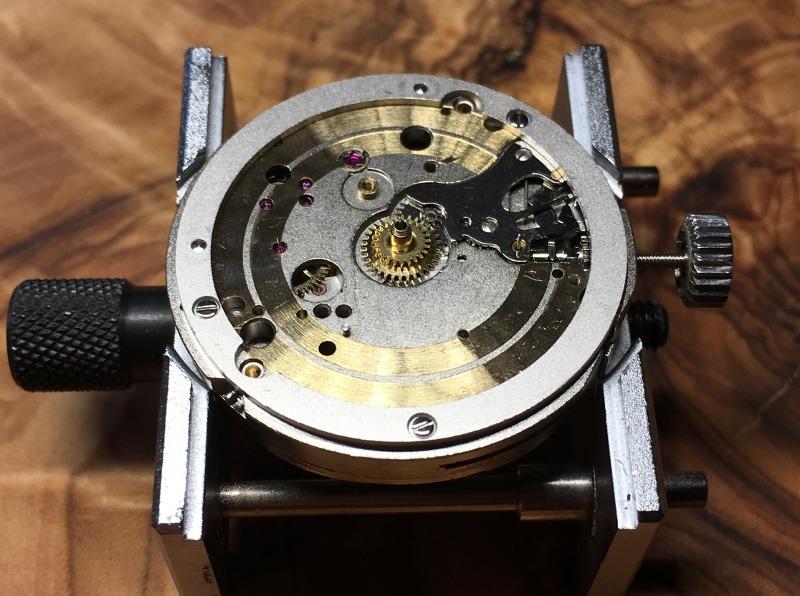
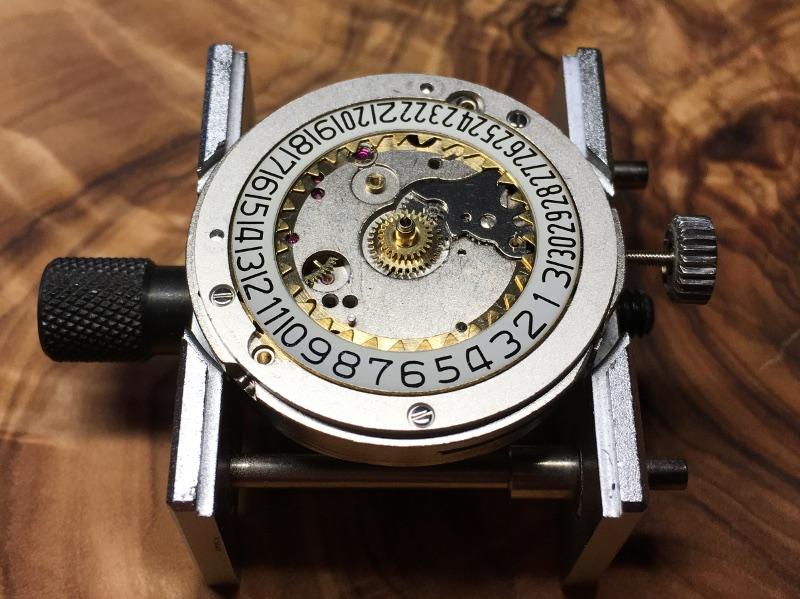
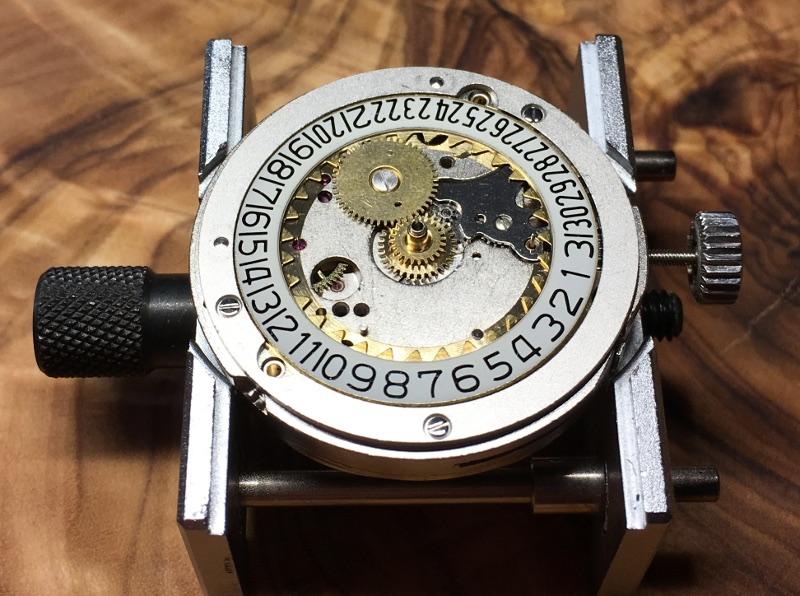
Still not finished. Need to figure out how to finish the ceiling. It is mostly functional but I have yet to service a watch.

 5 points
 -
Count me as one who is not a patina fan. I have to admit, I don't get it. Does anyone like a patina on their car? Or house? Or those old photos in the shoe box that are turning yellow? I'm trying to come up with anything that patina makes looks better and I'm not coming up with anything. Well, except for one thing. My wife. Her patina is the evidence of her years of warmth, genius, generosity and all around brilliance. She is definitely one thing in life that gets better with age4 points
-
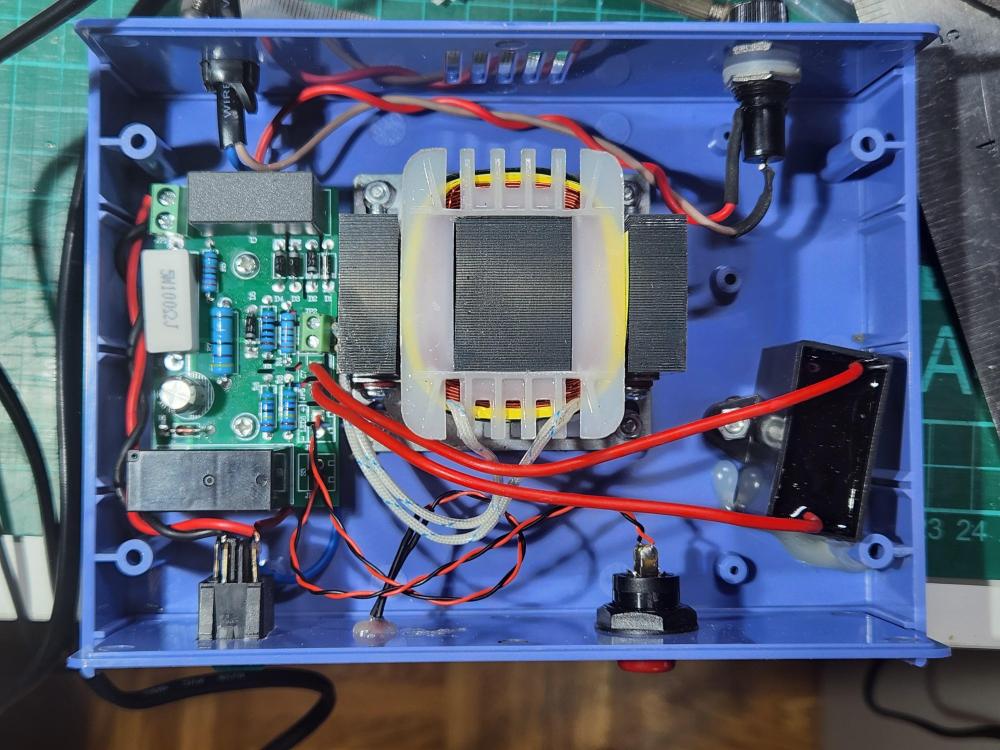
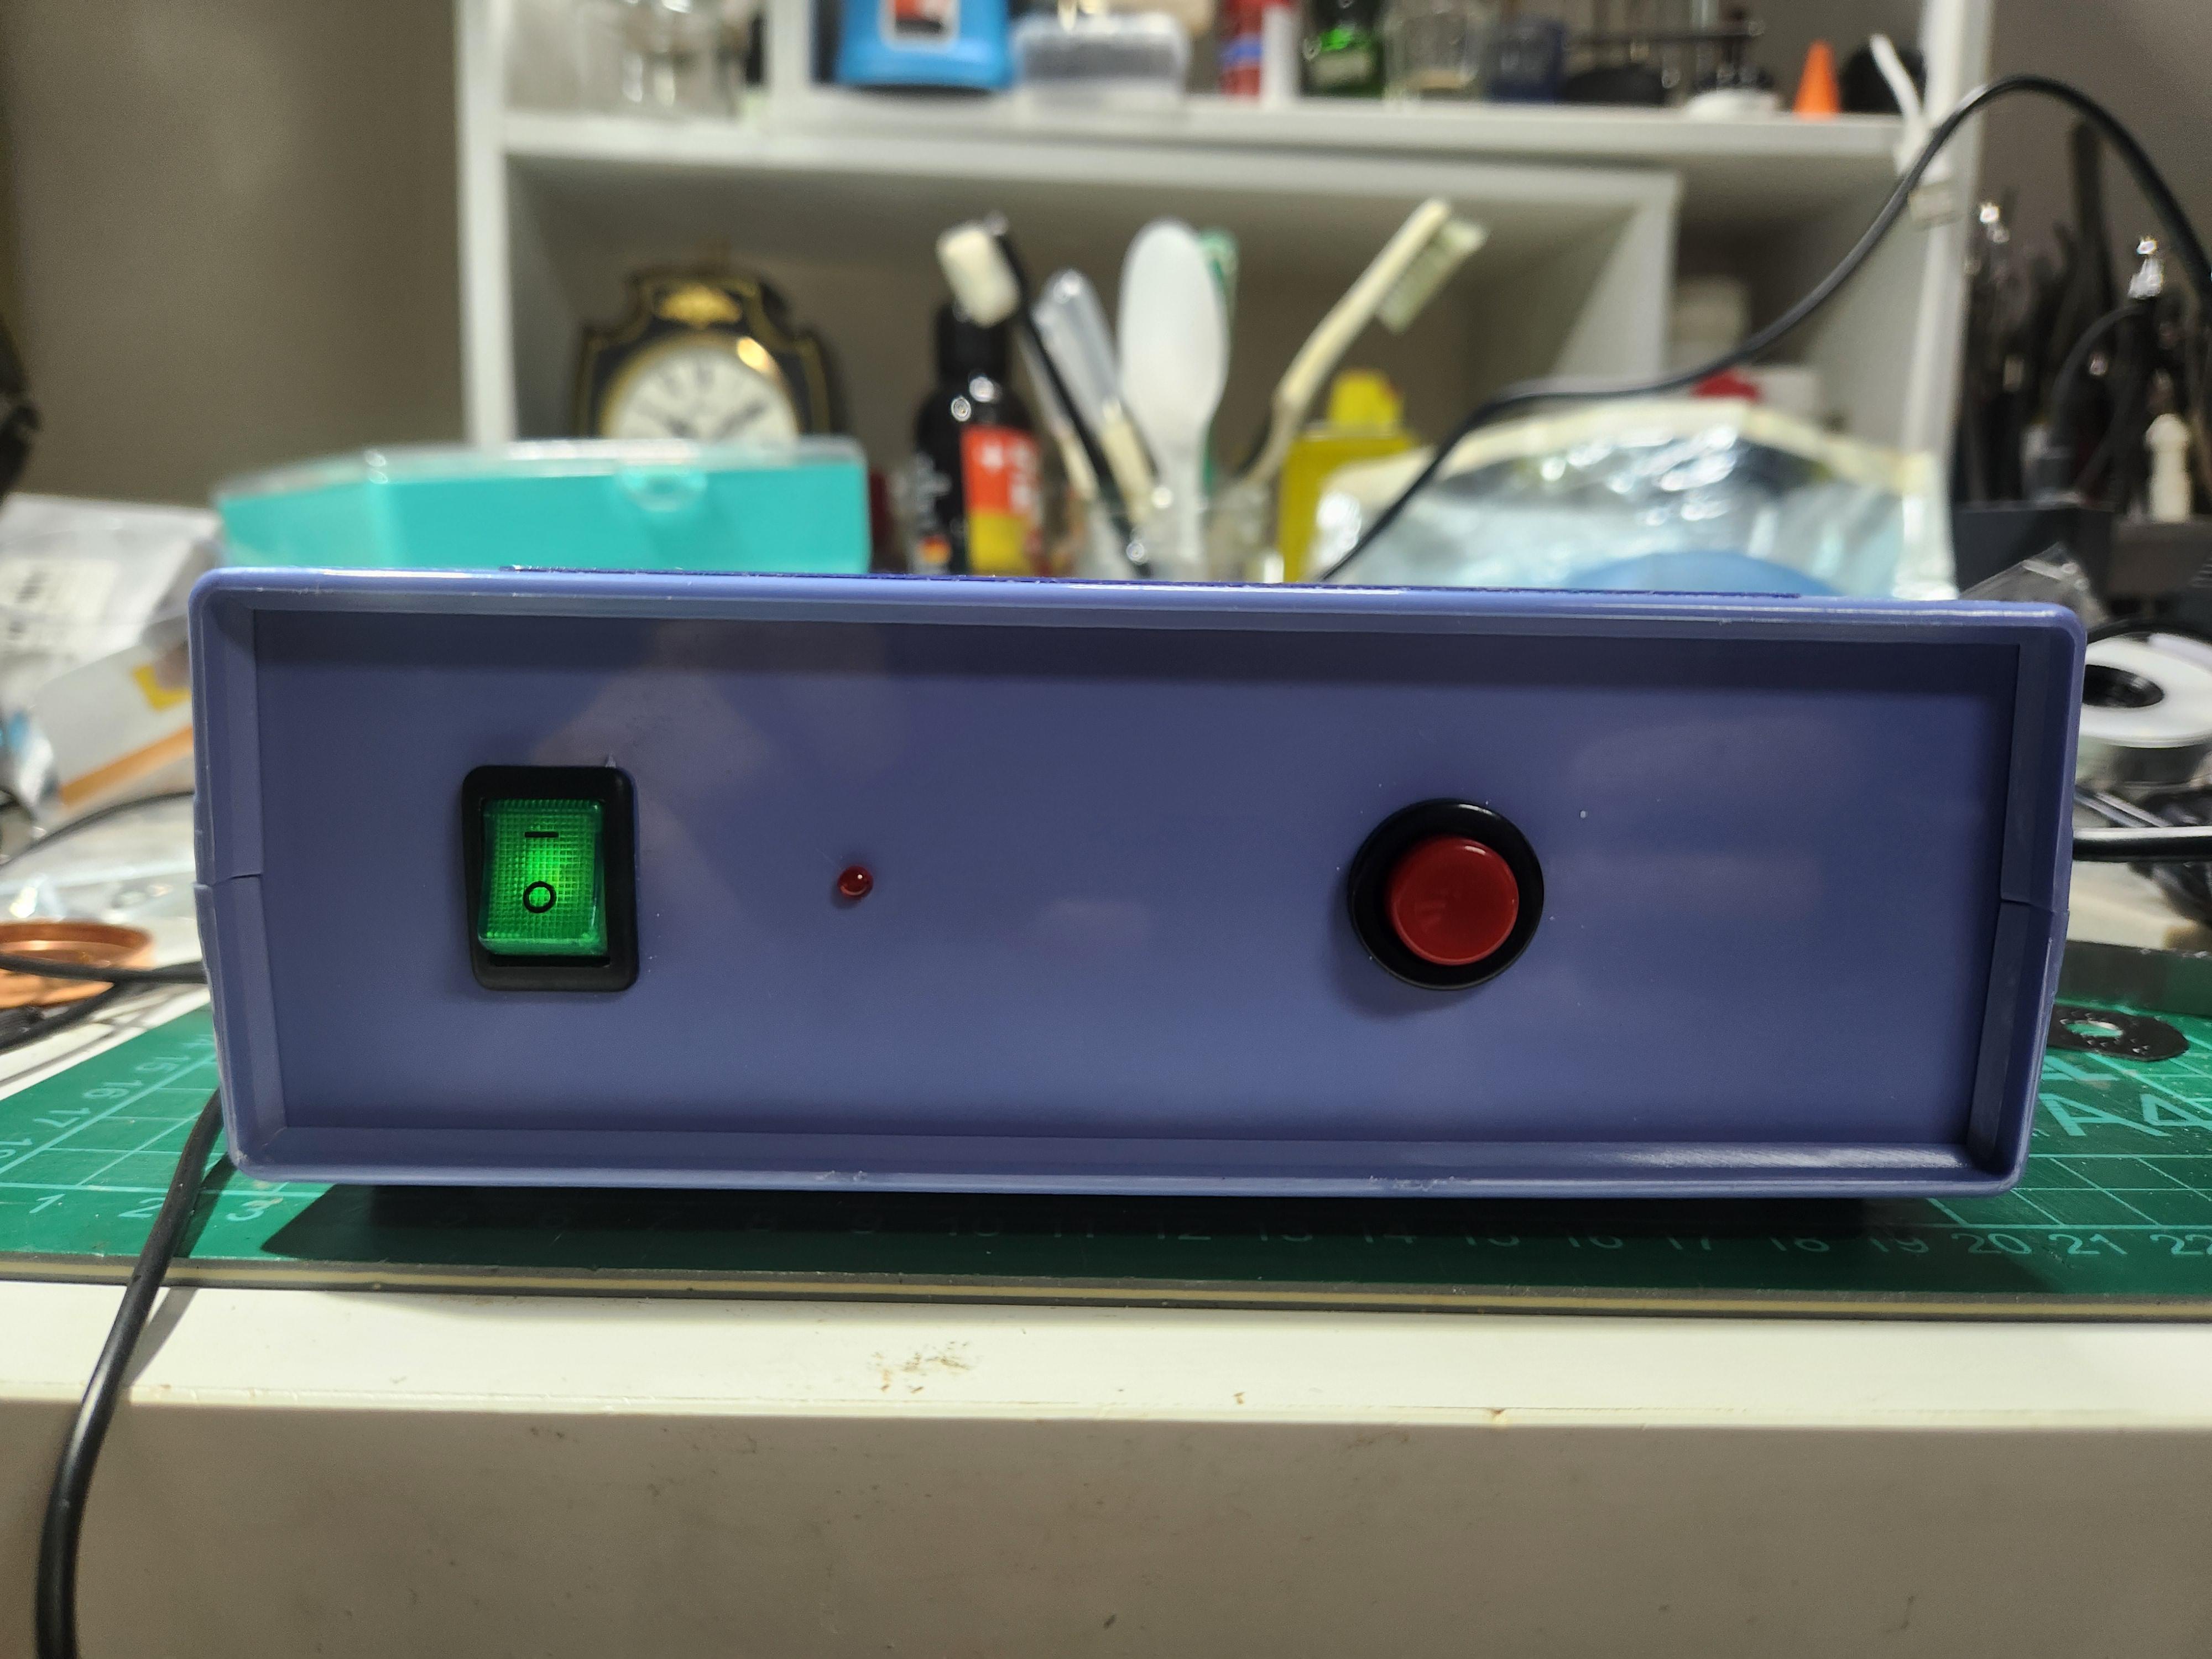
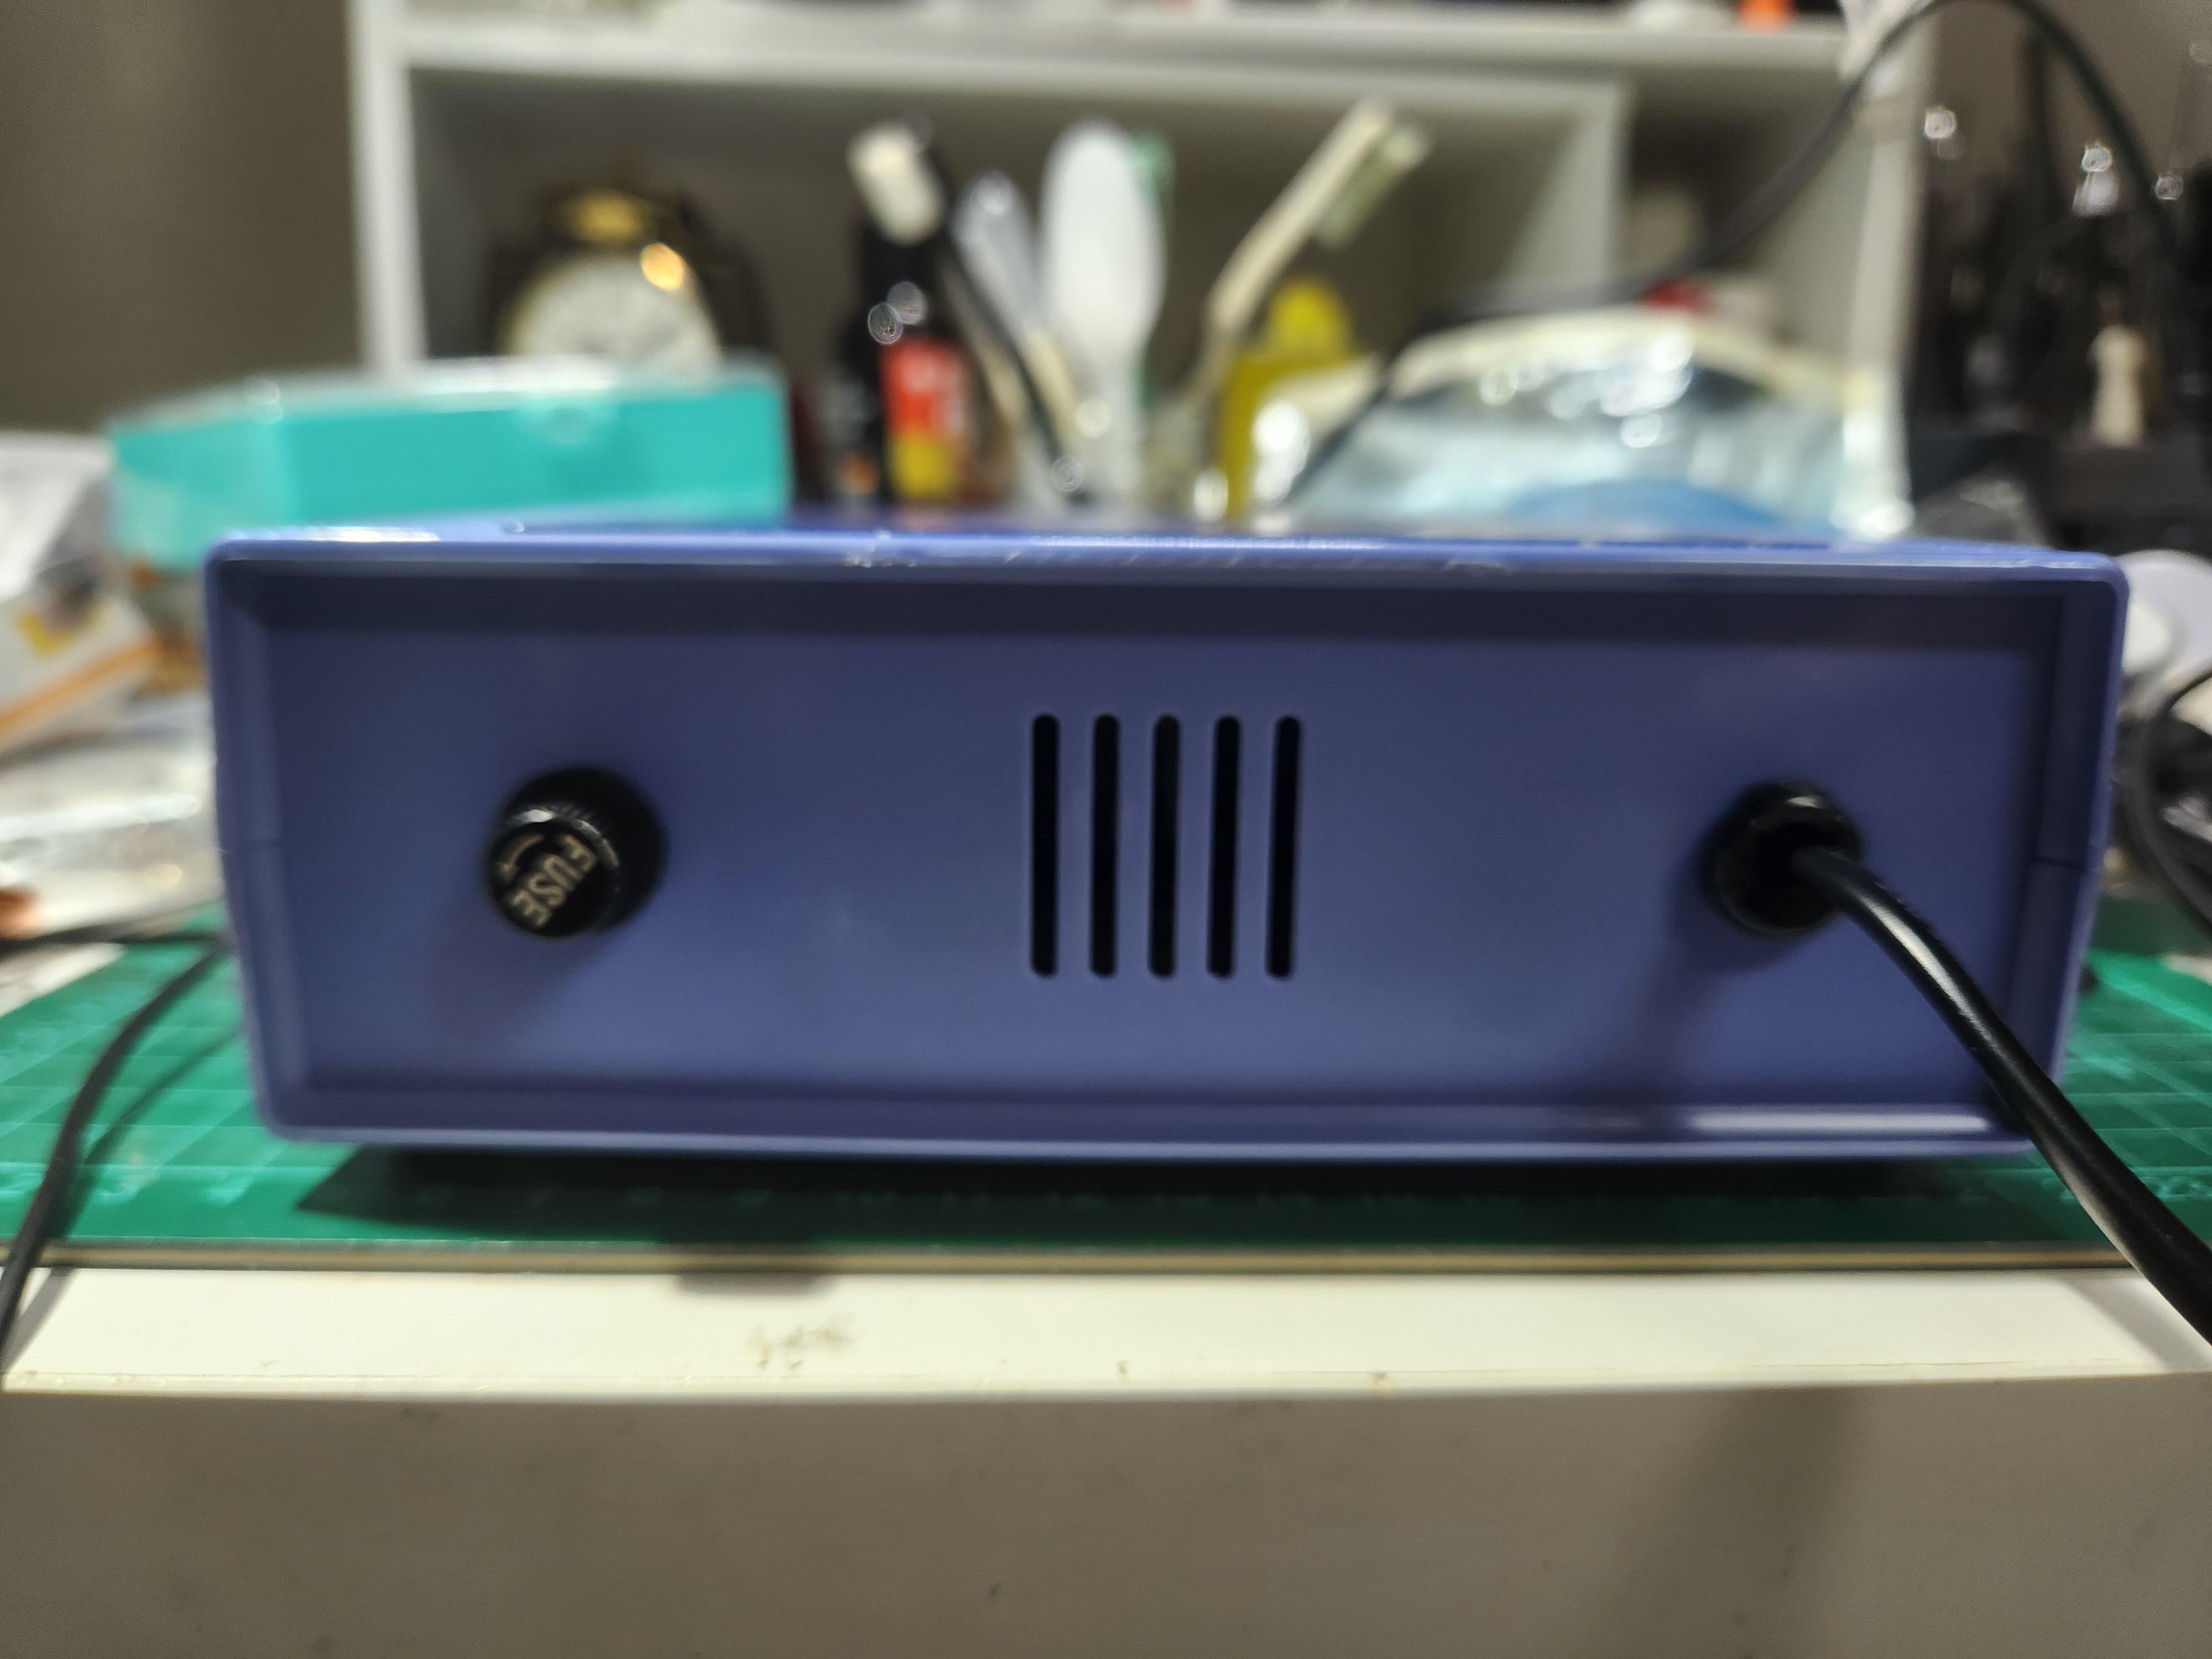
There had been a lot of criticism of the safety of Chinese demagnetizers in another thread. So I decided to look into how to improve on the design. There was criticism about the AC cord not being secured and was able to be pushed into the box, so I installed a cable grip. Then there was something that no one mentioned and that is there is no fuse in the entire circuit. So I added a 500mA fuse to the live wire coming in. I might reduce it to 200mA and see if it blows. Someone mentioned that the circuit was charged all the time, as long as it was plugged in as there wasn't any power switch. So I added one. And the biggest criticism about touching metal parts... I replaced the activation switch with an all plastic one. So, did I miss out anything?

 3 points
 -
I forget and it's a difficult habit to get out of suspecting an alloy hairspring has magnetism. I think that comes from being told when I started that the main culprit of sticking coils is magnetism when it obviously can't be.3 points
-
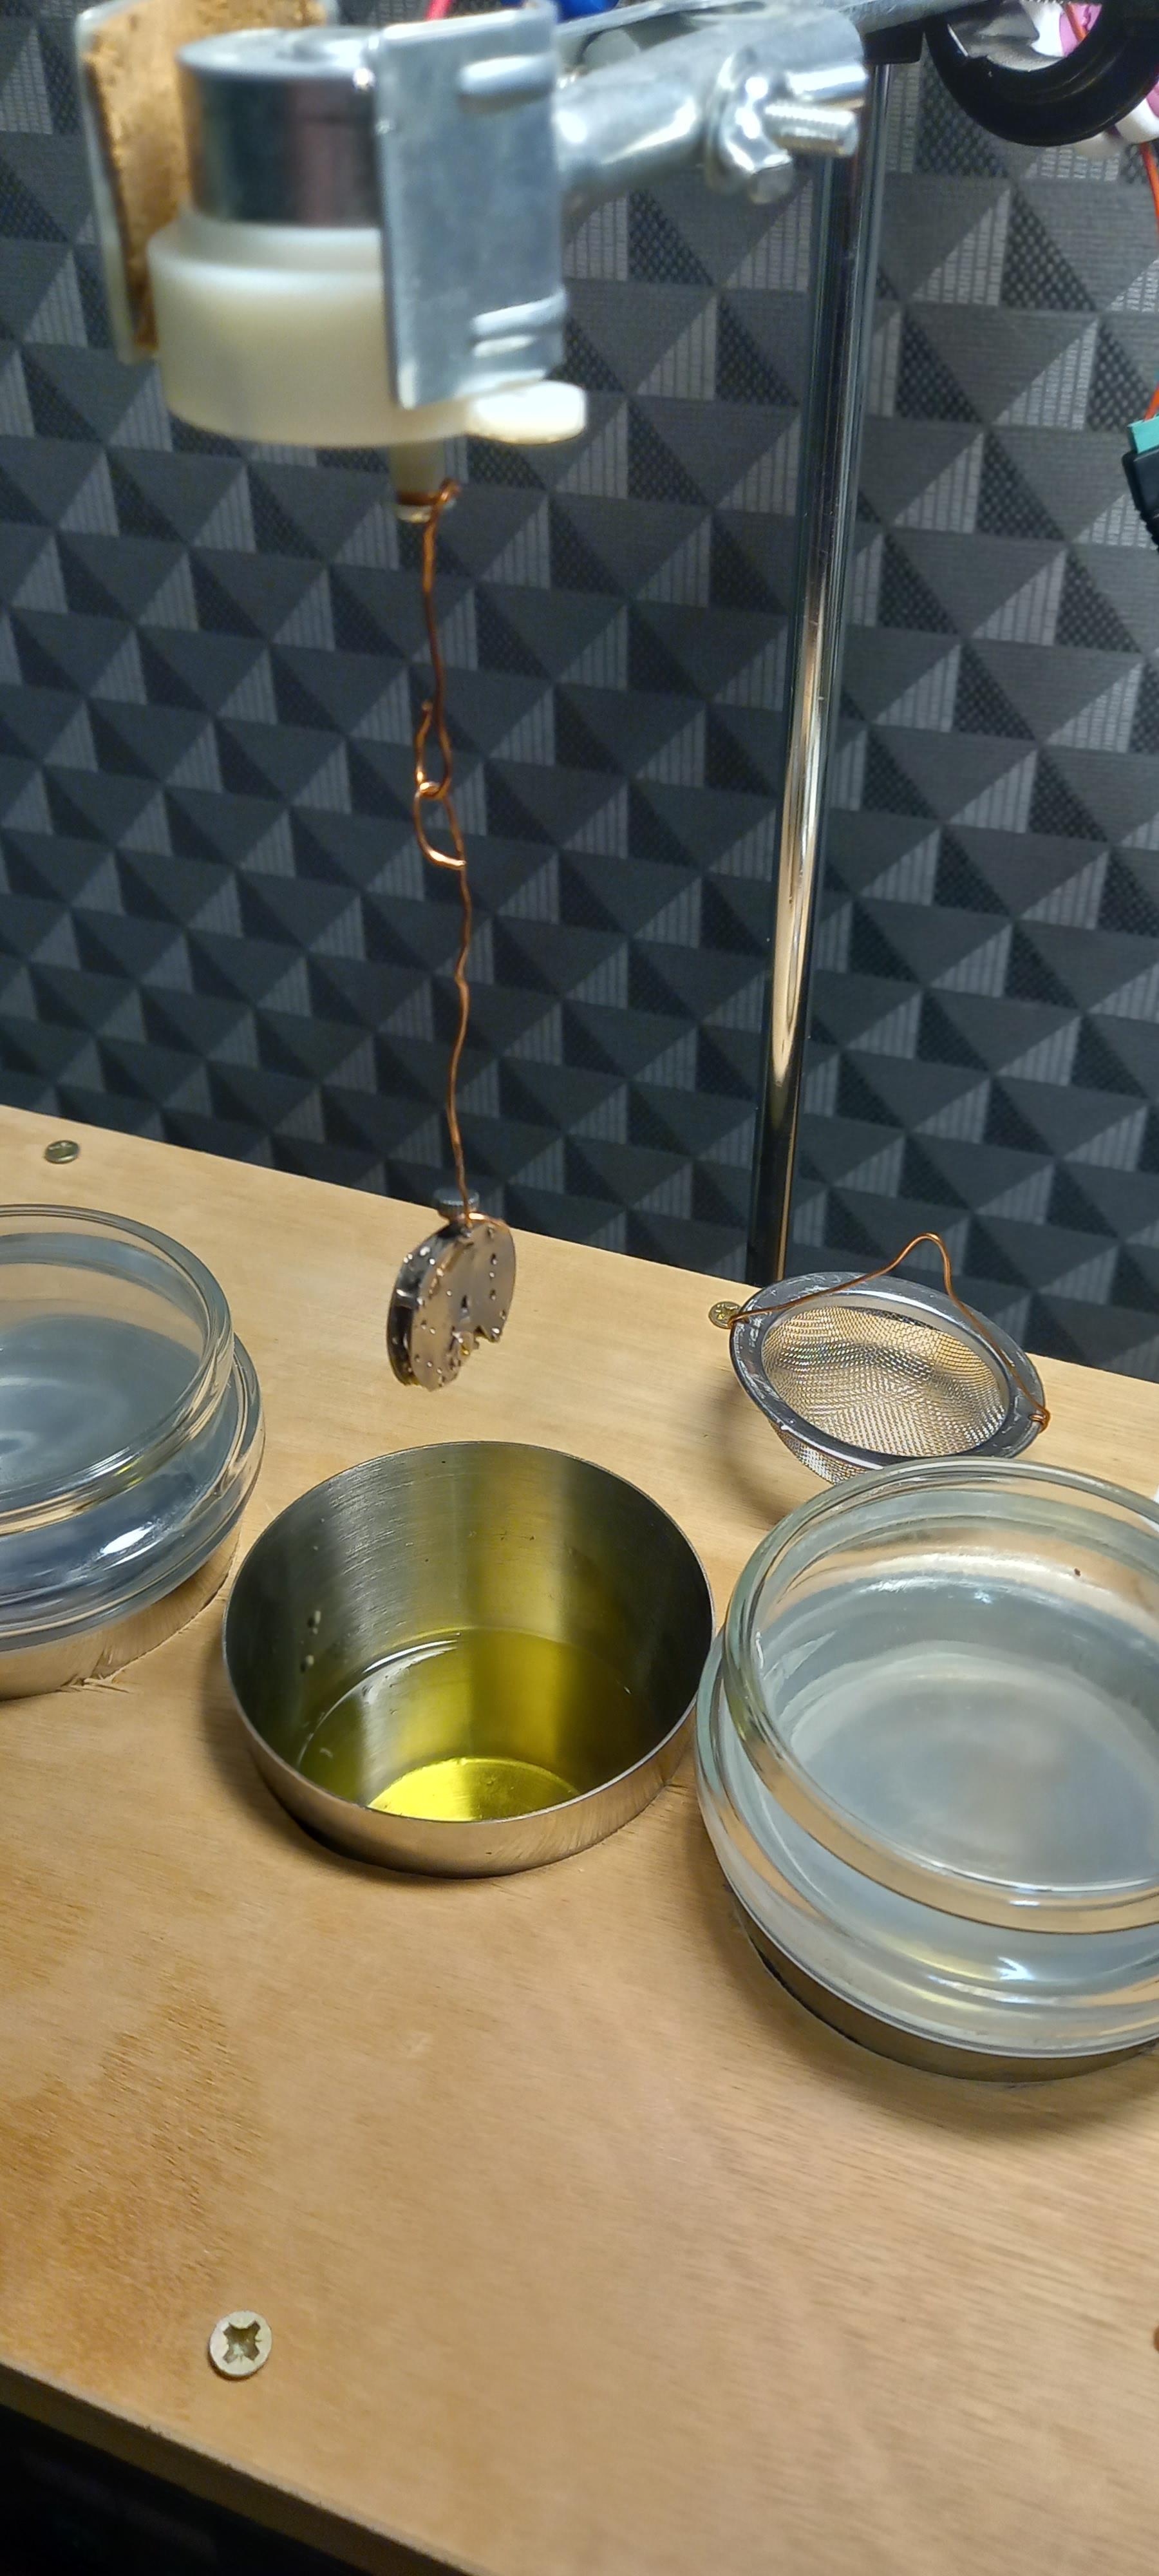
Once I have the code cleaned up, I can share it with you. It wasn't as easy as I thought to code it, as I had written a full program for it before I Had the parts, and the code didn't work. So I started from scratch and had to use a different library, which is like changing languages practically. Its working well now, and has cleaned a movement quite well, but I still want to clean up some snags that it currently has. I have recently purchased a 3D printer for my business, a Bambu Labs P1S. Its quite the machine, and fully enclosed, which I wanted for cleanliness and noise. With this, I plan on designing and printing some new parts for the cleaning machine, namely a cleaning basket that I can use on higher end watches that I don't want to scratch with the typical steel mesh baskets. I will also make a panel for the buttons to attach to on the front of the machine, and an enclosure for the power supply and stepper drivers. This project has taken me longer than I thought, but I'm still ahead quite a bit of cash when compared to commercially made automatic cleaners which range from $5,000-$6,000. When I started this, I had toyed with the idea of setting these up as a kit, with my code and all the parts needed, to sell to other watchmakers. I'm not sure that is feasible at the moment, as I am very backed up with repairs. I'll keep updating this post with changes I make to the machine, and I'll gladly take any design advice from other forum members that might see a better way to do things.3 points
-
He bought a Chinese demagnetizer
 3 points
 -
As the say " old habits die hard " or more relevant, instilled knowledge is difficult to forget, even if it's incorrect.2 points
-
Its possible. One thing I have learned when sizing and cutting wheels, is the module and diameter are very important to get right. I'd like to think that most watch manufacturers had some set size and module they used universally, but I haven't taken the time to measure my assortment of wheels to find out. You could sort them by tooth count I suppose, then move from there. But the entire train is dependent on how many teeth the main barrel has, and its designated beat rate it wants to achieve. Plus the pinion on the wheel will need to match what the watch you're using it for needs it to be. From my understanding, the first thing they do when designing a train, is calculate the tooth counts, then select a module to cut them to. The final diameter is kind of the product of those two. So I'm not sure if two different wheel manufacturers would be the same. Could always fire up the lathe and make on yourself!2 points
-
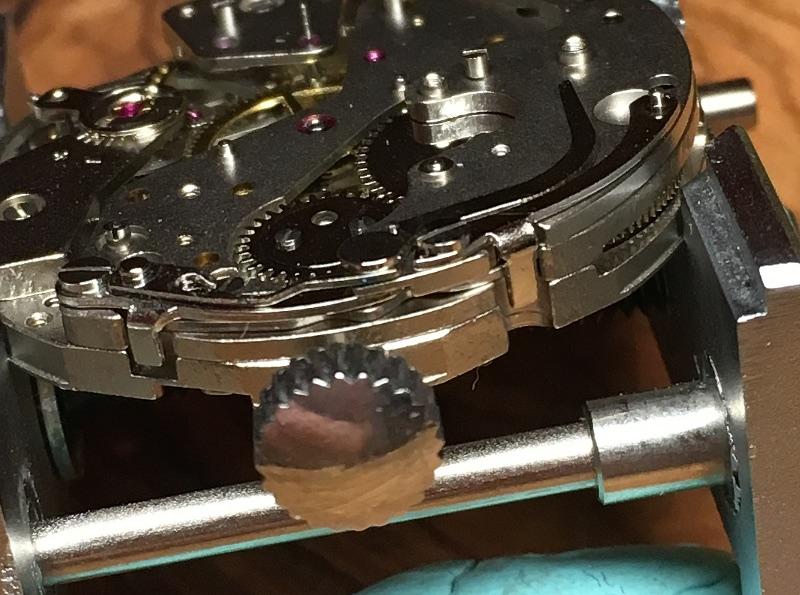
2000 RPM, clay everywhere.2 points
-
Although many countries have strict regulations in place, enforcing them unfortunately requires too much resources. Governments can only adopt a "wait and see" approach, reacting only when something happens. But China is progressing rapidly, learning and improving everyday. About 25 years ago, we saw the first China made dental equipment. It was an absolute nightmare. It also had absolutely no primary or secondary fuses. When I gave feedback on their lack of electrical safety, their representative replied they have manufactured hundreds of thousands of such units and are used extensively in China, with no incidents. That was their attitude at that time. I had to enlighten them on the concept of proactive safety and pointed them in the direction of attaining ISO 60601 certification. They might not have achieved full ISO compliance yet, but have definitely come a long way.2 points
-
I personally wouldn't go around telling women thst they had developed a patina . But there are plenty of things that are fully appreciated for the their age related colour changes. A piece of antique furniture can be completely ruined if it's not sympathetically restored, this goes for antiques made from most materials. Its something that an antique dealer actually looks for, there is even a process that mimics an aged look....distressing an item.2 points
-
Watch this video. Hope it helps.1 point
-
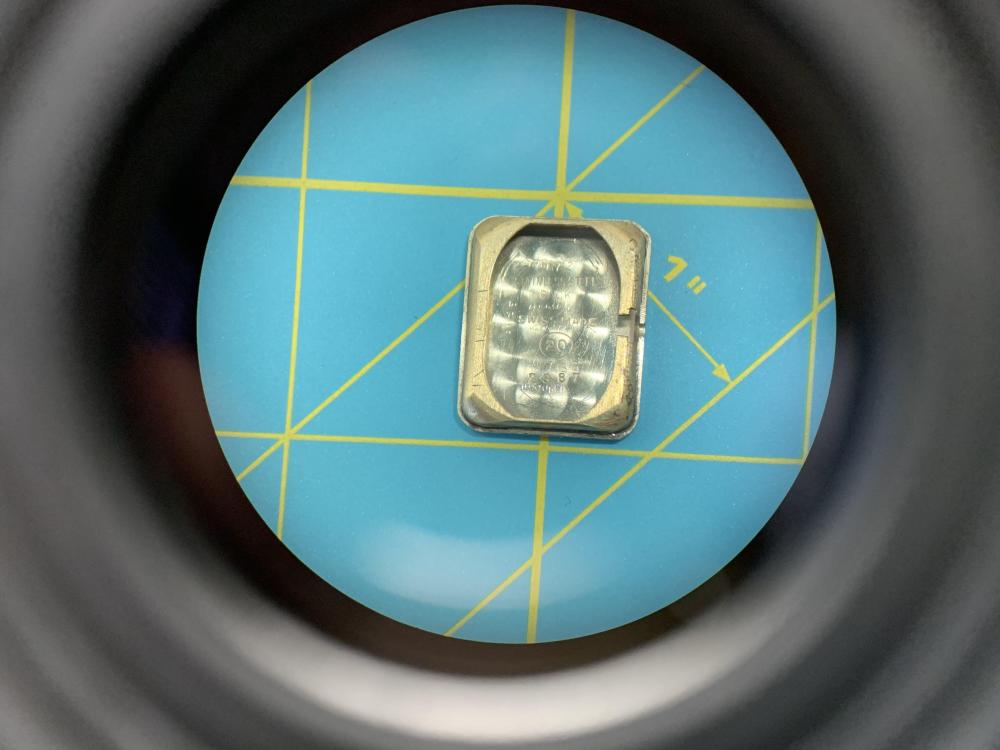
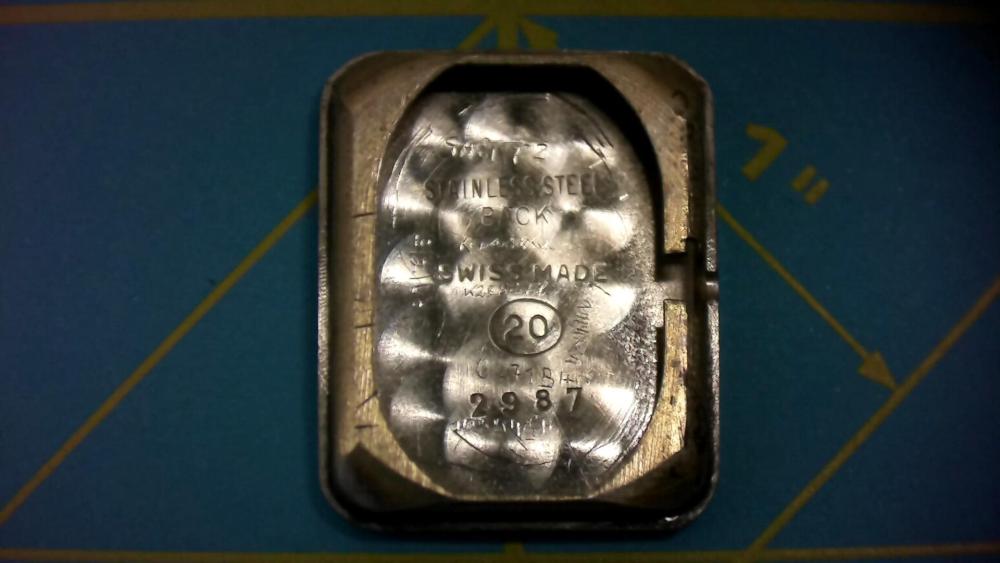
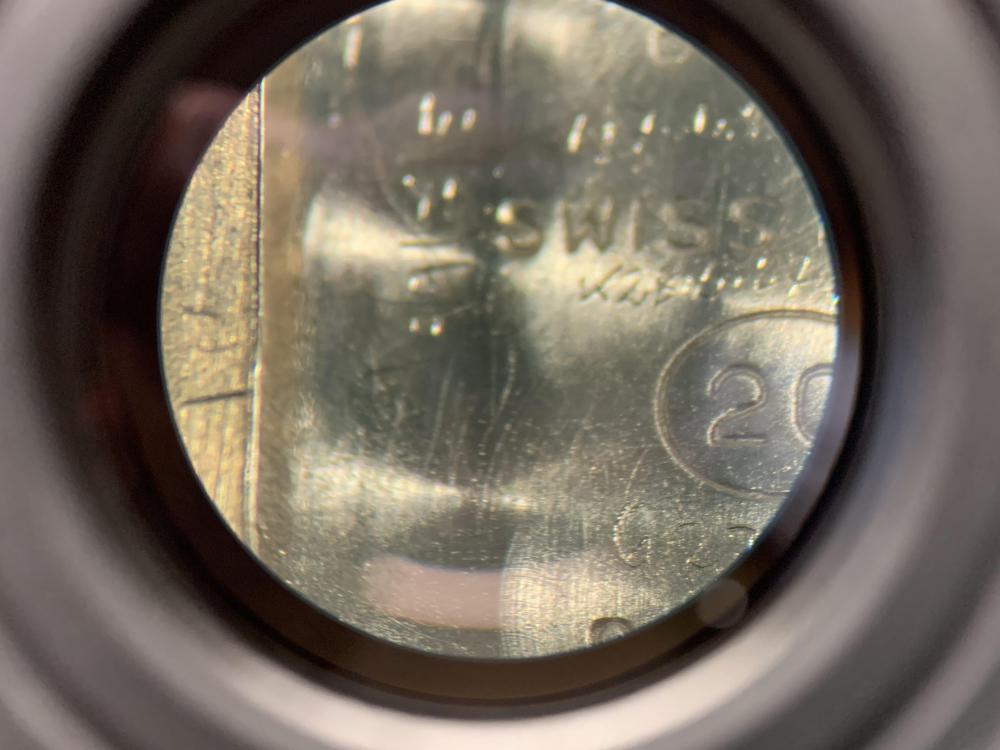
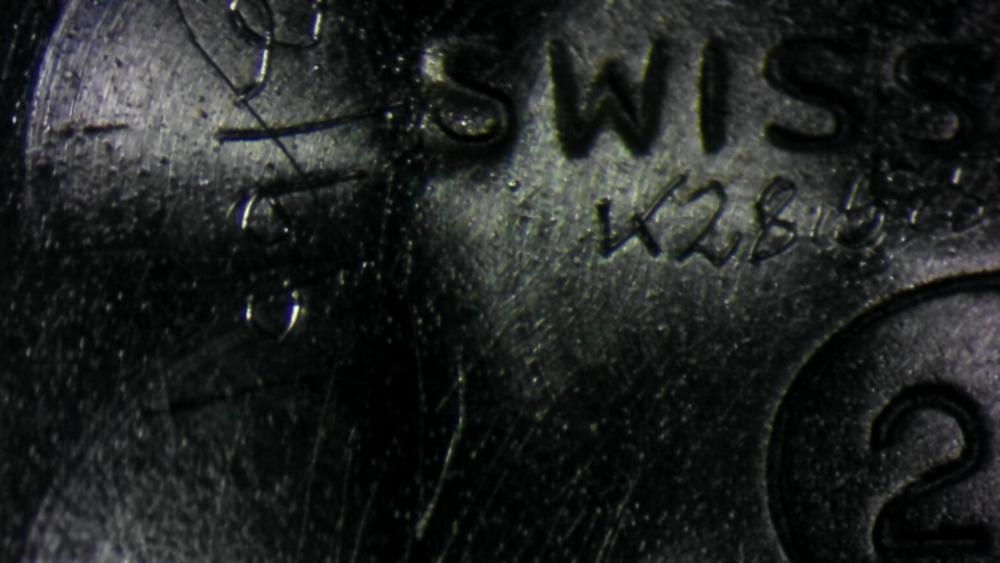
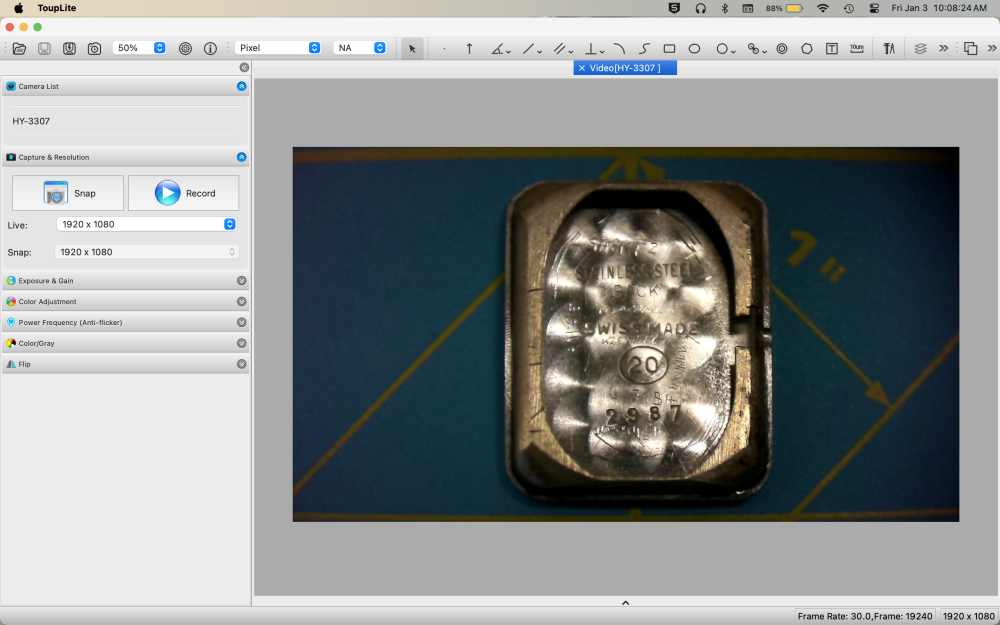
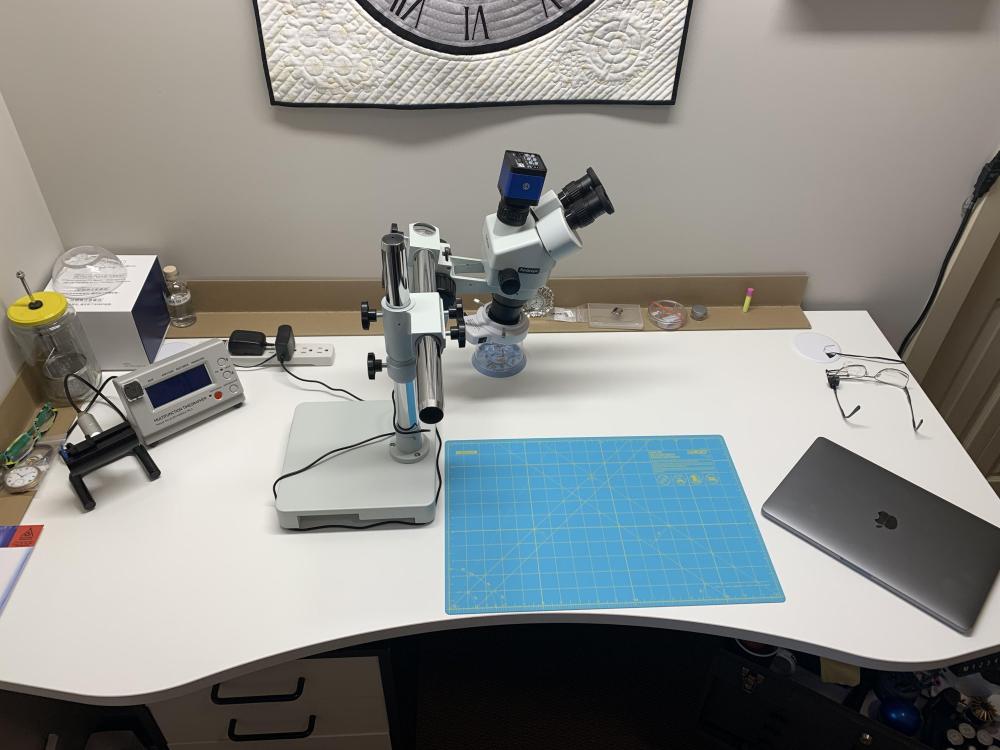
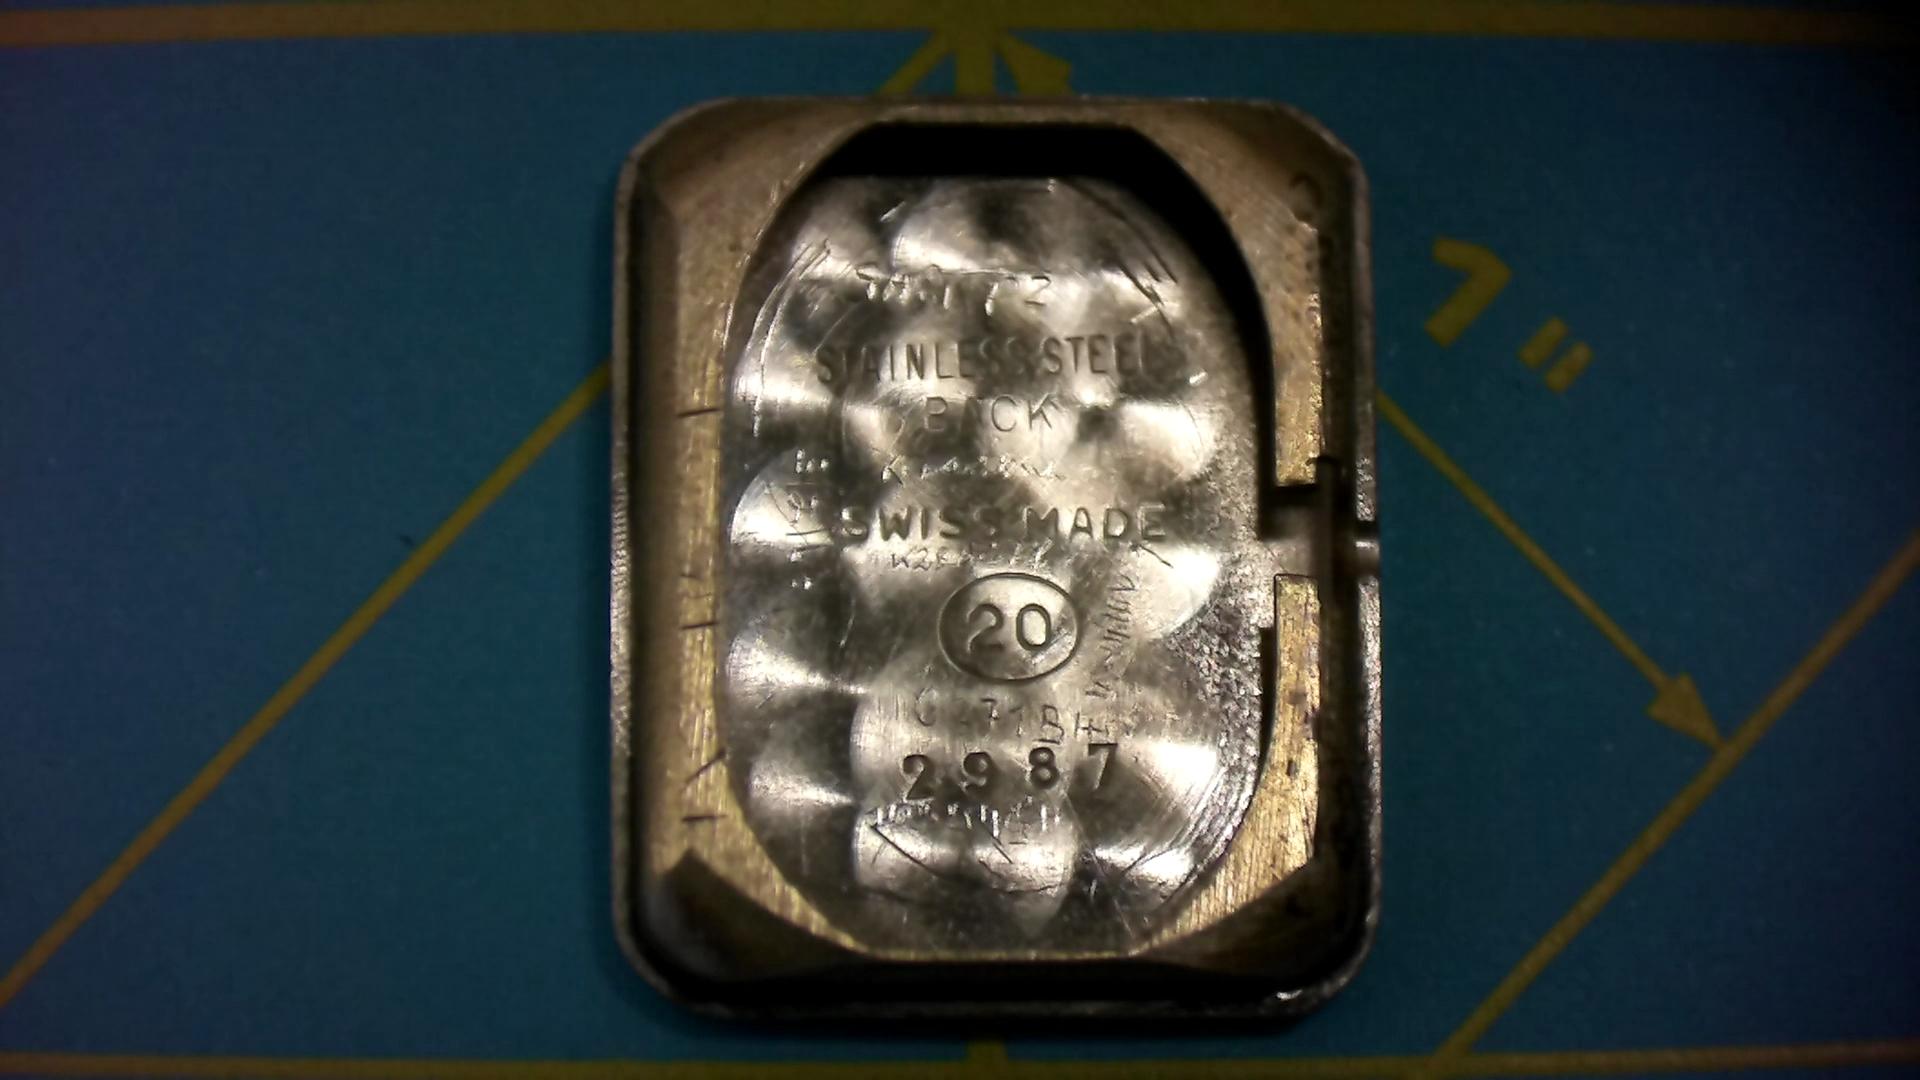
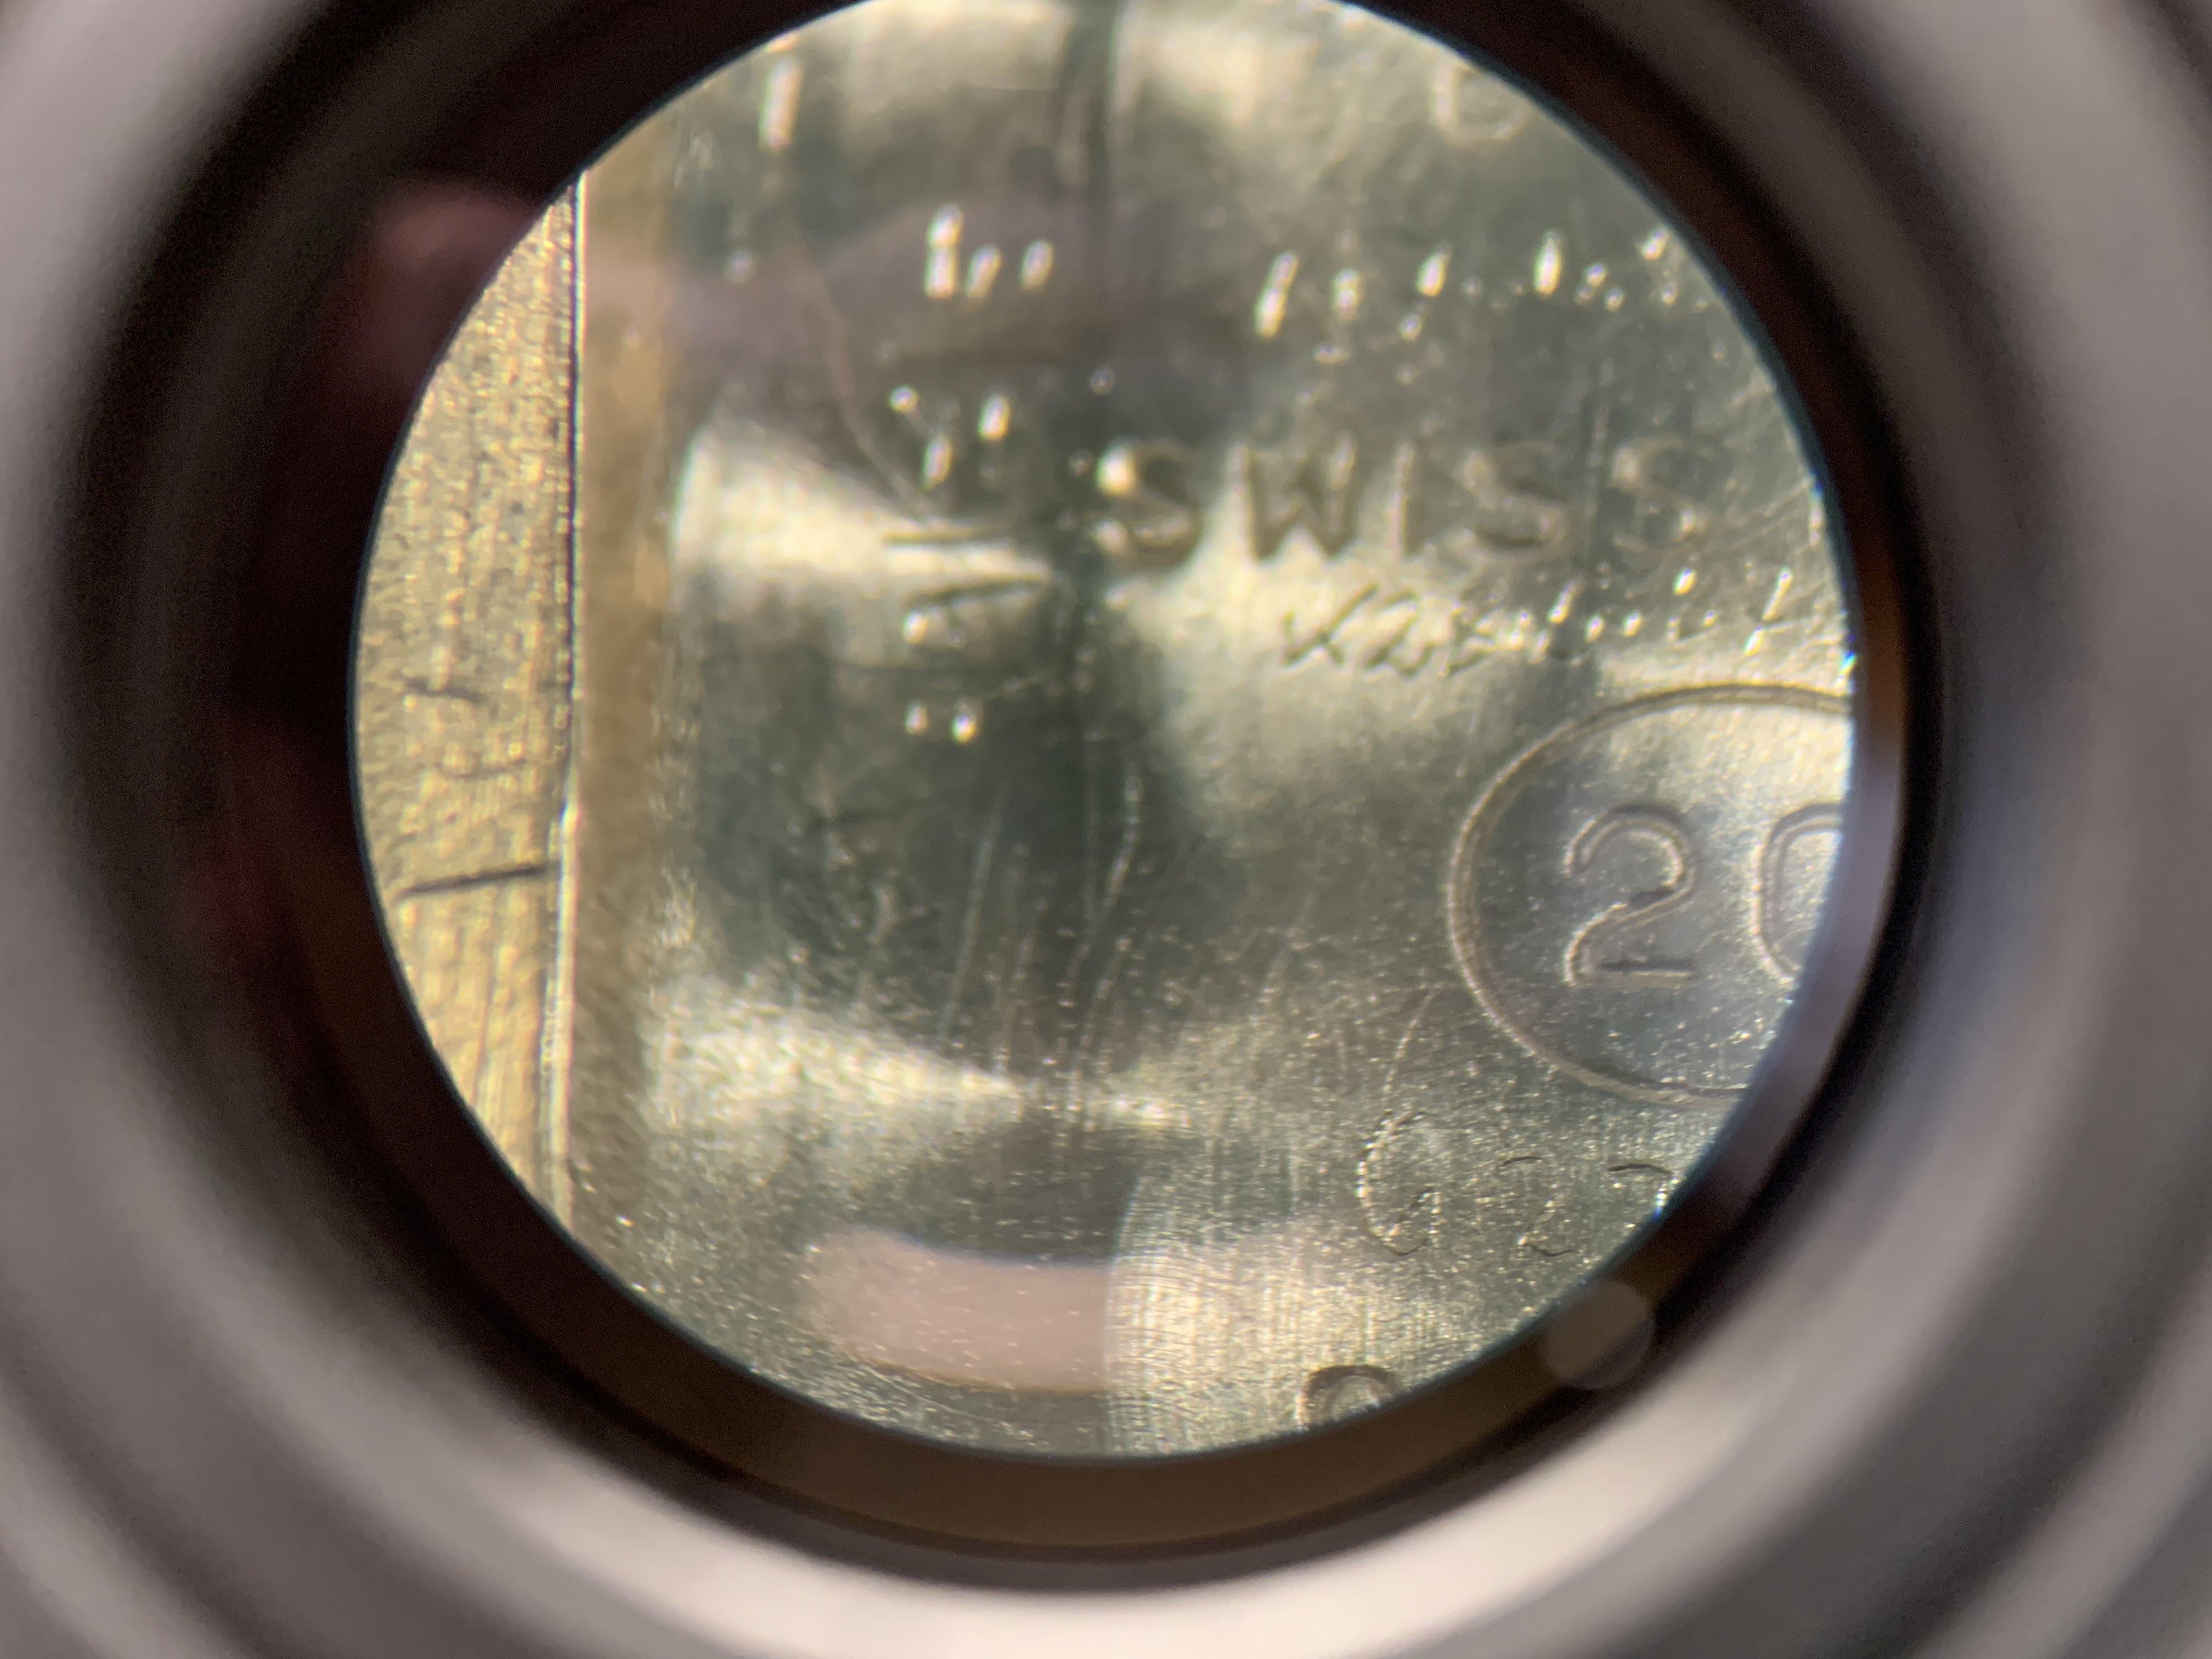
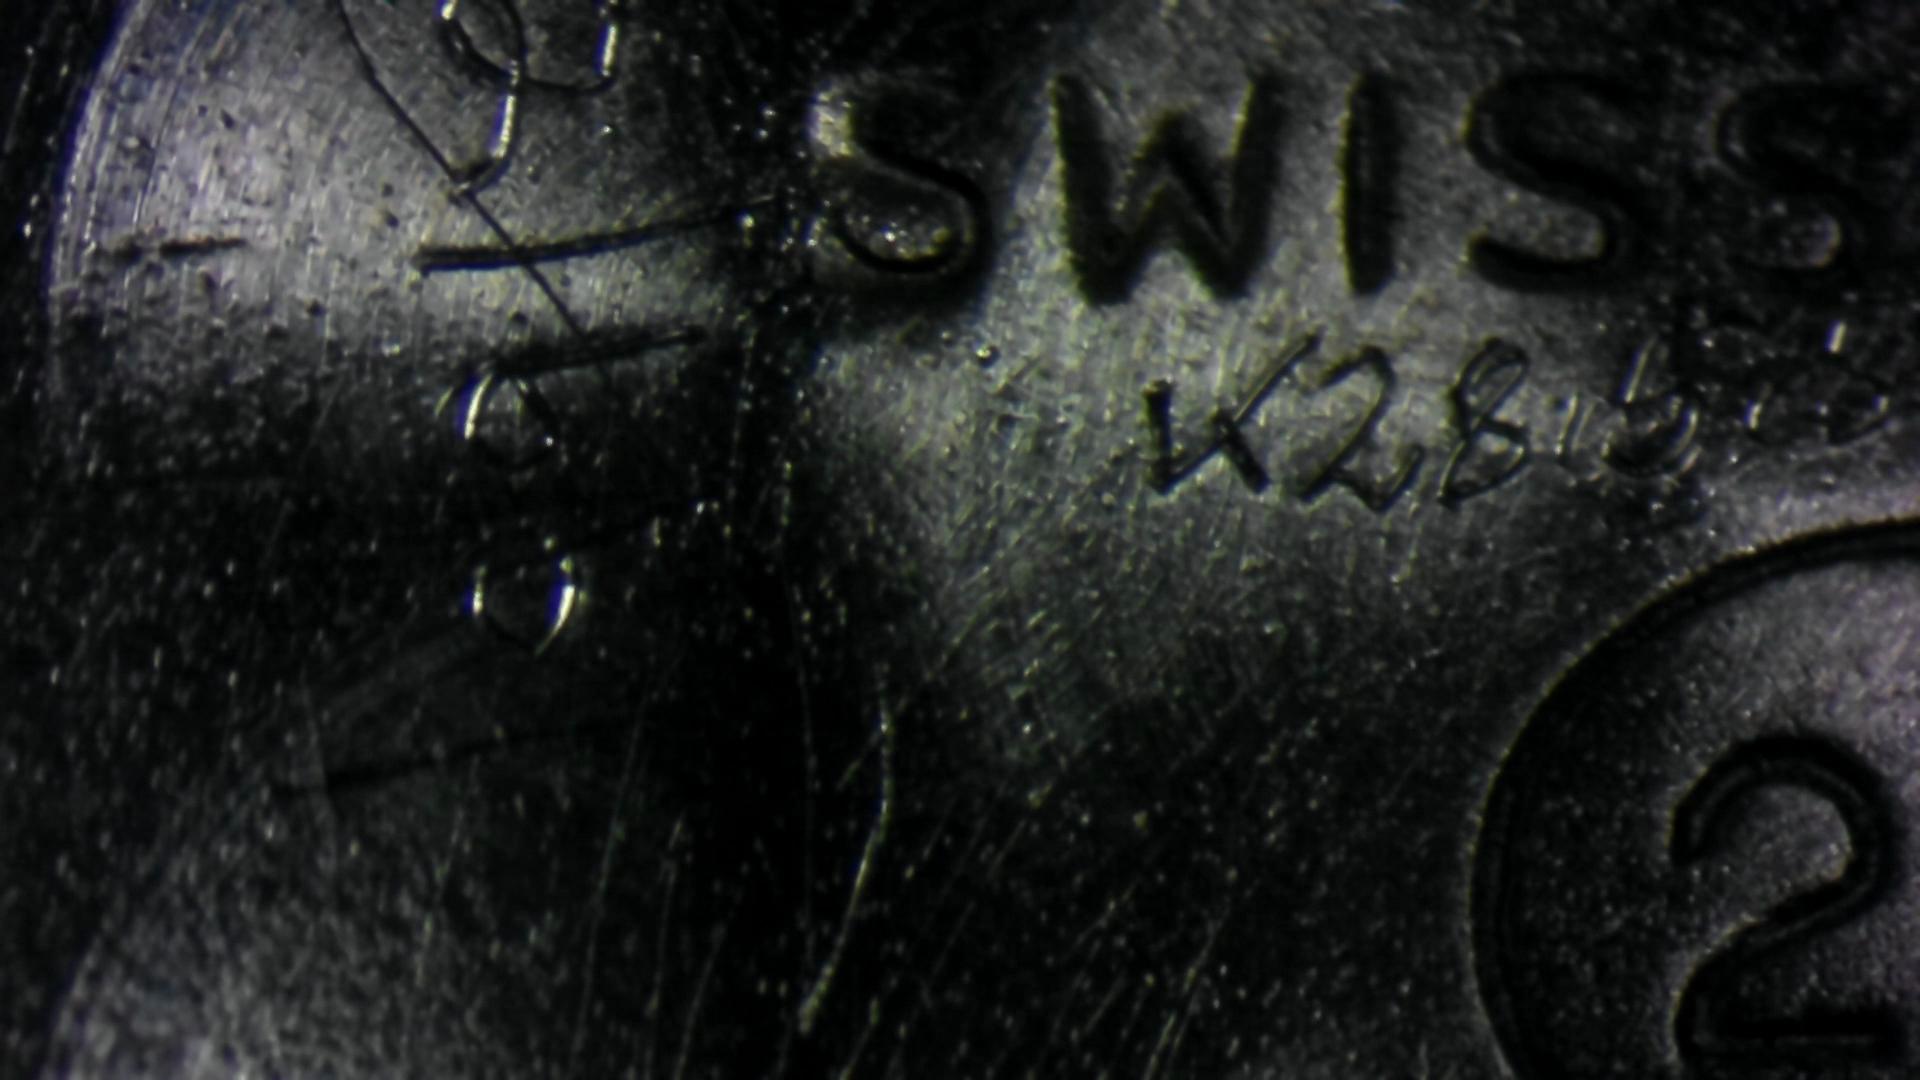
Back in this post, I promised a (brief!) review of the microscope I purchased from AmScope and camera from AliExpress. Brevity seems to have escaped me -- perhaps this was more complex than I thought! The AmScope order was placed on November 18, shipped the next day via FedEx International Economy, and delivered November 22. At US$120, shipping was expensive. But microscopes are heavy, and I wasn't up for the 10,000 km round trip to pick it up! And it got here pretty quick considering it travelled from the east coast of the United States to the west coast of Canada. Canadian federal and provincial taxes were collected by AmScope, so the order sailed through customs without delay. Everything was well packed and arrived undamaged. As expected, the camera from AliExpress took a little longer to arrive, but no complaints from me as I prioritized low cost vs. speed of delivery for this component. Ordered November 18 and delivered December 4 (still quick all things considered). The microscope was easy to assemble but took me a few rounds of trial and error to get it situated on my workbench 'just right.' I have the microscope head tilted back toward me on a 10° angle which seems just enough to allow me to control placement of screwdriver blades in screw slots. This means that the very top and bottom of my view are ever so slightly out of focus, but not enough to have an impact on any work I've been doing. So far I'm really impressed with the microscope. It is a huge ergonomic upgrade for my tired old body, and at least doubles my ability to do precision cleaning, inspection and lubrication. The ring light feels a little cheaper than the microscope (light weight plastic vs. heavy metal construction). But it does a good job and was inexpensive. It has a rheostat to adjust brightness which I really appreciate. I typically run it closer to it's lowest setting when zoomed out and on full brightness zoomed in. The power cord is unsightly but generally out of the way without much effort. There is a switch to turn the light on and off (separate from the rheostat) and a little green LED that lights up when the unit is connected to power. In my perfect world, the green LED would turn off when the light is switched off, but that is really more of an observation than complaint. The camera arrived after I was pretty familiar with the microscope, and I think that was beneficial to my learning curve. The microscope had a long adjustable tube with no optics that was to be used for mounting the camera. I didn't use that at all. Rather, I installed a 'Focus Adjustable 0.35X C-mount Adapter' between the camera and microscope. This alone did not provide enough adjustment to allow simultaneous focus of the camera and eyepieces, and I ended up adding a 2mm spacer between the camera and 0.35X adapter to get the camera focus synced with what I was viewing in the microscope. I wasn't sure what size spacer would work best with my setup, so I purchased four sizes: 1mm and 2mm spacers, and 5mm and 10mm threaded adapters. These all came from the same vendor on AliExpress (link below), and were so inexpensive that paying extra for the ability to have some trial and error flexibility worked well for me. Instructions with the HAYEAR camera were not great but enough to get going. There are basically two different ways to use the camera: First, I tried connecting camera with an HDMI cable to an external monitor. Works as advertised but I didn't like having a big LCD monitor on my workbench, and my HDMI cable is a bothersome brute that I also didn't like having around the workbench. When using this setup you need to power the camera with the supplied power adapter, and photos and videos could be captured to an SD card (not supplied) placed in the camera. There's a remote control (that didn't come with a battery, or even an indicator of what kind of batter was appropriate) that is used for taking pictures and such. I didn't like anything about this setup, but it did work. Second, I tried connecting camera to my MacBook Pro with the supplied USB cable. This eliminates the power adapter, the LCD monitor and the unwieldy HDMI cable from my workbench. Much better! Tricky part here was getting software on the computer that could capture photos and video. HEYEAR's website has software, but it is a bit hard to find and install, and didn't work well. I ended up downloading software called ToupLite from another microscope vendor. It is the software that HEYEAR's is based on, but with all the functionality I required working properly. I took some photos with my iPhone through the eyepiece of the microscope to compare what I see vs. what the camera sees. First two photos are with the microscope zoomed all the way out, first through the eyepiece then the HAYEAR camera: Next, zoomed all the way in: Here's a screenshot of the software: Here's a shot of the microscope in its working orientation: And swung out of the way: And finally, links for everything: AmScope SM-3TPX Simul-Focal Zoom Trinocular Stereo Microscope 3.5X-45X Magnification on Single Arm Boom Stand (includes 0.5X Barlow lens) AmScope 144 LED Intensity-adjustable Ring Light for Stereo Microscopes with White Housing HAYEAR HY-3307 Digital HDMI USB Microscope Camera 16MP 1080P HAYEAR 0.35X C-mount Adapter C-mount Spacers If you've stayed with me this far, thanks for reading! Let me know if you have any questions. Cheers!

 1 point
 -
You make a good point - that’s much more likely than any poor technique on my part!1 point
-
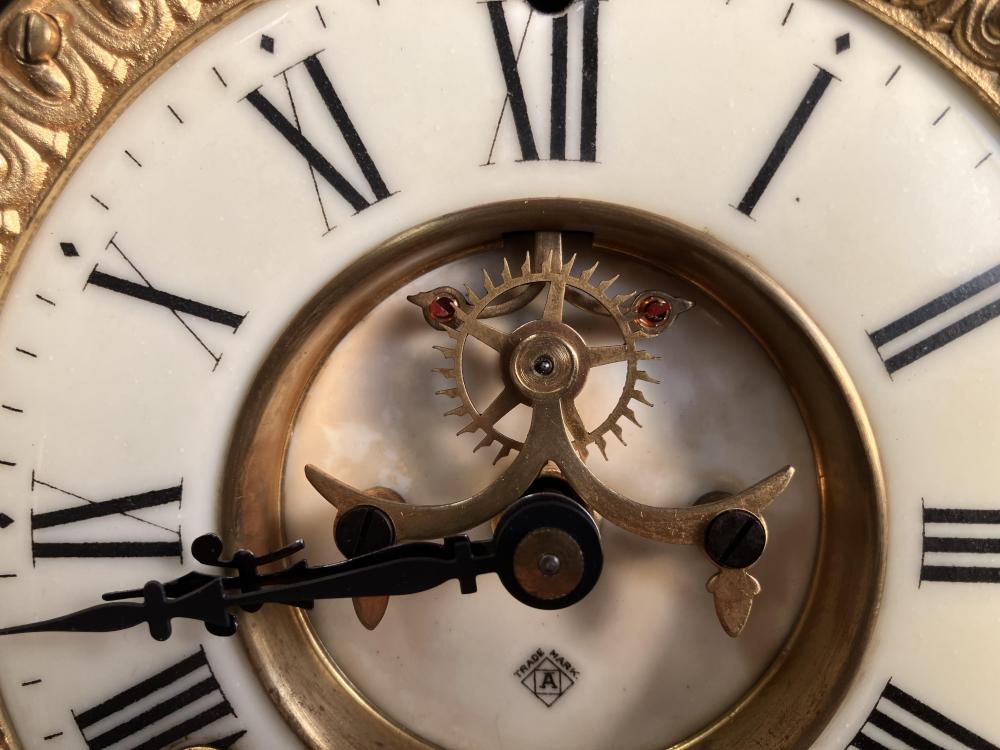
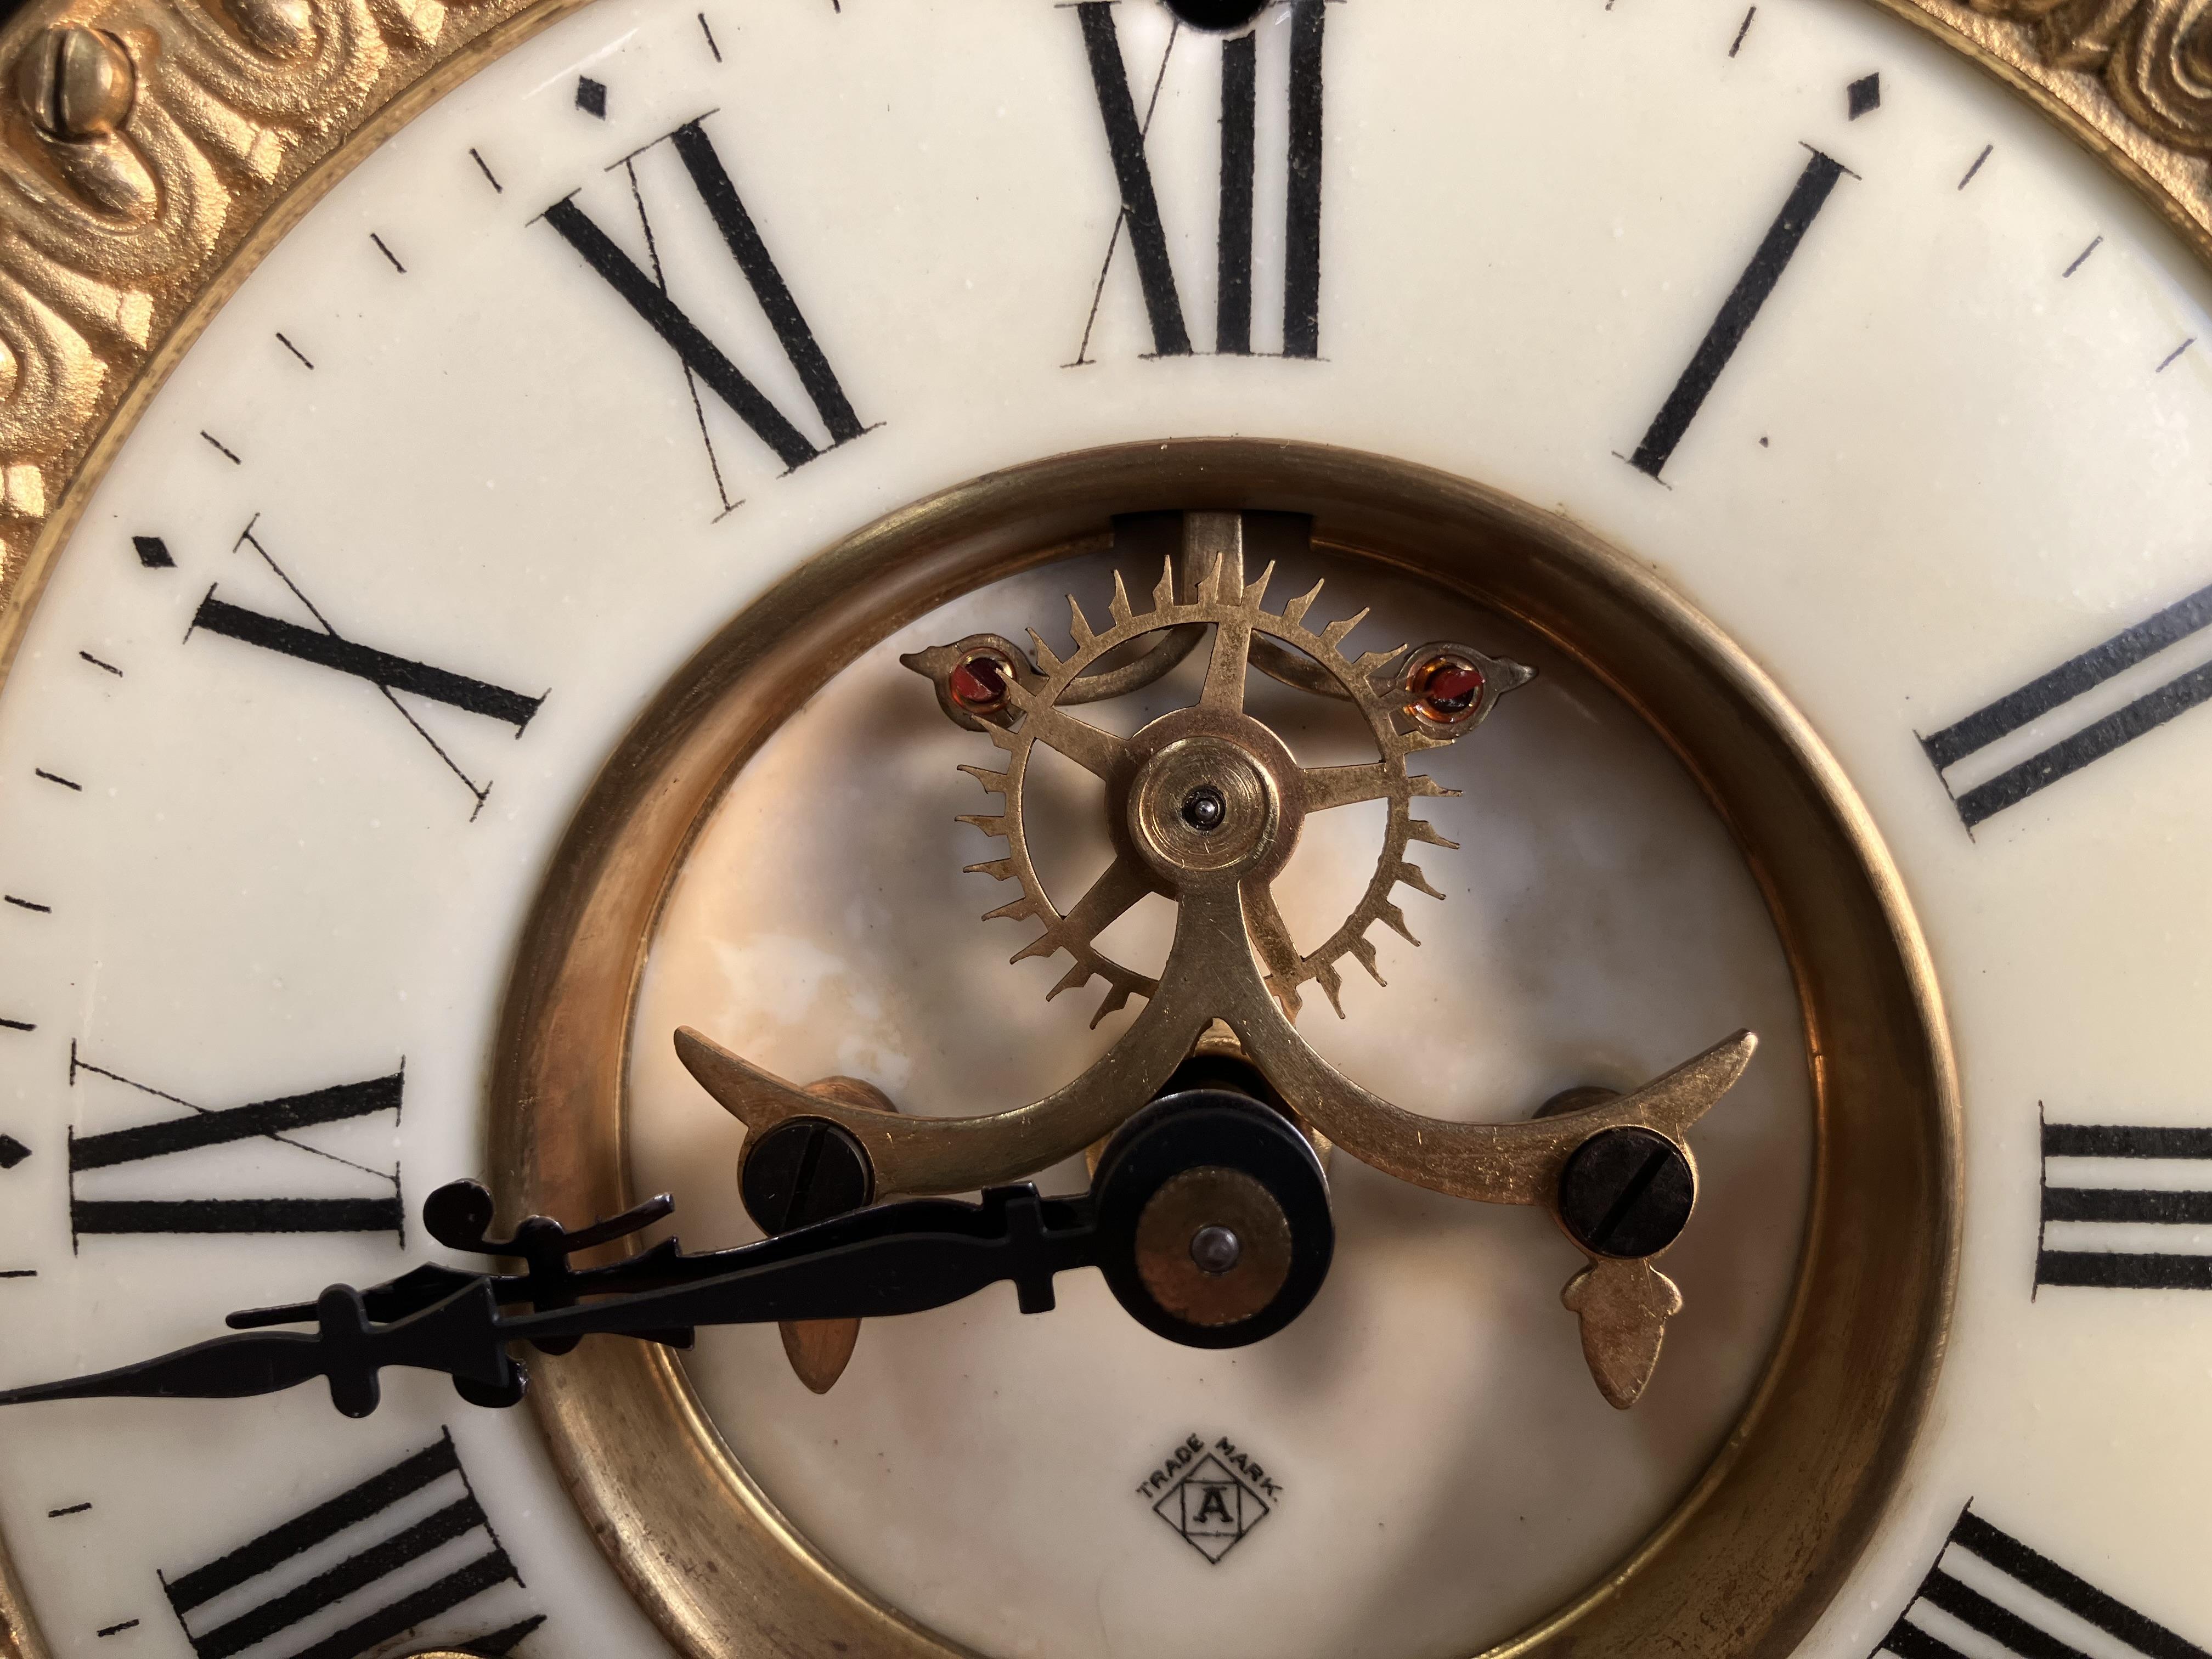
Hi, I have a Ansonia mantel clock with the Brocot Escapement which I restored and repaired in 2018. I was on holidays in New Zealand and visited the Dunedin castle in Dunedin NZ, in the great hall they had this Ansonia mantel clock ticking away and immediately I said to my wife I want one of these. Mission impossible ???? Anyway two weeks later in the town of Reefton NZ on the west coast of the south island, I went into an antique shop and they had two of them exactly the same model as in the castle. One was working for $700 NZ and the other not working was $200NZ as I had restored and repaired quite a few Enfield mantle clocks I bought the non working one for $200 NZ. It was from a deceased estate from Christchurch NZ and I believed it is dated late 1890's to early 1910 ? Now how to get it home to Australia without damaging the case, it was constructed from Belgium Black Marble and weighed 10 kilograms. Quick trip the the hardware store for some bubble wrap and heaps of tape and carried it on the plane as carry on luggage. Anyway it was missing one of the jewels in the Brocot Escapment, most people repair them with steel pins as seen above but i managed to get a correct jewel from the USA and shellacked it back in at an angle that I viewed on the internet from several photos. Disassembled the movement cleaned and lubricated and made repairs to the case. Worked perfectly from the start as soon as the pendulum was fitted. It is a beautiful piece. Photo attached to assist you in your repair. I also have a video but cannot upload it, I use a mac and the file ends in .mov I converted it to .mp4 but it still would not accept it, any ideas ??
 1 point
 -
Hi with the springs I use strong wire wrapped round and twisted so as to prevent unwinding. It’s thin enough to be out of the way and can be removed in a winder no problem. Have a strong Coffee Hector or a cold shower. Which ever is the most efficacious1 point
-
Yes, but leave this for later. Now You need to bring the spring centered and not touching the stud. Well, see how many posts and 4 pages, when it was clear from the beginning that the problem has nothing to do with magnetization1 point
-
Often I see HP-1300 as a substitute for D5 (both thick oils). And Molykote DX used where grease is called for in keyless works.1 point
-
Thanks JerseyMo, I hope you can forgive me for what I'm about to do......I got curious and its only my second Timex Jet wash system
 1 point
 -
I don't think it's powerful enough to vapourise you.1 point
-
Yes, Timex did not mark their movements with a cal. number.1 point
-
If you use one of those, your impersonation might become more realistic than you can imagine.1 point
-
Lol the speed is adjustable, (it's for my Patrick Swayze impersonation . But more to the point that the arbor and table are metal.....and that metal , water and electricity are a hair raising combo . When have I ever atually used anything for its intended purpose Ricardo ? Erm....rarely1 point
-
Thats pretty much the standard policy with the UK and I assume every country. The way of progression can be.... wait until enough people are injured or killed and then make a change... Look how long it took for cigarette advertising to be halted. Electical installation worked on much the same idea at one time...much more regulated and periodically updated these days . I'm just wondering how bad this device will be ?
 1 point
 -
The importer is liable that the imported (and now or later distributed) item is safe and meets the rules. He will be liable if a lethal accident happens by such unsafe items. But importers (i.e. all individual buyers from china directly) just don‘t care and customs cannot examine each and every item. Frank1 point
-
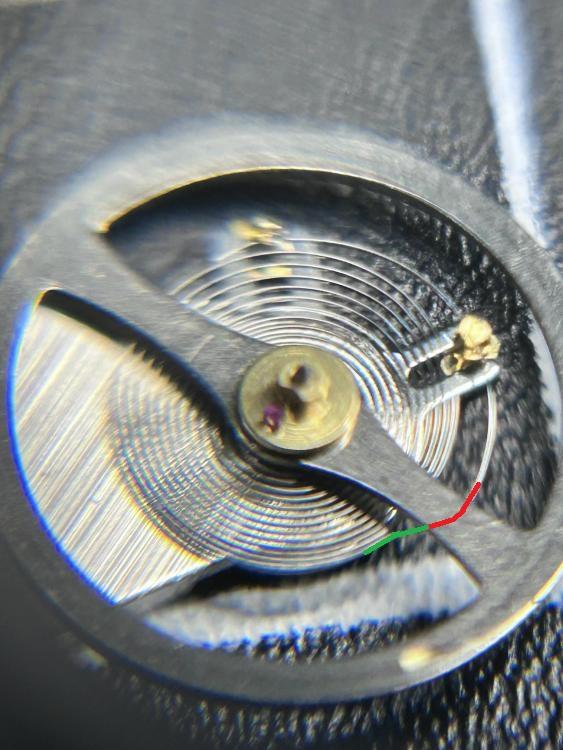
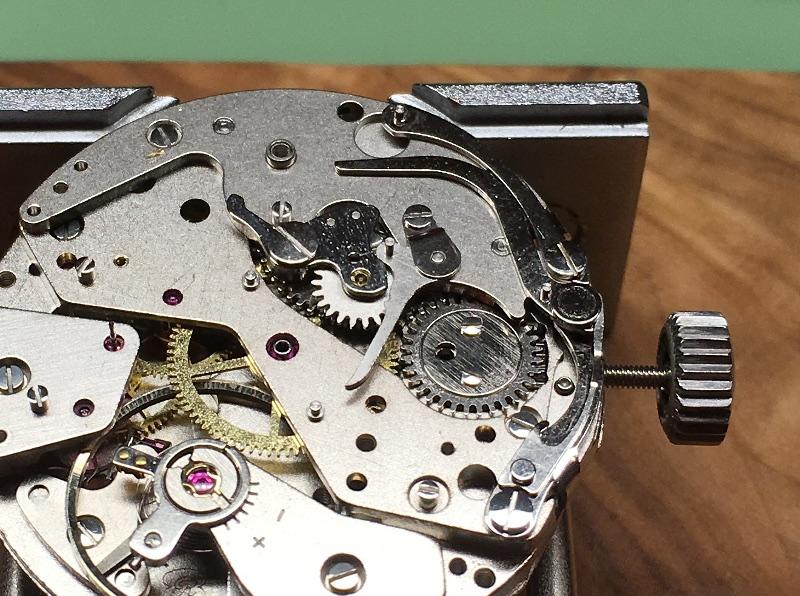
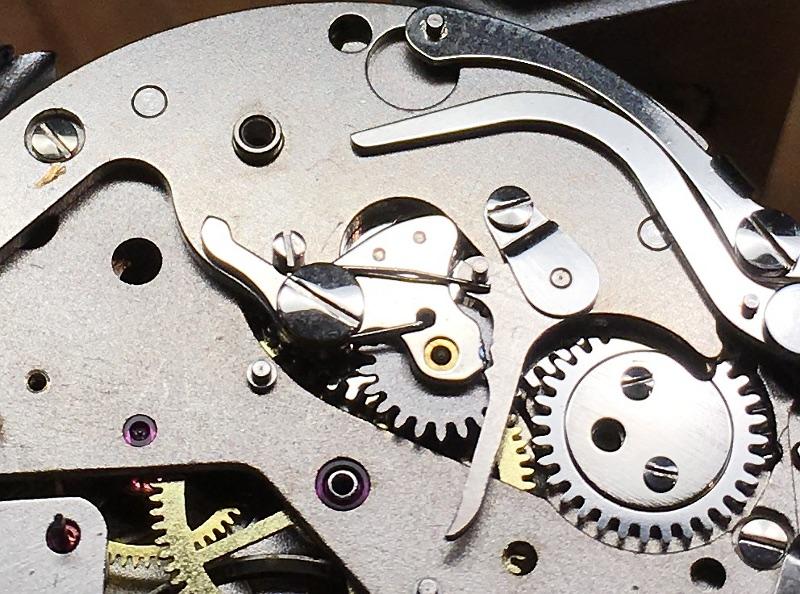
That bend on the green section should definitely be there, it's by no accident. Those two offset bends are the start of the terminal curve finishing at the stud, the space on hairspring where the regulation of the rate takes place. But as Nev says they do need tweeking a little to center the coils, just dont remove them.1 point
-
So, it's definately a dental thing. Awww.... You're just trying to avoid sleeping on the couch.1 point
-
Do not remove the balance from the cock. When it is on the cock You will be able to see the result of what You are doing. Both the red and the green sections must be there1 point
-
I mentioned that in another post, I too like them to look pretty much new. Each to their own as far as aesthetics go.1 point
-
Hello and welcome from Leeds, England.1 point
-
For some reason, I've never appreciated patina. I like my things clean and sparkling. Maybe it a dental thing.1 point
-
if this was a Chinese watch yes the regulator can move all by itself. but if it does move it's not going to be in a bad position the next day and a good position if you wind up back up again for instance it's probably going stay wherever it is once it moves. But if this is a Seiko watch it should stay word supposed to be. Then we really need a proper timing procedure to understand your pictures. For instance were all pictures the timing with the watch dial down? Ideally what we need is dial down, dial up and if you're going to be lazy about this one crown/pendant position for wristwatch typically crown down. It's why the movement holder can rotate to do this. Then you usually want to let the watch stabilize about 30 seconds each time you change its position or even when you put the watch on the timing machine. Then you want to measure for about 30 seconds just to let things also stabilize then you can take your pictures. then if the back is off typically with Seiko watches they can't be wound. Just not with the crown. Sometimes Seiko even give you specification of how much winding and that would be to turn the ratchet wheel screw a is can't remember what the typical Seiko is for fully wound up. As I said some of the technical sheets waxy tell you how many returns to turn the ratchet wheel screw to be wound up.1 point
-
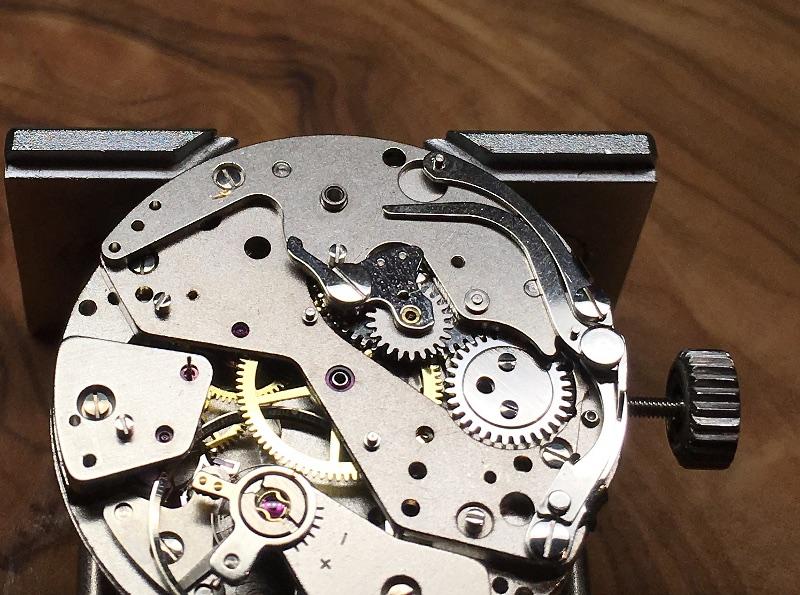
Alleluia! We have a picture... You need to open the angle marked with red and may be a little the green one too in order to bring the spring centered. Now it touches the stud or touches it when oscillating.
 1 point
 -
And here comes some additional information:1 point
-
Thank you for your introduction and welcome to this friendly forum. We all look forward to your contributions and continued involvement. If there is anything we can help you with don’t be afraid to ask. Nice clear photos can help a lot.1 point
-
Hi @thricci@thricci, You 100% have a loose cannon pinion. It's a relatively easy repair. And if it goes wrong or you don't have the tools, it should be an easy part to buy on eBay. There's nothing you can inspect visually, but it's an absolutely clear case.1 point
-
Welcome to both of you @robgau, @thricci1 point
-
Looks as if it has been set at the wrong angle. Have a look at this.1 point
-
Mike, the biggest issue with 6mm lathes is there are far fewer collets available for them. 8mm collets are still made and with an additional drawbar(may not be required) you can add to the set more easily if you need to. The BHI recommends 8mm because of this, you can read their recommendations in the free to view lesson 1 of the DLC. Tom1 point
-
A man who makes no mistakes, makes nothing at all. I like the saying, if you try to do things sooner or later you will f&&k up. The only way to make no mistakes, is to do nothing.1 point
-
@captainneek the person who hasn’t made a mistake hasn’t made anything, ever. Tom1 point
-
The Pultra is like that as well but only one clamps tailstock to bed , presumed the other was just a guide. Dell1 point
-
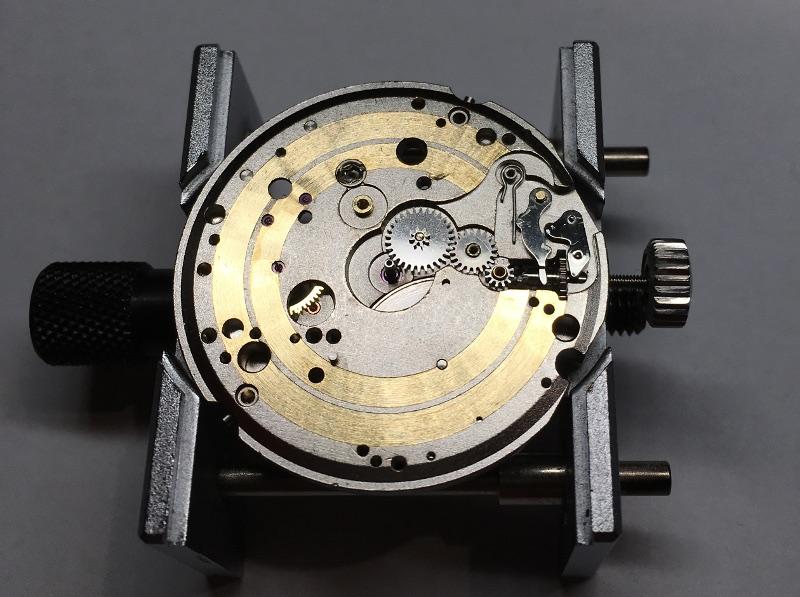
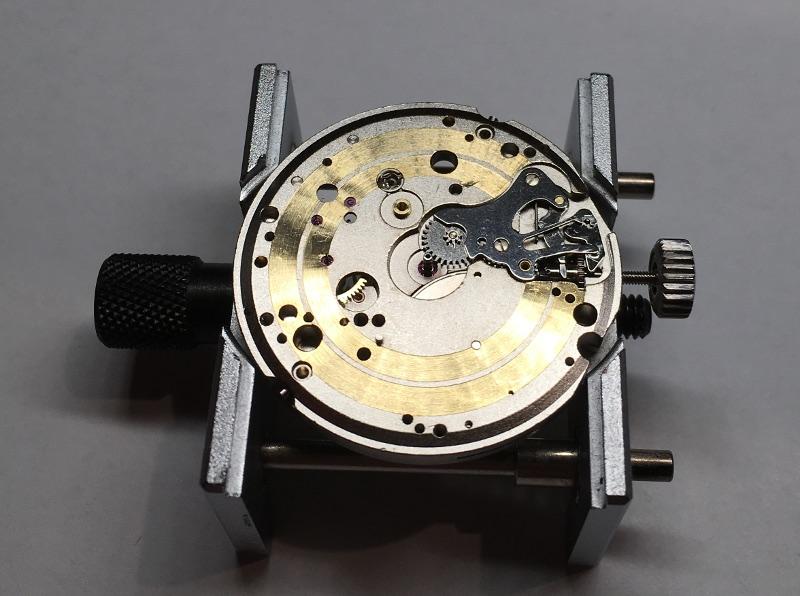
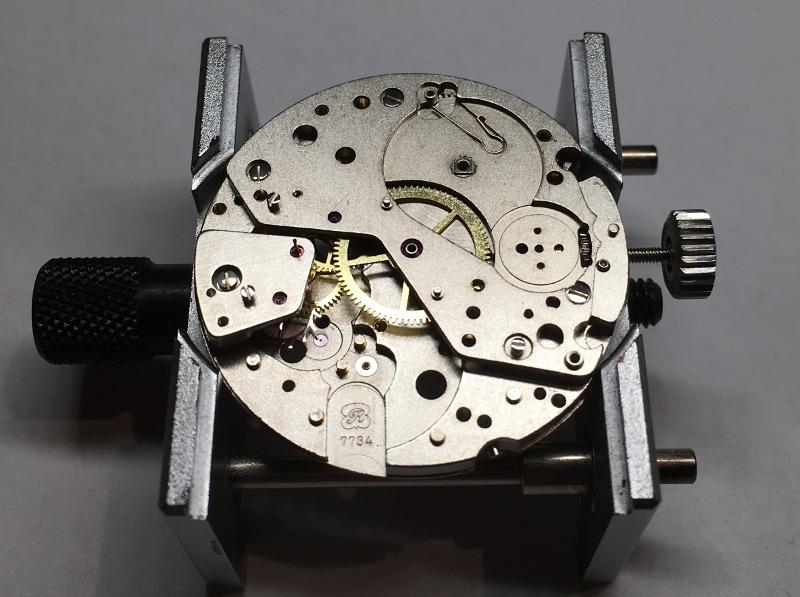
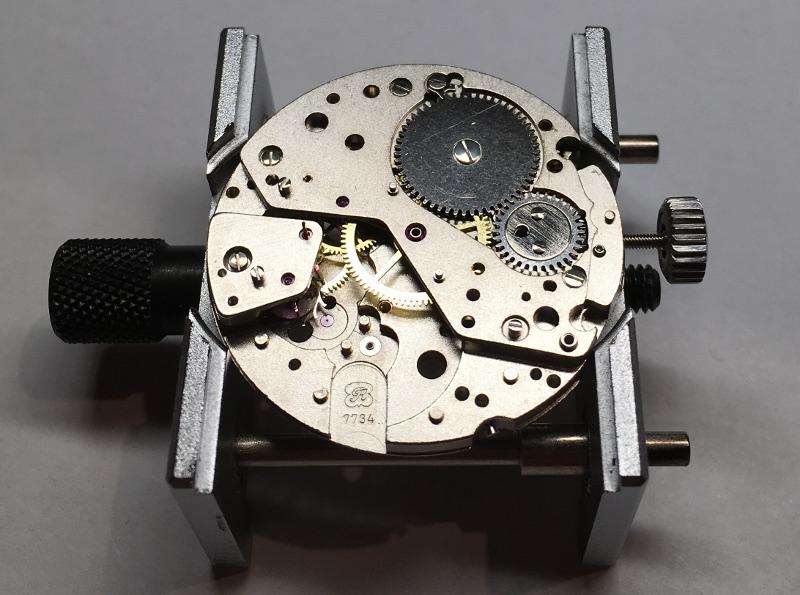
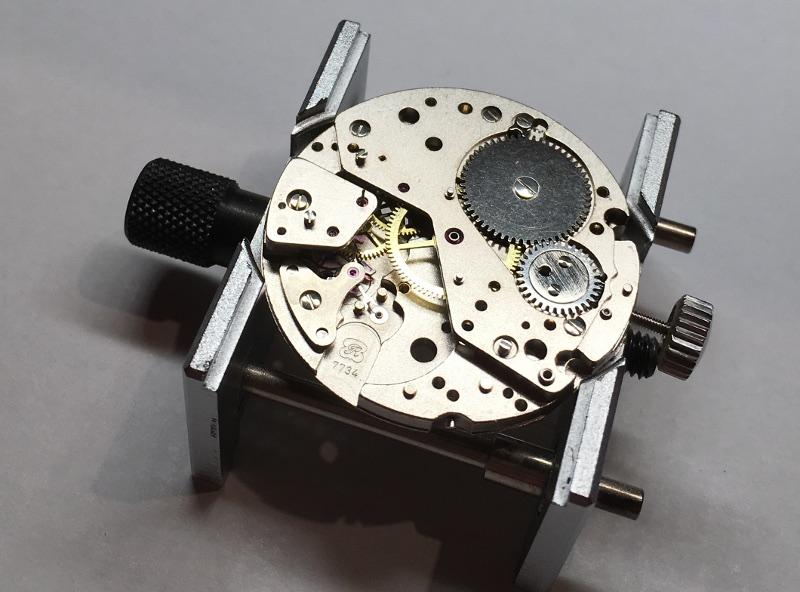
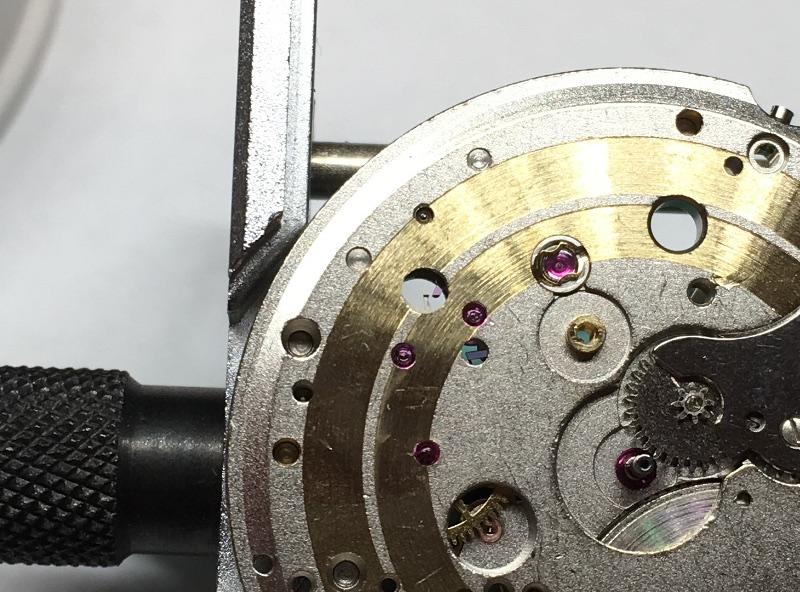
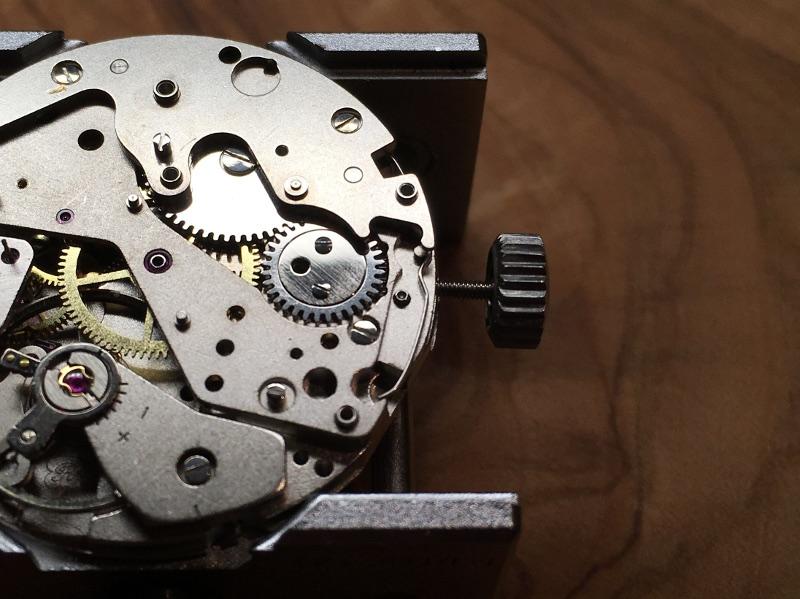
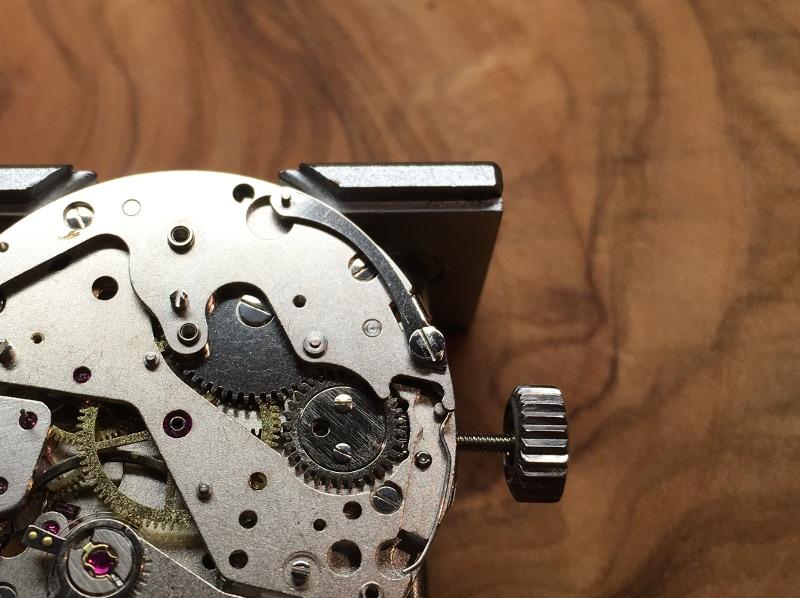
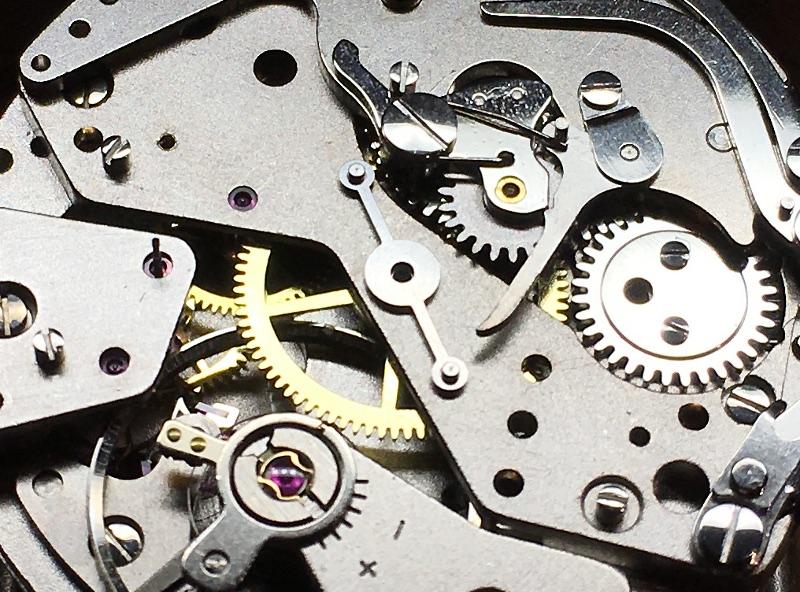
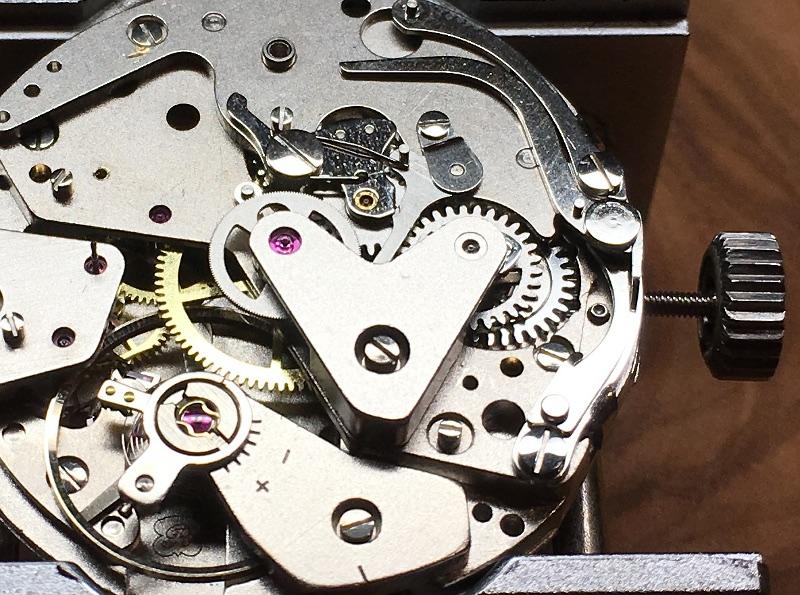
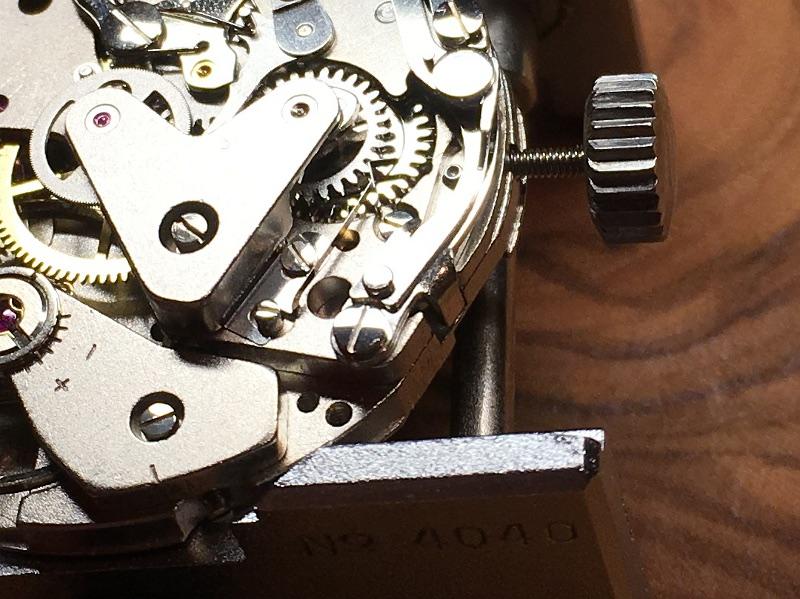
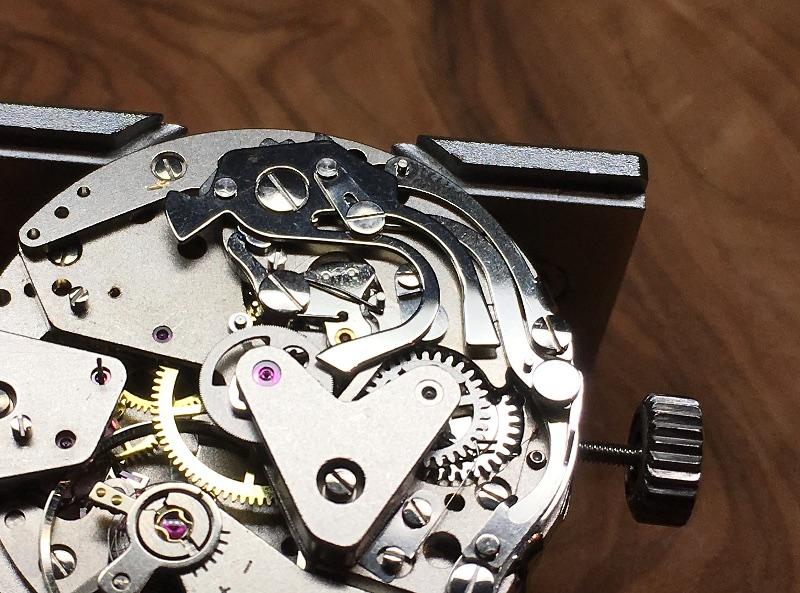
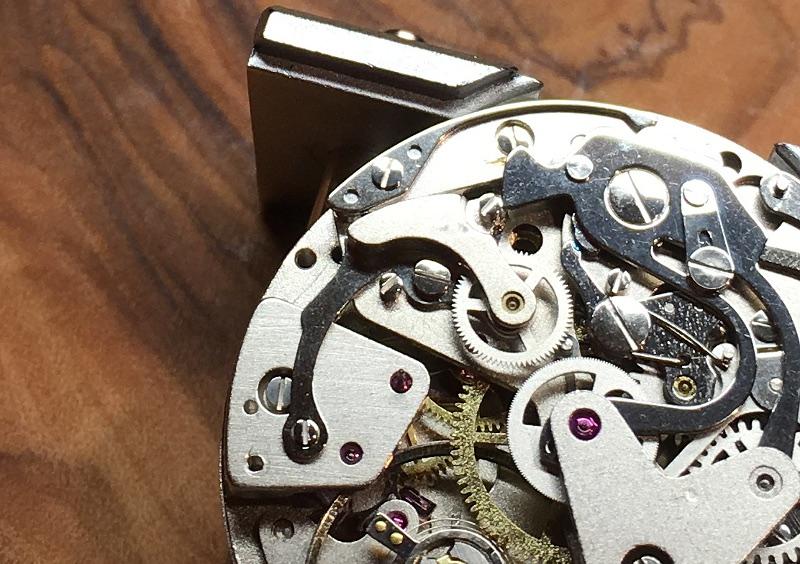
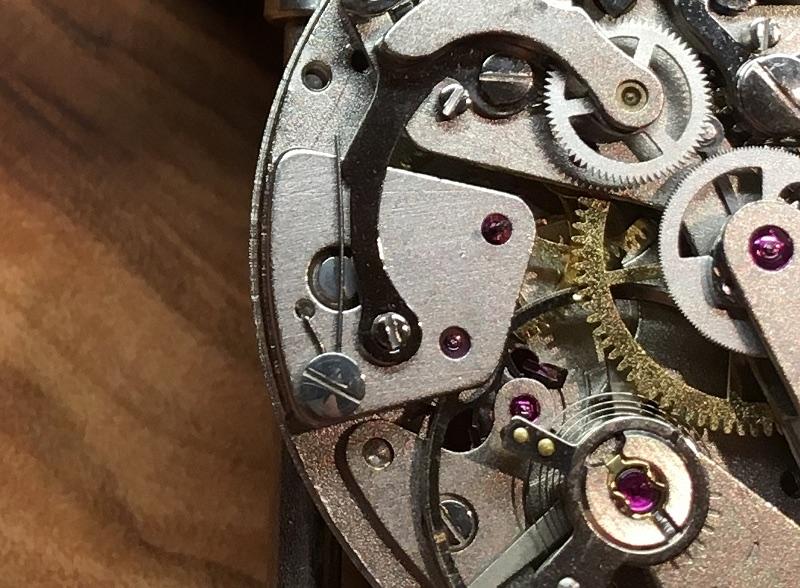
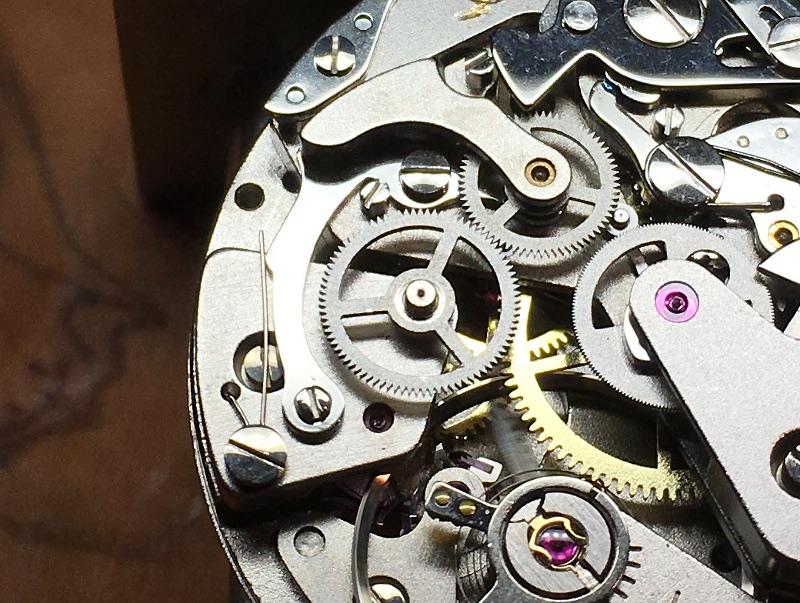
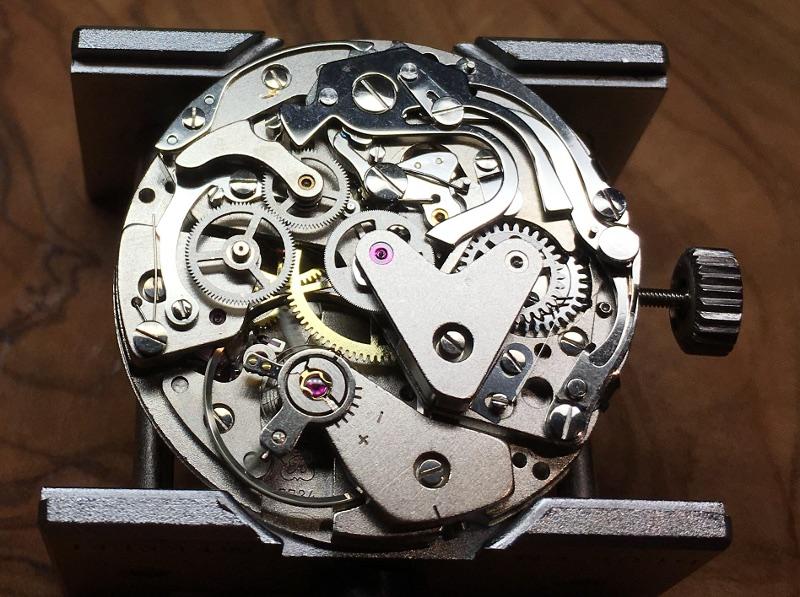
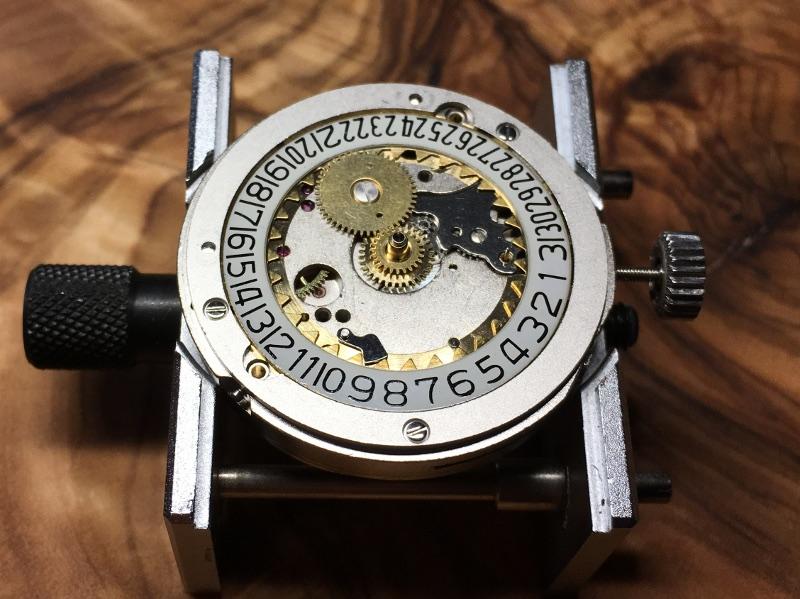
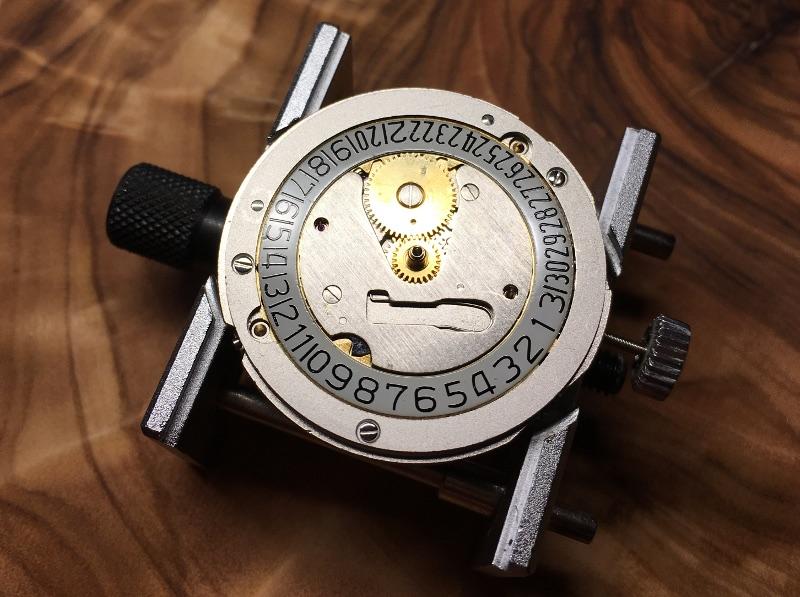
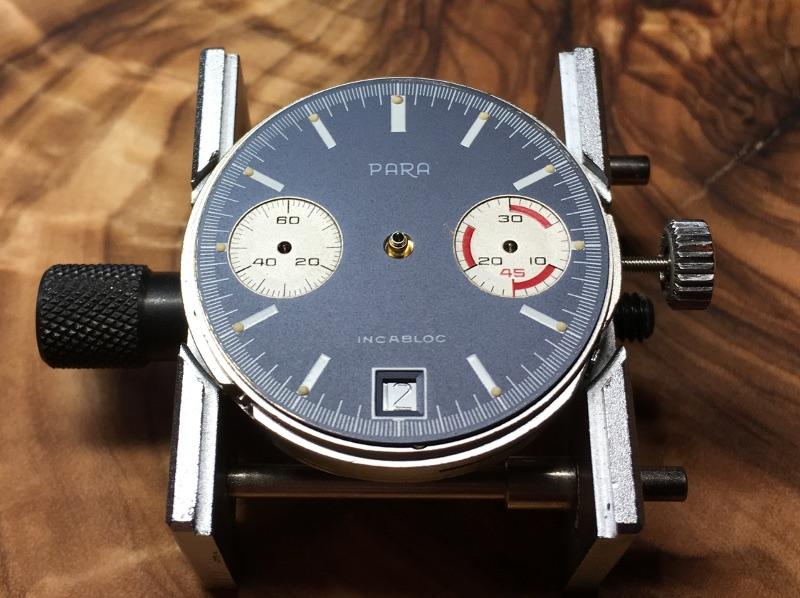
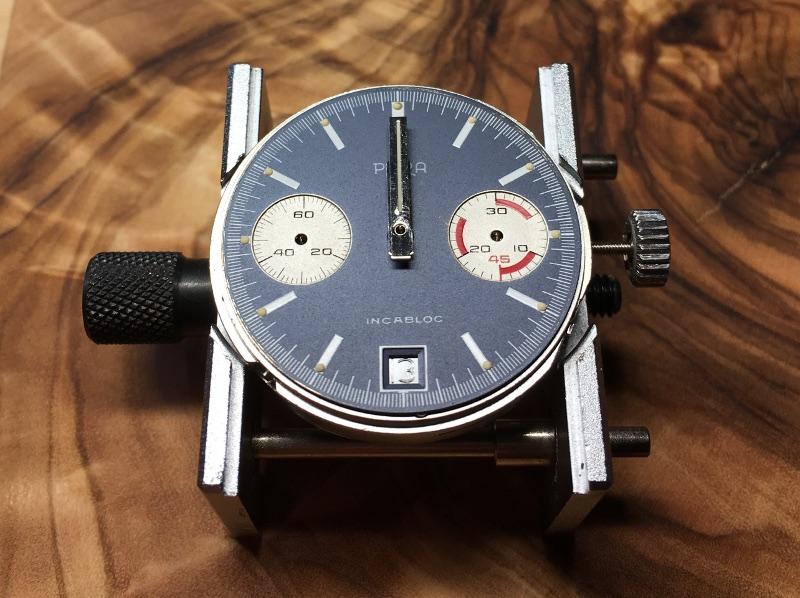
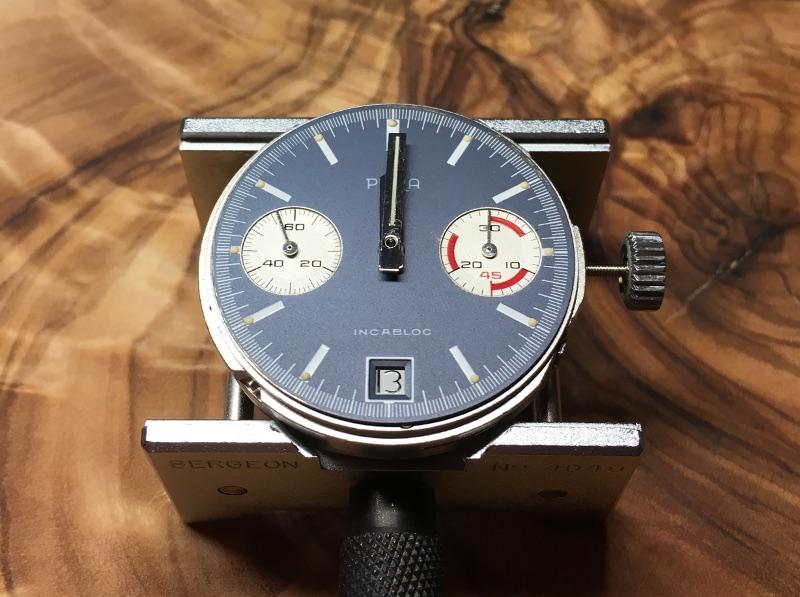
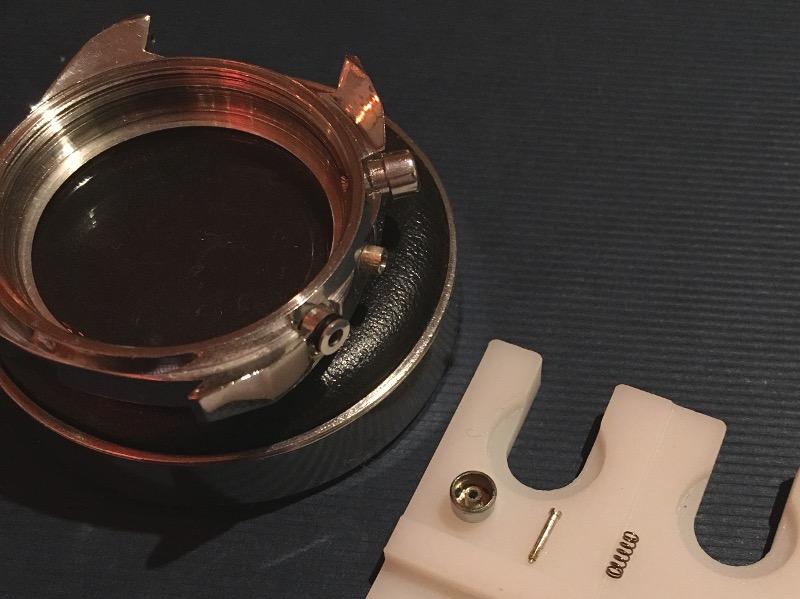
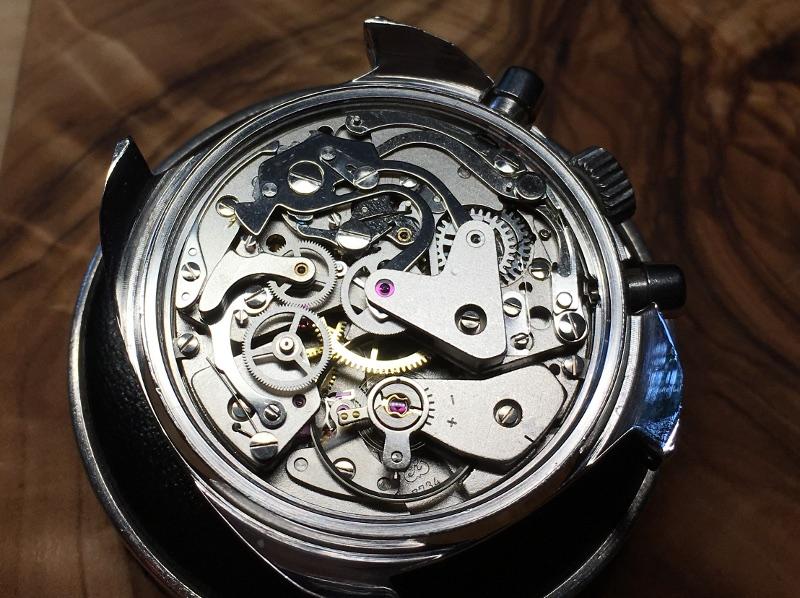
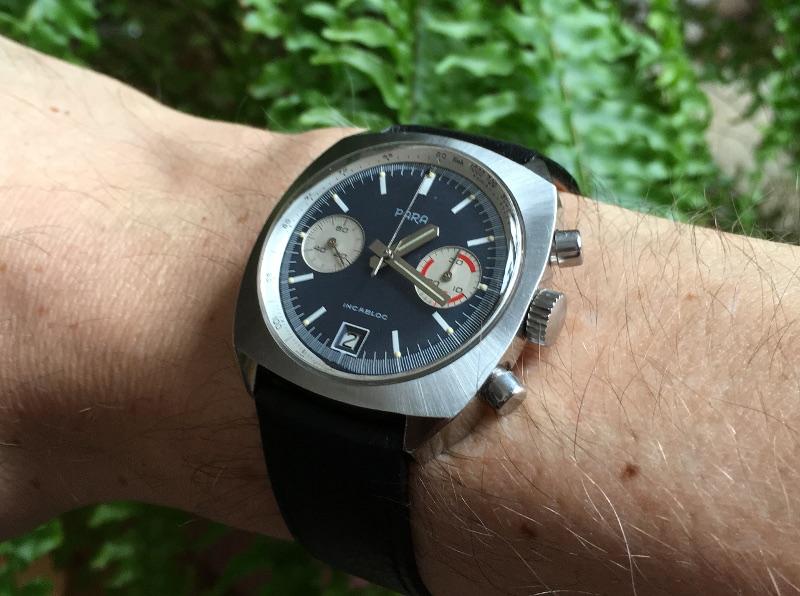
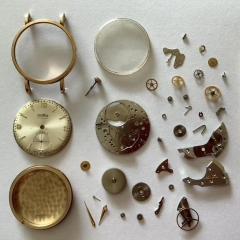
First of all my apologies for not having documented the disassembling, but the watch arrived in a terrible condition and I stripped it down right away to get rid of all that dirt. If you have worked on some watches yet and think about entering the chronograph world with a 7734 let me give you 3 advices: Do it! The 7734 is a solid construction and not too complicated. Take your time and watch all the 6 parts of Mark's Venus 175-service on youtube. Of course the Venus is a column wheel system, but the basic movement is very similar and also on the chrono layer you can learn a lot especially about lubrication: https://www.youtube.com/watch?v=EI3T-IR3AgM Download the 7734 service manual. A lot of information here: https://strela-watch.de/valjoux-7734-7733-7736-technical-documentation/ Here we go. Some 8200 for the barrel and the new mainspring goes in (got it from cousins - what I'm gonna do after Brexit? ). The complete barrel. Some D5 for the arbor. Putting in the wheels and the bridges. Lubrication: 9010 for the escape wheel and the second wheel, D5 for all others. The keyless works. 9501 for the stem and the gears. D5 for the wheels and the lever axis, 9501 for the contact points of levers and springs. The click spring. D5 for the click and the crown wheel, 9501 for the contact point of click and its spring. Finally the ratchet wheel goes in. The pallets go back in, no lubrication for the pivots. Lubricating the balance jewels with 9010. The balance back in. The escape wheel and the pallets got epilame so I let run the movement with dry pallets for some minutes. After that 941 for the pallets (work from the dial side through the window). Now I start with the chronograph. First the bridge and the spring for the levers go in. Fly back lever goes in with some D5. Operating lever, again D5 for the axis. A little bit tricky, you must upline the integrated spring with the upper lever first (9501 for the contact area). The second pictures shows the final layering. The sliding gear goes in, D5 for the lever axis, no lubrication for the wheel! At this point I forgot to put in the minute recorder runner (no lubrication). You should install it here, later its going to be more difficult. The blocking lever (D5) returns. Some 9501 for the contact area to the sliding gear. The blocking lever spring. Be very careful, this one isn't just a flyer, its a damned Lockheed SR-71 Blackbird. The friction spring (gets a drop of 9010). The chronograph runner and its bridge (9010 for the long pivot and the jewel in the bridge). The minute recorder jumper, no lubrication. The hammer. D5 for the axis, 9010 for the lever ends that hit the hearts, 9501 for the contact areas to the sliding gear, fly back lever, operating lever, jumper. The hammer cam jumper. Before installing the clutch give 9010 to the pivots of the coupling wheel. D5 to the lever axis. The spring. 9501 for the contact point. Finally line up the driving wheel with the coupling wheel and the chrono layer is complete again! The dial side. Some 9501 and the cannon pinion goes in. Hour wheel with D5. The dial rest with its 3 screws. The date indicator. The date indicator driving wheel with some D5. The jumper with D5 to its axis. As there was no lubrication described in the manual between disc/jumper or disc/wheel and the parts looked well polished I didn’t lubricate. It works - let’s see how long. The guard with 2 screws. Finally the spring. The dial comes back and is secured with its 2 screws from the side. While disassembling I put the little hands into seperate trays to prevent mixing them up. Now I turned the crown in the setting position exactly to the point when the date switches and put on the hour hand to 12. Positioning the chrono-hand exactly on zero was that tricky that I forgot to take a pic. New springs and gaskets for the pushers. Unfortunatly I’m not good in restoring cases. So just refreshing the brushing a bit and some cape cod work. The movement back in the case and secured with 2 screws. A new gasket for the caseback and here we are. Thank you for watching.
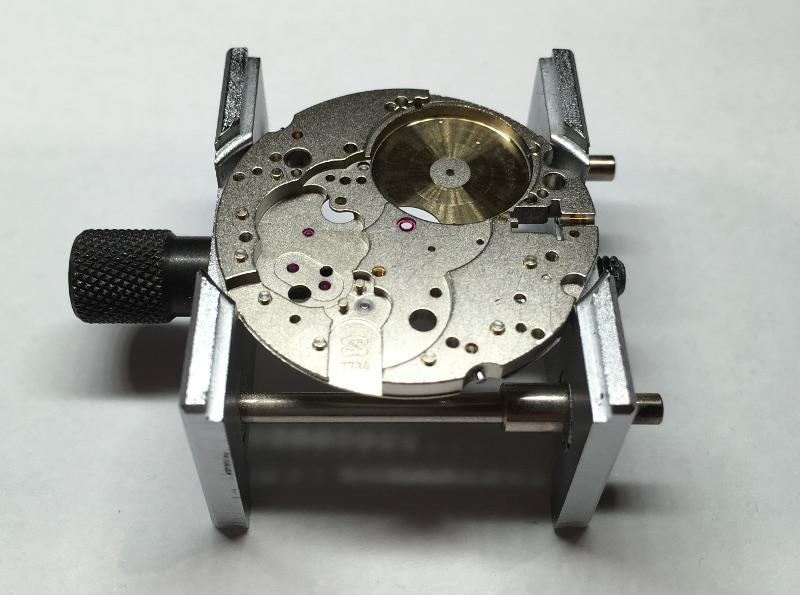
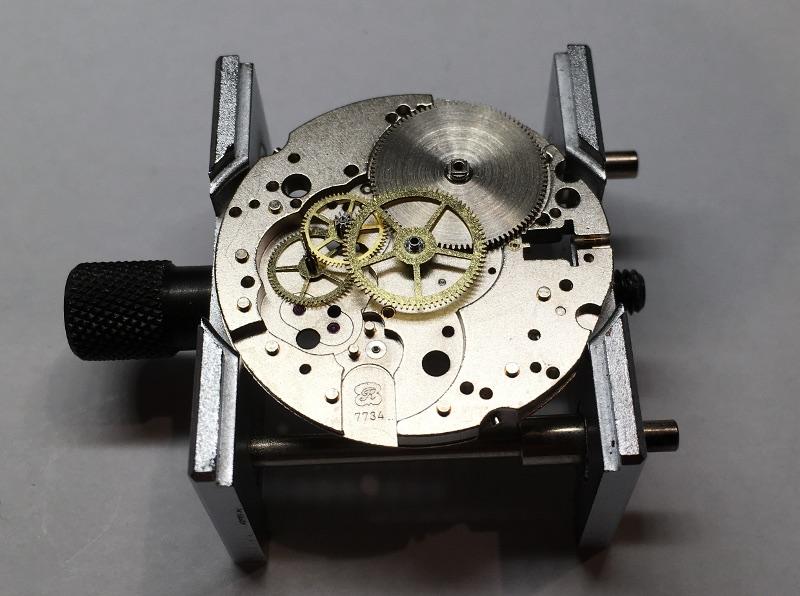
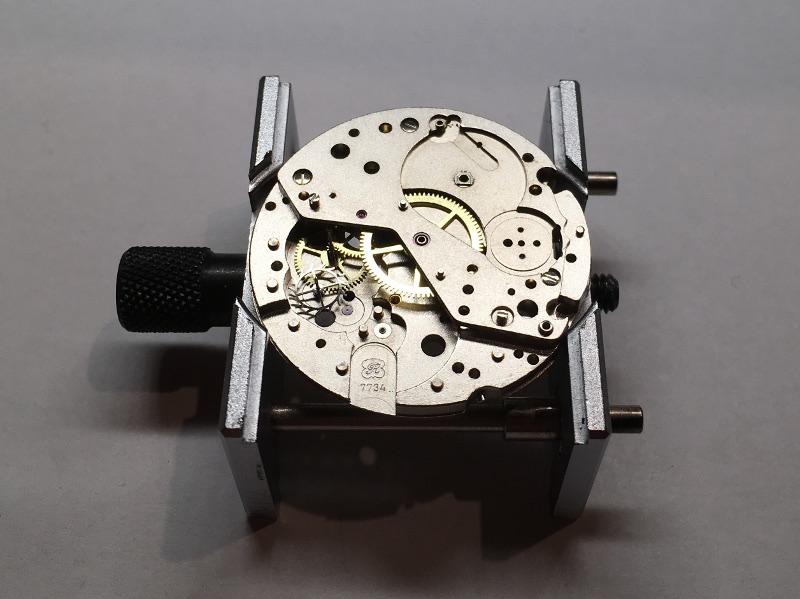
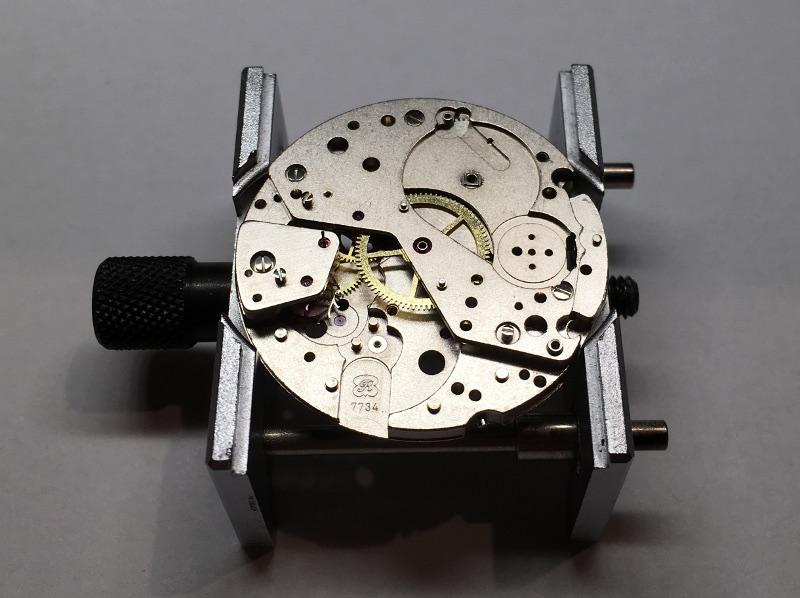


 1 point


.thumb.jpg.cb17a66989f1e796fd4217db2e9ca9df.jpg)


