Leaderboard


Popular Content
Showing content with the highest reputation on 09/18/22 in all areas
-
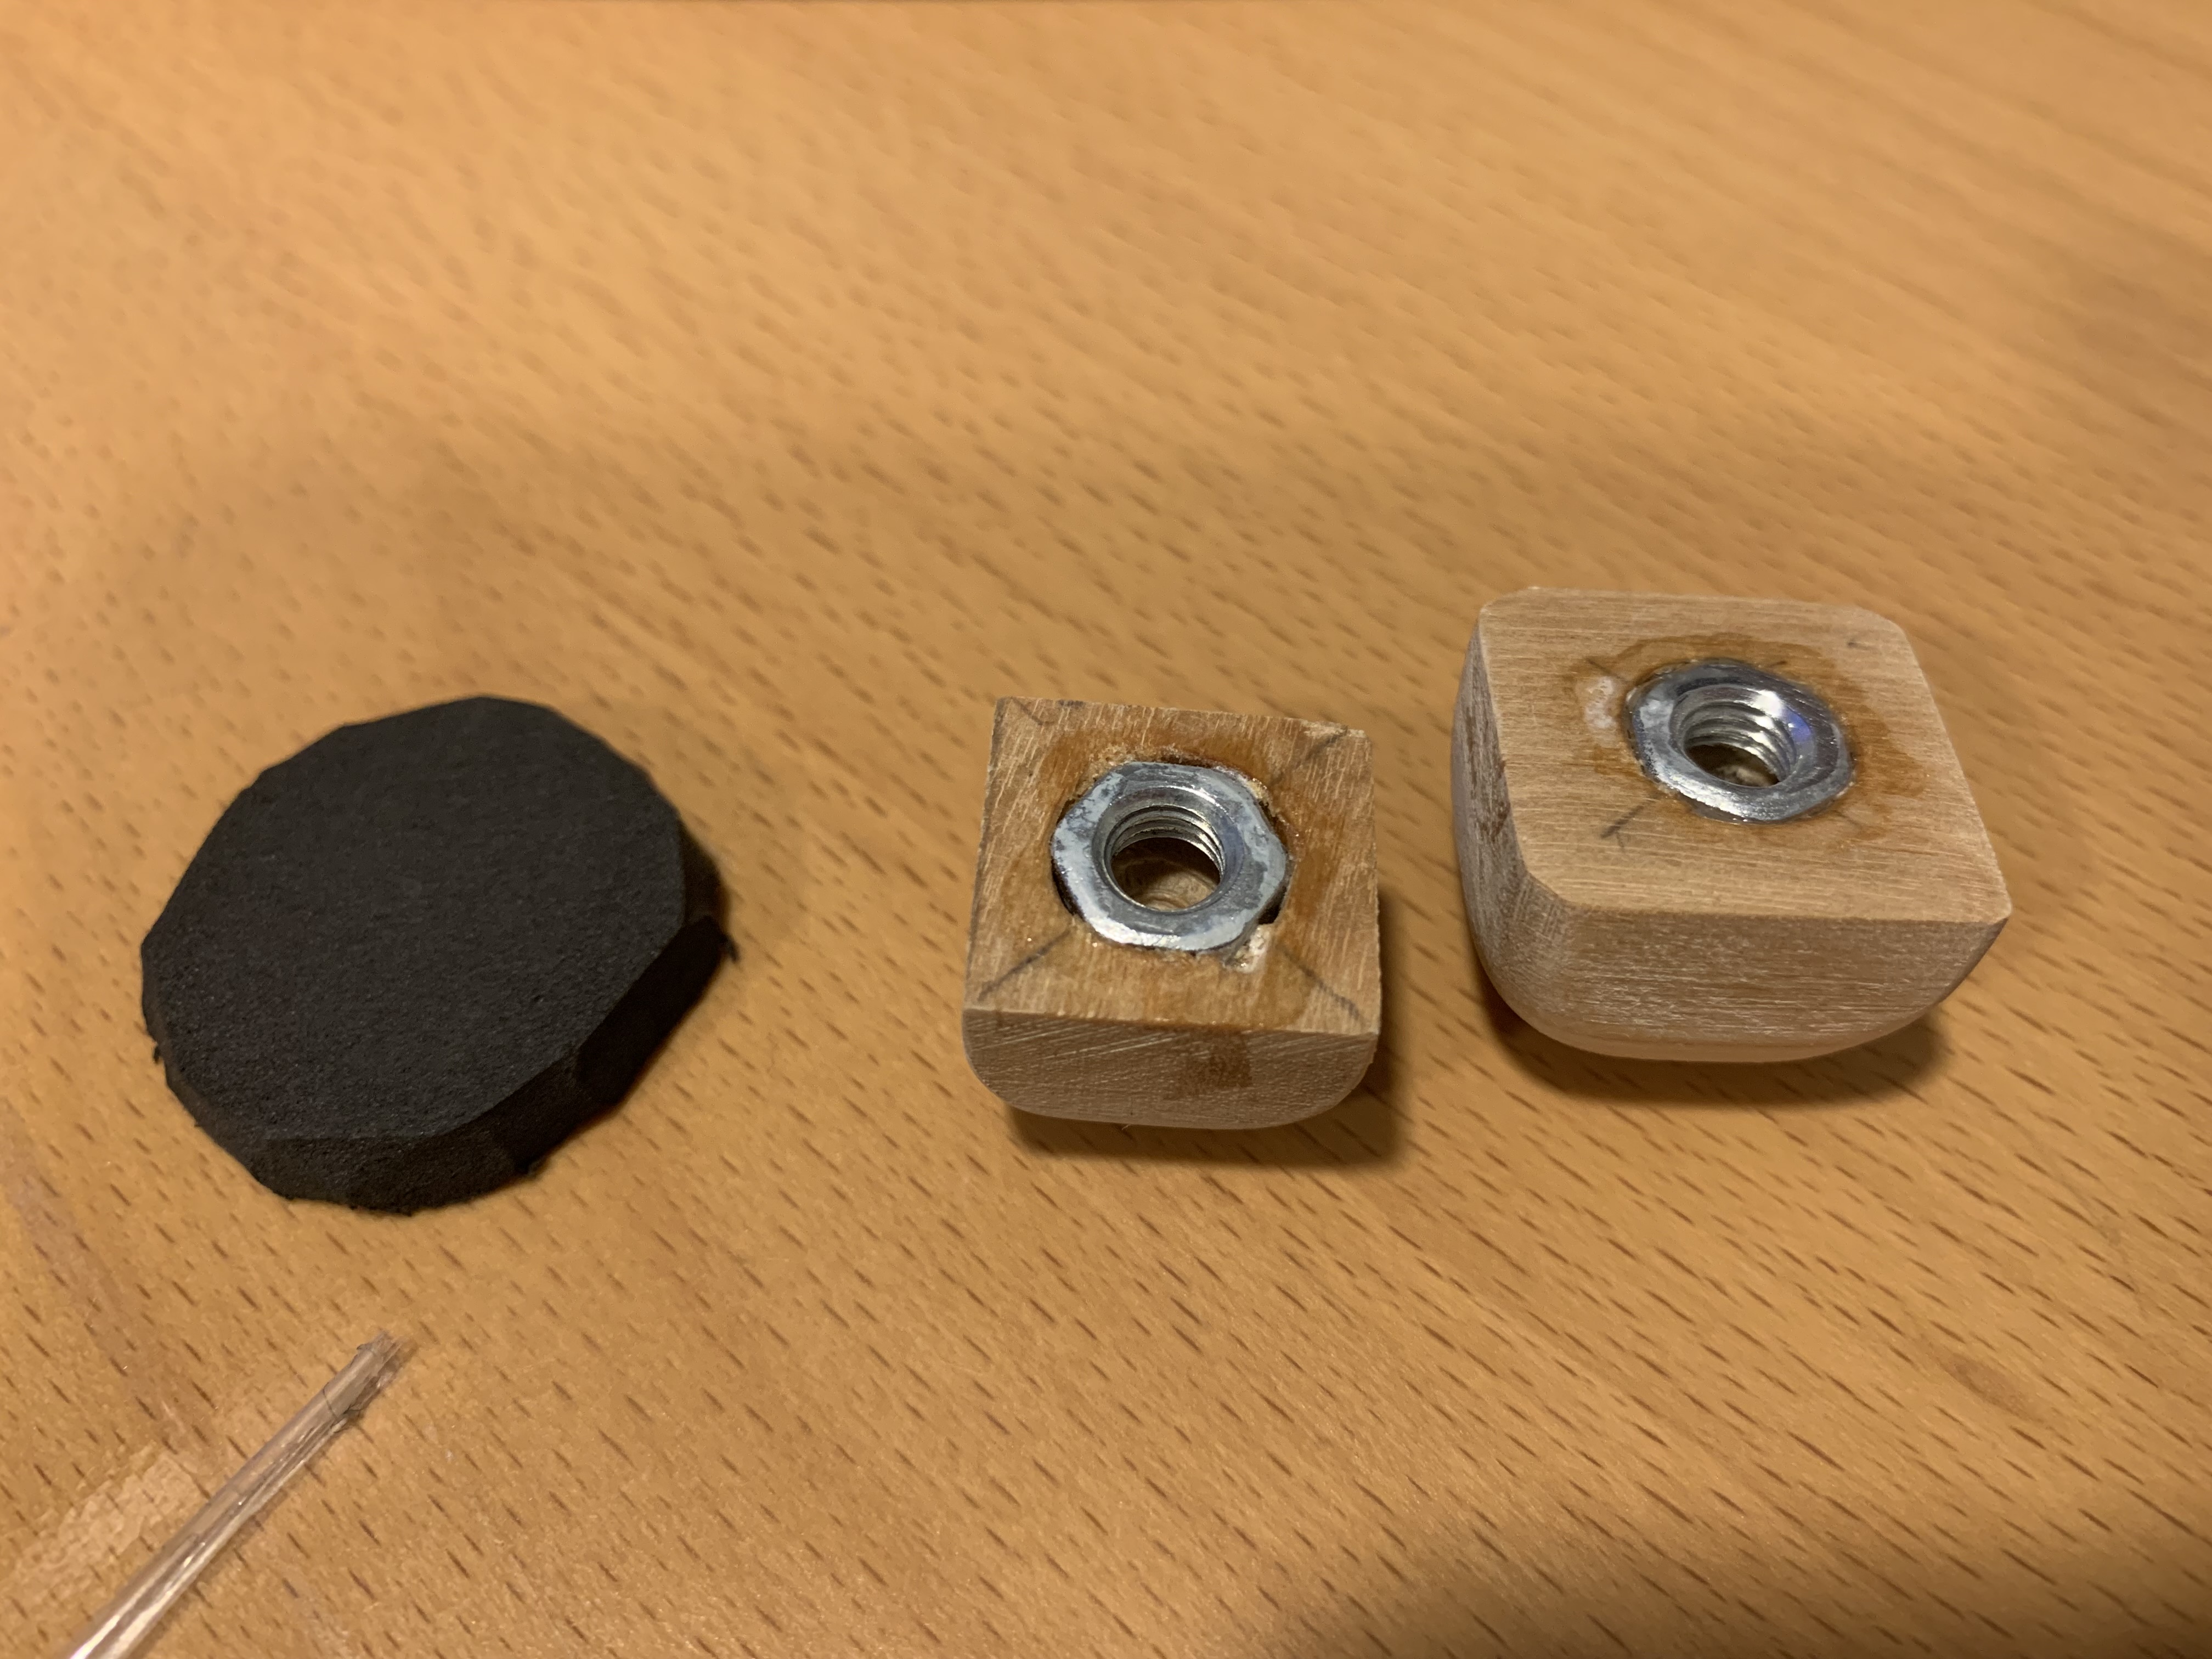
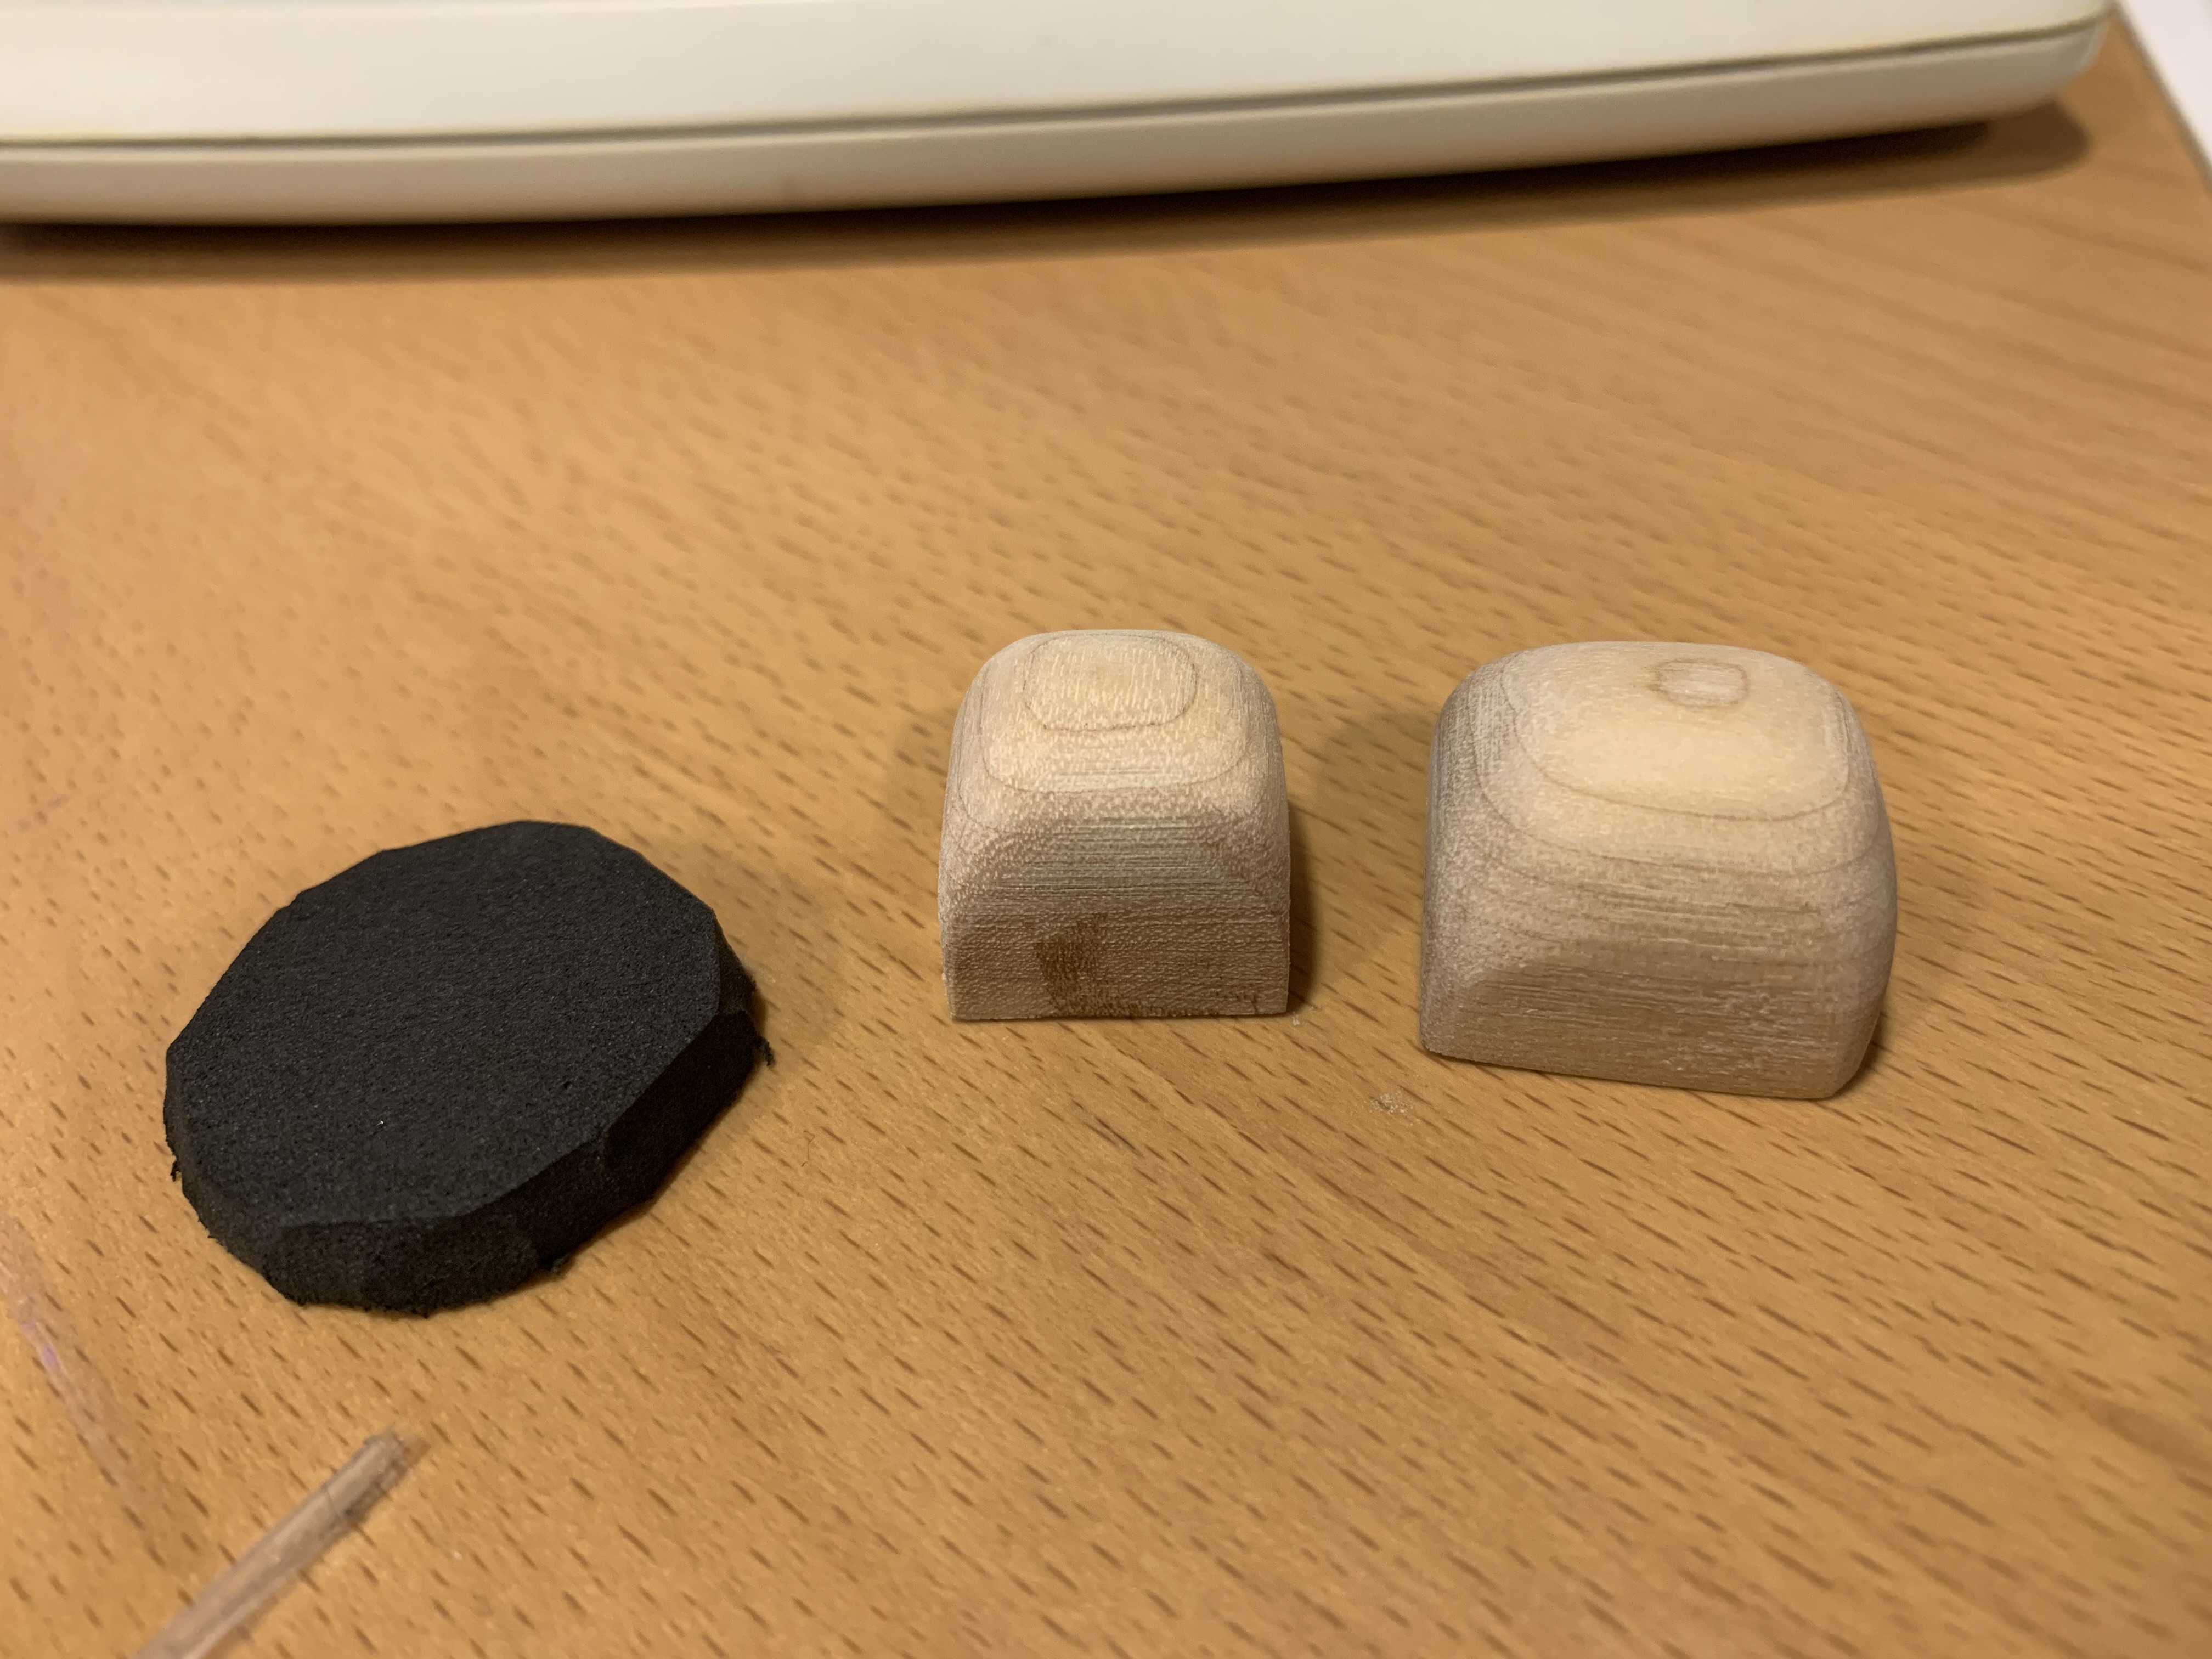
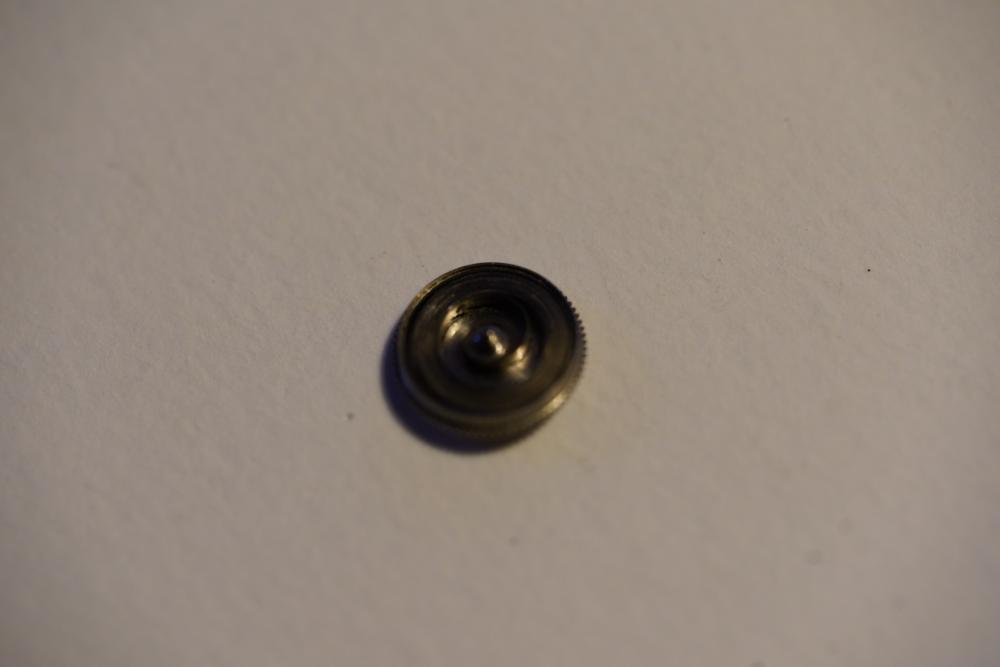
I actually did this a few days ago to put my 1st acrylic dome in. I have one of the cheap lever style chinese presses. I sanded down some scrap wood, put an M6 nut into the back and just used some super glue to hold it in. I put a small piece of foam over the dome when pushing on the crystal. Without the foam, I broke a crystal, but I chalked that up to also being too large and being the 1st time I have tried this, was using way too much pressure to make the larger size fit. The smaller size down is the one that ended up fitting.
 5 points
 -
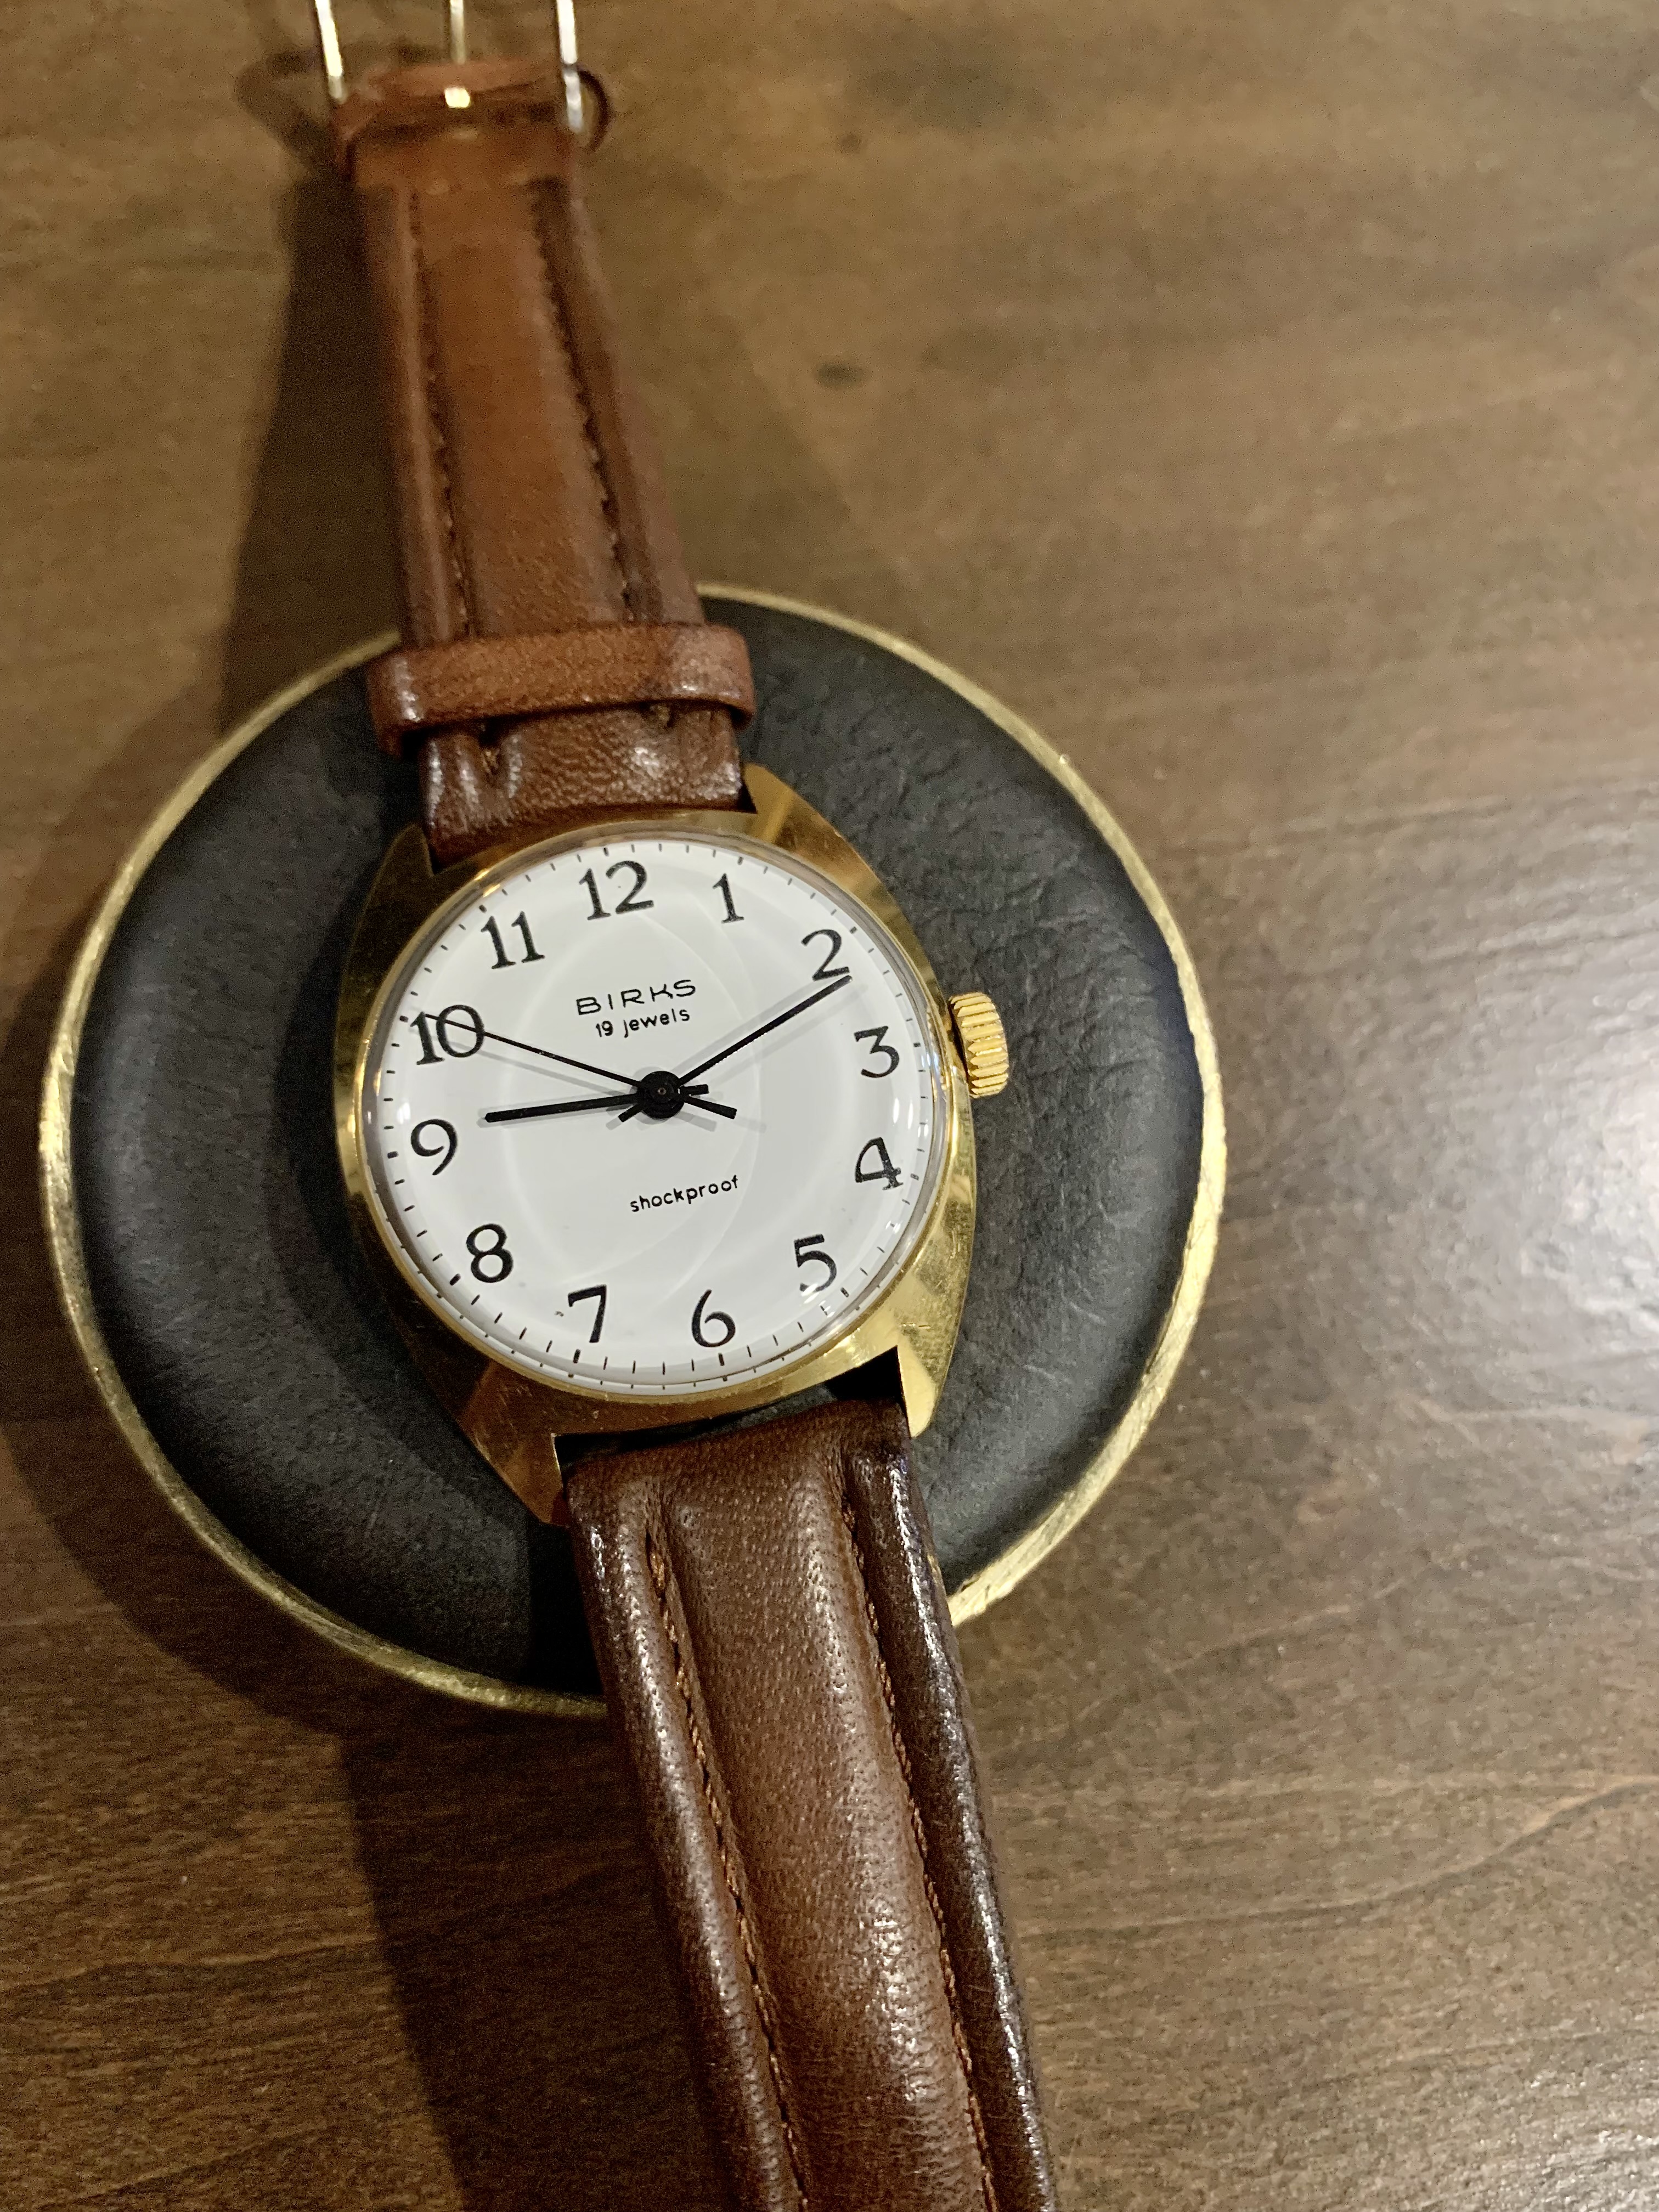
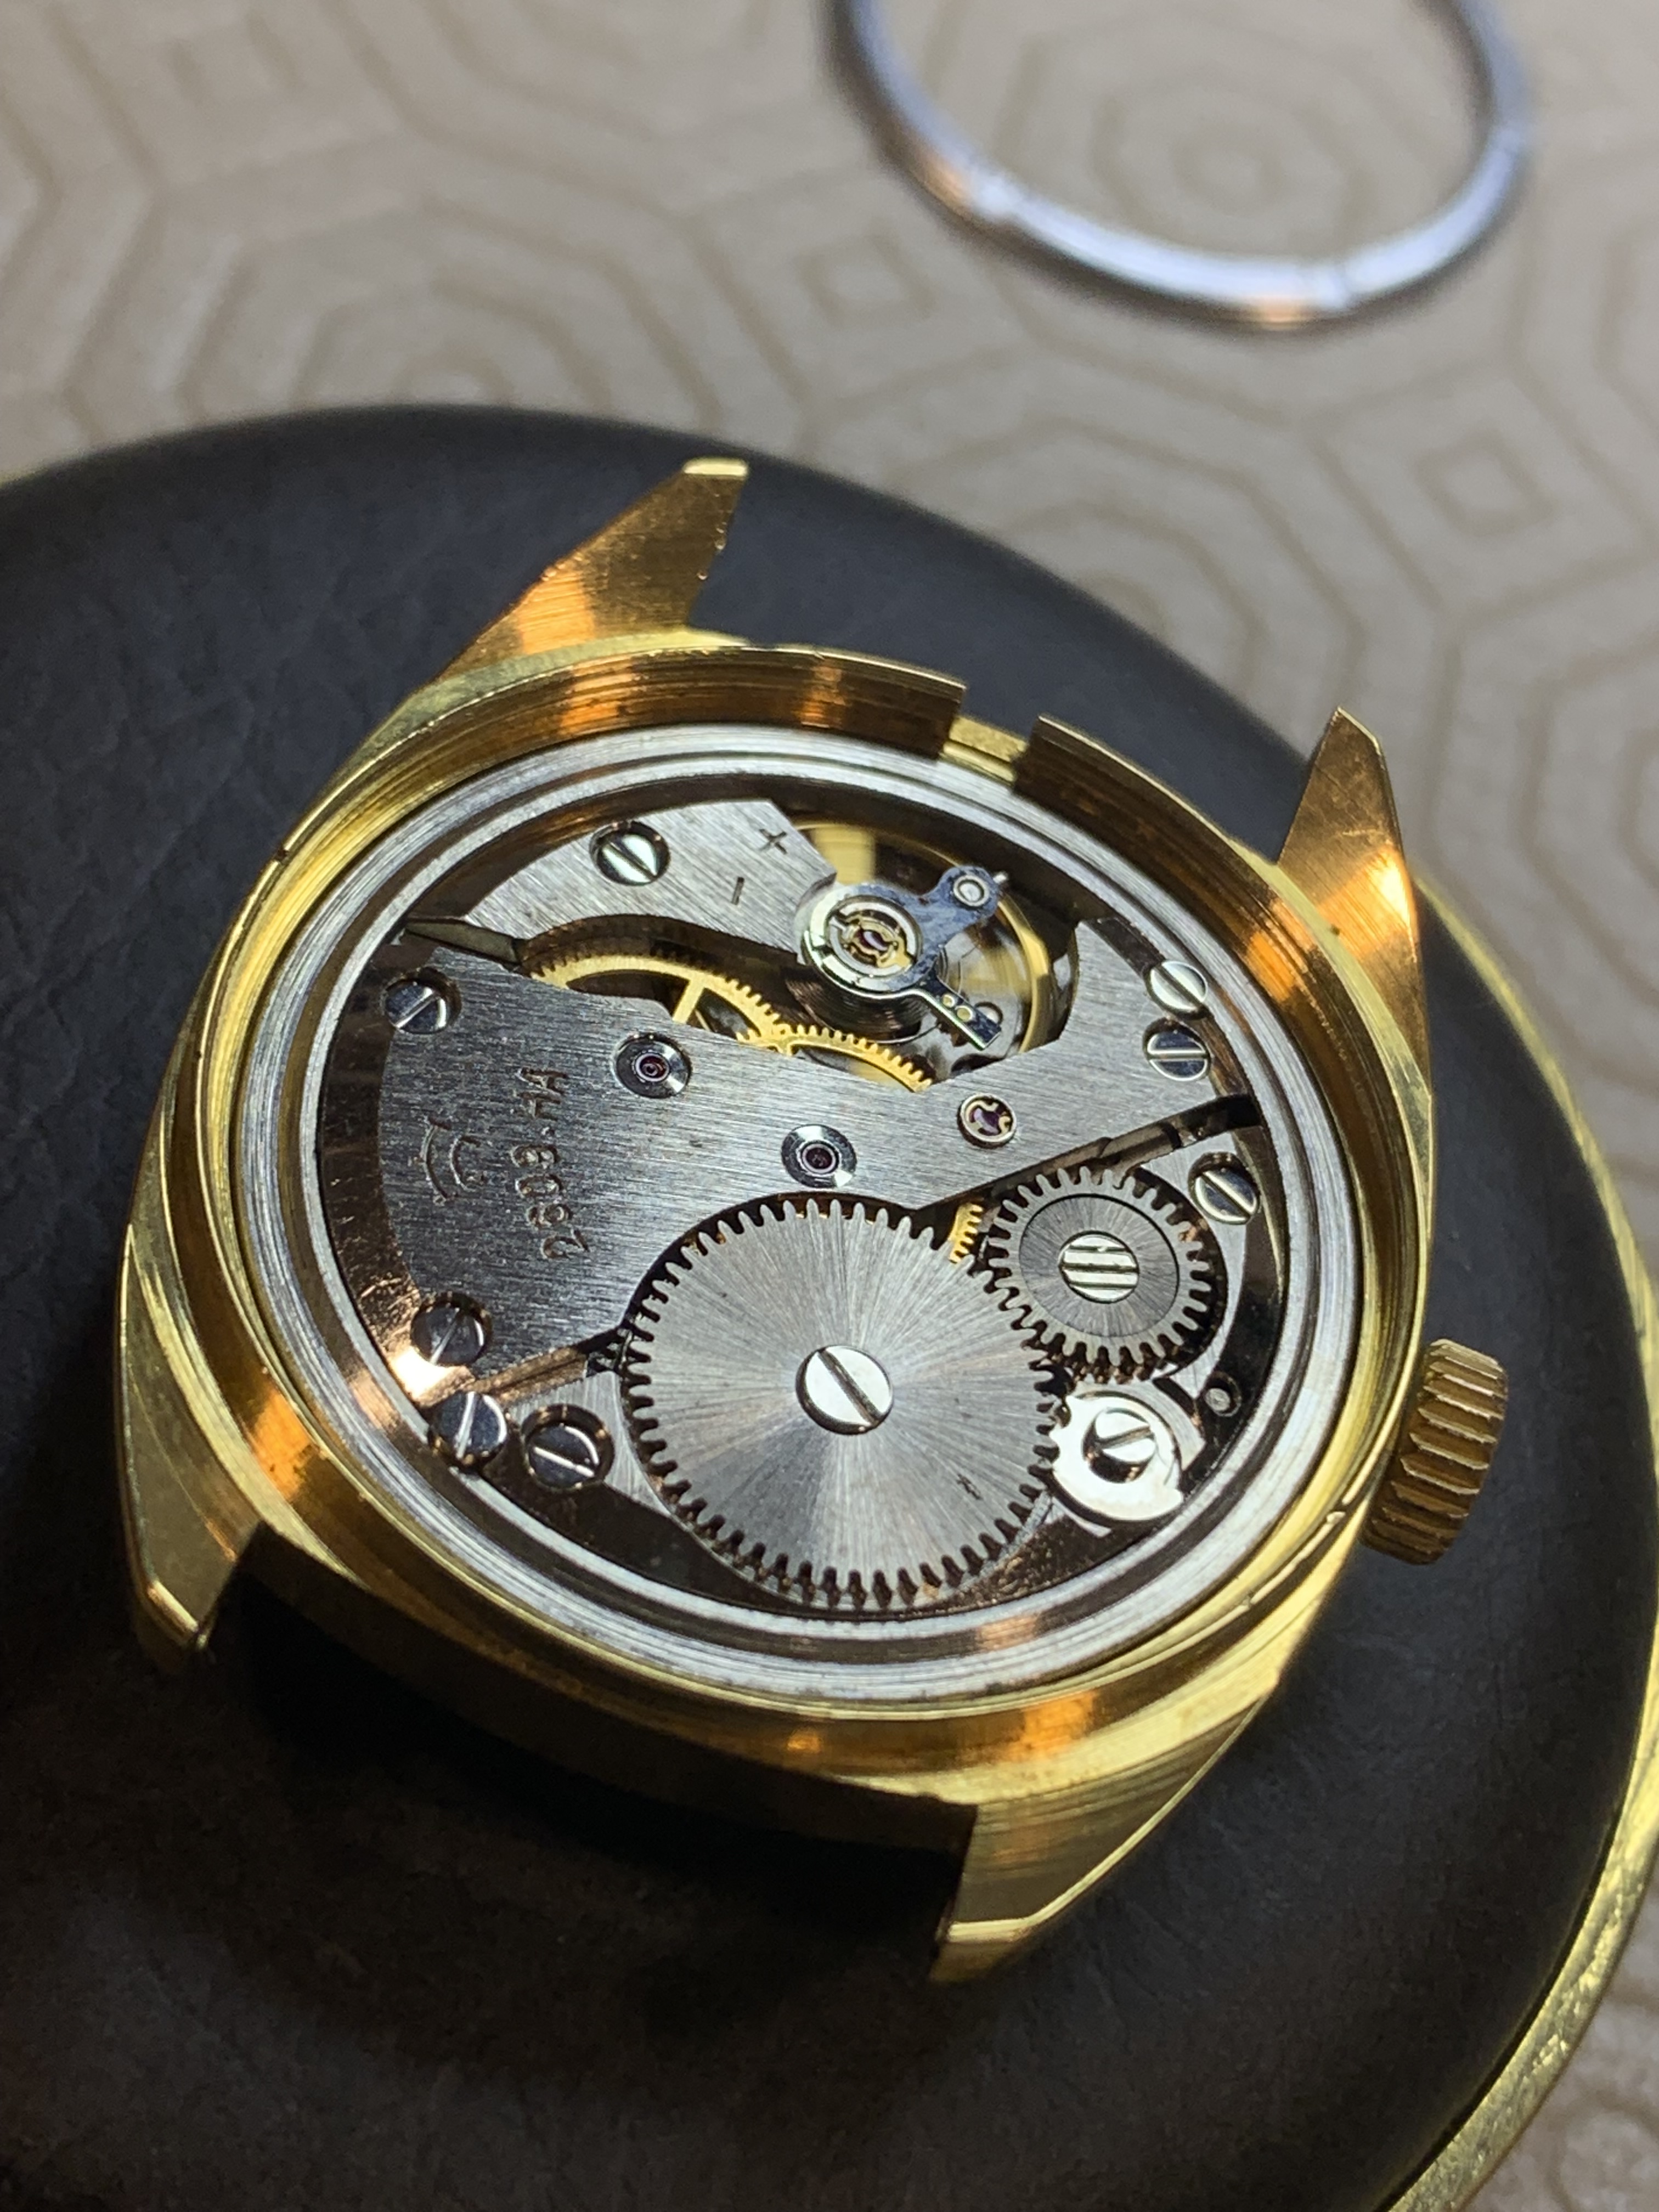
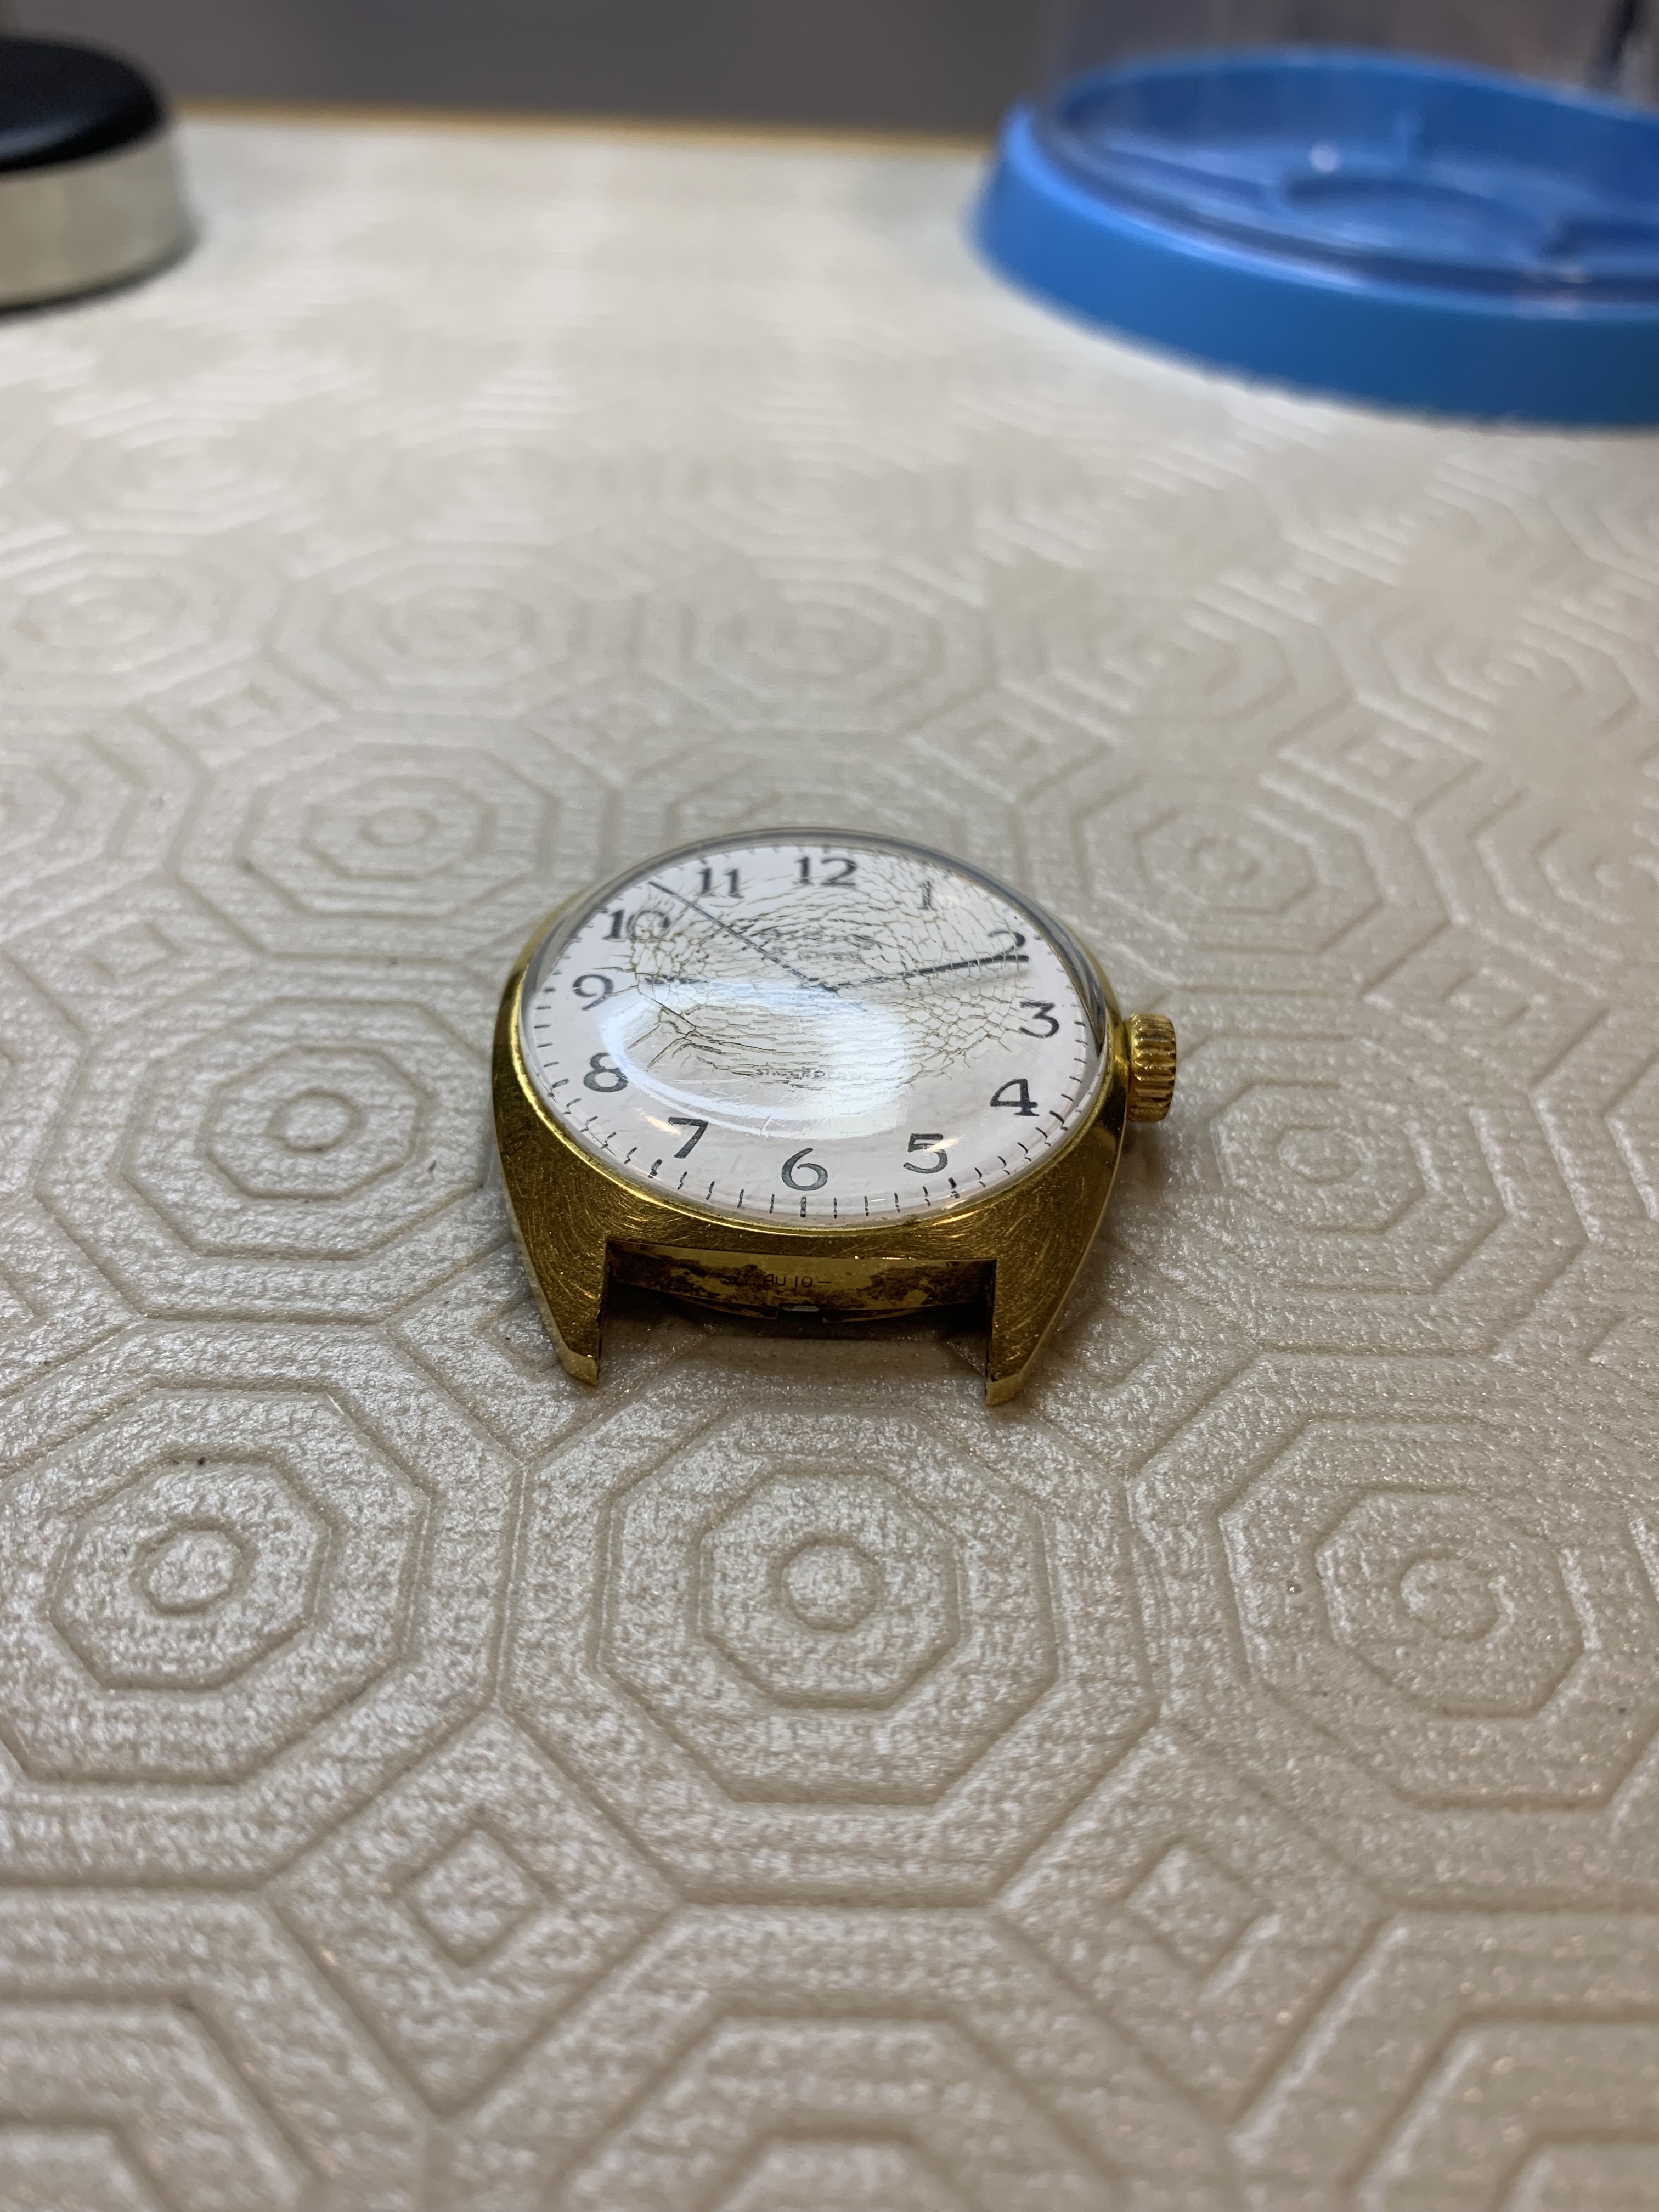
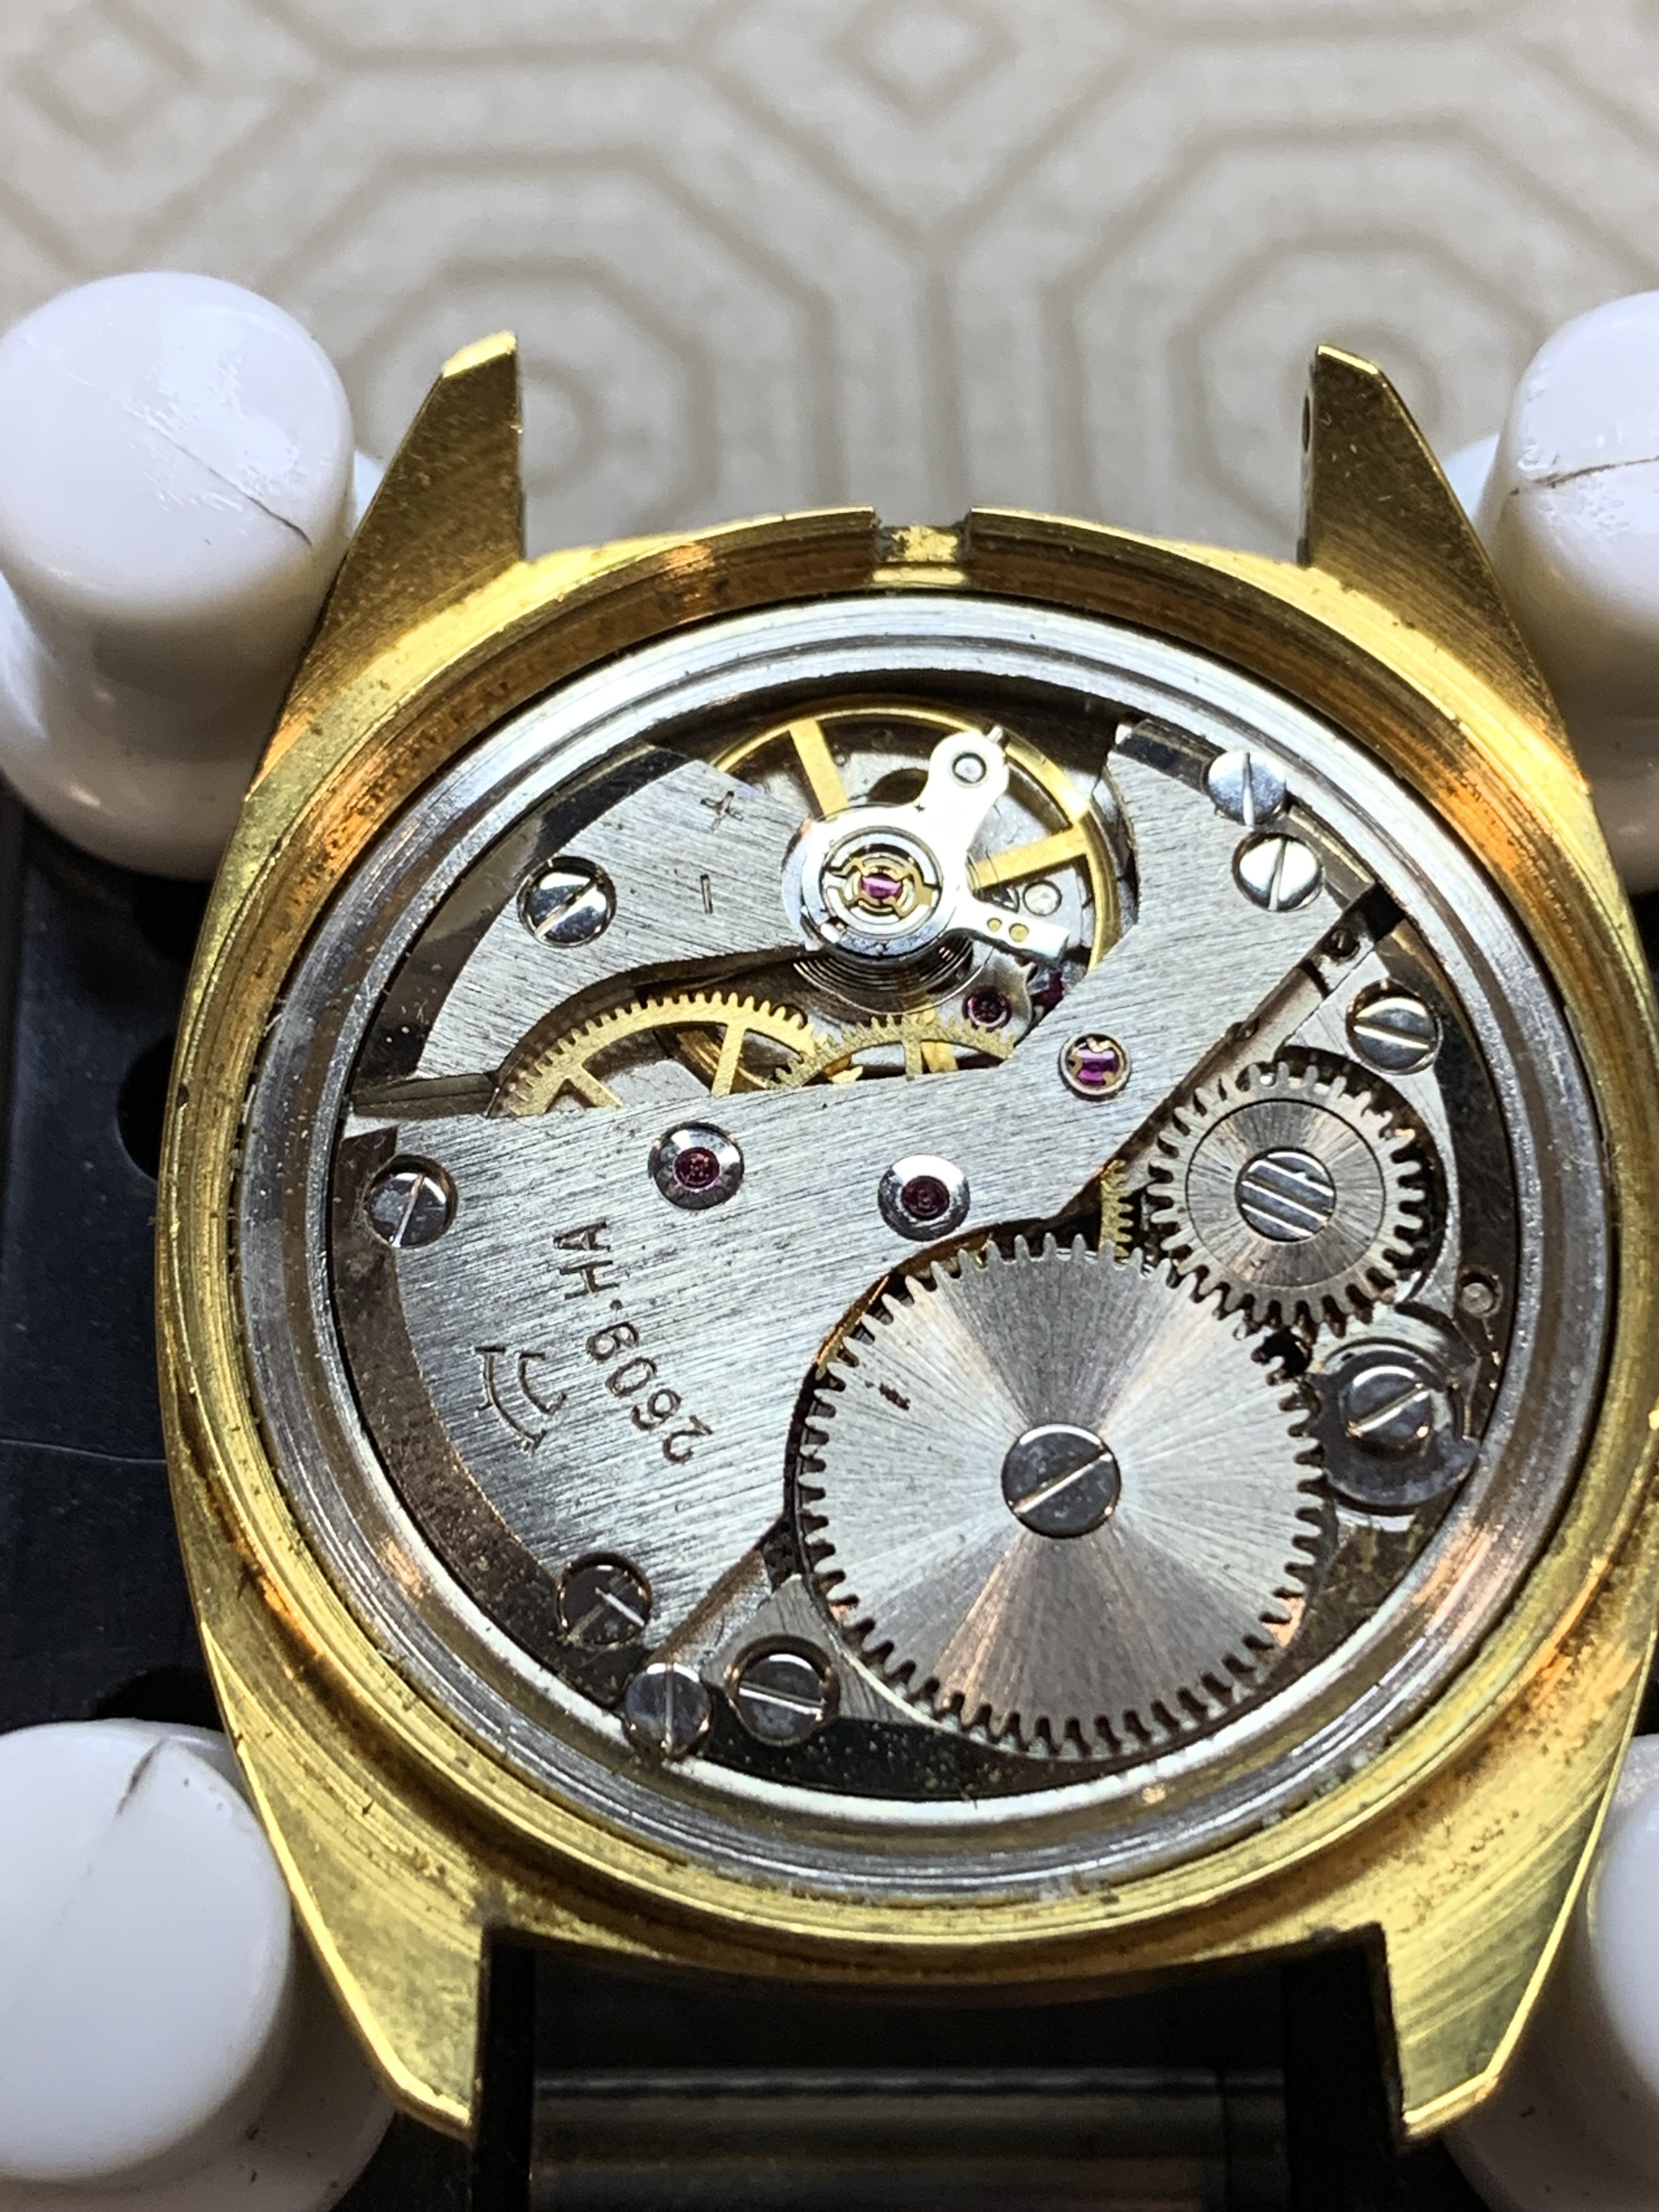
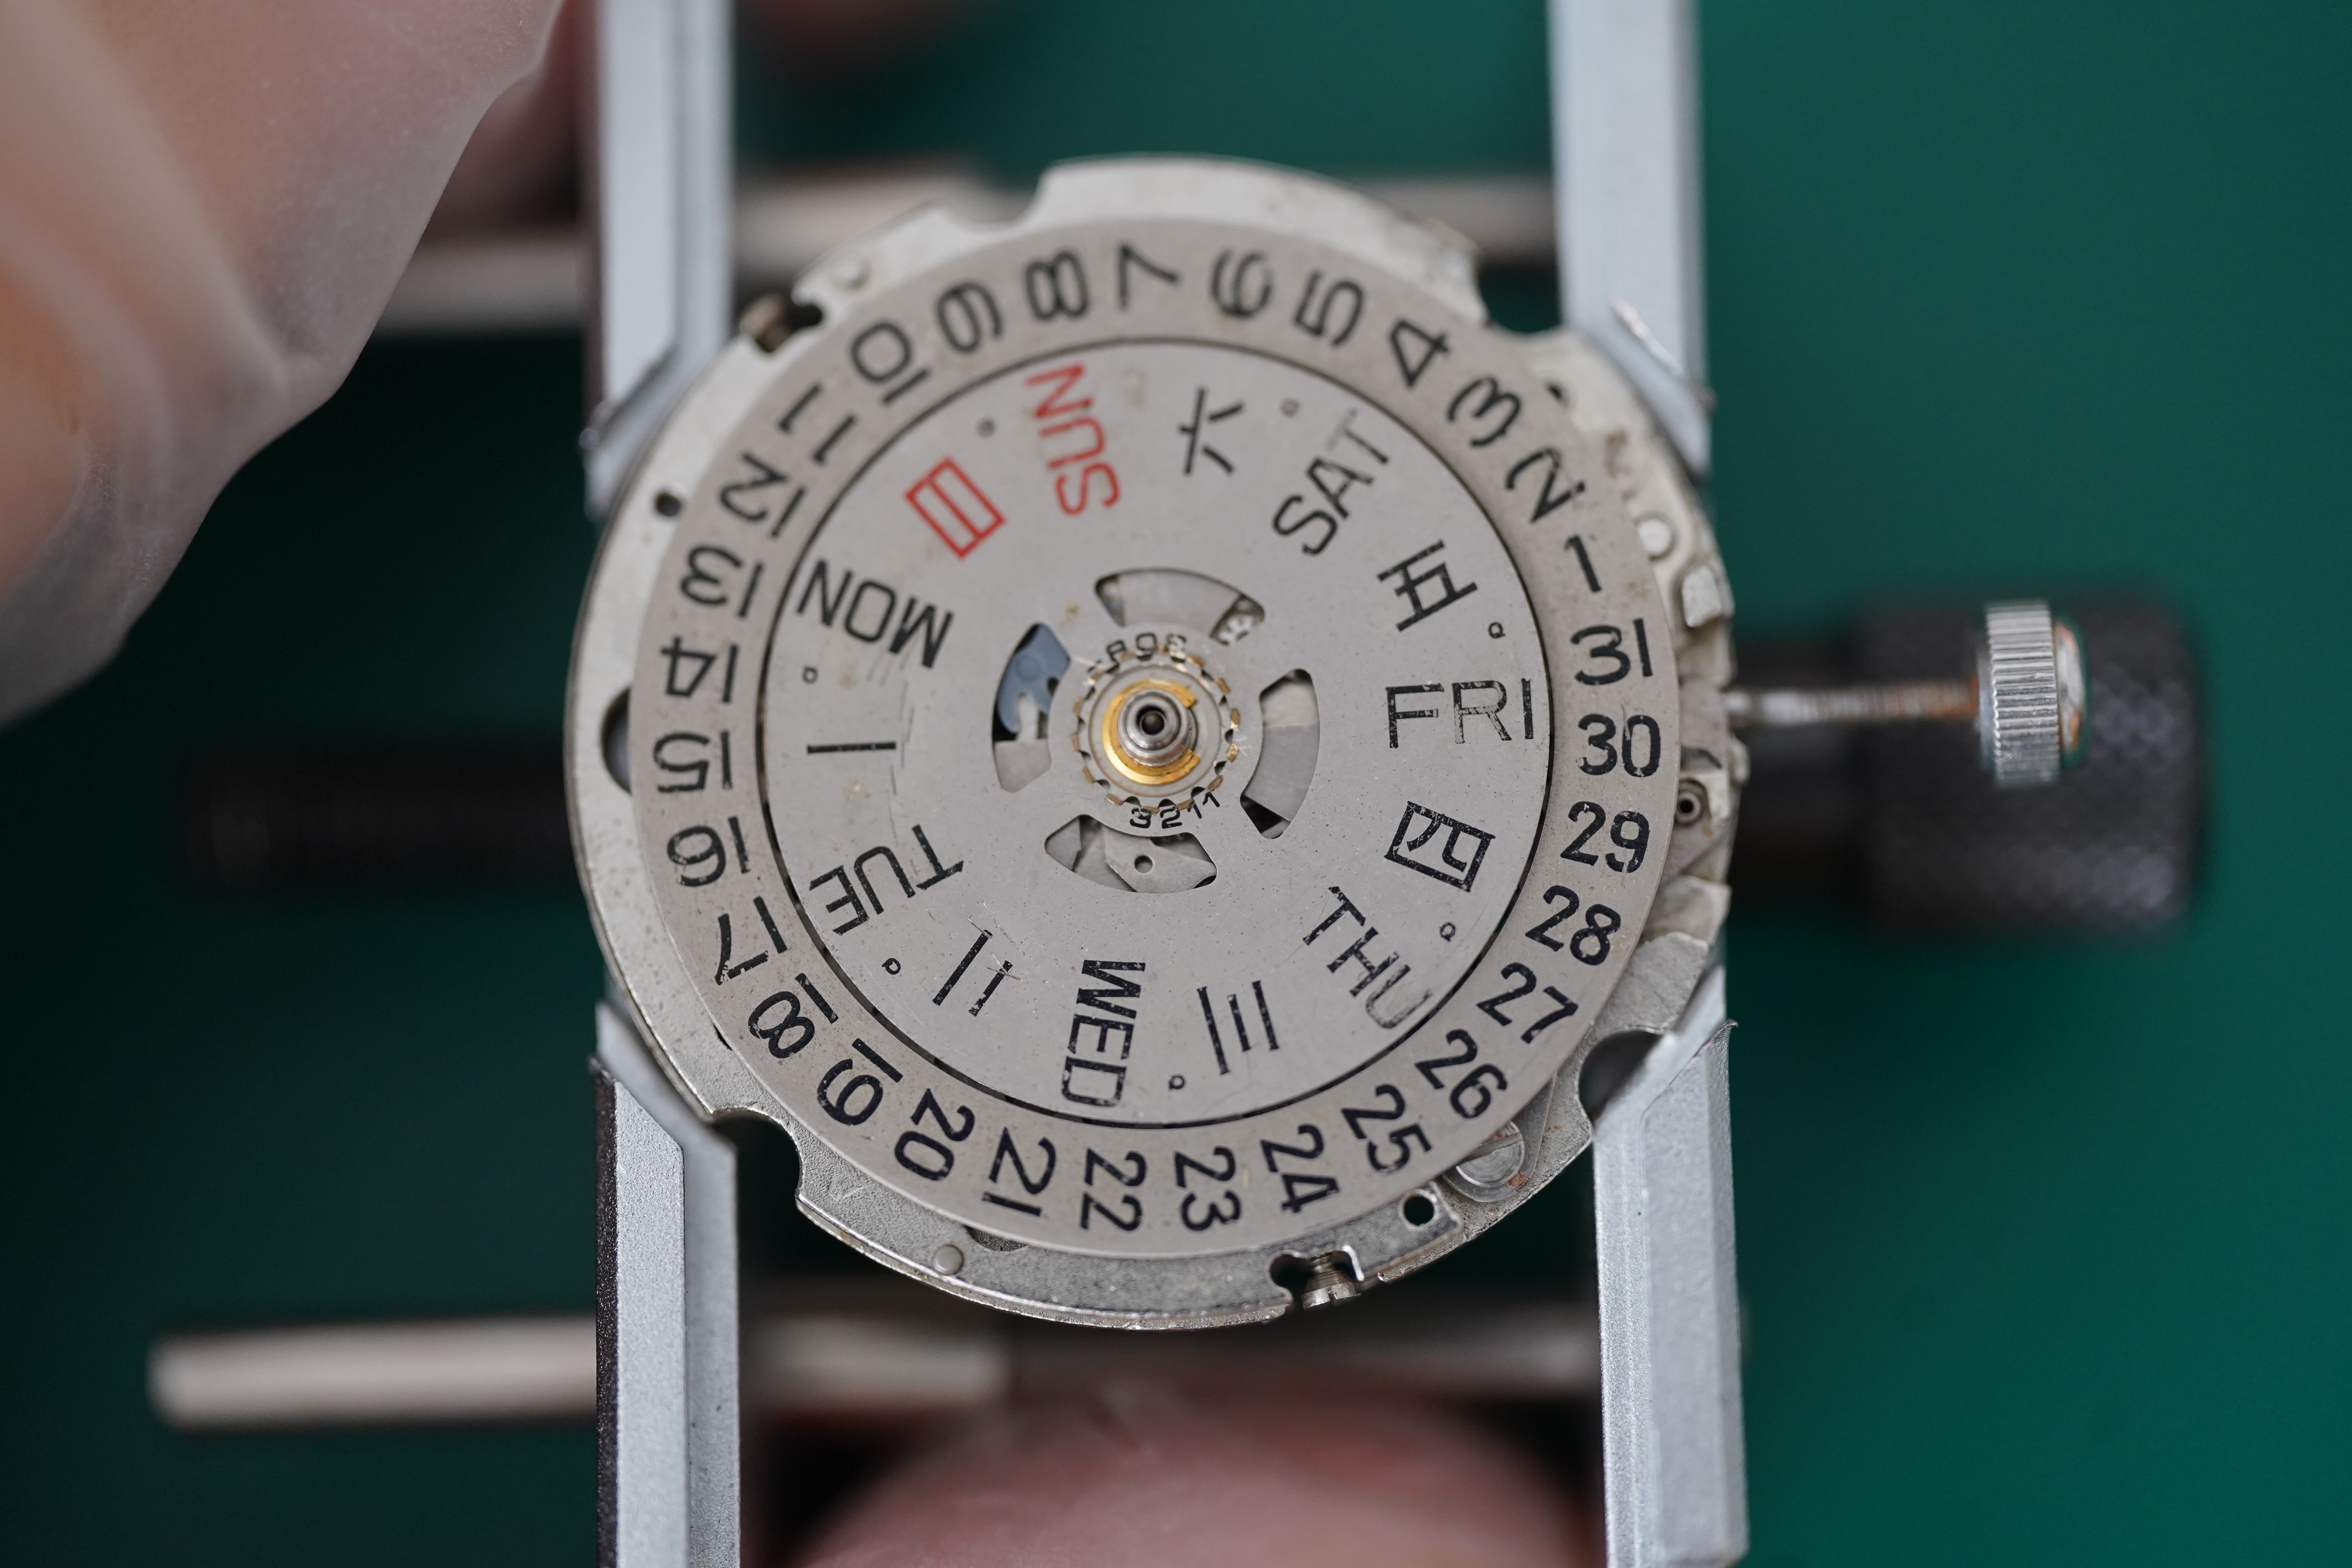
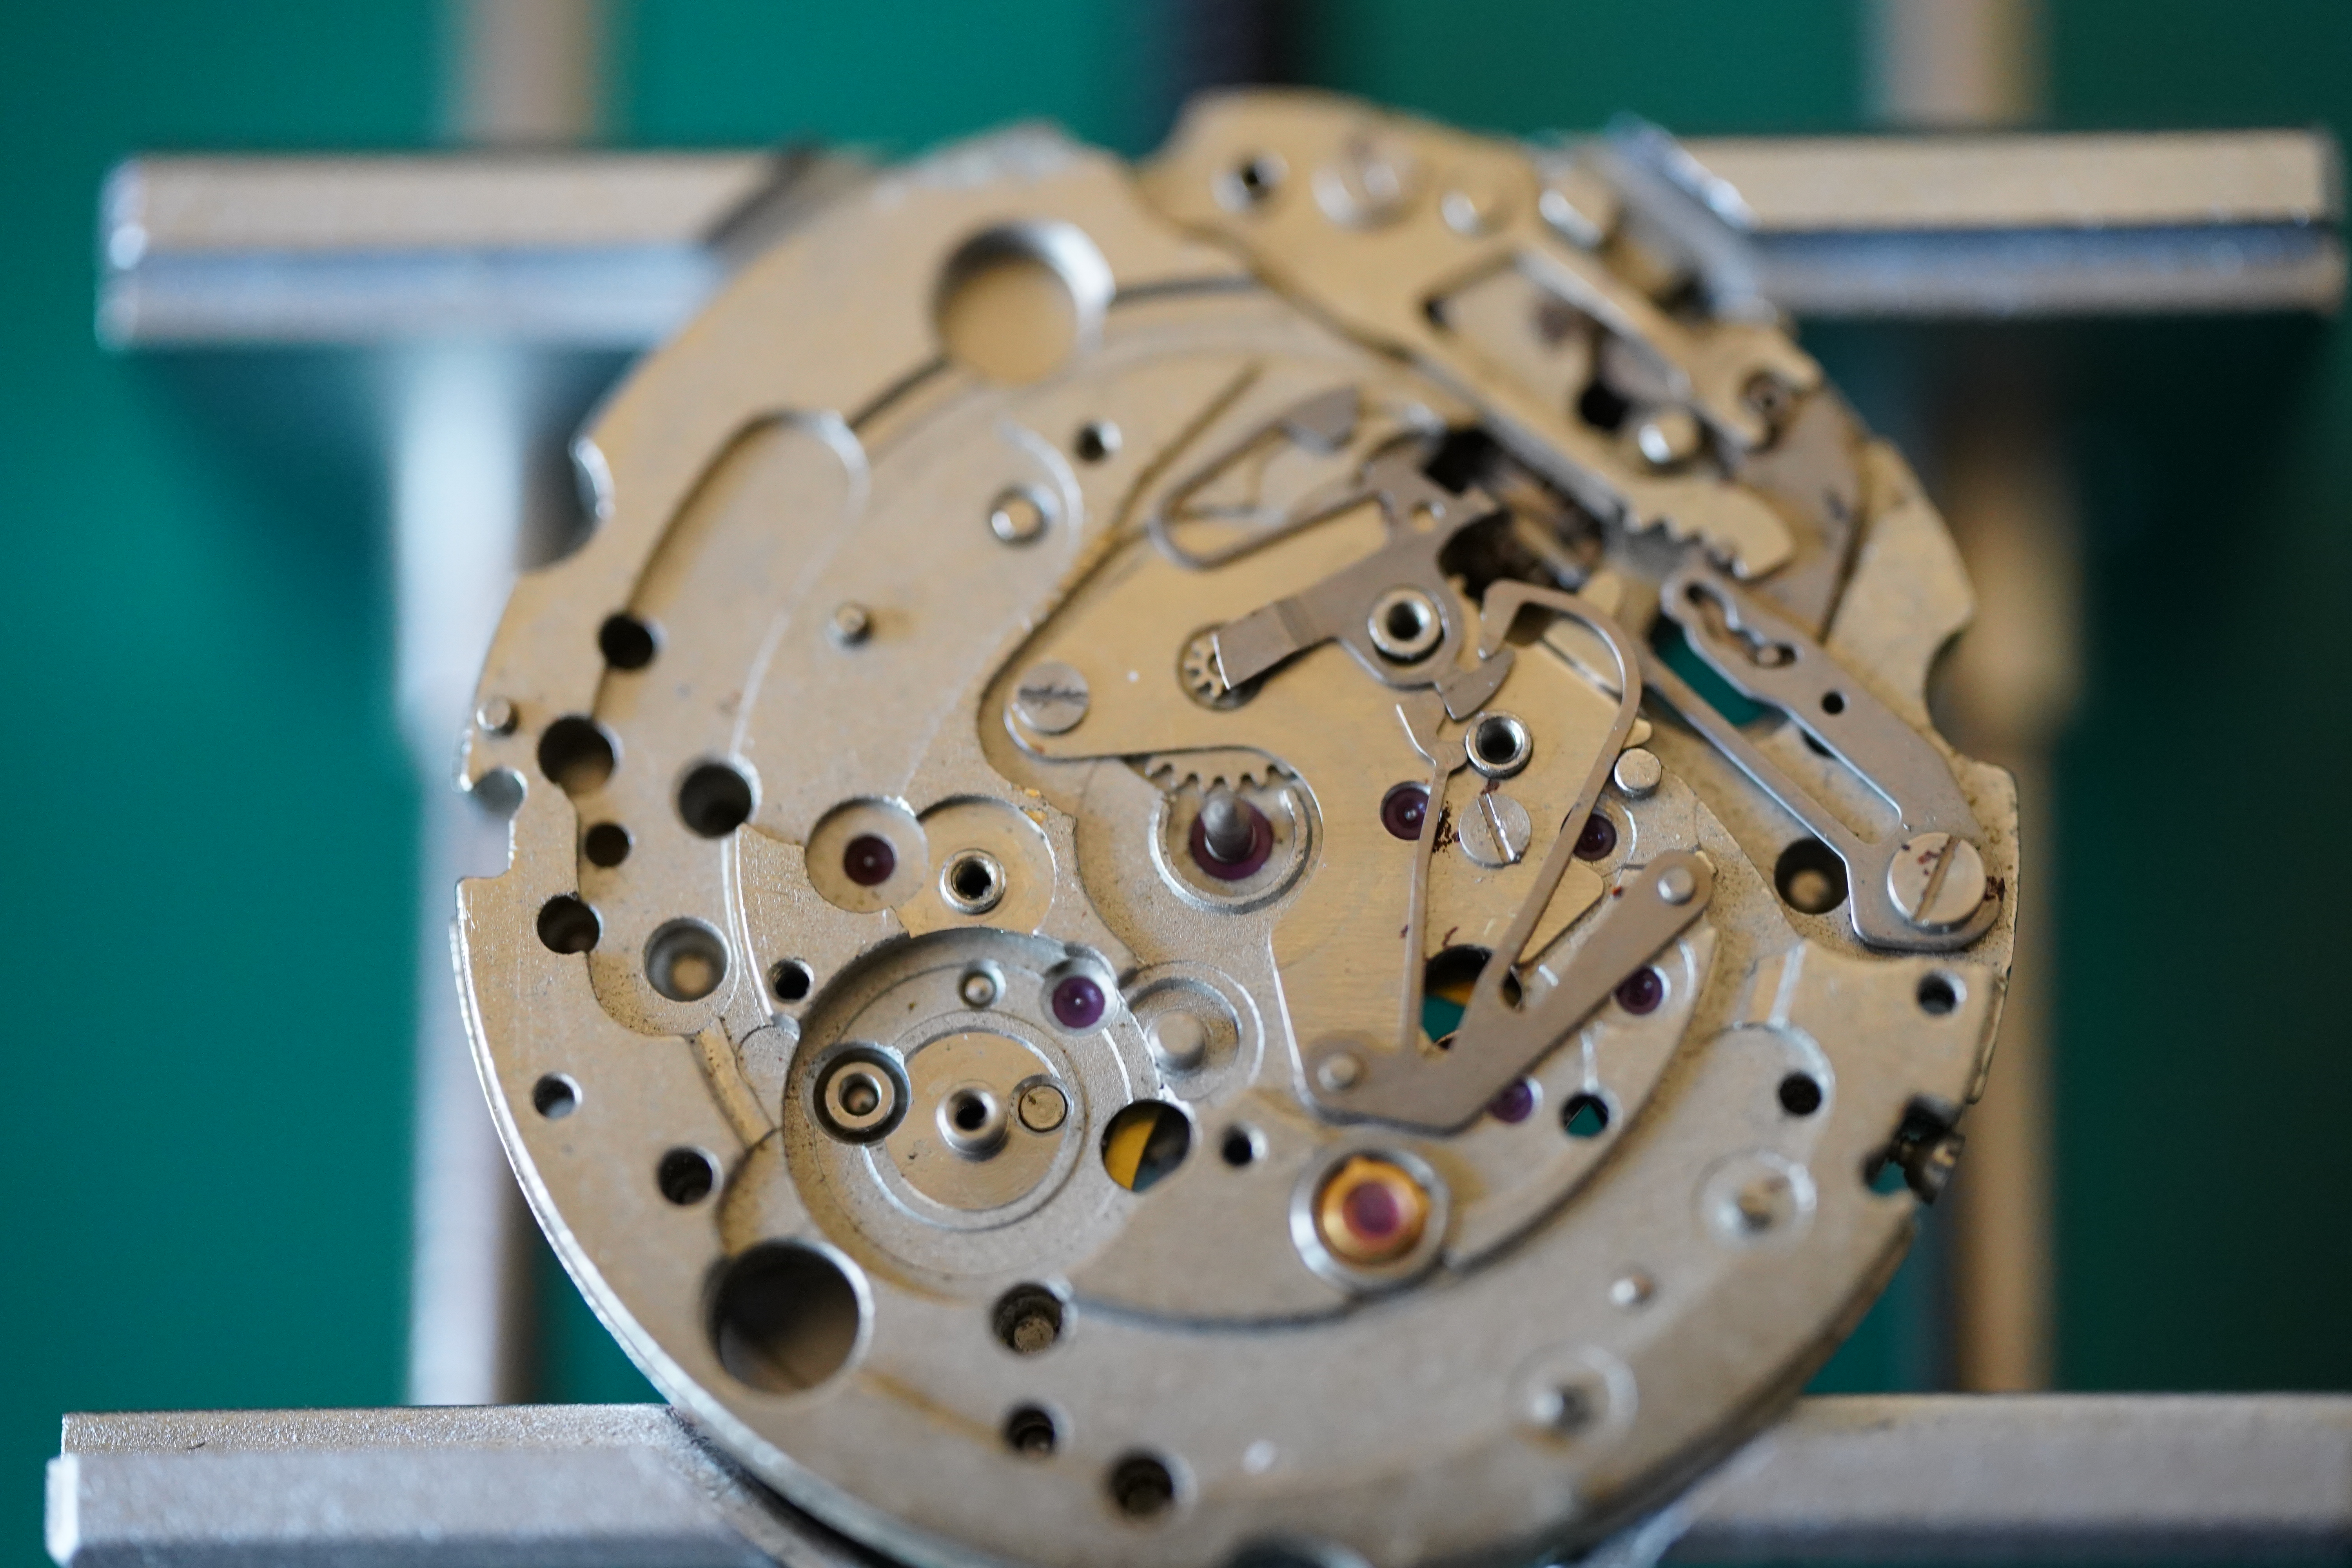
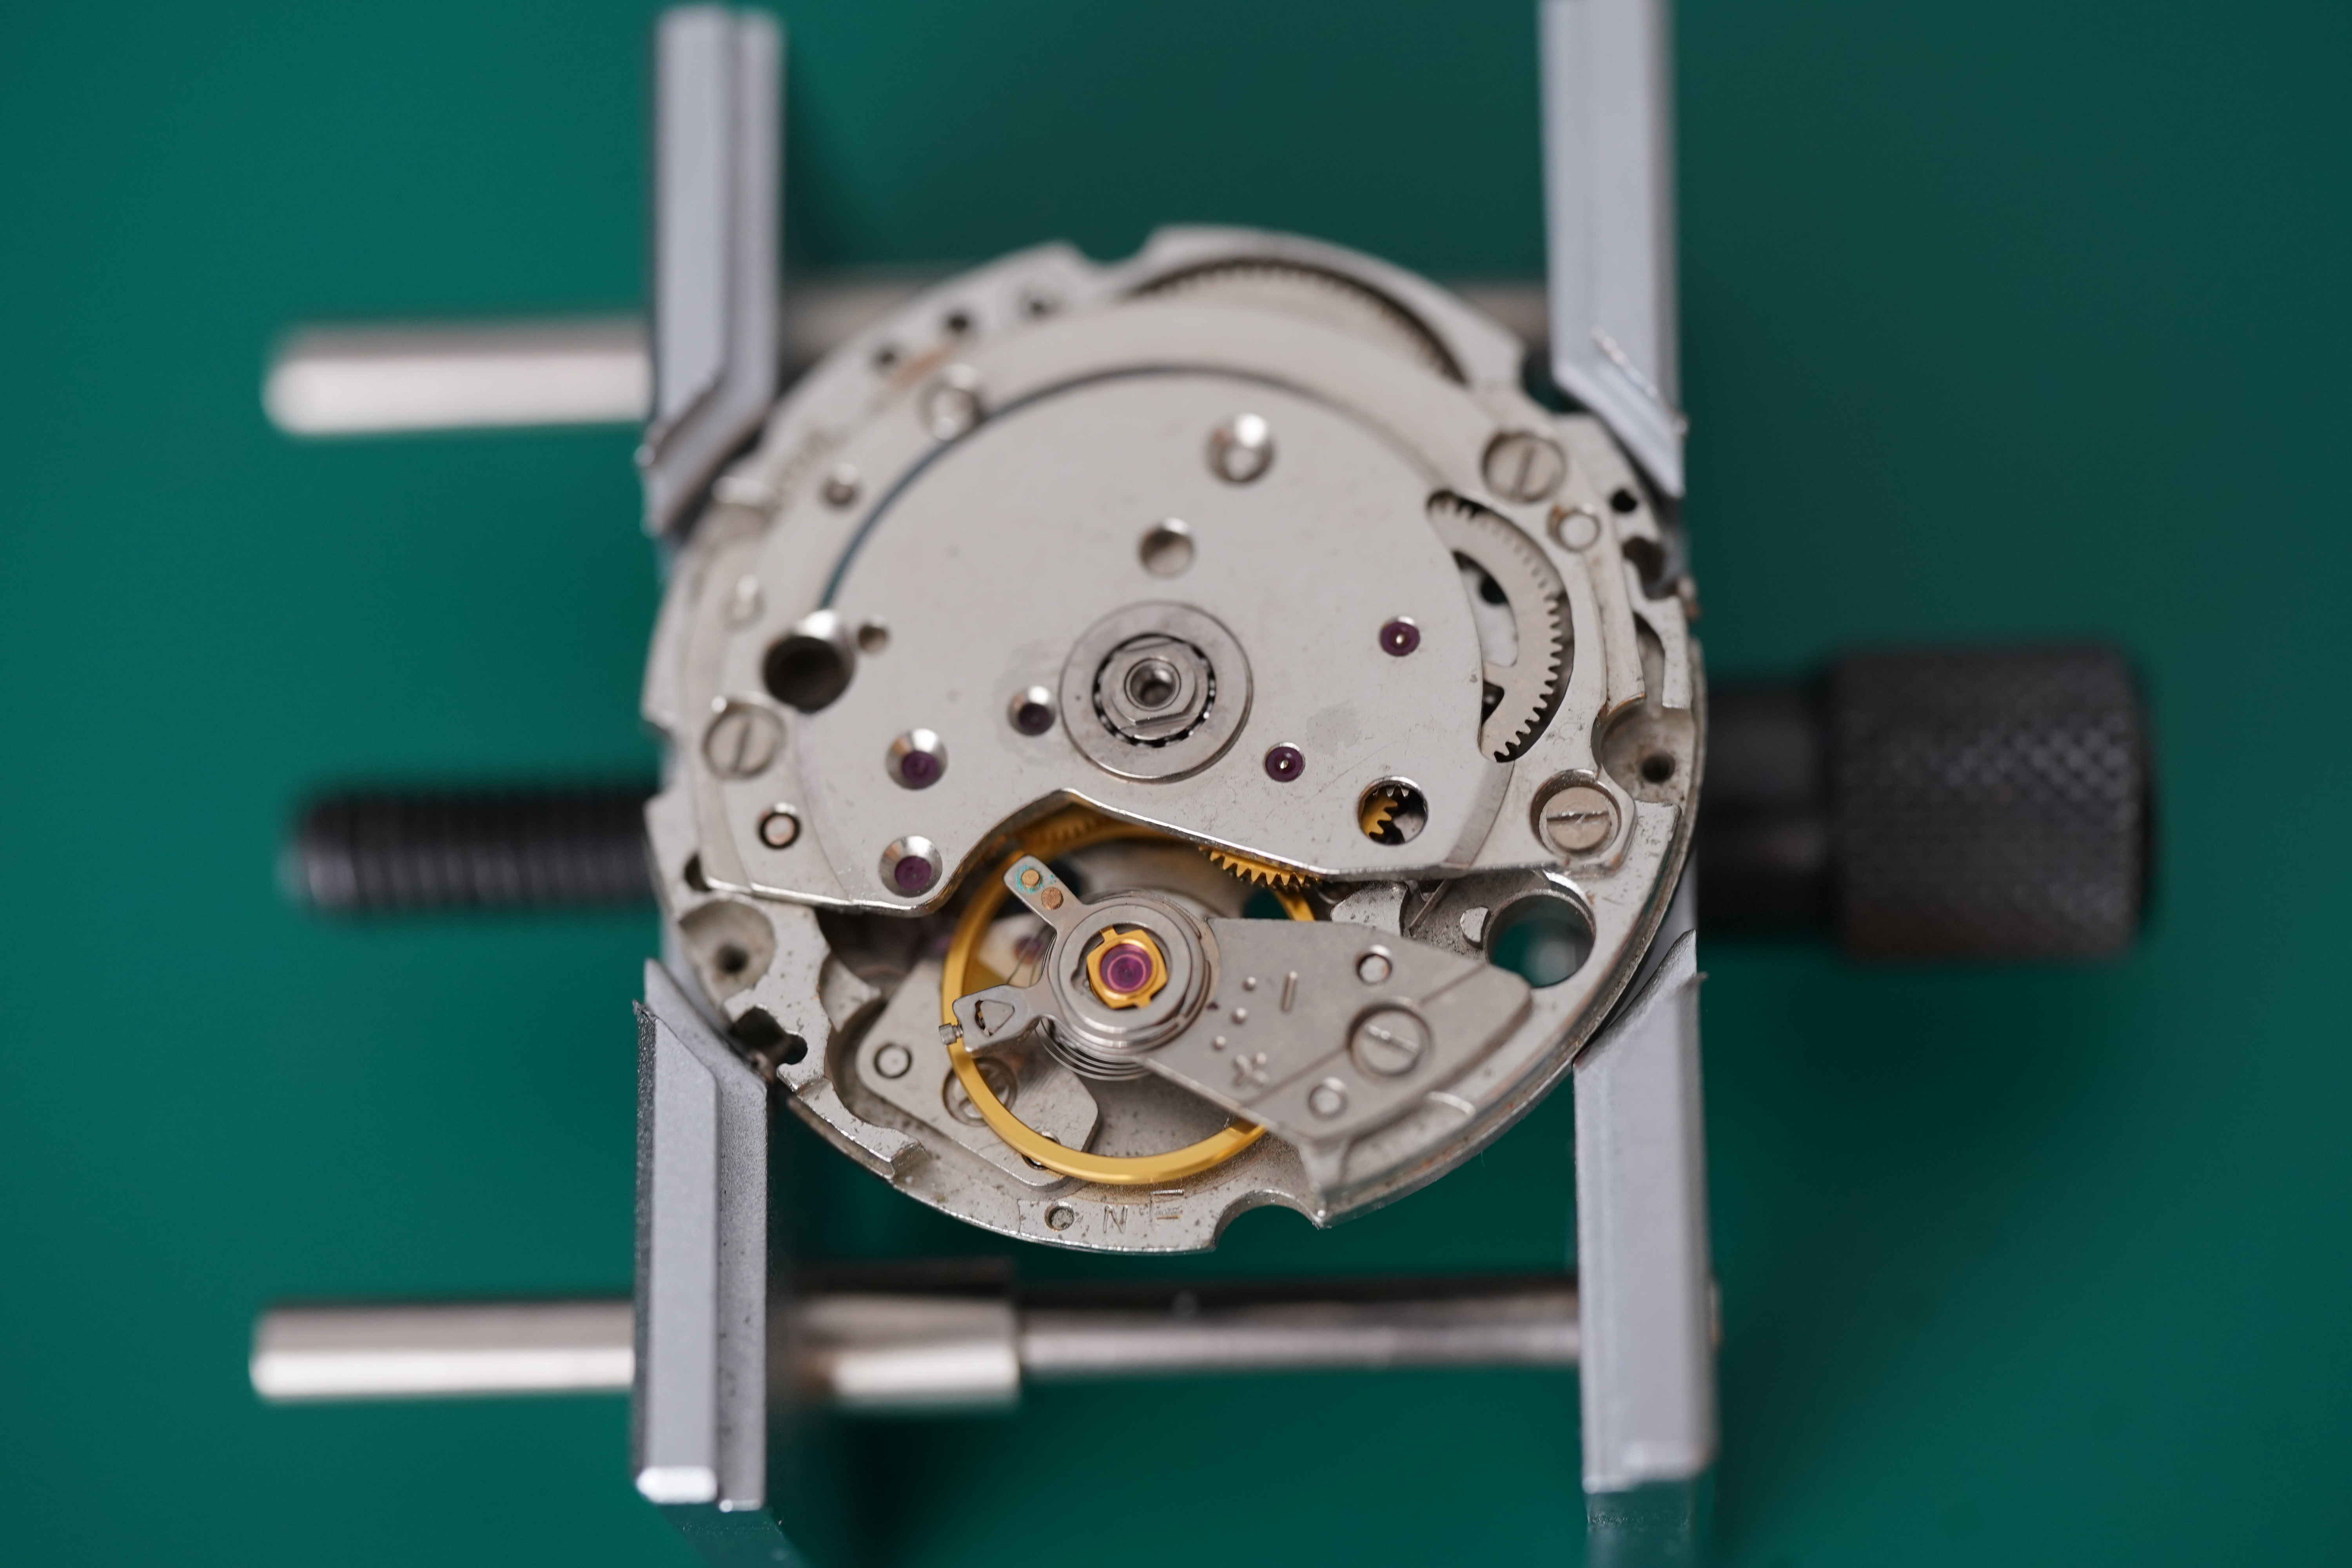
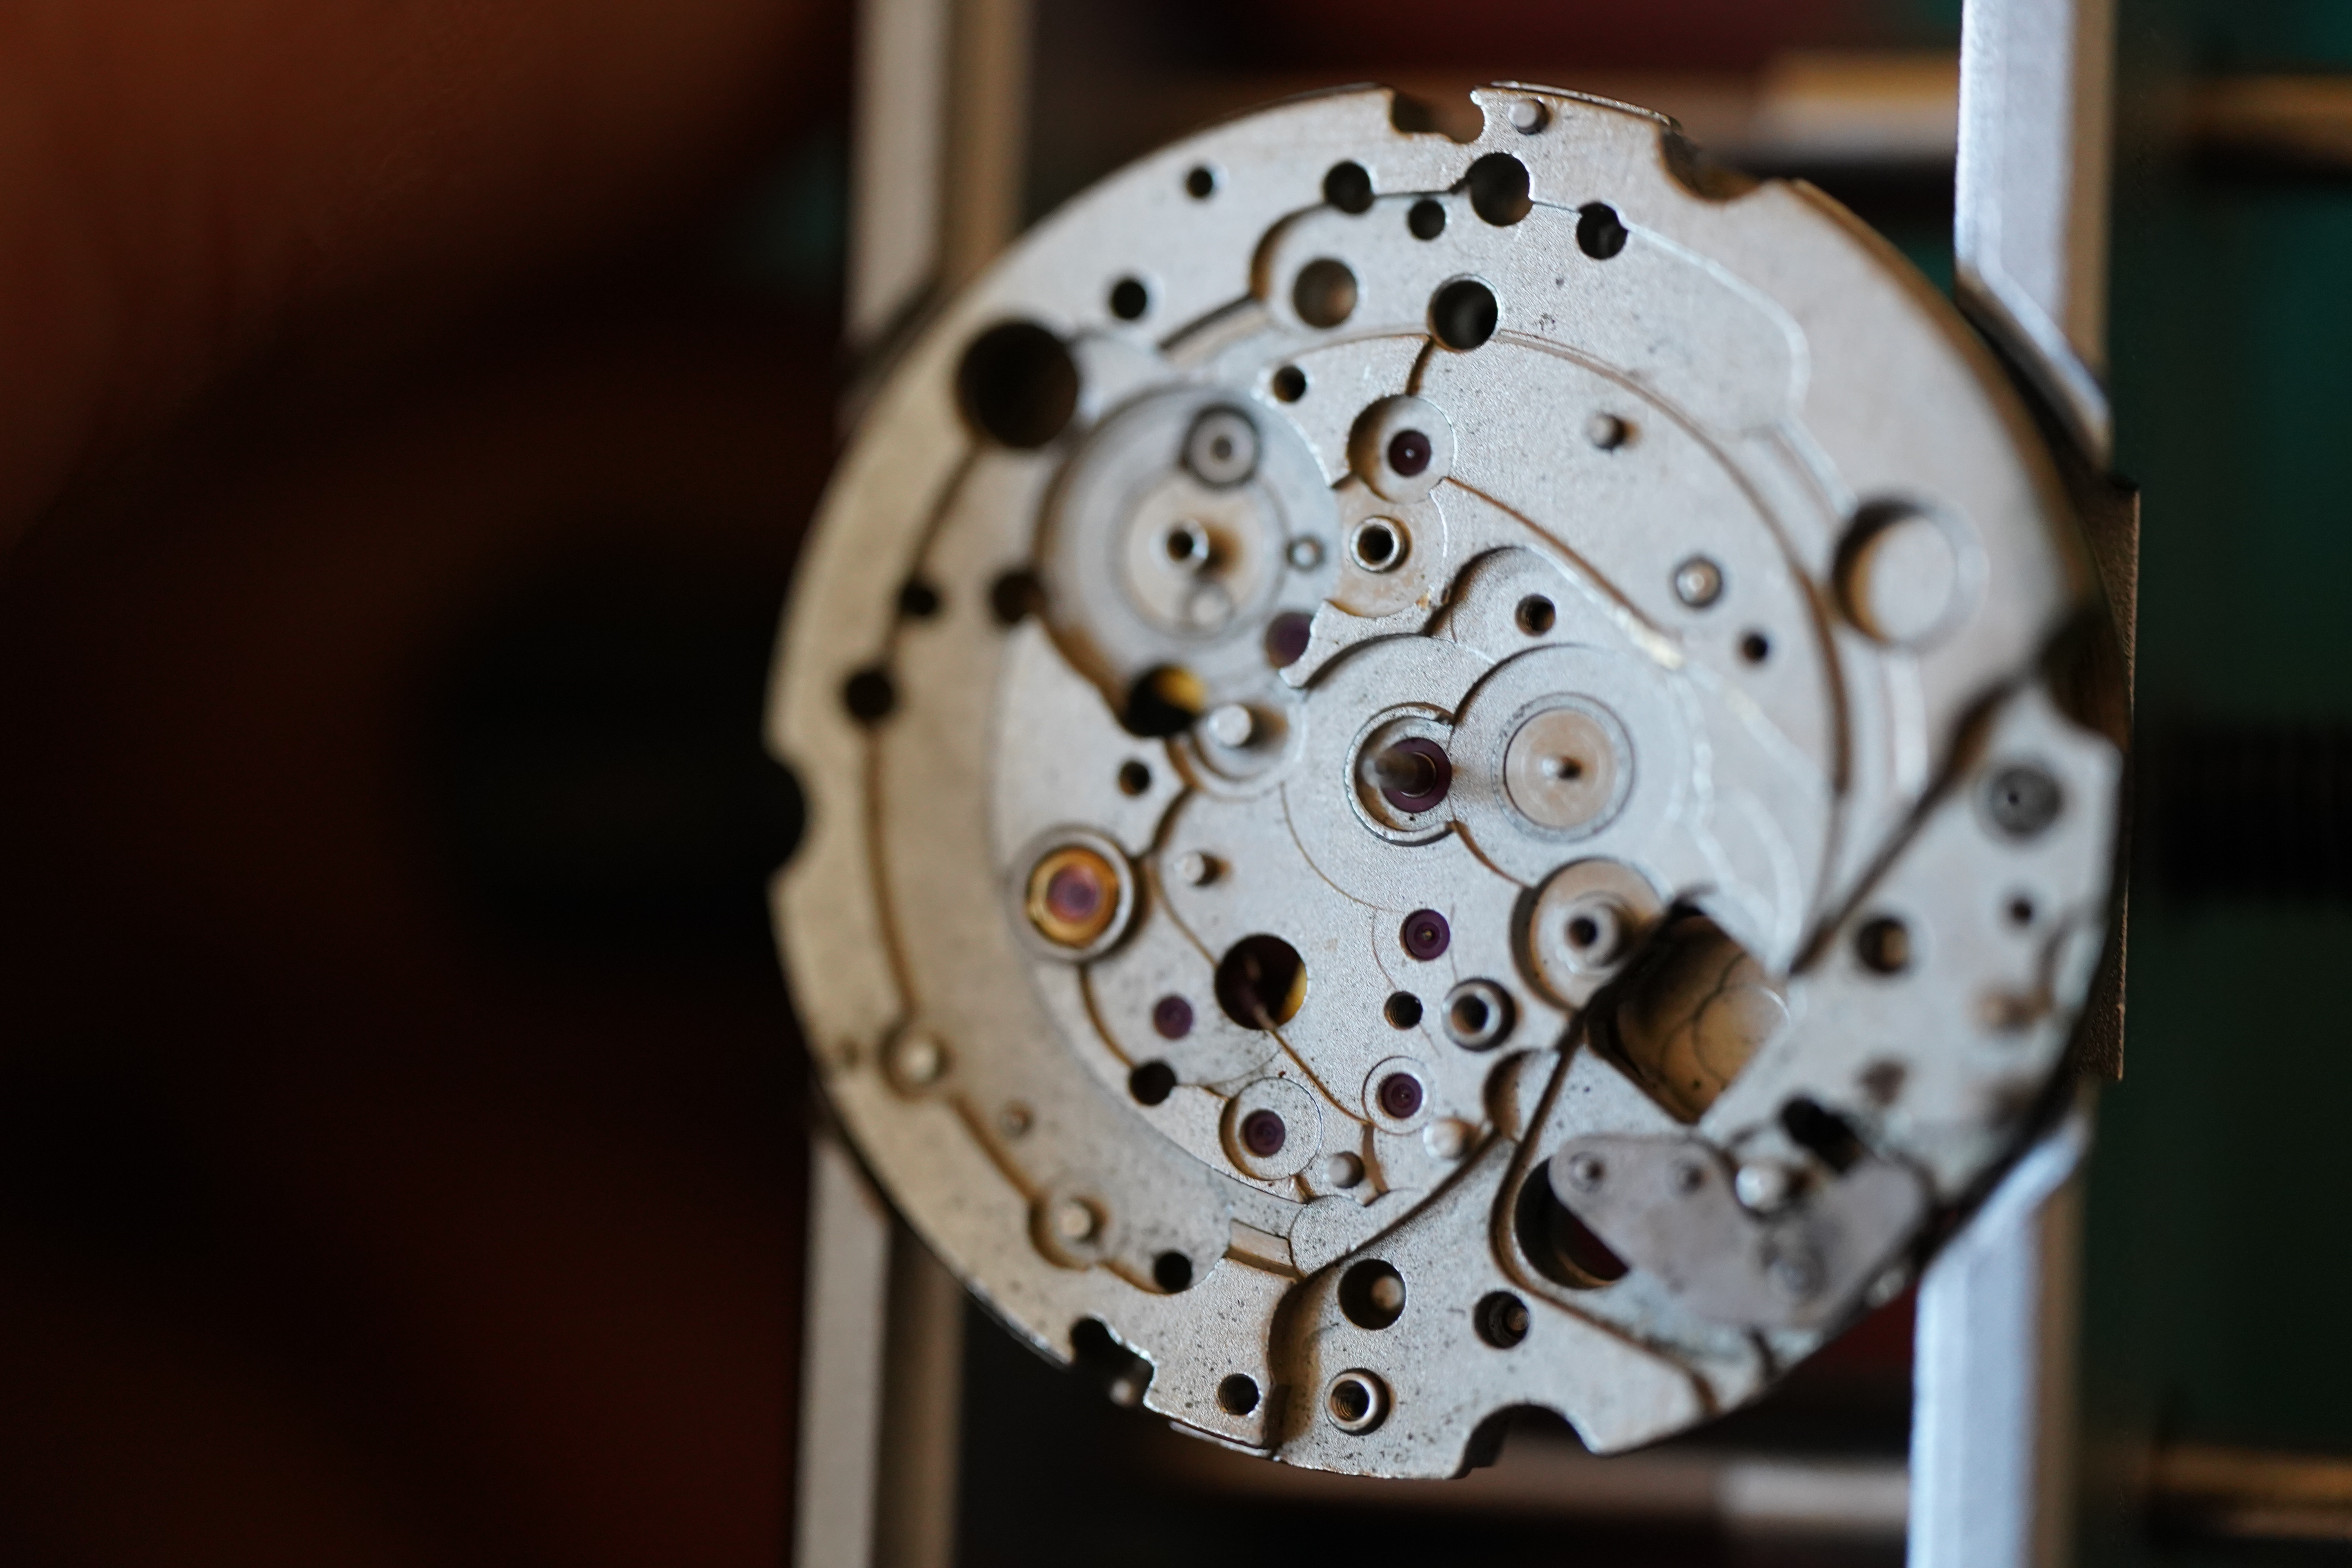
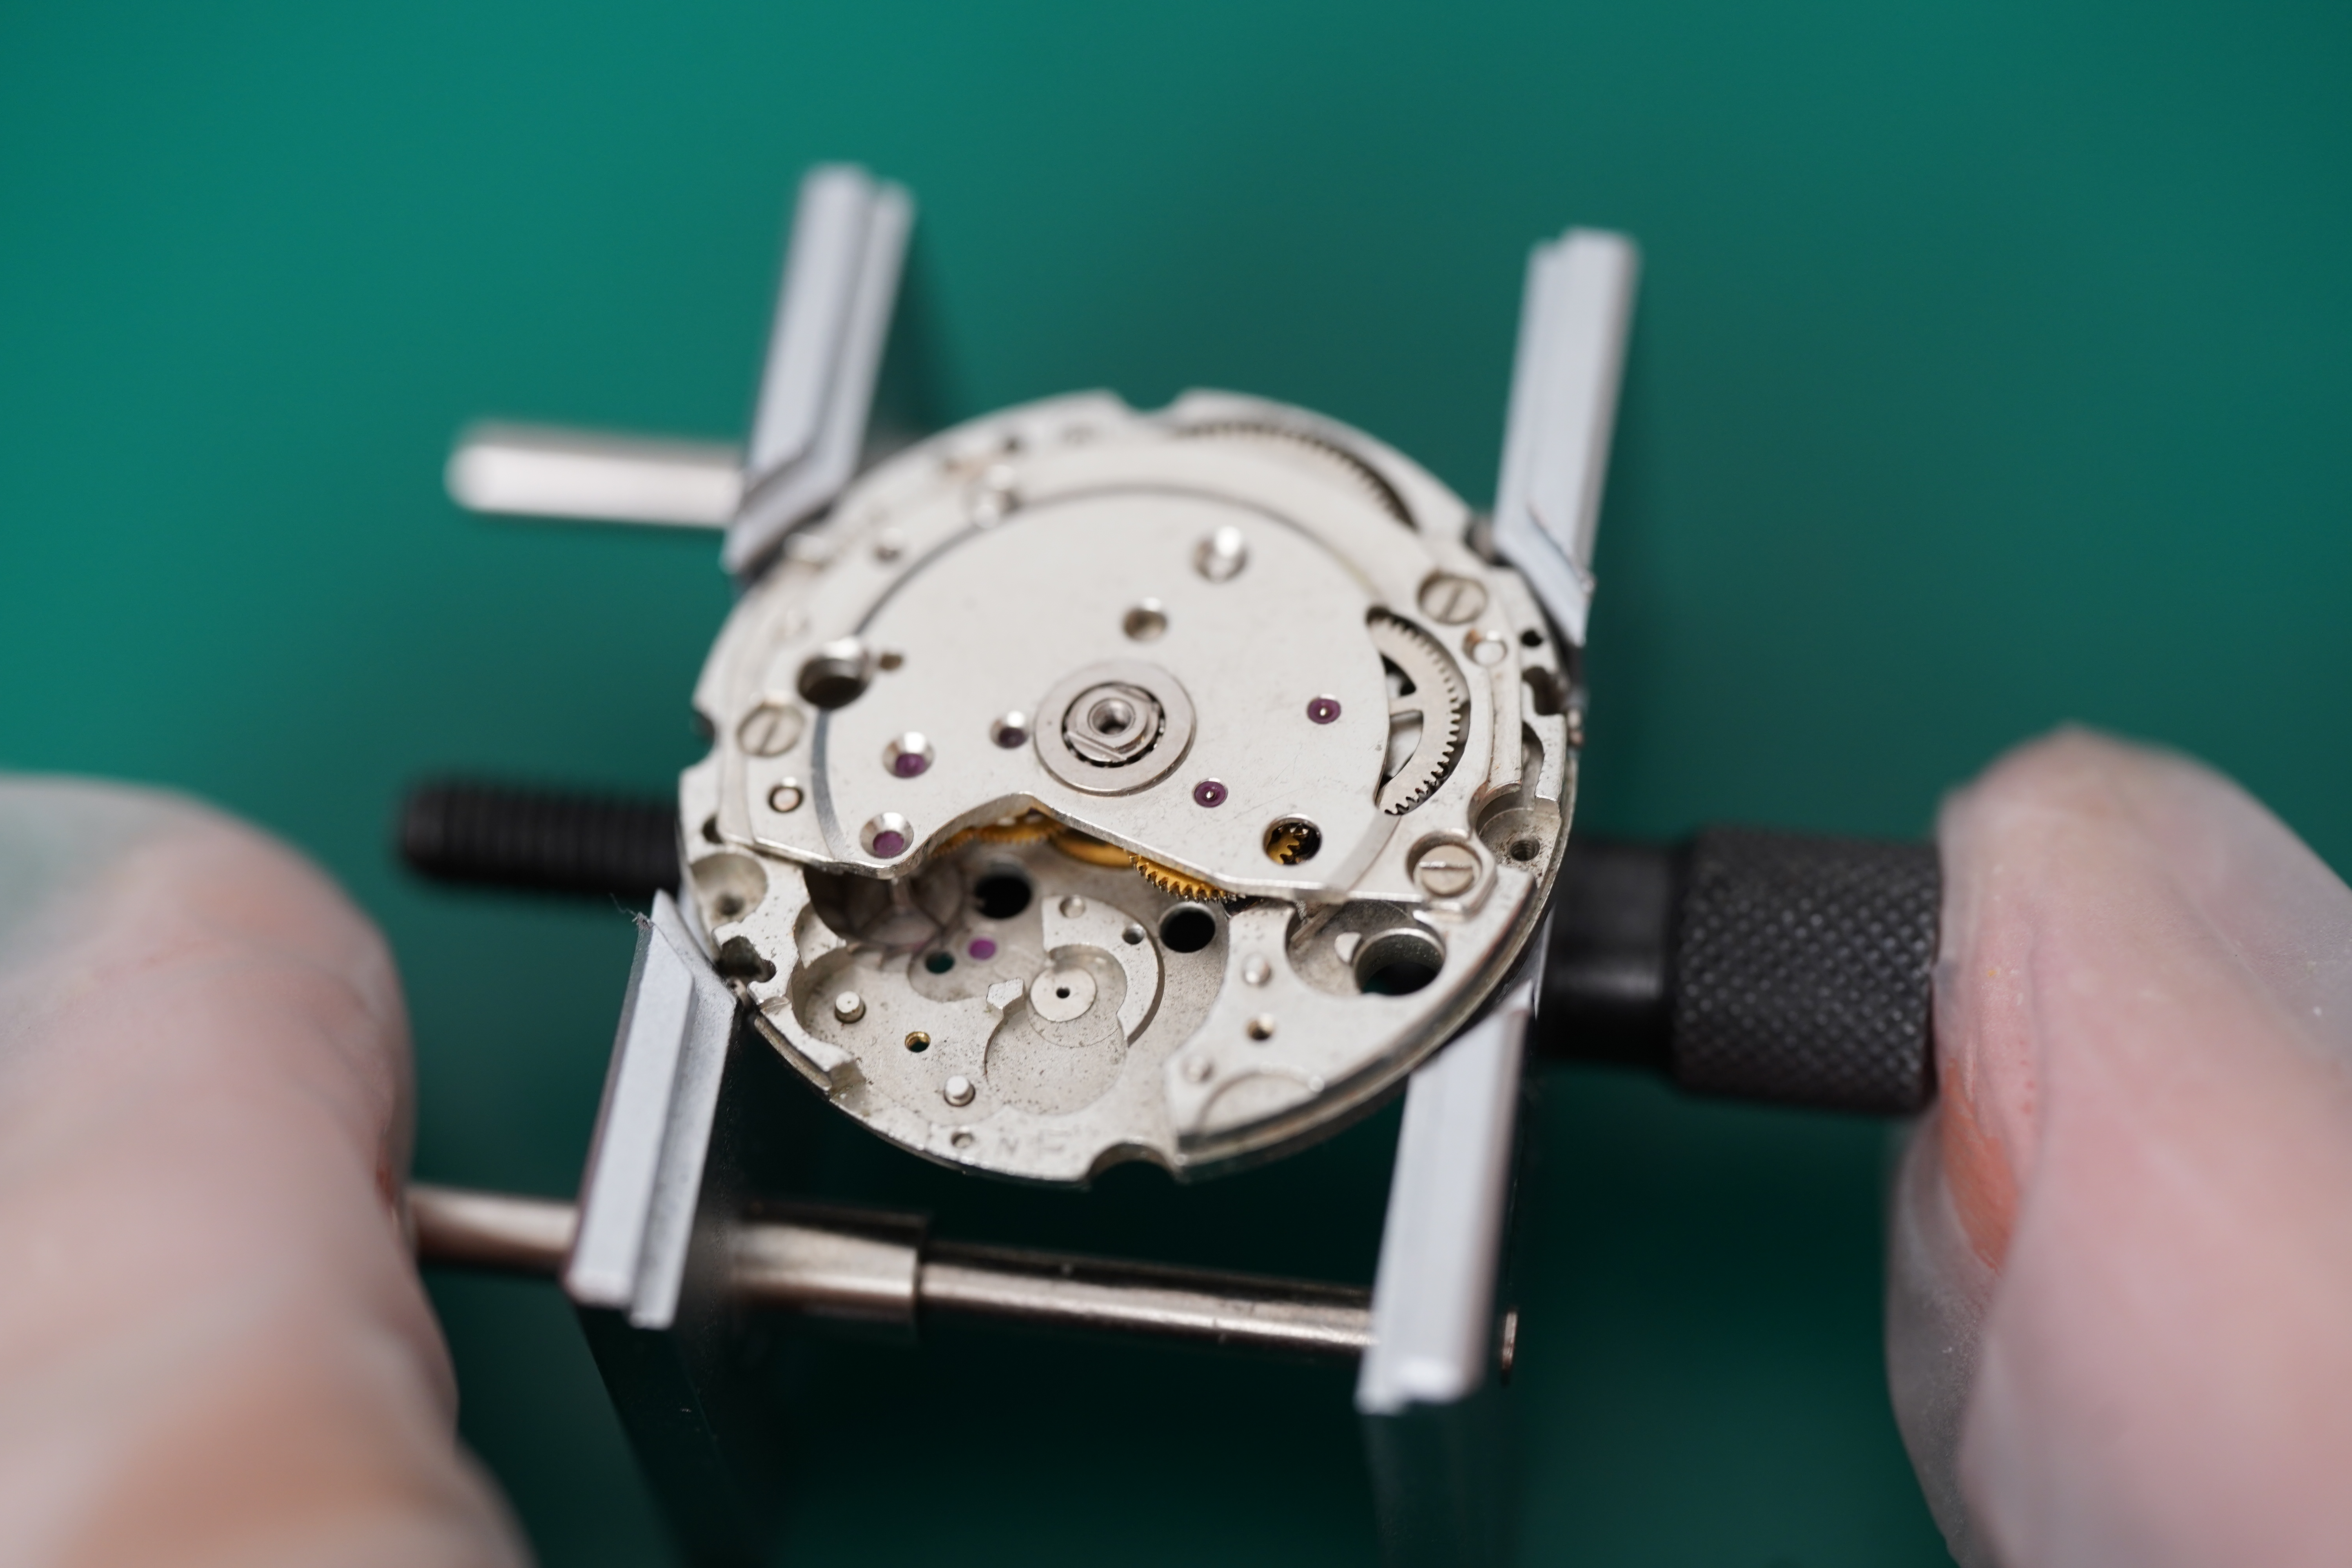
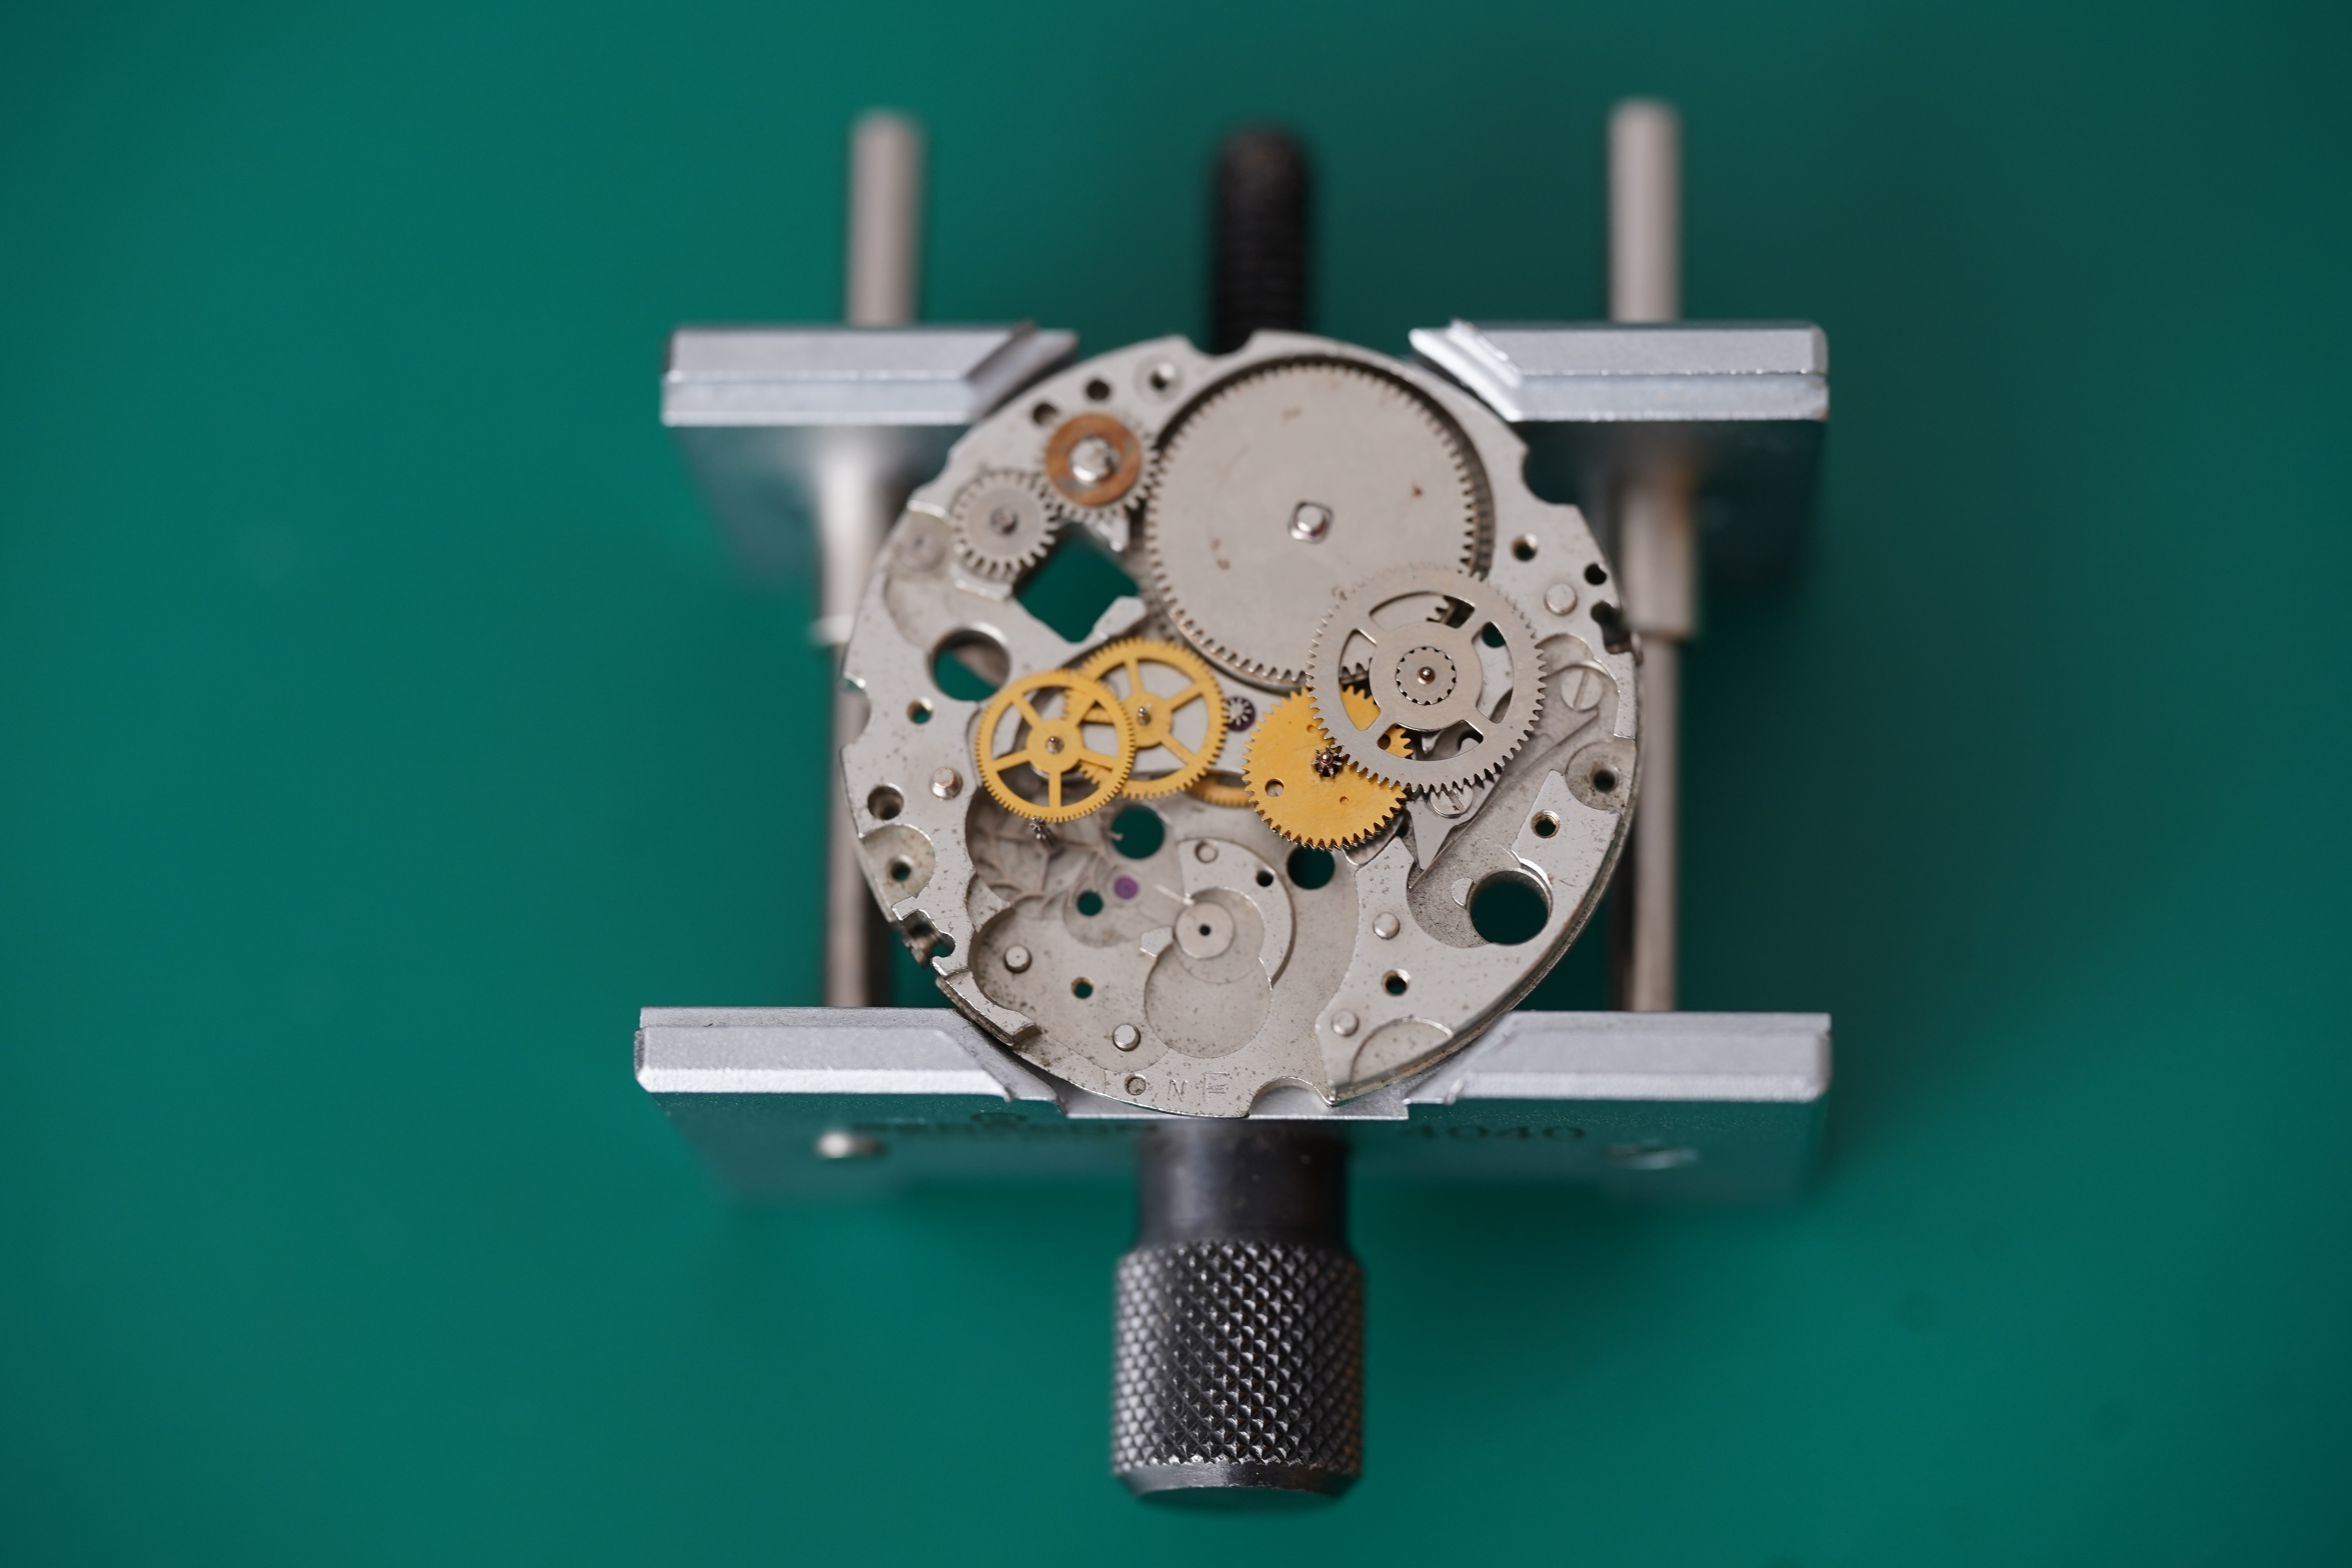
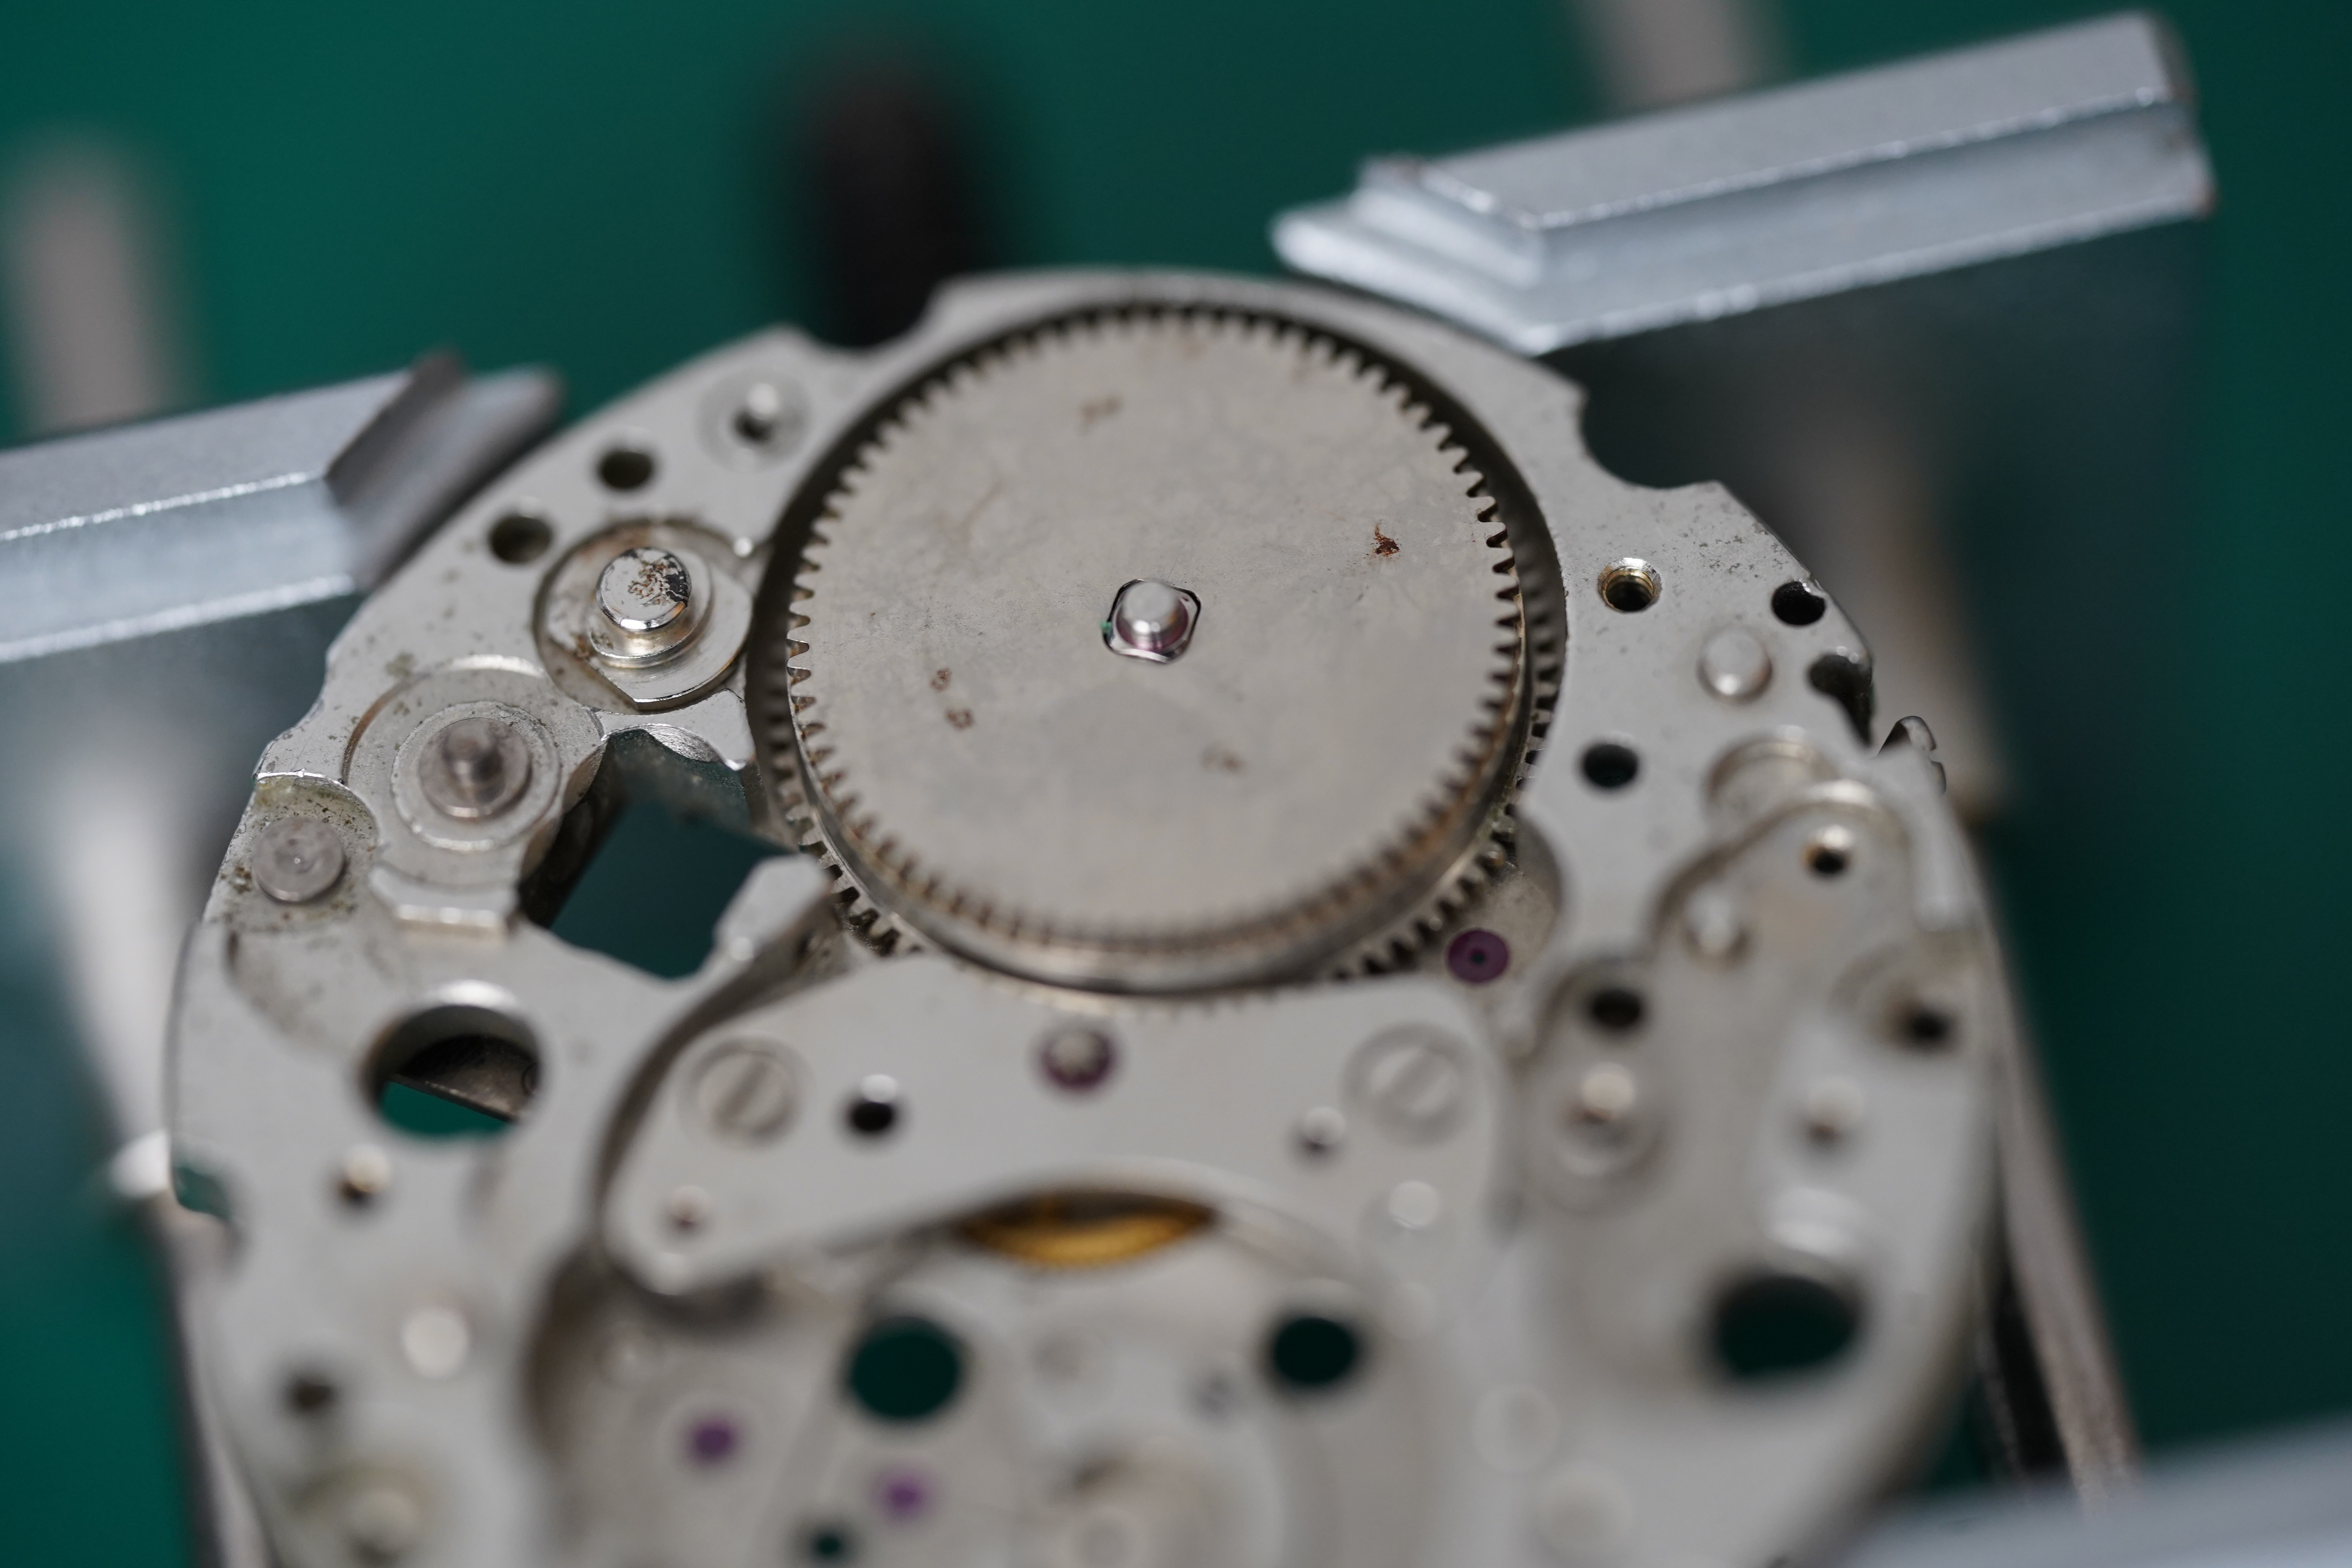
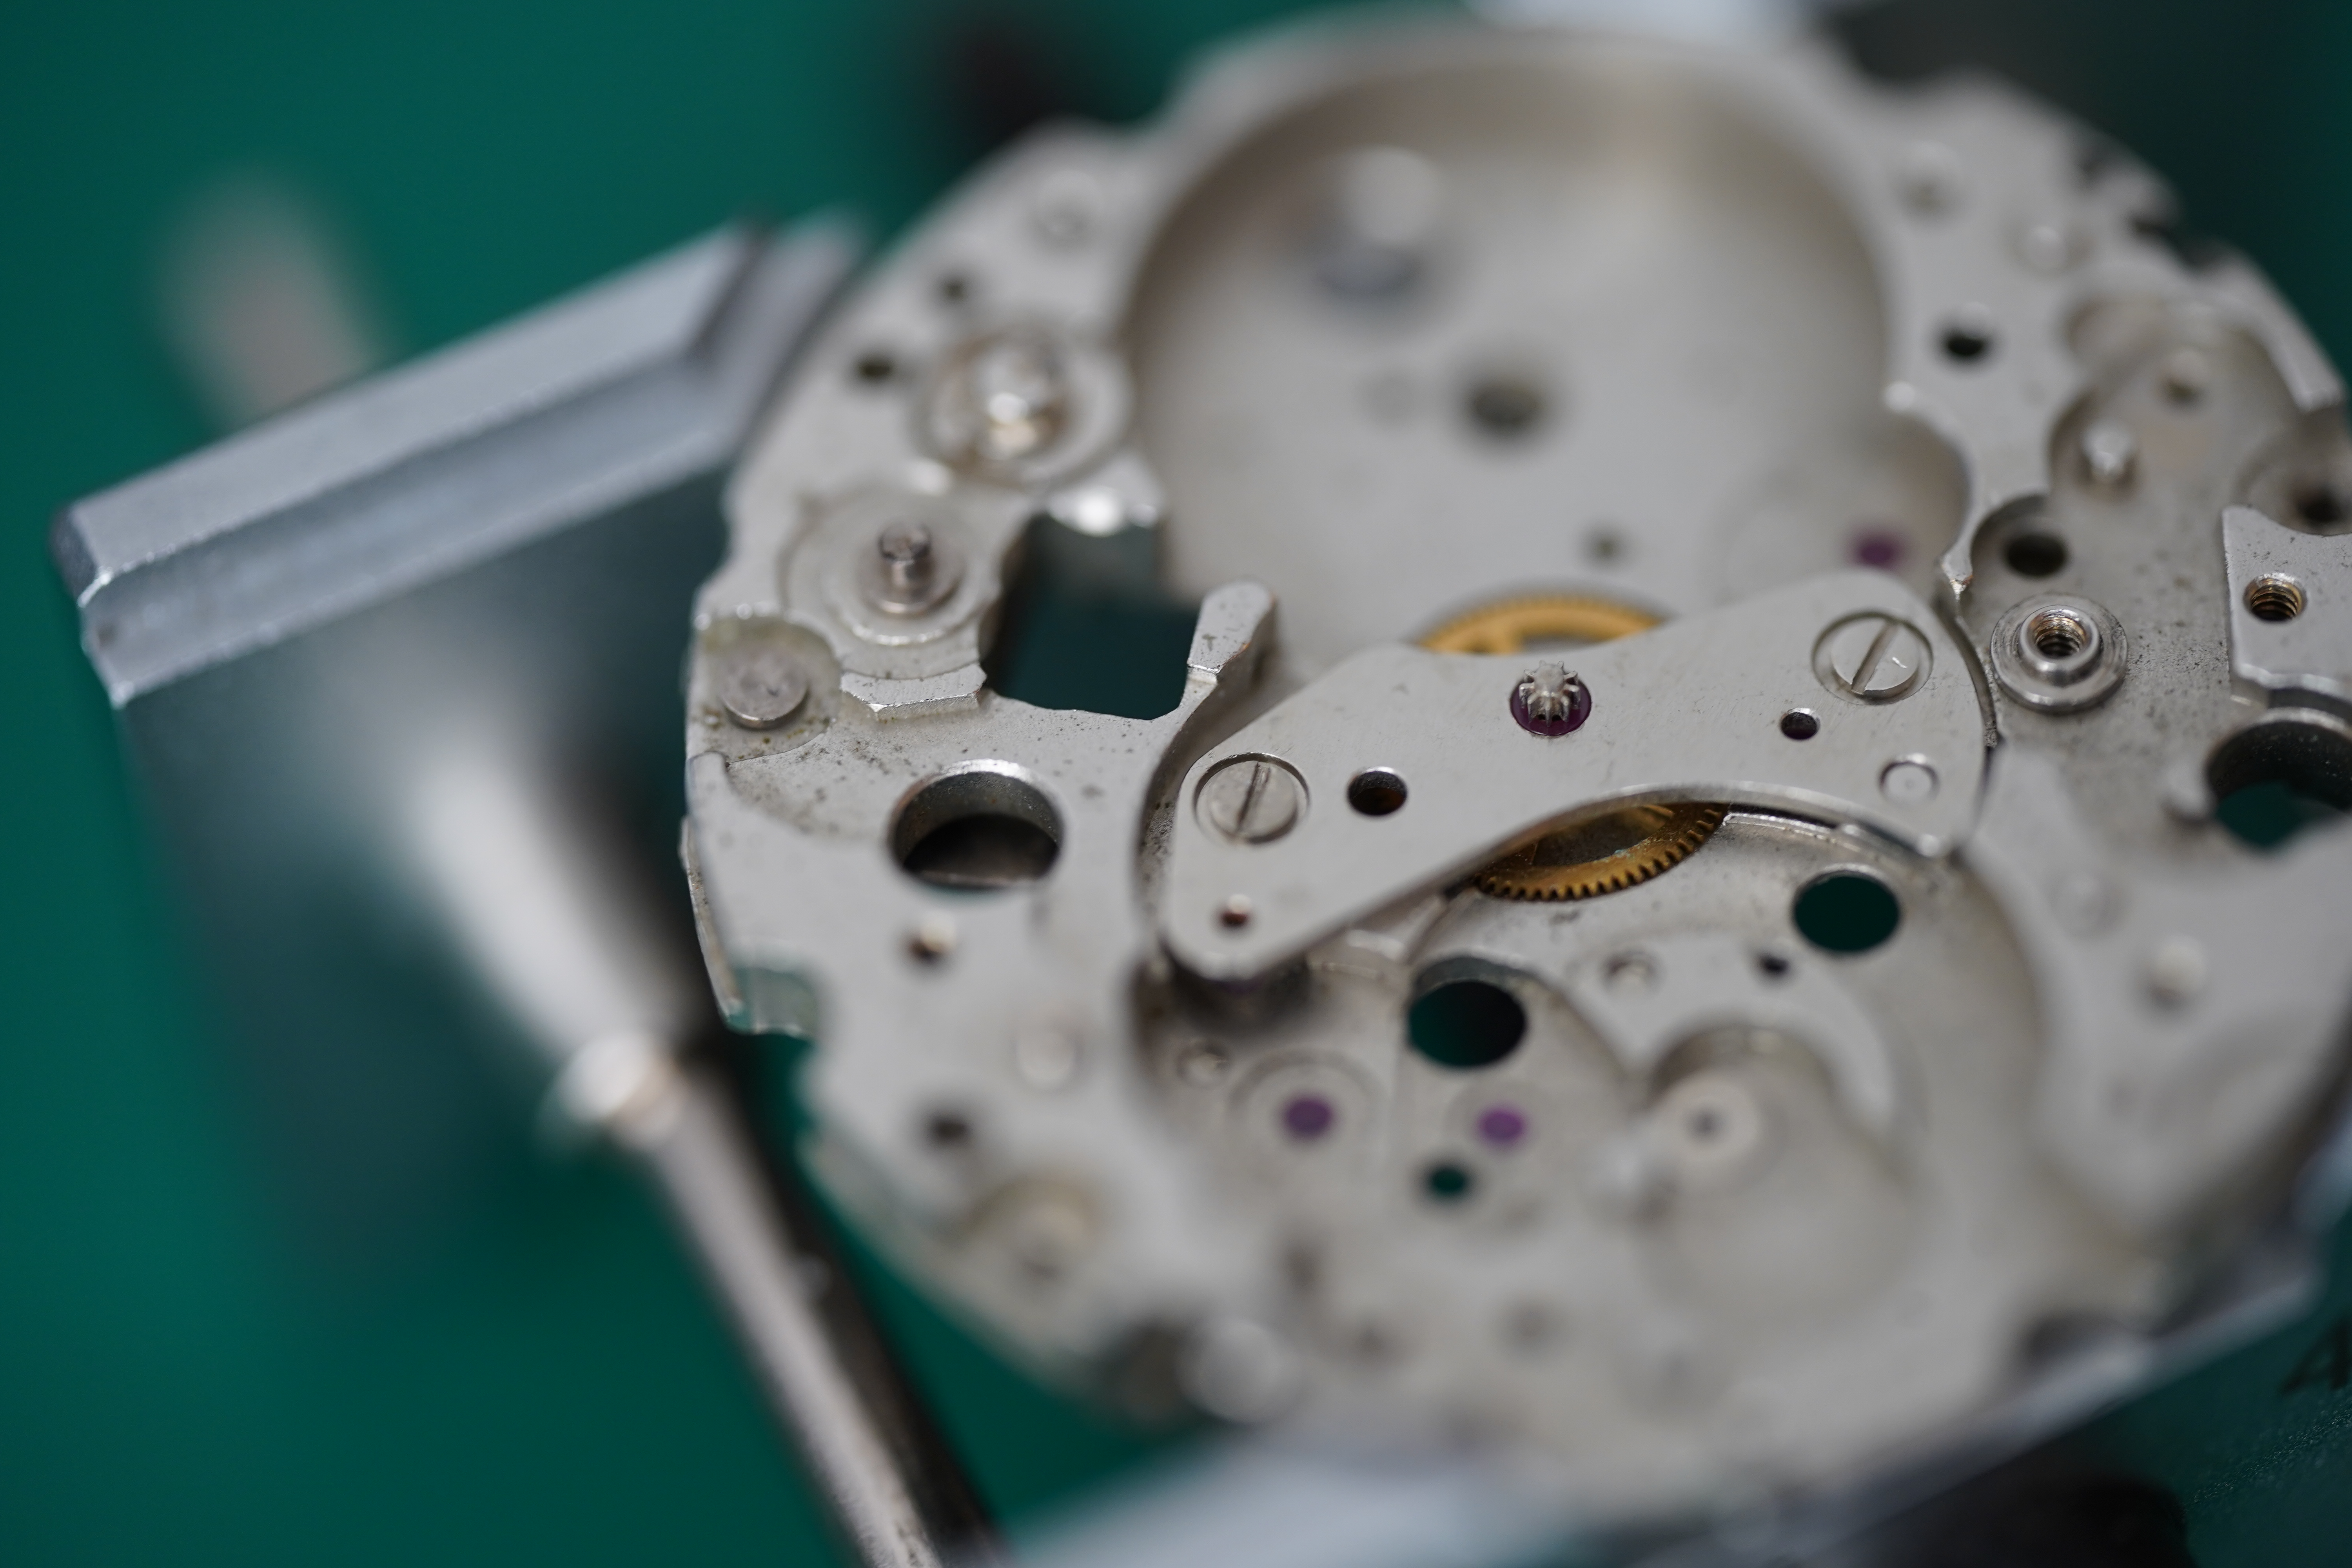
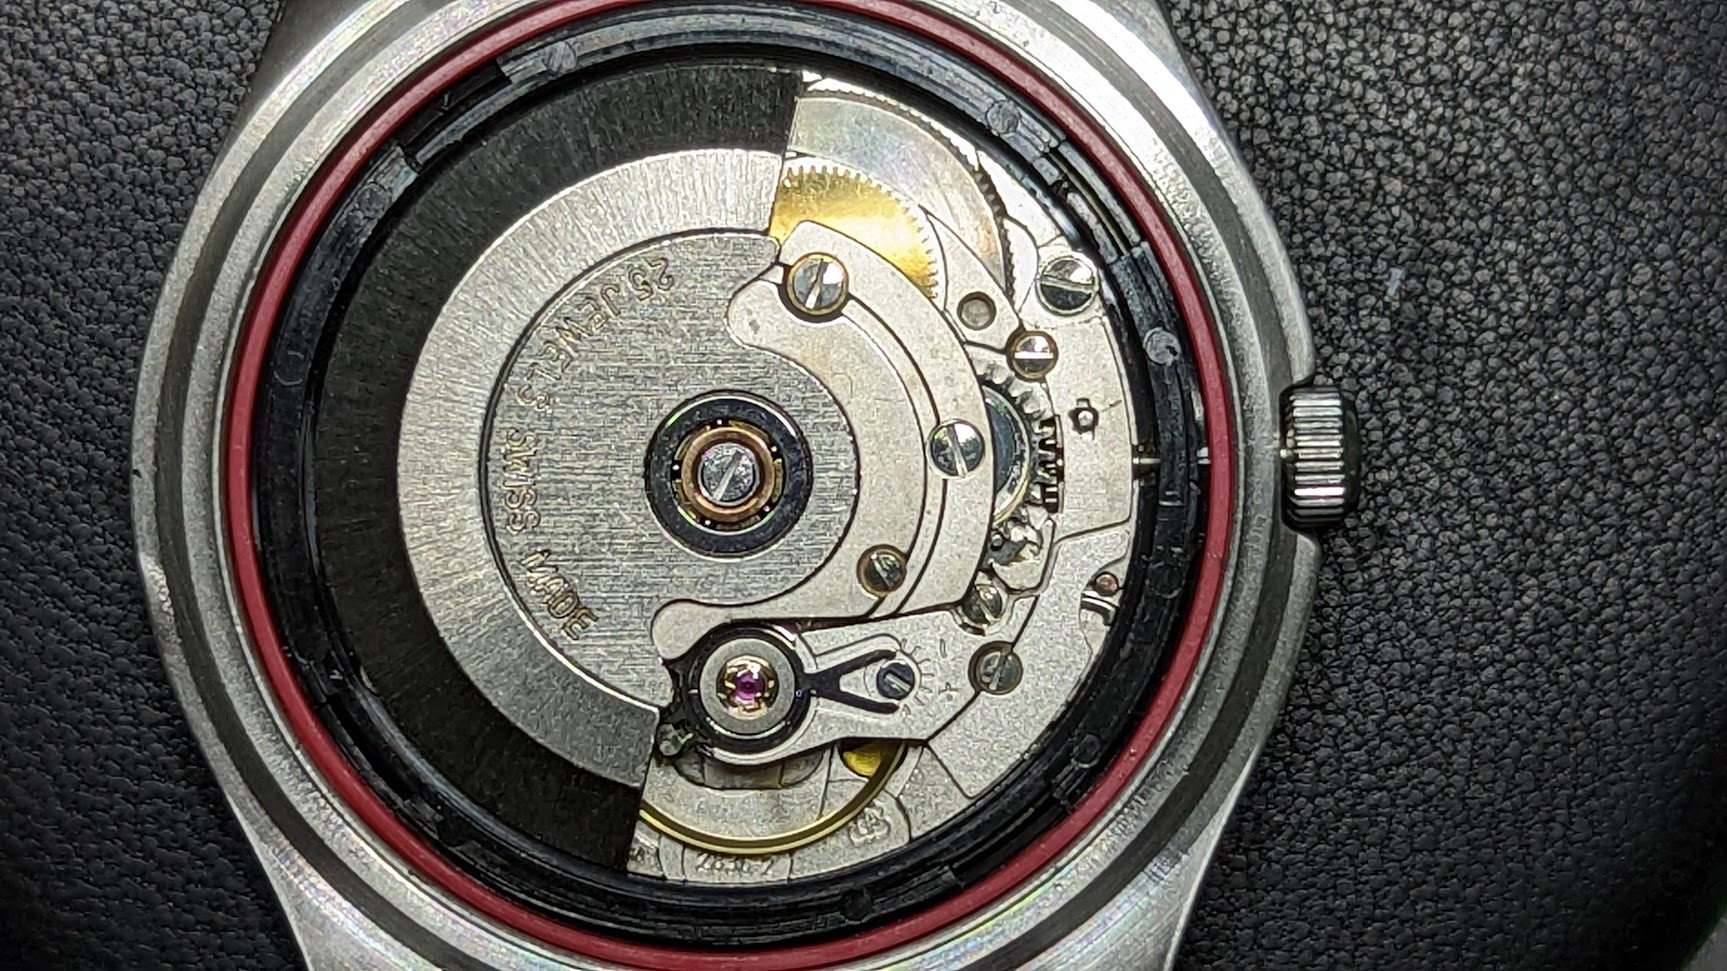
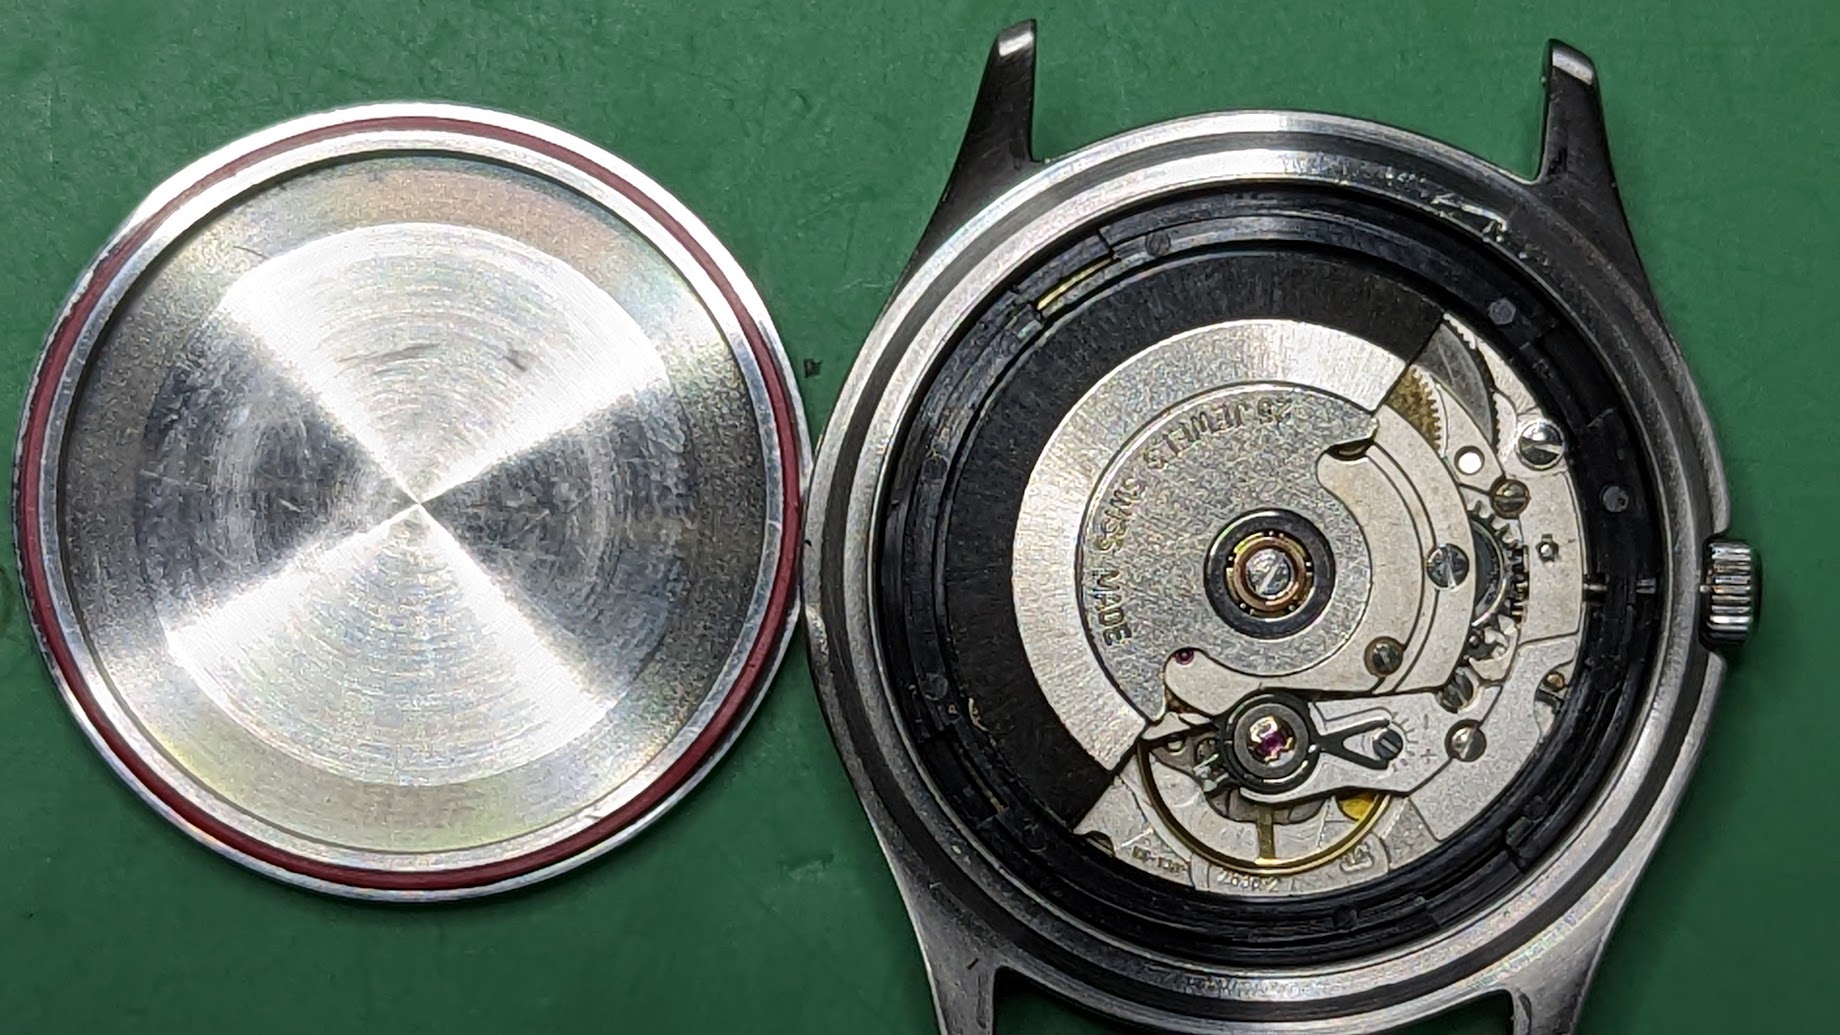
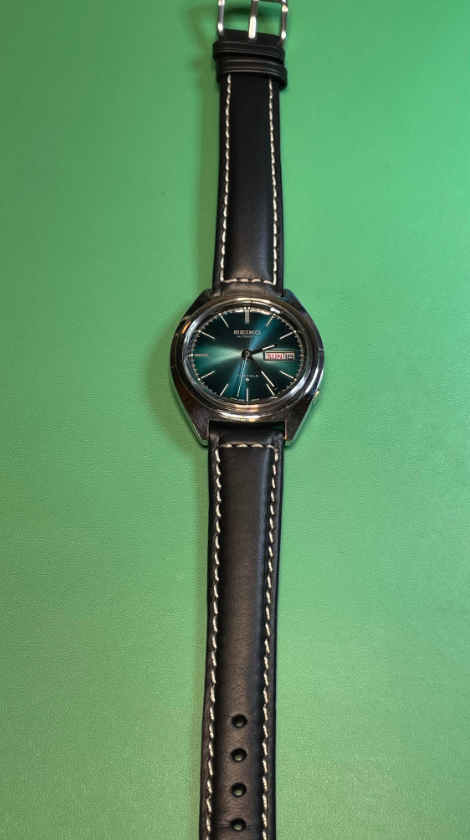
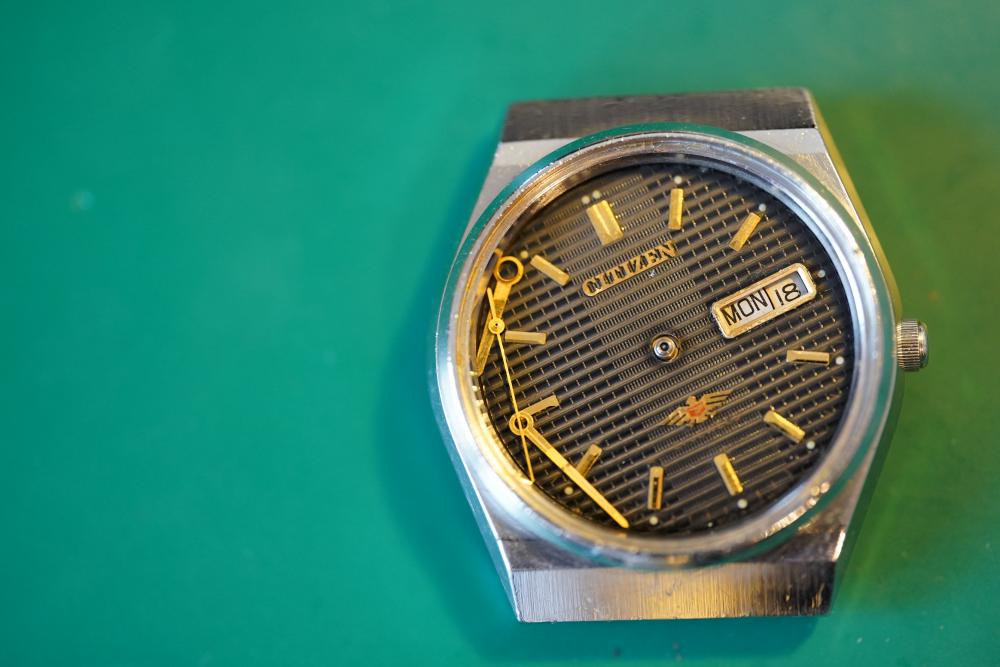
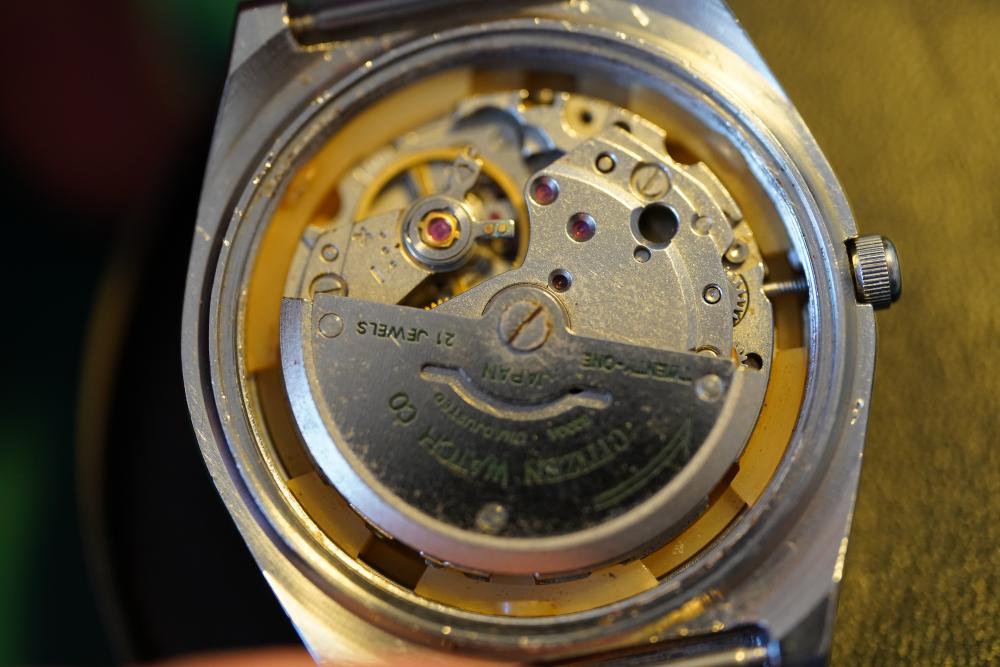
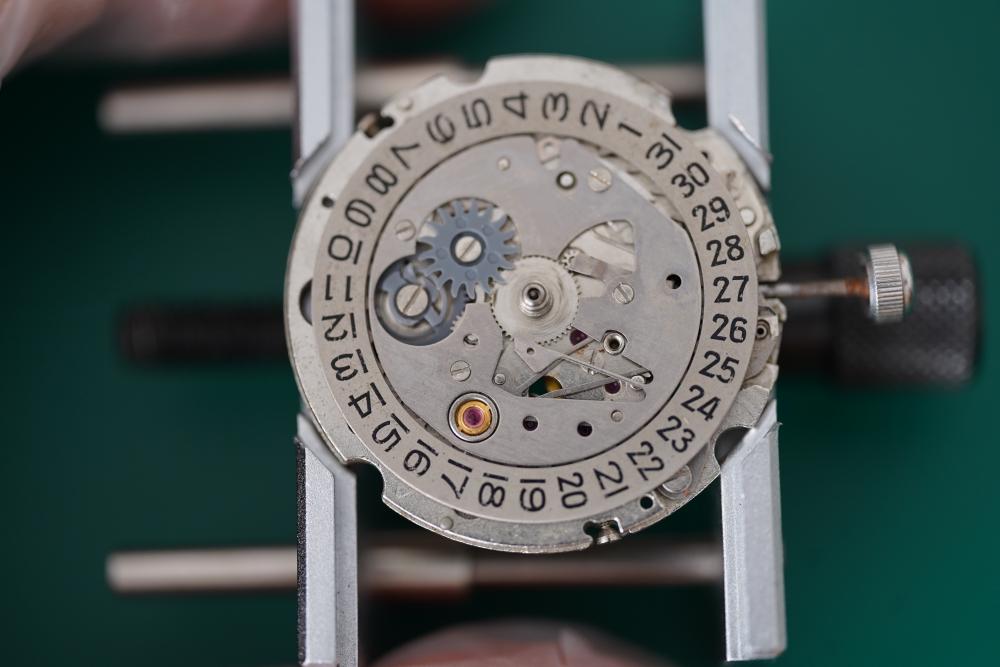
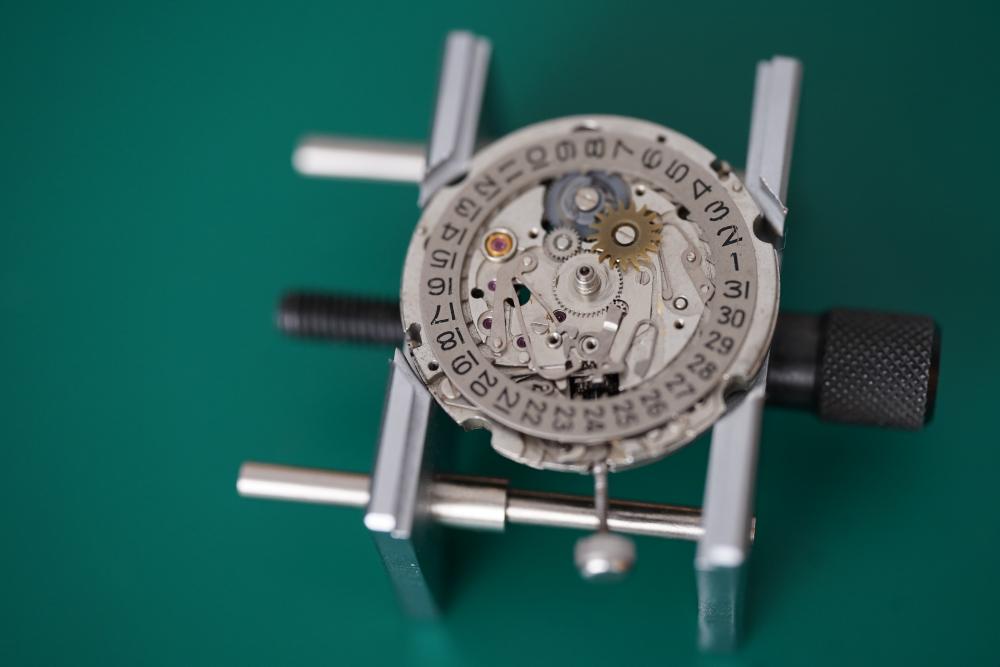
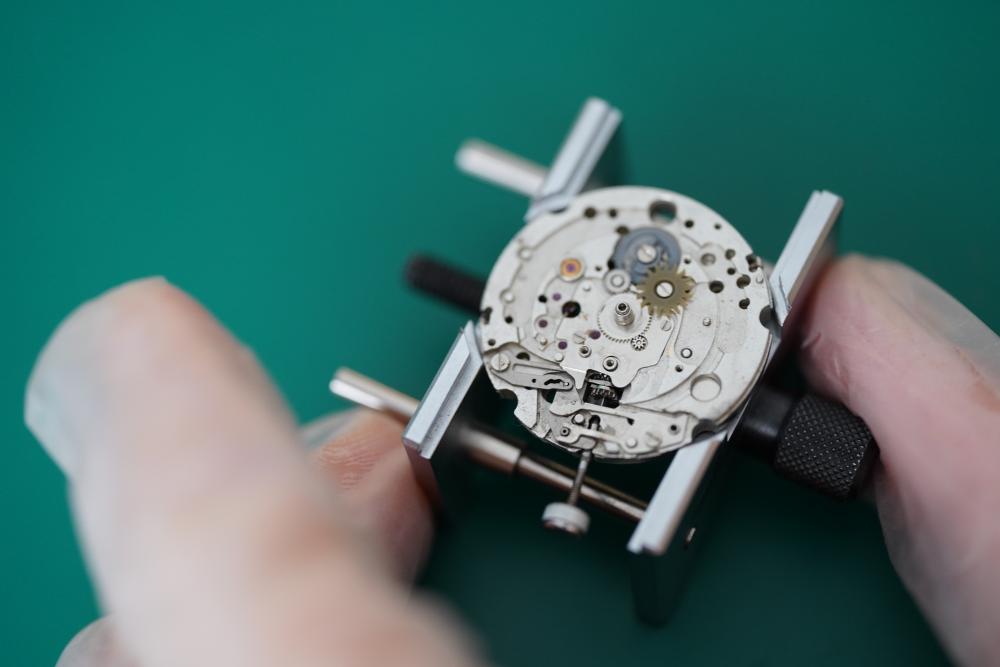
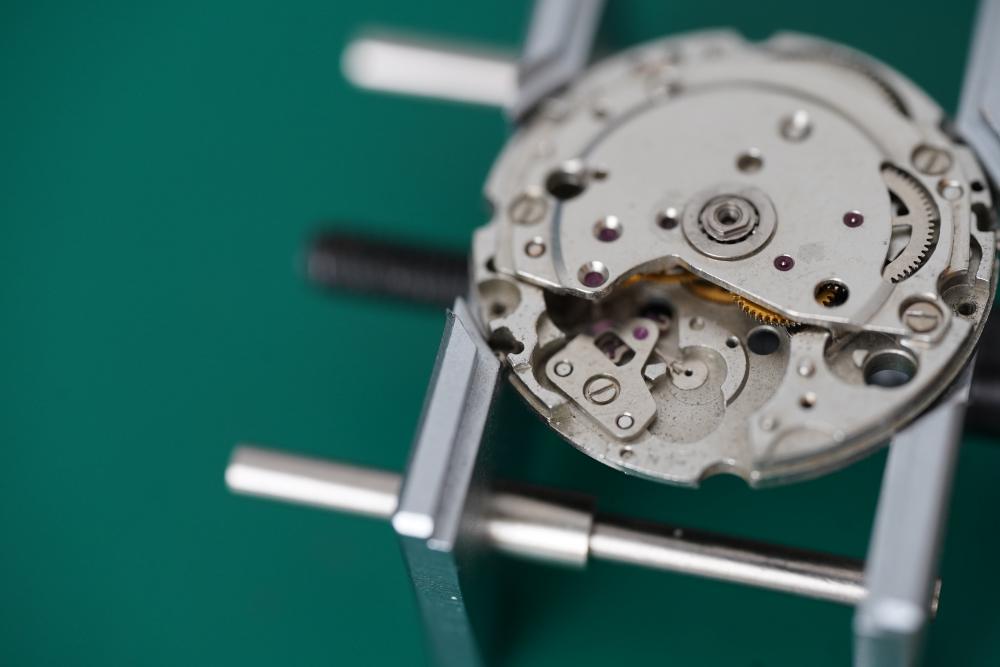
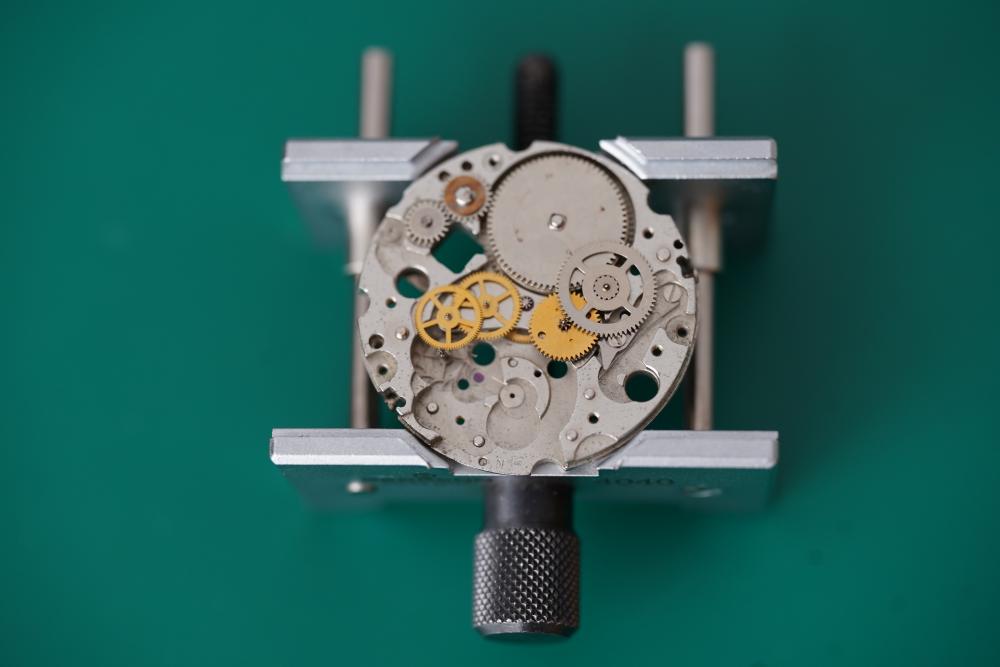
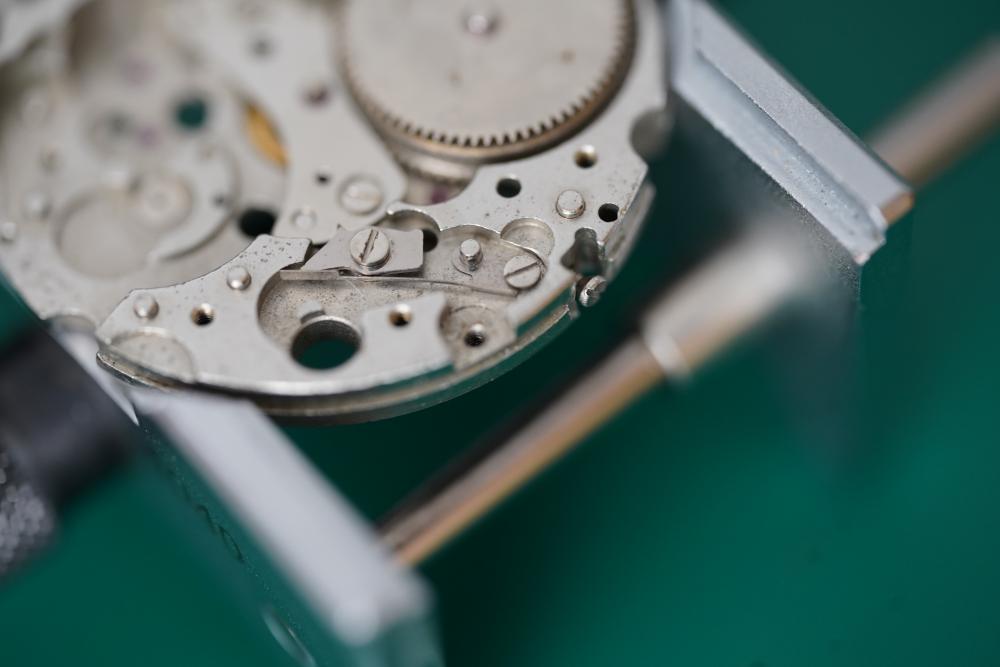
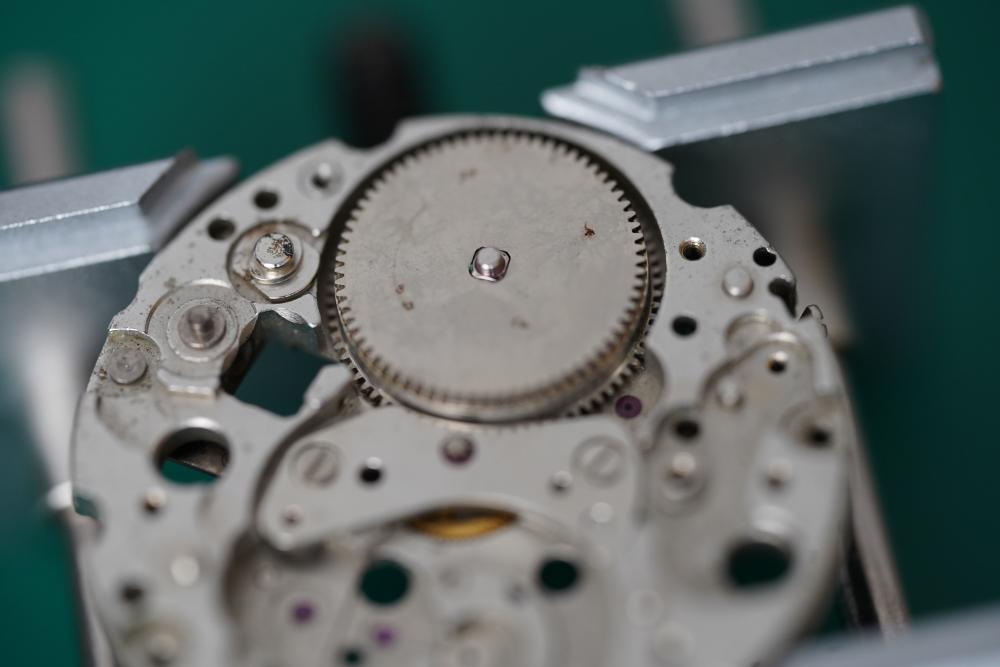
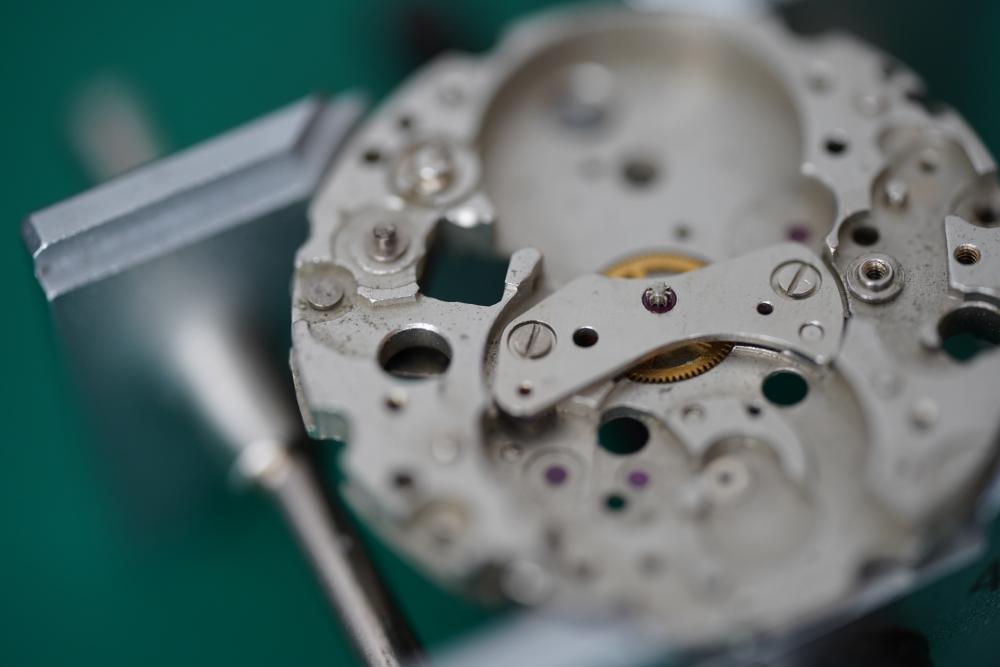
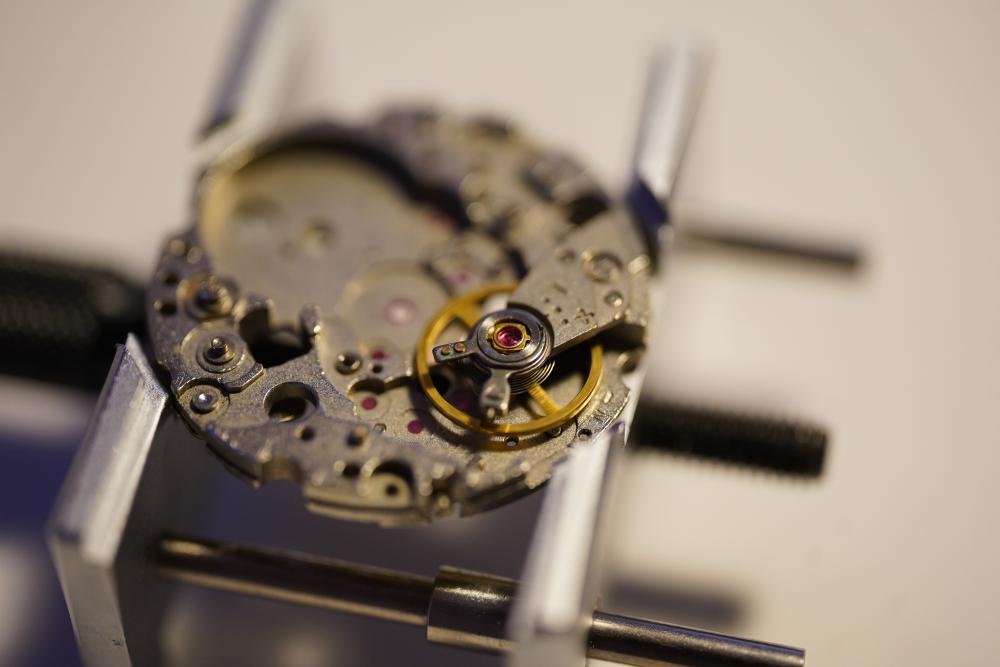
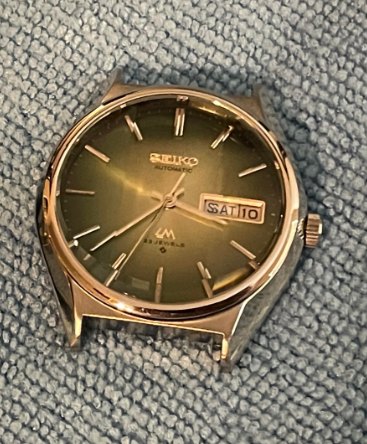
Hi all, Please find below some before/after photos of the 1st wrist watch that I serviced. After taking an online course I serviced two dollar pocket watches, then a swiss wrist watch before using this watch as my first try. I purchased this at the Aberfoyle Antique Market in Puslinch (outside Guelph), Ontario, not knowing much at the time. I knew that Birks was a Canadian jeweller, kind of like the Tiffany's of Canada. The crystal was spidered, assume watch was crushed down on at some point, but I had watched enough youtube videos at that point to know this could be replaced. Taking the watch apart and googling the movement, I was surprised to see that it was a Russian Raketa 2609ha movement inside. With further googling, I could not find any reference to Birks ever using a raketa movement. I know they often used eterna swiss movements. So, I am not sure if this is a true birks watch or if the dial was replaced and I have been 'had'. The dial itself was in pristine condition - unsure of the chances of the dial feet of a new dial matching up to the movement. In any case, it is a nice watch still, I thought. The case is gold coated, 10 microns. Lots of learning moments in working on this. At one point I thought I marked the dial slightly so I rubbed on it with rodico - learned it is a bad idea to do this on a matte dial. In the end result it is still hard to see unless looking from a specific angle with the light, but the area I rubbed is now shiny instead of matte. This movement had balance shock settings similar in shape to incabloc. There were also tiny springs on the escapement with cap stones. I managed to break both of these when trying to remove them. I also lost one balance spring that jumped away into the ether. The same happened with a capstone, I think from the escapement. I went a bit overboard and ordered parts movements through etsy from three sellers. One lot arrived from France within 4 days - I am still waiting on the other two. I will have enough 2609ha parts now to open my own store. The watch ran well before service - while reassembling I saw the escape wheel had both pivots broken - I thought I was careful but I guess this happened somewhere along the way. Parts movements to the rescue again. I may eventually change the band - this is the one that came with it and it is not too bad, I think. Changing the crystal was also a learning experience. I ordered the size I measured for and one size up, as I learned online. I have a cheap crystal lift from amazon. It is useless and will not grip anything - tried on 4 different watches. To install the new crystal I made some little wood domes to fit my chinese back/crystal press. Not knowing how much pressure to use to bend the crystal diameter smaller, and also trying to force the larger crystal in, as I was sure it was the larger 31.1mm crystal that would fit, I snapped it in two. The smaller 30.8mm ended up being the winner so I was glad that I purchased both at the same time. I also got a feel for the pressure required, not as much as I thought. Most of my kit has been purchased cheaply from aliexpress and amazon. I was hoping for a robur-style press for the crystal but the chinese have not copied this yet, hence my workaround above. I was hung up on having the proper equipment for cleaning. I have a cheap ultrasonic cleaner but really wanted a 'spinner' watch cleaner. Vintage was still out of my price range as I did not want to spend so much without knowing I would stick with the hobby. I found inspiration on reddit for a diy watch cleaning machine and built one using a timer/direction controller, small dc motor and various jars and misc from the dollar store and a lab equipment stand. My cleaner was also diy based on the SDS for L&R solutions. All in all, I am very pleased how this came out, for my first watch. My next project will be building a watch from parts using the eta6498 clone, Seagull ST3621.

 3 points
 -
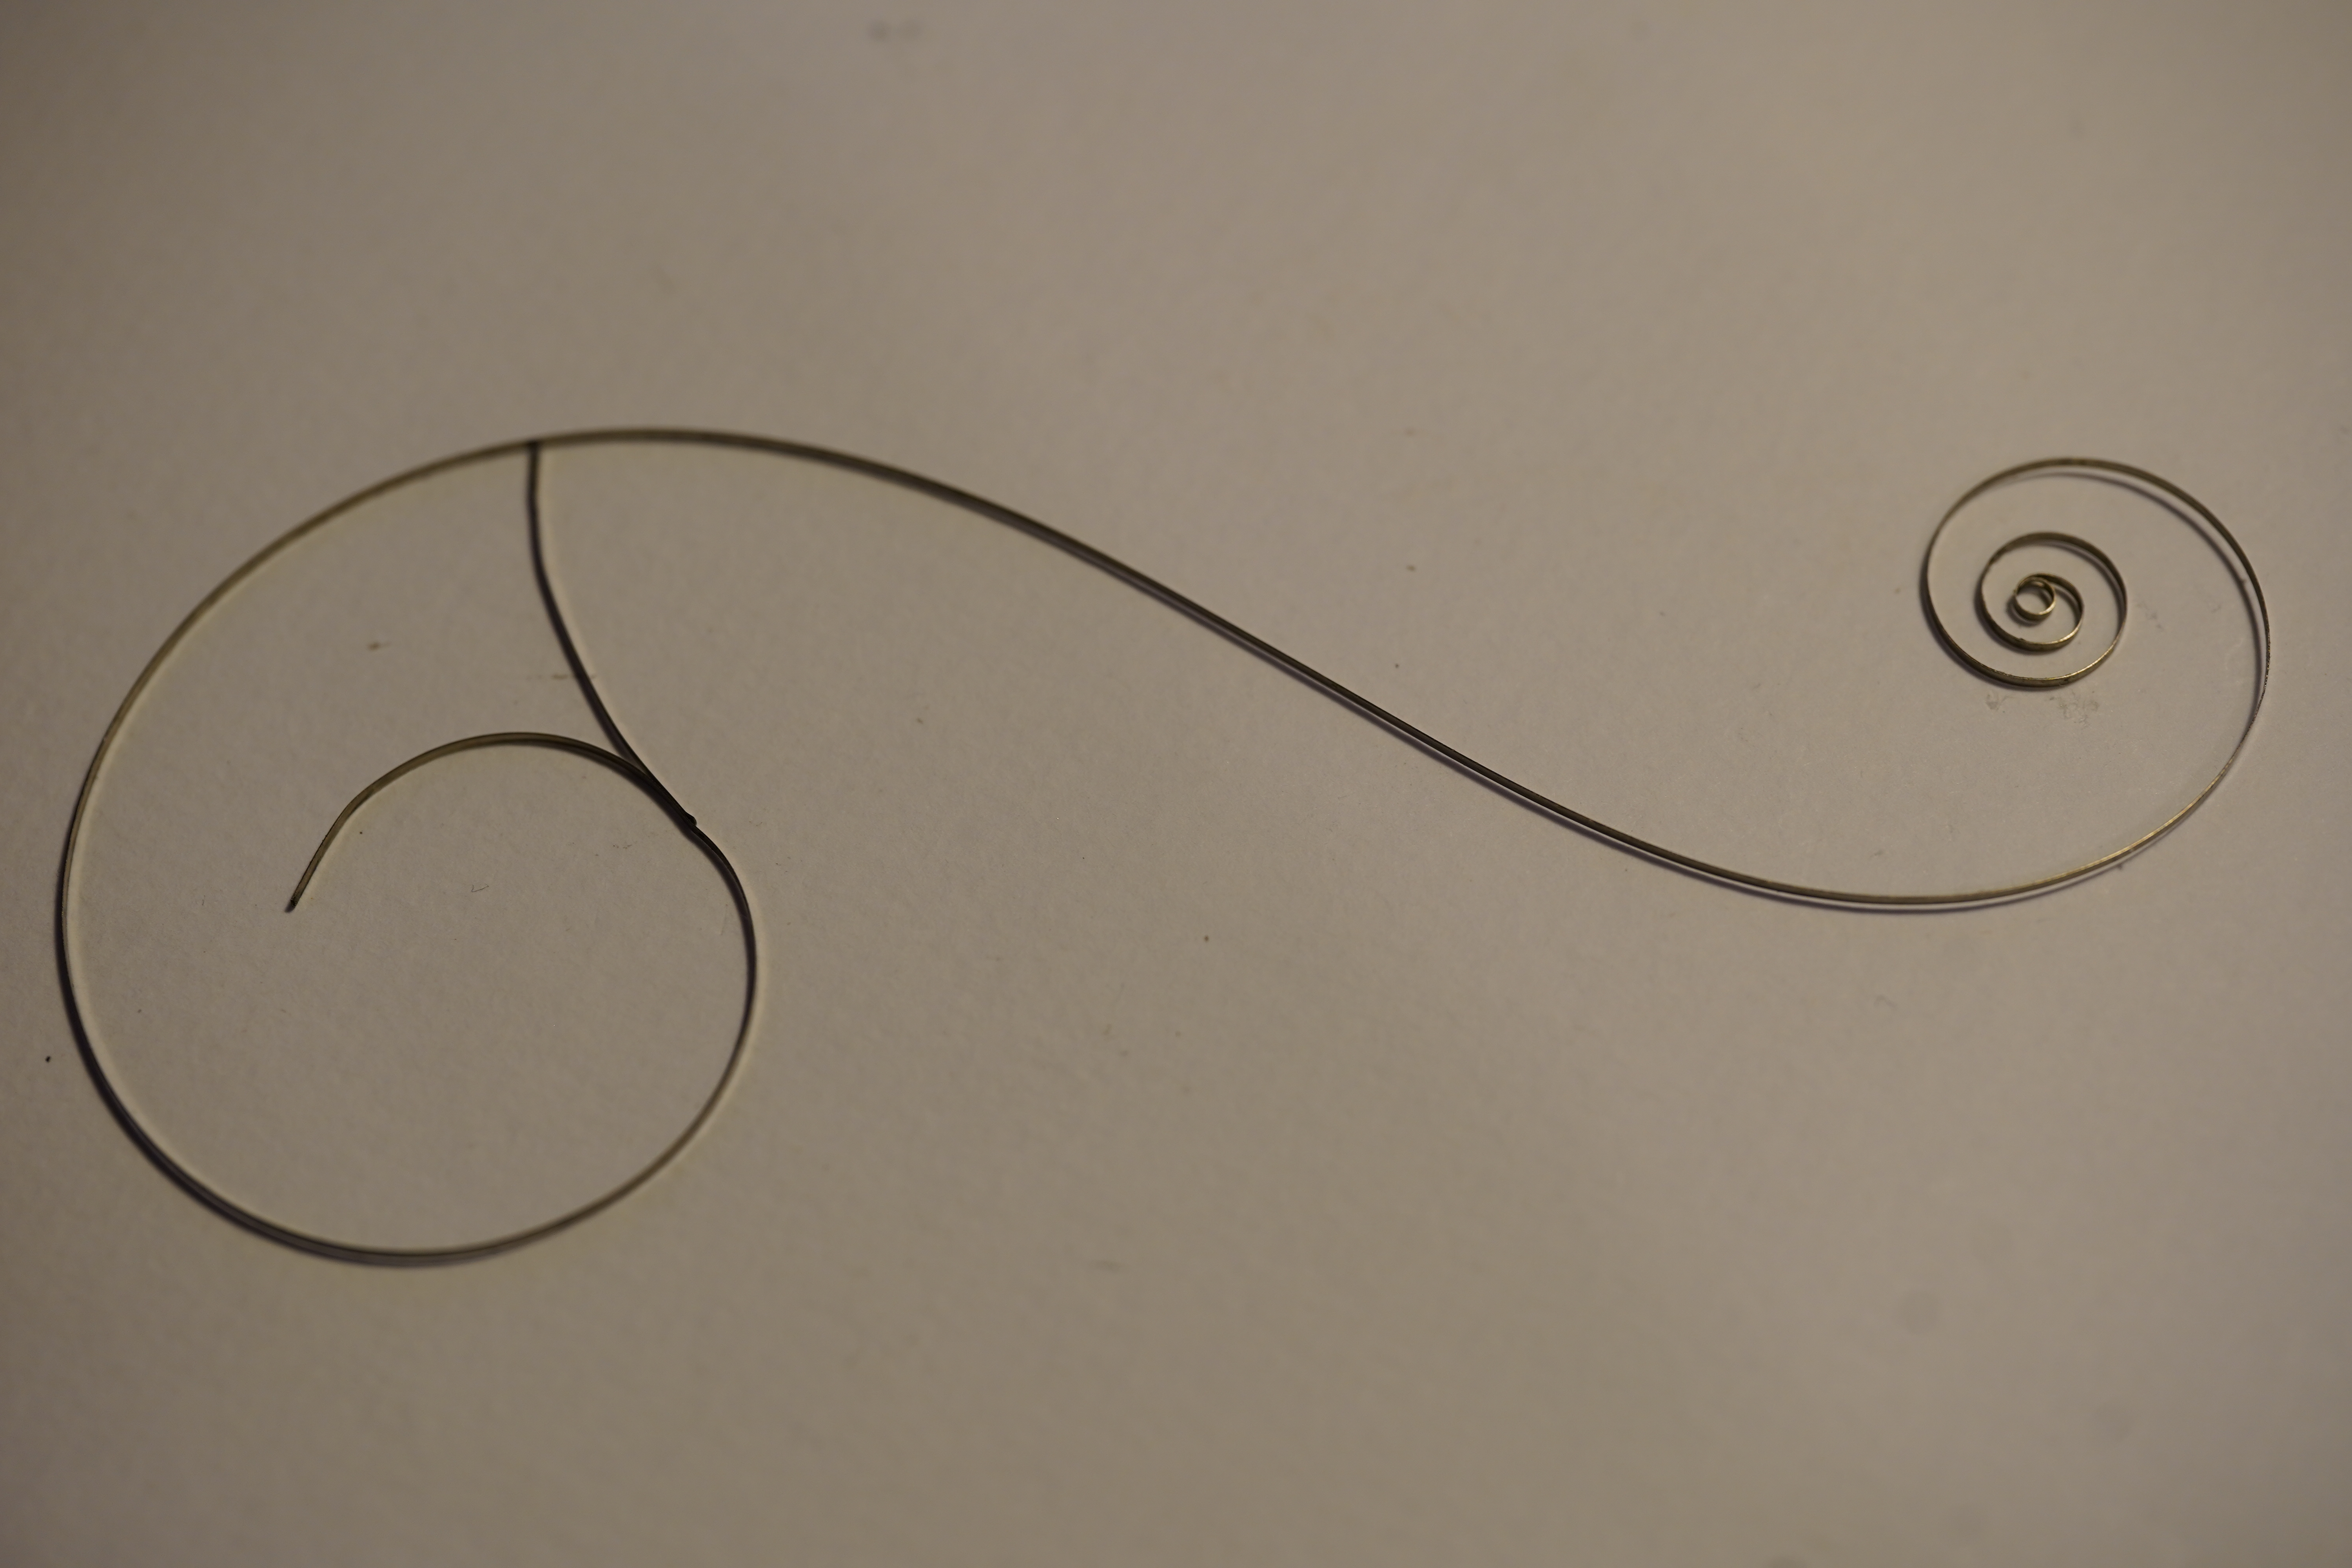
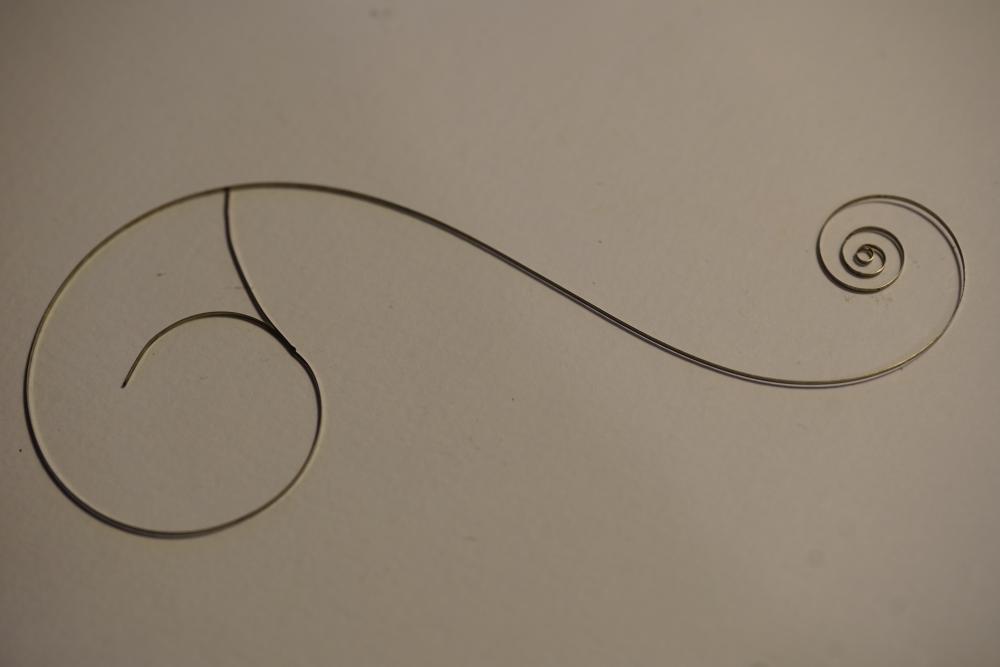
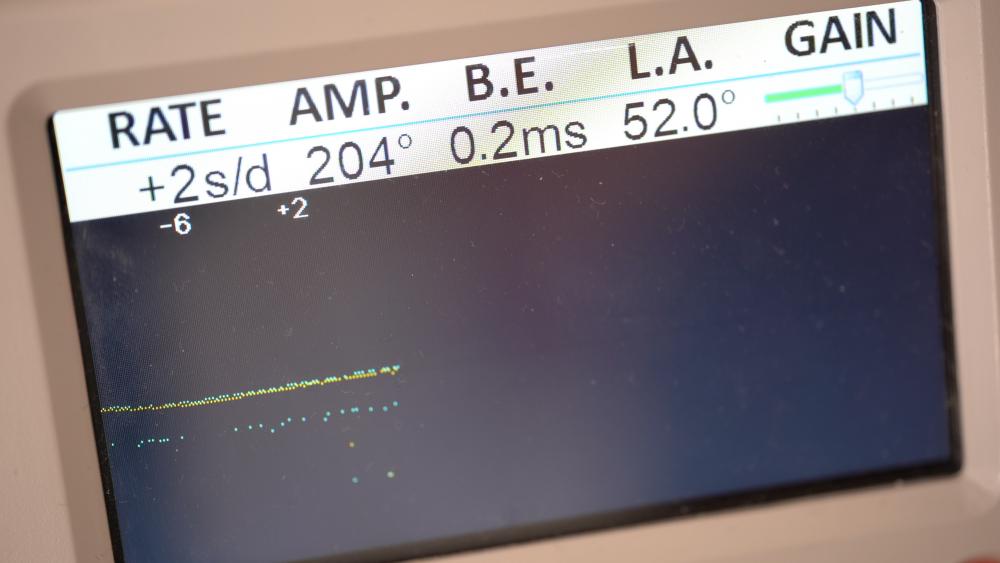
now a minor confusion flat hairspring versus over coil? I've attached an image over coil as tight as possible but the hairspring still has to slide when you move the regulator. Flat hairspring has to have a little bit of breathing room. This is why people who aren't familiar with over coil hairsprings may not notice that the regulator pin spacing that looks fine for a flat hairspring would be unacceptable for an over coil. Then the only way you can tell if you're centered is with no power. That will become obvious with some imagination and an example. For the example let's imagine that we have a watch with the etachron system. I'm assuming that were all familiar with that if not I can attach an image. The reason why for my imaginary example is this would work really perfect for demonstrating the regulator pin spacing without doing any permanent damage of trying to move the regulator pins which don't normally like to be moved dramatically. normally with this system you would with no power open the regulator pins up verify the hairspring is centered if not rotate the stud until it centered then you would close the pins but. this is where were not going to close them and you're going to have to use your imagination of how this is all working. Plus need to look at the chart below which was up above and pretend the pins are much much farther apart because it's going to dramatically change things. okay now with our imaginary watch with the regulator pins really far apart you barely wind the watch the balance wheel barely rotates and regulation will be at the stud in other words the watch will be really slow. Exactly what it shows on the chart below. Now if you very very slowly wound the watch up amplitude will slowly pick up. As the balance wheels oscillating the hairspring is opening and closing at some point in time much higher amplitude what the chart shows because the pins are much farther apart in this example they hairspring will just start to touch the pins. When that happens the regulation point will move away from the stud it will start to move towards the regulator in other words the watch will start to run faster. Now as the amplitude picks up they hairspring is going to spend more time touching the regulator pins as it does that the regulation point on the hairspring will move closer and closer to the pins. At some point in time it should stabilize like the chart shows below because it's spending so much time touching the pins with very little time in between. so this possibly confusing example shows that the regulation point with no regulator pins or pins are properly spaced apart other than over coil would be at the stud if they hairspring touches the regulator pins that more it touches them the more closely the regulation point becomes the pins themselves. This depends upon how much contact time they have greater amplitude the watch would run faster if they're far apart. If their space like the chart shows barely any spacing then like the chart shows it's much more defined. so hopefully this weird example makes sense. As I said on a pocket watch with the over coil hairspring pins too far apart especially if the watch isn't running well then you do see some dramatic timekeeping issues. As the amplitude goes down the timekeeping slows down because you're not touching the pins enough.
 3 points
 -
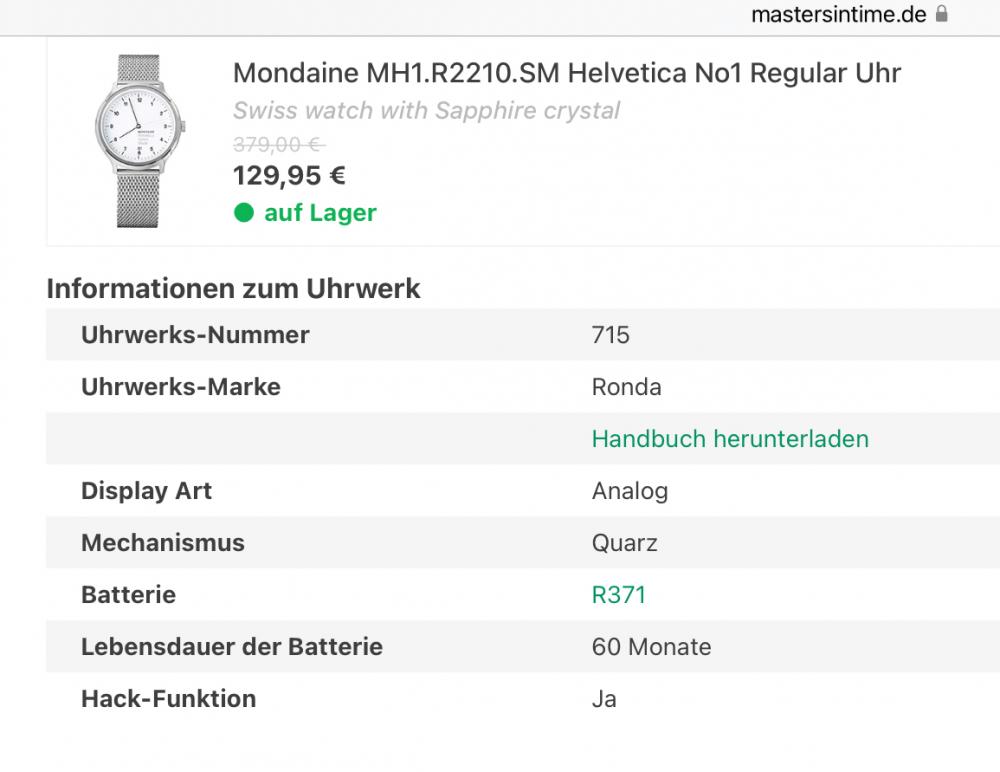
I see that the OP posed this question on another watch repair forum site simultaneously, and the most definitive-sounding answer that popped up there stated that the men's size Ronda movements in particular have a very long stator plate that is susceptible to bending from a drop or a poorly-performed battery change, which can cause the watch to run backward constantly or intermittently. A movement swap was suggested, as it was here.3 points
-
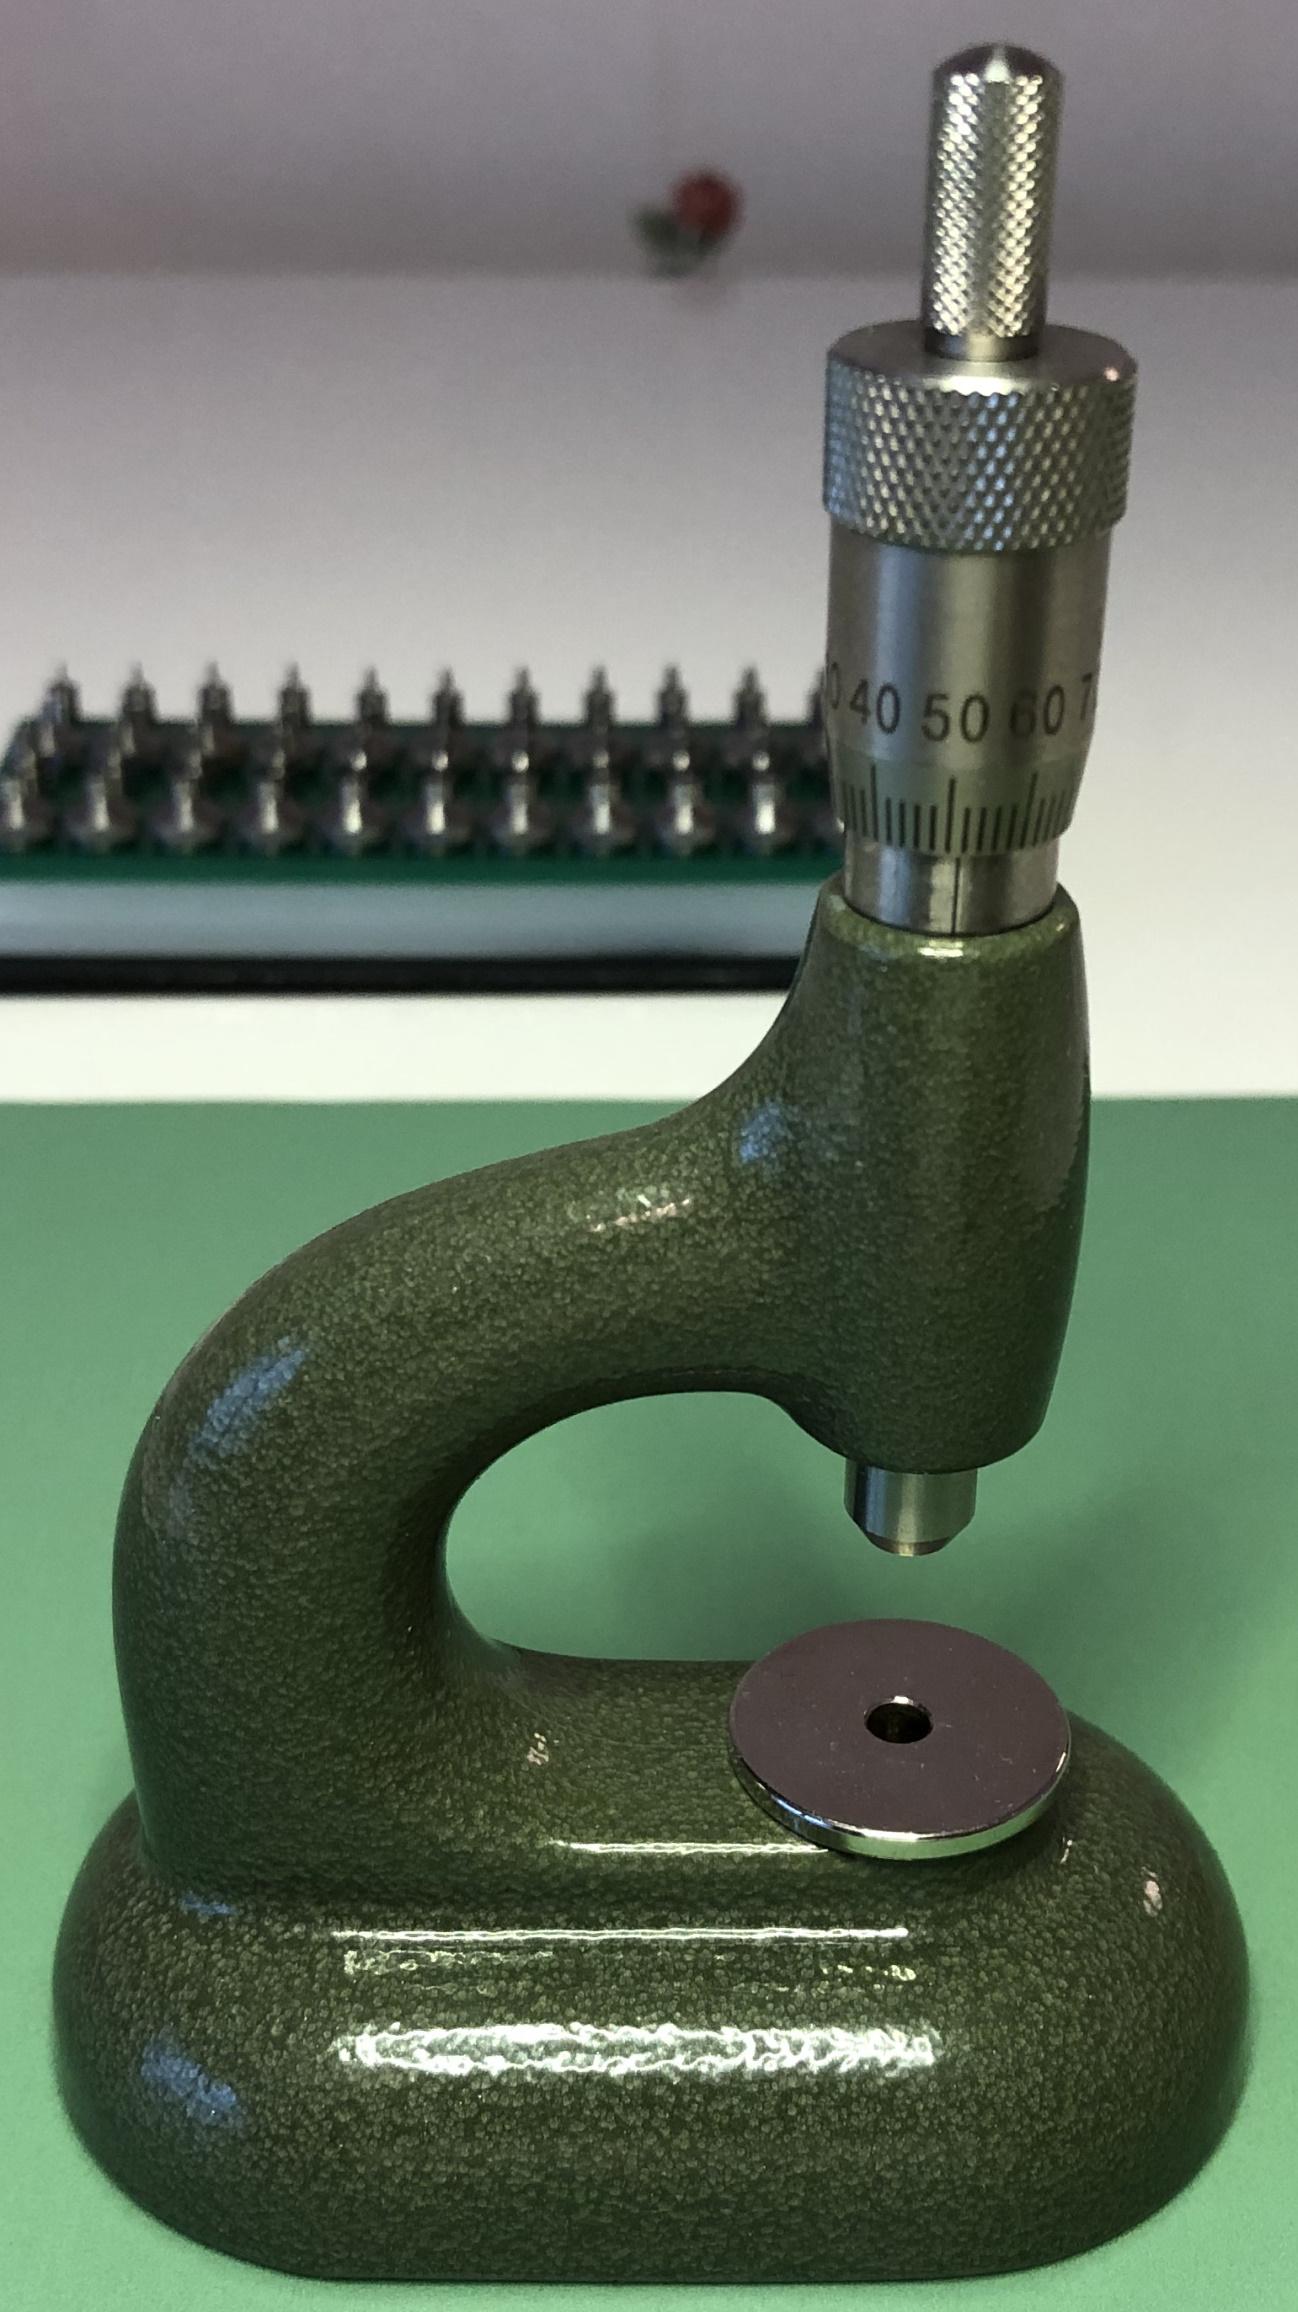
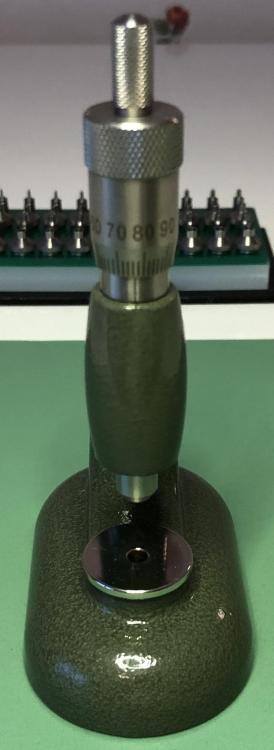
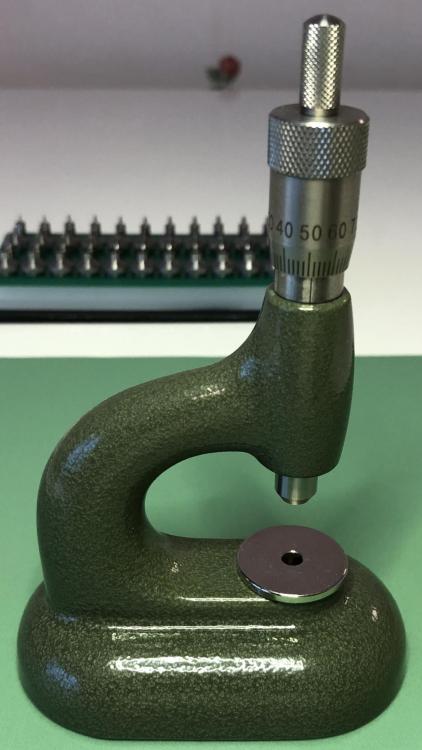
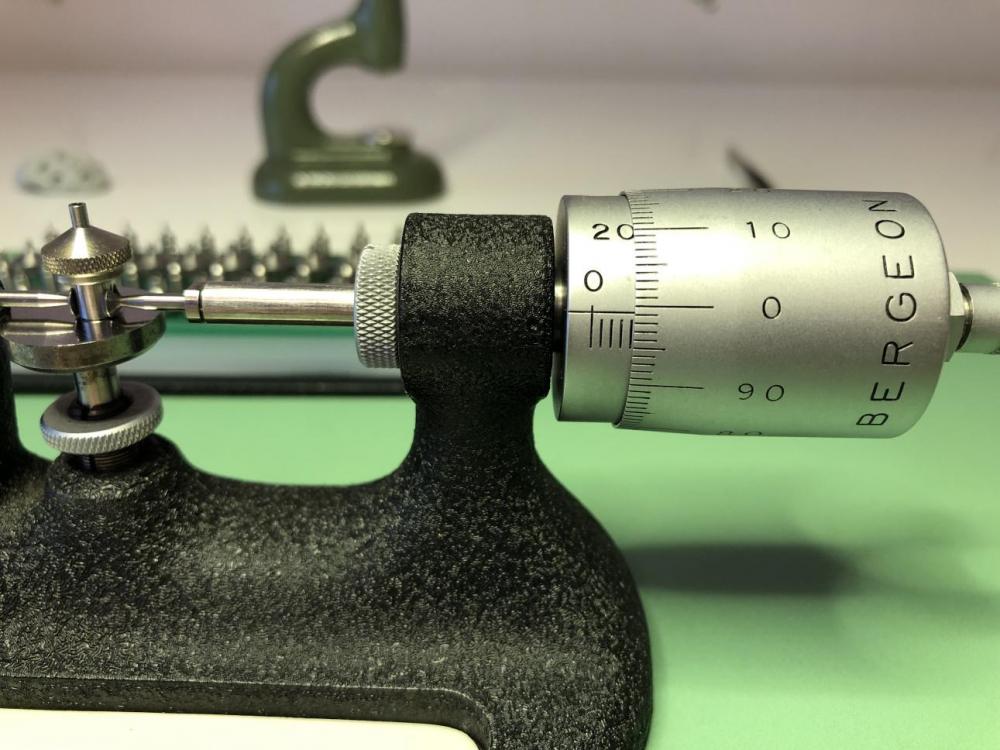
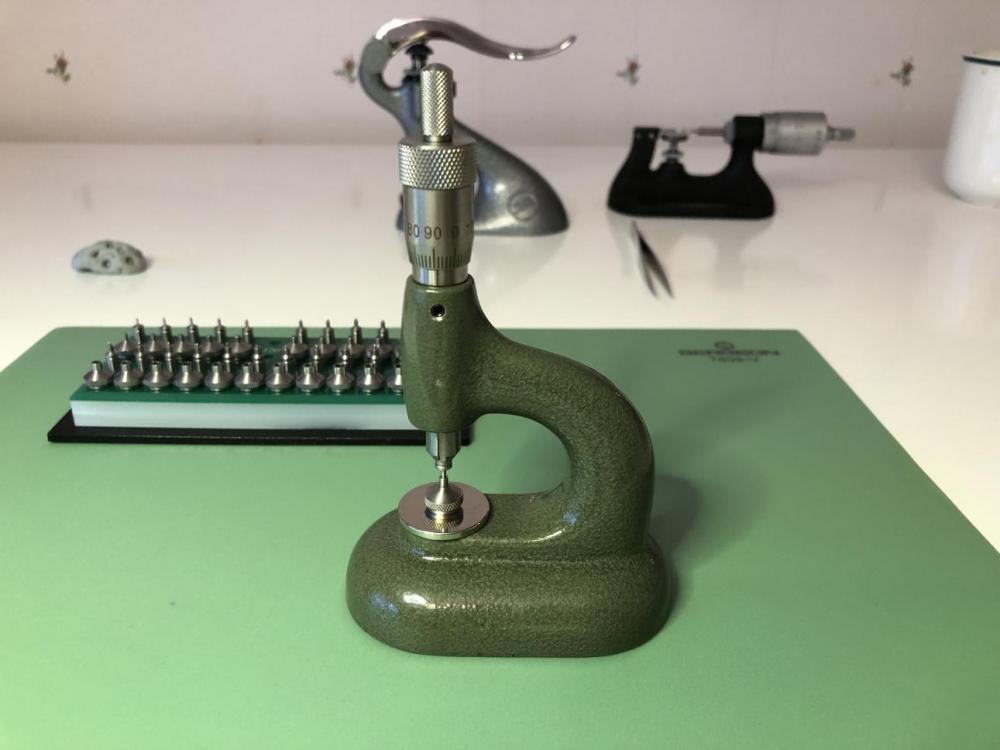
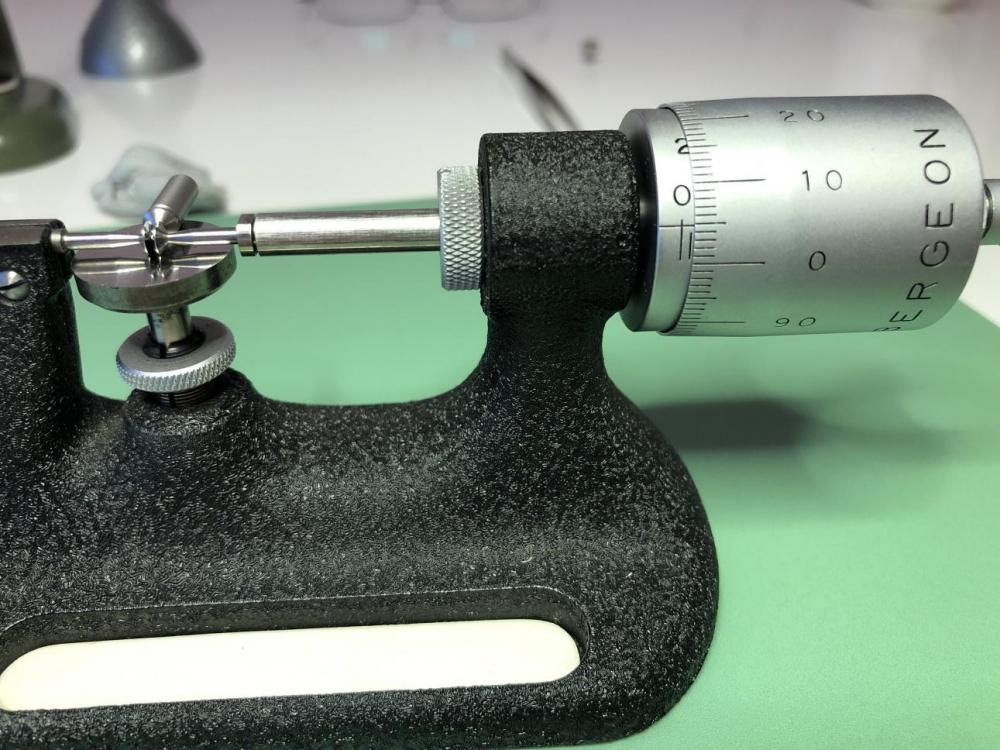
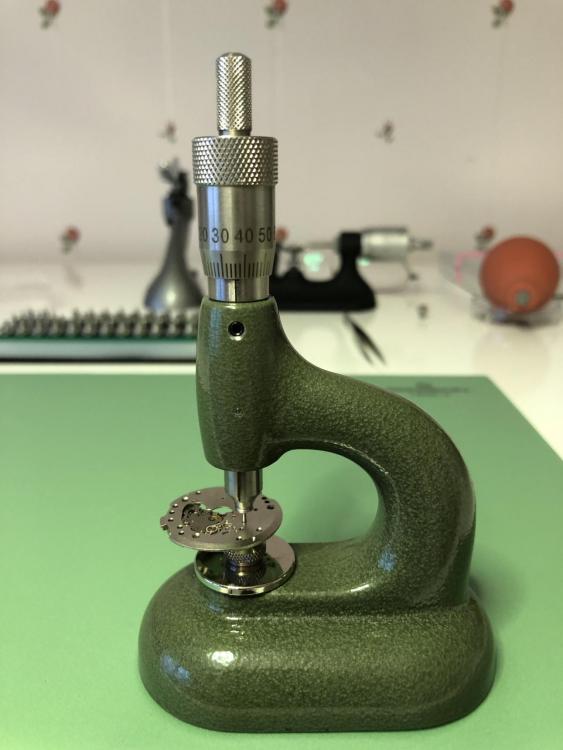
I remember @nickelsilver mentioning that the risk of denting very small pivots (<= 0.12mm, if I remember correctly) is imminent with a micrometre, so I always use my Seitz jewel gauge.3 points
-
Exactly what "matter"? Isochronism? Anything interesting in particular that you recall? Perhaps you could share a link in that case? Gramham, you sound like a professor or aspiring professor in horology. I'm just a passionate enthusiast and not even an engineer, so I'm having a hard time even understanding what you write. Therefore, I find it difficult to respond and comment.2 points
-
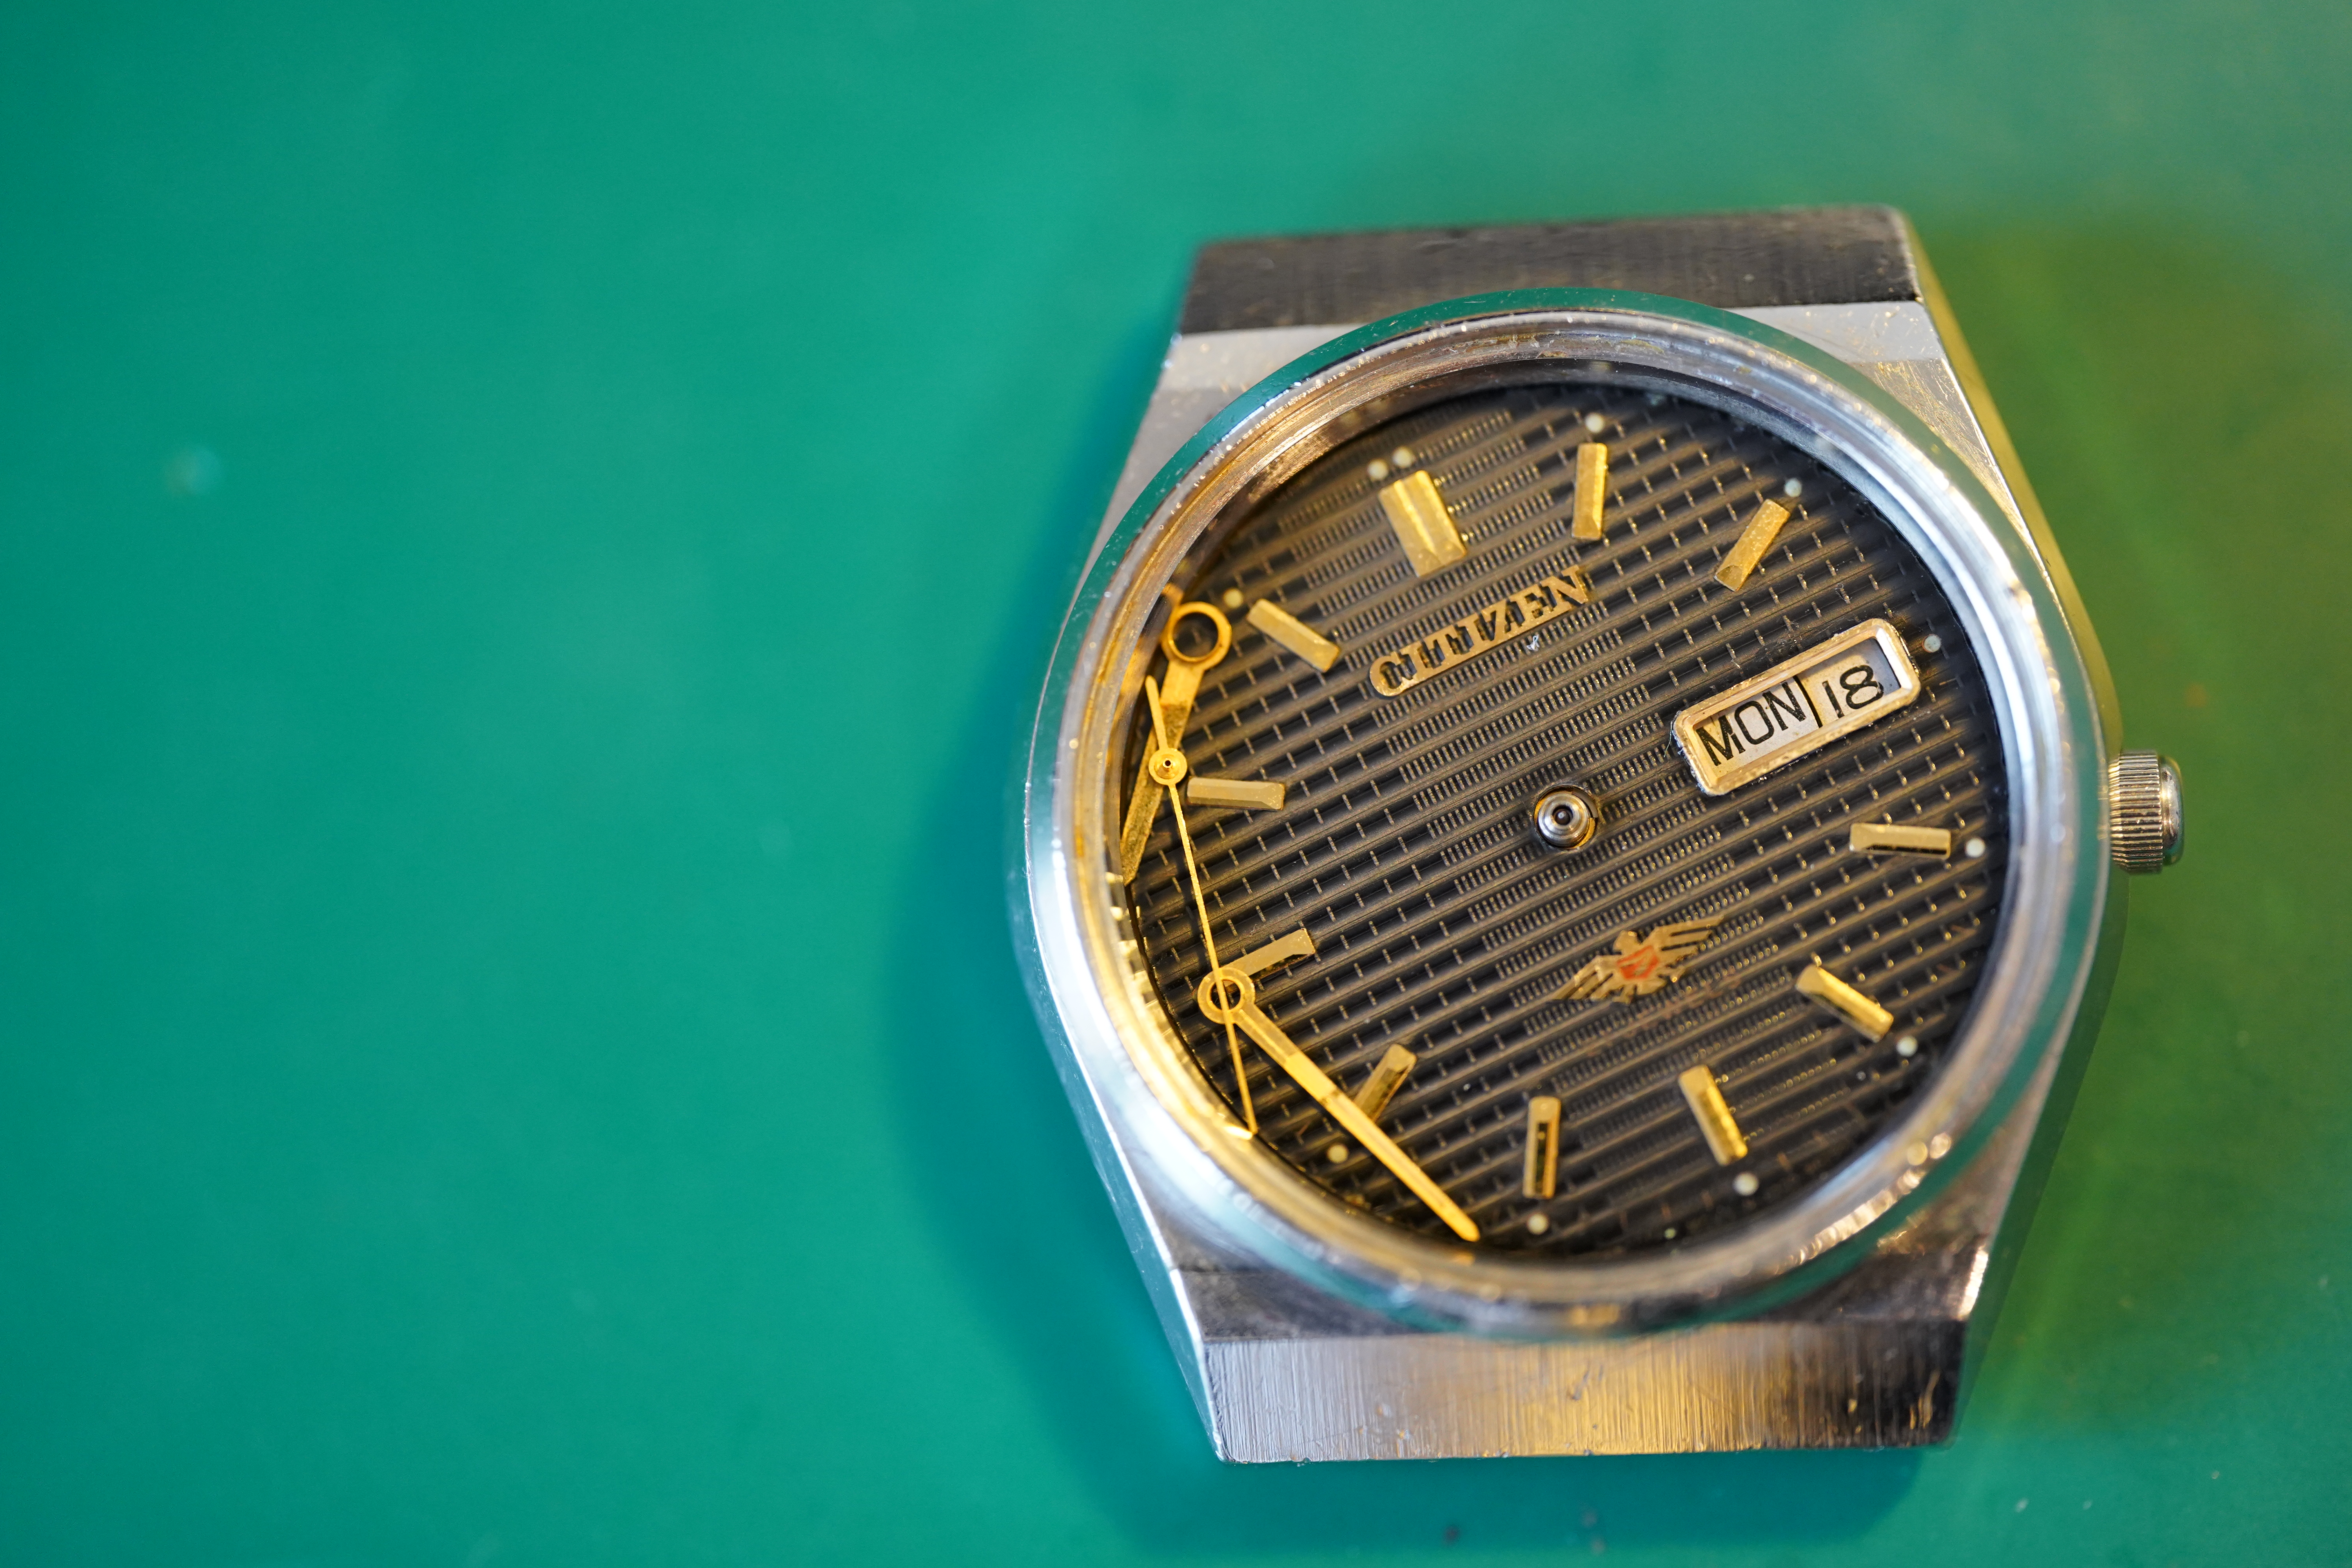
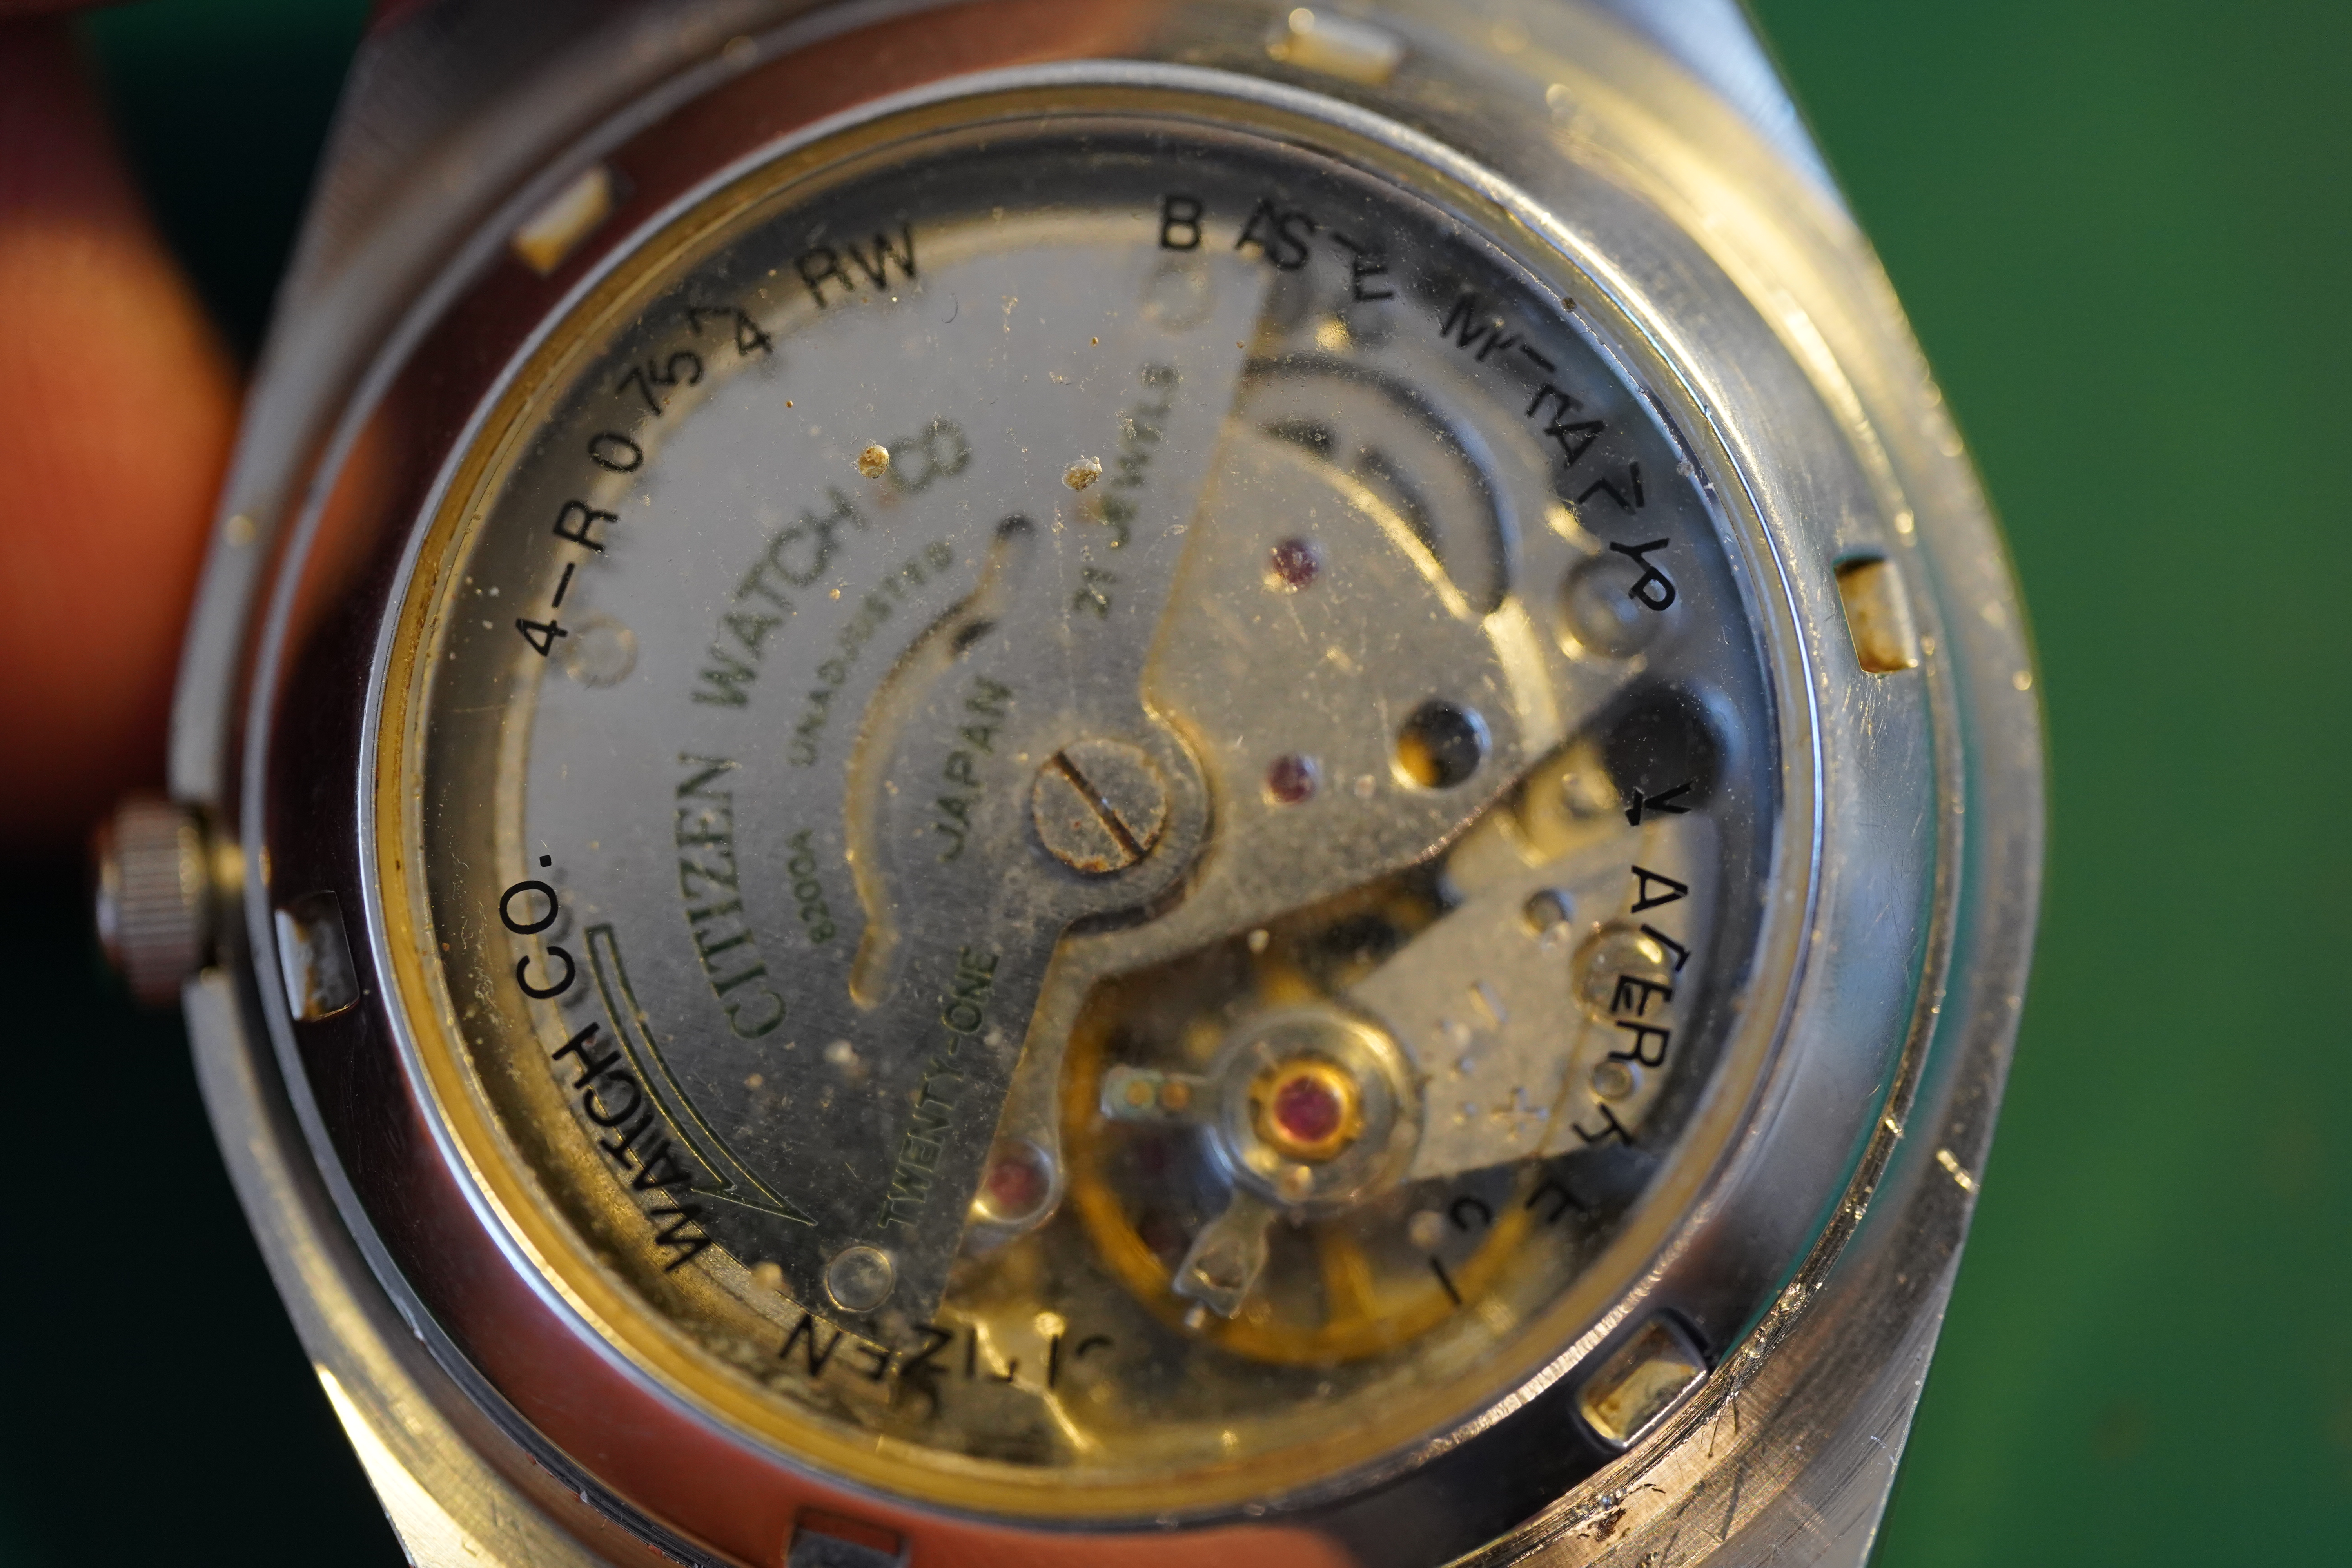
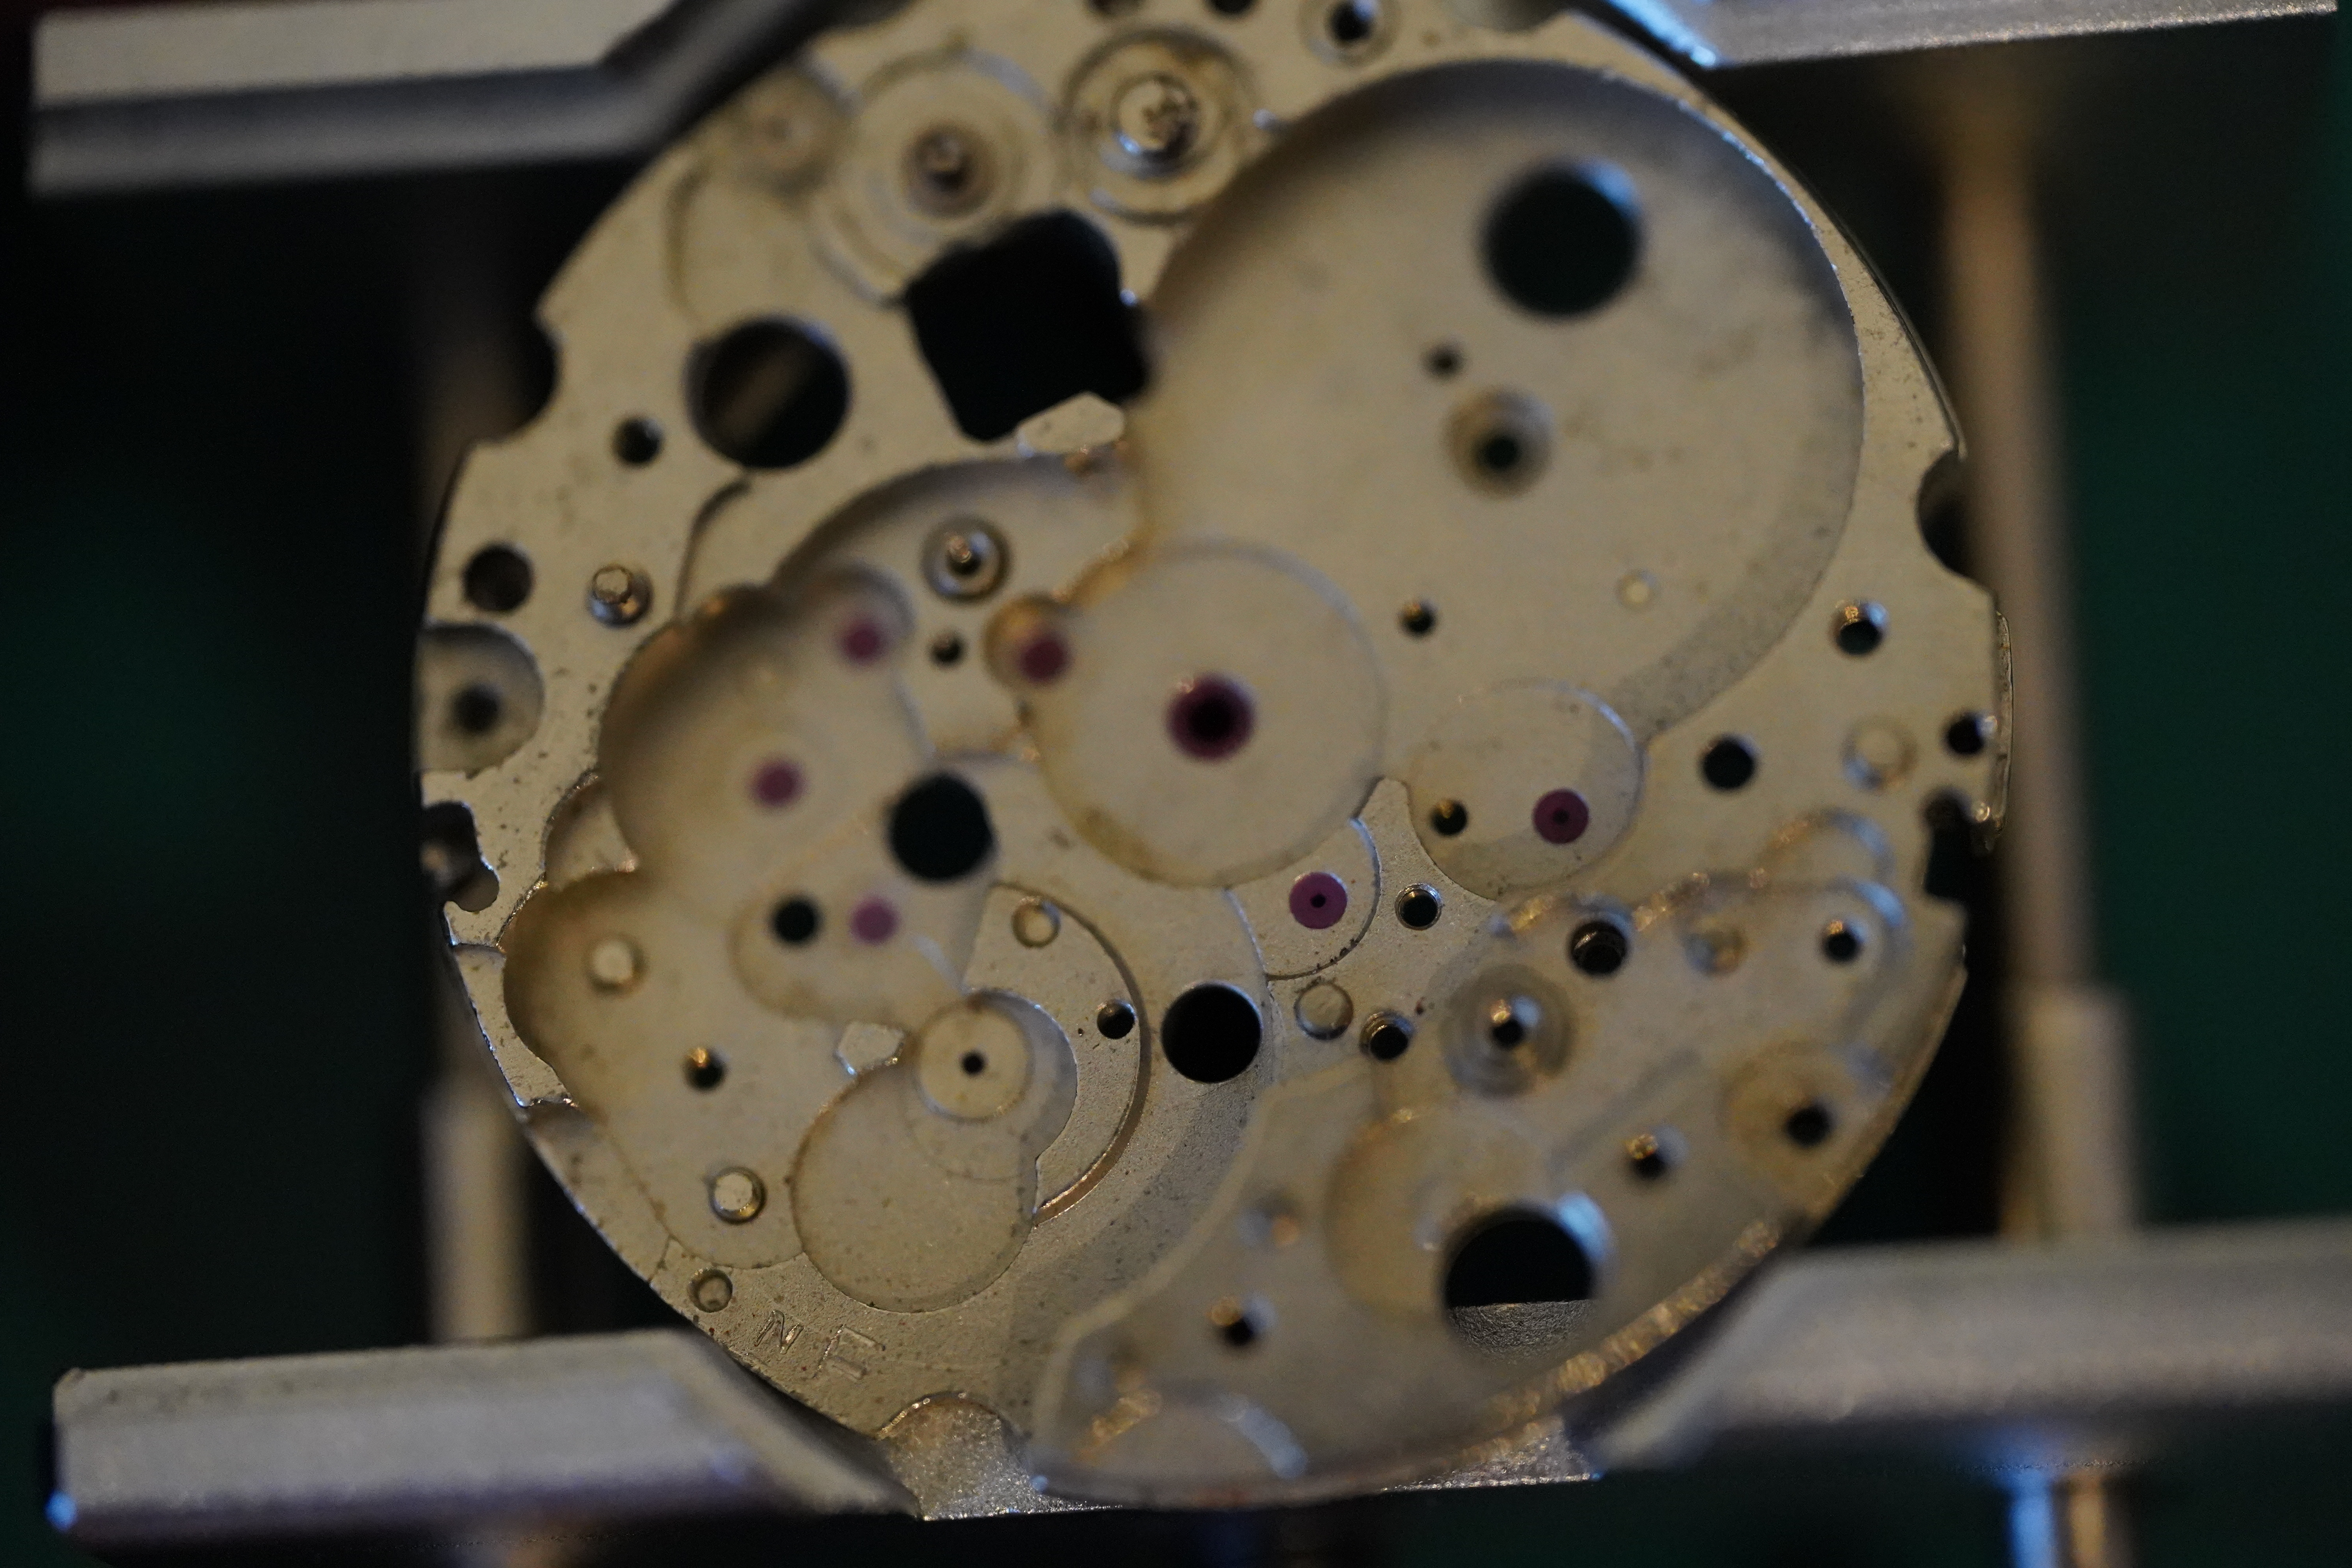
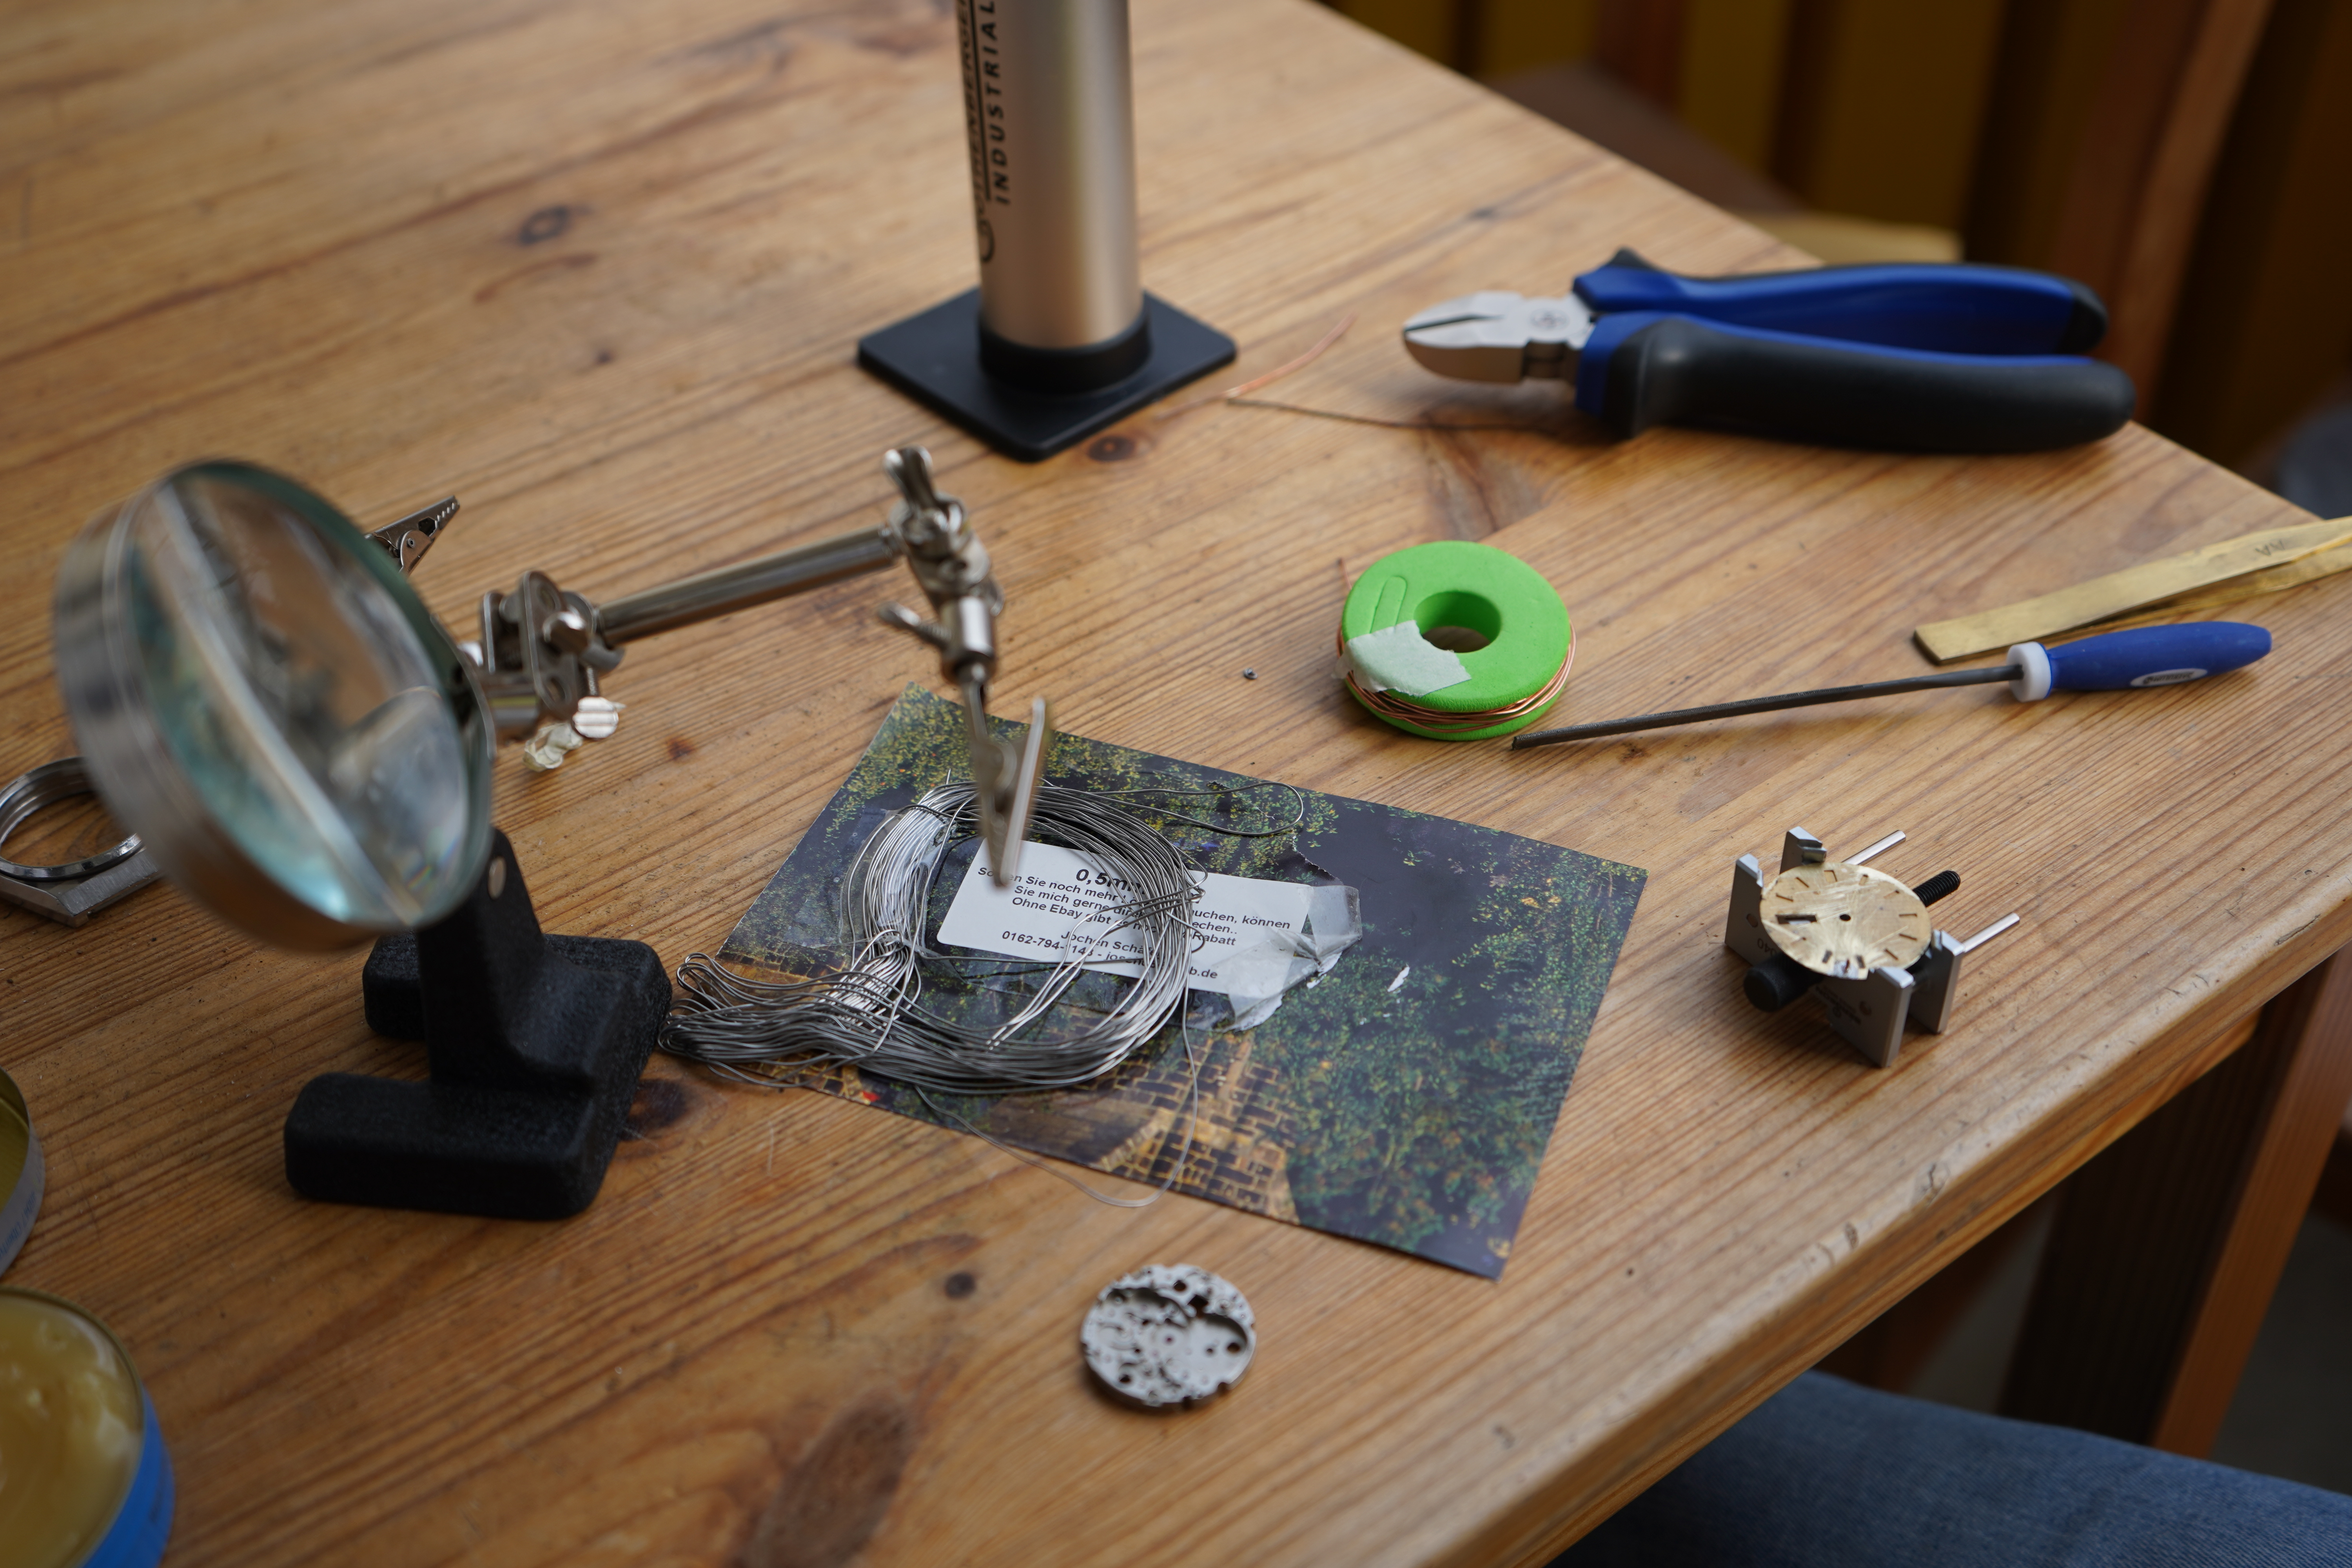
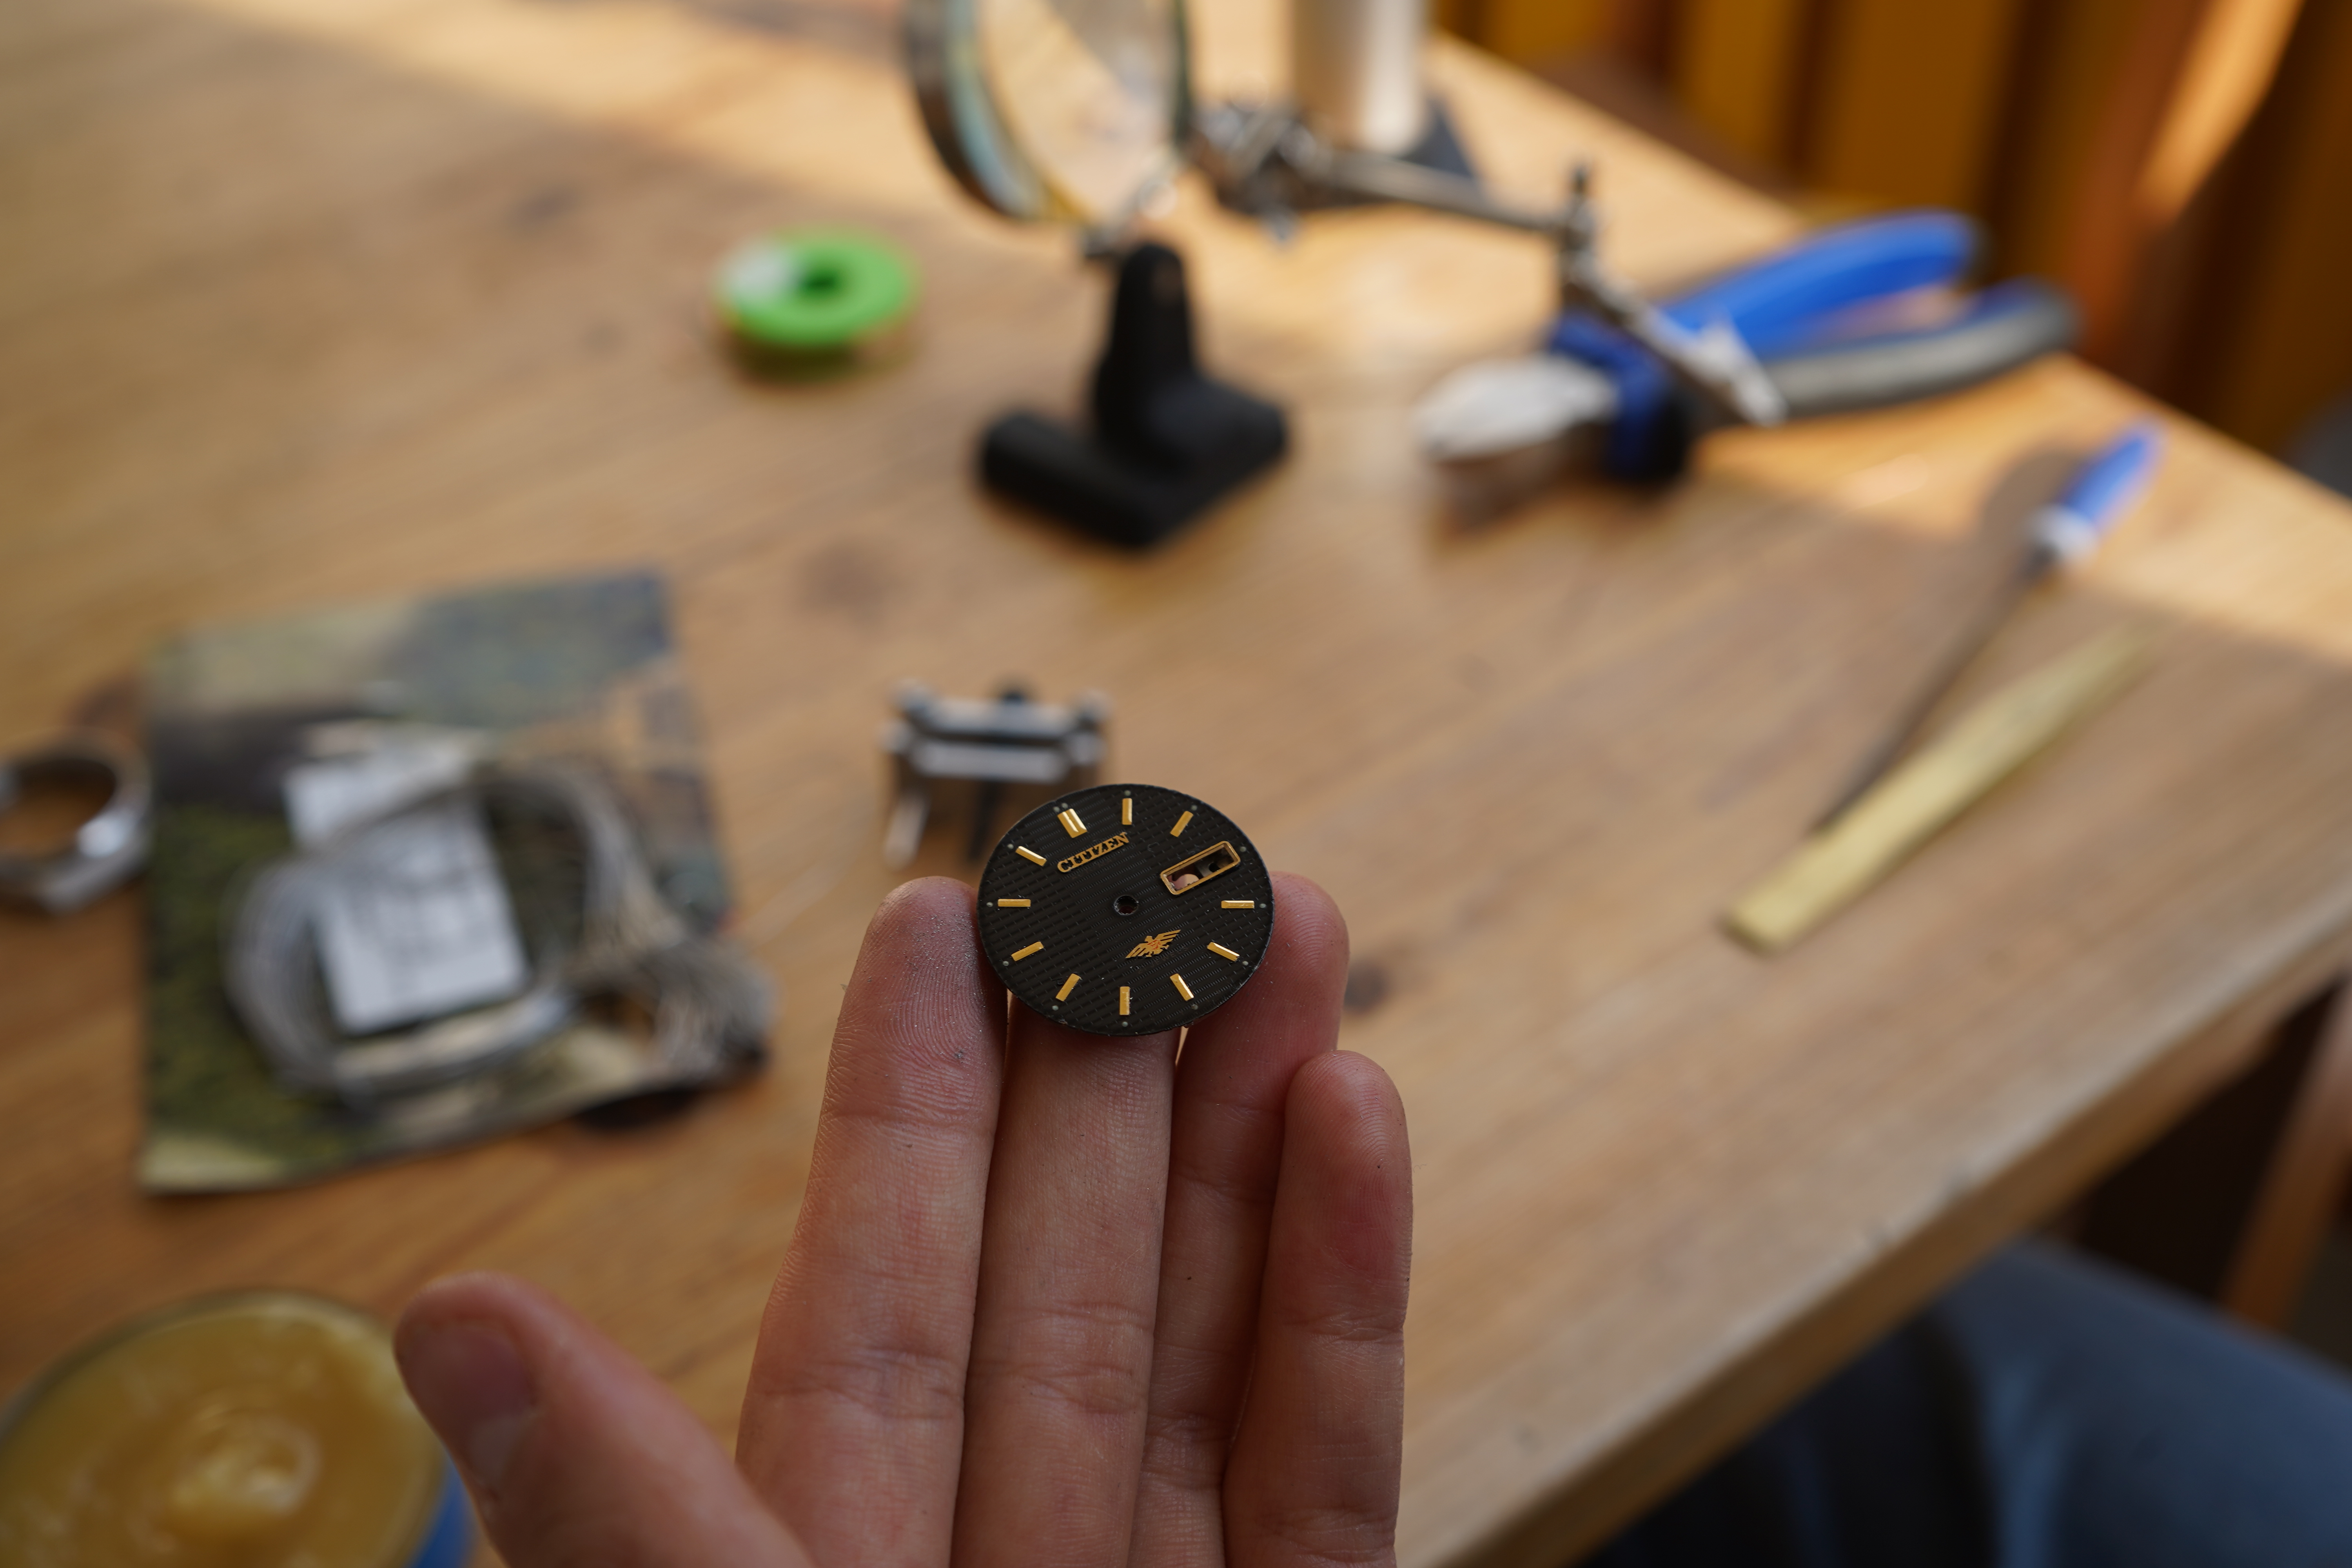
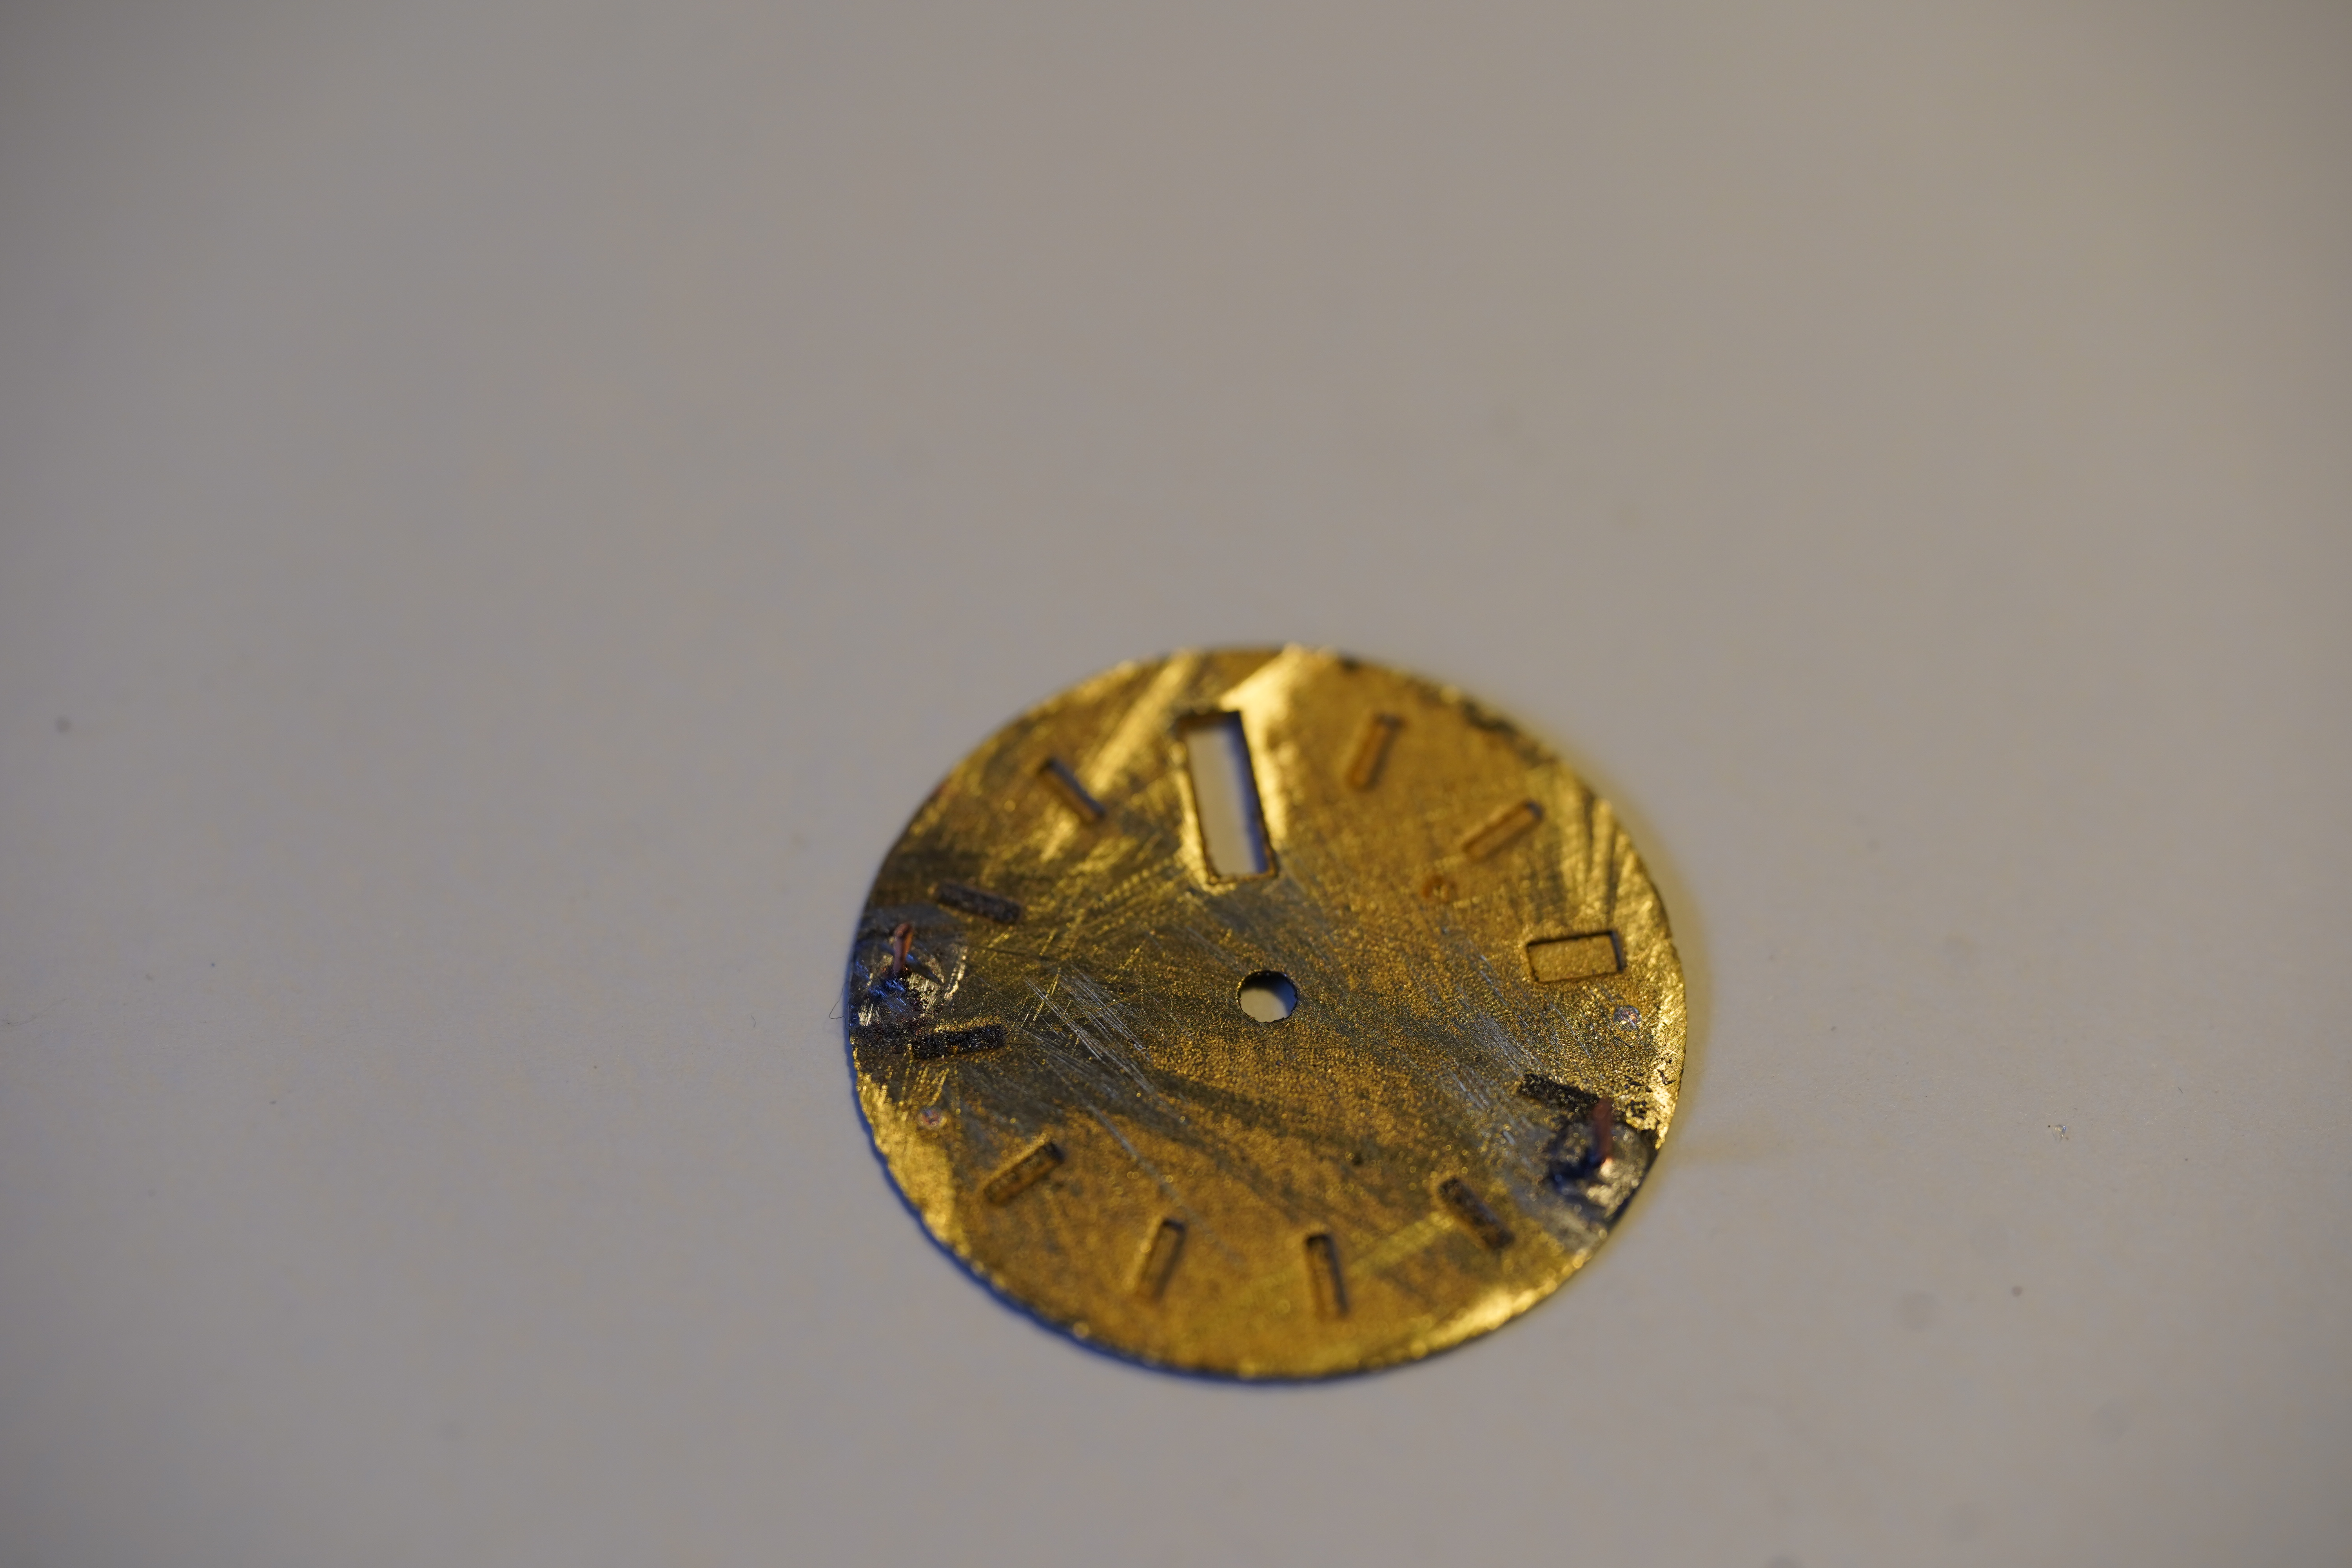
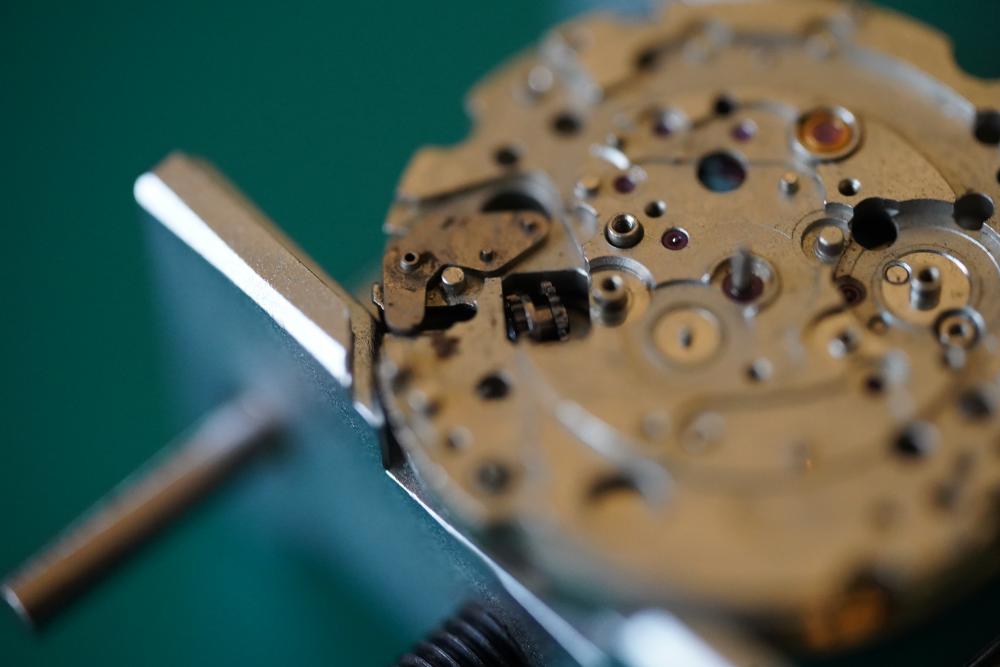
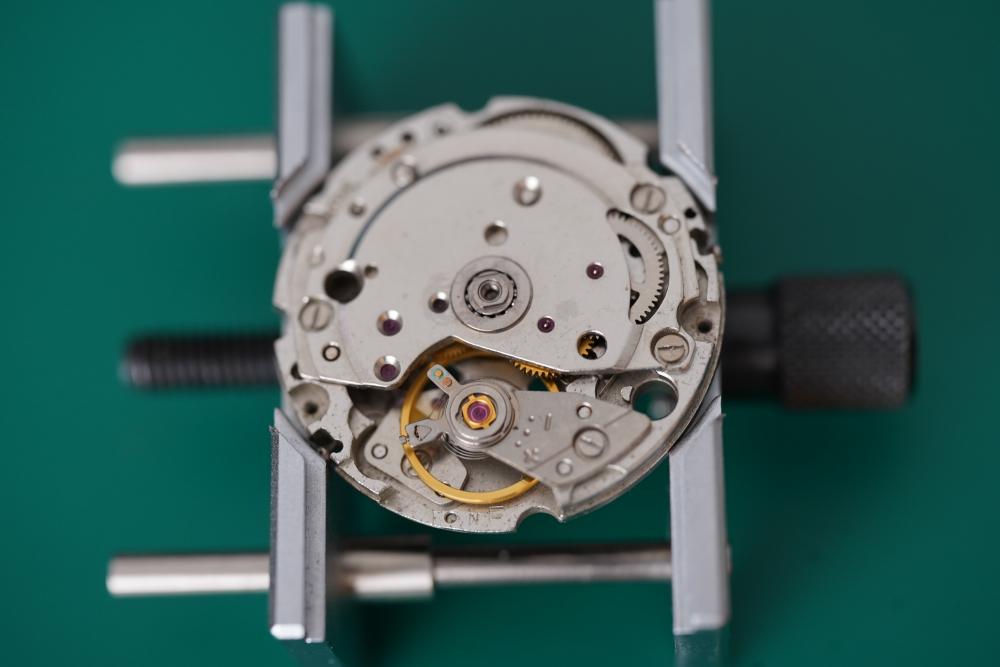
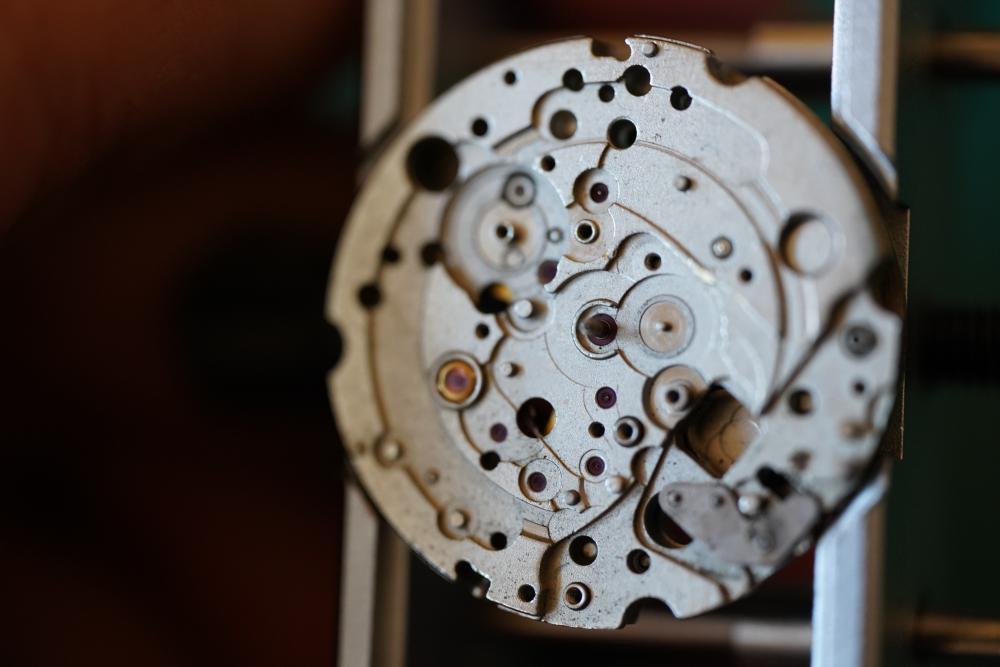
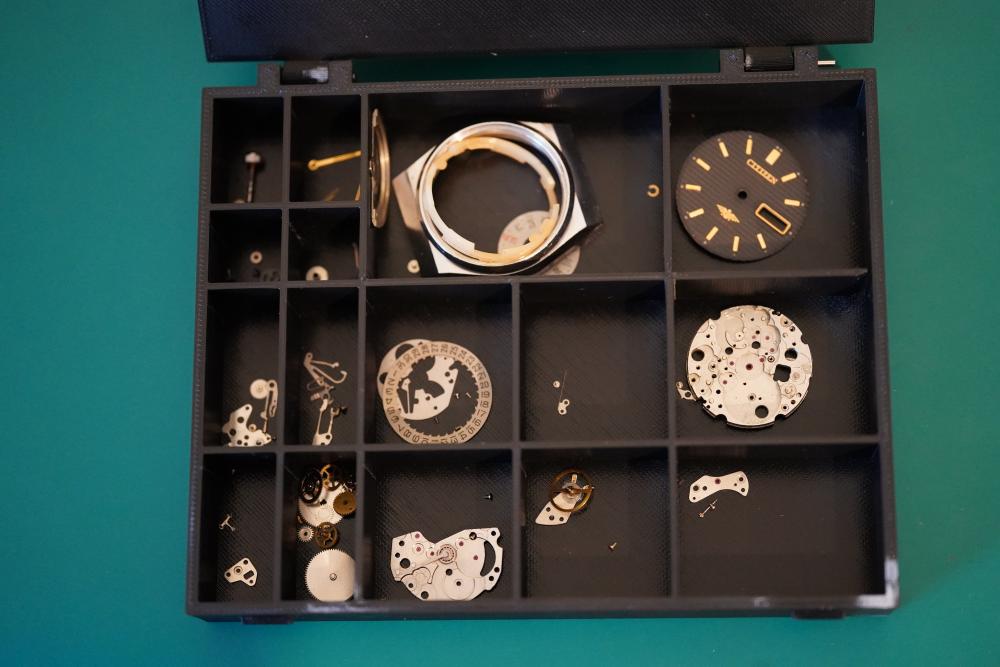
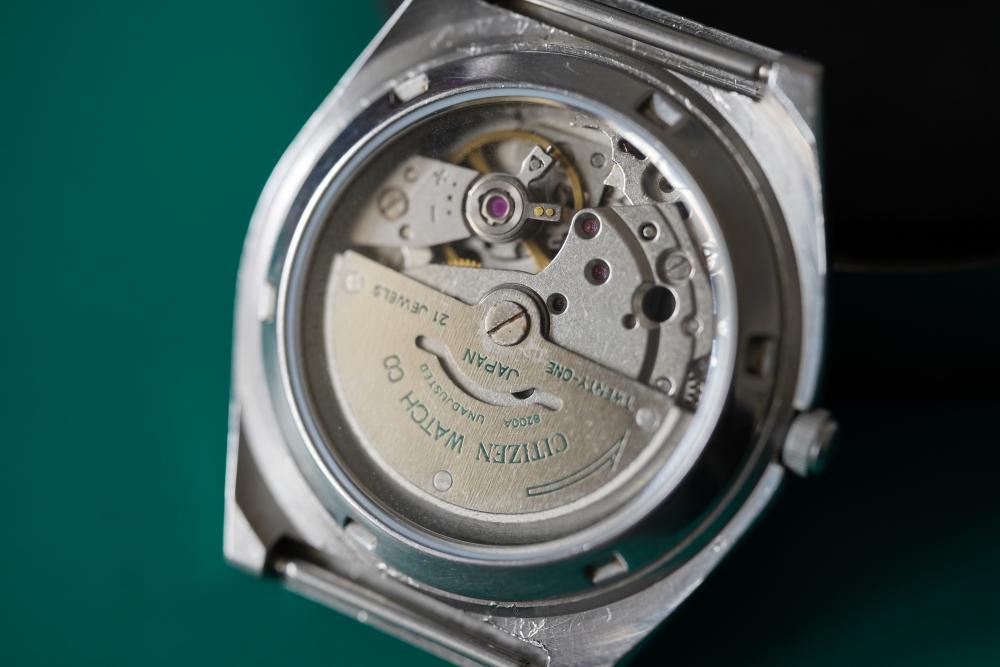
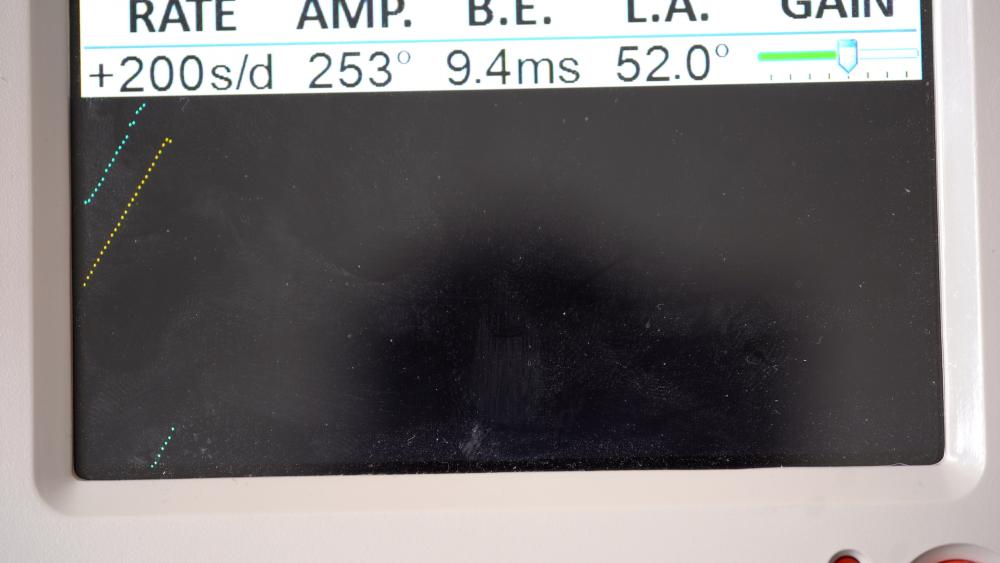
Hello watch bangers! Its been a while because I have decided to change my project schedule a bit but nevertheless, I bring you my most recent watch! This Report will be focusing on my work on an old Citizen watch with a Miyota 8200 movement! Next to the usual service features such as crystal replacement, lubrication and cleaning, I will also be talking a little about dial feet repairs since this watch needed one! Nevertheless, for you lazy people out there, here is the 4k fully commented video on Youtube: Overwise enjoy the read! Arrival status: Here is the watch when it first arrived on my work table Here is a list of what is wrong with this poor old watch: - Missing front crystal and dirty case back crystal - Detached hands - Misaligned dial - Non-Running movement So as you can see this is quite alot of work, but we will be covering all of this and the result definitely are worth it! Disassembly: 1.Removed the detached hands to protect them and screwed open the case back. 2.Removed the case, the dial spacer and the dial ( which had no dial feet attached anymore) and strapped the movement into the holder. 3.Took off the golden day wheel clip and the day wheel. 4.Unscrewed and removed the date cover to reveal all the setting subsystems. 5.Removed the date wheel by releasing tension on its little spring. 6.Took off the date spring and the two quick date and day levers. 7.Off with the canon pinion and the minute and whole wheel. 8.Removed the stem setting system ( Yoke and setting lever) as well as the translation to the canon pinion ( the two translation wheel and their cover). 9.Finally removed the clutch to complete the front side disassembly, well except for the balance jewel! 10.Flip the movement and remove the Rotor. I was really lucky and had a green gilden rotor on this miyota 8200! Loved the look of it! 11.Removed the complete balance. Loved the cool contrast of the round balance shape to the square jewel cap! 12. Undid the pallet fork bridge and lifted both of them away. Pallet fork jewels looked good under x20 magnification. 13. Unscrewed the brutalistically designed main bridge and took it off to be able to dig into the inner gear works. Took off all the gear leading from the escapement to the mainspring and moved on the to the ratchet system. 14.Removed the ratchet system and moved on to the Mainspring barrel and winding wheel which where both removed. 15.Here,I came to the final sub bridge where I removed the sweeping second pinion . 16. Lastly, I removed the final bridge and the underlying wheel which went through the mainplate. With this 99% of the disassembly was done! You can see all the parts (Around 75 I think) assorted in my sorting box! Mainspring As always, I did not have a spare mainspring at hand not did I plan on getting a new one so we once again go to servicing the mainspring! Unwound it out of the barrel and it came out pretty decent, maybe a few small nicks and unevenness but nothing major! After a manual rub down in lighter fluid and alcohol and the following lubrication of its whole length and the barrel insides, carefully wound it back inside to get this result: Cleaning Since I have decided to just keep going with the manual cleaning method, It is the usual process! A good soak in lighter fluid followed by a rinse in isopropanol alcohol. I of course did not include the balance or the pallet fork into this methodology since the alcohol could dissolve the shellac used in the jewel adhesion. I just gave them a good lighter fluid bath! Lubrication All the lubrication I used: Moebius 9010 - Basically All jewel bearing Moebius 8200 - Mainspring lubrication and barrel bottom and under the barrel lid. Moebius 8217 - Mainspring barrel grease Moebius 9415 - A miniscule amount on the palletfork jewel tips Moebius HP 1300 - Slower moving contact points such as: Metal barrel bearing, canon pinion and hour pinion sides Molycote DX - Heavy contact points mainly in the gearless setting system. Reassembly: Just follow the disassembly steps and you should be good! Dont forget to clean and lubricate the balance shock jewels. I haven't really taken any pictures of that process but they will be coming in the following reports! Here is one right after I did the whole process: Dial feet Repair: Now dial feet repair was quite a big issue for me since I always buy used watches and their parts online. And very often I would be super enthusiastic about a lovely looking dial that I snagged just to get it and realize that the dial feet are snapped off. And since I dont like glueing dial and not even mentioning the fact that glueing dials on watches withd ay/date complication being basically impossible anyways, I had to find another way. After some research, I decided to go into the field of resoldering the dial feet onto the dials. Now this has alot of variables which decide if it works out without ruining the dial ( dial material, print, cover, thickness etc..). I went onto my balcony and used a little tools holder, solder, copper wire, safety goggles, soldering paste to solder the copper wire used as a replacement to the dials again. Here are a few pictures of the balcony: And here of the “fixed” dial, even though the back does look absolutely demolished. You dont see that side though hehe. I wont write down the whole process here but I probably will do a more in depth one on a separate post in the proper forum. Timegrapher Test: After everything came back together, it was time to test my work on the good old timegrapher! Here is the result right after reassembly without any regulation: And here it the watch post-regulation: The low Amplitude is probably a mixture of the mainspring not being replaced and not being wound fully! Im also not very satisfied with the slight background noise with is visible on the graph ( just because I like my lines neat and straight haha). Oh and I regulate the watches to their best performance in two position. So once dial up and once dial down. Everything else really is outside of my skill, ressource and patience level xD Final Results So here are the final results of the restored watch! I did end up buying a fitting original citizen stainless steel bracelet but I did not have the chance to use my works camera to capture pictures. Anyhow, the pictures of the watch still look great to enjoy the view! Conclusion So in conclusion, working on this watch was a nice experience! It was cool to show you guys the movement since this was the last movement of a 6 watch lot which I finished off! I loved the brutalistic but kind of aesthetic design on the parts so shout out to the people at Miyota. Im writing this up last minute since im going on holidays tomorrow and I havent done anything in terms of packing or cleaning so i'm sorry for the shallow and short finish! Hope you guys enjoyed the write up and hopefully the video! Criticism, comments, tipps and anything else really can be put into the comments below! Enjoy the next weeks and see you watchbangers for the next watch!


 2 points
 -
Me too, and i bet it will be a lot more than anyone else can. I must admit i did wonder if something was amiss here in graham's explanation. It wasn't my understanding of isochronism. As far as i was aware the period between the ticks remains the same or as near as, regardless of the force applied to the balance wheel, or its amplitude .2 points
-
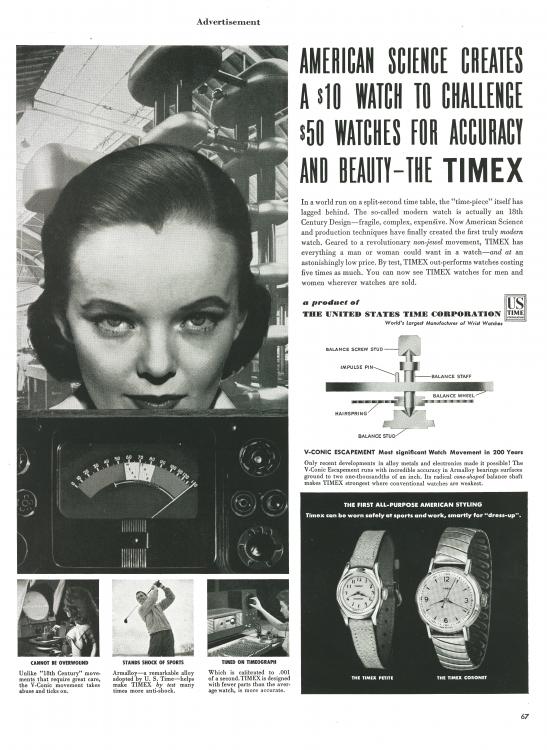
Two things I wanted to mention, first Timex and my favorite escapement engineering. If you want to consider high-G performance, think about the use of "clockwork" time fuses in artillery shells. Yes, these things ticked after they were fired from artillery, and I can't imagine much harsher G-force conditions than that. My understanding is that the Timex V-conic escapement and the alloys used in that escapement were developed for use in artillery fuses, and afterward made very robust watch escapements Secondly, in horology I'm used to seeing the term isochronism to refer to the rate of an oscillator being the same regardless of the amplitude of the oscillator, and does not necessarily refer to the stability of the oscillator with other varying conditions like motion. Common understanding of a term that may have different uses in different fields helps communication, I'm sure you know that. It helps me, because it keeps me from descending into a pit of confusion that is hard to climb out of ( I spend way too much time in the Principality of Muddled Thoughts, i.e. state of confusion). Cheers!
 2 points
 -
SUCCESS!! I managed to separate the ratchet screw from the barrel arbor. I ended up soaking the subassembly in CocaCola overnight and with a couple of taps on my staking set with a punch collinear with the screw axis, it loosened up the crude holding it together. LH thread. I'm going to mark that screw head with three lines to indicate to whoever takes it apart in the future that its a lefty. Thanks for the tips y'all !!2 points
-
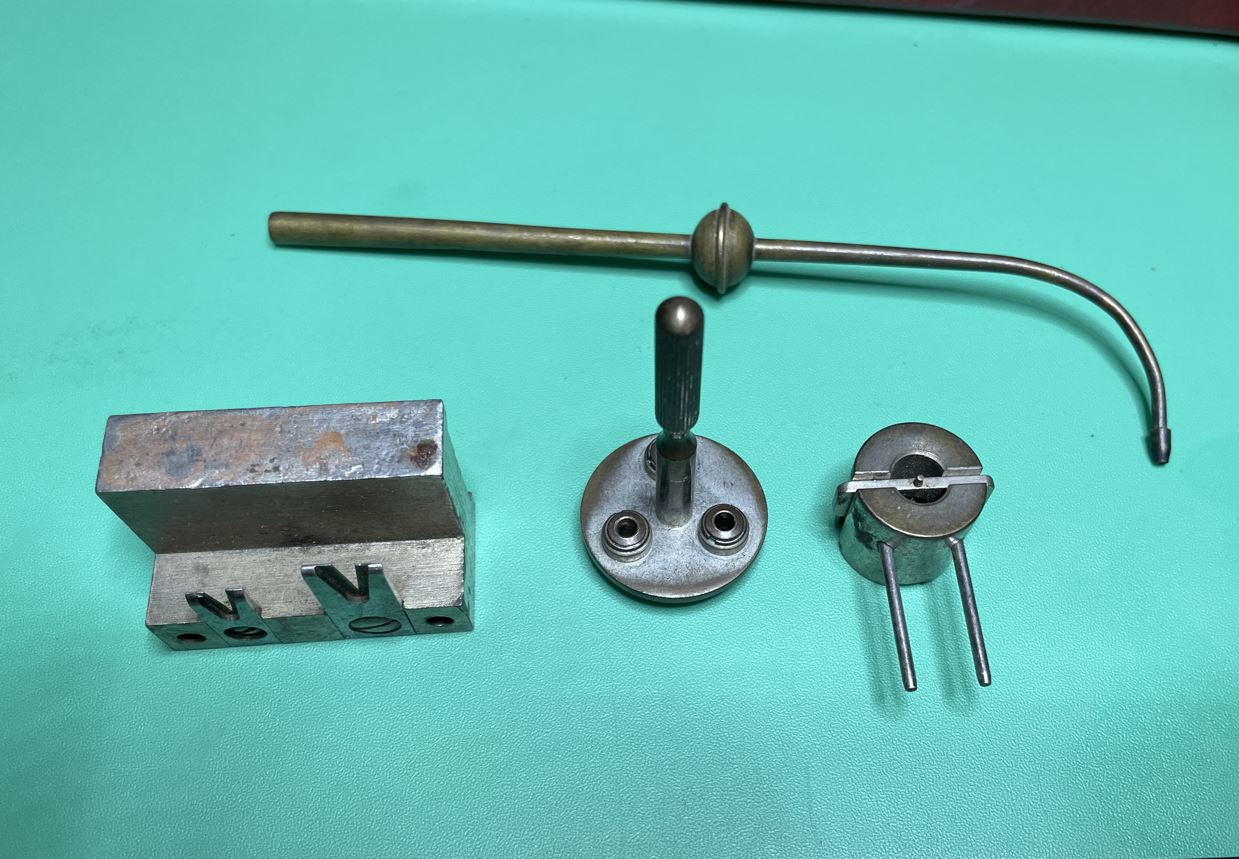
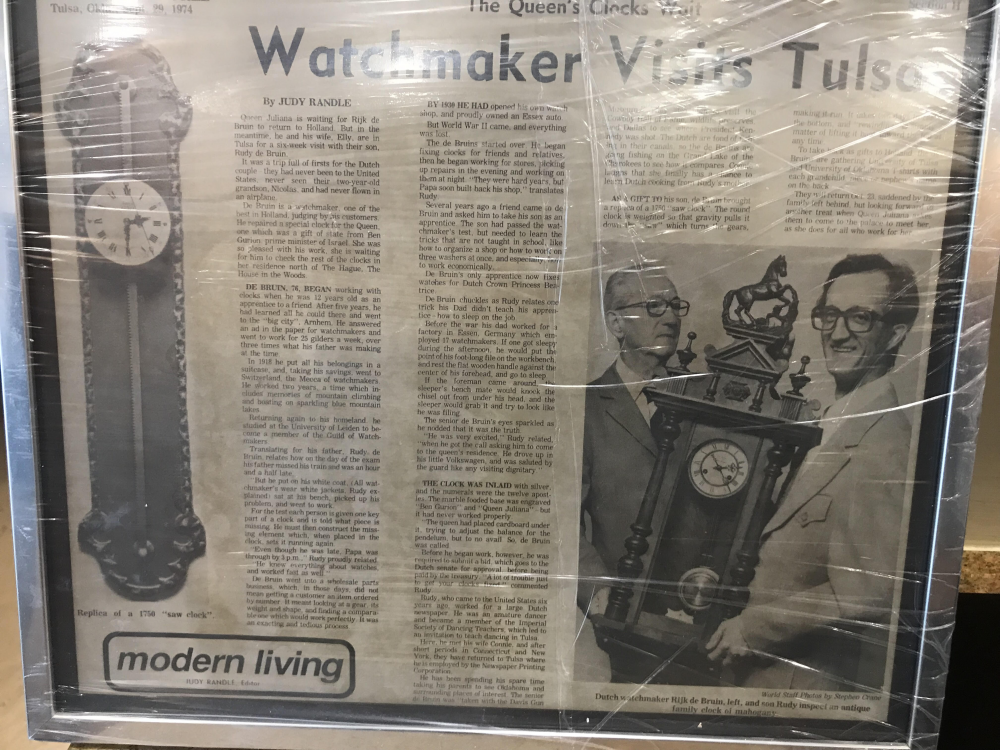
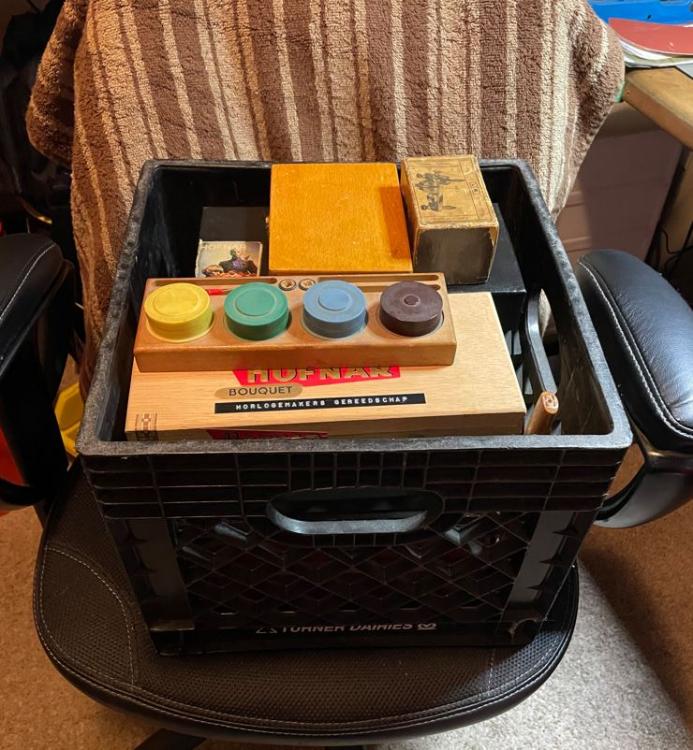
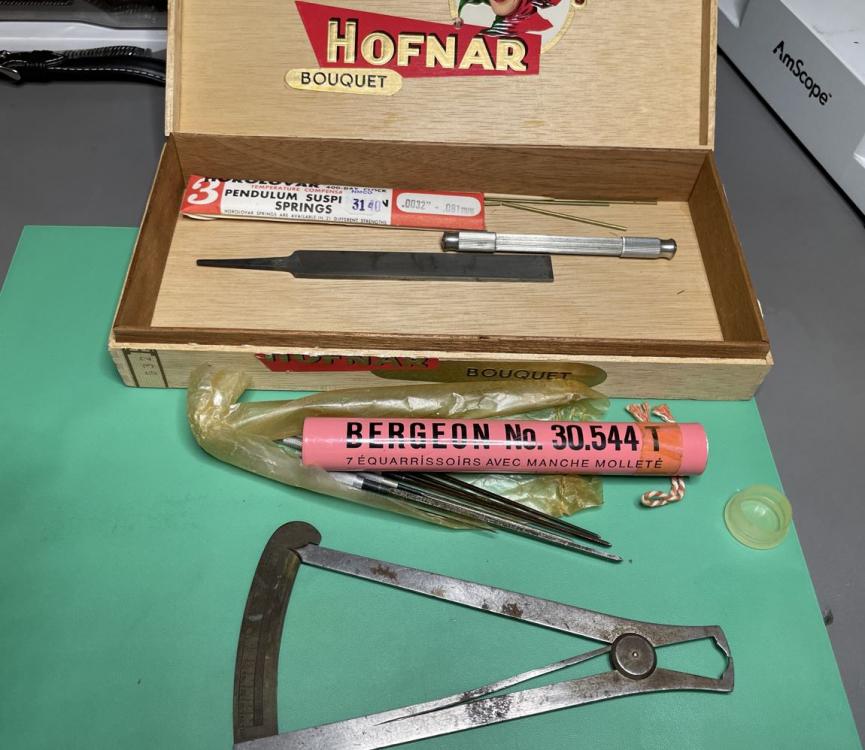
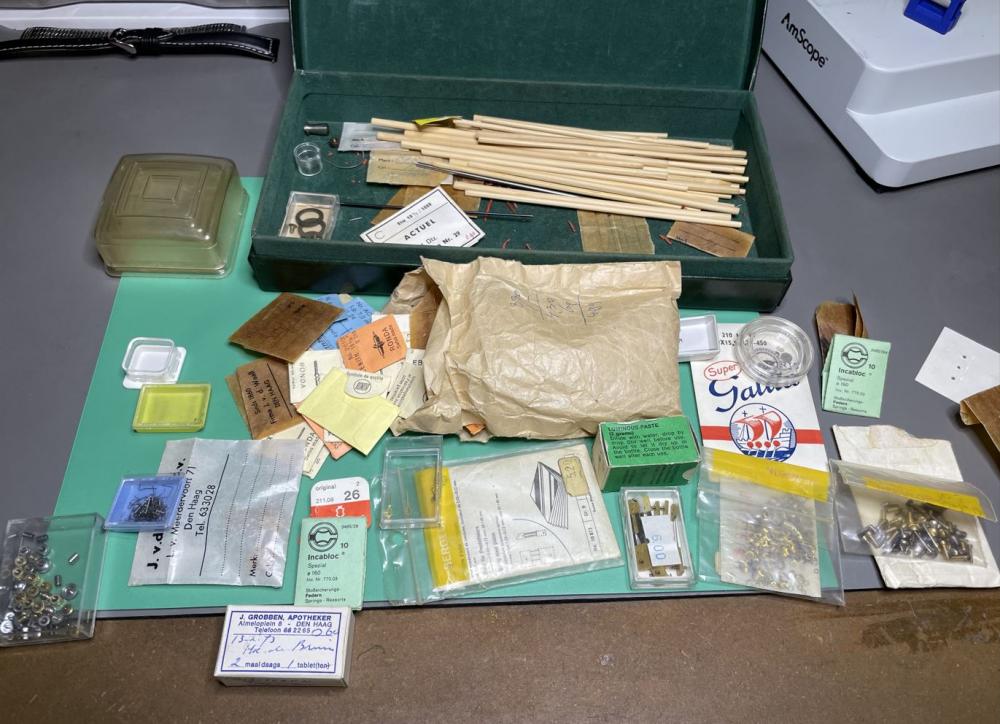
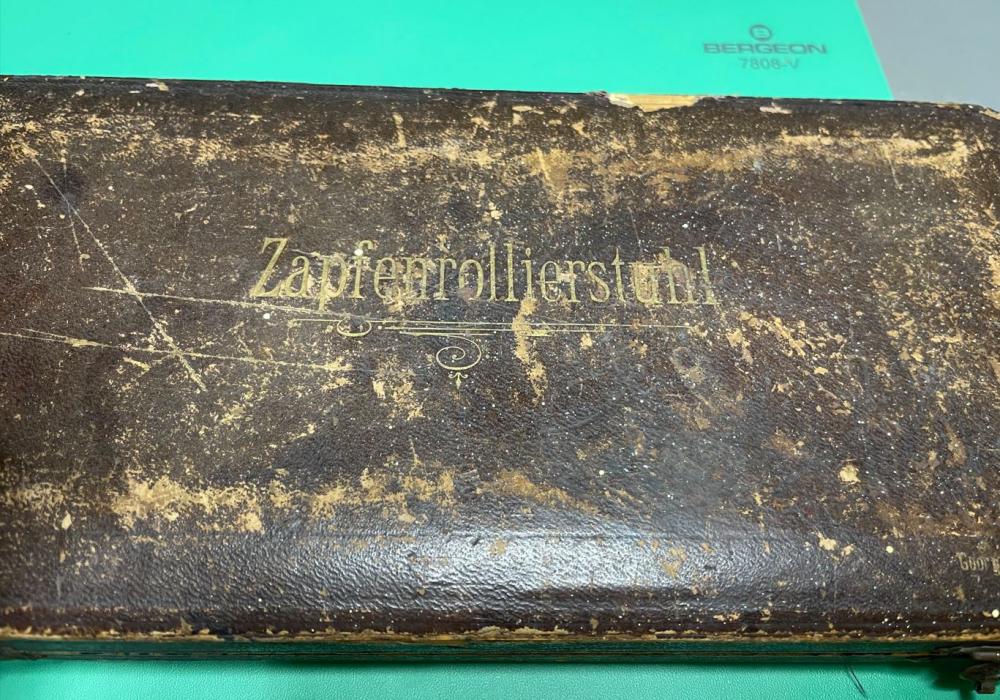
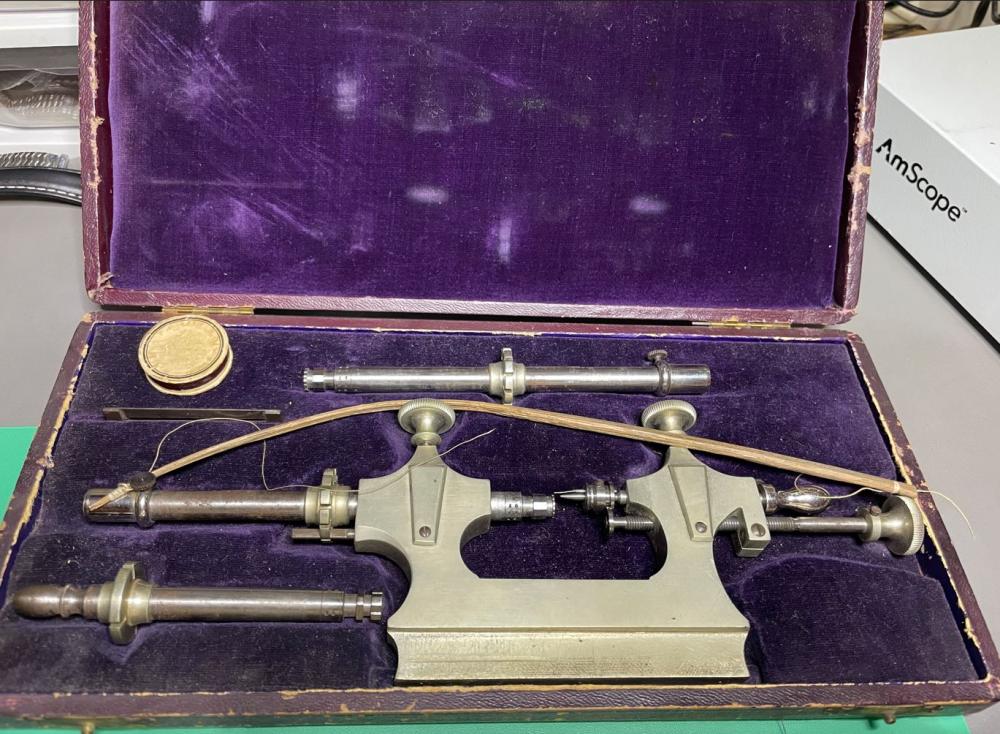
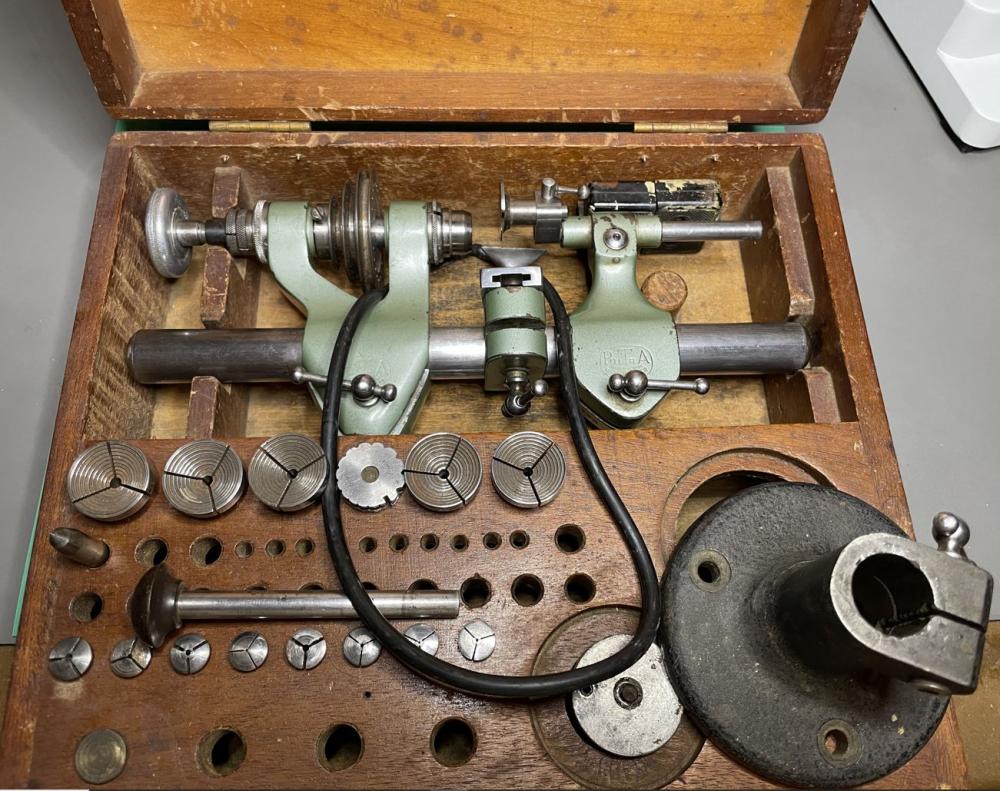
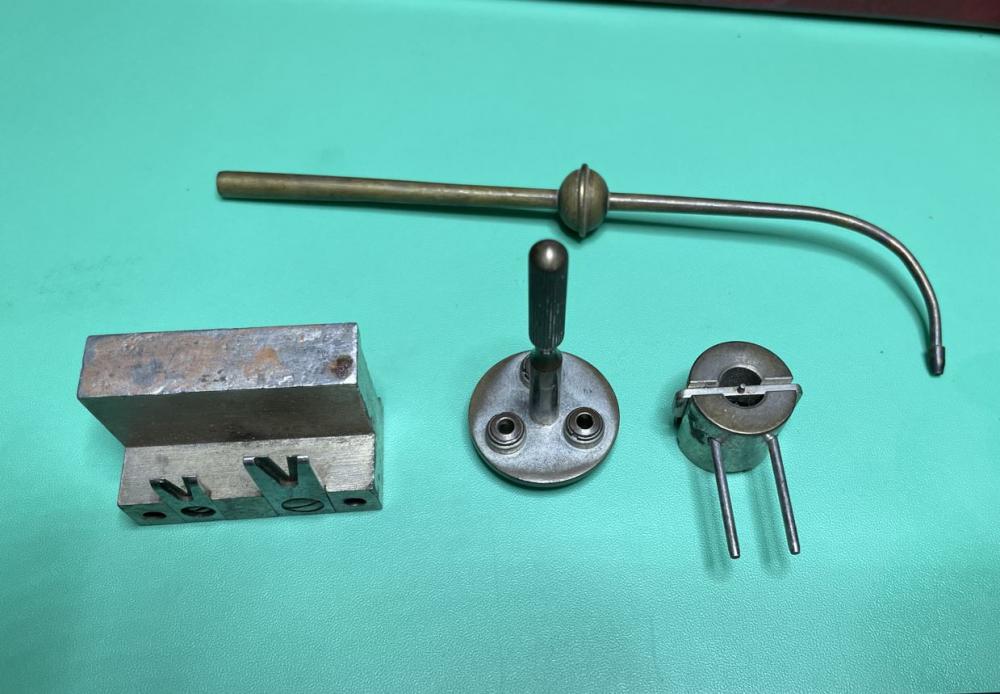
I'm a longtime member of another forum (non-watch related), and personally know several of the members. I have posted up some of my recent watch projects as a several of the people there have told me that they enjoy seeing that kind of work being done. One of the members (whom I haven't met previously) sent me a private message telling me that he had his grandfather's old watchmaking tools and asked me if I'd be interested in purchasing them. We started to talk and he sent me a few photos, which got me excited! He then proceeded to tell me that his grandfather was the official clock and watch repairer for Queen Juliana of Holland. He sent me a photo of a newspaper article his family has kept from the Tulsa World newspaper back from the 1970's, stating that his grandfather was one of the best watchmakers in Holland. After he repaired a special clock for Queen Juliana that was given to her as a gift from Prime Minister David Ben-Gurion of Israel, she was so pleased with his work that the queen became one of his clients! The story goes on to give a history on his grandfather, and was very interesting to read. I tried to upload a high quality photo of the newspaper article, so you can zoom in and read it if you'd like to. He told me that his family has kept his grandfathers tools since he passed away many years ago. They never had any intent of selling them, but after he read that I was getting started learning watchmaking and knew that I was local. They decided to offer them to me for sale with the strict provision that I do not sell any of them, but rather use his grandfathers tools as I continue to learn watchmaking. I was happy to agree to his terms. I finally got home this evening after meeting him on the other side of the state and began going through all of the items. There is a complete staking set with every single piece still in the box, all of which are in fantastic condition, a Jacot tool, a lathe, several sets of broaches and files, bags upon bags of parts, a poising tool, and some other tools that I honestly don't even know what they do at this point. I explained to him that some of the tools were beyond my current skill level. We both smiled when I said that because the whole idea was for me to use them to learn as I continue to move forward. Here are some photos: This last photo is of a few tools that I haven't yet figured out what they for. The bottom/middle tool I thought perhaps was what you use to hold hands if you need to use a broach to open up the eyelets, but it does not separate to allow you to install the hands, and the holes are quite large. I'm unsure what any of them do quite honestly. I think I got a really good deal. I purchased all of these items for a total of $600. I know the staking set is probably worth nearly that by itself. I'll need to find a motor to use for the lathe, but I'd imagine it'll be some time before I get to a point where I can use it. I have an immediate need for the staking set and Jacot tool, so I'm going to find some fishing line and restring the bow so I can spin the tool. If anyone can provide any insight on what the 4 tools are in the last photograph, I'd be very appreciative. I'm pretty excited to use these tools, and am extremely grateful that his family thought me worthy to continue on using his grandfather's tools. Hopefully I made a good investment!


 1 point
 -
Yes. I've been doing that for years.1 point
-
Congratulations!1 point
-
That's the way I handle my own stuff myself, if it doesn't need to be addressed at the moment I usually leave it, most of the time I have other things I'd rather do. Life is short Perhaps someone who reads this is having strange problems with their machine, or wants to rebuild it, and my two cents might help. Cheers!1 point
-
Evening all. Wanted to introduce myself. Only recently have gotten into this amazing hobby. I credit Marshall at wristwatch revival and Mike at my retro watches for this new obsession. Had a couple of their videos pop up on my feed and decided to see what their videos were. Ive restored cars( thus the name), small engines, ATVs and motorcycles. If its mechanical ive probably tinkered with it. After watching several of these fellas videos I thought I bet I could do that. The scale of the hobby really intrigued me. Bought a couple old seikos on ebay and started learning. This progressed to a restoration of a pogue then a ufo then a diver and now working on a helmet. Ive fallen for the quirky designs of the 70s seikos and im sure ill have tons of questions as I get deeper and deeper into the hobby. Cheers Chevy
 1 point
 -
I have seen Spencer's videos as well but I blame Marshal and Mike1 point
-
Hi dadistic I hope you do well sir. I am still a wire monkey as I am currently a H.V.A.C. contractor and I do not like wire nuts either but they are a quick method of joining 2 wires together. I have seen them burn through if you do not twist the wires together tight enough on restive heating circuits and the wires arc internally inside the wire nut and melt the wire nut. Like I was telling Frank this watch cleaner does not have the amp draw or vibration that I feel warrants the extra effort to do all the extra tweaks to bring it up to a MIL SPEC standard IMO. I have only had it for more than a few weeks now and so far it has performed flawlessly except for the basket shaft that I am going to have re done. Down the road If I have problems I may consider addressing It at that point. I also agree that soldering is the way to go but for me I don't want to put the extra effort into soldering all the wires., like I said if I have problems down the road then I may have to do that. Best regards, James.1 point
-
Hi I've worked on a tissot seastar and I get it close of course. Now I'm trying to close the back but I can't I cannot explain why just that it seems there is no room I join pictures Thanks for any advise I answer my own question I've inversed the movement ring so I came back to the picture and figured out. My advise for the beginner : take picture of the case and the rings before disassembling to avoid this experience it as much as important as the movement itself Thanks

 1 point
 -
This topic covers my version of similar tool. I have used it on several occasions. https://www.watchrepairtalk.com/topic/13621-cannon-pinion-tightening-tool/#comment-1214871 point
-
Thank you John. I did need to read through your explanation twice but i understand the effects of the regulator pins now. Yep dad. That all makes perfect sense thank you. John did explain that really well and your addition was a clear indication as to why the amplitude can drop dramatically in certain vertical positions depending on which way the hs hangs inbetween whatever spacing the pins have, jumping the regulation point from the pins to the stud. I cant actually believe I've overlooked this very simple detail for so long. So to make up for it, i will spend the rest of my evening developing zero gravity inside a sealed watch case Thanks matey, very much appreciated1 point
-
Great explanation! Really clear. I'm going to be a bit devilish and complicate things further The amount of time that the hairspring will spend contacting one or the other of the pins will also change with position. Just think of the way the hairspring might hang differently depending on the orientation of the balance. Thanks!1 point
-
I use the term stability, and again I think that it is important to be specific, and say with respect to what. Temperature change is a great illustration of how an oscillators frequency can change with a change in operating condition. Because metals often expand with increases in temperature, and metals may lose their springiness with increases in temperature, the frequency of the beat of your watch will change some amount when the temperature changes. Much of the horological art has been about finding materials and designs to compensate for this, and modern materials and designs are much less affected by changes in temperature. Being "adjusted to temperature" is a lot less important than it used to be, and you can see this in the removal of the adjustment features in a modern balance assembly. Some folks here may be able to tell that I have been diving back into Hans Jendritzki's book "Watch Adjusting" I am trying to learn the material in that book as best I can, doesn't mean I'll be able to *apply* it, but I at least want to understand it! Cheers!1 point
-
My lunchtimes are usually double, and my missus occasionally thinks thats an illusion. " haven't you just eaten honey " " erm no this is my first plateful sweetheart "1 point
-
Remember, time is an illusion, lunchtime doubly so1 point
-
Wow, this this conversation takes me back to my years as a "wire monkey" working for a machine tool builder. The enemy of any connection is vibration, and every type of terminal block is susceptible to it to one extent or the other. If a machine tool started exhibiting intermittent, flaky kinds of failures, one of the first course of action would be to go through and check terminal block connections, and reseat any components that used edge connectors. Terminal blocks are useful if you are looking for quick assembly, or if you expect to take things apart or change them. The most reliable type of connection is permanent. Strip the wires, twist them together, solder them, then insulate. For small gauge wire, heat shrinkable tubing for insulation is fine. I personally would not use wire nuts to provide insulation, I don't consider them reliable in a machine environment. We would really get serious with high voltage motor wiring in a tough, vibrating, machine tool environment. This was often heavy gauge wiring. We would strip and solder the ends together (parallel, couldn't twist), clamp the ends with a brass clamp to provide additional mechanical strength, wrap the end in soft rubber tape that fused together to provide a sealed insulated cover for the connection, and then wrap that in a high quality electrical tape. These connections could last decades in very extreme, environments, with lots of vibration and moisture. Hmm, almost like a watch cleaning machine Cheers!1 point
-
Yep, we learned in school that some movements could go backwards after a hard shock. The wall around the hole in the stator where the rotor fits can get very thin. We tried to get one to go backwards messing with the stator but I don't think anyone was successful.1 point
-
I use a large oiler that was made from a small piece of aluminum rod with the end flattened. Delivers about a "drop" into the oil cups without minimal loss. Easy to clean up and maintain.1 point
-
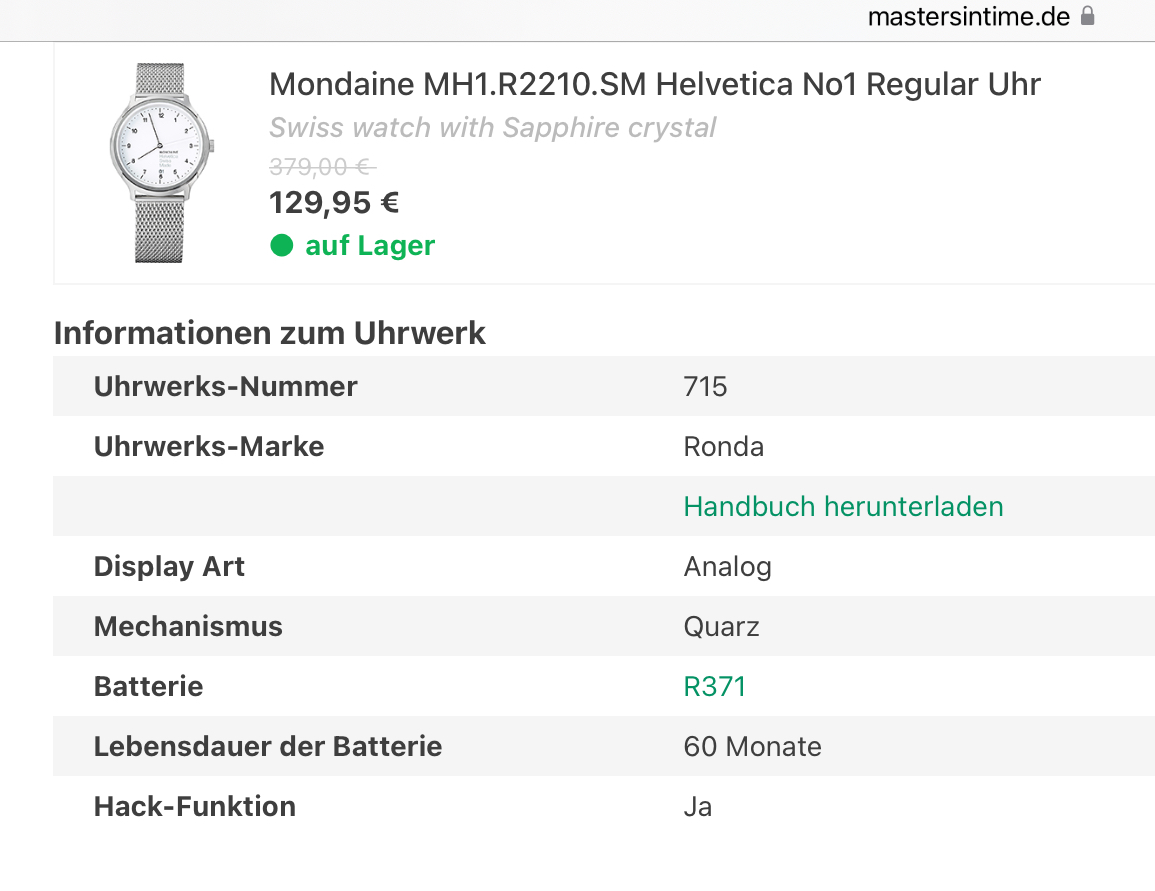
yes true a DC motor reversing the voltage and it will run backwards but this is a stepping motor. Stepping motors don't work that way at least not in the watch. It will not run backwards if you flip the battery over the circuit will not work at all. flipping stators over is a thing of the past at least it should be. in the early days there may have been at least one or two watches you could flip to stay here but typically there shaped so that doesn't happen. If you are able to drop the stator and changes shape perhaps you to get a drug backwards but this doesn't look like it's one that's going to tolerate that. Then if you were enthusiastic with a small file and change the shape then it definitely runs backwards. I did that once out of curiosity I had a quartz watch the grand backwards. Quartz watches typically all by themselves don't run backwards. I found a link where someone servicing one of these you can see that the state or has steady pins so they can only go in one way you can't flip upside down. It's possible it's something else is going on that we may never understand because we need to access the movement. https://www.watchrepairtalk.com/topic/2354-ronda-715-service-walkthrough-a-beginners-quartz-service/ the easiest way to fix this watch would be just to put a new movement in. Who knows when it was last serviced if it's ever been serviced just get a movement swap. Although that's likely to exceed the costs the watch even though the movements relatively cheap..1 point
-
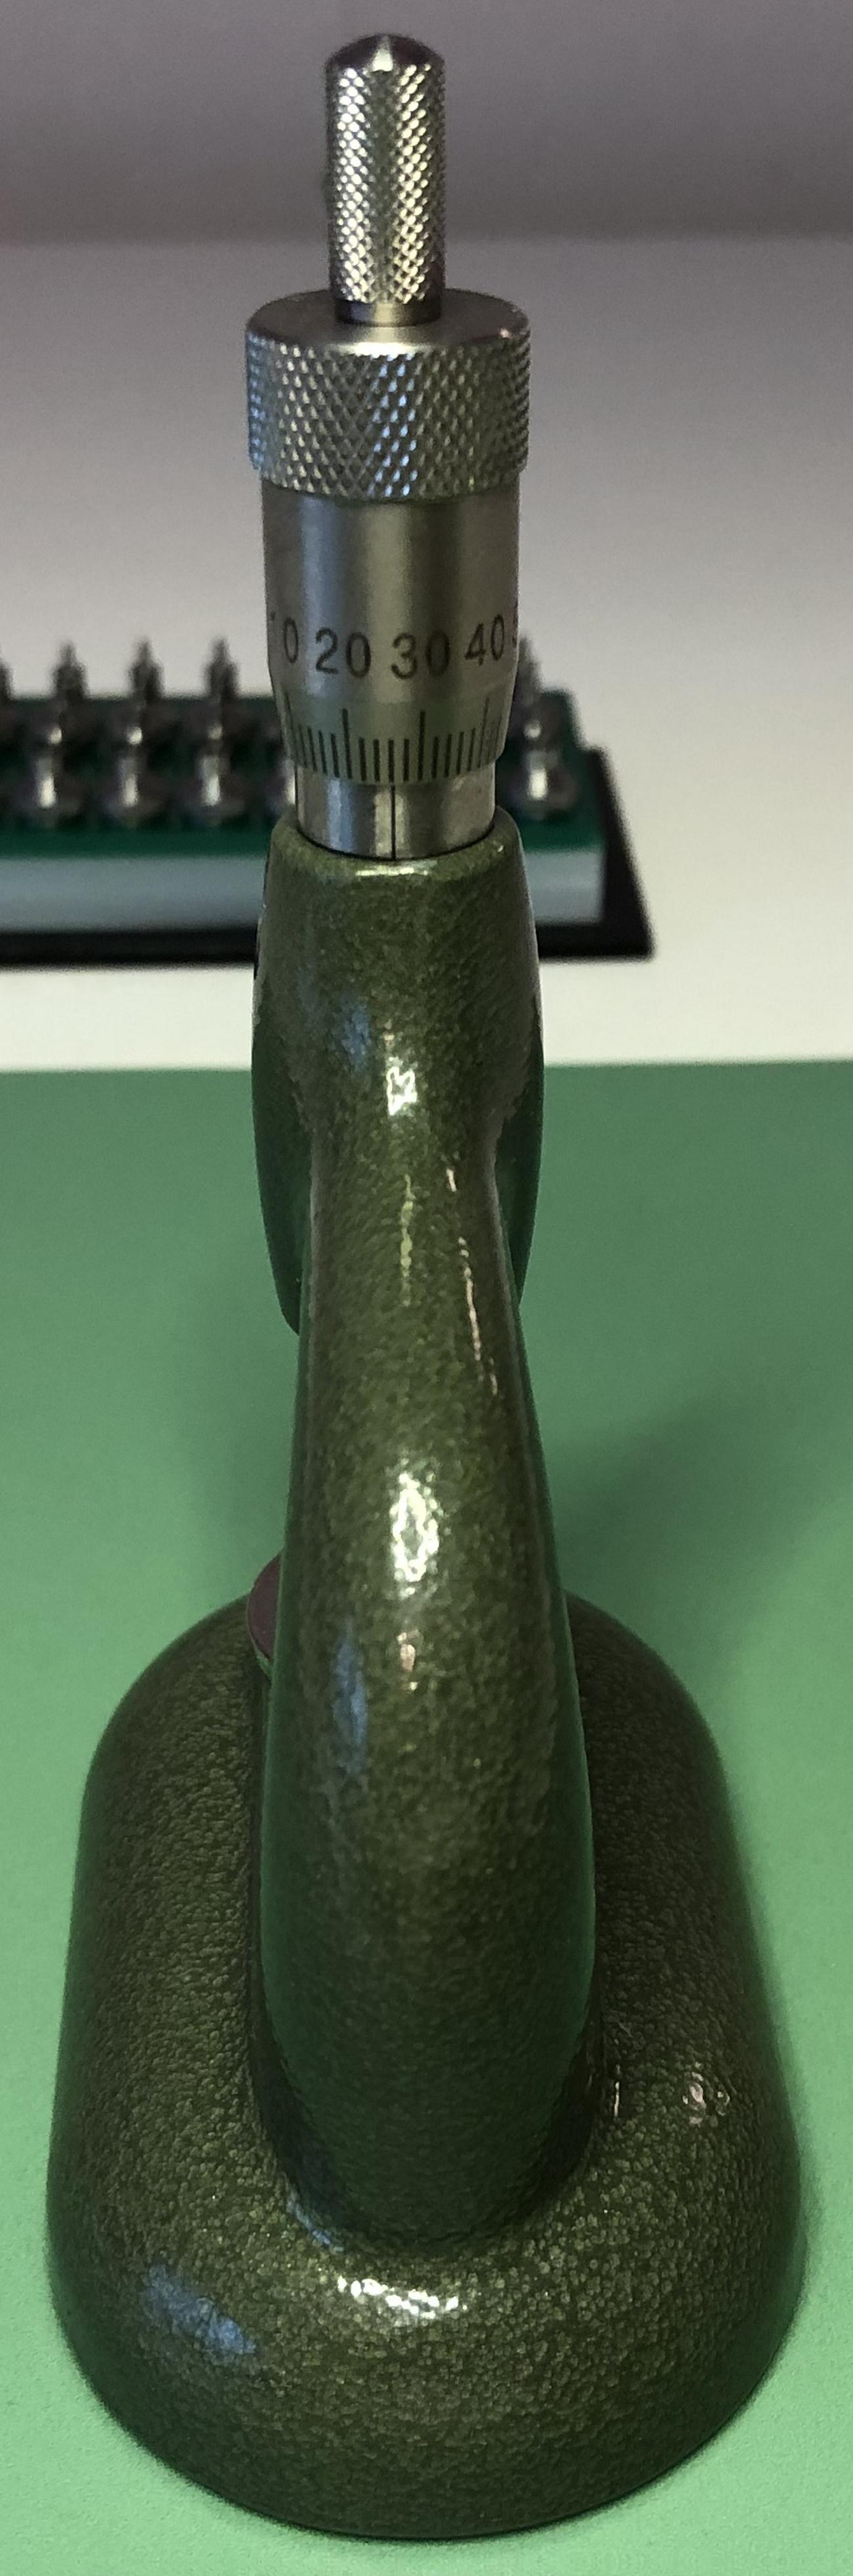
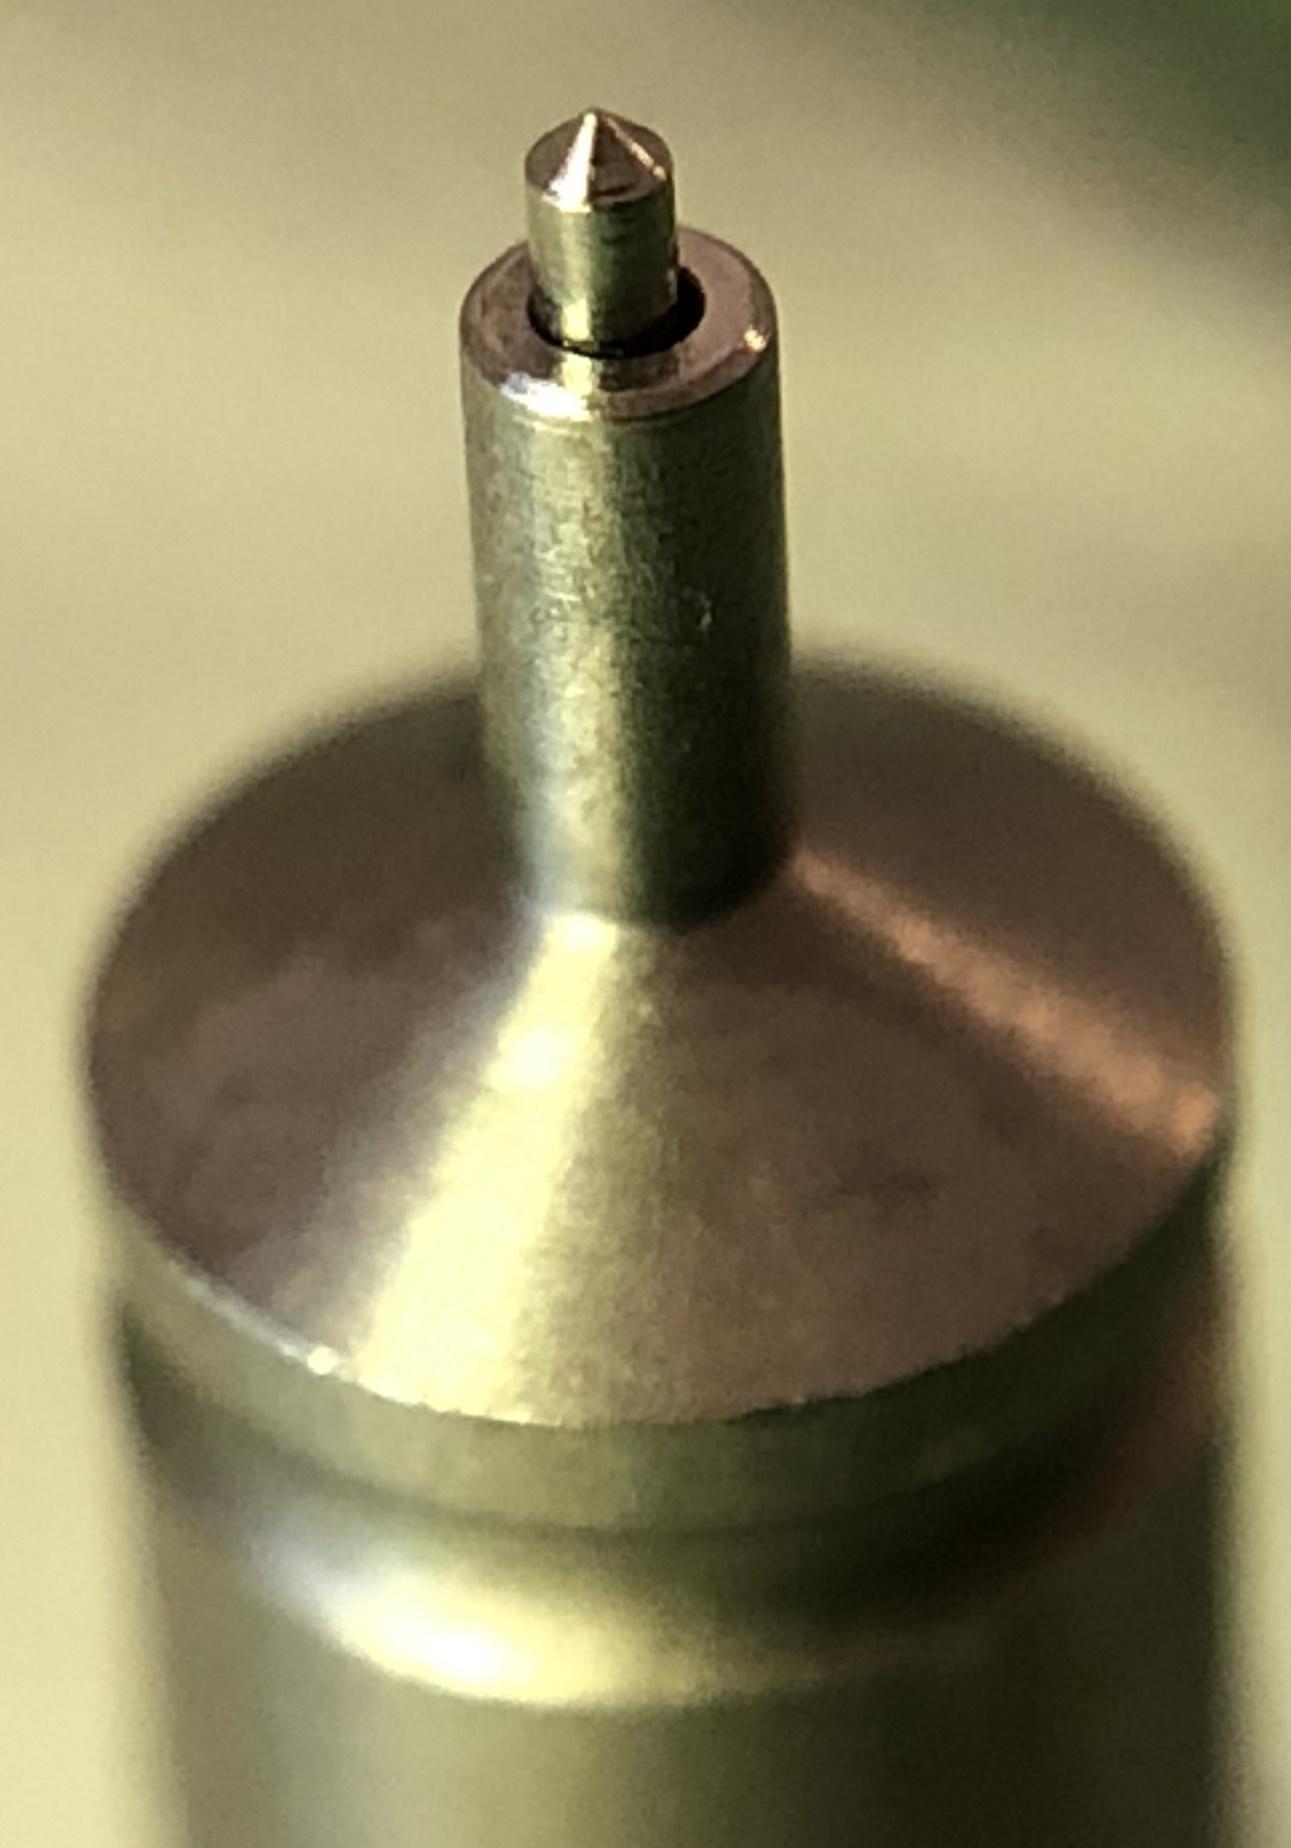
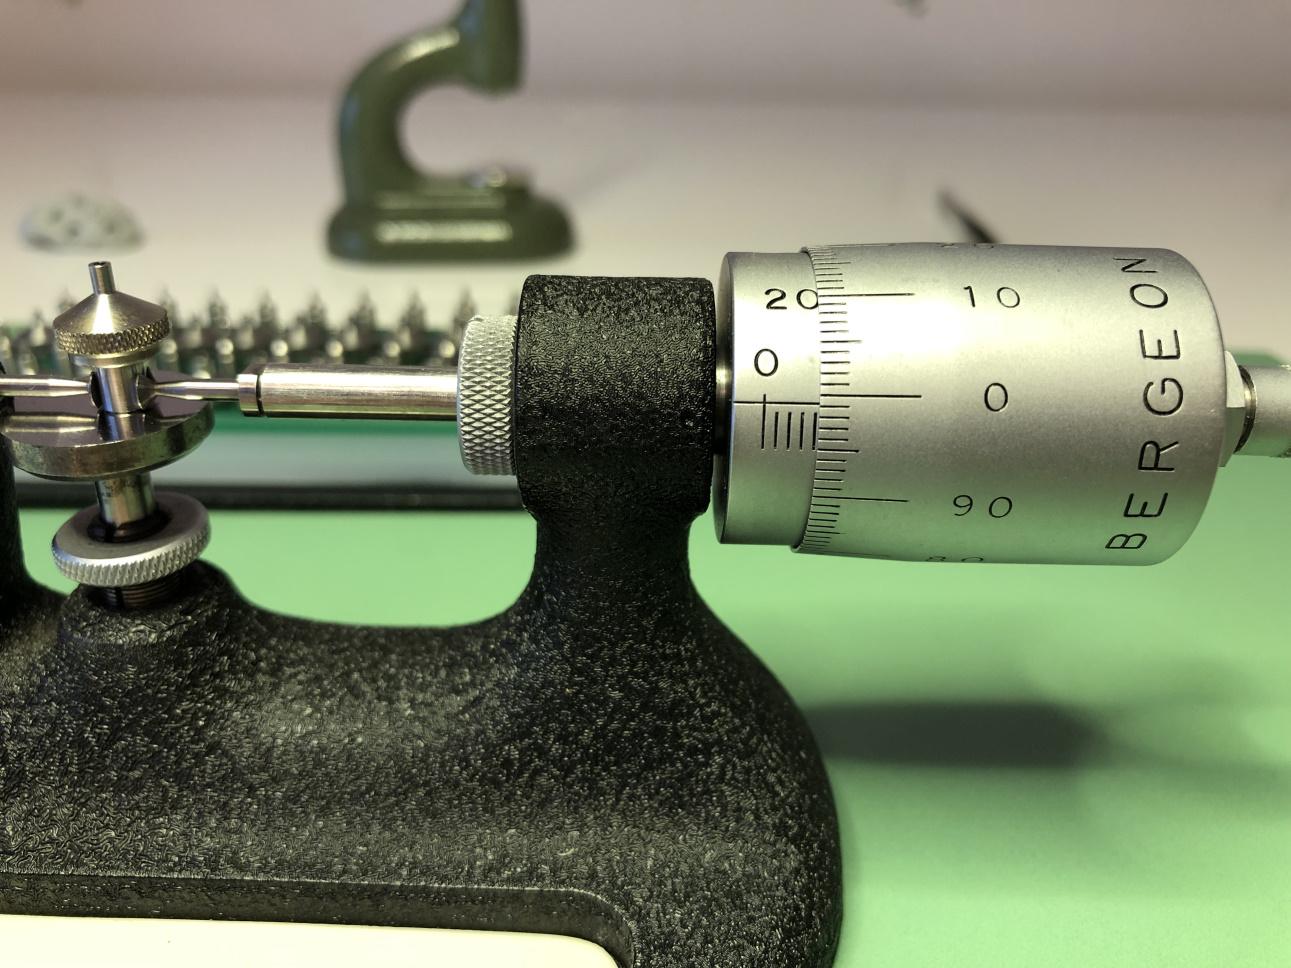
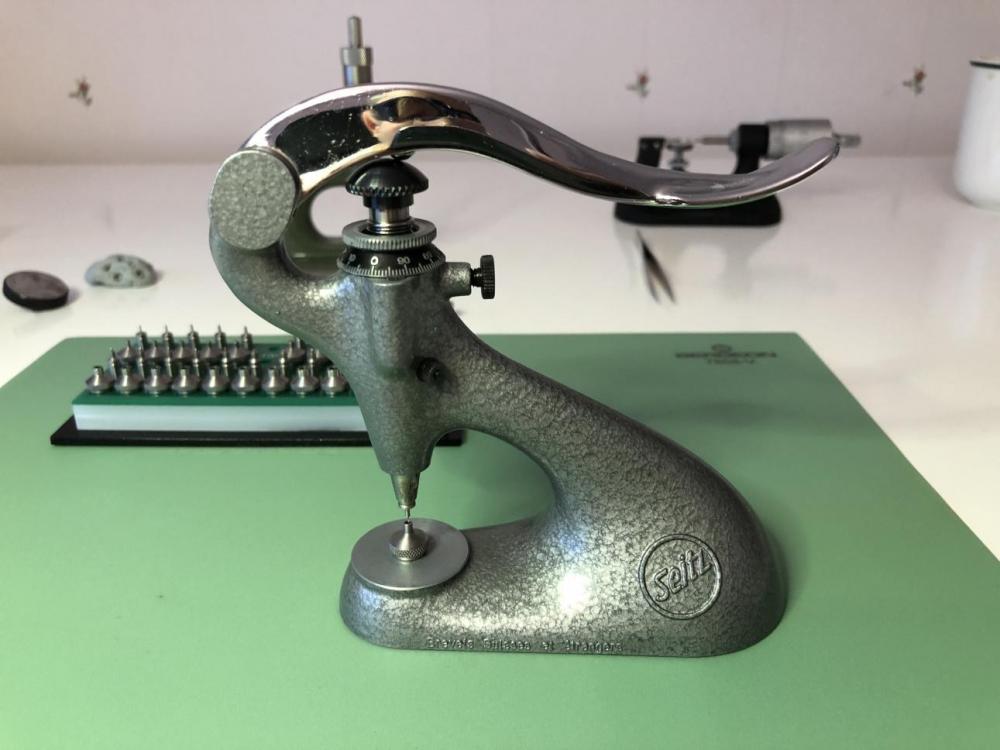
Neither did I, i chanced by them while looking for something else. Expensive though 150 for the press 300 for a die set. Ah-ha the perfect tool for what i have in mind. Experiment Sunday in Hull, Neverenoughwatches style. . And baking with my crazy 28 year old daughter. Its going to be a fun day ☺ You do remember correctly Watchie, i remember the same mentioning. I also remember being disappointed because i had just aquired a lovely Bergeon bench micrometer and was then informed i needed a jewelled pivot gauge1 point
-
Eyup Graham. How you doin ?. As regards to my understanding of isochronism, I was initially suggesting the force that was intended to make the movement tick. Ie. Energy released from the mainspring that travels through the train that reaches the balance wheel. But any exterior force such as magnetism, electrical ? Or a G force can act upon the balance wheel's mass to alter its swing so changing the movement's own amplitude for which it was designed. In which case i am thinking that the isochronism that was created for the movement is now out of the window. Which is maybe why Watchie is experiencing non isochronism rates .1 point
-
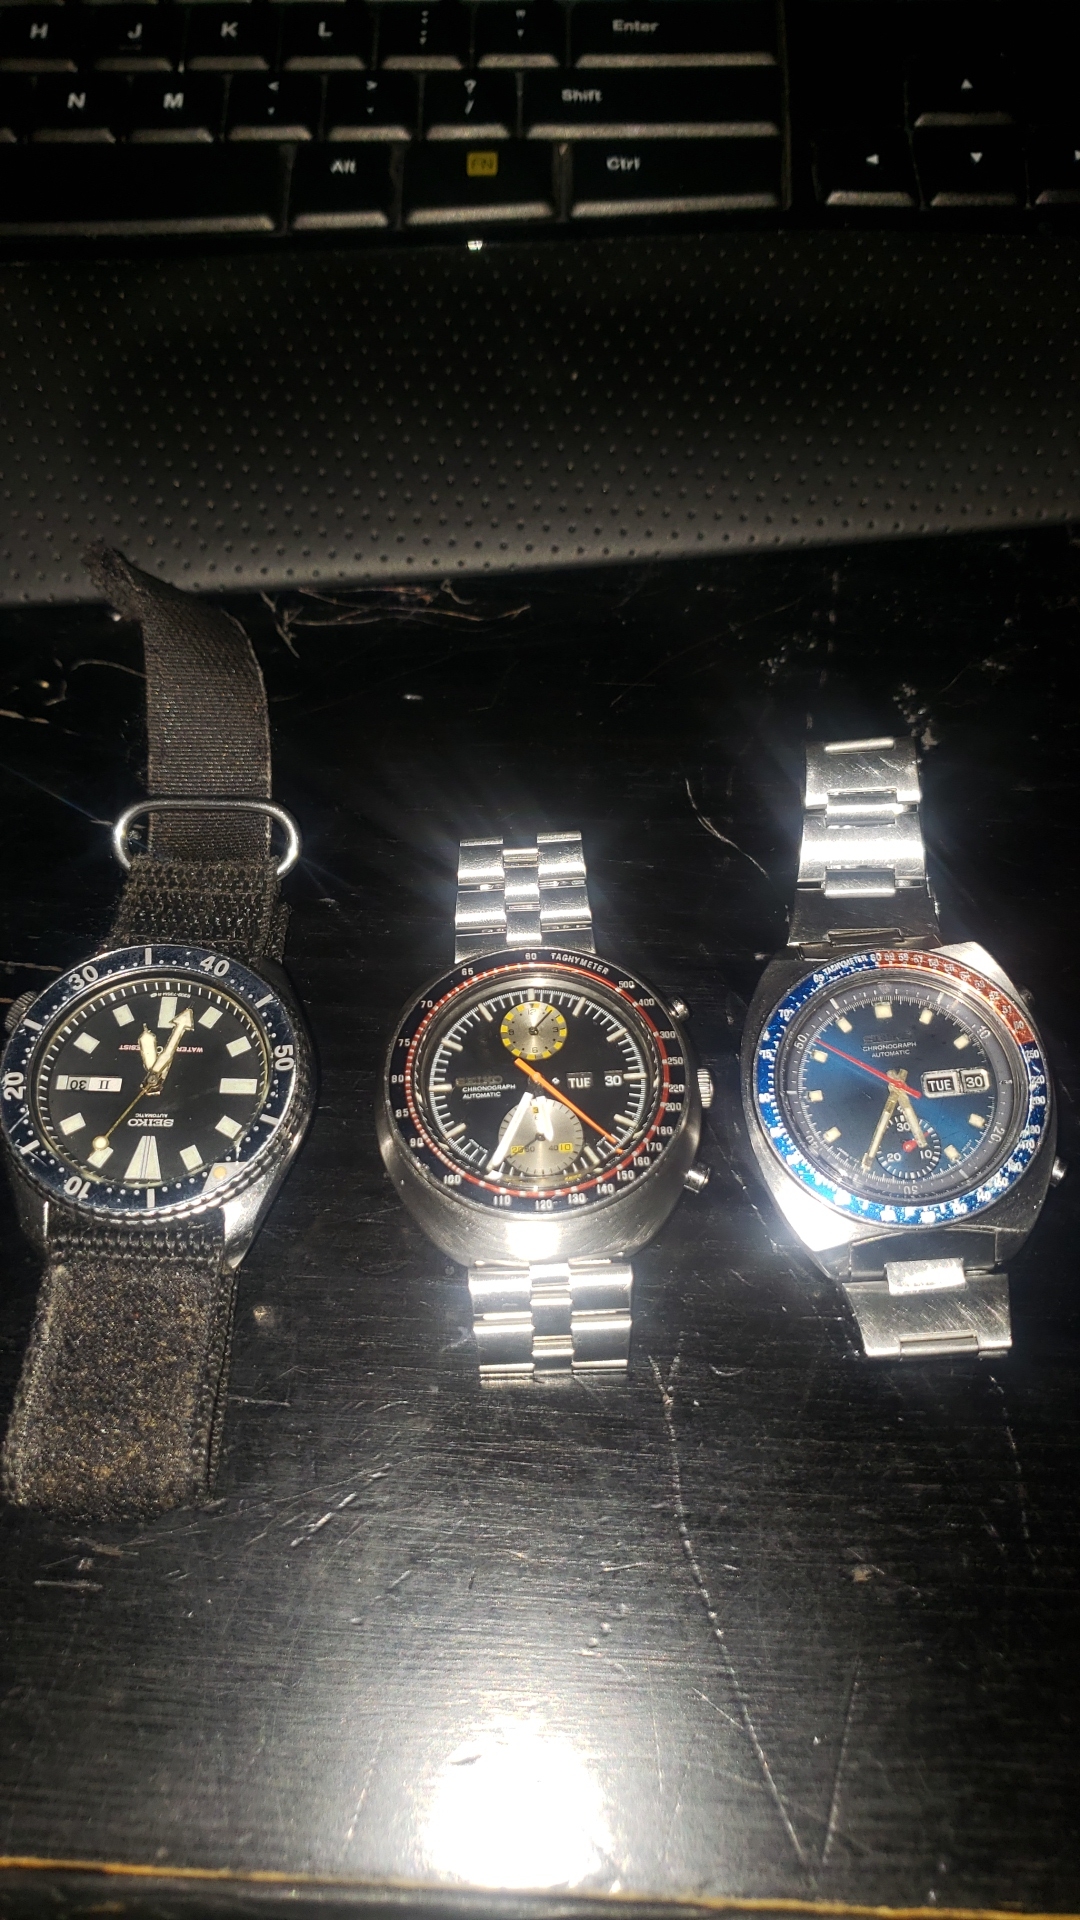
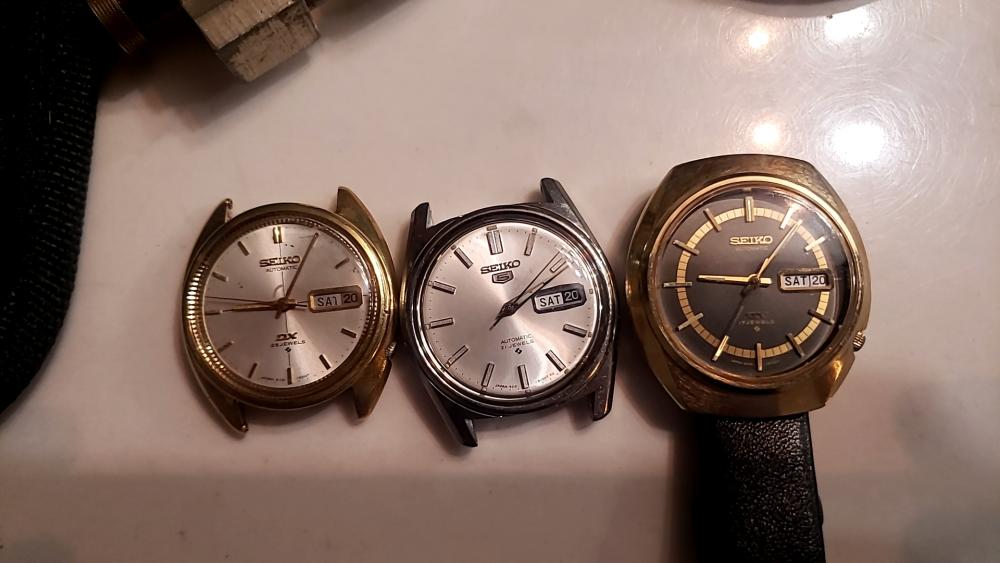
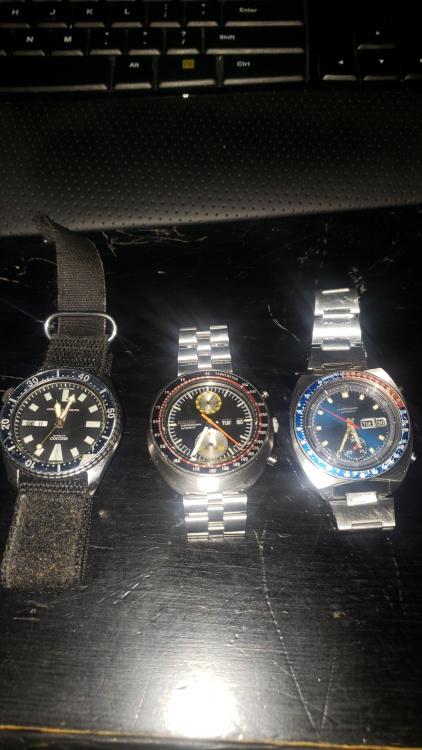
I blame Marshall at Wristwatch Revival, Mike at My Retro Watches, and Theon at Vintage Watch Services for getting me interested in the hobby. Once I found Mark's channel and courses, I was completely hooked. Excess funds are rapidly shrinking, but I've got a bunch of really interesting tools now! Such an enjoyable hobby to become involved with, and I find it encouraging to see so much support and advice within the community. Welcome to the hobby and to the forum. I'm a fan of the 70's Seiko's as well. I apologize for any past or future bidding wars on vintage Seiko's on eBay! Another excellent channel that really specializes in Seiko's is Spencer Klein. His videos are a bit different, as he sort of goes off rambling about non-watch things during his work, but it's entertaining to watch nonetheless. He seems to be an encyclopedia of Seiko information. He doesn't solely work on Seiko's, but they are definitely his specialty. Apparently he runs a business that specializes in restoring them. It's worth a look if you haven't found him on YouTube already. Here's my first three completed Seiko's as well. Seems that we're on a similar path.
 1 point
 -
Historically, isochronism refers to the ability of a timepiece to keep constant time with a varying force of the power source. That is the first problem that had to be resolved powering from a mainspring was introduced. Many watchmakers still use isochronism in this restricted sense only. Of course, the matter has been discussed here many times already in the past.1 point
-
The movement is a Swiss Ronda 715 Date @ 6h Cousins: https://www.cousinsuk.com/product/ronda-715-movements?code=715M6 Ronda: https://www.ronda.ch/fileadmin/user_upload/Products/TA_BA/TA_Pdf/71X/TA_712_713_714_715_de_fr_en.pdf
 1 point
 -
As an electronics engineer using low melt solder to desolder things because it melts at a low temp would be my way to go here as it sets like regular solder given enough time but melts at 138 deg. Thus with the metal of the dial acting as a heat sink you do not have to apply the iron for very long to melt it into place. As a conductor Tin/Bismuth is crap, but we arent bothered about electrical connection here just attachment...1 point
-
I agree with you Frank but personally I have not ever had issues with soldered connections being tightened down in lugs. Here in the USA a lot of the manufactures tin the end of the wires such as ceiling fans and many light fixtures. I mean if I wanted to go "Full Monty" I could have replaced everything but IMO it doesn't need it. I am currently in the process of machining another basket shaft as the one that came with it is terrible, after I finish the shaft it will be a solid machine. Best regards to you Frank, James. The motor ramping up is to some extent the characteristics of the universal type motor used in this machine. Everyone complains about the rheostat as well as it doe's not have enough sensitivity but it does work better in the solution as there is more drag on the motor. I was going to replace mine but so far seems an impossible task to find a suitable replacement unless you are an electronics guru. It would be nice to find one muddtt, best regards sir, James. P.S. It could be the basket shaft is out of round like mine and causing vibration, how true does everything turn? check that out. You may have to have someone make you a shaft as well.1 point
-
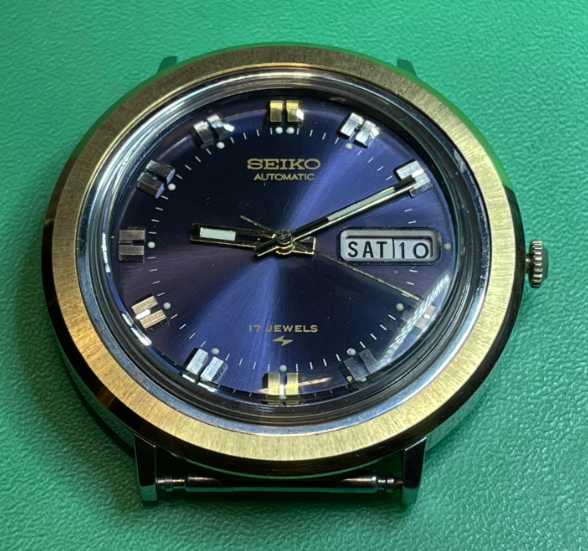
the use of the battery in a modern watch which suggest quartz? normally when someone says mechanical watch we think of watch with the escapement were not usually thinking of a stepping motor quartz watch interesting wording we need to see the picture of the movements because I Google MH1.R2 I just get a picture of a watch which is basically worthless we need the movement number and picture the movement would be nice it's not impossible to make a quartz watch run backwards if the state or has been tampered with in a variety of ways at one time it was sometimes possible to take the stater out flip it over the watch will run backwards. If it's been modified it bumps a variety of things with the stater is no longer the proper shape watch could run backwards. It's also conceivable that something is not quite right with the circuit but it was probably a mechanical thing we would need to see a picture of the movements then I assume by the wording of your watch was running fine you took at some place for battery and now it's running backwards?1 point
-
Such a cheap simple effective cleaning machine. Ok there is a bit more labour and time involved by having to manually change the cleaning and rinsing mediums . But apart from that it puts expensive machines to shame. And for the cost of what $100 you could have a few of these on the go if you want multiple watch cleaning. I have been looking at the same motors but much slower rpms to turn a watch case while plating. These motors are pennies and most of them have voltage ranges between 3 and 12 volts so variable speeds, some as slow as one revolution per second ideal for plating. Thanks for adding to this Kalanag, a great upgrade on mine . What about an empty heated jar for drying ?1 point
-
Final update. My patience finally paid off and I managed to find a perfectly sized replacement bezel on Ebay. It is not the same style as the original and red was the only option but I actually think it works really well (the red is metallic and looks better in real life). This watch is now my daily wearer!
 1 point
 -
Why don't you guys just use your tweezers? Dip a properly cleaned #3 into a vial, open them slightly to "suck up" the oil between the prongs (capillary action) , then go to your pot and open them fully to dump the oil. Job done and no issues with cross contamination. Repeat if you need more, but usually once should be enough1 point
-
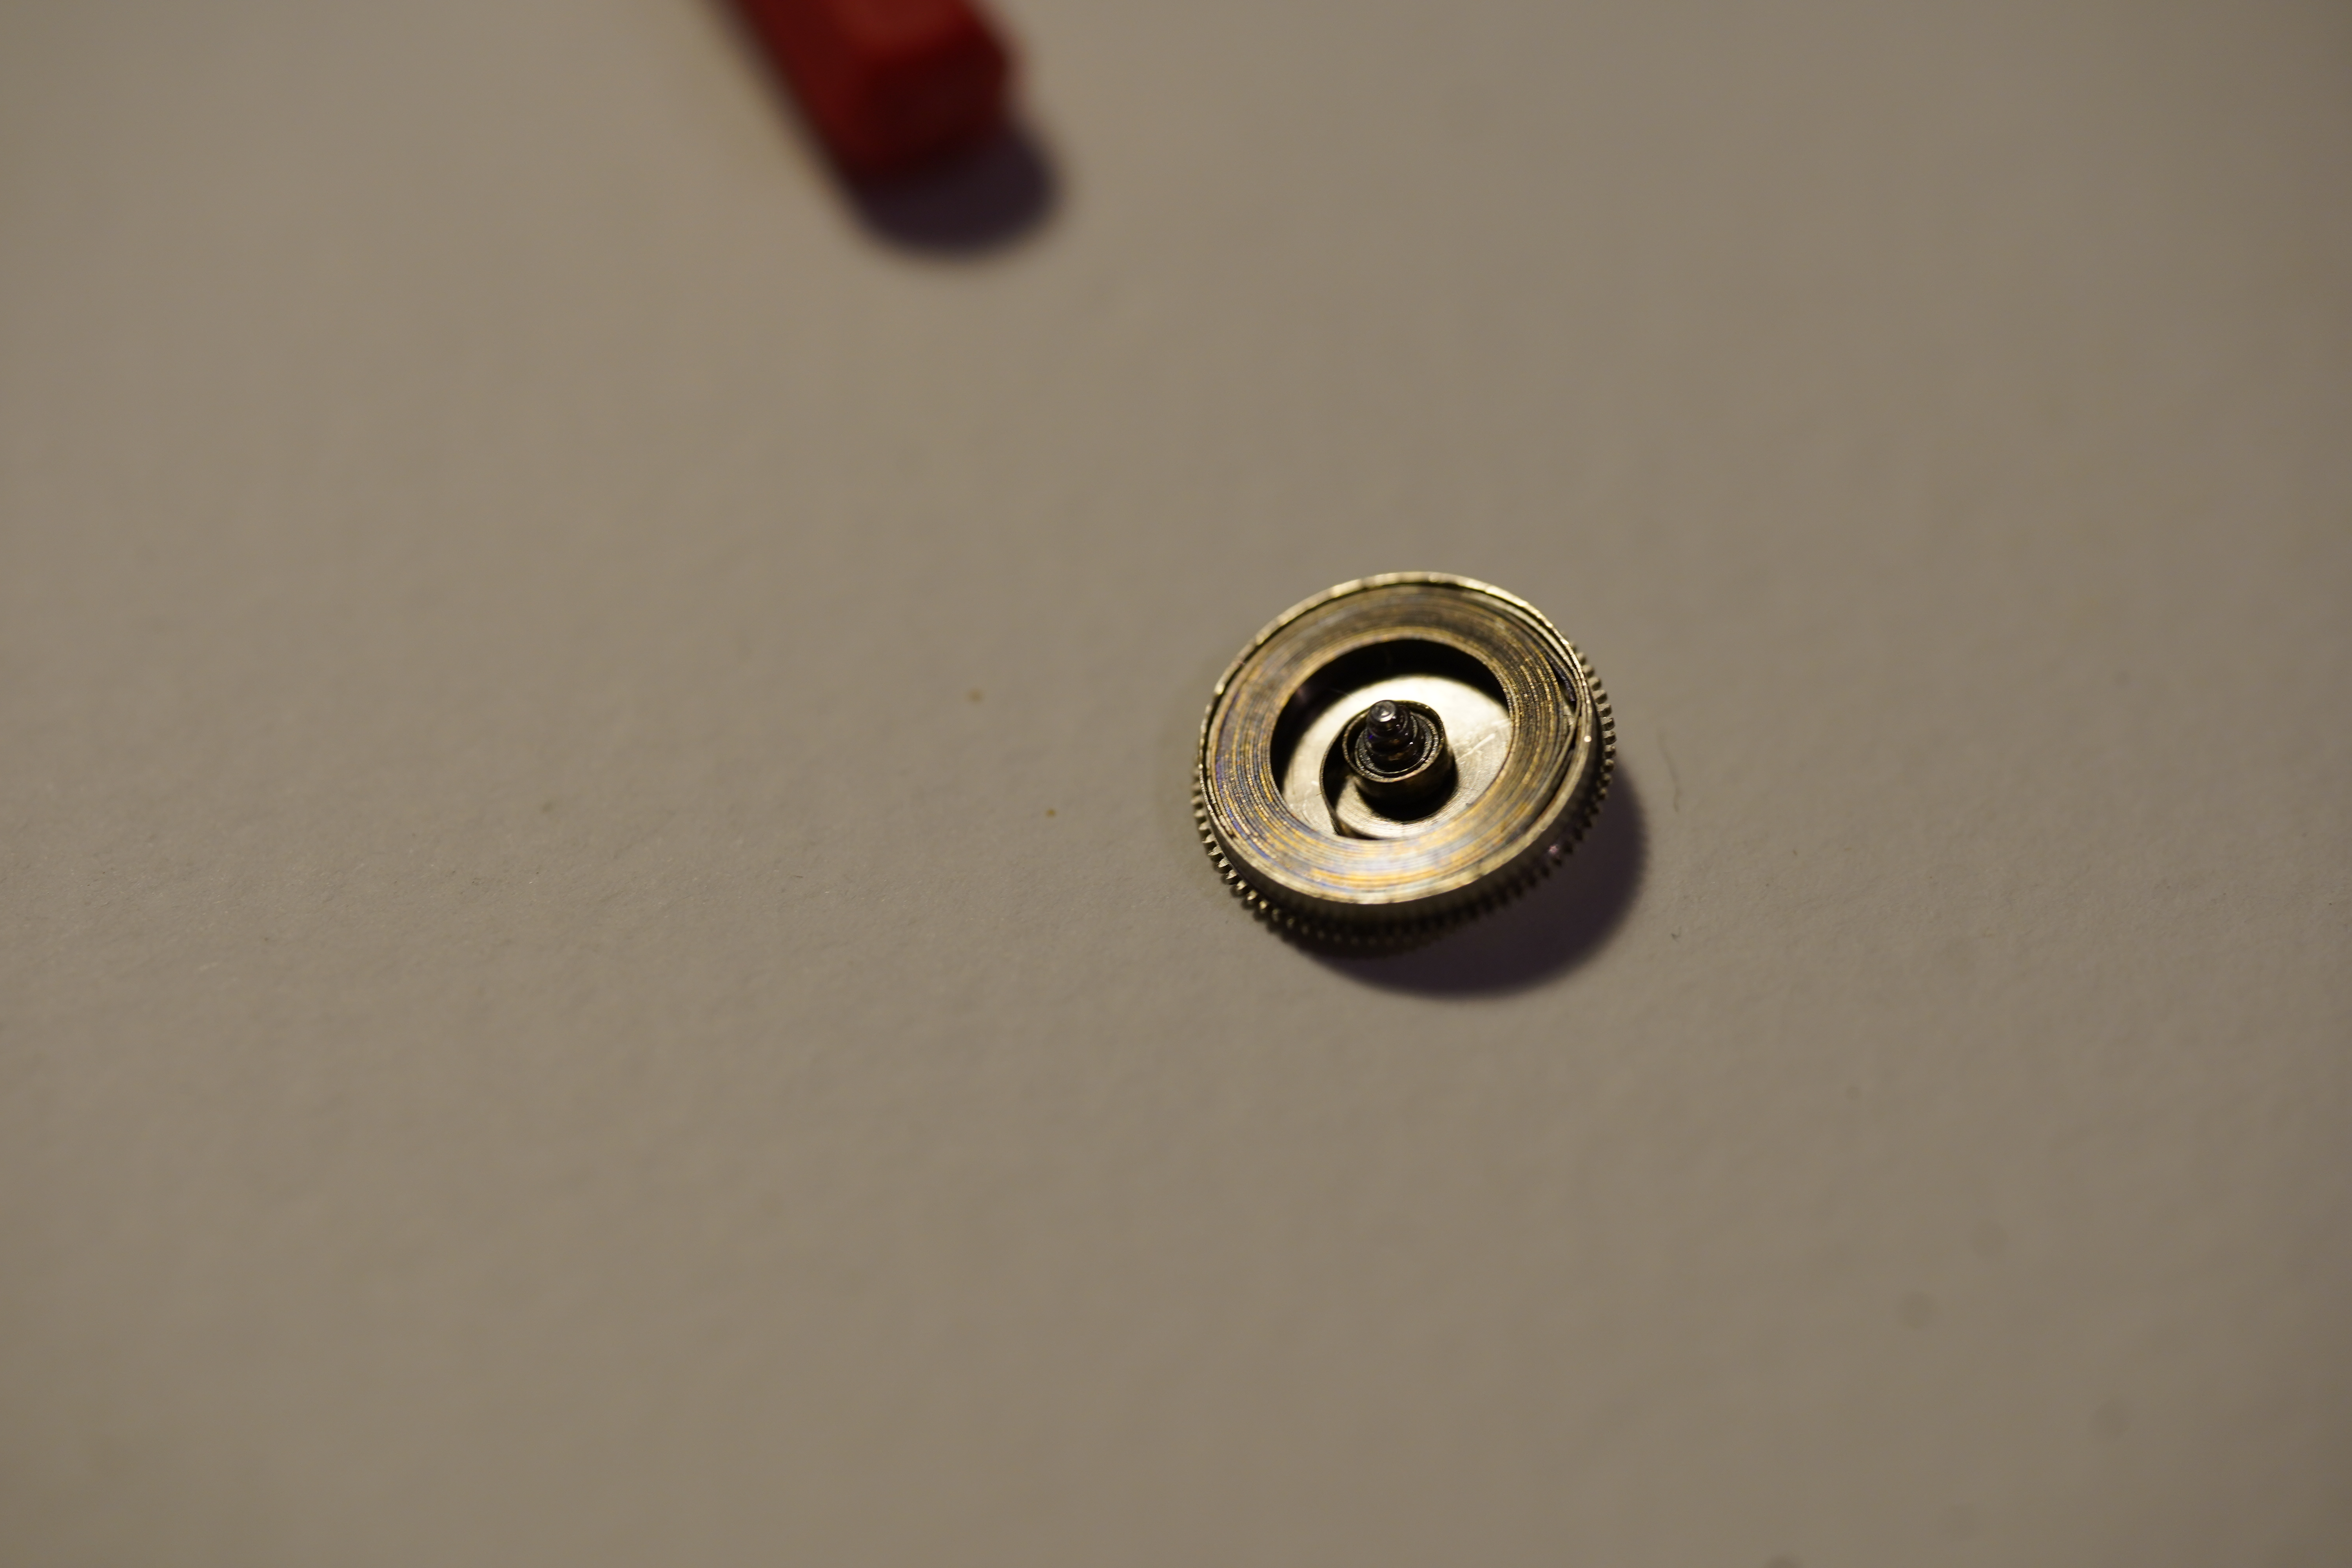
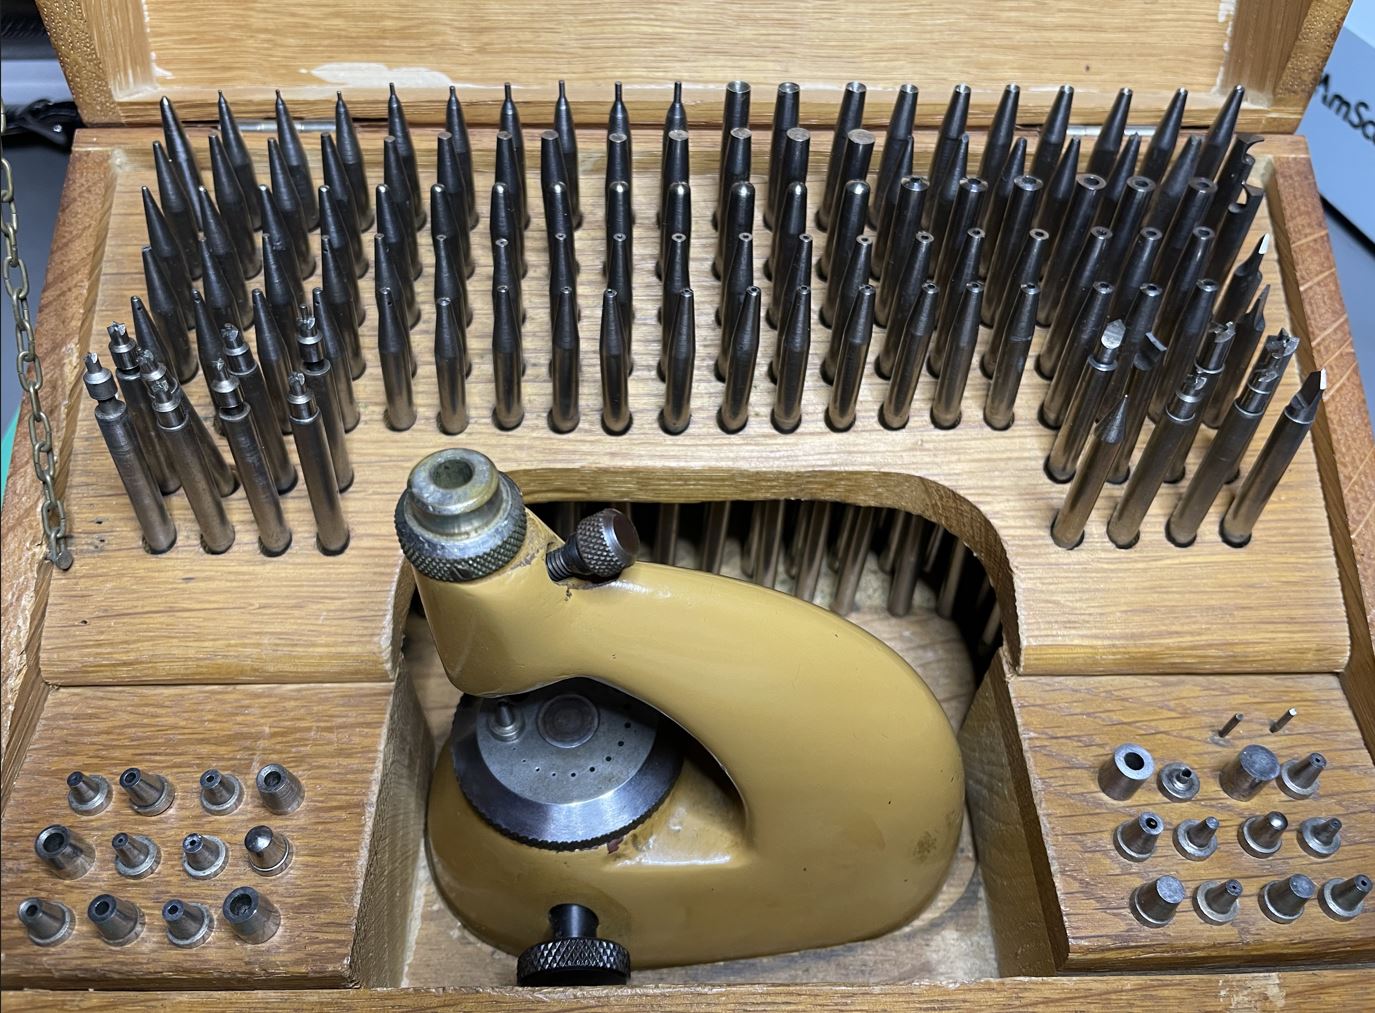
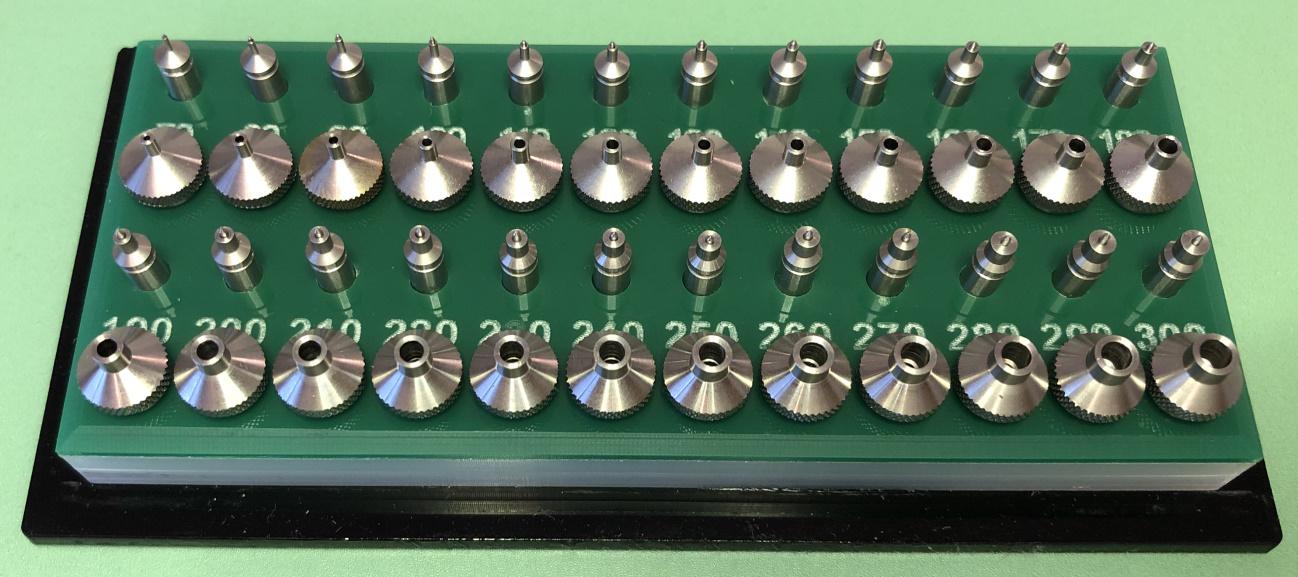
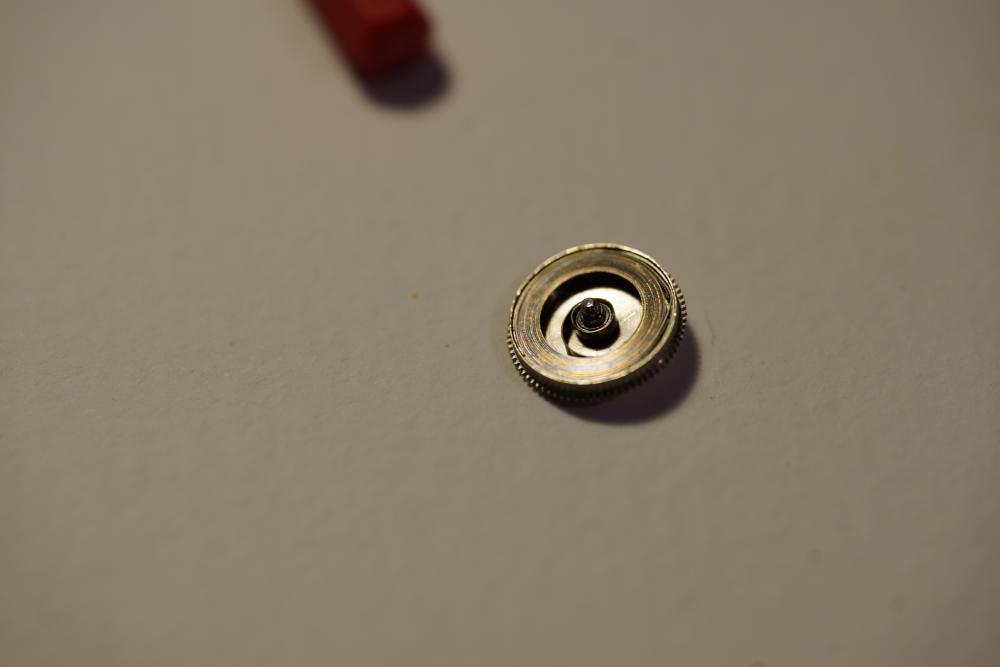
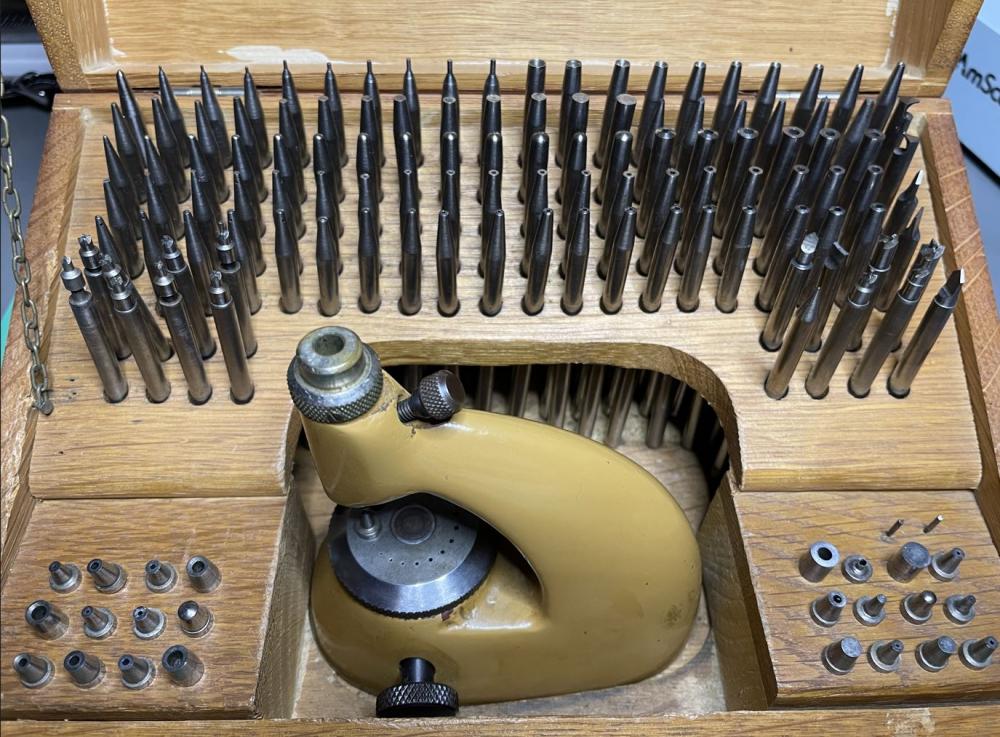
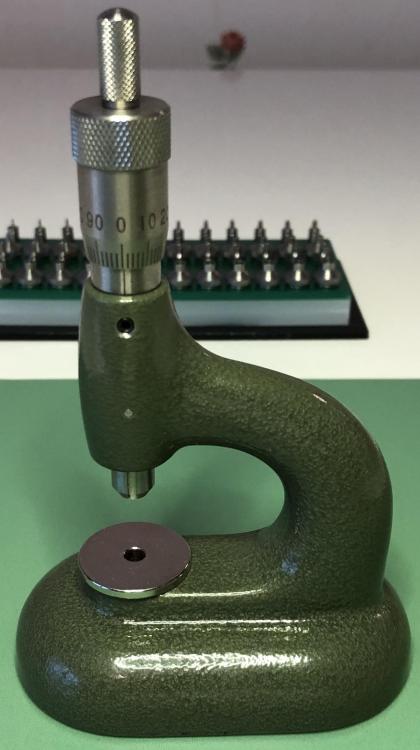
A couple of weeks ago, or so, I got my AliExpress Chinese Horia jeweling tool clone having 24 pushers and 24 anvils. So, it took approx. a month for the package to arrive. That's a lot less than I had expected. Another pleasant surprise was that it wasn't delivered from China but from the Netherlands (another EU state), so no additional fees had to be paid. Yippee! Anyway, it wasn't until today I had a chance to take a really close look and give it a try. Here're some pictures... (Click to zoom in!) Unlike the Seitz jeweling tool this tool does not have a "threaded cup" to catch the jewels pressed out all the way Anvil bottom-side Anvil top-side Pump pusher Pump pusher bottom-side (spring held in by screw having a slot) Pump pusher bottom side (spring held in by a hexagonal screw) Overall, I must say everything feels very well made and exceeded my expectations by a margin. Why some pump pushers uses a normal screw and some a hexagonal screw I have no idea, and I didn't try to remove any of them. The screws look like they could be made of plastic and they don't look all that nice. I don't know what the original Horia pump pushers look like, but the Seitz pump pushers are, is this respect, of a much better design. I measured the diameter of five randomly selected pump pushers and they all had the given diameter minus approx. 5/100 mm, which of course is necessary to make them pass through the holes for the jewels in the plates and bridges. I also measure the foot of a few randomly selected anvils and they all came in at 3.99 mm. So, as an added bonus the anvils and the pump pushers fit perfectly (near zero shake) in my Seitz jeweling tool (and in the clone tool) as well. Nevertheless, after having adjusted just a few jewels I already prefer this type of jeweling tool. With the Seitz tool you must always assert pressure on the handle, but since the Horia type uses a screw it frees up one hand and makes the operation feel both more precise and safe. The only drawback, of course, is that the Horia jeweling tool can't be used for reaming, so for that reason I'll be keeping my Seitz. Using my caliper I also measured the distance between the anvil and the pump pusher, then rotated the screw 360 degrees (1.00 mm) and measured again. The difference between the first and second measurement was just a few hundreds of a millimetre (minus the added millimetre of course) and my caliper is naturally not as exact as my Bergeon micrometre. So, it would seem the Chinese got the threading on the screw just right as well! Conclusively I must say that my very first AliExpress buy of a watch tool was a (somewhat unexpected) success and I wouldn't hesitate one bit to recommend this tool. The finish is not up there with the Swiss (Seitz and I would expect Horia), but it does what it's supposed to and it does it well. And, considering the price difference between the original tool and this clone, I'd say this is a no brainer, especially if you're a hobbyist.


 1 point
 -
Wow, just wow. Sent from my iPhone using Tapatalk Pro1 point
-
I’ve managed to fix some really old ones McGyver’s style: a bit of plumber’s teflon tape where the cannon pinion fits ahah1 point