Leaderboard


Popular Content
Showing content with the highest reputation on 02/19/22 in all areas
-
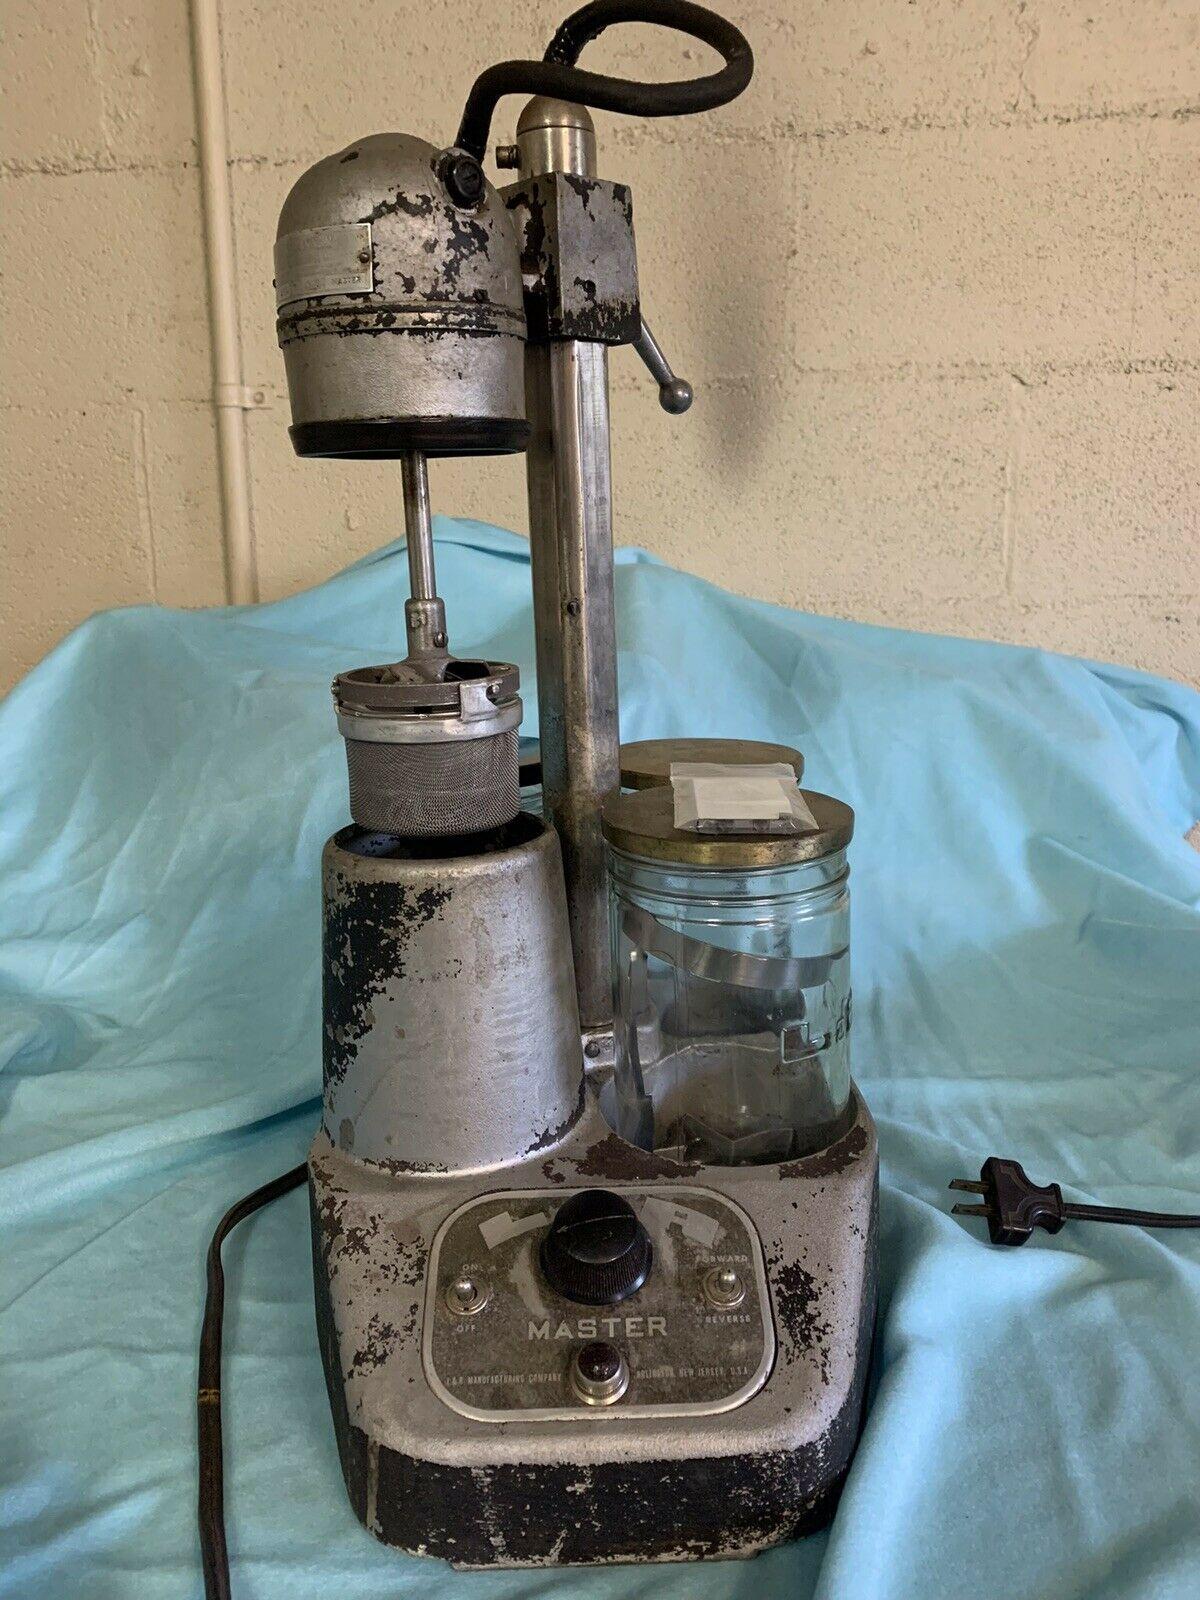
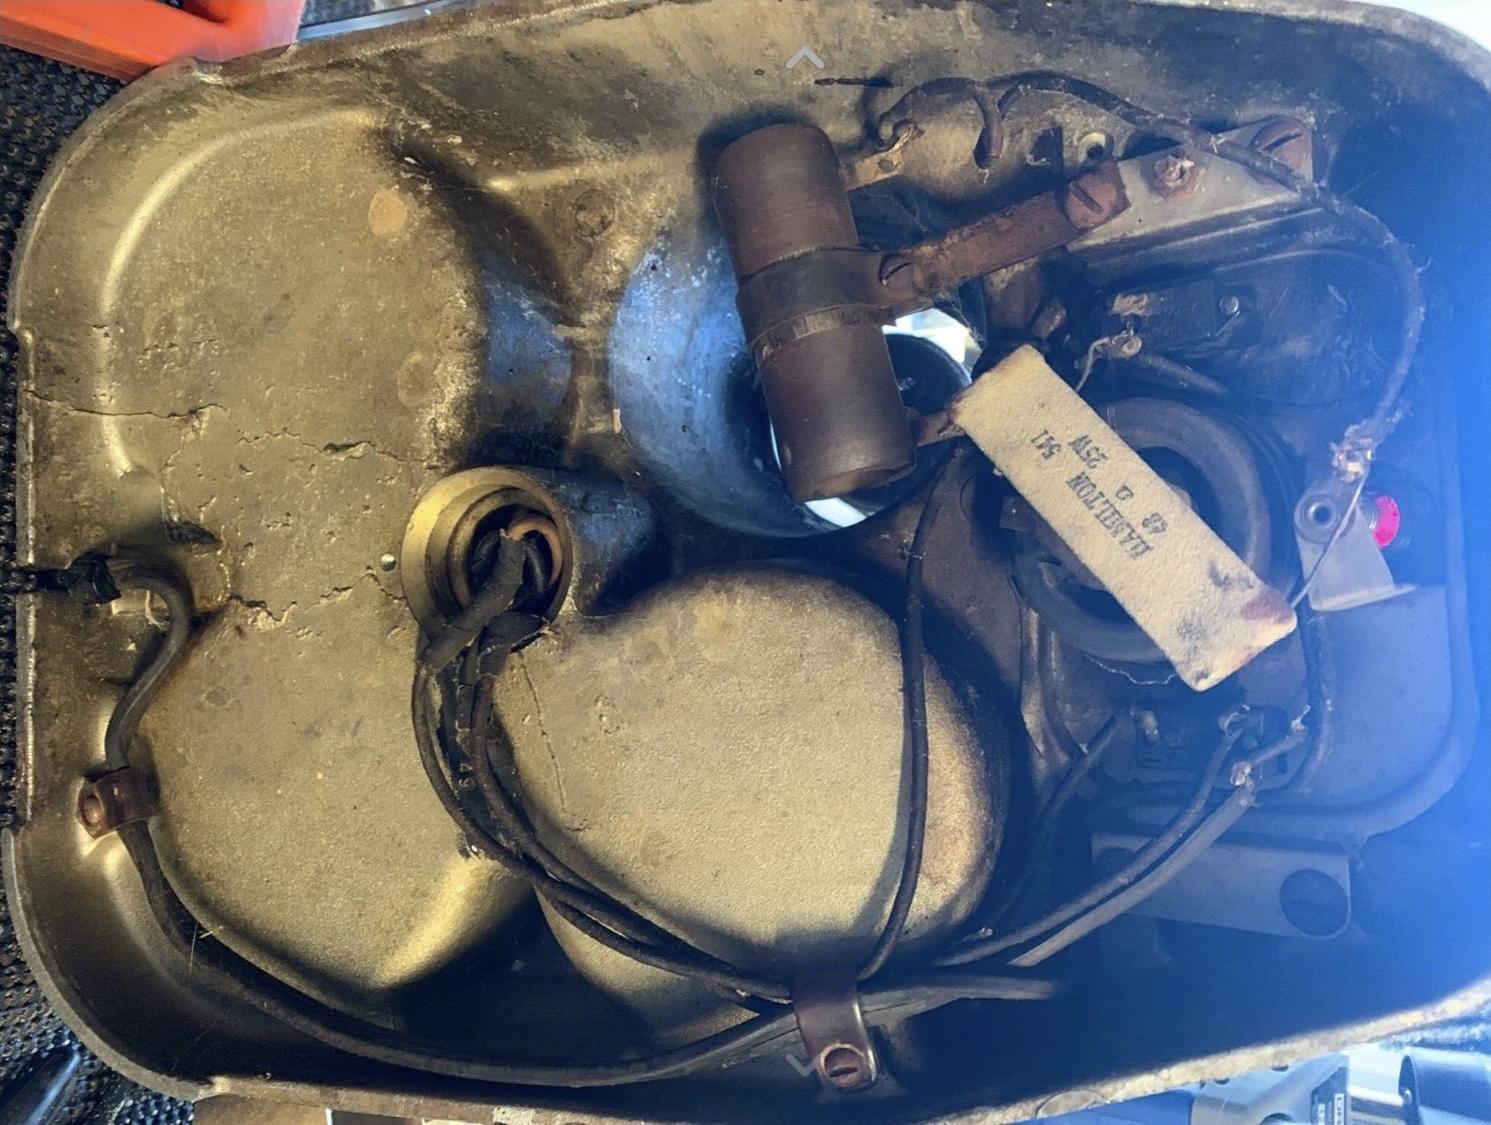
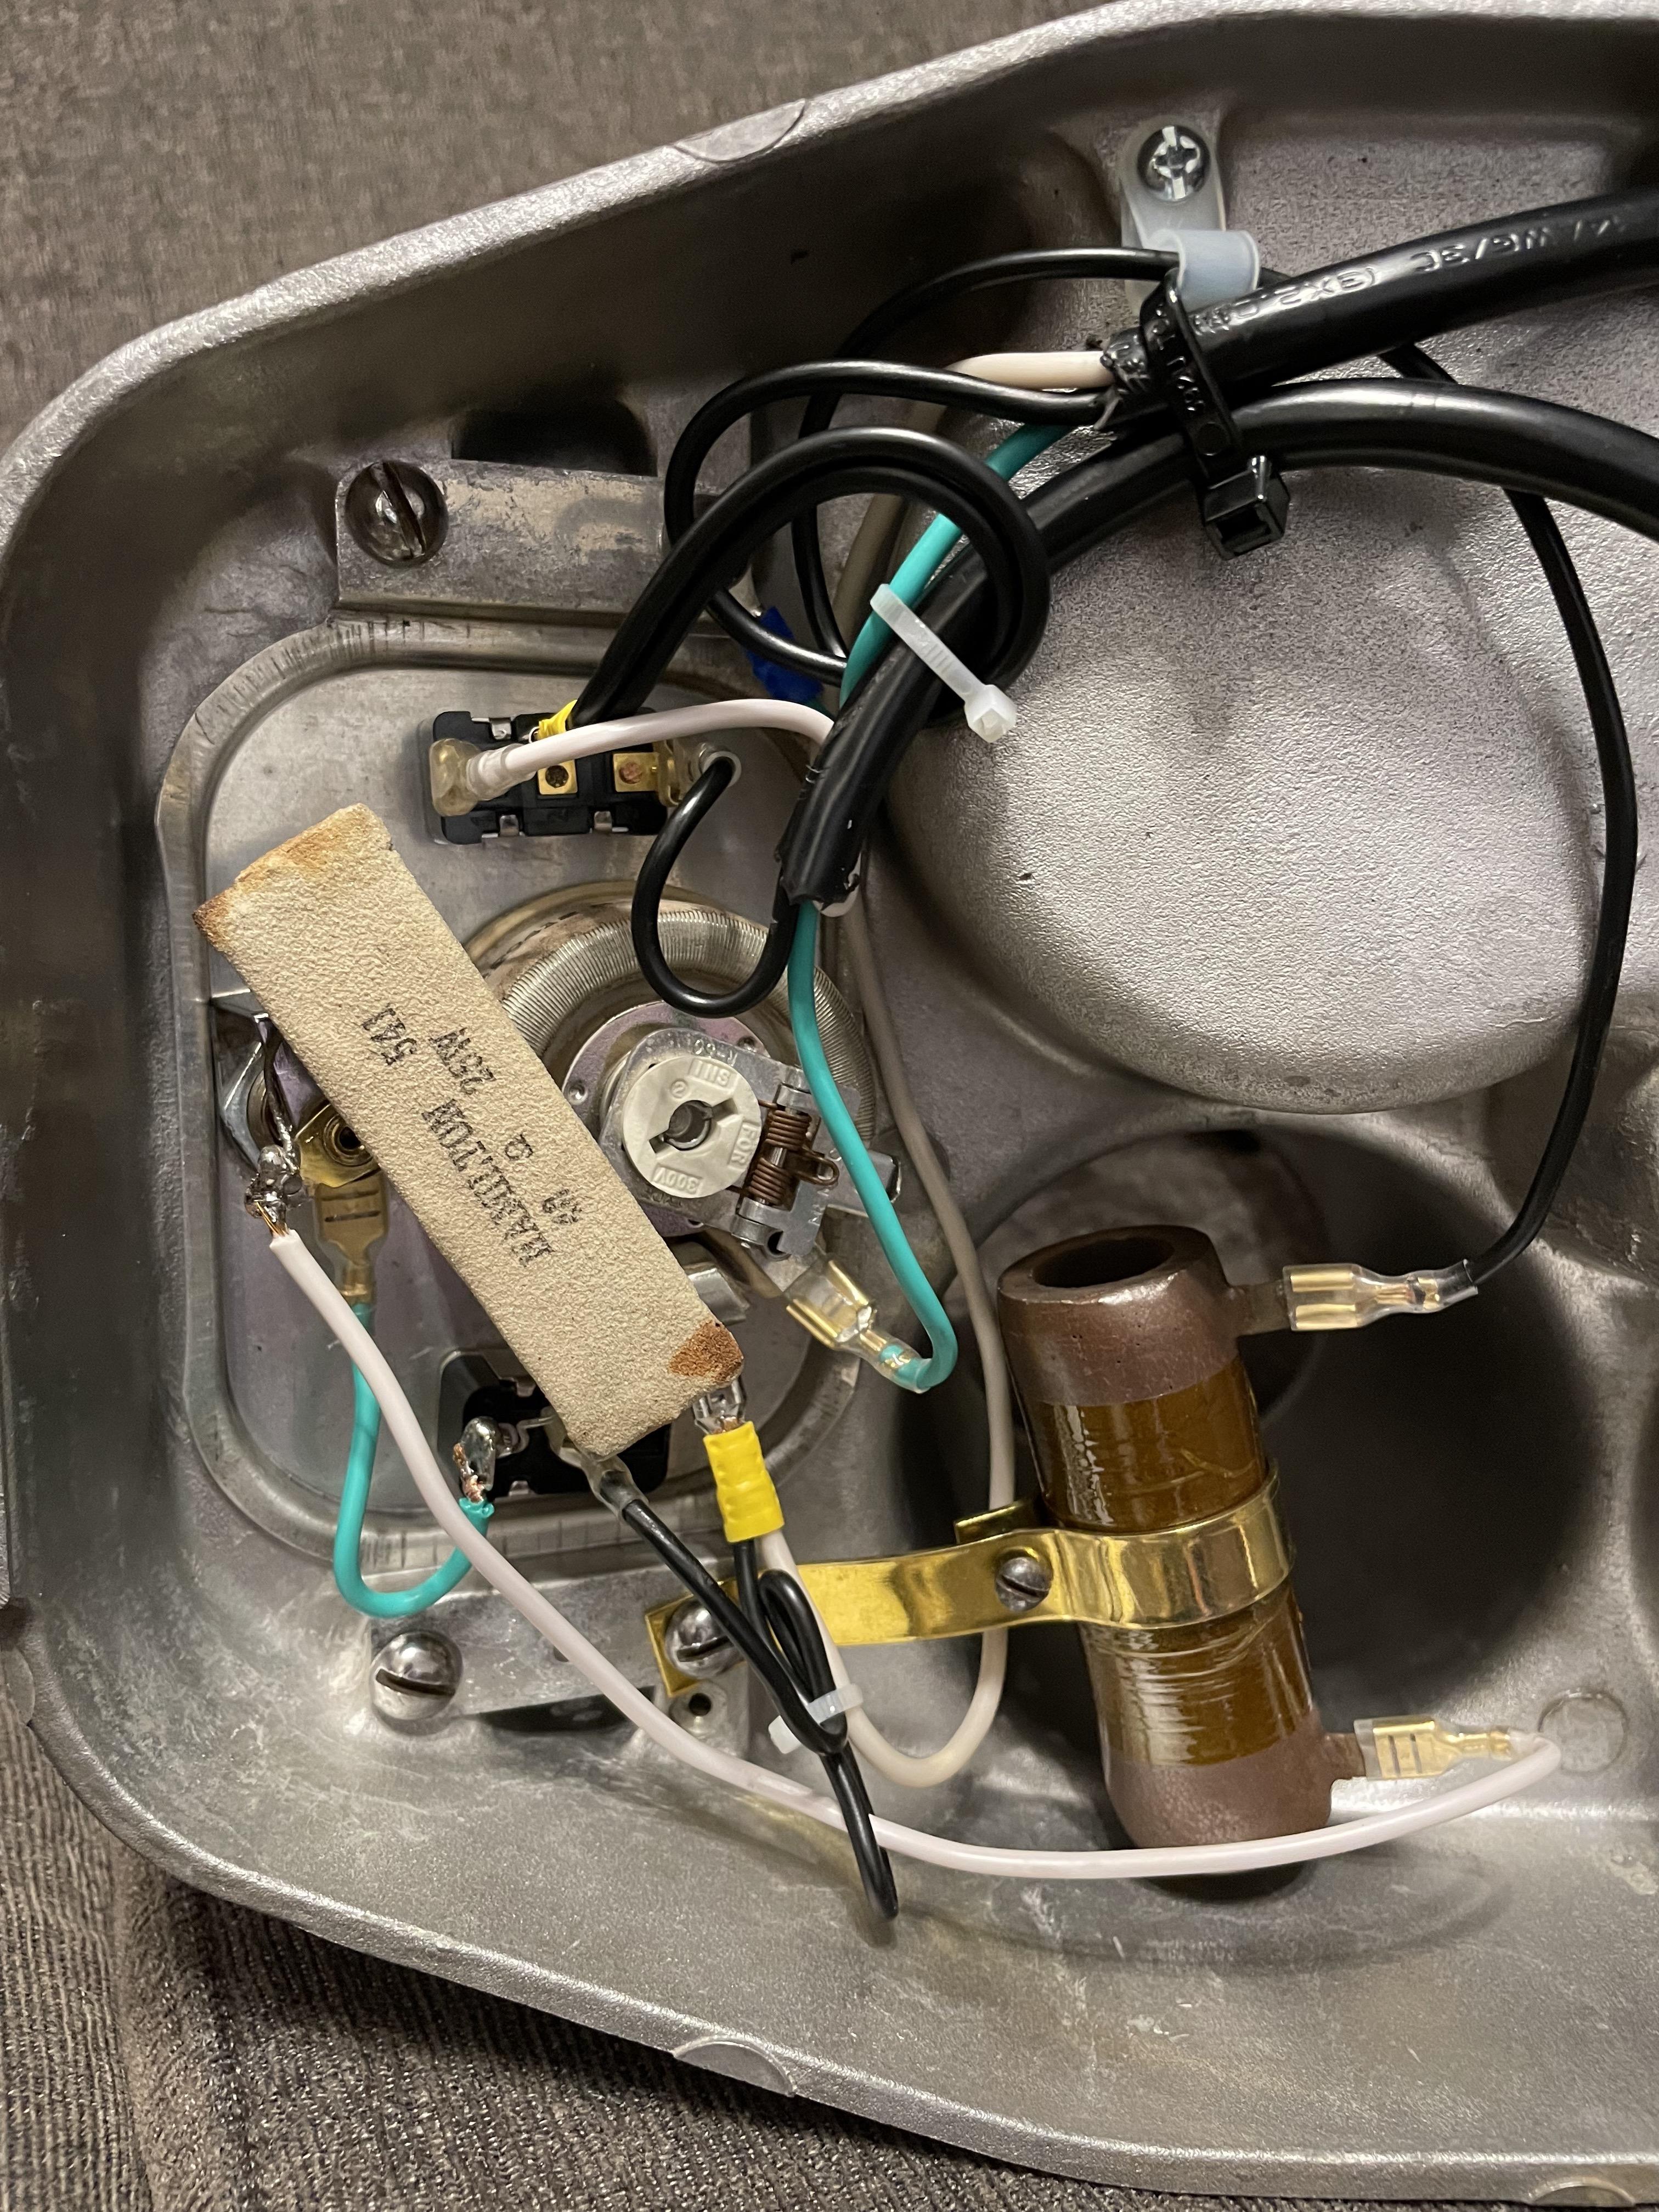
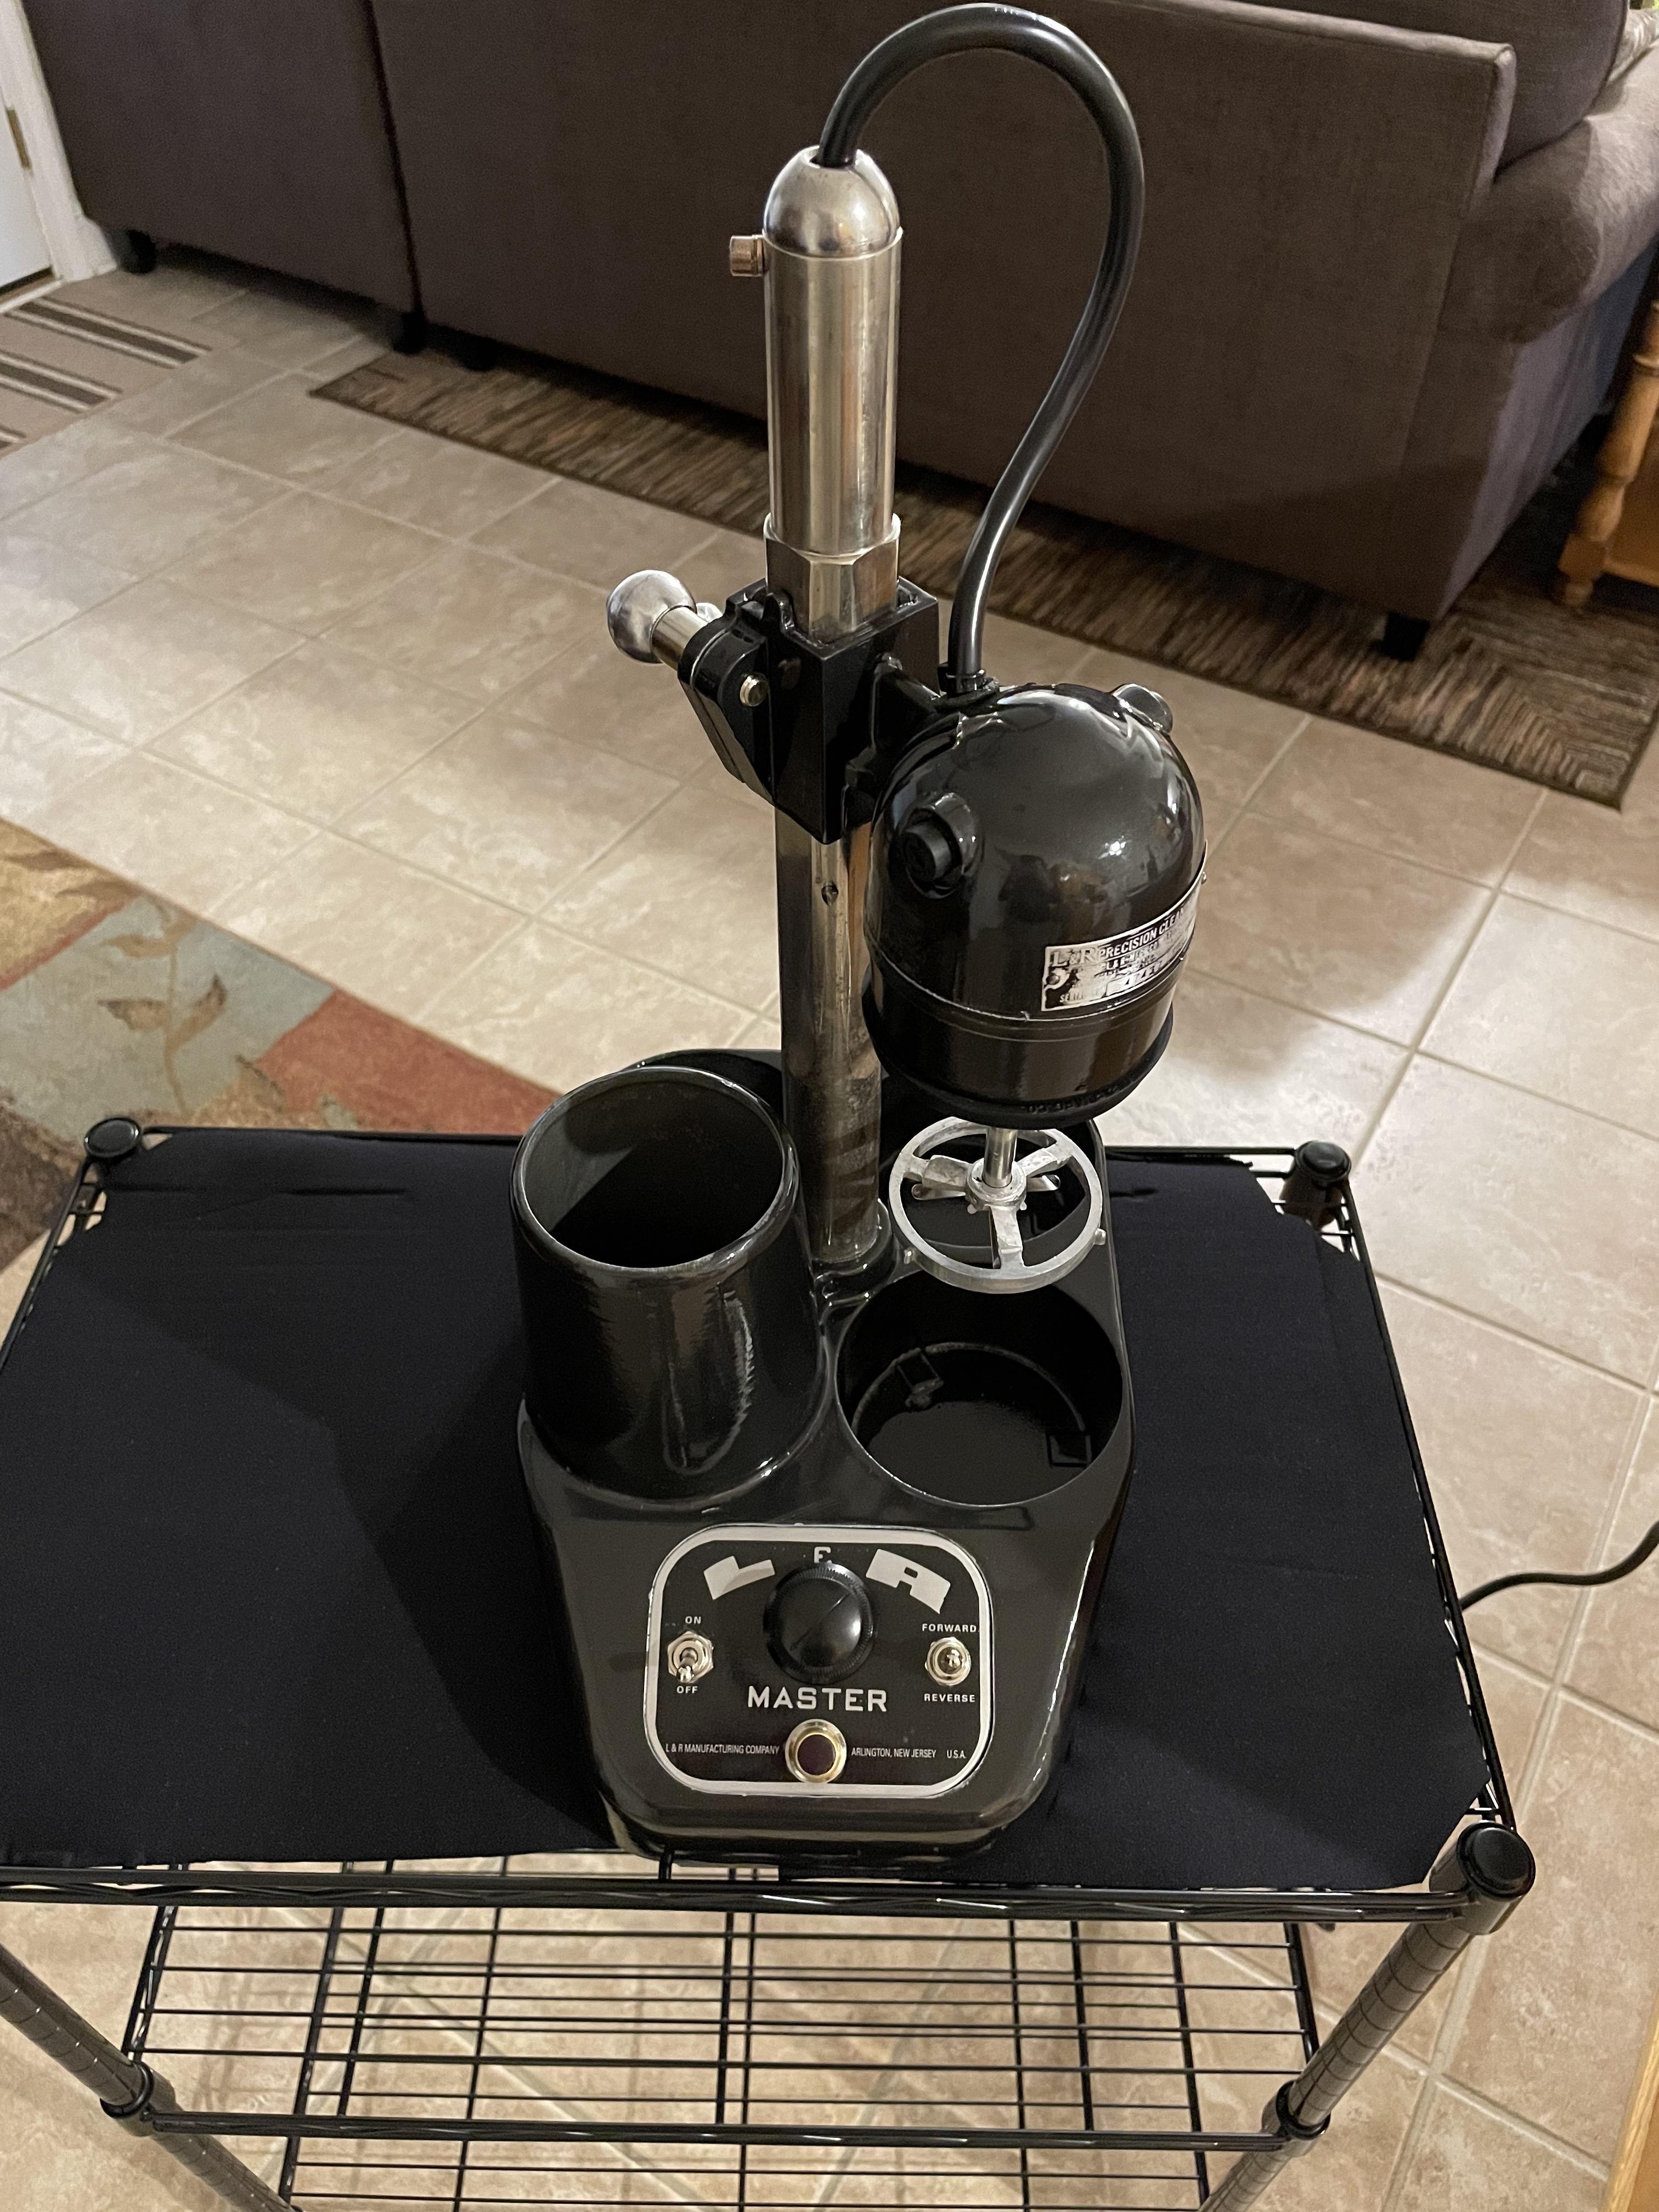
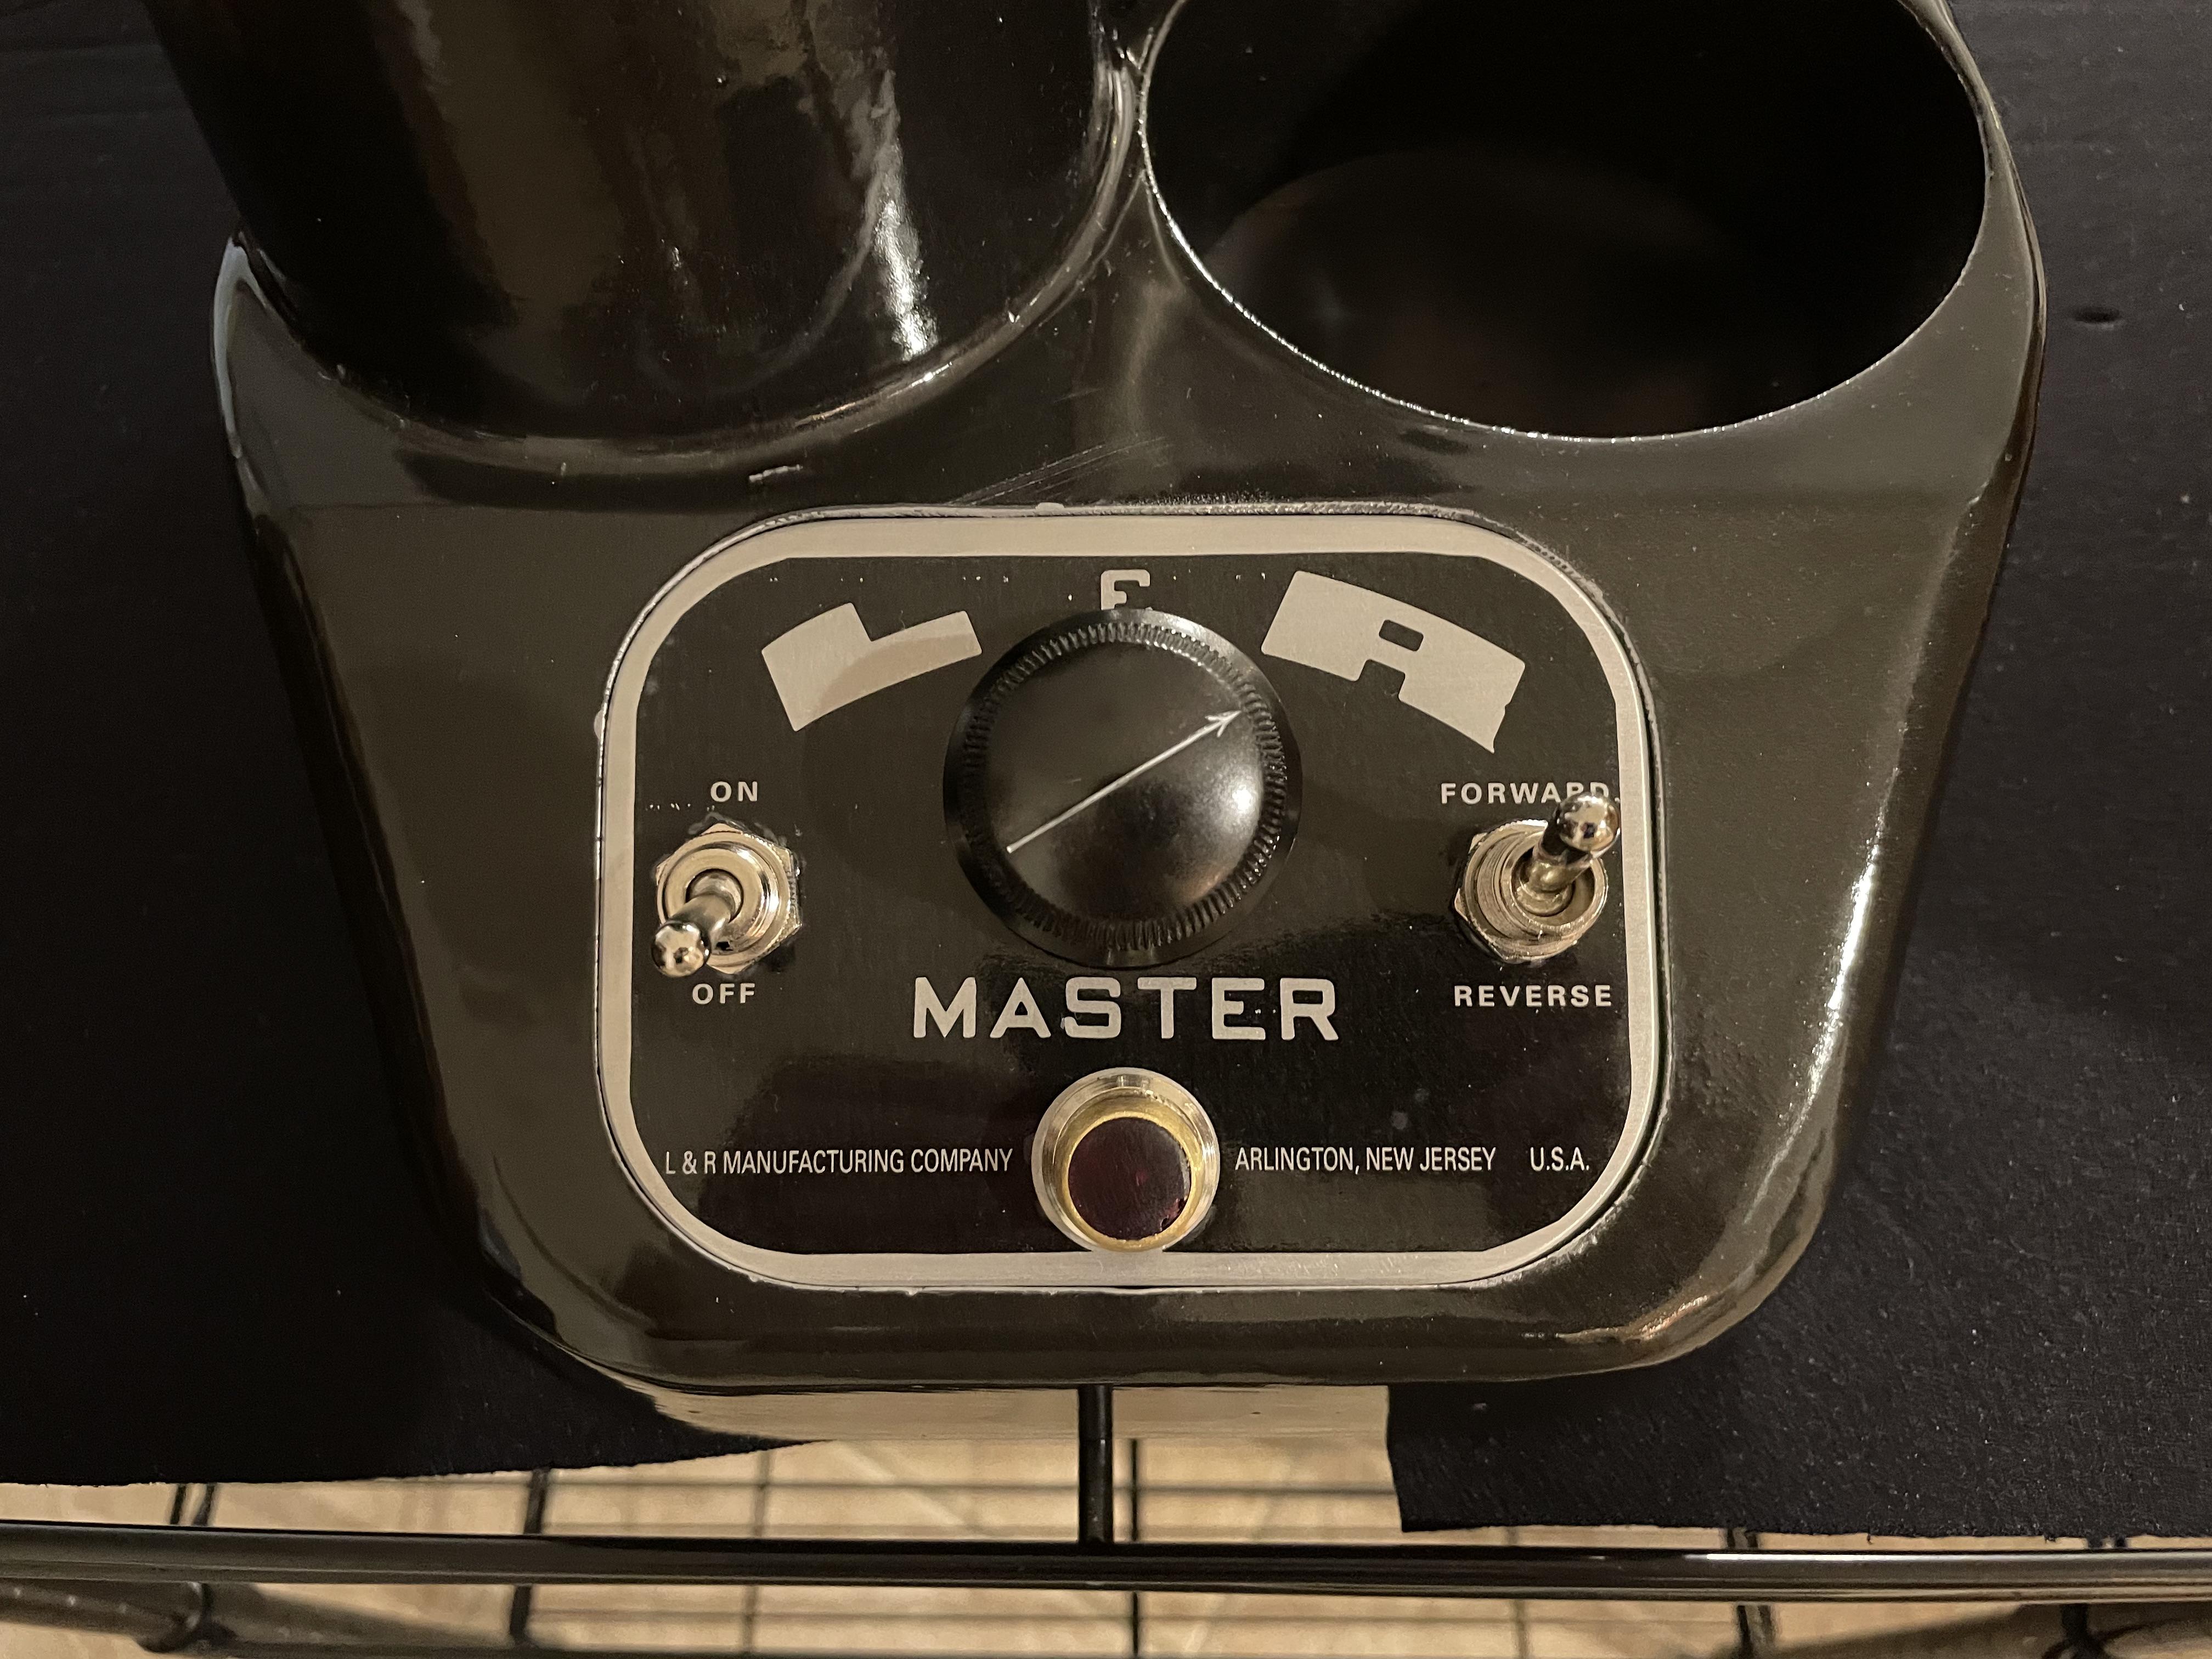
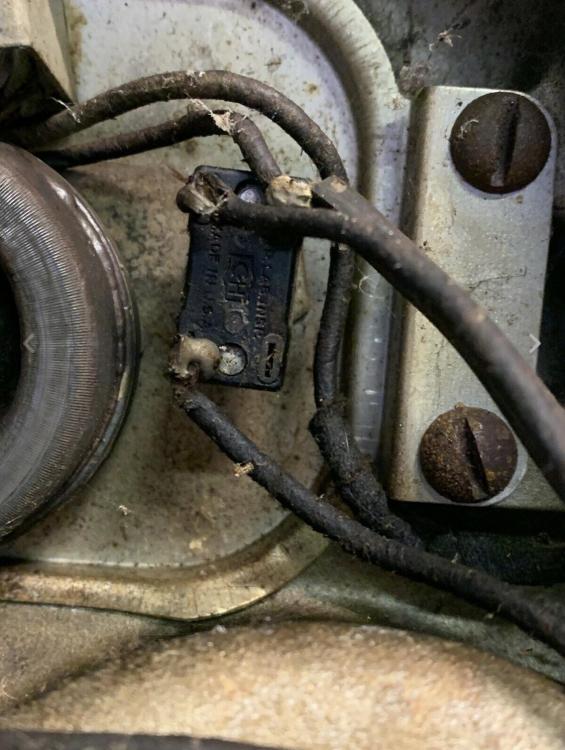
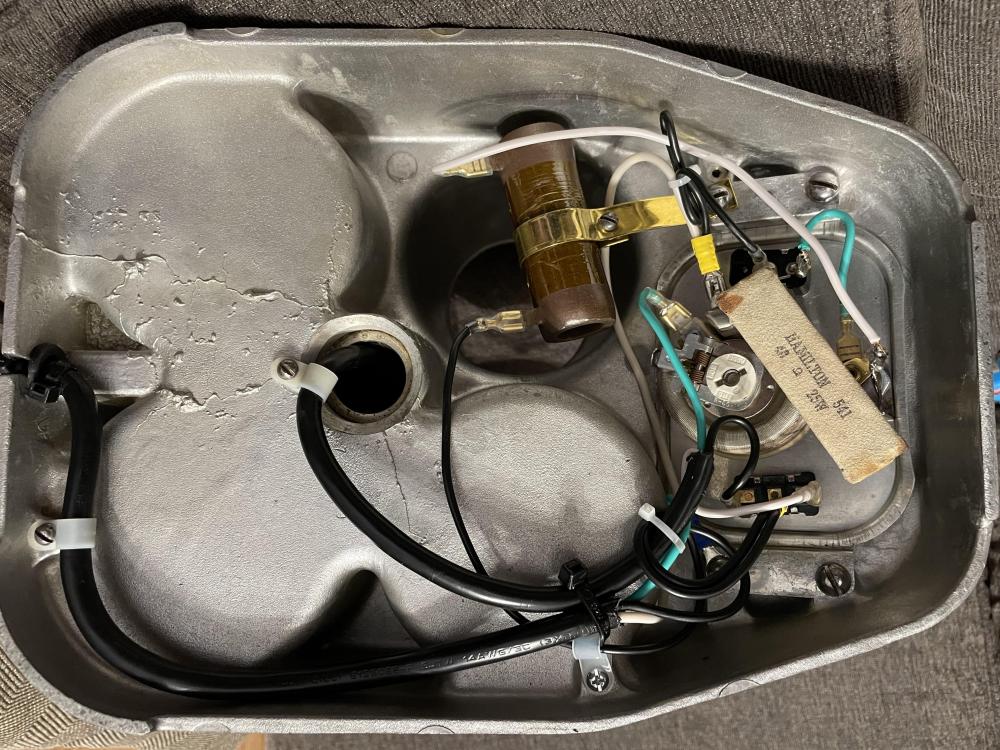
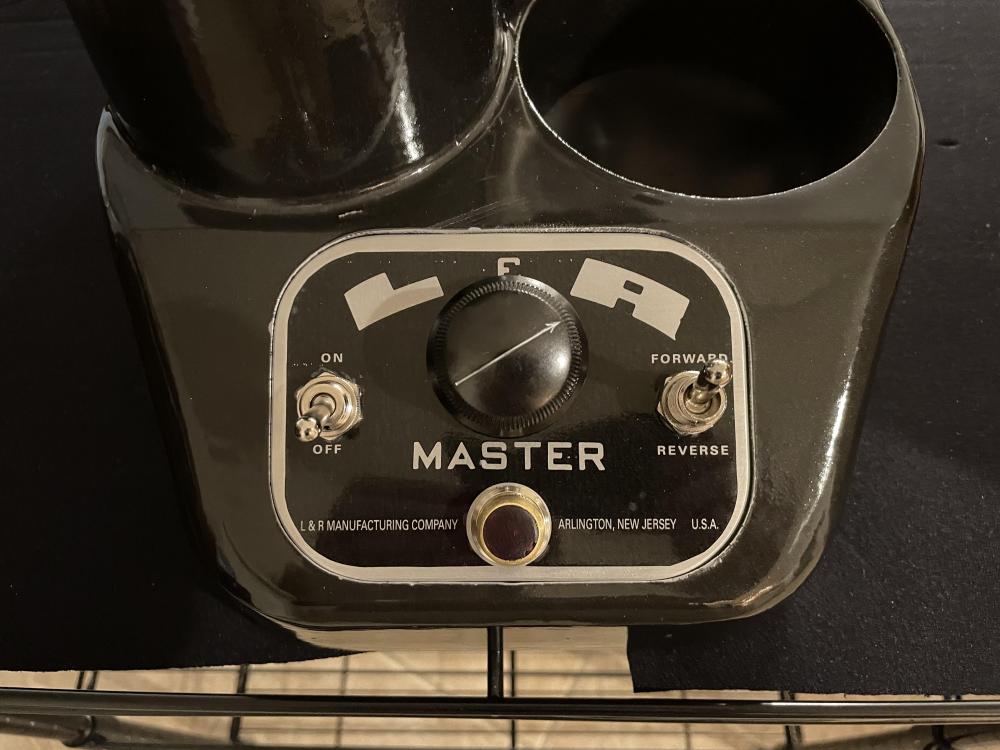
Greetings everyone, hope all is well. Well, it's done. I don't call this a full restoration due to lack of skills and still learning techniques, etc. so we will call this a half or semi-restoration. Everything works perfect and is SO MUCH quieter than it was when I originally got it. There are a few things I did that couldn't stay true to the original.... The power cord strain relief connector is homemade with a rubber grommet and two zip ties. I know they make them for this but will just have to keep looking and will be easy to switch out in the future since I used quick discomments (spade connectors) for most of the connections to assist with future maintenance if needed. For the Forward and Reverse switch, I elected to go with the one that has 3 positions or ON OFF ON instead of the original design that has just two positions. I figured this would be another good safety measure to have so I can ensure everything is completely off when plugged in. I did elect to keep the ceramic\concrete resistor that is for the light, just because it was original, the company Hamilton for Hamilton Beach is on the resistor as well as it was still in spec. These were the only two connection points I soldered due to the heavy gauge wire from these. I think the label for the control panel turned out ok. I put a piece of mylar over the print to help protect it as I printed the sticker clear labels from my laser printer. I originally was going to go to Office Depot, but the last time, their prints also had dots here and there where the toner missed. Compared to how it was, I think it's an improvement and I wasn't going for museum quality as I plan on using this. Well I think that just about does it for me, I know the paint job is very amateurish and that will be the LAST time I use spray lacquer over spray paint, will save lacquer for wood products. Hope my journey helps someone in the future as everyone here has helped me out so much. Enjoy the before and after pics. Take care and stay safe.


 3 points
 -
As I posted recently on another topic. It's about preventing disasters before they happen. Before starting even trivial work, checklist: Am I seated correctly, work at least chest high? Do I have good light? Is the bench free of clutter? Do I have a non slipping work mat, traditional watchmaker's or electronics silicone as preferred? Do I have decent tweezers, and am I handling them correctly? Do I have correctly sized screwdrivers (brand or price not important), which are dressed correctly so they wedge into the head slot and keep it firm ? Do I have a dust tray, or at least a small clear box where immediately put and keep safe all parts in case I'm interrupted or an accident happens? If the answer to any of these is no, do yourself and the watch a favor and stop until all conditions are met.2 points
-
There is a reason we keep containers of assorted screws, and often a magnet, within easy reach. Other tricks we know: use good quality tweezers and learn how to dress the tips, a piece of nylon stocking (panty hose) secured to the end of a vacuum nozzle with a rubber band - for picking up light stuff without sucking it in, good bright flashlight, I also made a bench apron for which the lower edge of it fastens below the front edge of my bench, for parts which must be removed while under tension or pressure (such as click springs or battery strap screws) many of us undertake the operation with the movement placed inside a clear Ziploc-style bag and we reach in to work on the part.2 points
-
I bought some clocks stuff and watches from a guy in San Antonio. He gave me a bunch of stuff as well. This Vigor crystal lift was one thing. The rubber tension ring and worn out and the jaws would not expand. Today, I printed a replacement using TPU filament. Works nice now.
 1 point
 -
Another "makes it look so easy" video by one of our members @Repivot, this time about hairspring manipulation. https://youtu.be/IoBd-oxpEZ41 point
-
Somewhere on this discussion group I think they were talking about Mark's new shop which of course was new a century ago? So people were commenting about books so I showed a picture of where my horological books mainly are and I probably just about need a gun safe to fit them all in but I don't have a gun safe.. So if you could find that image you can see how many horological books I have other than those that never made it to the shelf yet bad habit of acquiring books Then for a lot of key paperwork items they been converted the PDFs.. Is really annoying when paper doesn't last forever even more annoying if you have a photocopy from way back when one photocopies really sucked and they start fading away where PDFs tend the last forever. Especially if they're stored across multiple hard drives just in case something fails1 point
-
GREAT ADVICE!!!! I literally JUST checked Ebay and there are some pretty good deals on used Vigor and Dumonts. I have 2 pair of Indian and one pair of Pakistani tweezers. They are good tweezers but I prefer the feel of the Vigor or Dumont. That being said; I was a professional auto tech for many years. So I have grown accustomed to a certain "feel" for tools. Dumont, Vigor, and even Bergeon don't hold a candle to Snap-On in regards to pricing!!!! I'm not saying to put a large outlay in tools and other equipment. Start small and see where the hobby takes you!1 point
-
Langzeitfett - should last a long time! Seriously, if you get the specified power reserve, and it doesn't spread everywhere, especially outside the barrel, then I don't see a problem with it as a cheap alternative for your own watches. If you remember, give us an update in a few months.1 point
-
Good magnets on a sweep bar (magnets from modern presentation boxes are good). Led light bar, wave it about in the dark. Gaffa tape wound round hand, adhesive side out, rub around work area, then inspect under magnification if needed. Good for non-magnetic parts and jewels. Old fashioned brush and pan sweep around then inspect debris with magnet and magnification. Don't forget to include yourself in the above! Keep workbench clean and as empty as possible. Keep tools well dressed to avoid launching parts, use bags/cling film/rodico for springy parts. Look beyond the obvious! Collect brownie points from your other half for keeping the place clean !!! If still not found, order new part. Guaranteed old part will turn up before order is delivered !!! Then cancel order if possible!1 point
-
How about getting dumont for hairspring work and small springs ( that be No4) and low quality ones for other tasks.1 point
-
I picked up all of mine used.. I think I'm up to 15 pairs now. But I primarily use maybe 3 the most. U just need to determine what u like the "feel"of. Also how to maintain them......1 point
-
Investing in good tweezers made a TREMENDOUS difference for me. I could then pick up and manipulate/place screws, parts, etc.. with confidence. Instead of sending them into the "fourth dimension"!! I've got a smattering of Dumont, Vigor, and even a couple of good Indian sets...1 point
-
I have a sweep magnet, AND an uber bright flashlight. The flashlight is quite effective because many things I drop are shiny objects.1 point
-
We ALL get a turn. J1 point
-
For a more accurate hands adjustment, it better not be running, You can release the power through the click or wait until it stops.1 point
-
It was bent where the crown screws on, managed to straighten it. Do you have to stop it to put hands back on?1 point
-
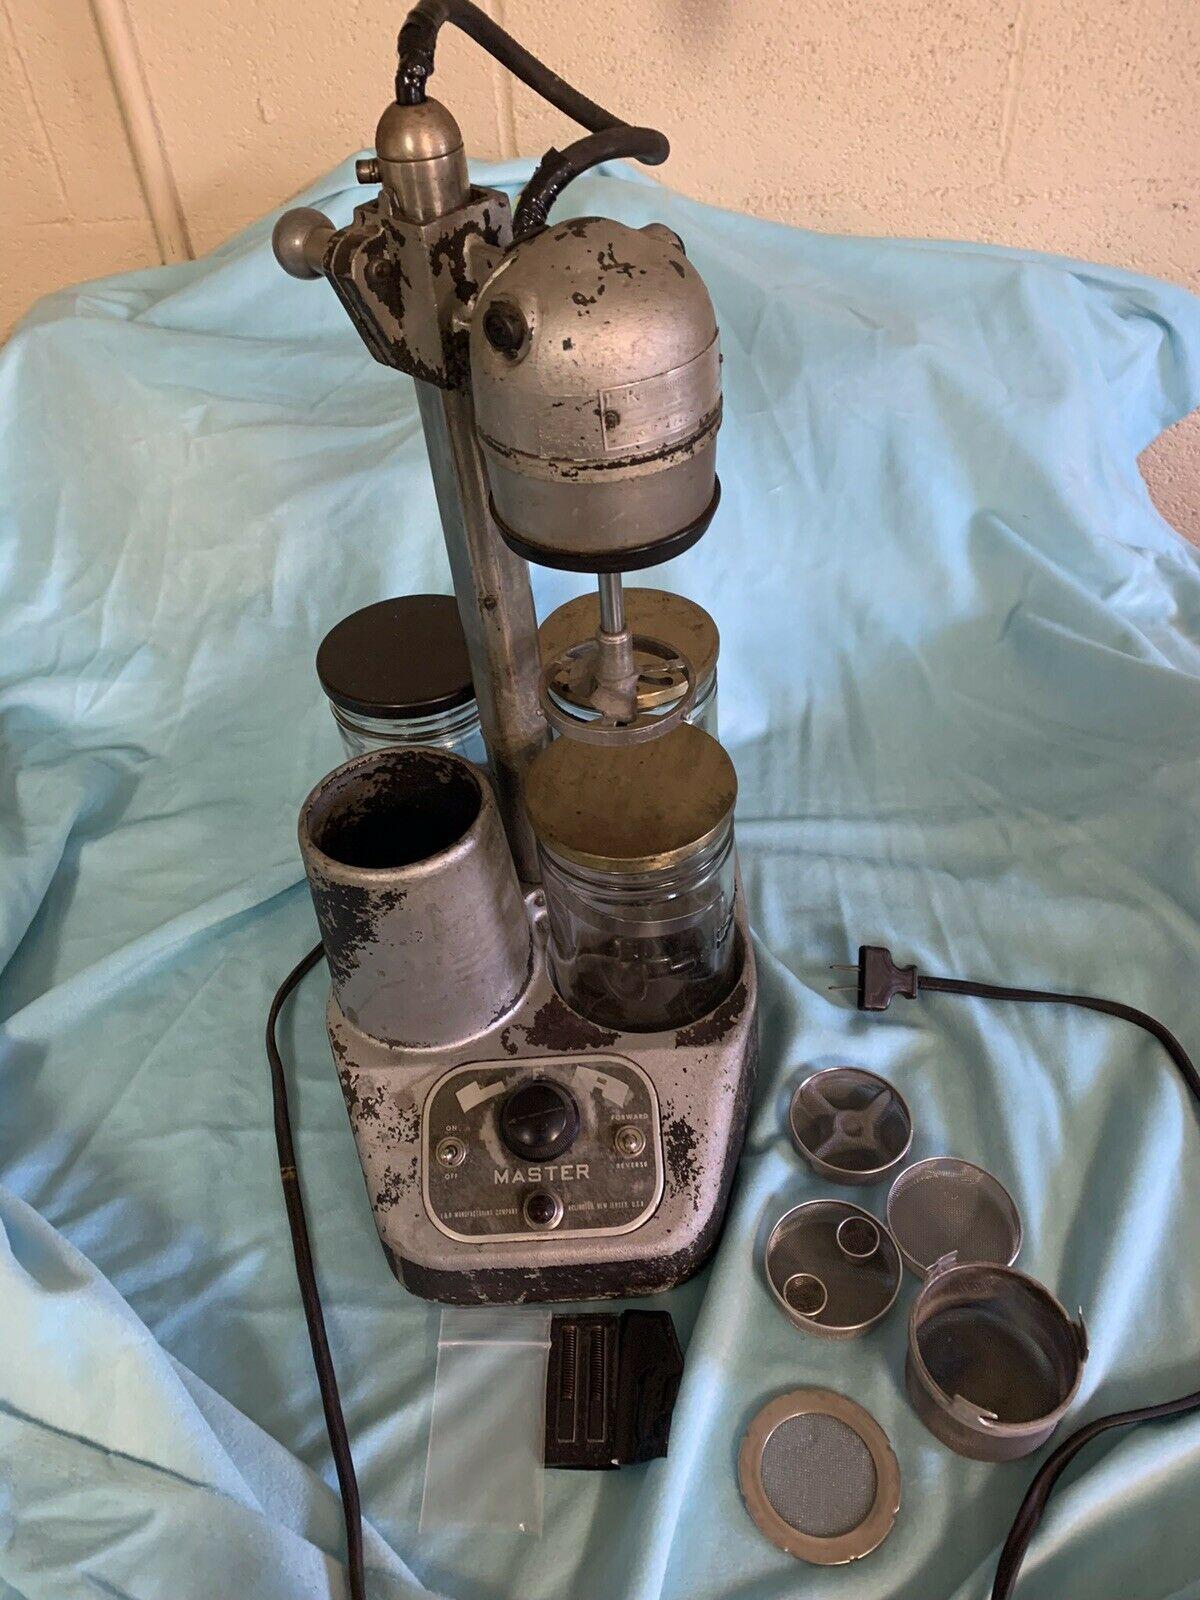
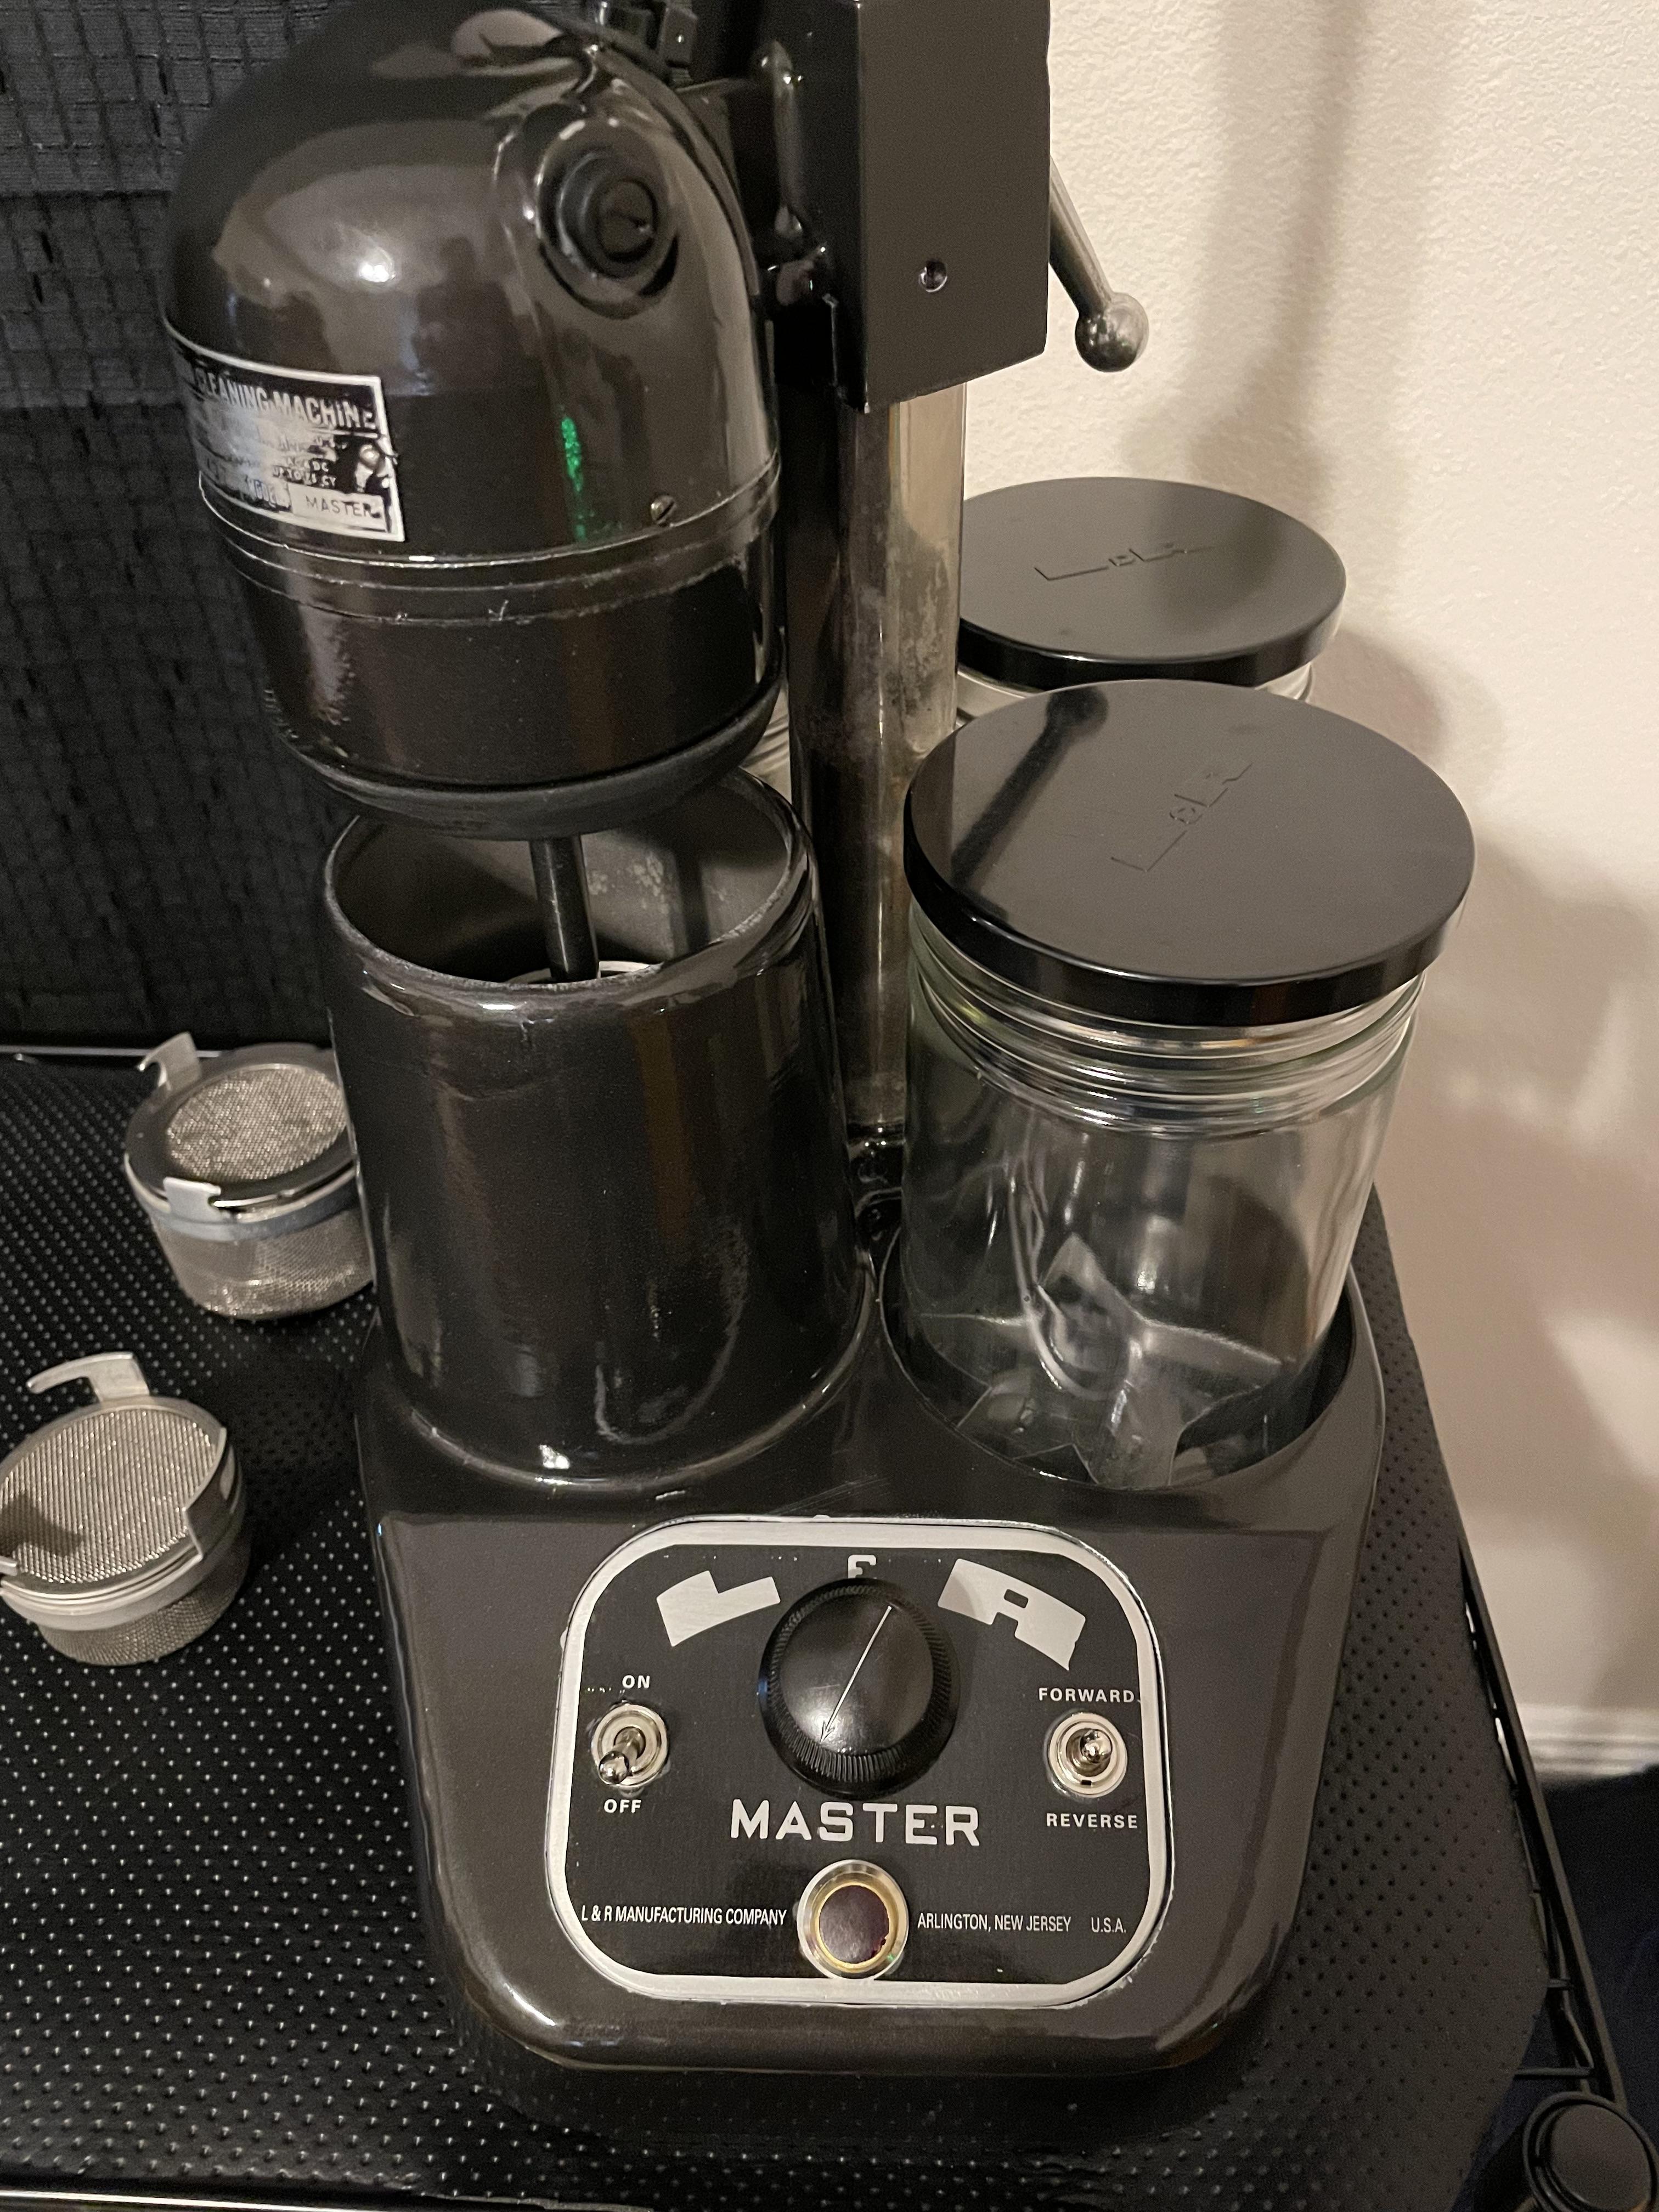
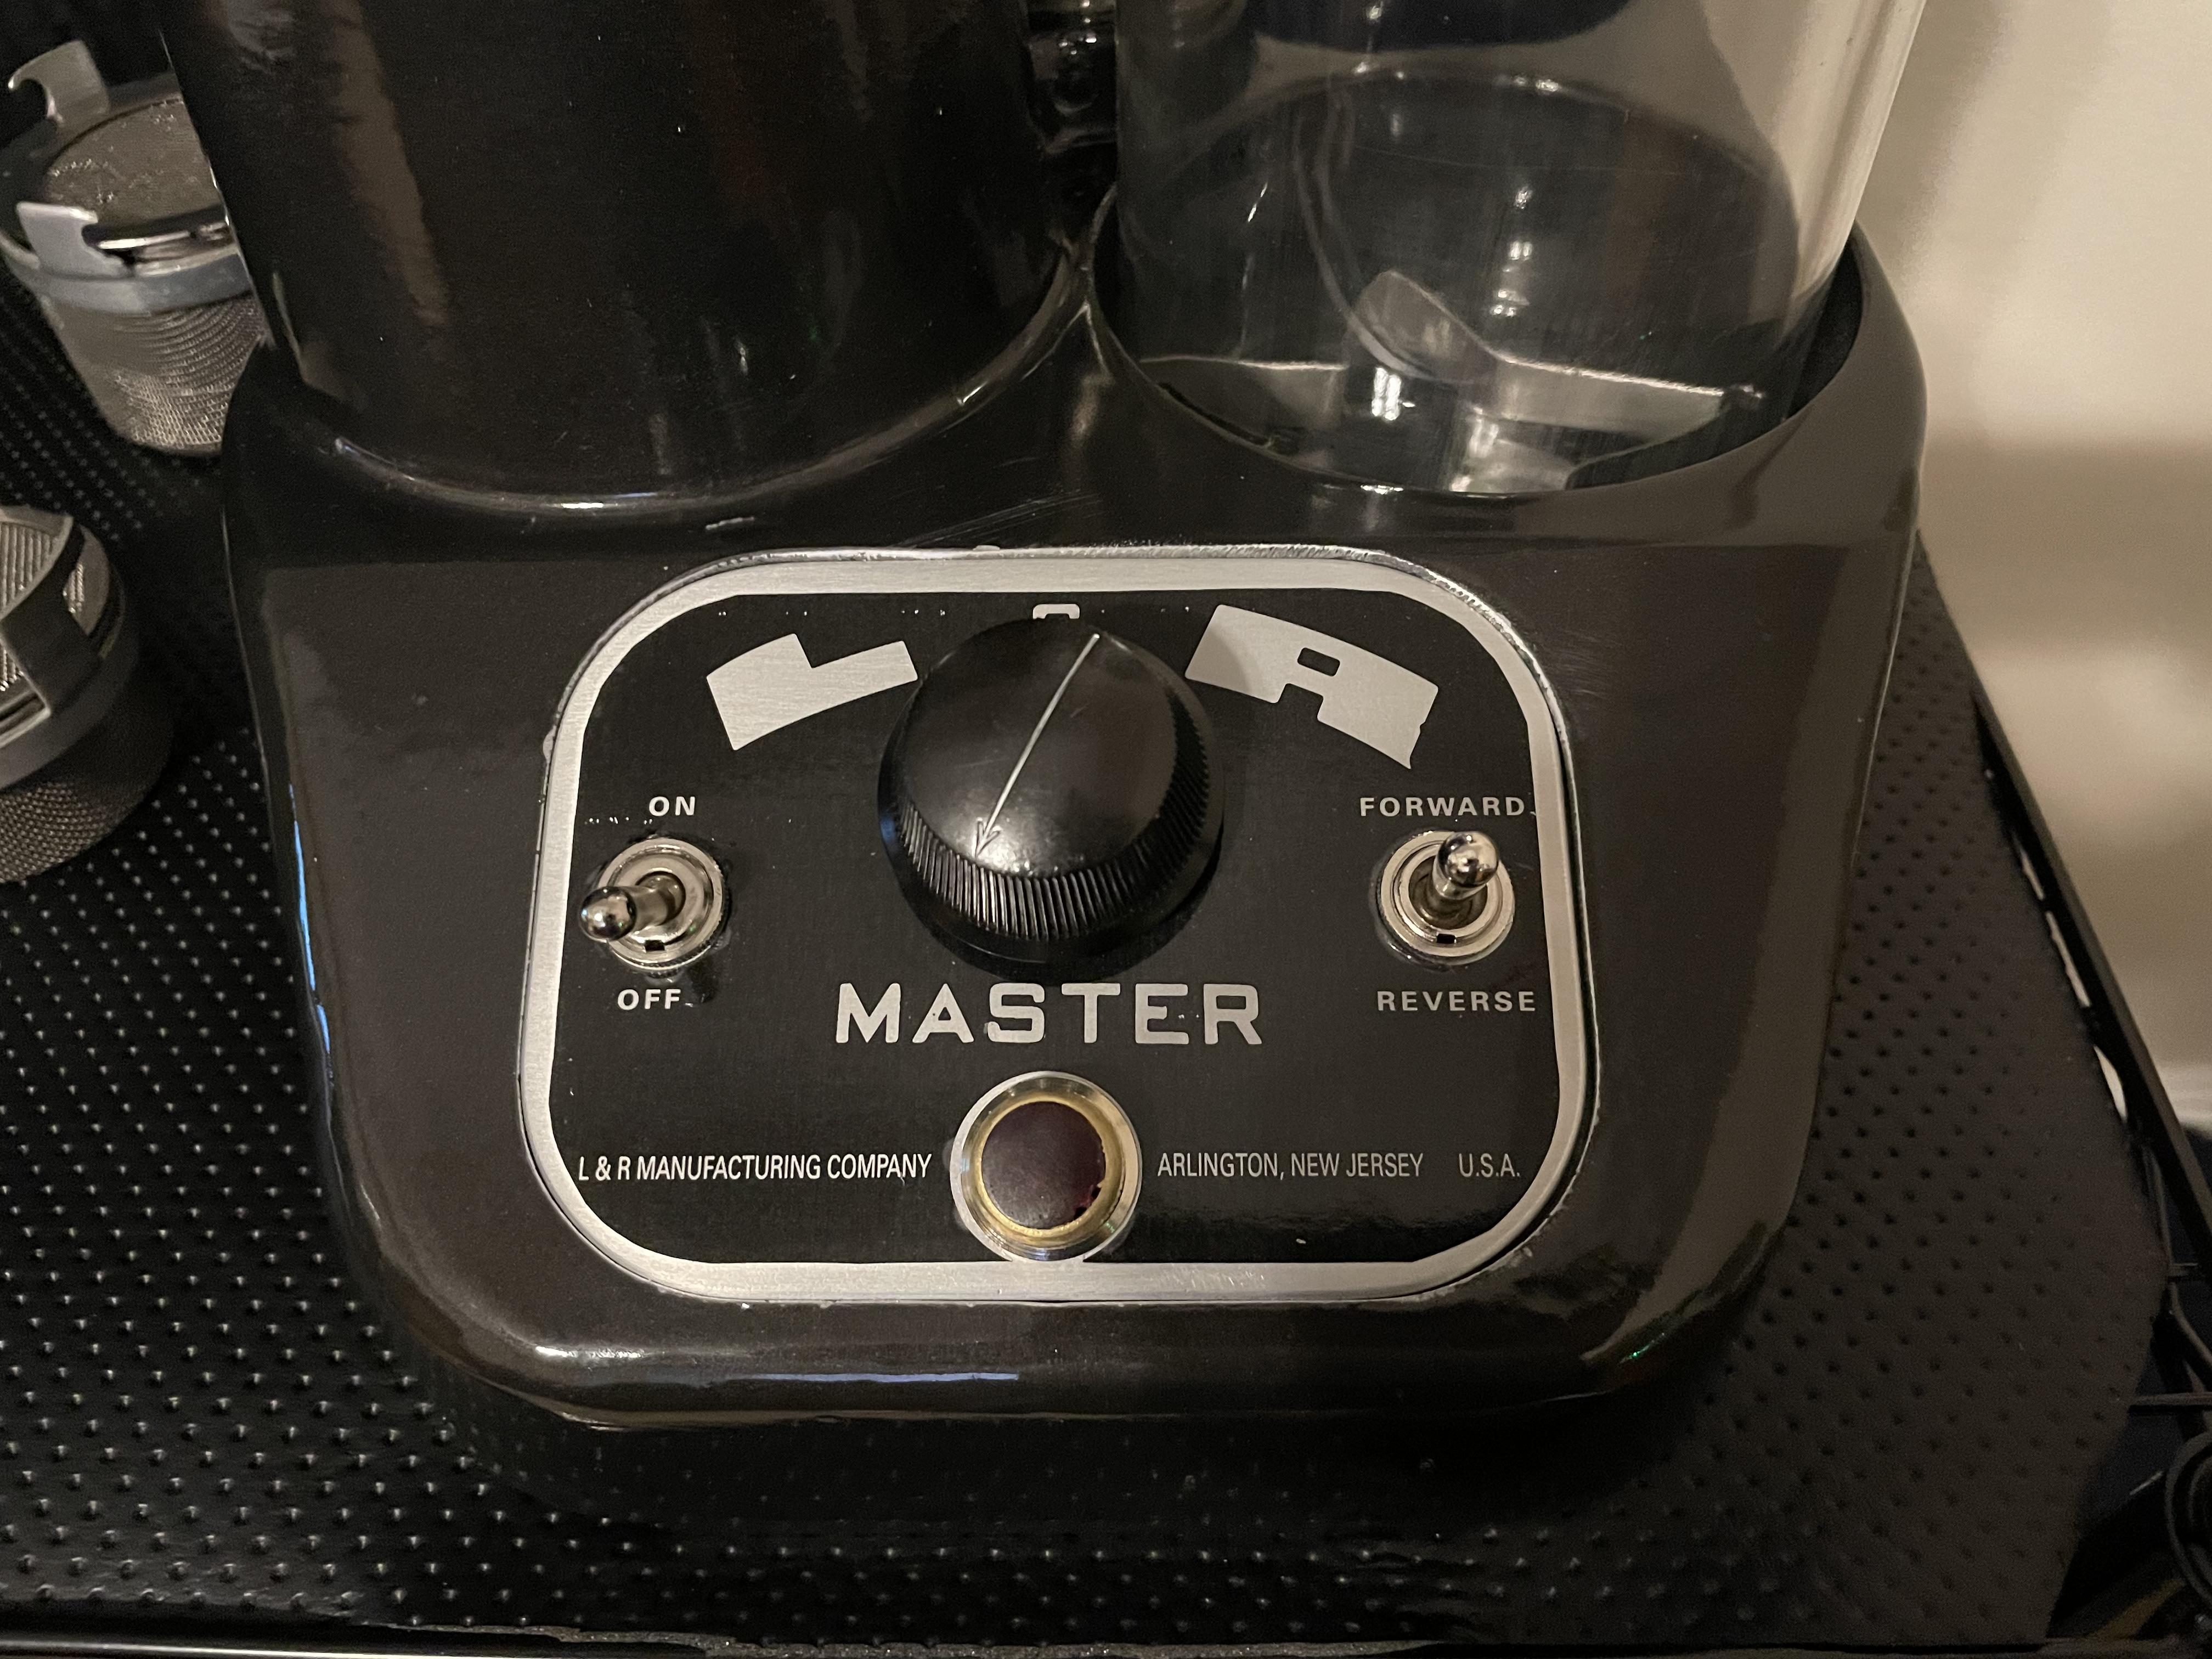
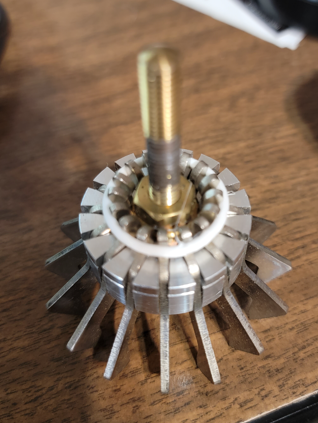
A few more glamour shots with all the accessories (jars, lids, baffling, stars, etc.). I also figured out why switches come with two mounting nuts....I didn't realize it was to adjust how much of the switch sticks out of the top, DUH, so I fixed that as well and now the switches don't stick out so much and are more level and look nicer. I also tried and tried to redo the manufacturer's tag on the motor housing but the lettering hardly sticks out so no matter what type of sandpaper or Scotch Brite I used, it would always take off additional material, so I left it as is and figures it shows the machine's age and battle scars so to speak. The red cover over the light had A LOT of pitting so I sanded them all out and that's why it is now flat, I'll keep my eye out if there is ever one for sale or anyone has one from a donor machine. Have a great weekend everyone and please stay safe.


 1 point
 -
correction sweep arbour , not sweep pinon.1 point
-
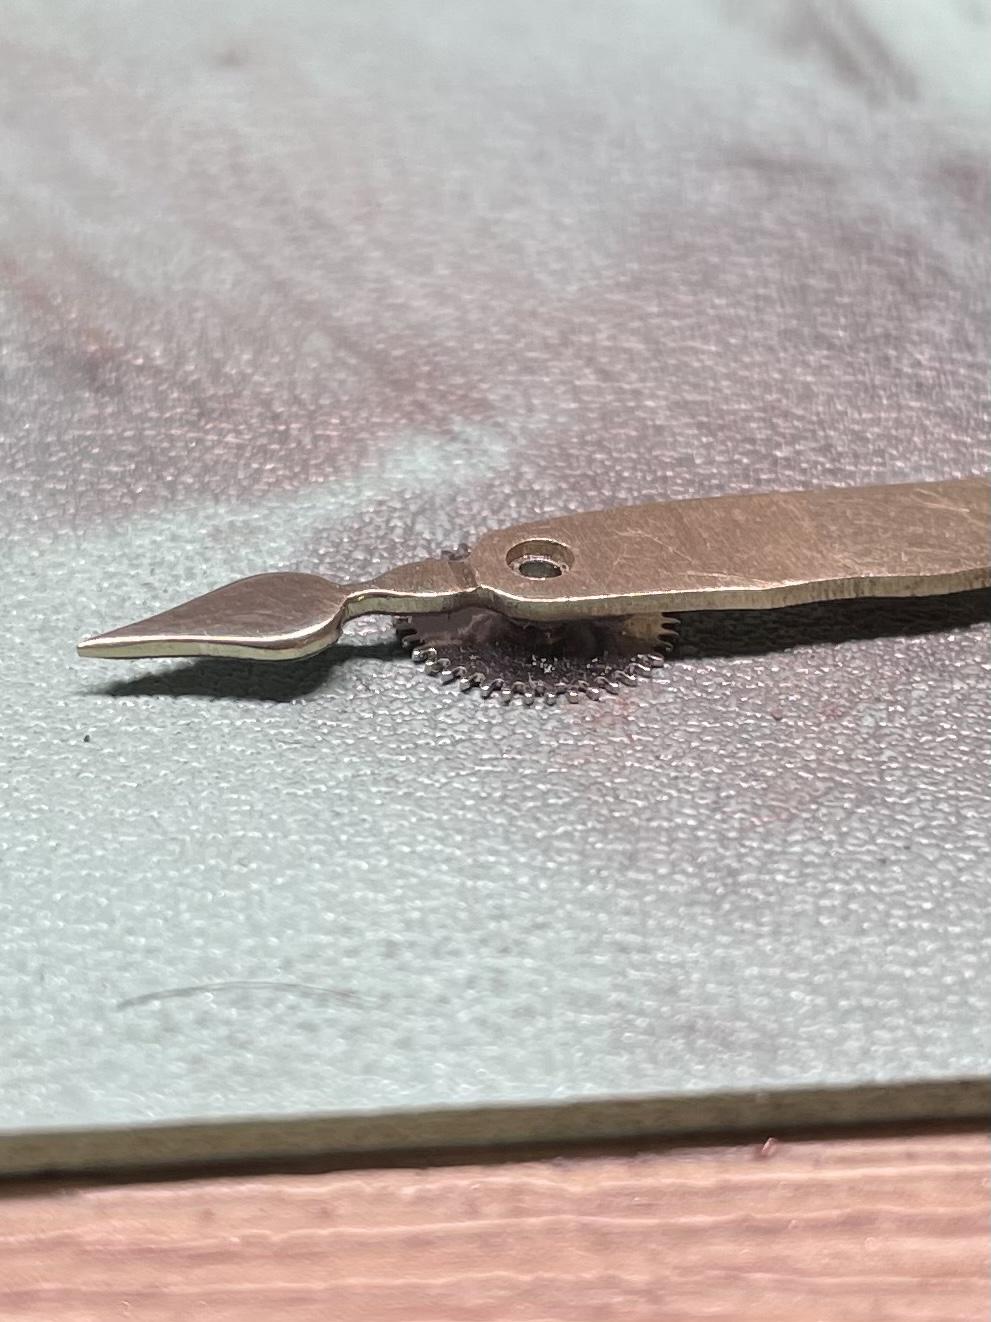
Nothing wrong with removing dial screws, if ithey don't want to come out, putting a bit of oil on them helps. So something must have been hindering the gears there, old dried oil or dial plate pushing on gears, you just ought to keep testing everything to find out. Could even have been the stem setting the keyless bad. So you have a movement to clean and find what under the dial was hindering it from running. For tube ID of the seconds hand , measure OD of the sweep pinion Good luck1 point
-
If the oscilator is good, runing it sustainablely by adding power to any gear of the train should be possible. in which case a good clean and lube should suffice. Your adding power to the train to check if escapement can be made to do cosecutive escapes. Nevertheless swing of the socilator is no gurantee a movement would run with just a clean and lube. I make a habbit of, 1- Checing the end shake on balance staff and at least fork arbour , escape wheel 2- Check if balance pivot can easily be forced to leaves the jewel hole. 3- if balance wheel or any gear wobbles. 4- Once disassembly gets to the gear train, see if the train runs freely, ideally it should do a back spin at the end. Actually this type of setting should be taken apart to check the jewel hole and face of the end stone. 3- Every part can be tested as you disassemble ( see if its doing what its suppose to do ) so the movement is often diagnosed and fixed before the clean. A preclean is real helpful. Check if the oscilator runs freely without the fork in place. and If the fork jumps to the banks with a gentle tweak and pallets are aligned and aligned/ level with escape wheel. So, what we doing is checking each part. Good magnification make life a lot easier. Regards1 point
-
To answer your question. Yes it does need a service. That entails a complete teardown and inspection of all components. Looking at the pics it appears as though there is some "foreign material" stuck up under the barrel bridge and the third wheel... As a fellow newbie (bout 9mos now); I completely agree with the other folks!!! Do several pocketwatches first. Also some suggested reading that helped me is Practical Watch Repairing by Donald de Carle and Watchmaking by George Daniels... How are.your tools??? I found that quality tweezers made a HUGE difference..... Best of luck, were all here to help.1 point
-
Its quite common on these "fashion" watches that the dial is held in with the bezel which contains the crystal. So to remove the bezel you need to locate the pry point and use a case knife or if no prypoint can be foun use a Xacto knife/or blade into the seam carefully to create a gap suitable for a case knie. If you have no movement holder then use safty gloves in case of slippage. The loss/slashing of fingers/hands is not a desireable state of affairs. You may require a tool/press to re fit the bezel and case back.1 point
-
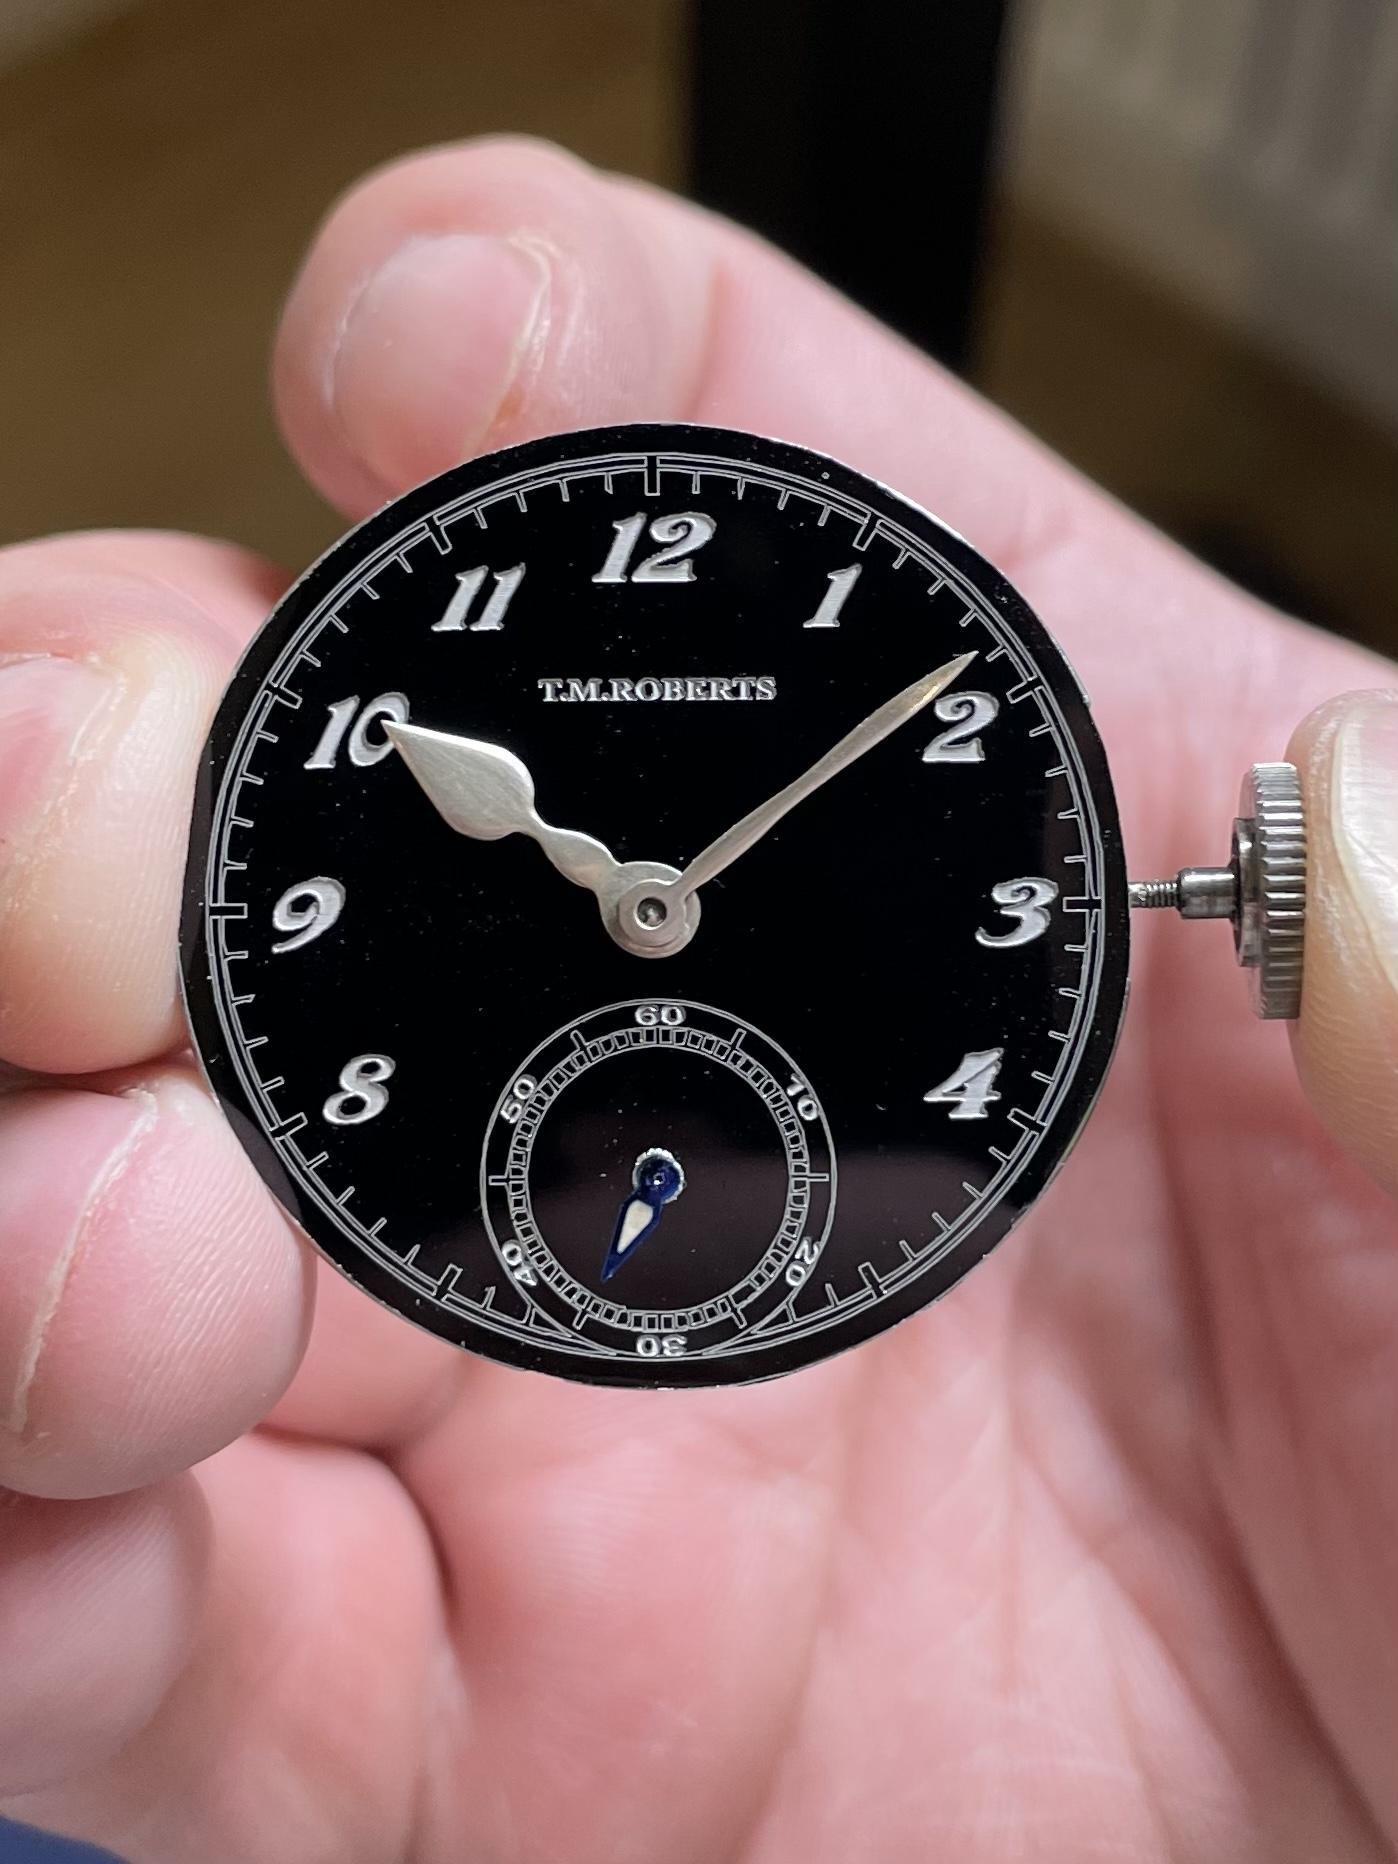
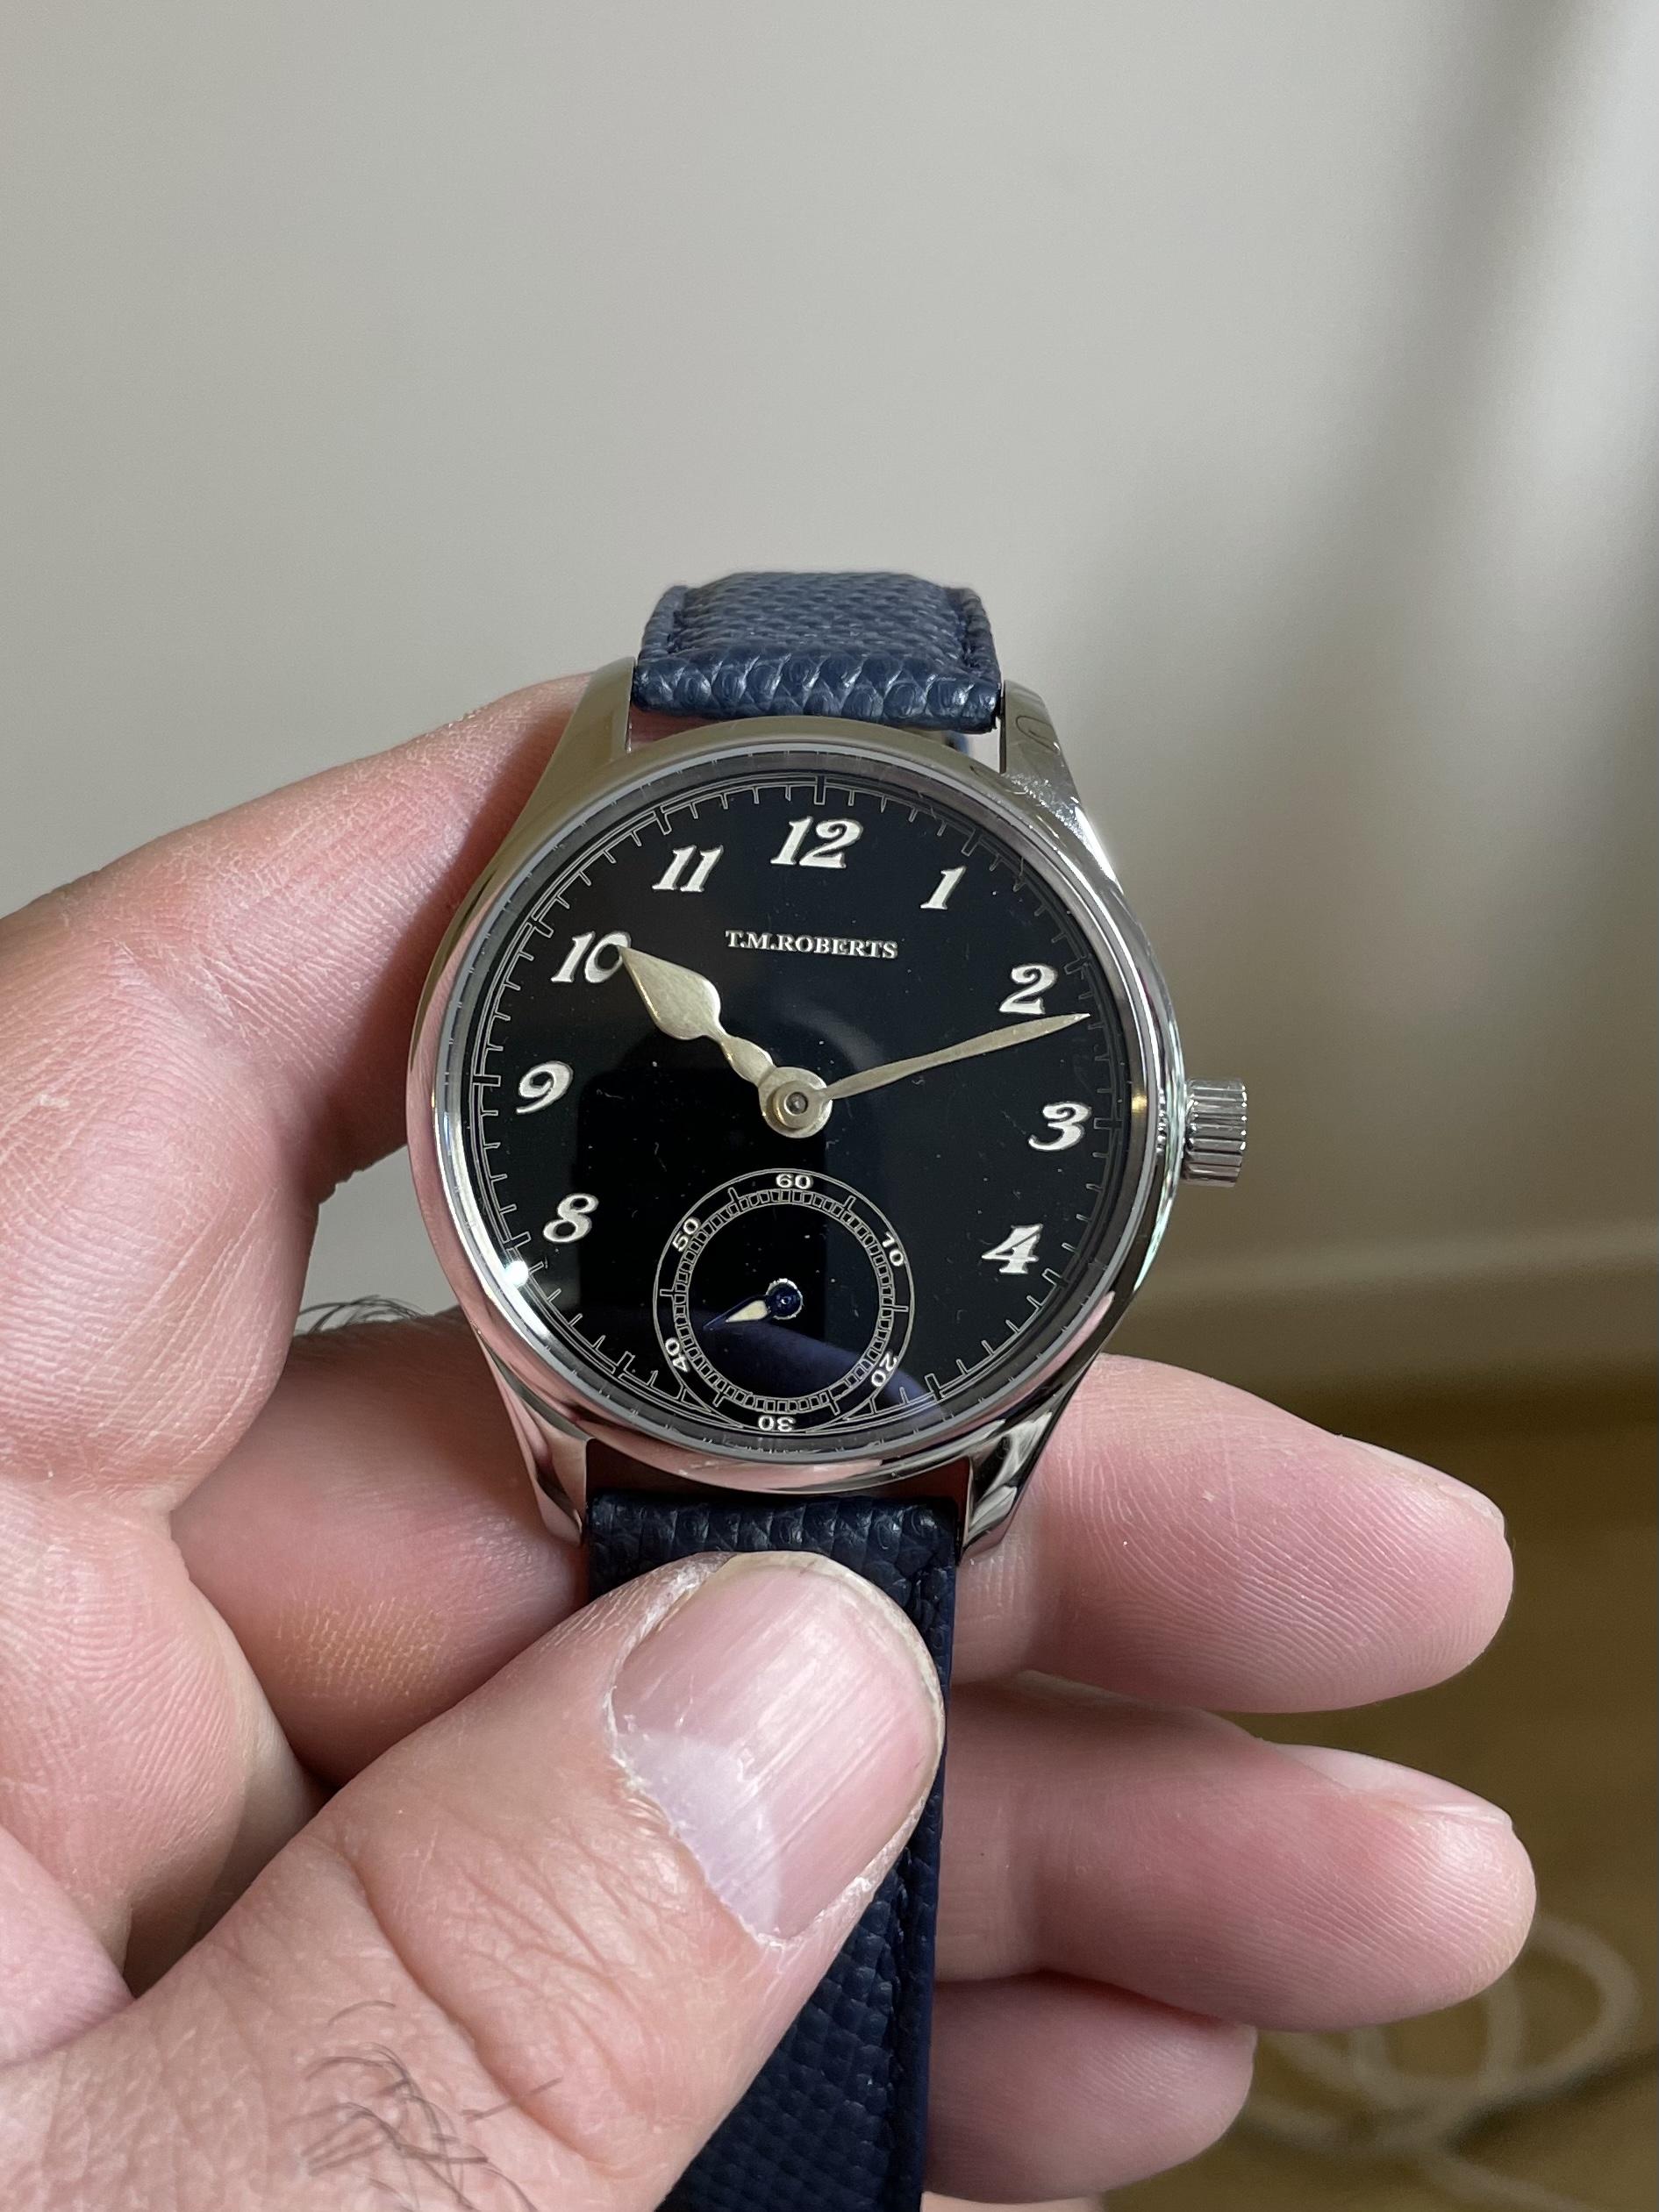
Touch of silvering powder and I’m almost happy with them.

 1 point
 -
Now with photos!


 1 point
 -
My partner showed an interest in my watches for the first time recently. She really liked the military inspired one, and requested one for Christmas. So I made here a more feminine version of the dial (is that sexist? If it is and offends anyone please let me know and I’ll retract it!). Not sure she likes mother of Pearl, but that’s what she is getting!
 1 point
 -
All watches I own over 40mm are currently gathering dust. I have some lovely Panerais and a Planet ocean XL that I really need to get rid of. I can’t see myself ever wearing them again. I only tend to wear my homemade watches these days. I’m quite a big chap, but my favourite is 35mm. Everyone laughs at it, but I love it.
 1 point
 -
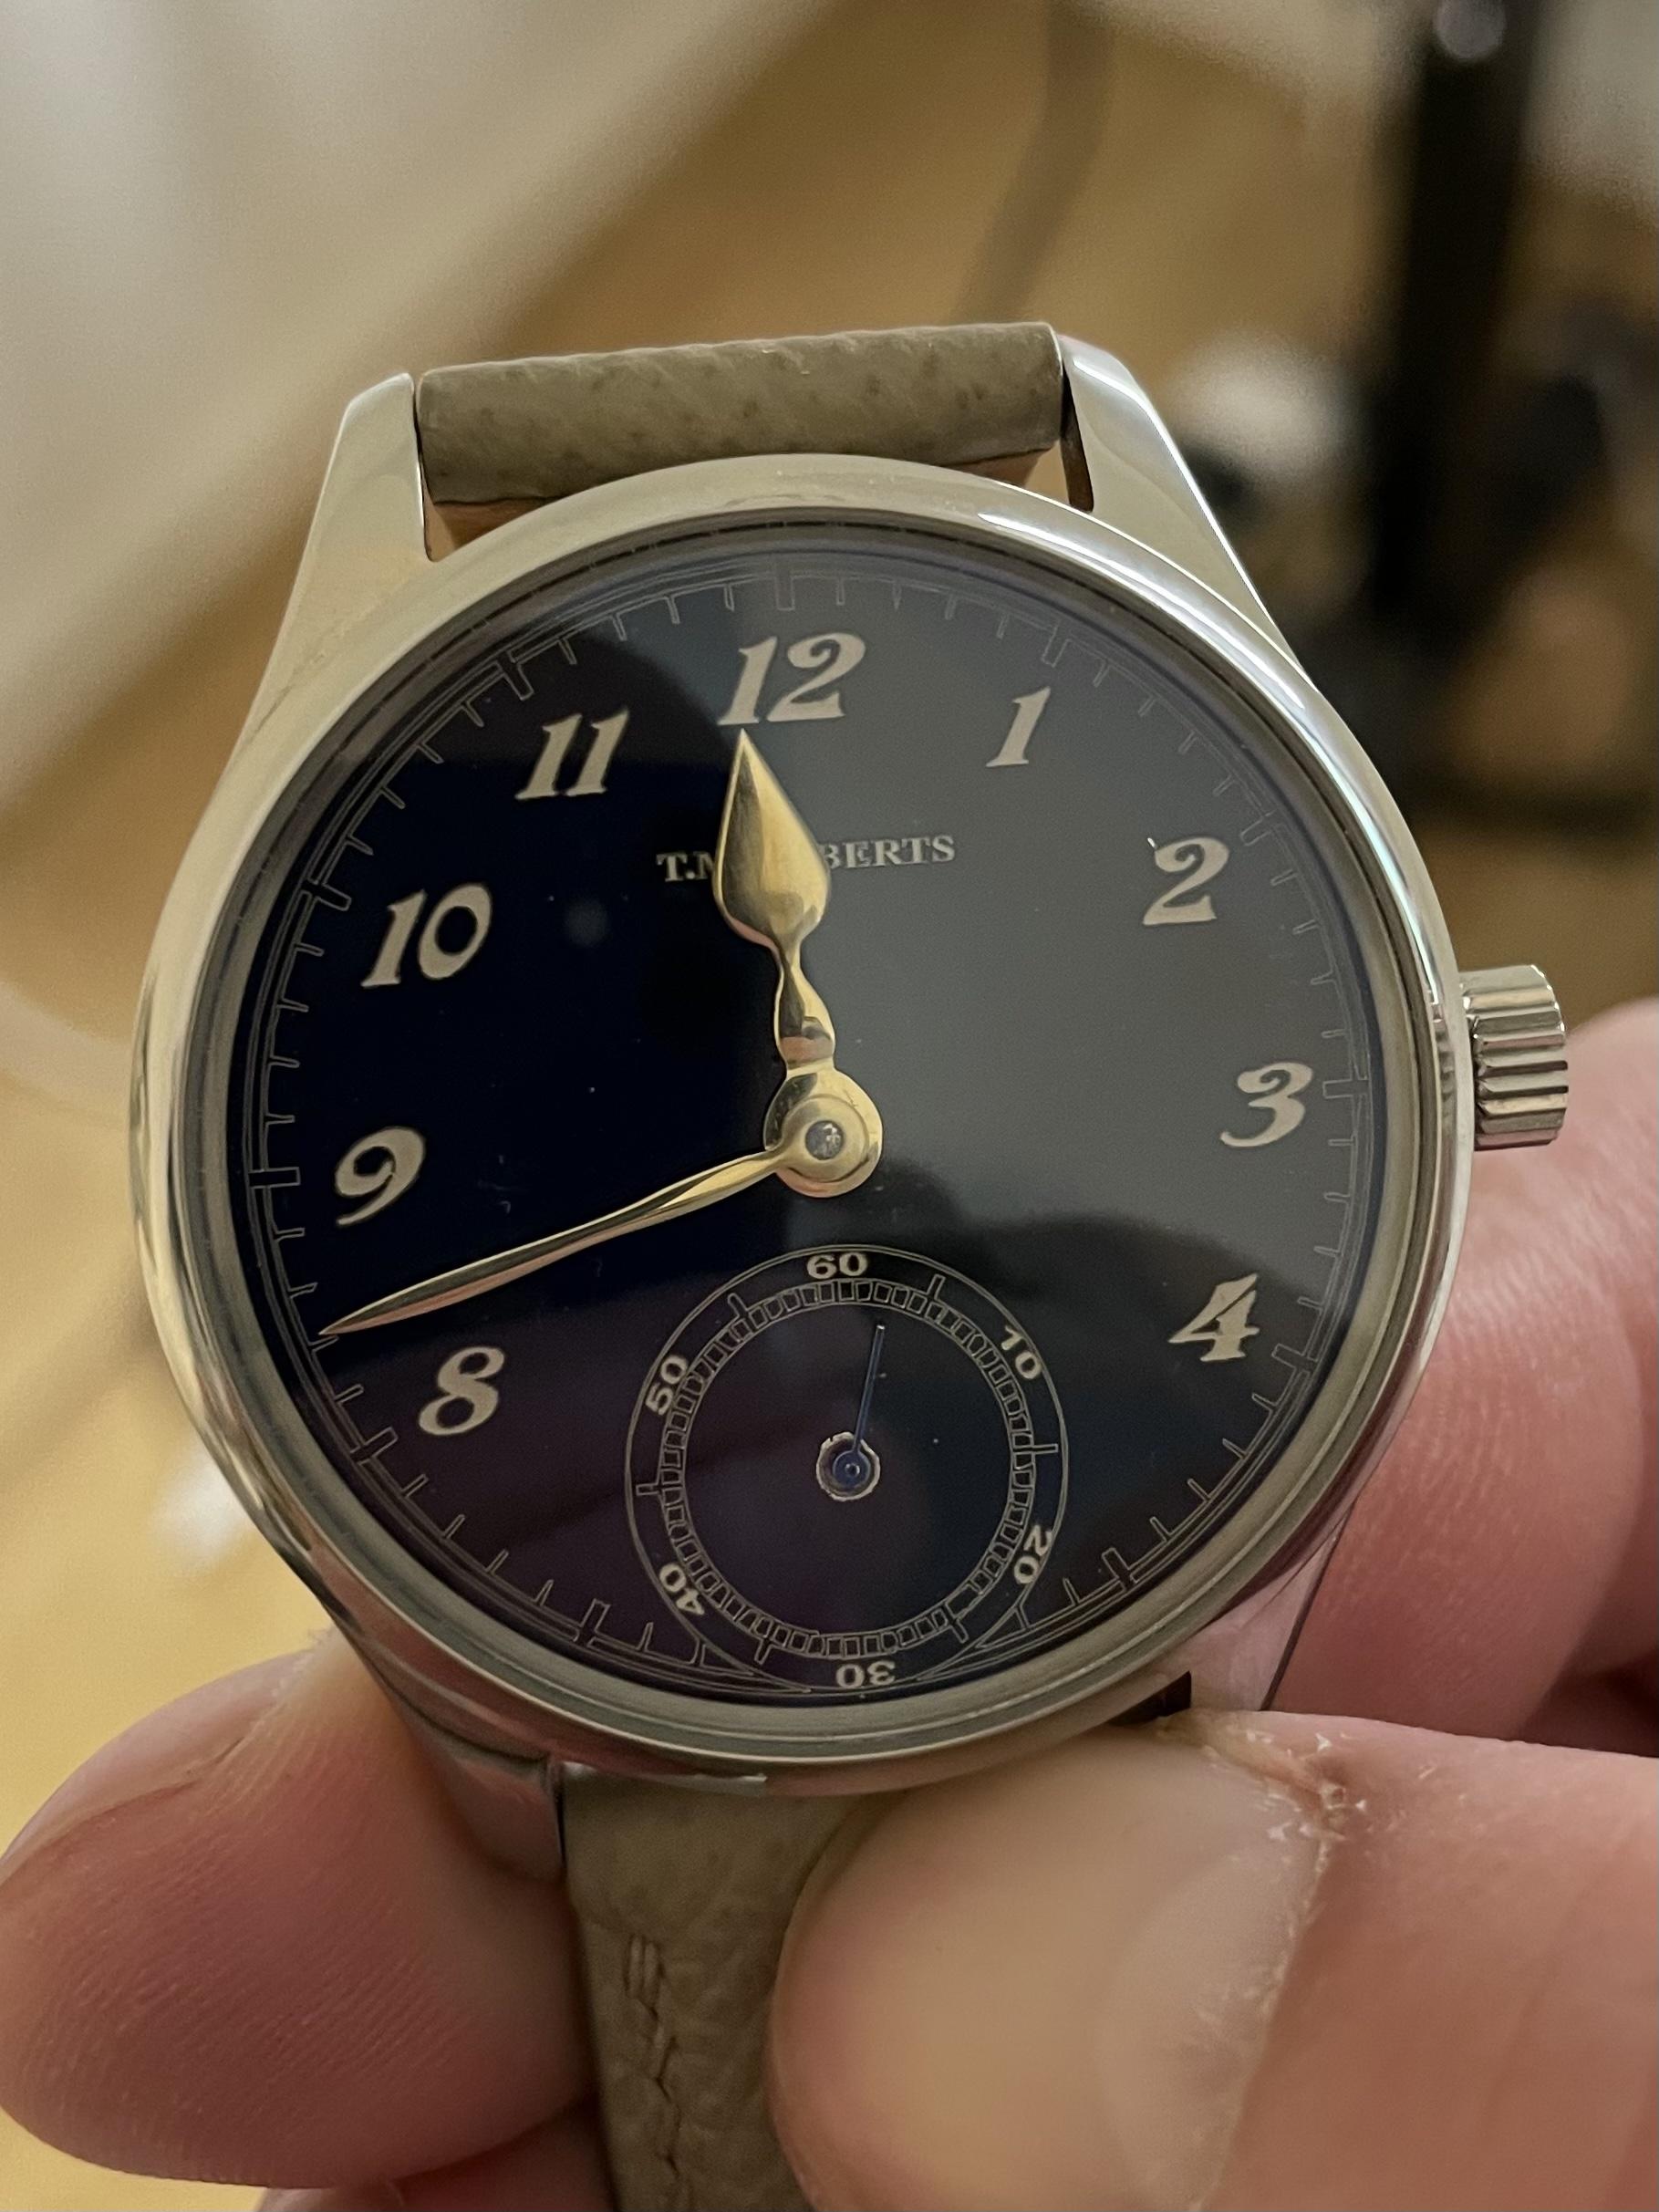
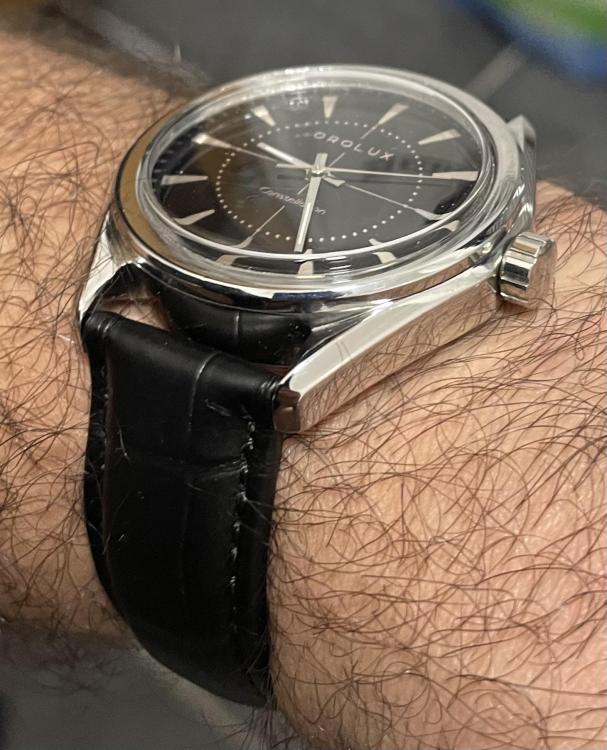
Just so watchweasol doesn’t think I’ve forgotten about him, here are some progress photos. Bezel has been slightly reshaped, the case has been refinished, the seconds hand has been changed, and it has a new flat glass. Total watch thickness now down to 11.5mm. Much better.

 1 point
 -
1 point
-
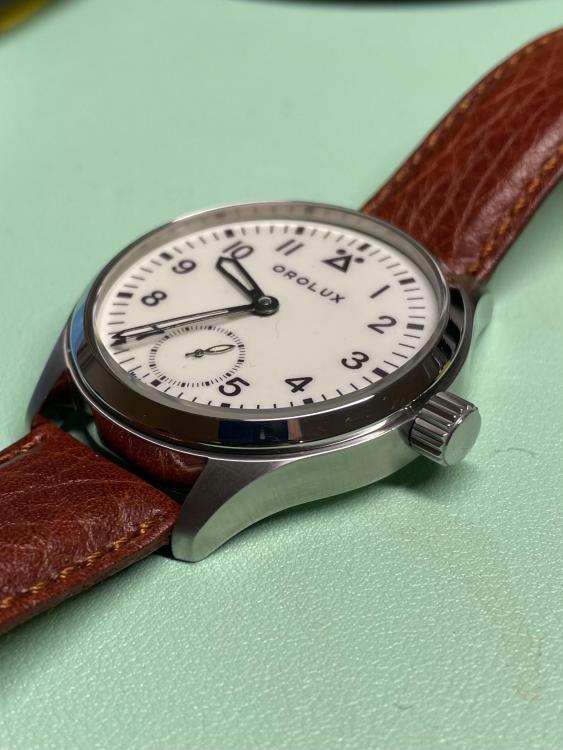
With high dome acrylic crystal. Either this or a flat sapphire Crystal. The flat crystal may keep the thickness down. What do you think?
 1 point
 -
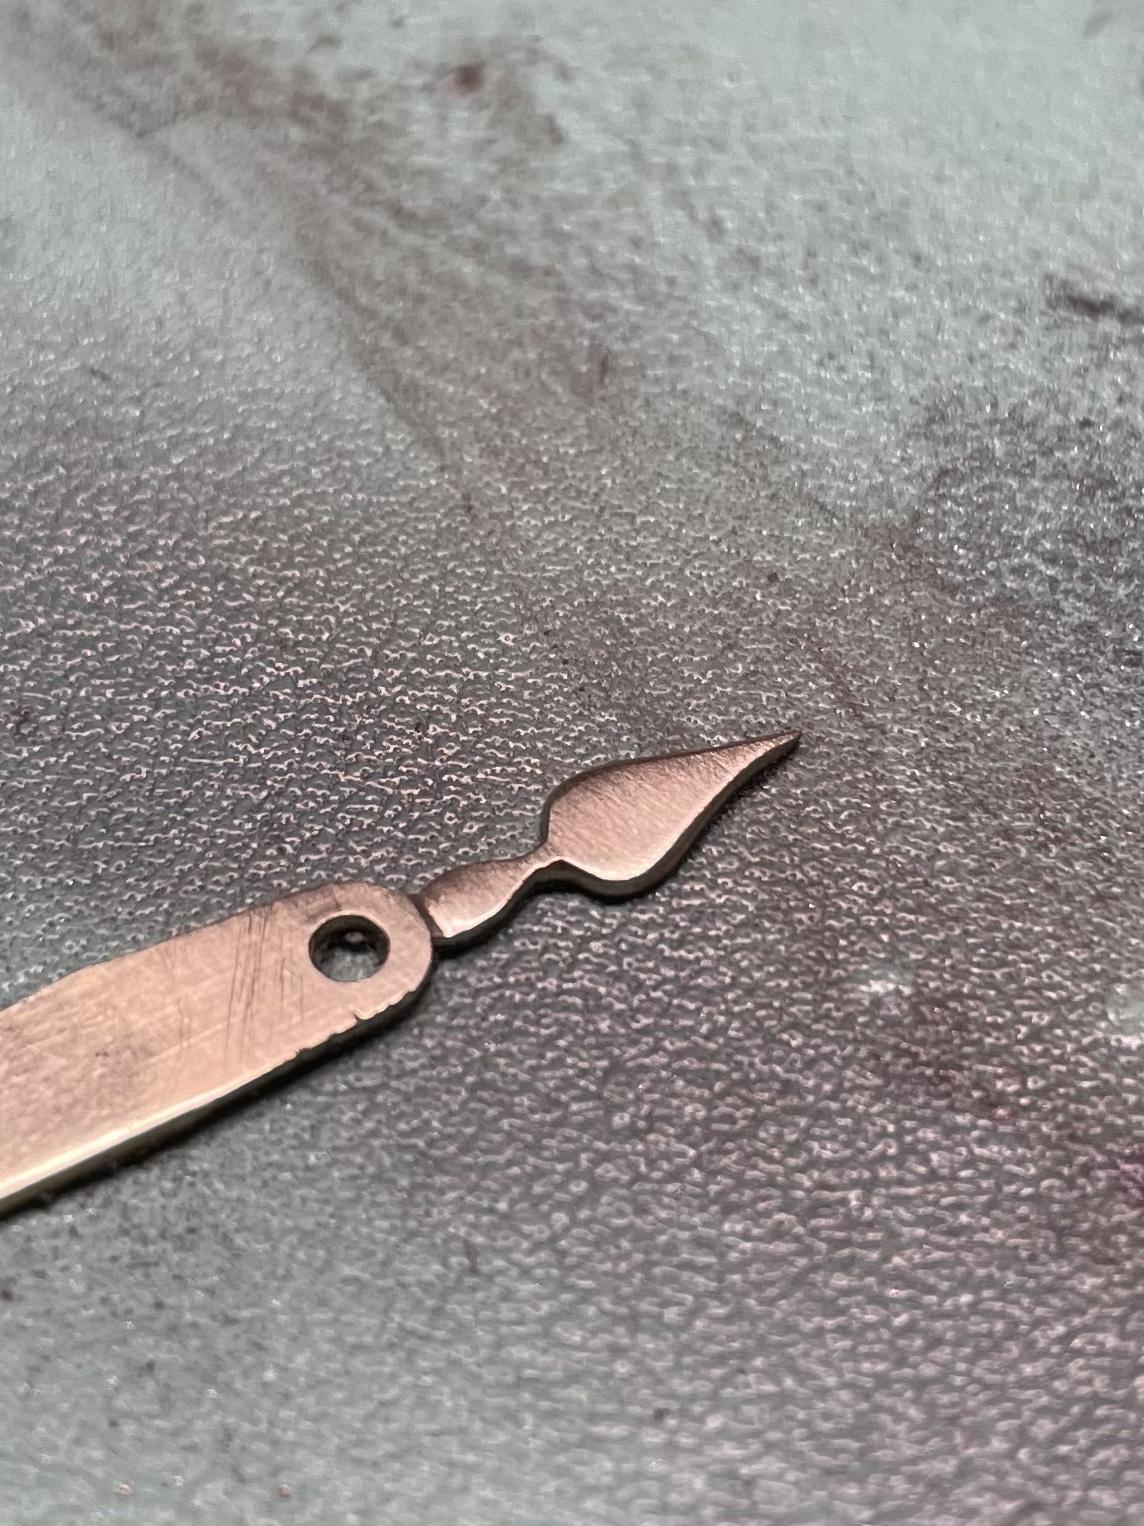
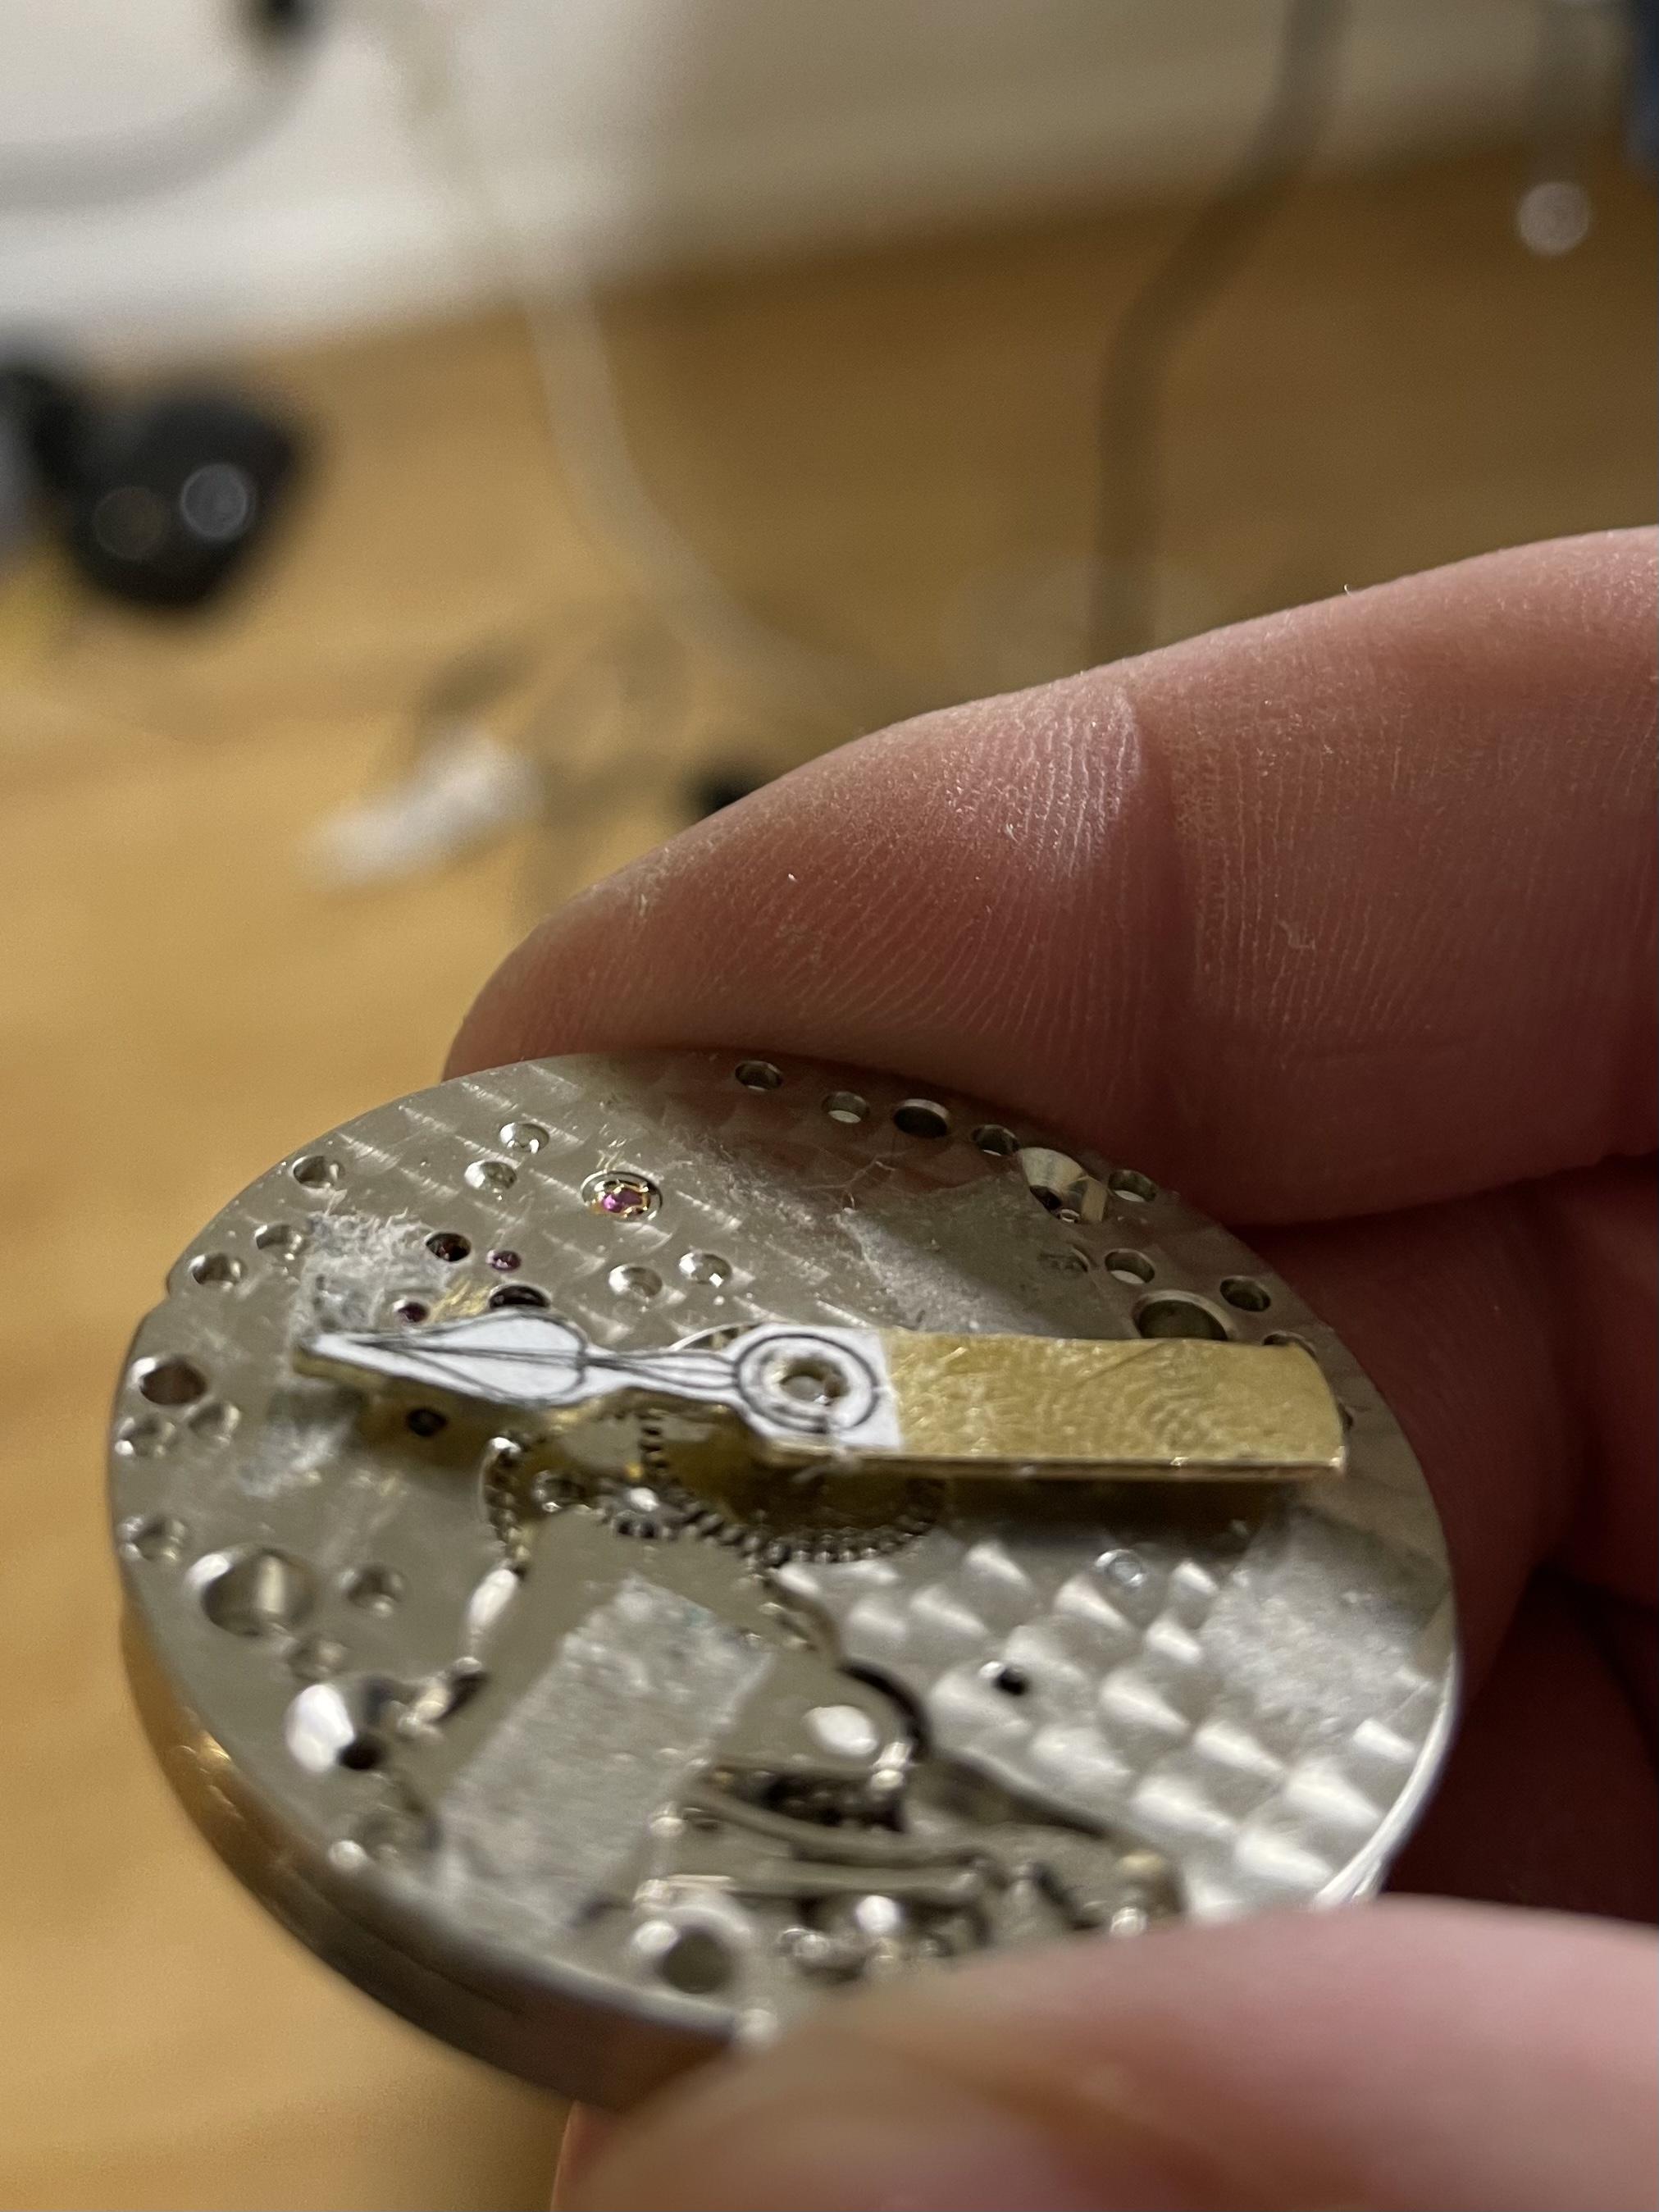
I liked the last watch so much I decided to try a version for the 6498. Just finished reshaping and painting the hands. I really like them without the lume for this dial. With or without lume? Answers on a postcard.
 1 point
 -
Ok, last photo I promise!
 1 point
 -
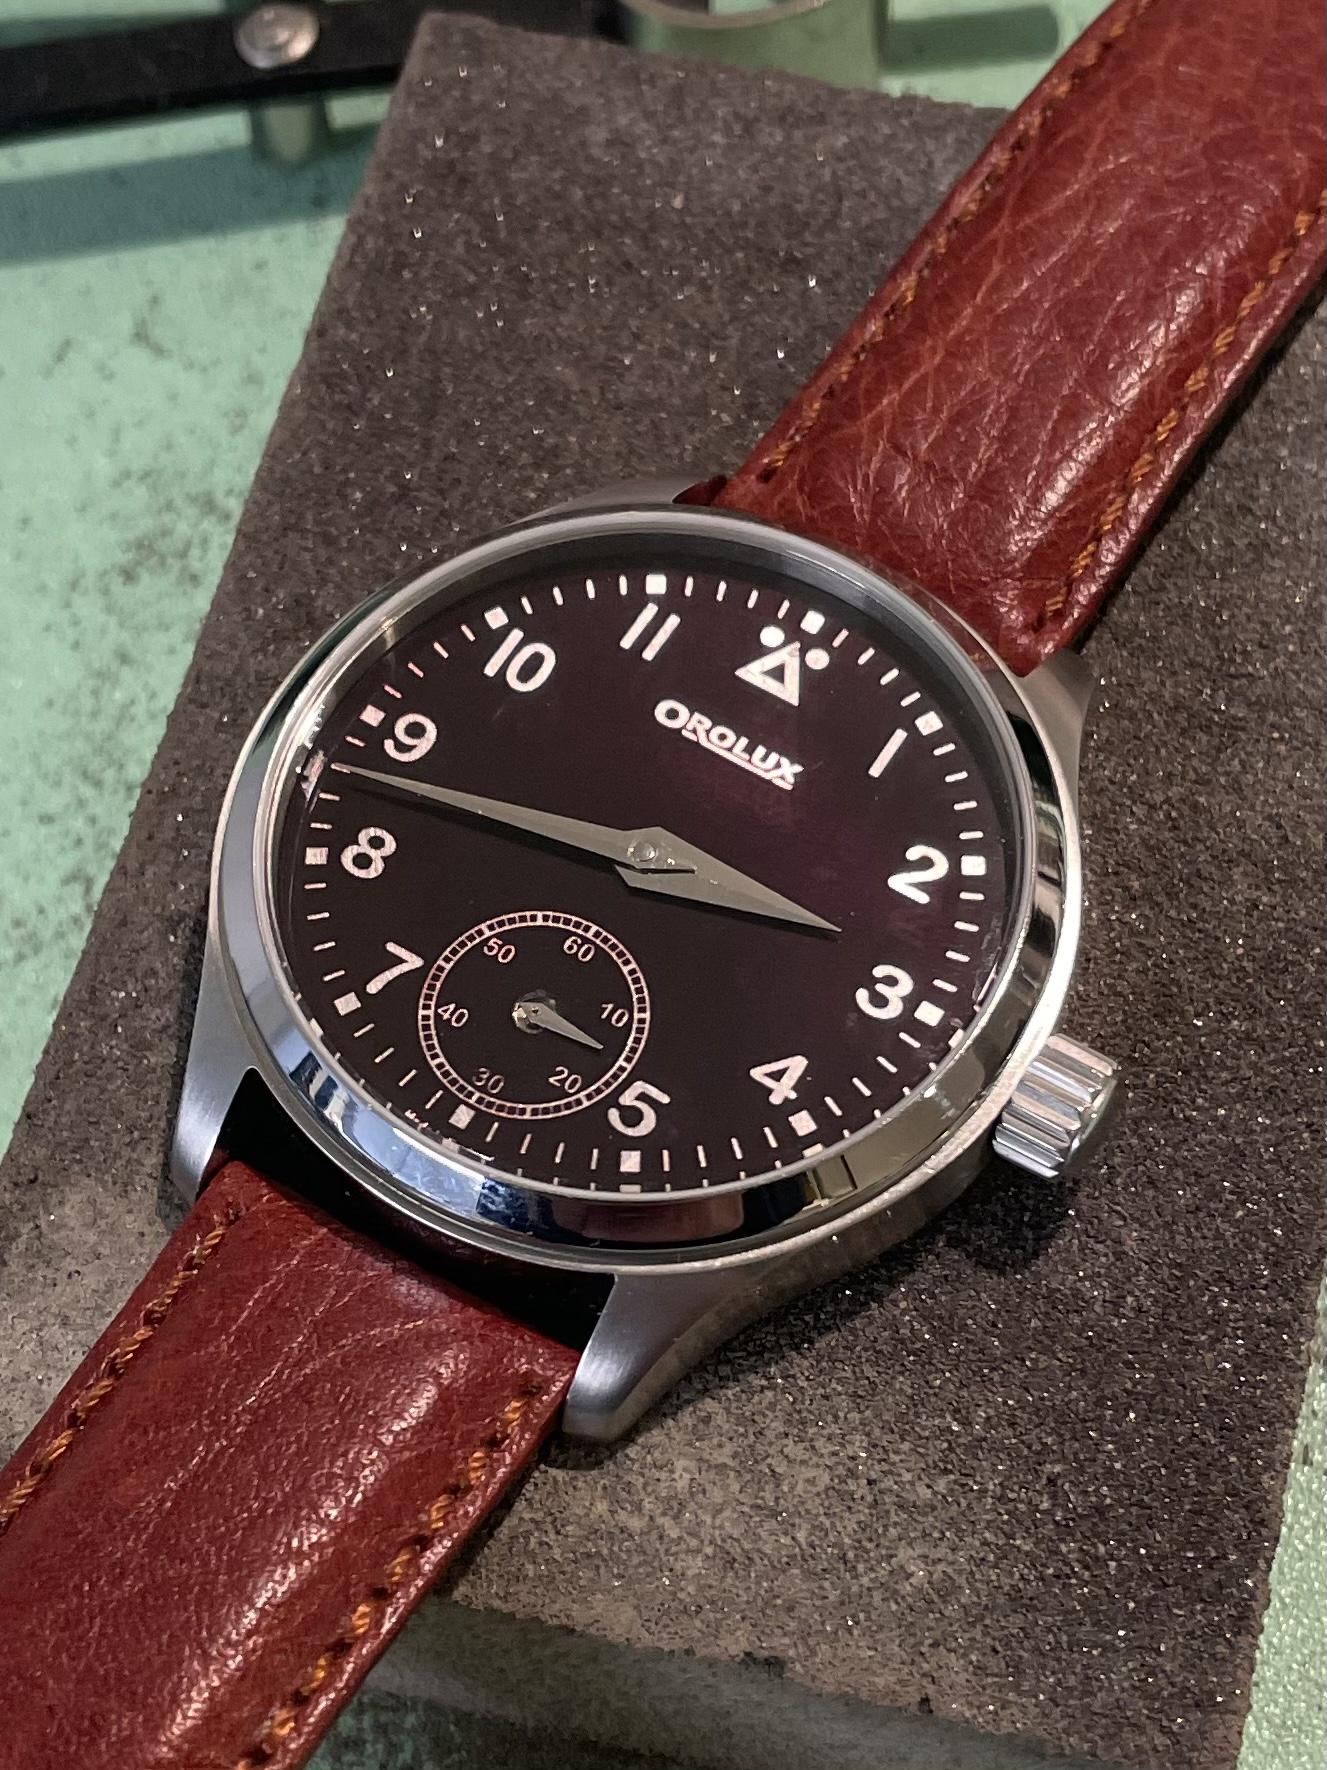
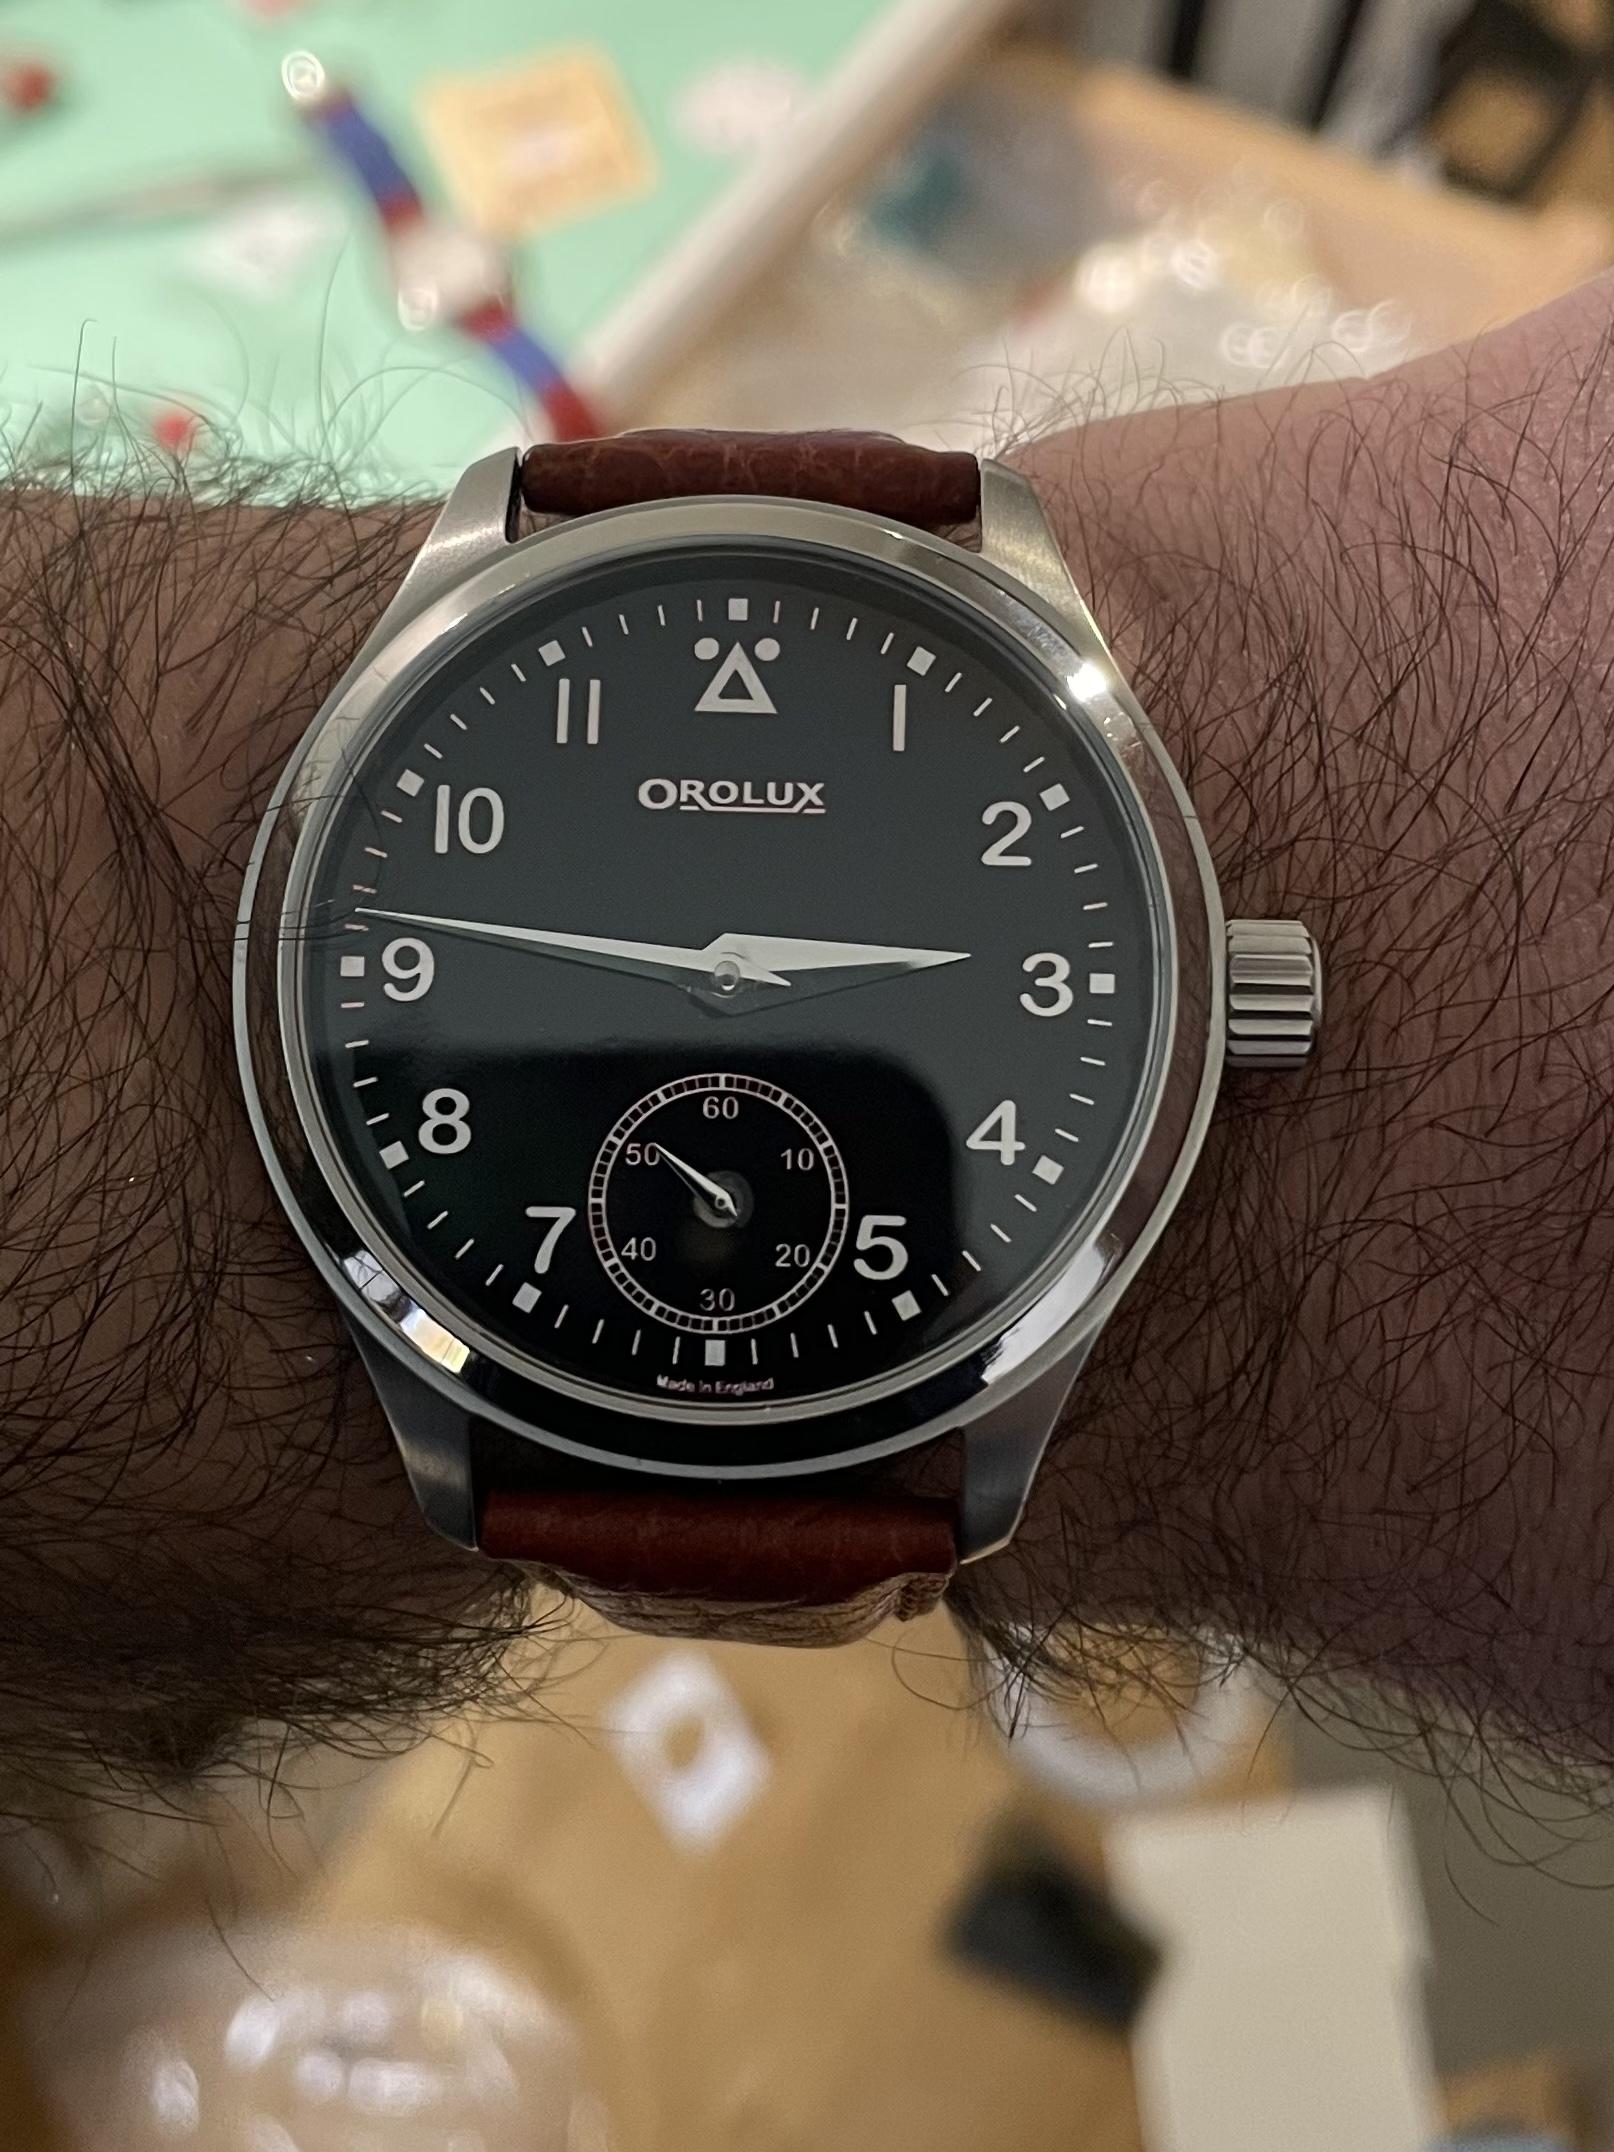
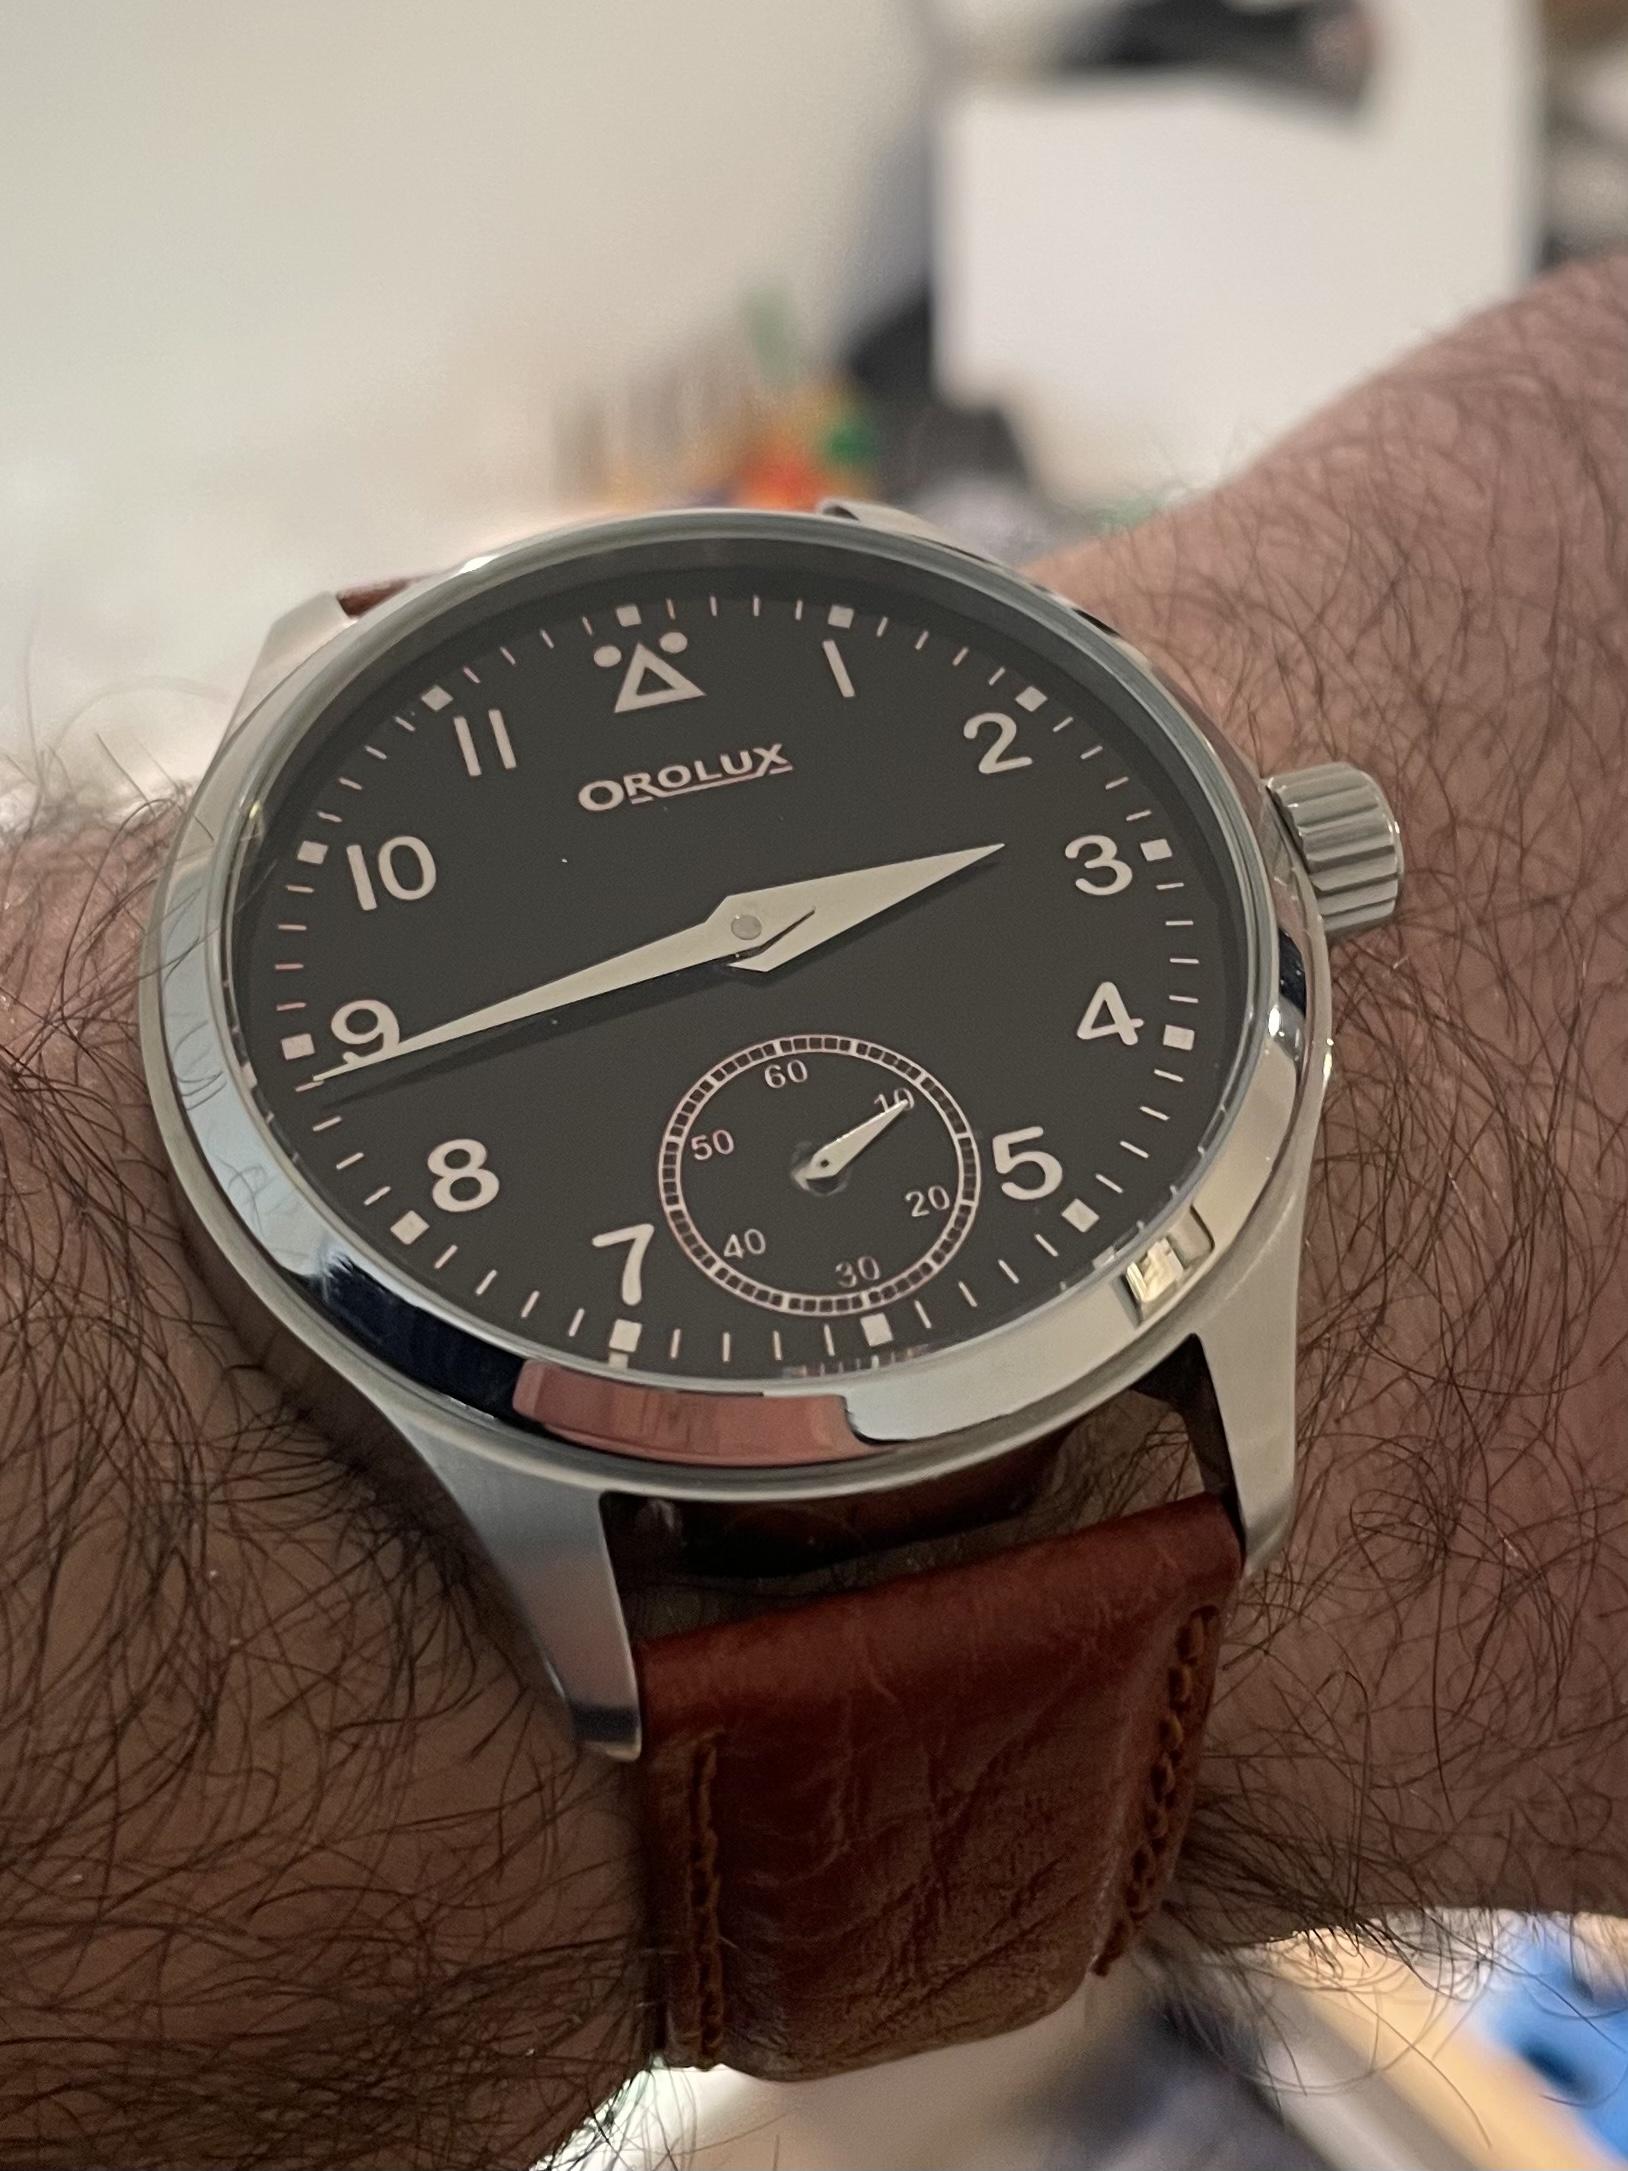
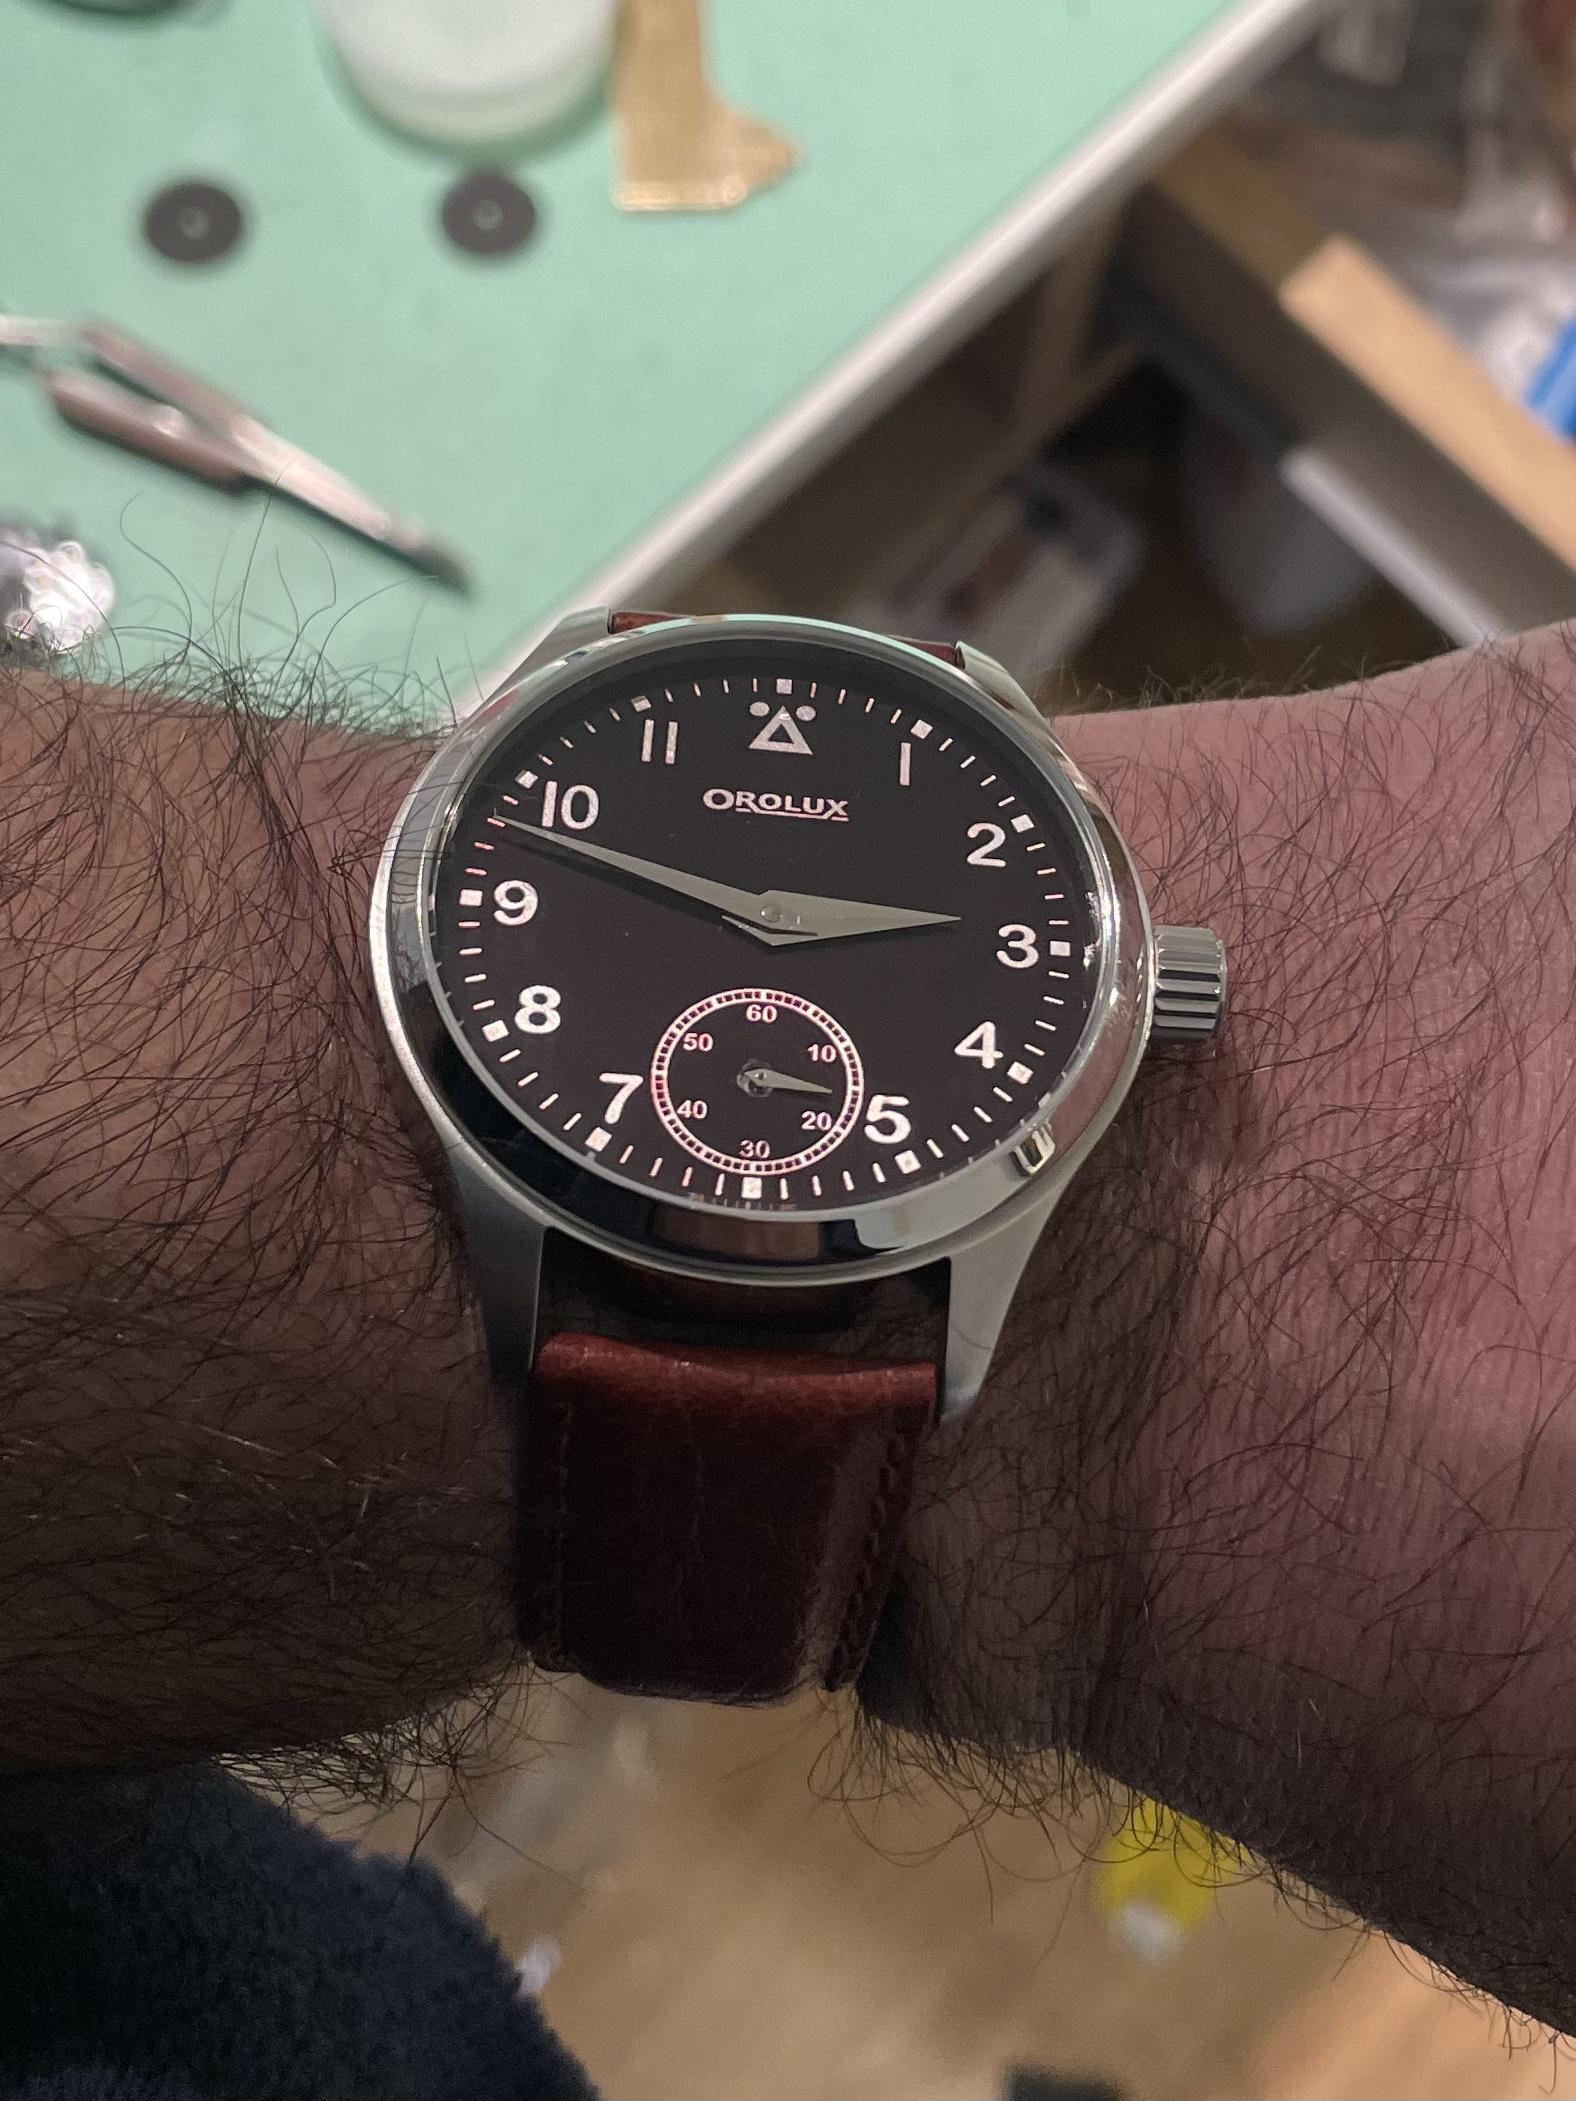
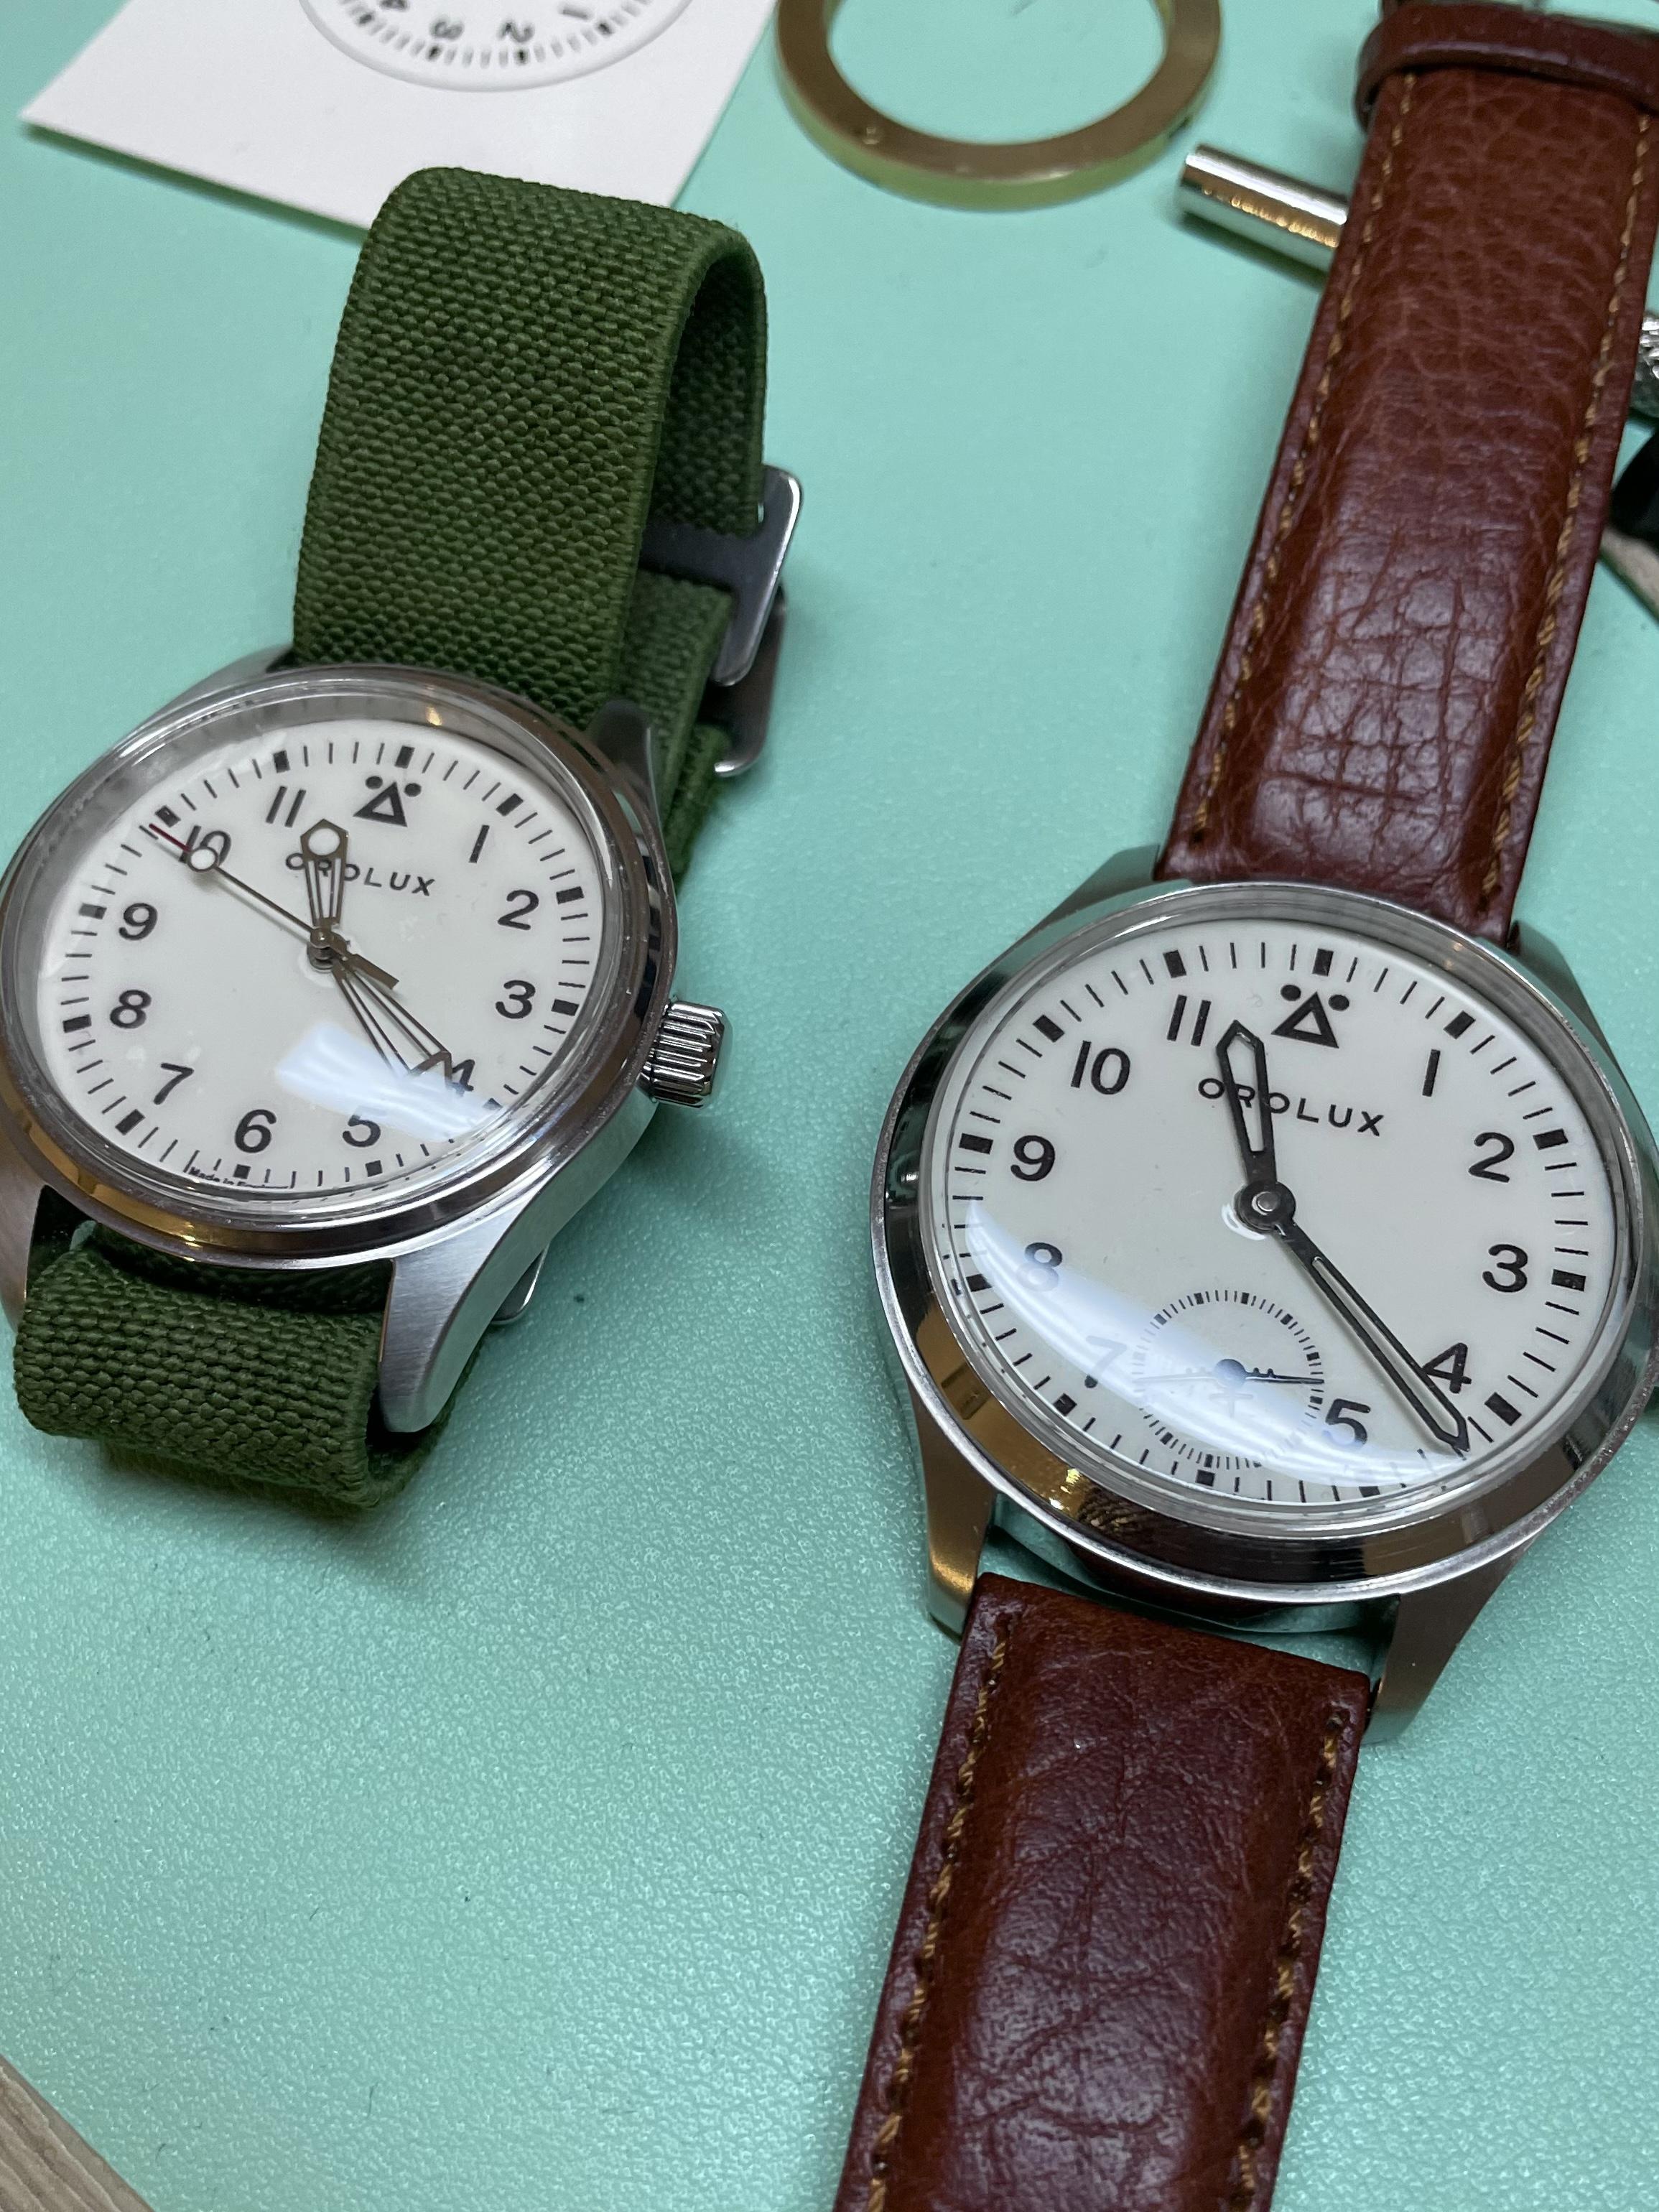
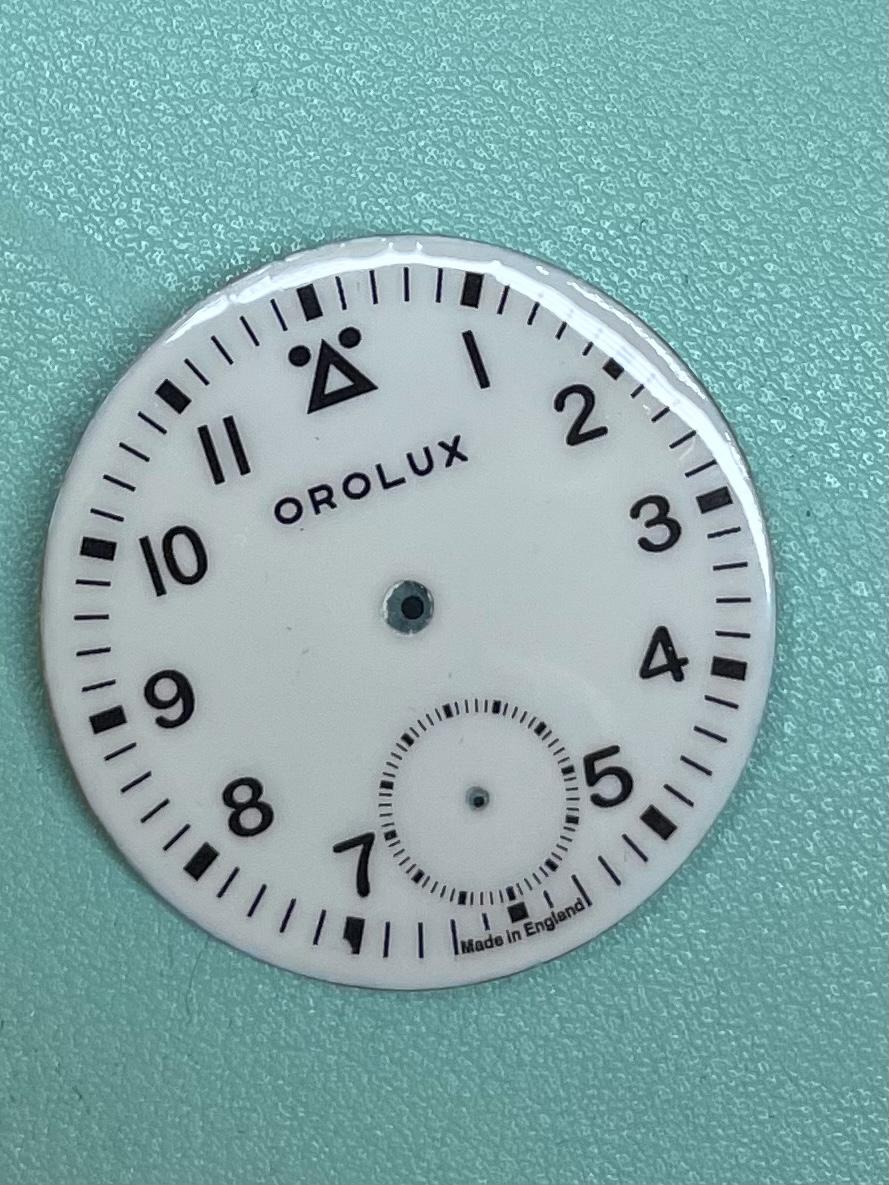
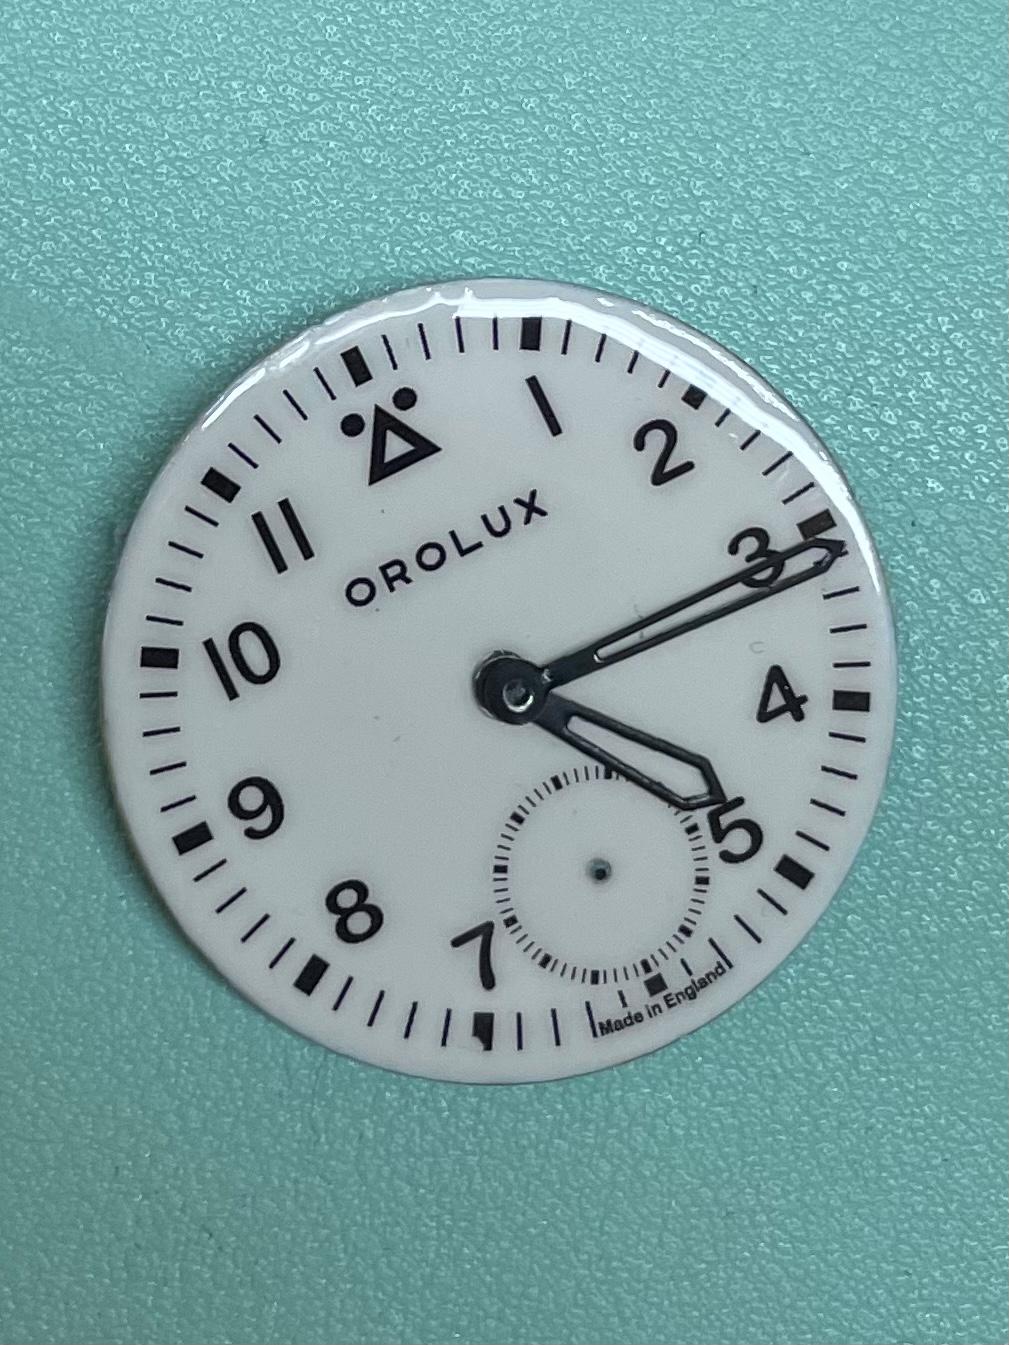
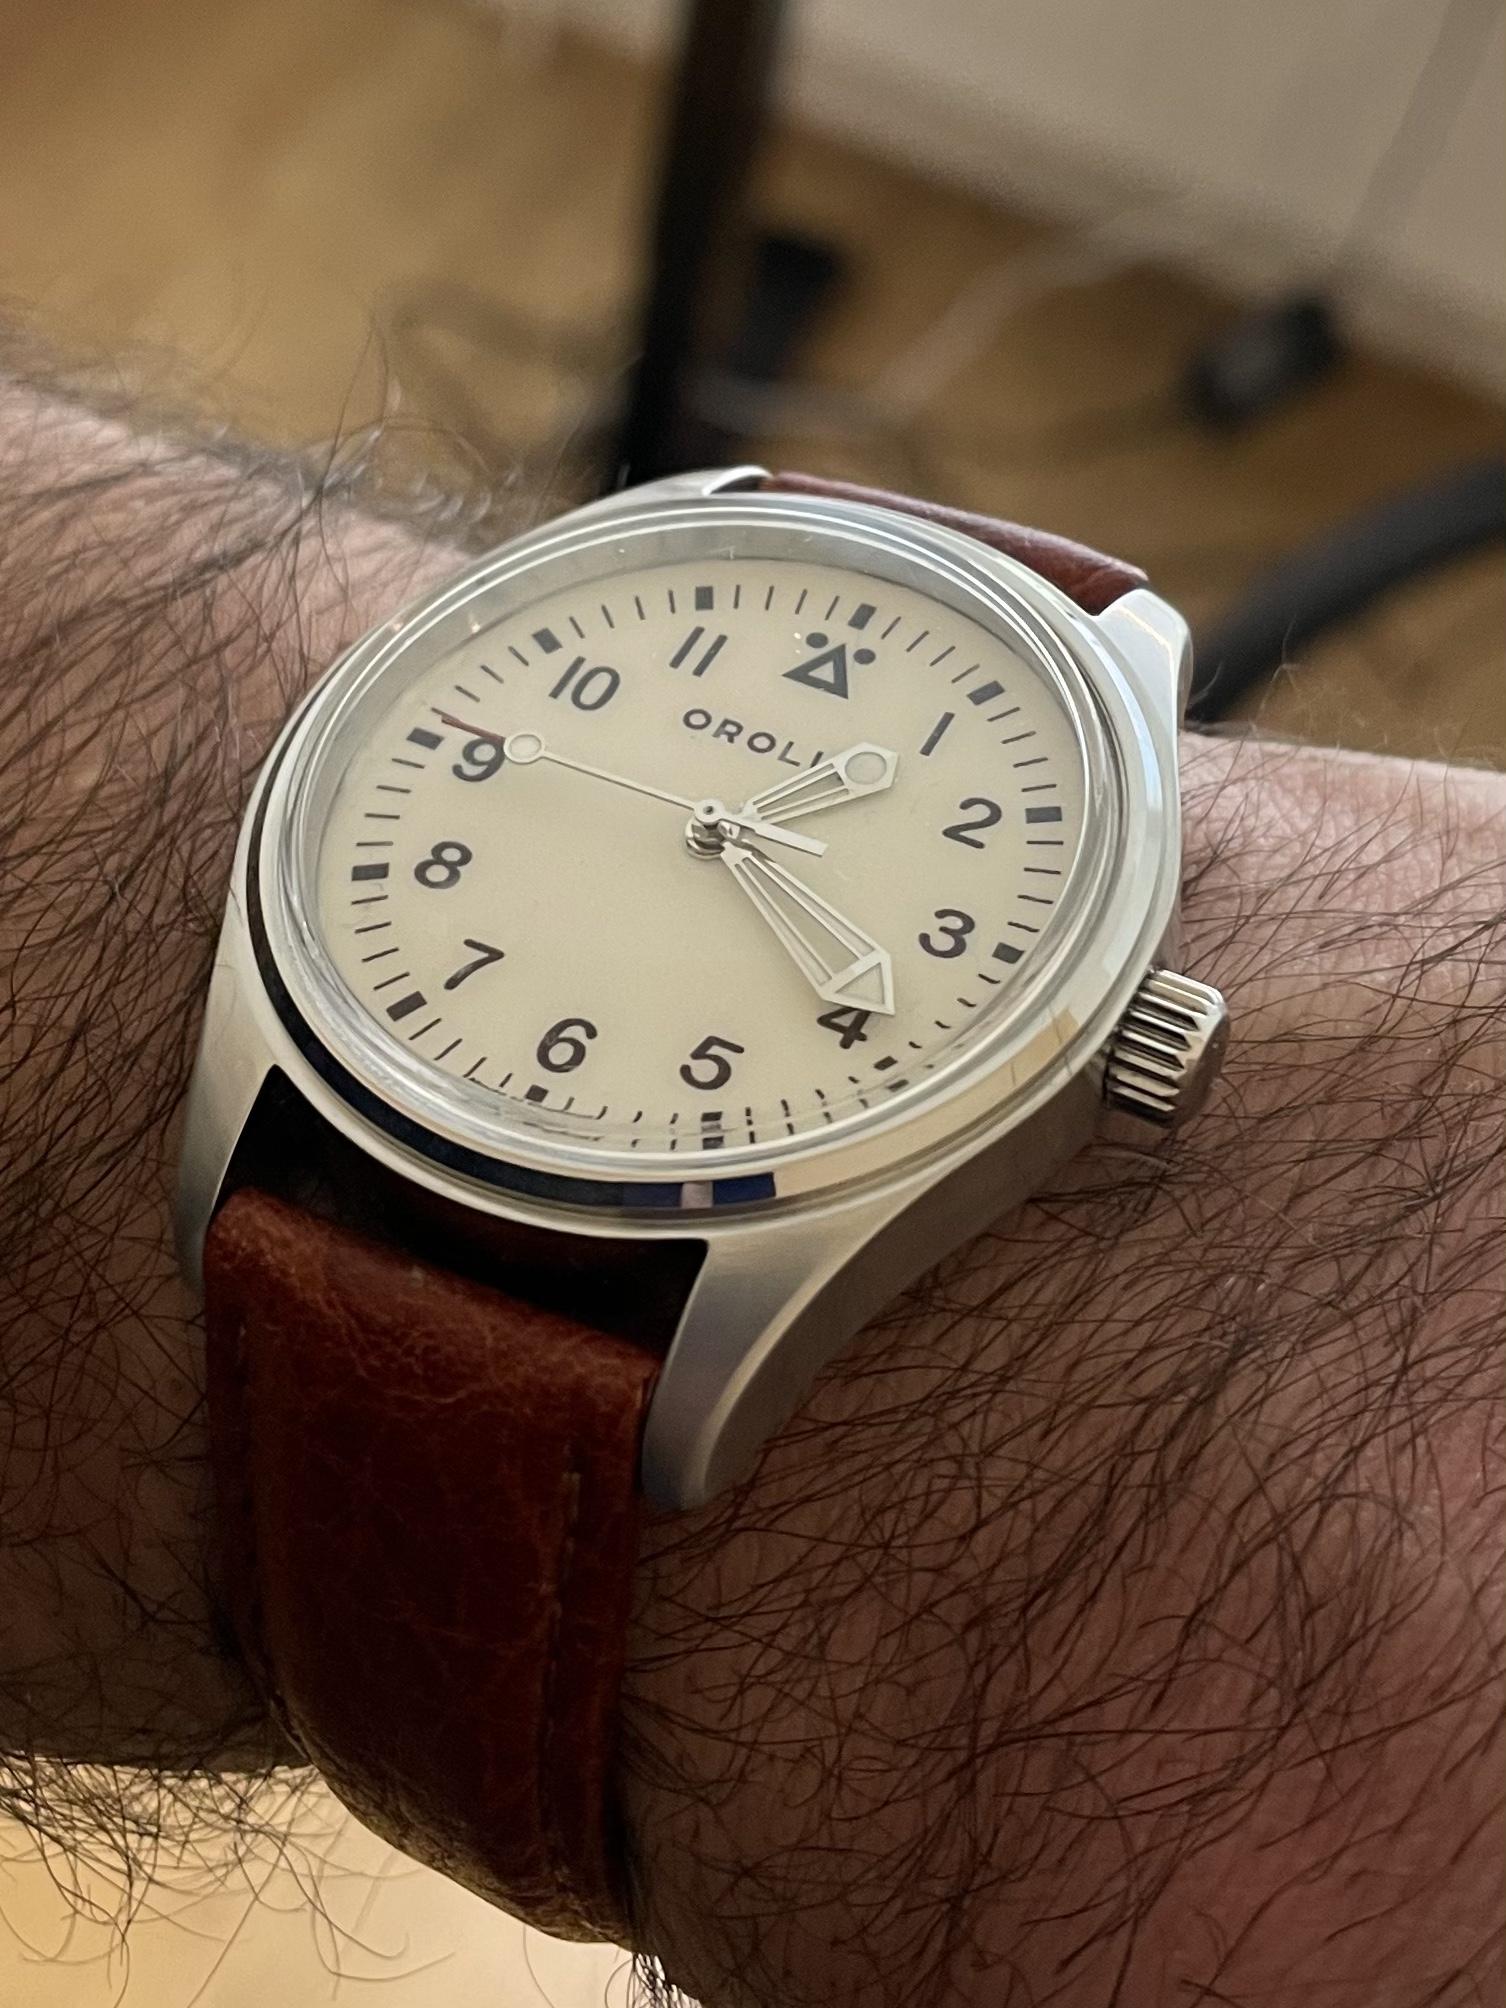
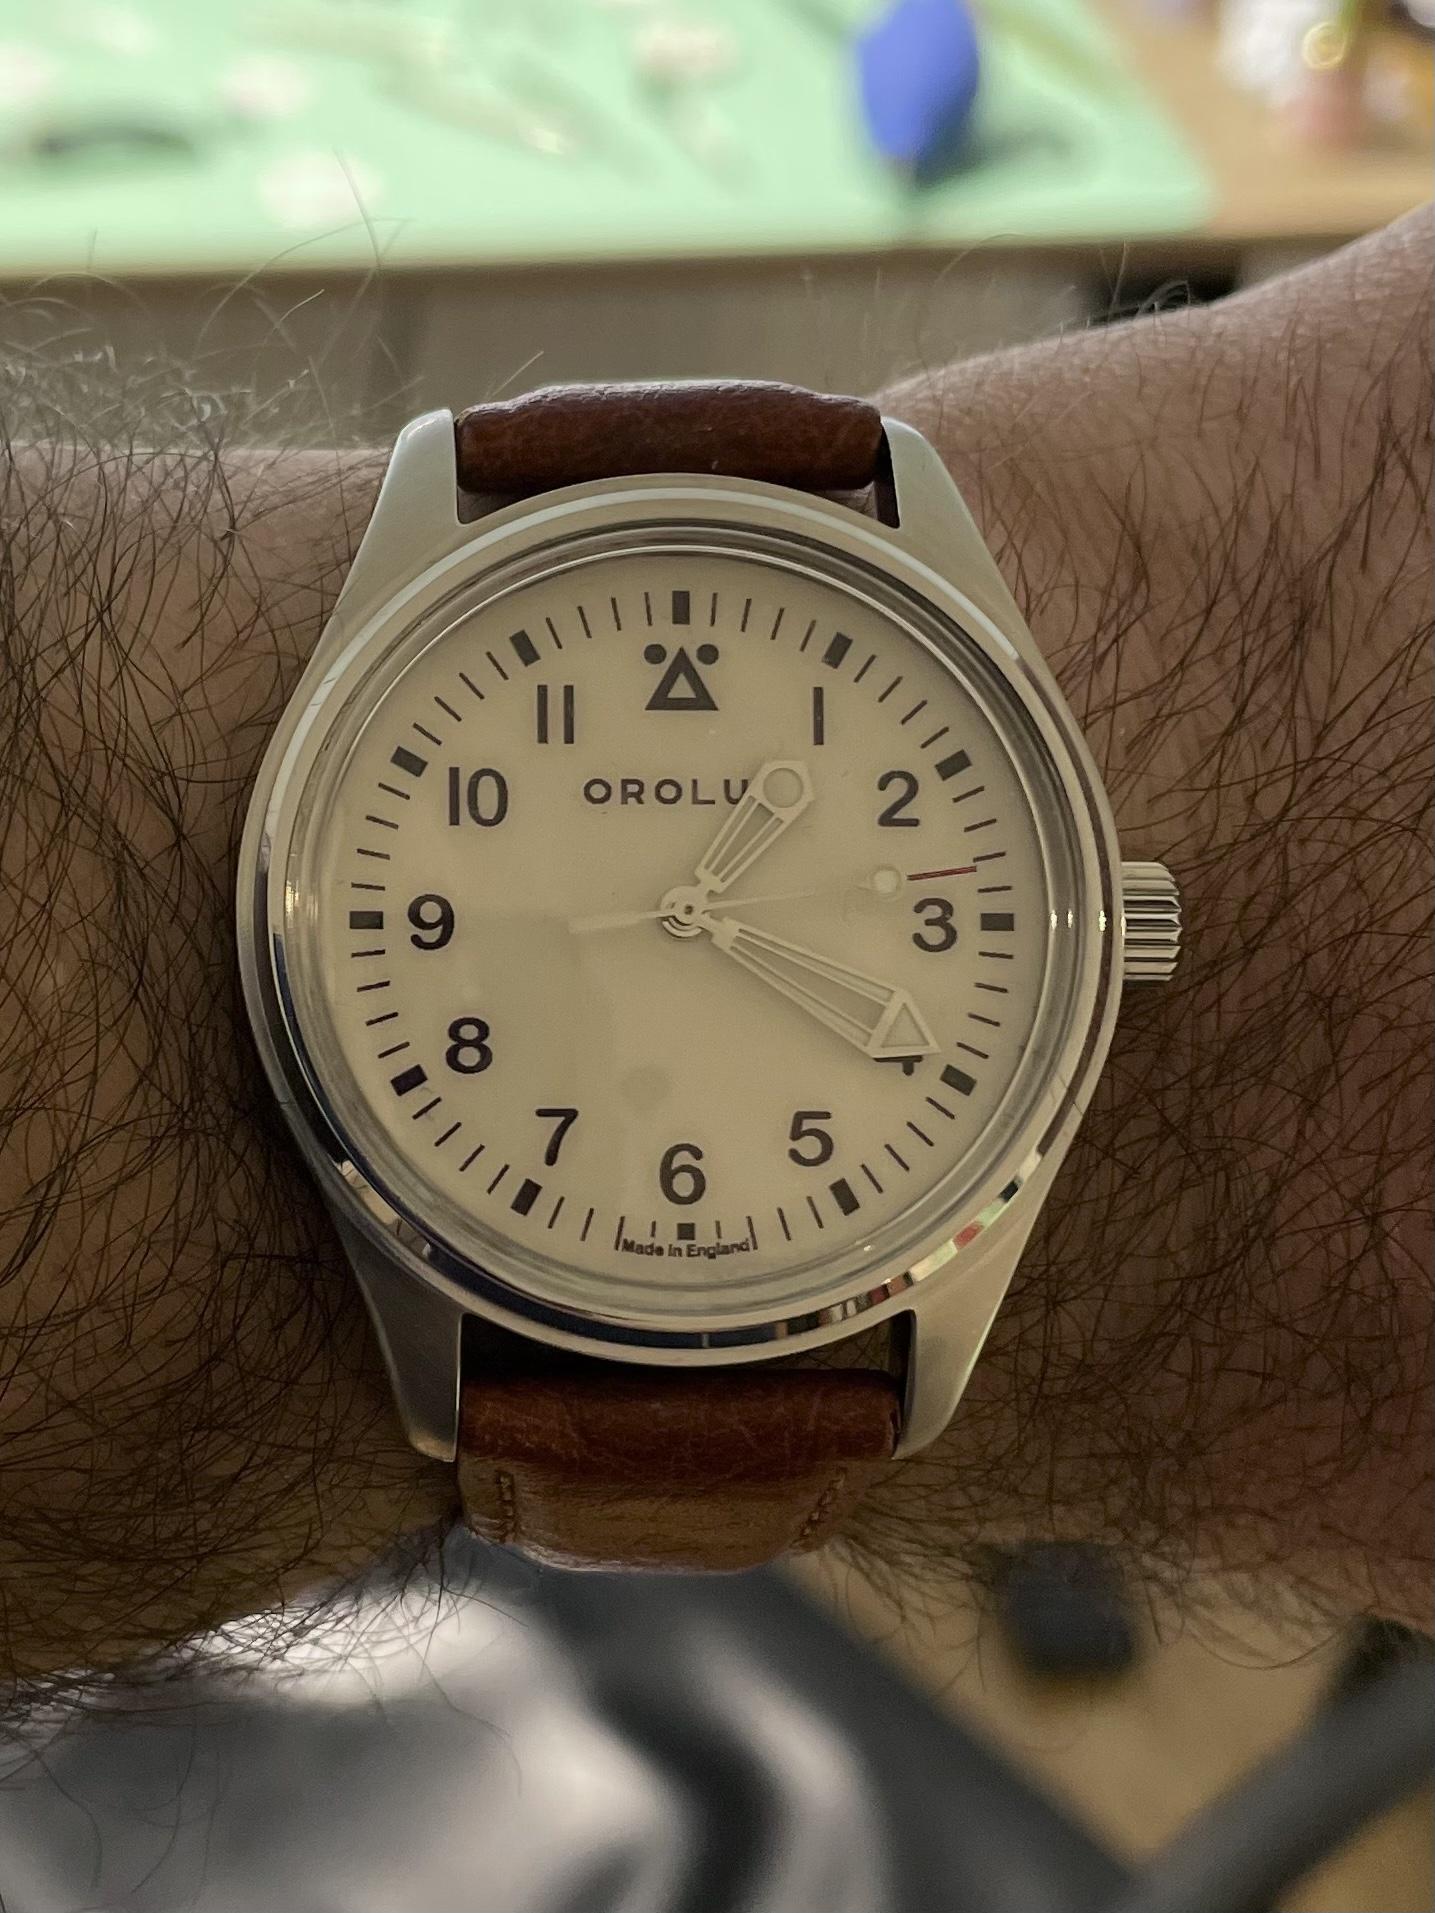
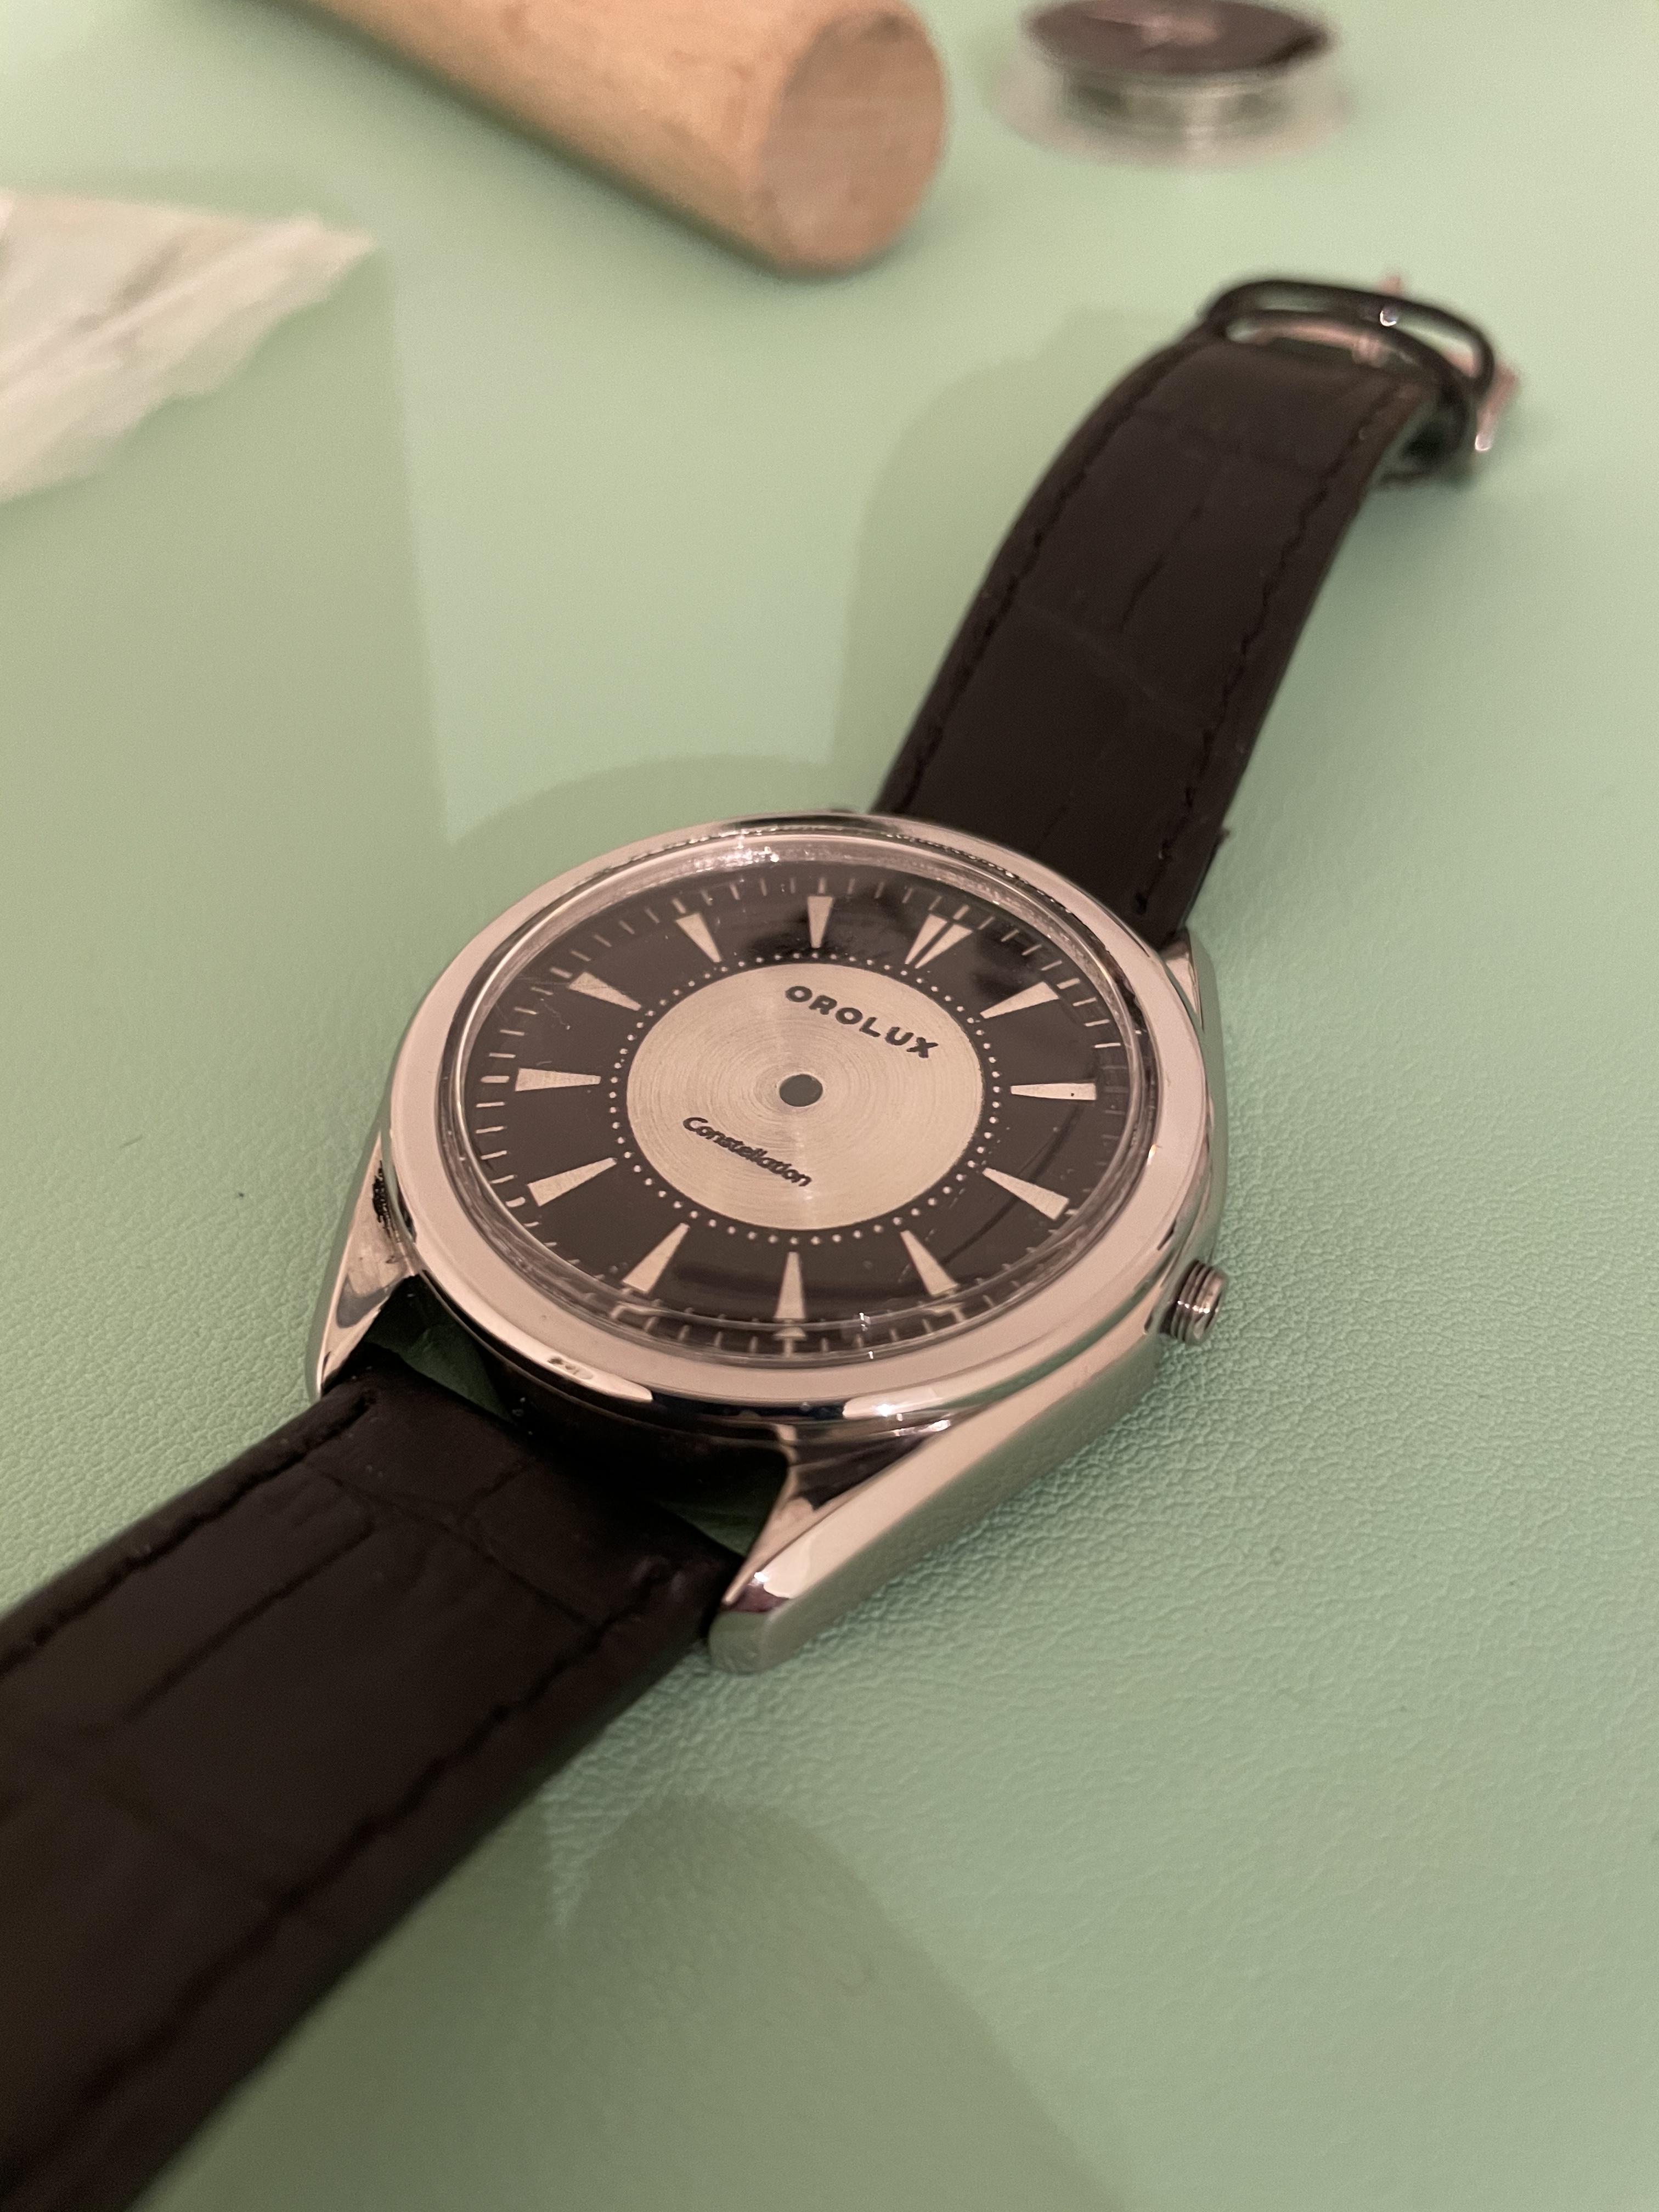
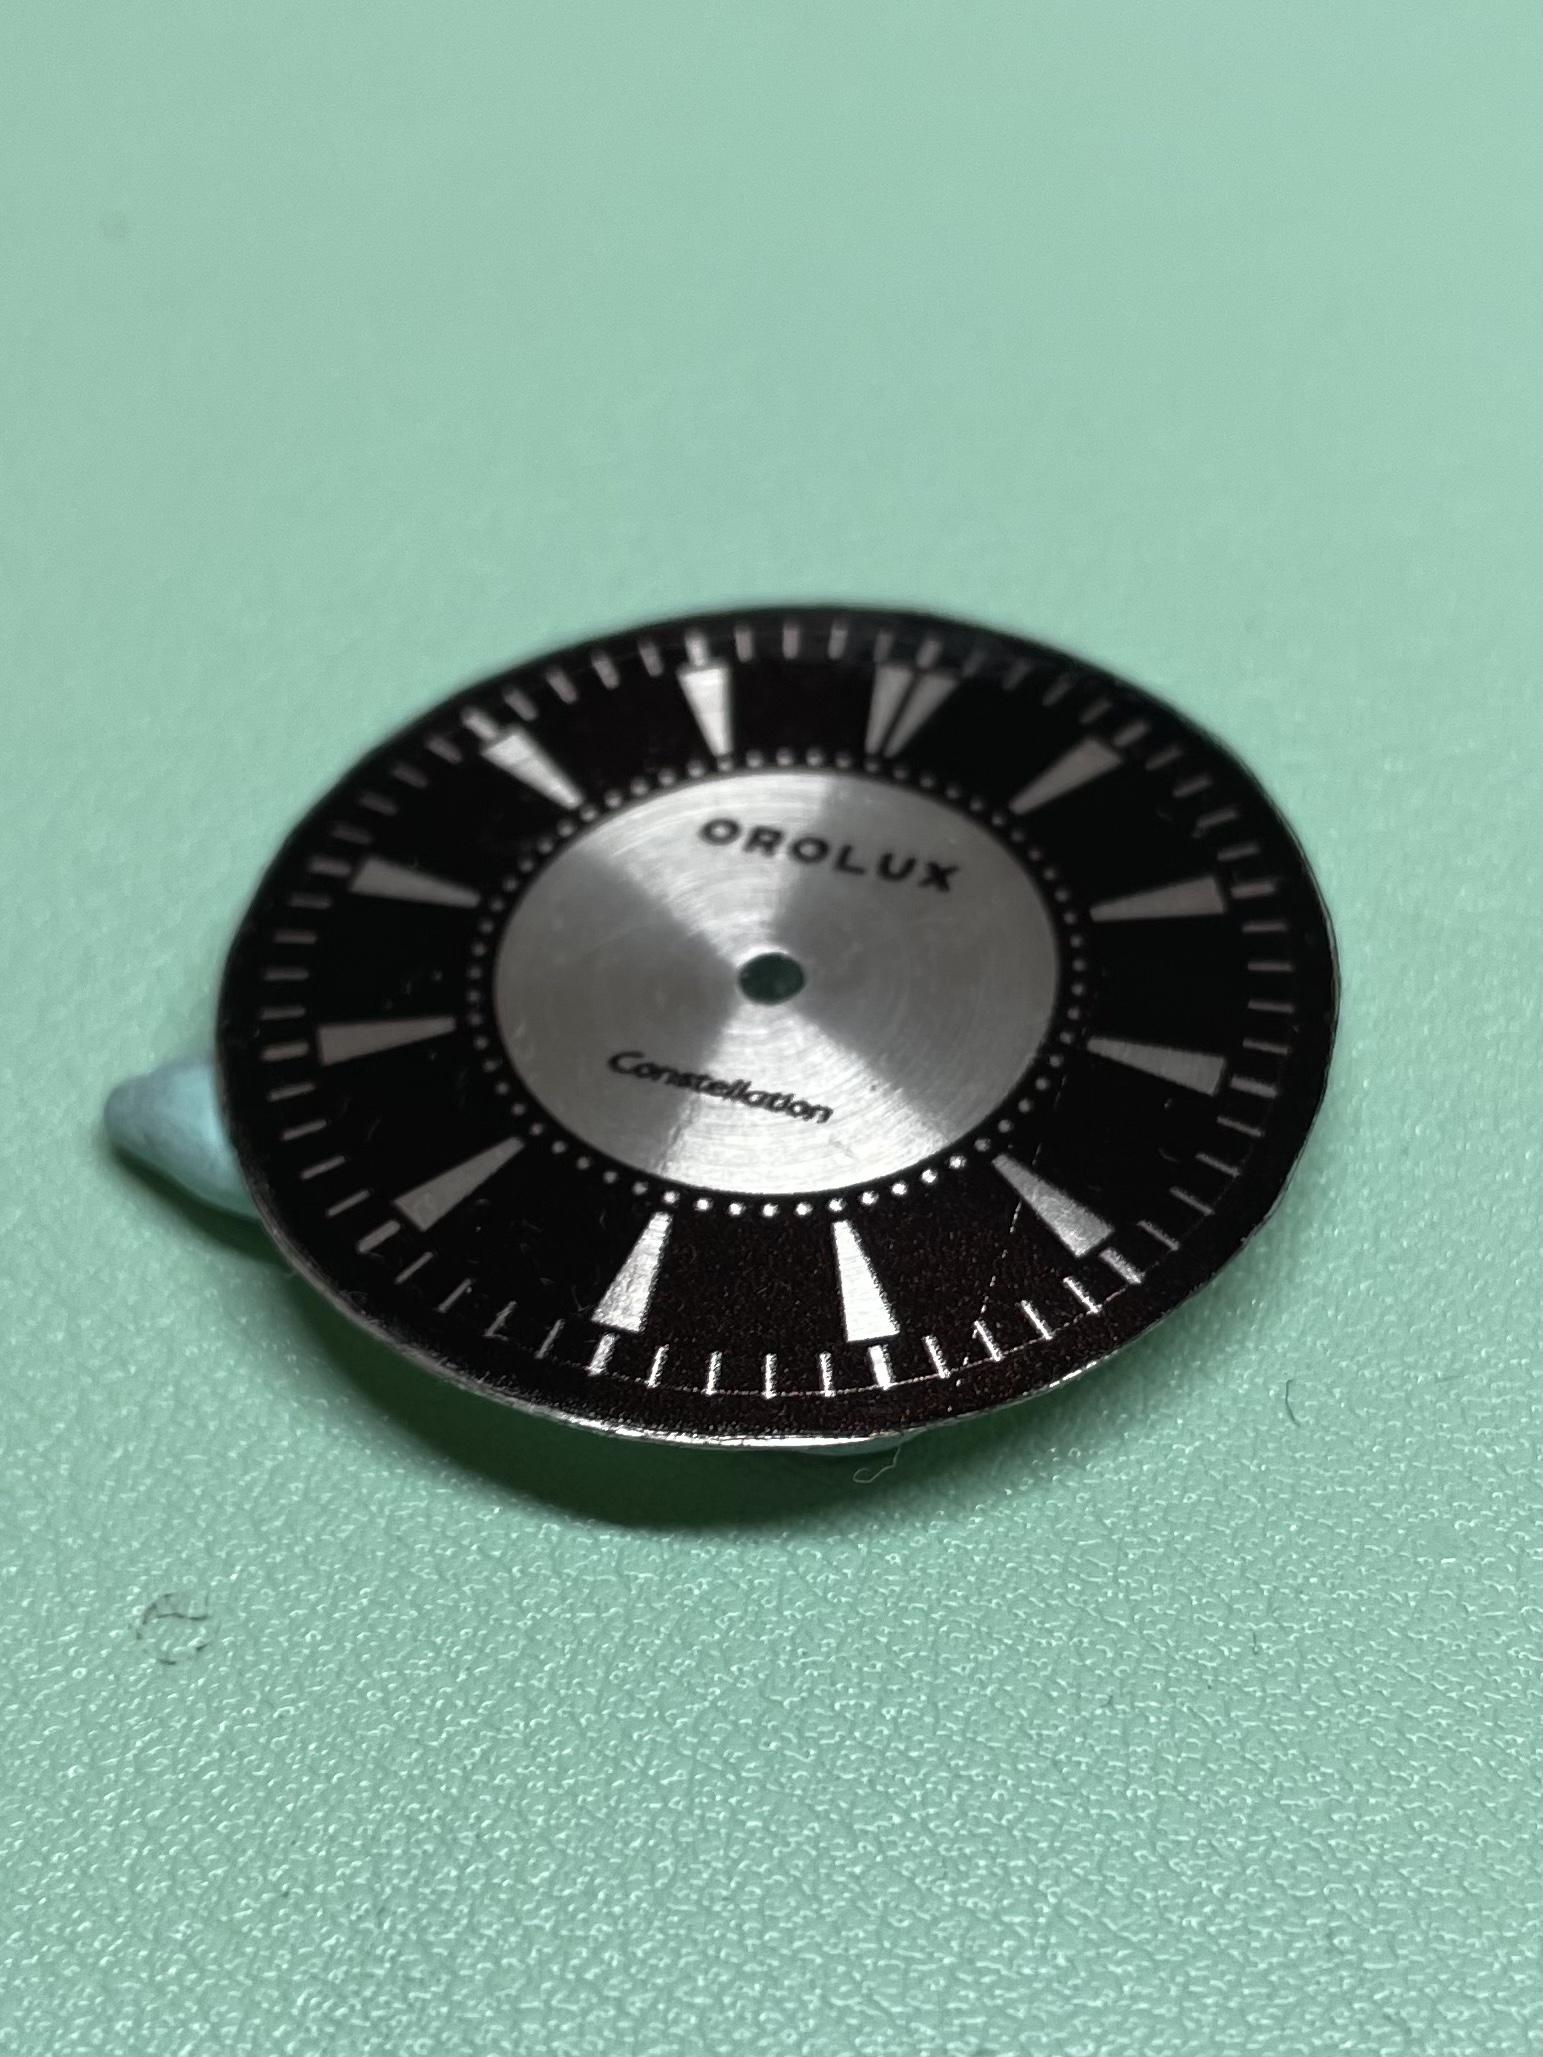
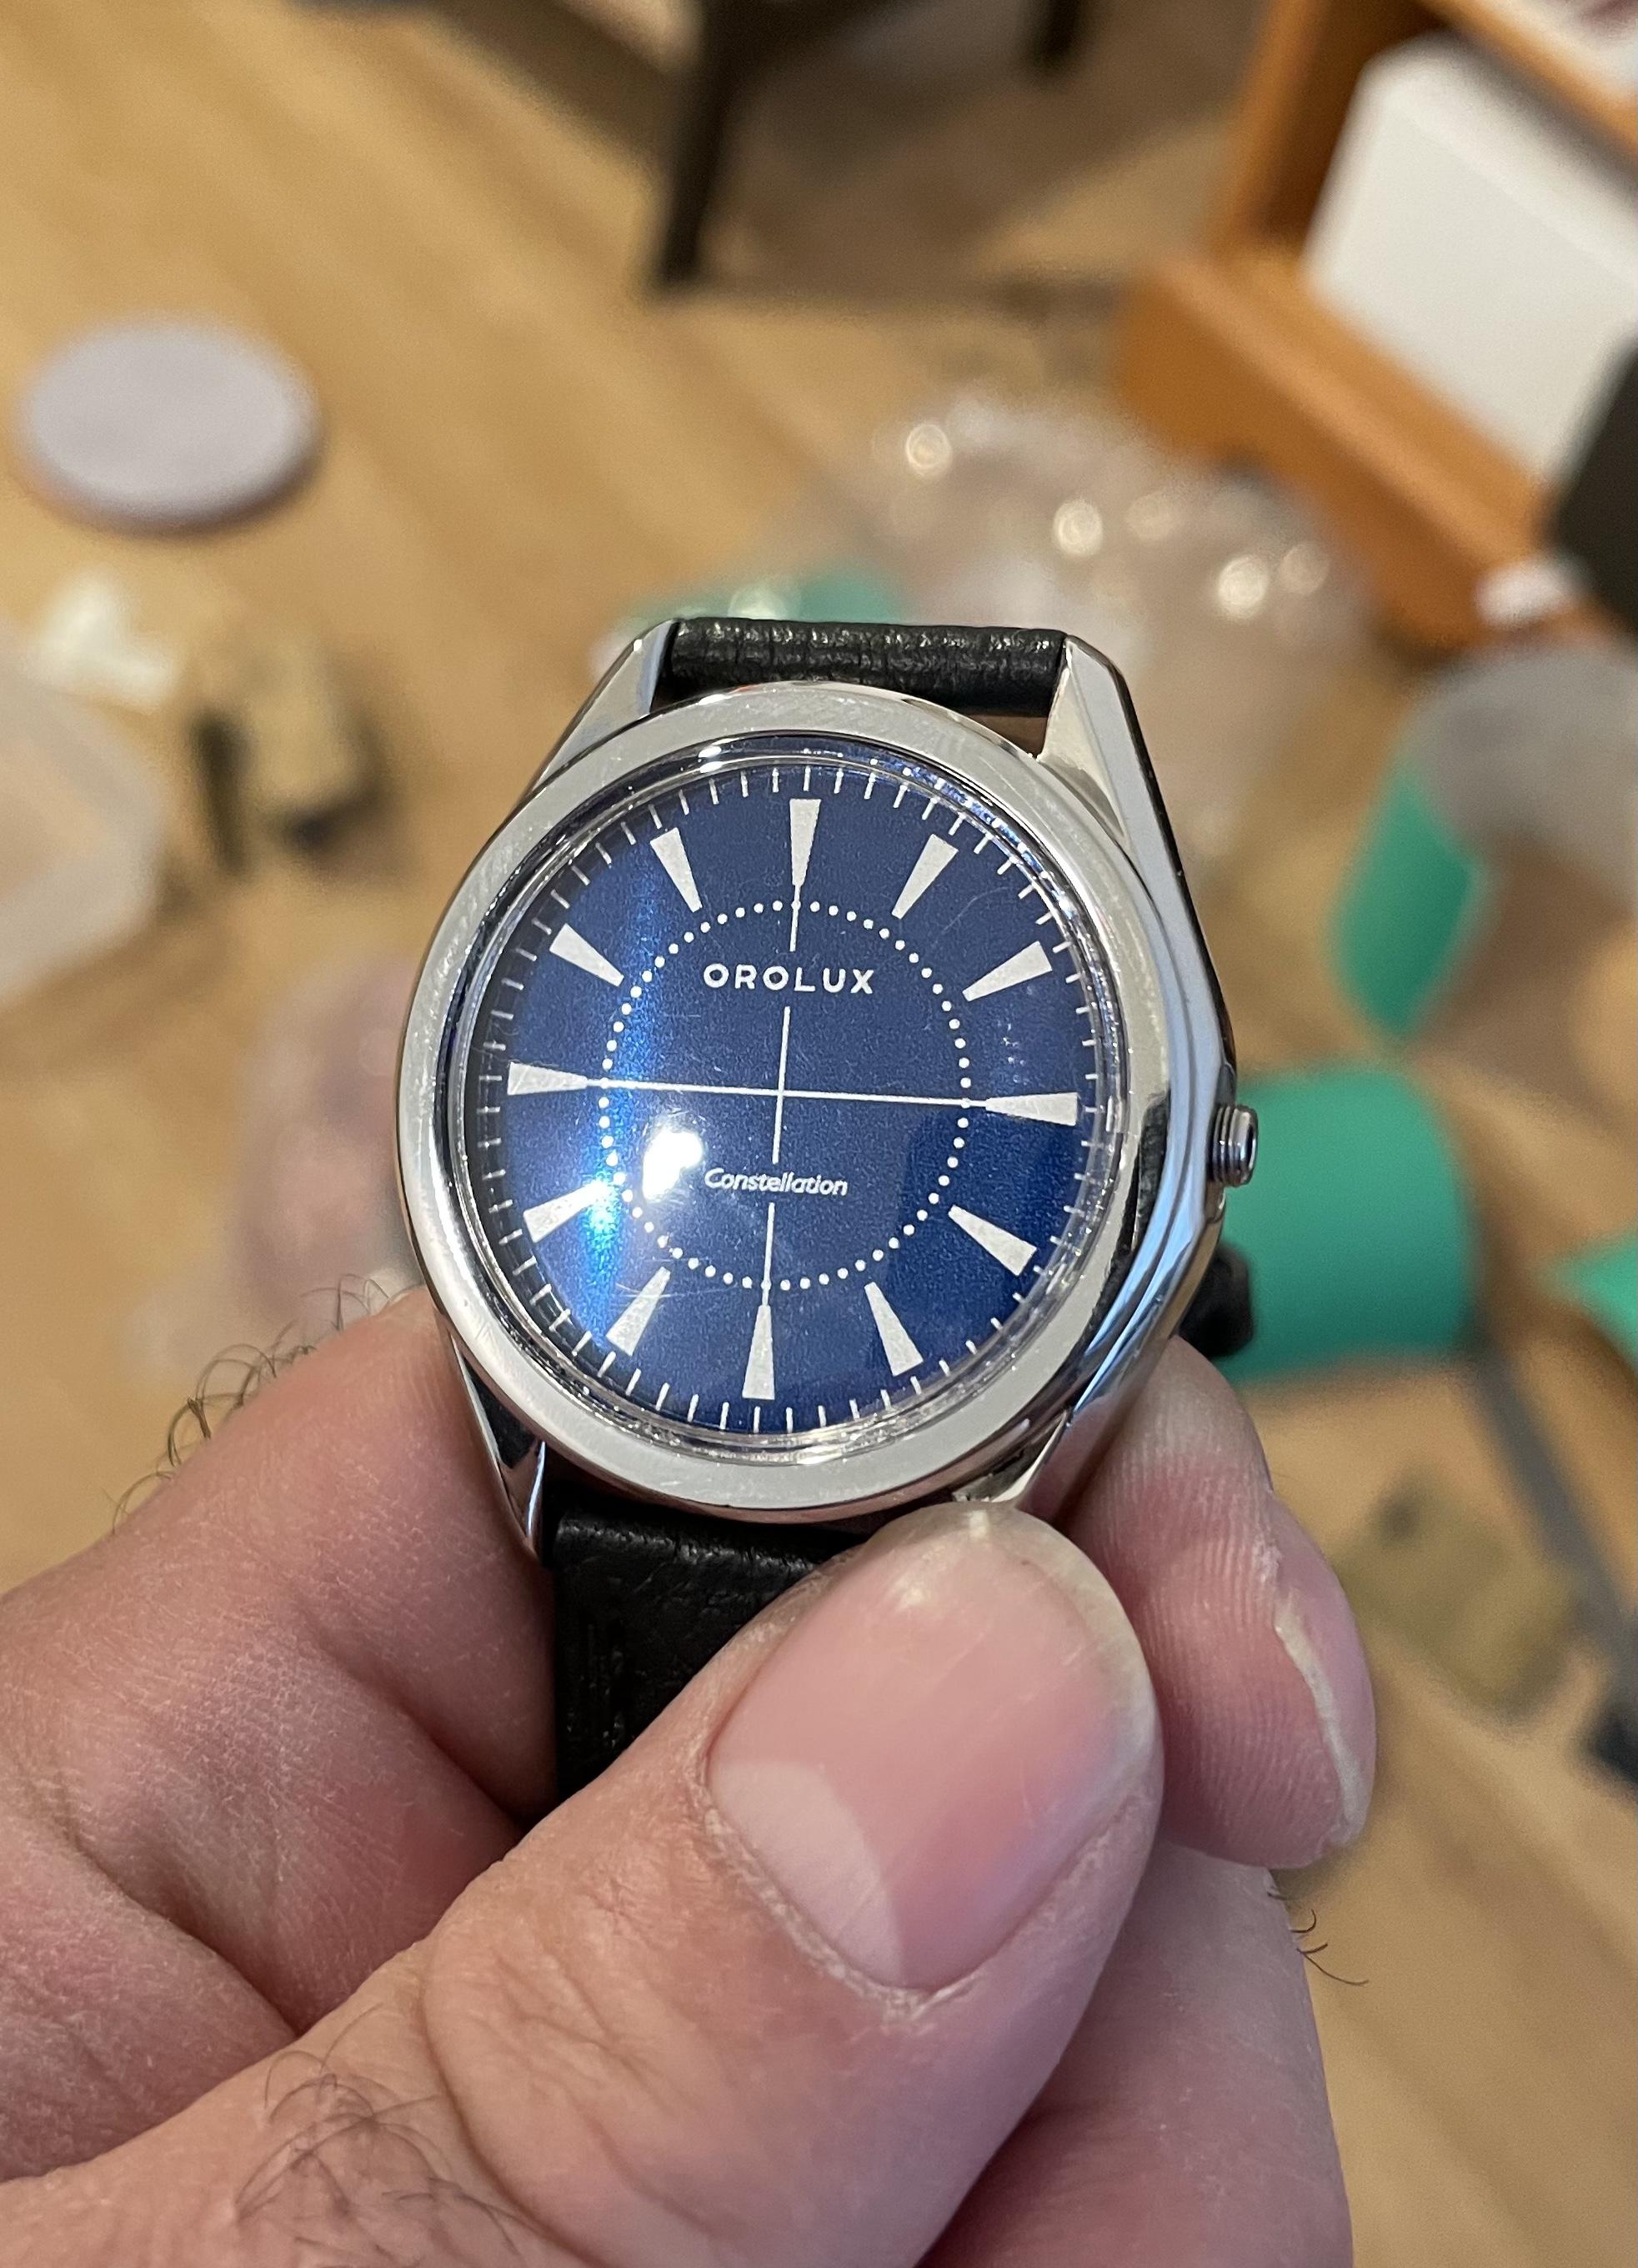
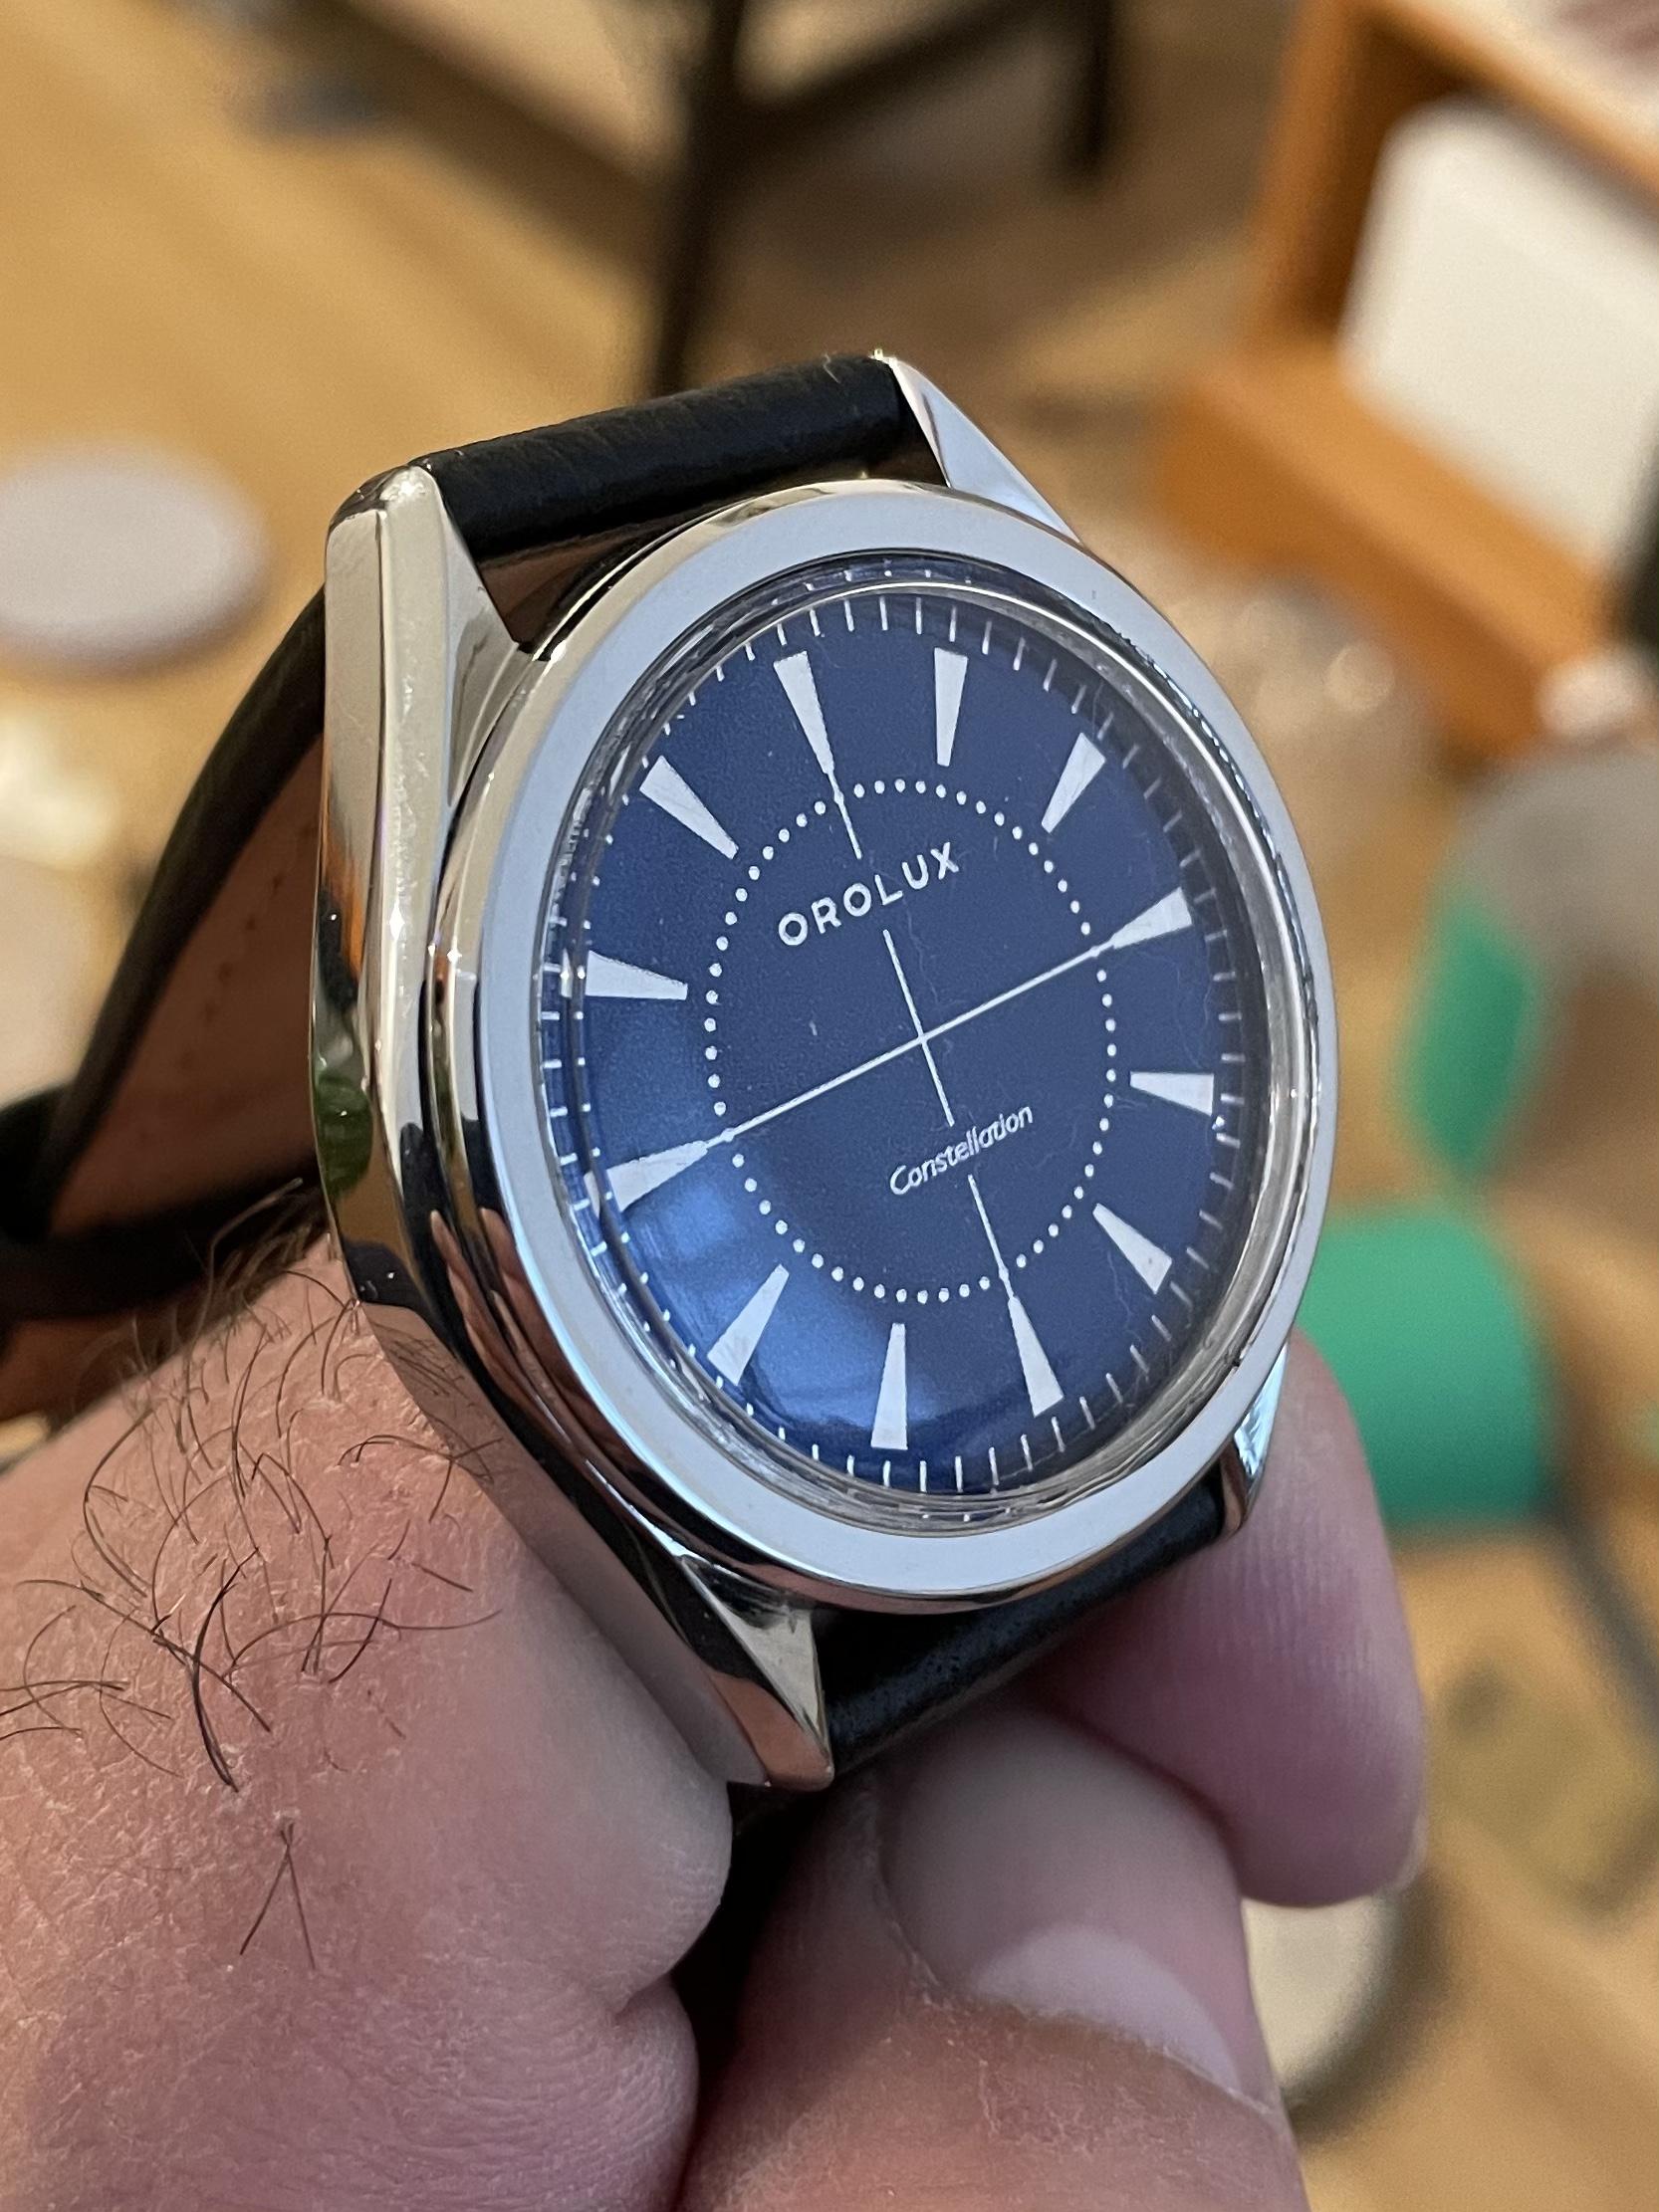
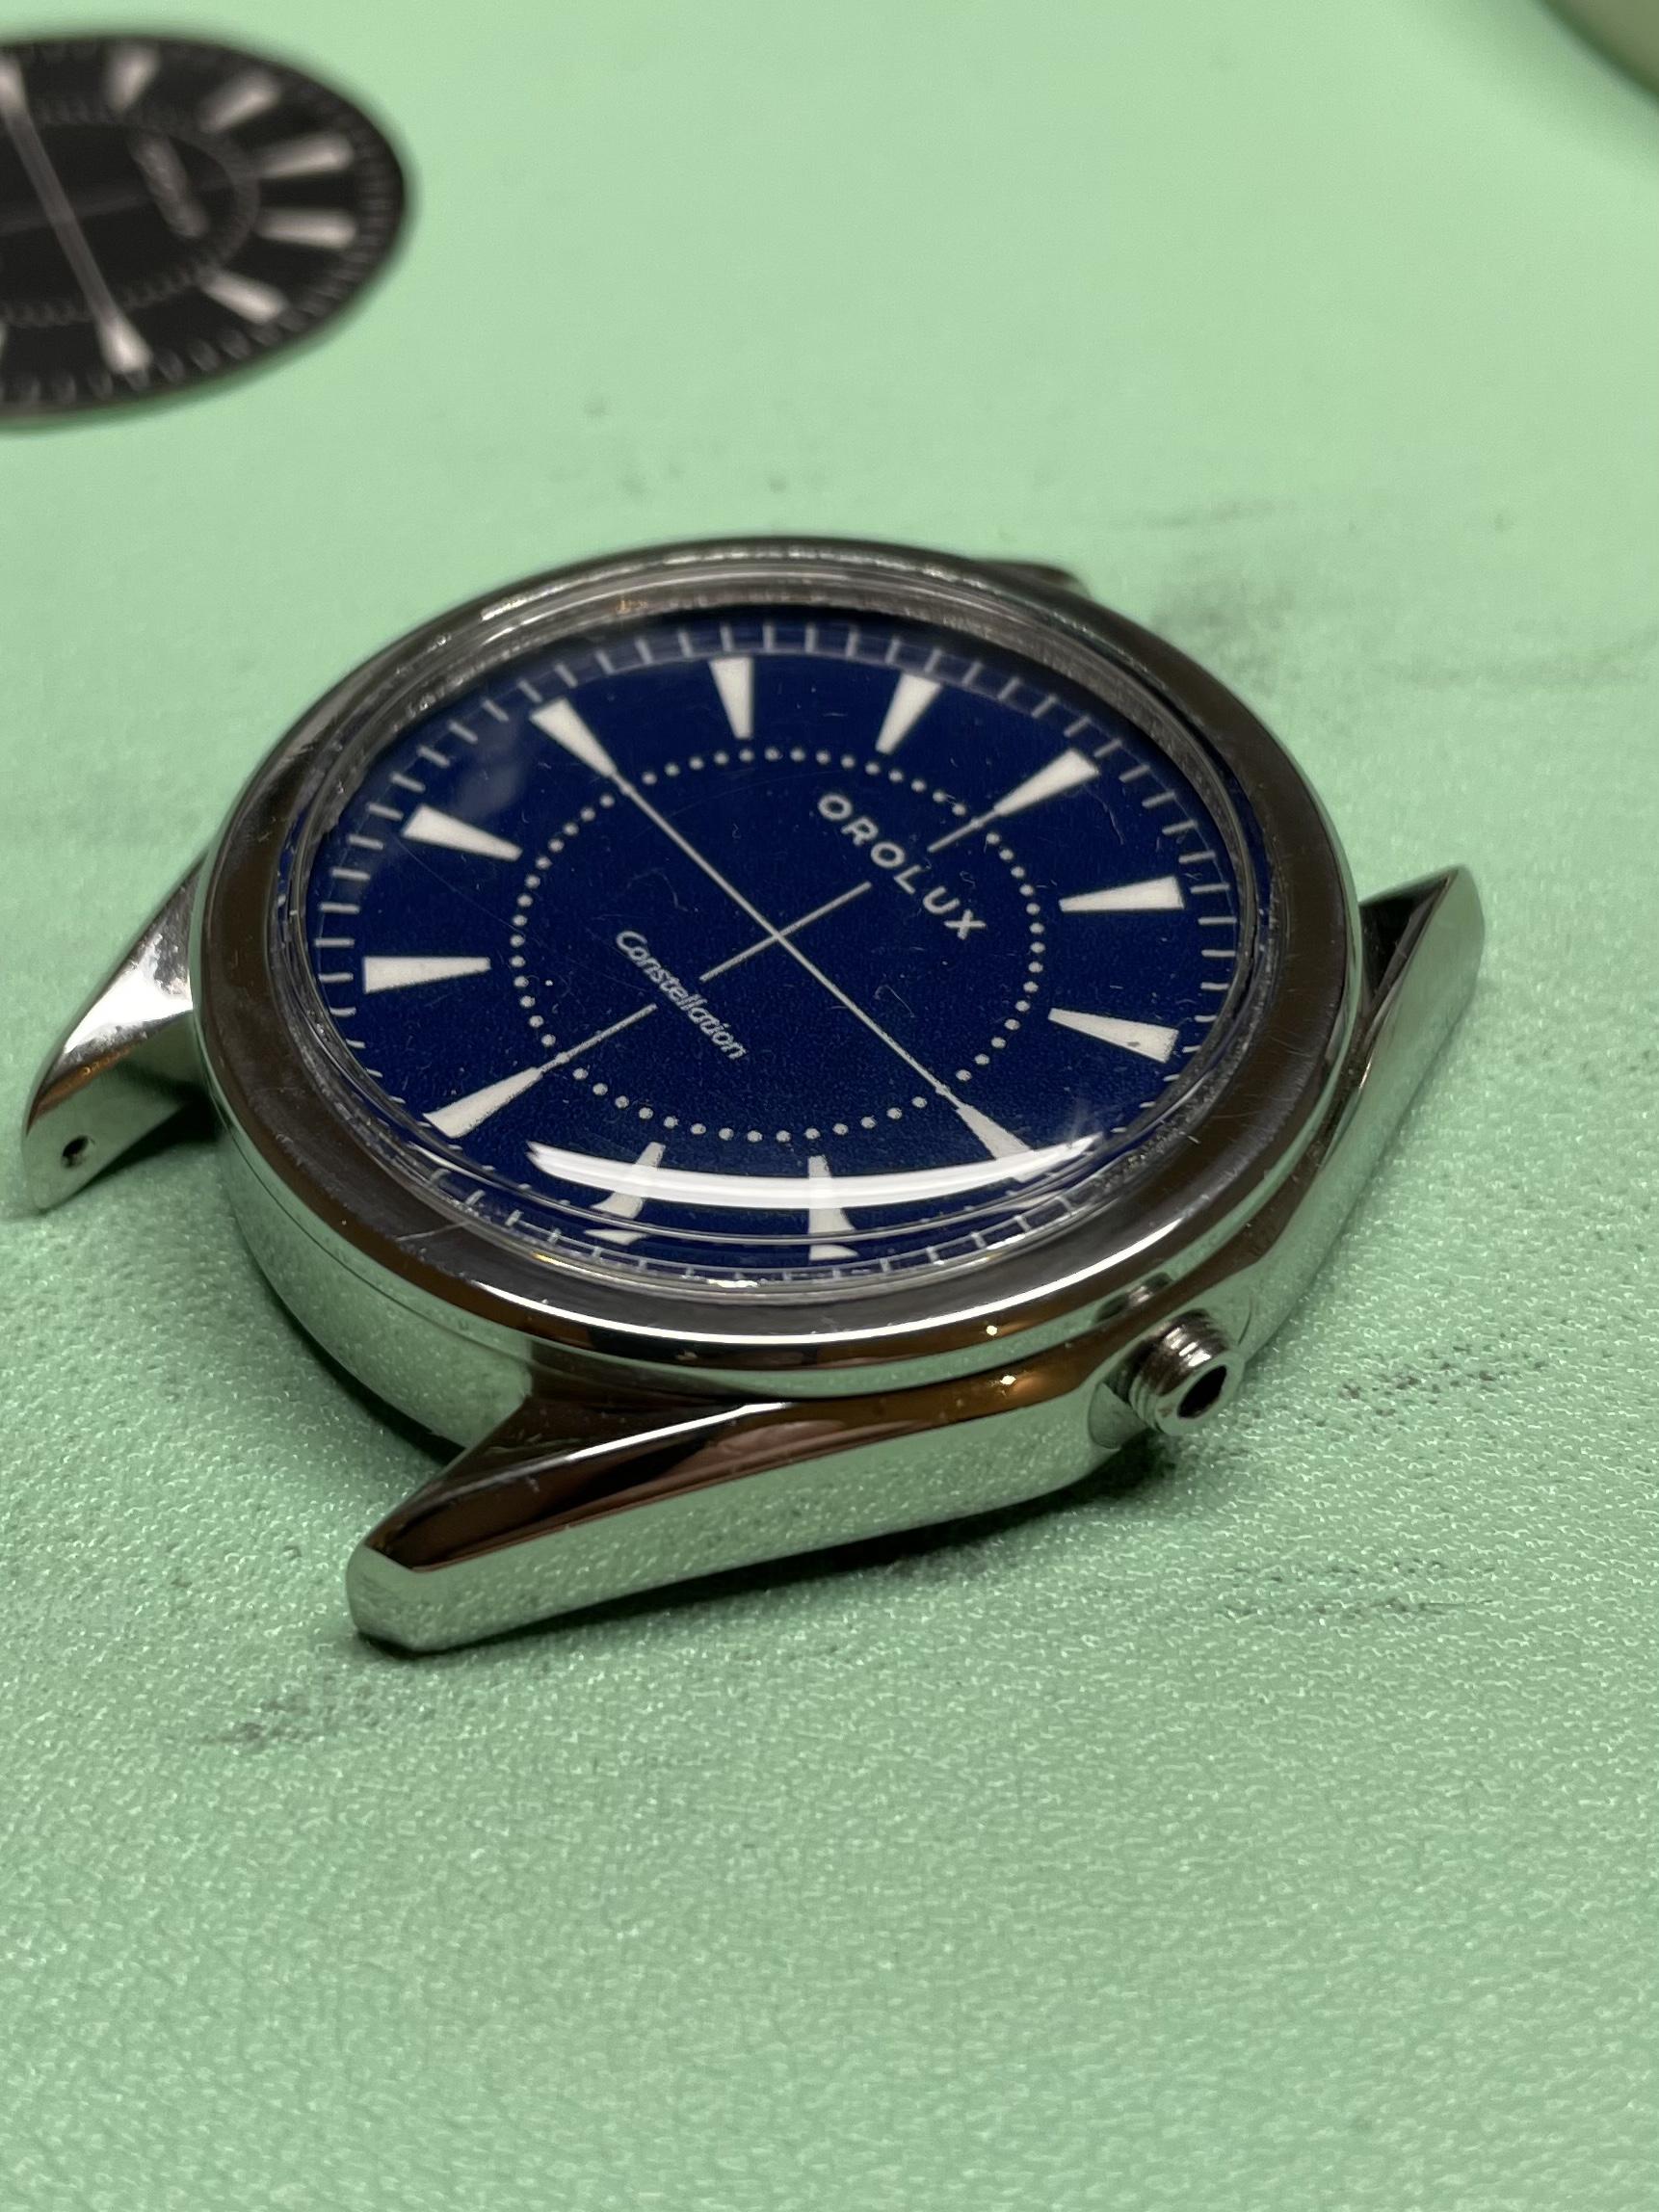
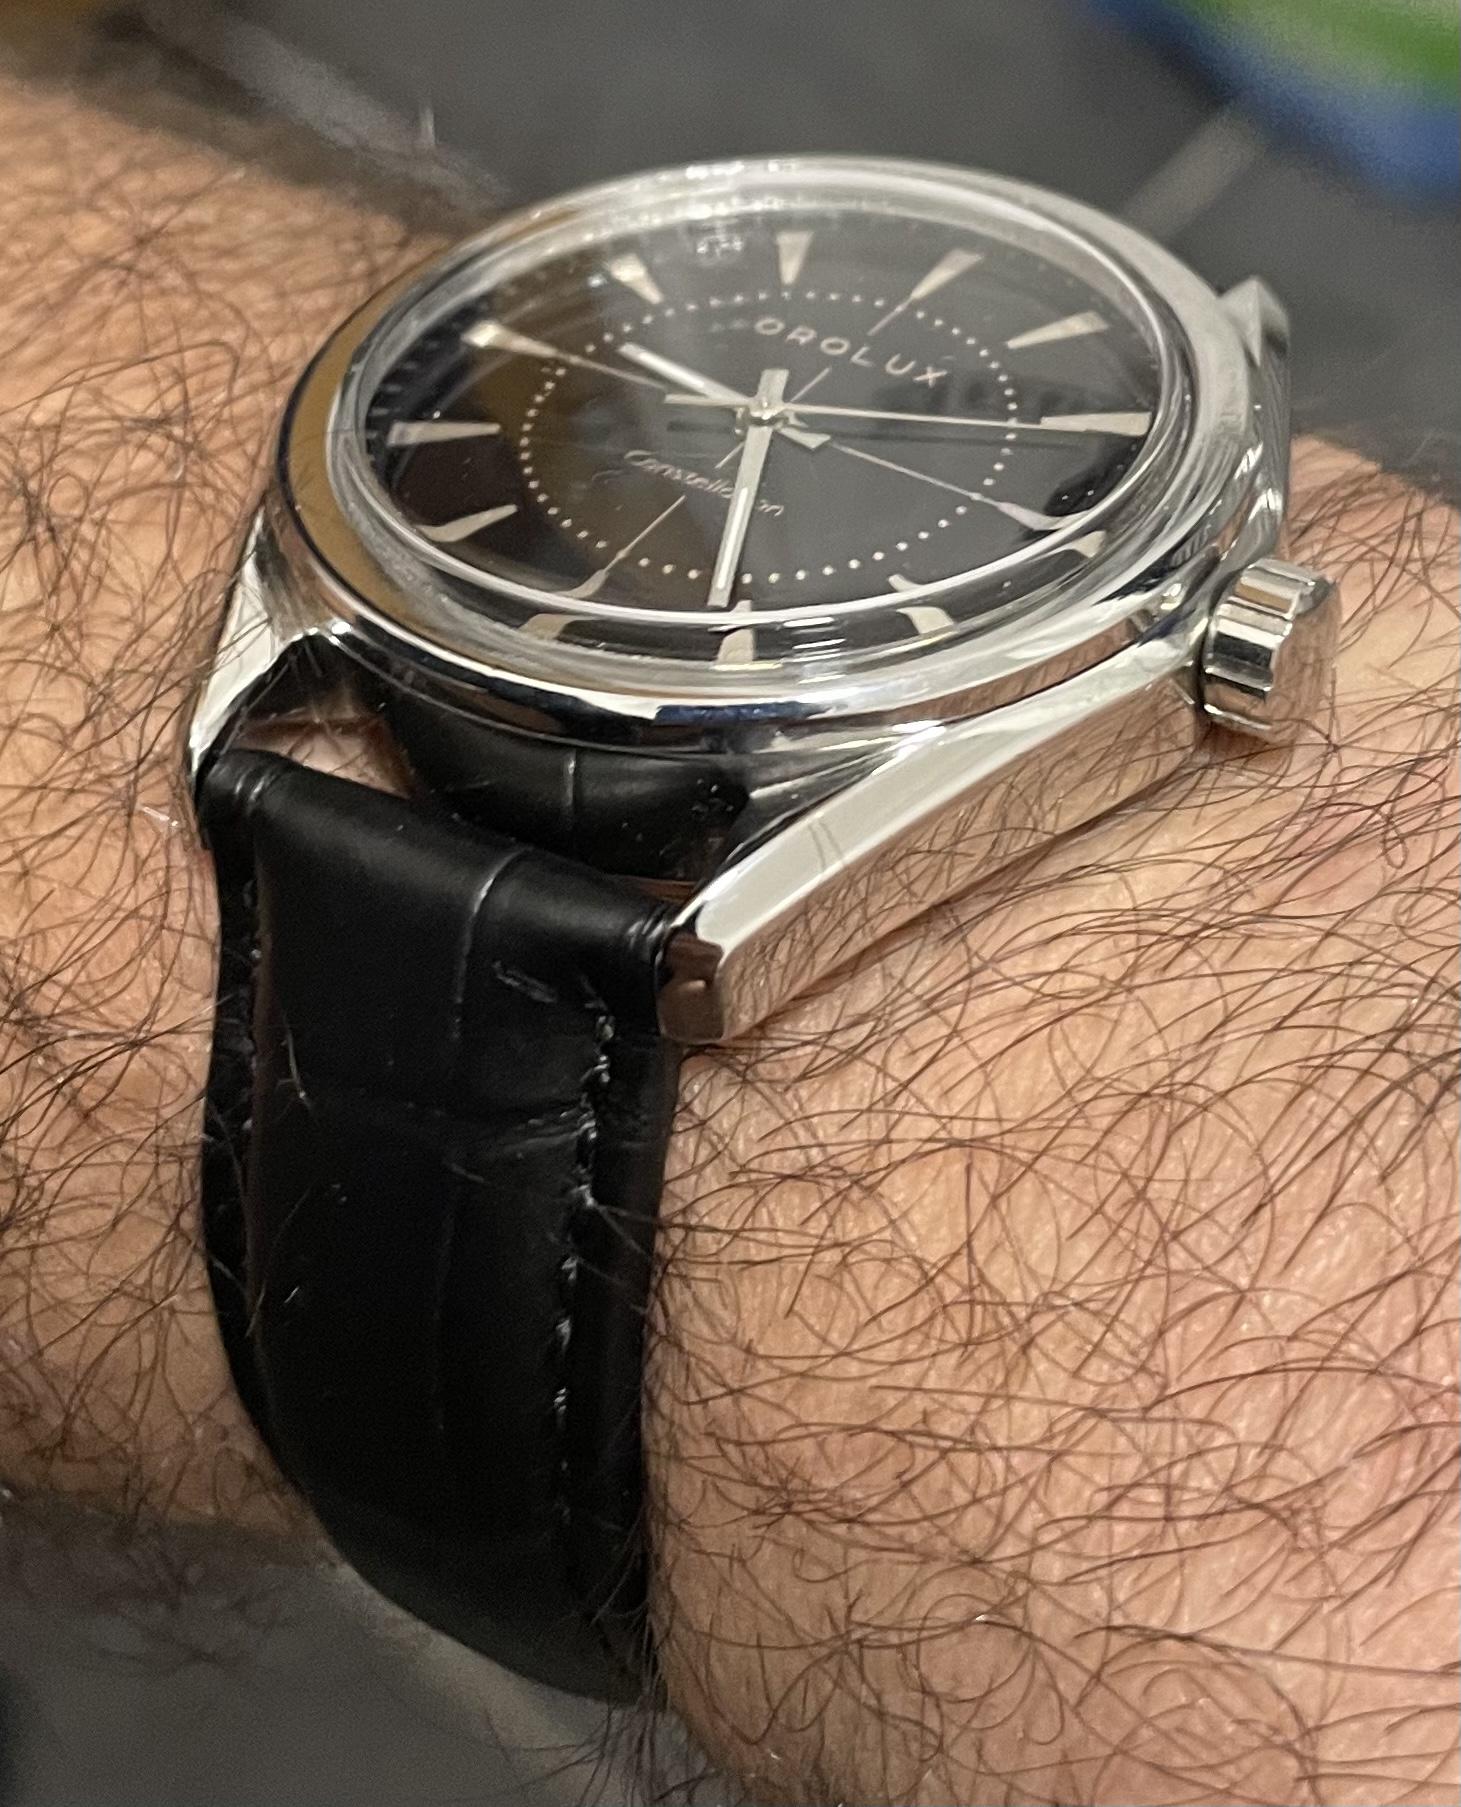
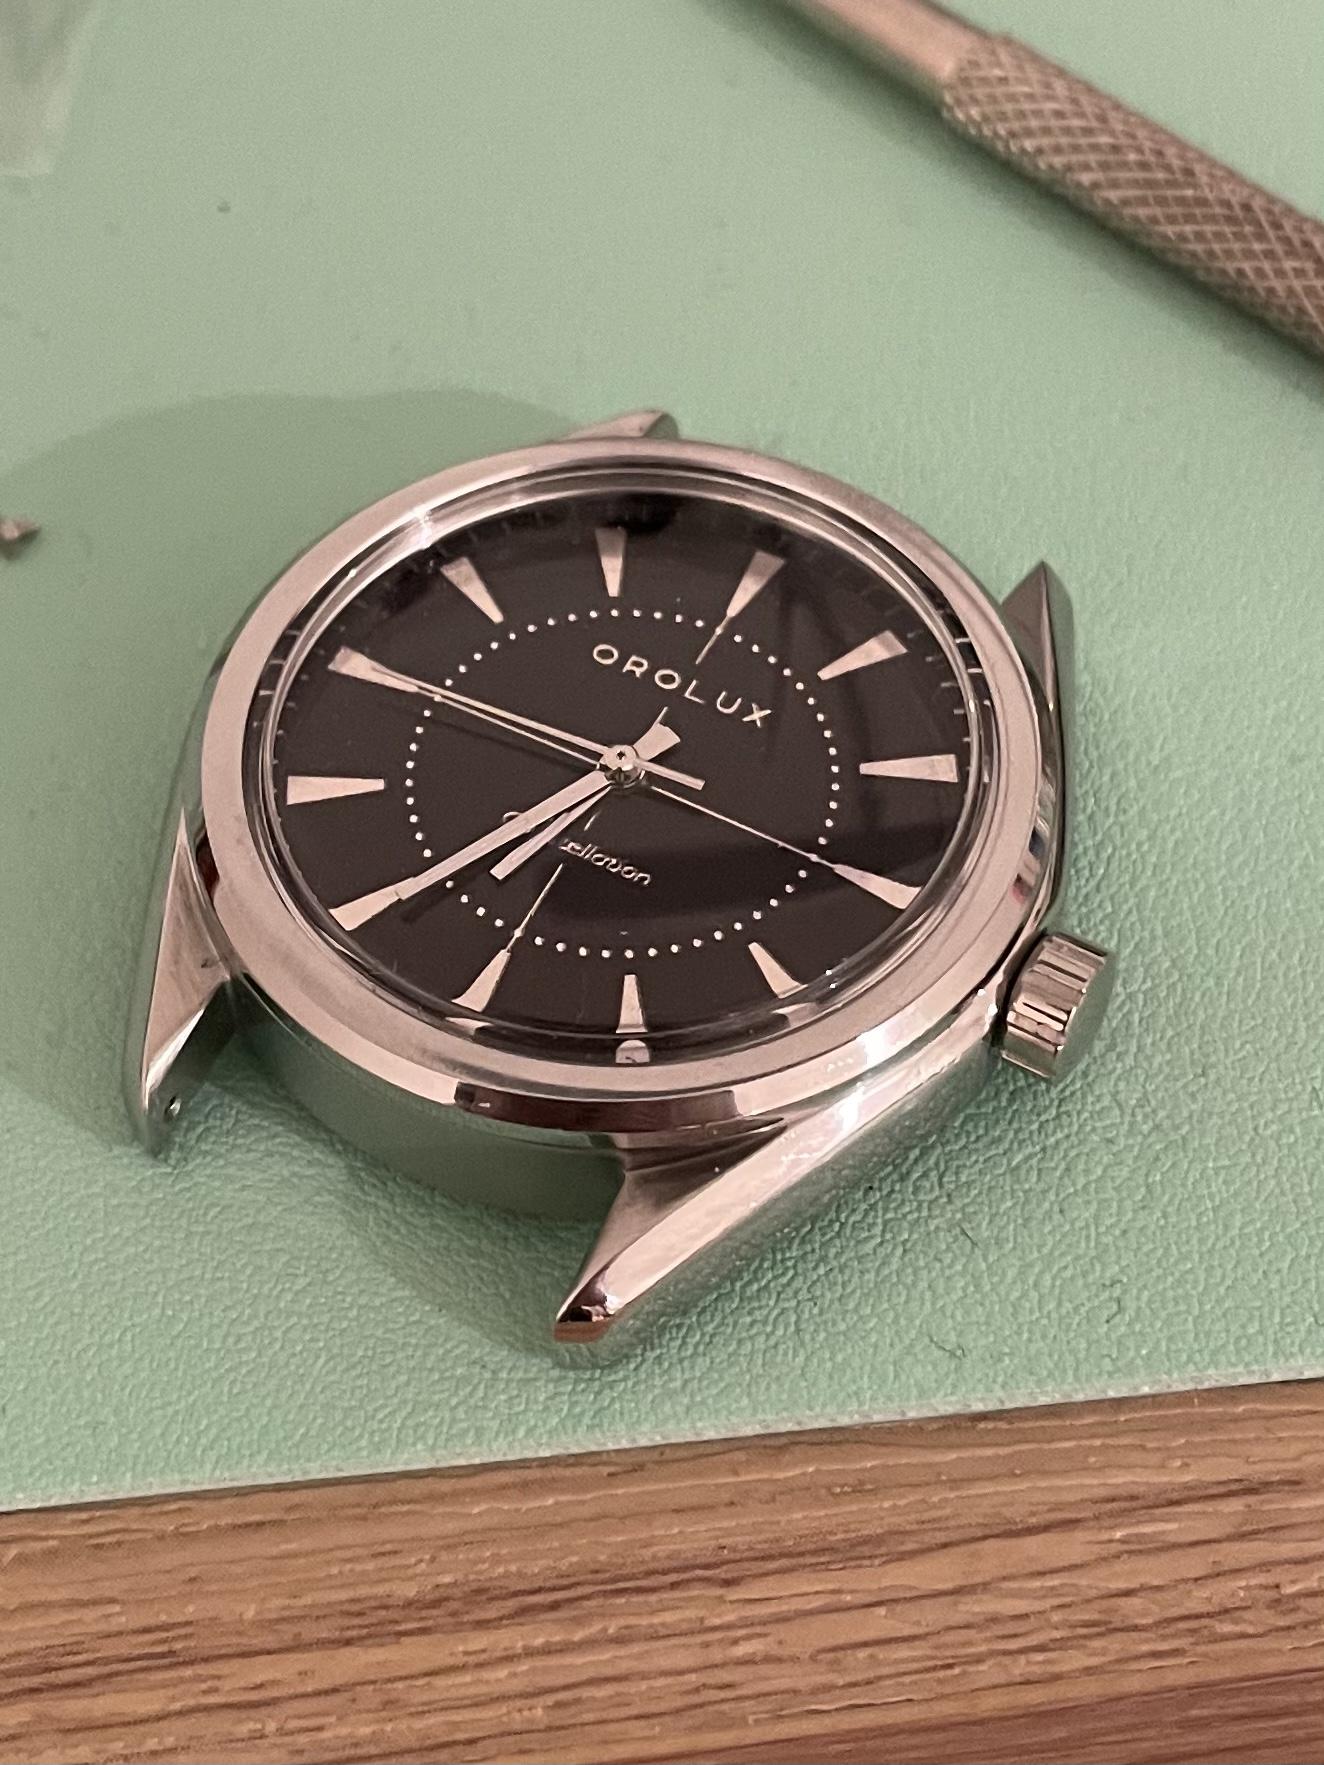
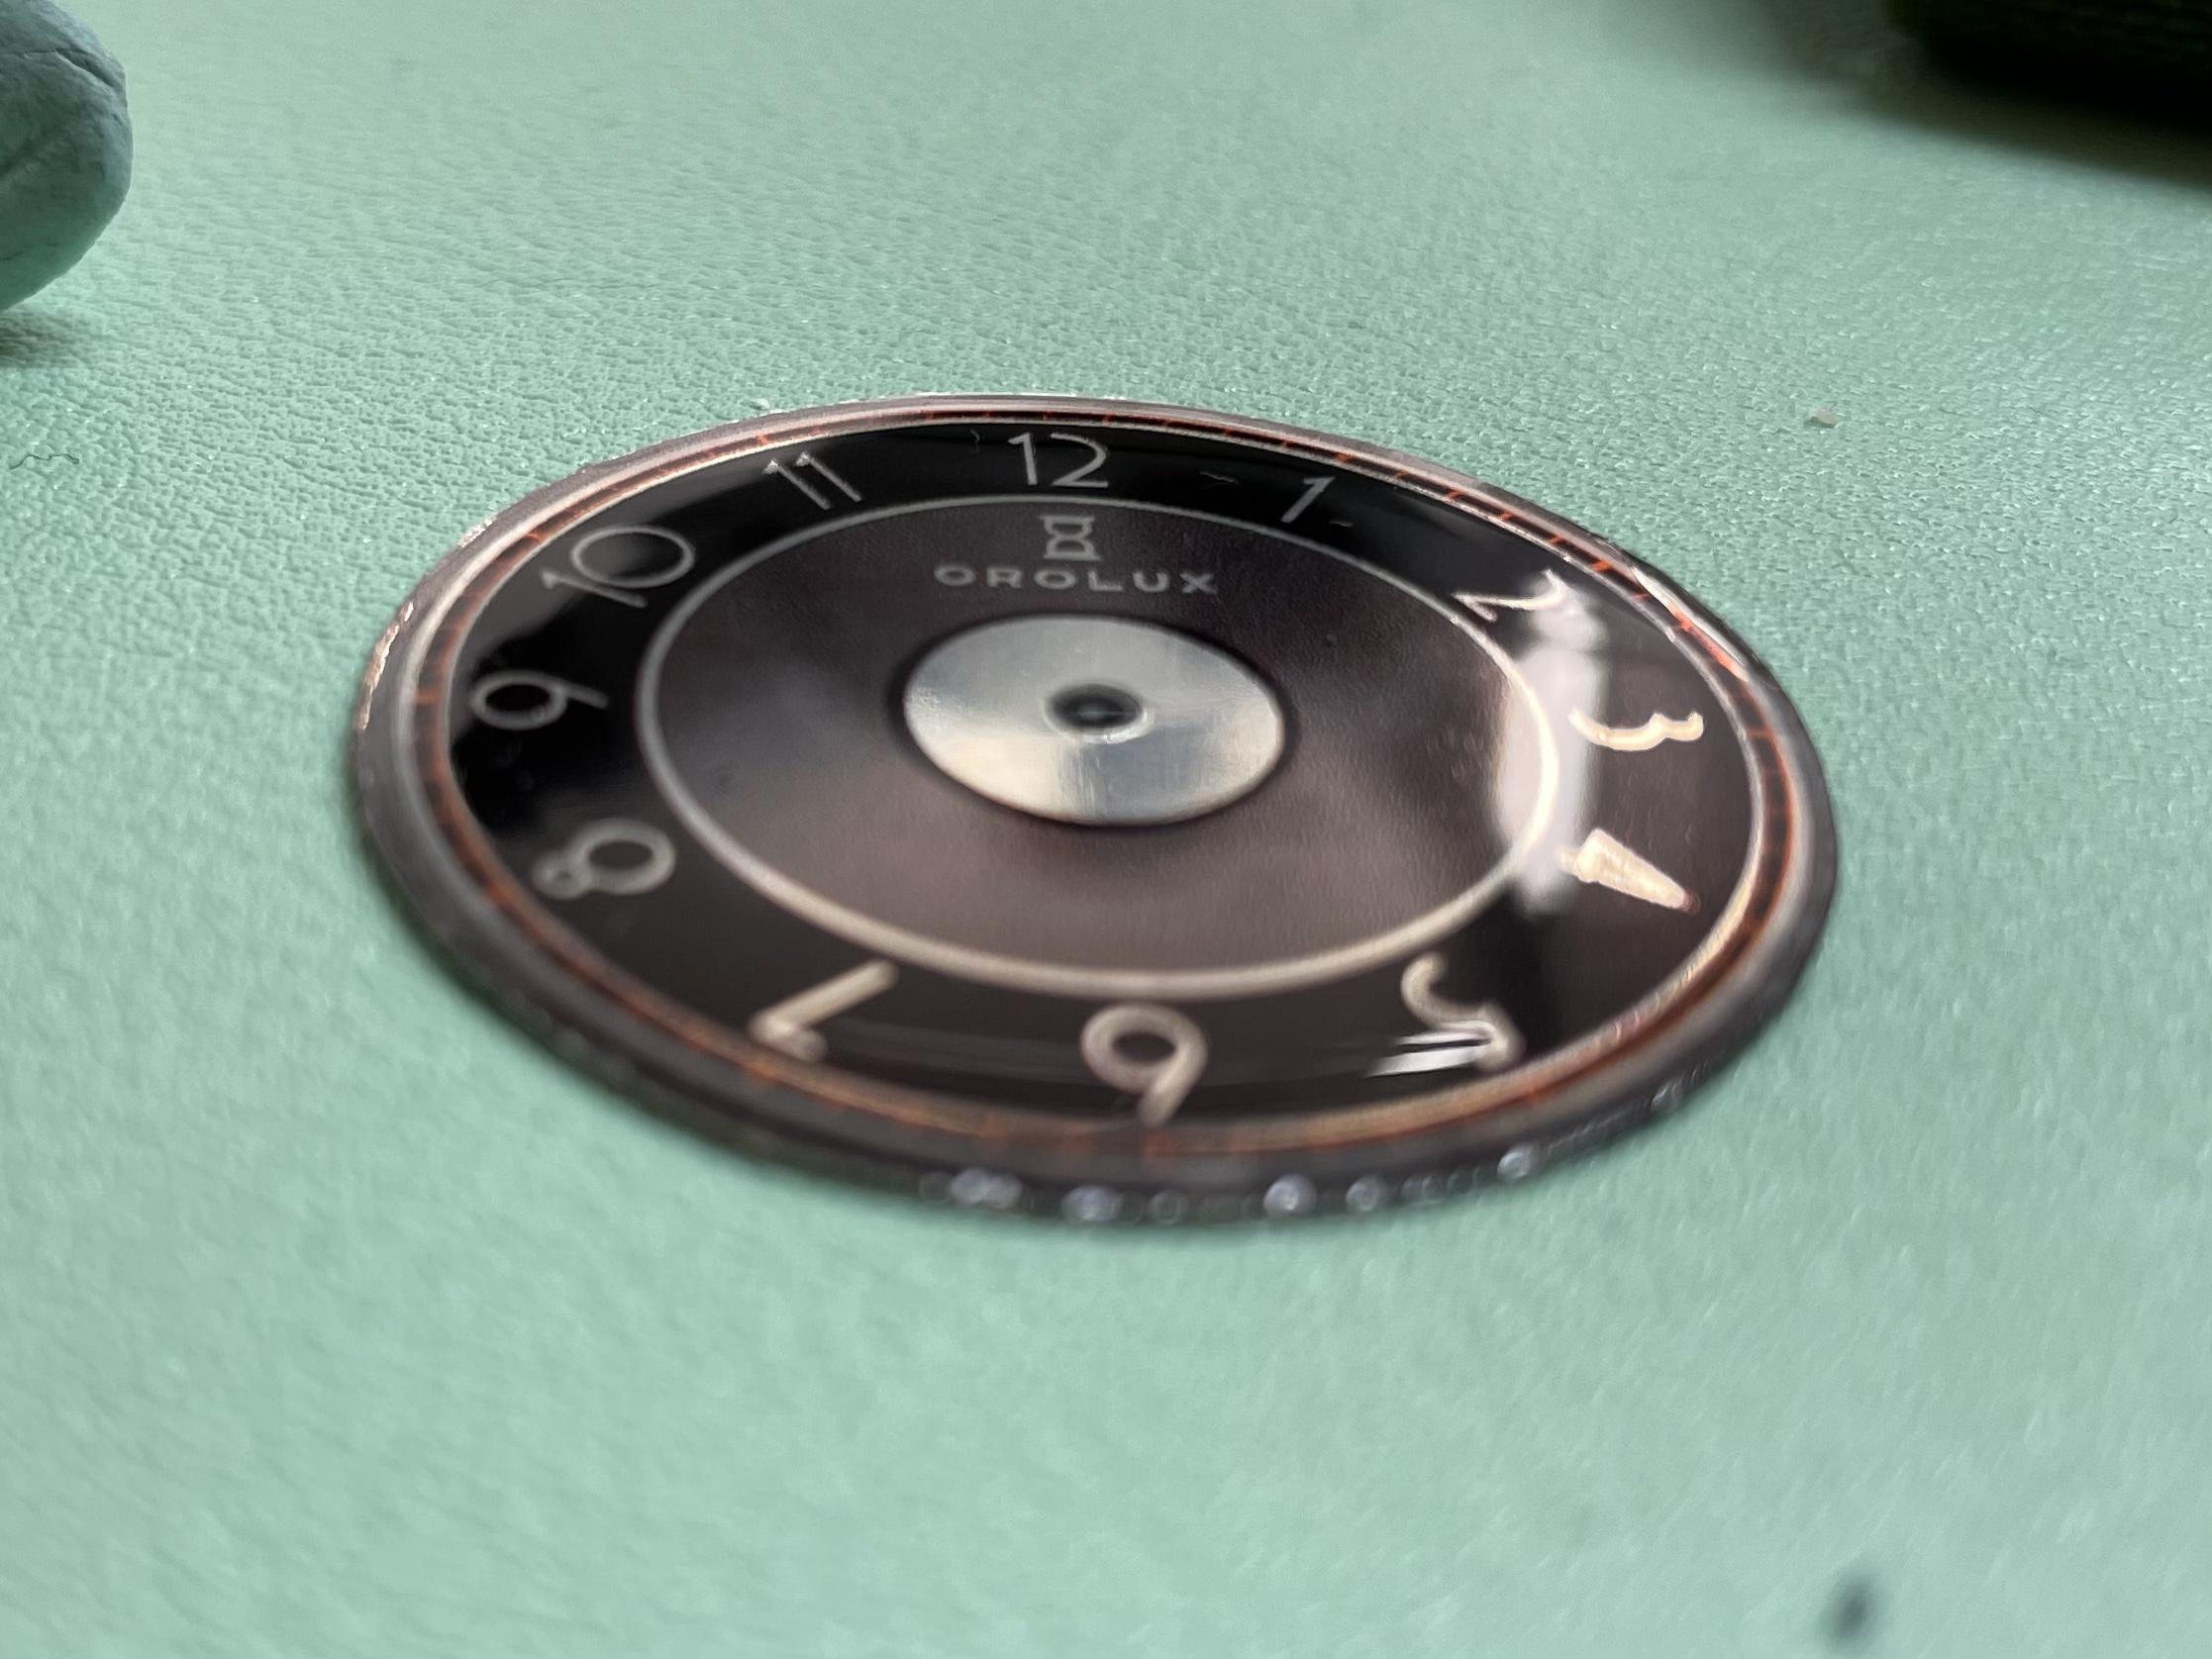
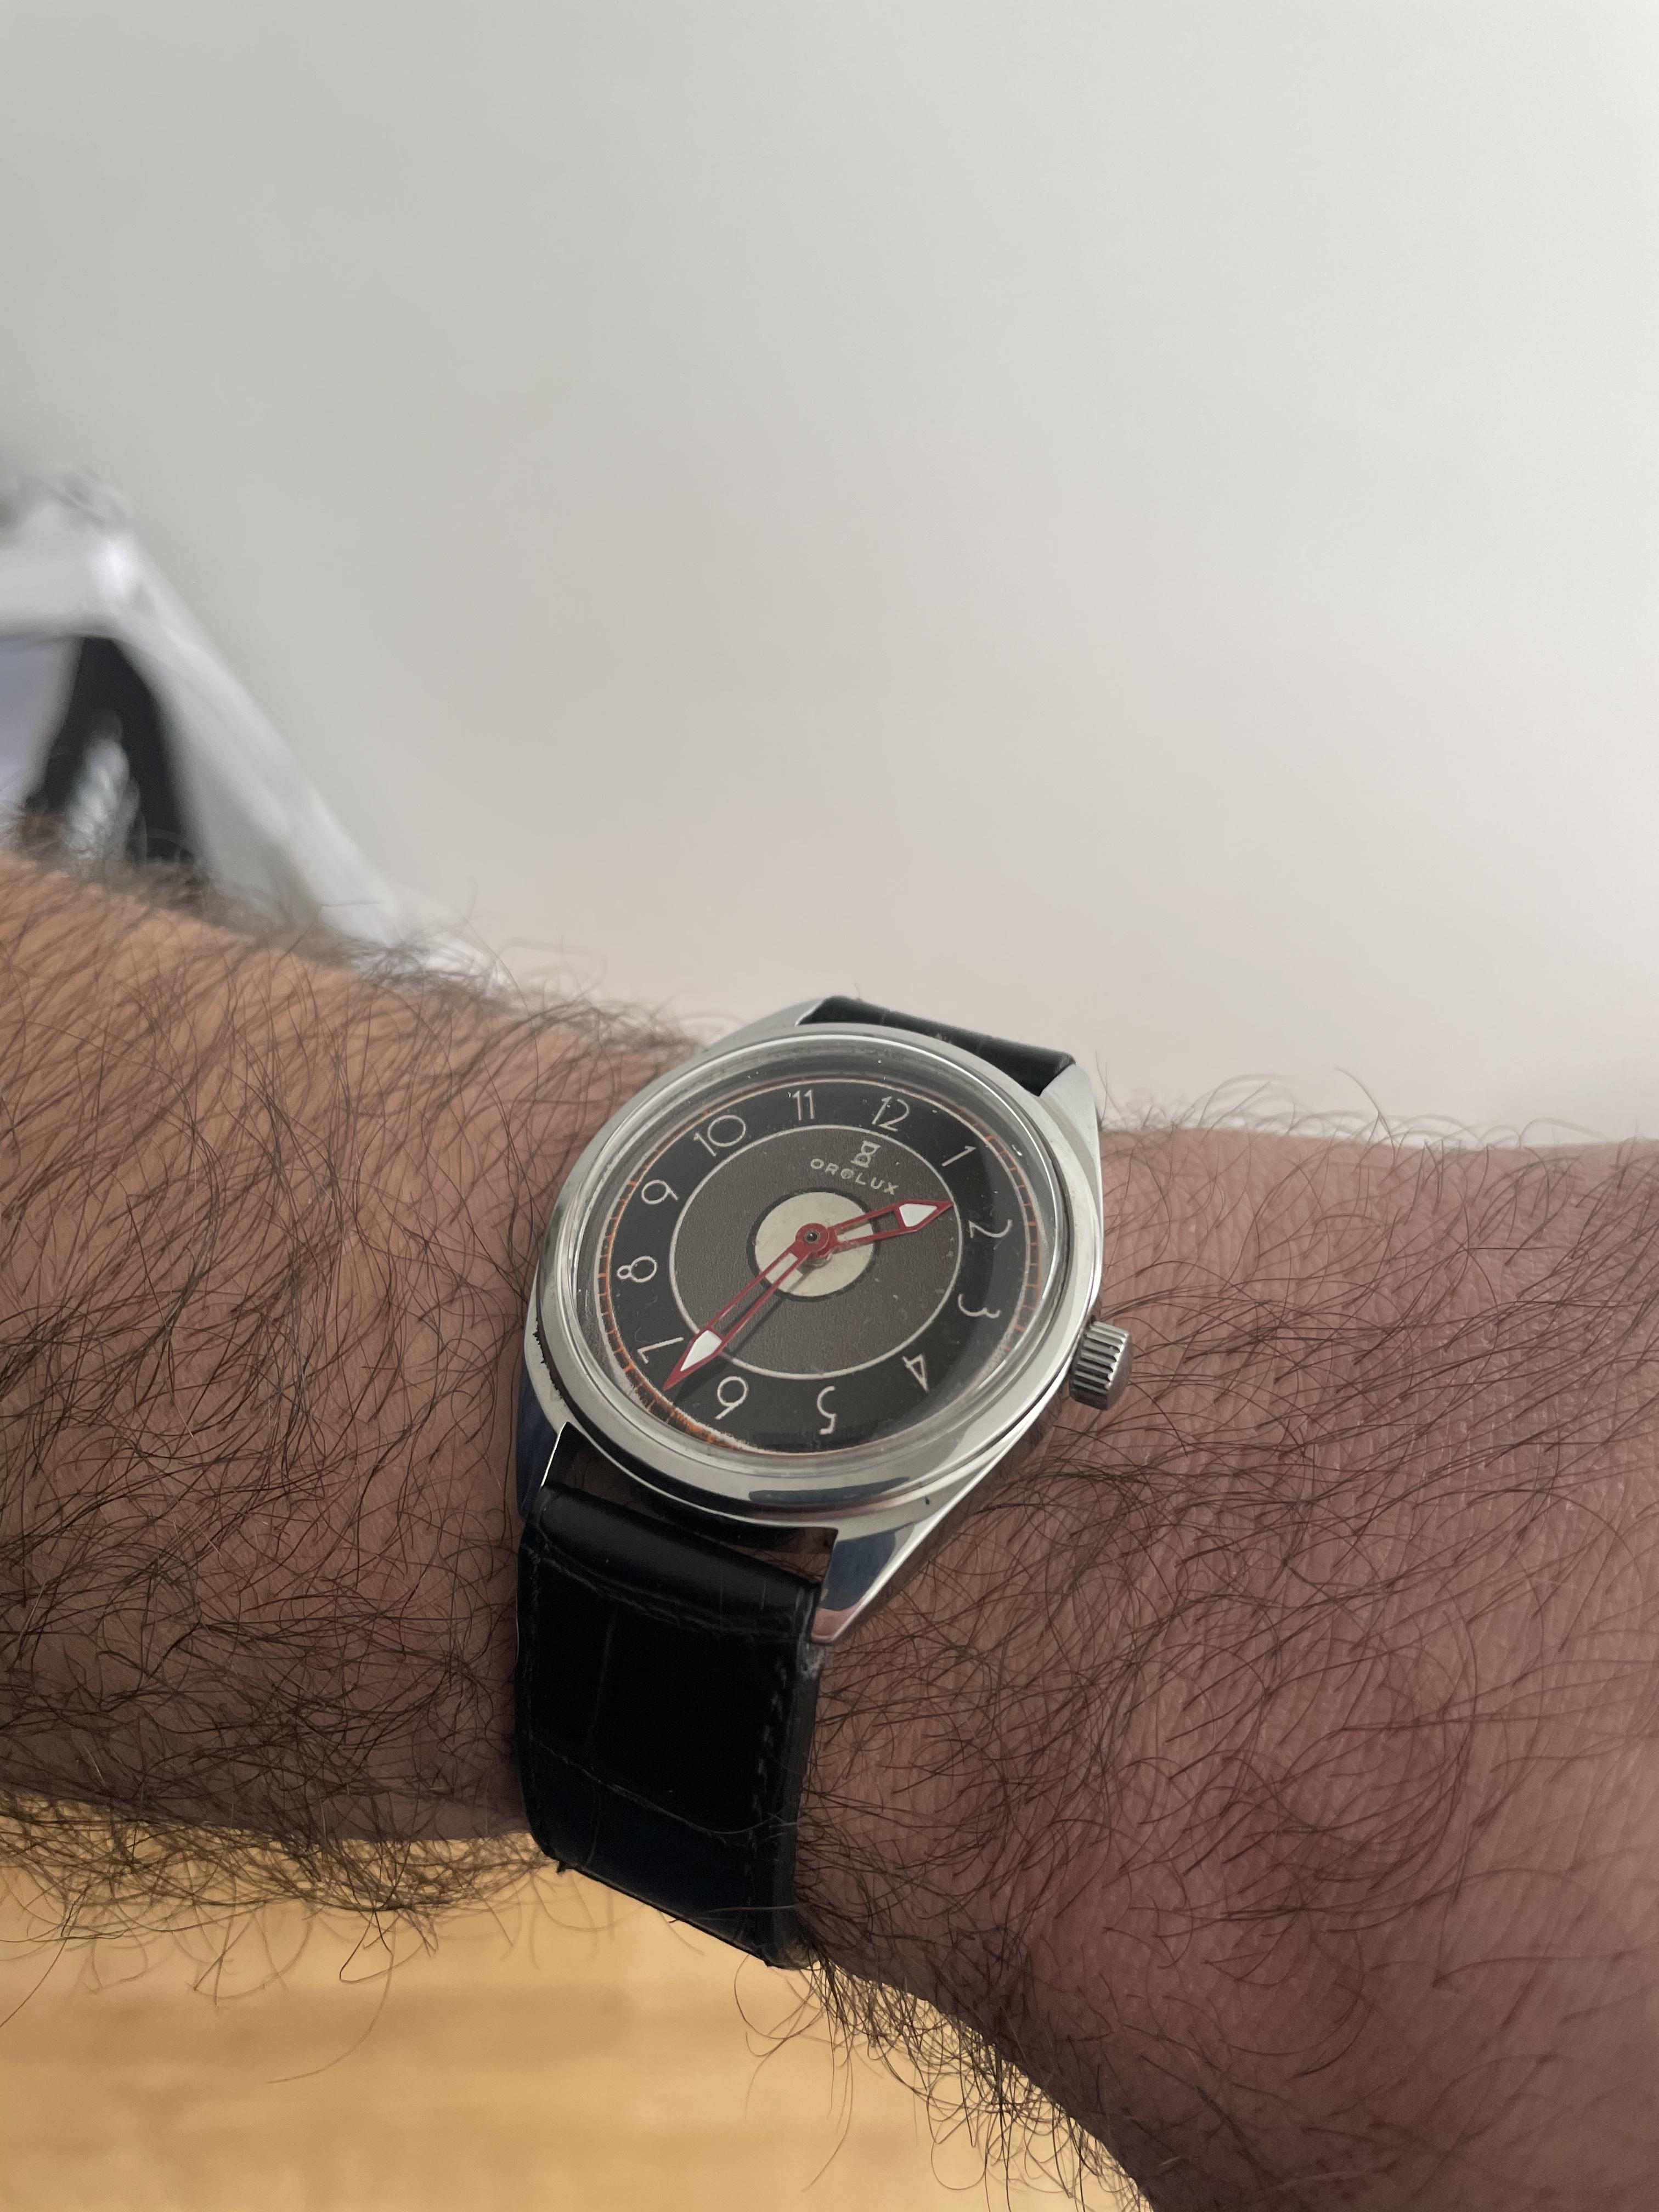
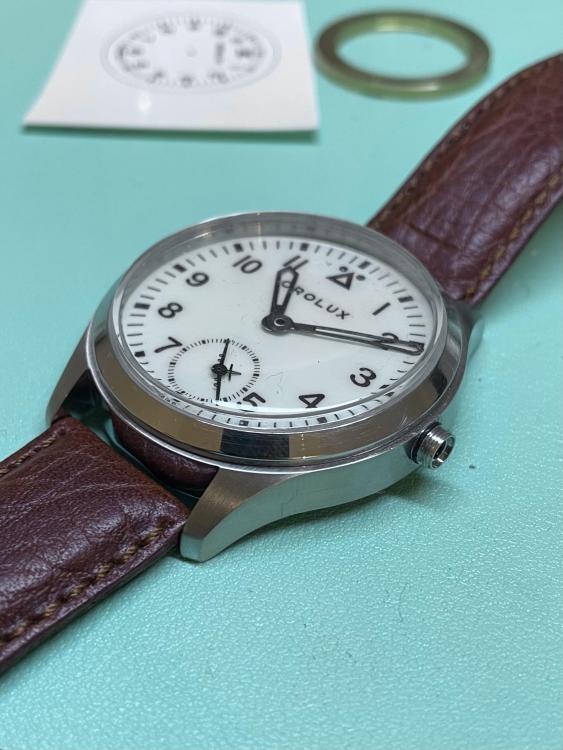
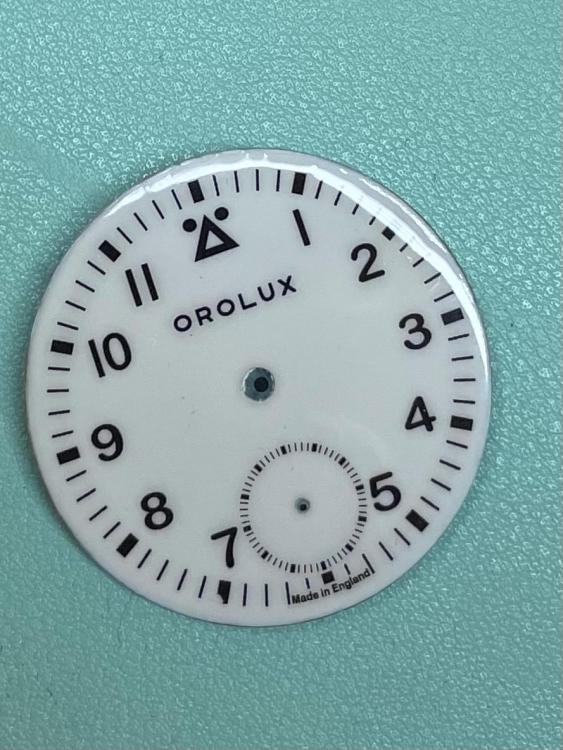
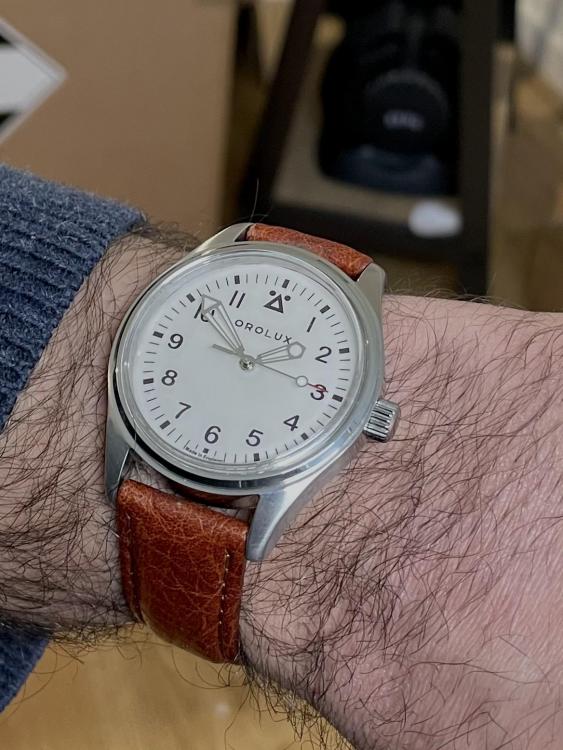
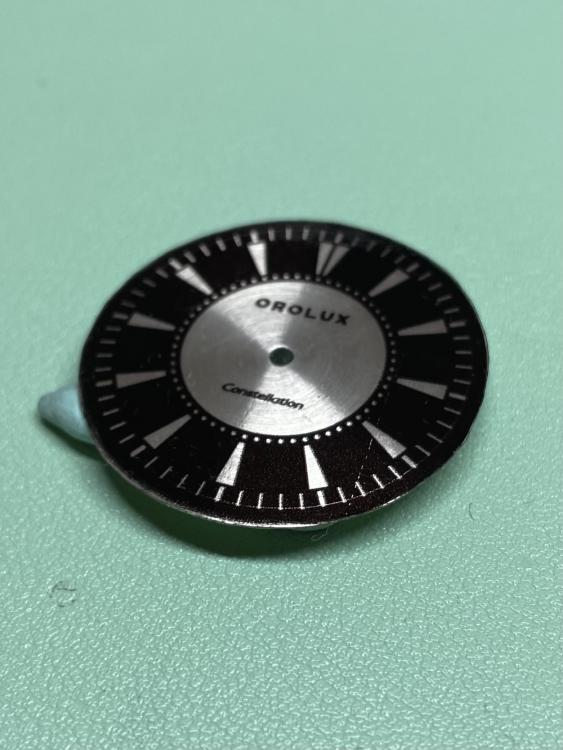
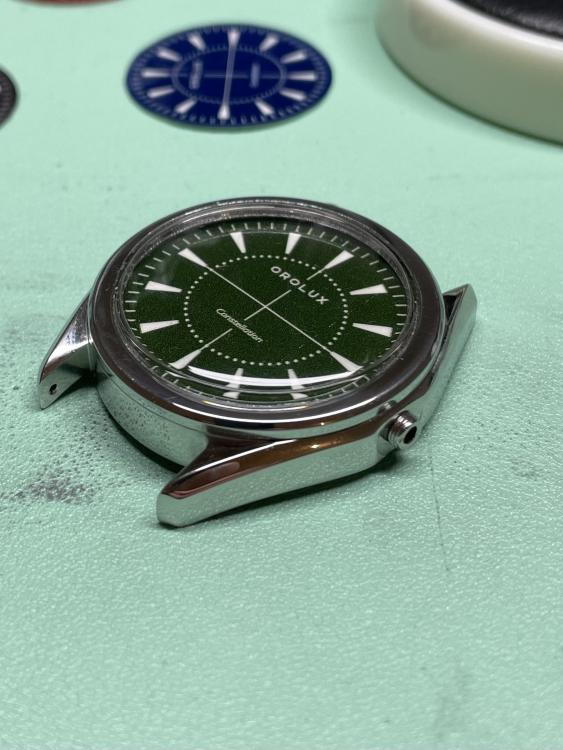
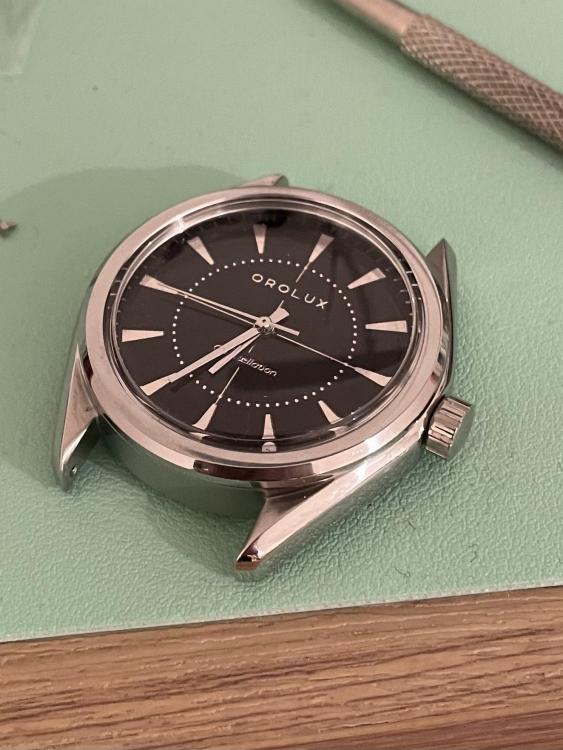
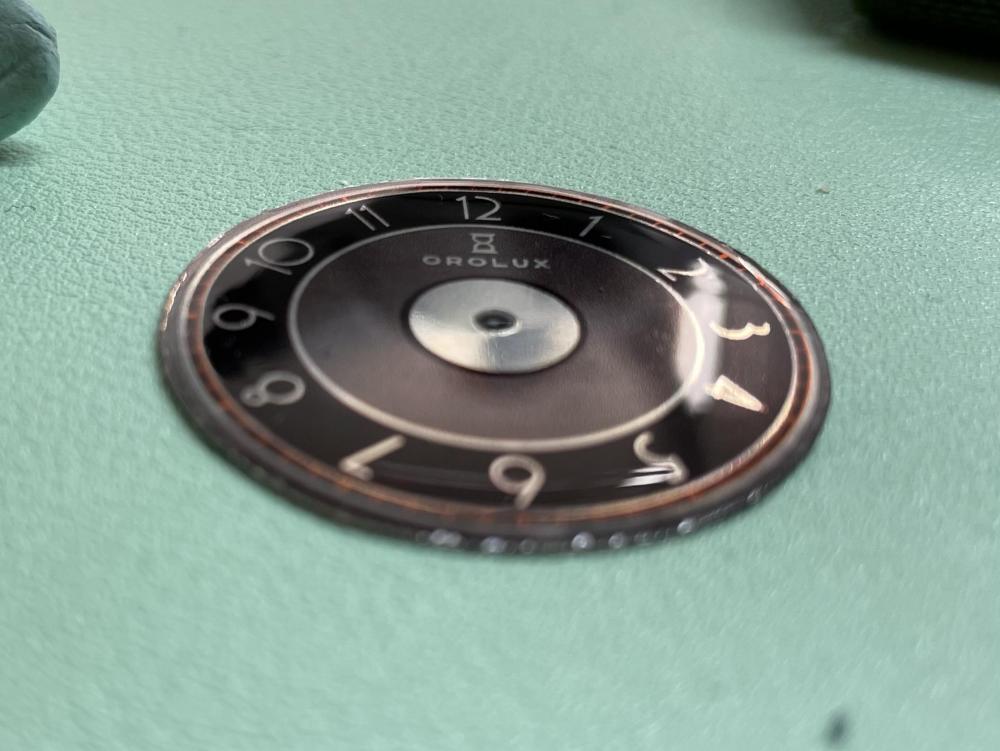
The Orolux ‘Mil-spec’ (working title, lol) has arrived! I can’t believe how excited I am! I know it’s very similar to every other military inspired watch out there, but this one is mine (guess the military film reference). And I’m pretty sure most modern mass produced military watches don’t have an enamel dial.

 1 point
 -
1 point
-
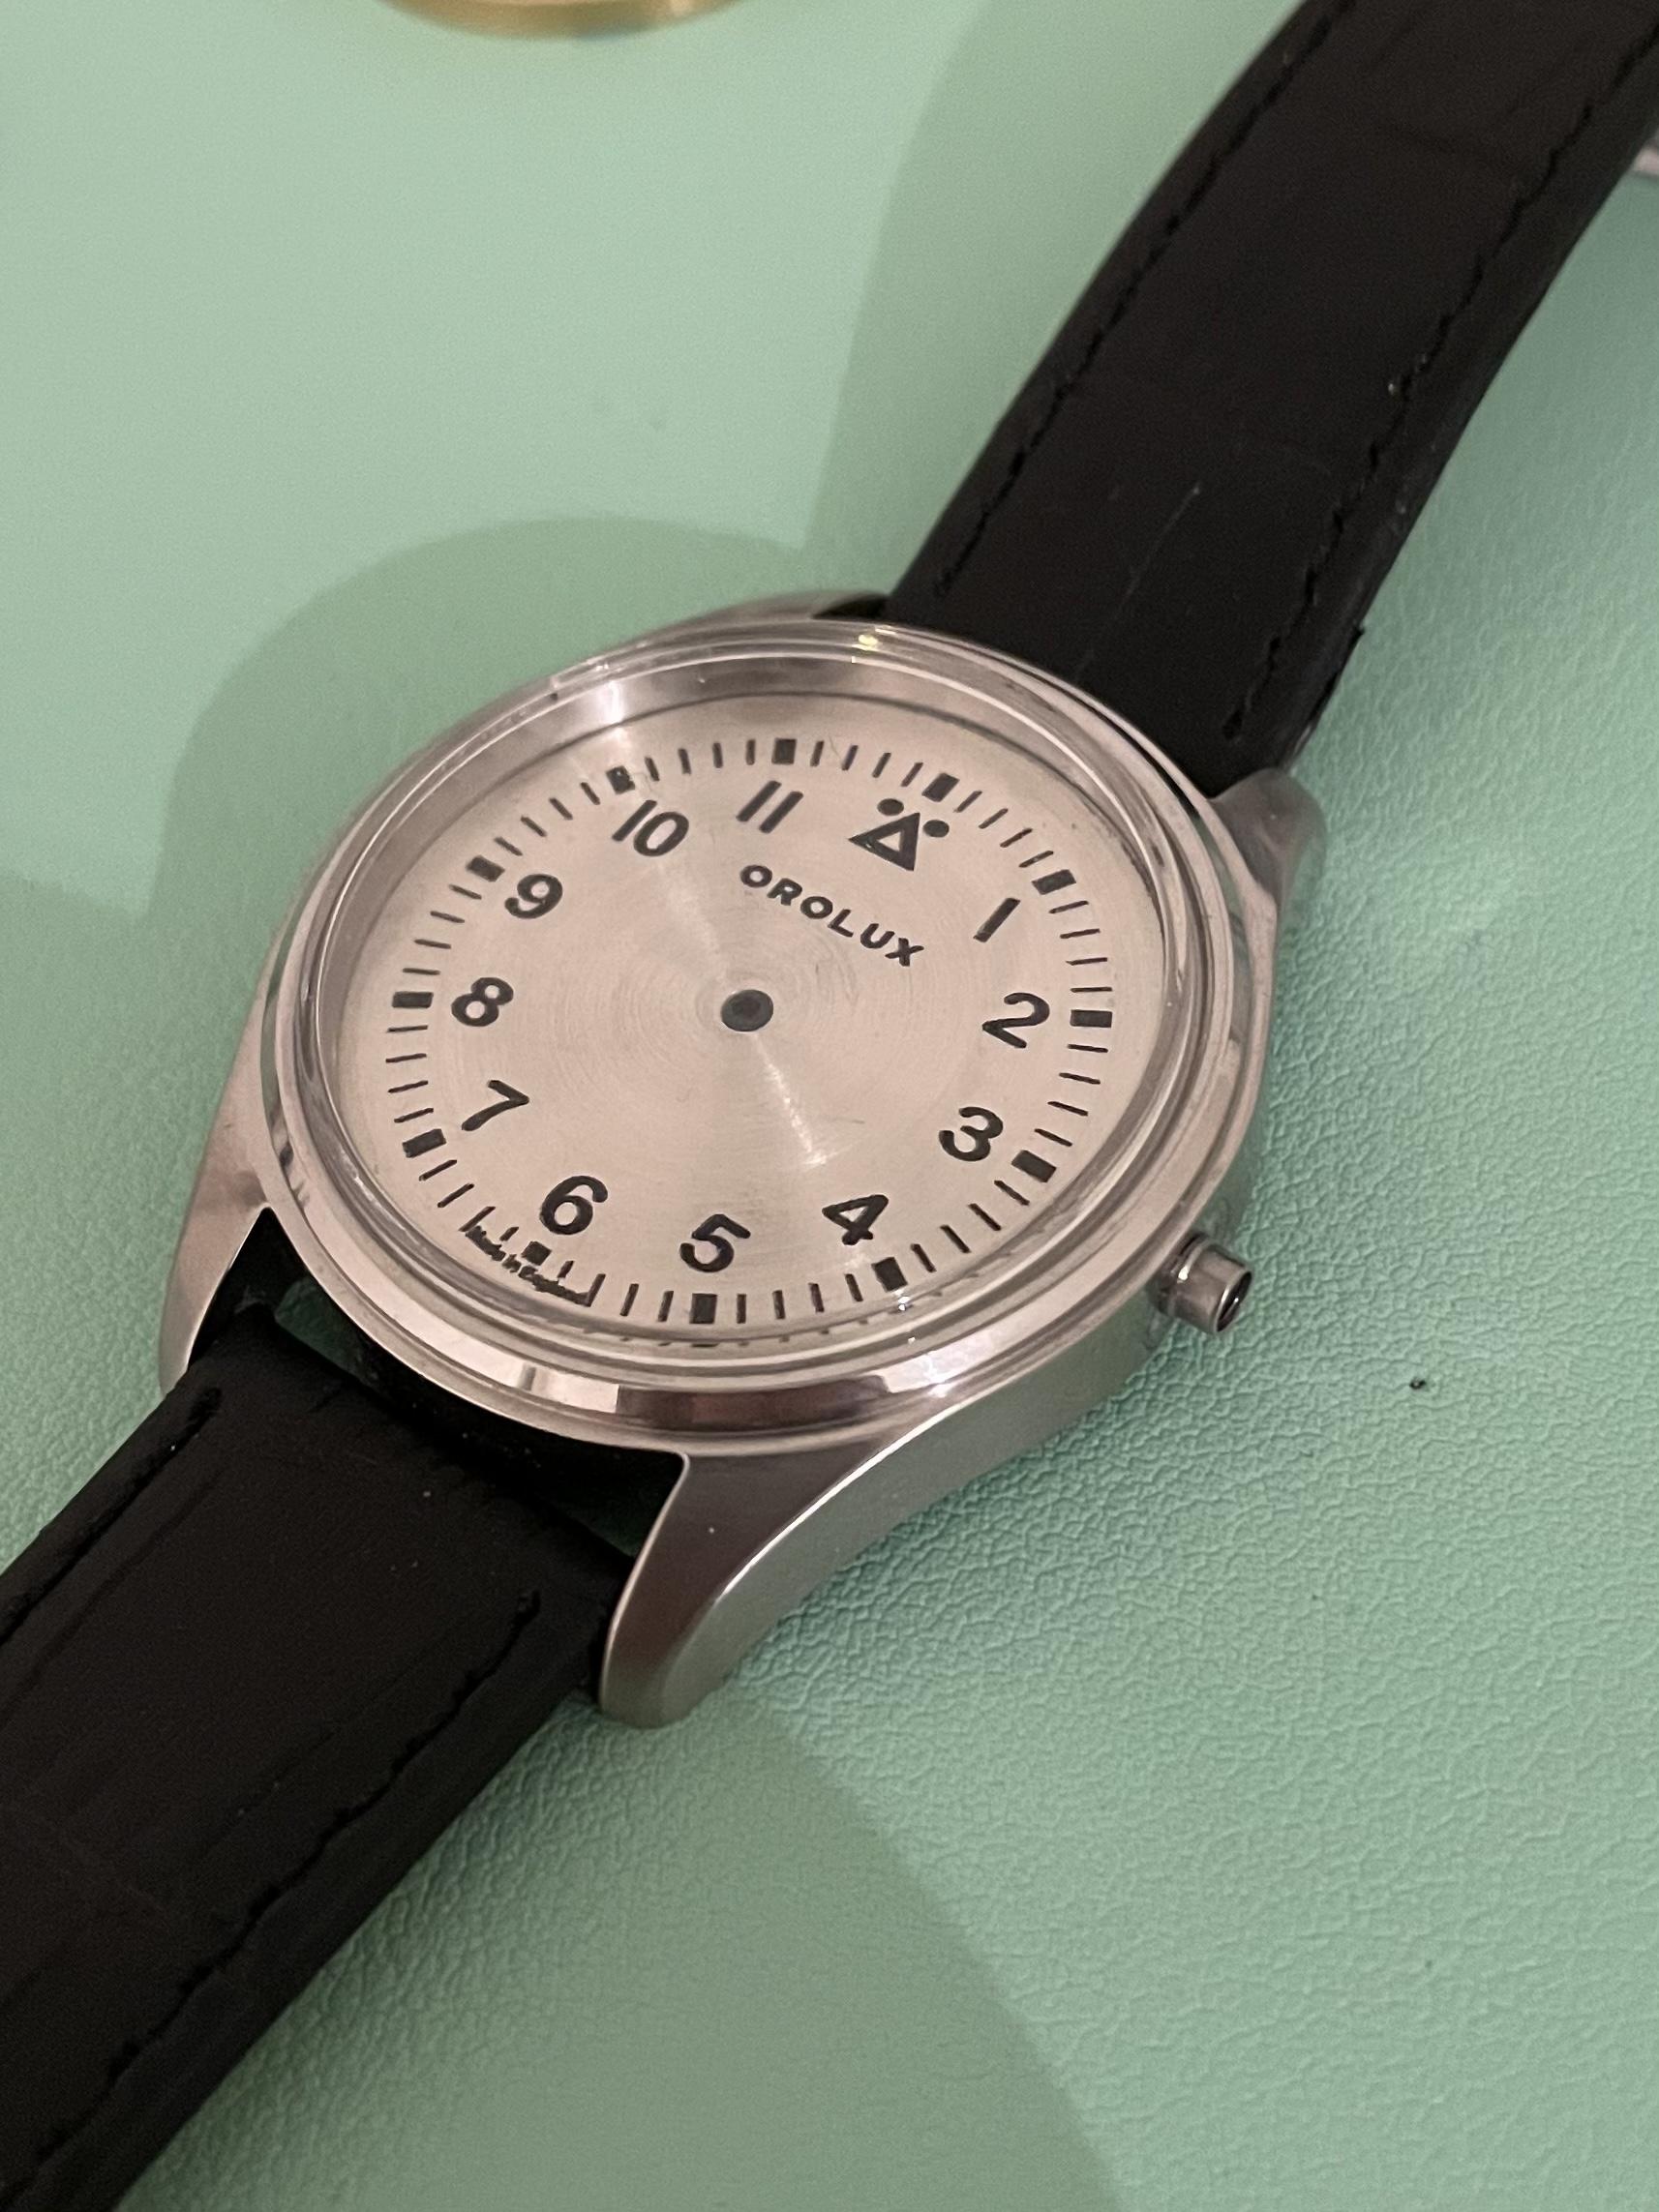
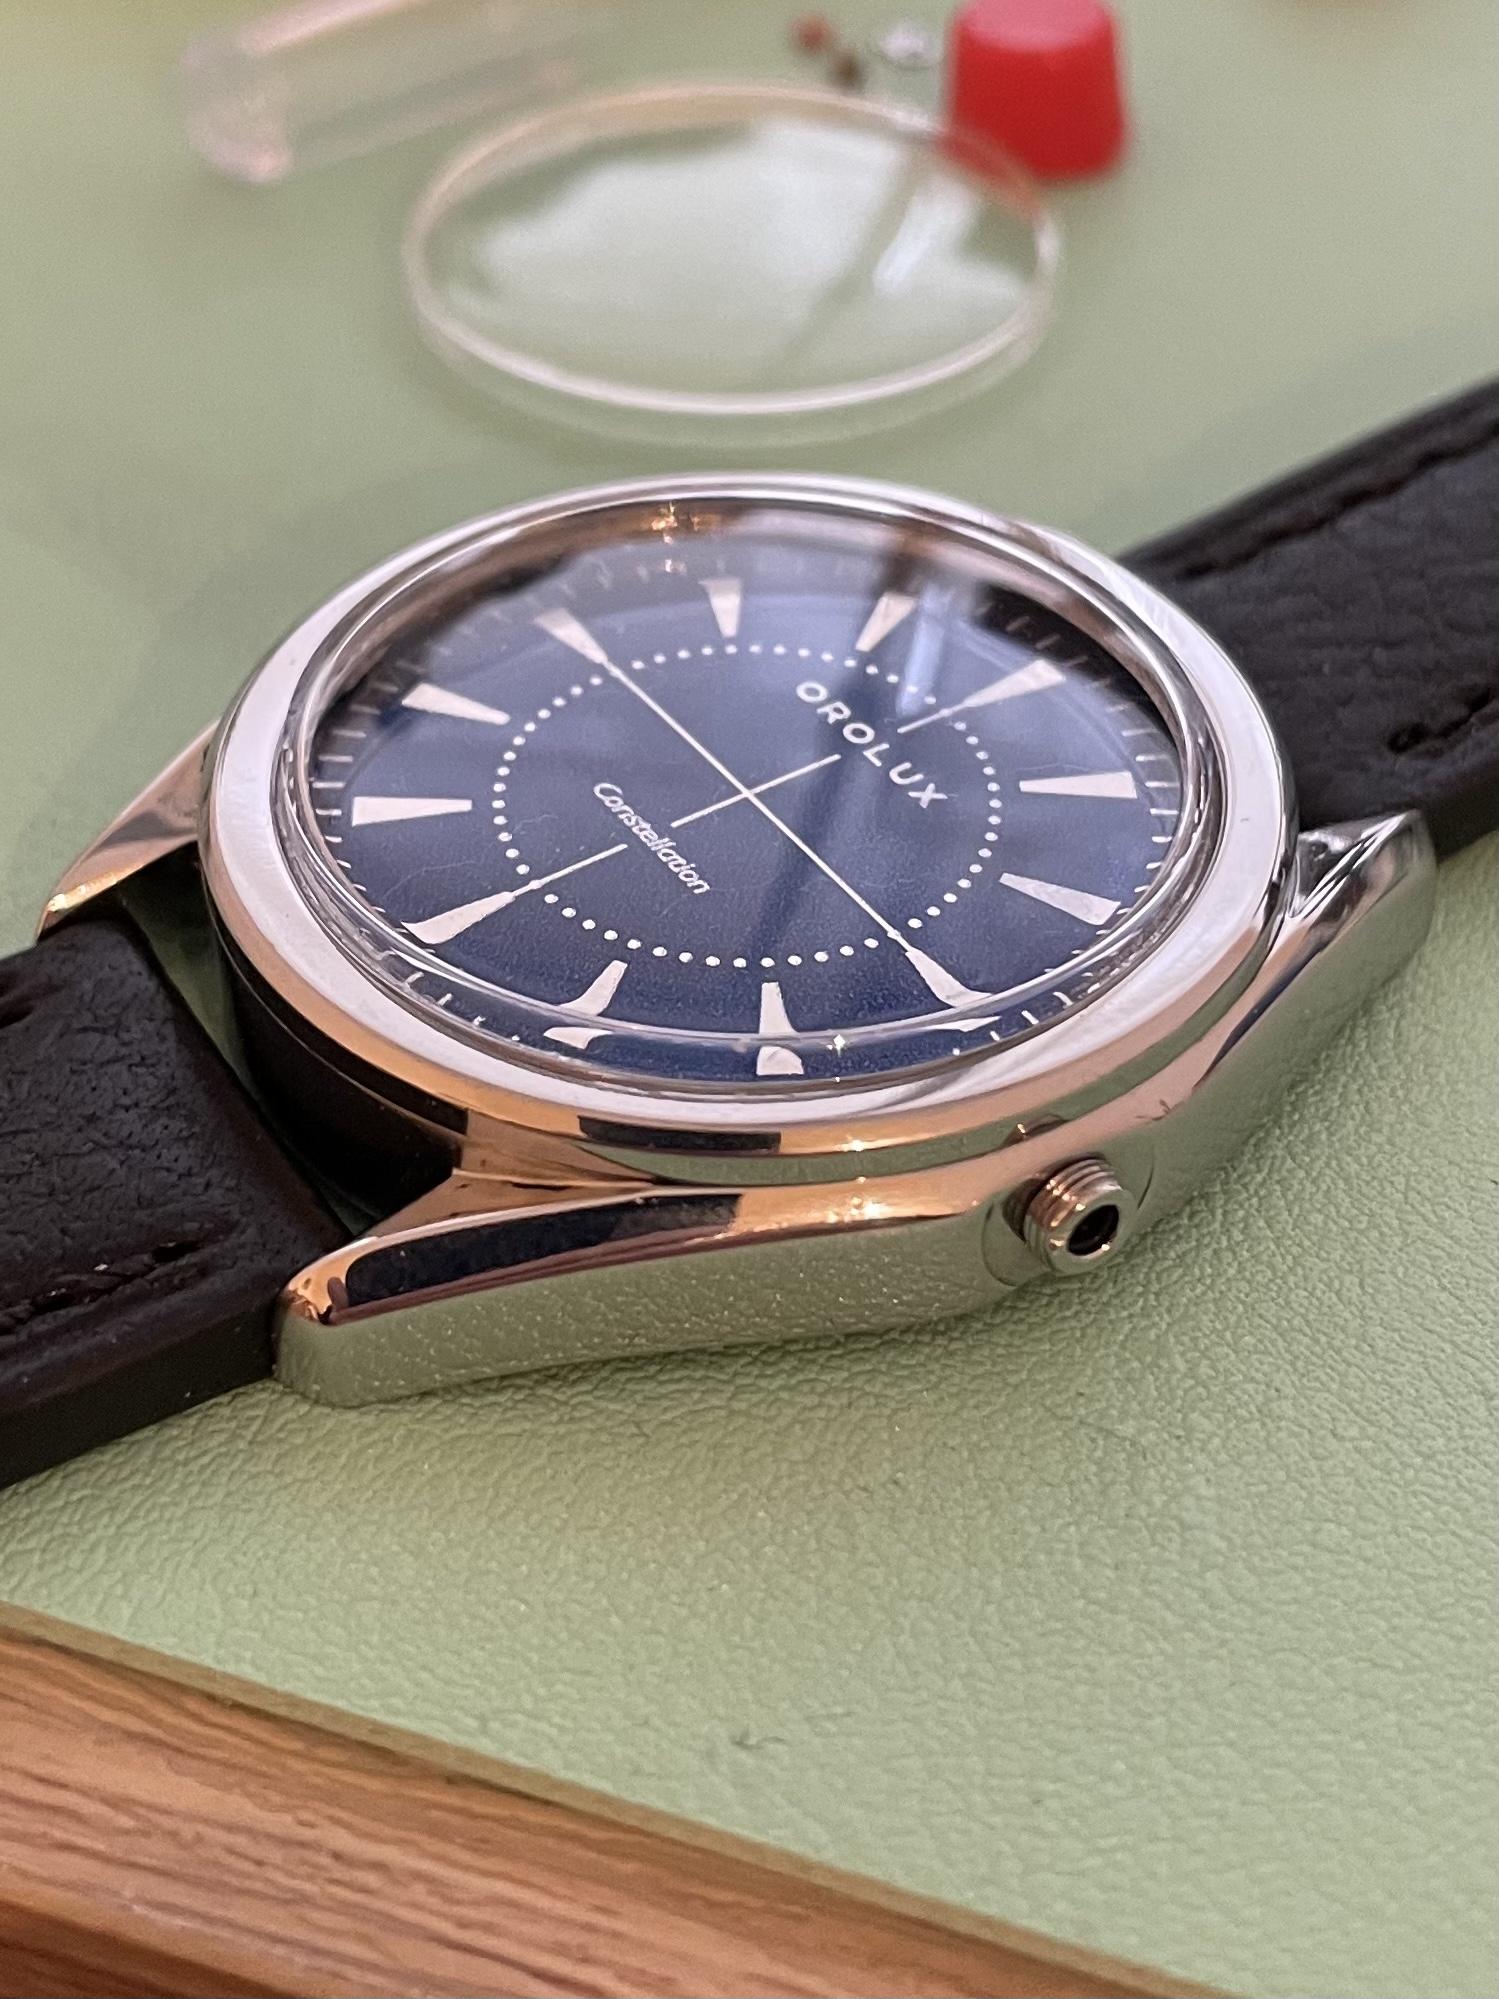
Had a bit of a play this afternoon with trying to achieve a spun dial finish (rather dangerously I fear). It inspired me to adapt an old design, and try something new. Comments and criticism are gratefully accepted as usual. Once again these are ‘fast and dirty’ proof of concept creations.
 1 point
 -
Thank you. That’s all the encouragement I needed. I’ll nickname it the Weasol. The OROLUX Weasol is done!

 1 point
 -
1 point
-
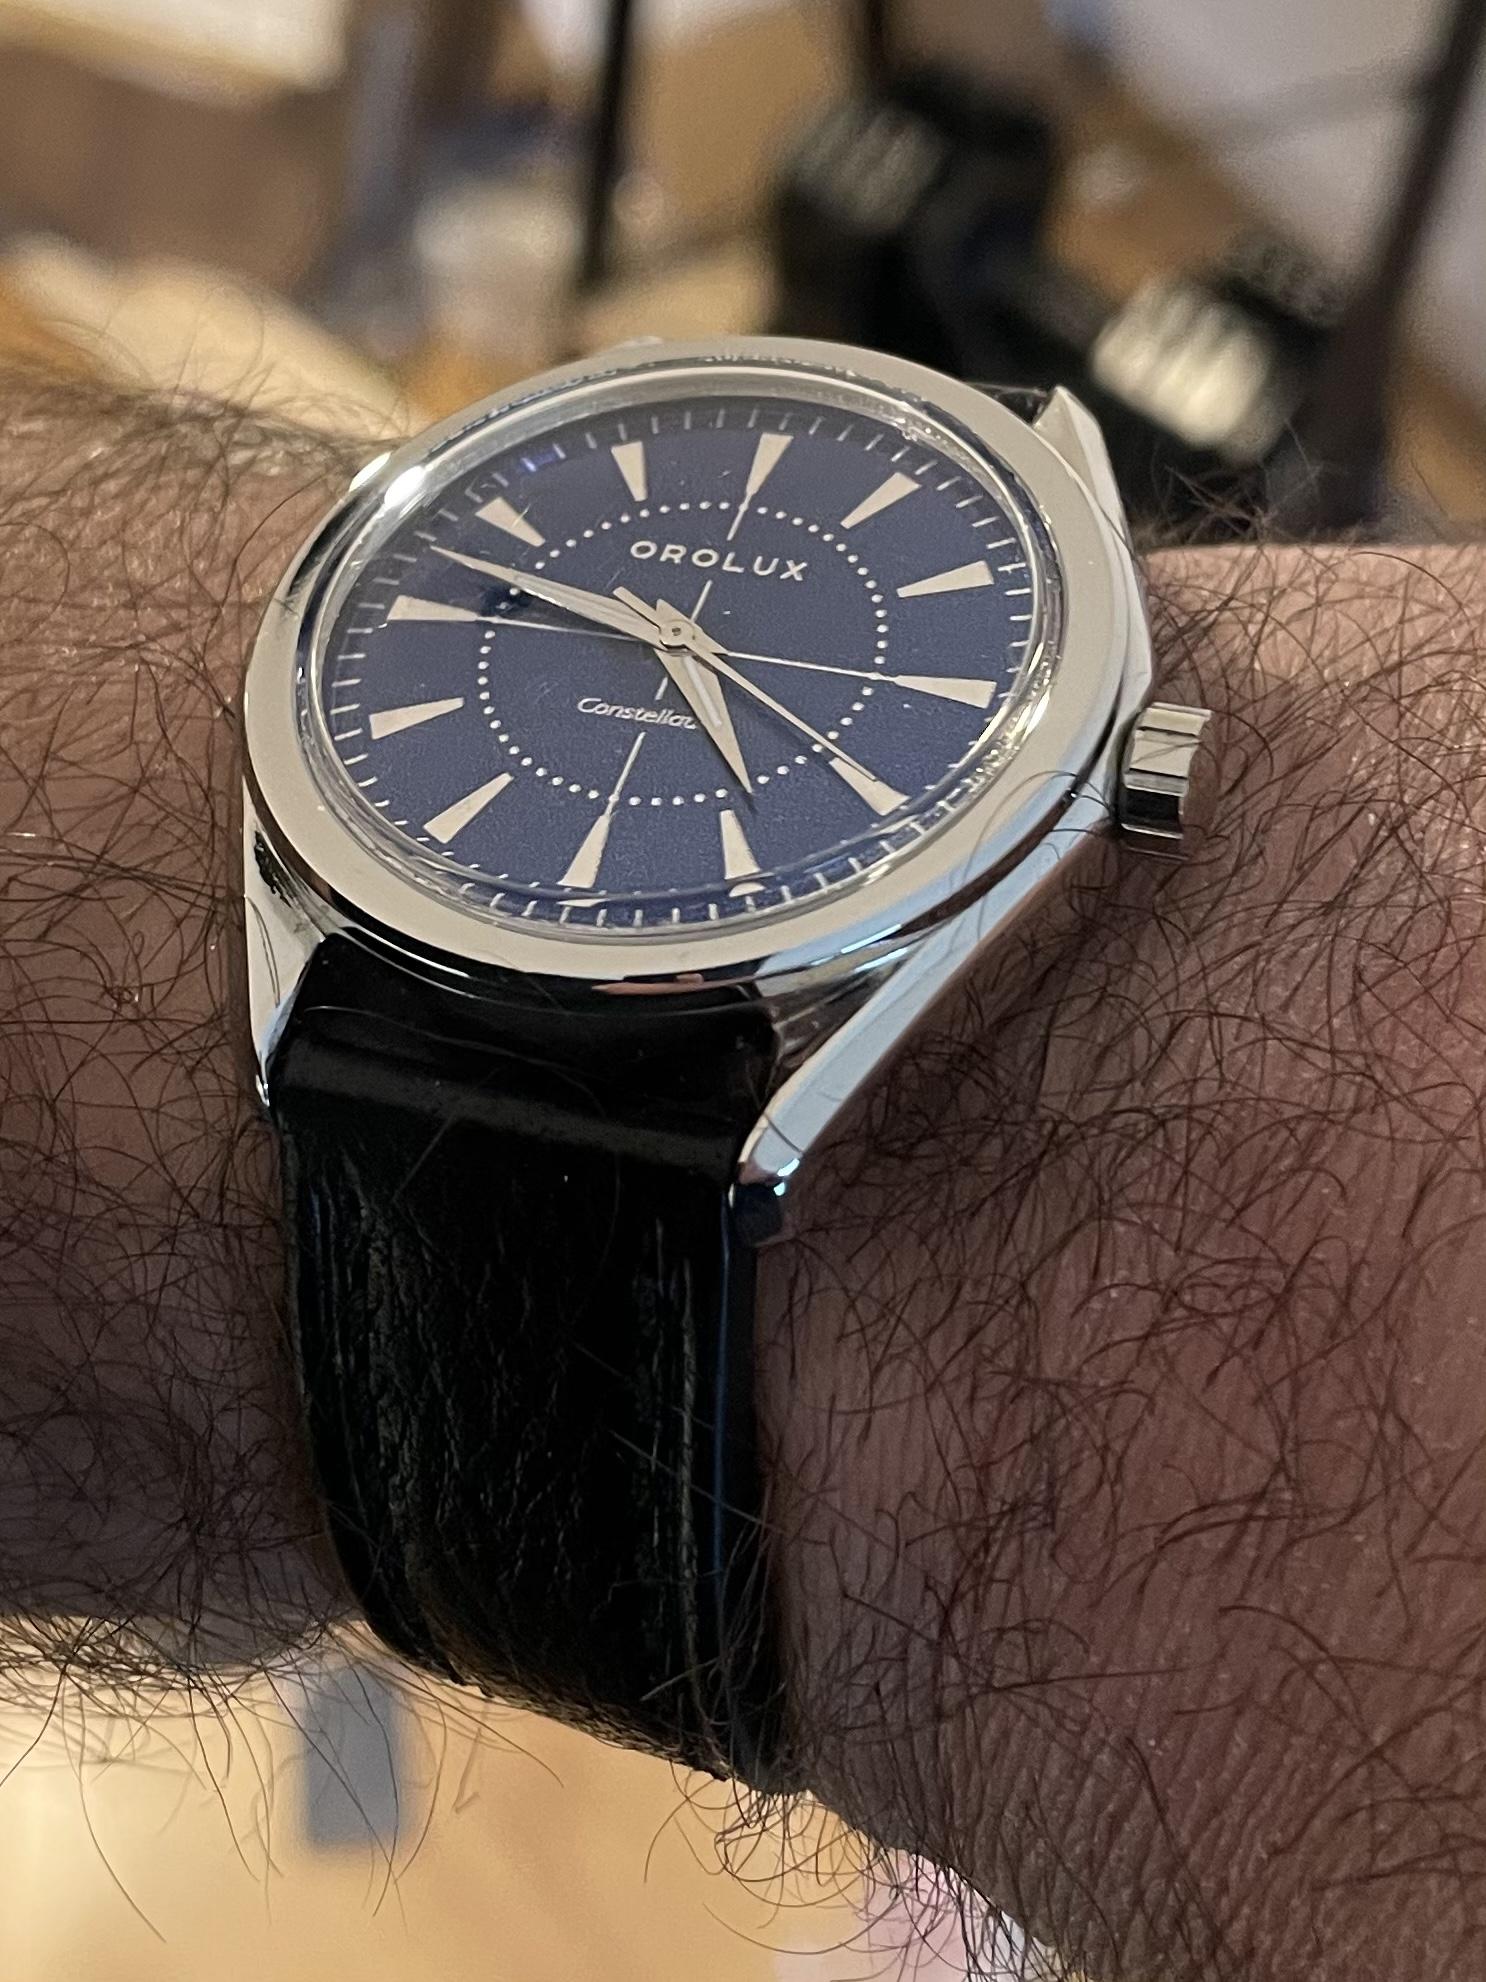
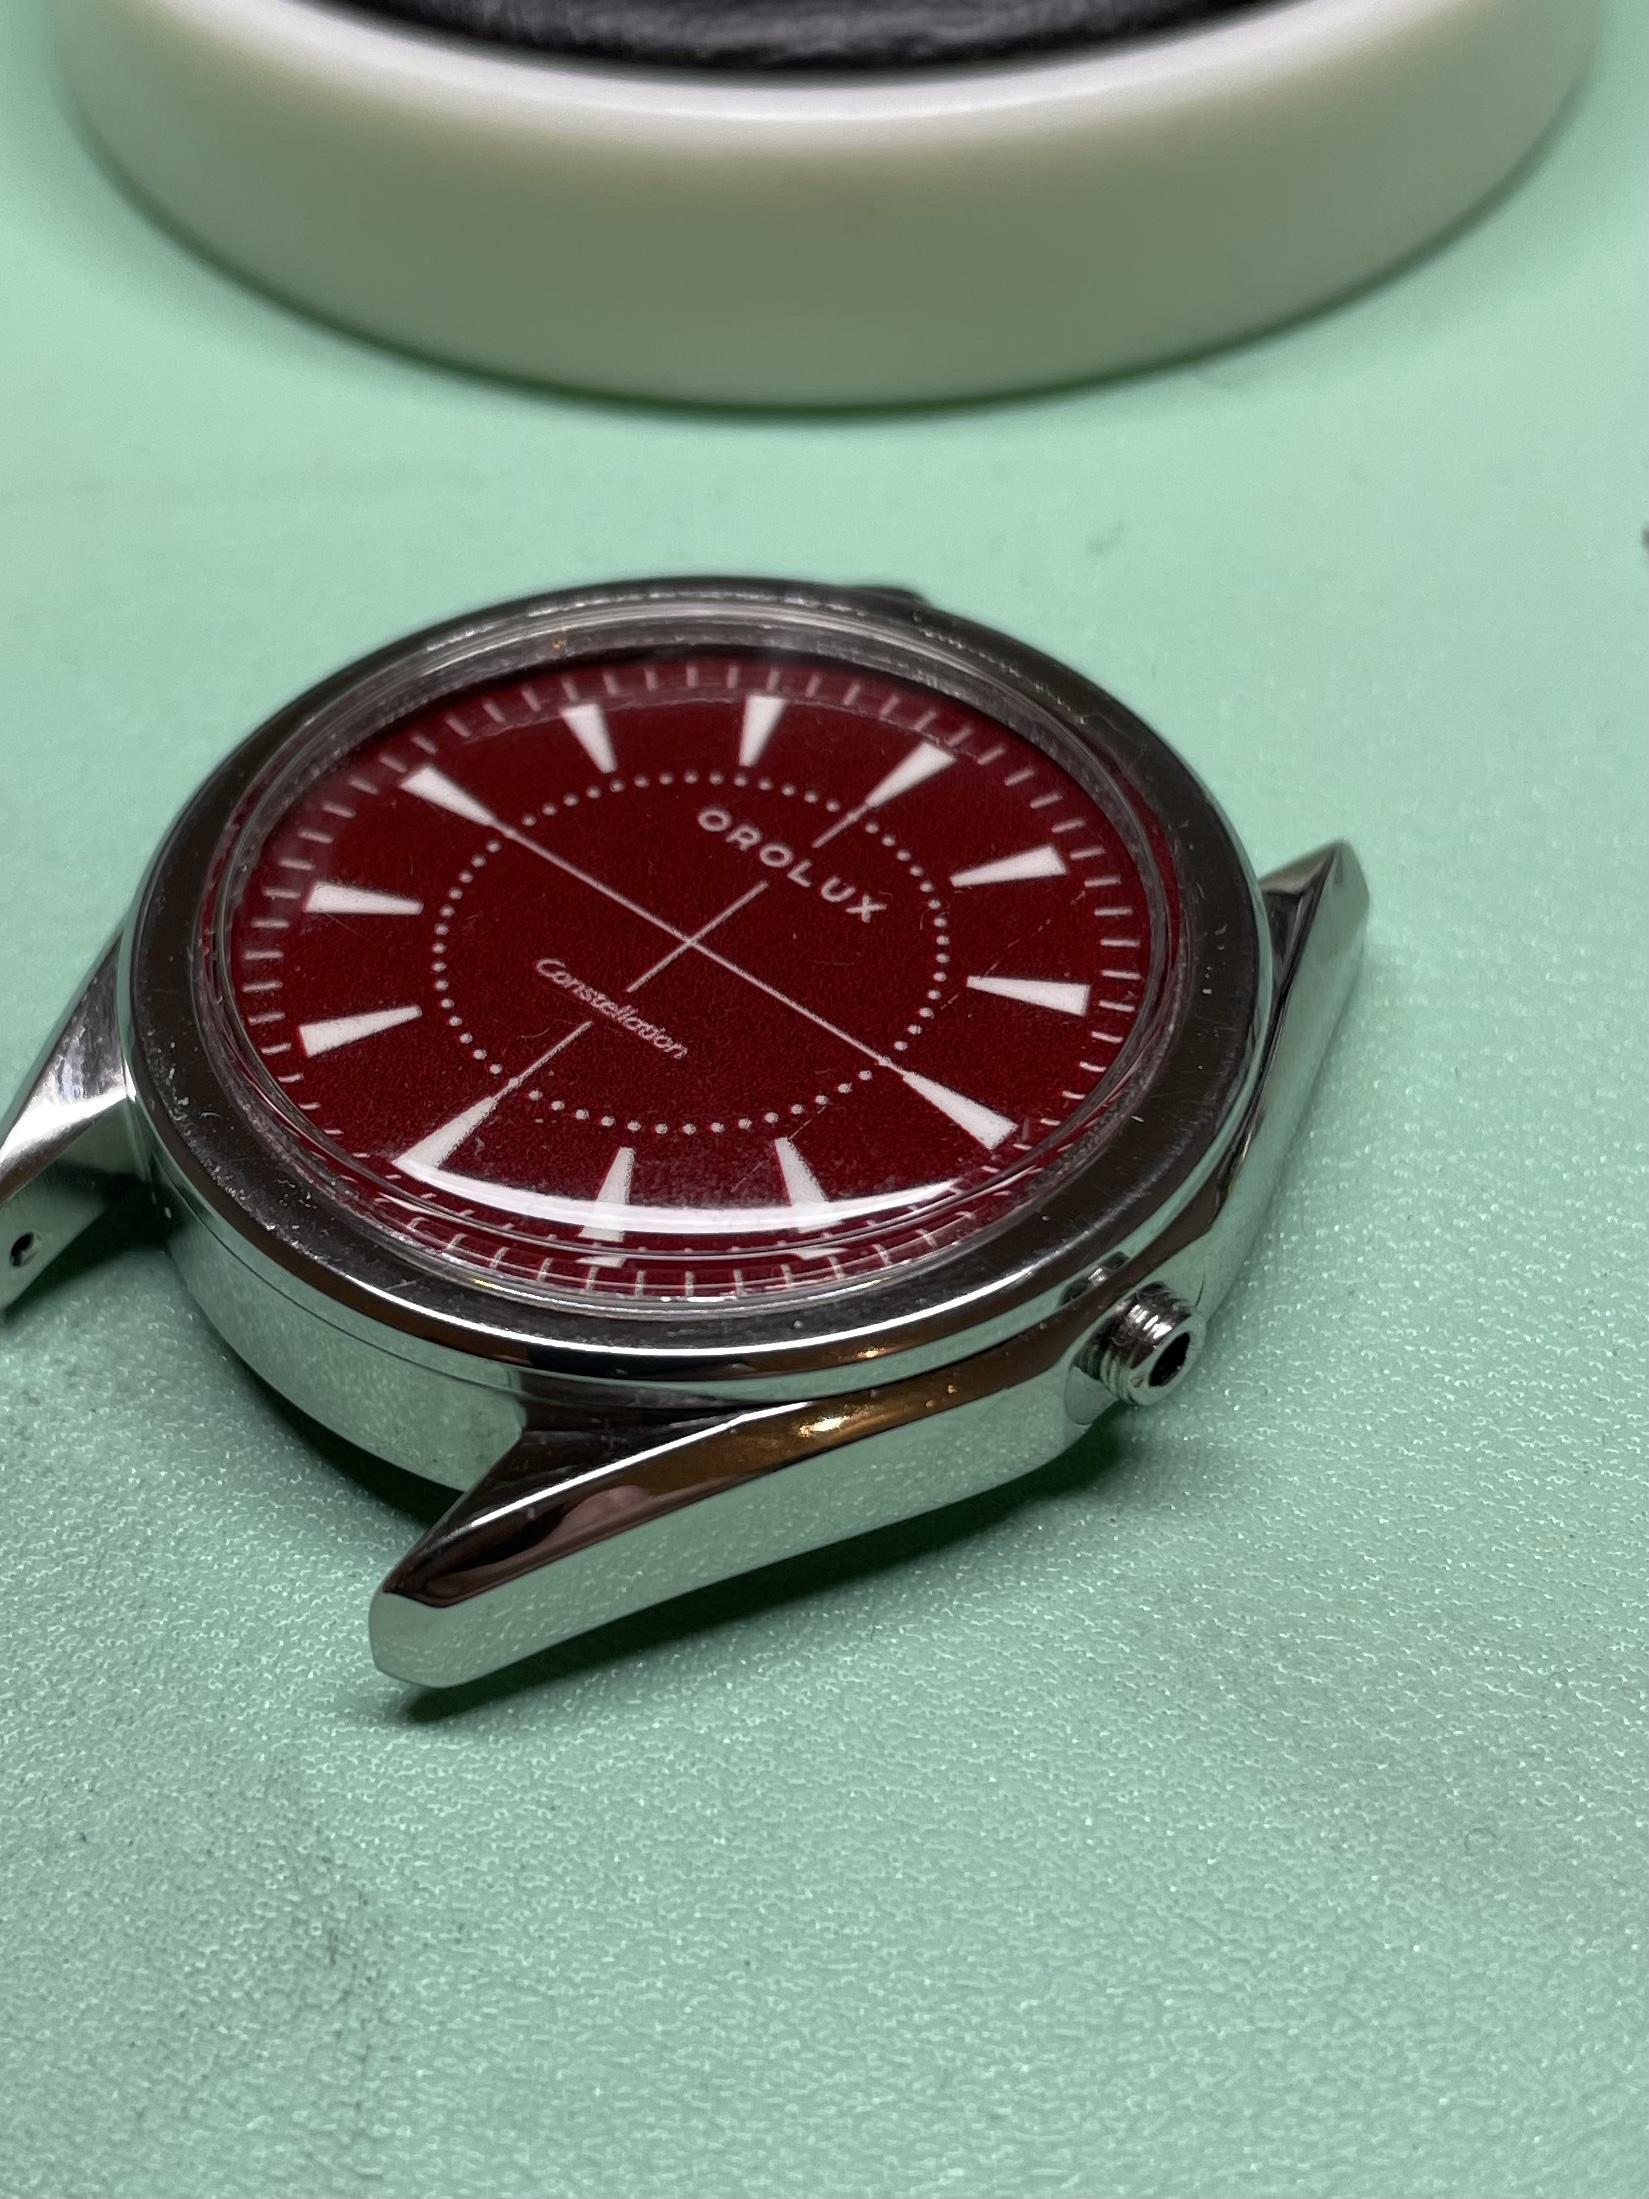
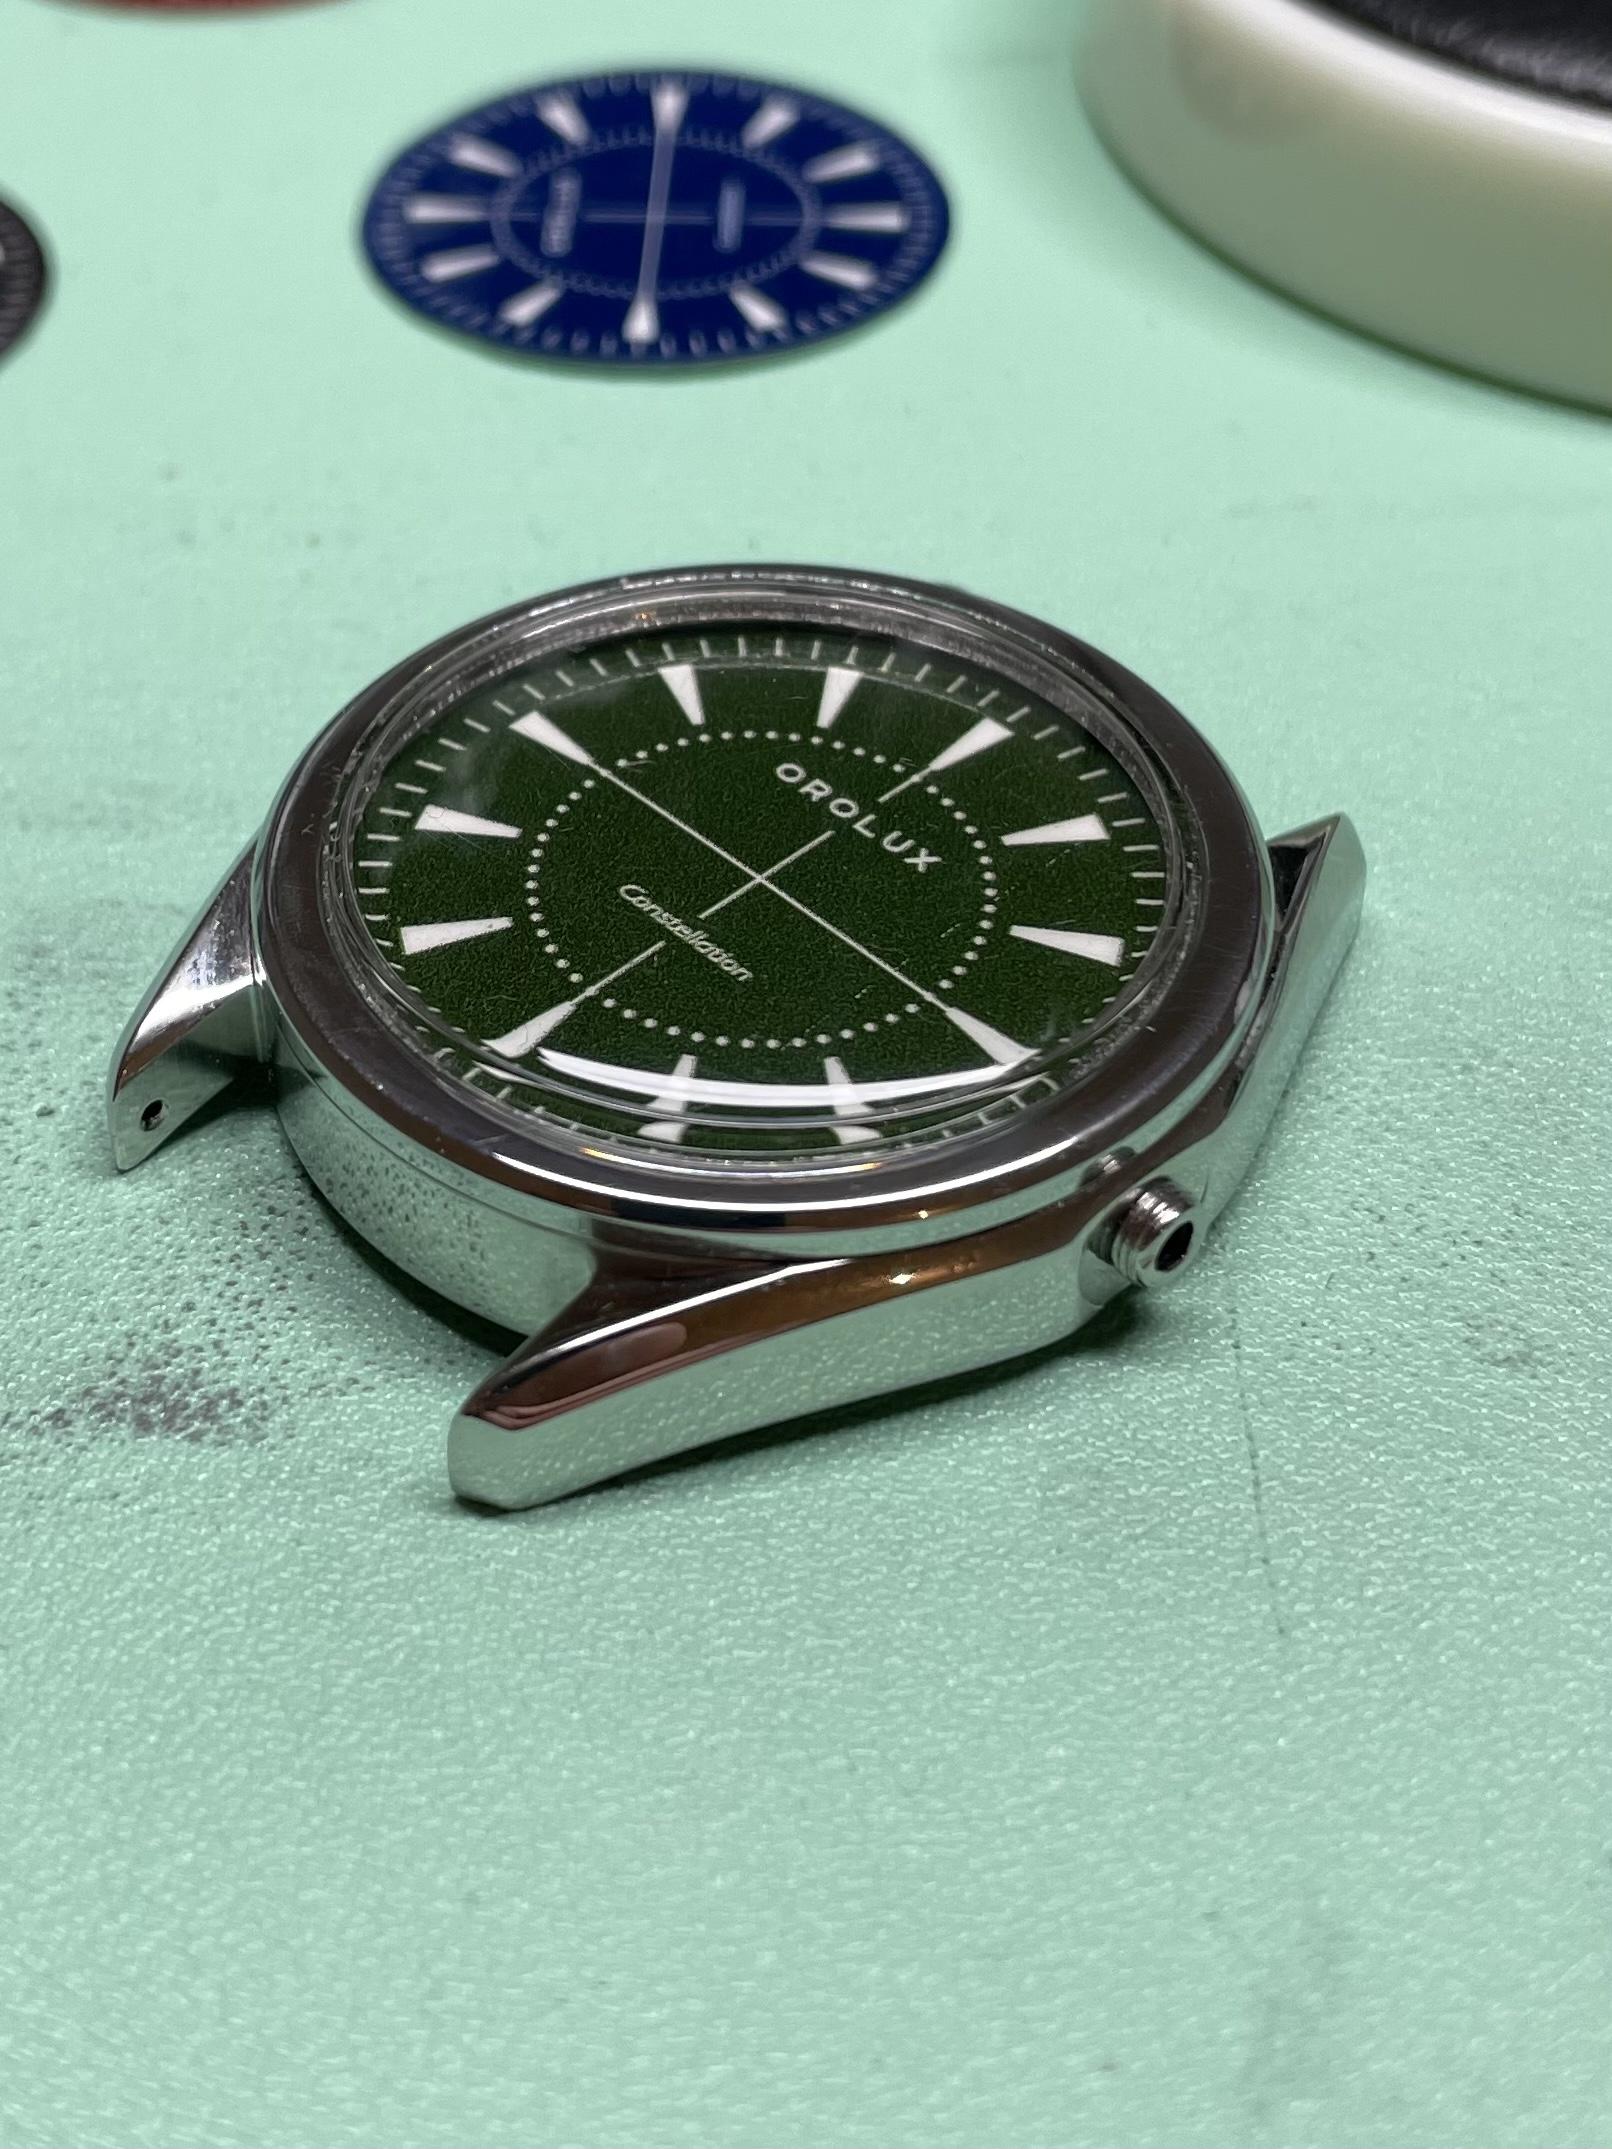
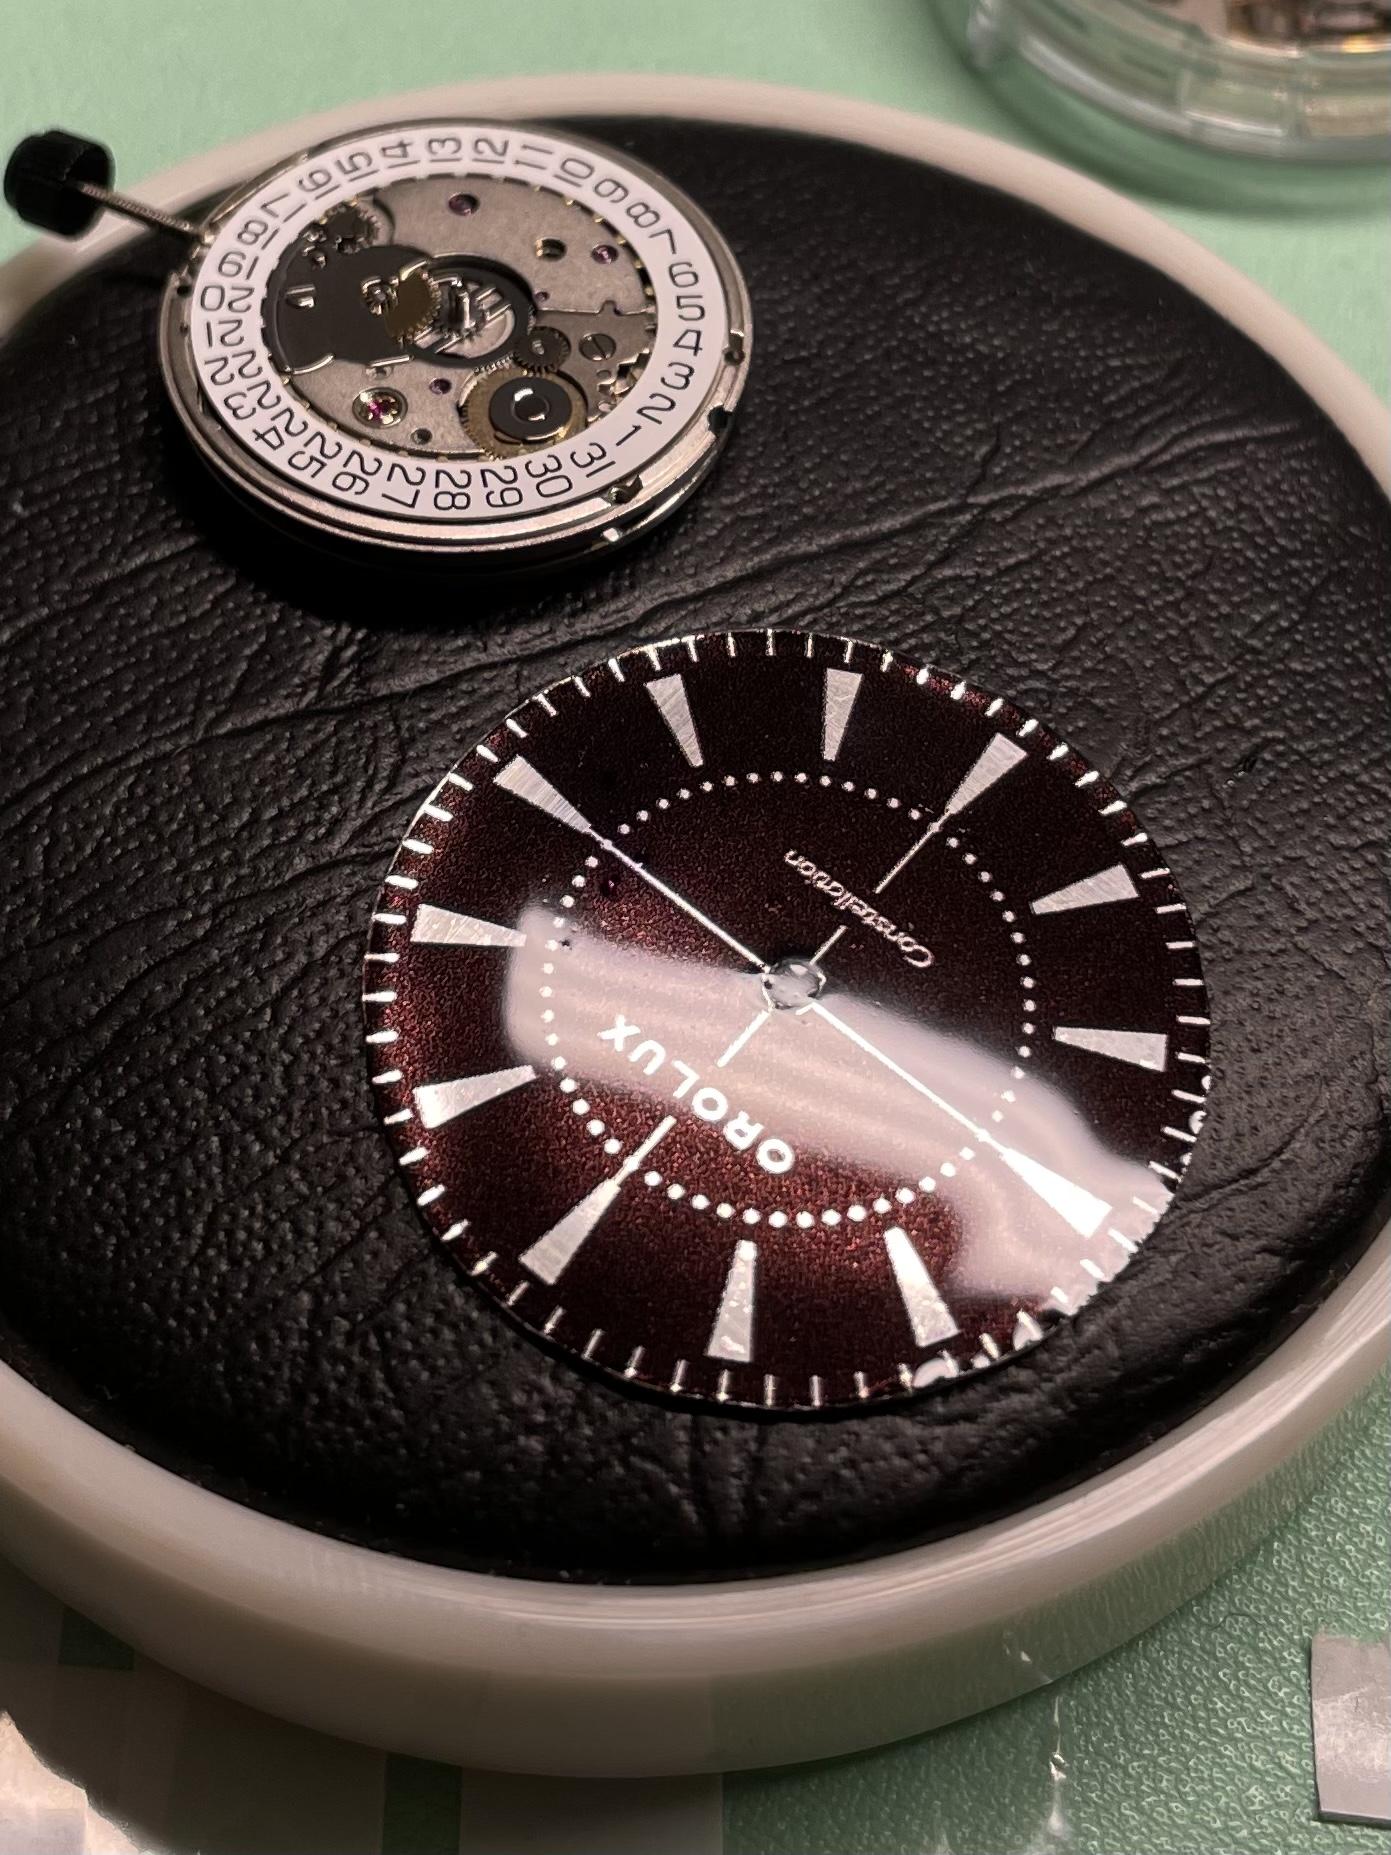
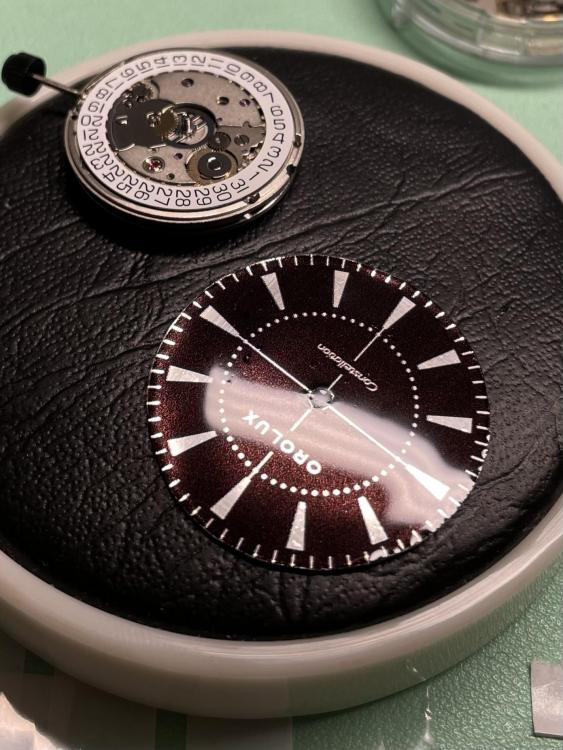
Decided on making a gilt relief dial in the blue and I think it’s a vast improvement. Please let me know your thoughts? I’ll probably keep posting until someone tells me to shut up, so if the thread is getting a little tired please also let me know.

 1 point
 -
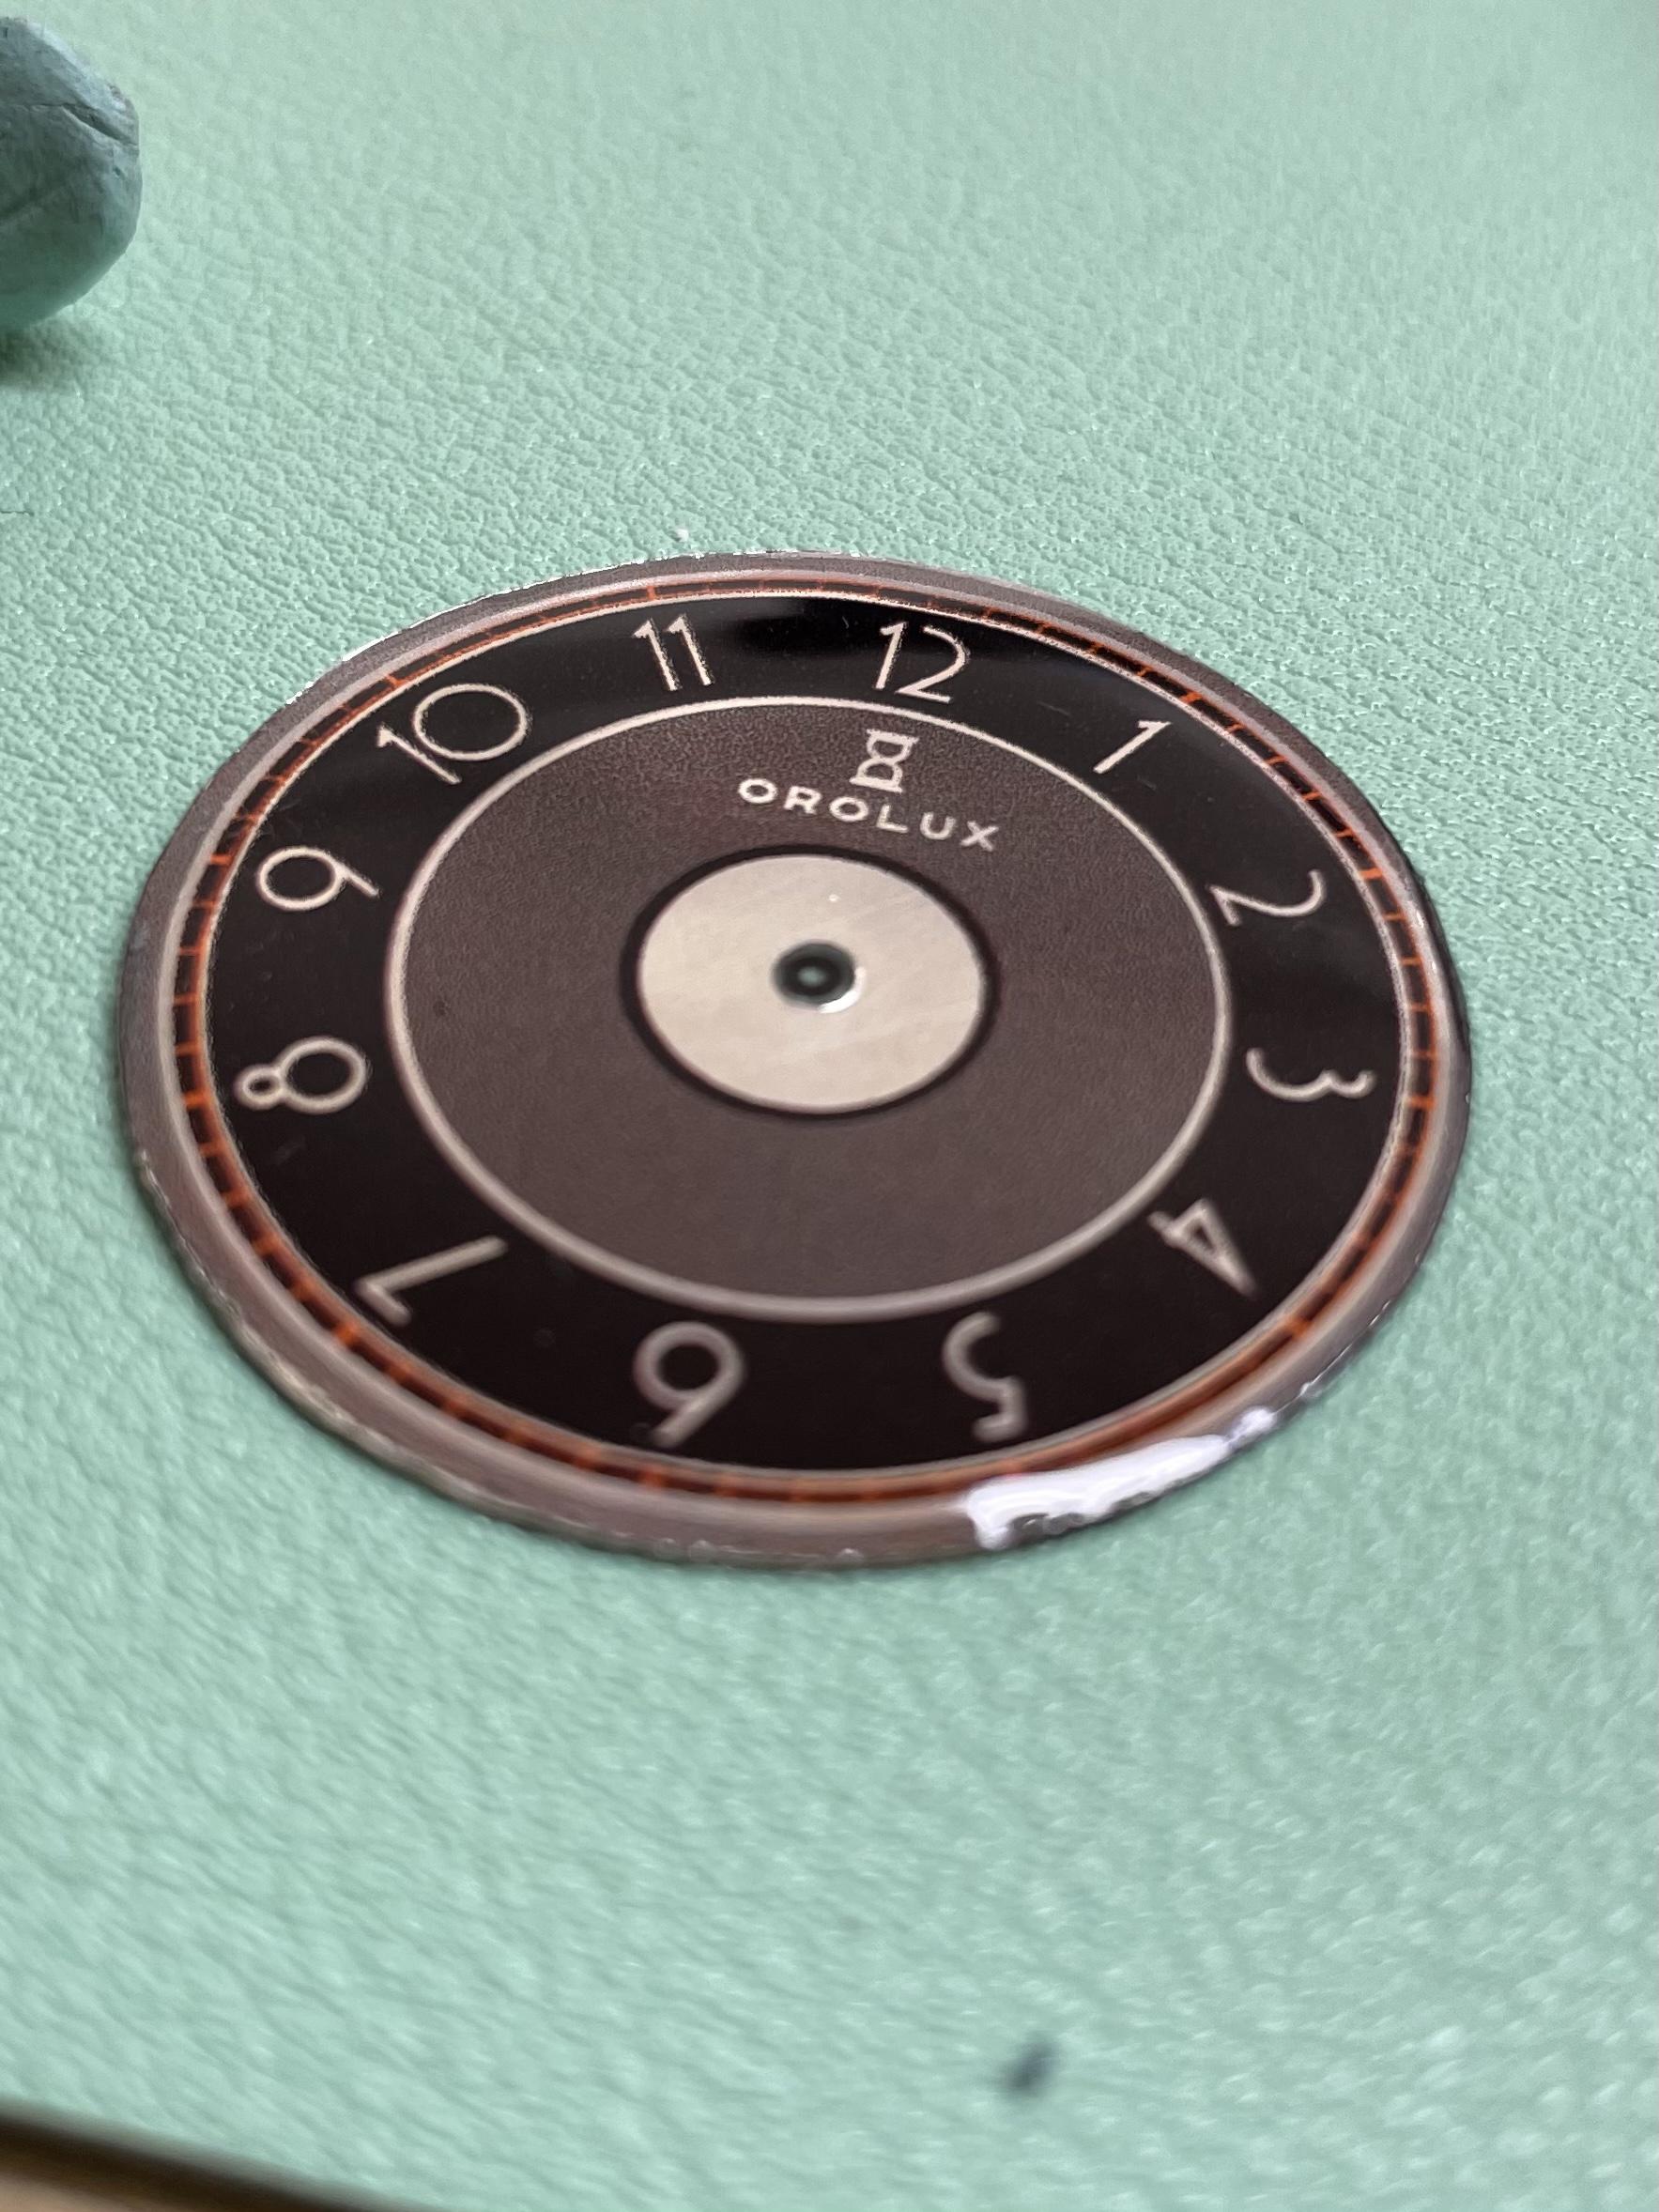
Test colours....

 1 point
 -
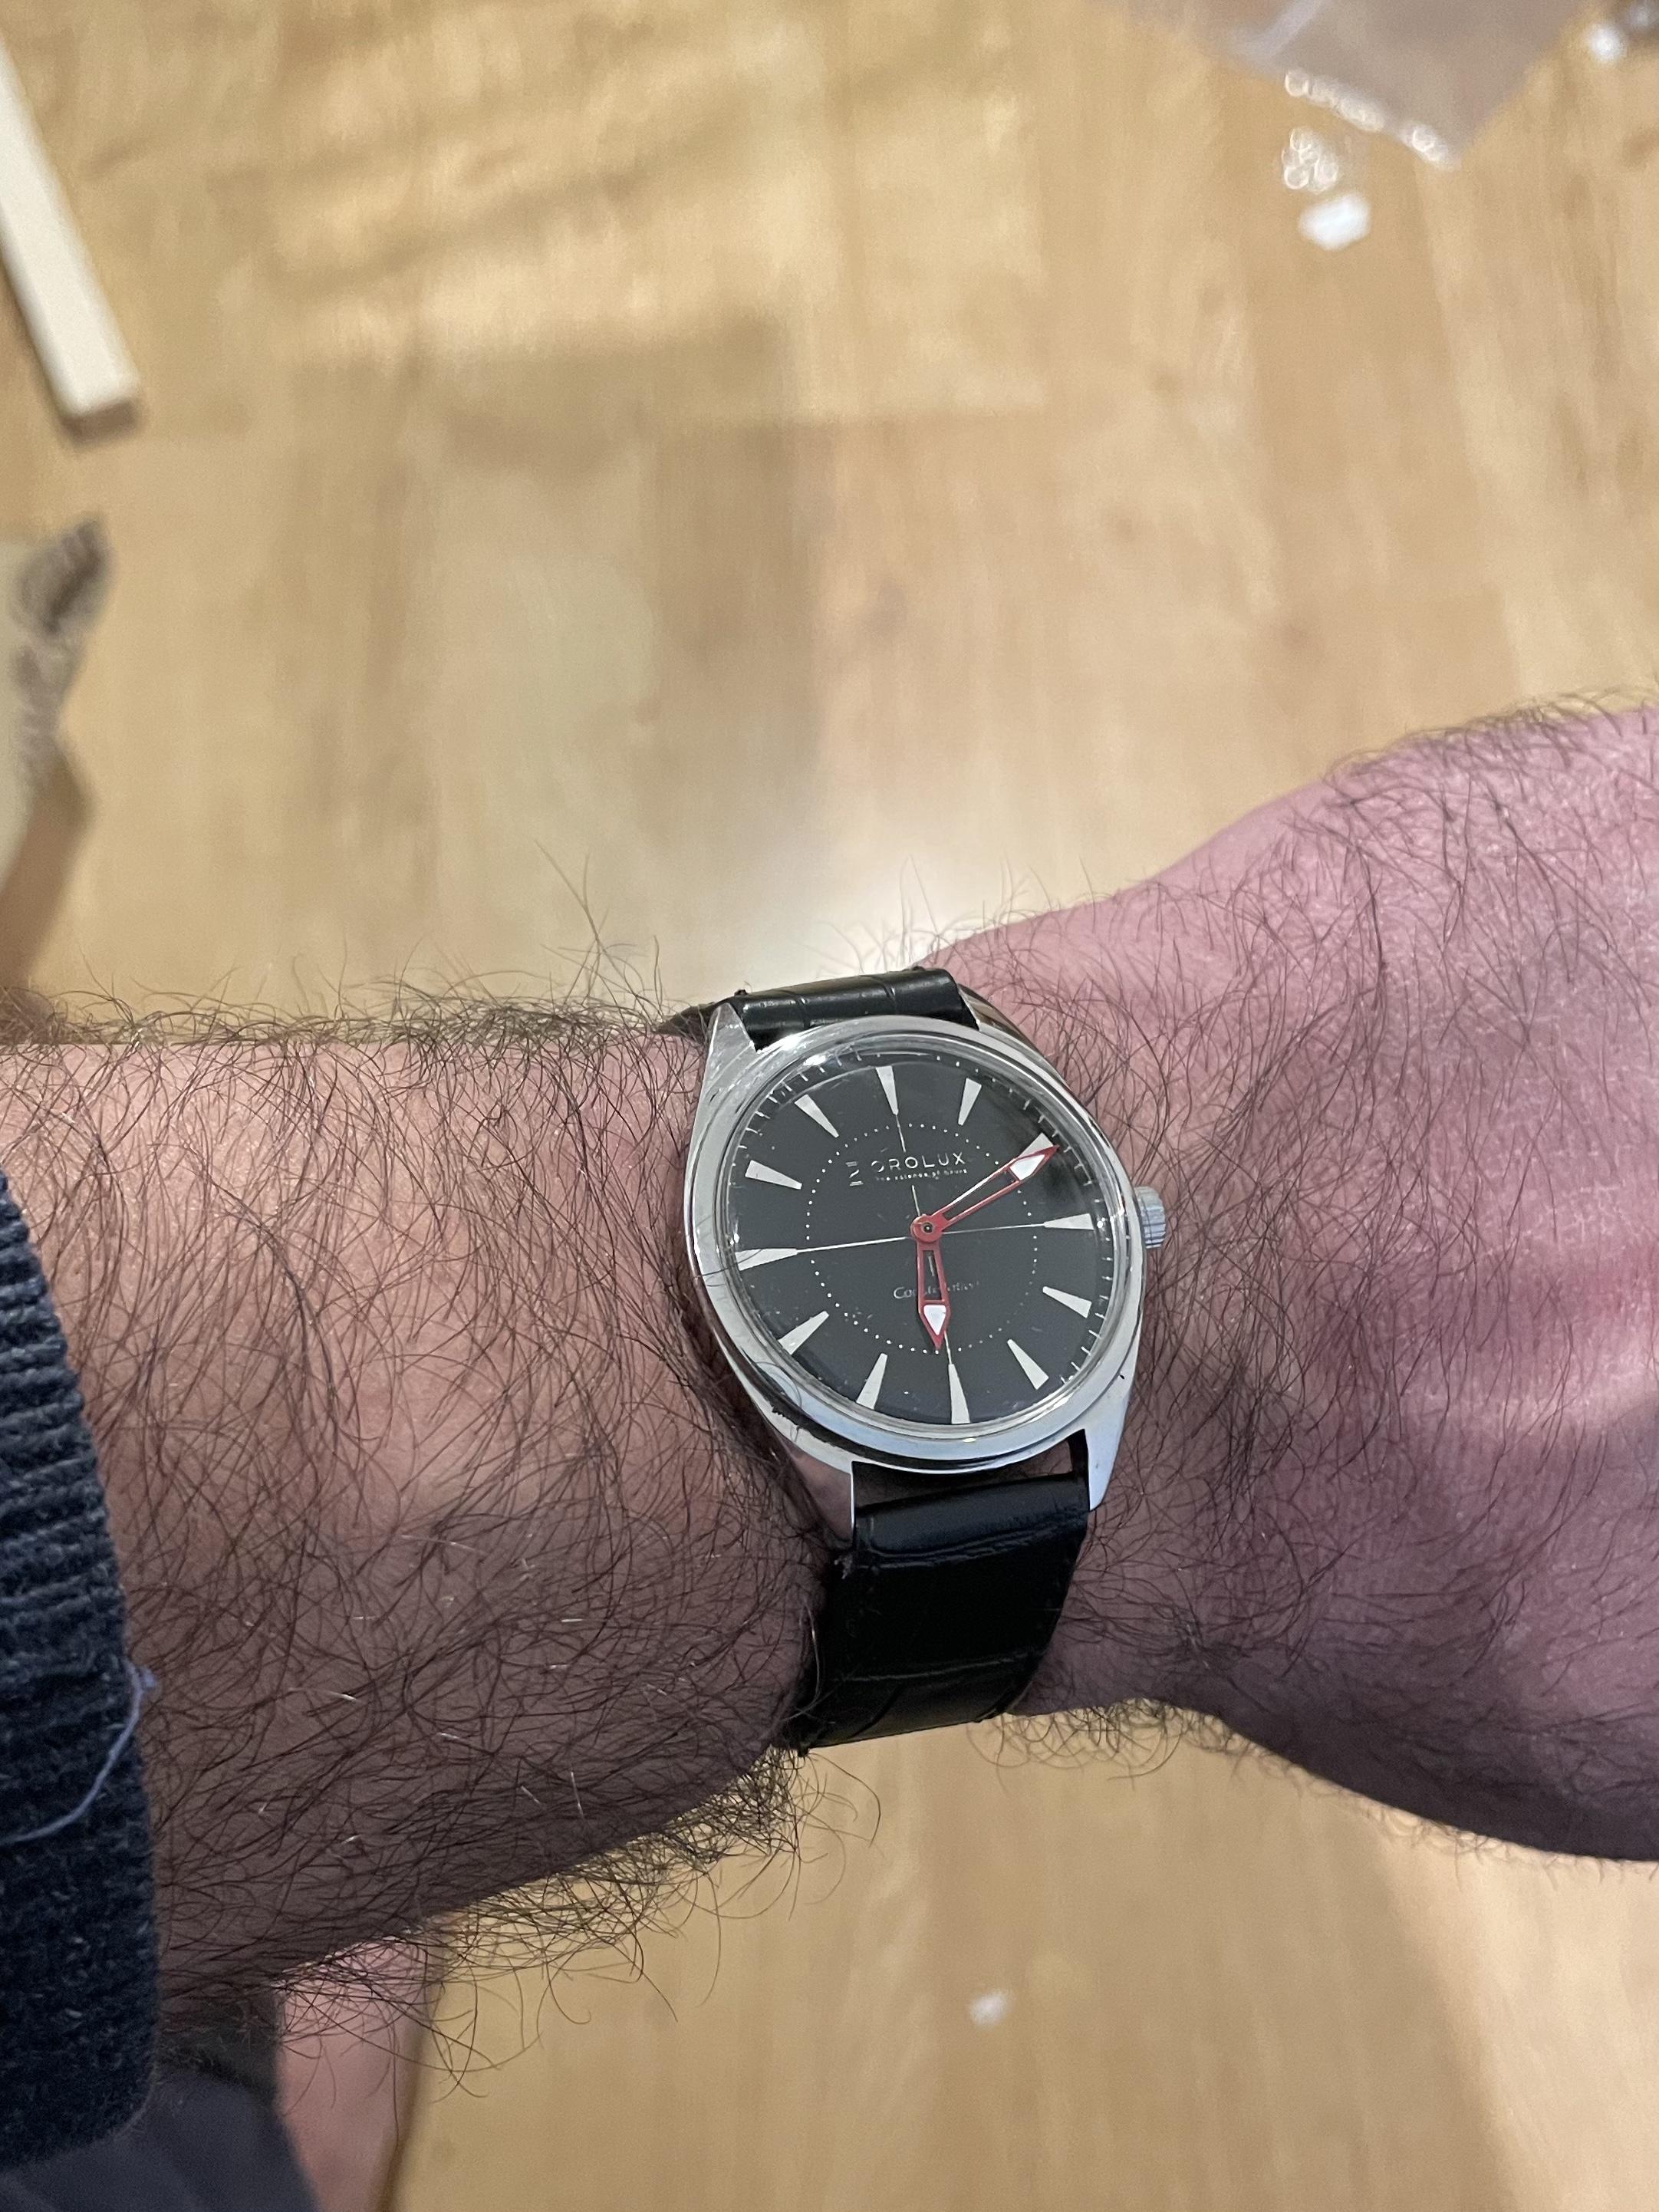
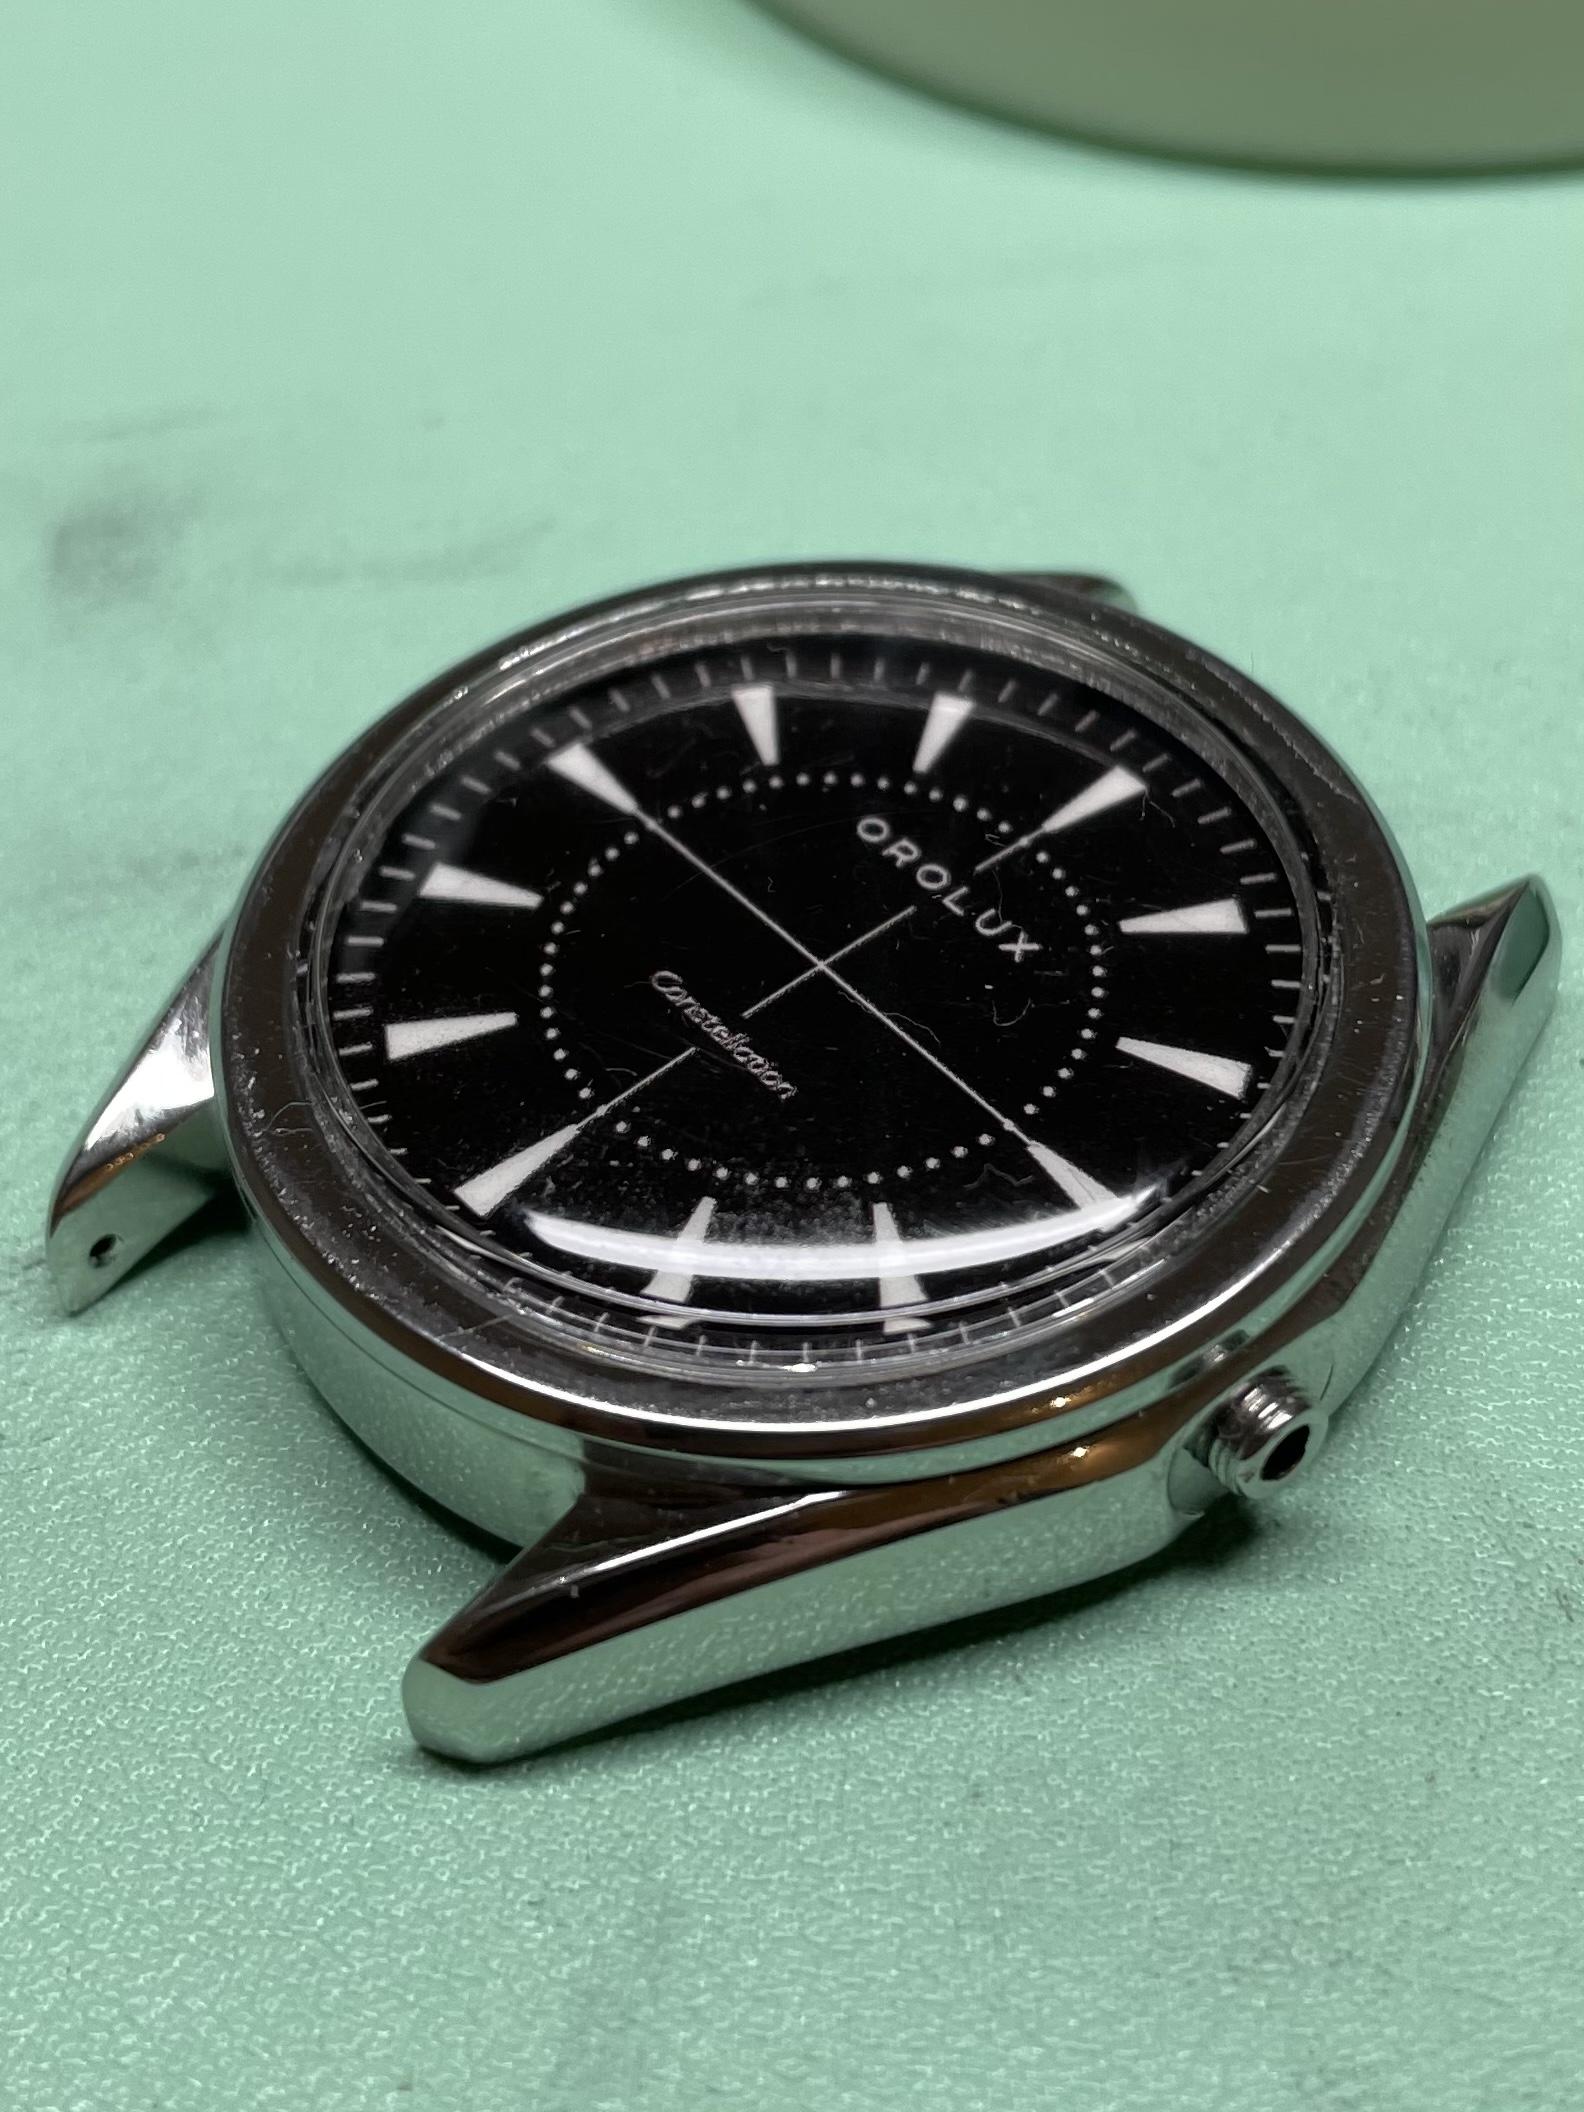
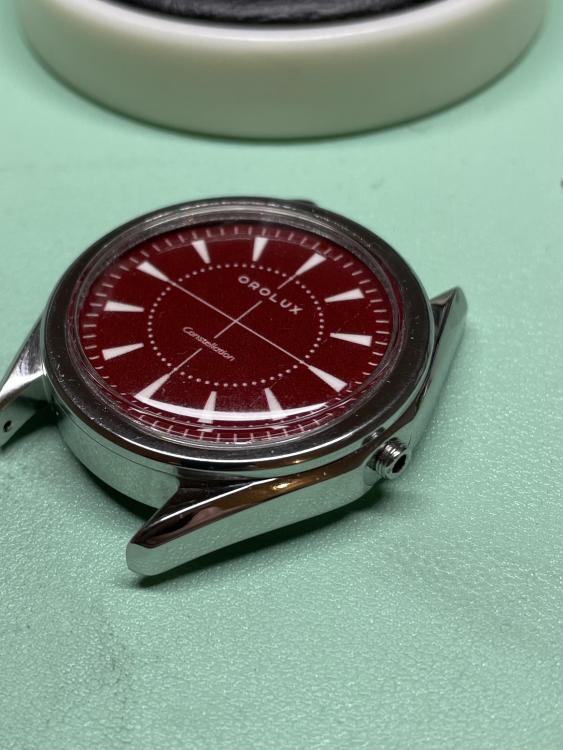
Update for anyone that hasn’t been put to sleep by my continued post. I finished the black watch and had been happily wearing it, but something wasn’t right. So I made some adjustments to the dial design, and at the same time decided to try some more colours.

 1 point
 -
1 point
-
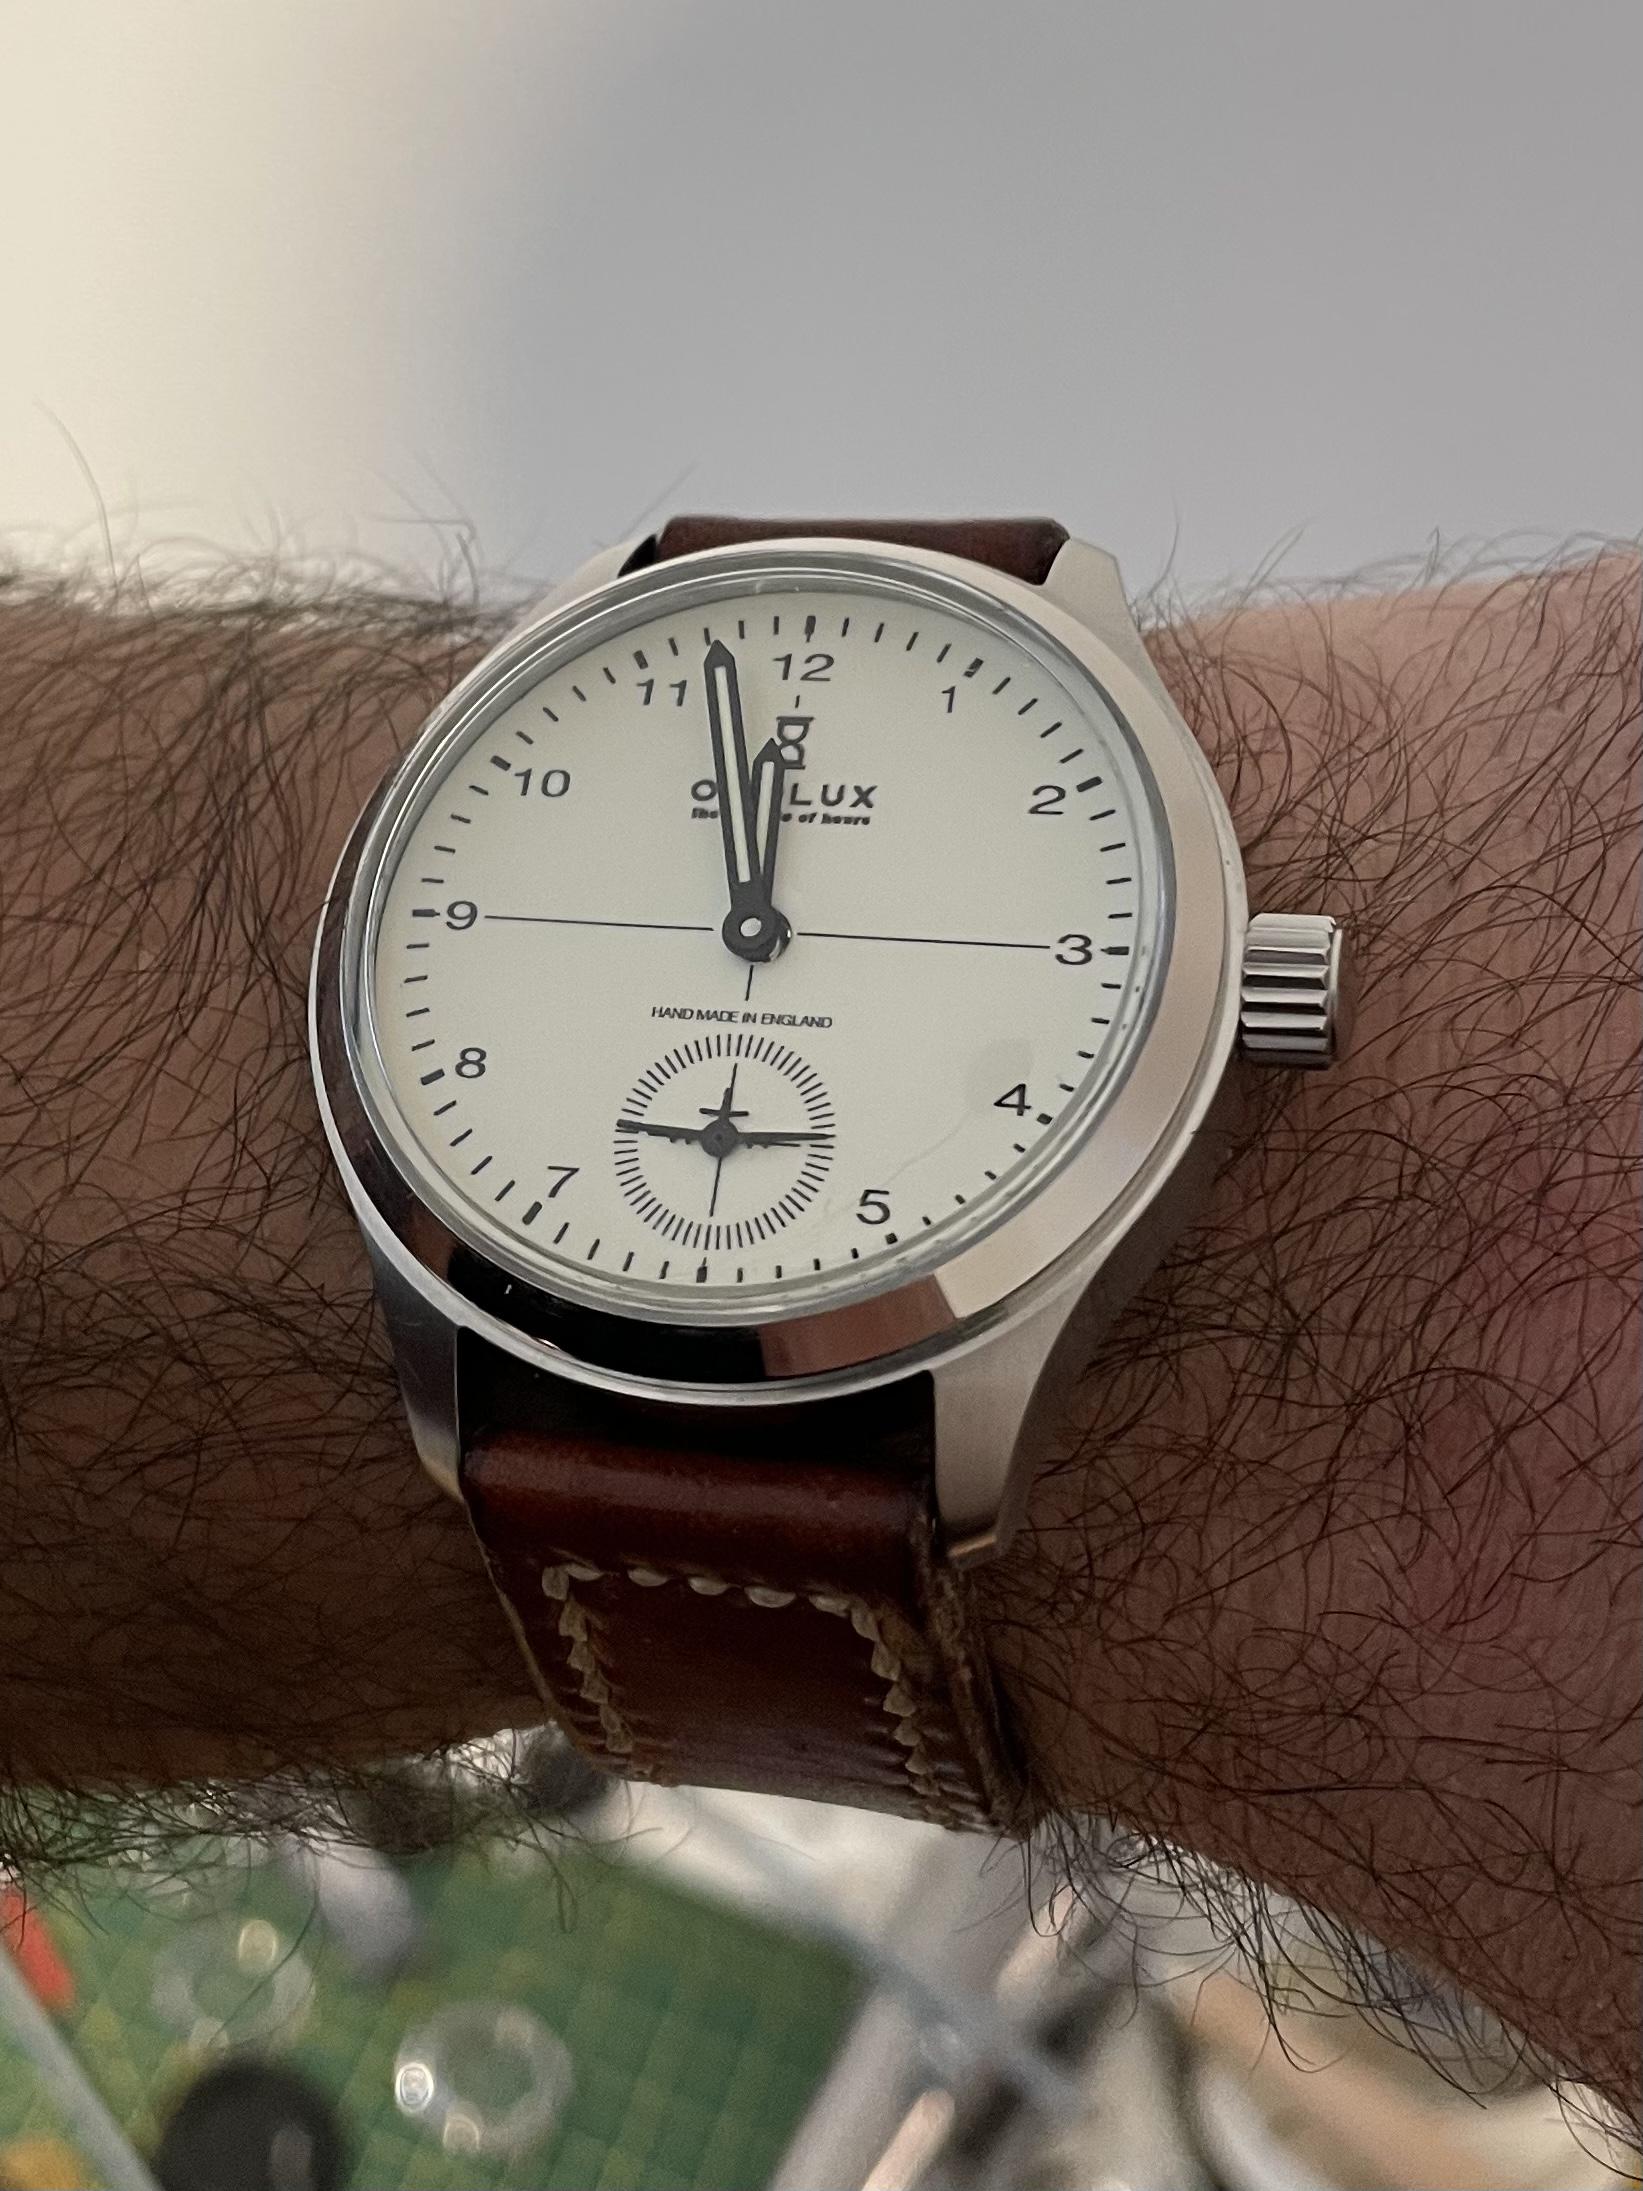
Bomber in the gun sight! A bit of fun? Or a bit naff...... Let me know.
 1 point
 -
More progress
 1 point
 -
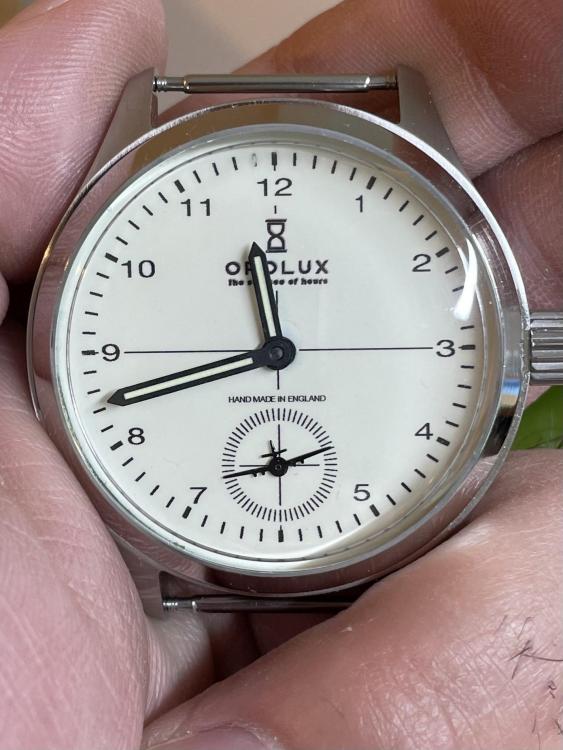
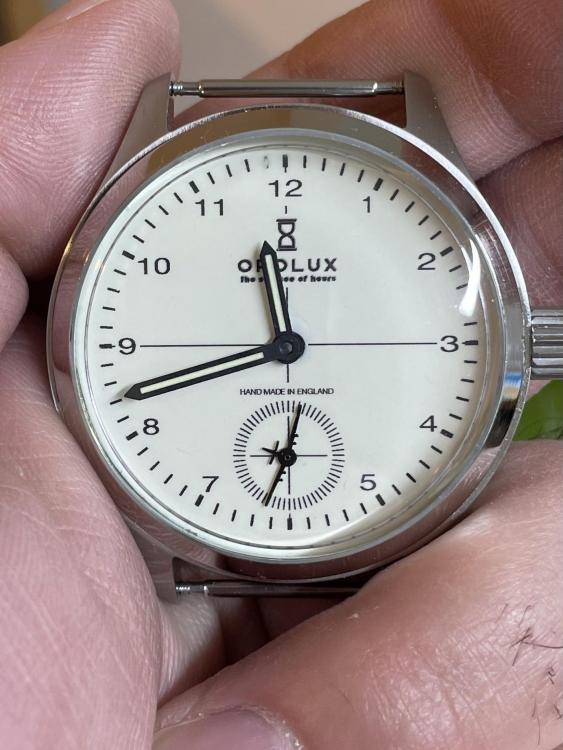
Shiny new dial waiting to be fitted to its shiny new sellita sw200. I know the sw200 has a date complication, but it makes more sense for me to buy these as I can use them in projects with date windows if necessary.
 1 point
 -
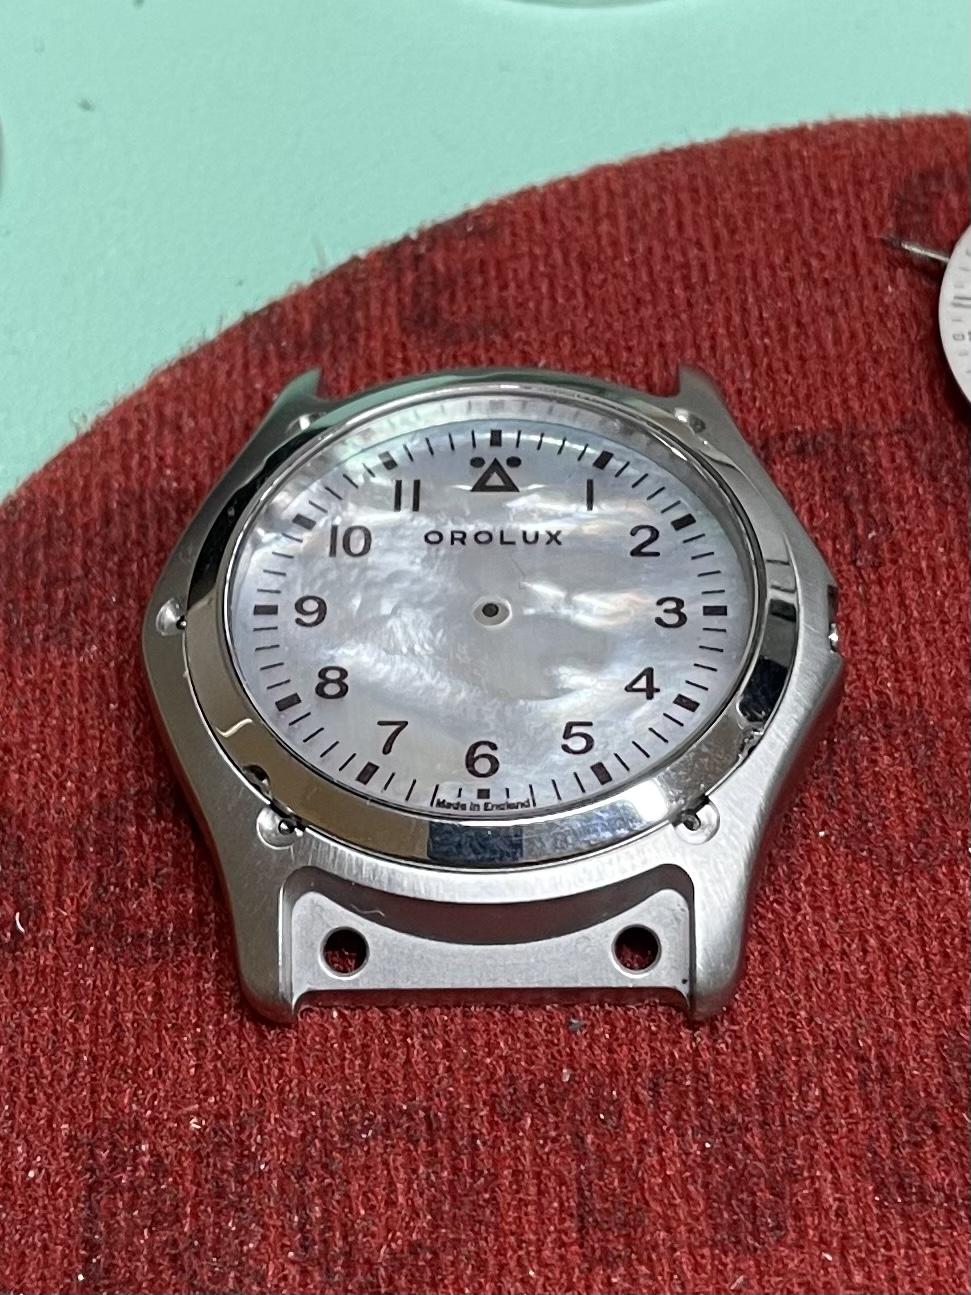
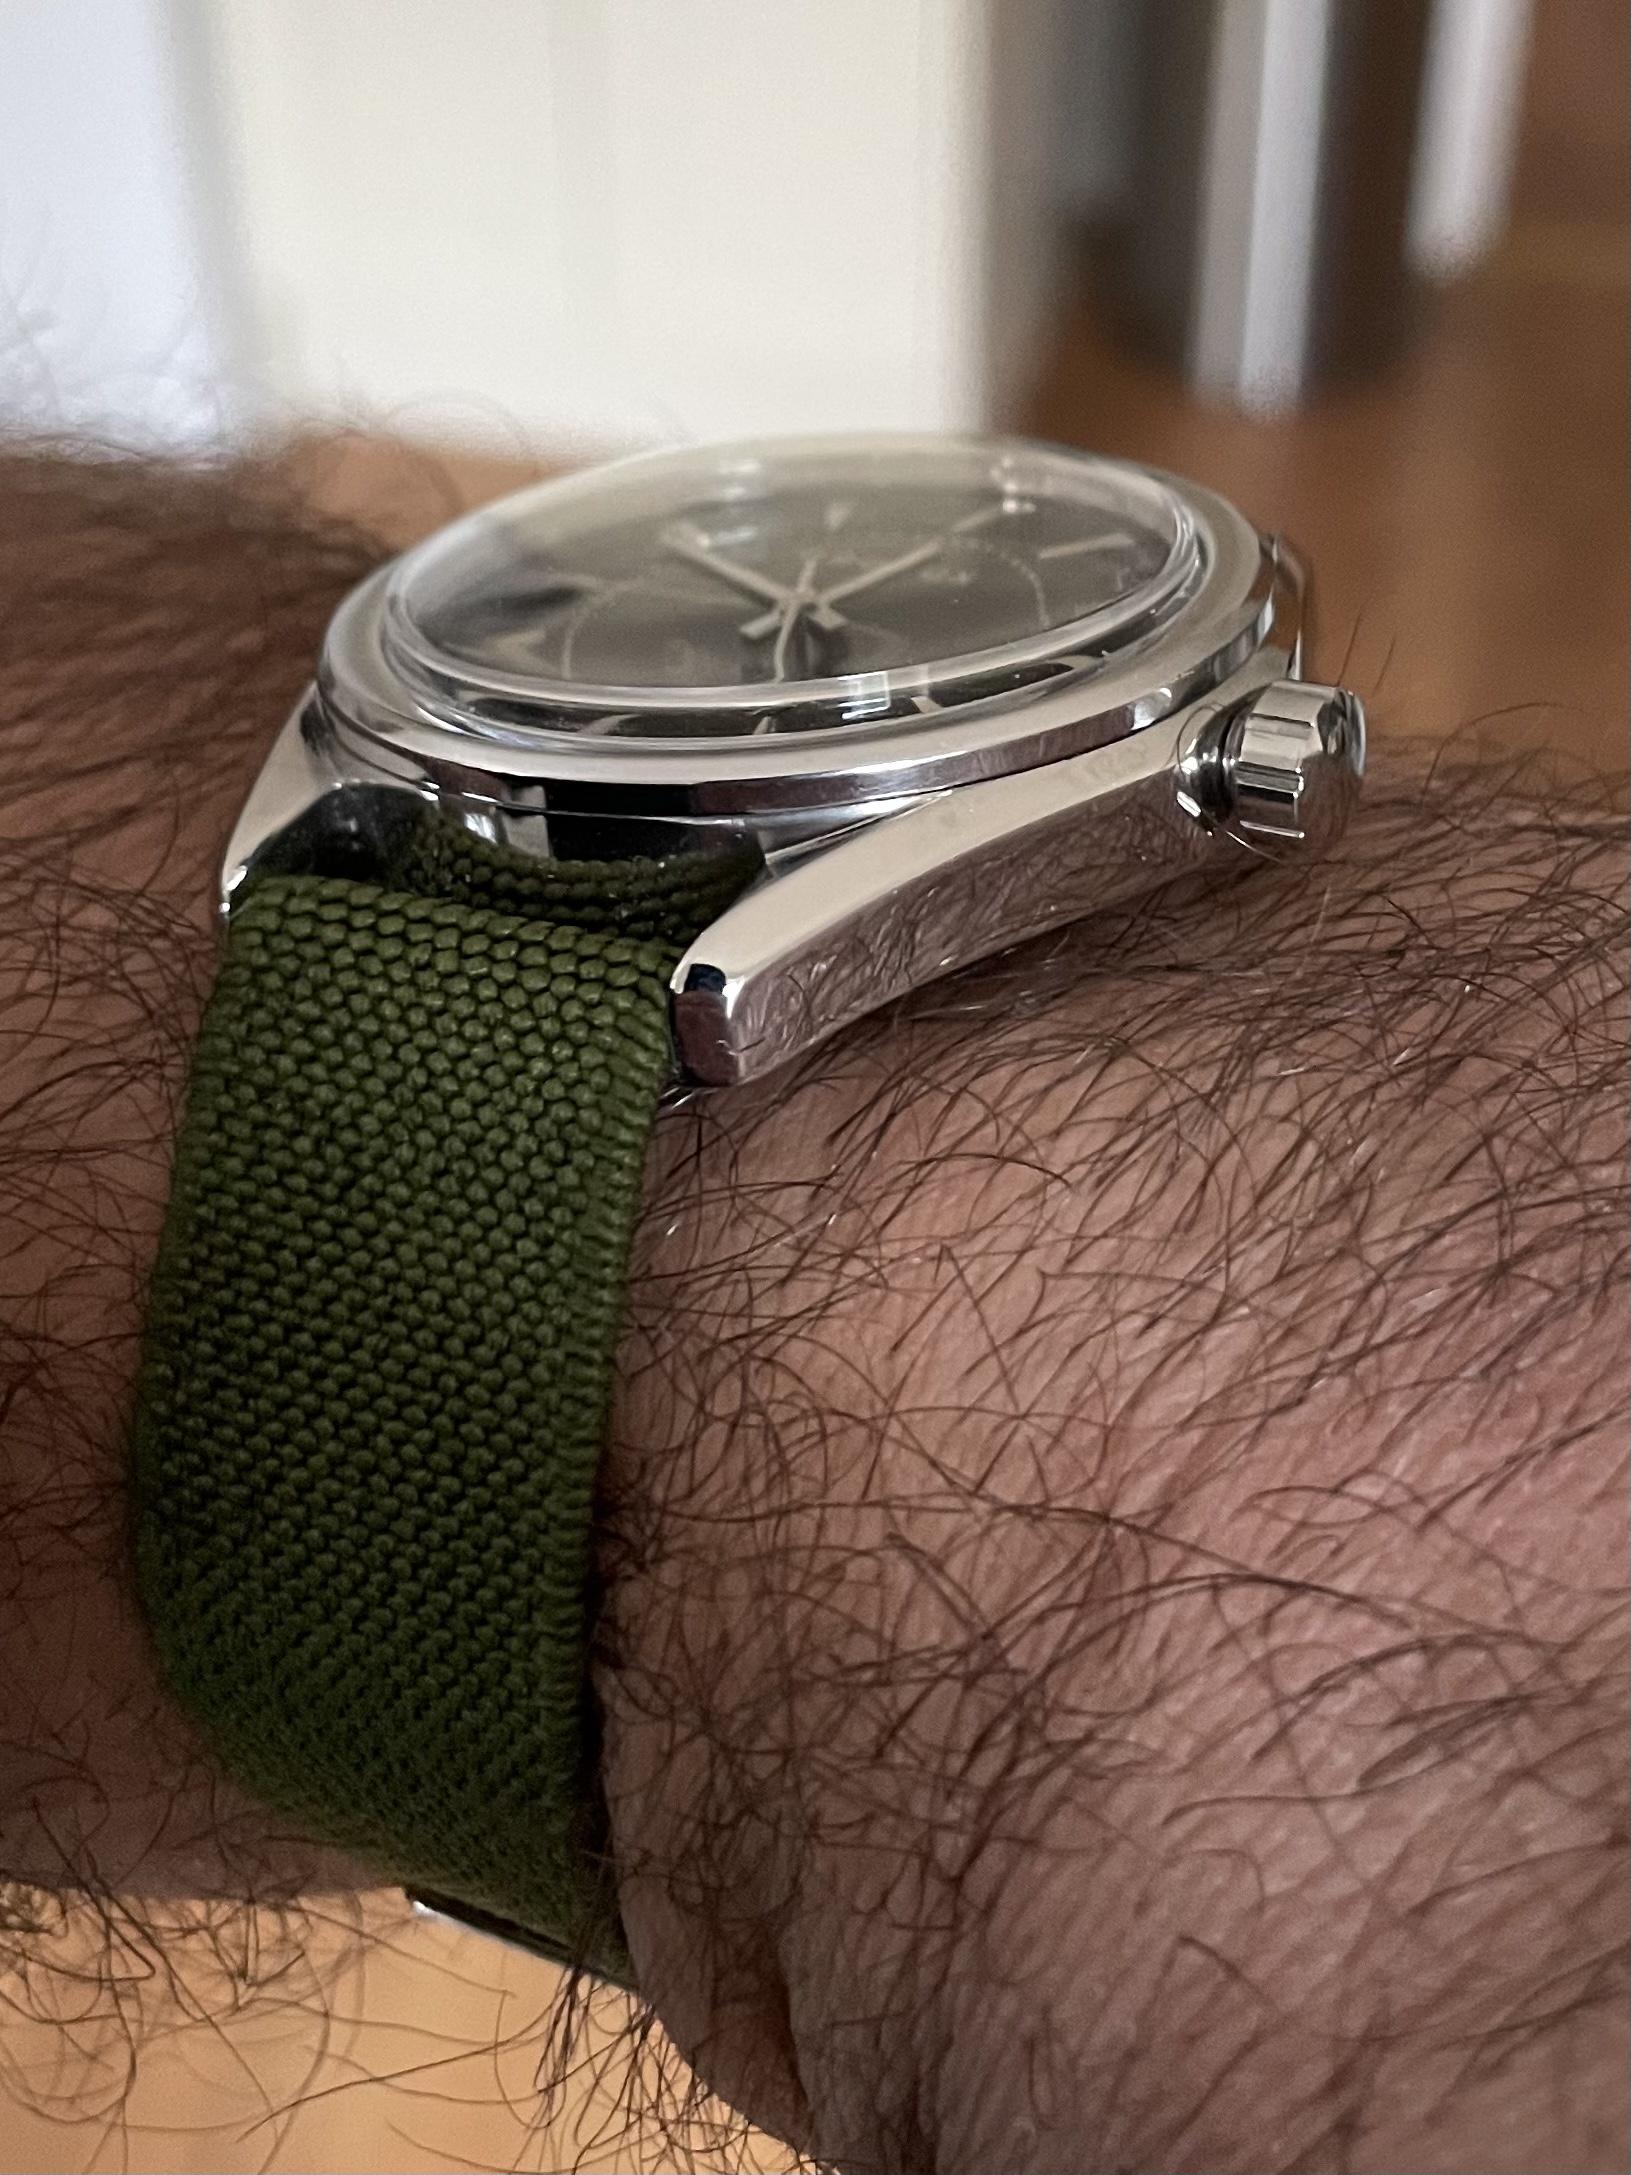
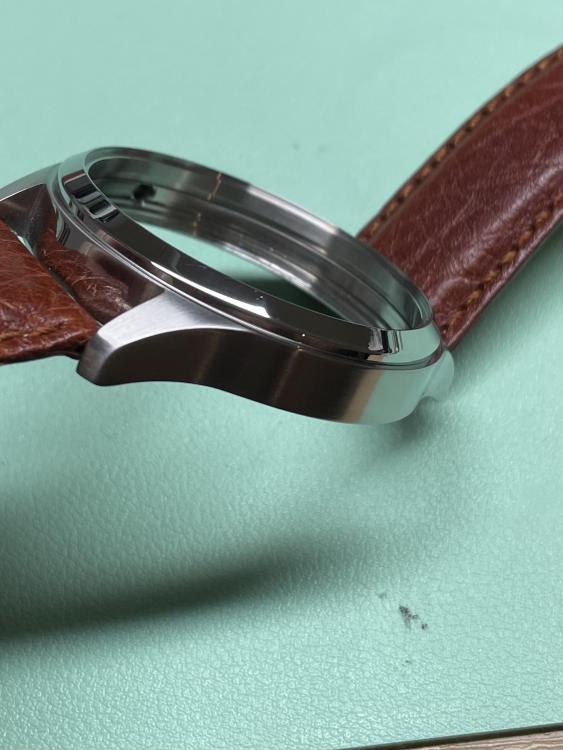
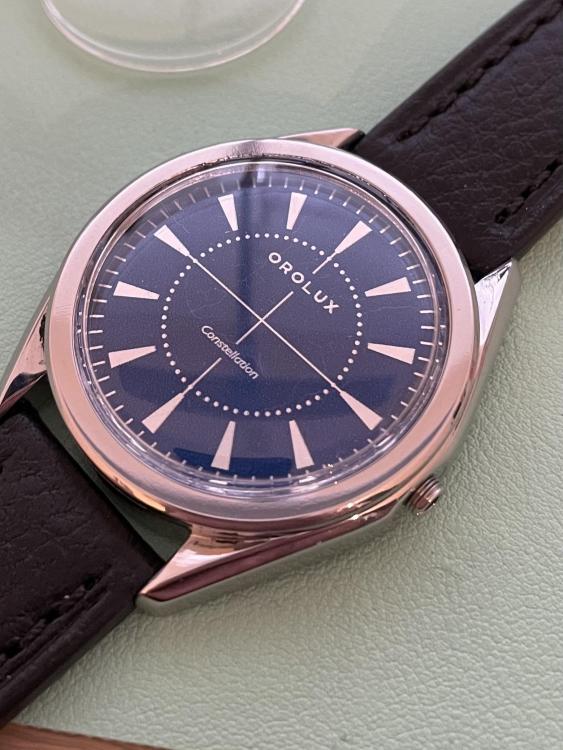
I’m also working on the new 41mm case. Wanted opinions on whether the bezel is too high? I like the profile but think it needs to be half a millimetre lower. I’m trying to really show off the high dome acrylic crystal.

 1 point
 -
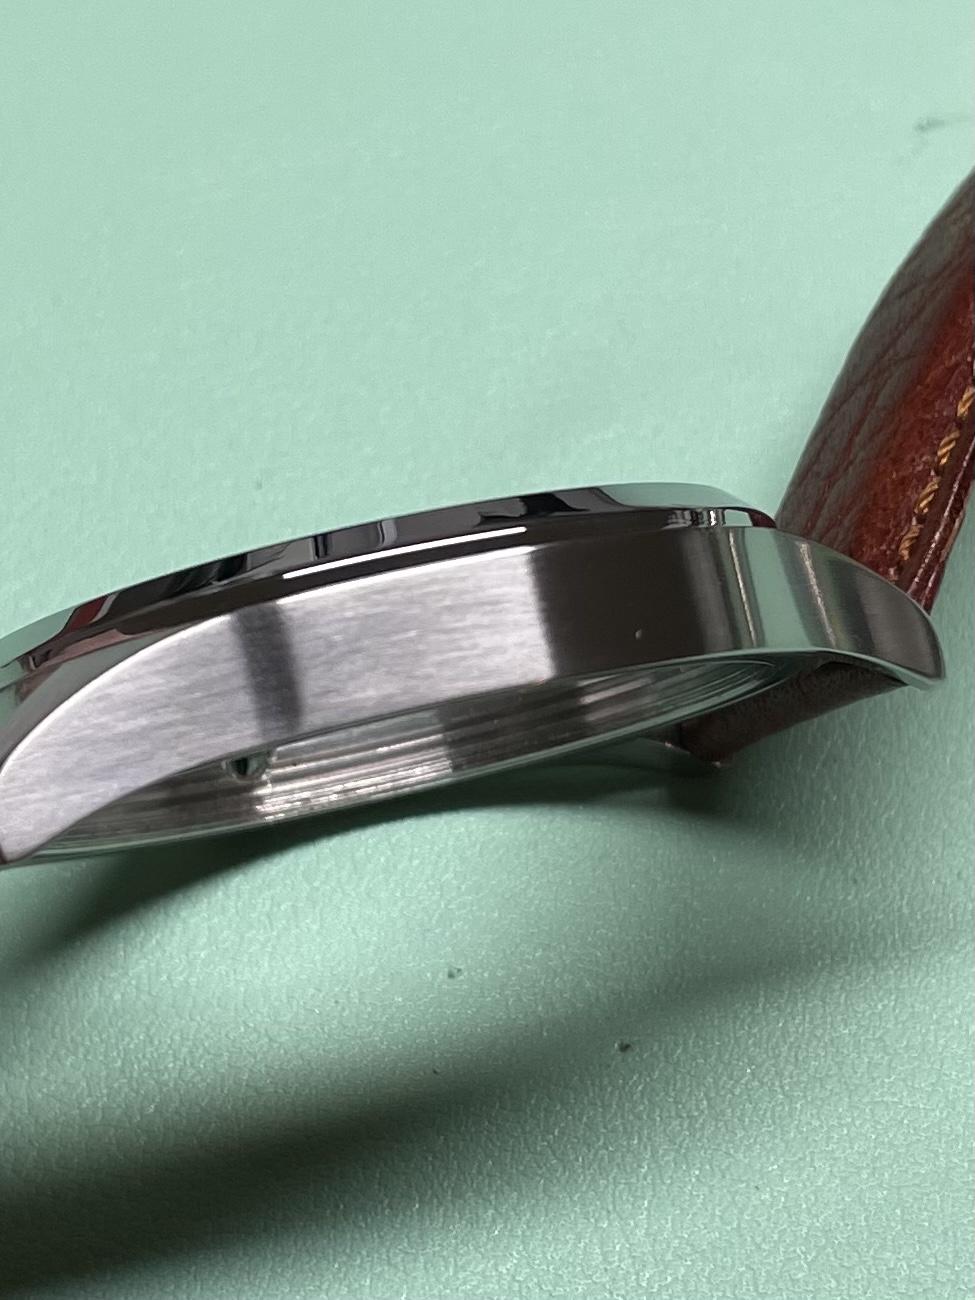
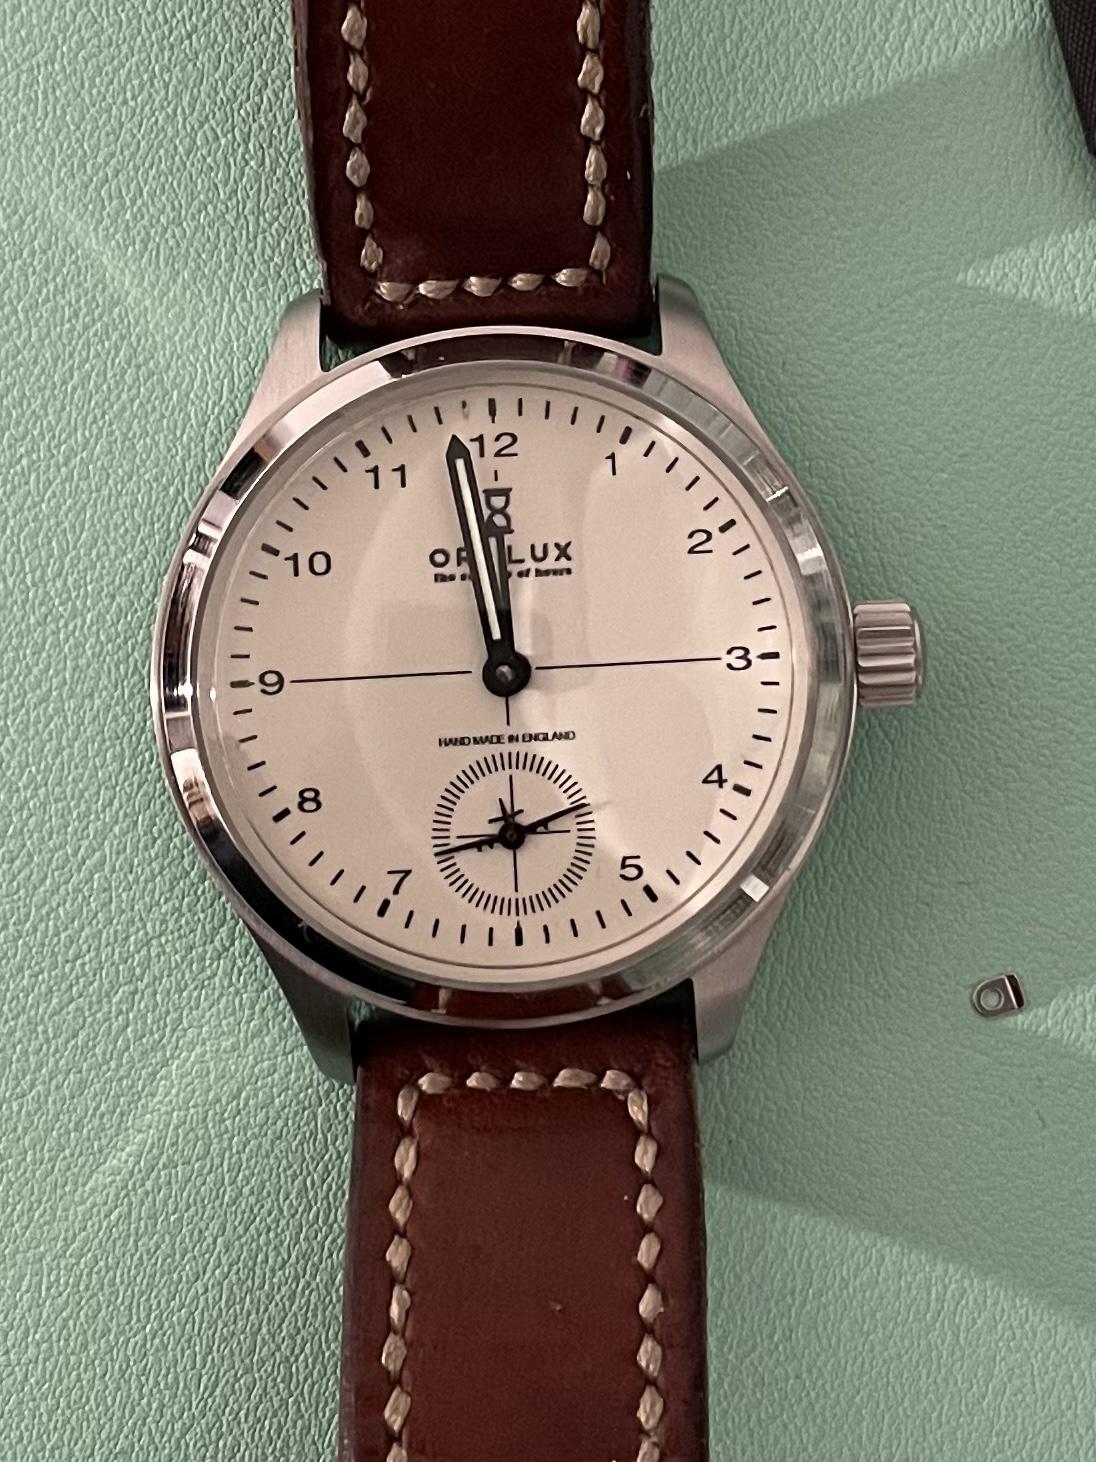
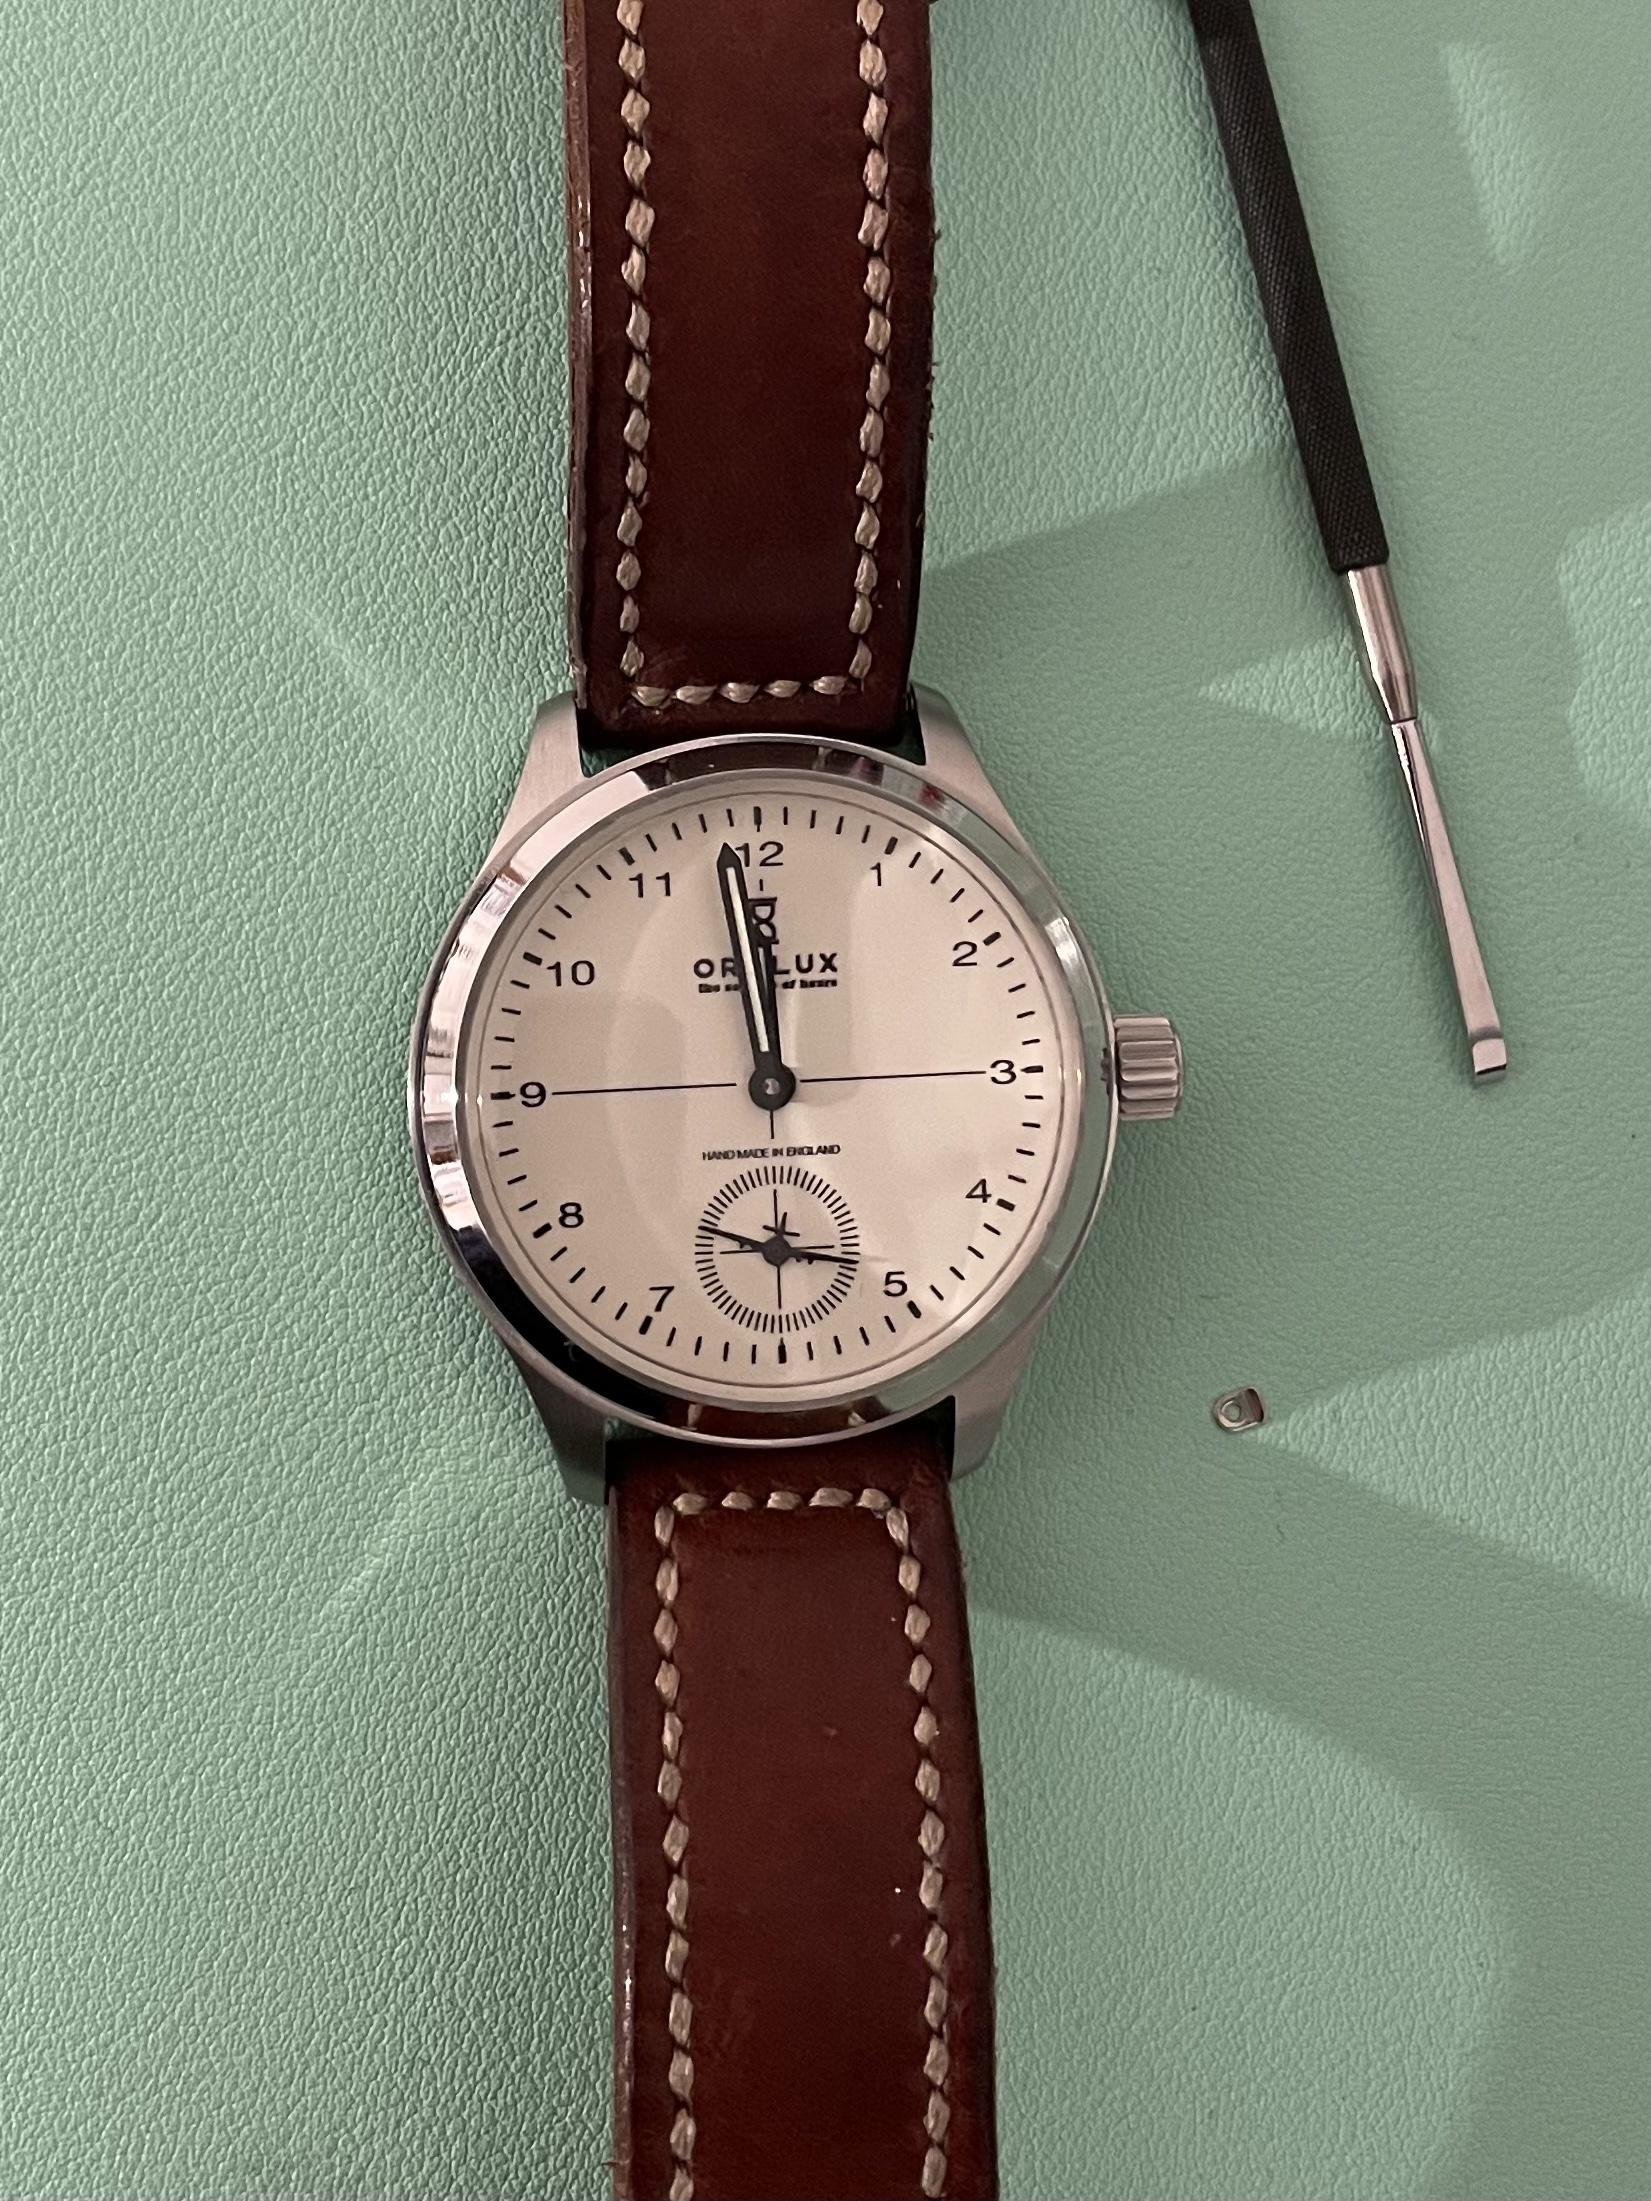
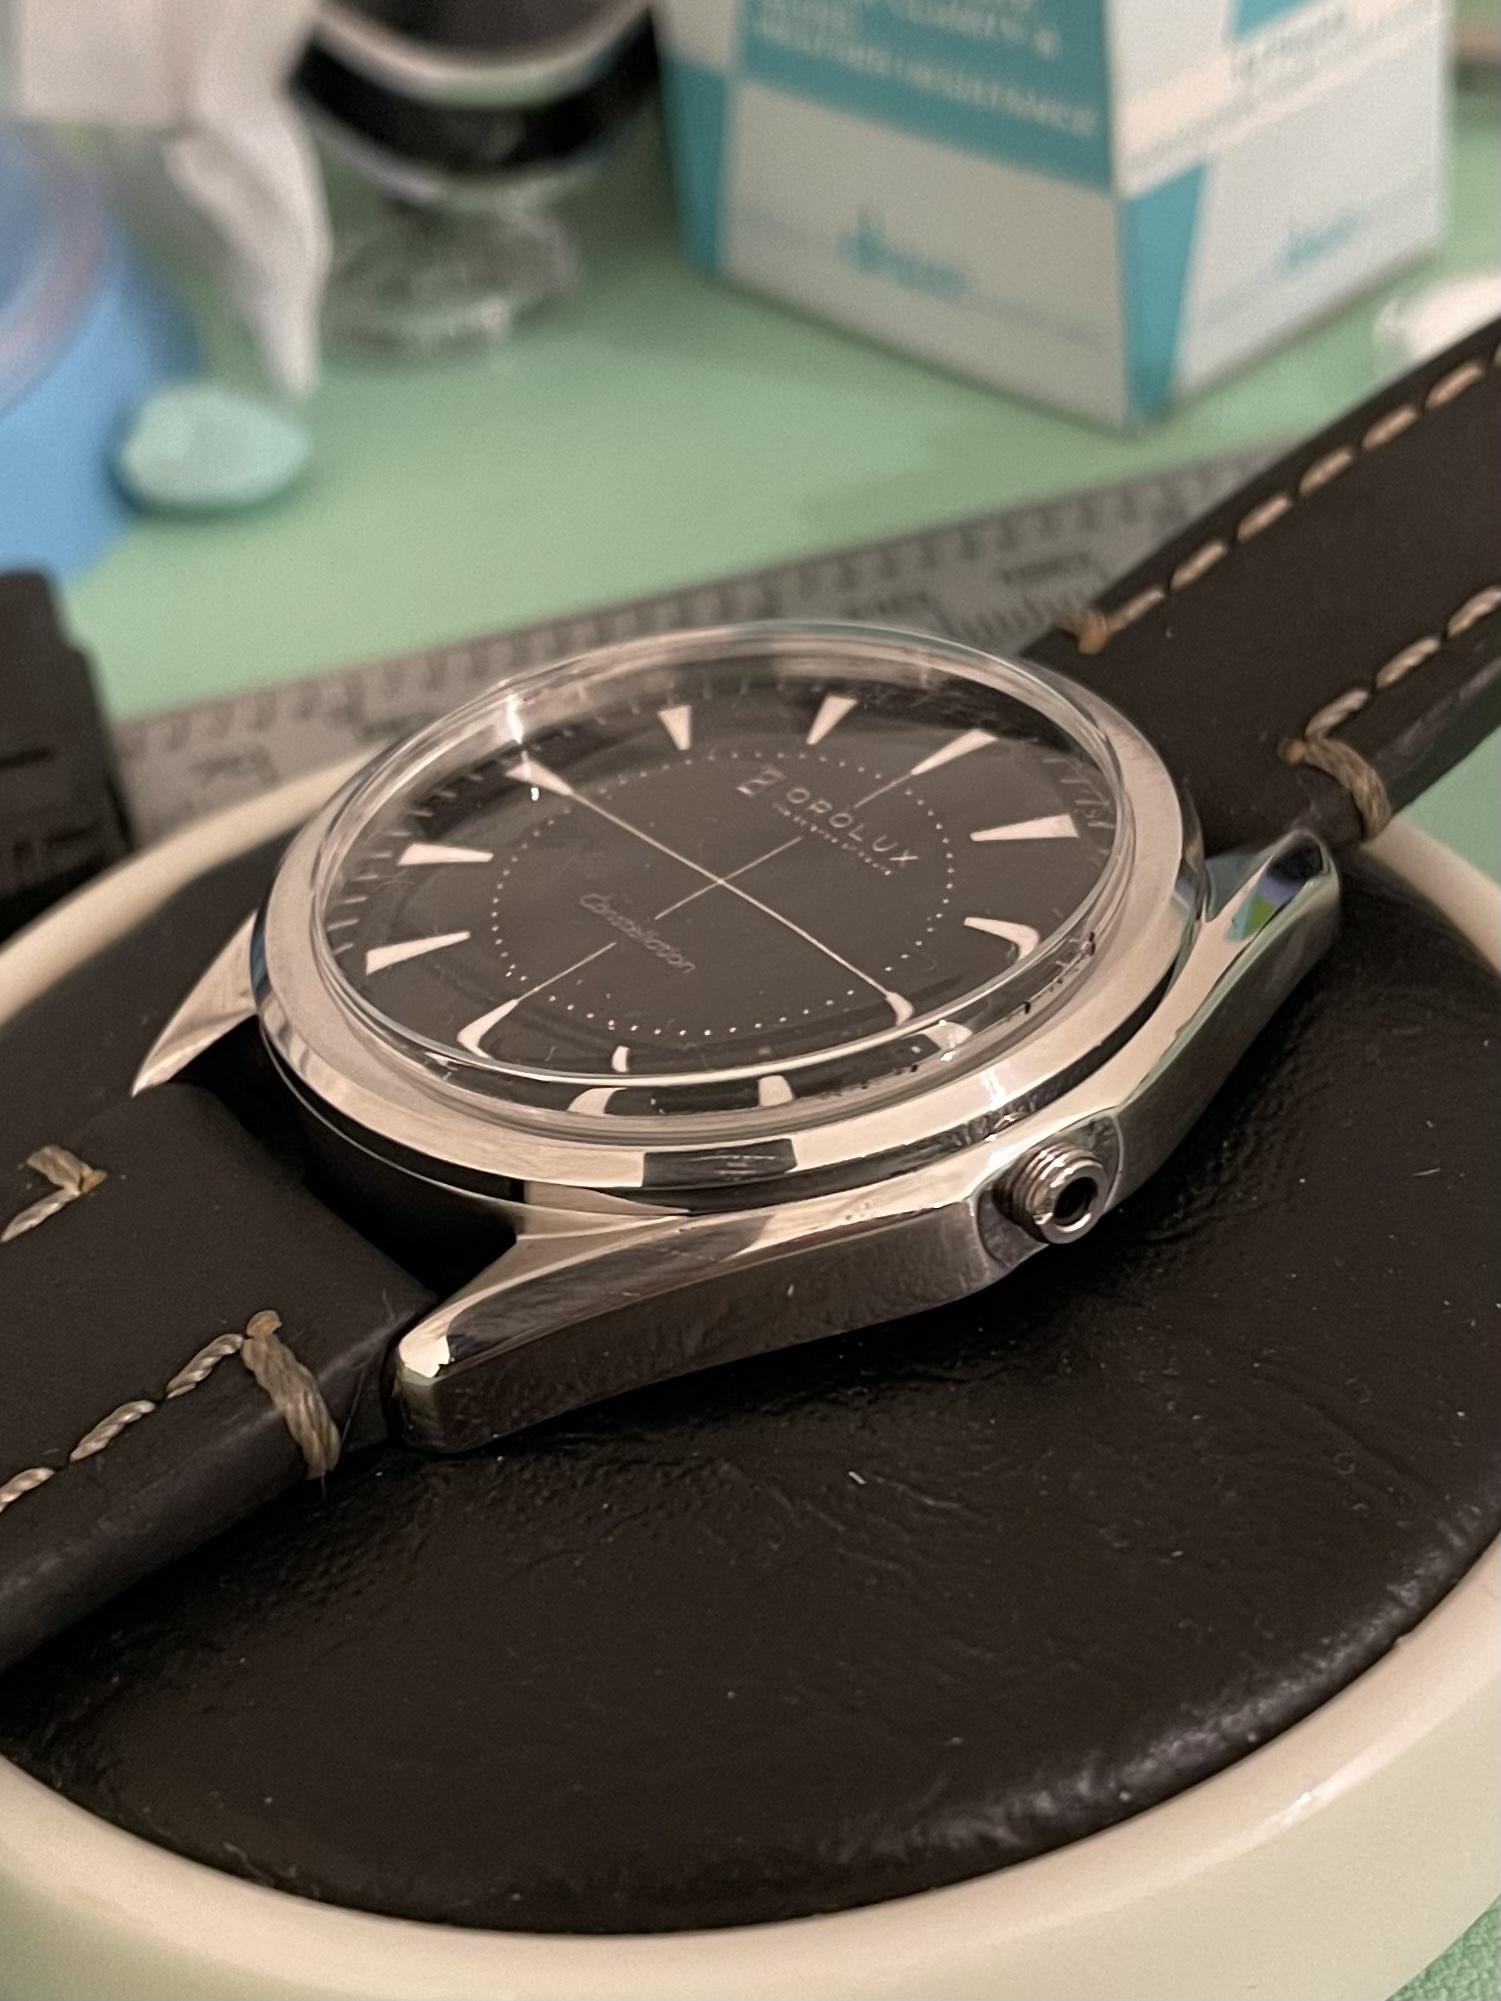
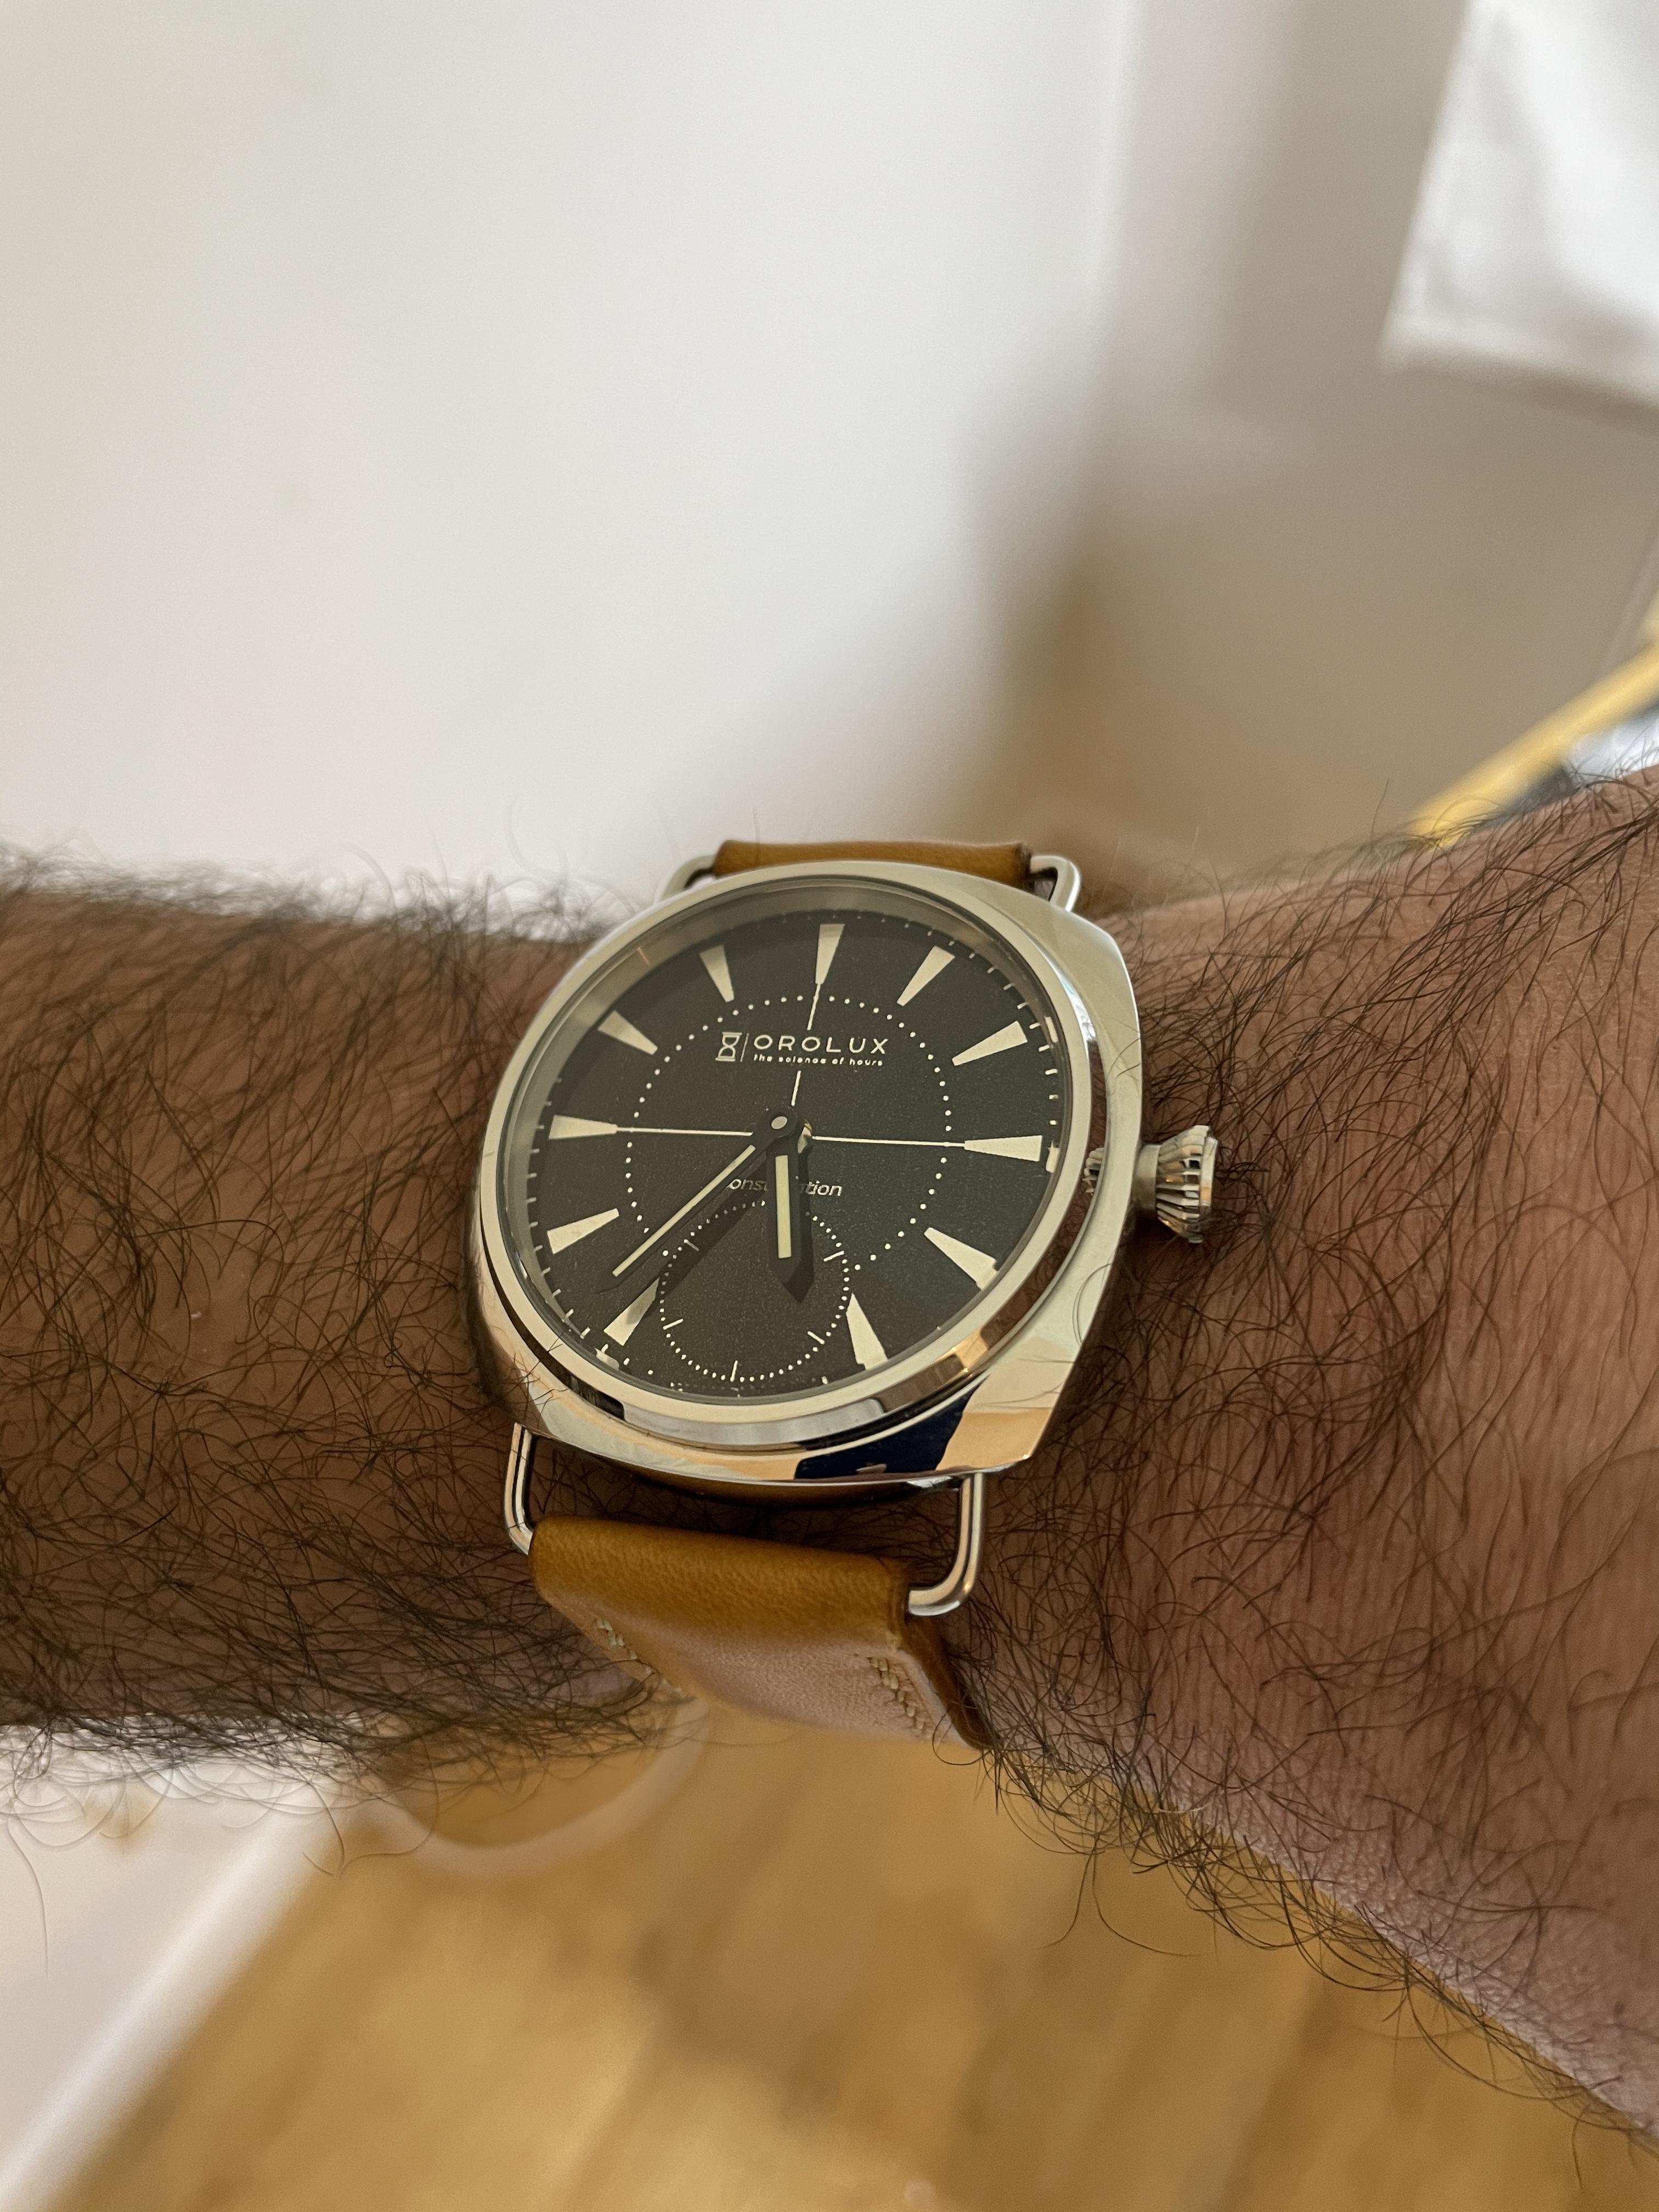
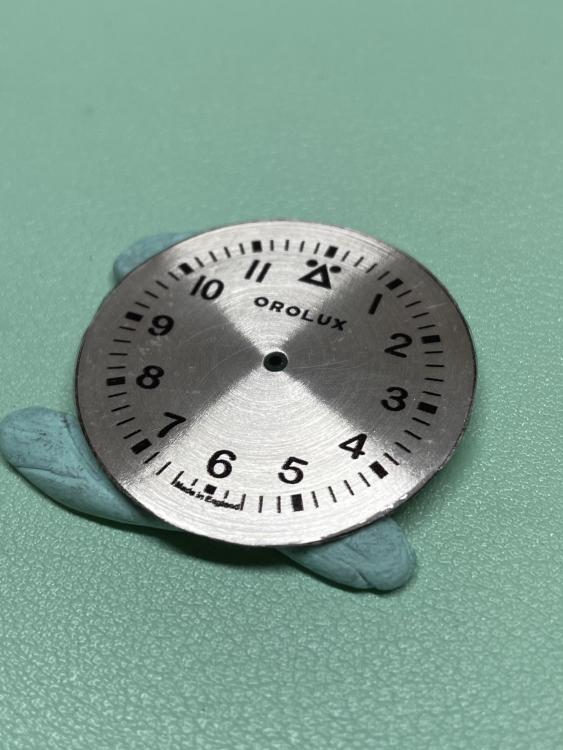
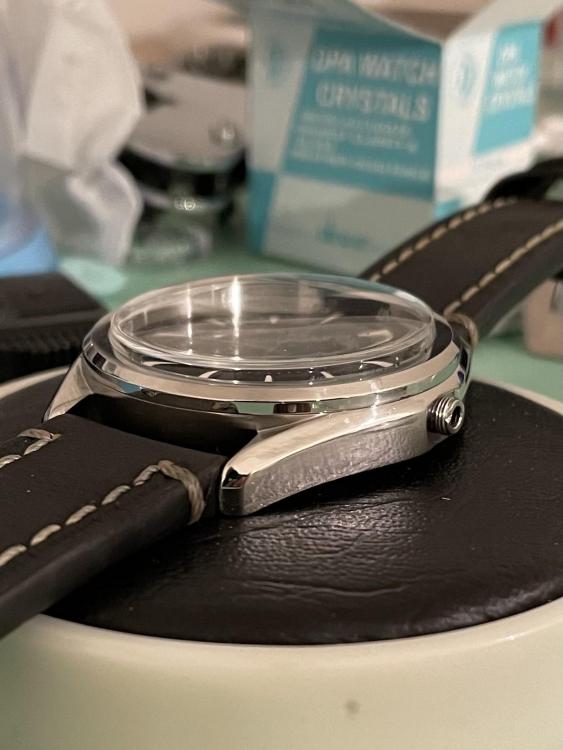
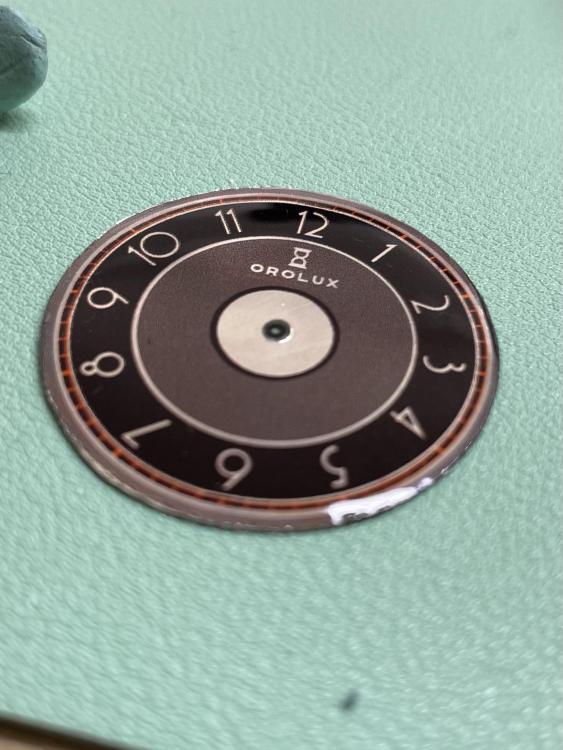
Just finishing a 41mm version of decotime, thought you might like to see how roughly cut my dials actually are! But I have found a much better and quicker alternative to spray lacquer and you can see the results here. Creates a lovely shine.
 1 point
 -
I should mention when I say production I mean by myself! For example the first watch will probably be made from etched/engraved sterling silver with enamel infill. I should hopefully have a pad printer setup by Christmas. Cases are bought pre made and adapted using basic hand tools. Pretty much just stuff that anyone on this forum can do at home.1 point
-
1 point
-
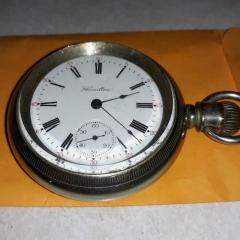
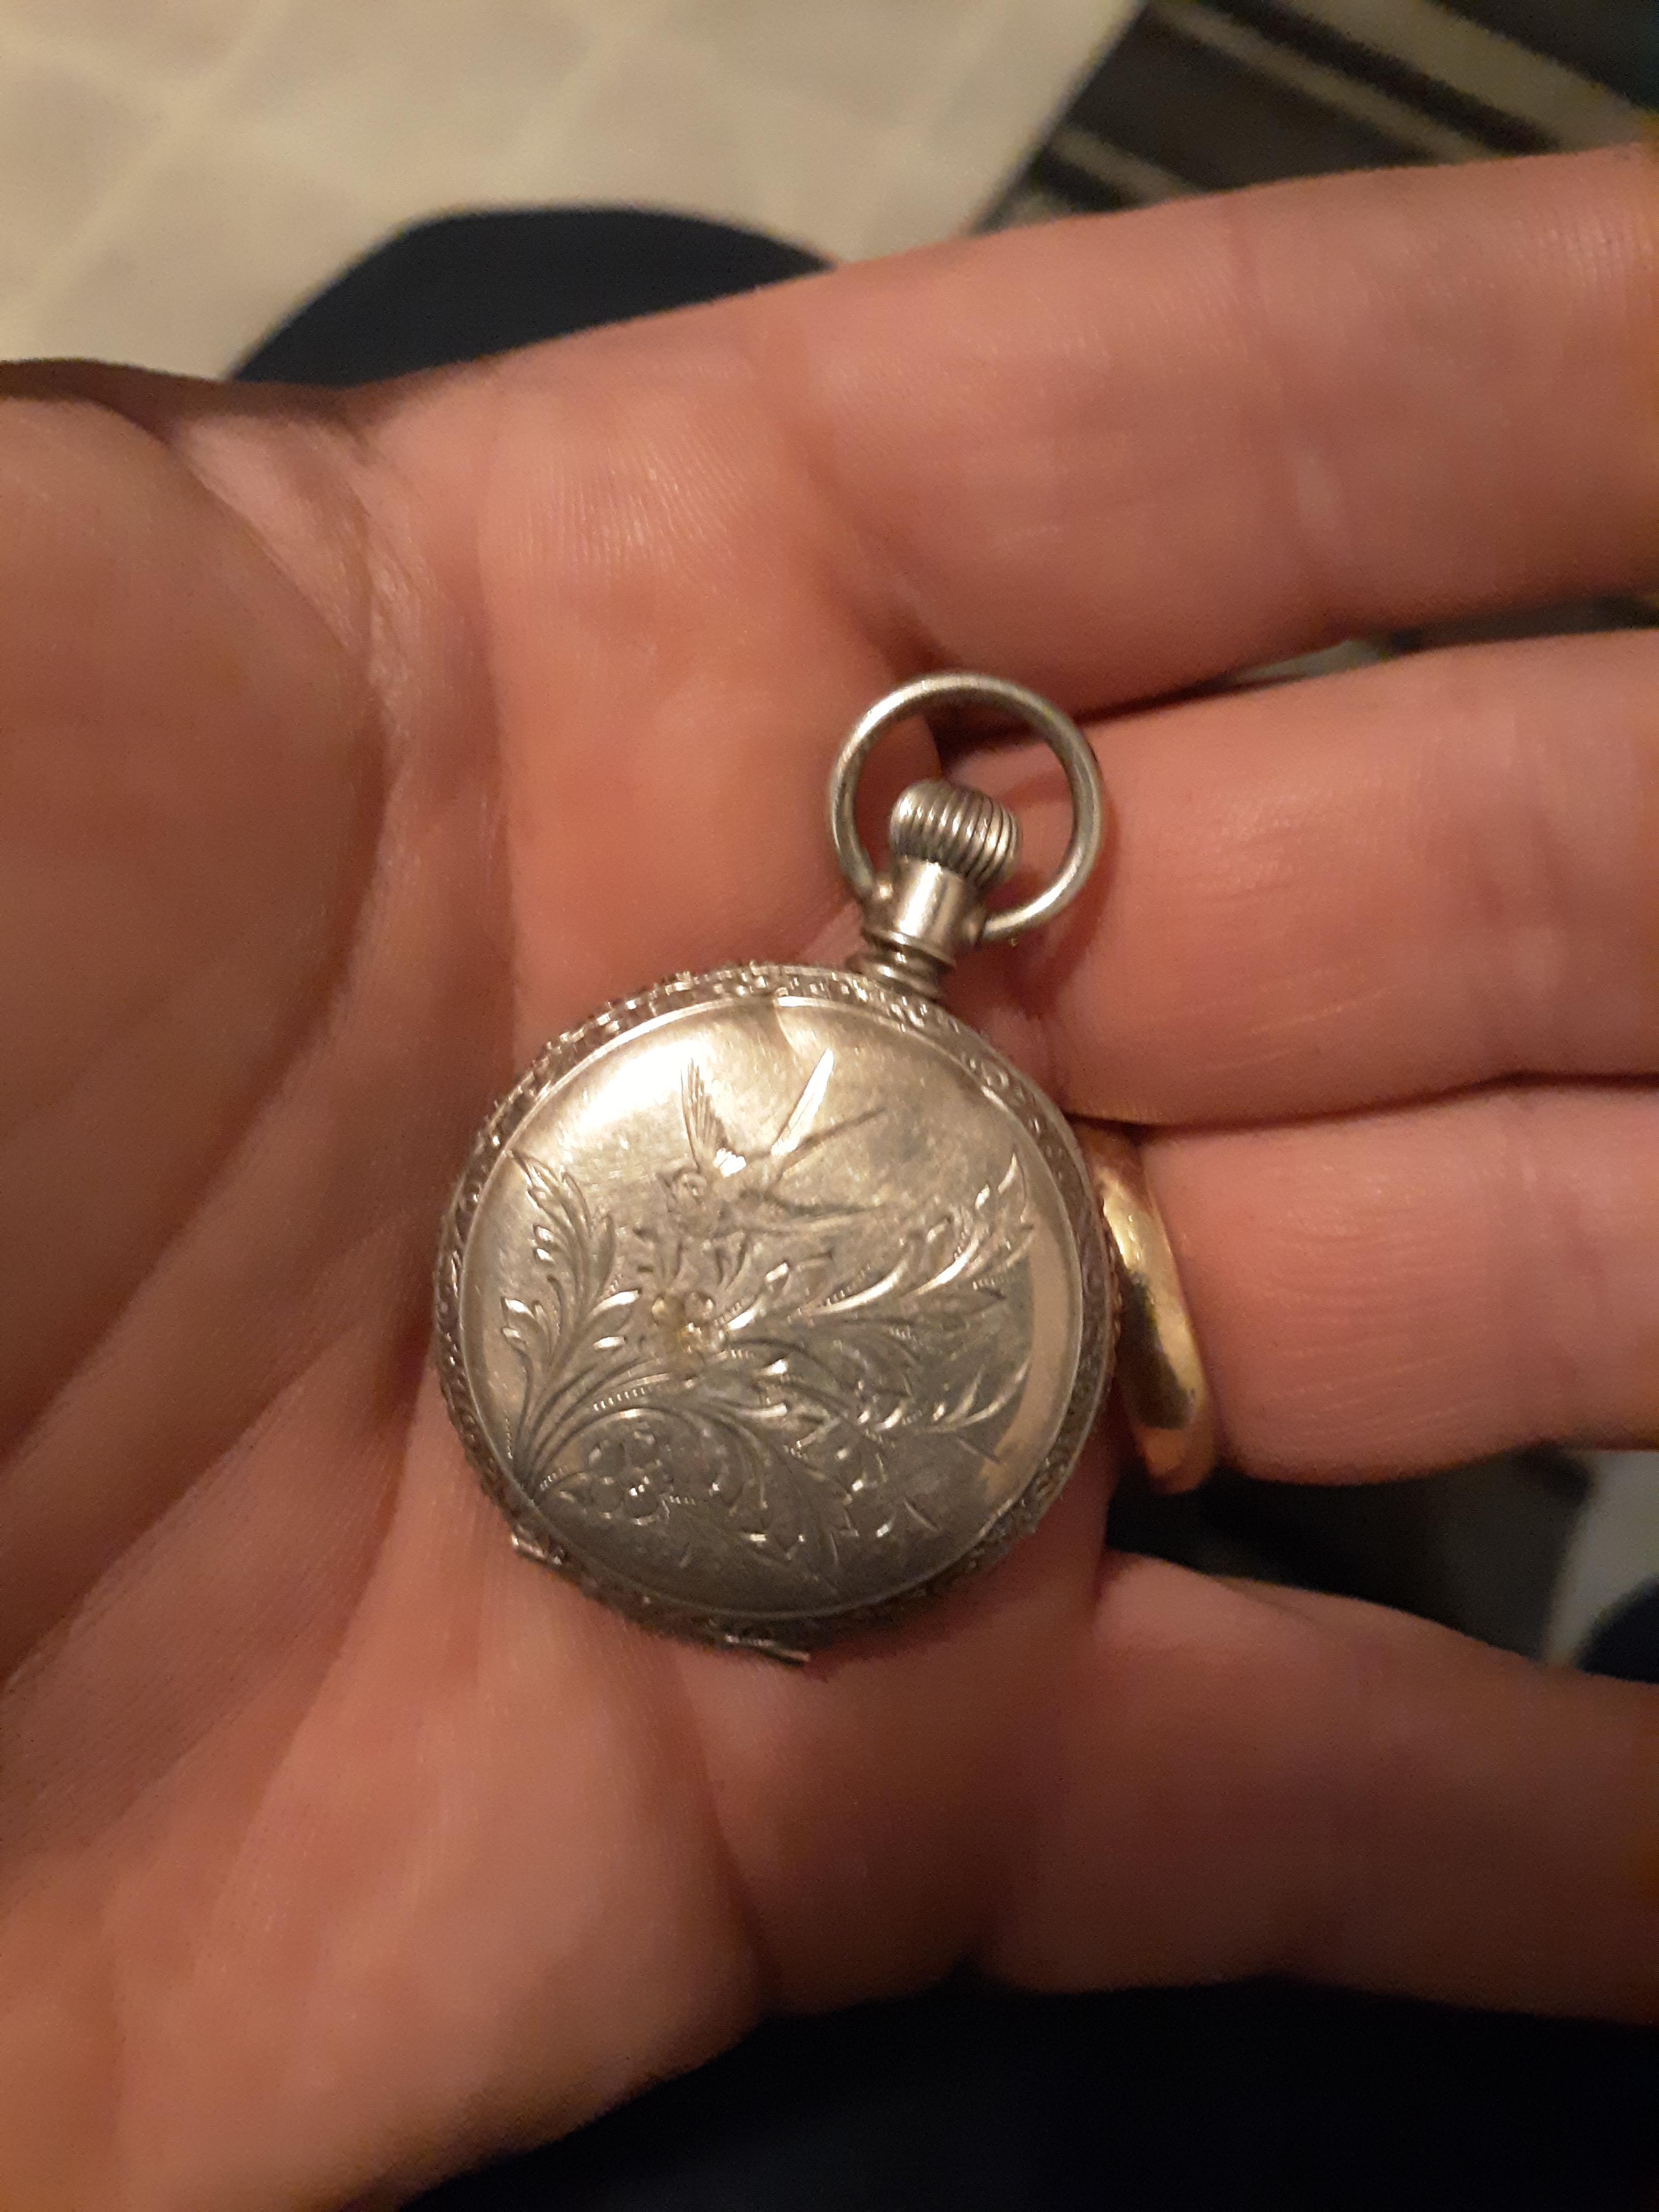
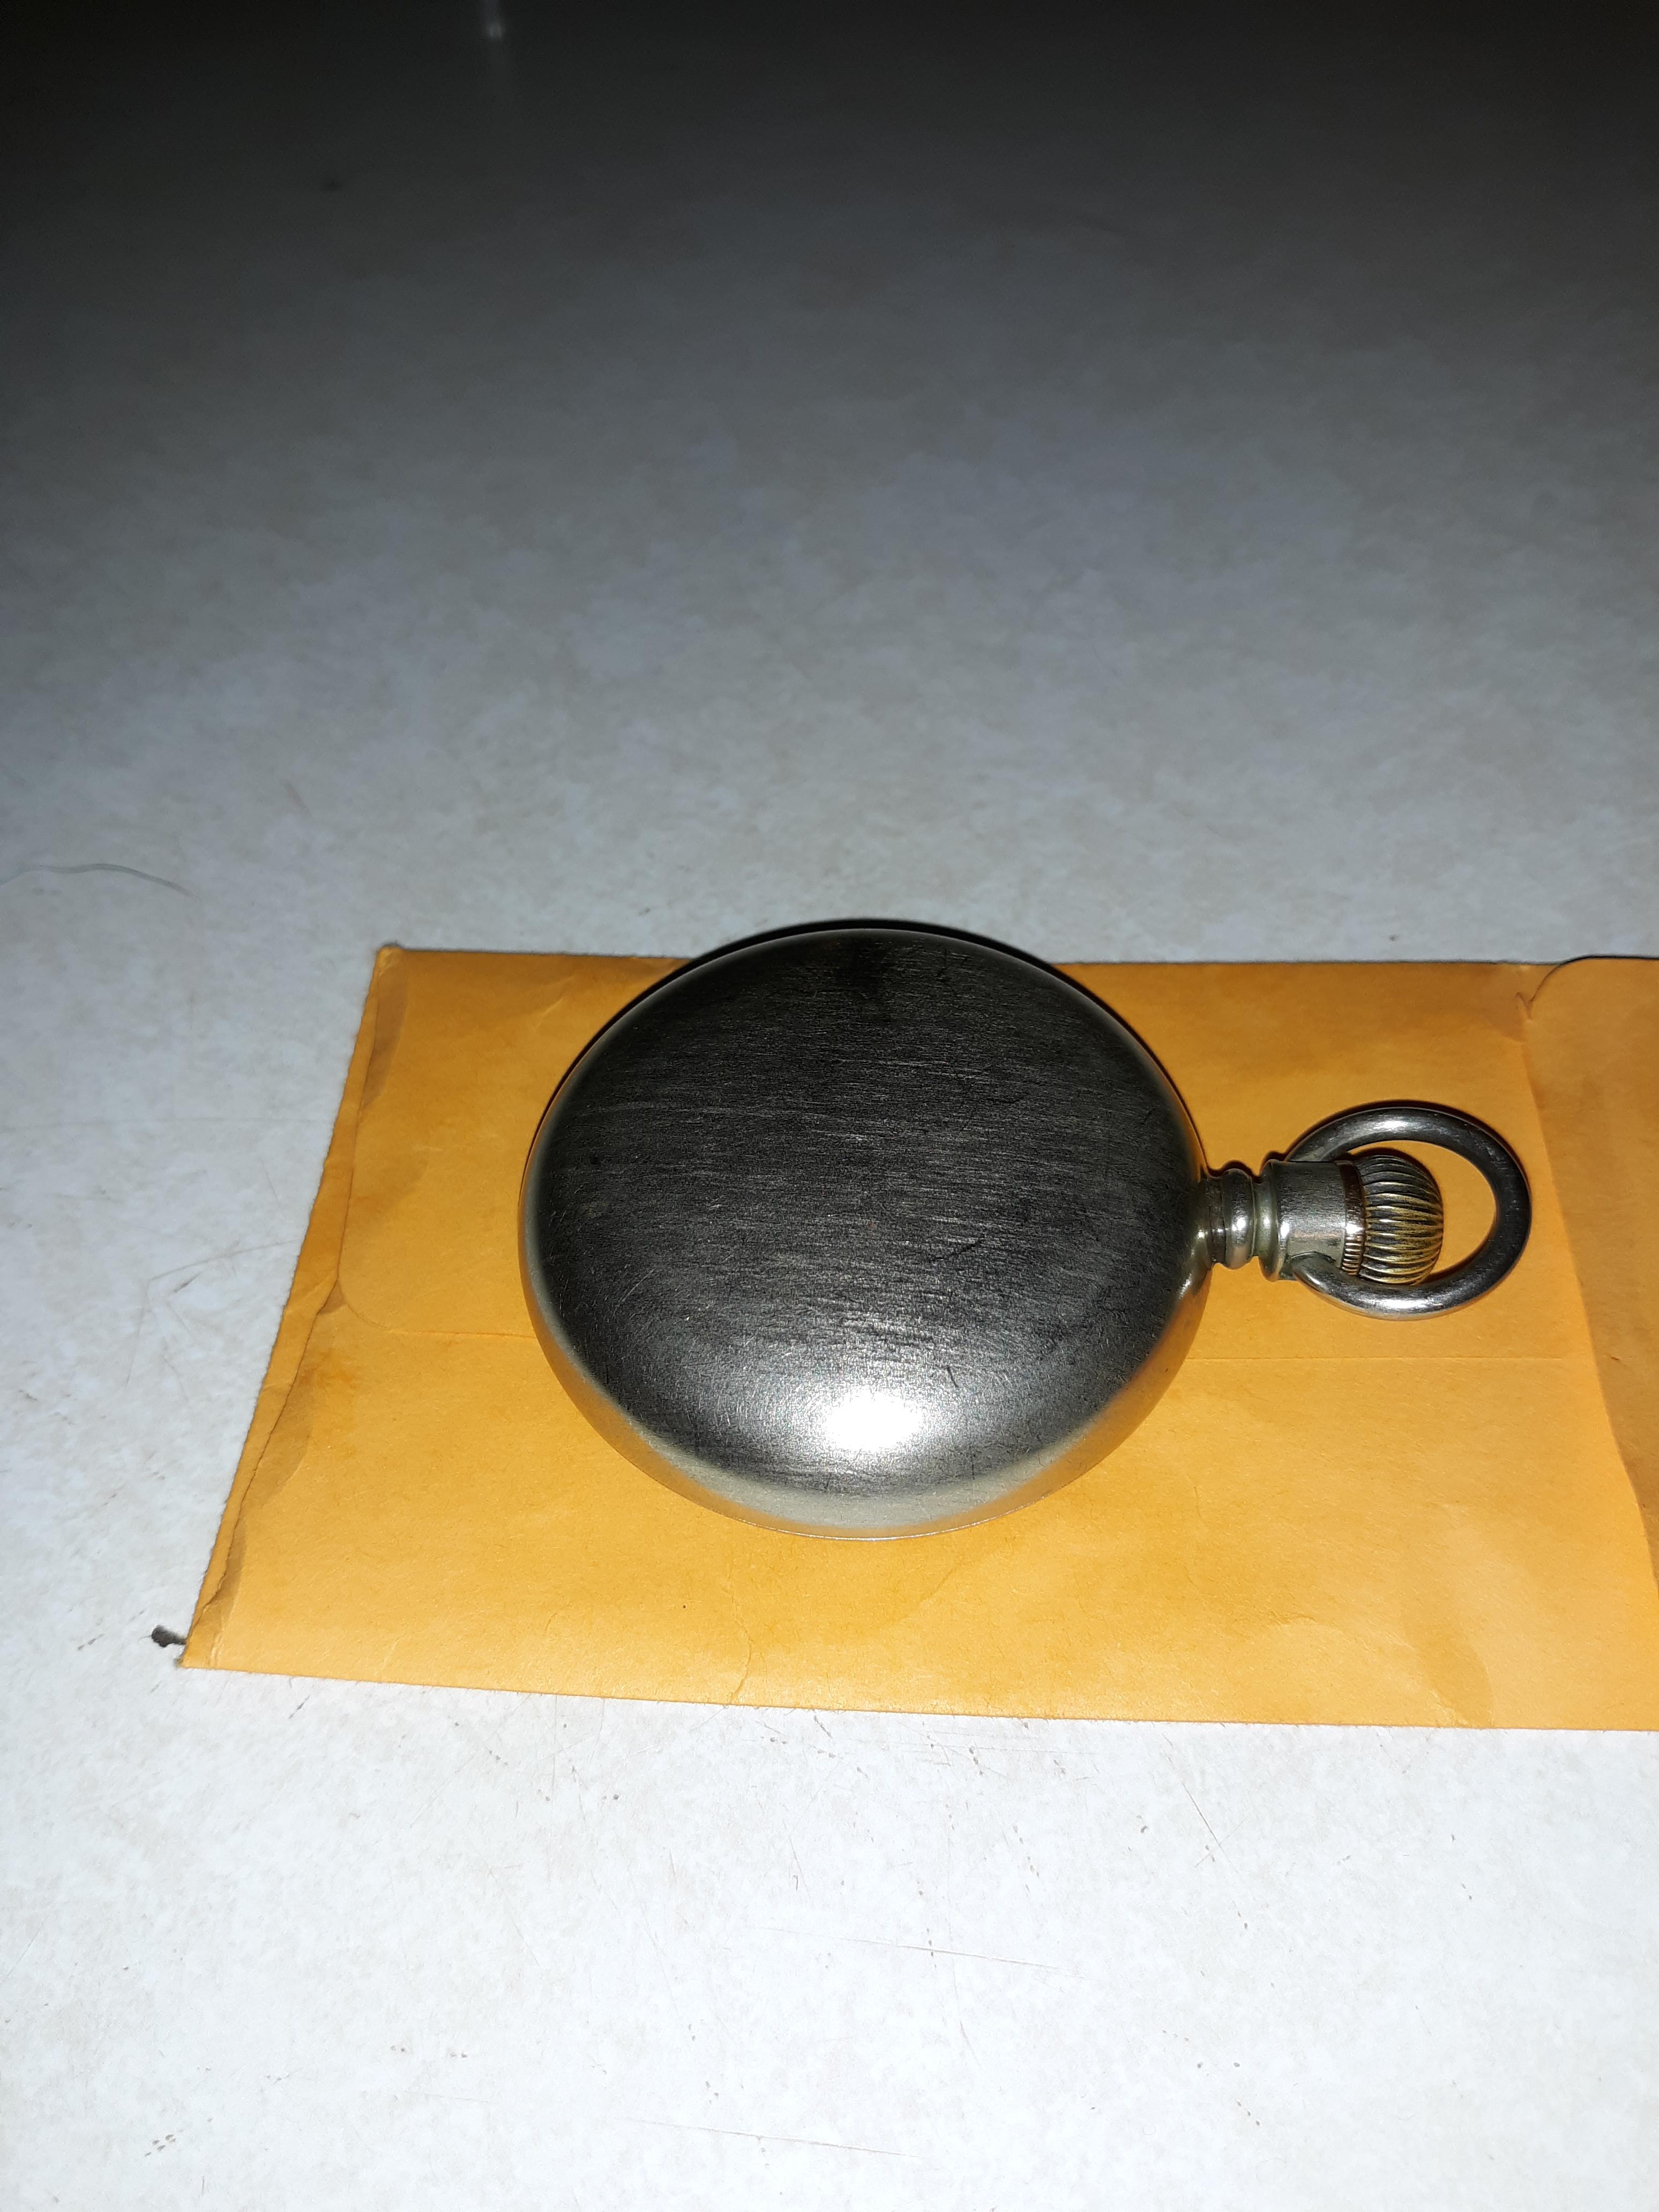
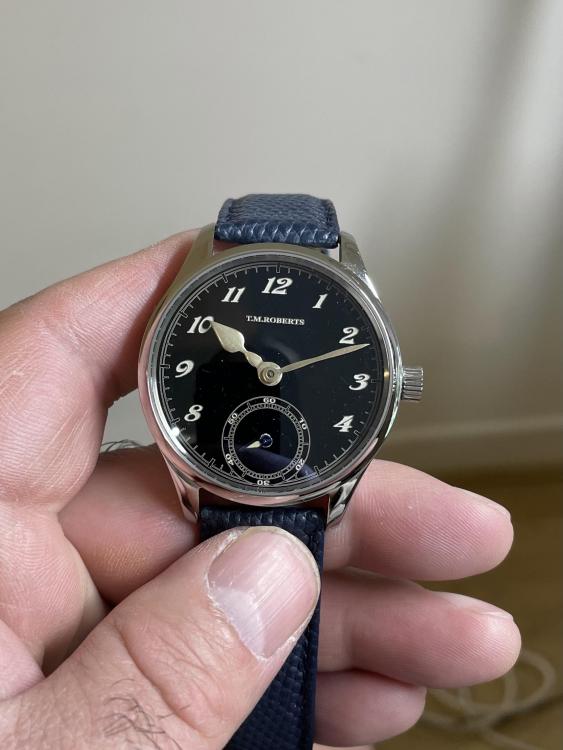
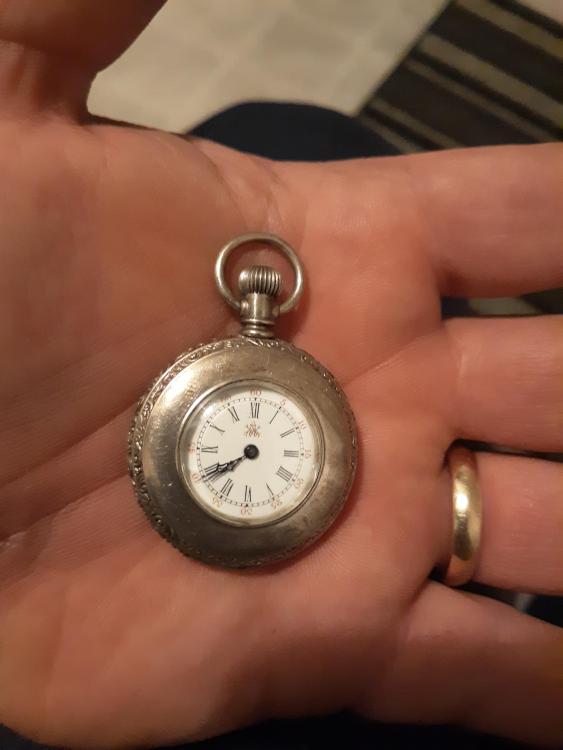
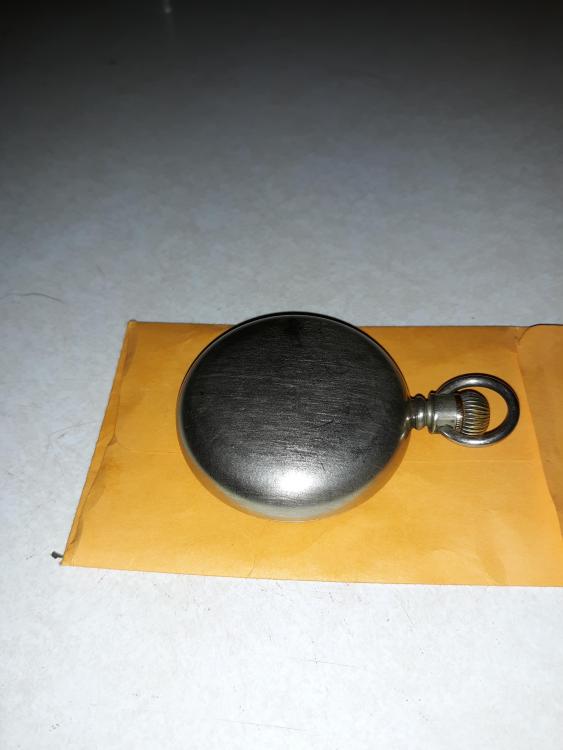
Nothing special-sometimes I just like the look of a well worn, almost satin-like finish of an old pocketwatch. Just a personal preference. The Hamilton was my grandfather's.

 1 point
 -
Going by the book the meter has to be set to Volts when checking for pulses. As noted above it will also show pulses if set to current, but will indicate the current that traverses the instrument, and that is not a value useful for diagnostic, while voltage might be. Refer to page 9 of the attached document. One needs an analog multimeter with null current setting for this test, fortunately these are quite cheap nowadays. 955114.pdf1 point