Leaderboard


Popular Content
Showing content with the highest reputation on 02/13/18 in all areas
-
No posts are deleted for being too dumb. But if no answers are forthcoming then it just goes back in the queue of posts.2 points
-
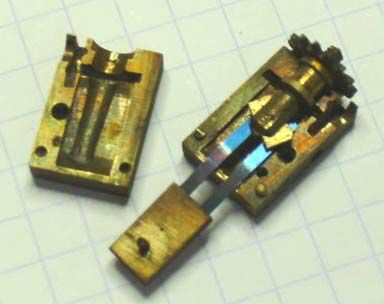
Hi vinn. The objective is to measure and validate the dynamic frequency of the balance / hair spring as a system, therefore it needs to be set into motion first. There are some good videos of the traditional empirical method on the BHI website. The system is excited by pushing and releasing a lever then comparing angular displacement over a fixed time. It’s rather tedious looking, but the above apparatus is ingenious Sent from my iPhone using Tapatalk2 points
-
Wow that is a beautiful clock c18 60/70?? Well worth restoring..looks like you need an 8.4 pendulum (90g??). I did have a table somewhere, if I find it I will add..There is someone on Ebay that cleans clocks for about £95 full strip and clean..I don't know him or his work so can't vouch for him..Also pendulums come up now and then along with suspensions...I would love to clean that one, especially with the outside count wheel nice easy one...alas but my eyes are not all that good a present.. Nice keep good luck with that one..1 point
-
If there is a number on the plate then you can use the following link to calculate for the pendulum. http://www.m-p.co.uk/formulae/frpend.htm The pendulums are available at Cousins ,Walsh or I have used this company a few times: http://www.johnwardle.co.uk/french-clock-spares-13-c.asp1 point
-
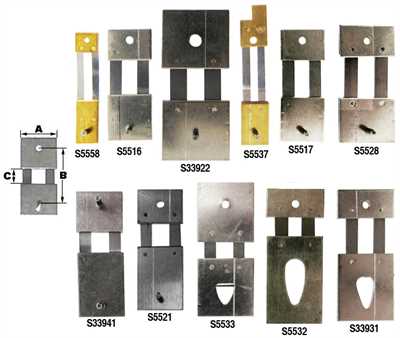
Wis1971 is correct. The only thing is with your clock it does not appear all the numbers are there. To properly clean oil and replace parts with these movements is very time consuming. Every brass part should be polished; every screw should be polished and blued. You do not just wash the movement out in an ultrasonic tank. If the place you took it to do that sort of thing then take it to a proper clockmaker. £300 is too much; around £200 including parts would be I think a fair price. Here is a photo of the fitting of your clock for a new suspension spring, I think this one should be right for your clock, you might need to file the top block a little in order for it to fit, both blocks must close tight when screwed back together. Also I have picked out a pendulum that should be right for your clock, again you will I expect need to alter it a little. Ø35mm (No.1) Pendulum & Hook* Suspension spring S5558
 1 point
 -
I think it was added to the stem. I have often found rust in there. after cleaning and adjusting, I sometimes put a small o-ring under the crown. vin1 point
-
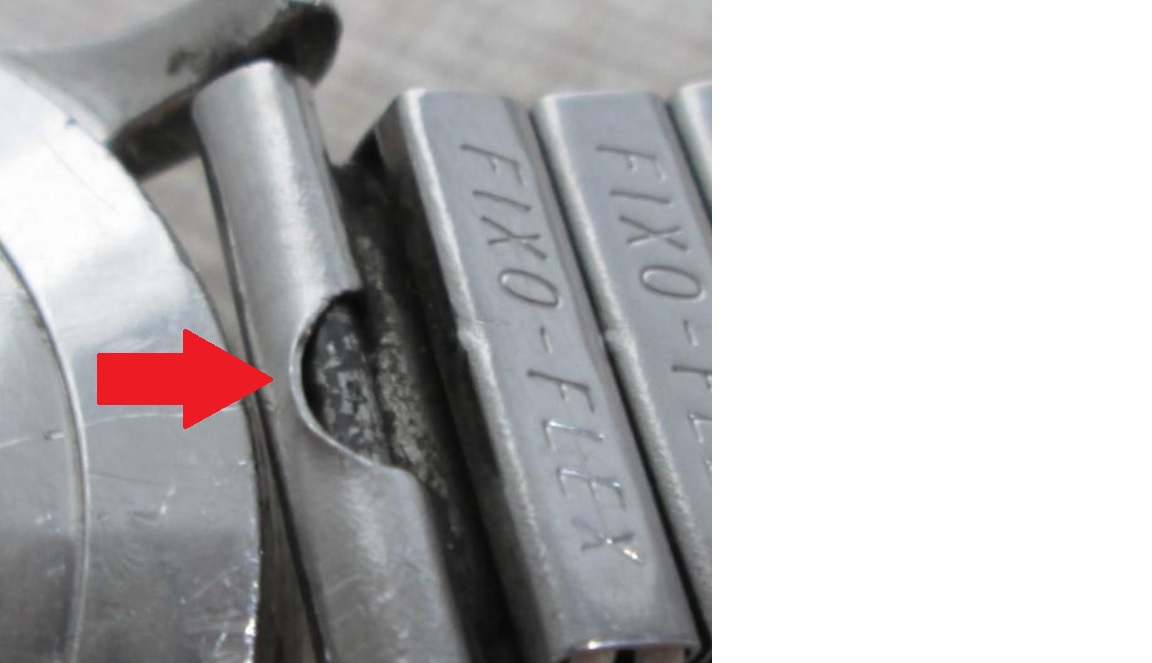
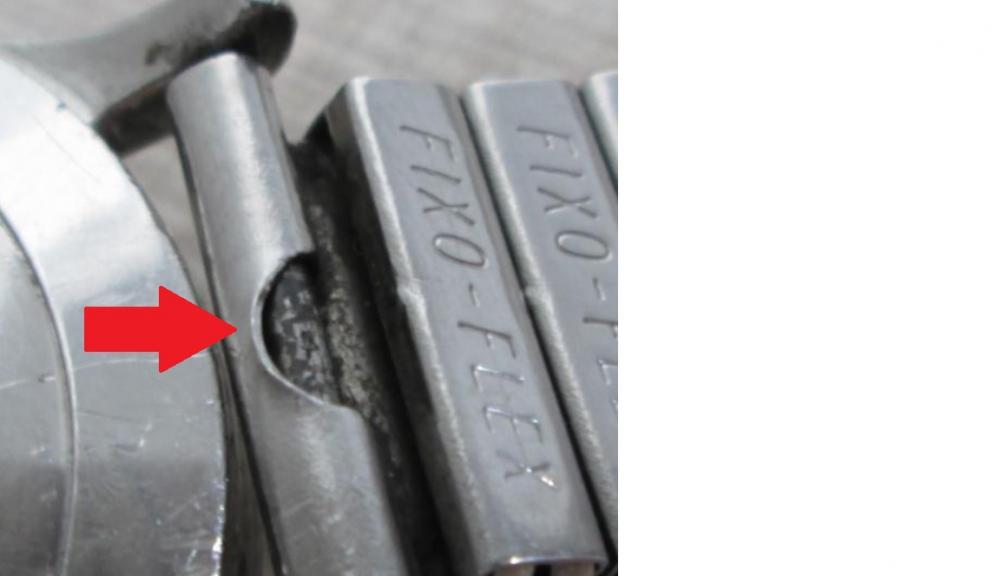
If you pry at the edge of the band, ie near the case, you may not damage the band but you may damage the case and/or lugs. Conversely, prying in the middle of the band may distort the band a bit but is safer for the case. In the case of the original pic posted by the thread starter, I would probably break the spring bar by forcing a screwdriver into the gap in the band itself, not in between the band and case(see arrow). IMO this would be cause the least damage. Anilv
 1 point
 -
I've taken dozens of these old pocket watches apart and I can say the ONLY place I've ever found a "washer" was under the crown wheel of some movements. That's not to say that someone at some point added a washer to wrongly fix a problem. but that's the only place I can think it would have come from. Sometimes when removing the crown wheel the washer is "stuck" to the bridge plate by the old dried oil/grease, and it looks like just part of the plate, but it's not. I have seen washers a couple times under the case screws, again to wrongly fix a problem, and it could have become lodged in that recessed area as well....hope this helps...1 point
-
Nice adaptation of the luthy-Hirt oscillator. Sent from my iPhone using Tapatalk1 point
-
Thanks! I called it a turret because it was the only thing with a lever that matched what I have. Do you suppose it had a draw bar at one time? I'm wondering if that's how it worked. I have some casting equipment that I'm not sure still works but if it does, I could cast an insert for the back to accept a drawbar out of brass. As far as the button, that's way above my ability to make and I don't have any way of holding stock that big. I don't know for sure but I'm guessing a machinist would charge a young fortune to make something like that so I'll probably be going the hammer route. I'm guessing that getting it red hot would make shaping it easier but I really know nothing about steel. The thing, whatever it is, is really a precise machine and functions very smoothly. It would be a shame to let it go to waste. Think of the watches I could ruin with it!1 point
-
If you registered with them you can go to "My Dashboard" and check the status of your order.1 point
-
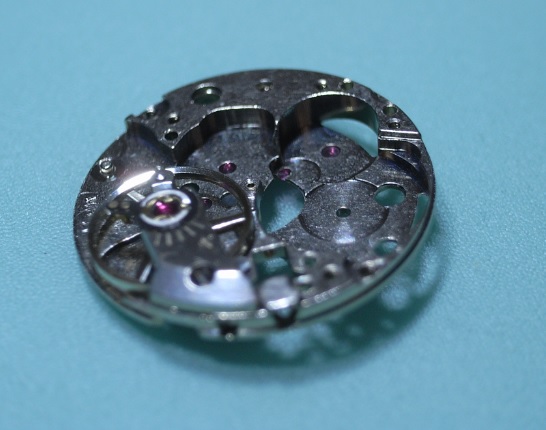
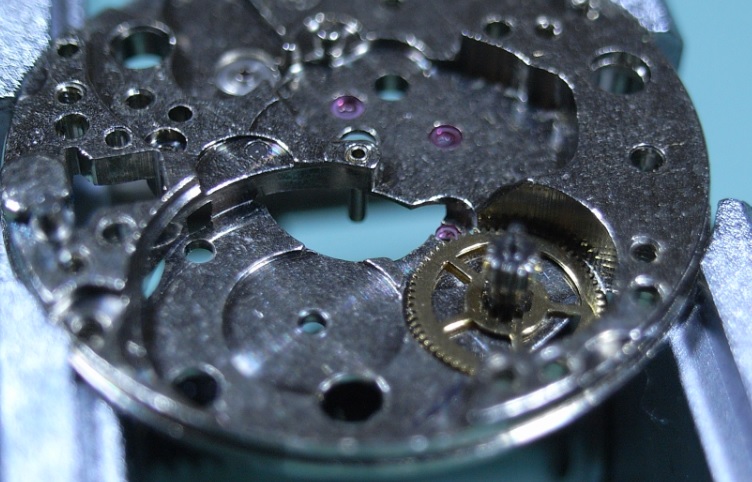
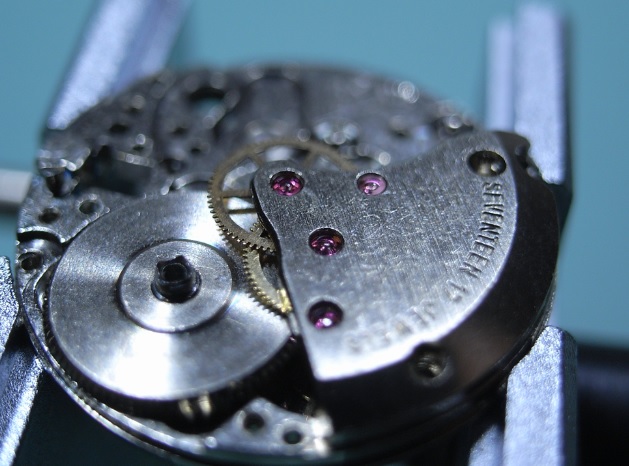
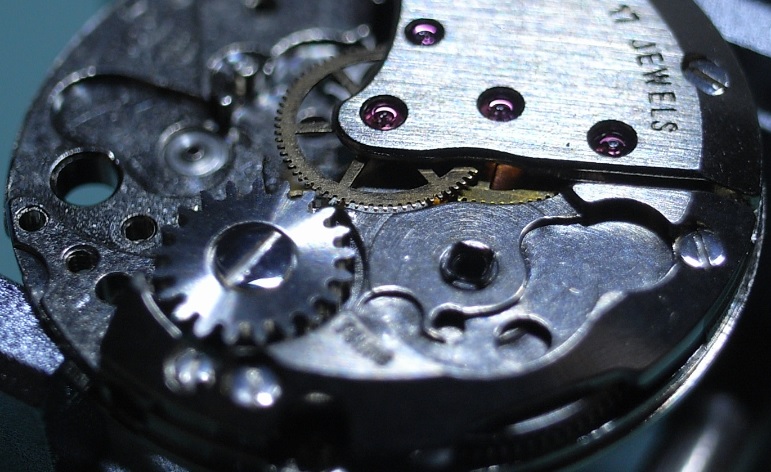
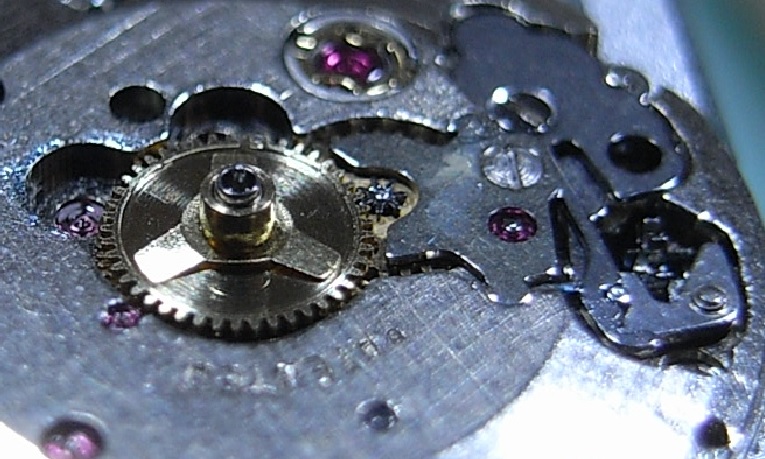
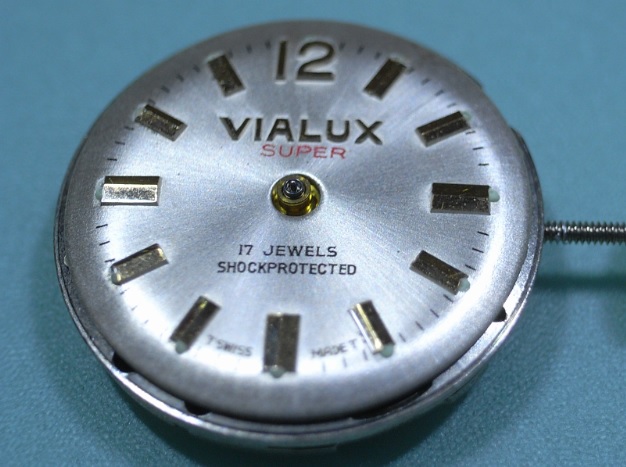
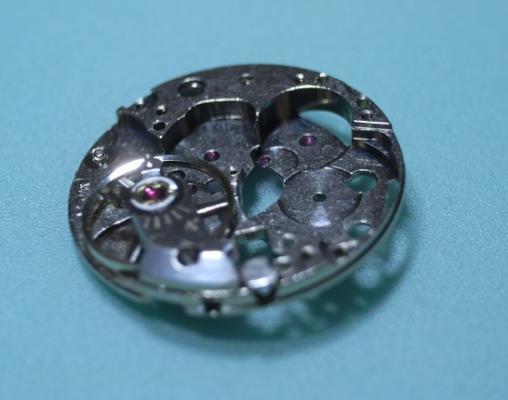
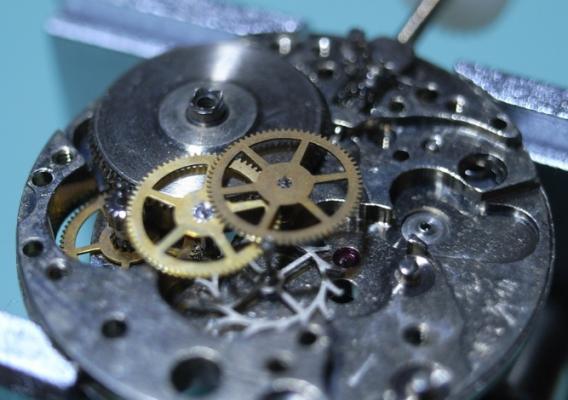
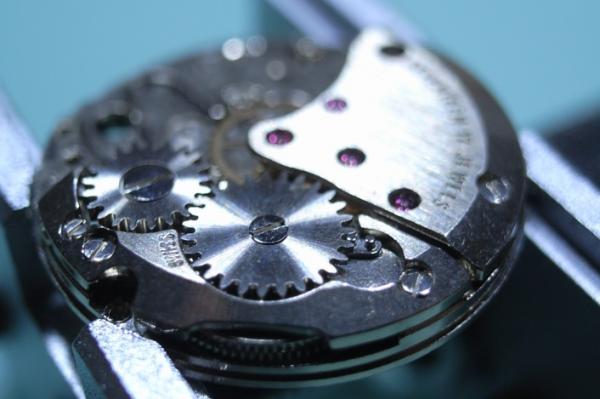
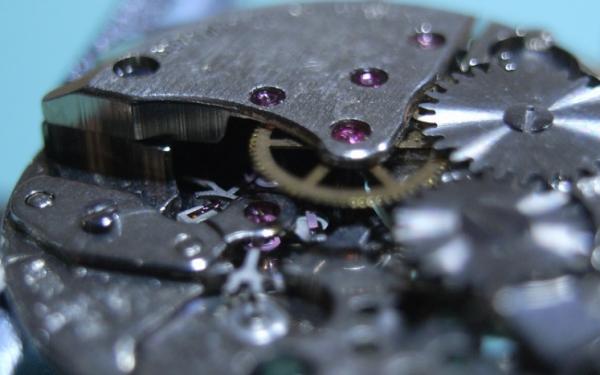
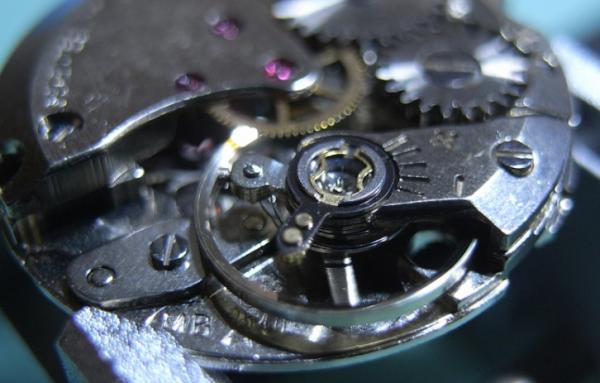
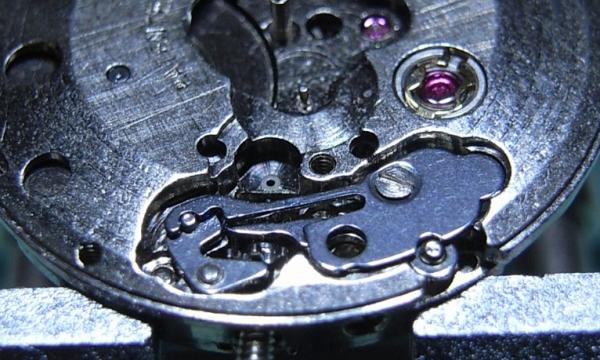
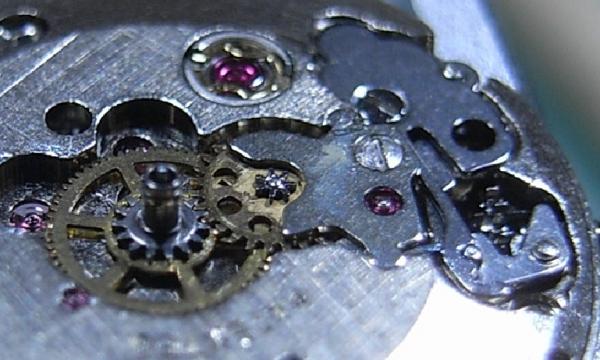
Cleaning Replace the Balance back onto the Main Plate for cleaning, and clean parts. Assembly Below is the link to the Tech Doc on this movement. ETA 2540-41.pdf Assembly of this movement is somewhat different in procedural order than normal. This took me a little while to work out, and I was also hampered by only having a x3 Loupe and a x10 Loupe. This made it very hard to line-up the Gear Train. I am still waiting for my good quality x3.5 x5 x7 x10 loupes to come from A*F Swiss, and for this movement I would highly recommend at least a x4 Loupe (preferably a x5). Firstly replace the Intermediate Wheel, and locate the lower pivot. Then replace the Barrel and locate the lower pivots for the Third Wheel, Second Wheel, Escape Wheel. Place the Train Bridge back on, and locate the top pivots as best you can with the limited room you have, and replace the screws for the Train Bridge and just LIGHTLY screw them down. DO NOT APPLY ANY TORQUE TO THE SCREWS!! Then with a piece of Rodico, grab the Barrel and remove it as pictured below. You now can loosen the Train Bridge Screws and gently move the pivots into their jewels completely. This also allows you to free spin the gears including the Intermediate Wheel. Then tighten down the Bridge. Once you are happy with train gears and have the bridge tight, replace the Barrel, install the Barrel Bridge, and the Crown Wheel. While tightening down the Barrel Bridge continue to check the free spinning of the gears. Install the Click and Click Spring, and then the Ratchet ... check it's operation. Replace the Pallet, and the Pallet Cock. Replace the Balance and remove the Inabloc Jewels ... clean, then oil them, and replace. Turn Over. Refit the Keyless Work. First the Setting Lever, then the Yoke and Yoke Spring, and lastly the Setting Lever Spring. Refit the Motion Work. First the Winding Pinion, then the Canon Pinion with Drive Wheel, and lastly the Minute Wheel. Replace the Motion Work Cock. Refit the Hour Wheel, and Tension Spring. Fit the Dial. This was a very interesting movement, with a few little tricks to re-assemble it. Once again, I hope this is of interest and helps others :)


 1 point