Leaderboard


Popular Content
Showing content with the highest reputation on 08/25/16 in all areas
-
Just a wee reminder to everyone. Please do not make any posts that either directly or indirectly constitute a sales advert, as it contravenes the long established forum rules and it will be removed. Thank you.3 points
-
I have over the years refinished a few Speedmaster MkII cases for friends. They are fun to work on as they are,usually quite beat up och the surfaces have been polished a few times to many. Last week a friend of mine told me that there was a 1970 MkII for sale on a Swedish auction site. I was born 1970 so this watch I just had to have! On Sunday when the auction was about to close the website where the auction was held started to act up and I could not log on......... About thirty seconds before it closed the webpage loaded and I was able to submit my offer....then it was down again......did I win or not!!??, I waited for the usual confirmation mail when you have won an object and five minutes later I had mail, -Yesssssss..... The watch arrived On Tuesday and looked like this: Not to bad, but the sunburst was gone and the top surface had......"straight graining" .....I guess the previous owner used a abrasive rotating mop or something! The case was practically free of deeper scratches and dings so a good prospect for a lapping session! The case was stripped and I started with the sides: I do this part in my small Boley lathe with 90mm discs that I have made and a small tiltable table to set the angle. Depending on the geometry of the case you can either slide the case directly on the table or use a adaptor to get the right angle - in this case no adaptor was used. First run on one side done: First disc is 400P so you have to be careful, especially with the start/edge where the case can grip the disc - and you do NOT want this as you will have a case with scratches in places they where not intended to be! After 400P I move up to 1000P and finally a last run with 2000P. This usually gets the surface almost up to mirror finish but,a quick final touch with a mop gives it,that final shine. When the surfaces are flat and when needed polished, it is time to grain the sides and lapp the sunburstpattern on the top. This is done in a small mill I have with a tiltable spindle using a 305mm rotating disc and another home made tiltable table. For this case I use a 120P paper so you really have to take it slow and be sure all the angles are set up correct or the disc will chew material in places you do nor want it to! The result I was not 100% pleased! There where some spots there the graining did not go al the way up to the grained edge around the glass. This was obvious in the pictures and reflections in some angles on the wrist - I relapped to top surface.... Some grease from my fingers on the chamfer in the pictures but the graining is better now! I am waiting for a NOS dial and crown - when they get here I will strip and clean the movement as well.2 points
-
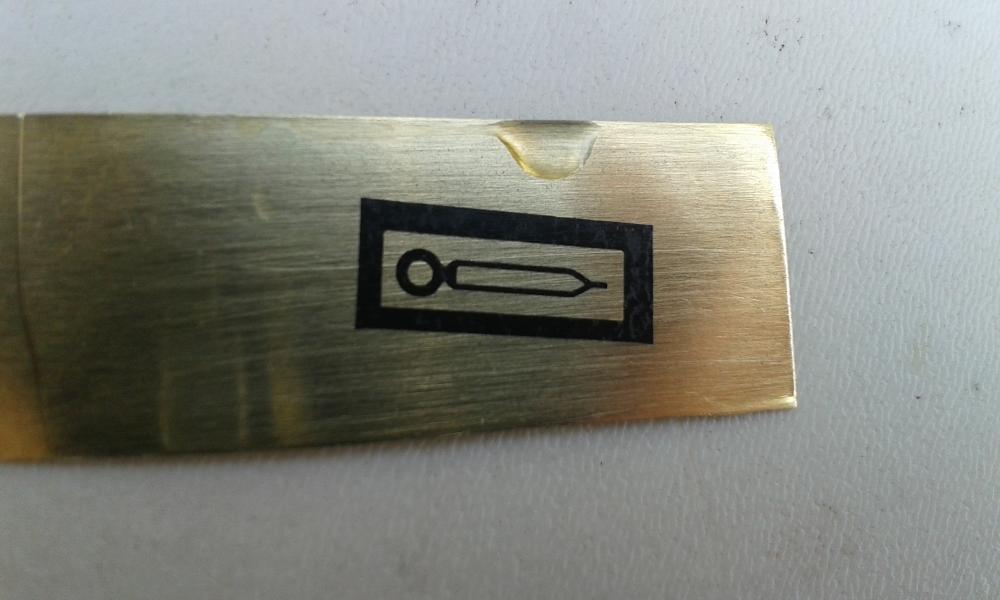
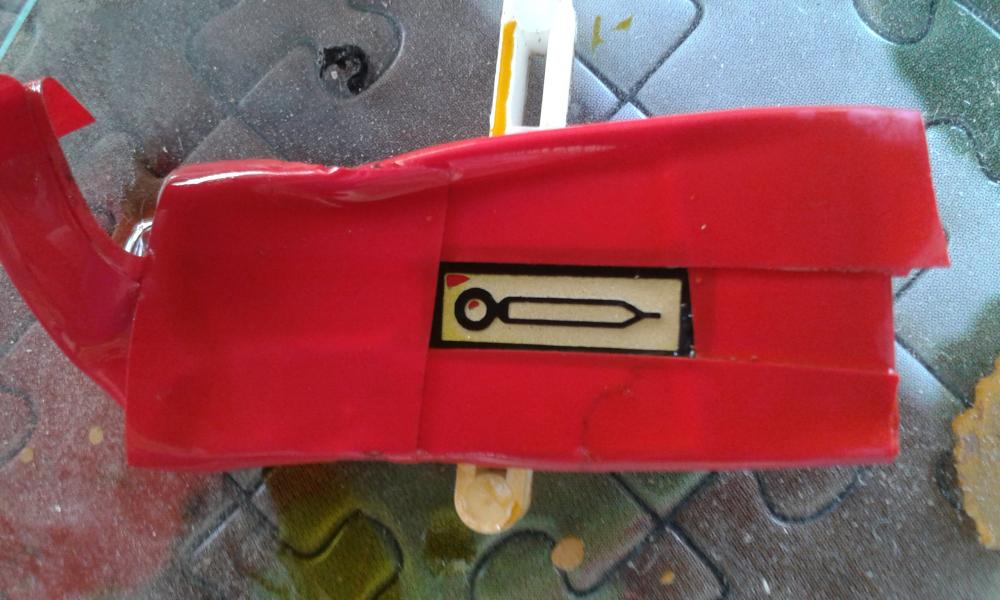
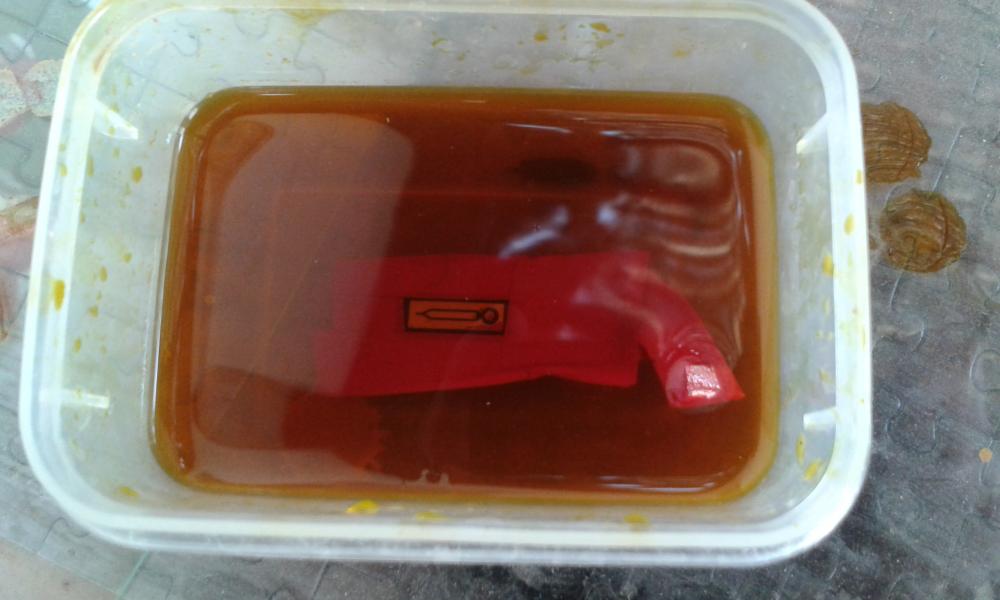
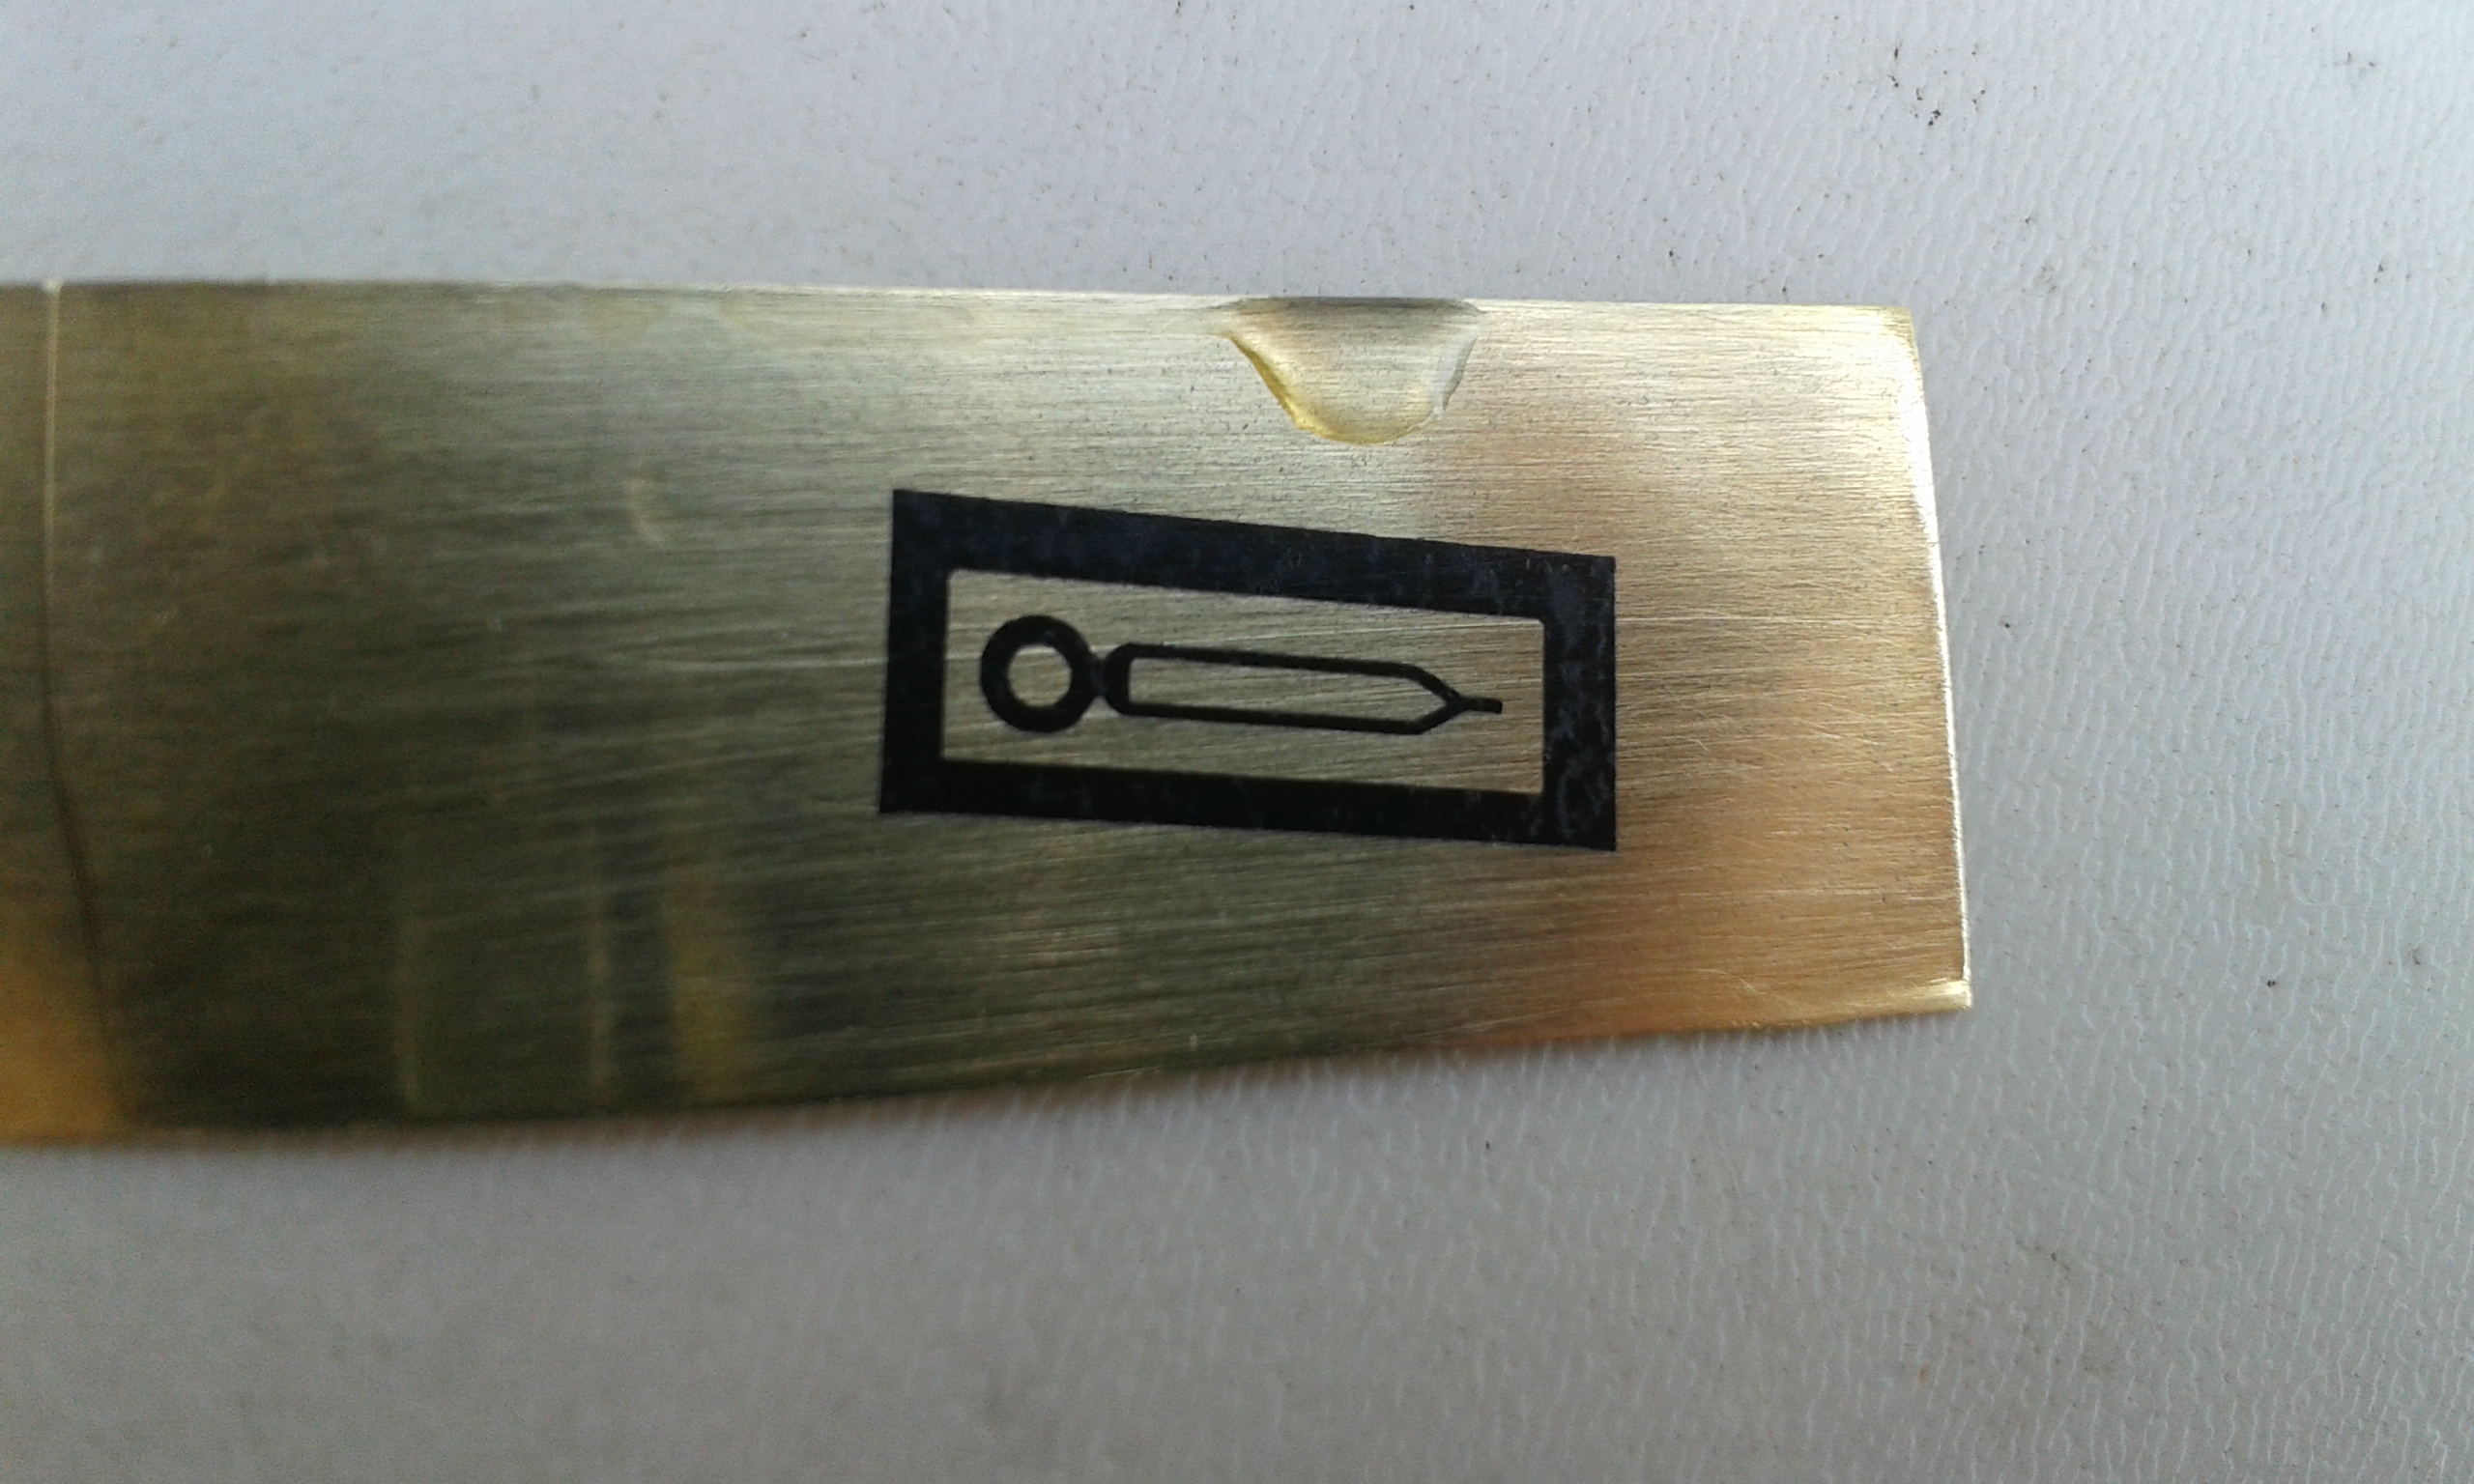
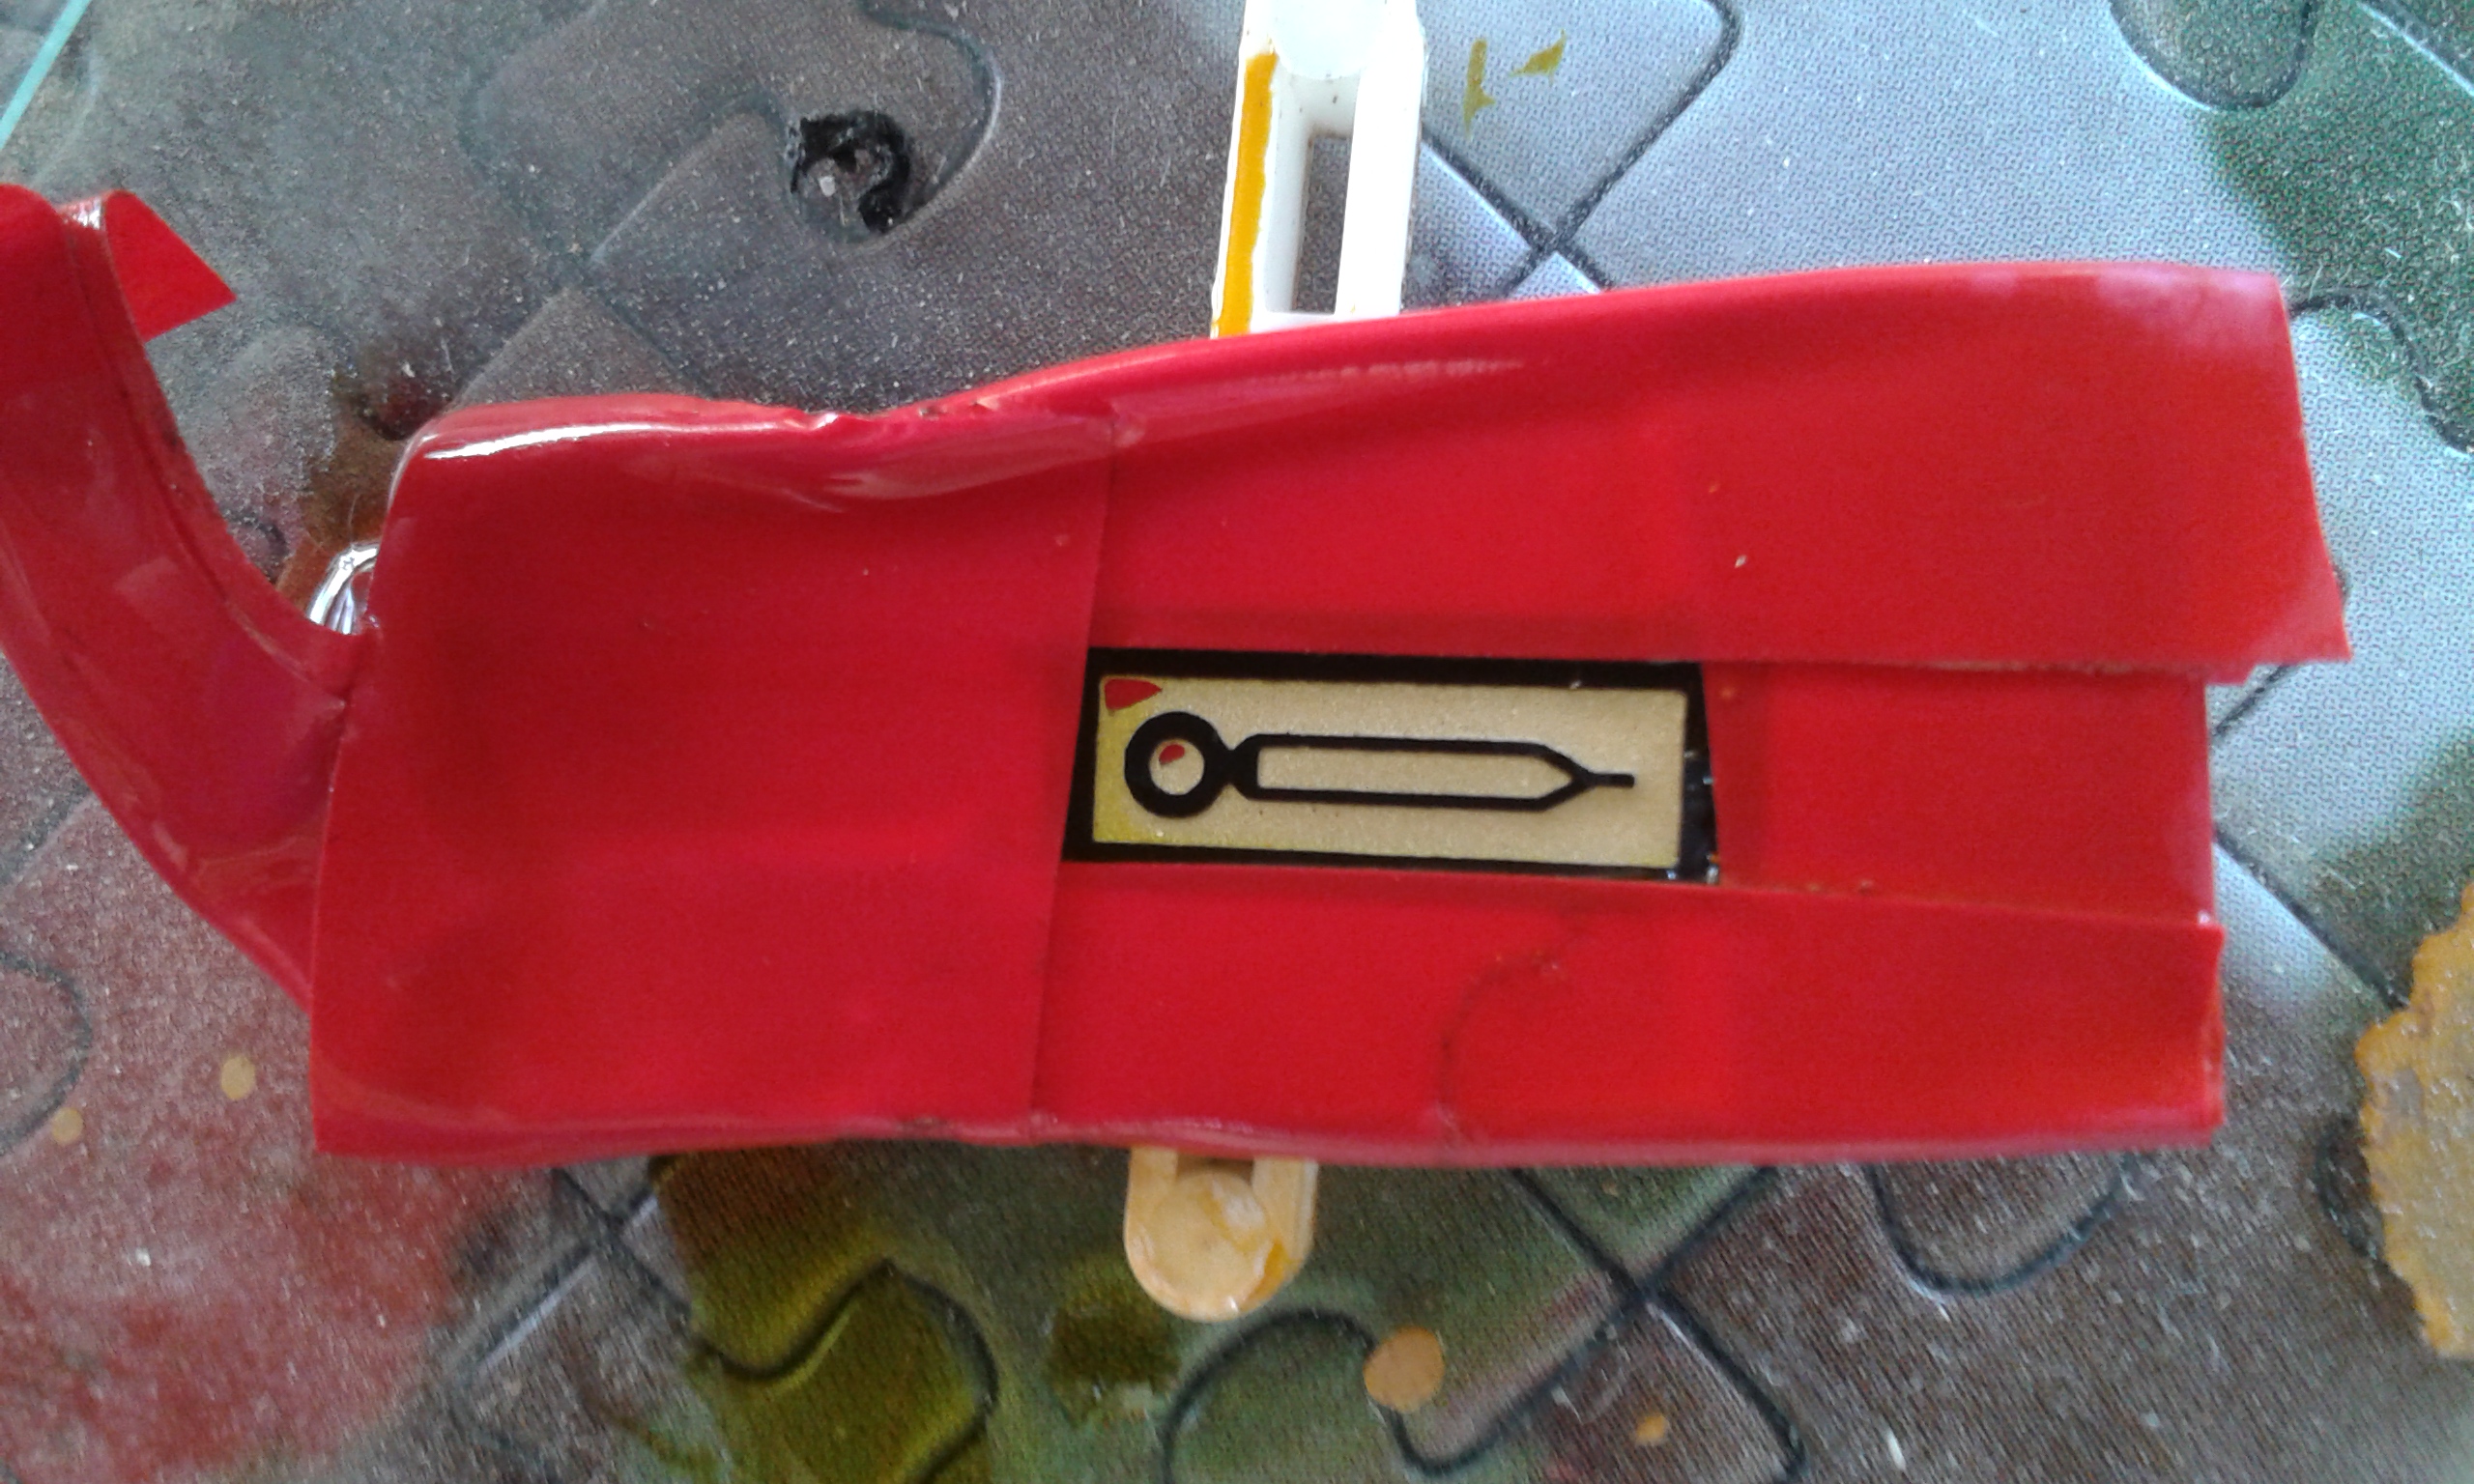
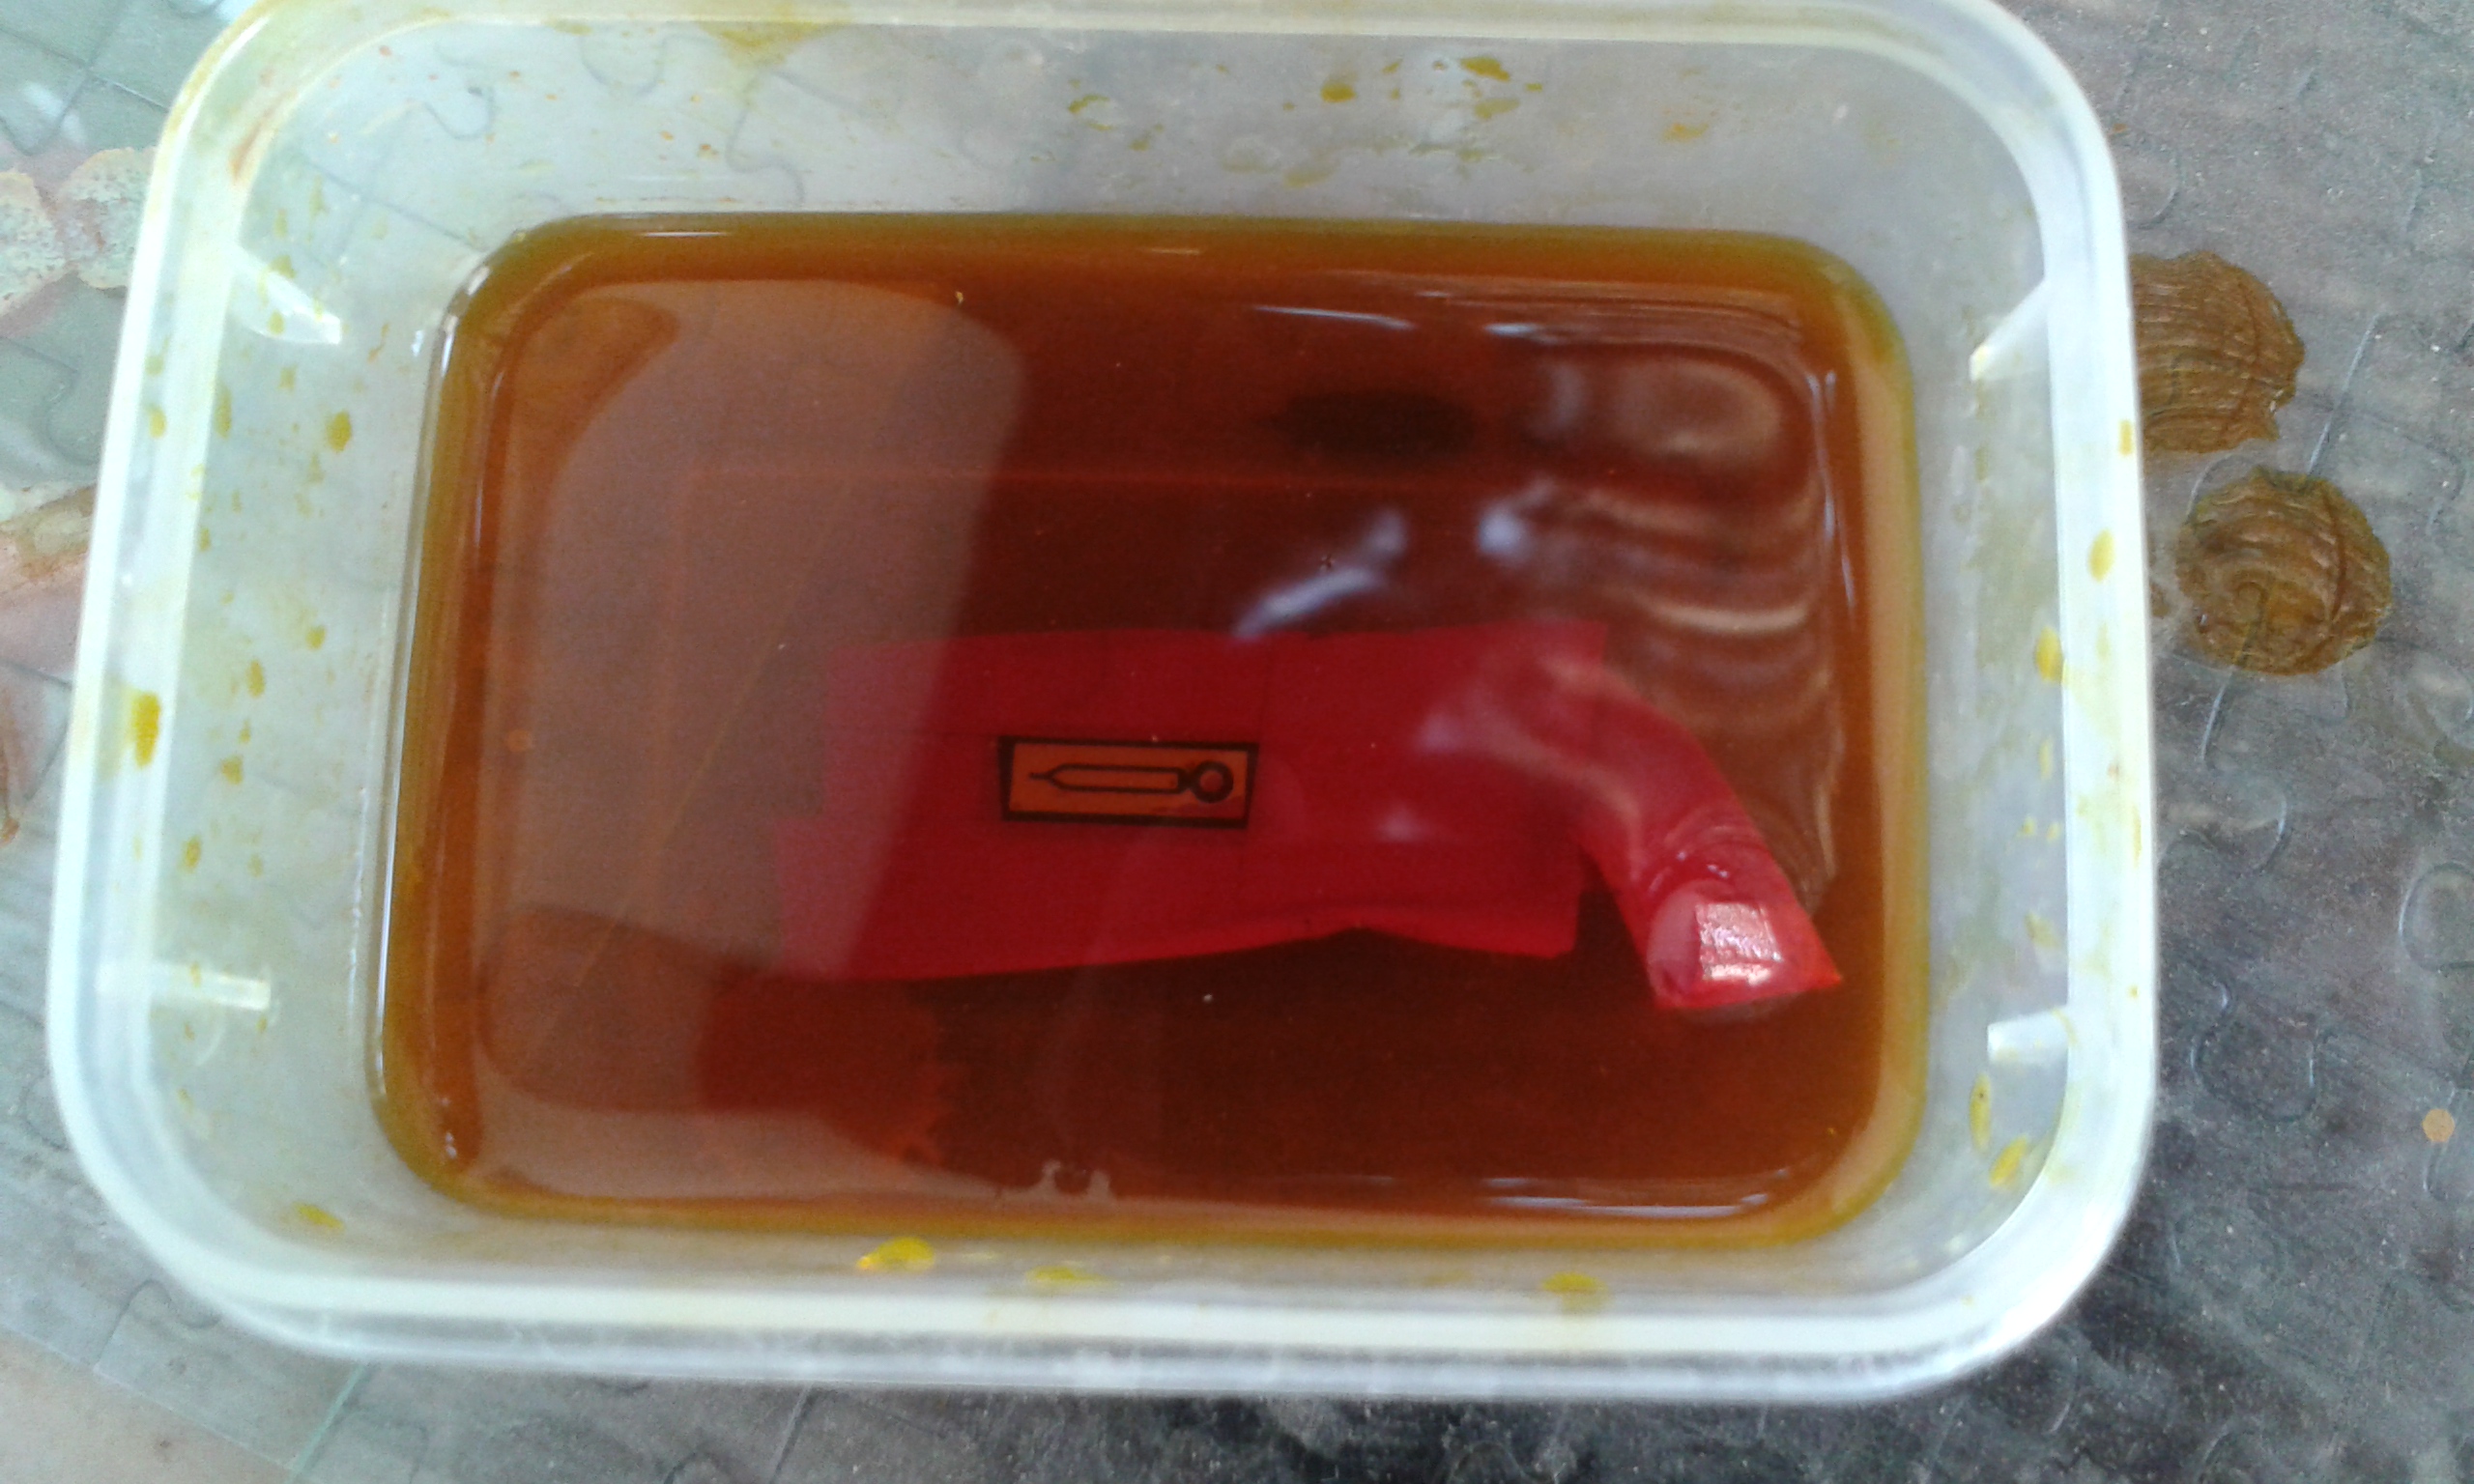
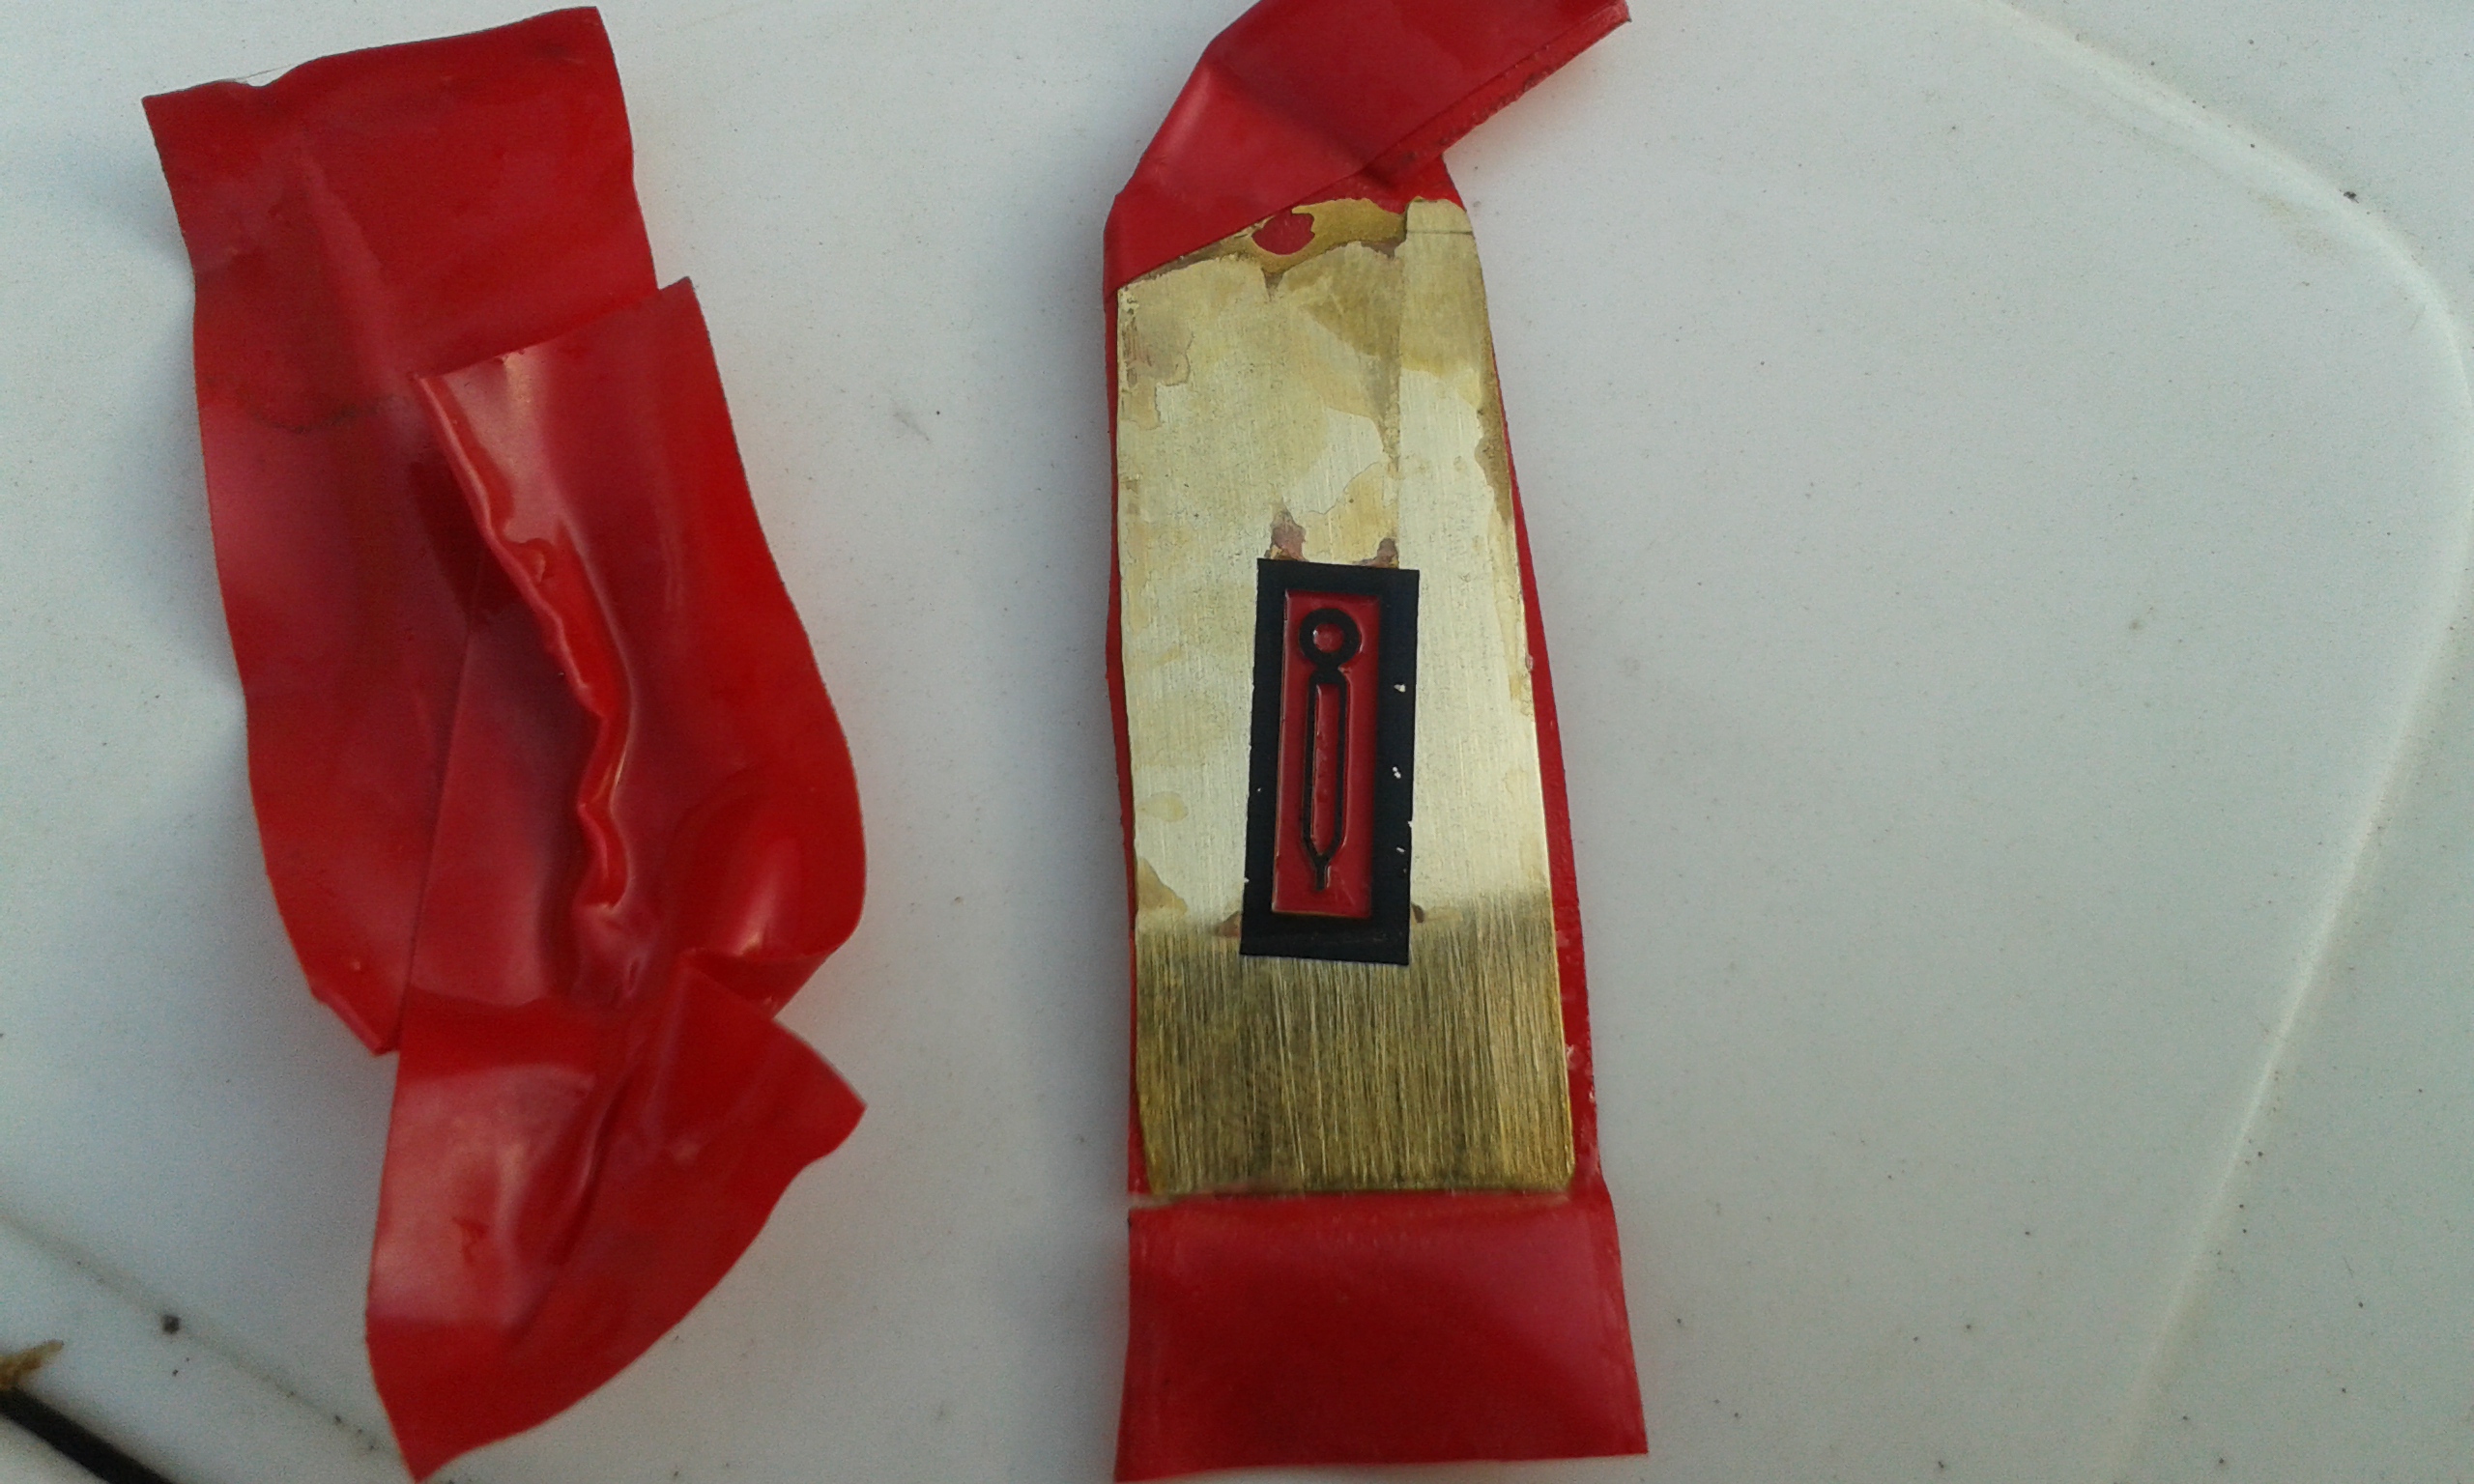
A member here has an awsome tutorial how to make dials with lume markers. http://www.stefanv.com/watches/making-custom-watch-dials-1.html Myself did some experiments with dial etching with FeCl2 but have no pictures of that. I can post hovewer about watch hands etching from brass. Its the same you can do to dials. The shape was drawn in paint. Printed to the back of a sticky paper and then transferred to the copper sheet with flat iron. The back and the rest was masked and then etched.

 2 points
 -
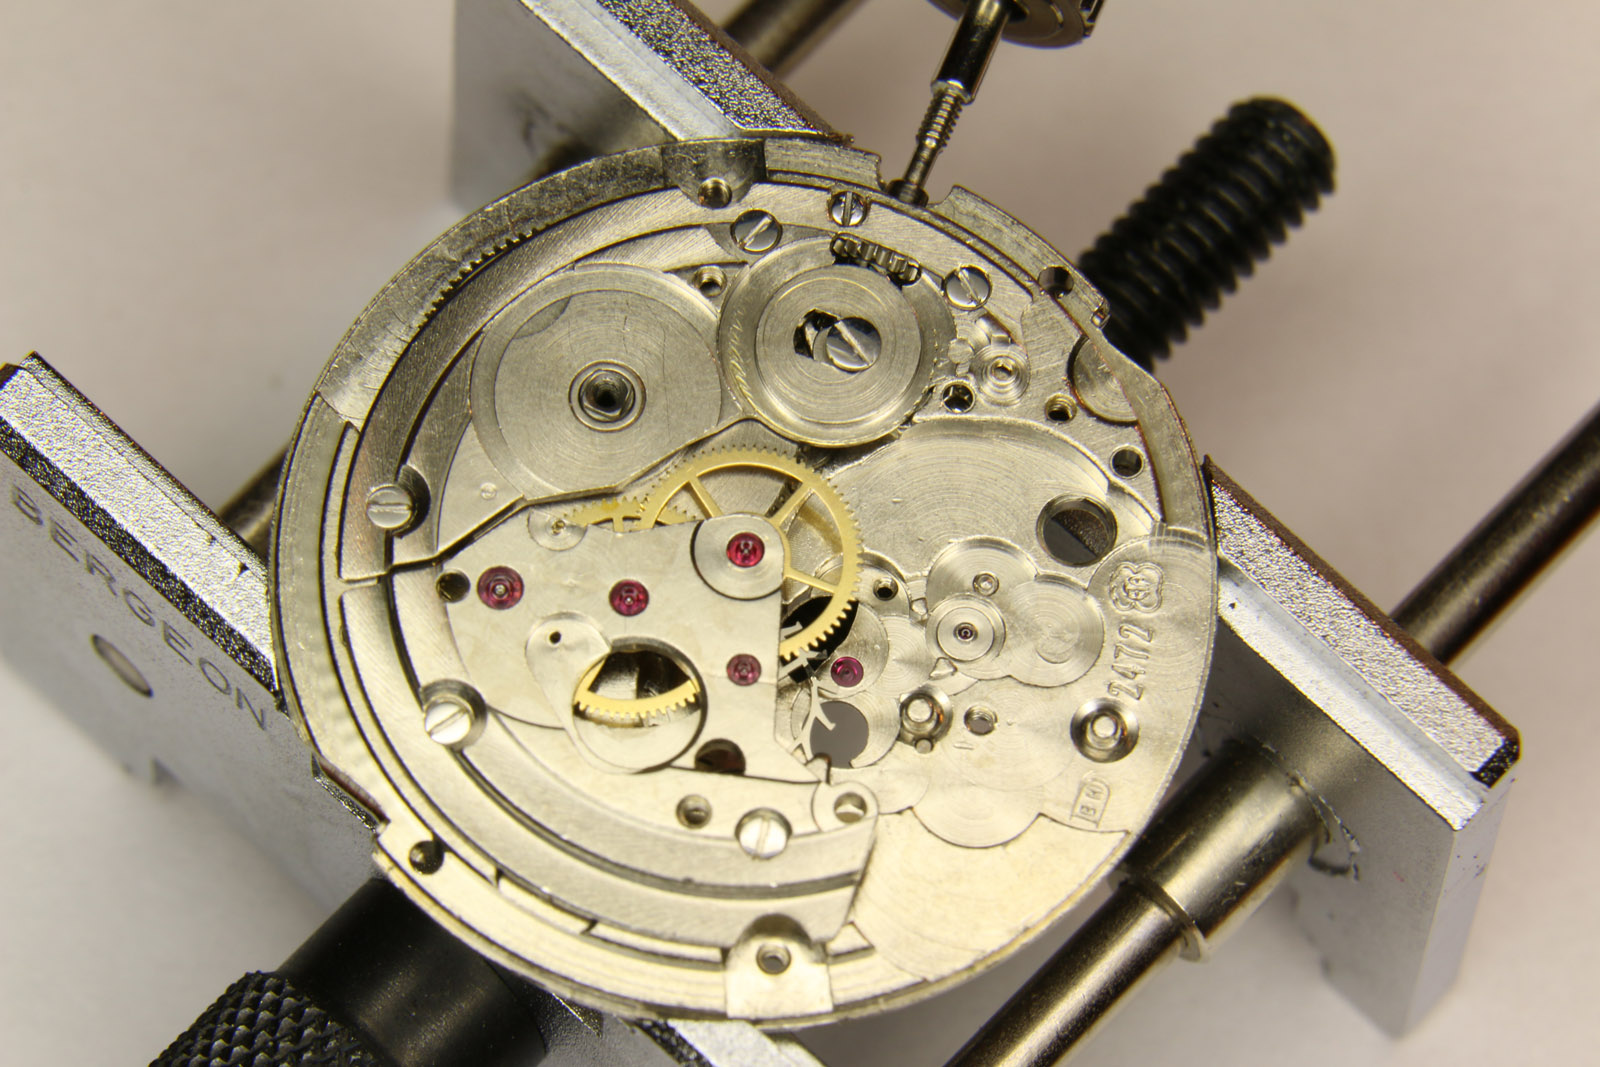
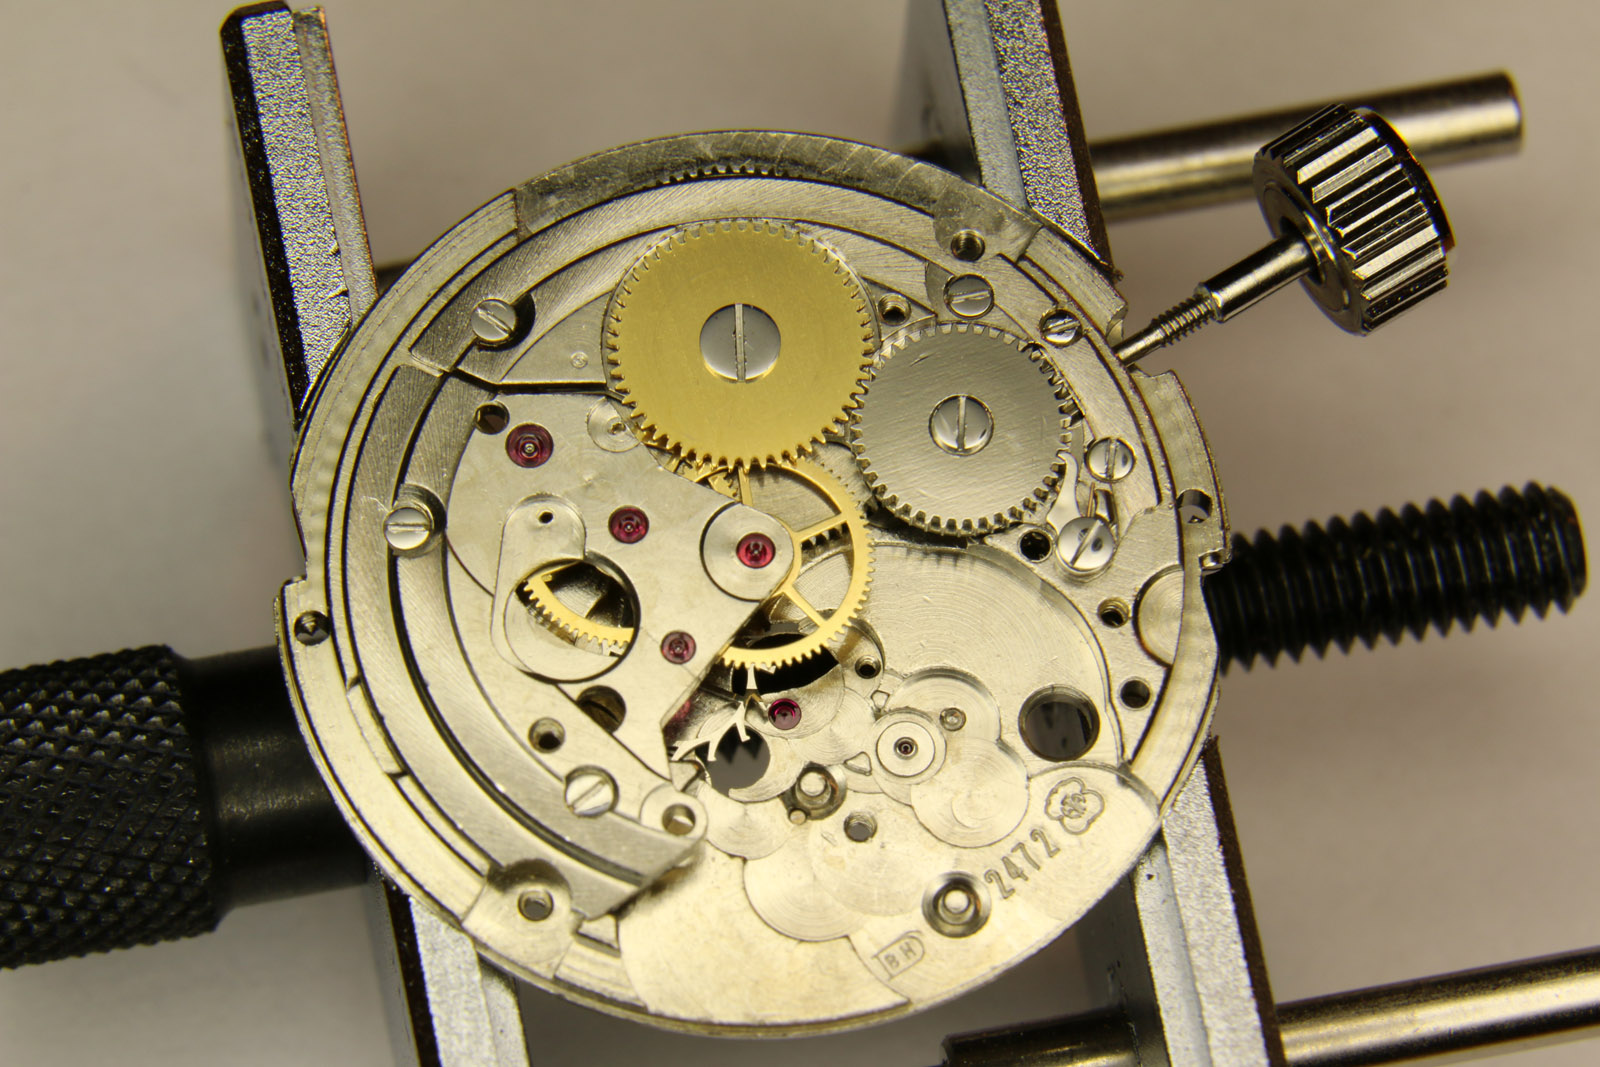
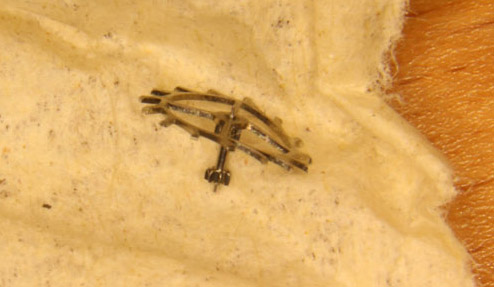
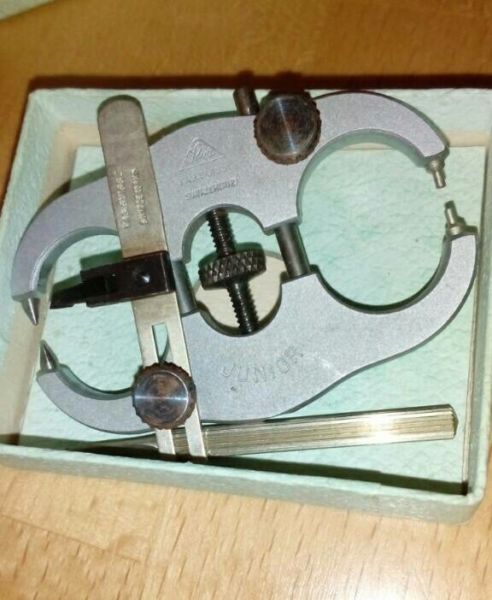
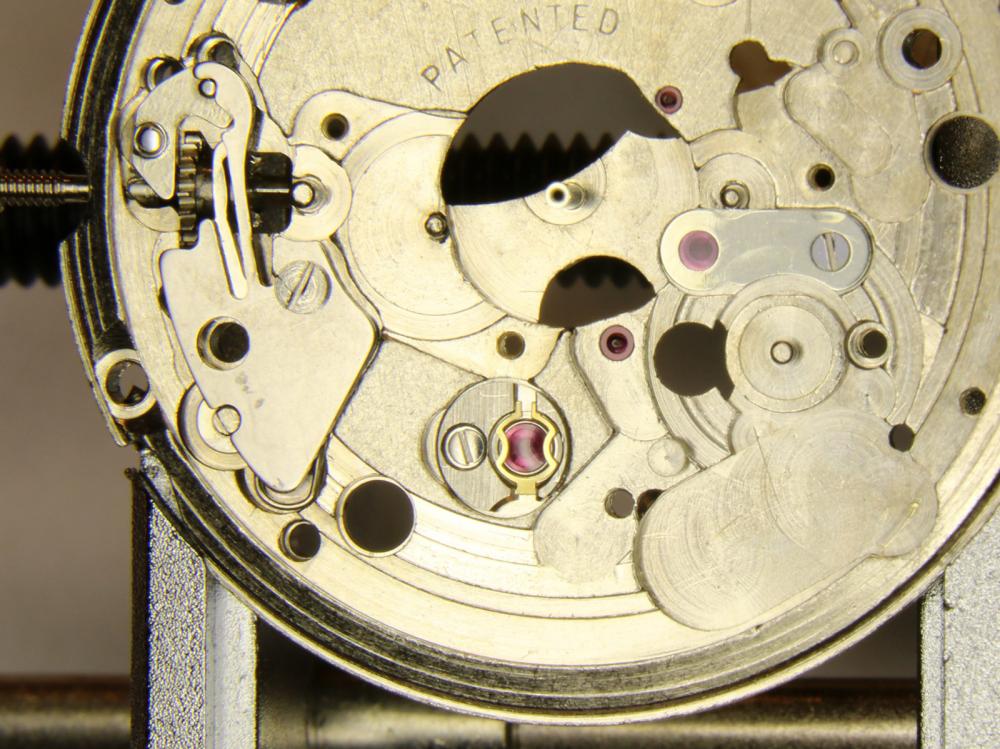
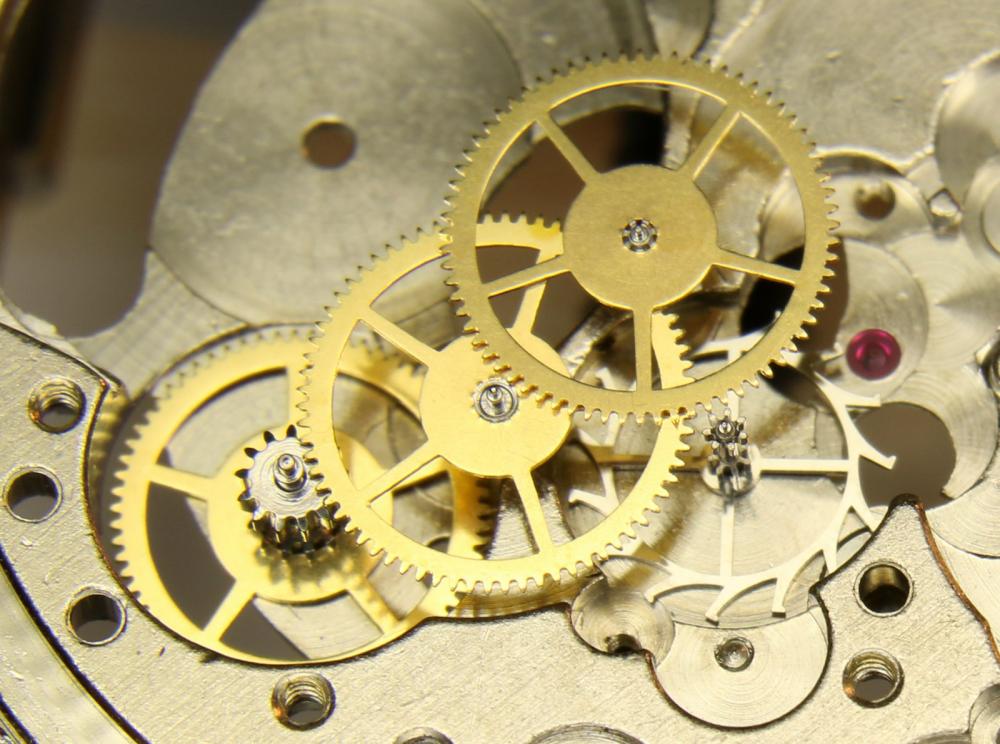
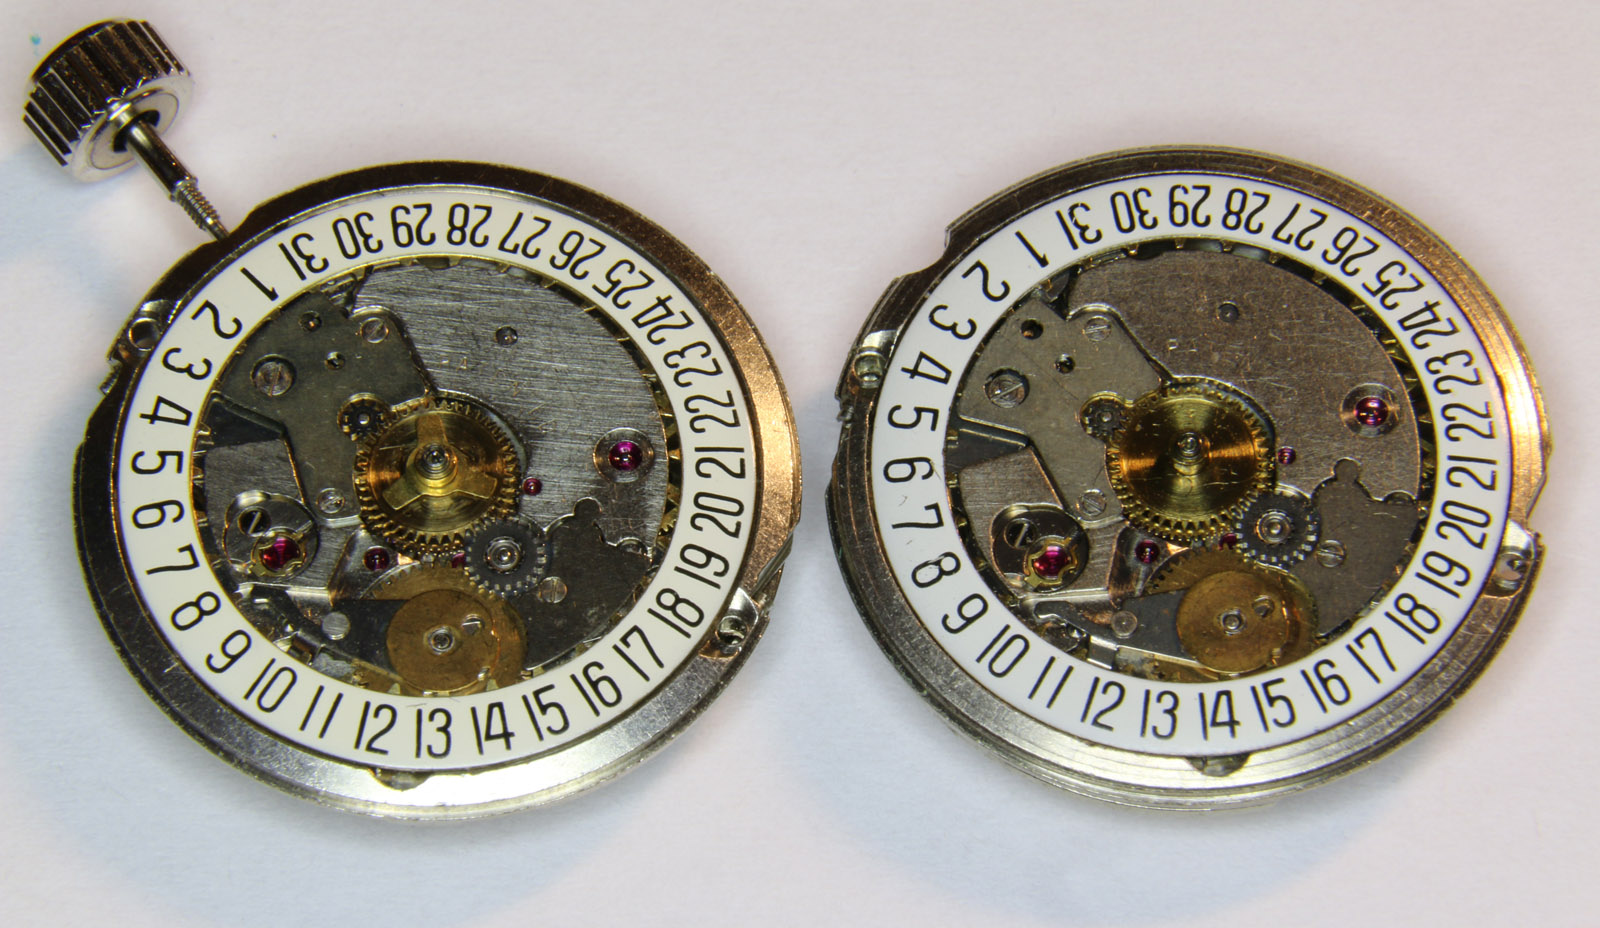
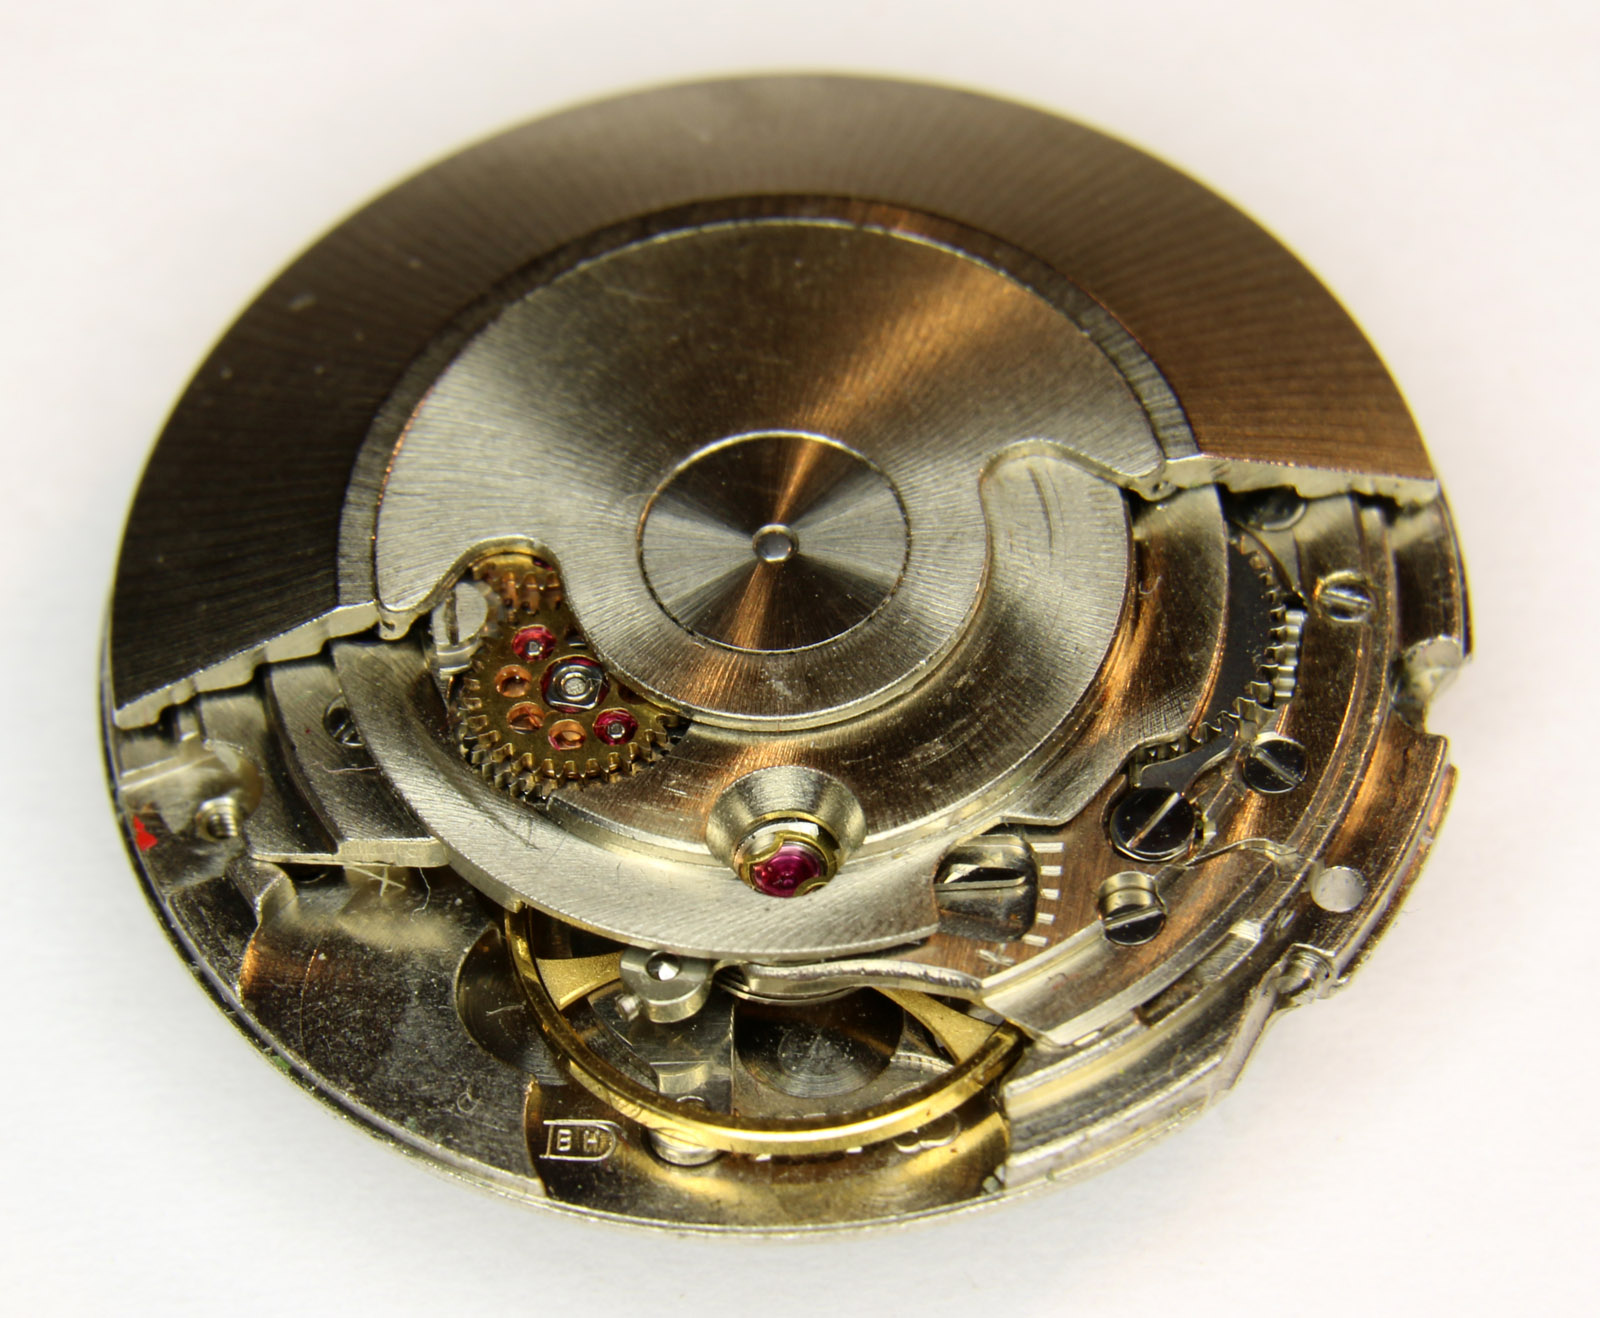
Also merely to gather more and more experience, I bought two ETA 2472 over the time for little money on ebay. I think they were less than 20 EUR each. I already worked on one which did not work, since one of the escapement wheel pivots was sheared off. I demagnetized the movement which I hadn't worked on earlier and put on the timegrapher. The result is excellent, especially since the beat error is zero. I did not adjust anything yet. For the first movement I ordered a replacement escapement wheel on ebay. Unfortunately the seller didn't pack it properly. This is the result: A bent wheel. I was able to fix it with this trueing caliper which I also got for very little money on ebay. This is the result of the movement with the repaired escapement wheel. BTW the seller of the bent wheel refunded me and apologized. He asked me to keep the bent part. The movement which I will work on now has a problem in the date mechanism. The date just doesn't move after midnight. I assume it's a problem of lubrication. Let's see. I will now disassemble the movement. I will use the order that ETA suggests on the 2824, @bobm12, this thread is only for you Cheers Alexander


 1 point
 -
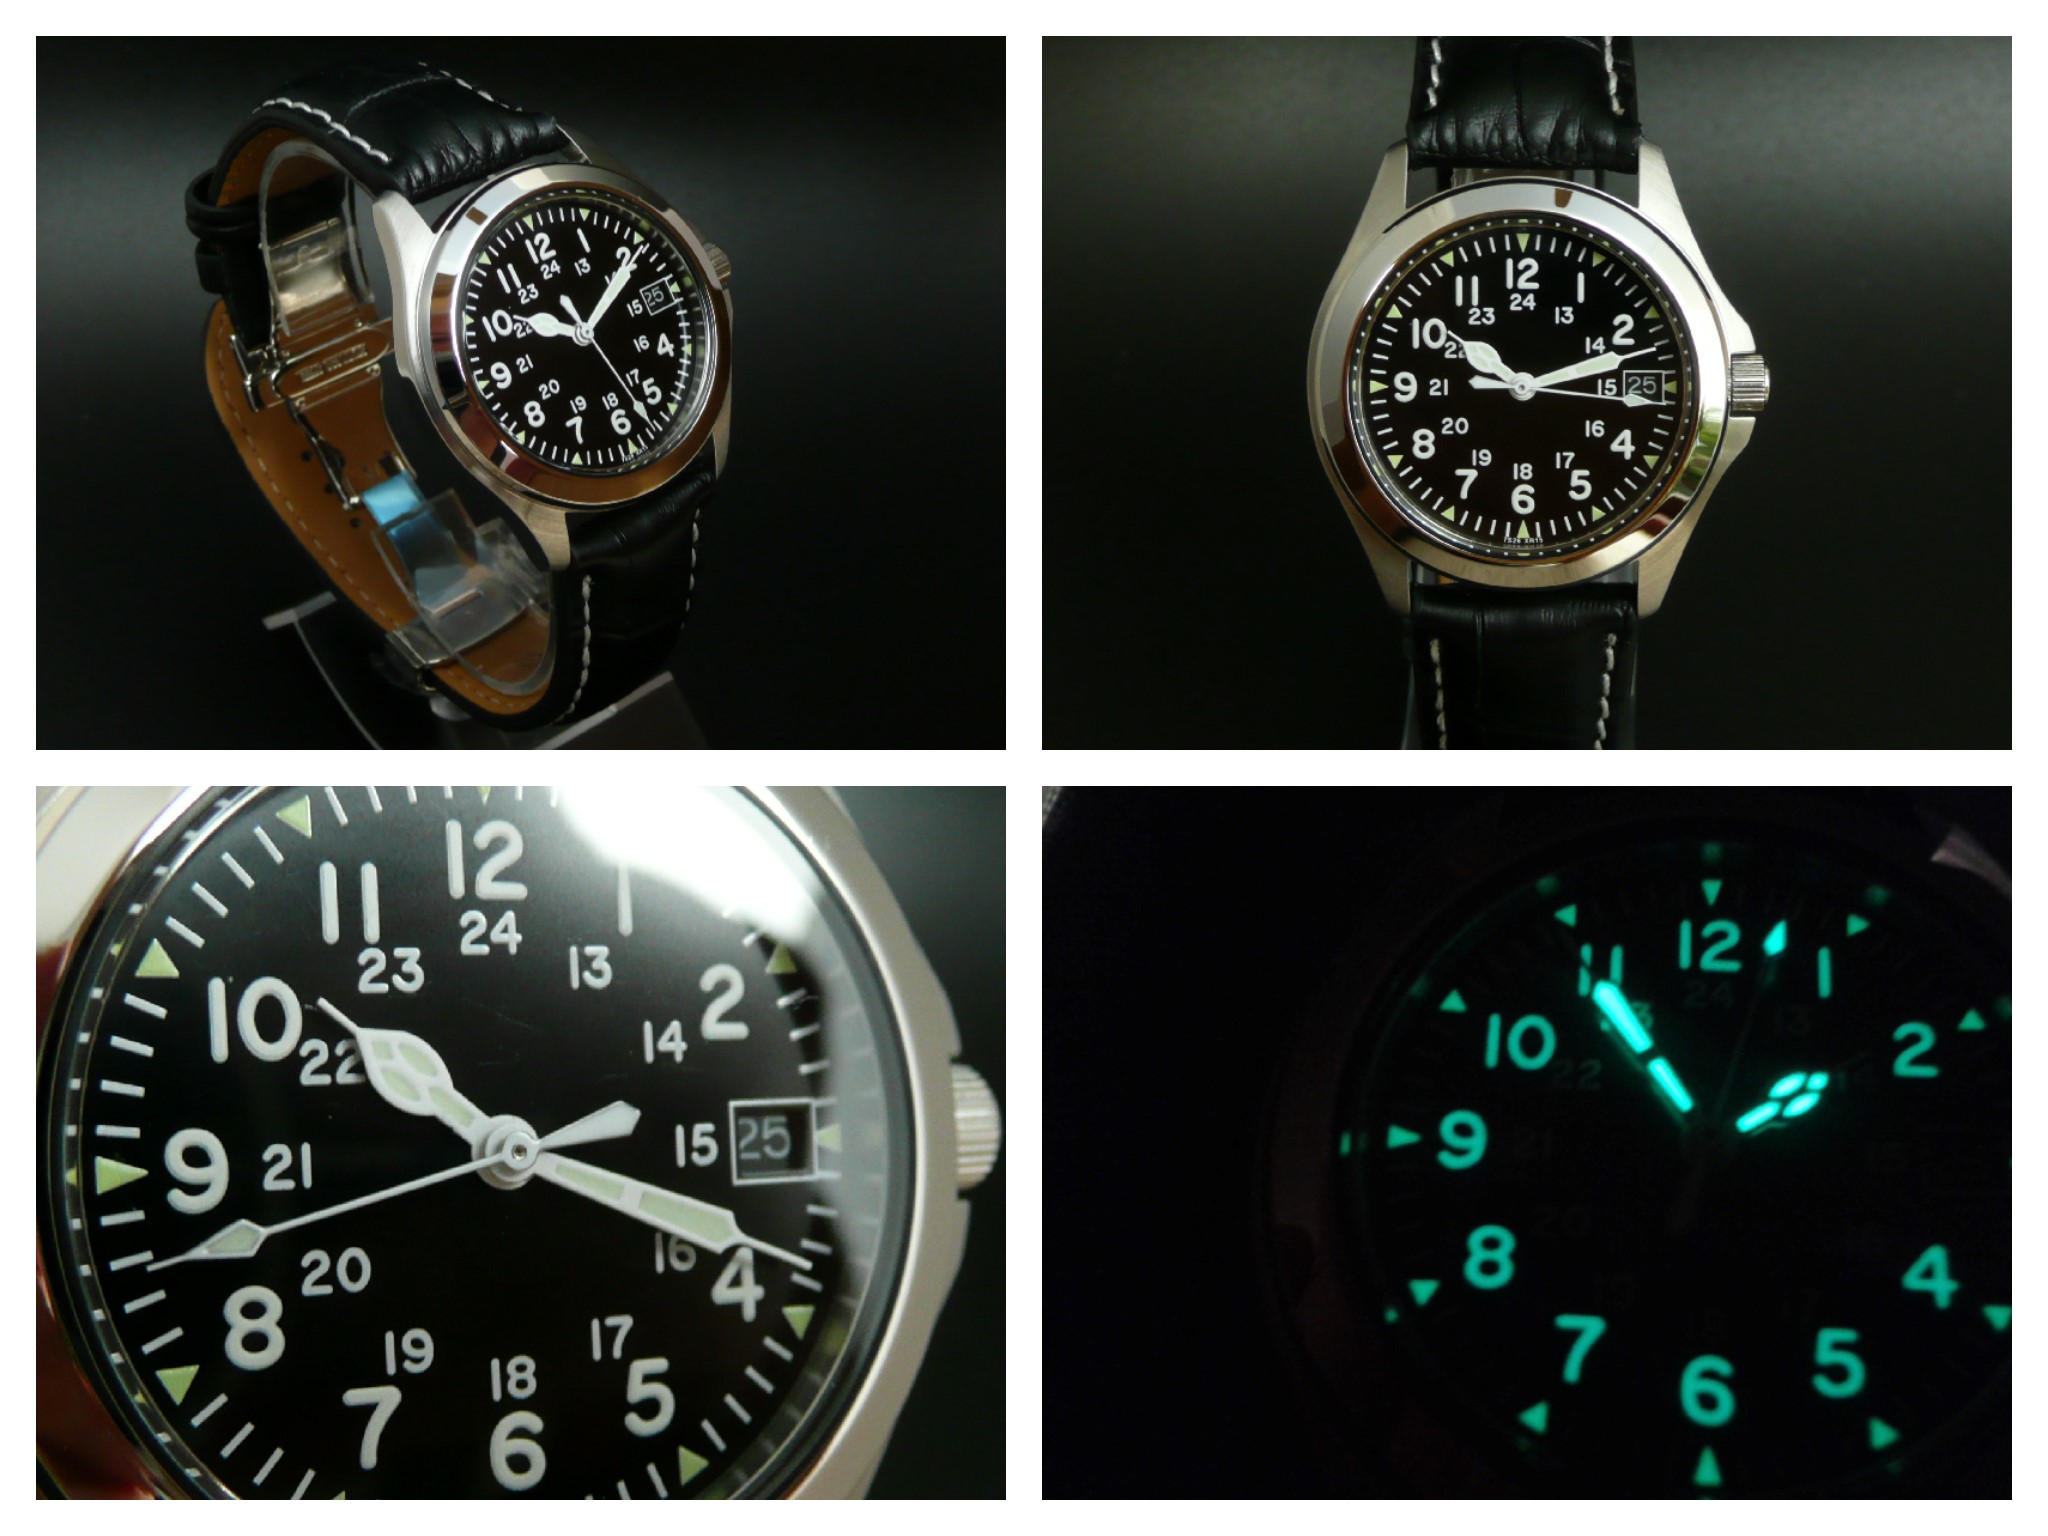
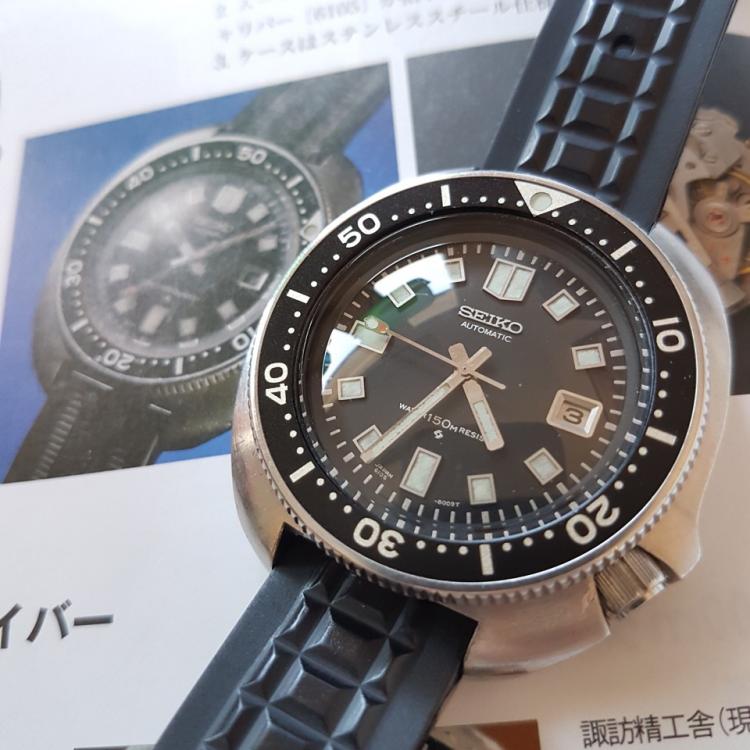
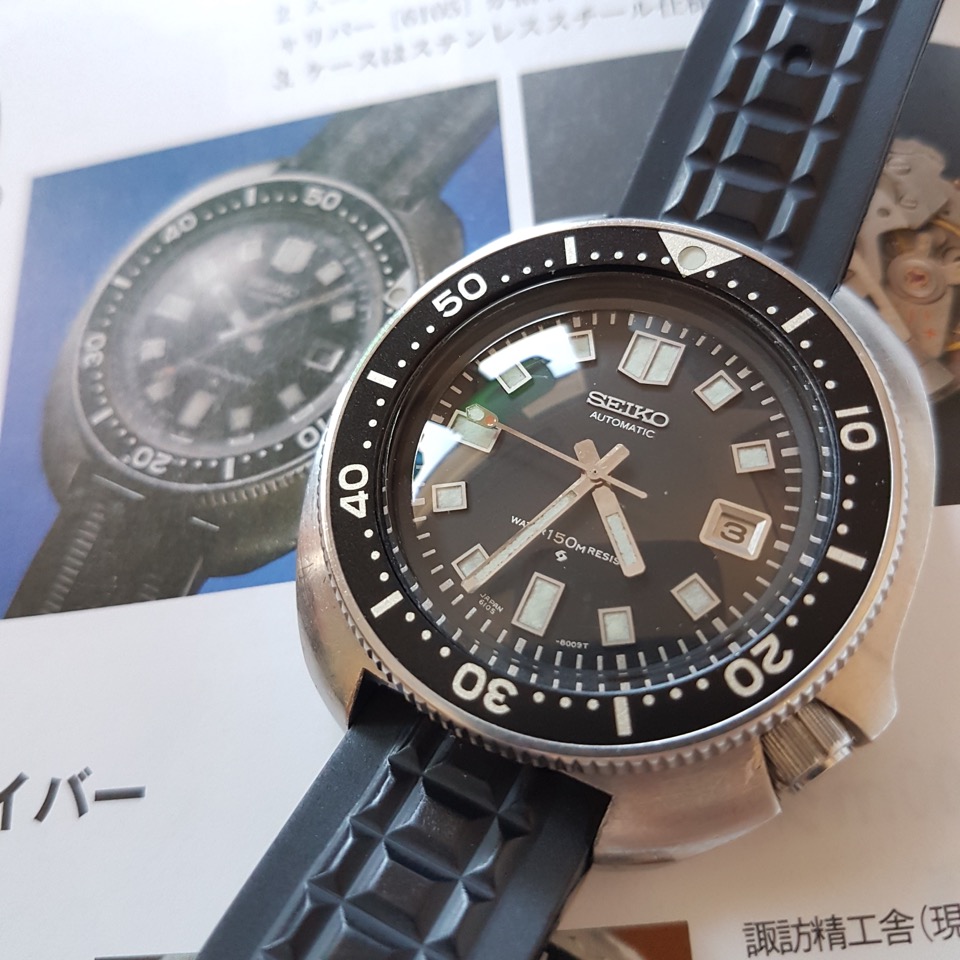
Today Im wearing my numero uno favourite watch ... Seiko 6105-8110 produced in january in 1977. All original, except crystal, but that is a Spencer Klein spec.
 1 point
 -
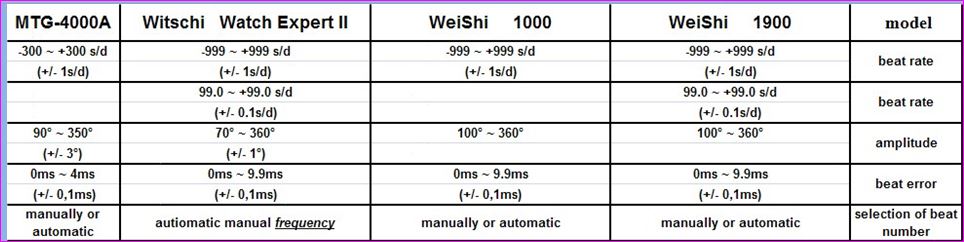
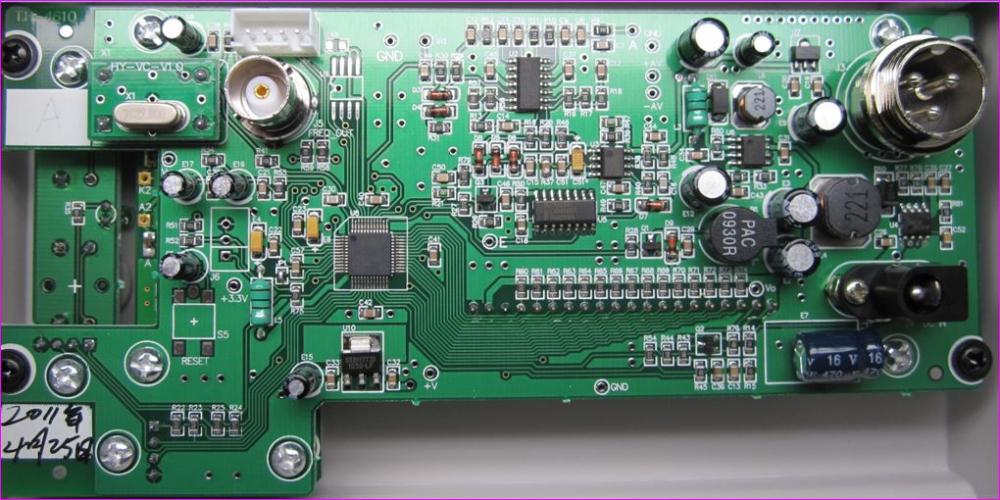
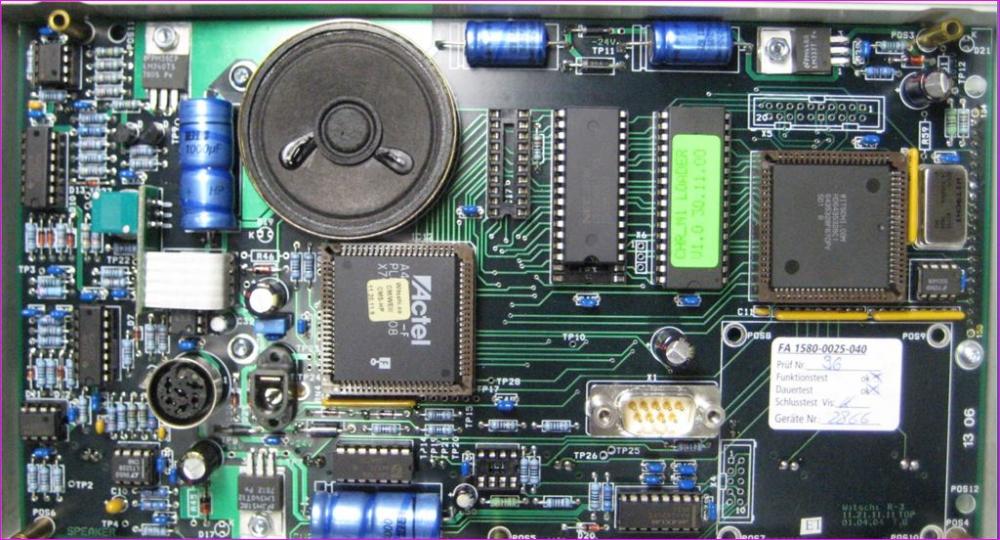
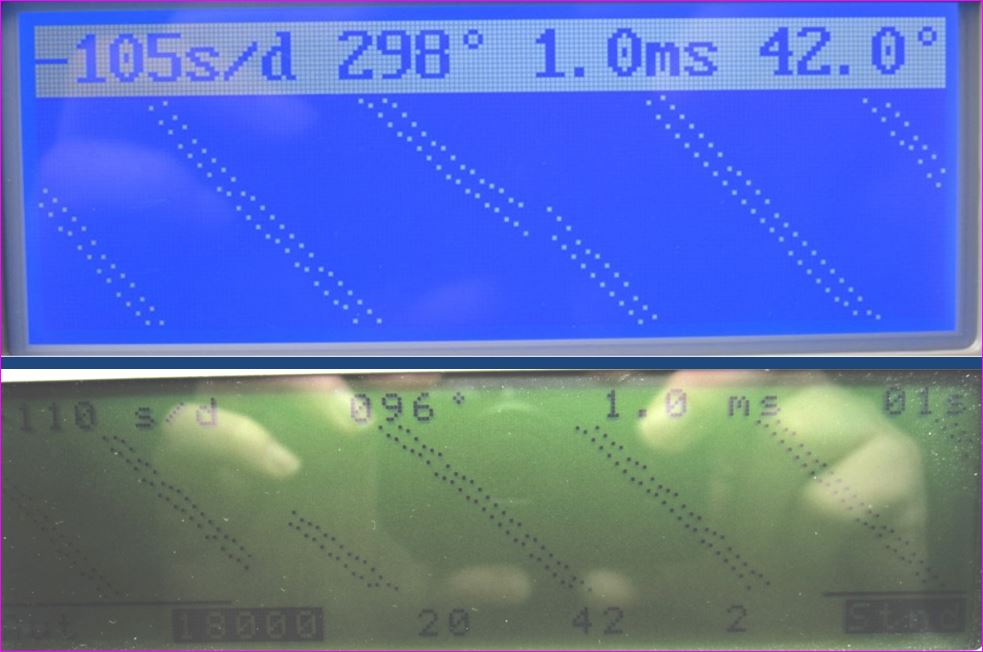
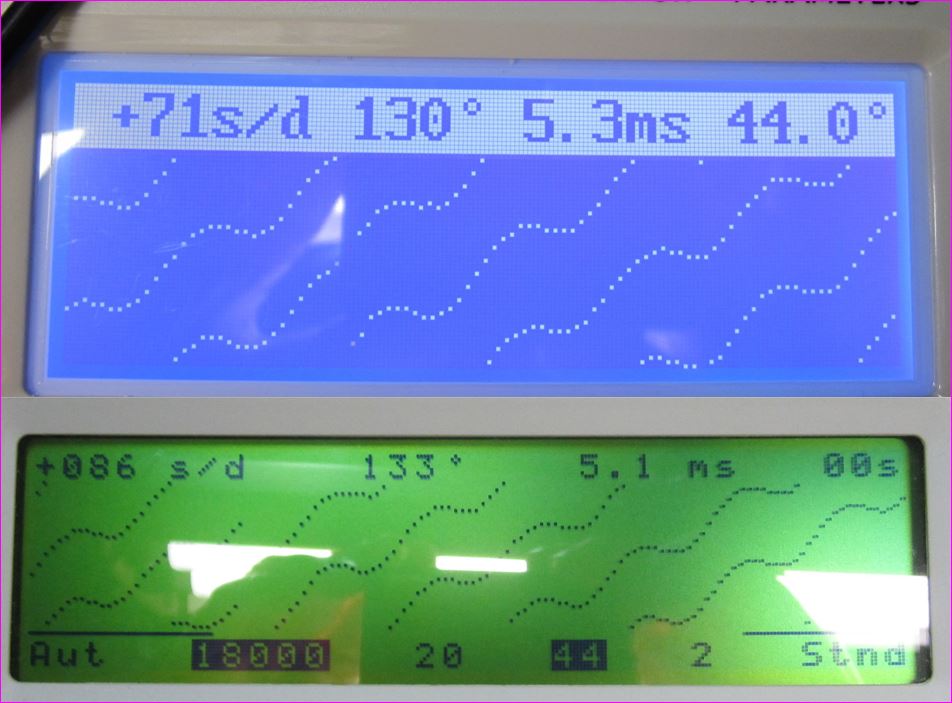
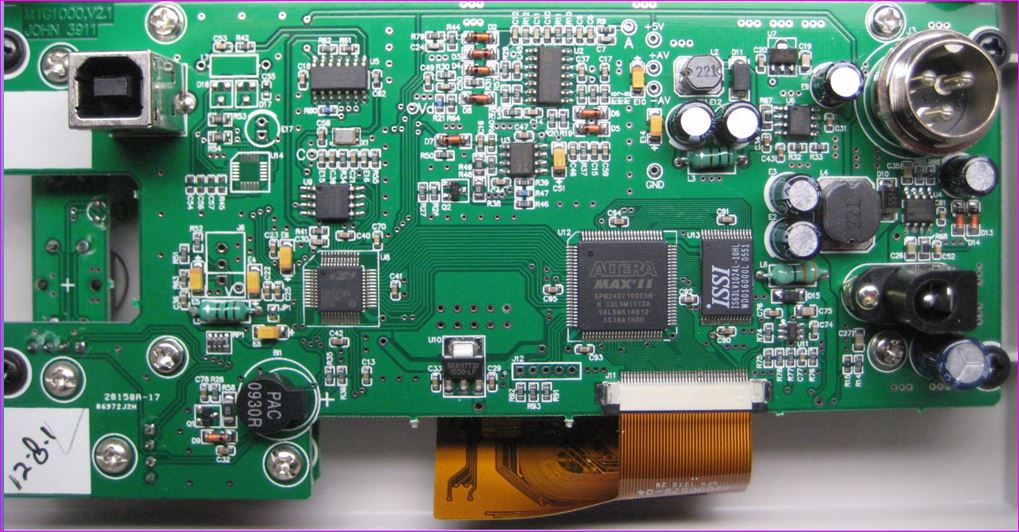
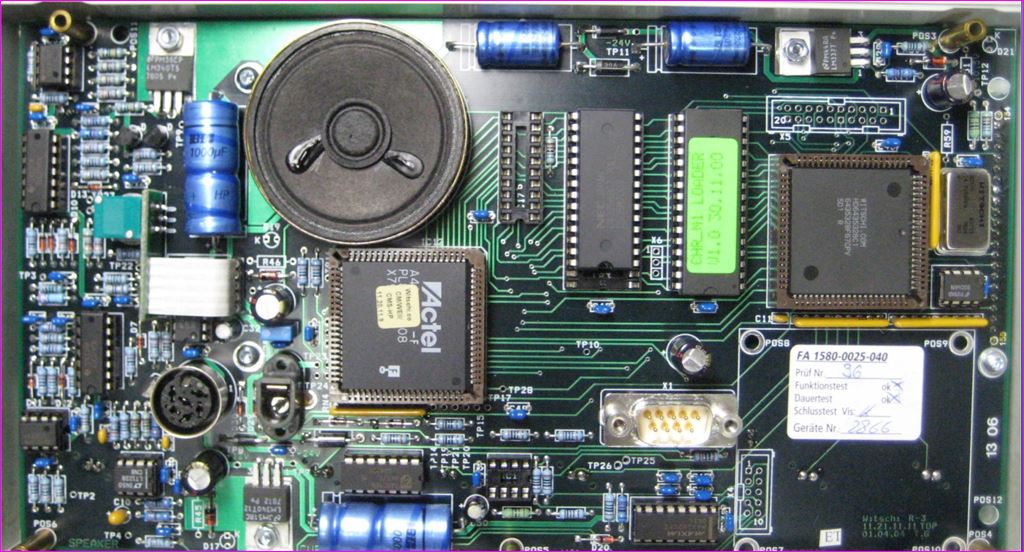
There are differences beyond the display size of why someone would pay roughly $3000 versus 225 for a 1900. But for most hobbyists you're never going to notice the difference. I have actually done side-by-side comparison with a Witschi Watch Expert II and the 1000 1900 Chinese machines. Overall for the money the Chinese machines are outstanding but if you're really going to nitpicky about it the Swiss machines have some differences. So let's look at one of the most interesting features I find with the Chinese machines which is who actually makes them? For instance Swiss Timing machine company witschi You can look them up them website they physically exist they have distributors if you had a problem somebody could help you with it. The Chinese machines it's almost impossible to track down where they actually come from. Not that that's a problem because at the price who cares. Then the internal software to run the machines seems to come in two separate types. To explain that I have a image below. So some of the Chinese machines have limited ranges versus the 1900 or 1000. Then if you look at all the different physical sizes their actual characteristics don't really change is not really much advantage of buying a bigger machine. Although as pointed out above if you get the right machine you can use a printer with it. But if you are planning a getting a machine with a printer get it at the time don't plan on adding it later as I've seen the machines without printers don't have the right software to run the printer it's a separate chip. So one of the features missing from the Chinese machine found on the Swiss is frequency mode. Suppose you're doing American pocket watch someplace swap the hairspring or it's missing a timing screw it's running hopelessly fast slow or something not even close to 18,000 beats per hour and frequency mode It will tell you exactly what frequency it's running at.. Other things External audio noise such as an electric shaver in my case. The Chinese machine was showing absolute garbage on the screen the Swiss was working fine. But if the noise is large enough the right frequencies all the timing machines while problems. At work we had problems with one of the cleaning machines so is banished to another room. Then this one I've seen before if the amplitude is too low sometimes the Chinese machine will pick up the wrong part of the waveform giving the impression of a much higher amplitude. So I'm attaching some images. For those of you who like naked electronics like I do the inside of the 1000, 1900 and watch expert II. Then two examples of what the timing machine shows timing of the same watch. Yes if you're clever you can clip both microphones on the same watch at the same time. You don't always get the exact same results because both machines are averaging at slightly different places in the waveform. So you can see the Chinese machine in this case the 1000 is doing very well on a watch that's magnetized. The peculiar sine wave is an indication of a watch that's magnetized. Then we see another example of the extremely low amplitude the Chinese machine is confused.

 1 point
 -
Bear Hair!1 point
-
maybe stem parts. would if it was a hunting case. can't remember all of it. i have cut a notch in the case to install a lever set mvt., i have more cases than running mvt.'s. vinn1 point
-
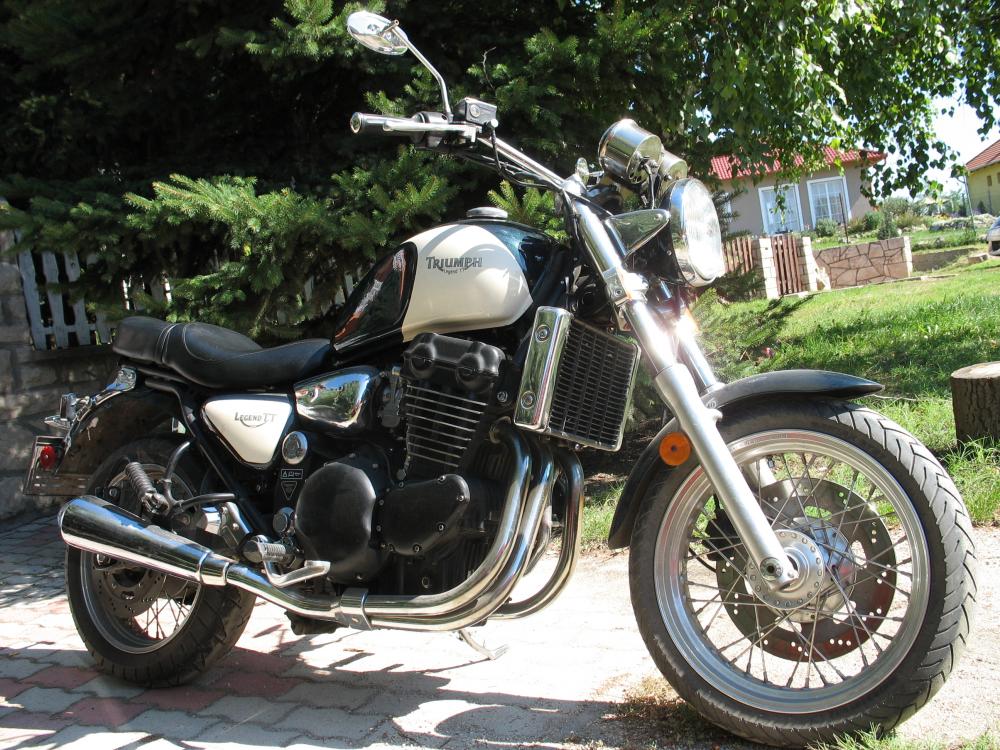
Yes,mine has only 72 BHP but a lot of torque. I think that the engine could handle bigger transmission to get to higher speeds this bike is not for that however.
 1 point
 -
Excellent bike! I would like to try it! I have a Legend TT 900. All bearded scary gang guys on the Harley meeting here in Hungary were looking at my bike and were asking what the heck is this Wow! bike? I liked that so much. Triumphs are really rare here.1 point
-
That is gorgeous, stunning bike.1 point
-
Here's my tuppence worth guys. I have repaired a few springs that I couldn't get replacements for by using the Tissot tool described above by CB. For best results when punching the hole, leave the spring in it's hard state as this ensures a clean and accurate hole. Once the hole has been punched, I soften the end of the spring to allow me to accurately shape the curl for the arbour. I have not had any problems with springs that have a soft arbour curl. I do not attempt to re-temper the end, as to I would have to temper the whole spring to ensure evenness of temper throughout the entire Spring length. If you try to harden and temper only the end curl, there is a good chance that you may reduce the temper of the spring further into the main curl. I have tempered springs completely and use this method. First I heat the spring to cherry red then immediately quench in water. Once glass hard I carefully apply grease to the spring ensuring total coverage. The spring is now dipped in a bath of molten lead that I have set at the correct tempering temperature using a infra red thermometer. Using this tequnique, it is impossible to go beyond the correct tempering temperature. The application of grease prevents lead soldering itself to the spring.1 point
-
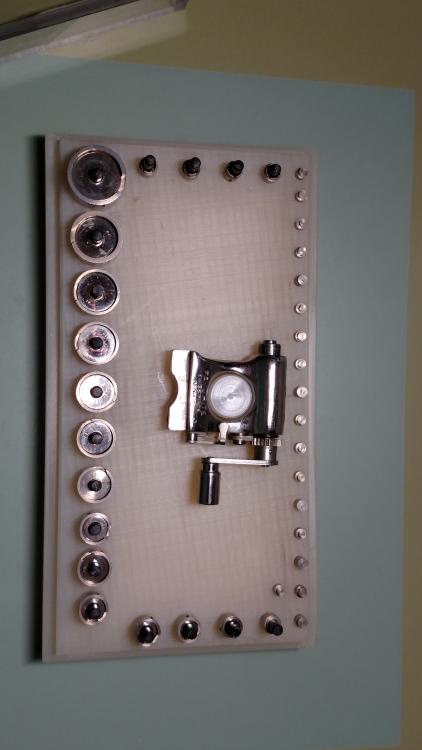
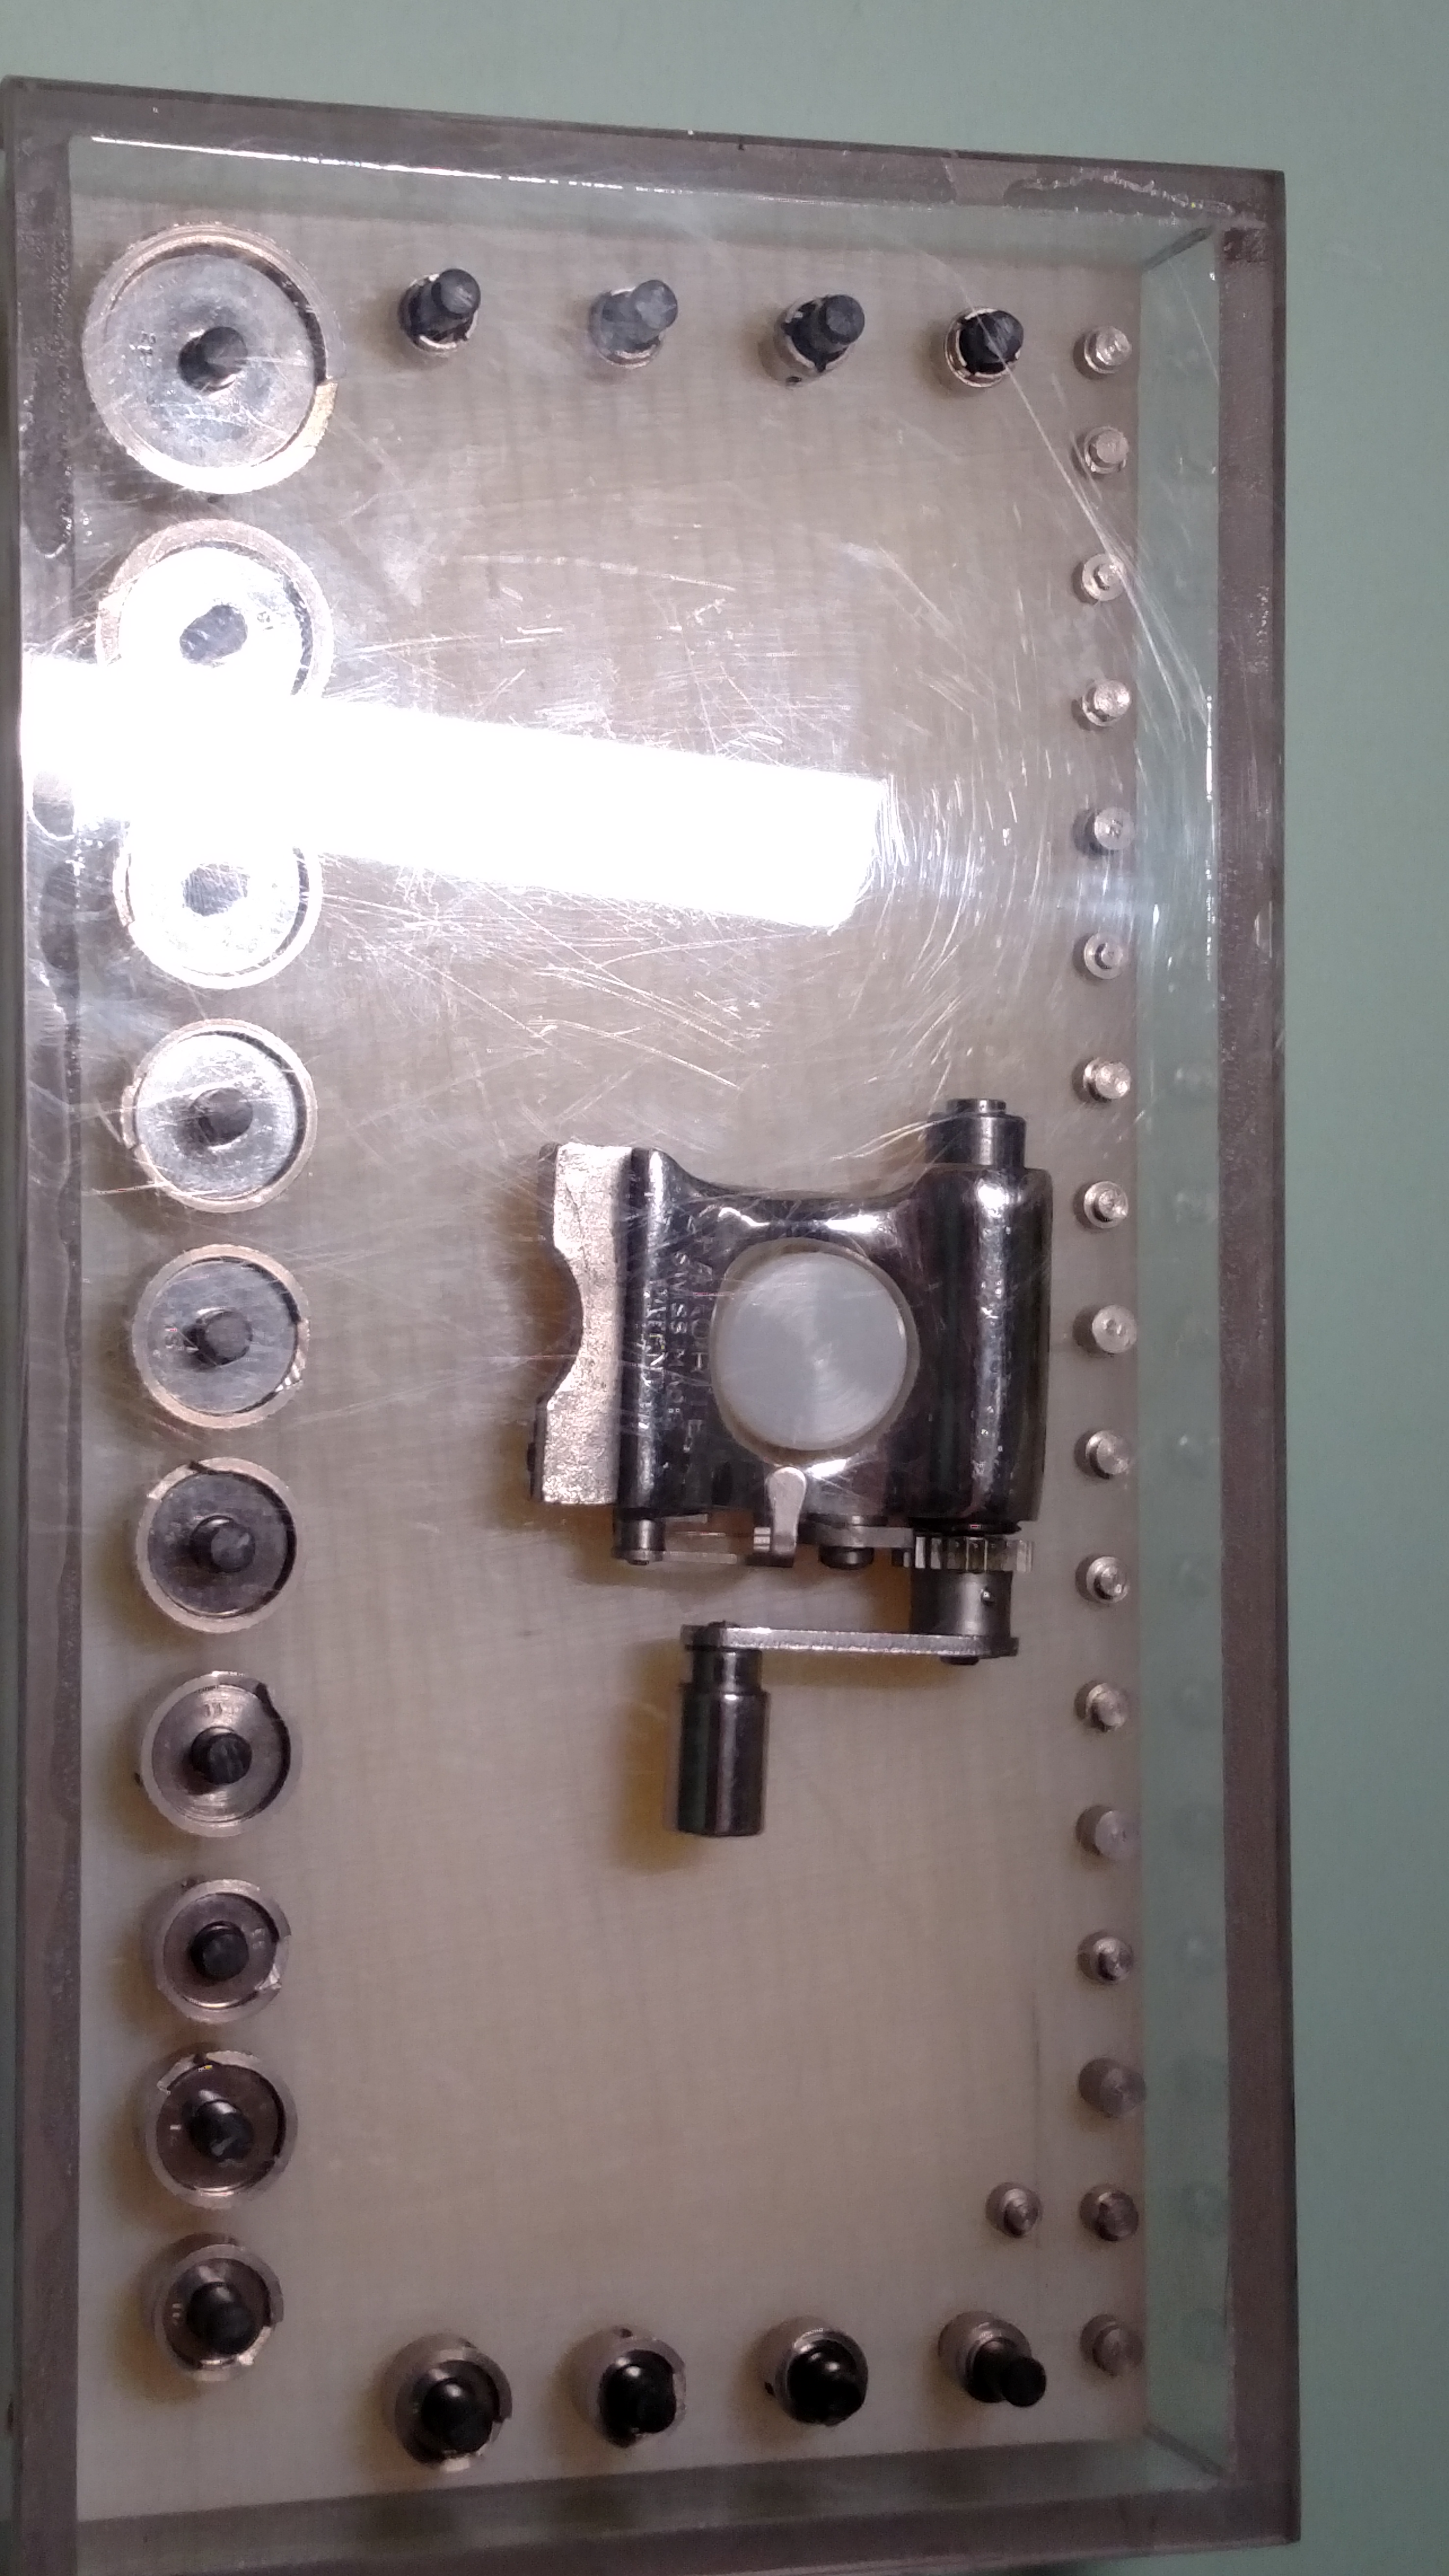
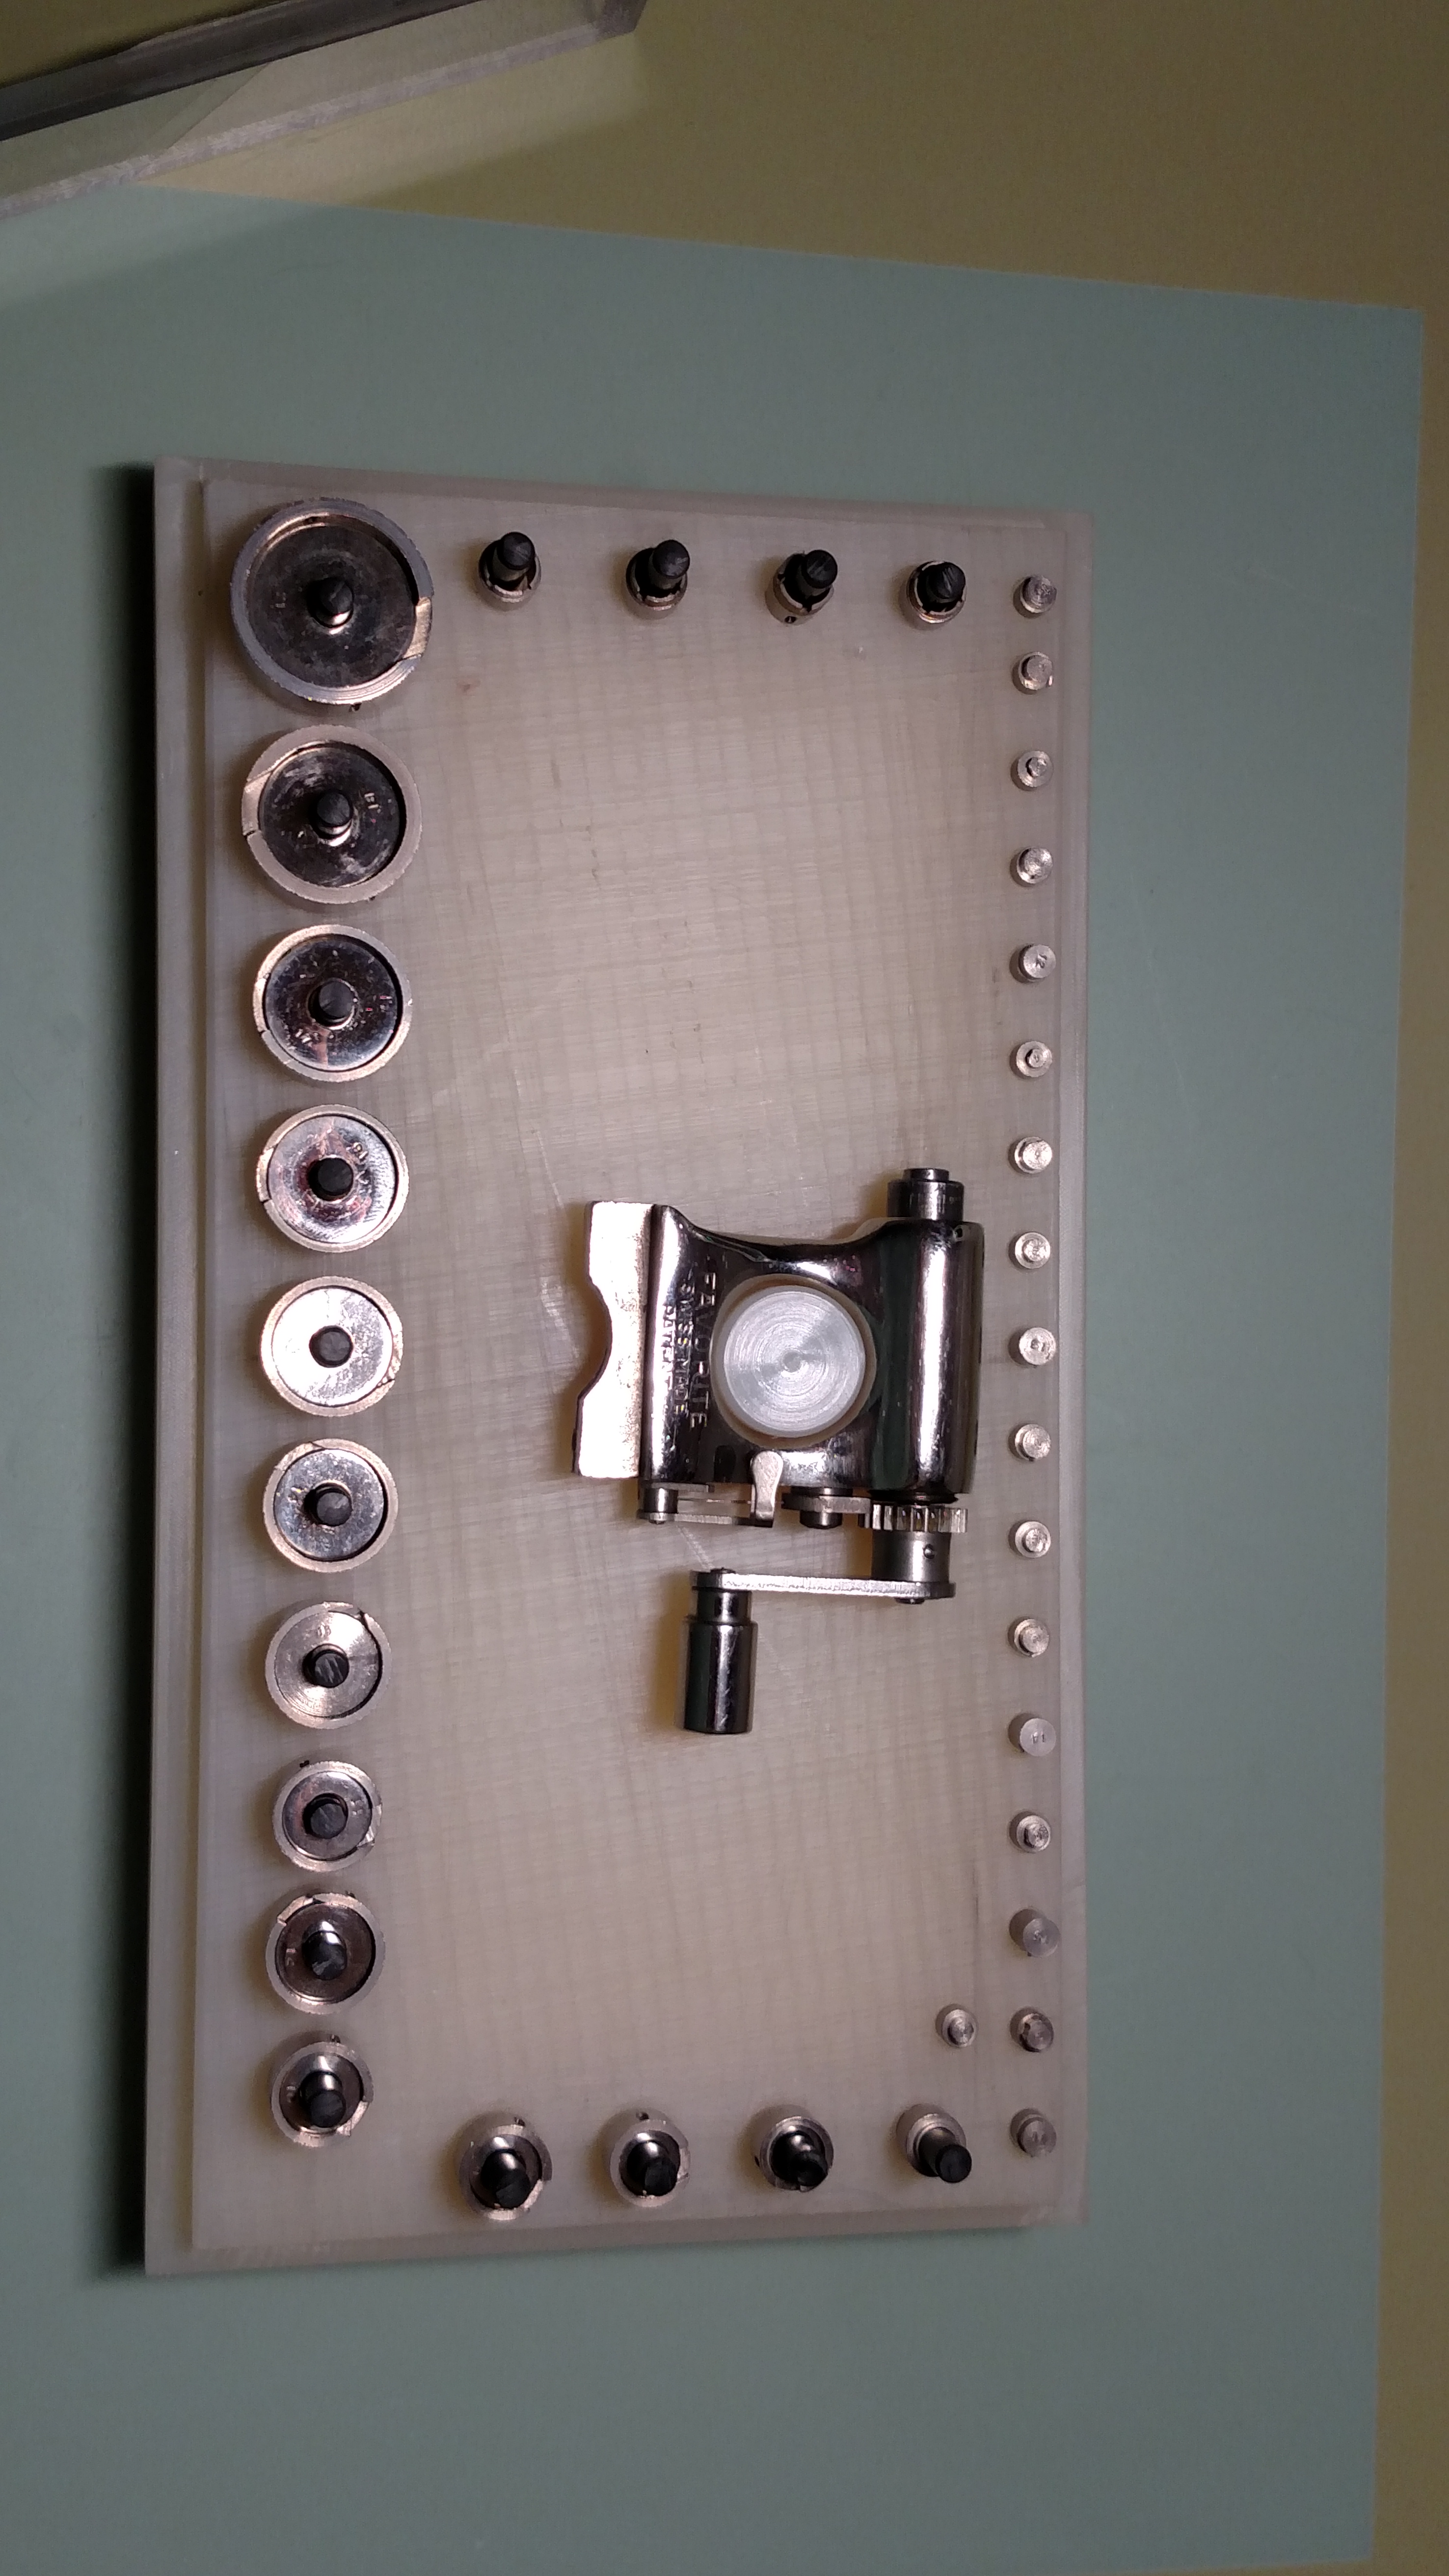
I just wanted to share one of the tools I picked up on eBay for a hundred and fifty US dollars. The mainspring winder by favorite. The tool is one of my "favorites". The watch maker that owned it took great care of it. I love the dust cover.

 1 point
 -
I agree that leaving the end of the main spring in its annealed state could lead to problems with the steel being too soft to be durable. However if, following annealing and punching the end of the main spring, you then re-harden the end by heating and then quenching, would it not then be necessary to temper the re-hardened part of the spring? Typically spring steels when simply hardened become very brittle and need a degree of adjustment by re-heating to a specific temperature, traditionally gauged by observing the oxidation colours that vary according to temperature, in order to achieve a balance between hardness and durability appropriate to the intended application of the steel. I had always assumed (rightly or wrongly) that the blue colour of of the older blue steel main springs was the result of the tempering process. Temperature Color of Heated Carbon Steel (oF) (oC) 600 316 Scrapers, spokeshaves 560 293 Screwdrivers, springs, gears 540 282 Cold chisels, center punches 520 271 Taps <= 1/4 inch 500 260 Axes, wood chisels, drifts, taps >= 1/ inch, nut taps, thread dies 480 249 Twist drills, large taps, knurls 460 238 Dies, punches, bits, reamers 450 232 Twist drills for hard use 440 227 Lathe tools, scrapers, milling, cutters, reamers 430 221 reamers 420 216 Knives, hammers1 point
-
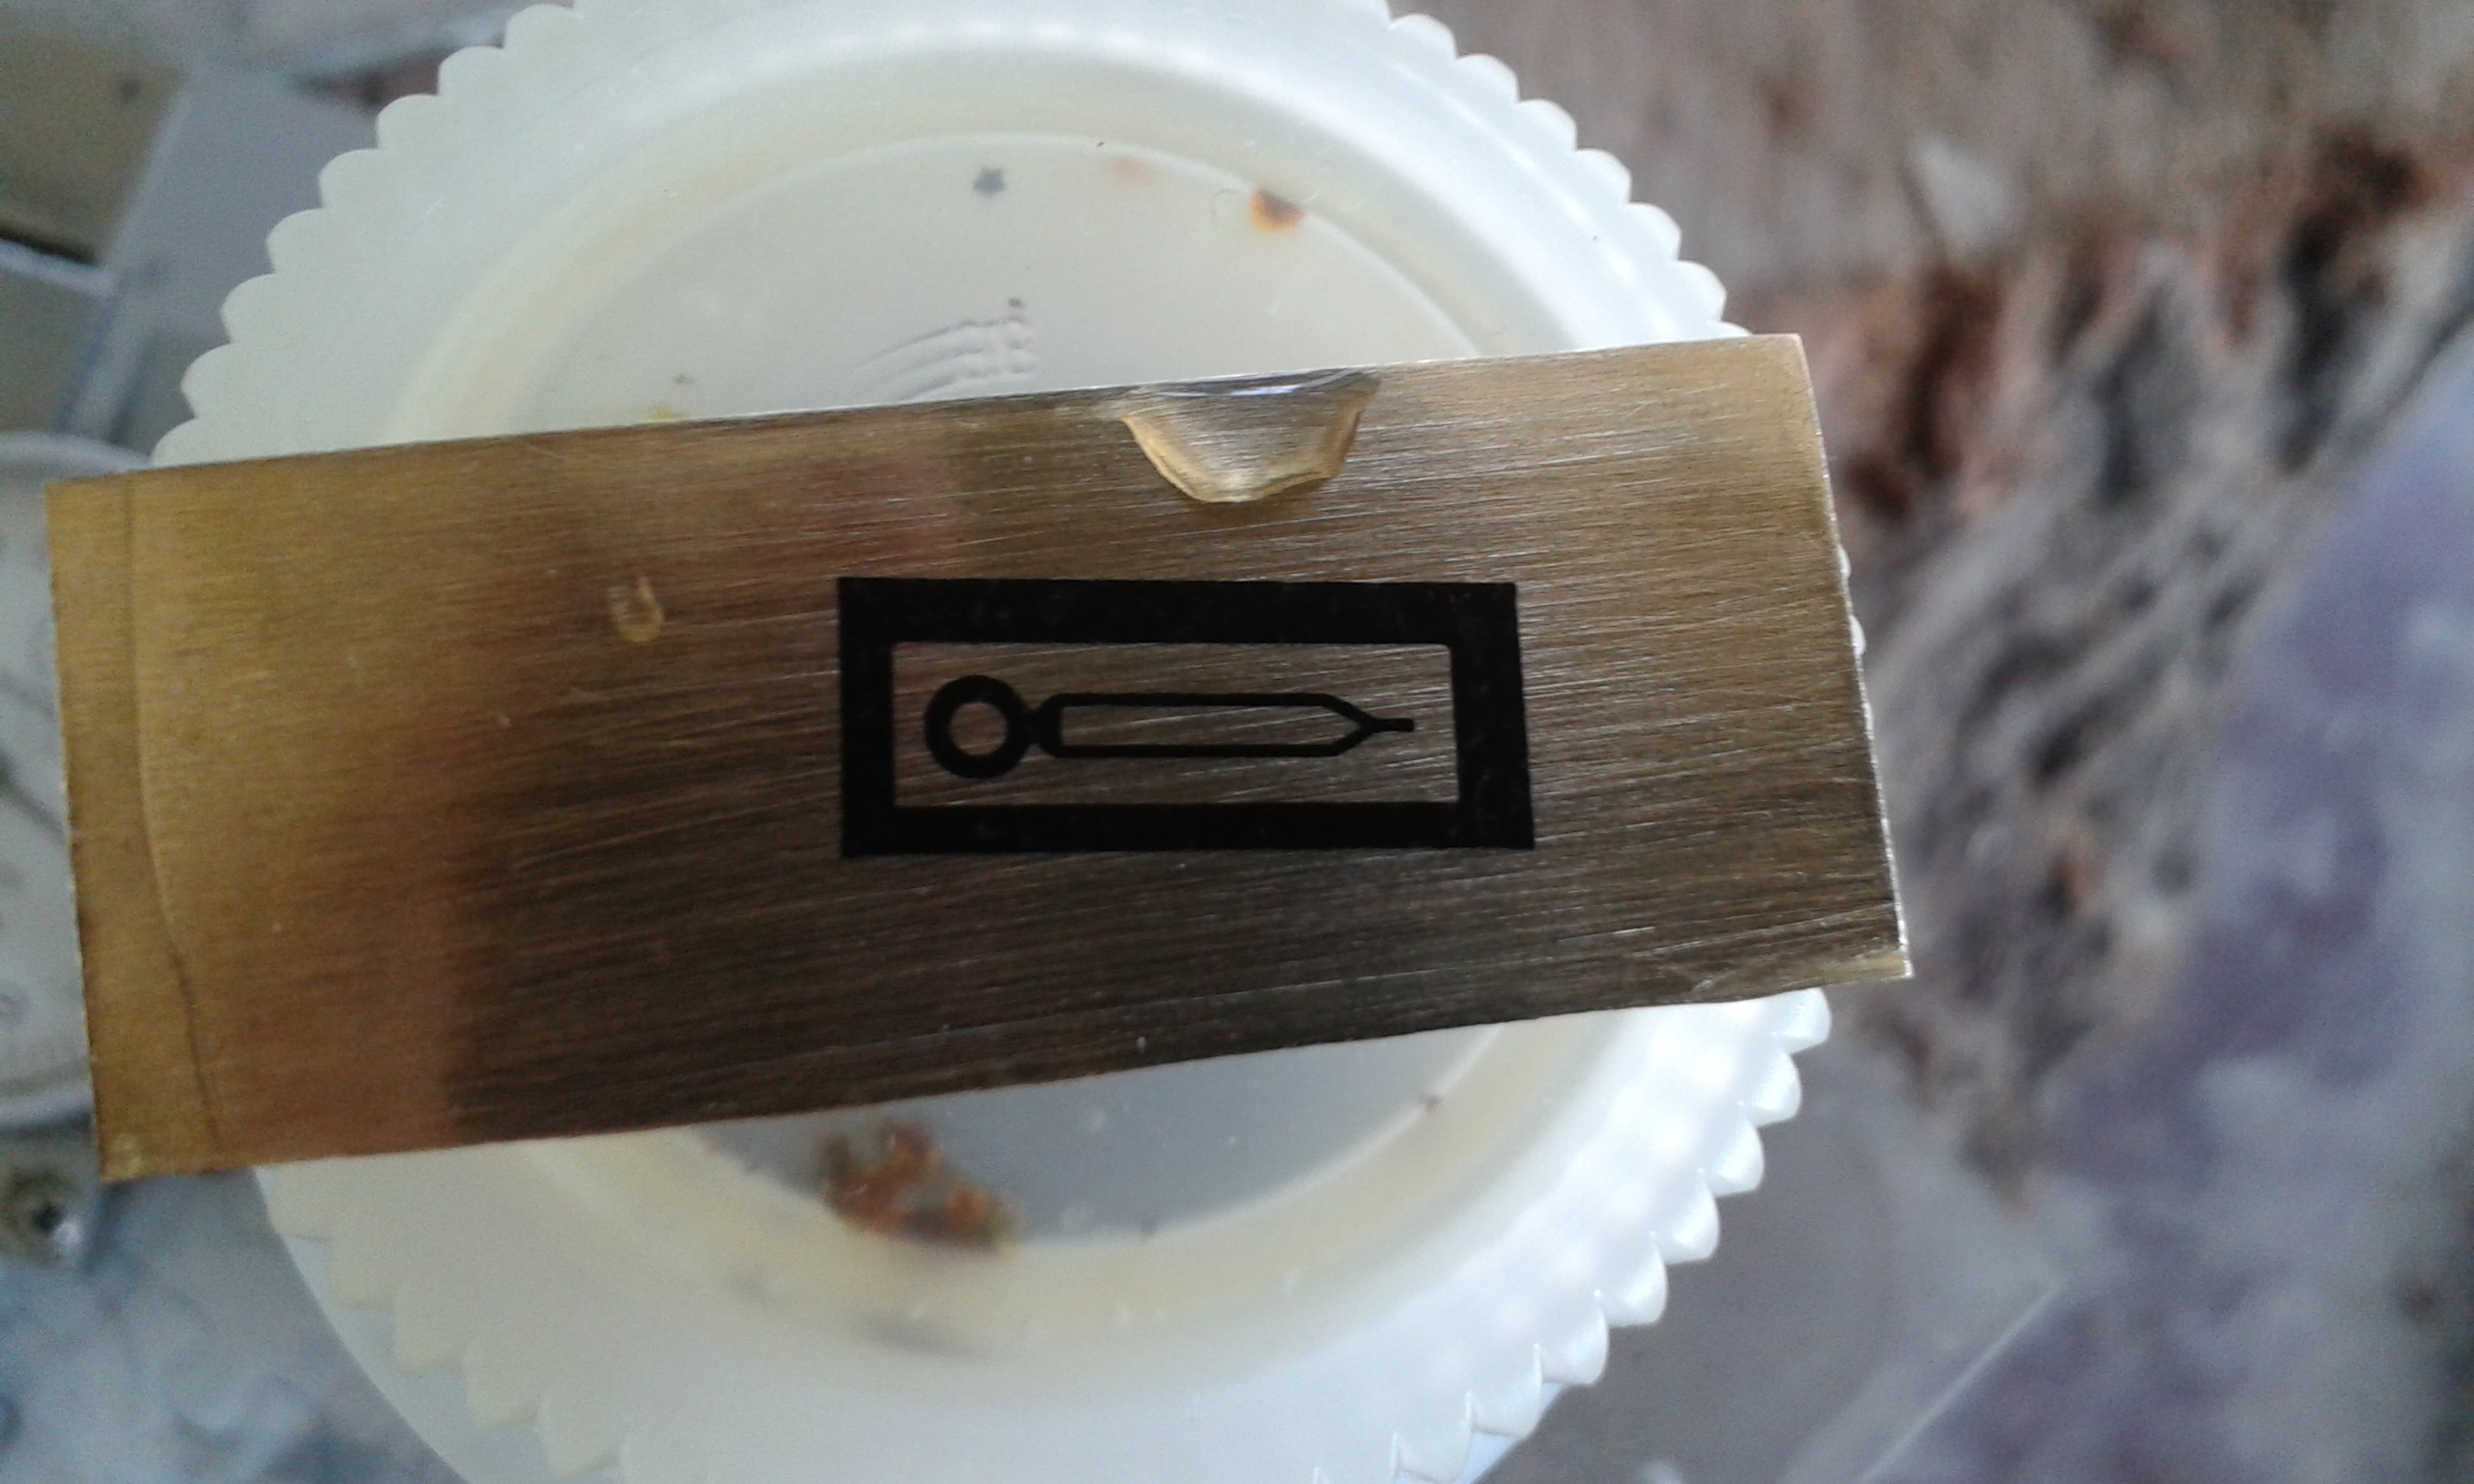
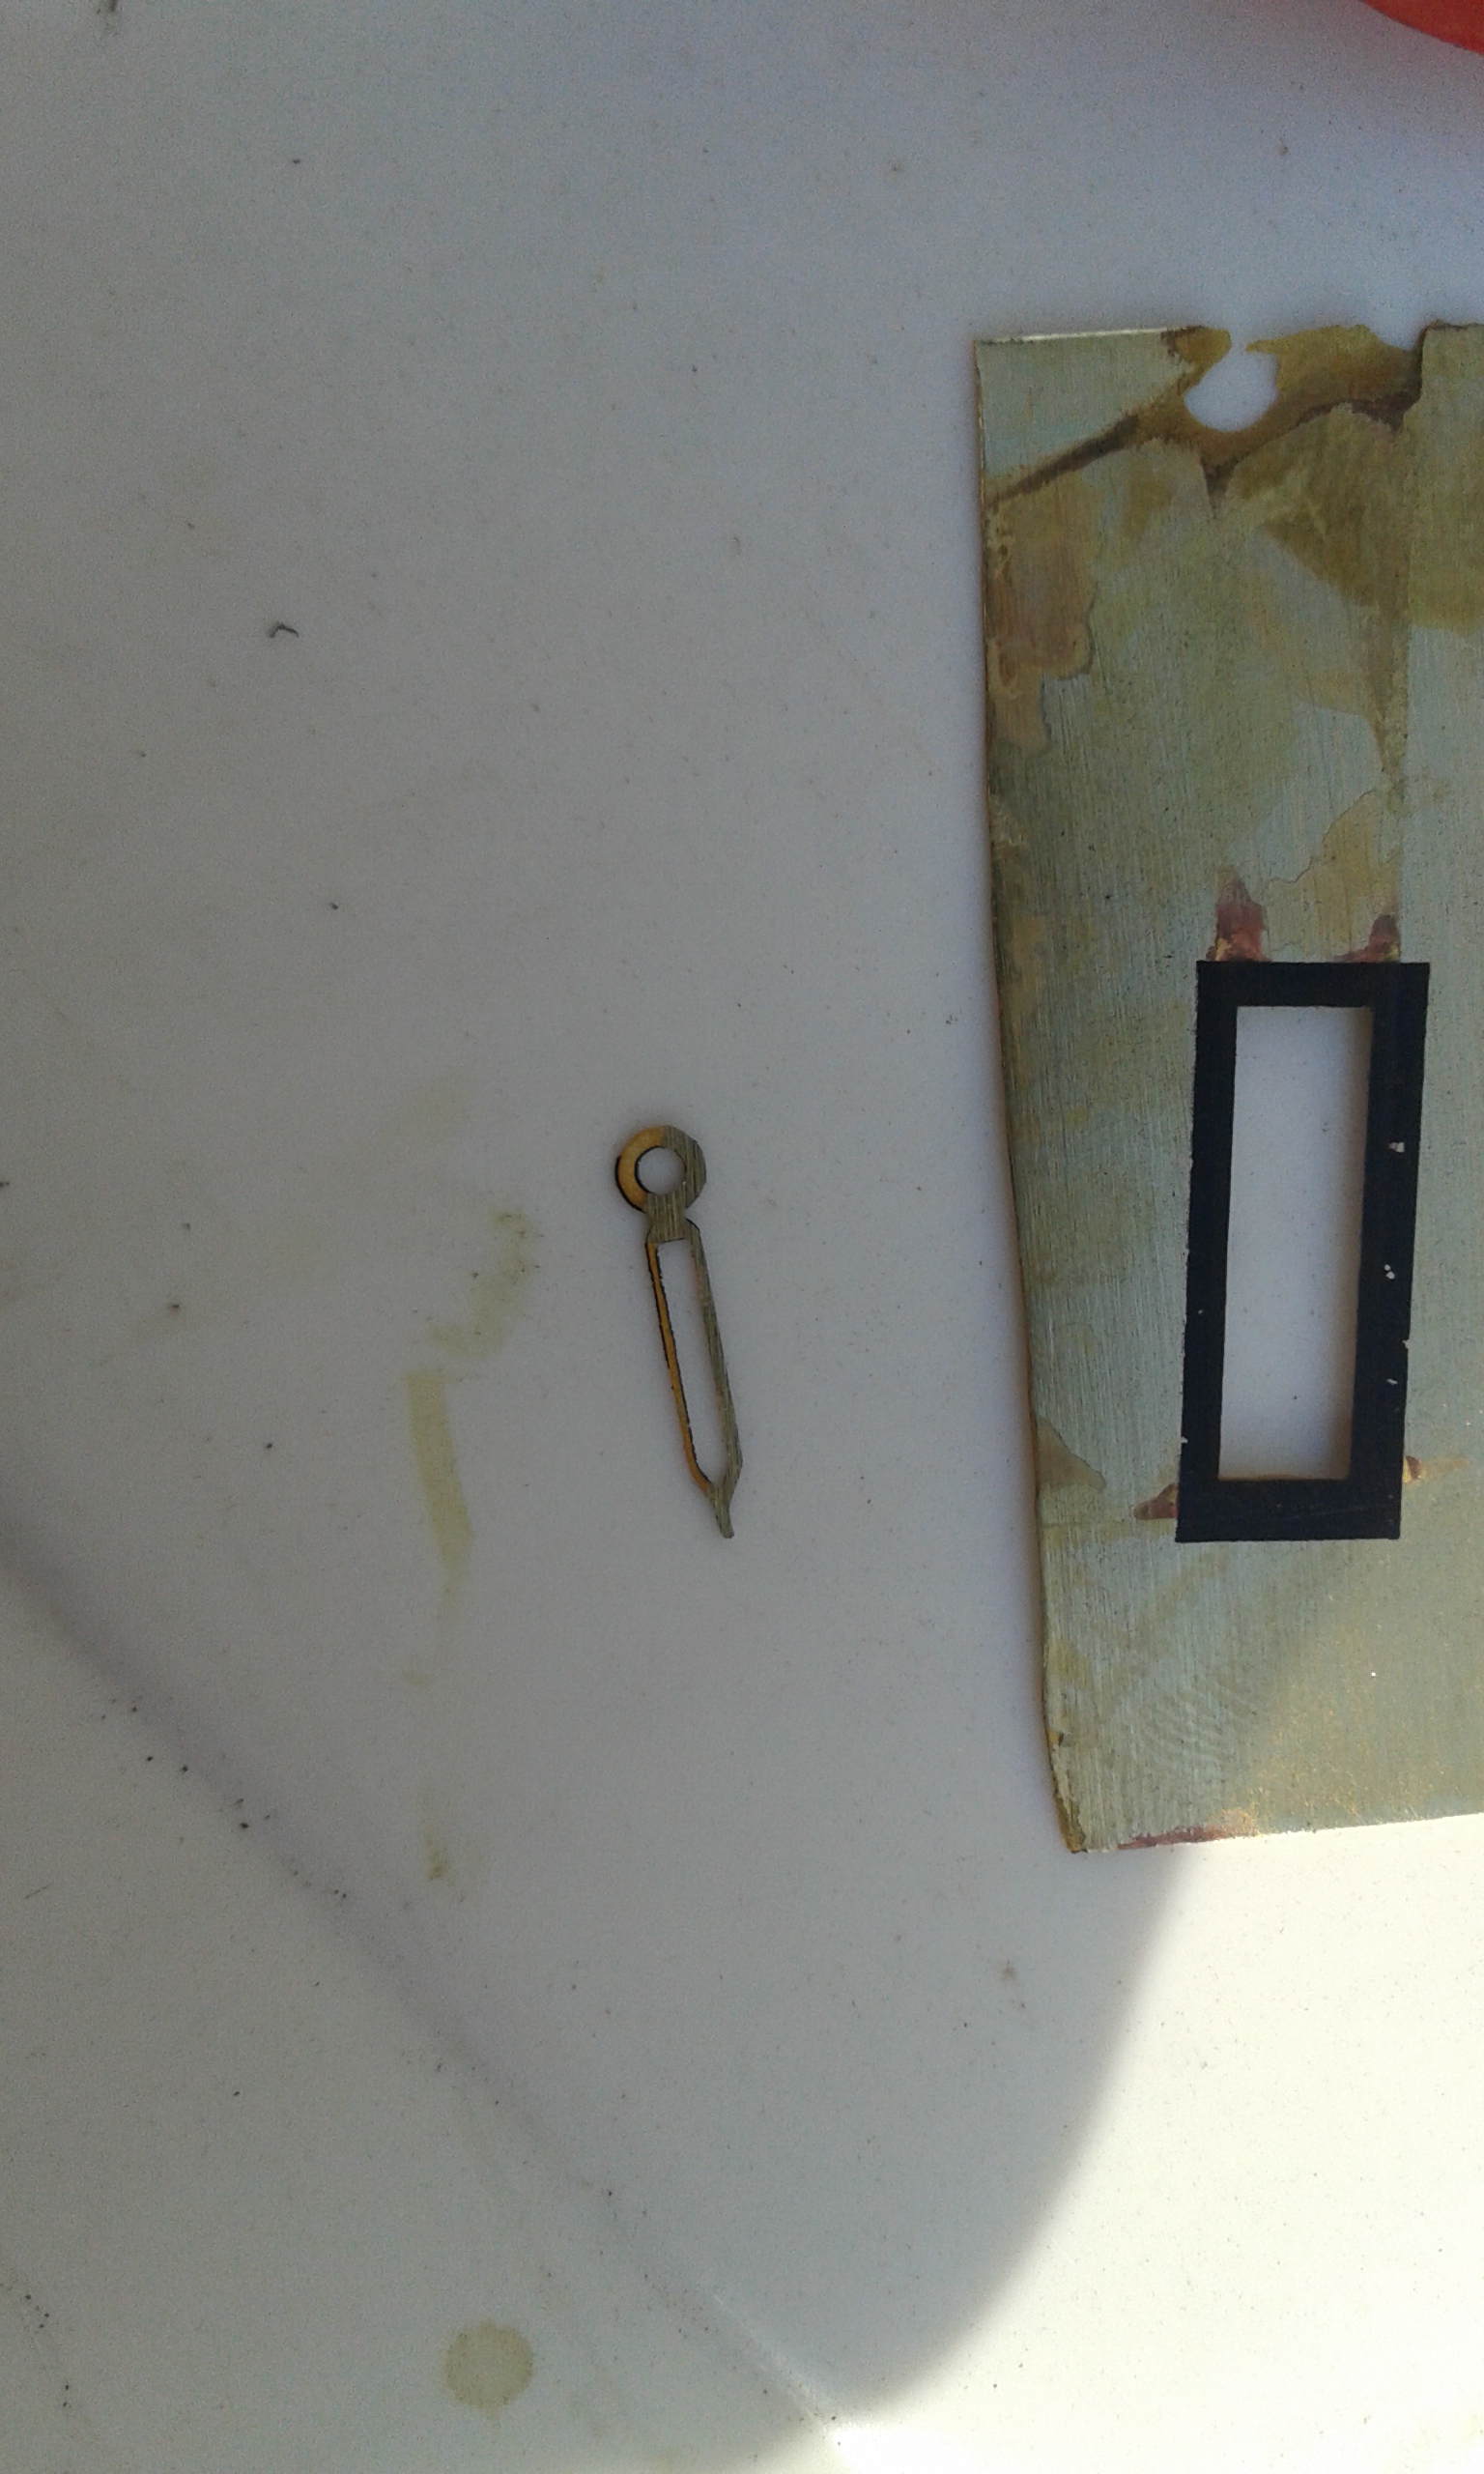
I agree the spring does not need to be the exact size providing it is not to high.However the problem Sven has is the spring he requires has holes/slits at both ends. I did not know how to make a slit shape hole on a watch mainspring without distorting it. However I have done some research this morning & it appears it can be done. First you need to anneal the spring end that requires the hole/slit & then either punch to drill the hole. But the I presume you will need to harden the spring again. I found this tool on the net but I don,t know how small the holes slits are that it makes.
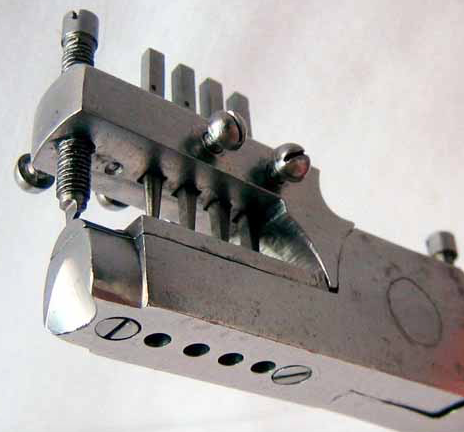 1 point
 -
What a great machine.1 point
-
Stunning Seiko! I love and respect them...and have a lot of fun destroying...errr, fixing them! I may own at least 50 of them....and won't be stopping anytime soon! Watchitis at its best! Cheers, Bob1 point
-
The hair indicates that someone was in there before and that someone was not too particular about keeping things clean. It could be he was not the cause of the problem but who knows? Anil1 point
-
Another modified Seiko 5 I did a while back. SNKL05.
 1 point
 -
As a veteran of a number of eBay staking set purchases, I concur with those above that it's a good way to get started. Complete sets in great condition go for top dollar but the prices for less complete sets requiring a little TLC are much more reasonable. I started out using only abrasives to clean up the stakes as described here. Currently (today in fact!) I start with an overnight soak in EvapoRust to remove most of the rust and convert what's left to black iron oxide. Then I use fine 3M radial bristle disks to polish up the working and marked ends. I take great care with the working ends to insure that I do not round over corners, etc. Usually the highly polished working ends are the least rusted parts of the stakes. I'm not a fan of vinegar for rust removal since it will remove clean metal along with the rust. EvapoRust or electrolytic derusting will not. An important note about EvapoRust: be sure to completely immerse the objects being treated. Any object breaking the surface will be etched along the waterline (deeply if you leave it long enough). One of my staking sets is very sad that I know this.1 point
-
Hi, I've got this nice looking watch on its way to me. Anyone know anything about this make please. Any help would be appreciated.
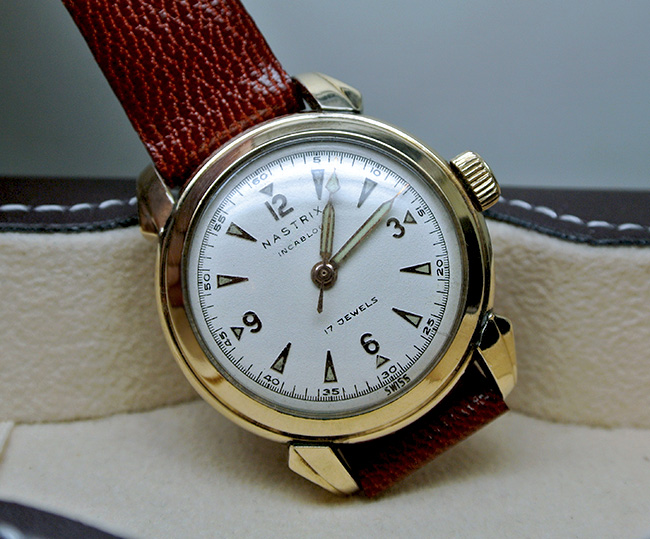
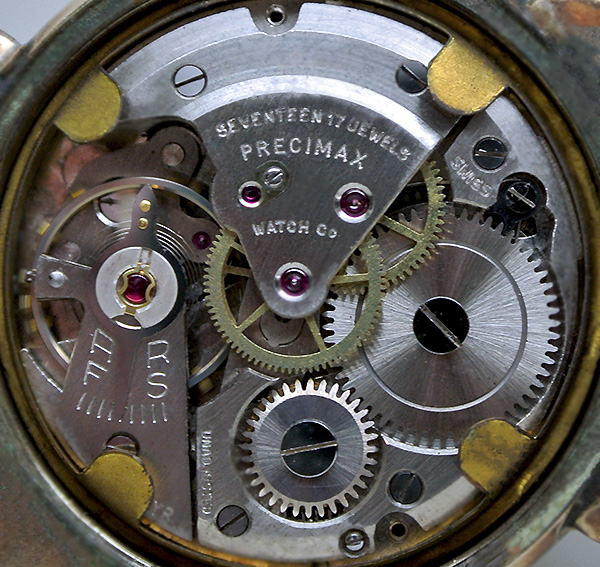 1 point
 -
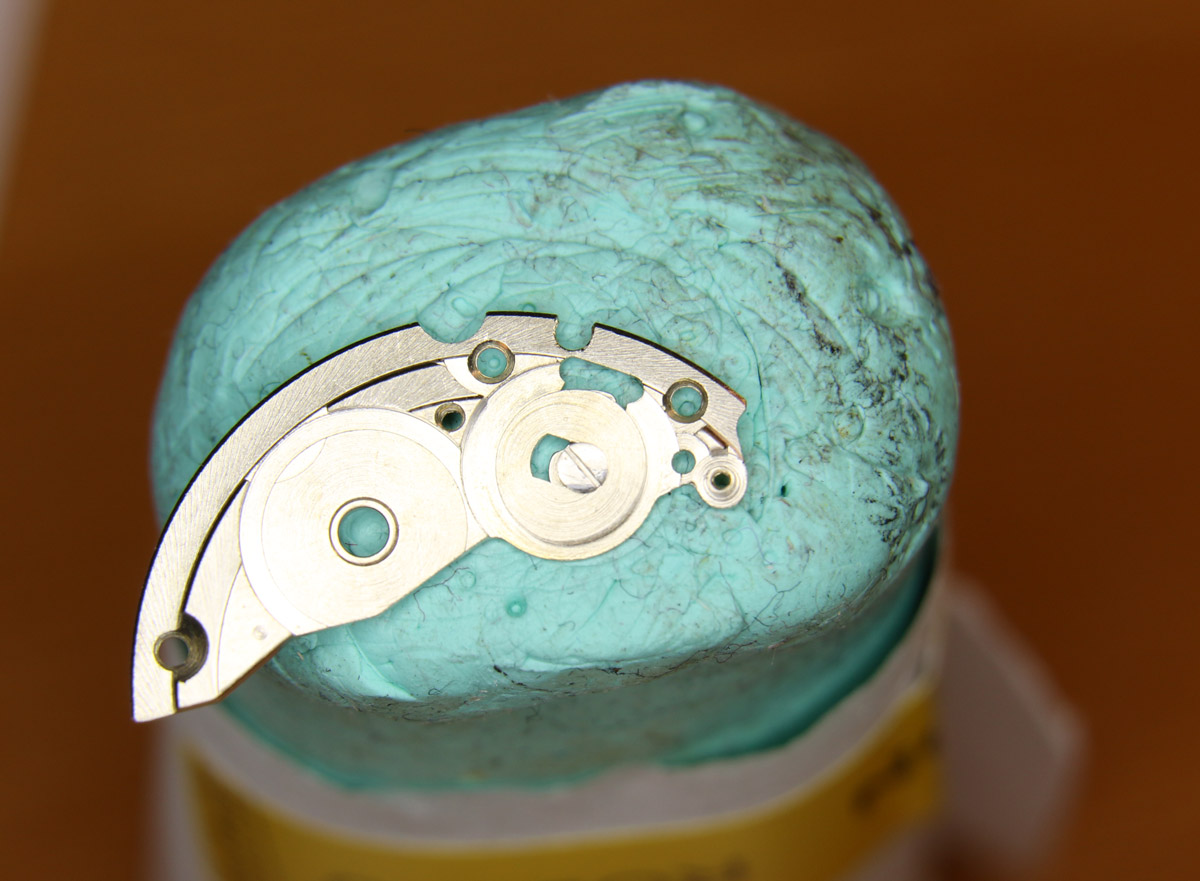
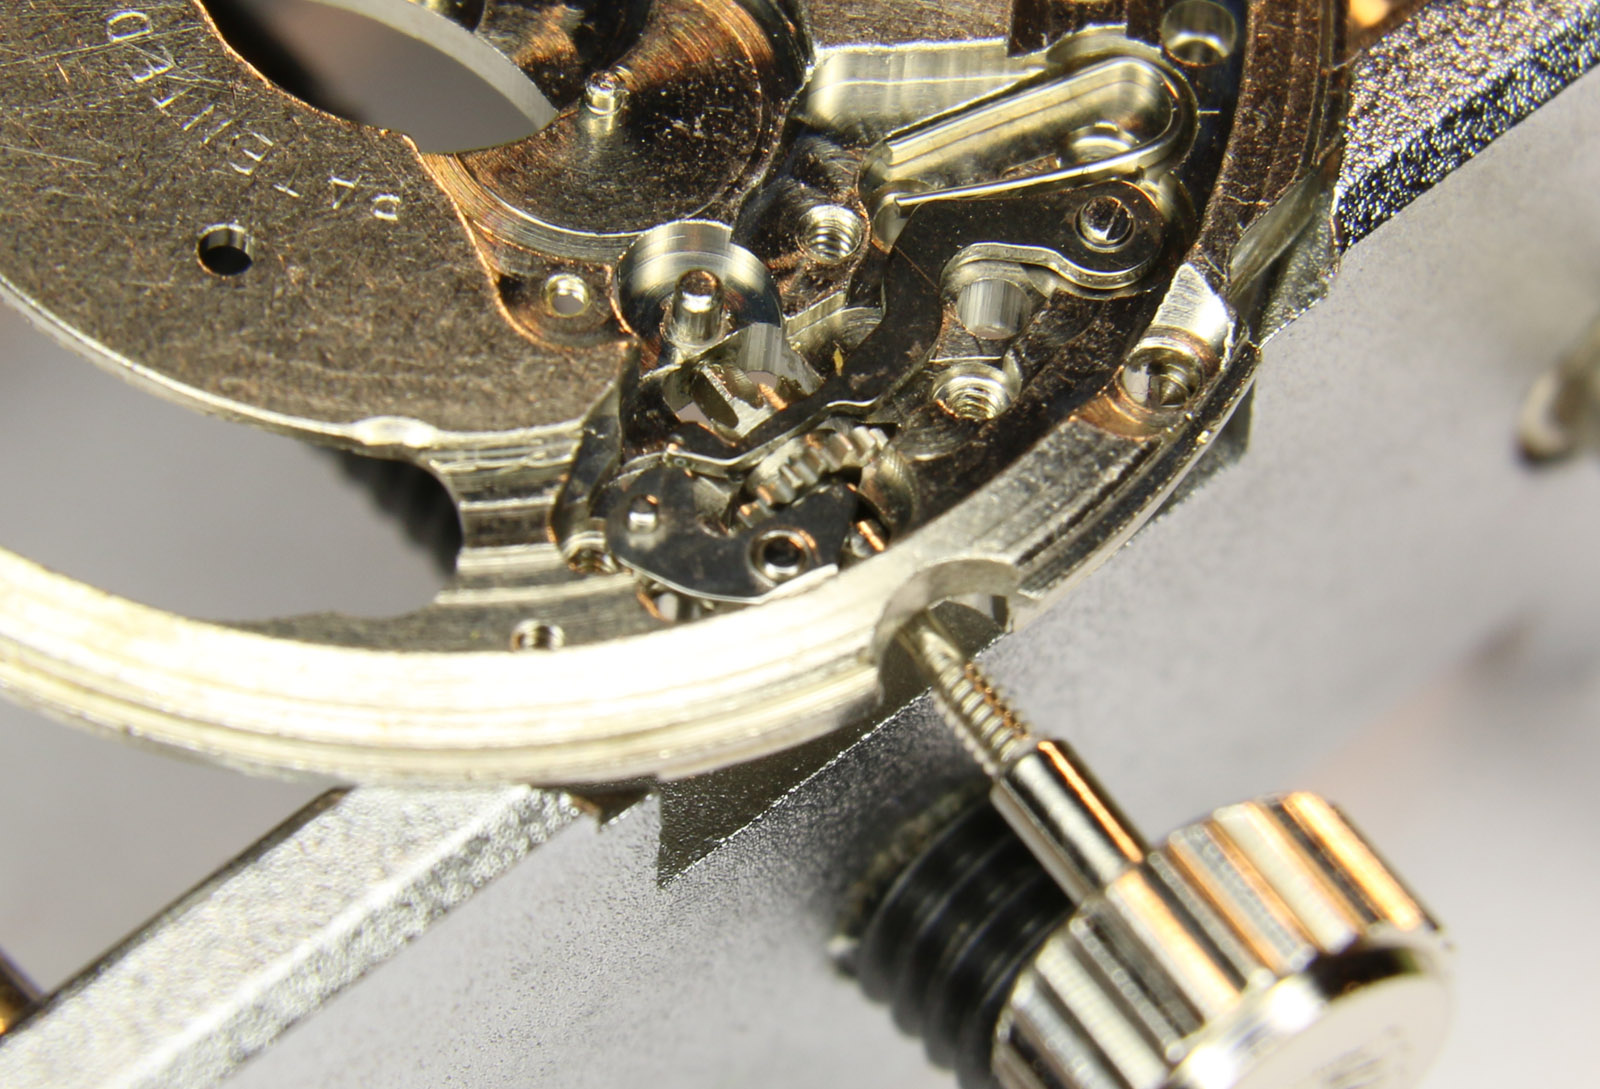
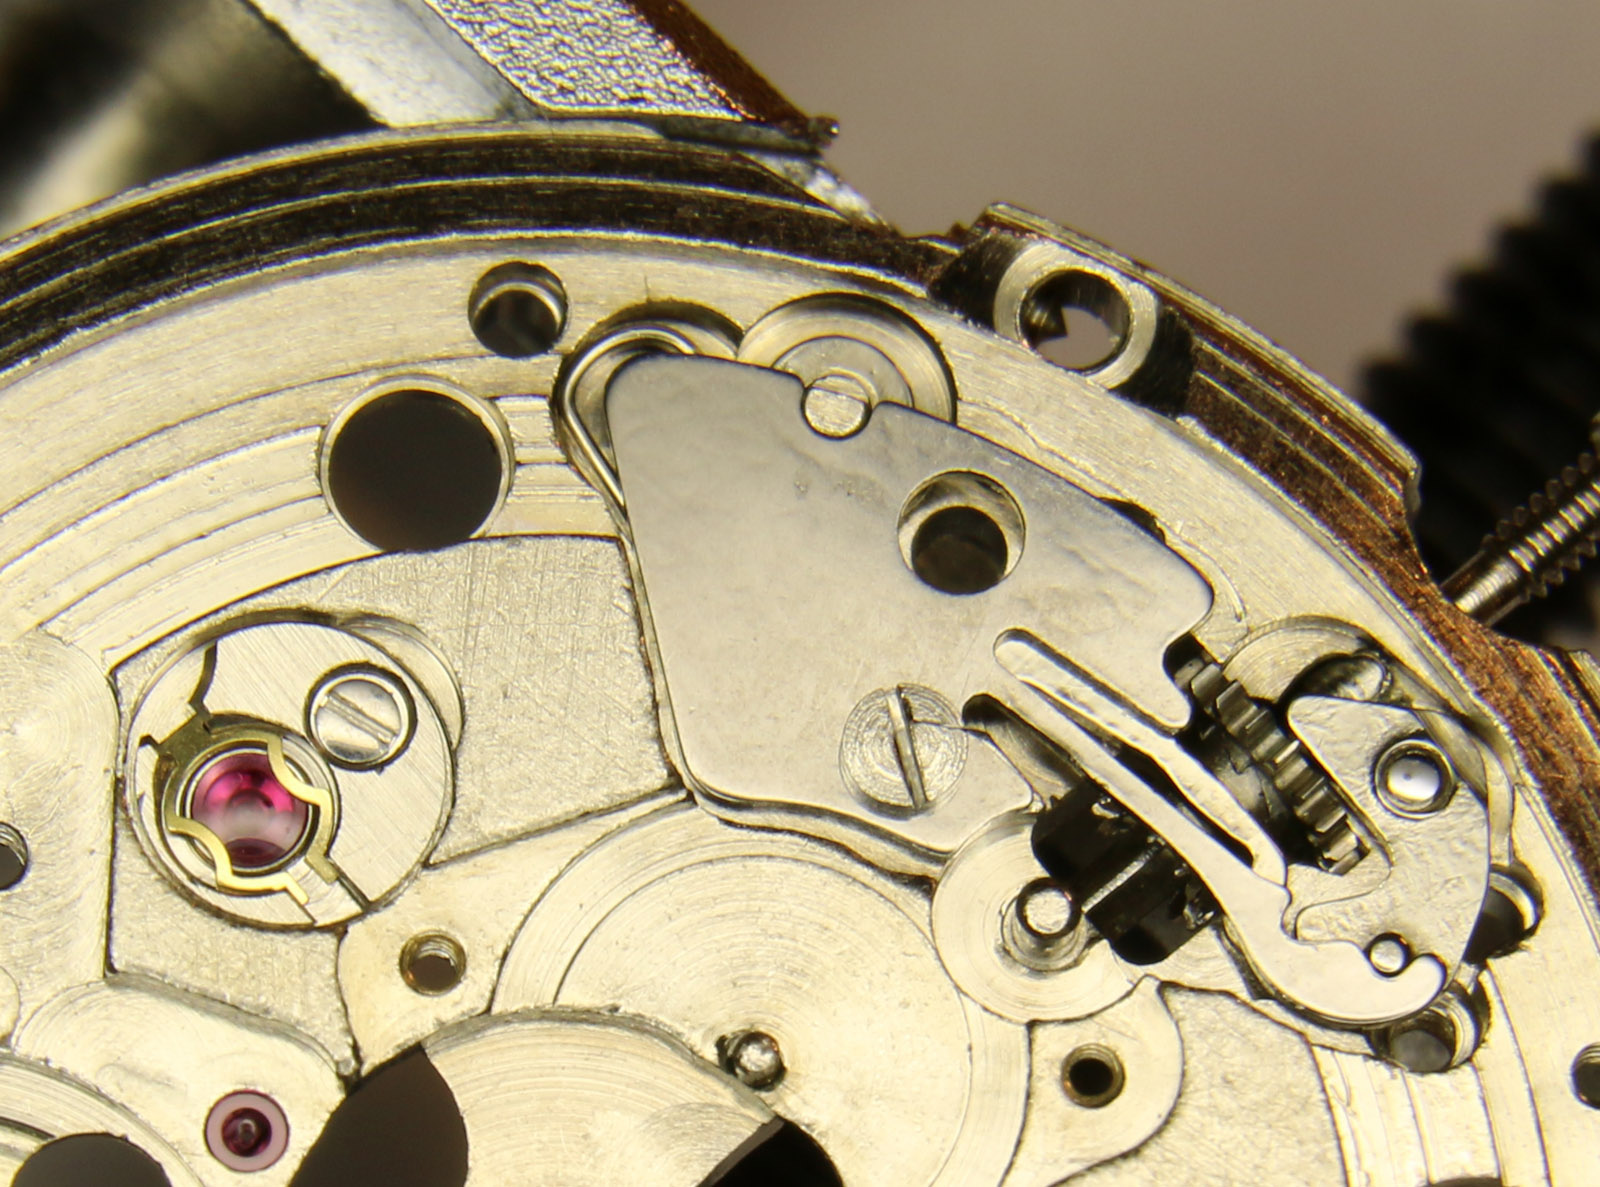
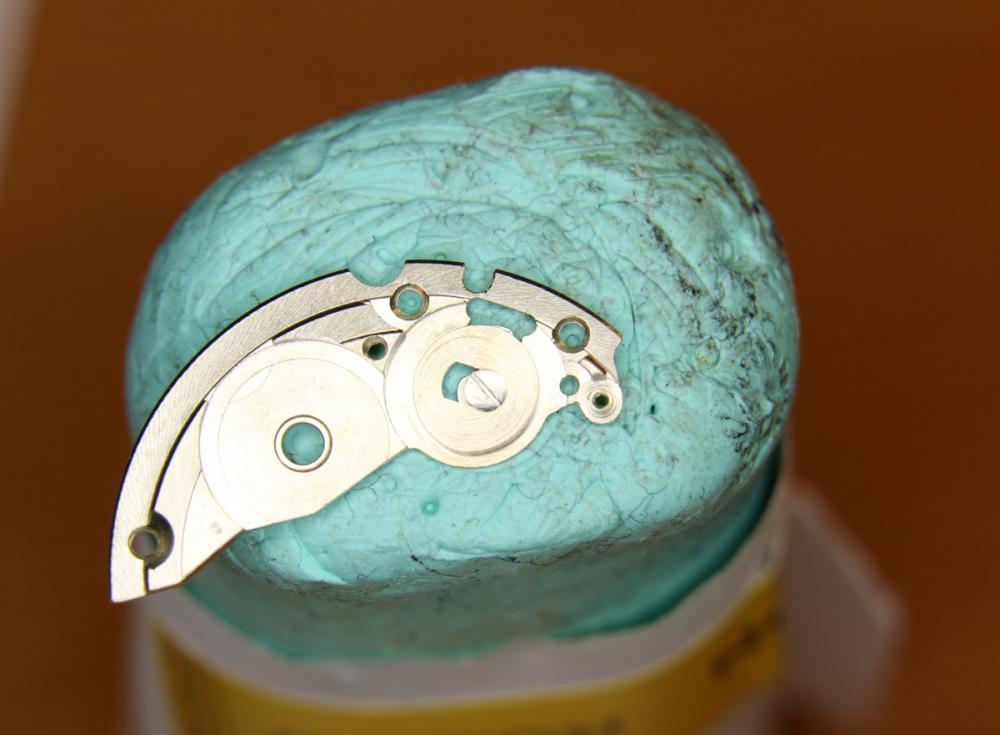
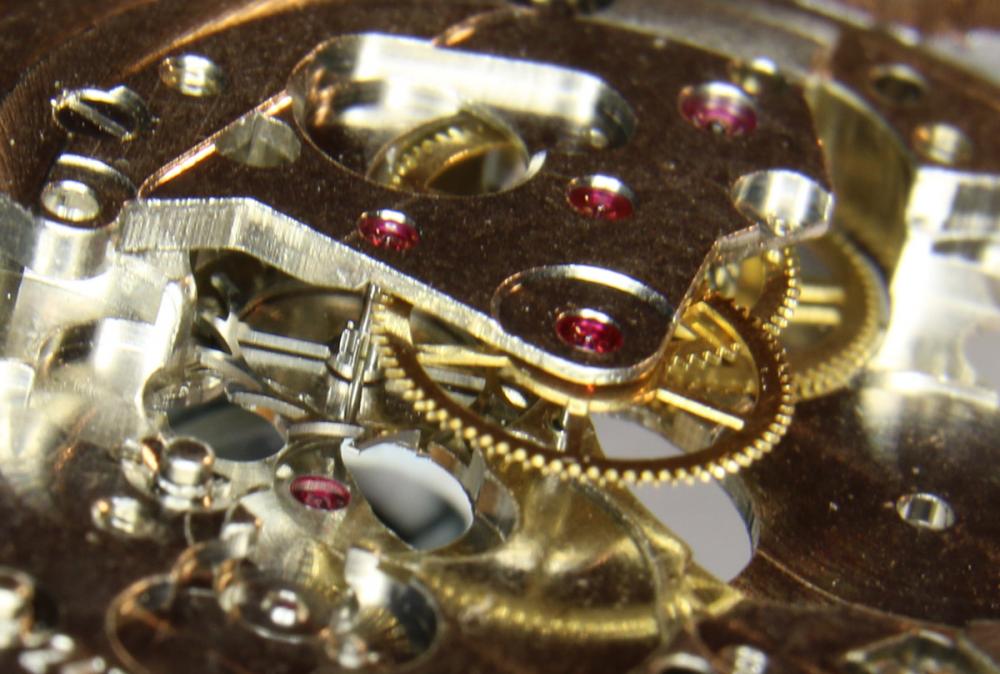
Today I was able to clean the parts and started assembly. Nothing special, pretty straight forward. This is how I attached the "Crown Wheel Rocker" before mounting the barrel bridge. Cheers Alexander


 1 point
 -
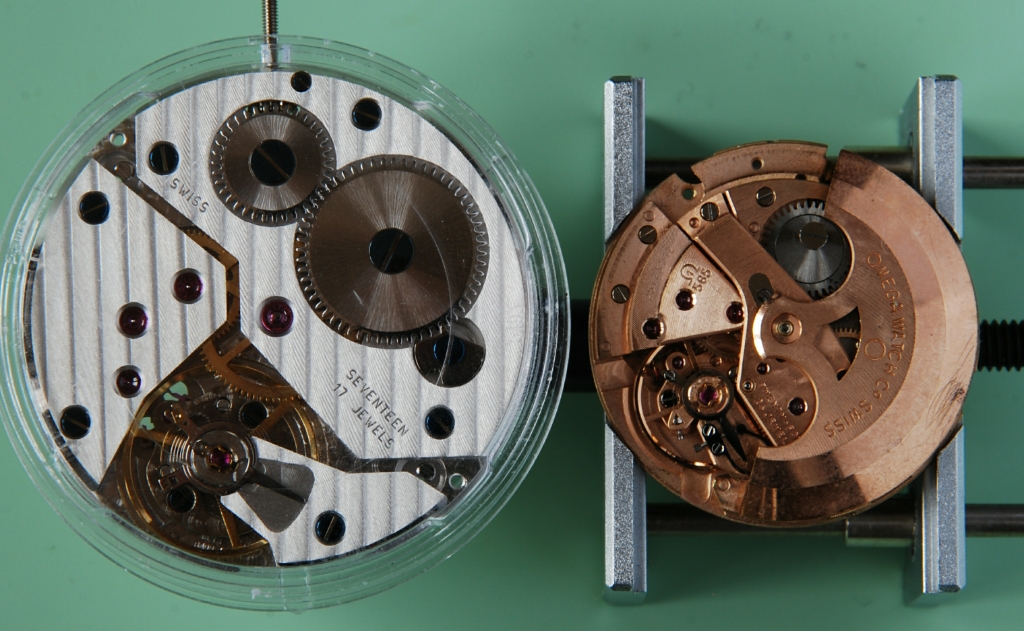
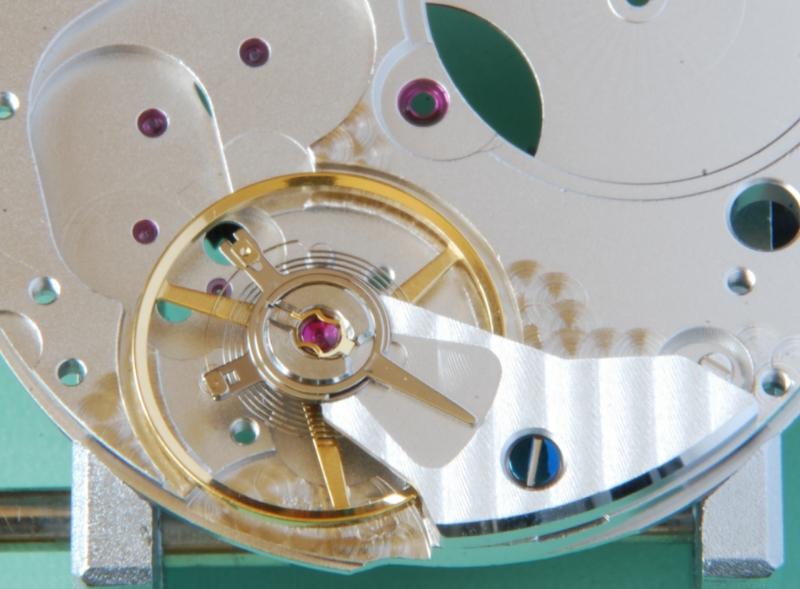
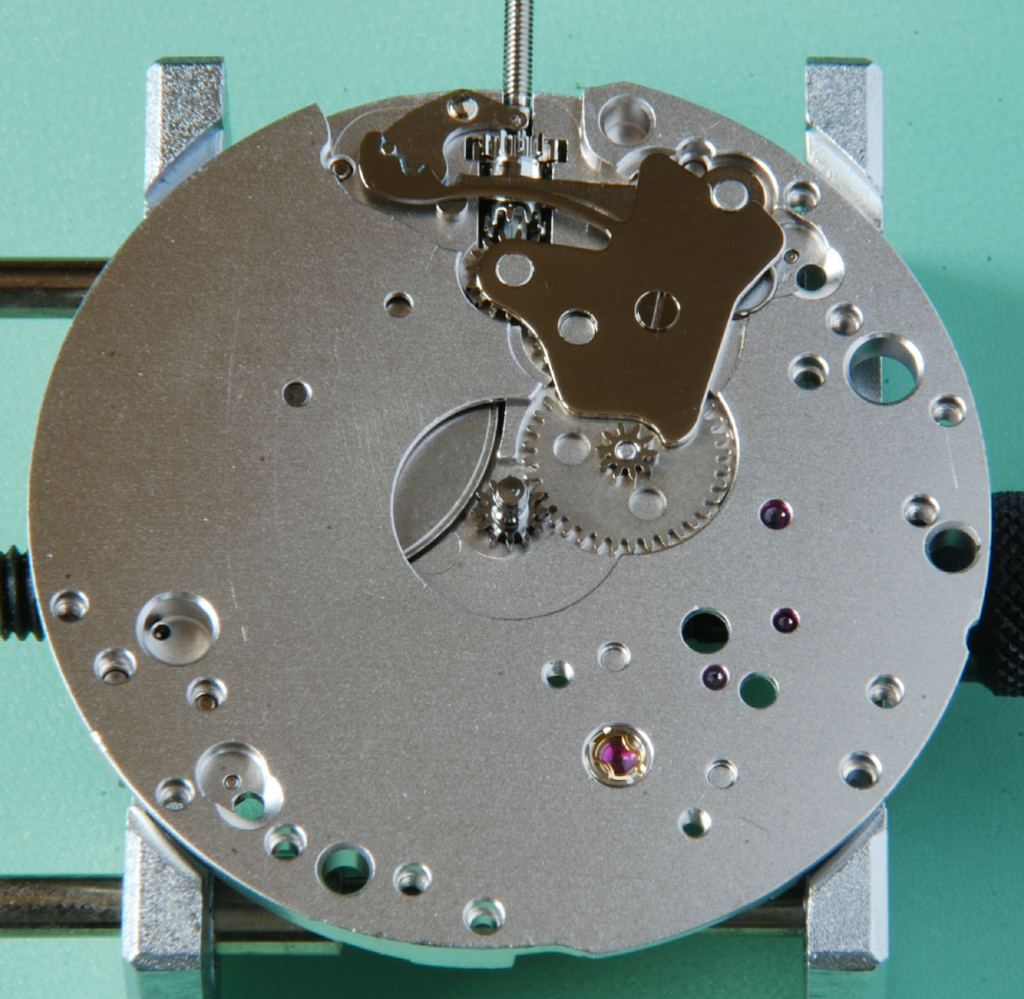
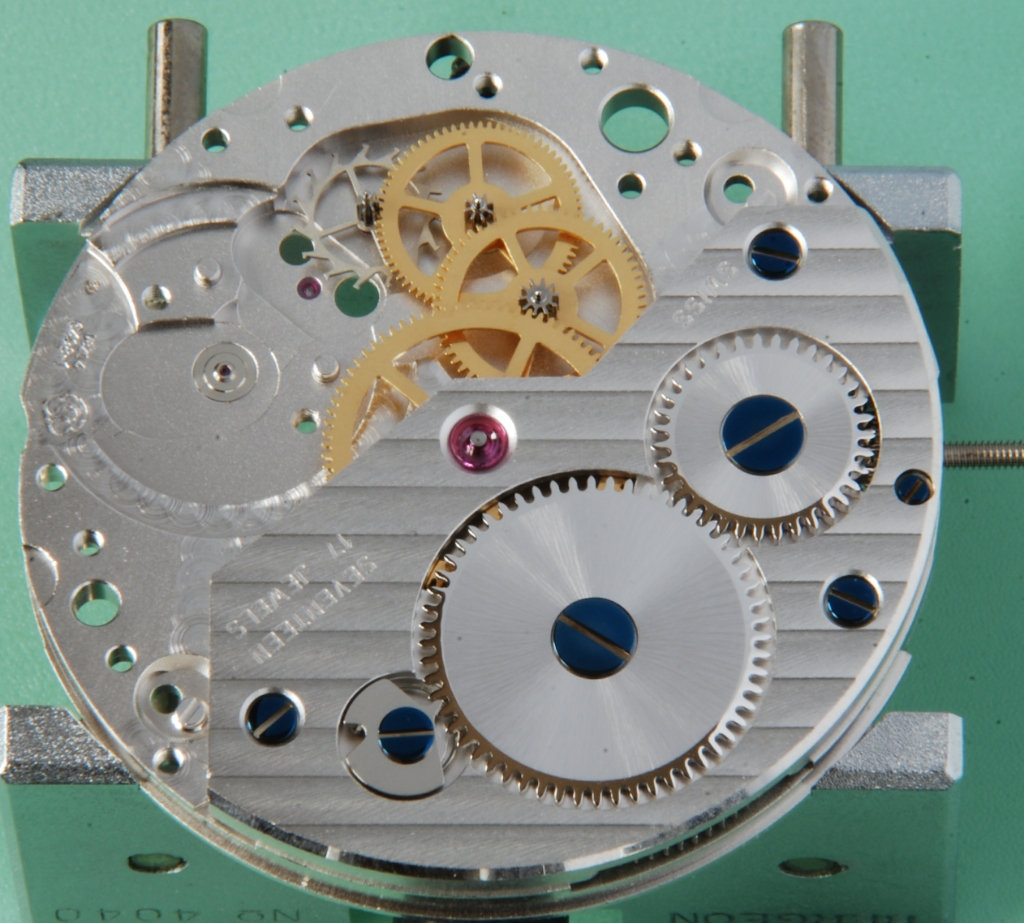
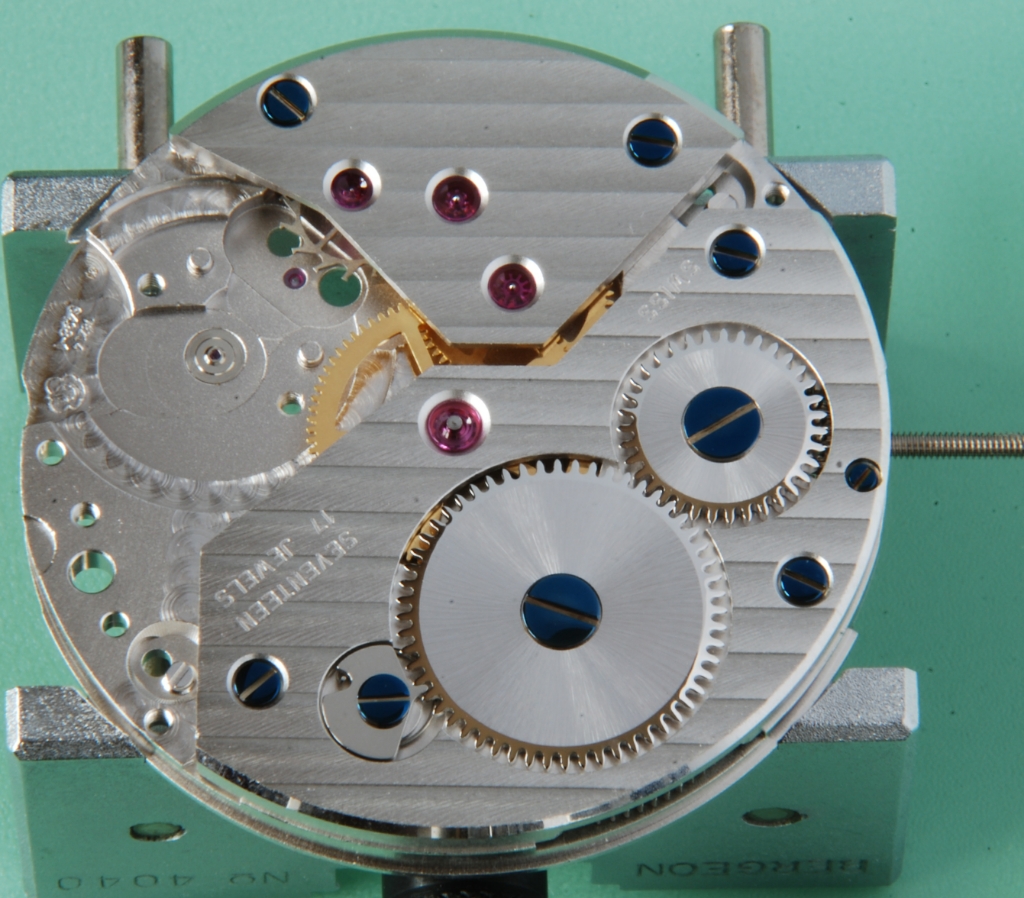
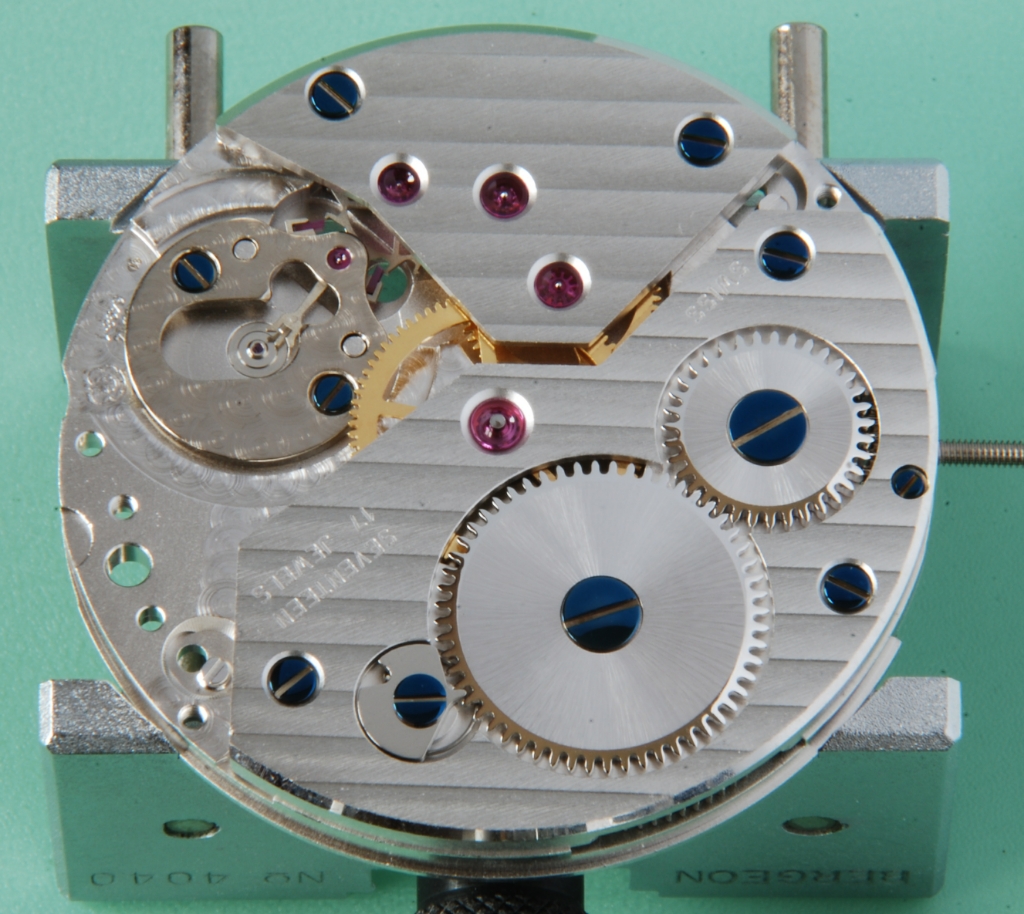
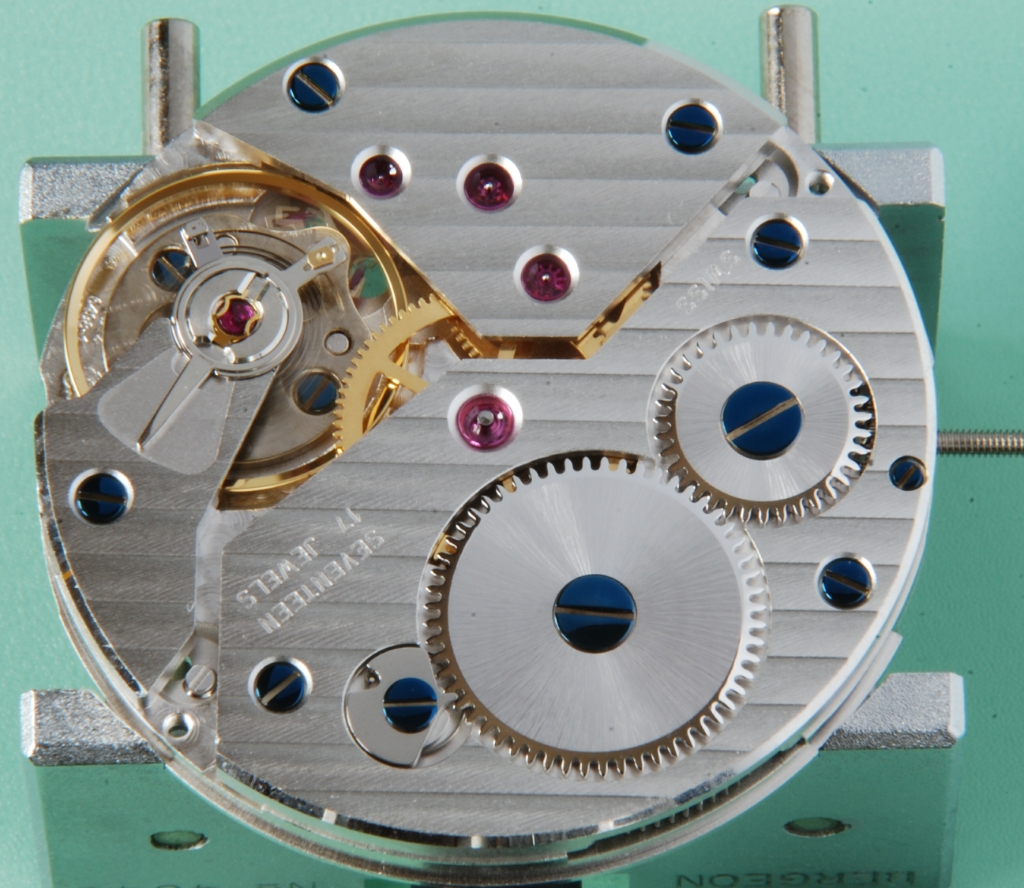
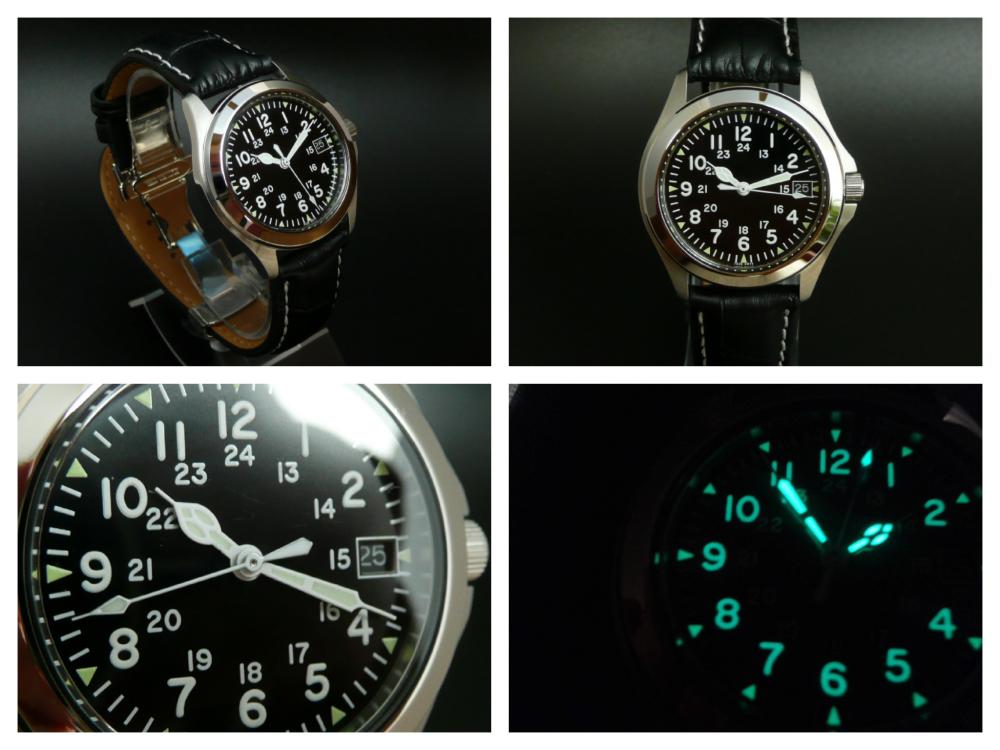
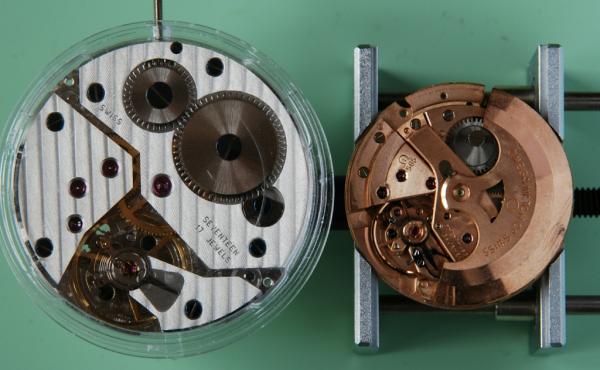
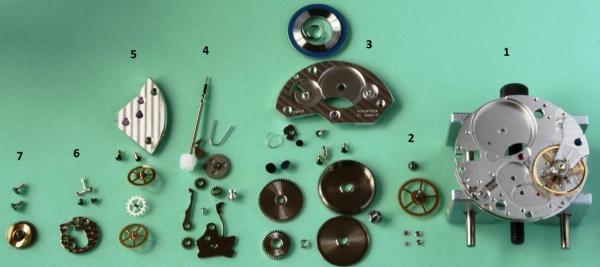
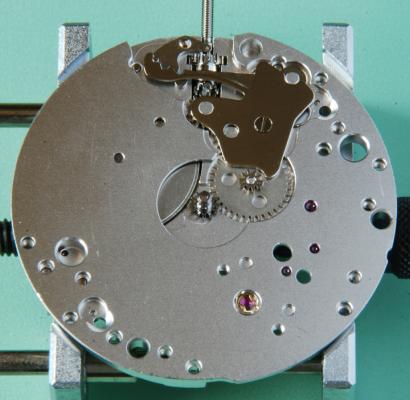
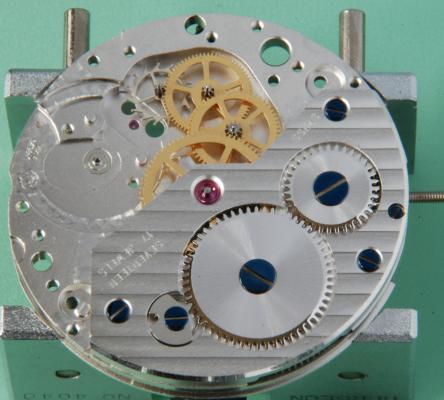
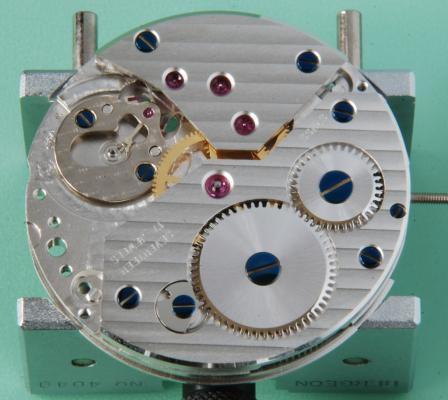
Hi I've just joined the forum so by way of an introduction and where I am in this hobby, I'm posting this build of a 6498. It's not a full walkthrough but this forum seems the best place for it. I usually work on older watches but have been meaning to have a go at one of these for some time and received a 20% discount offer from PayPal so I picked up an ETA6498-1, dial and hands on eBay. The case came from elsewhere. There are loads of people selling these as kits to build your own watch. This is just about the most basic movement you can buy, with no complications. There are two calibres in the family, the 6497 has the sub second counter opposite the crown so at 9 O’clock and the 6498 sub seconds is at 6 O’clock which I prefer but, the two calibres are very similar with many shared parts. Servicing one of these simple ETAs is probably not a bad way to start. I didn’t do that but, thought it might be nice to work with a new movement for a change and play with the Etachron system. To the best of my knowledge, these movements come in four grades: Standard; Elabore; Top and Chronometer. The lower two grades are easy to buy so that's what I have. The top two are not so readily available. It’s big at 36.6 mm diameter so, minimum case size must be 41-42 mm diameter as that’s a case wall of 2 mm only. People use these in cases much bigger than that but, I chose a 42 mm case as my wrist is only 6.75”. Here’s the spec for my grade and a bare movement picture (in its plastic case) next to a very dirty Omega 565 spares movement which is 28 mm diameter. Manual wind, 46 hour reserve 17 jewel and Incabloc shock protection with Etachron system. 18000 A/h (2.5 Hz) frequency It’s possible to buy these in a foil sealed pack (I think packed with an inert gas) and use straight from that pack but most, like mine, are sold ‘loose packed’ so should be serviced before use. I will do that and also see if I can improve a little on the way it runs straight out of the box. ETA publish a set of service instructions for this calibre with types of oils and an assembly sequence and the pdf is readily available. I more or less follow that assembly sequence. For the performance, to set a datum, I wound the movement, let it run for a day and then tested the 24H and 0H conditions. The CH, 6H and 9H are the only specified test positions for this calibre but, I tested over all six positions. Results as follows: Amplitude: max 290 degrees at 0H and min of 220 degrees at 24H. Six position delta: at both 0H and 24H of 18 seconds. Beat error under 0.4 milliseconds. These are pretty good and almost chronometer spec so I will try and get within that, being delta of 12 seconds at 0H and 15 seconds at 24H. On the older Omega movements such as the 5xx series, some are chronometer rated (e.g. 561) and some are not (e.g. 565). I remember looking at the parts commonality between these some time ago and I’m pretty sure that there were no differences in the critical parts so, those usually will come close to that spec. On this 6498, the balance and balance spring seem to be the major differences to guarantee chronometer spec for the better movements. Well, I have the cheaper one so, we’ll see. First is to line up all the big screwdrivers as these started as pocket watch calibres so, all the screws are big for me. Stripped and cleaned, the parts are these and this shows this is a simple movement. The parts are in seven groups working from the right. This is not a blow by blow account but I took some pictures to show how it goes together. These are all the pieces. 1. Plate with balance still mounted. 2. Incablocs and second wheel/cannon pinion. 3. Mainspring, barrel, ratchet wheel, crown wheel, click and barrel bridge. 4. Keyless works. 5. Train wheels and bridge. 6. Pallet fork and bridge. 7. Case clamp screws and hour wheel. First to go on are the Incablocs. I don’t know what reflection is being picked up on the machined parts of the plate but there is no discolouration at all in reality. For those in the know, I have the curb pins wide open as I am adjusting concentricity and centering of the hairspring between them. Really, for me to improve this movement performance, I can adjust the wheel shakes and try for the best configuration of the hairspring so, I spent a little time here. No poising of the balance at this time. Nice to have an adjustable stud carrier to set the beat error. This Etachron system is quite clever and it’s pretty new for me. It certainly reduces the amount of hairspring work which is not my favourite. I know it's not universally liked but it seems pretty neat to me. I end up with a very slight turn on the stud holder after some playing and am happy so, close up the curb pins again for final tweaking when it’s on the timing machine. Second wheel and cannon pinion fitted. Mainspring mounted in barrel and the complete barrel and barrel bridge mounted with its three screws, not forgetting to fit the setting lever screw first (!) which must go in before the bridge. Ratchet wheel, click and crown wheel fitted. It’s quite an attractive finish and the blued screws are a nice contrast. Turning over and the keyless works are fitted. I was a little generous with the grease here. This side of the plate is not so well finished but will be hidden under the dial so not so critical. Nice that there are holes in the minute wheel to allow the train oiling later. Here the rest of the train is shown, third, fourth and escape wheels. And now the train bridge mounted with its two screws. A little bit of wheel shake checking here but, it’s very good. Then the fork and bridge are fitted. That bridge is not the most attractive but it’s usually obscured by the balance. Checked the fork locking and so on here and no adjustment needed. Finally, the balance goes back in and the movement lives again. I let it run for 15 minutes and then removed the balance to oil the pallet jewels with 9415 (out of interest, I'm only using Fixodrop on the escape wheel and pallet jewels). This is an easy job on such a big movement but trickier for me on a very small ladies calibre. I have an Omega 684 in my wife's watch which is about 2/3 of the 565 size. After running for 24 hours again, I made some tweaks to the curb pins to equalize the horizontal and vertical running a bit better. Now, the six position delta is 10 seconds at both 0H and 24H so, I’m very happy with that. This really is a terrific movement for the money in my opinion. Bit more to follow later with (huge) case, dial etc. Hope some of this is of interest. Cheers, Chris


 1 point


.jpg.6225a64433578a11e0218b27c20b13f5.thumb.jpg.d82b0cd1e370f3a3a59a06afa957d184.jpg)