Leaderboard


Popular Content
Showing content with the highest reputation on 03/20/18 in all areas
-
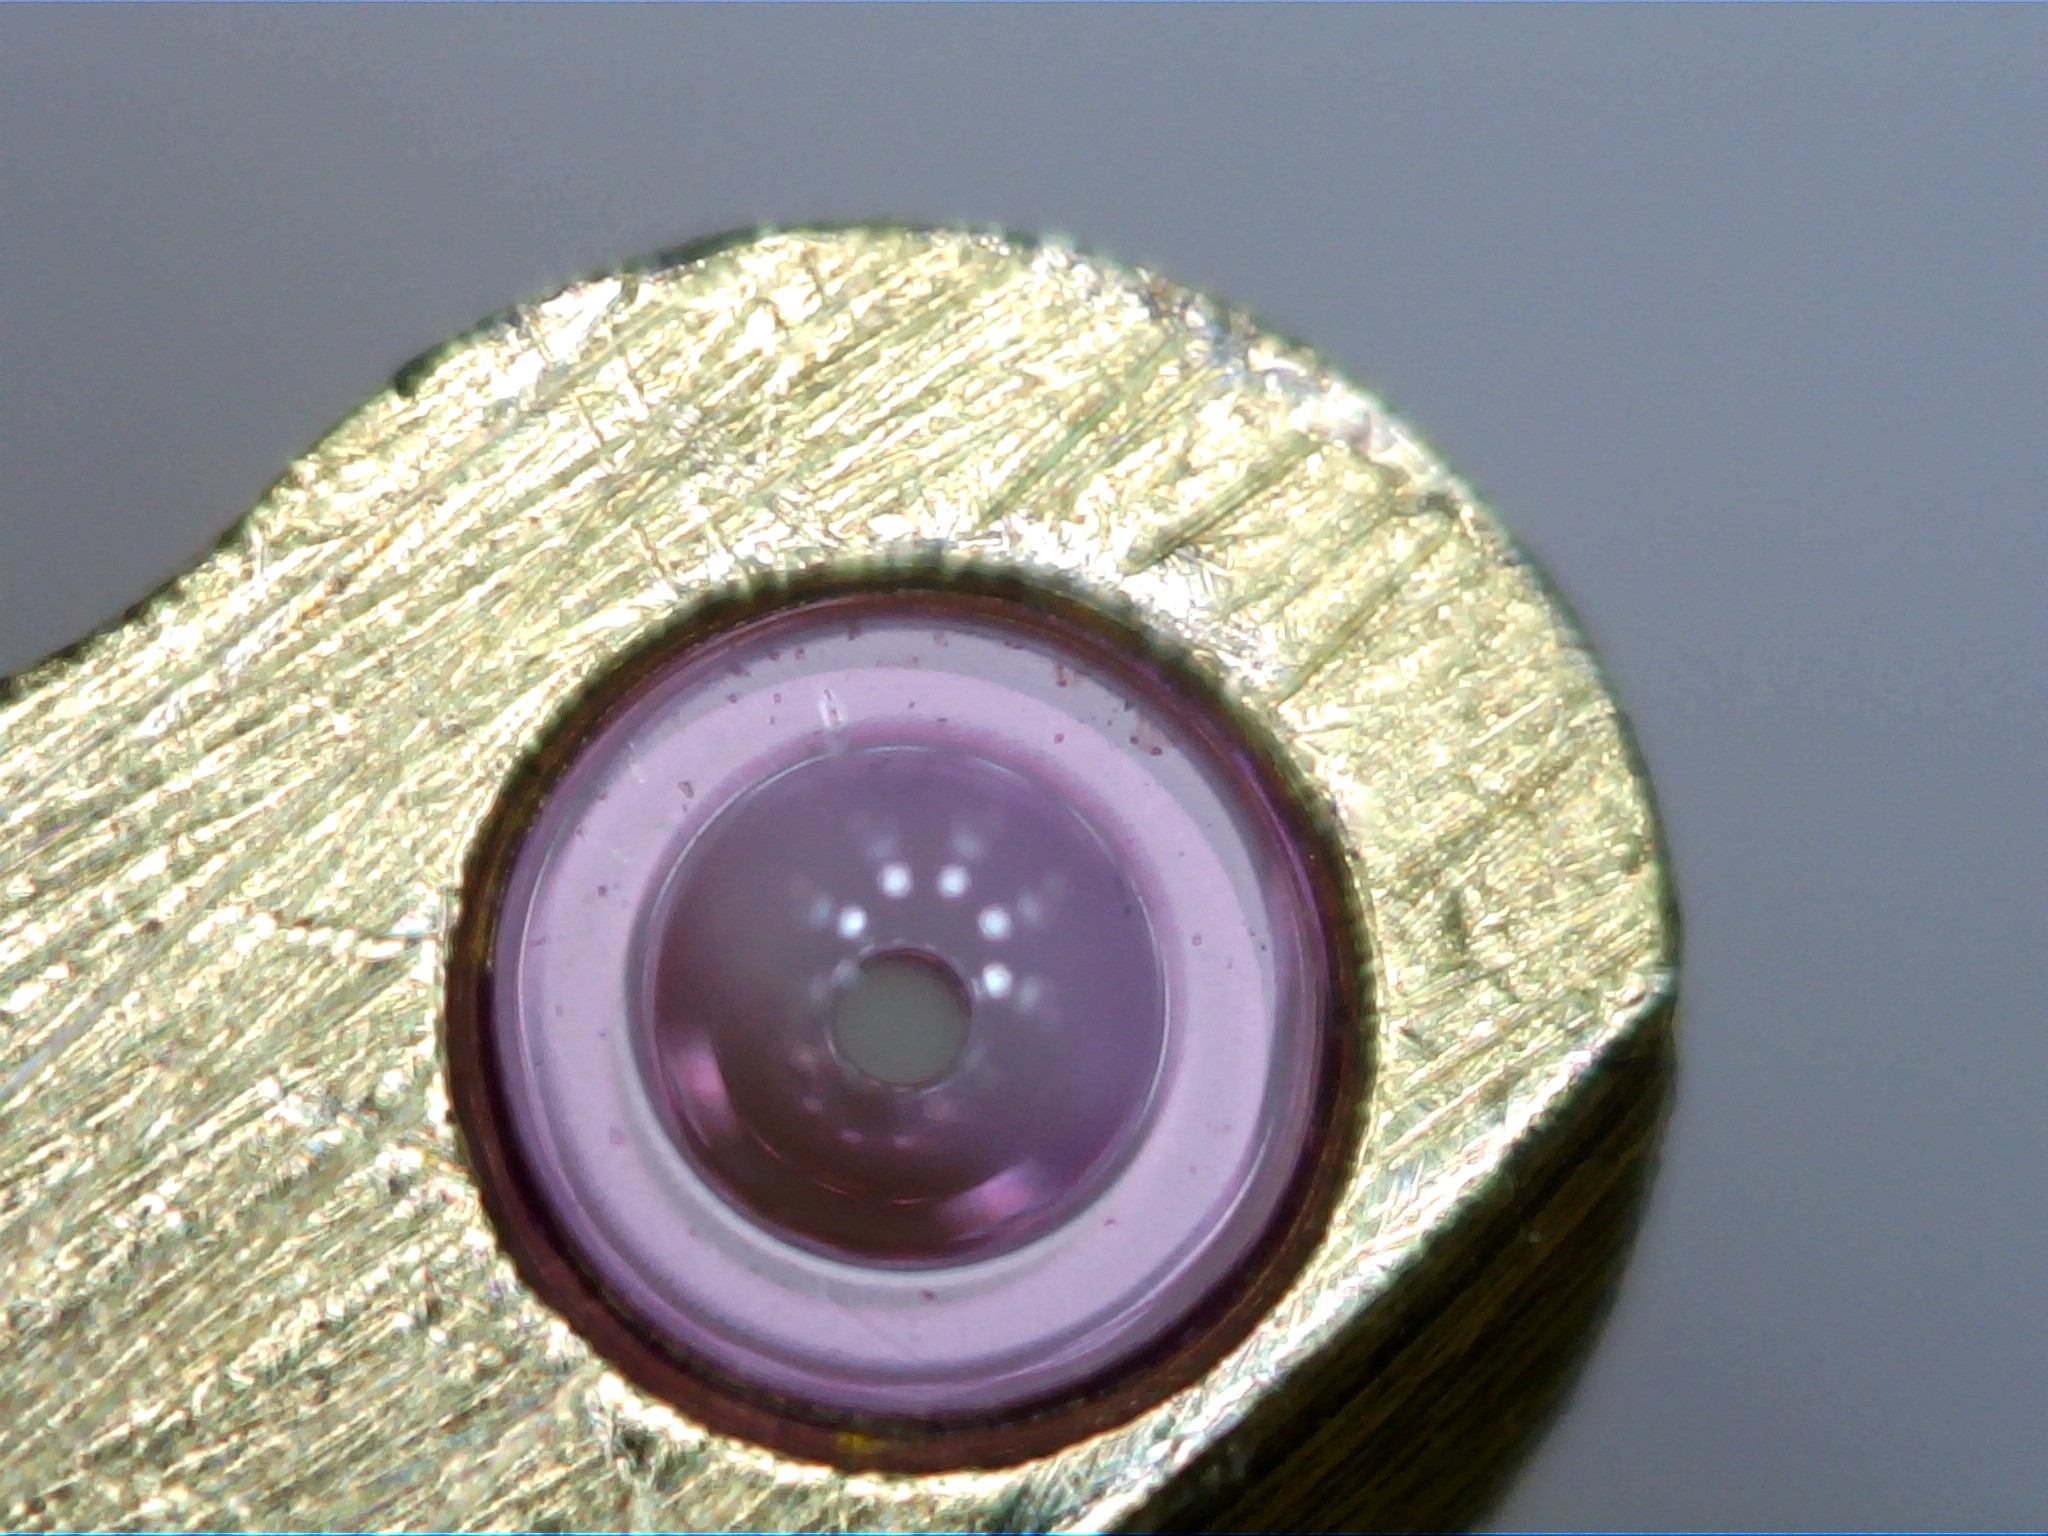
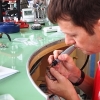
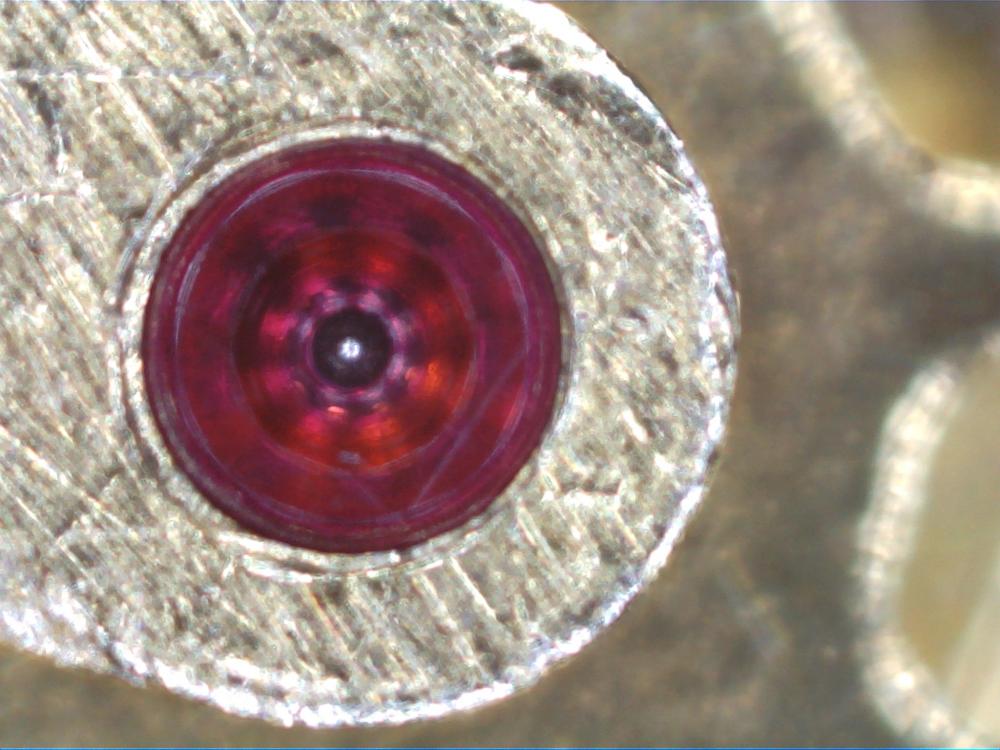
New jewel fitted and looking good ! In the end it was pretty easy to fit. The seconds wheel now spins nicely with correct endshake. With the pallet out I still have some 'stiction' - usually the gear train moves with the slightest turn of the crown, but sometimes it takes a full turn or more to move. The gear train on it's own seems fine - spins nicely when I use the blower. The barrel and intermediate wheel also seem OK when isolated so I'm at a bit of a loss to work out what the problem is. Could the arbor be binding in the barrel ? Any other suggestions ?

 2 points
 -
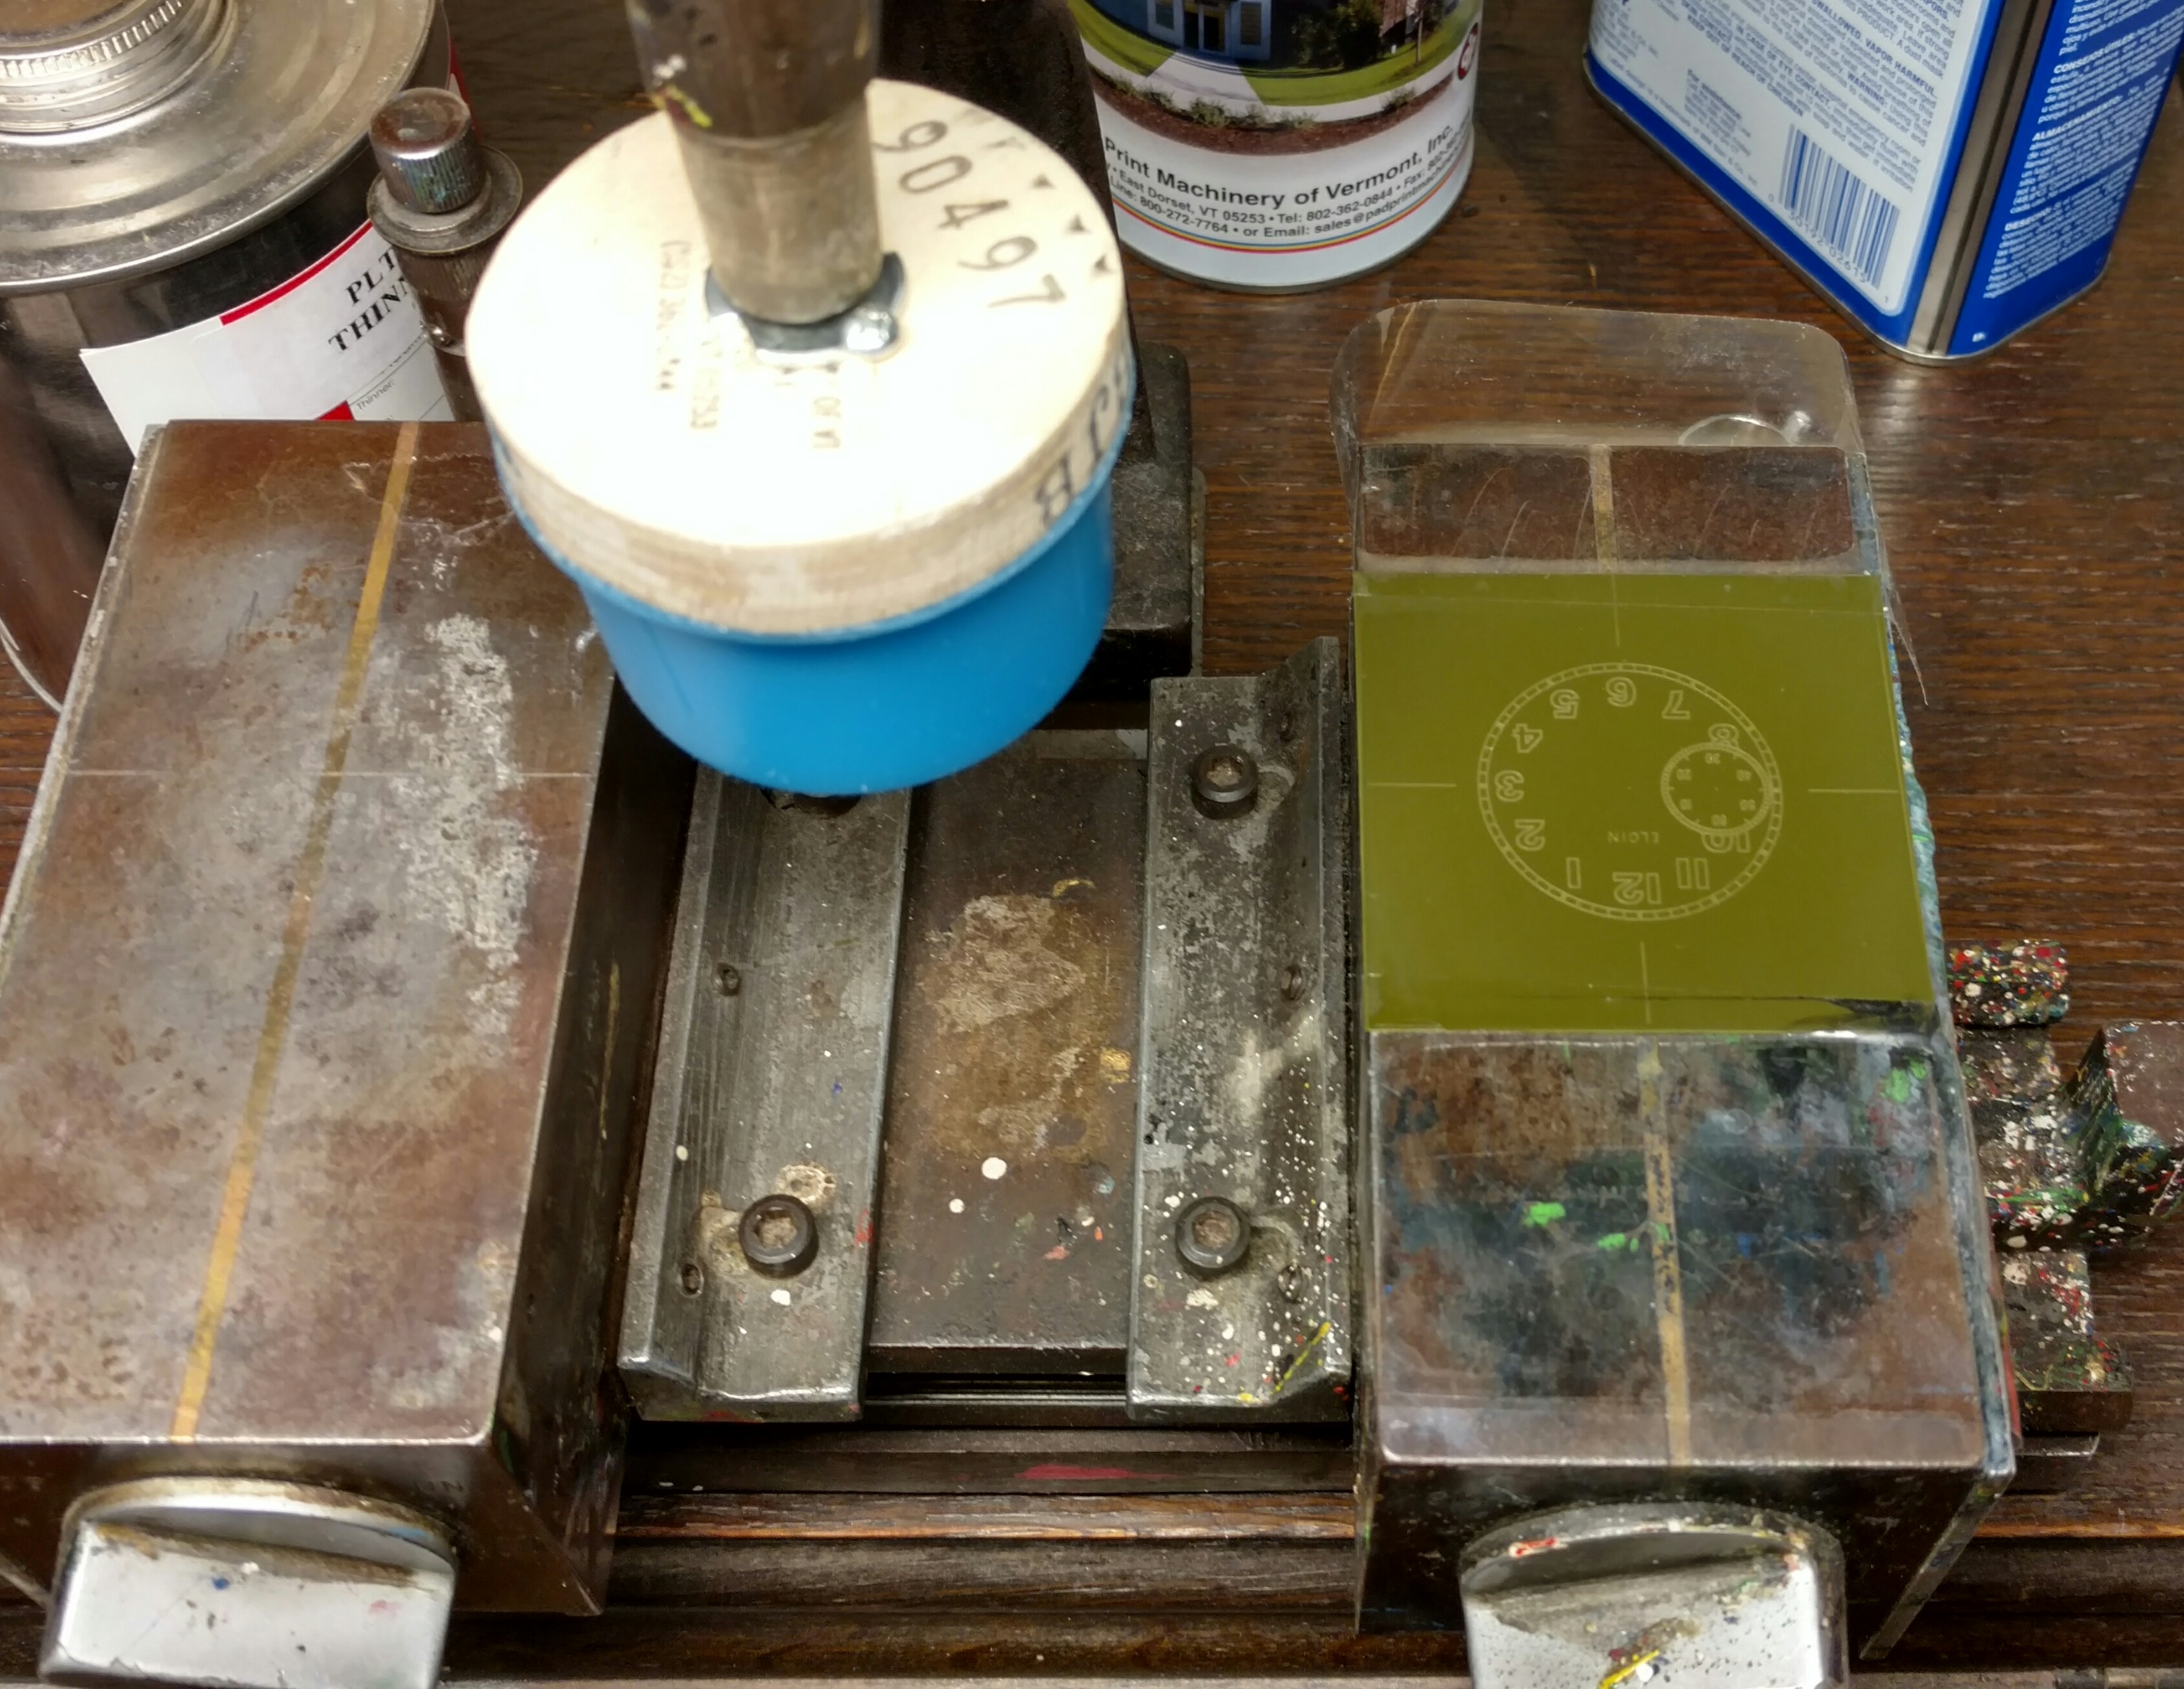
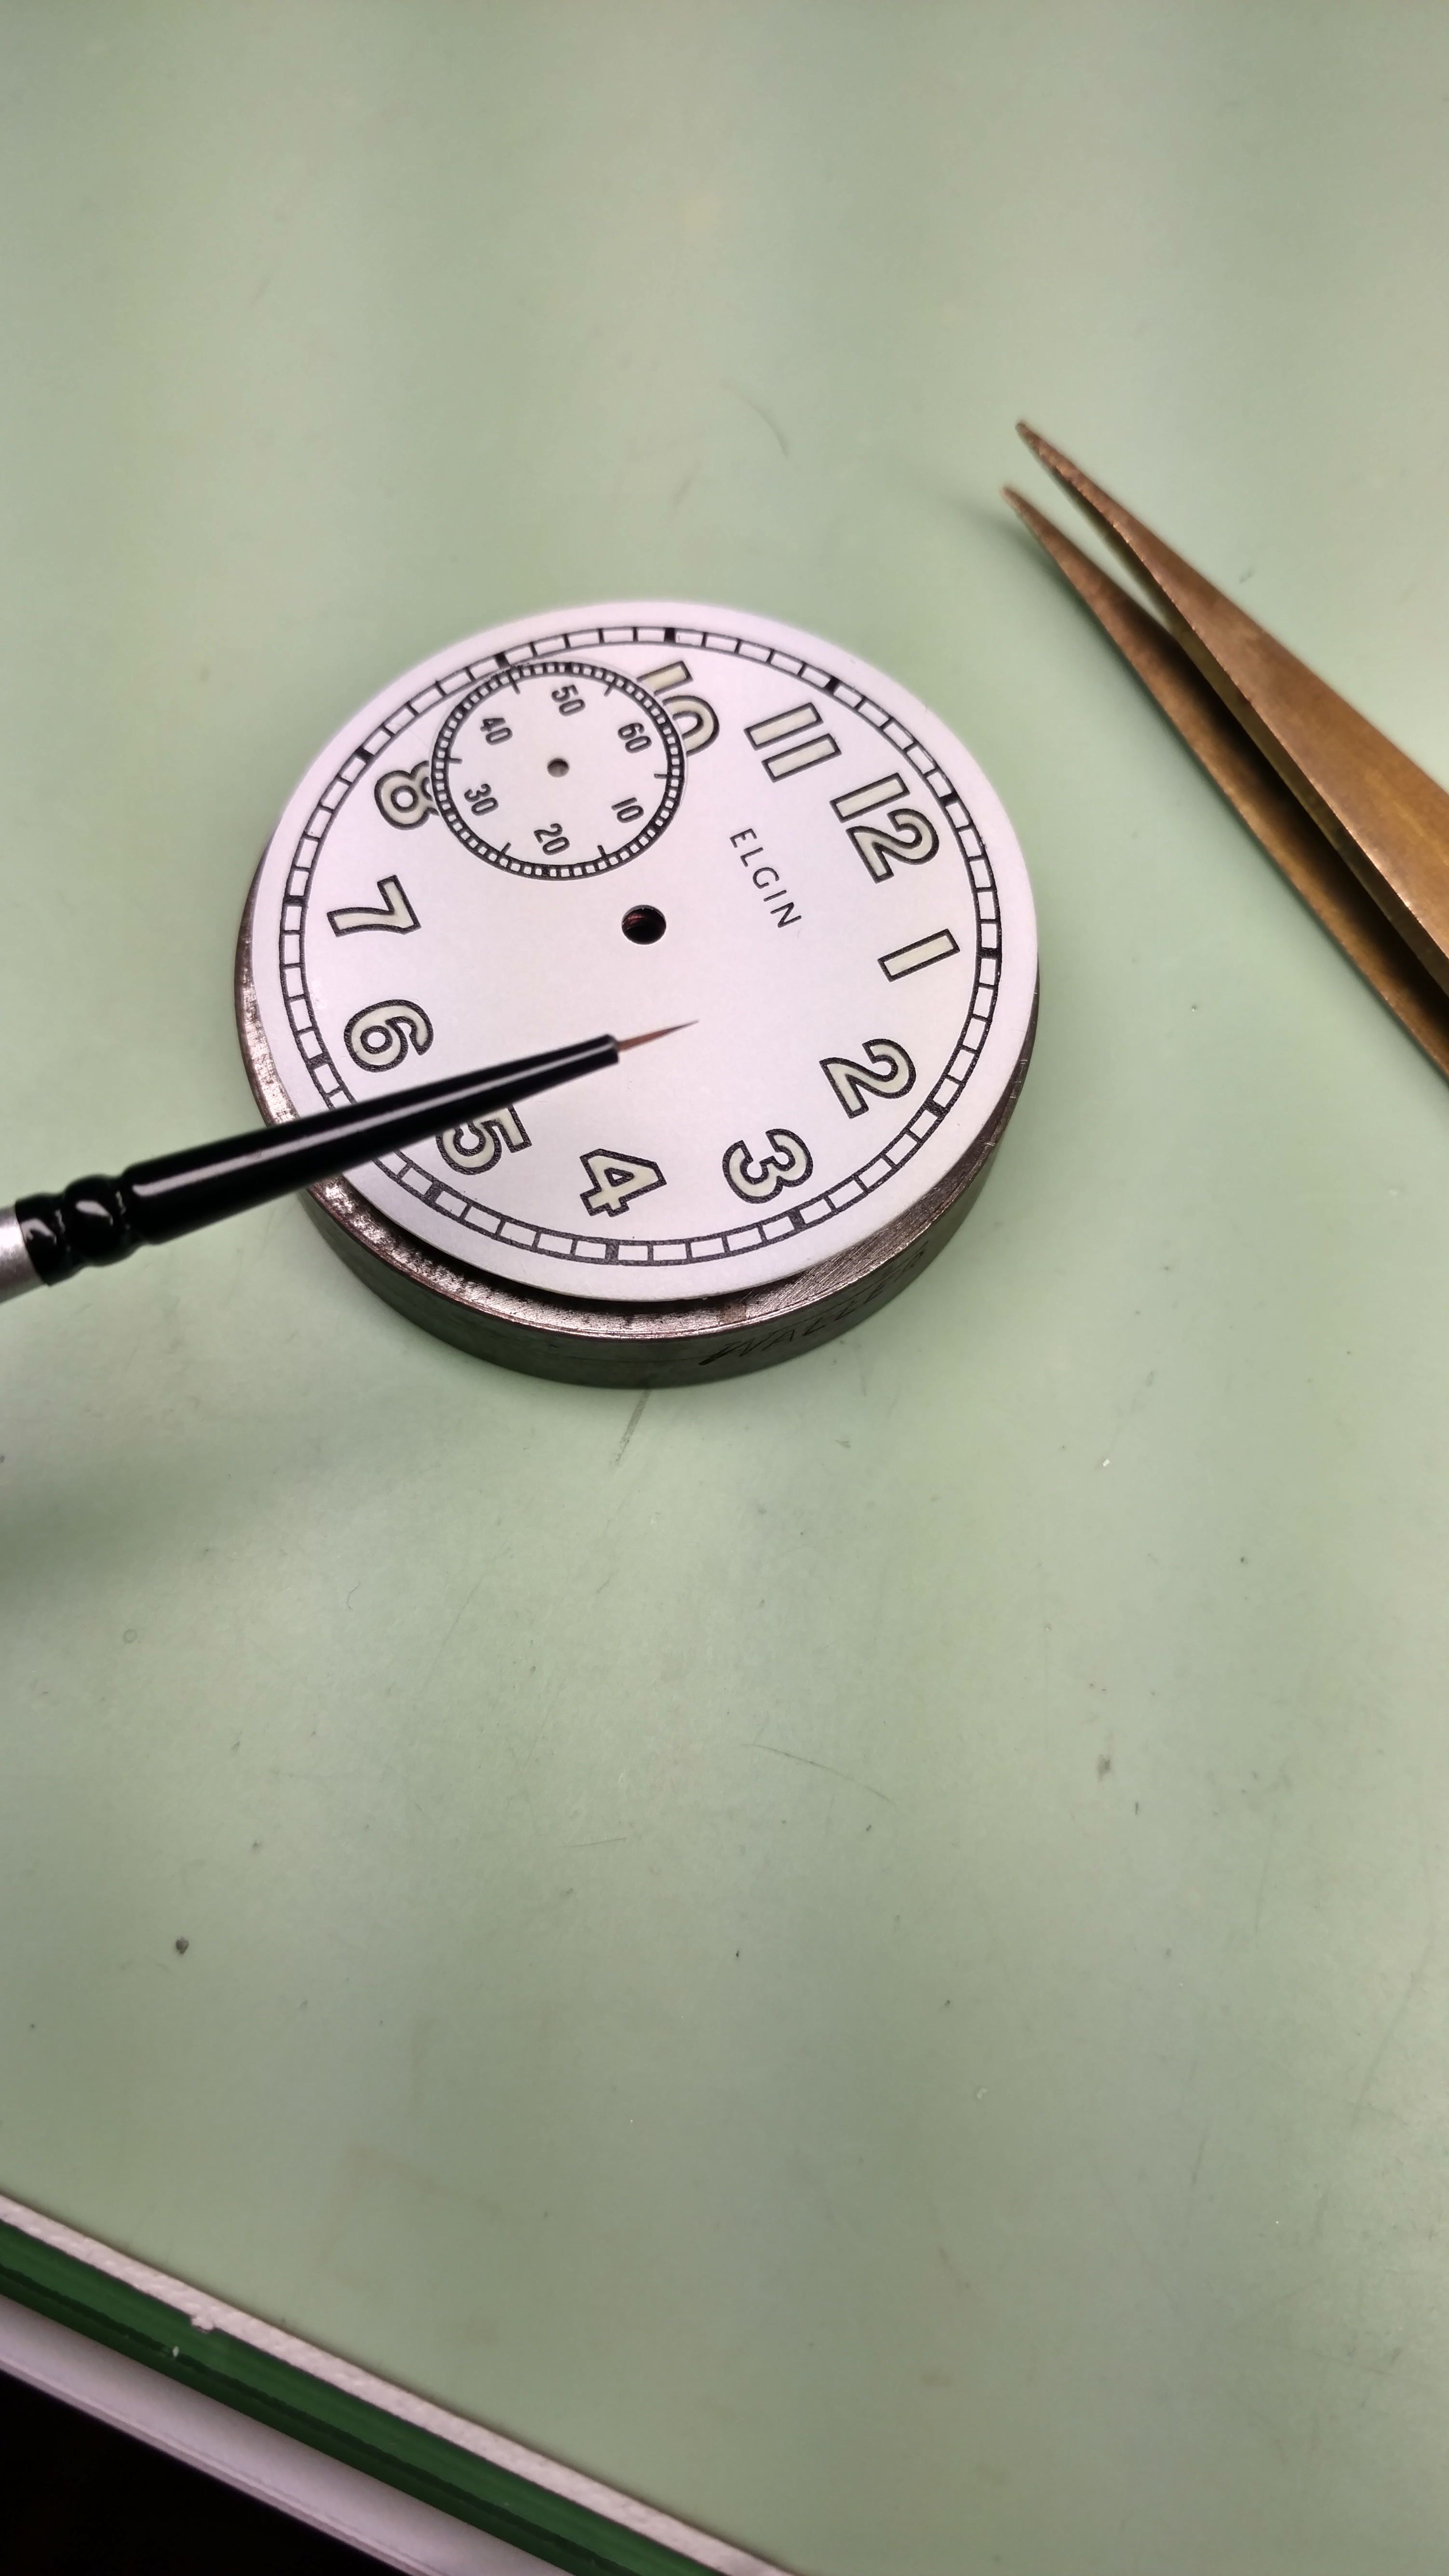
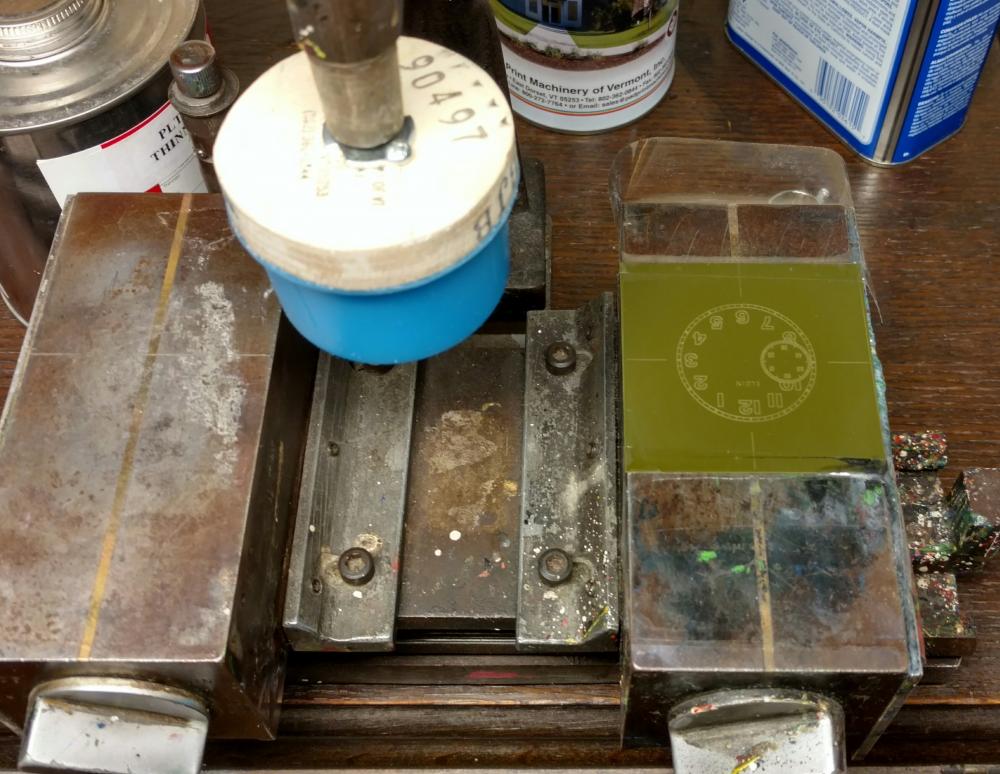
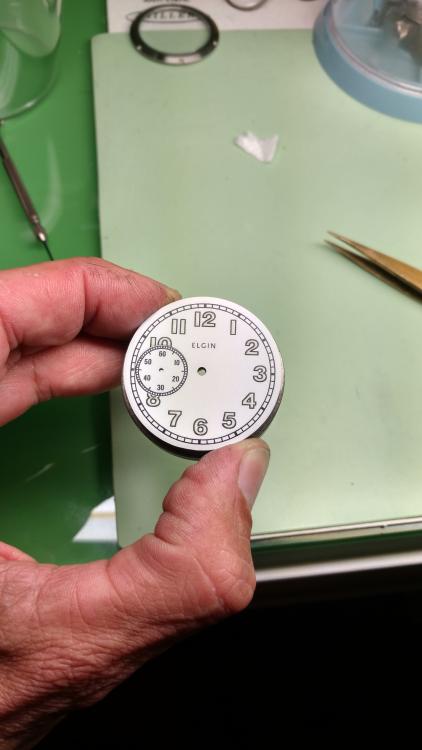
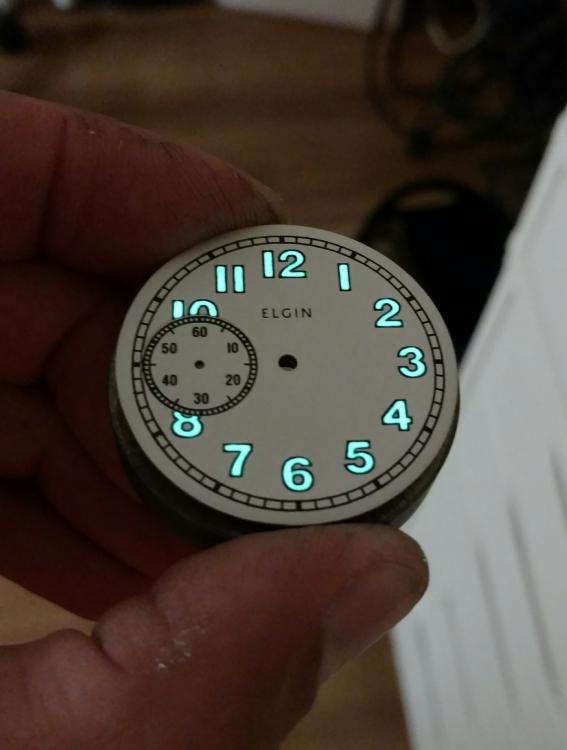
I'm very satisfied with how this dial turned out. I'm building and Elgin pocket watch conversion into wristwatch and wanted a vintage military dial look. I had recently purchased a lume kit but hadn't had the chance to use it yet. I design the dial with bold outlined numerals for the purpose of filling with lume. It really turned out better than I ever hoped! The first dial I did turned out very acceptable, except that I had another issue with it and had to start over. I learned quite a bit just from doing that one dial. Once I had the printing plate made I repainted the original Elgin dial to a flat white. I then Inked the plate and printed the new dial. Once everything was dry I then slowly added the lume using a 100 - 0 paintbrush which is about the size of a watch Oiler. I went around the dial 4 times adding a layer little by little. I'm very surprised just how much Lume this process adds. The markers have a nice three-dimensional heft to them...

 1 point
 -
Often times a watch needs to "run in" for a day or two before doing any kind of regulating. This gives the oil time to spread and settle and the train to settle back into place. Did you check this the second time on a full wind? It could be a small amount of contamination has settled into one or more of the train/escapement pivot areas. The motion work could also be exerting some resistance, ie the cannon pinion, hour wheel, etc.....I'd check everything under high magnification to start with, then I'd start by removing potential drag items, hands, hour wheel, etc and work backwards from there...I don't believe the oiling of only one pallet stone is the cause, as the oil will still be distributed to the teeth of the escape wheel, and thus the second stone, it just won't be as much oil as if both had been treated.1 point
-
A normal non-automatic mainspring will do fine. GR6413 will work. That has a normal bridle. Just pop it in and it will hook into the cut out when you wind it up.1 point
-
One other thing i have found is that the old crystals are not perfectly round, so I measure in several different places and get the average. Sometimes just changing the orientation in the bezel will be the trick to getting it to fit. All that being said, I've had much better luck with GS acrylic crystals, especially in hunting cases, because the glass is so thin to begin with. Good luck!1 point
-
Looking at the photos it looks like it's missing a few pieces. There should be several sizes of hollow end arbors that hold the work while you insert the drill. There should also be a drill holder. Have a look at this one: https://rover.ebay.com/rover/0/0/0?mpre=https%3A%2F%2Fwww.ebay.com.au%2Fulk%2Fitm%2F2327016427661 point
-
Tried on a ETA pallet fork., Getting it out without breaking anything was the hardest part . Getting it in i used a bit of rodico on top of a staking punch. I just mounted it loose and then pressed the rest in with a jeweling tool . But a pin vice could work just as well i think? The tricky bit now is to find an arbor.1 point
-
Removal of the case back and inspection by a watchmaker/repairer is required.1 point
-
Thanks, khunter. That sounds like it's more effort than I care to expend, as well as being well beyond my abilities. I do see that it would work, providing one took their time and used the right abrasives, etc. The seller found another crystal that is marked 18 4/16, and measures 41.27mm. The actual measurement of mine is closer to ~41.35mm, so I'll have to use a bit of glue. I'll see how it goes. One thing for sure, the 18 5/16 ligne wasn't going to do it without the type of work you described above. I tried heating the bezel, as well as cooling the crystal, but it wasn't enough to make up for the .15-.20mm size differential. Thanks again. Cheers.1 point
-
Yes, done this a couple of times. It’s fairly easy to set the height correct if you use a jewelling press to fit it with.1 point
-
Turned to eBay and after trawling the pocket watches (why do people always show the dial before the movement! Especially on “needs servicing” watches that are obviously spares or repairs!) I found another, which arrived today and boom swapped the minute wheel and away it went.1 point
-
Should be good to go. I've found that slowly pressing in the jewel in small increments, then checking the endshake works best as opposed to trying to get it right the first try. Check the hole/pivot size under high mag to make sure it's not too sloppy but it sounds like you're on the right track...1 point
-
I've found that the sizes listed on the old glass crystals is more of a guide than anything. I've measured several that we all marked the same, but still varied in diameter by a tenth or two from what was stamped. You CAN resize a glass crystal, but it is painstaking and not always successful. I made a wooden bobbin on my lathe, about 1" in diameter, then slightly beveled one face, and coated it with a thin layer of silicone rubber sealant. Mounted on a 1/4" dowel, I chuck it in my lathe and use the tailstock with a loose fitting wooden "pusher" to hold the crystal to the bobbin. Run the lathe slowly and use hand pressure on the tailstock while centering the crystal on the bobbin, I use the wooden handle of a burnisher to apply pressure to the edge of the crystal until it runs true. Then I tighten the tailstock in place. Using various grits of carbide emery cloth, I gently reduce the diameter a little at a time. You MUST polish the sanded edge using the finest grit cloth you can find, at least 2000, or when you try to install the crystal it WILL chip! Heat the bezel up! This will slightly expand the ring and allow the crystal to go in, and when it cools it will shrink back down and hold the crystal tightly.1 point
-
Slightly different lathe, turret style, but the principle is the same.1 point
-
You don’t say what you want to lacquer. I used to lacquer French Carriage Clock cases. I used a very fine brush, a brush I got from an Artist paint shop. I would just paint it on making sure not to use to much so it covered evenly but never ran. Make sure it is spotless, no tiny hairs or specks of dust. I used this one for brass and clear. It dries very fast in fact within seconds. https://www.cousinsuk.com/product/lacquers-rapid-drying1 point