Leaderboard


Popular Content
Showing content with the highest reputation on 01/26/16 in all areas
-
And here are a few shots Sent from my iPhone using Tapatalk4 points
-
Hello John, First things first, never adjust the pallets, their set from the factory, maybe polish the impulse faces slightly. Also check to see that the pin lever has not worked loose in the verge/anchor. Should only be checked when its removed from the plates, the pivots will break like glass. Like OldHippy says, the suspension spring must be the exact thickness and length, and the fork must be positioned perfectly according to the horolovar book specifications, and the mainspring should be wound Setting up proper beat takes more patience then watching paint dry. Make the pend stand still, put tape on base and mark as neutral position turn pendulum horribly slowly until you see it escape a tooth, mark this position turn pend the other way until it escapes, mark this. The distance from each mark to neutral should be equal, if not, you need to turn the top Saddle assembly a microscopic amount until it is correct. Realize each adjustment will require new marks After proper adjustment, you will see that not only does the pendulum swing enough to cause escapeing, but you will also see it overswing the mark, this is very good. A total rotation of 270 degree's is great. This shows good power coming through the train to the escape wheel. Once you have it in beat, a half bottle of Wine is in order Beat Rate is adjusted with the knob on top on the pend bob. Don't be surprized if the etched arrows are in correct for Retard or Advance. In a perfect world the knob should be in the middle at the correct beat rate according to horolover specs If the beat is too fast and you can't slow down with the pend knob, you can sand the suspension spring length below the fork with Crocus Cloth, polishing cloth. If you didn't put in the correct suspension spring to begin with, don't expect Crocus Cloth to fix it. If the beat is too slow, you put in the wrong suspension spring Finish off the rest of the Wine Forks that flutter are usually adjusted too low on the suspension spring a micro amount If the fork is too high it will reduce the total swing of the pendulum, but not flutter, you need to find the sweet spot in between. Any adjustment to the fork or spring throws out the above adjustments, do it again, and again. Also as the mainspring and oil ages along with dirty pivots, this reduces tolal swing of the pendulum until the swing cannot cause escapement any longer If you've gotten this far, you might be wondering if the clock will run an entire year. To test this, let down the mainspring and put 1.5 winds on it. It should barely be escaping. If it does, pat yourself on your back, your done. Now you know why most clocksmiths will not touch anniversary clocks, too much labor, not enough money I think its time for my nape Al Takatsch Jefferson ClockWorks4 points
-
Also, this type of movement requires disassembly to get to the capacitor and the plate covering the capacitor tends to shoot the retaining screws to the next galaxy so if you have no experience working with watches you are in for a challenge.2 points
-
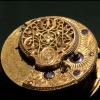
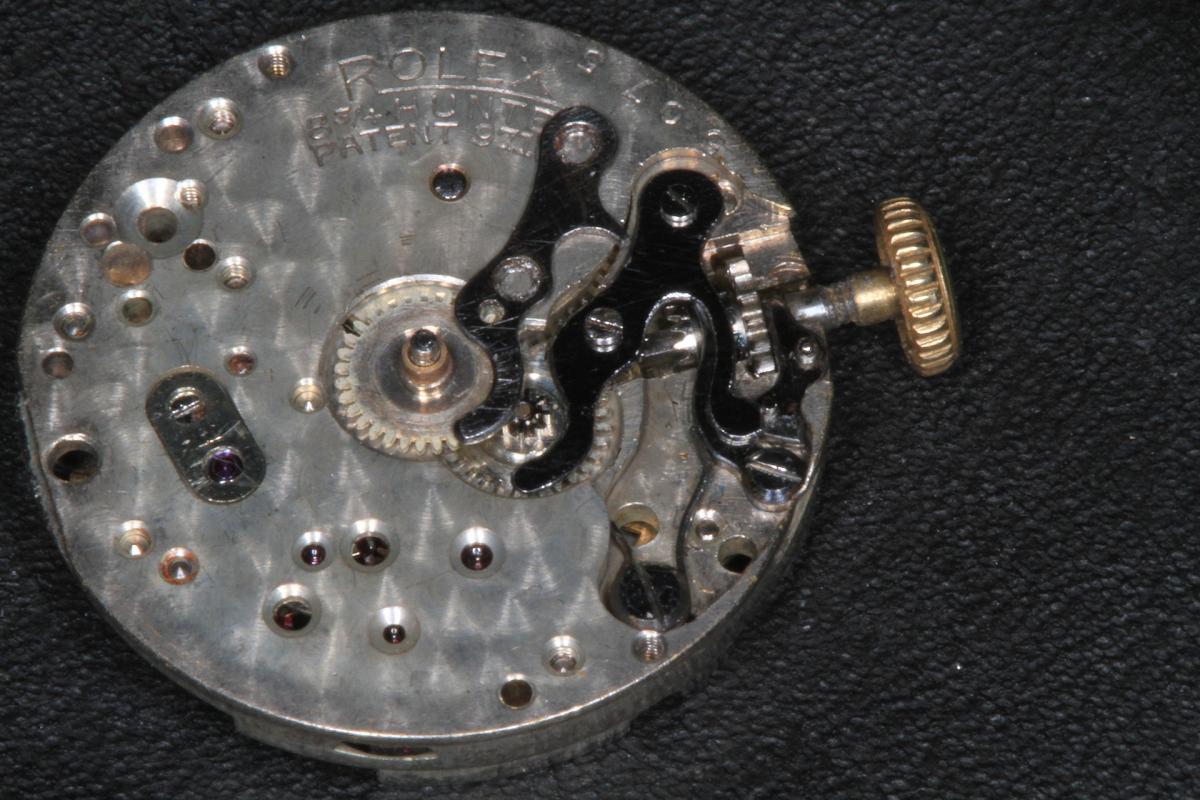
The fruits of my labour... The keyless cover for a (clapped-out) rolex was made from a bit of mainspring: The setting lever spring for a 40's movado was made from a hacksaw blade: A pleasant evening's work.
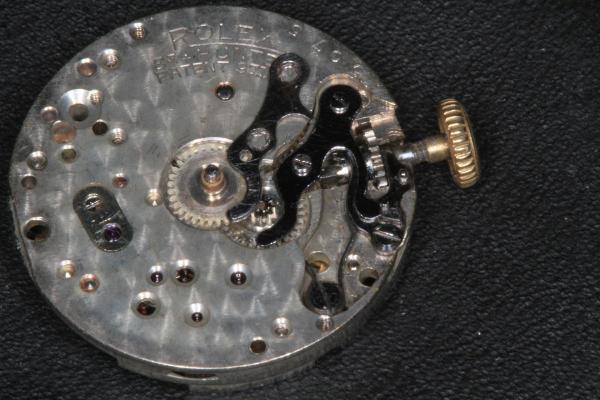
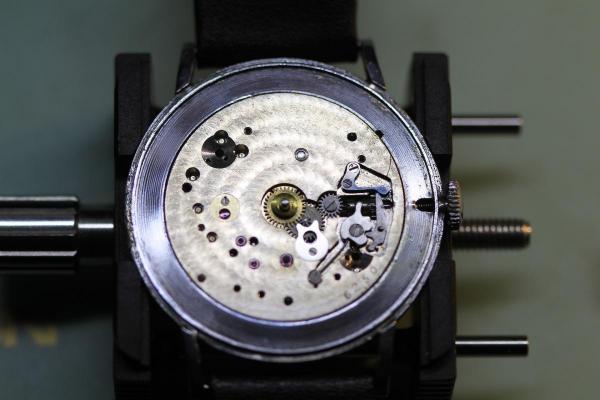 2 points
 -
Parts list shows them as the same.1 point
-
From a galaxy far far away. [emoji16] I live in Holland. IVe have alot of Reading to do. And in time i Will ask for advise About with tools and how-to's. Send from outer space1 point
-
You won't pay import duties on 96 dollars U.S. I think the allowance is 135 sterling. You will have to pay VAT and the post office will pay customs, then charge you and also charge a handling fee for the service Sent from my SM-G900F using Tapatalk1 point
-
Contact Sternkreuz and ask them what it is used for, they have a contact page on the site below. http://www.sternkreuz.de/ Max1 point
-
It looks like a factory gauge set for checking production tolerances during the making of plastic crystals.1 point
-
I've often wondered if old clock main springs could be a suitable source of material, suitably annealed for working and then hardened and tempered before finishing.1 point
-
I haven't looked thorough all he has but I like the style of this. http://www.ebay.com.au/itm/201491980459?_trksid=p2060353.m1438.l2649&ssPageName=STRK%3AMEBIDX%3AIT The only thing is there will be extra charges bringing it into the country, import duty is fair enough but the last thing I bought, the post office put a handling charge on that was almost the same cost as the item I was buying. Still going to have a look though :) Good point that Geo, I guess lying in storage all these years all the oils and grease will be u/s.1 point
-
I bought my wife one of these about 18 months ago, http://www.ebay.co.uk/itm/NOS-NEW-SWISS-WATERPROOF-RECORD-LUXE-WOMENS-WATCH-1960S-/401053527897?hash=item5d60a72f59, I don't remember the seller but it wasn't this guy and I paid a lot less. It was NOS, but maybe more of a one off. It needed a service as it occasioanlly ran at about double speed! The case back was really hard to remove, the crown seal had turned to mush (fortunately managed to replace that and keep the signed crown), and the lume on the dial crumbled if you stared at it too hard. All these were fairly easy to rectify and she now has a "new" watch. If you're paying someone else to do the service, then these can work out quite expensive. If you are DIY, then they seem like an ok deal. S1 point
-
Remember that they are well over due a service because of the age. I purchased a NOS ladies Vulcain for my good lady a couple of years ago for £40 and it was a bargain and ran OK. After I serviced it, it's now is great time keeper.1 point
-
Excellent result really glad it worked out well , don't know if i would of had the nerve to do it1 point
-
I believe that the best way to assemble and fix a movement is to first understand how everything about it works. So I made some animations to help in understanding how the chronograph assembly works. The Seiko 6139 features a column wheel and a vertical clutch. The chronograph second engages and engages with the 4th wheel via a clutch spring. The clutch is controlled by the first and second coupling levers. See how pressing the operating lever rotates the column wheel, which in turn, controls the coupling levers. While the chronograph is running, pressing the flyback lever will have no effect. But when the chrono is stopped, pressing the flyback lever will activate the hammer, which in turn, resets the chronograph second wheel and the minute recorder wheel. I hope these animations were helpful.
 1 point
 -
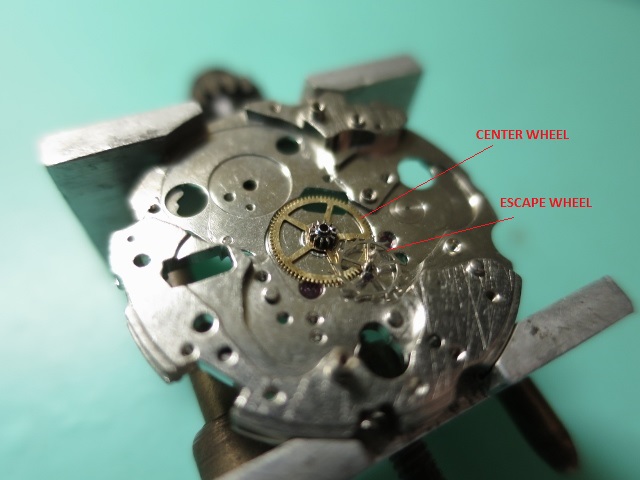
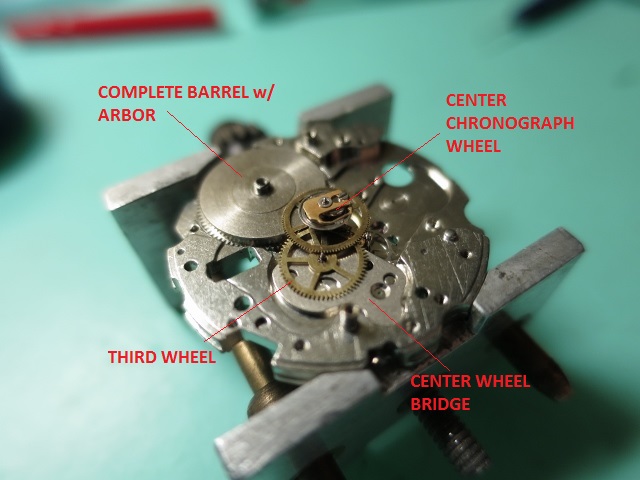
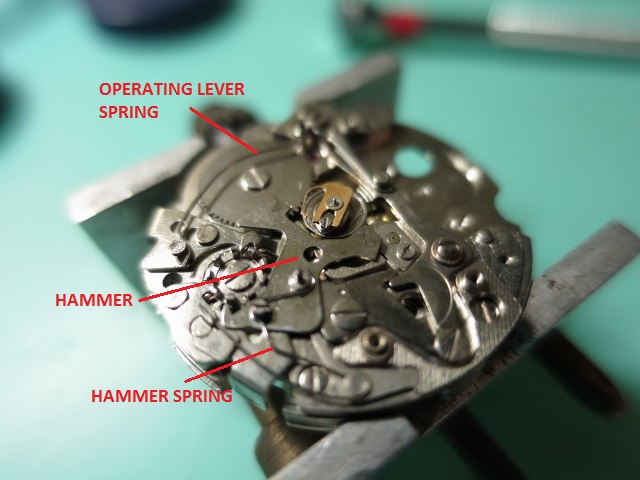
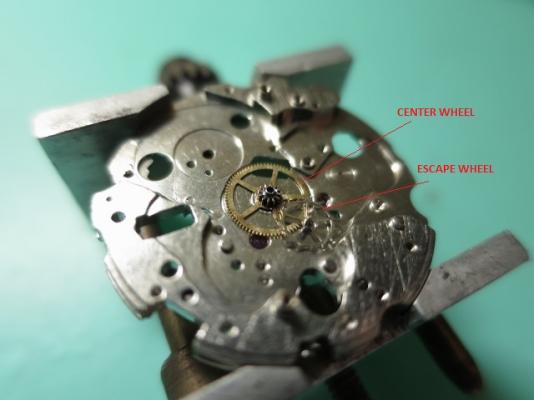
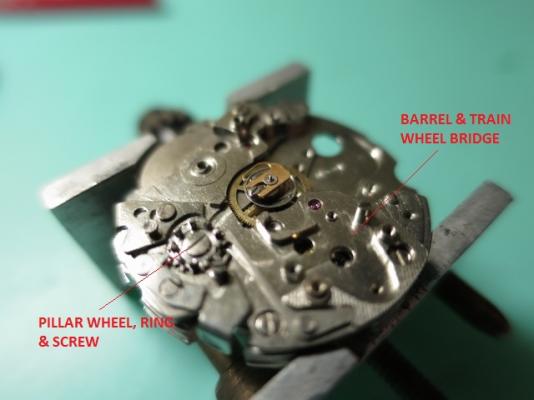
Good day,everyone! Finally had some time to update this post. I will now describe how I assembled the movement. But first, let me refer you to some documents that helped with the the service. Of course, the 6139 service manual: http://www.thewatchsite.com/files/Seiko%20Technical%20Manuals/6138A.pdf That document is for the 6139A. The movement I serviced is actually the 6139B: http://thewatchsite.com/files/Seiko%20Technical%20Manuals/6138B.pdf There are minor differences between the A and B variant but the 6139A service guide will do. I find Polly's Seiko Calibre 6139 Amateurs Guide: http://www.thewatchsite.com/39-watchmaking-tinkering-reference-materials-how-s/43929-seiko-calibre-6139-amateurs-guide.html I started the assembly my installing the center wheel and the escape wheel onto the main plate. ...followed by mounting the barrel assembly, the center wheel bridge, the third wheel and the chronograph wheel. The pillar wheel is then installed onto the barrel and train wheel bridge. Then I installed the assembled bridge. In my case, it helps not to install the pallet fork or the click wheel first. Freely rotating wheels help in aligning the pivots to their respective jewels. I then lubricated the pivots with Moebius 9010. Once the third wheel and escape wheel pivots are lubricated, i then installed the intermediate minute wheel recorder holder. After which I installed the coupling levers. I also installed the ratchet wheel. Next, I installed the hammer and the springs. ...to be continued.


 1 point