Leaderboard


Popular Content
Showing content with the highest reputation on 07/29/15 in all areas
-
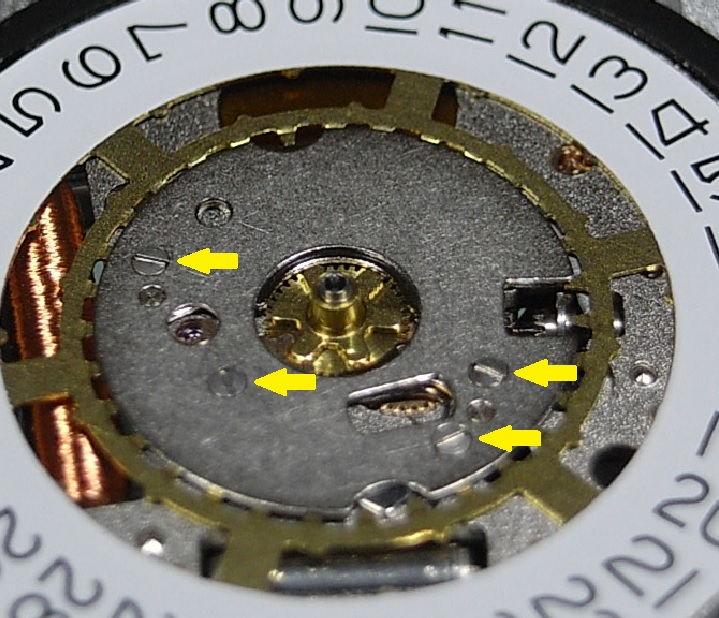
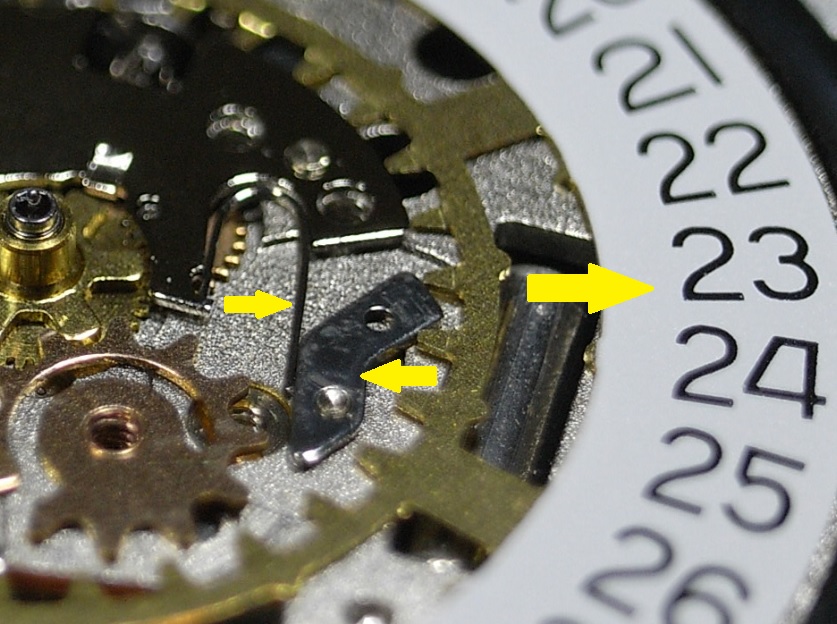
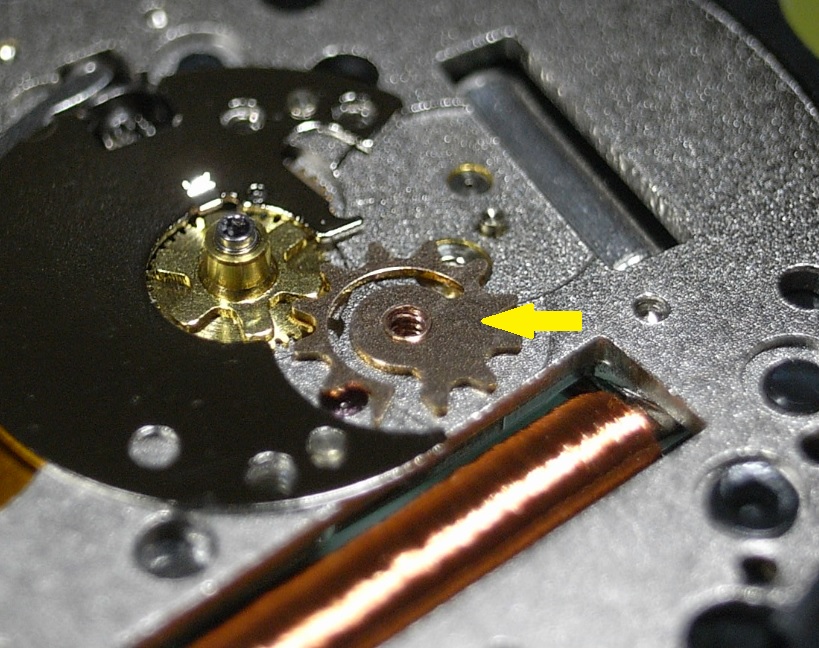
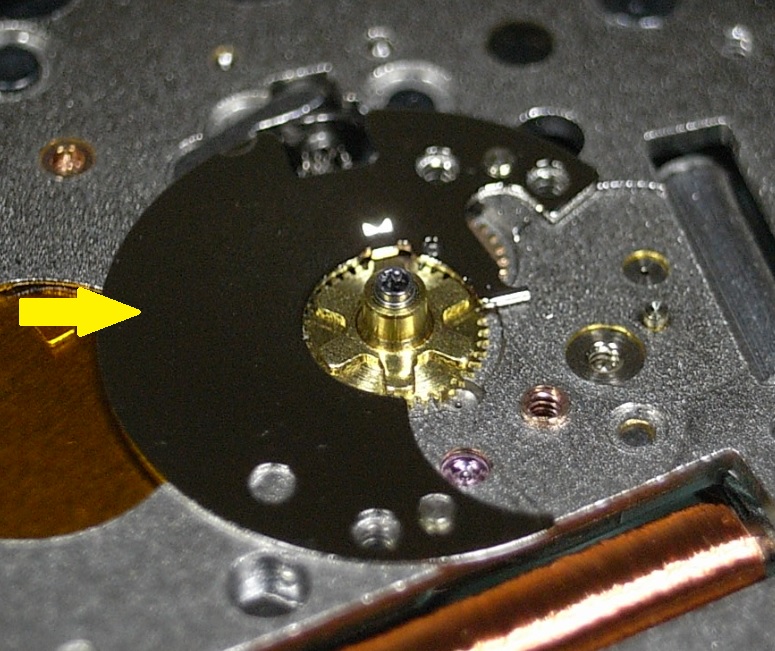
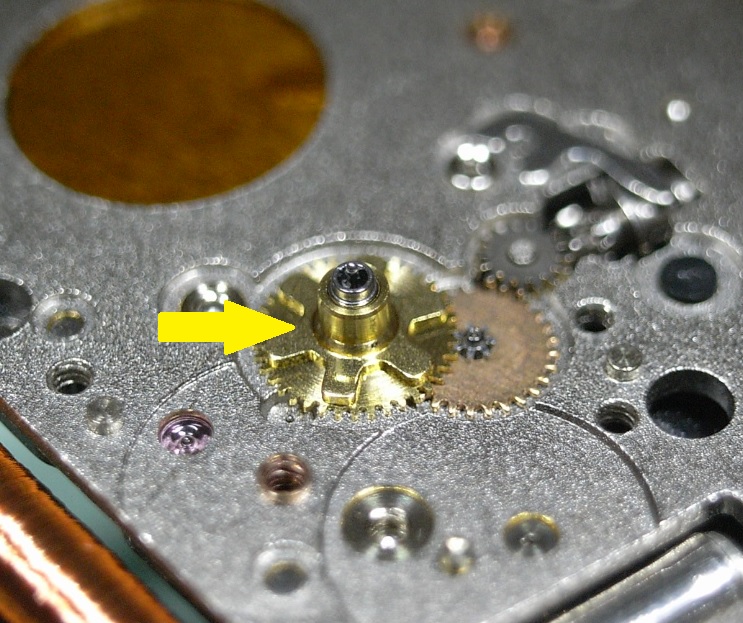
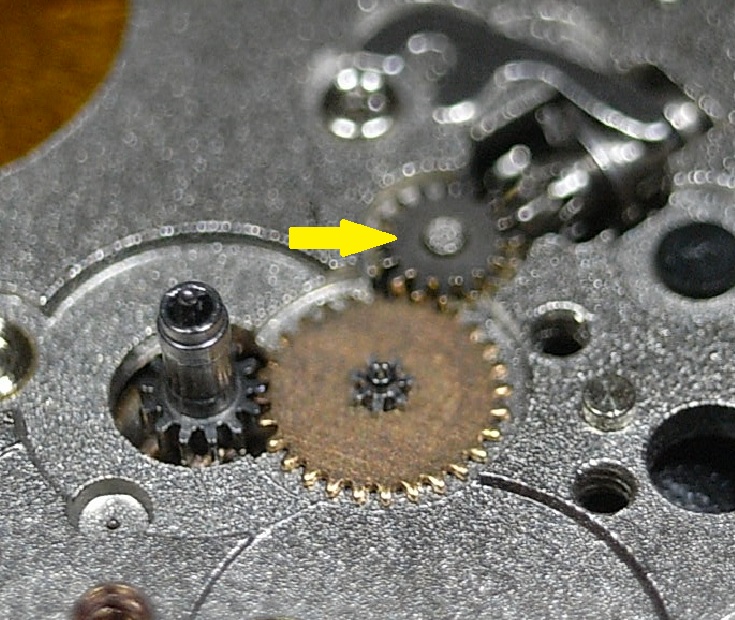
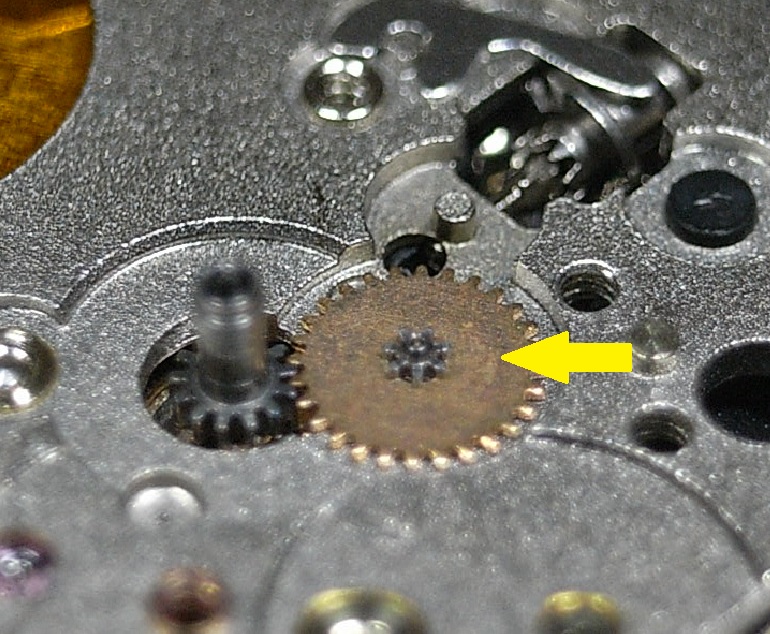
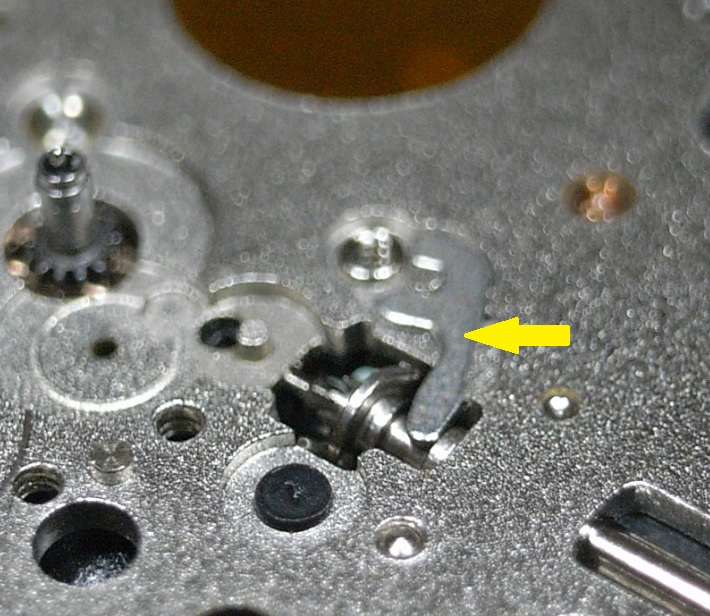
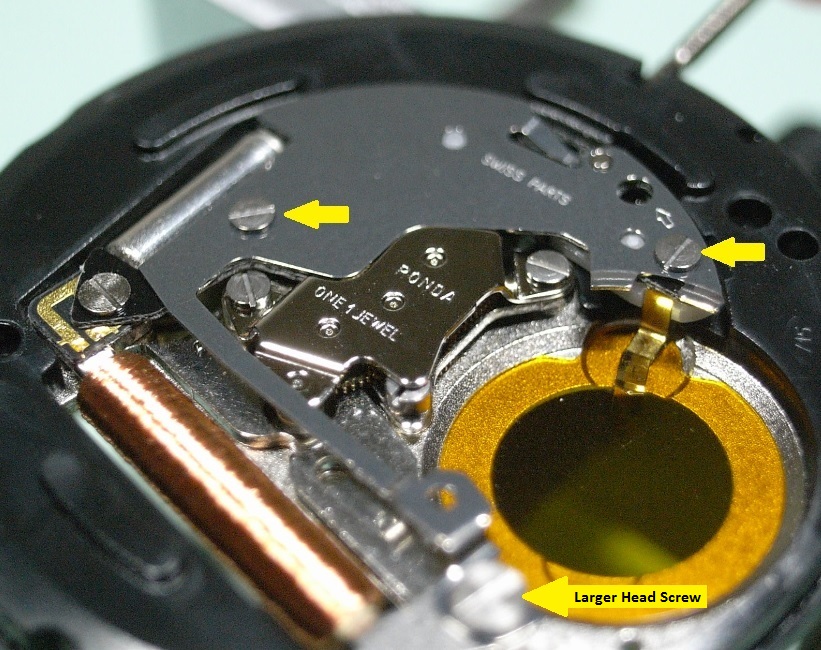
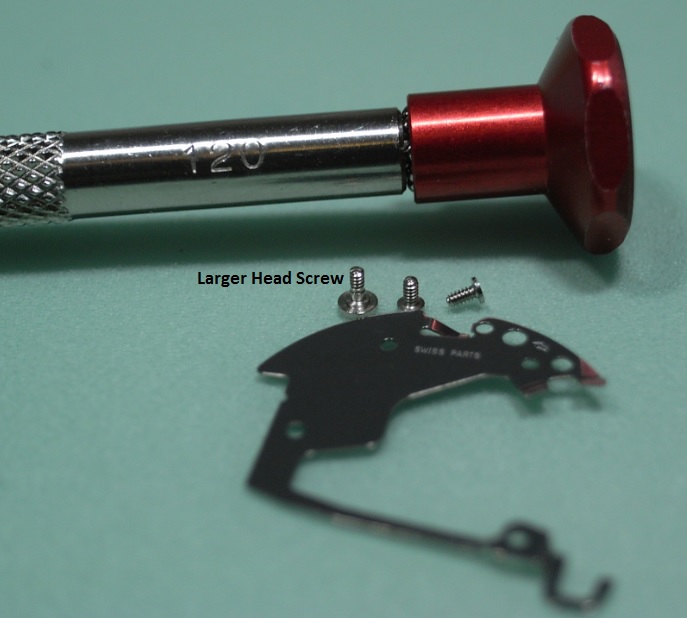
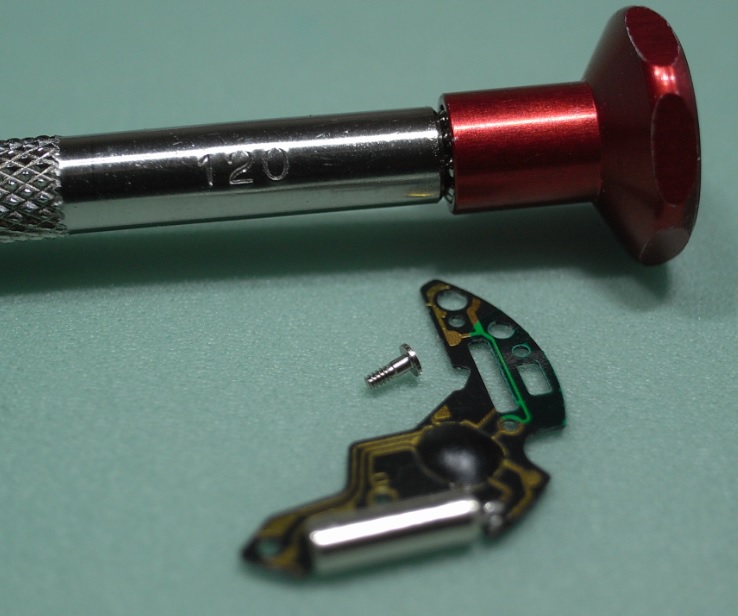
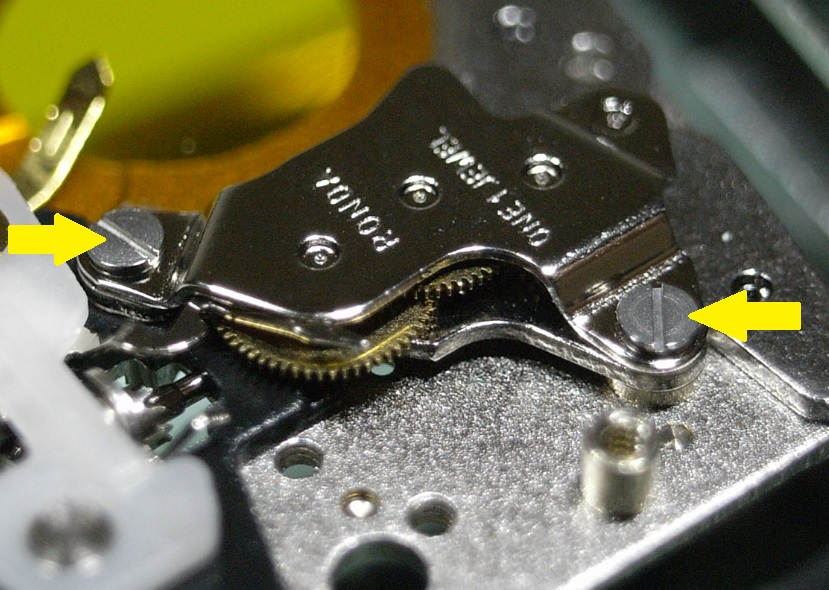
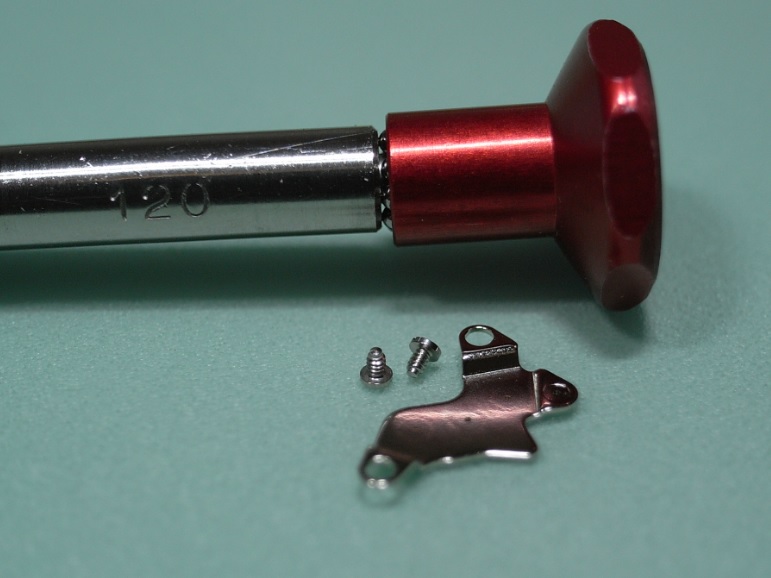
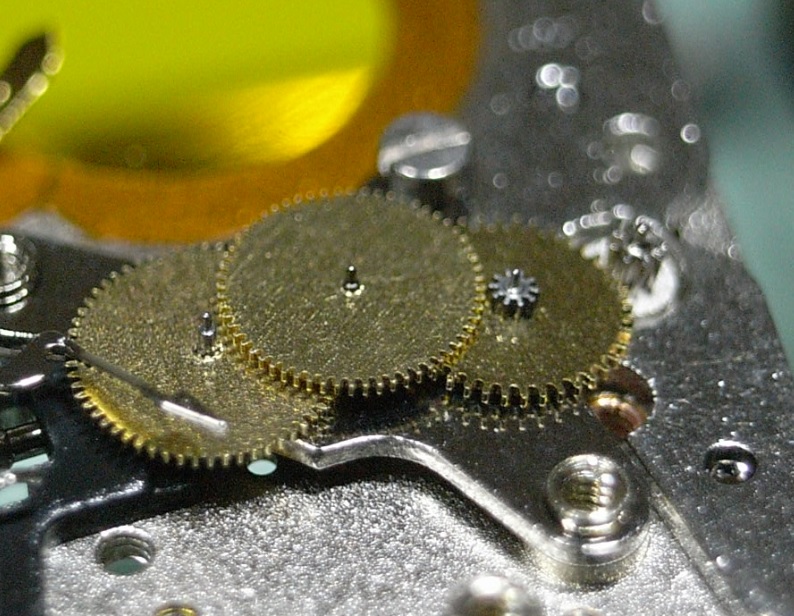
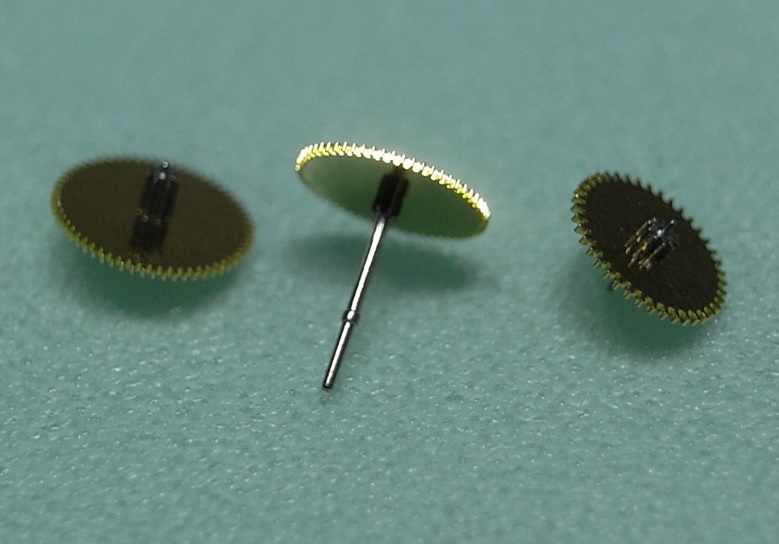
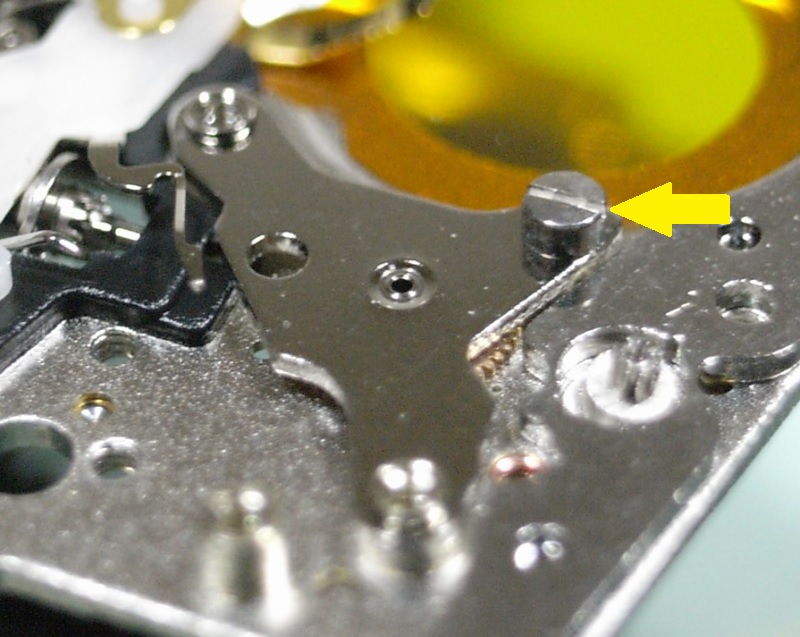
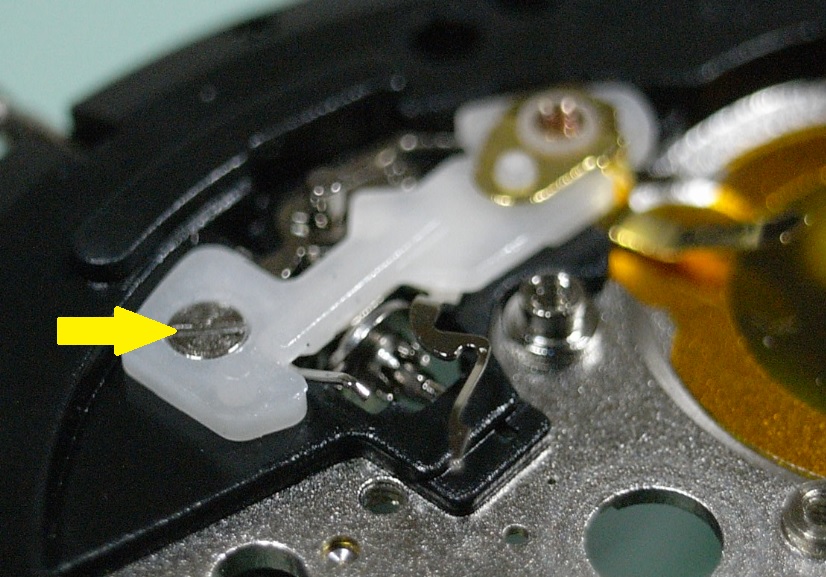
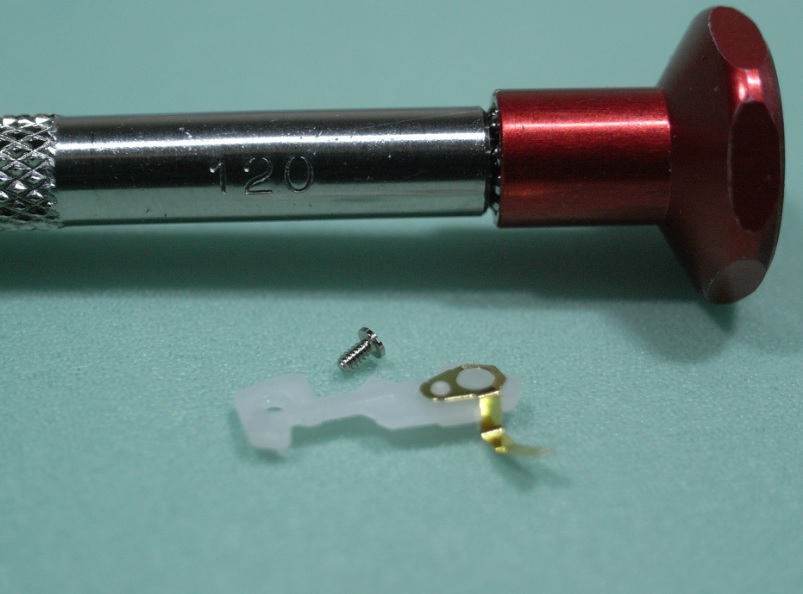
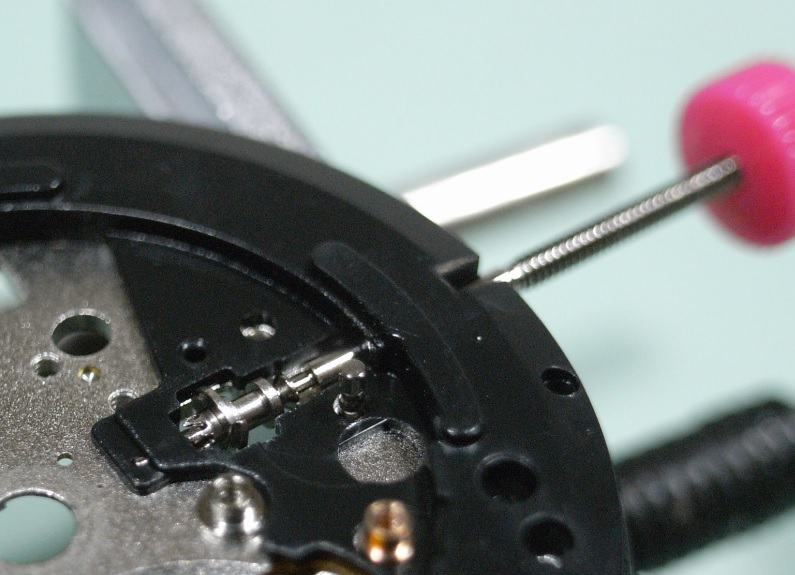
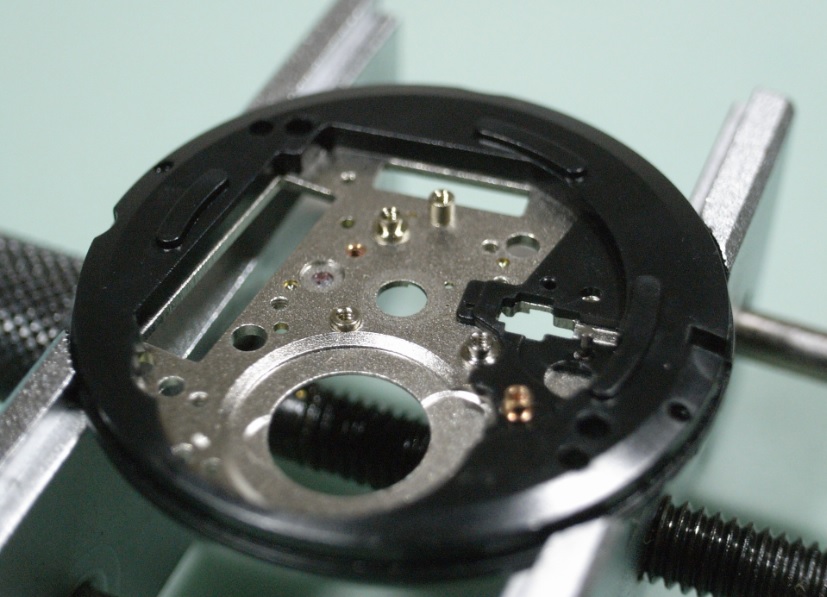
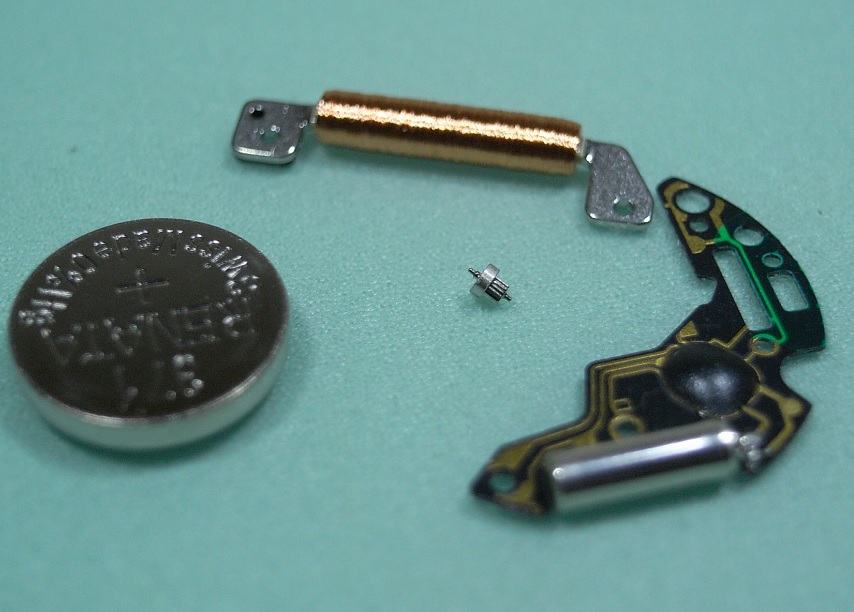
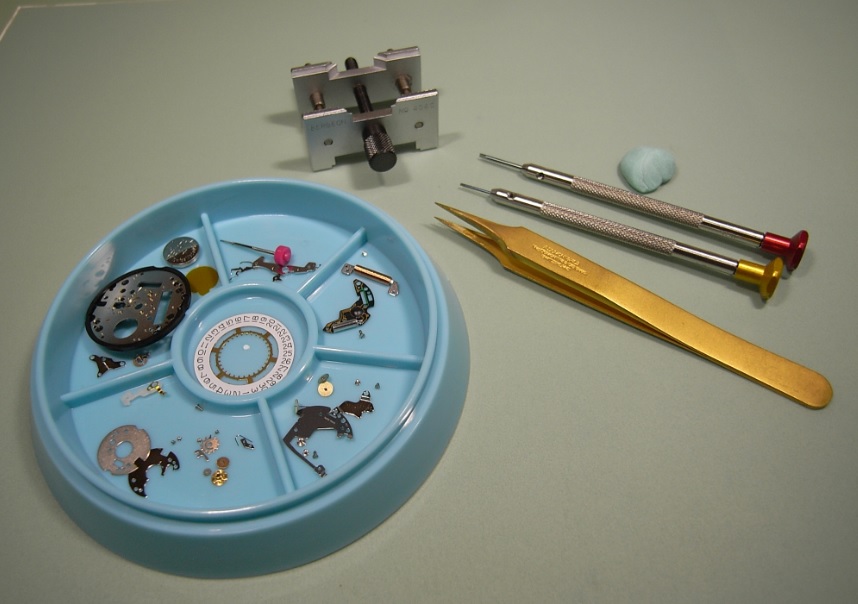
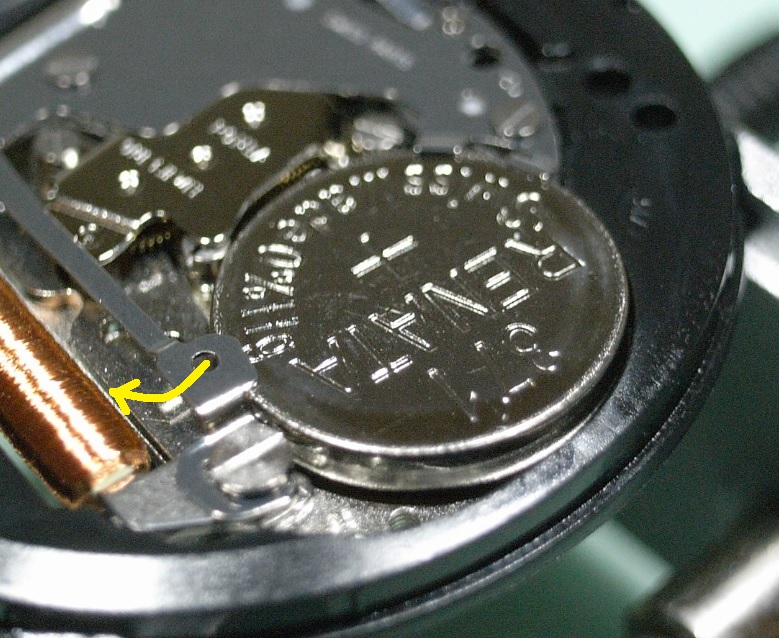
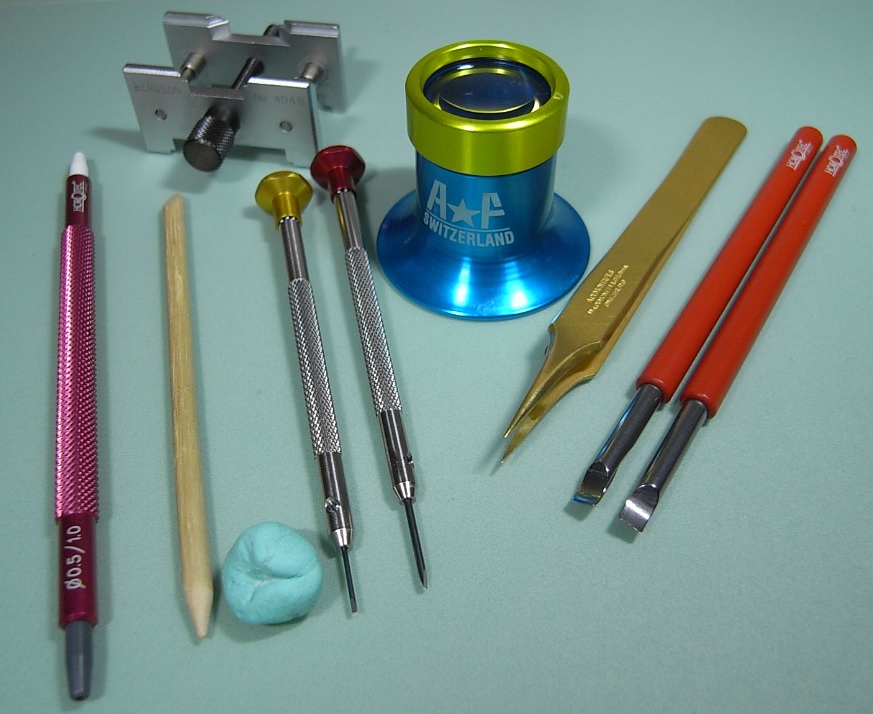
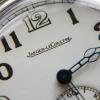
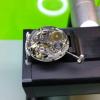
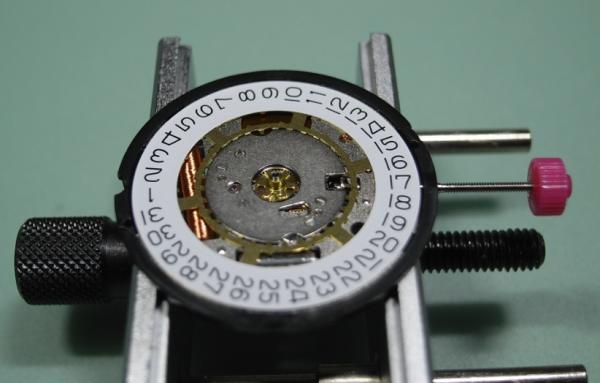
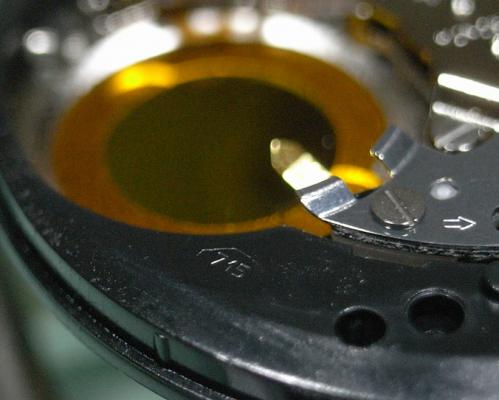
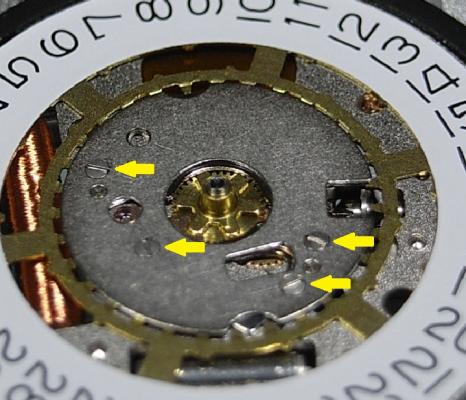
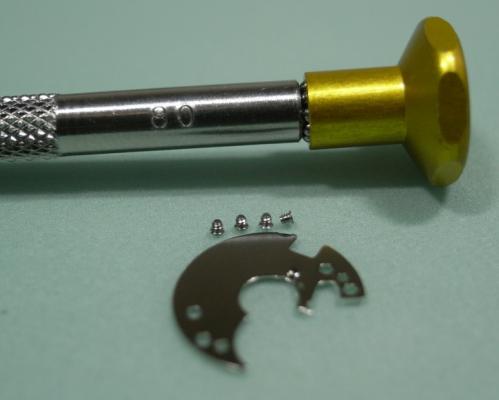
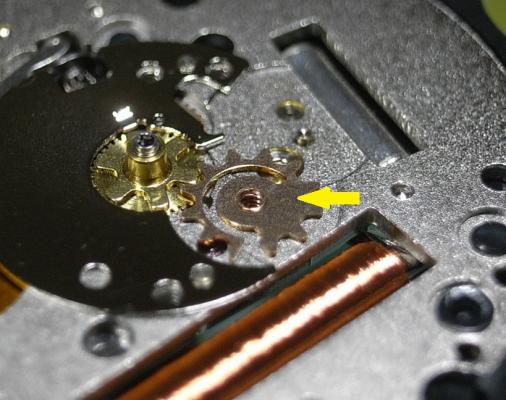
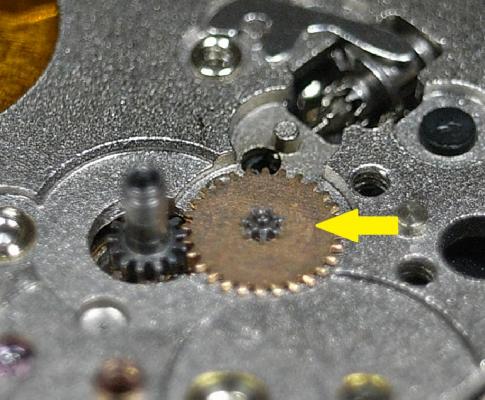
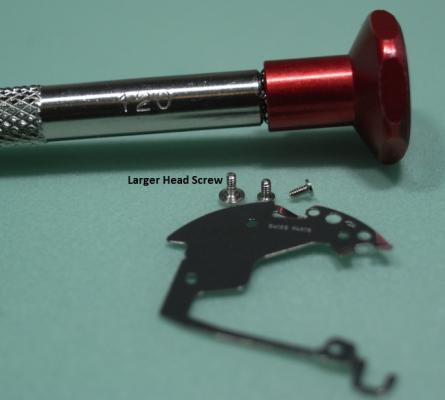
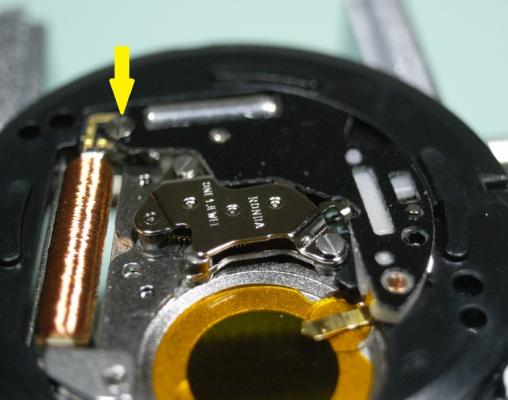
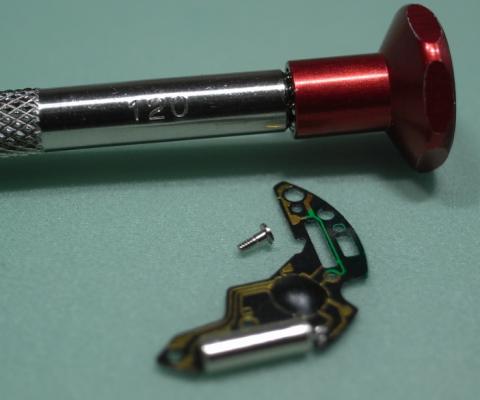
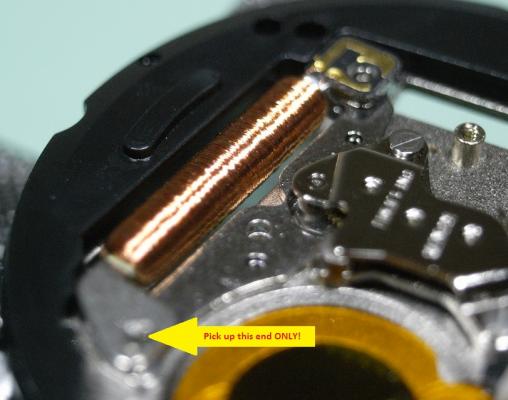
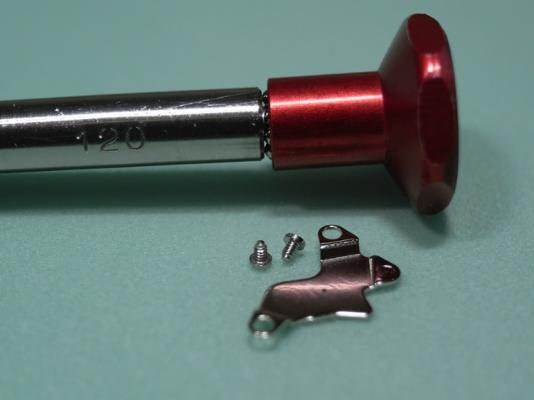
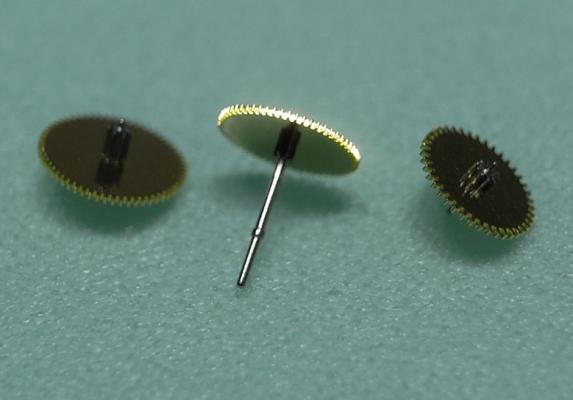
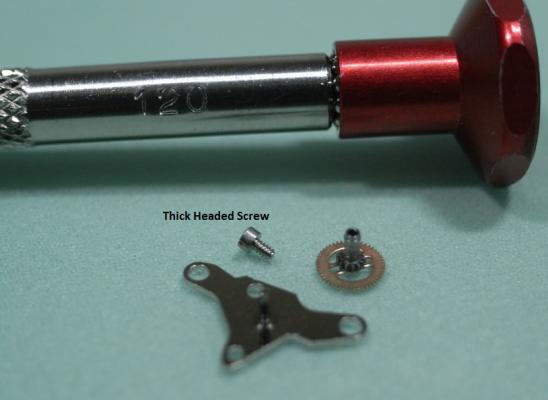
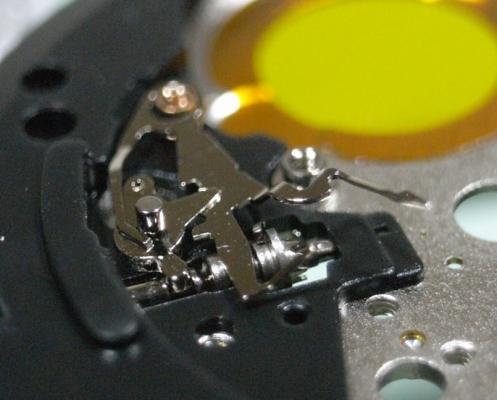
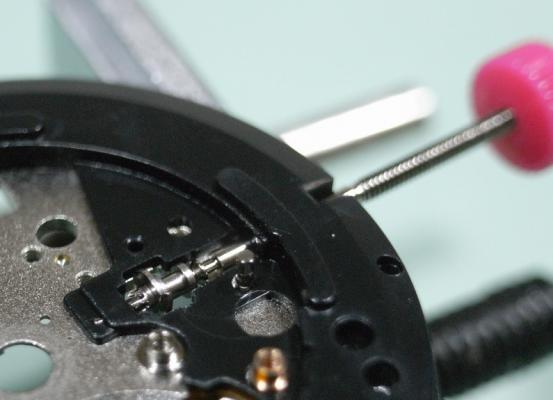
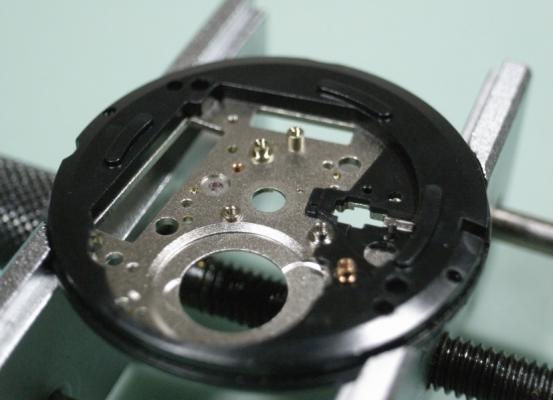
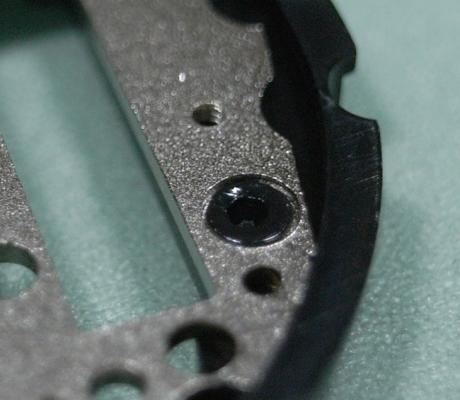
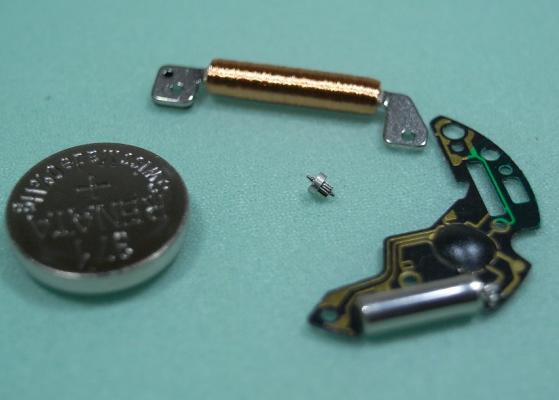
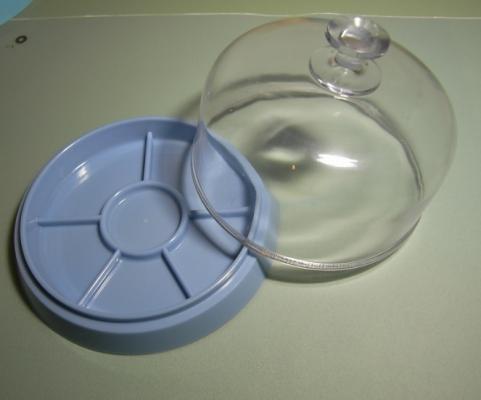
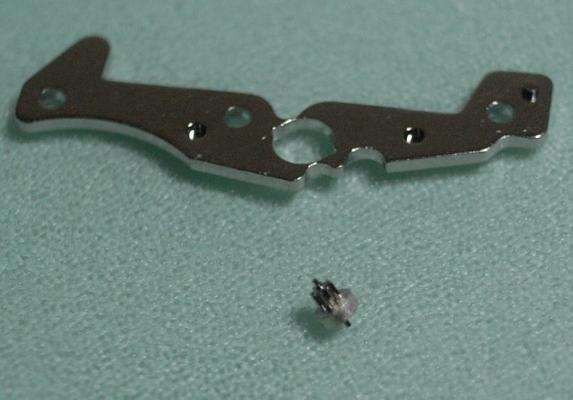
Ronda 715 Service Walkthrough I thought I'd post a walkthrough on a simple quartz movement for people who are just starting out in watch repairing. The Ronda 715 is an excellent movement to begin with, as it's simple in design; but has all the components needed to practice your skills on. Even better is that it only cost around $10 to buy this movement brand new online. So if you break it or loose a part, you learn from the experience, and just buy another one :) Perfect!! The Ronda 715 is found in many of the "Fashion" brand watches, like Guess, JAG, Loyal, etc... As this is a walkthrough for novices there will be arrows to every part as we disassemble this movement. I also recommend you download the Tech Spec PDF and get familiar with how to read them. Here's the link to down the PDF 559_Ronda702,703,705,708,712,713,715.pdf Remember to have fun!! :lol: If you start to get frustrated, just have a break and come back to it later. Patience and perseverance will get you there, and once the skills are mastered it's very rewarding. Ok, lets begin Firstly, you identify this particular caliber of movement by the number stamped into the plastic surround. As you can see this one is stamped "715" The tools you will need for this service are as follows: Bergeon 4040 Movement Holder An Eye Loupe, or some type of optics 3x or better Pegwood 0.8mm Screwdriver 1.2mm Screwdriver Tweezers Hand Lifters A Hand Setting Tool A Parts Tray with cover And a piece of Rodico Since I am using a movement purchased from CusionsUK, I unfortunately don't have Hands or a Dial to remove. If you are servicing a movement presently in a watch, I suggest you watch one of Mark's video's to see how you remove Hands and the Dial. Mark's Videos are a fantastic resource to show you proper technics, and I highly recommend viewing them. They can be found here: https://www.youtube.com/user/jewldood/videos Once the Hands and Dial are removed, we then need to remove the battery, if one is installed, before we begin disassembly. On this movement it is done by gently pulling the Keeper Arm back away from the battery. Be careful when doing this so that you don't slip and damage the Coil. Then turn the movement over and remove the 4 screws, using a 0.8mm Screwdriver, that hold down the Date Indicator Guard, and remove it. Here is a reference photo of the Date Indicator Guard and screws. Next, hold down the Jumper Spring with Pegwood to stop it pinging away, and remove it with your tweezers. Then remove the Date Jumper and Date Indictor Ring. Next remove the Indictor Driving Wheel Then the Date Indicator Plate Followed by the Hour Wheel. Next remove the Setting Wheel Remove the Minute Wheel Remove the Secondary Yoke This completes all the components on the dial side of this movement. Turn the movement over in the holder. Unscrew the 3 screws, using a 1.2mm Screwdriver, that holds the Module Cover Plate, and remove it. NOTE: One of the screw is unique and larger than the others, remember it's location. Here is a reference photo of the Module Cover Plate and the 3 screws. Next remove the single screw that holds the Circuit and the Coil. Then remove the Circuit VERY carefully and store it somewhere very safe. Here is a reference photo of the Circuit and screw. Next remove the Coil by lifting it with the end with no circuit tracks on it, as shown below. Now unscrew the 2 screws, using a 1.2mm Screwdriver, that holds the Train Bridge and lift it off gently. Here is a reference photo of the Train Bridge and screws. Next remove the wheels of the train carefully, then the Rotor and Stator. From left to right there names are: Third Wheel, Second Wheel, and Intermediate Wheel. And here are the Rotor and Stator. Unscrew the single screw, using a 1.2mm Screwdriver, that holds the Centre Bridge and remove it. The Cannon Pinion should be on the centre post of the bridge and come away with it. NOTE: This screw is also unique with a thicker head, remember it's location. Here is a reference photo of the Centre Bridge, Cannon Pinion and screw. Next remove the screw, using a 1.2mm Screwdriver, that holds the Plastic Setting Lever Cover, and remove it. Here is a reference photo of the Setting Lever Cover and screw. Then lift out the Setting Lever and Primary Yoke. Lastly, pull out the Stem and the Sliding Pinion should fall to your work mat. You have now completely disassembled the movement ... WELL DONE!! :) The black plastic outer ring can not be removed, it is riveted to the Main Plate All the parts can be put in the cleaning machine or Ultrasonic ... EXPECT THE FOLLOWING PARTS! Battery Circuit Coil Rotor I hope this was a fun movement to begin your journey into watch repairing, and that it builds your confidence to advance further. Assembly will be posted soon...stay tuned!


 1 point
 -
I finally decided to order the led bench light from cousins. The shipping cost hold me back in the past but now it seems a new and cheaper option was added. So yesterday the light arrived and ofcourse I wanted to try it asap. Why it isn't burning yet? I should have know when ordering electrical gear from the uk [emoji2] The adaptor is already on it's way [emoji6] Verzonden vanaf mijn iPhone met Tapatalk1 point
-
Just a heads up guys. I to bought one from cousins, but now I find there selling the same lamp on Amazon UK for £84. Last week it was reduced to £75 Amazon.co.uk Daylight Company Natural Light X-Large LED Lamp https://www.amazon.co.uk/dp/B00XTUCIW6/ref=cm_sw_r_awd_jUtUvb3QWB53V Sent from my GT-I9505 using Tapatalk1 point
-
I think if the part has already lost its plating it comes down to personal preference, being brass it will patina fast but again the look is something personal taste likes or dislikes. Just remember to keep finger prints away from it ! :D Lapping cpus to get extra few celcius off the temps, wow bring back memories :) Geos method is almost like for like with mine except i use a flat polished zinc or tin sheet in place of glass sometimes, really adds depth to steel black polish.1 point
-
I put a small blob of kluber in each of the 6 indendts of an eta barrel1 point
-
I think once the strap wears in and gets a bit of lifes knocks that will look really good. Good choice :thumbsu:1 point
-
I just put three small blobs on the barrel wall with a yellow oiler, avoiding the bottom of the barrel1 point
-
Here's a small update on my Landeron 248 based Hema Chronograph: I got it a new armband... I think it suits it well, if not perfect! what do you think?1 point
-
Haha. [emoji1] Yeah, it doesn't even have removable links. I have a vintage ish thick leather strap that i could notch. I've seen Gucci screw pins that i could use if i can find them wide enough. EDIT: Thanks for checking yours for size.1 point
-
I was searching it high and low, and I think I finally found it, and I won it! Here's my "new" watch cleaning machine: The picture is from the seller, the machine is travelling to me now... Will post more pictures when it arrives... It is said to be wworking perfectly, even the heating part and seems to be in great condition! Do you guys think I made a good purchase?1 point
-
Hi George, please don't take this the wrong way, but for this type of finishing a Dremel is not really the way to go. Can I suggest that you purchase some sheets of wet or dry carborundum paper that is used by car painters. The grades to get are 600, 800 and 1200 grit. You should also purchase a small square of plate glass 150mm x 150mm about 6 to 8mm thick. You will also need a good quality metal polish and I recommend Solvol Autosol and a silver polishing cloth which you can buy through eBay if required. What you are after is a really flat finish on the the bridge. To get this take a piece of 600 grit wet and place it on the piece of plate glass and now rub the bridge on the paper in a straight back and forward motion with firm downward pressure. Keep doing this until any scores and scratches are removed and you are left with straight line graining. This finish itself can look very pleasing. Continue this process with the 800 and 1200 grit to the point where the brass is starting to take on a dull shine with this process. Before going onto polishing, take a well worn piece of 1200 paper and rub it with another piece of 1200 paper to reduce the sharpness. Now rub the bridge back and forth on that and it will start to shine. The final black polish is achieved by taking a piece of A4 White printing paper and place that on top of the plate glass, and smear some metal polish on it. Now continue to rub the bridge back and forth until you obtain the shine that you want. Finish off by placing the silver polishing cloth on the glass and rub the bridge on it to get the final lustre. This takes a bit of time but the results are well worth the effort!1 point
-
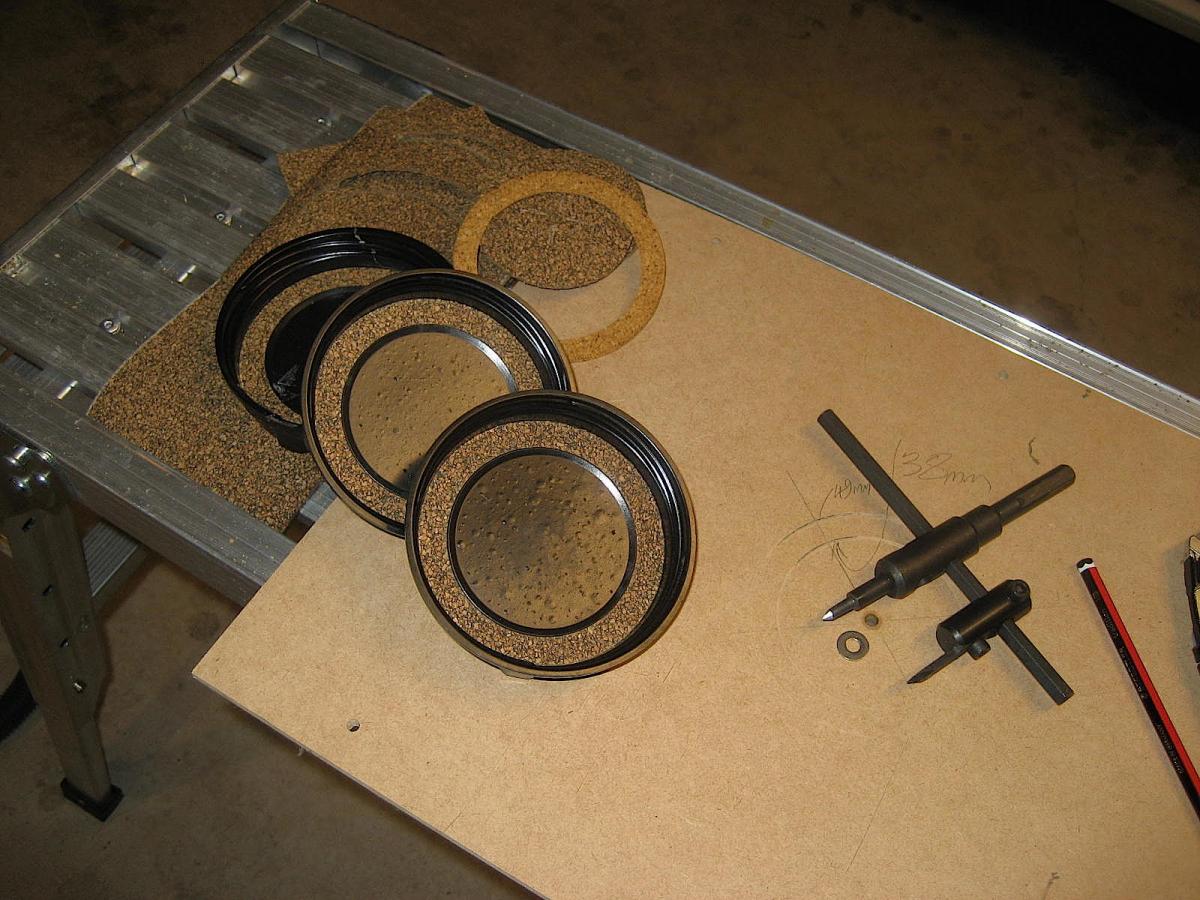
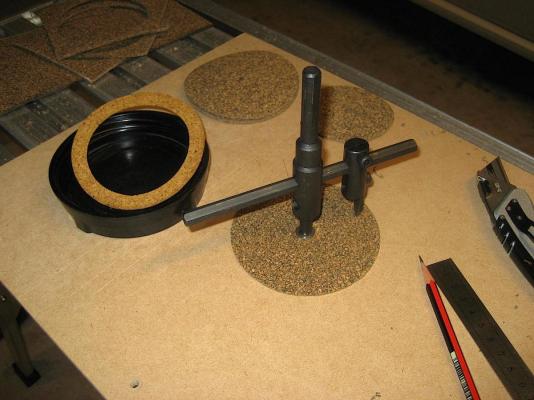
Now that the jars are filled with the right stuff, I turned my attention to the jar seals. When I got them there were one and some bits cork gaskets, and as they help prevent evaporation of liquid more expensive than petrol, I decided to make some new ones. I got a sheet of nitrile bonded cork gasket material from the car parts place, measured everything up and started. Not having a CNC controlled laser machine, I used an old cutter left over from installing some downlights. The blade was sharpened, set to the correct radius and off we went. The results are rather pleasing and now all three jars will prevent the angels getting their share of my cleaning fluids.
 1 point