Leaderboard


Popular Content
Showing content with the highest reputation on 08/22/22 in all areas
-
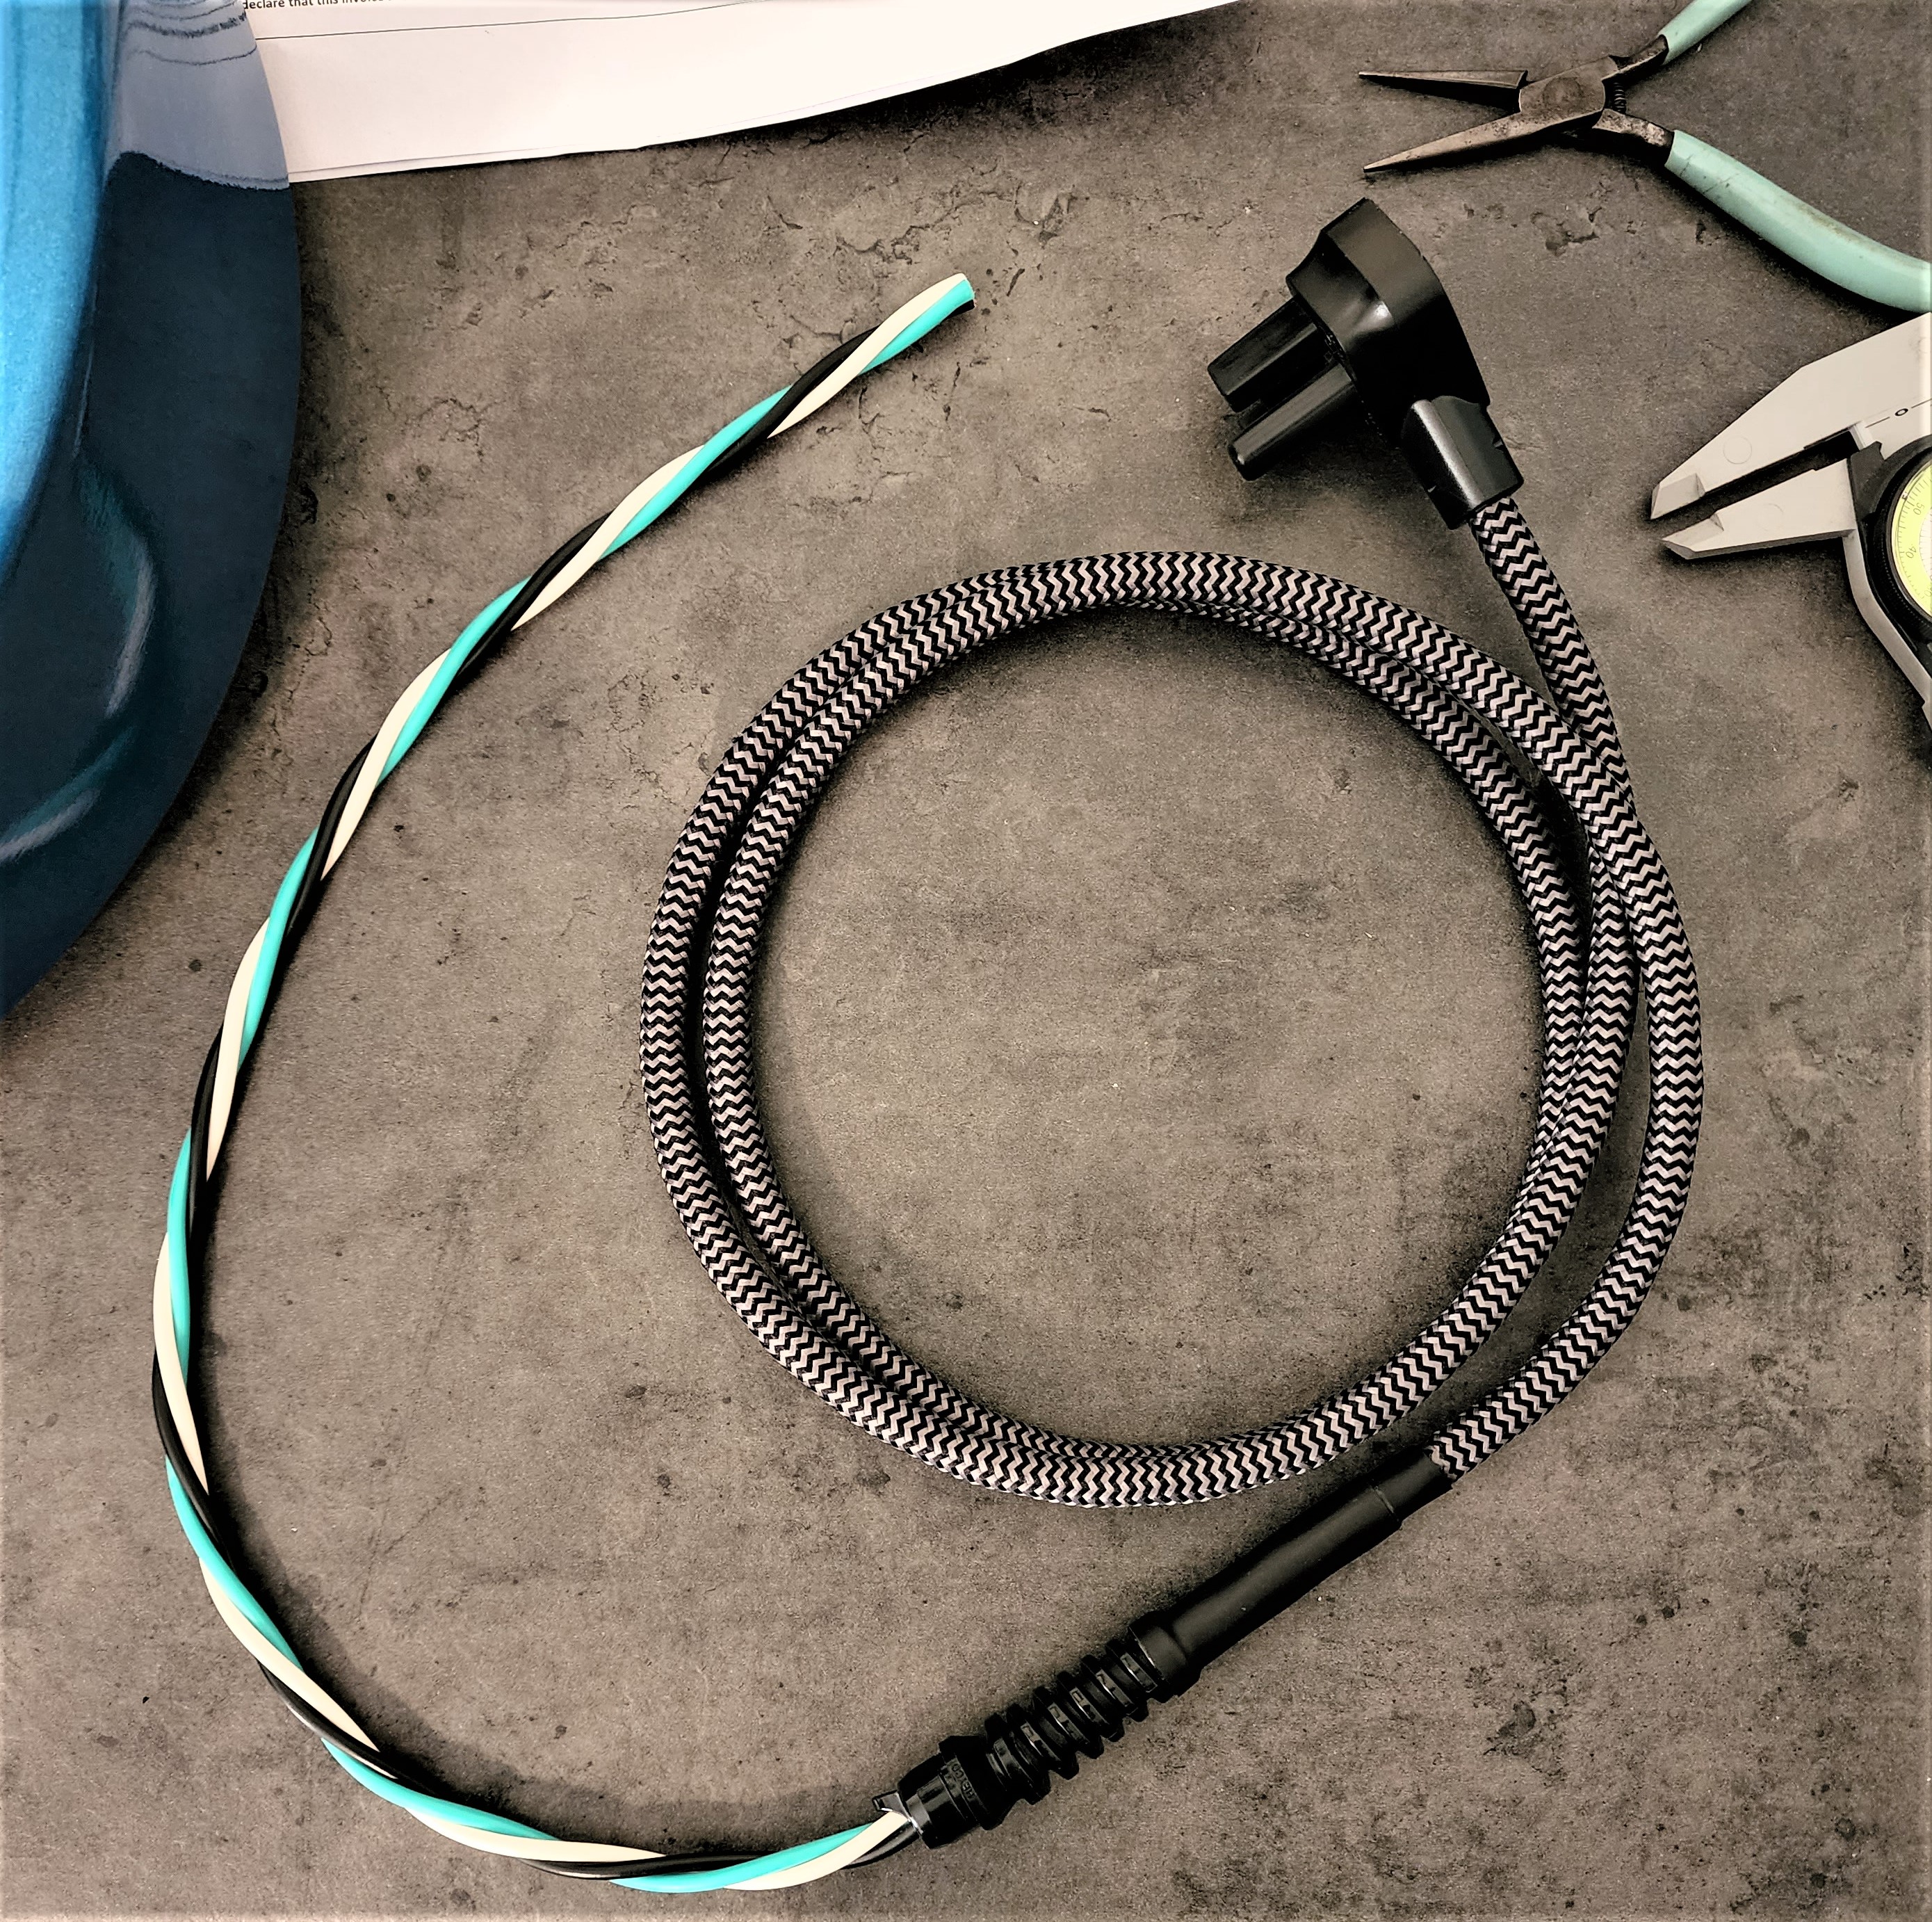
Usually size 3 and 4 (combination). Not really painful but still can be awkward. Just keep practicing. Definitely the best method in my opinion - install them dry, then use an automatic oiler once fitted.4 points
-
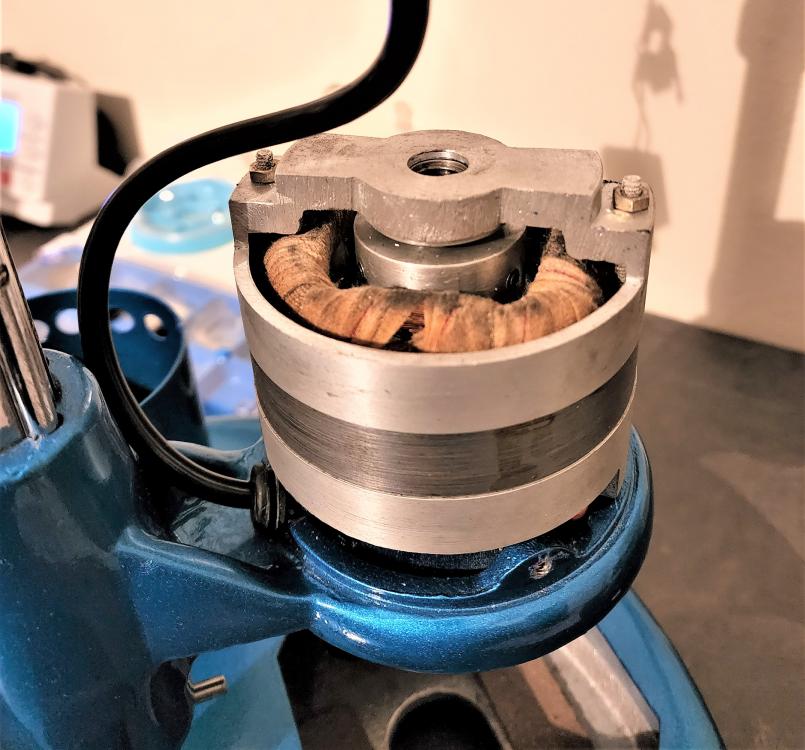
I've seen rings like that used as spacers on the crown wheels. Take off the two screws and plate holding it down, and you might find it goes in the center of the wheel between the wheel and its pivot.4 points
-
Another bargain bin Casio is on its way. I also picked up the programming manual for this one for added geeky nostalgia points.
Cropped-l1600.thumb.jpg.55906cc5a474b7e062c0b0894c255d9a.jpg)
Cropped-l1600.thumb.jpg.0d734fd2303eb72f492e7a603c9161f8.jpg) 3 points
3 points -
Look nicely at the sheet you posted. It shows oiling of the jewels from the underside of the train bridge. It is obviously assumed that the caps are already installed. I believe there's guys doing this without an auto oiler but using an Incabloc oiler to get oil on the cap through the jewel. It's nothing more than a stupid fine needle. I bought one of these a while back but never used it so I can't give you first hand advise on that https://www.cousinsuk.com/product/oilers-3-in-1-incabloc-specialist?code=O49486 If JDM says those should never be removed then that would be his opinion. I've not seen any official documents from Seiko saying you should or shouldn't remove these (if I missed it I'm happy to be proven wrong). Many people choose to not remove these because it's difficult and that's ok. Most people here are hobbyists and they service these for their own use, so far be it from me to criticize anyone who don't have the skill, patience or equipment to do it. If you charge for your work, then that's an entirely different conversation.3 points
-
To finalize this thread I like to report that I successfully serviced the movement. I used the old pushers in the newly gold plated case. The plating was done by a goldsmith after I had removed the crystals, the crown tube and the pushers. The crown and the front crystal are new. My friend is happy wearing a good looking watch again
 2 points
 -
No chance of the spring pinging off on you, I also did a vid how to re-fit the spring There are more than one way to skin a cat...2 points
-
Filming this process is not easy with a bloody big macro lens in front of you - if its not in the video it doesn't mean it's not been done though - there are quite a few things that don't make it in my YouTube videos which are not step-by-step instructionals But to be clear - they absolutely must be clinically cleaned and lubricated, as painful as the process might be.2 points
-
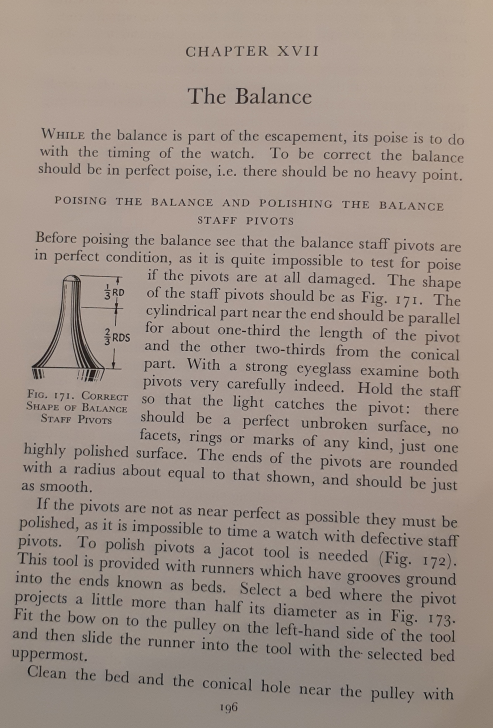
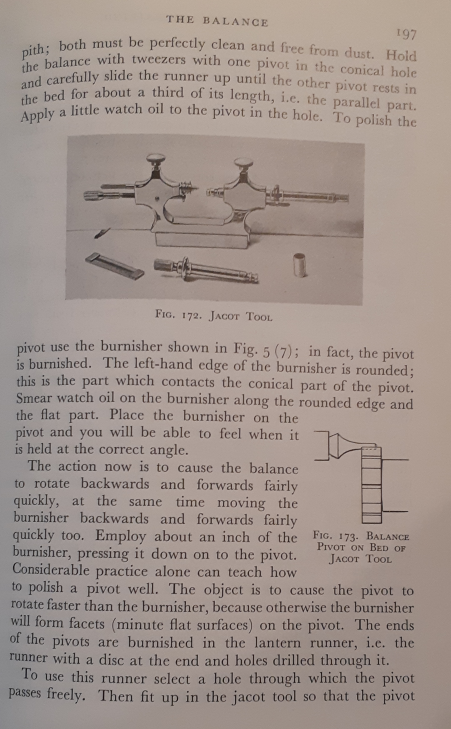
Hello @mikepilk, I may have some helpful information, though from a purely theoretical perspective. I just watched a video over at ChronoGlide where the stated difference in friction between pivots in line with the center of the Earth (i.e. Dial Up, Dial Down) and when at right angles to the center of the earth (Pendulum Up, Pendulum Down, Pendulum Left, Pendulum Right) was in the order of 800%. This makes sense when you consider the amount of surface area of the pivot coming into contact with the amount of bearing surface area that it has been set in (brass or jewel). In de Carle (1981, pp. 196-197) there appears a discussion of the proper shape of the end of a pivot, as well as a couple methods of polishing the end of a pivot, one manual and one machine-based that relies on the use of something called a Jacot Tool. Could it be simply that your pivot ends are rough from corrosion, which is affecting effective transmission of impulse energy through the train of gears? Have you inspected the pivots and bearings for rough surfacing under a microscope? Are they sufficiently polished? I include screen shots of the above-mentioned sections of the book for your convenience: Forgive me if you know all of this stuff already, I am just trying to be helpful. g. ---- REFERENCES de Carle, D (1981) CLOCK AND WATCH REPAIRING (2nd Edition), London: Robert Hale (ISBN: 0-7091-9436-6). https://www.gettextbooks.com/isbn/9780719803802/
 2 points
 -
Me too @VWatchie - I don't think I've ever had a watch with less than 10° difference between vertical and horizontal. I would say that about 20° was more typical of a 'good' watch. I'd say that 10 would be the limit between DU and DD. (But I am just a home tinkerer)2 points
-
No problems. Life is all about passing on what we have, which I believe is good karma. Send me a private message with your address and I'll send you a ready made pegwood tool that you need and another stick of the 'primo' pegwood. The same tool works well on Kif shock-proof springs and others that are non-captive springs1 point
-
Yes, You're right! The pegwood you get these days is a bit dodgy. I bought the pegwood you see in the videos from Cousins a few years ago, which was advertised as German orangewood, I believe. I've never come across anything of the same quality again and Cousins doesn't stock it anymore. Send me a DM with your address and I'll send you a stick I have already made into the tool as shown in the vids. It will help no end..1 point
-
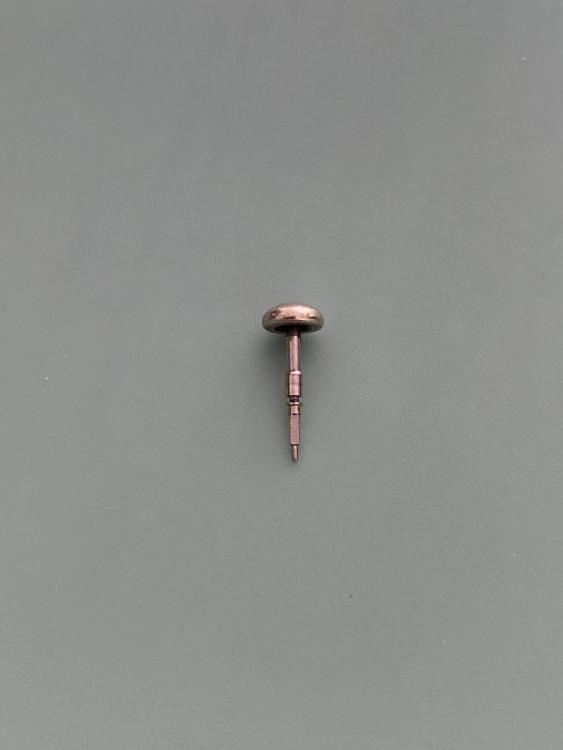
Hello Bruno, wow that is smooth. It must be a well used and loved watch. Do you have a pin vice and a digital caliper? Armed with these you'll be able to remove the crown and measure for it's replacement. There's some good you tube videos describing this if you've not seem already. Any luck with ebay?1 point
-
How about getting a non working 8215 movement to practice disassembly/assembly? That way you can concentrate on that skill before moving on to oiling etc1 point
-
Gramham, Benzine is another name for Naphtha (aka Petroleum Ether) Note that Benzene is another chemical compound entirely. Likewise Ether is not petroleum ether. Petroleum ether is a mixture of alkanes, such as pentane, hexane, and heptane. The laboratory reagent is supplied in different boiling ranges such as 40-60 C and 60-80 C. Each range has a different proportion of alkanes. Lab grade Hexane is sometimes recommended for dip cleaning balance springs. Easier to obtain the lab reagents where I live so that is what I’m using (or rather intend to use)1 point
-
Haha, I wasn't thinking that you were combative at all. I was merely pointing out the part I thought you missed. That's the issue with something being written, it's way too easy to take things the wrong way. I did it in that video I linked earlier realtime so I dunno, a couple of seconds? Admittedly, as I said before, if you haven't done them in a while it does take longer to get into it again. Let's call it under a minute just to be fair. As Mark has said above, you just need practice. It's the first movement you've worked on so you shouldn't get too frustrated. It's a skill you build over time and what may seem insurmountable now will become routine as you build skill. It's easy to forget how stupidly small watch parts are when you look at YT videos - it's deceiving. I like your ingenuity with making a plastic tool to fit them though, well done. Now stop cheating and practice those tweezer skills !!!!1 point
-
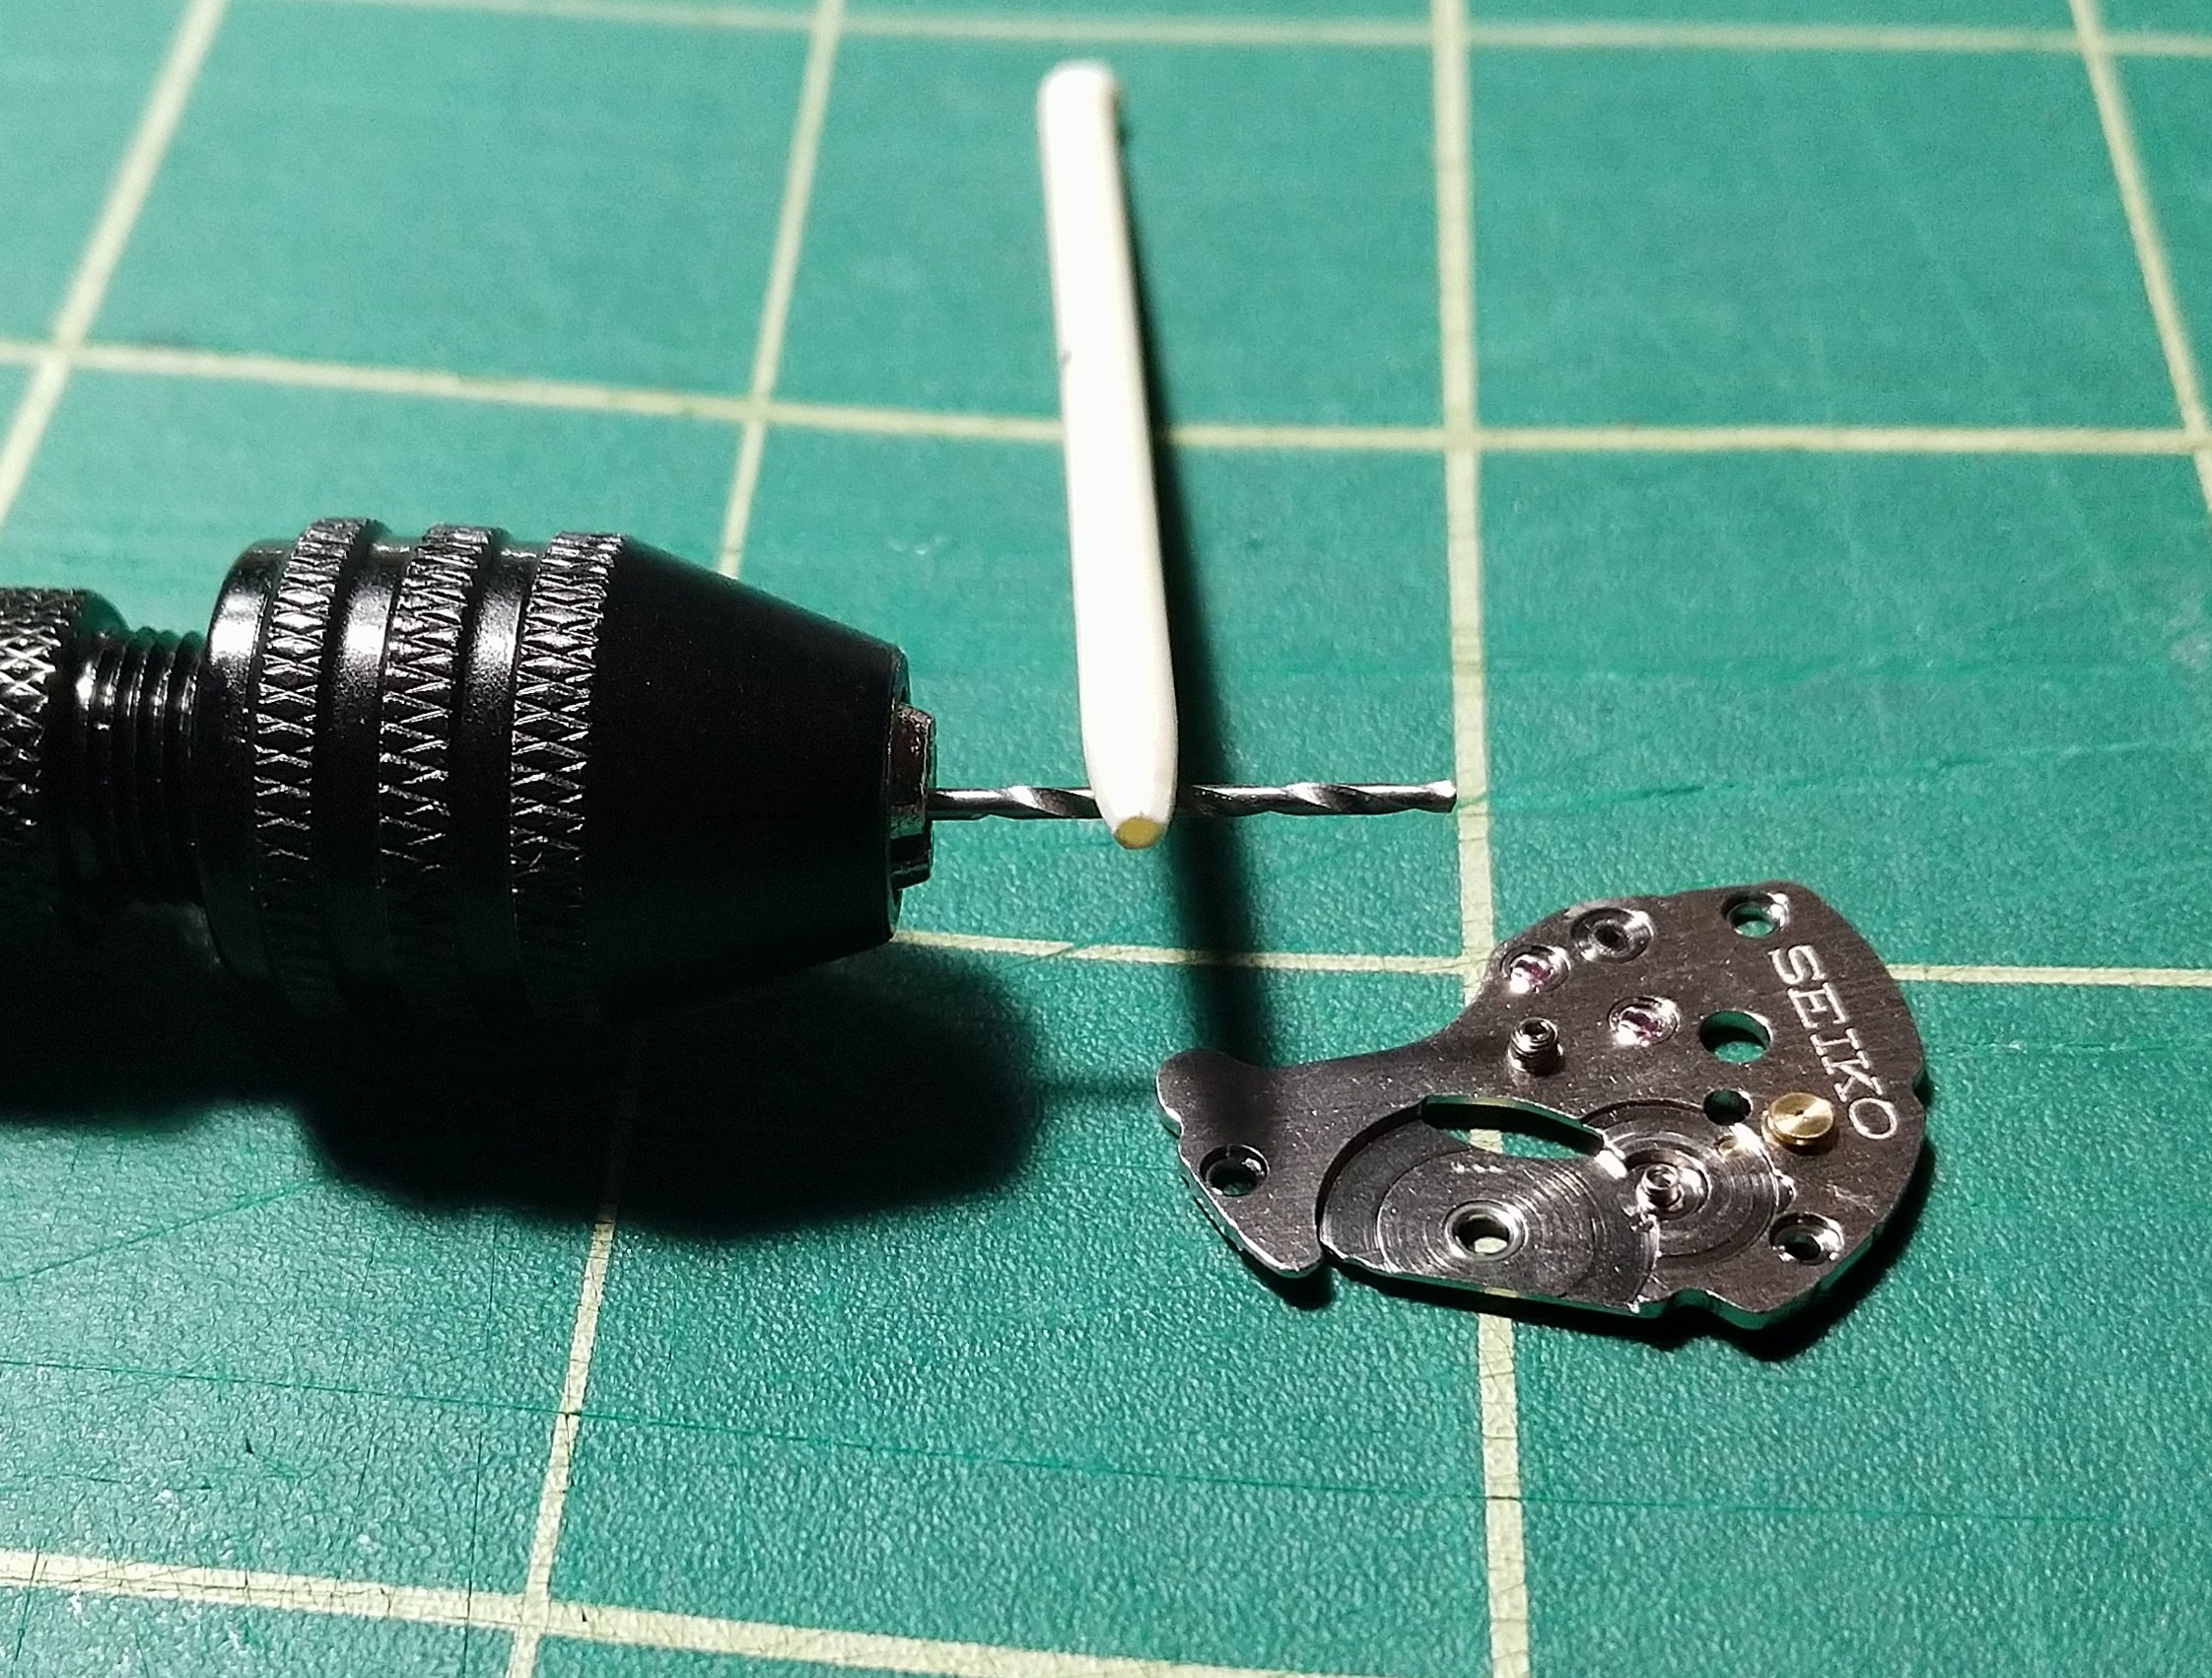
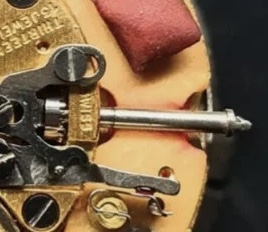
I"m not being combative haha. You asked me why i did not think specifically the cap jewels had to be oiled. I answered you. I'm of course wrong and every correction i get is much appreciated so cheers to you. I'm VERY glad i learned that now and not after i had cleaned, incorrectly lubed, and reassembled the dang thing only for a month later for it to go haywire because oil is getting everywhere. Serious question though. You reset those by hand with tweezers, you got skills. How long does it take you? Seconds? minutes? hour? I'm just curious. To remove them or to not remove them? I have no idea what's correct. I've long since accepted that not a lot of things are agreed on by people with far more knowledge than me. That said I have another bridge to practice these damn things on when my new tweezers get here and i will do that but I GOT IT BACK ON, 5 hours and about a dozen failed tools later so for archives sake for other noobs here's what finally finally worked as I'm sure I won't be the last person here to pull his hair out over these awful things. I bought a 6 dollar cheap pin vise hand drill from amazon, for the small ones peg wood doesn't work, I found an old plastic knitting needle my mom had and cut the tip off and sanded it down flat but rough. The pallet stone is about exactly a 1mm wide, drilled a 1mm hole in the end and VERY carefully shaved the outside down with an xacto knife to get the wall exactly the right width of the setting slot so that you could put it in without the jewel in and push it side to side and it won't slip out. I thoroughly rodico'd it and it still took many tries. If anybody is struggling with these and doesn't have proper tweezers or skills try this.
 1 point
 -
Thats what the auto oiler is for mate. You are right it would be difficult to place oil on the cap jewel through the holed jewel correctly with a hand oiler even if you had one that small. The smallest acupuncture needle i can find is 0.18 probably still too big. Thats also without the spade end to hold the oil plus unlikely you would be able to release the oil from it. One auto oiler to add to your tool list I'm affraid or get very good at manually oiling cap jewels and fitting microscopic shock springs without disturbing said oiled cap jewels. I prefer good strong filtered coffee to hyper myself up1 point
-
I type about 110 wpm. Remind me to pound some of those before my next typing test That said, I ordered some 3's 5's and cousins was the only place seemingly on earth with that auto oiler in stock. Sigh. More waiting but this seems like the best solution.1 point
-
Well for me it was difficult. Think about it; how do you prevent the oil being messed up when you fighting the spring and the cap jewel gets shoved around? Especially since you’re struggling as it is now without any oil on the jewel? I’d love to tell you it gets better with practice (and it does a little), but it never gets easy. Most everyone doing train cap jewels on a 7S movement (especially professionally) is using an auto oiler. If you only going to do one or two movements it’s hard to justify, but if you do many it’s a no brainer. And yes, you have to oil them. Not sure why you thought you shouldn’t?1 point
-
Helios are associated with Precimax (as are NPX and Perfecta). Certainly this looks Precimax like if you consider: http://www.ranfft.de/cgi-bin/bidfun-db.cgi?10&ranfft&2&2uswk&Precimax_250 But I can't immediately see a 315 variant. A pic of the keyless works would be useful.1 point
-
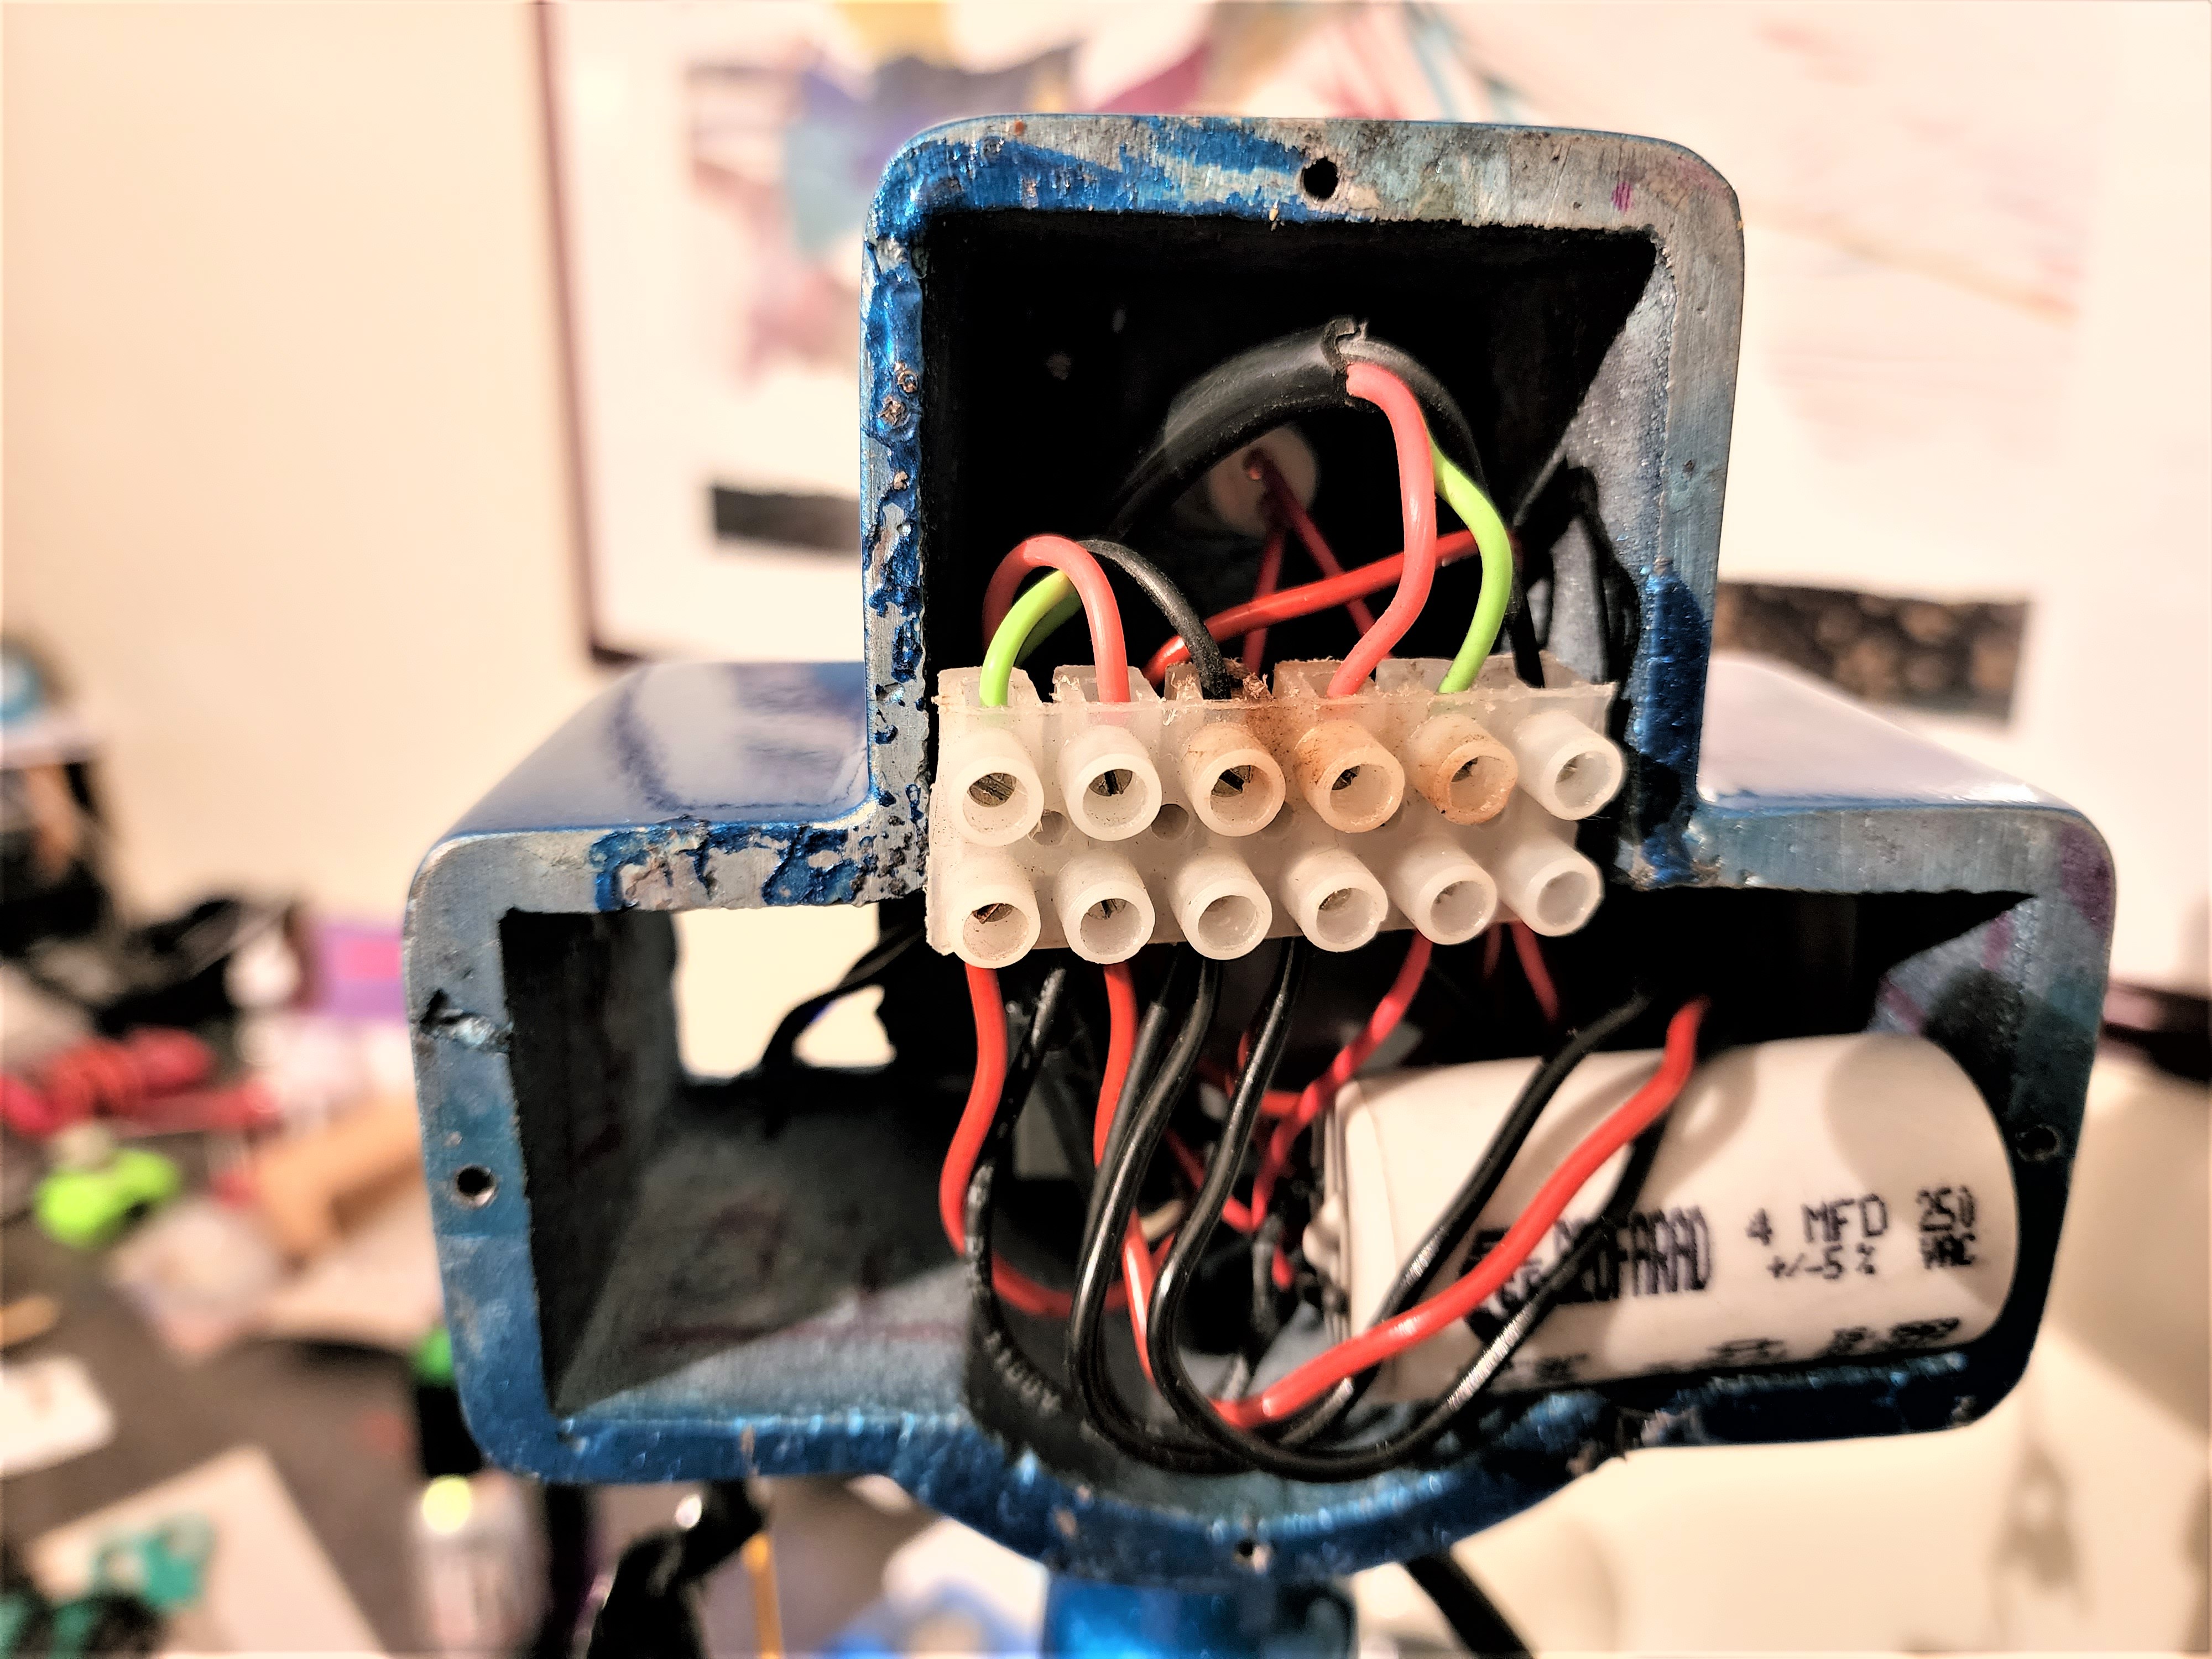
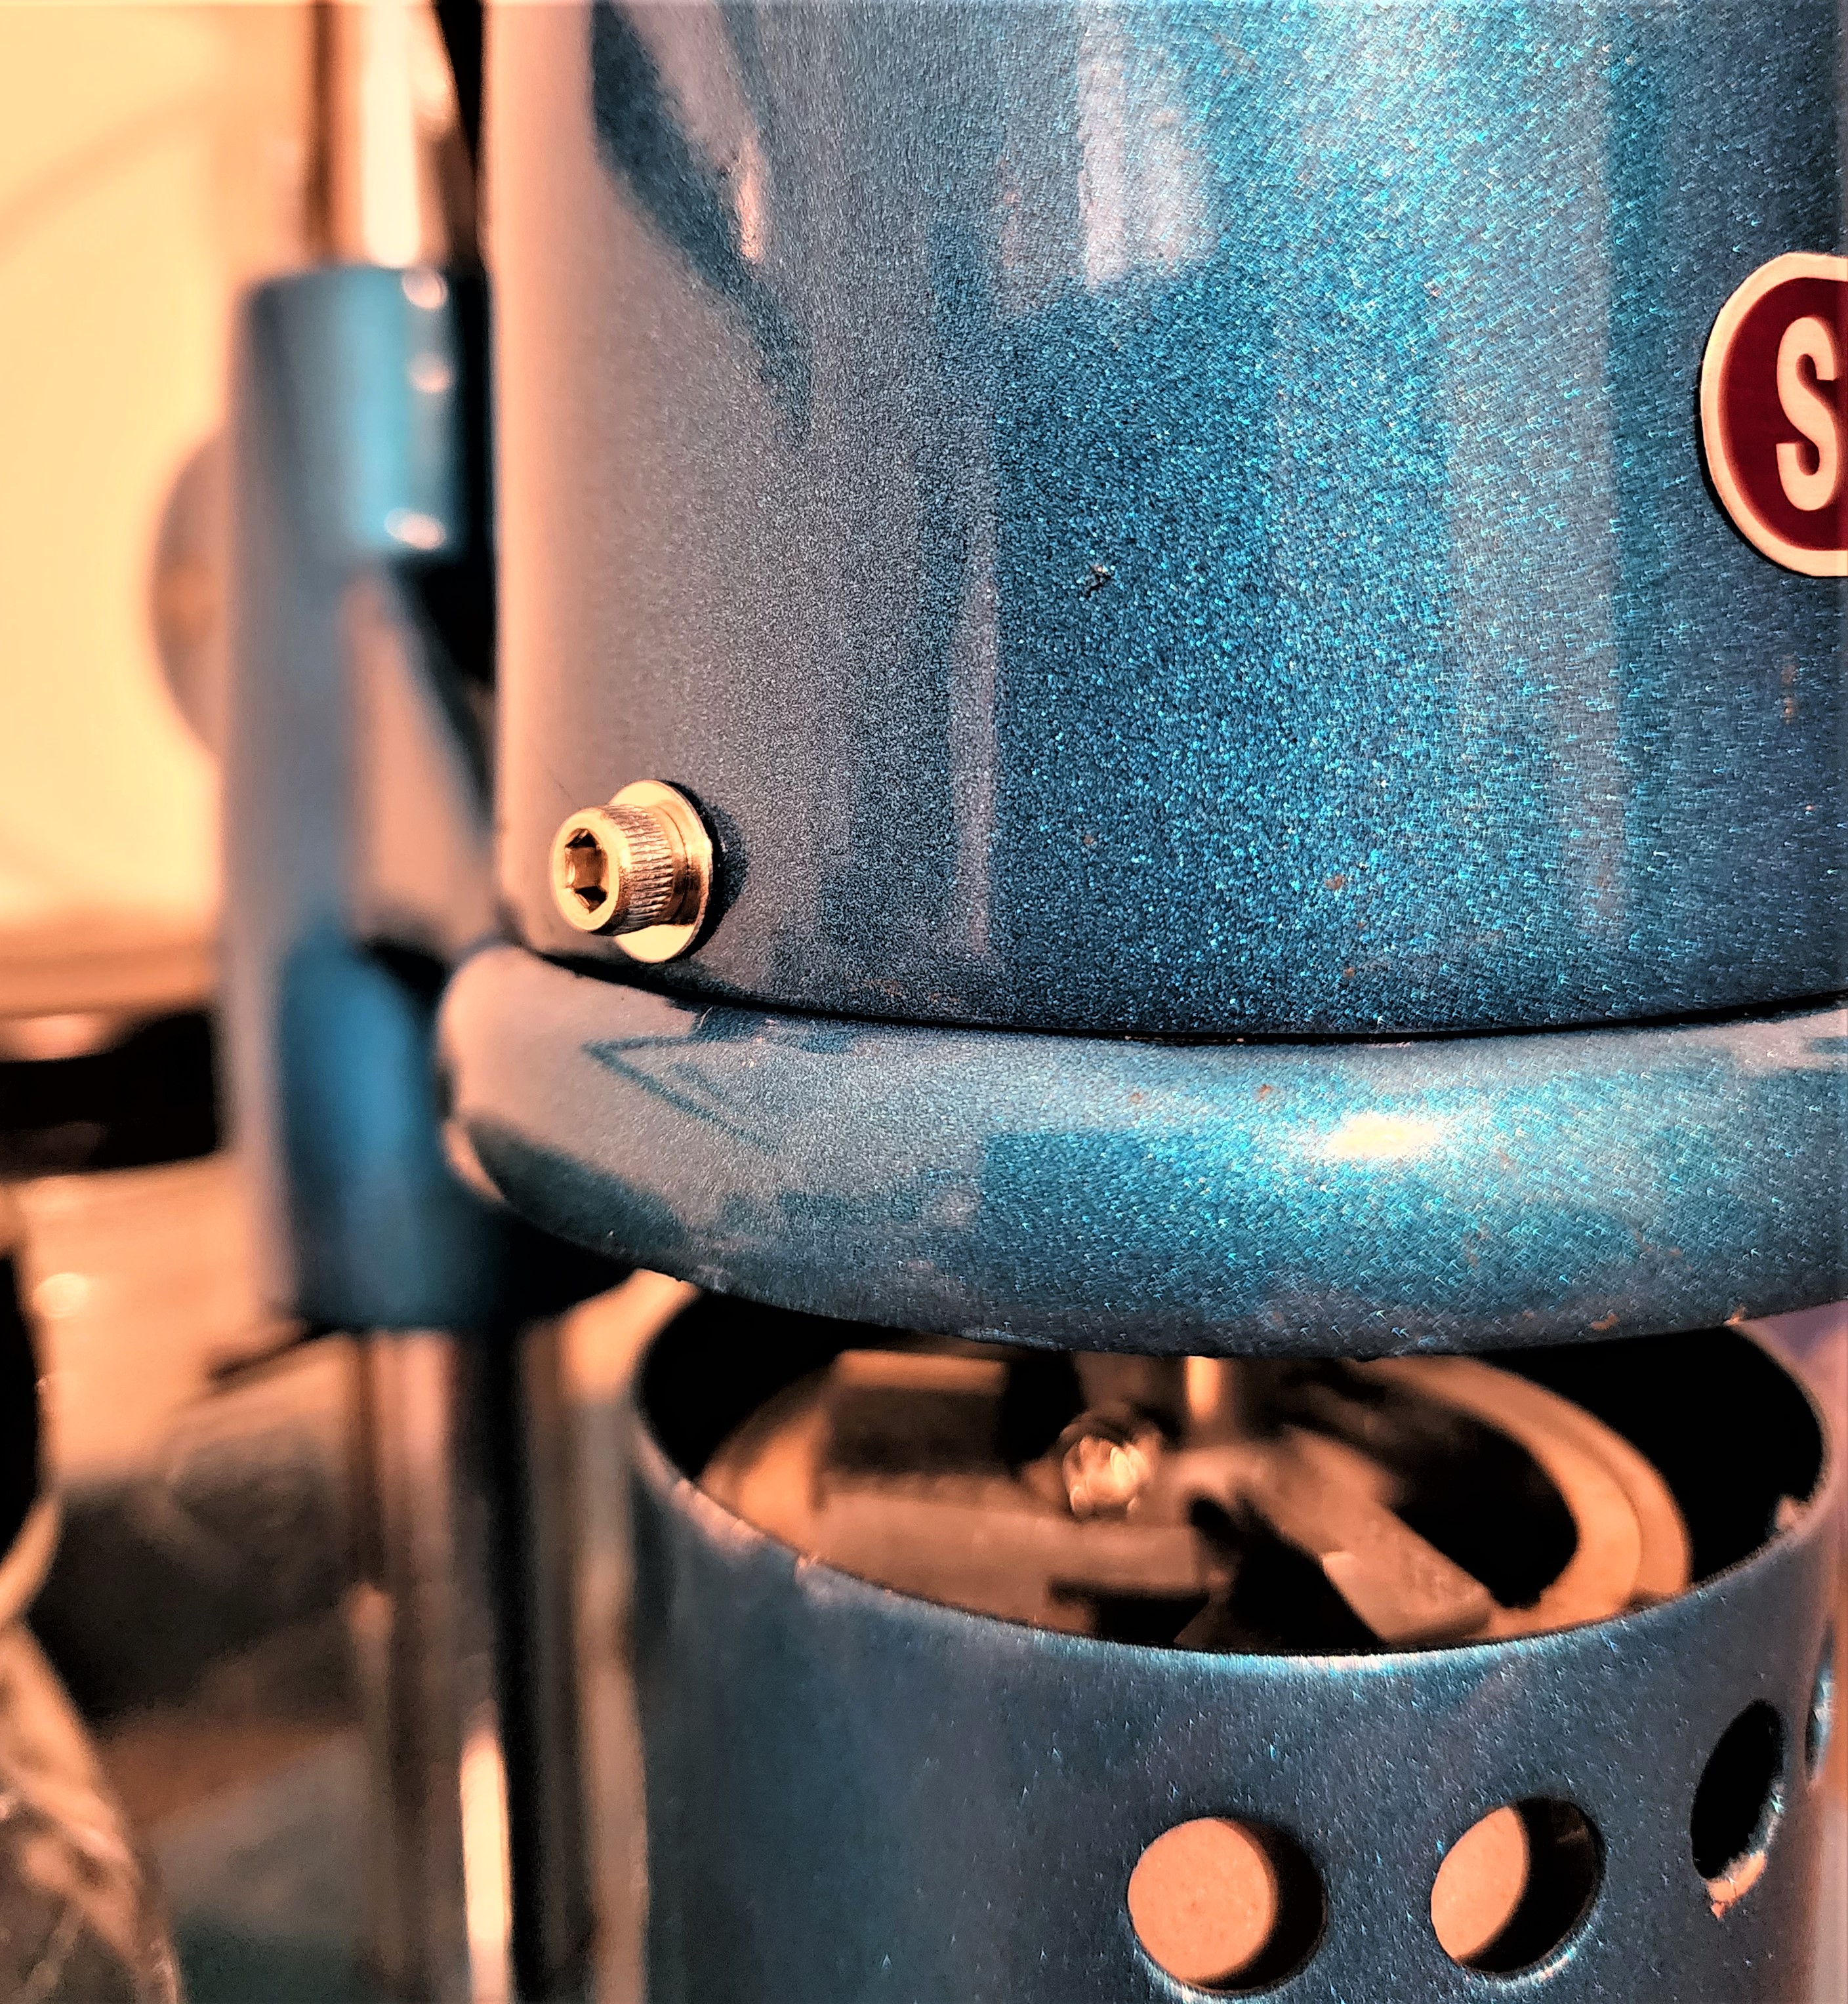
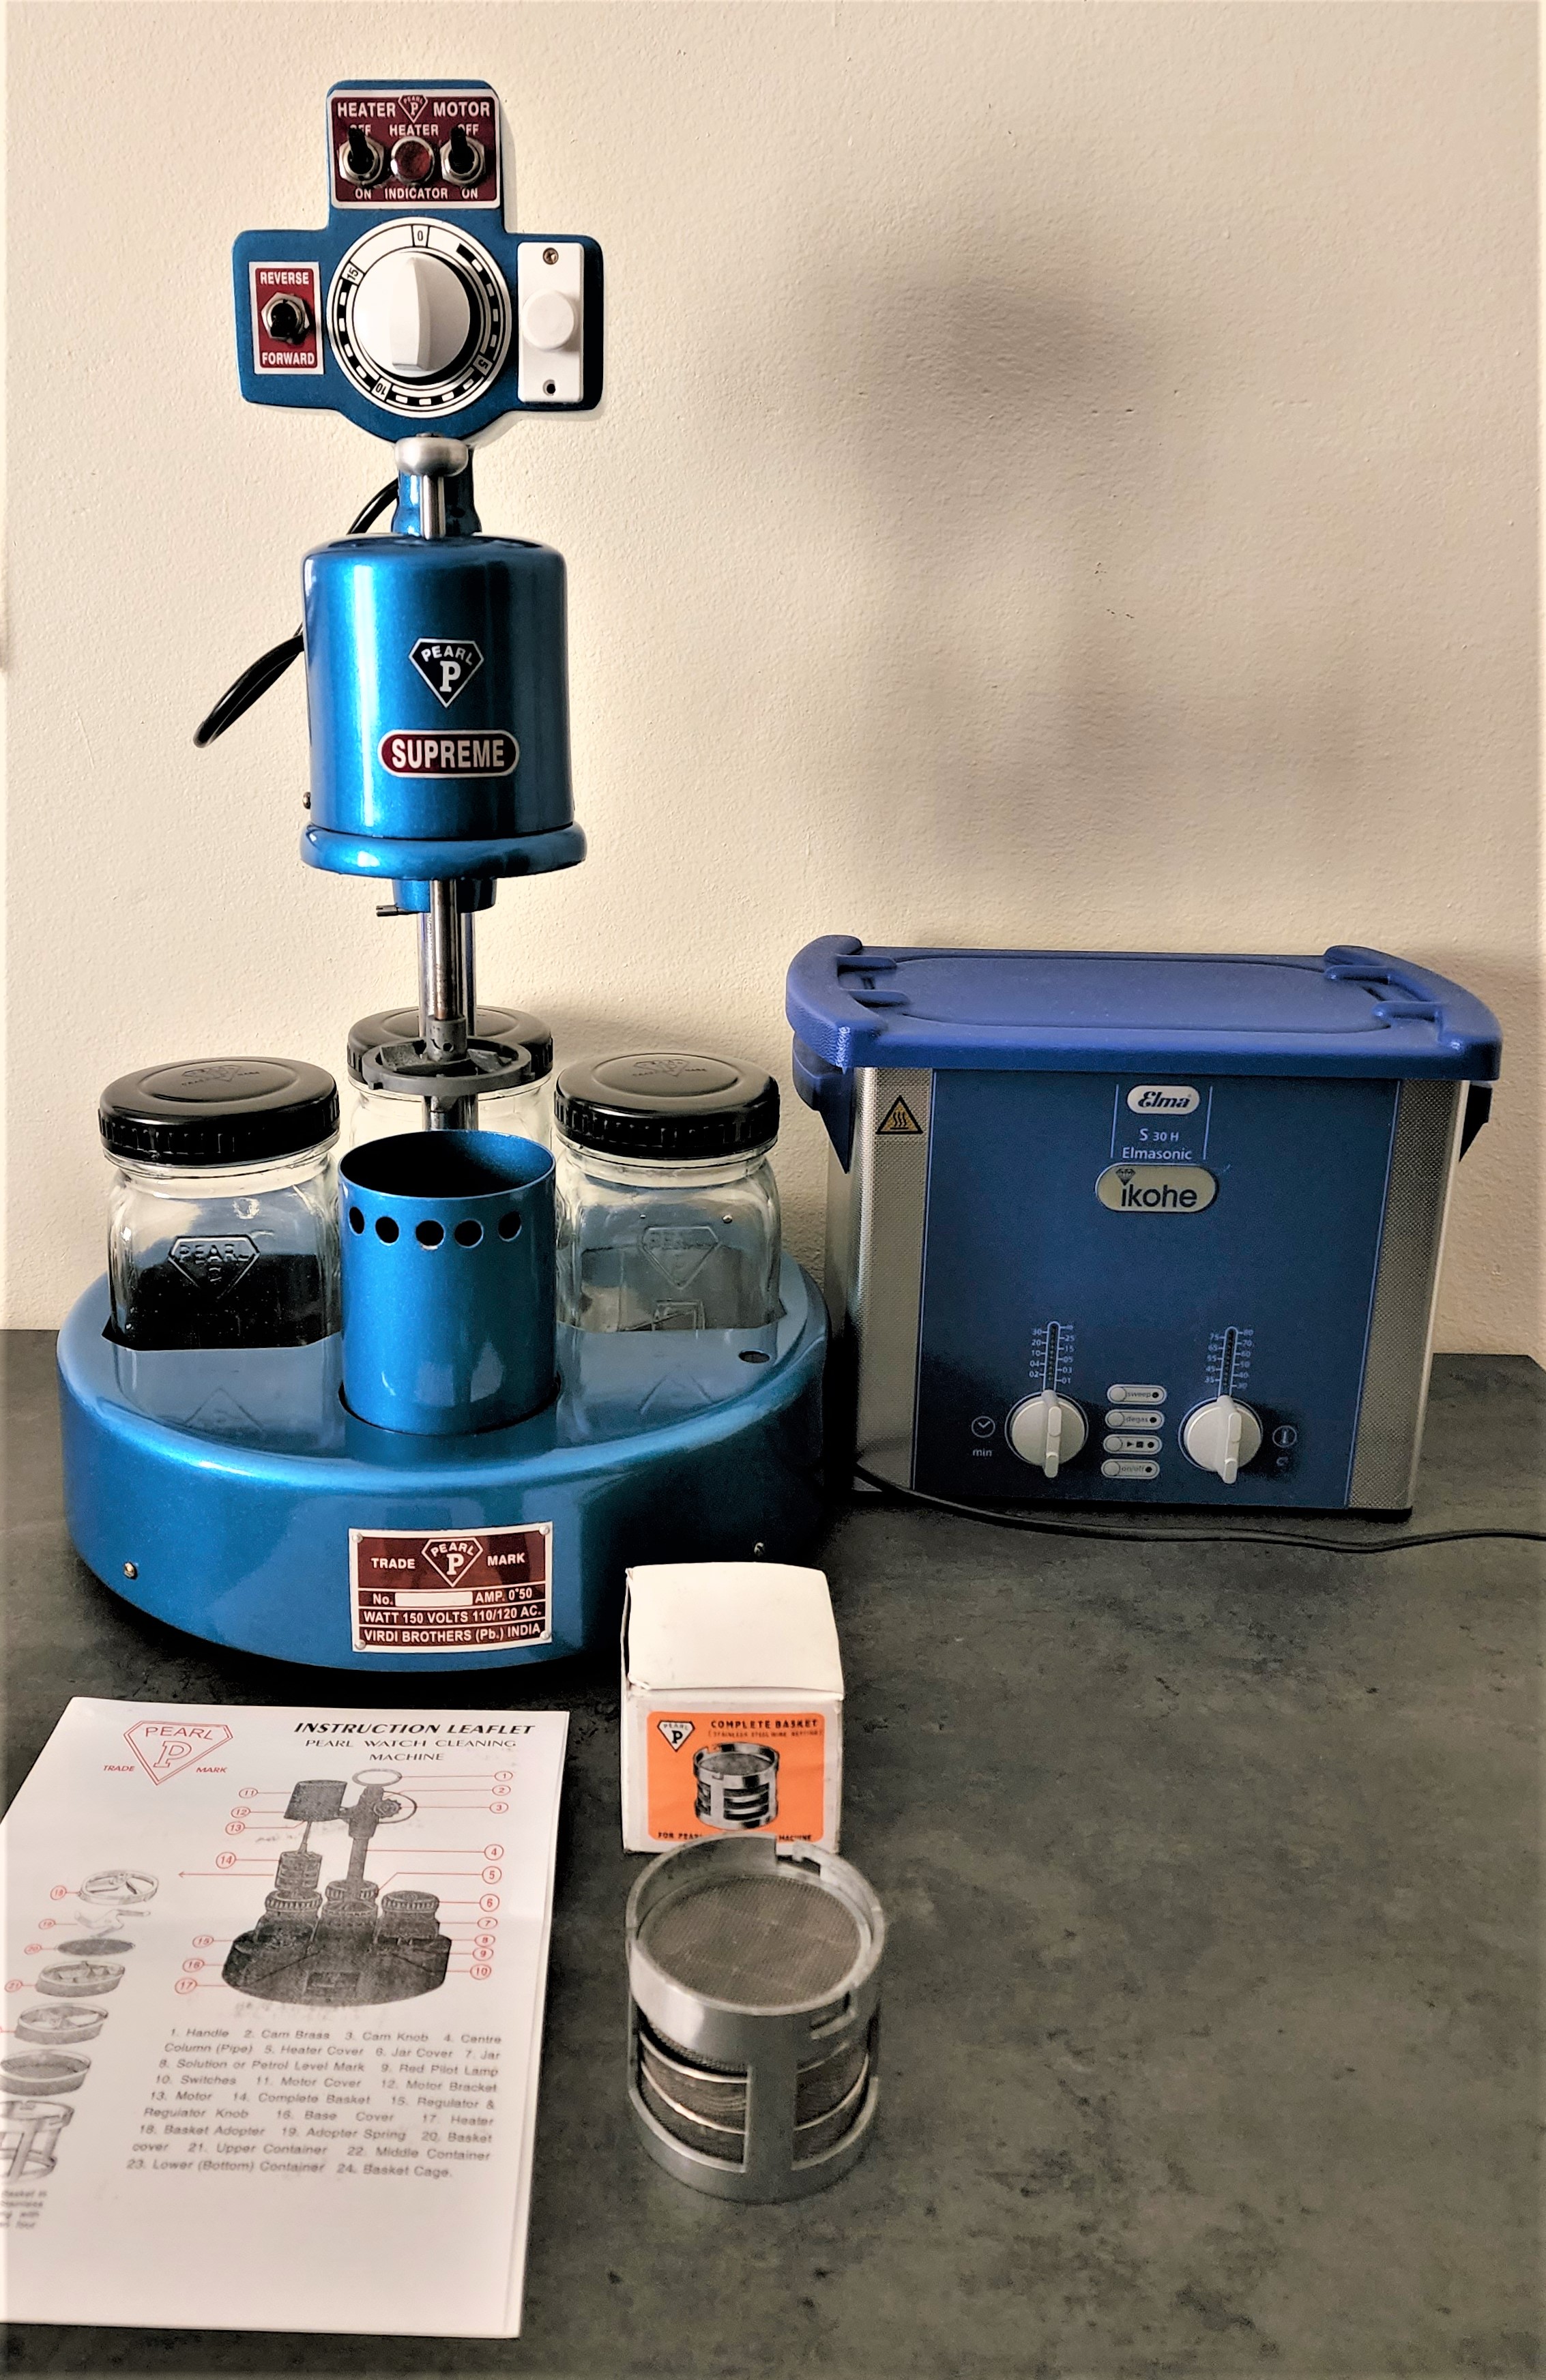
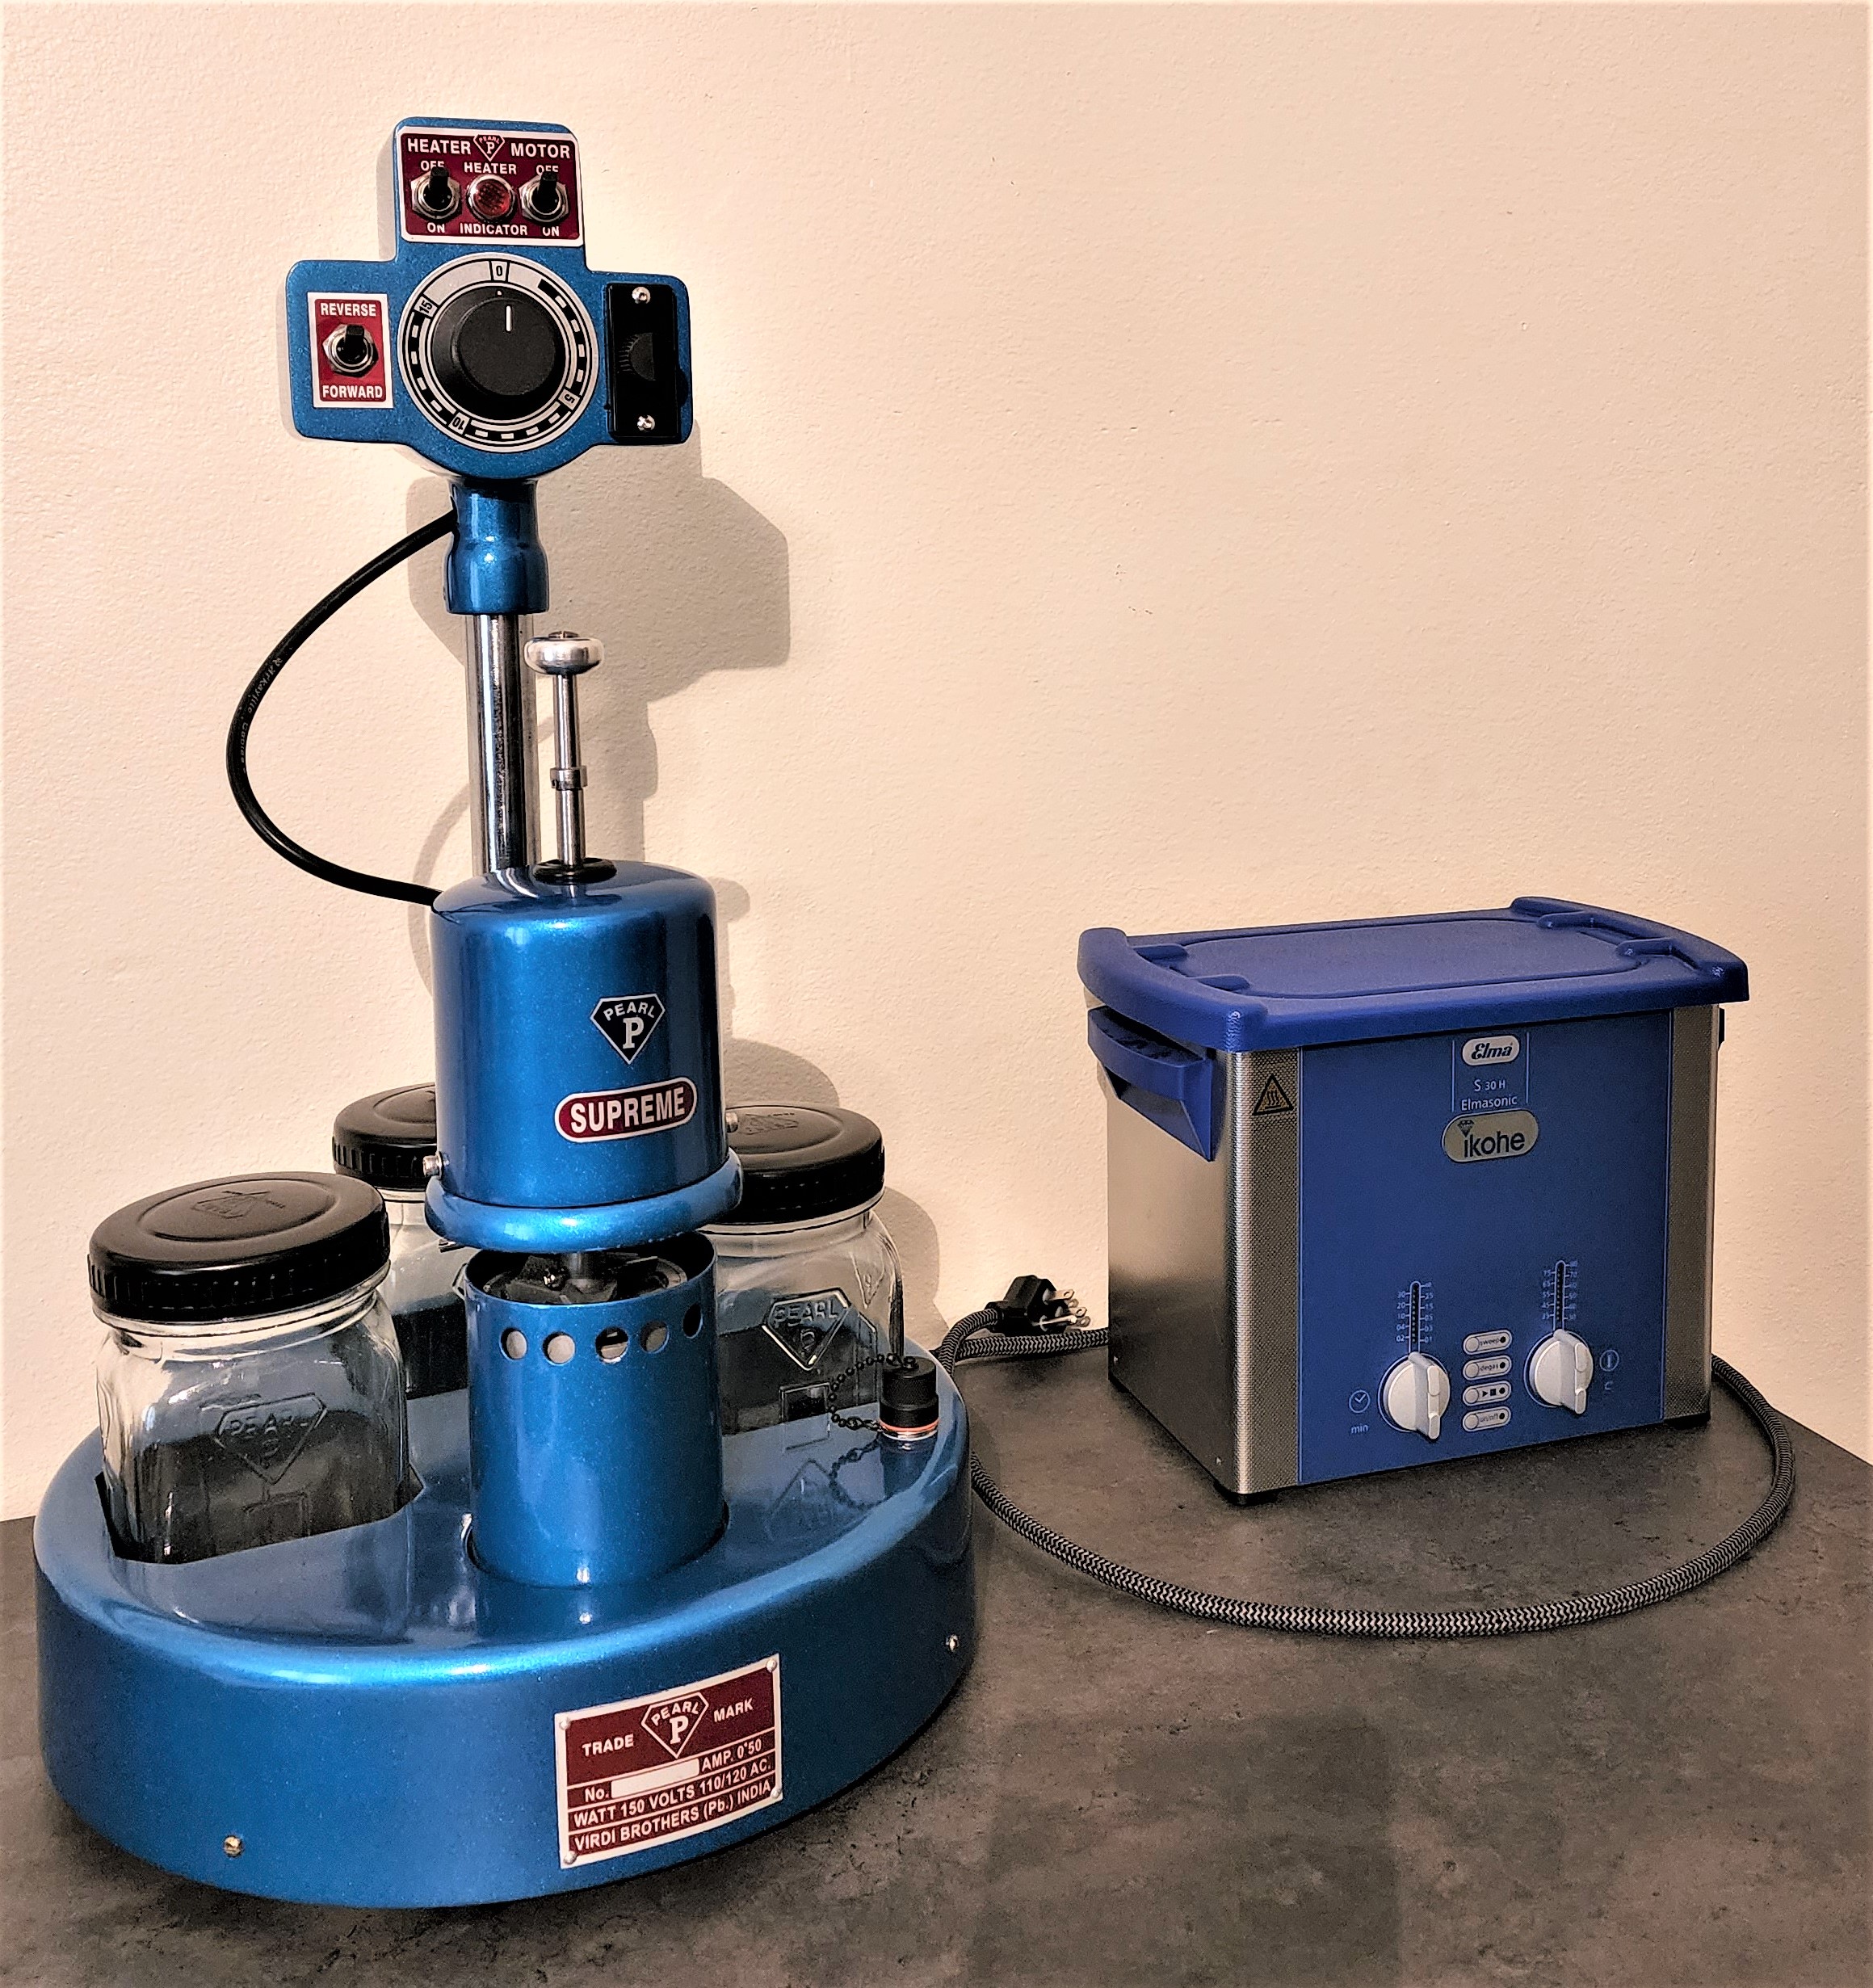
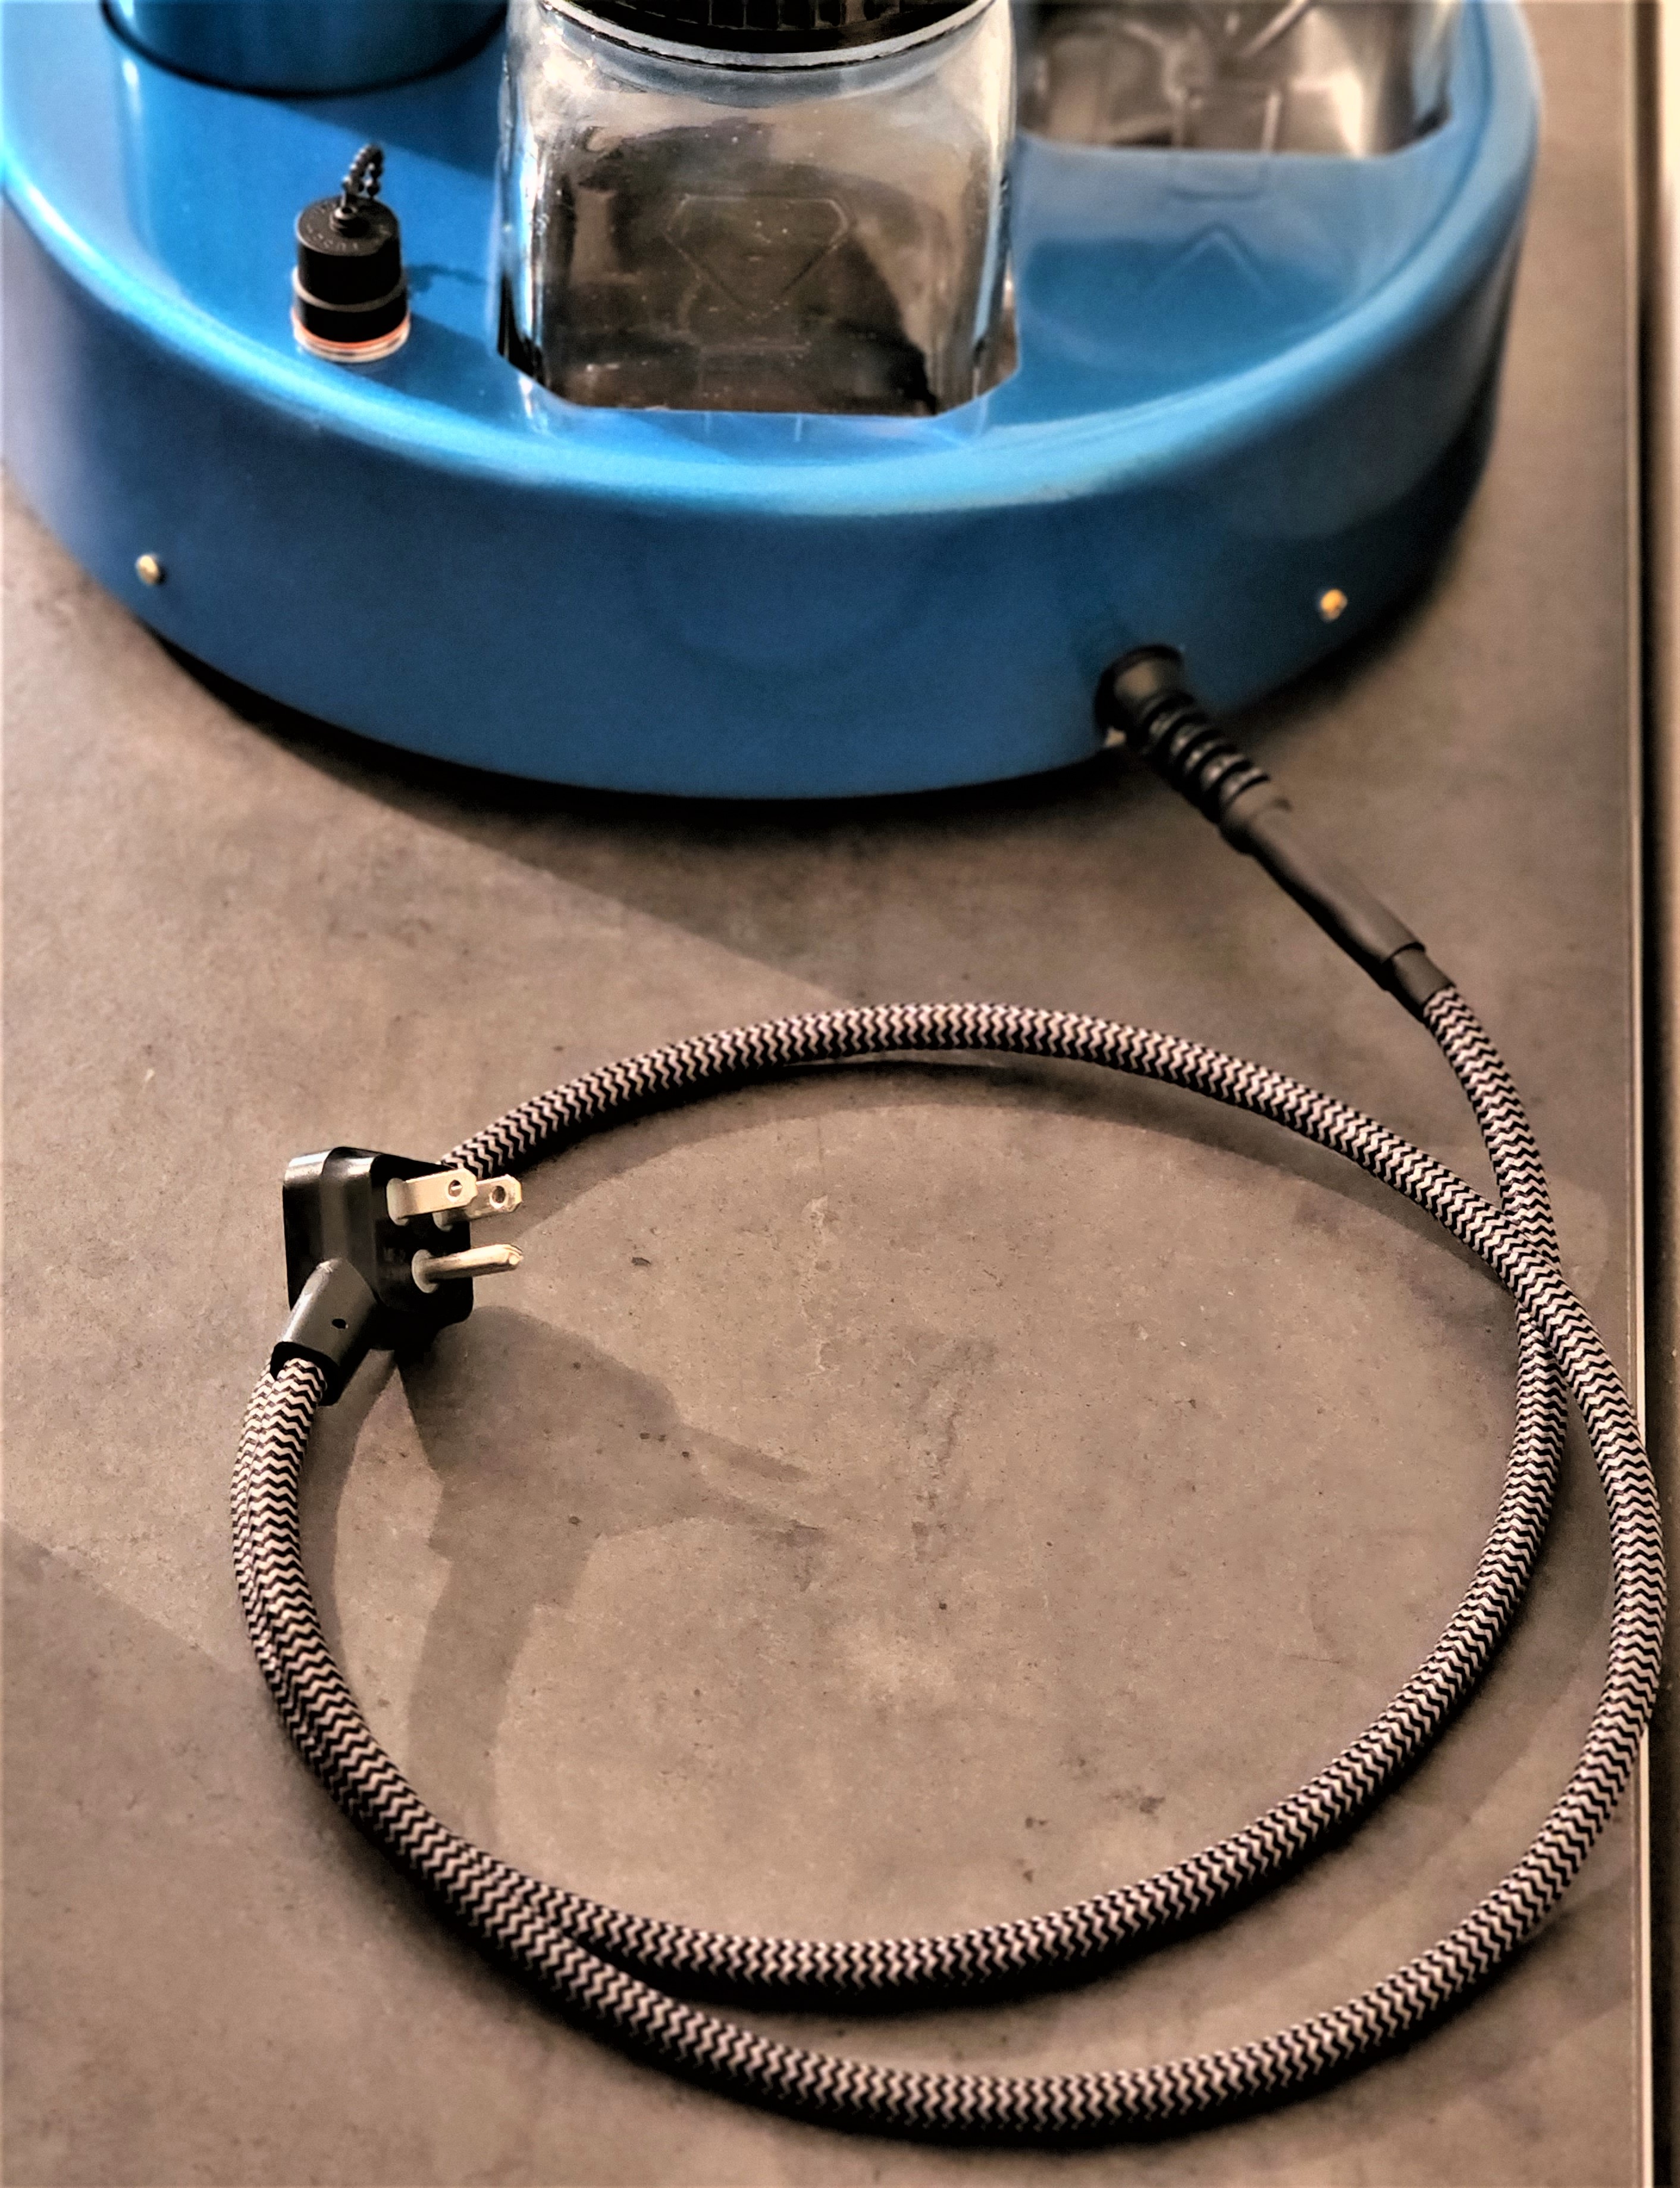
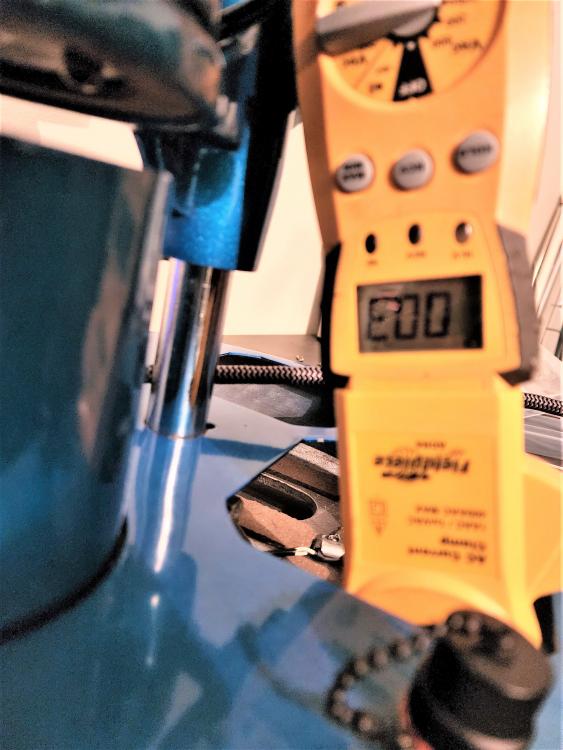
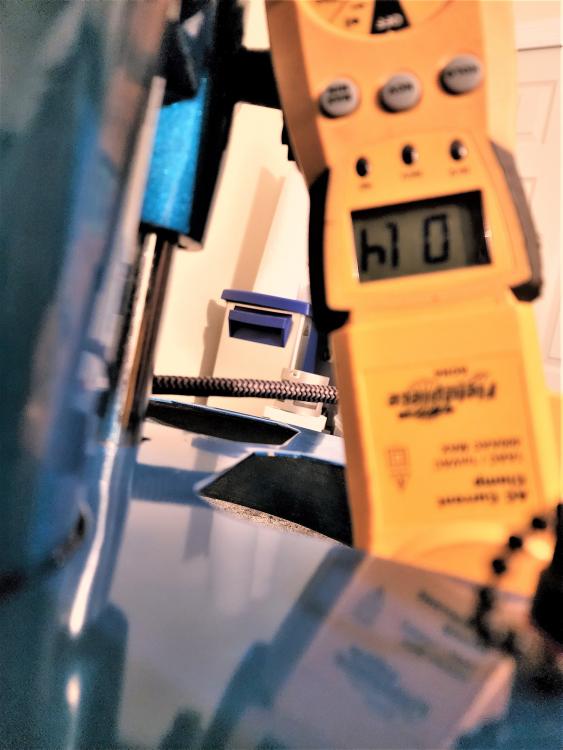
Line voltage issue? rheostat took a dump?, first 2 off the top of my head, just guesses. when you see how the rheostat is wired in you will be shocked! I'm getting ready to post my unit soon. Hey guy's finally got my cleaner finished and I would like to share with you what I did So you know I do have a prototyping back ground and am currently a mechanical contractor(H.V.A.C.) use this information at your own risk. Picture below shows the wiring compartment. I removed the wires from the terminal block and soldered the ends of all the wires and re inserted back into the block. these blocks are not too bad so long as you don't over crank the screws. I had to re do the rheostat, this is what I saw when I un wrapped the tape, yes tape! Looks to me like an India style western union style splice, horrid! I soldered the wires properly and sealed with some glue shrink. This whole machine is put together with slotted screws so on the fasteners I need greater access to I used Allen head screws and had to re tap the threads. The wiring on this unit is OK meaning it is good enough, the quality of the wire is nominal This machine draws very little amps so wiring size wise it is OK but on the other hand the assembly process is VERY poor and that is why like everyone else said THOROUGHLY CHECK ALL THE WIRING OUT BEFORE USING THIS MACHINE. This unit is not grounded and does not have a fuse or breaker so I got rid of the un grounded cord and made up a 2 wire with ground power cord and installed a fuse holder in the existing hole on the base of the machine. The 40 year old MIL-SPEC tank fuse holder dropped right in. I used a 1.25 amp fast blo fuse my amprobe showed .3 Amps RLA no heater and 1.4 Amps RLA with the heater and motor on. I ran the heater and motor on a full timing cycle, I think 12 minutes straight to see if I could get the 1.25 Amp fuse to give up the ghost but it was fine. Your machine may have slightly differing characteristics (sorry for the poor pics) I got a picture of the motor and heater assembly just for s**ts and giggles All in all I just went through the weak points of this cleaning machine and tweaked what I thought needed it. I think It runs well for what it is ...... an entry level cleaning machine. I cannot compare it to the Elma as I do not have one to compare it too but for my use as an amatur I think it will serve the purpose. Here are some before and after pics, best regards, James.


 1 point
 -
Here is a very similar Wyler Vetta Electronic with access through the front and a split stem: https://www.chrono24.de/wylervetta/electronic-vintage--id22900049.htm
 1 point
 -
Ah, I should probably mention that I exclusively use a stereo microscope when working on anything. I use one professionally as well so I never bothered trying to work on a watch with a loupe. I’d rather remove my eyeball with a spoon than sitting hunched over a high bench with my nose glued to the movement.1 point
-
Just for clarity, there are the arbors (right and left), the drums (universal) and the handles (right and left). 1- The handles are specific for right or left hand wind springs. As Kalang said, you don't need the handle; it's easy enough to just hold the drum (I can't remember when I used the handle). 2- See 1 3- The dimensions given are the outside diameter of the drum of the winder. So a 13mm would fit inside a barrel with an internal diameter of 13+ mm. 4- The arbor is specific to its drum , with some exceptions. If you check this link, you will see all the Bergeon winders listed by number, also with drum diameter and arbor diameter. For a #9 winder, with 13mm drum, the arbor measures 4mm diameter. It happens that the #10 winder uses the same size arbor. Looking at that list, I see there are 8 different arbor diameters, for 19 different drum diameters. Yes, the arbor is performing the function of the barrel arbor when using the winder. 5- It depends. Sometimes you can go quite a bit smaller than the measured internal barrel diameter with the winder, but it isn't a hard rule. Remember that since the drum needs to fit inside the barrel, after accounting for the wall thickness of the drum the actual space to wind in the spring becomes significantly smaller than the normal space the spring should fit into even for a drum that is close in size to the internal diameter of the barrel.1 point
-
Hi there , I meant timegrapher by TG. Sorry buddy I keep assuming. Rgds1 point
-
Cleaned
 1 point
 -
I would recommend a Seitz jewelled pivot gauge for measuring pivots and avoid using a bench micrometre for the reason stated by @nickelsilver in the below-linked post. I only use my bench micrometre and/or my JKA-Feintaster for measuring the outer diameter of the jewels.1 point

Cropped-l1600.jpg.5a0c4769508275567d4cfc30b7db4ce2.jpg)
Cropped-l1600.jpg.056975c95c434119168aa103e5e76af9.jpg)