Leaderboard


Popular Content
Showing content with the highest reputation on 03/29/22 in all areas
-
Hi GRSNOVI With watch repair is not to try running before you can walk, just take small bites at a time and as your profficiency and dexterity inprove and you gain confidence go thet step further. You will never be alone as the members here will always be at your elbow with advice and help. I my self use my left eye with a loupe , no scope except for the use of parts and jewels for close inspection , For normal work is done mostly one eyed. Depending on what I am doing soetimes use a binocular head band. With practise with one eye you will be able to gain the depth perception no problem. Have confidence in your own ability. As for tools collect them as you need them. attached are a couple of documents to read. All the very best. 1612608791_ToolsfortheHobbyist (2) (1).pdf TZIllustratedGlossary.pdf2 points
-
Pocket watch oil is best for clock platforms.2 points
-
Hello everyone , my name is Ian and i love watches. I have always liked watches since my father gave me my first Timex military style watch as a lad in the mid 70's. I am sure i still have it , and it will turn up one of these days ... I bought a Hamilton khaki a few years ago that reminded me of it a lot. I dont have any real vintage watches yet , I only really have old watches at the moment ... including one or two that need a bit of love to hopefully get them running again... and a couple of slightly newer ones, Breitling Aerospace and Omega Speedmaster Moonwatch that have tempted me over the years ... dont you just love interest free credit I wish that i had paid more attention to my fathers tinkering and repairing watches for his friends and friends of friends when i was younger, I guess now i'll have to try and learn the hard way I dont have any aspirations to being a watchmaker , i'm just an aircraft engineer in my late 50's who would like to be able to take apart and rebuild some simple watches to running order for my own pleasure and to give the old grey matter something else to think about ... and if i could maybe create a watch from an old case with a homemade / designed dial and hands i would like that a lot. I like leather straps as opposed to bracelets , I dont like gold watches , and i dont like outrageous flashy anything ... I am a simple creature. Not much else to tell you at the moment , I shall surely be posting a few cries for help soon as i stumble along trying to diy it, or more likely "biy" it ... until i can justify / afford to do Marks watch repair course ... I already have my basic toolkit that i bought a good few years ago ,and its had far too easy a life so far and is almost as new so now its time has come ... lets see how many of the tools are worth using and what needs replacing first .... Thank you all for listening to my ramblings Ian1 point
-
Why should be fake? These were cheap and not very desirable watches, not worth the interest of counterfeiters. The clasp is also signed in an inexpensive way, which probably was thought to be better than nothing at all.1 point
-
I should add there is an incredible amount of talent on this site always ready to answer questions in a friendly manner. I cant image starting down the watchmaking trail without this site.1 point
-
Having worked on printed circuits for decades, soldering takes practice. I can solder much better than I can grab small screws with tweezers. There are a lot of things going on when you hand solder and its easy to lose control. Its taken a couple of years but I can usually deal with small screws, even the ones in those tiny ladies seiko movements without launching. Its pretty obvious this hobby will test your patience. One of the less expensive game changers for me was buying a set of real watchmaker tweezers. I realized the tweezers I used for surface mount assembly of circuit boards are too springy for watch work. The other big game changer for me was a stereo microscope. I still have a crappy set of mainspring winders. Some day I will buy the Bergeon set when I cant stand it any more. Best of luck, take your time, enjoy. Matt1 point
-
It's a guin Relax, it's genuine. It's not the kind of watch targeted by counterfeiters.1 point
-
Ys its ok to brush clean and not soak with isopropanol although using Ronsonol will be a cheaper option and just as good, whats the pallets like are the jewels intact and noe loose ?. lubrocate it with watch oil, Windles clock oil might be a tad too viscous.1 point
-
It is not released as of today. I know only what is published on watchfix.com, on the related Patreon page for pledgers, and nothing more.1 point
-
Virgins are a very rare thing these days1 point
-
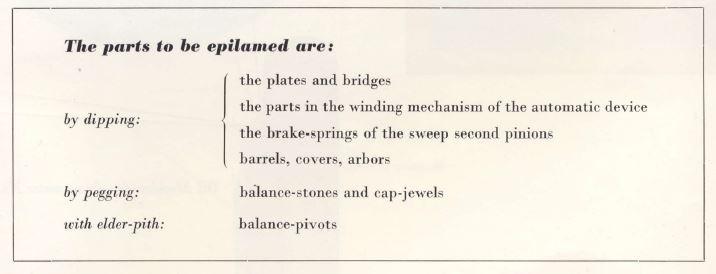
One of the things we may never figure out is why do they do what they do? Although I do think there is a trend? If we look at for instance ETA 6497 like the one that I attached up above you see something similar to the document that you mentioned which is a combination of oil and grease. But let's look at an older 6497 document which if you like I can attach it but I've already attached a whole bunch of things for today. Not sure what the limit of total attachments is? A case of you look at the older document all away C for the keyless is oil. Either HP 1300 or D5 no grease at all. Then this particular vintage document is it really vintage is 2011. Looking through the only place that they put any grease at all is on the canon pinon. Then of course there is zero mention of basically our current discussion of something to keep the oil from spreading we might assume they didn't use it but they did they just don't put in the document. Who does tend to be a trend of going for heavier lubricants. I've attached two documents that have reference to manufacturing information. Interesting separate companies but they largely look very very similar for documentation? Scroll down far enough you get the description of the components like the escape wheel as this epilame–coated, Lubrifar. Just for the fun of it I'm not throw in some additional documentation for that other word that you probably have never seen. Which of the skip over continuing down we get to the pallet nothing interesting here yet the pallet stones and epilame–coated. Continuing down we get the balance staff and we find this Epilame–coated, flat ends. This brings up my amusement with older documentation failing to disclose that things have Epilame–coated Anything and typically insanely lite lubrication's they're going to run all over the place if they're not treated. So mystery substance? Lubrifar Notice I've attached two separate documents has been around for a very very long time. At one time there was an expensive kit at least I assume it's expensive because it was selling at that involved a spray can with the substance and a way of holding the escape wheel it was somehow motor driven so it's been and the holder would keep the stuff off the center so only the teeth were coded. I've only seen a picture of it I'm sure is really expensive. You also see references to it in the Omega working instruction 40 the lubrication document that you get from cousins. What I believe it typically says it washes off and once it was washed off you can't put it back and ideally Omega would like you to just replace the escape wheel. Then I'm throwing a bonus document innocently titled Omega – oil. I think you might find it really interesting I scanned it to a PDF I think it's the oldest Omega document I have on lubrication with bonus cleaning. So basically skip over all the wonderful and interesting pages and go to page 9. What are they talking about here aware of we seen this before well they're talking about exactly what were discussing what to put our epilame On and yes both bottles basically the same substance. For those who don't want to open up the PDF I snipped out the image look what they are treating and look at the date of the document that wasn't like the printer this yesterday. Then you have to read the text above the image that I snipped out they put it on a heck of a lot of the watch don't play and they been doing this for a long time the only really amusing thing is they don't put it on the pallet fork at all including the pallet stones. Other than that it's been in use for a very long time and typically never see references to this in any of the documentation's meaning the watch companies until relatively modern times. Like the 2011 PDF I referenced there is no mention at all it's only in the last few years do they start putting everything together in one document. Except of course the manufacturing document shows a few more parts that are treated do not mentioned at all. Now have a little light reading it should keep you busy for a while. Oh and what's the other amusement in the Omega ancient document? Choice of oils is interesting. It's a law hard to see but if you follow the line what are they using on the keyless is that oil I see? The good old days when oils were not call the number but they have a name I'll let you figure out which oil that is and then you can tell me does it seem a little light to you? Of course maybe that's why the surface treated everything was to keep this oil from spreading all over the place. Brochure_technique-SW300-1_19 manufacturing information.pdf ETA 2834-2 - Manufacturing Information.PDF ETA No 29 Lubrifar 7.96.PDF Omega - Calibres No 08 Lubrication of the Escapement - Lubrifar.pdf Omega-oil.PDF
 1 point
 -
I'm not sure if this is the part you are looking for. https://www.ebay.com.sg/itm/0884283-Genuine-Original-Dial-Ring-Holding-Seiko-Diver-7002-7009-7019-/294863015944?mkcid=16&mkevt=1&_trksid=p2349624.m2548.l6249&mkrid=711-127632-2357-01 point
-
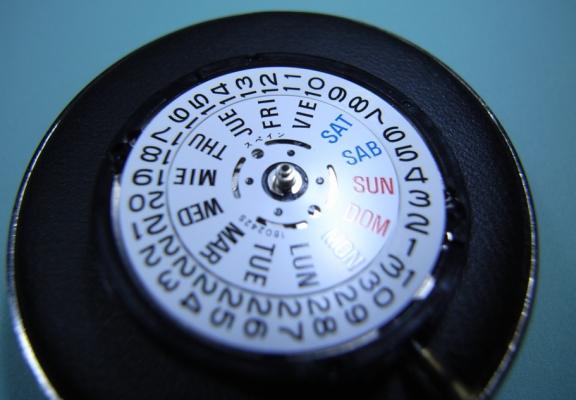
It took lots of tweaking of the angles, but the alarm is working properly now. The clock is back together on the bench and running.1 point
-
Iirc the reduction and eventual stopping of new videos coincided with Marks move to Thailand. Perhaps he is now either too busy for new videos or he has lost interest in his YouTube channel, which would be a shame as I for one found them very informative. Or it's all being kept for his paying subscribers on Patreon or those who paid for his courses Can't blame him for doing that if true. It would be helpful to his many subscribers if he was to publish a short video explaining what happened to his channel.1 point
-
I don't know anything about release schedules but Mark has just released some level 5 videos to Patreon 10 and up only: https://www.watchfix.com/development-platform-categories/patrons-access/1 point
-
This is all very interesting and quite a good read Thank you all for the information1 point
-
I have a few question that I (and hopefully others) would like to hear your take on. Q1. When you treat the escape wheel, do you treat the entire wheel or just the teeth? I treat the whole wheel. For the fork, I just treat the jewels. When I went to school they taught us to do the whole fork, then somewhere along the way they determined it was bad to have Fixodrop on the pivots and fork end that interacts with the roller jewel, but now it seems it can go either way, haha. I just do the jewels anyway. The only issue is ideally you soak the part in the Fixodrop x amount of time; doing just the jewels that isn't possible. Q2. What parts do they not want treated with Fixodrop? This is the question I am most curious to get answered! Similar to what John posted above, the balance primarily. Q3. I have never treated any large parts such as the main plate and the bridges. I have an epilame bottle with a mesh basket, but how would I treat the large parts? Can I simply lower them in glass jar, let them soak for a while, and then pick them up? That's basically what I do for all parts. I have a 30ml lab bottle with about a 22mm opening, and I keep maybe 10-15ml of Fixodrop in it. I dip the parts, then set them to dry. It's small enough that if one falls in I can get it out with tweezers, and it keeps me from potentially contaminating a larger quantity if I accidentally stick something in there that's dirty. For the larger parts like mainplate, in the past I have wicked up some Fixodrop with a closed pair of number 5 tweezers and deposited it where I want. For the new gig with the manufacturer I will get another small lab bottle with a wider mouth and dip them. Q4. Can Fixodrop be reused? Perhaps "a stupid question", but I'm thinking that as long as the parts being soaked are clean to a clinical state, no contamination should occur and so I would assume the answer is yes. On second thought, the answer must be yes, or your 100 ml bottle wouldn't last you a year and 200 overhauls. I guess this was a stupid question! Yes, you can use the same Fixodrop to treat many parts. But it is so volatile that I feel at some point it's best to pitch it and start with fresh. That's why I start with maybe 15ml in my little bottle, and when it gets really low, I wipe it out with a paper towel (and let it evaporate off that), clean, then start fresh. Q5. Being a hobbyist doing less then 10 movements per year, how important is it to respect the expiration date? I don't think the expiration date matters at all. For oil and grease they only started putting one a few years back, and I had an older bottle of Fixodrop banging around here I looked at some time back during expiration date discussions and it didn't have a date either. But- it was from maybe 2005, and had lost a good 30% of its volume over 10 years. I tried it out and it seemed to work but not worth the risk in my book. But that's an open bottle, maybe halfway used, that lost 30% of what was left over 10 years, and still seemed alright. So not really a worry if it's slightly out of date I'm sure.1 point
-
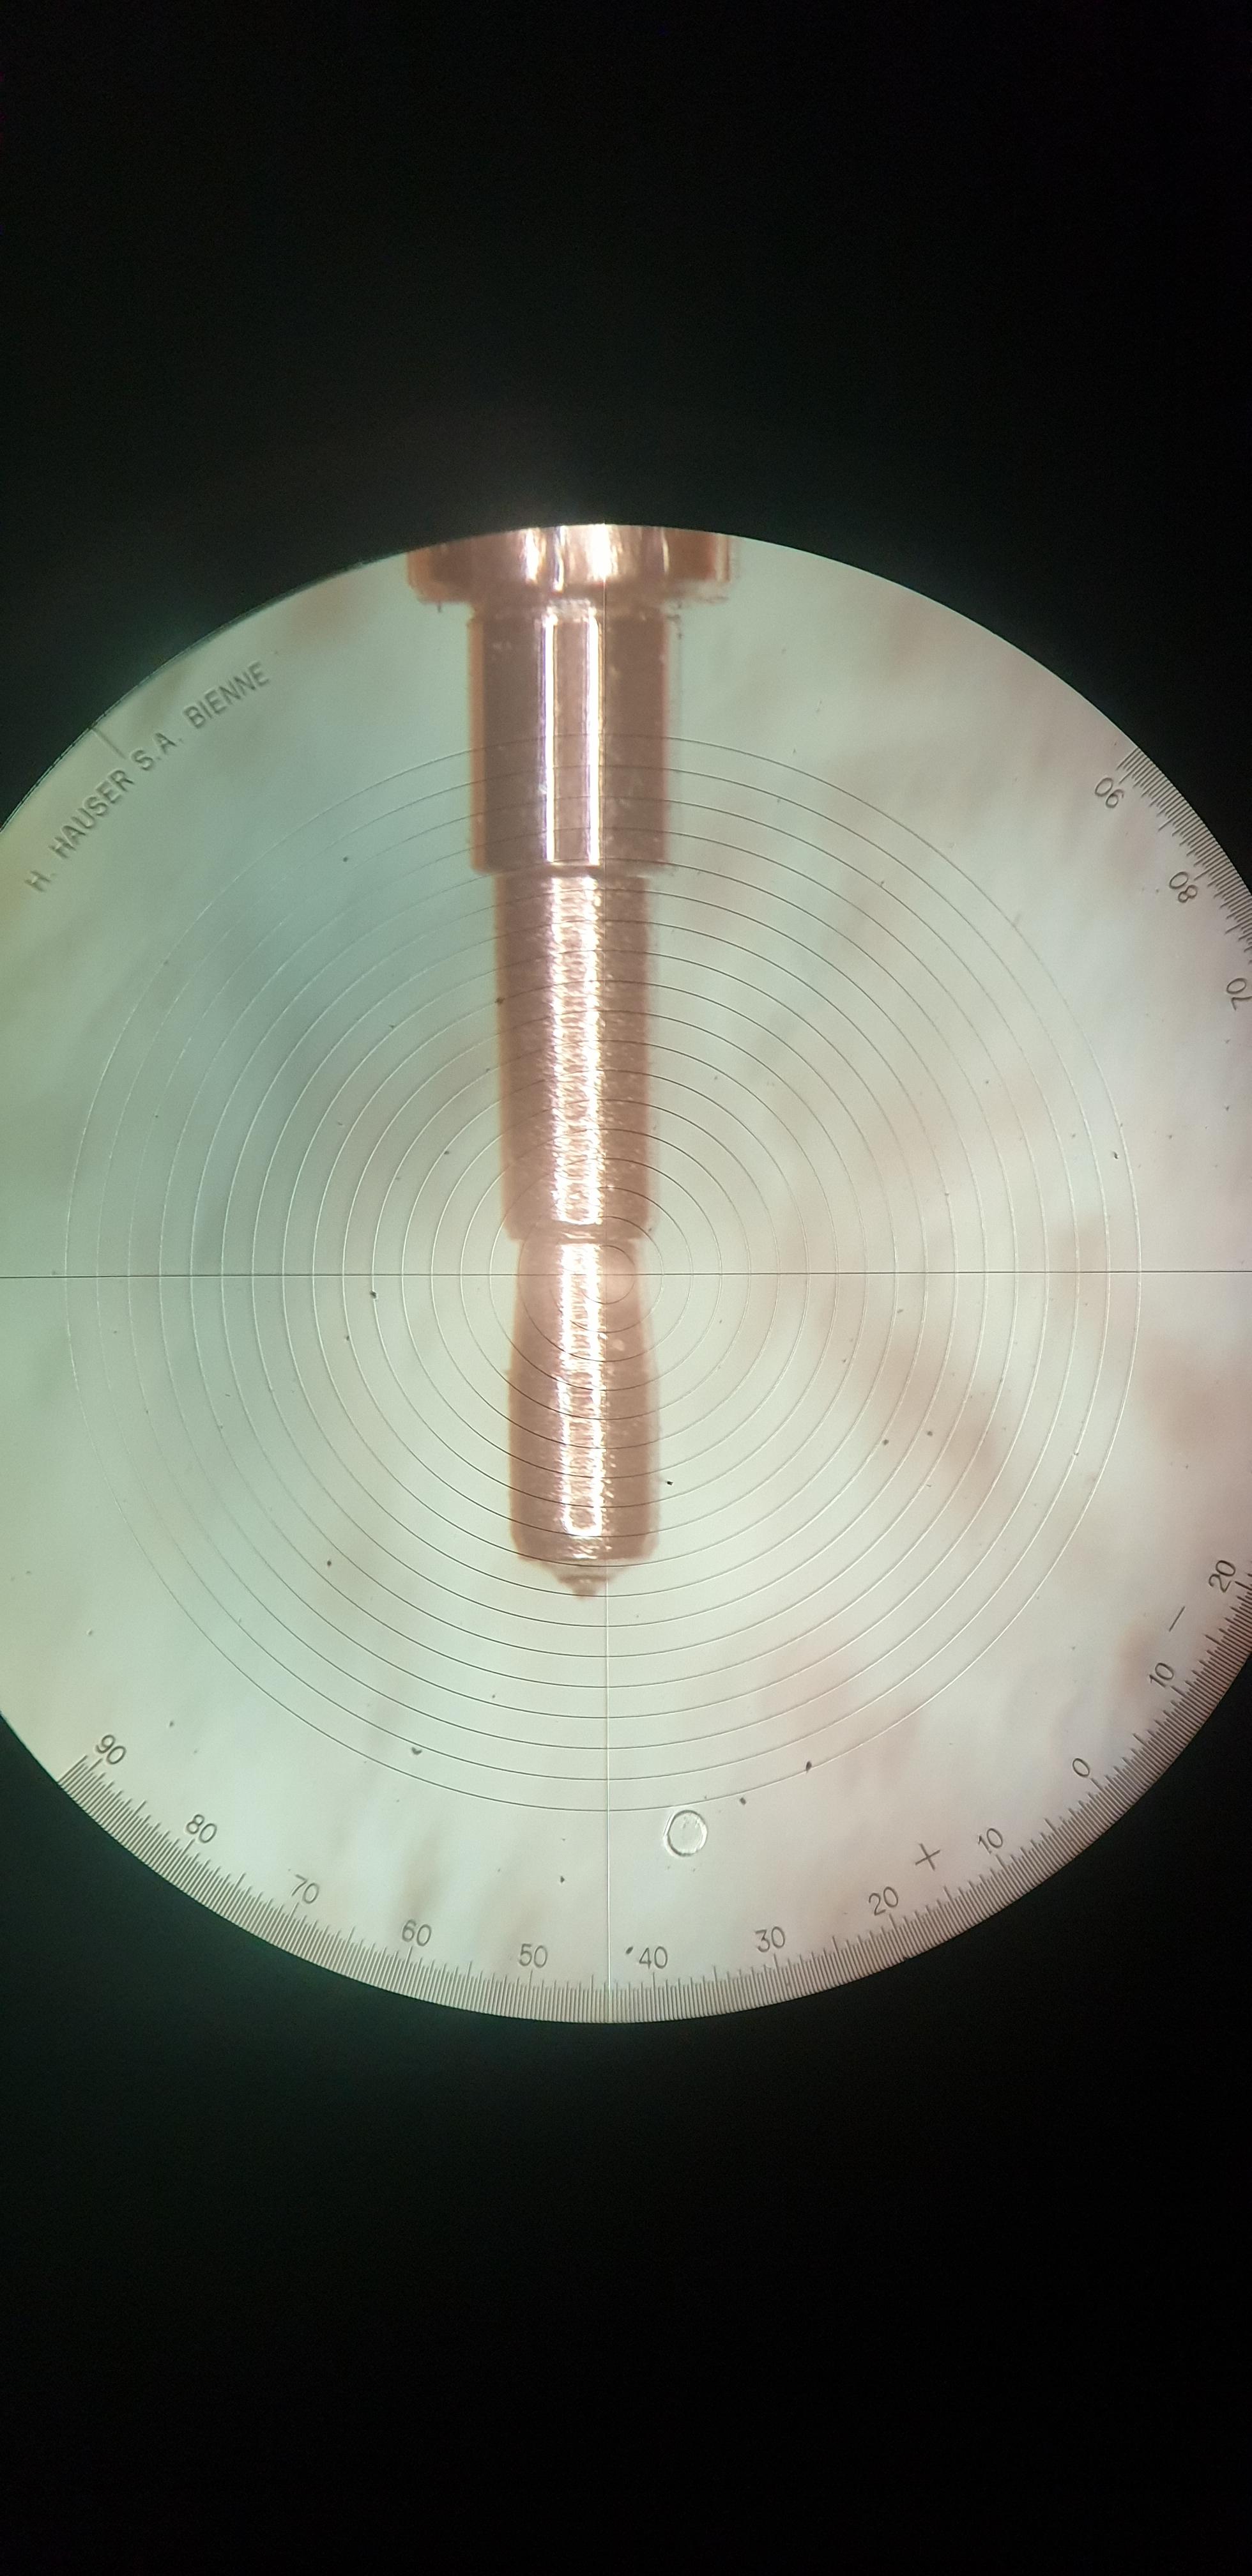
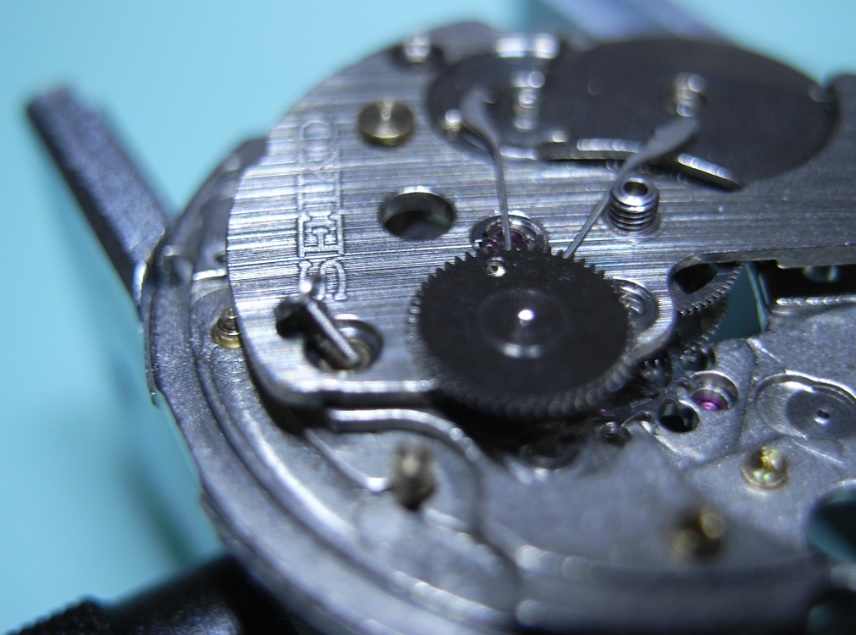
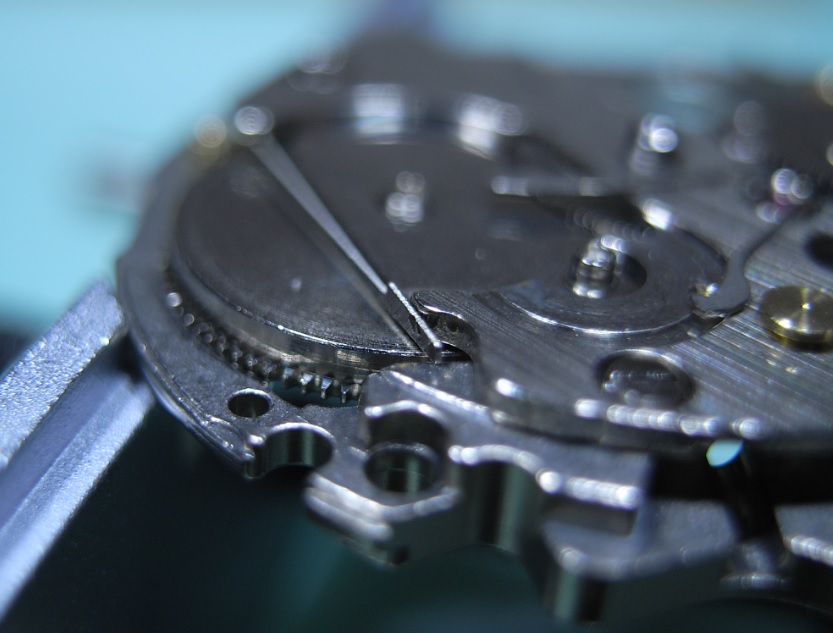
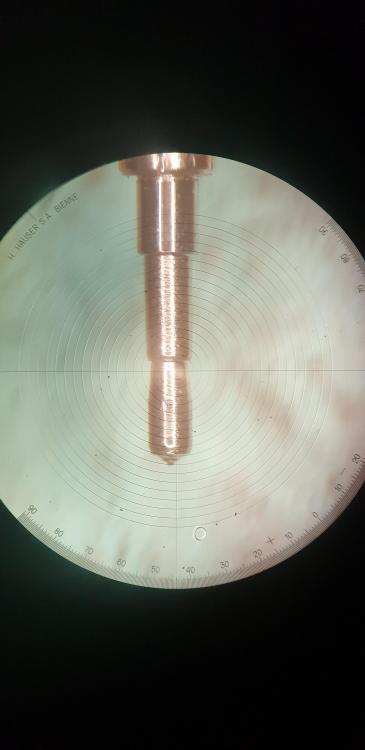
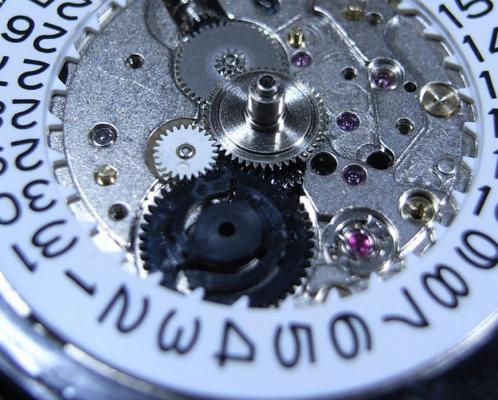
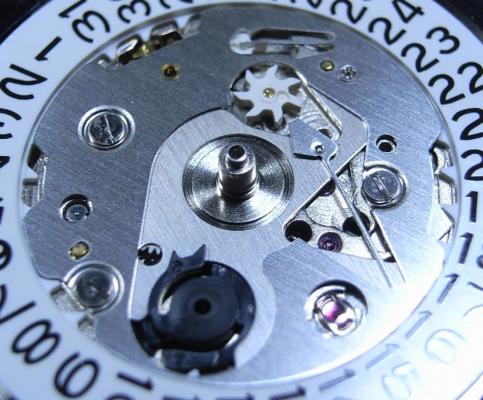
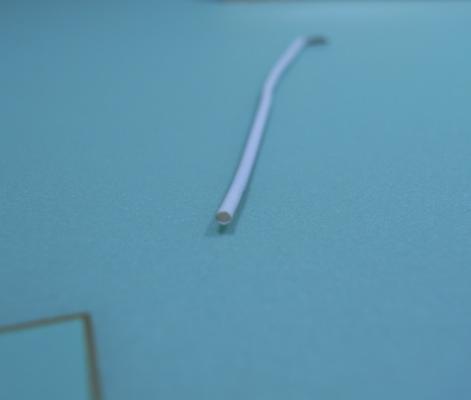
The pivot of your center wheel where the cannon pinion fits looks totally wrong. It should have a distinct slope going to a shoulder along the pivot, this is where the dent in the cannon pinion fits. The slope is to make sure the cannon pinion tends to push itself down when setting the time, rather than ride up. The pic is a typical normal center pivot/ shaft. I'm 100% certain a Peseux would look like the pic.
 1 point
 -
In another of my hobbies I was once spending so much with one supplier that they sent me a bottle of whiskey at Christmas, oops.1 point
-
Hi In addition to that I have attached the tech sheet. Hope it helps 8685_Miyota 9015.pdf1 point
-
Thank you for your introduction and welcome to this friendly forum. We all look forward to your contributions and continued involvement.1 point
-
On behalf of "Watch Repair Talk" moderators, I would like to extend a warm welcome to all new members. This is a friendly place with plenty of knowledgeable people who have varying degrees of horological expertise, the great thing is they are willing to share that invaluable knowledge and help one another. To help us keep things running smoothly, I would ask all new members to read the forum rules and place their posts in the correct sections.1 point
-
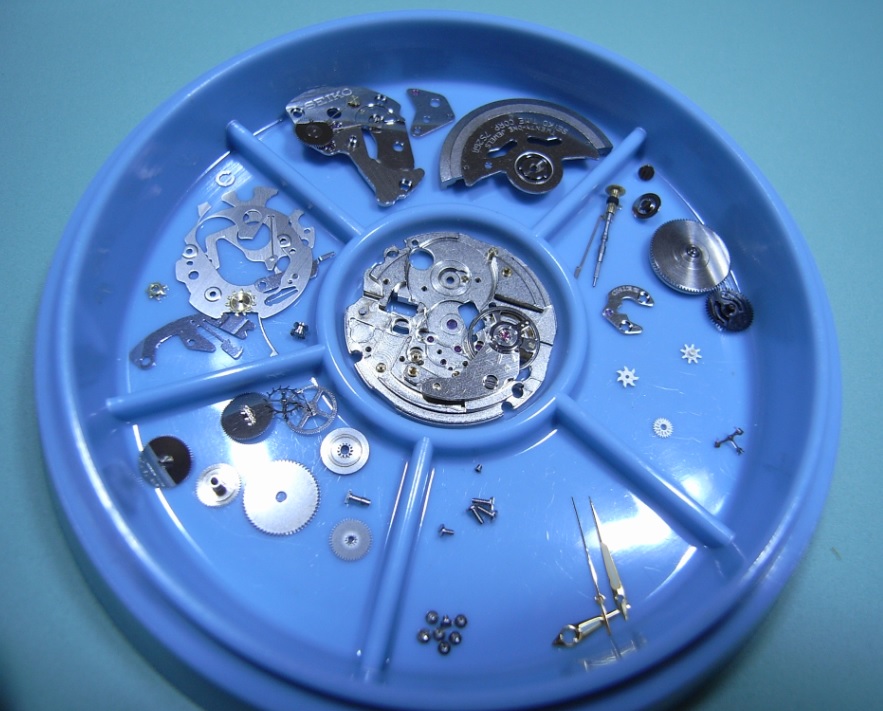
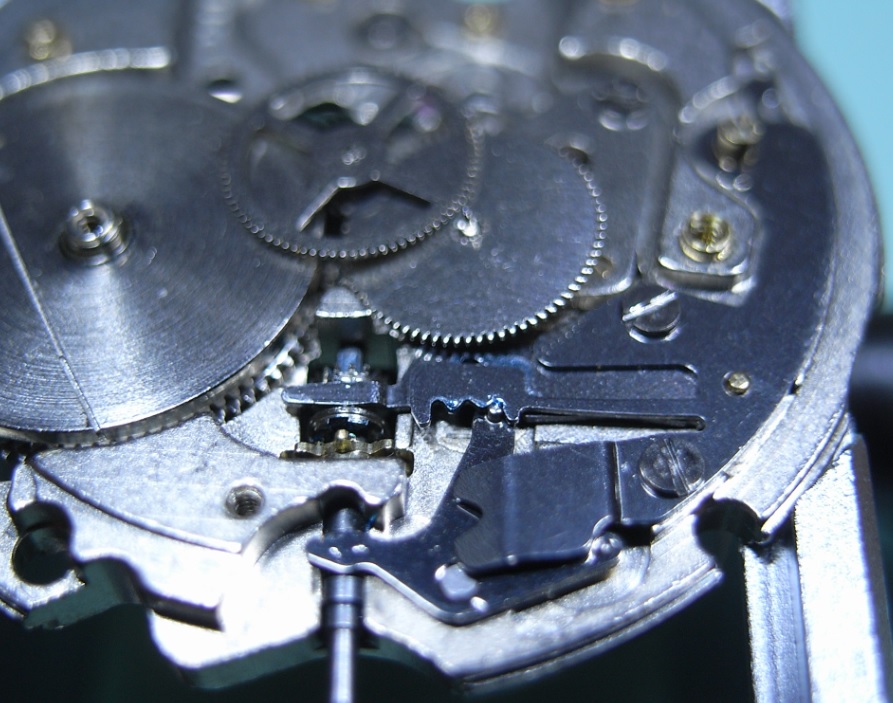
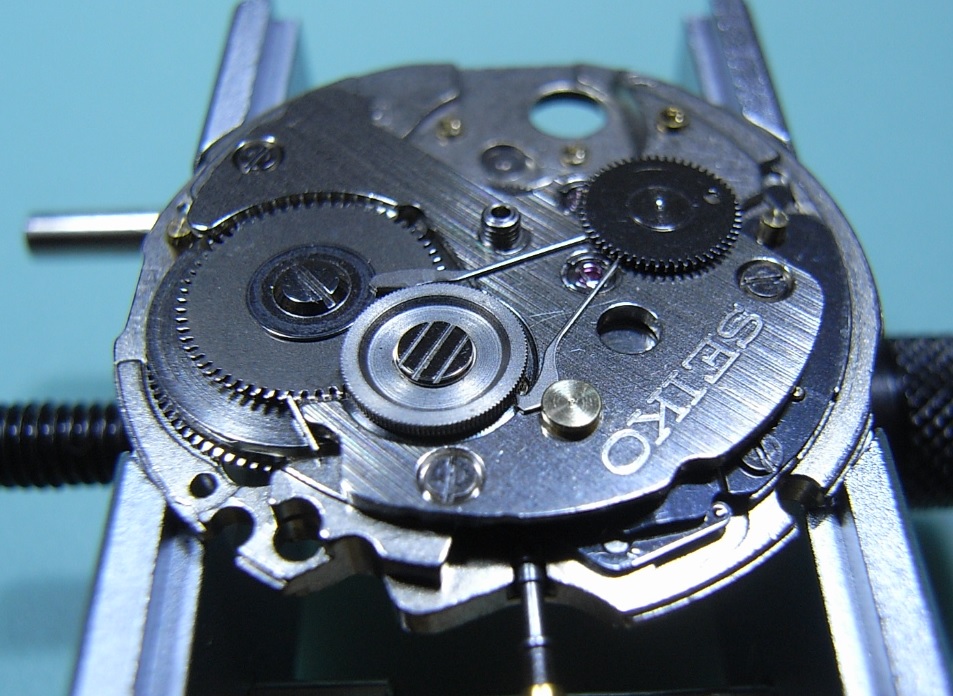
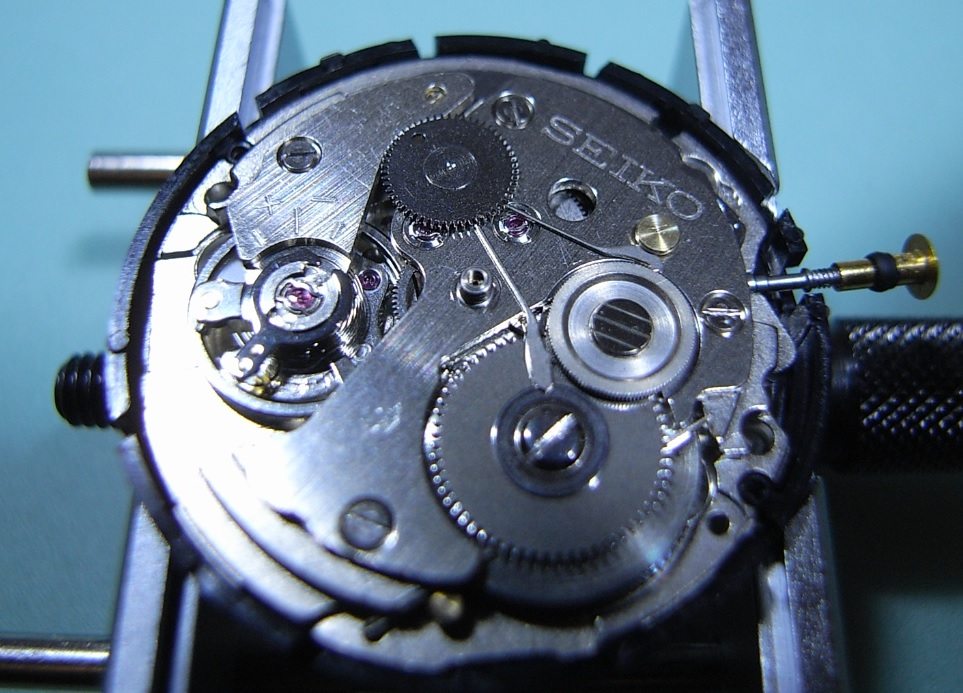
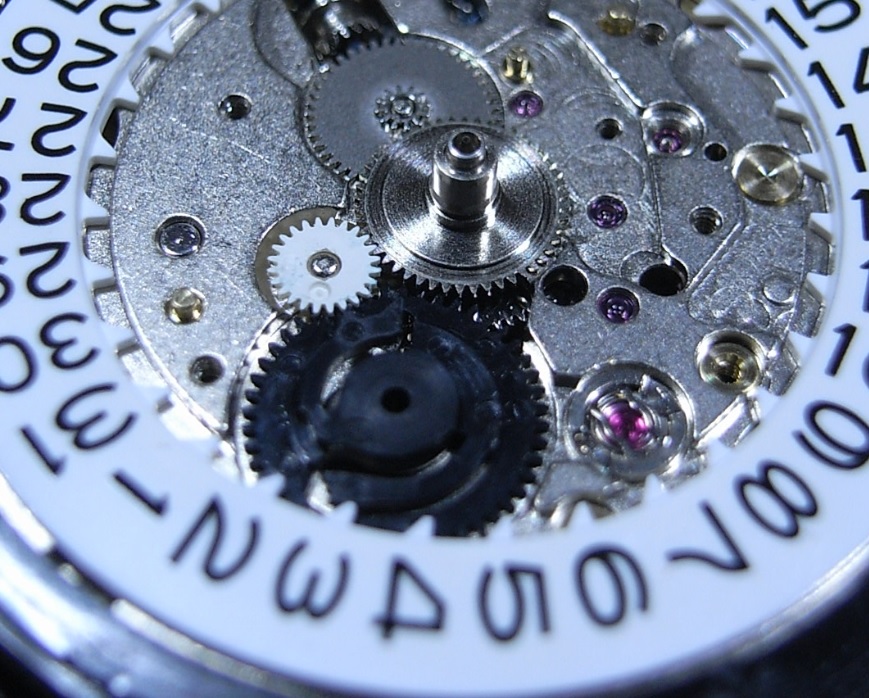
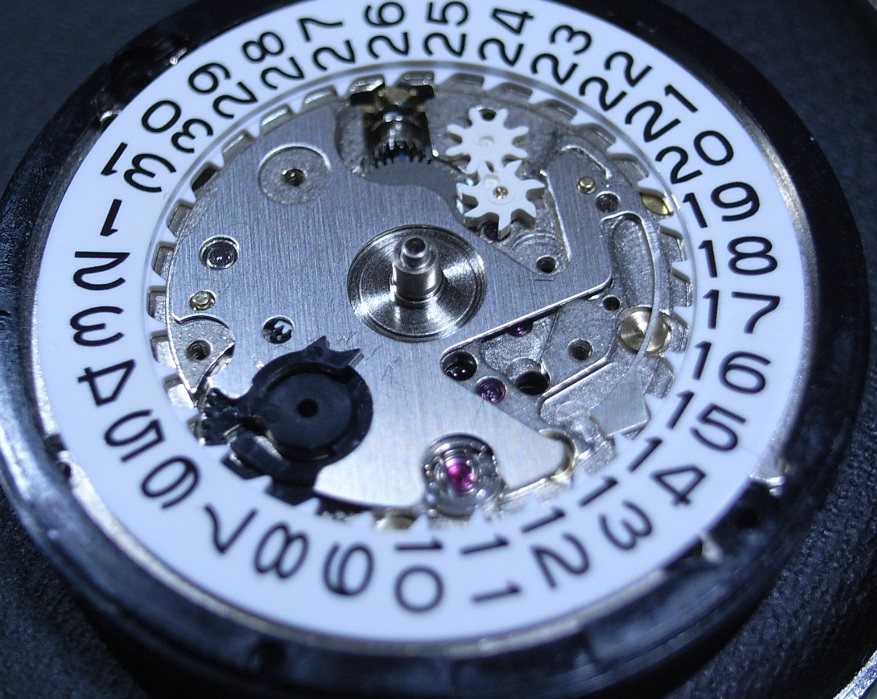
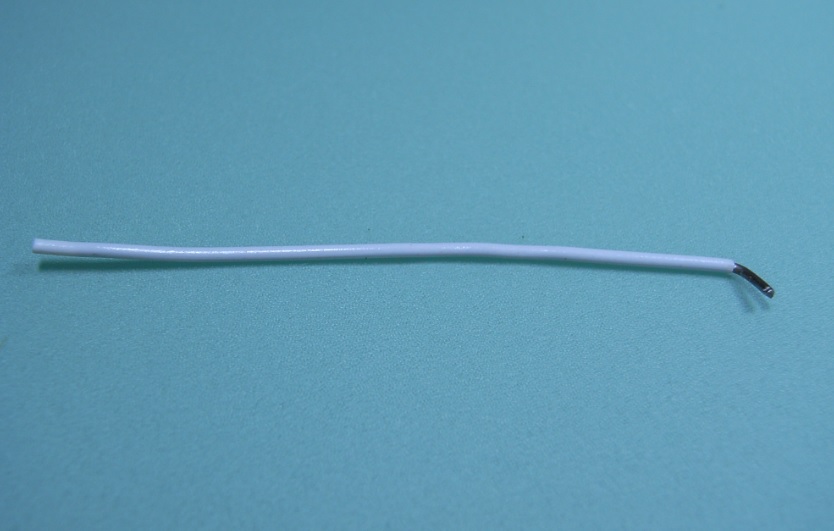
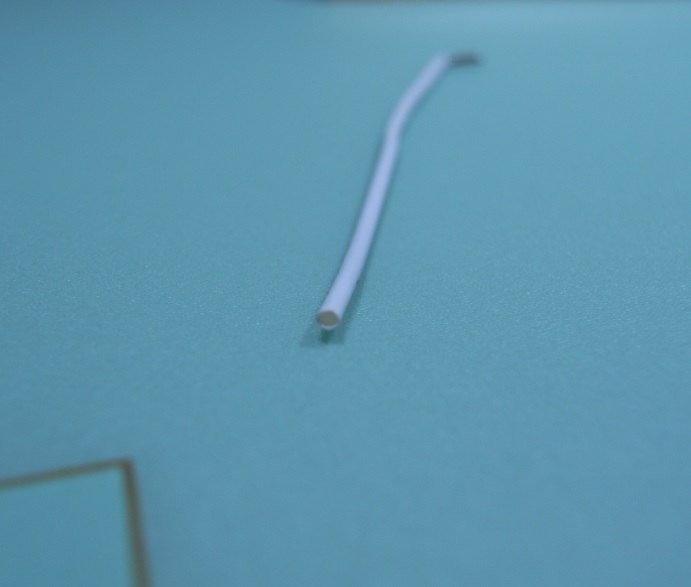
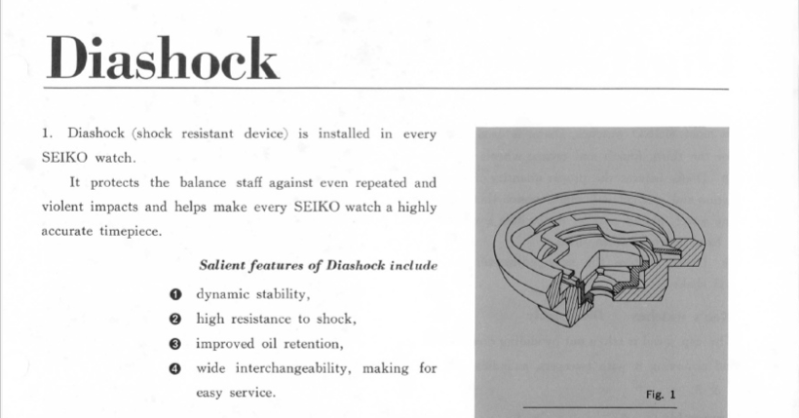
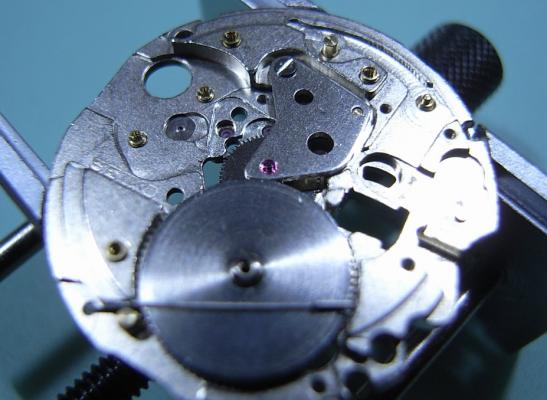
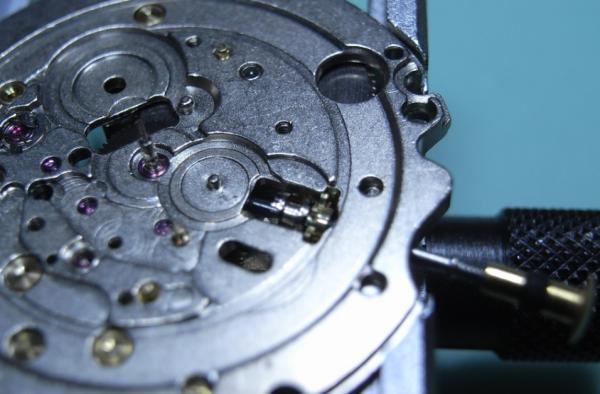
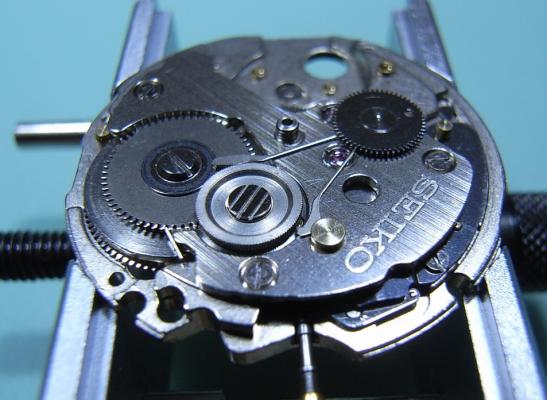
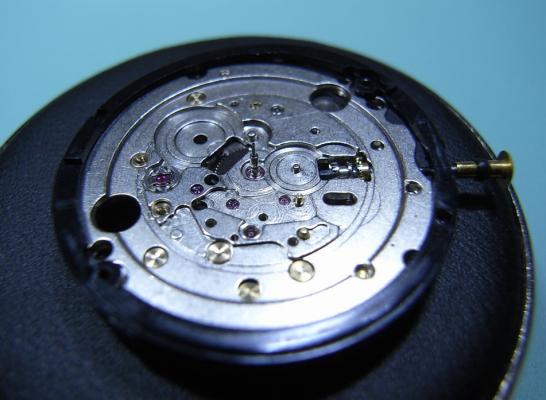
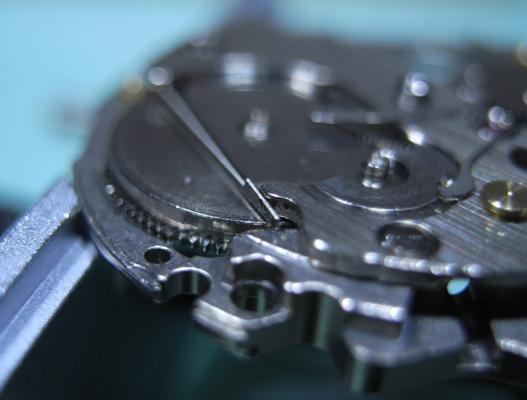
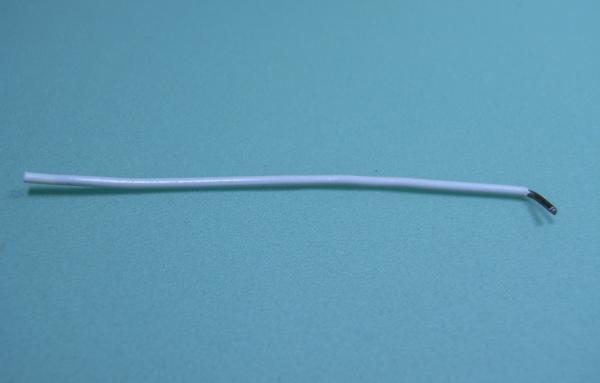
Assembly This is a very easy watch to re-assemble. In fact I'd recommend the 7S26A to be the first Japanese Movement to practice on, because it's so beautifully and logically laid out. The only downside to this watch is that you have to buy one special tool from Seiko, the S-921 Philipshead Screwdriver; but it's not very expensive and once you've got it, you have it for life. For oiling information and a parts list for your movement, please download the copy of the Tech Guide below: 7S26A_7S36A.pdf Drop in the Clutch and Intermediate Wheel. Then push the Stem into the shaft. Fit the Centre Wheel, and attach the Bridge. Then drop in the Mainspring Barrel, and refit the Click. Refit the Keyless Work, and I have to say the Seiko design is a HUGE improvement over the AS and ST Keyless Work design ... no fiddly Setting Lever screw to worry about ... Love it!! Once the Keyless Work is installed, install the Third Wheel, then the Fourth Wheel, and lastly the Escape Wheel. Next, fit the Barrel/Train Wheel Bridge. PLEASE NOTE: Be careful to check that you have pulled the Click out from underneath the bridge BEFORE you begin locating the pivots of the train. Once all the pivots on the train are in place, and you're happy it's all moving freely, use the three longest screws to secure it down. Install the Ratchet Wheel, and the Second Reduction Wheel. Two things to note here: Firstly, when screwing down the Ratchet Wheel, make sure to clear the leg of the Pawl Lever, as it has a nasty habit of wanting to slip under the screw. Secondly, as you screw down the Second Reduction Wheel (Reverse thread remember!), keep adjusting the Pawl Lever arms so they rest on either side of the wheel. Next, fit the Pallet and Pallet Cock, and then the Balance. This particular movement has the DiaShock system for the IncaBloc. To remove and refit these for oiling I suggest you make a simple tool from a plastic covered Paperclip. Straighten out the Paperclip and cut it to a comfortable length to work with in your fingers. Then pull the plastic cover down about 4-5mm ... as pictured below: Use this like you would Pegwood, over the top of the DiaShock Spring, as you use your tweezers to turn the spring and remove/refit it. The plastic cover will conform to the shape of the spring and hold it securely without damaging it ... It's works a treat! PS. Sorry I couldn't get a photo of me removing/refitting the spring with this little tool; but I don't have someone here to do the camera work, and only have two arms. Next, flip the movement over, and reinstall the plastic Location Ring. Install the Cannon Pinion, the black plastic Date Driving Wheel, then the Motion Work, and lastly the Calendar Ring. Install the Date Jumper Plate Install the white plastic Date-date Corrector Wheel and it's Intermediate Wheel Note: Remember from disassembly that the black plastic Date Driving Wheel needs to lip over this plate. Install the Date Dial Guard Place the Day Disk on the shaft and push the Circlip down the shaft after that and push down until it locates in the Circlip Groove. Lastly, reinstall the Oscillating Weight, Dial, and Hands. Case back up and your done! I really enjoyed working on this movement, and I thank my Heavenly Father for the skills and ability to be able to do this type of work ... amen!


 1 point