Leaderboard


Popular Content
Showing content with the highest reputation on 07/13/16 in all areas
-
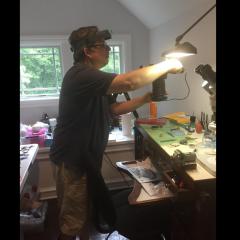
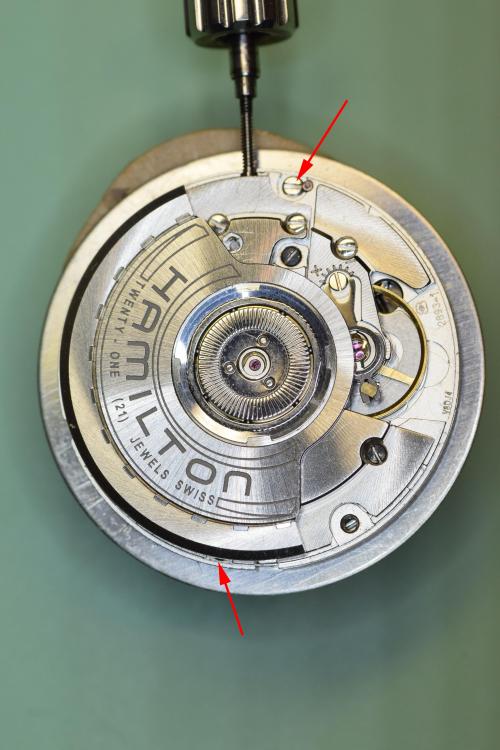
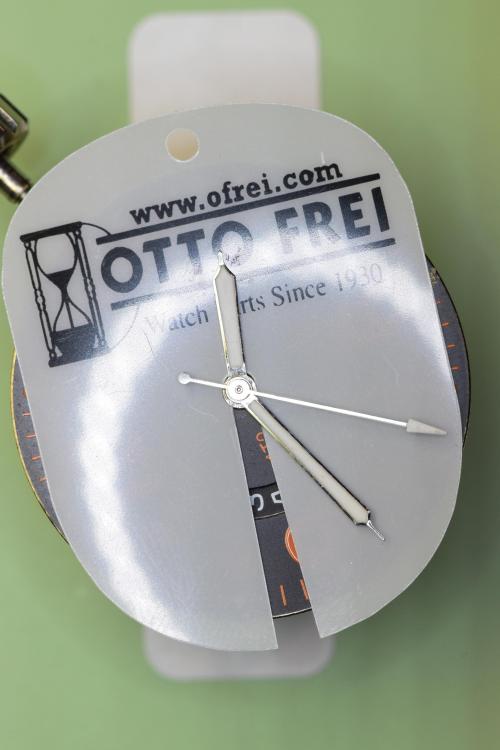
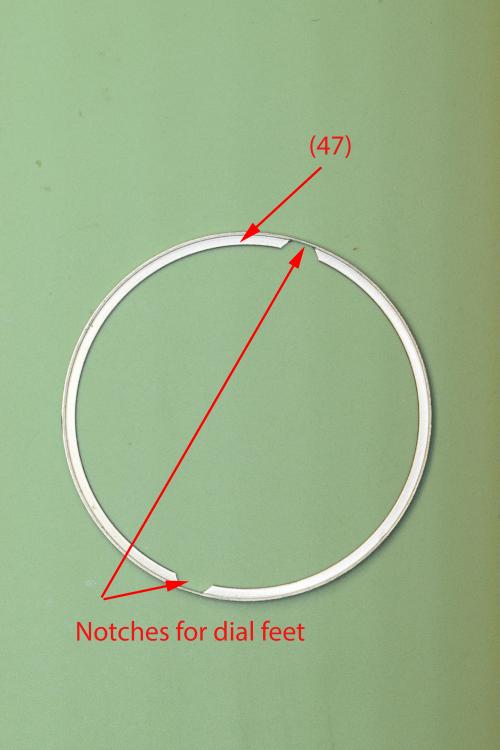
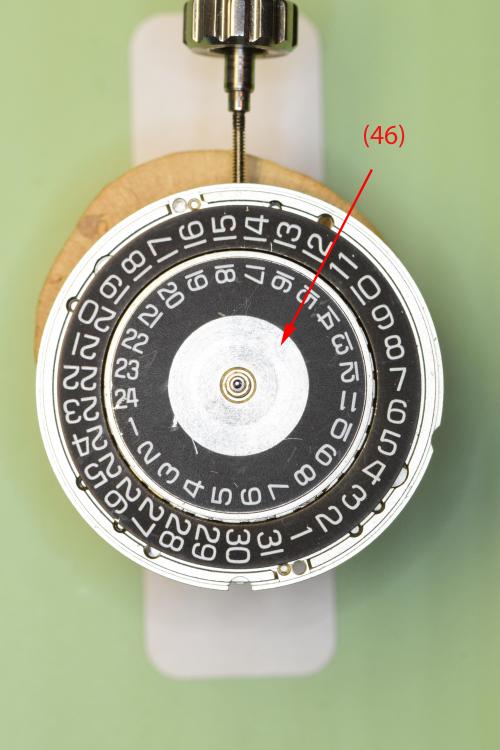
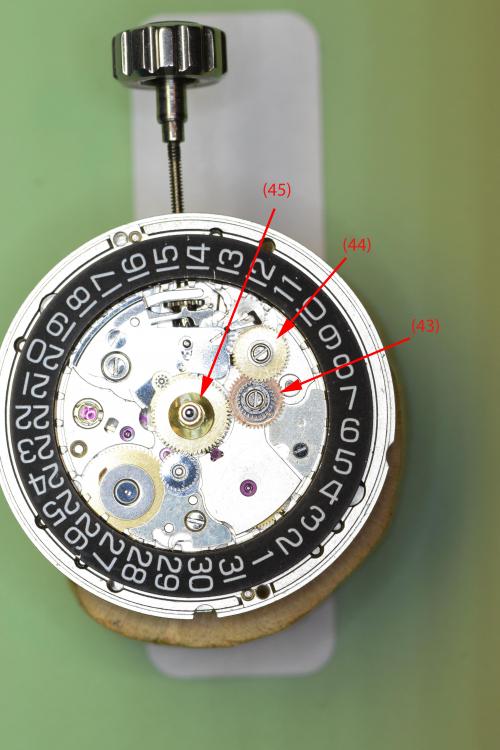
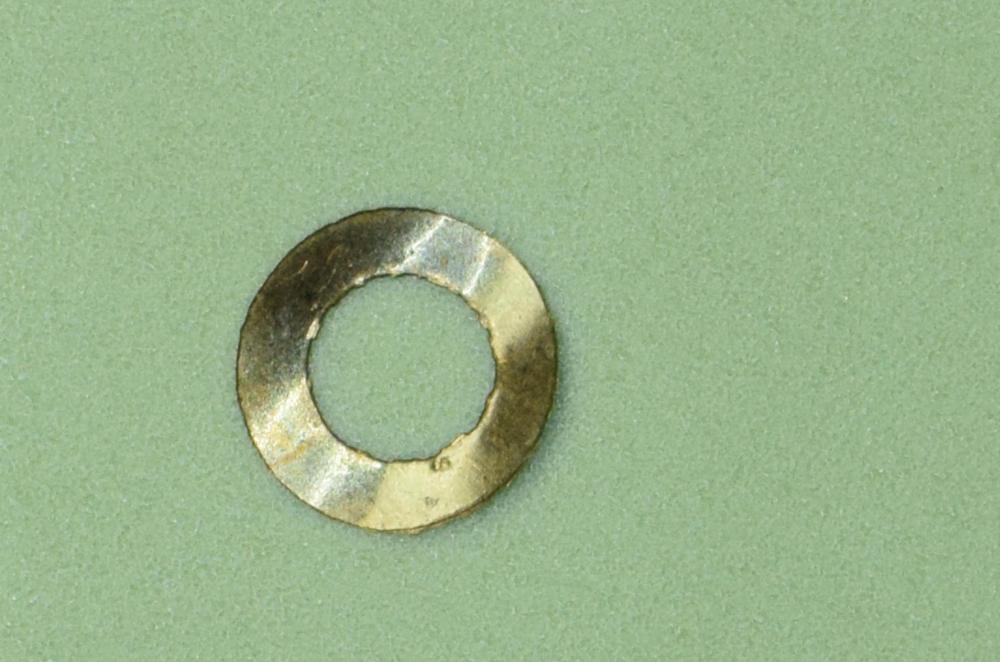
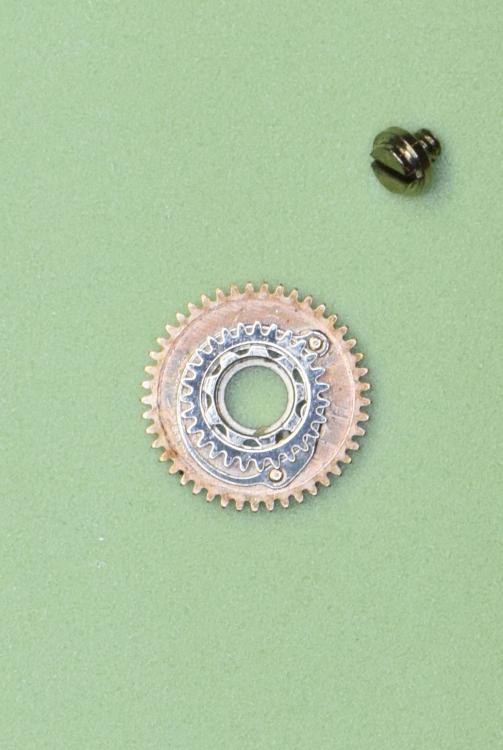
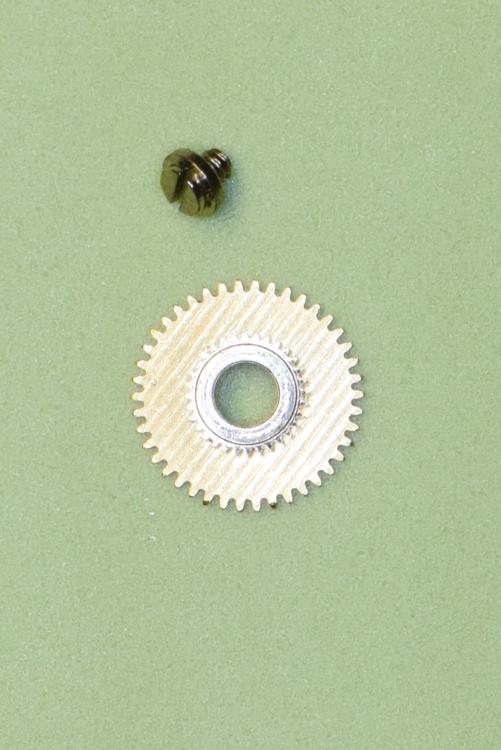
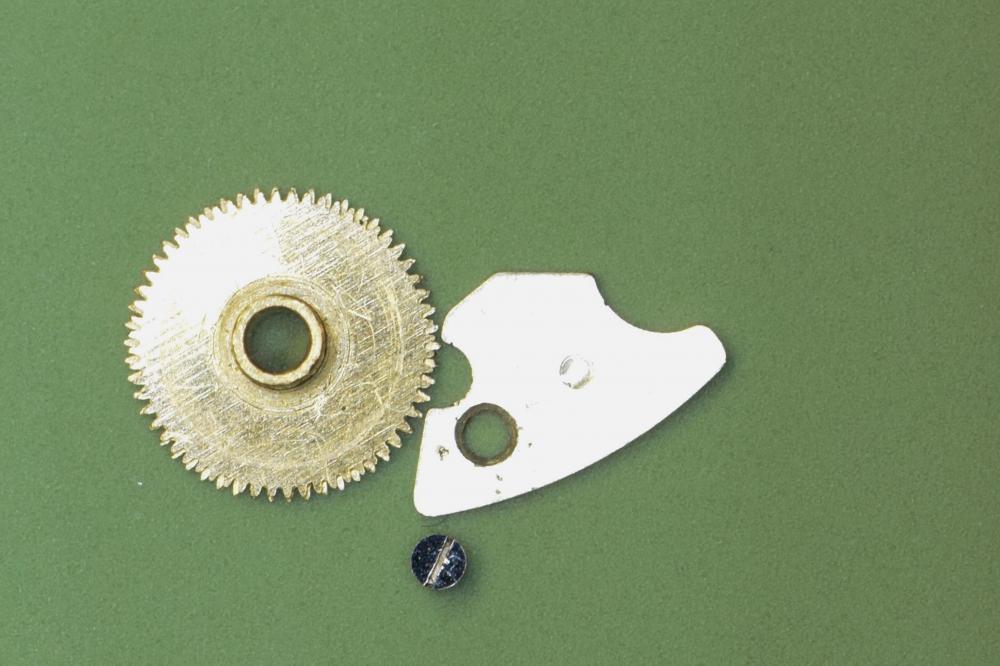
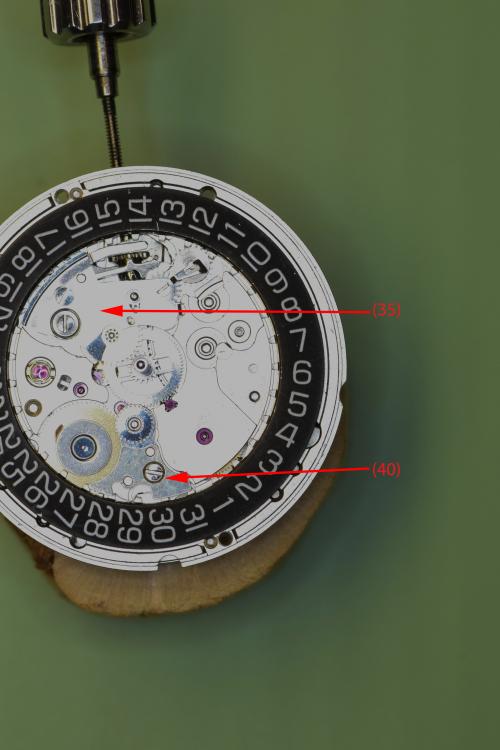
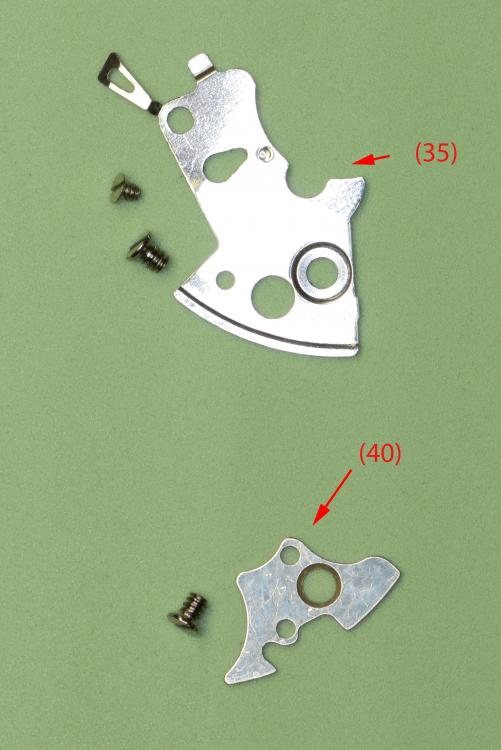
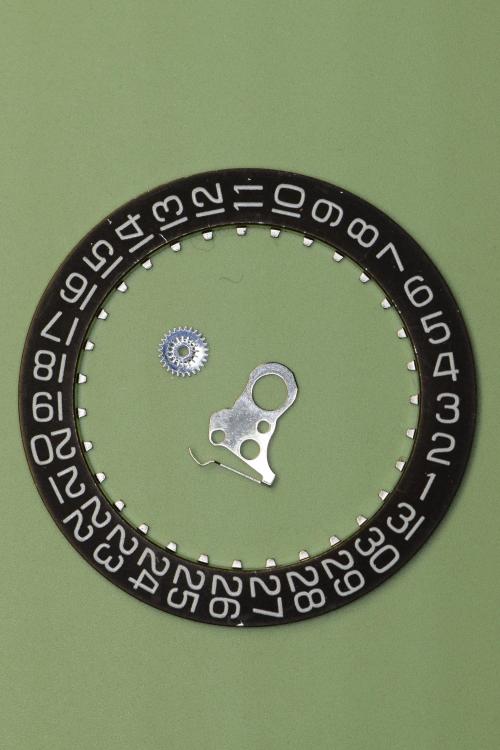
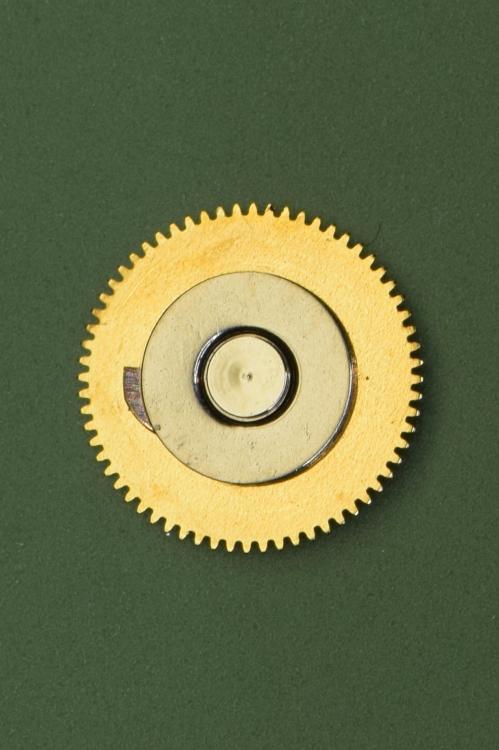
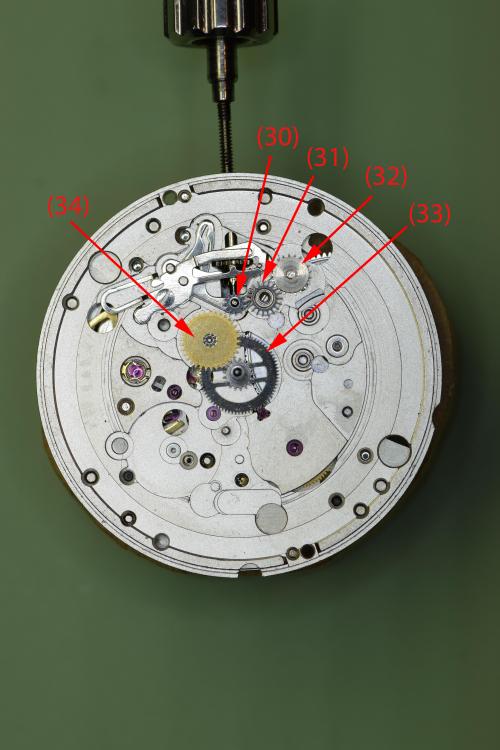
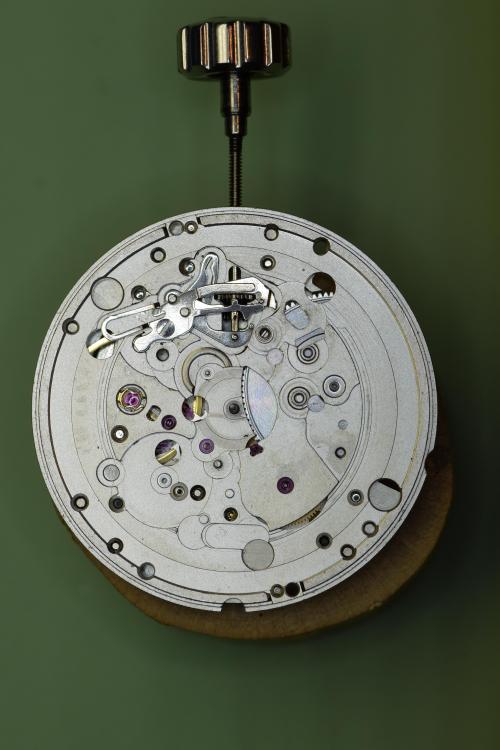
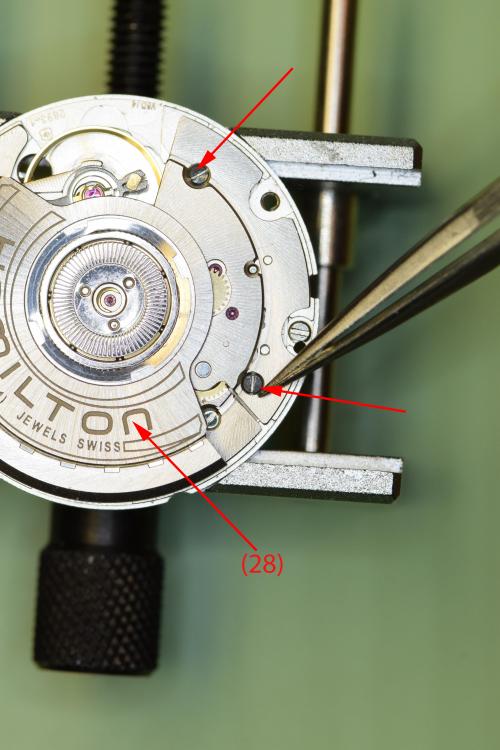
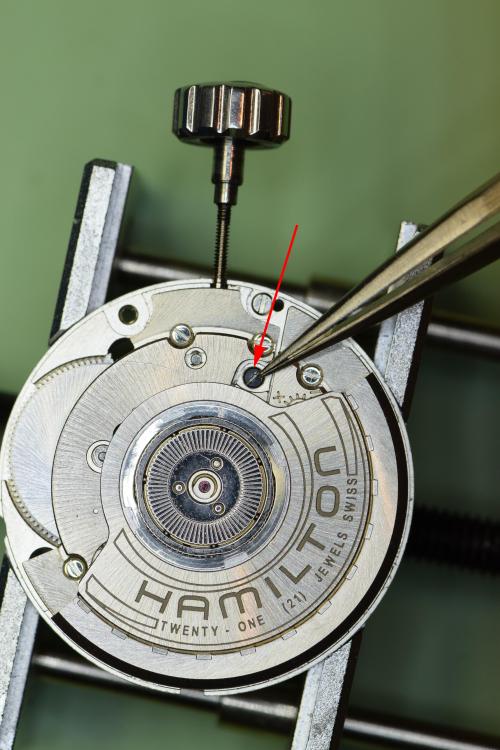
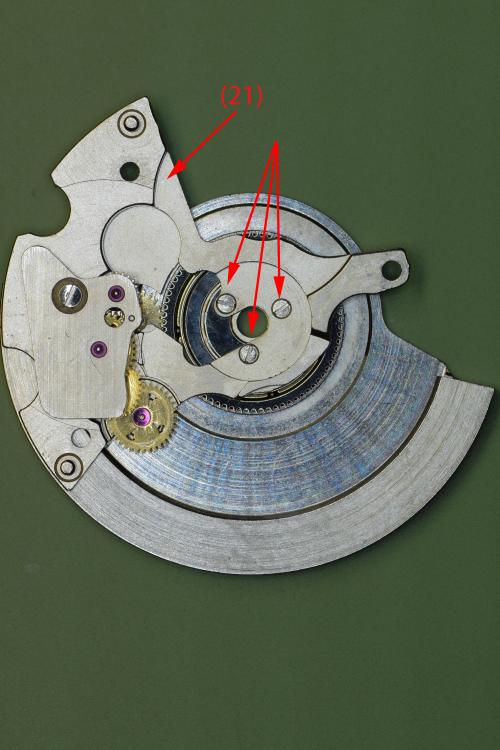
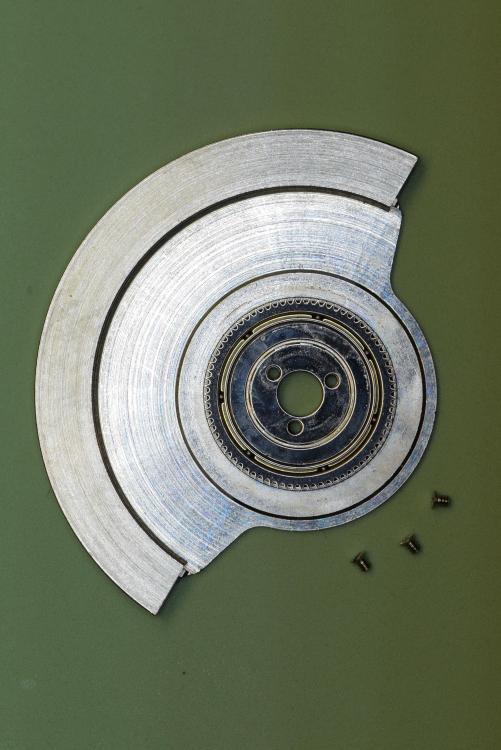
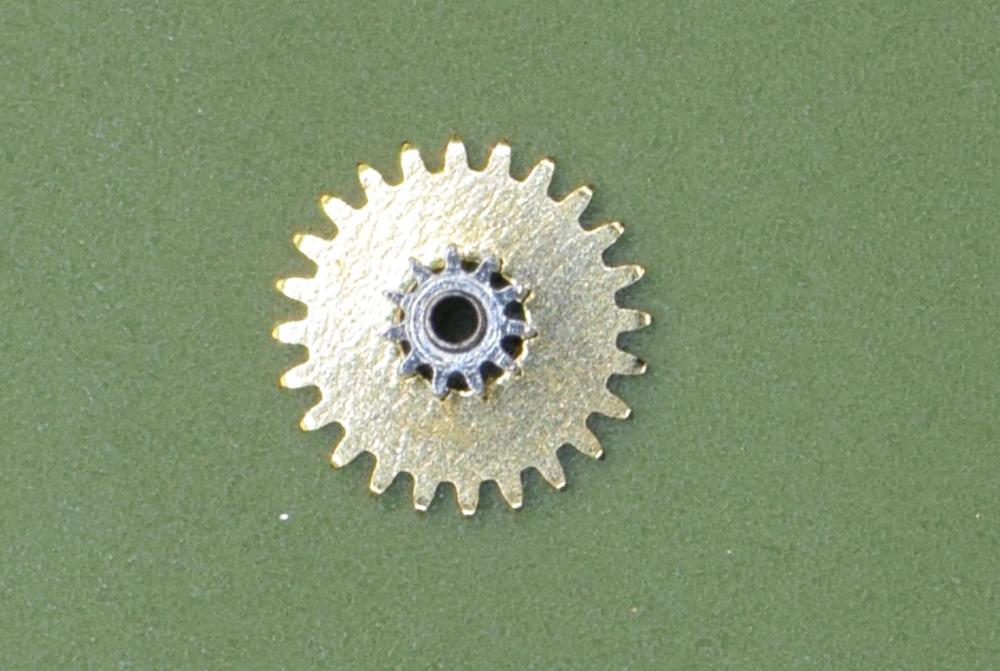
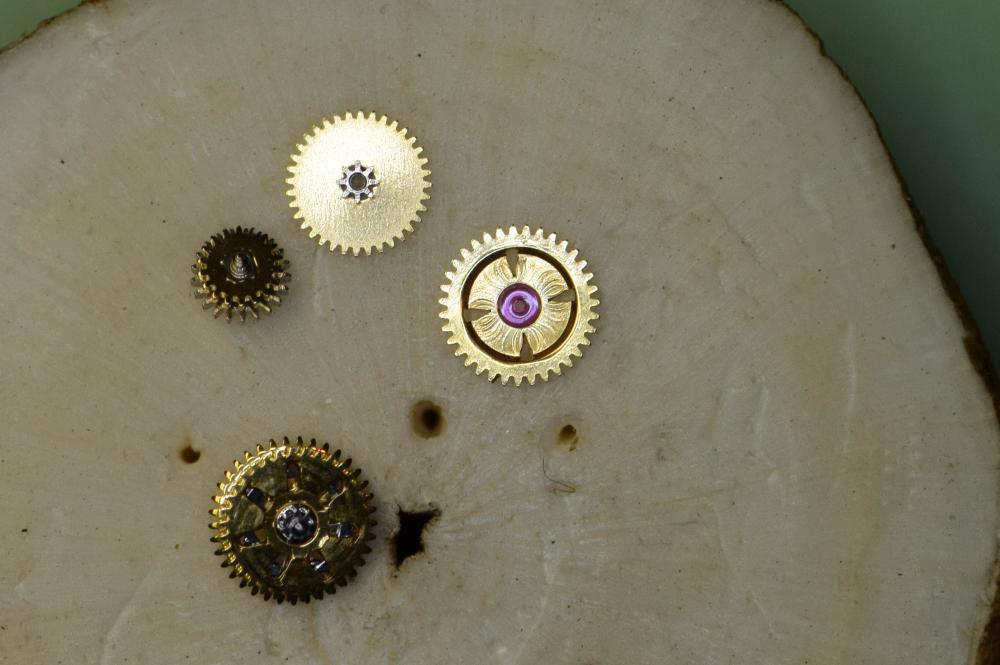
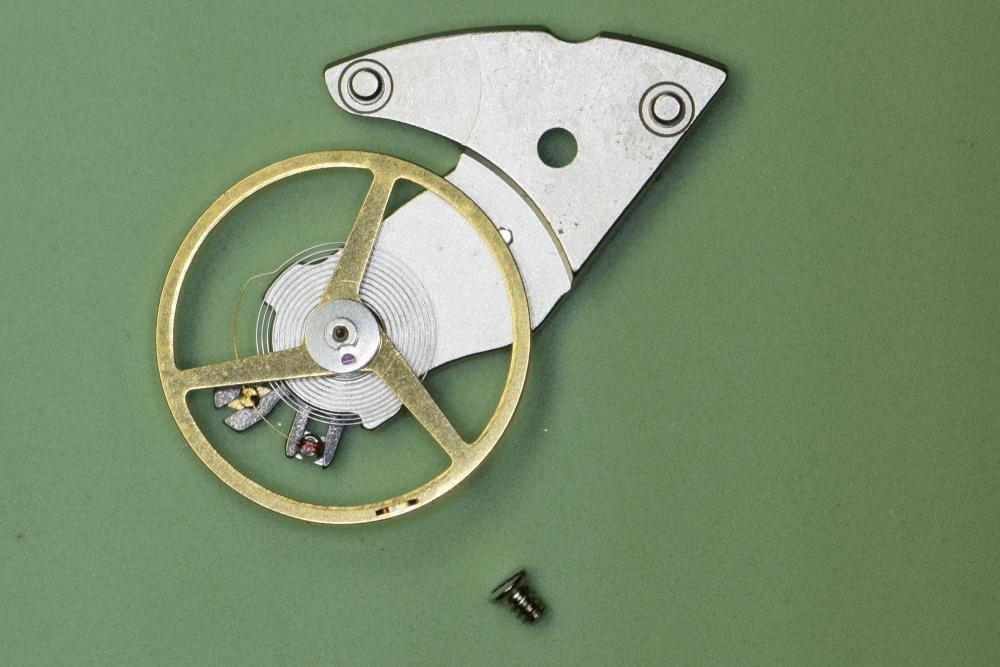
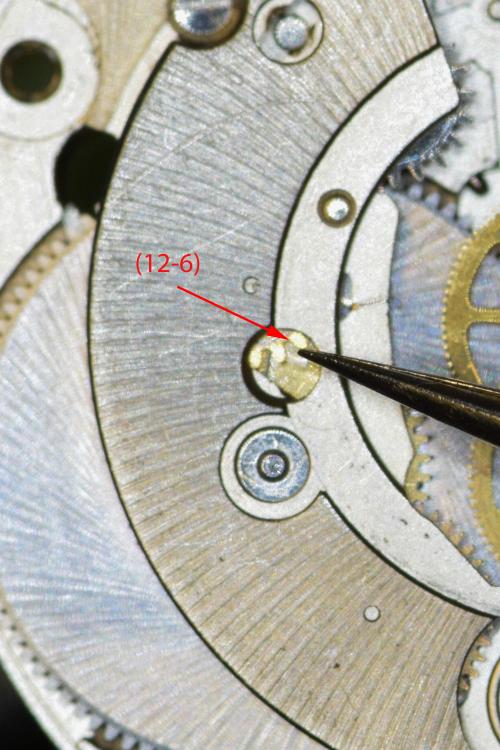
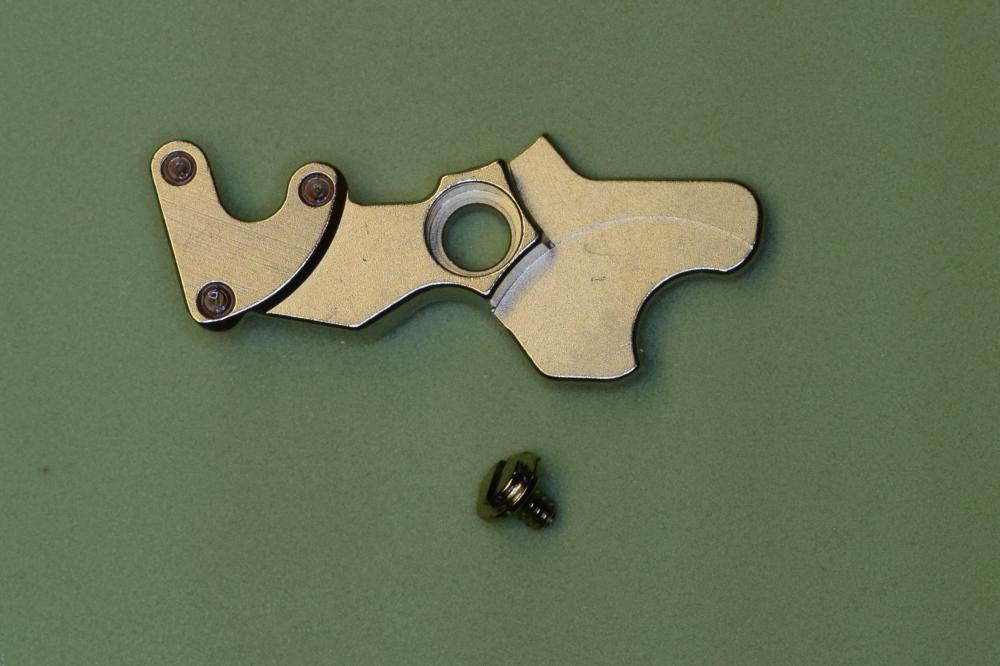
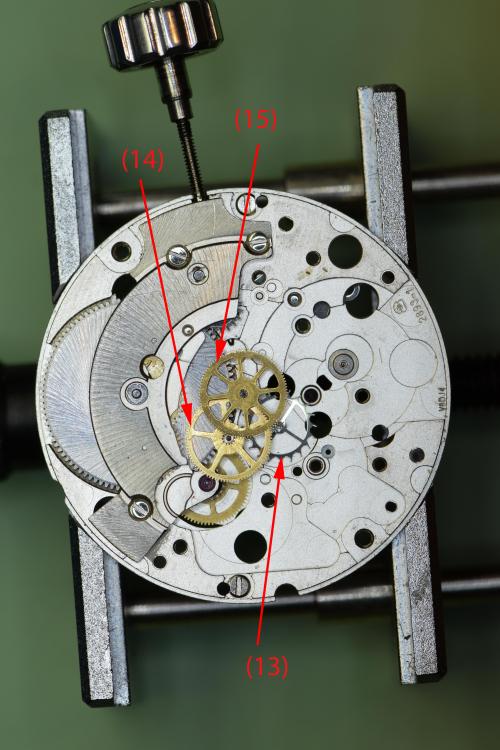
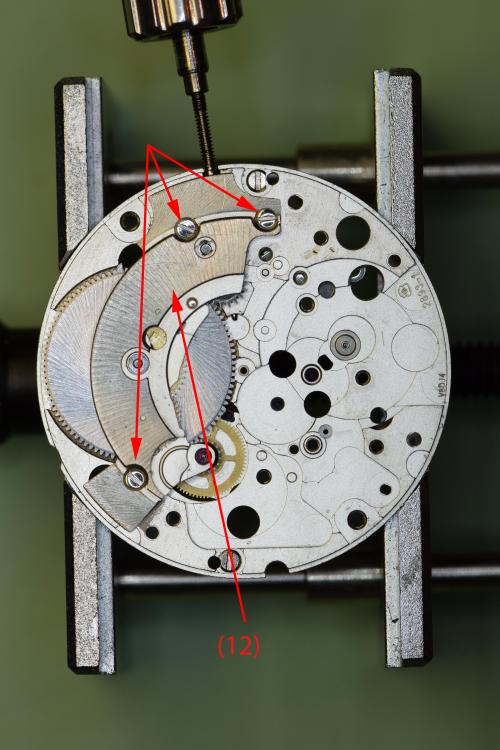
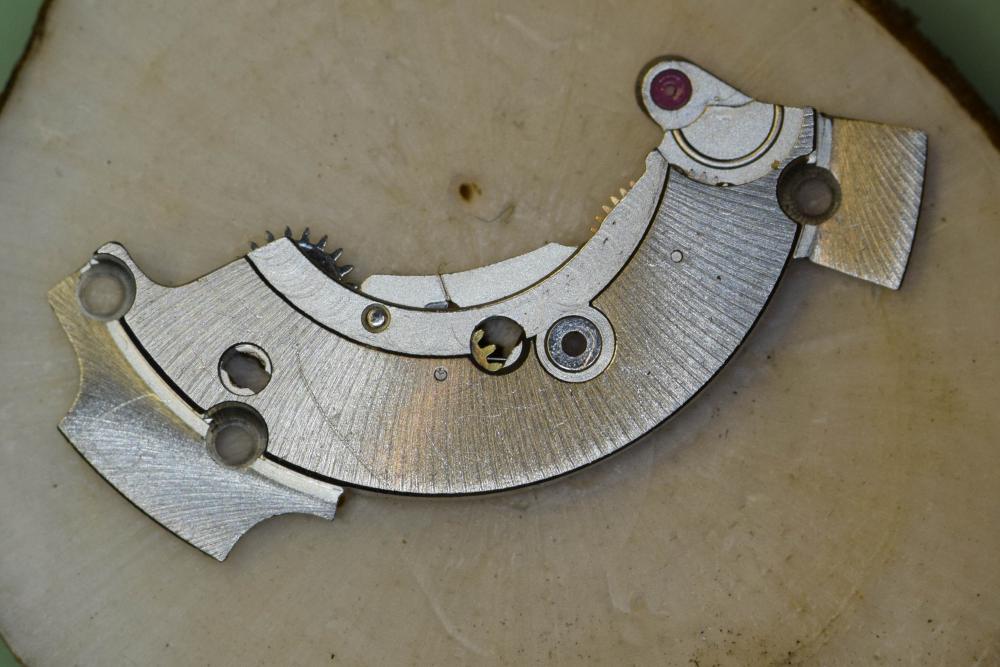
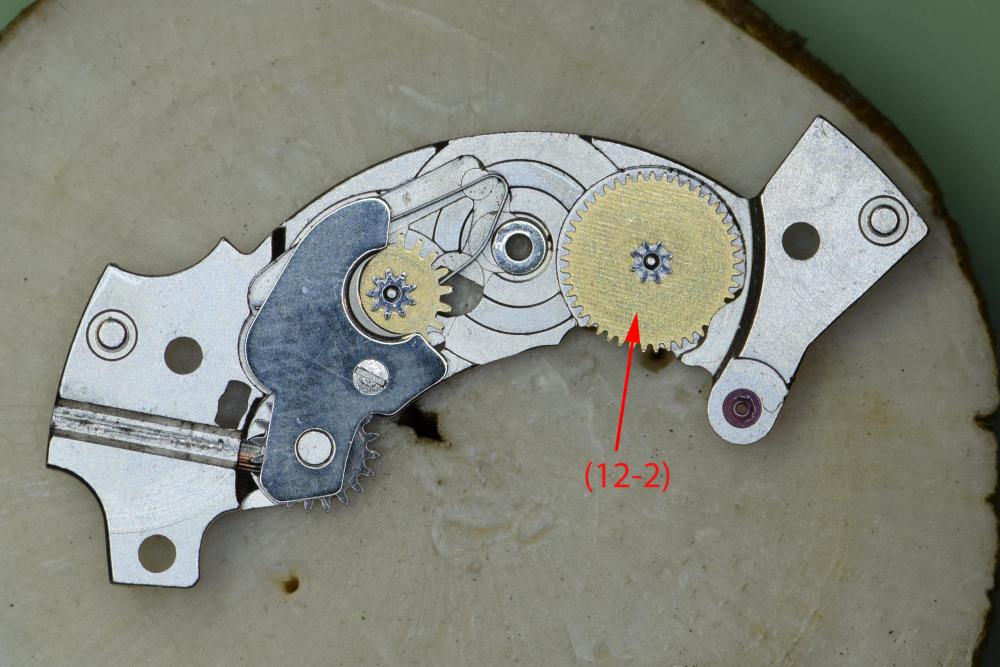
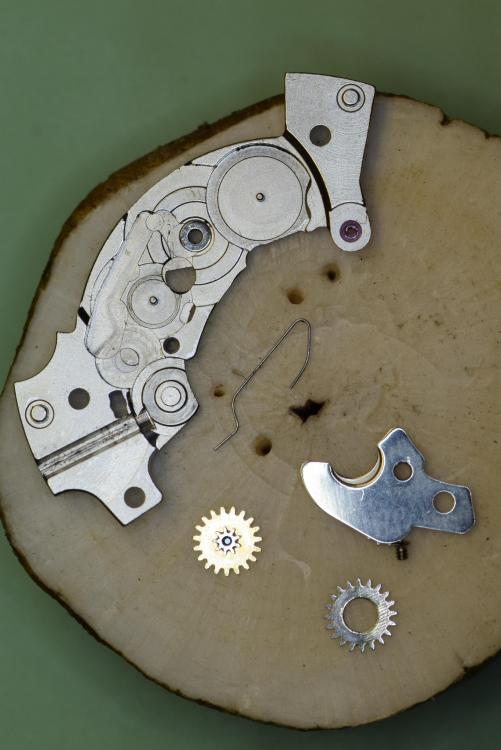
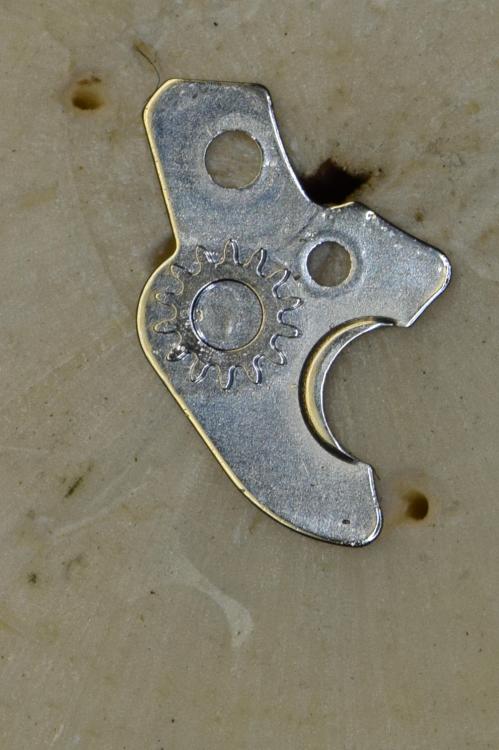
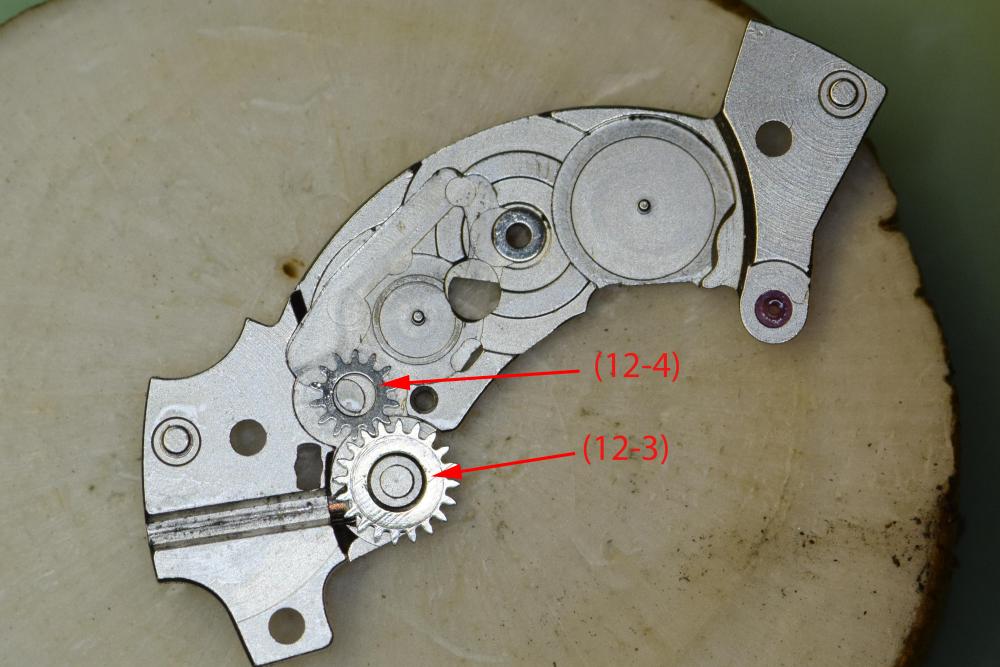
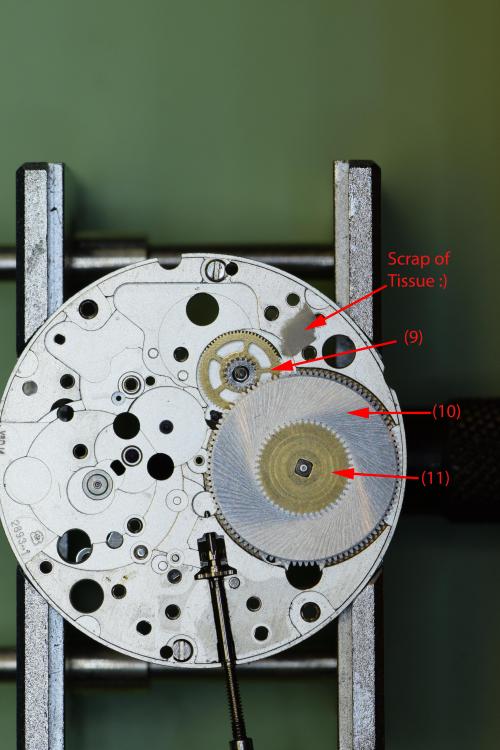
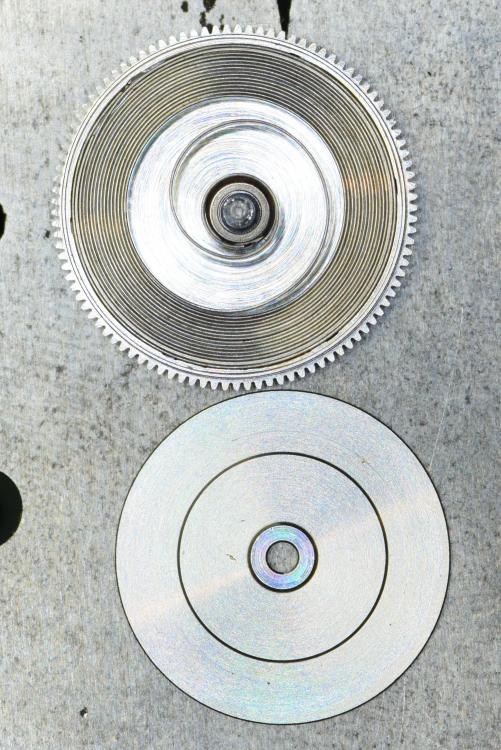
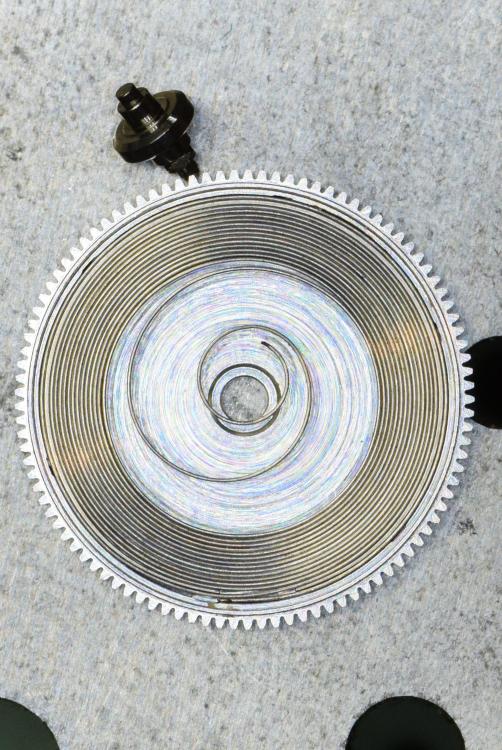
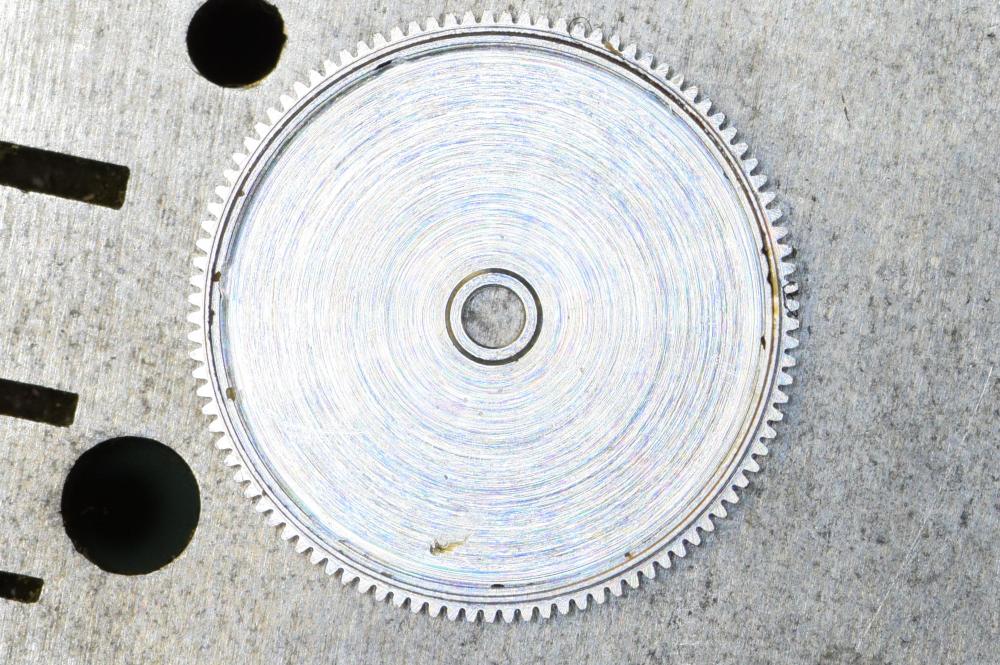
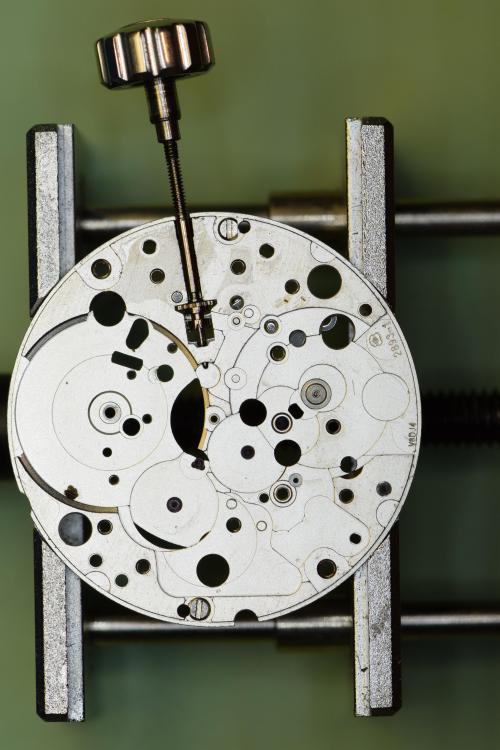
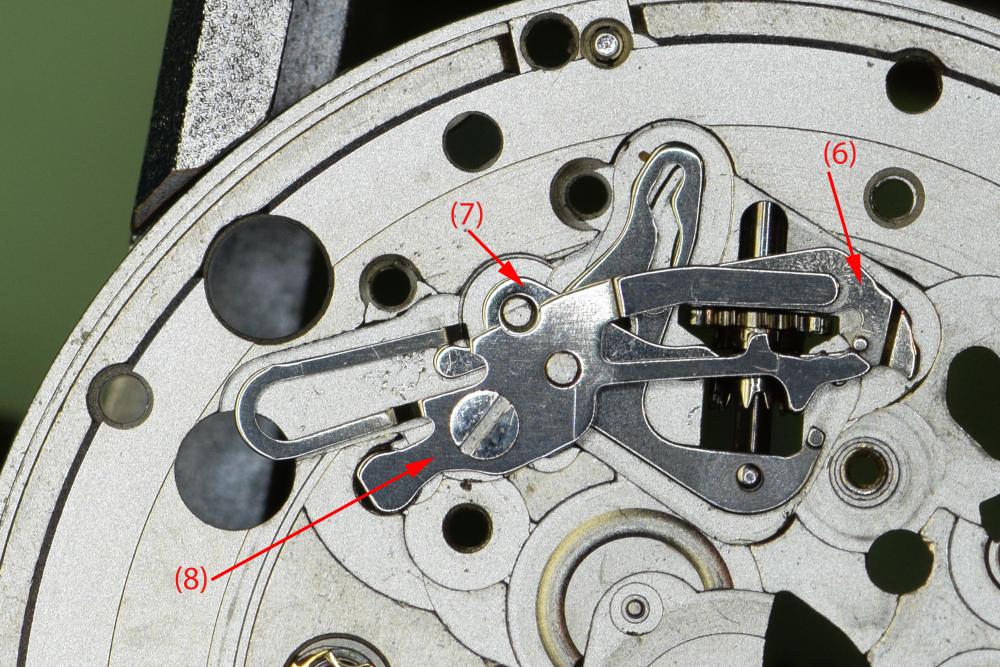
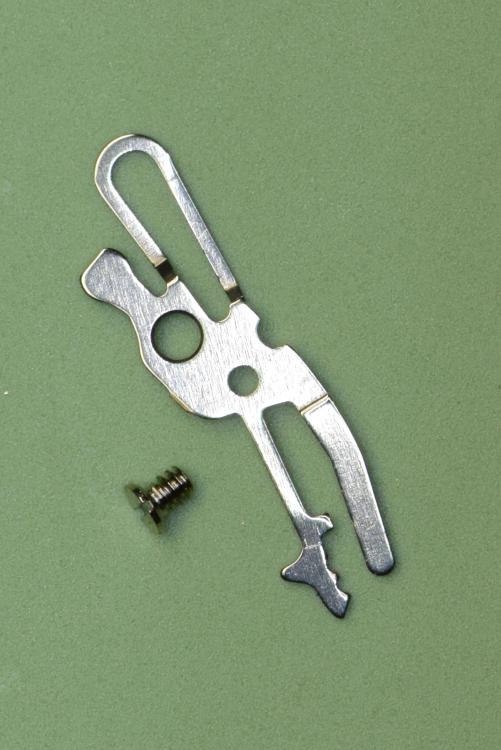
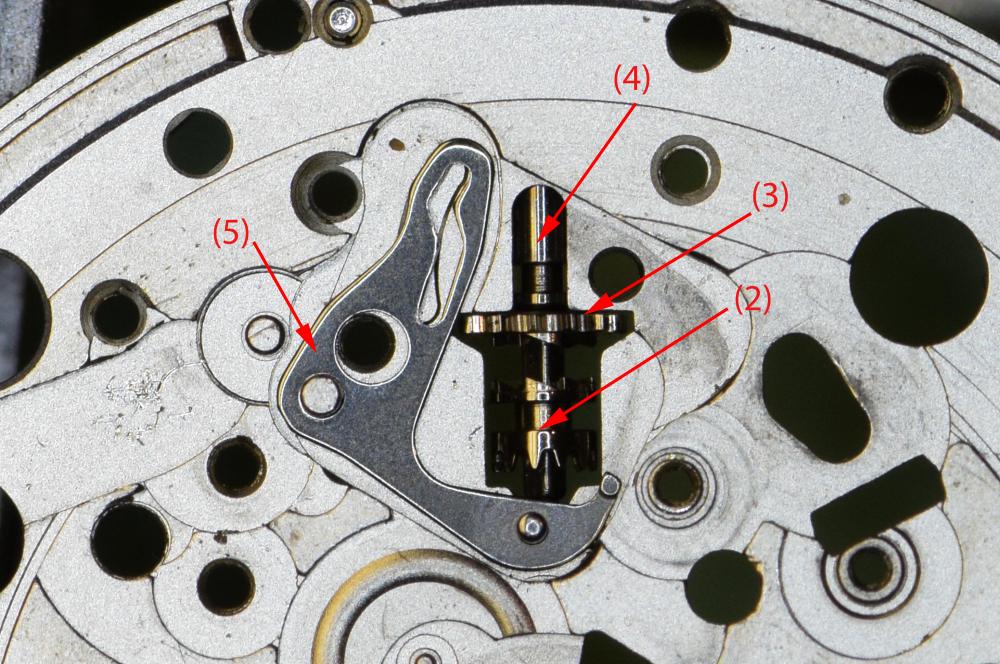
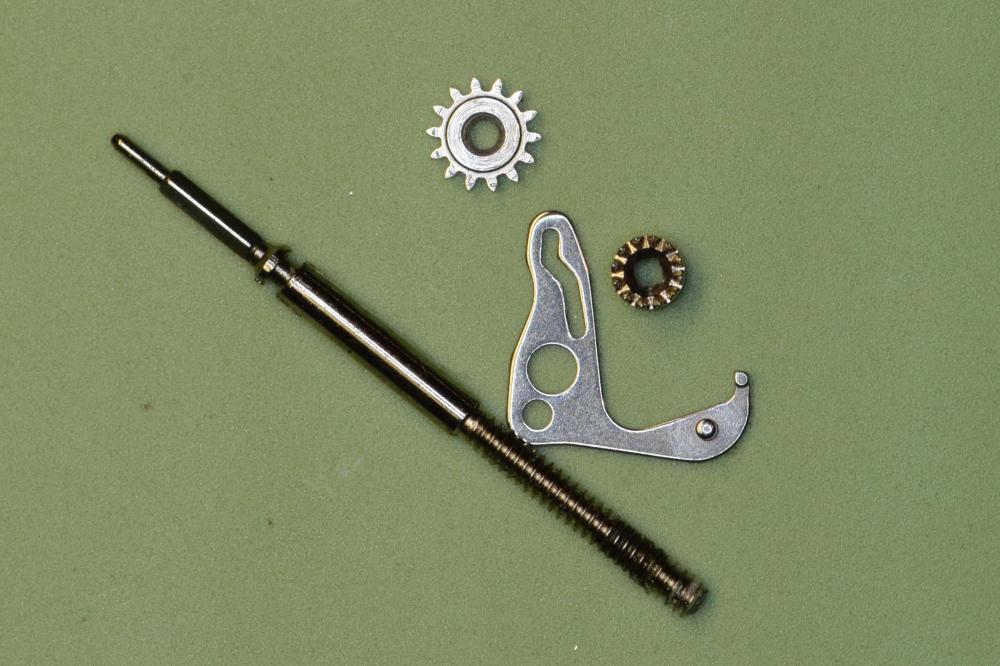
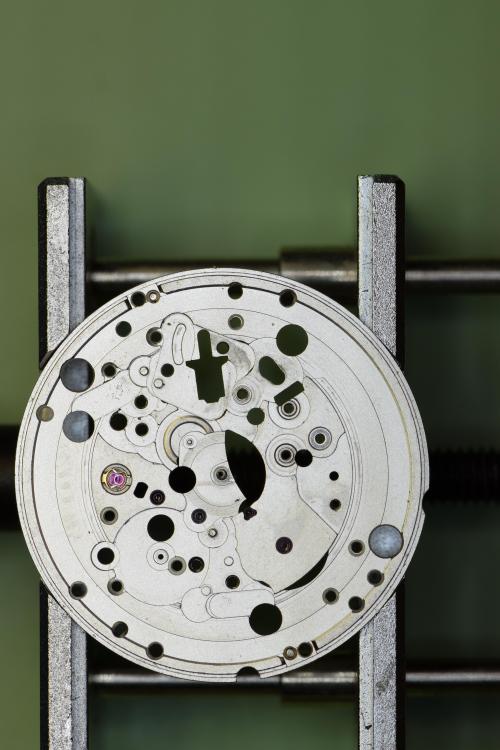
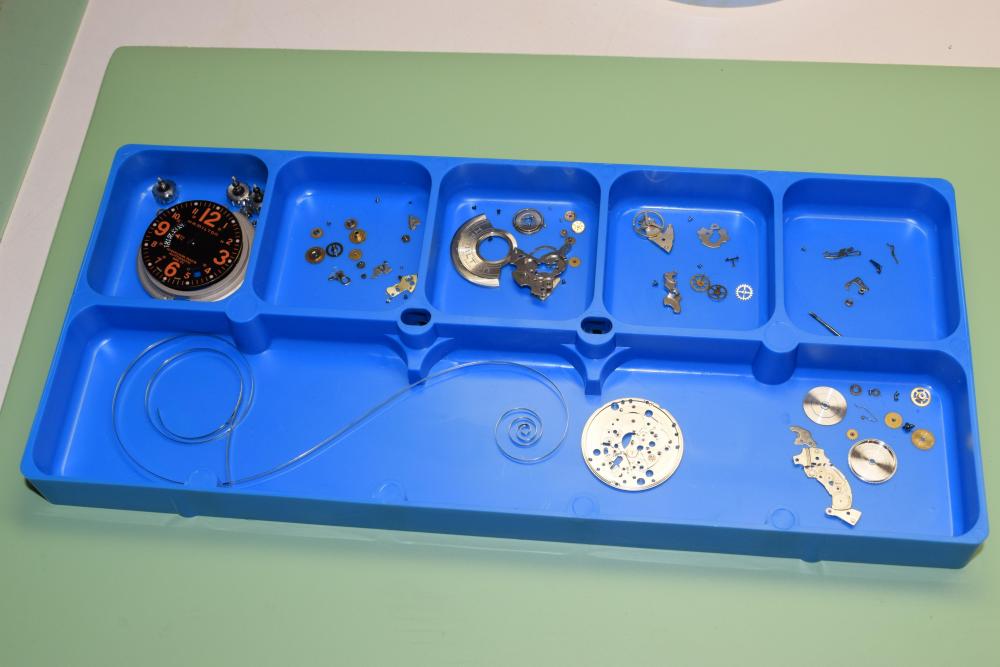
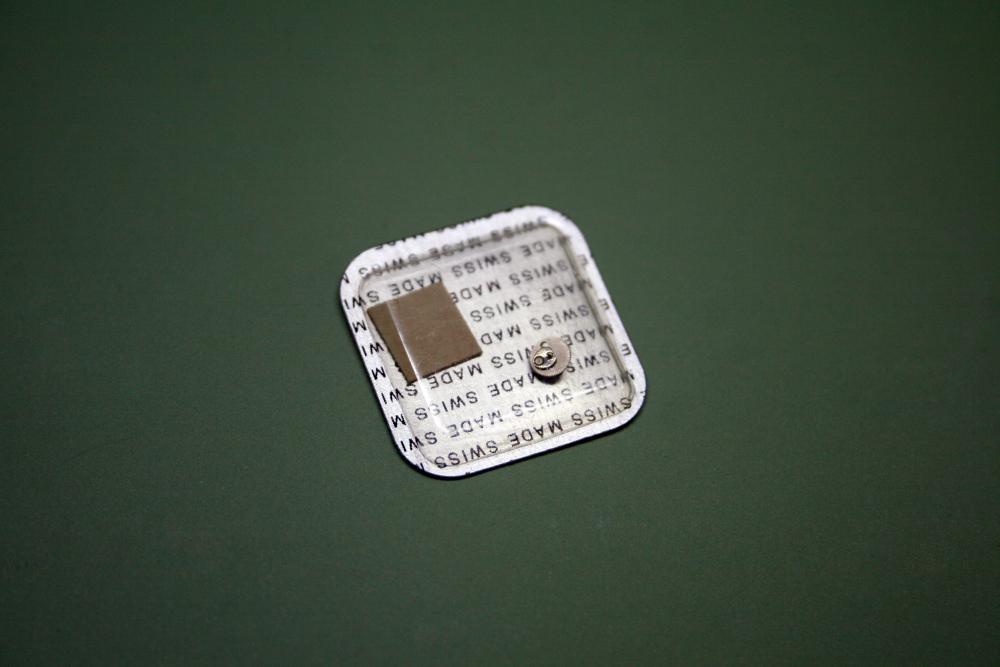
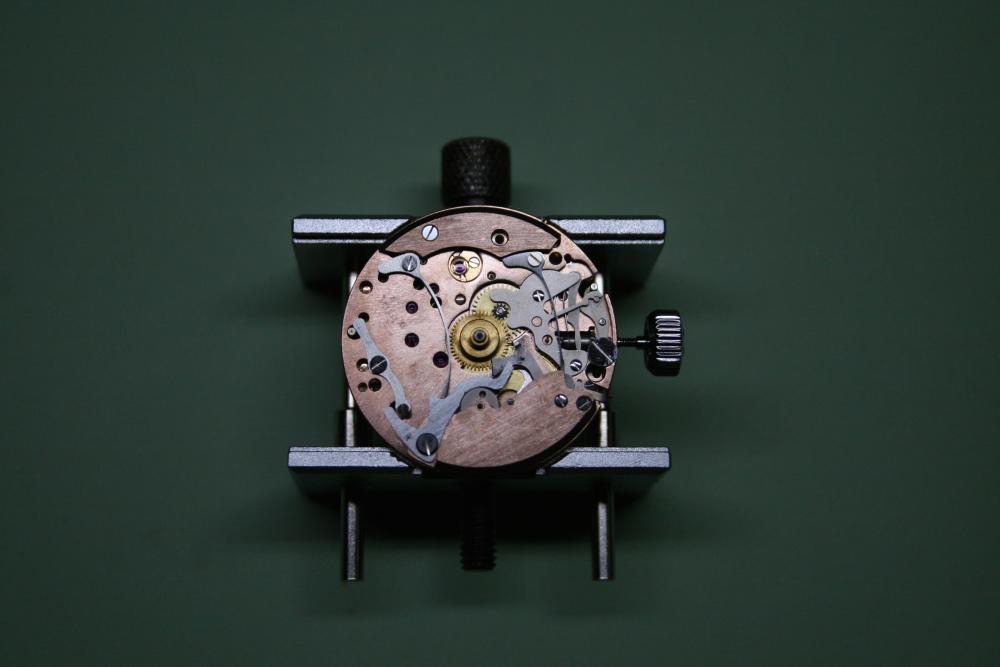
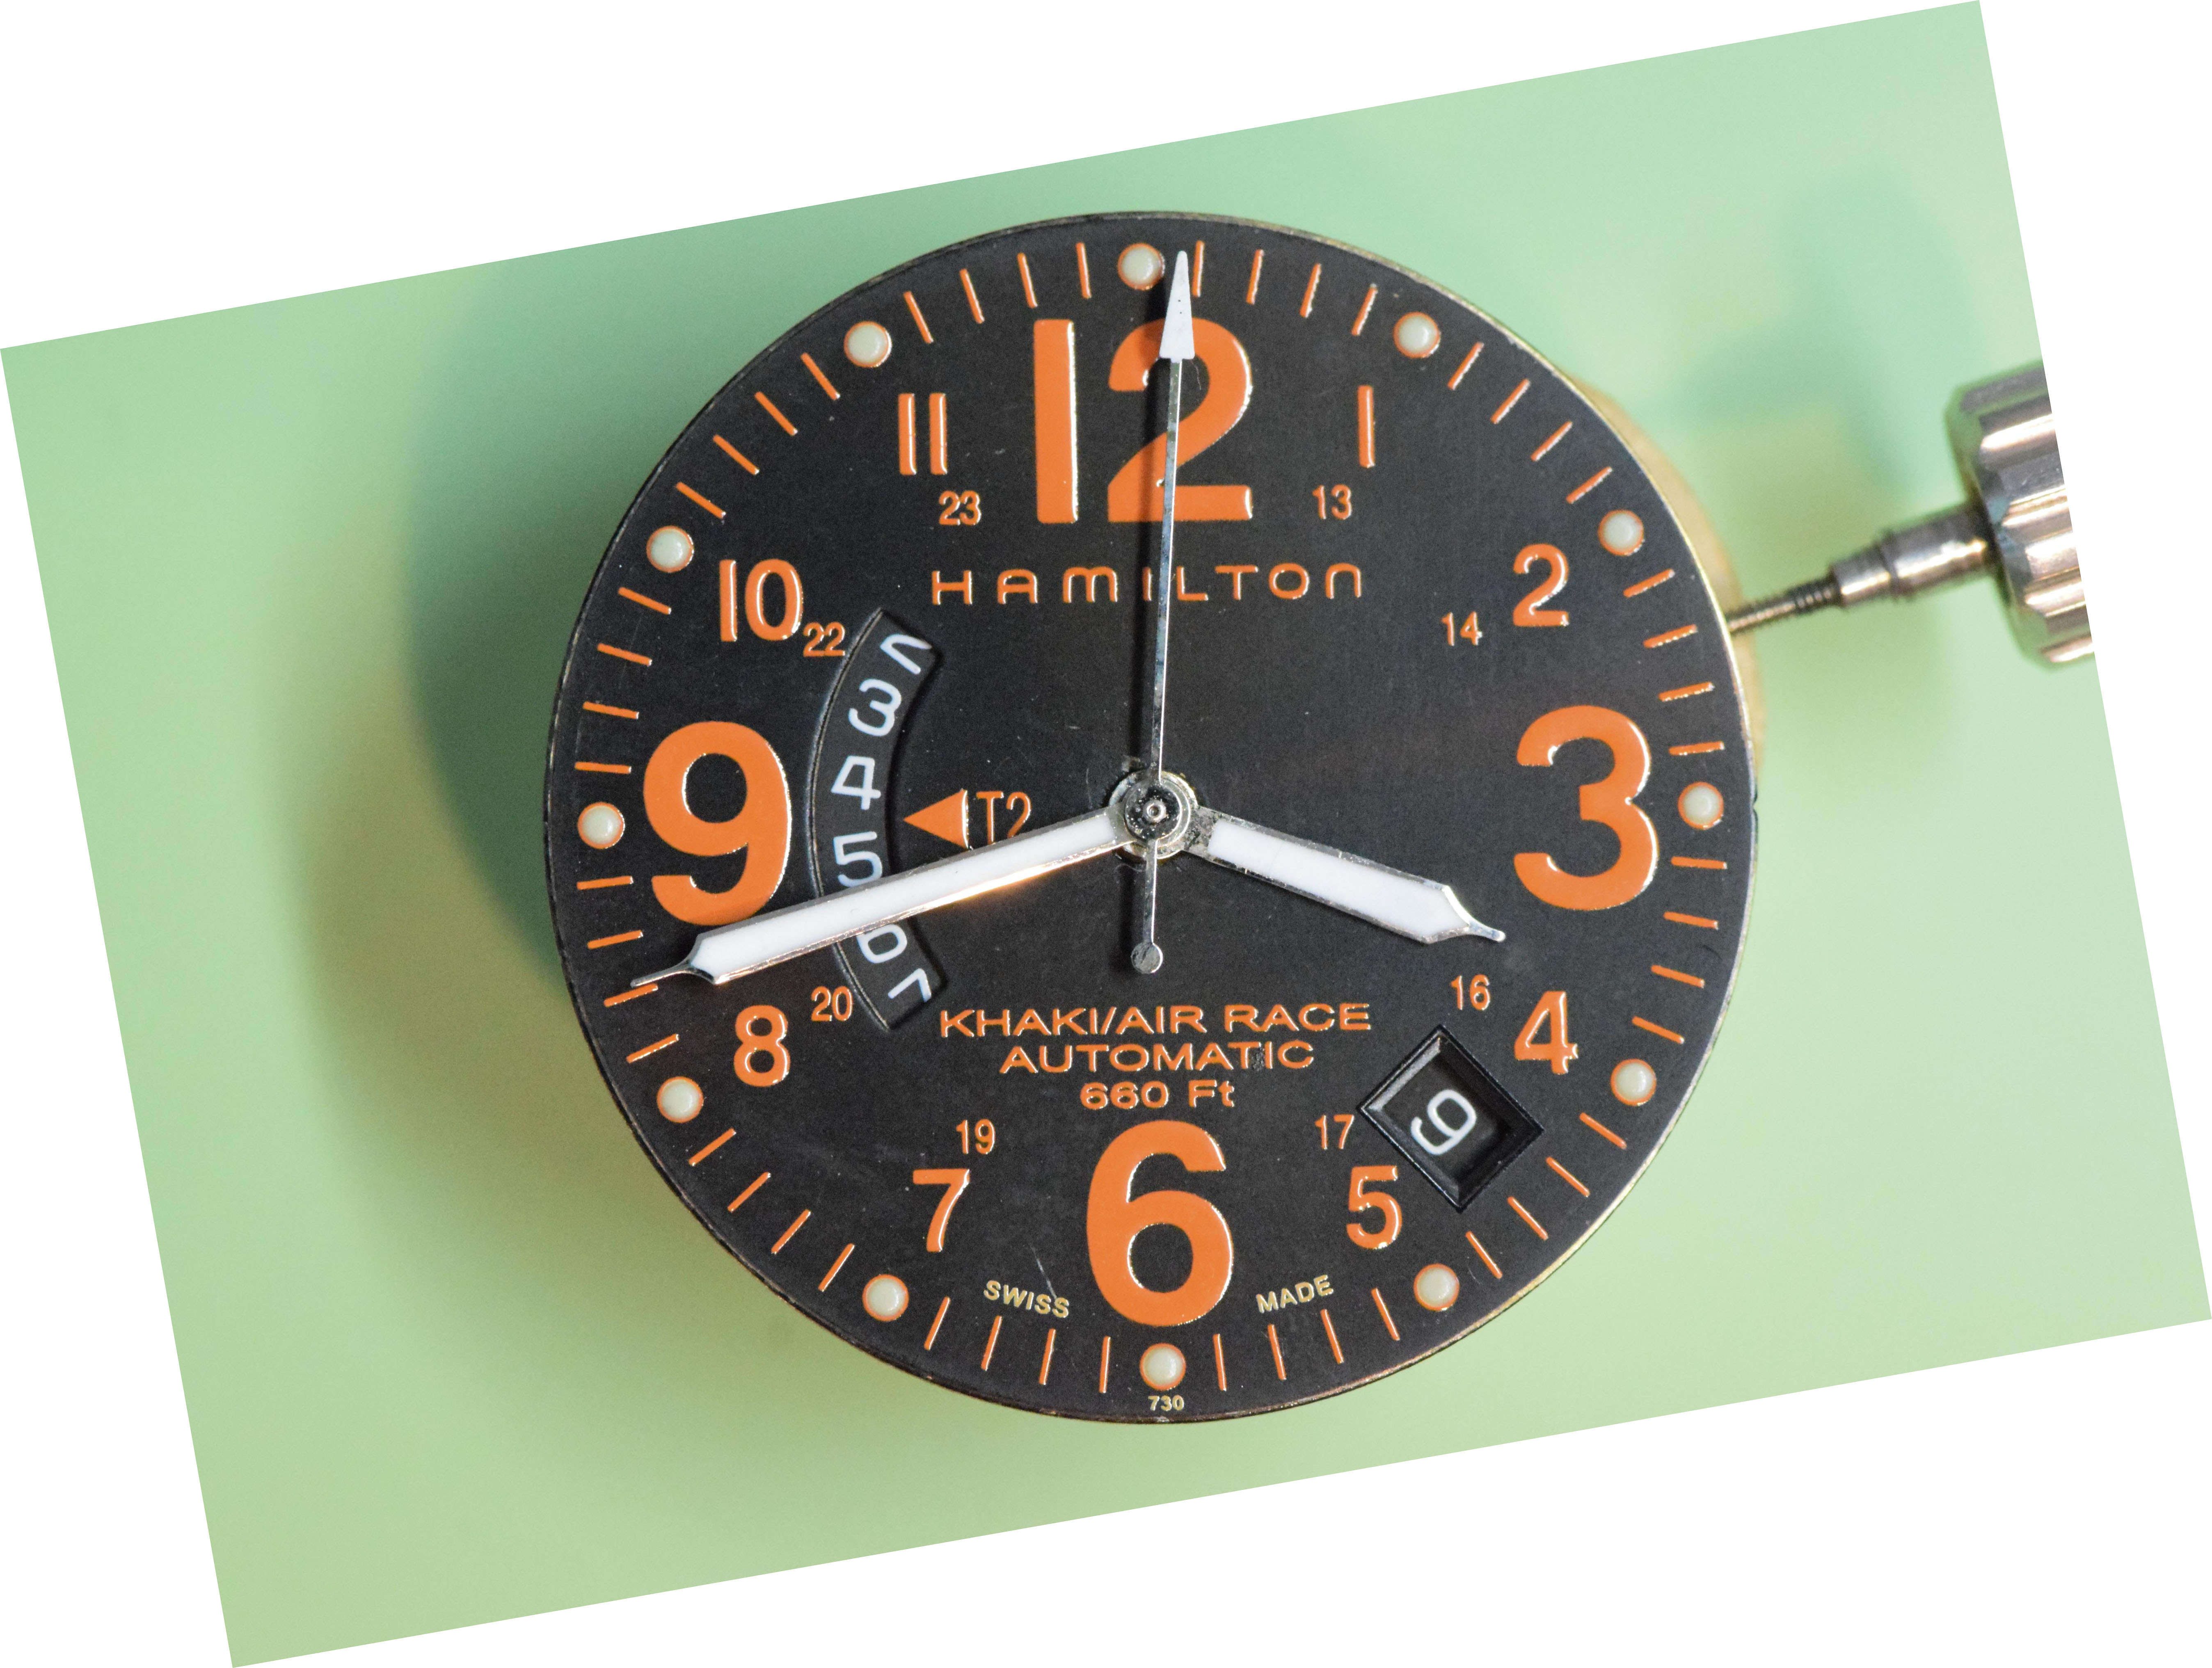
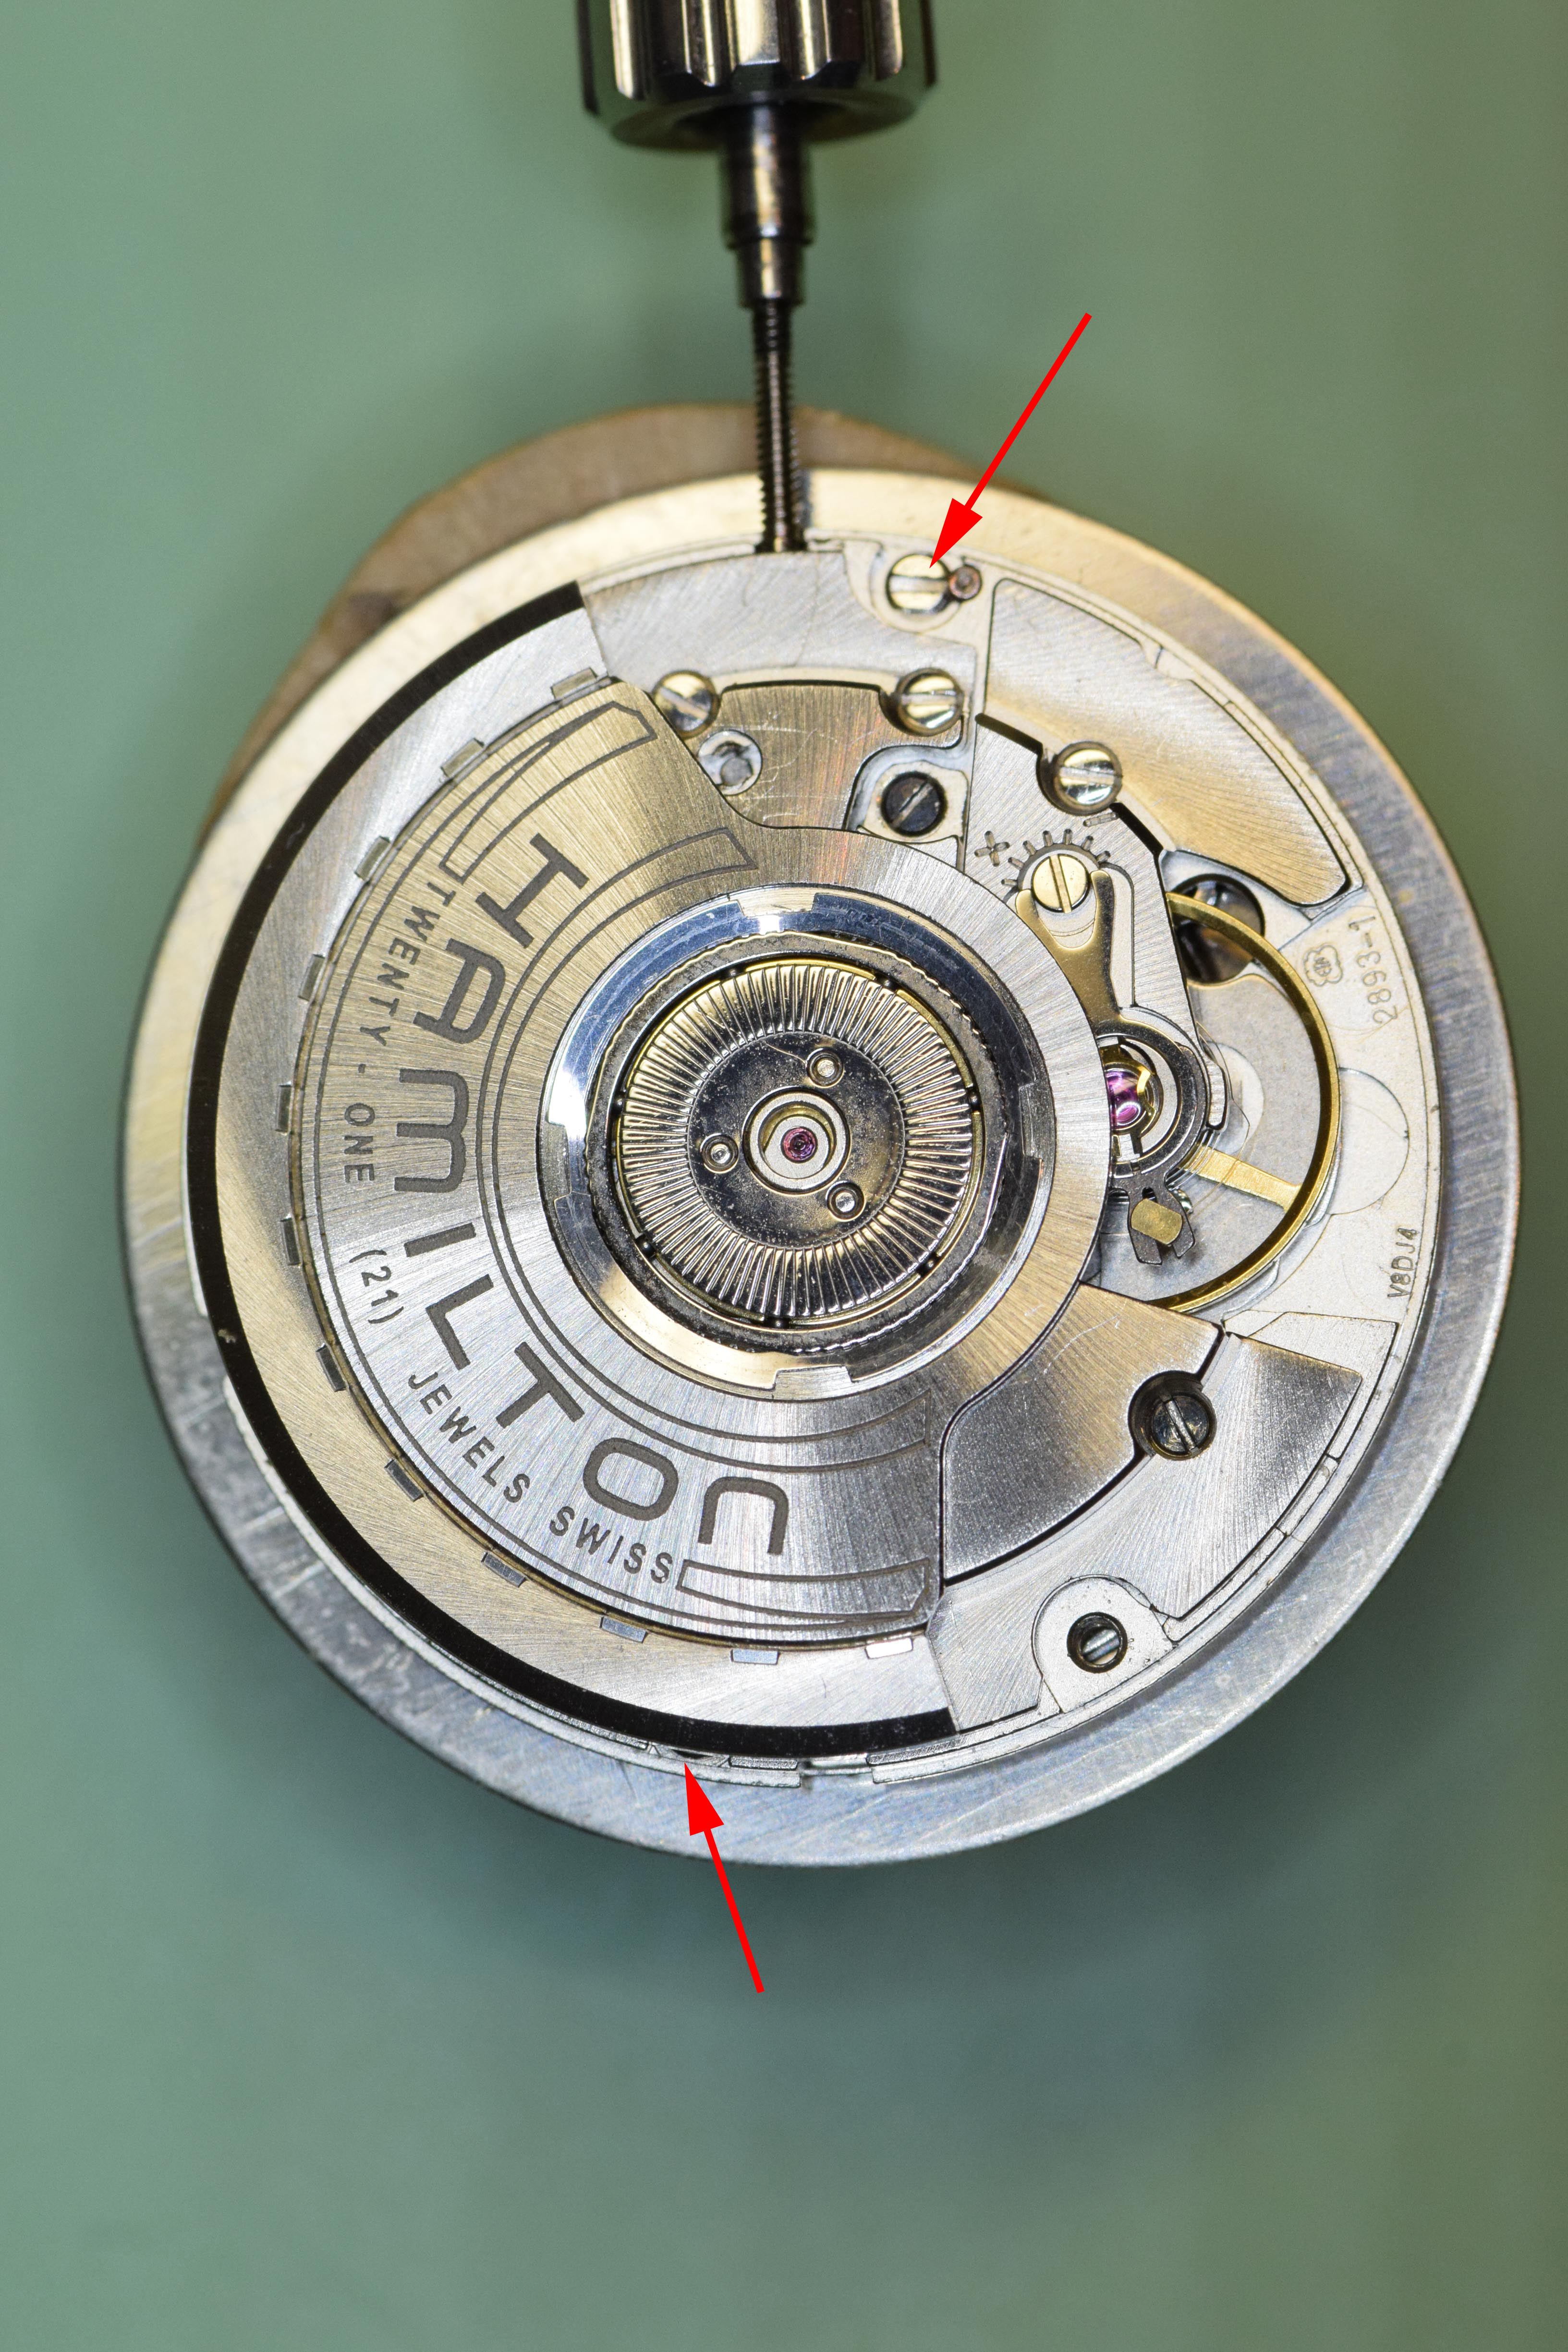
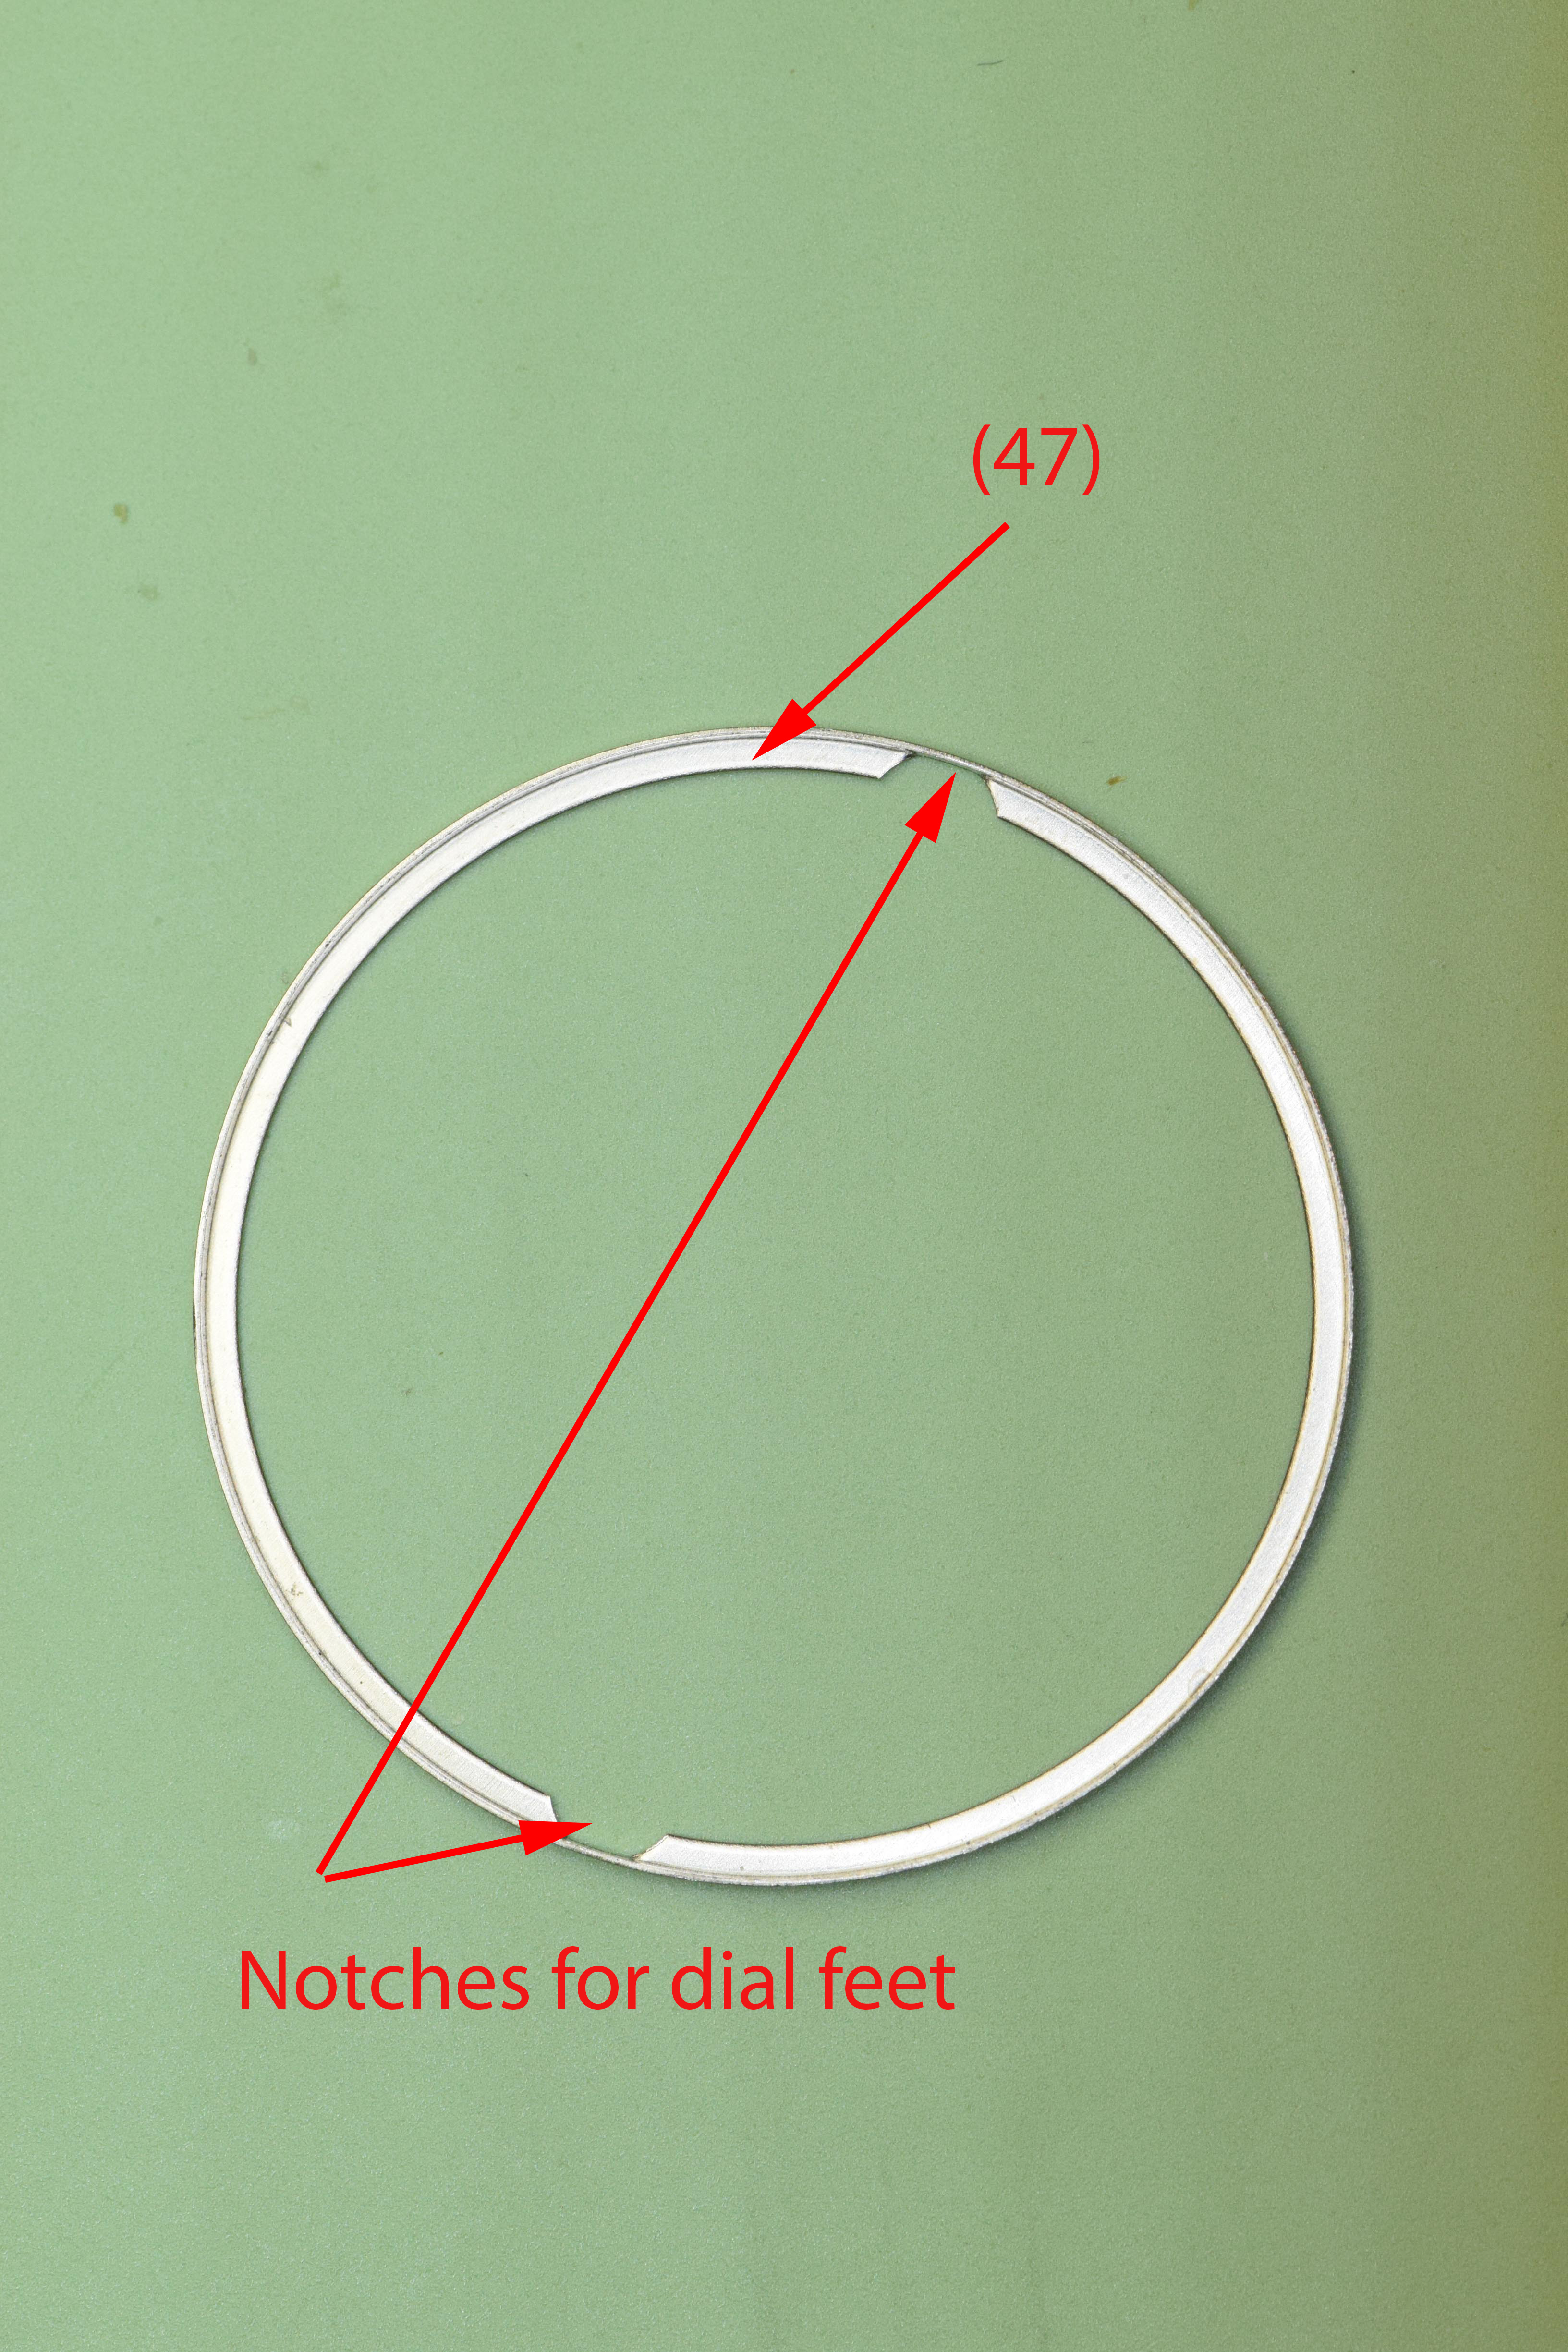
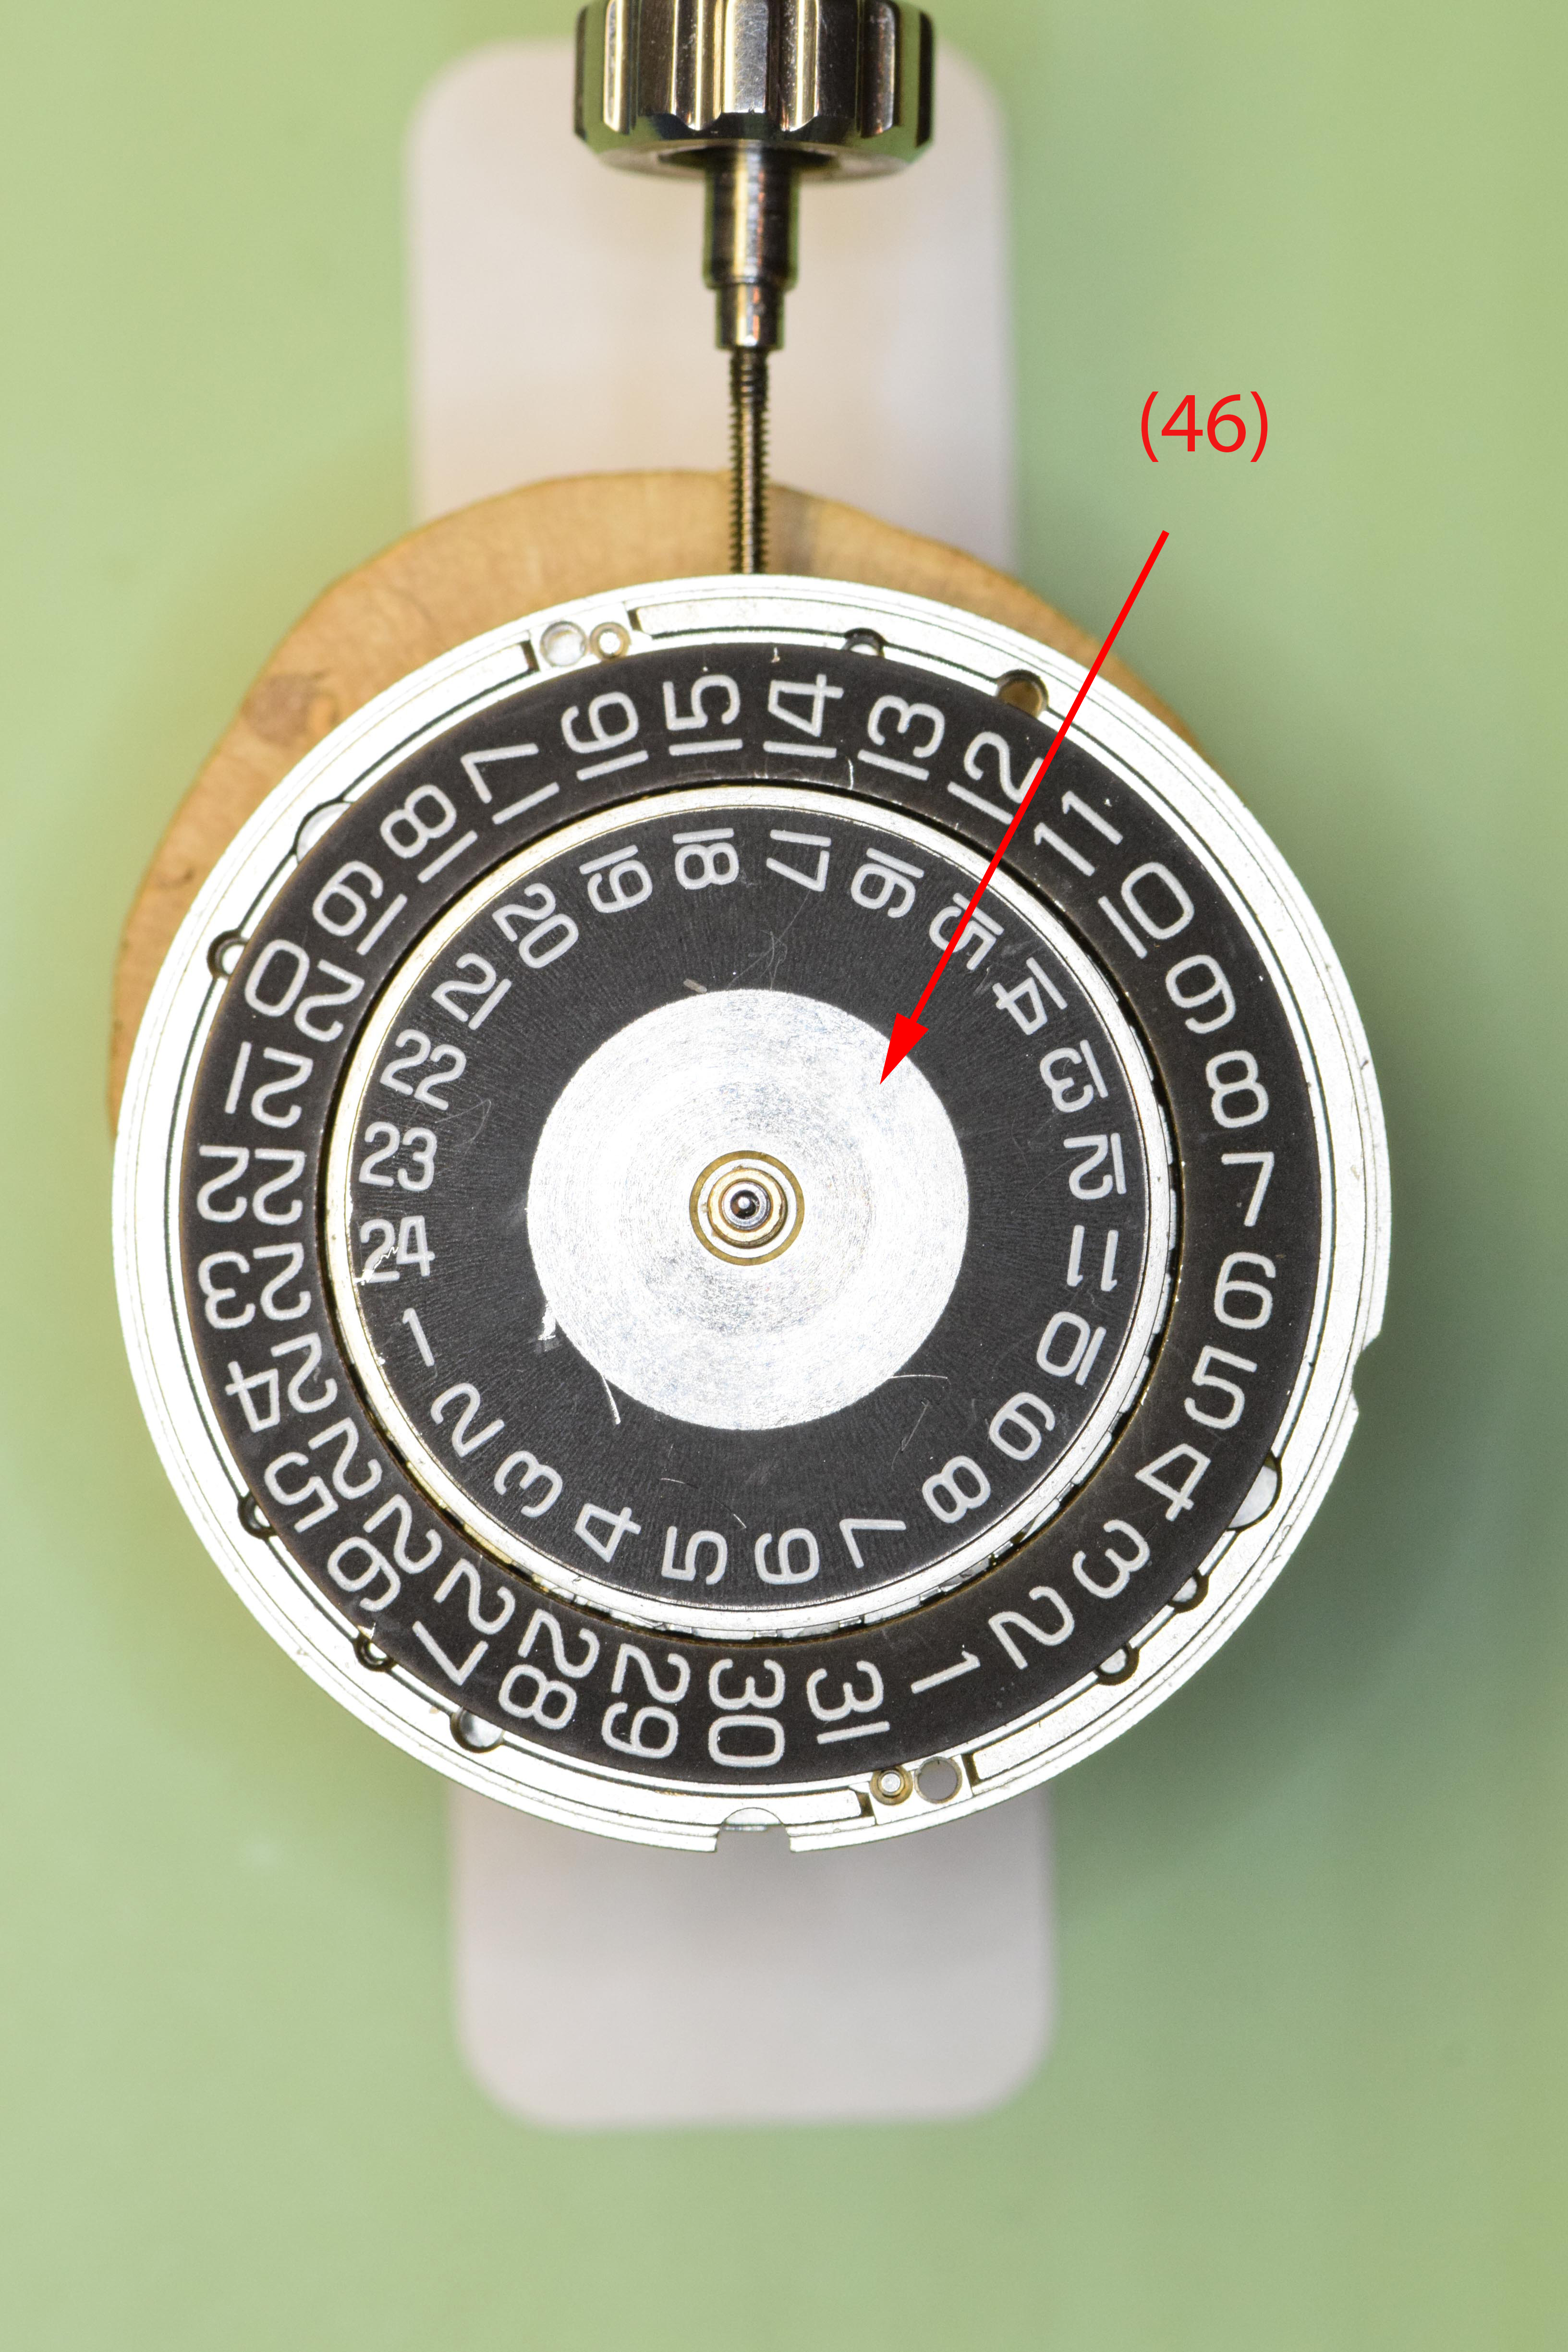
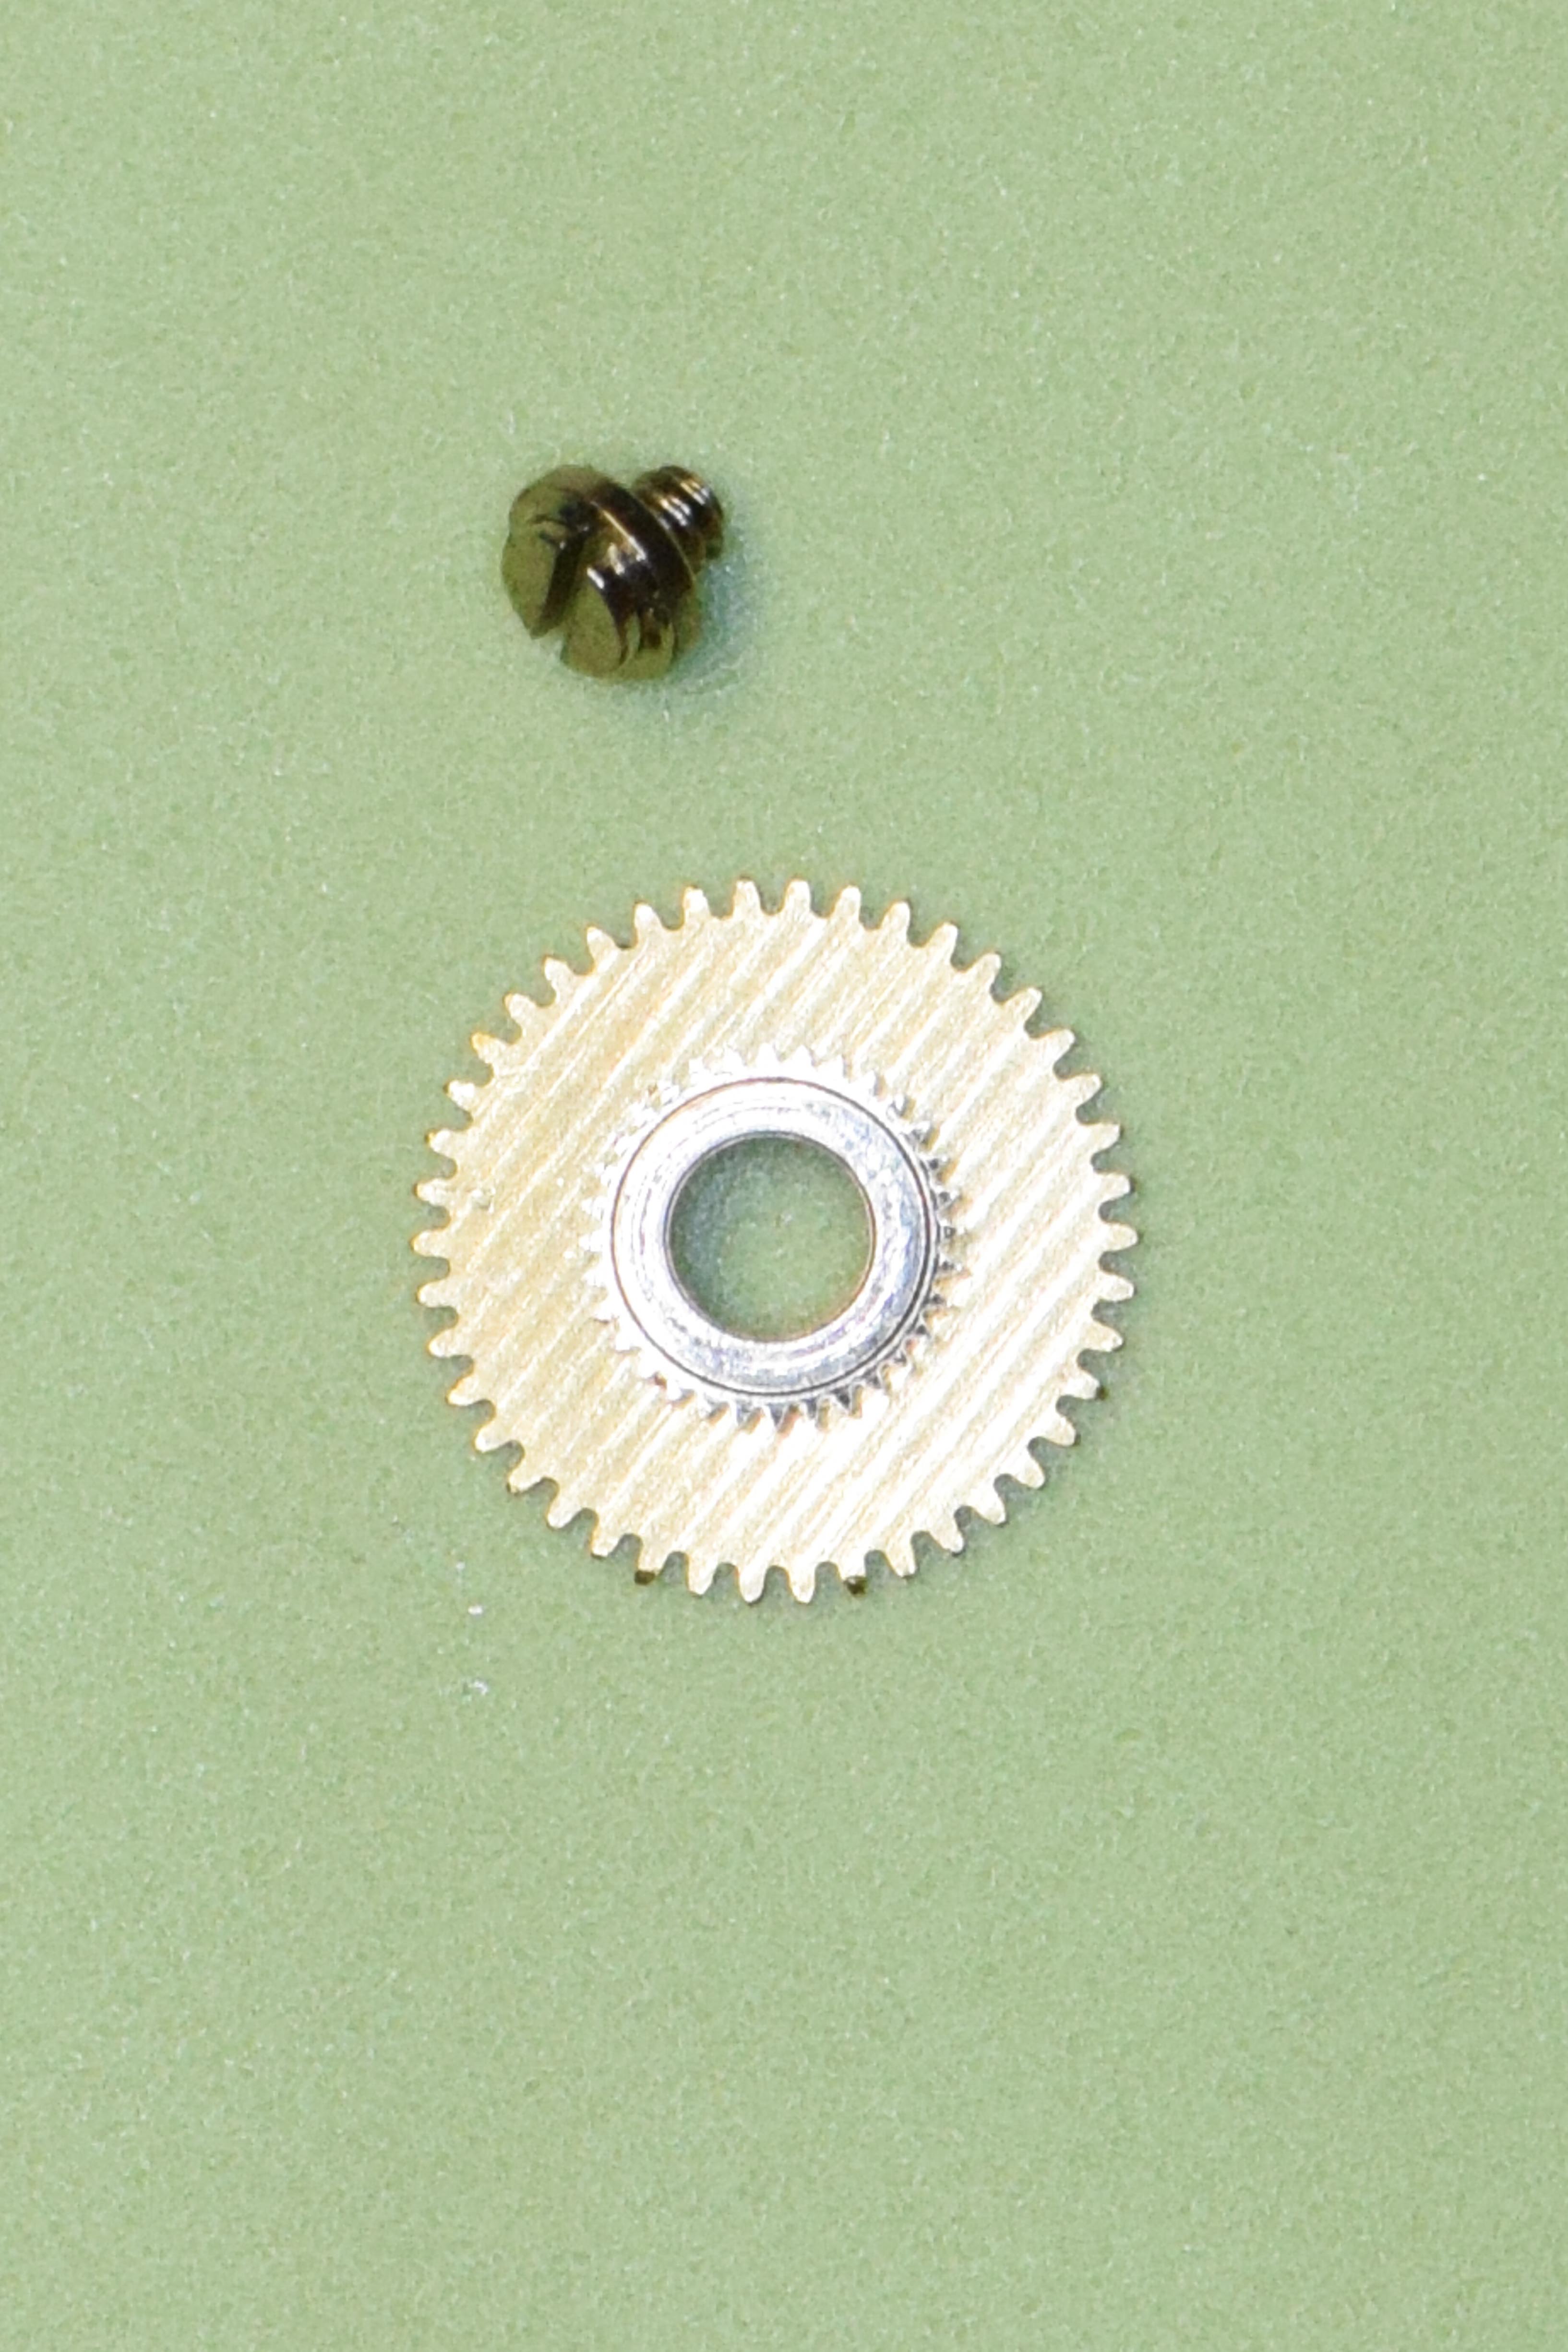
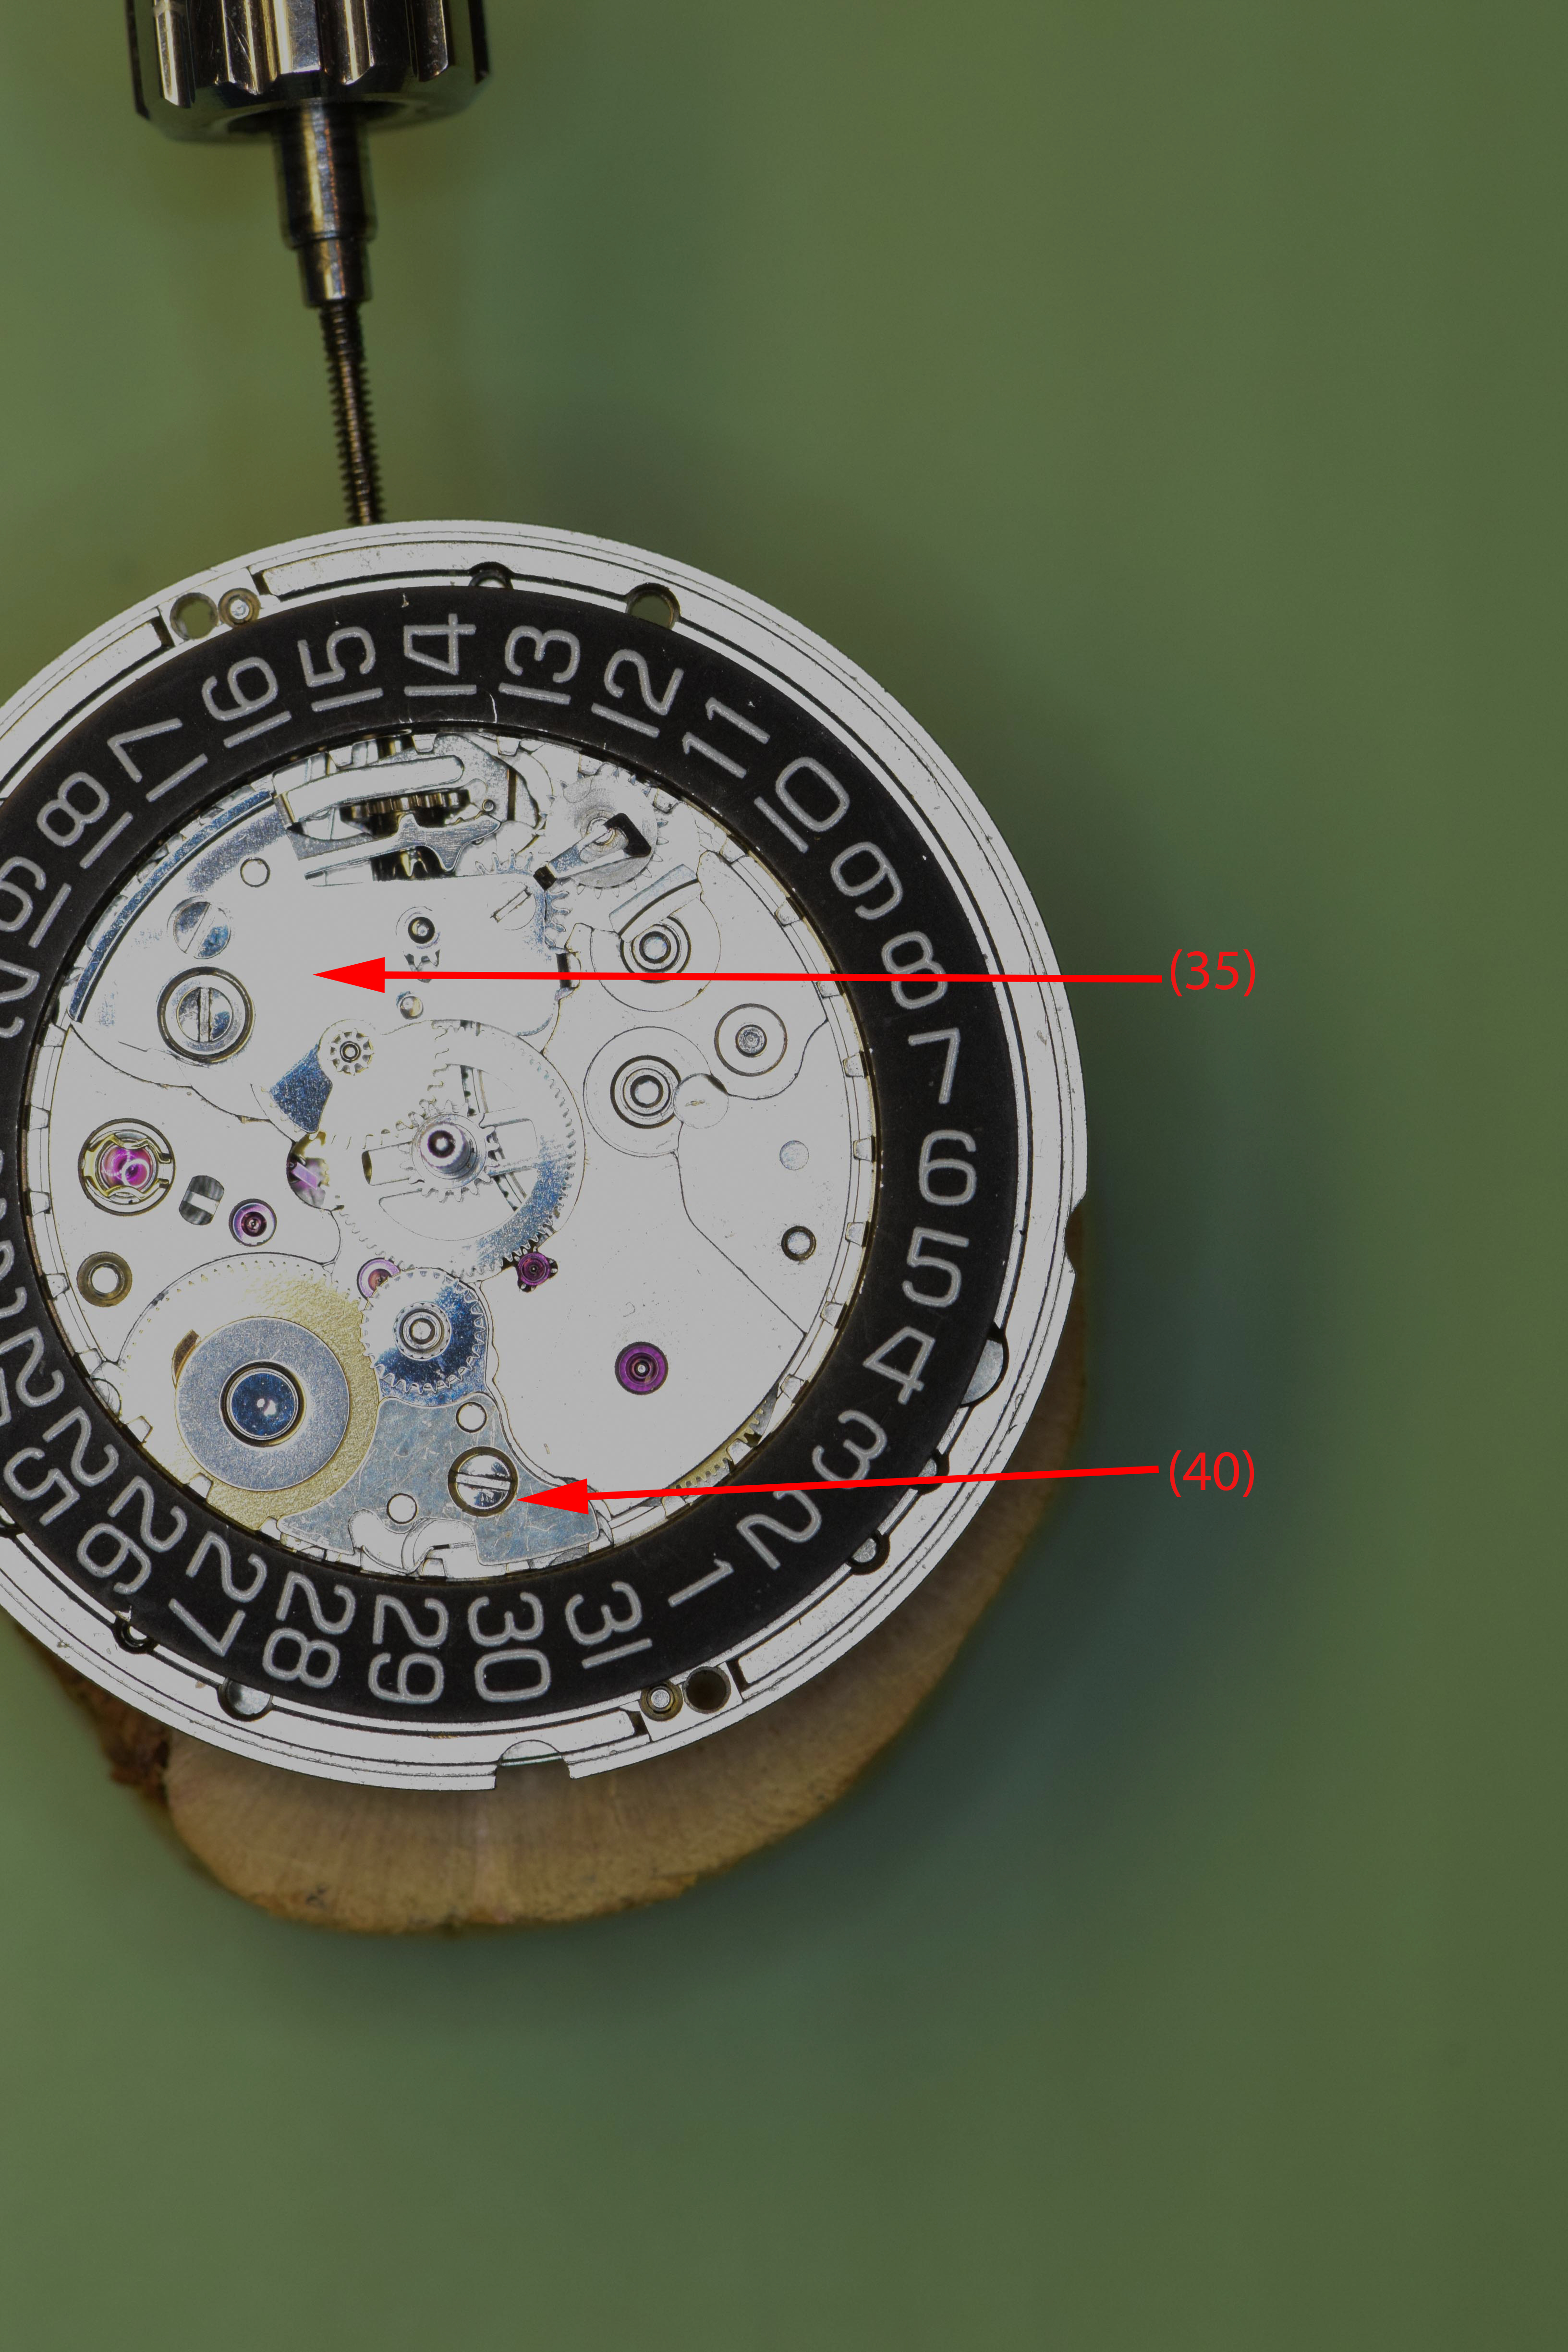
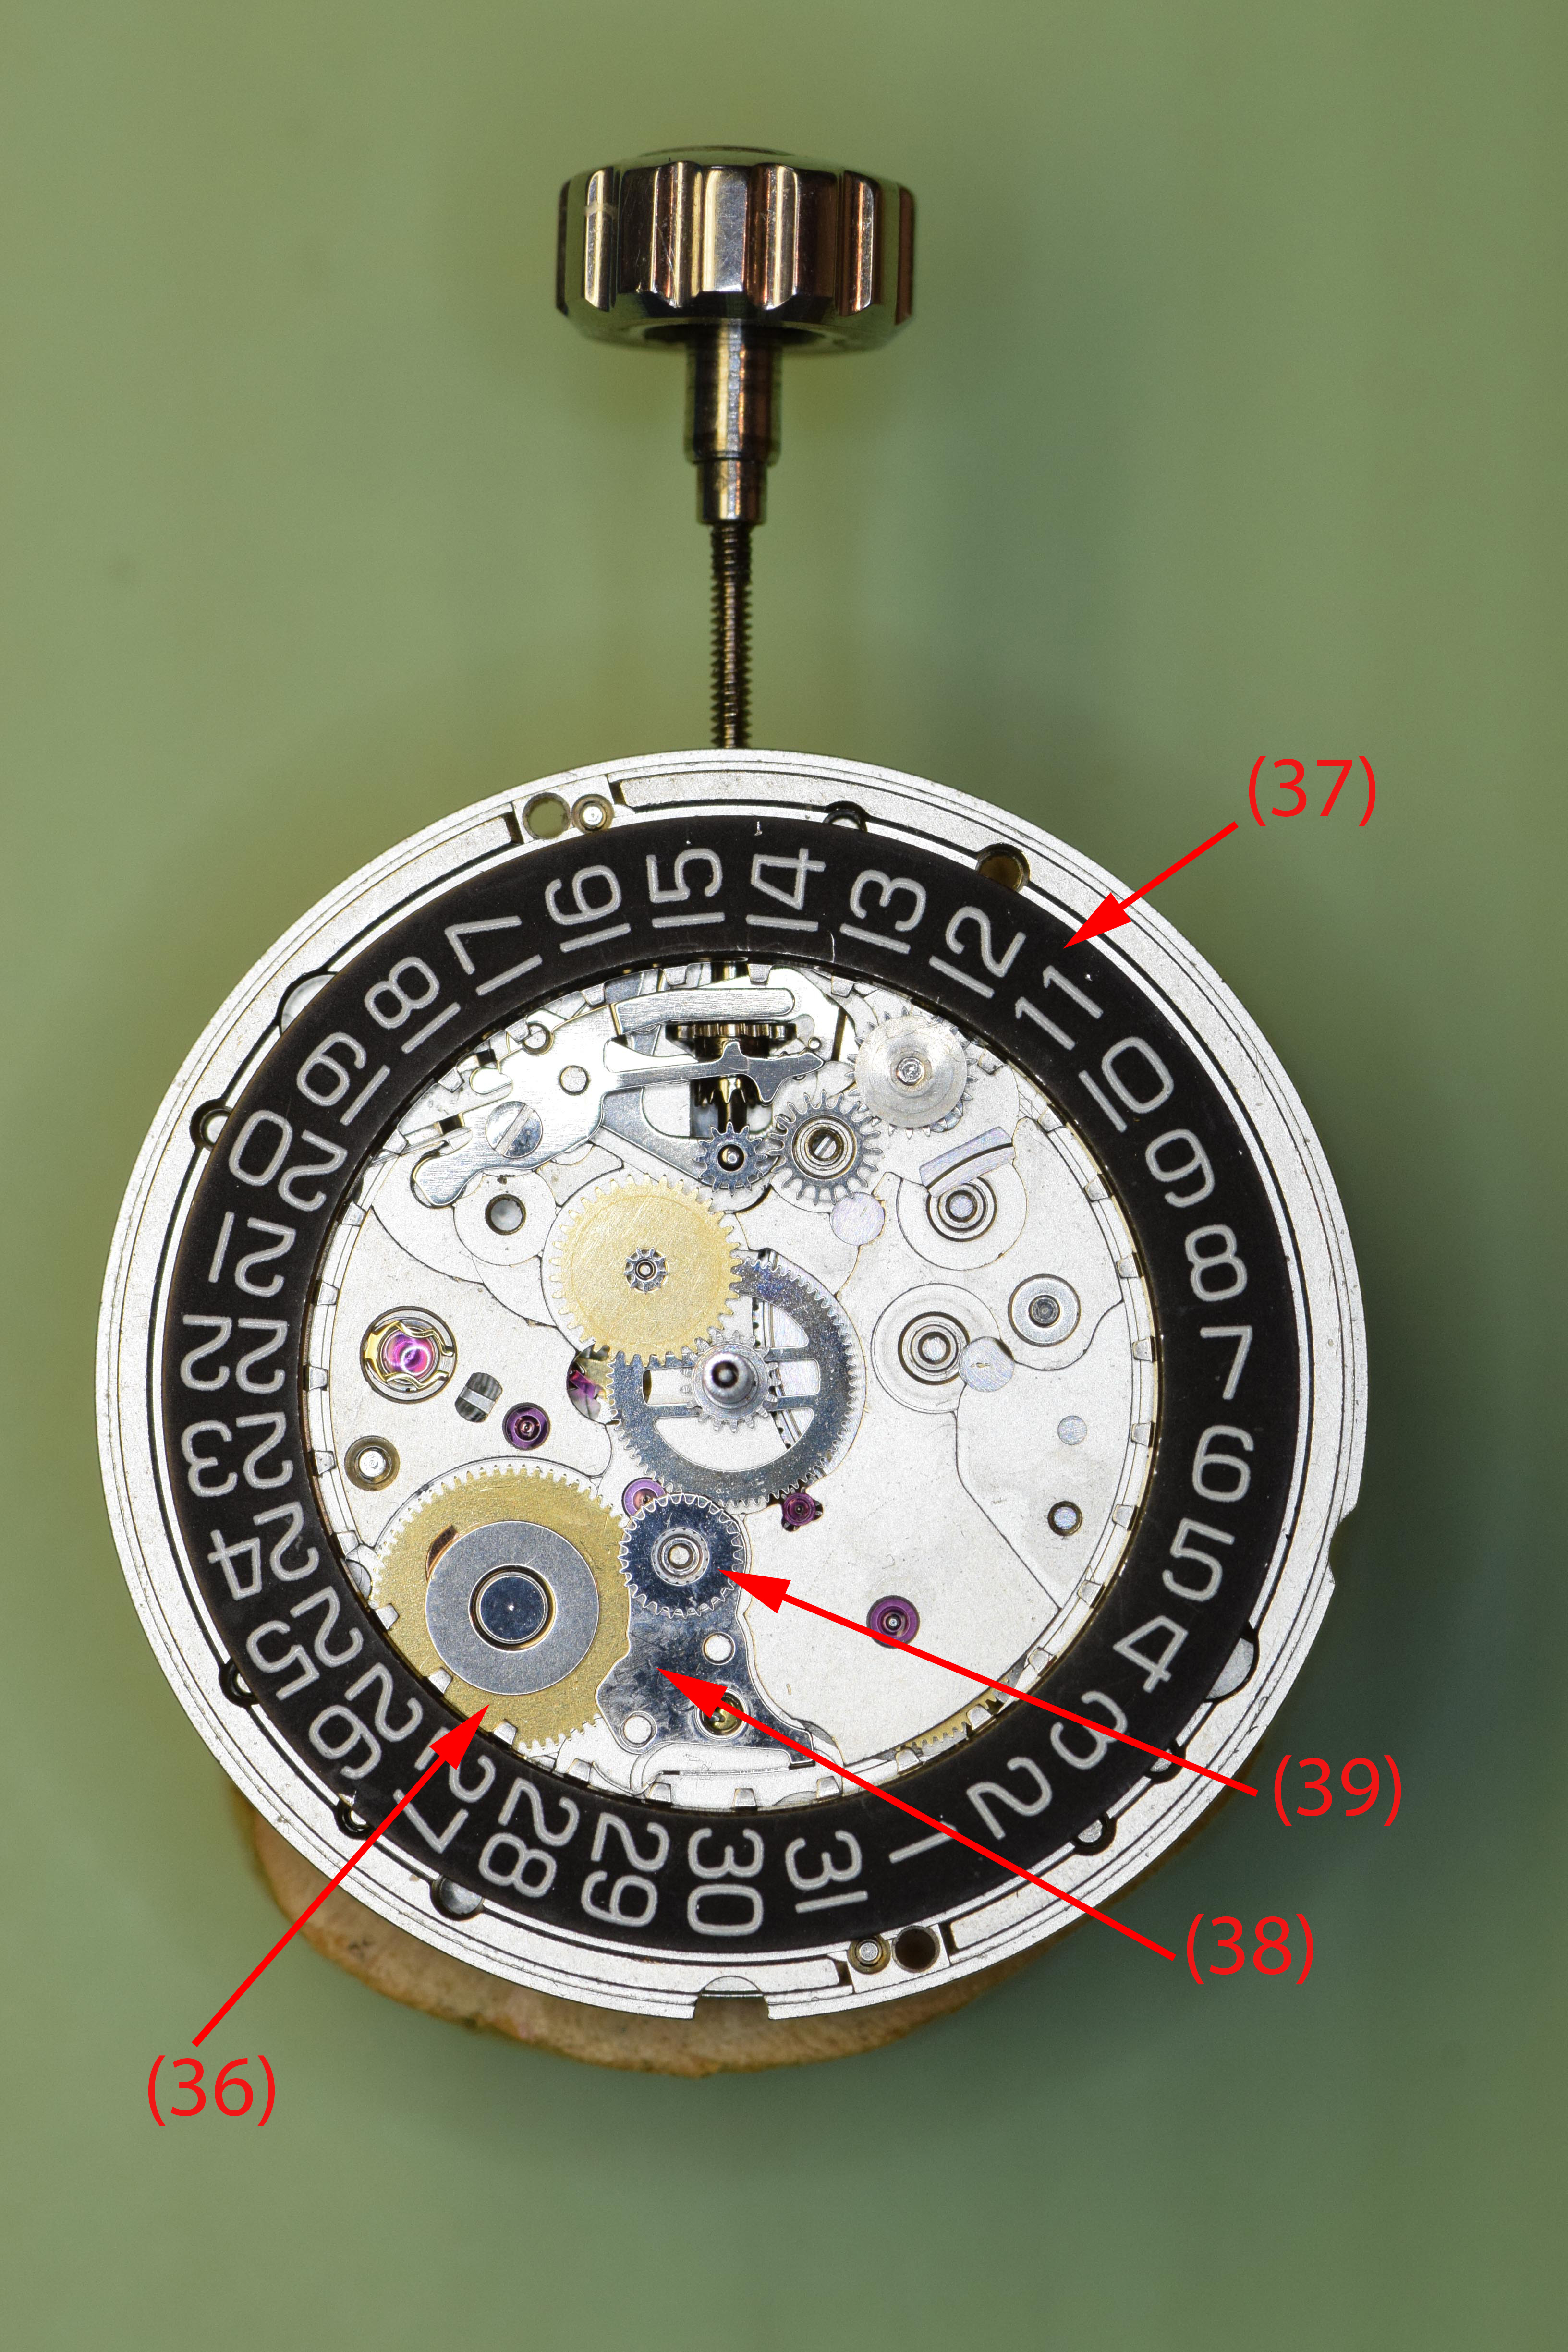
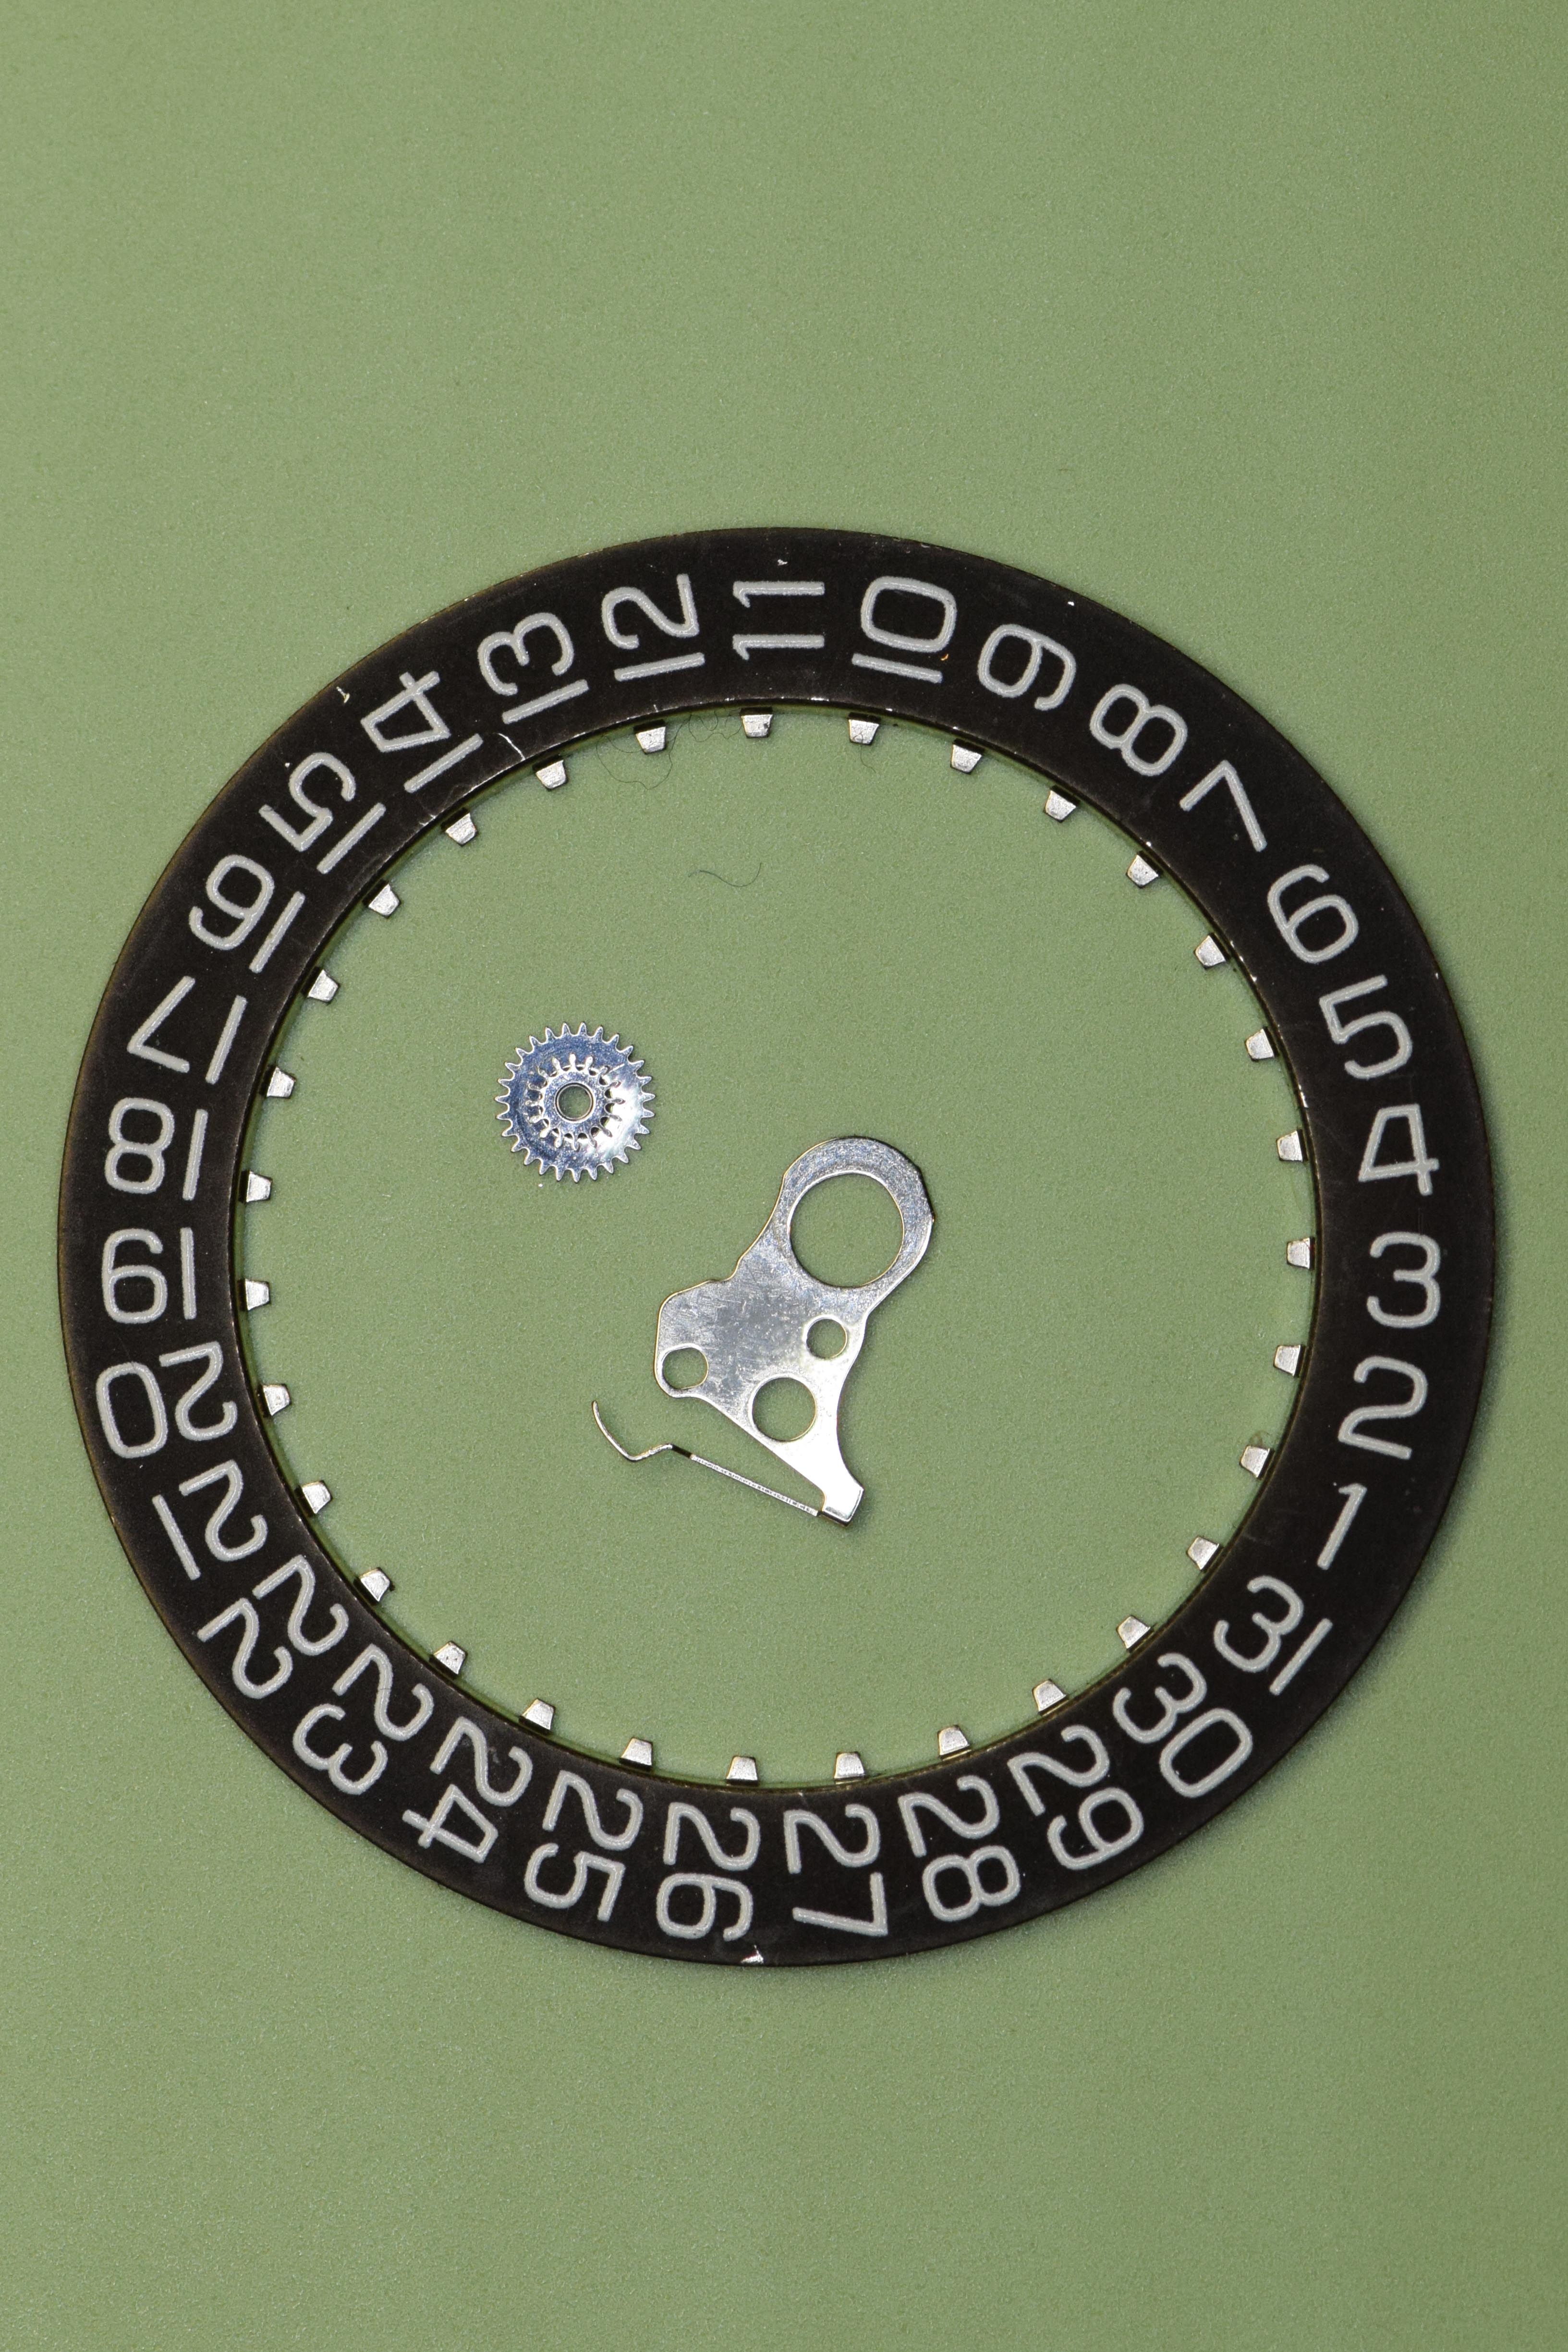
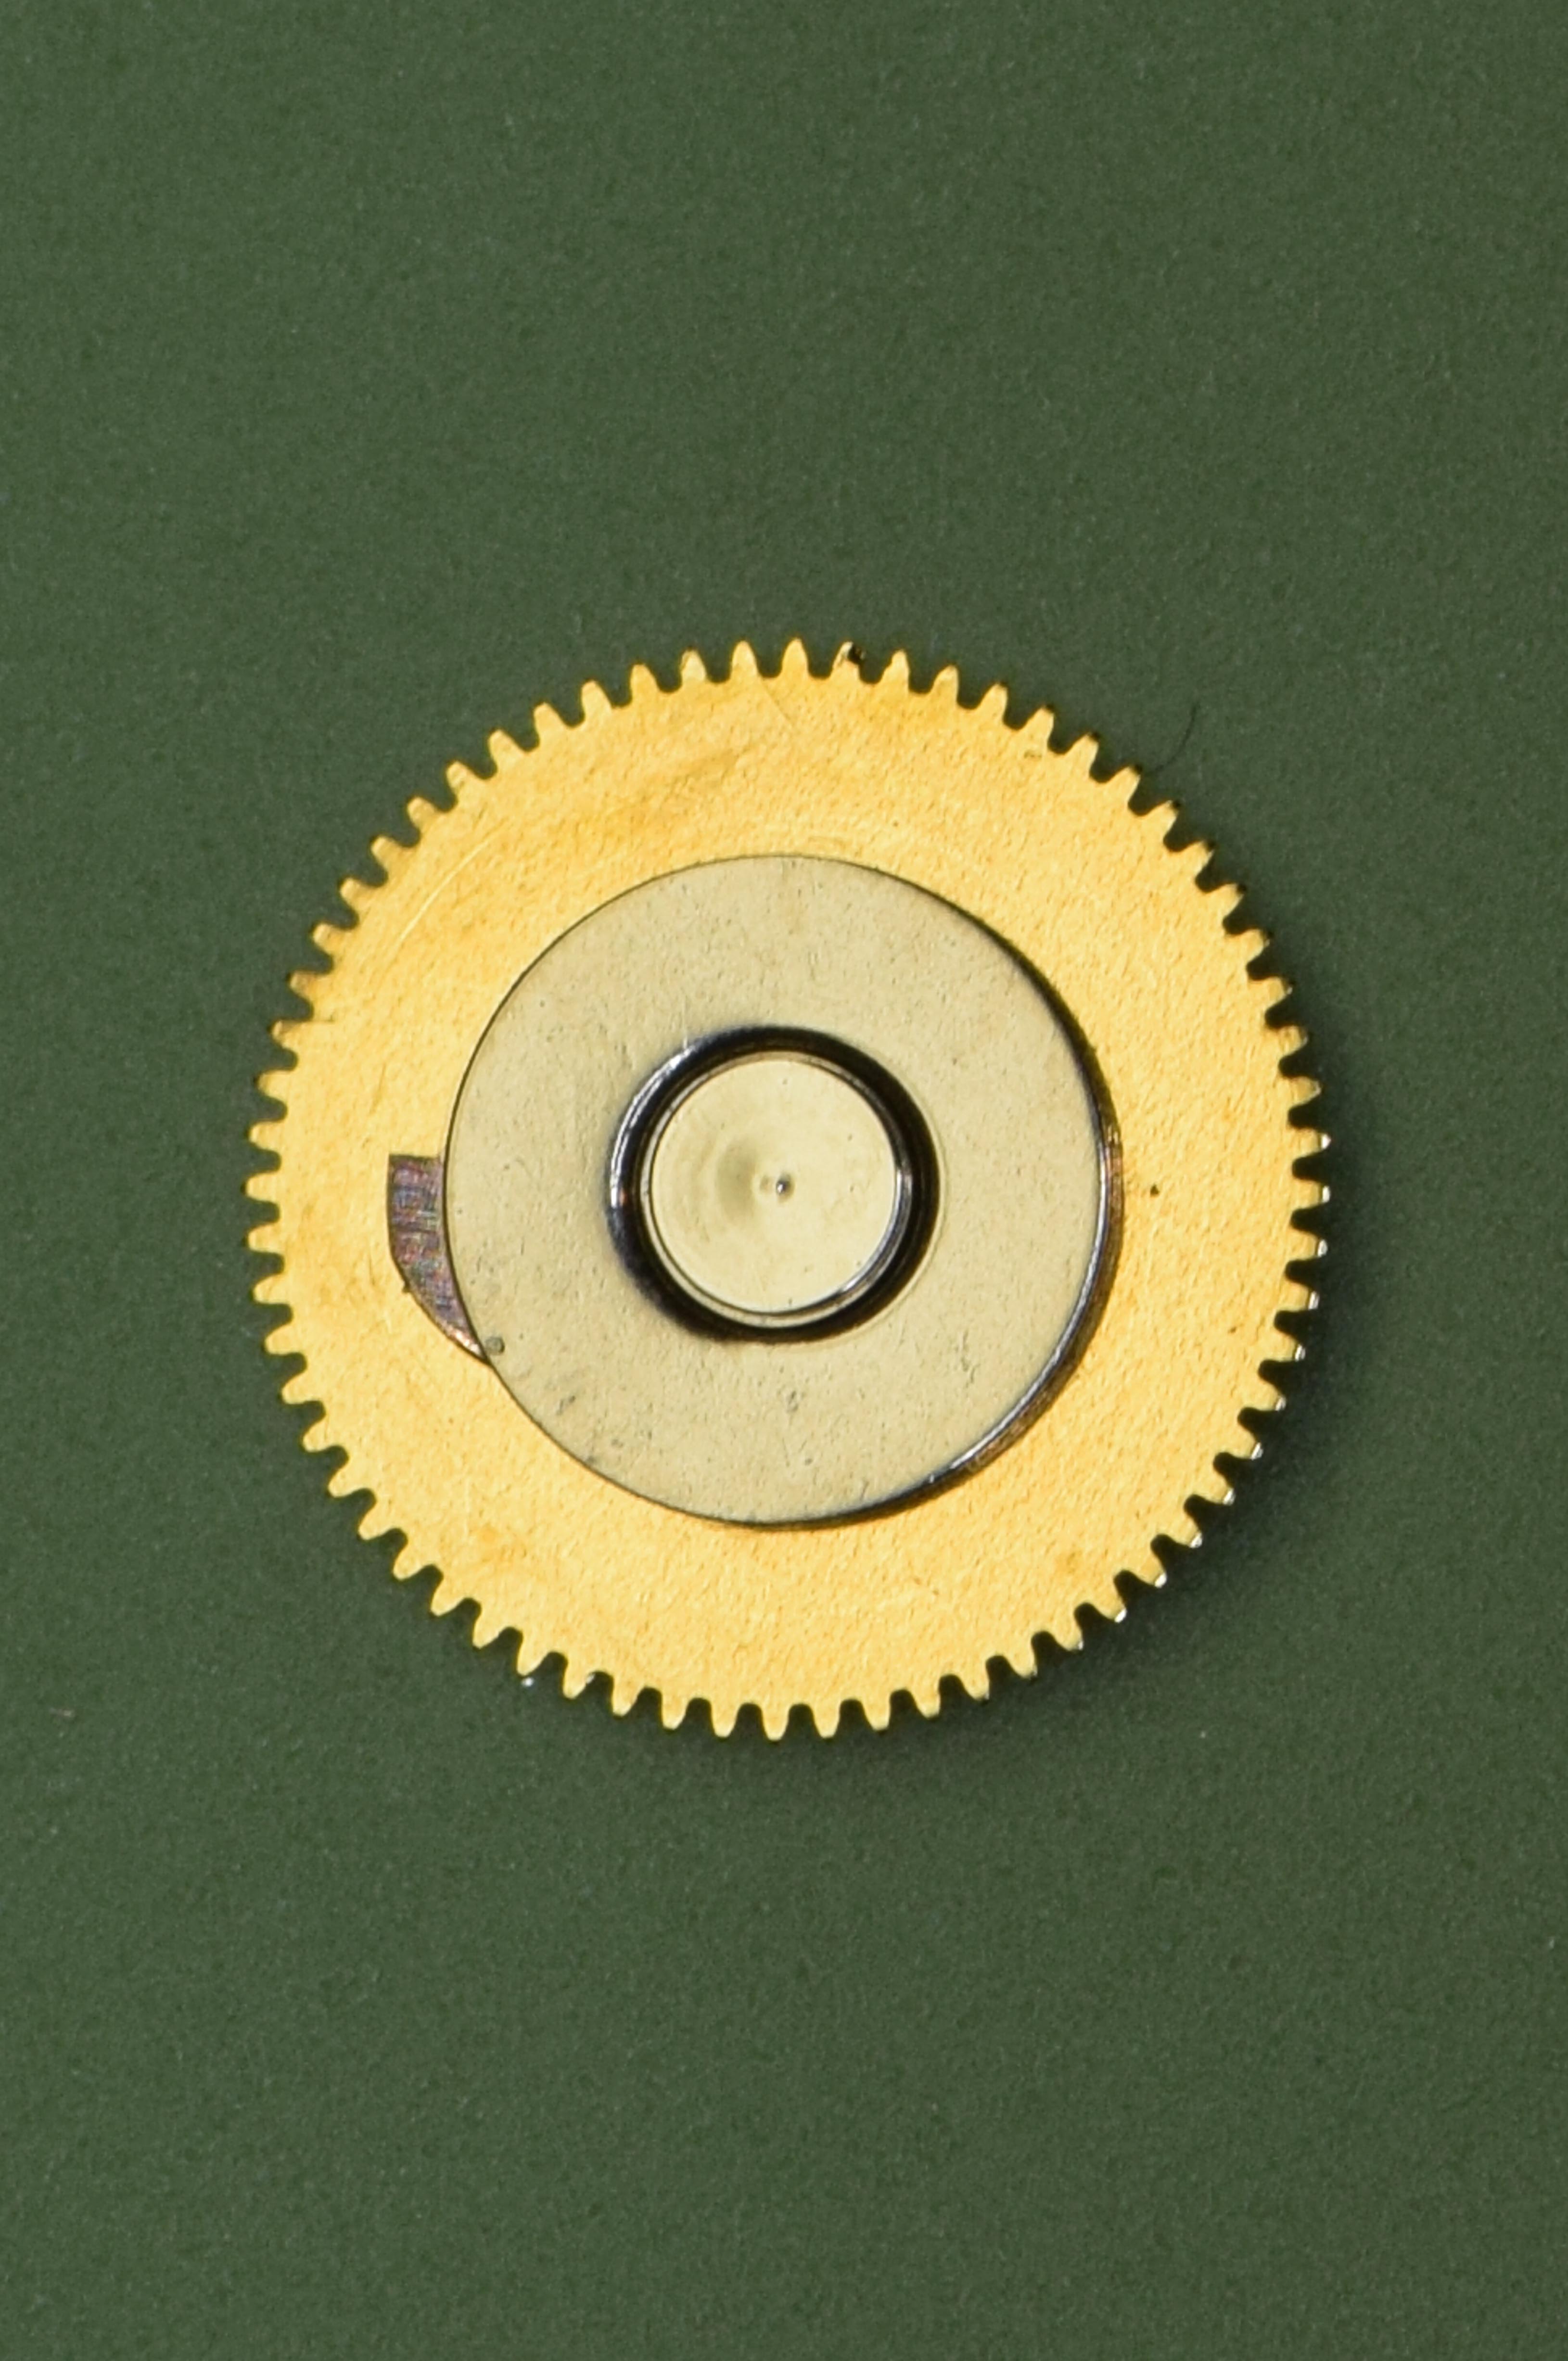
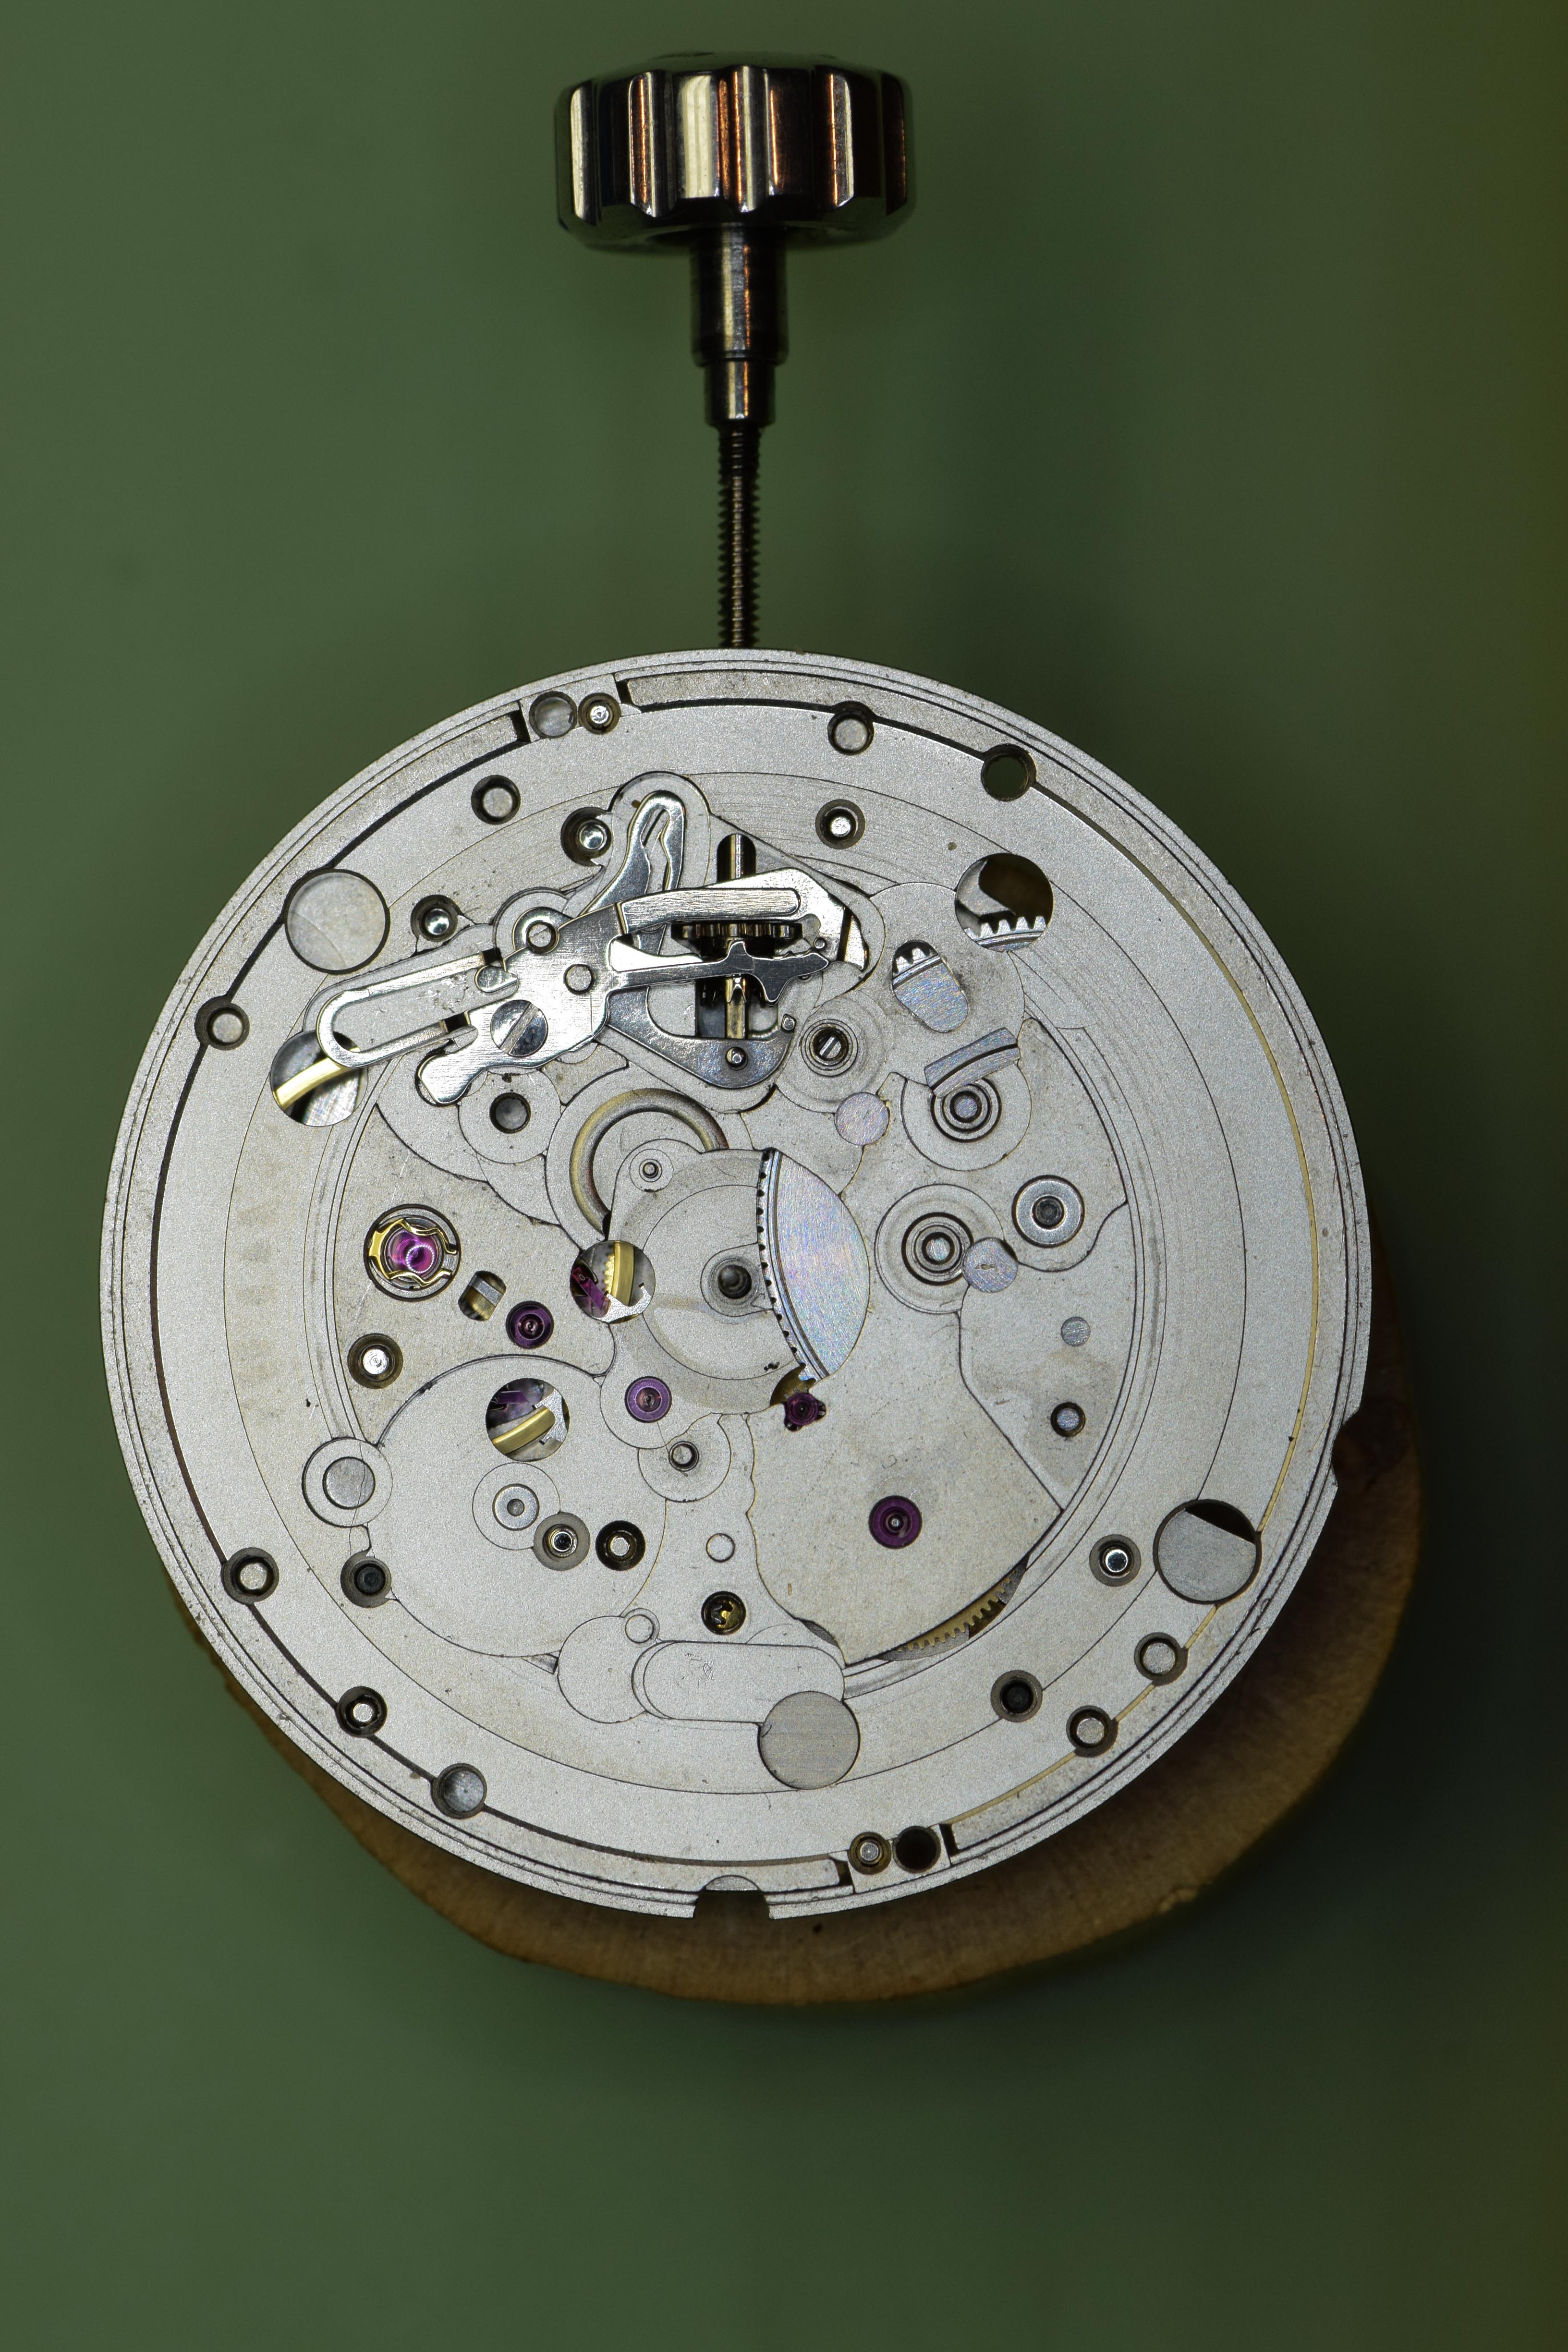
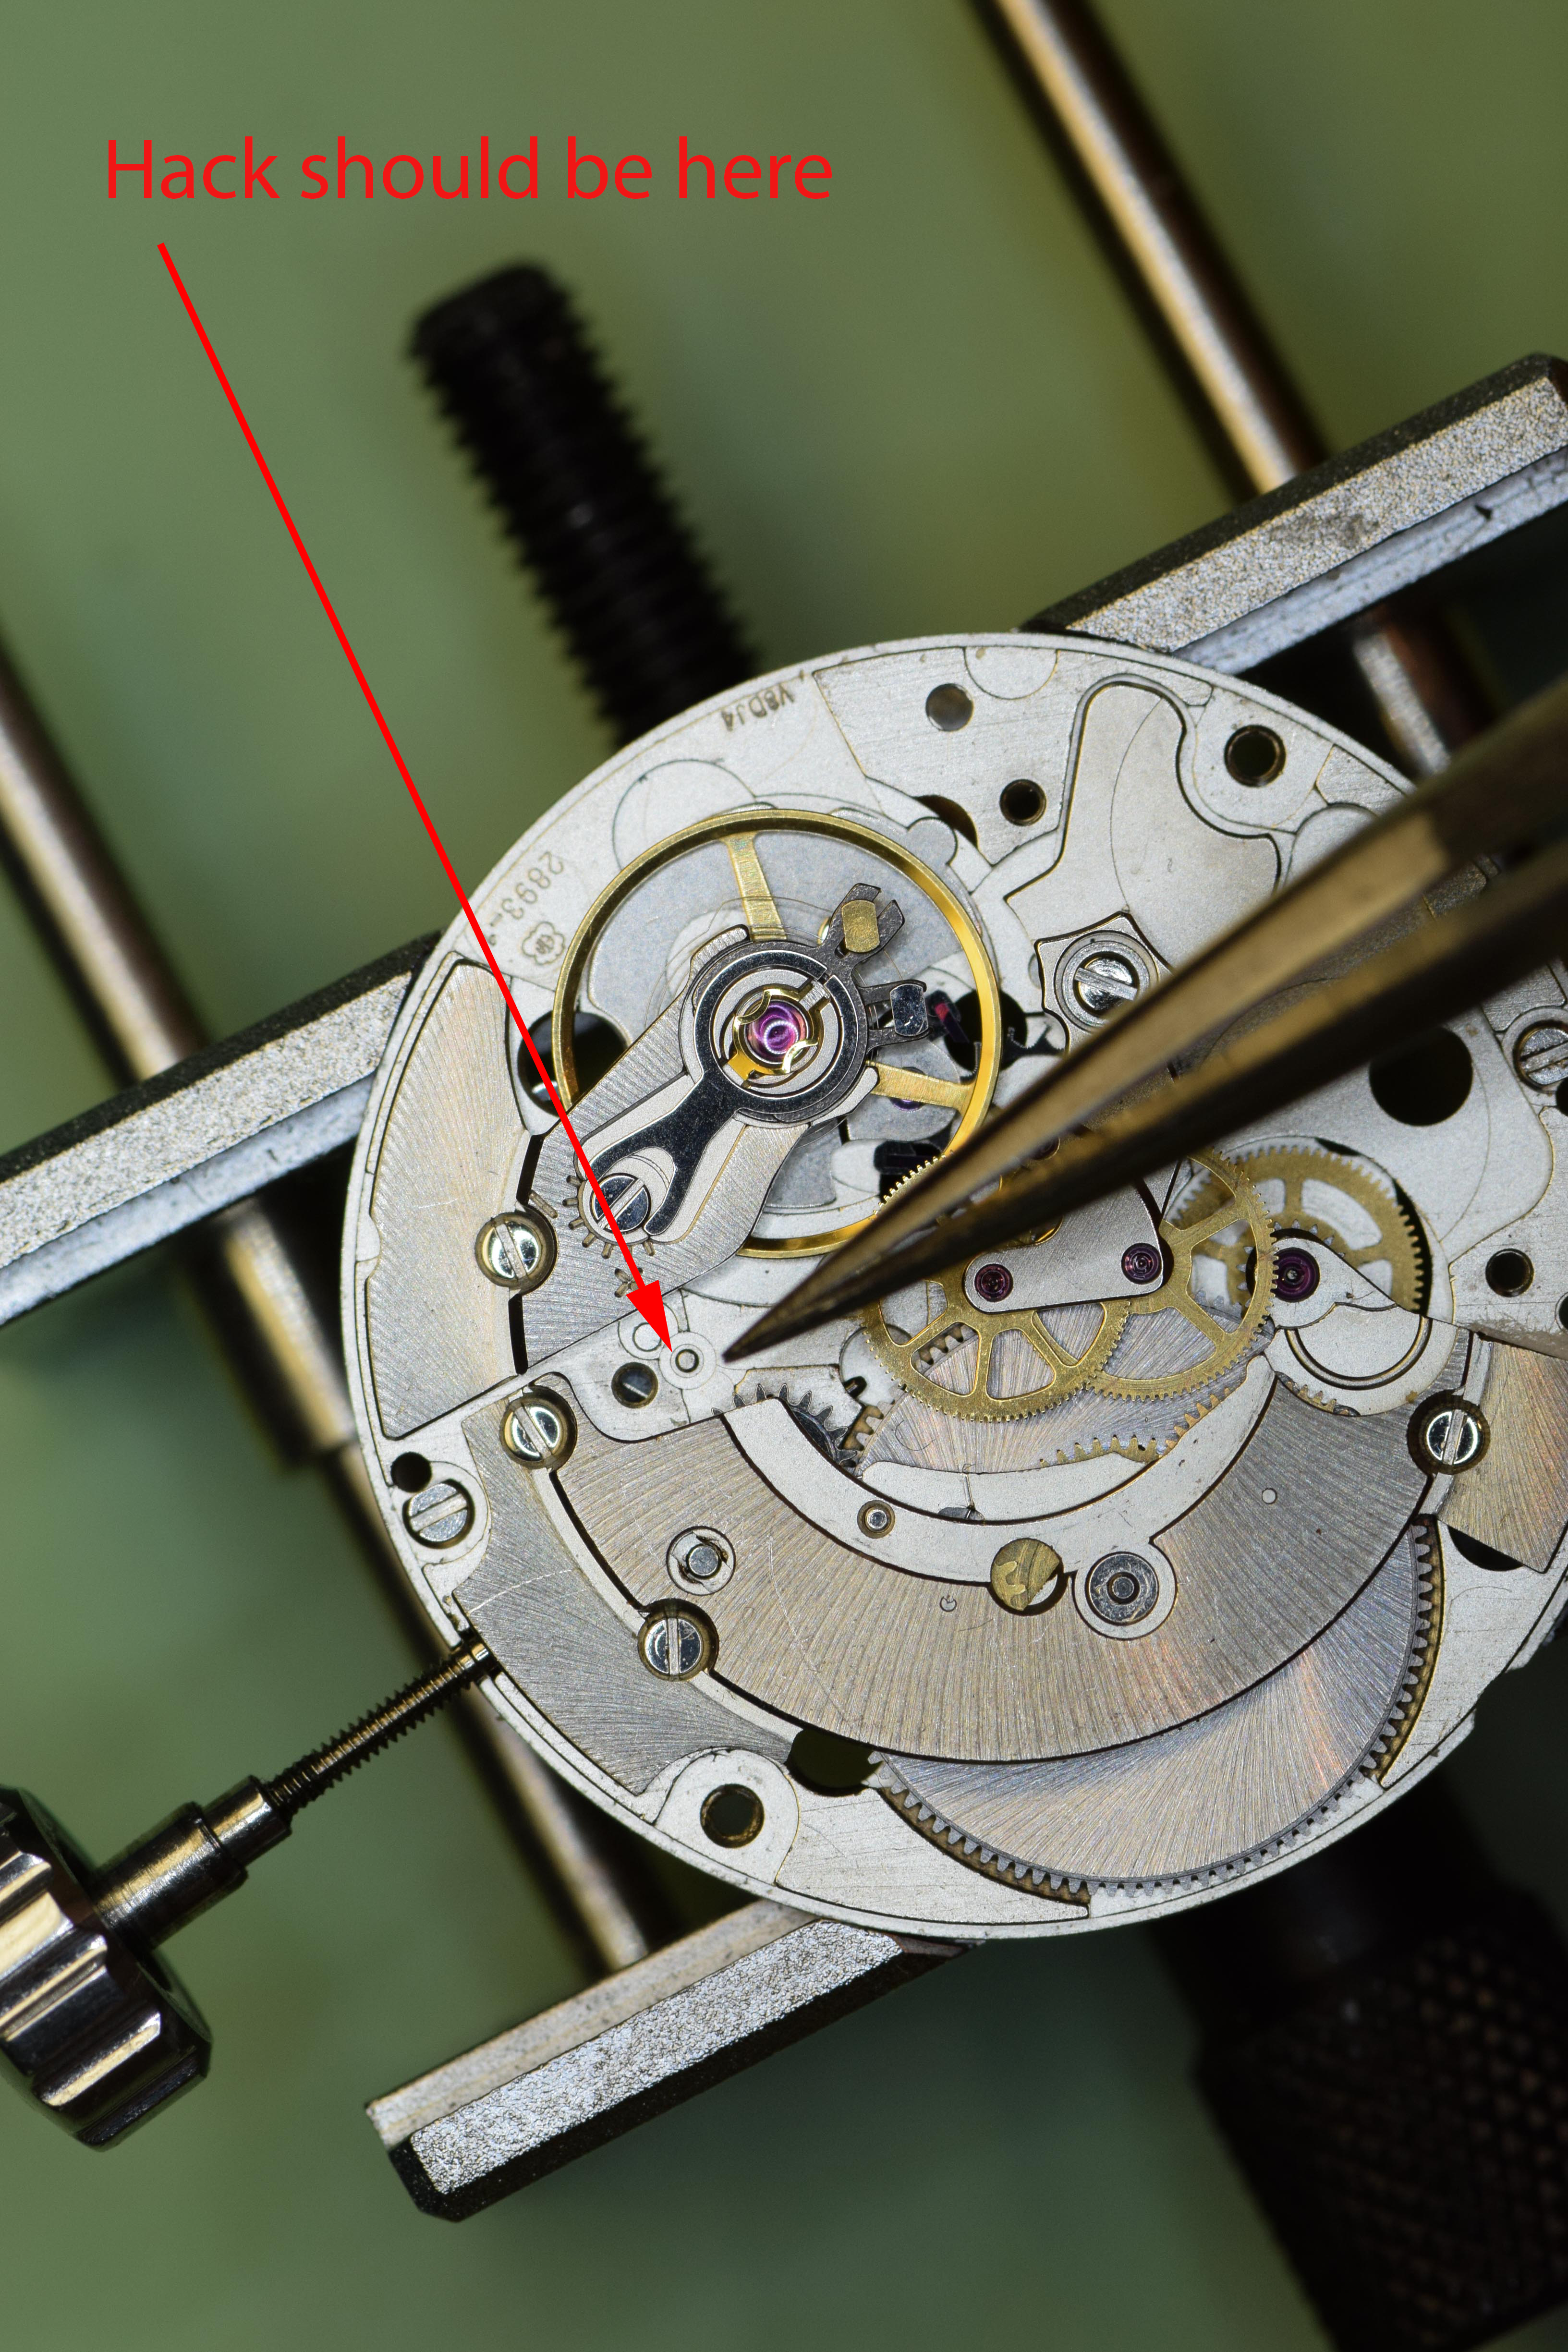
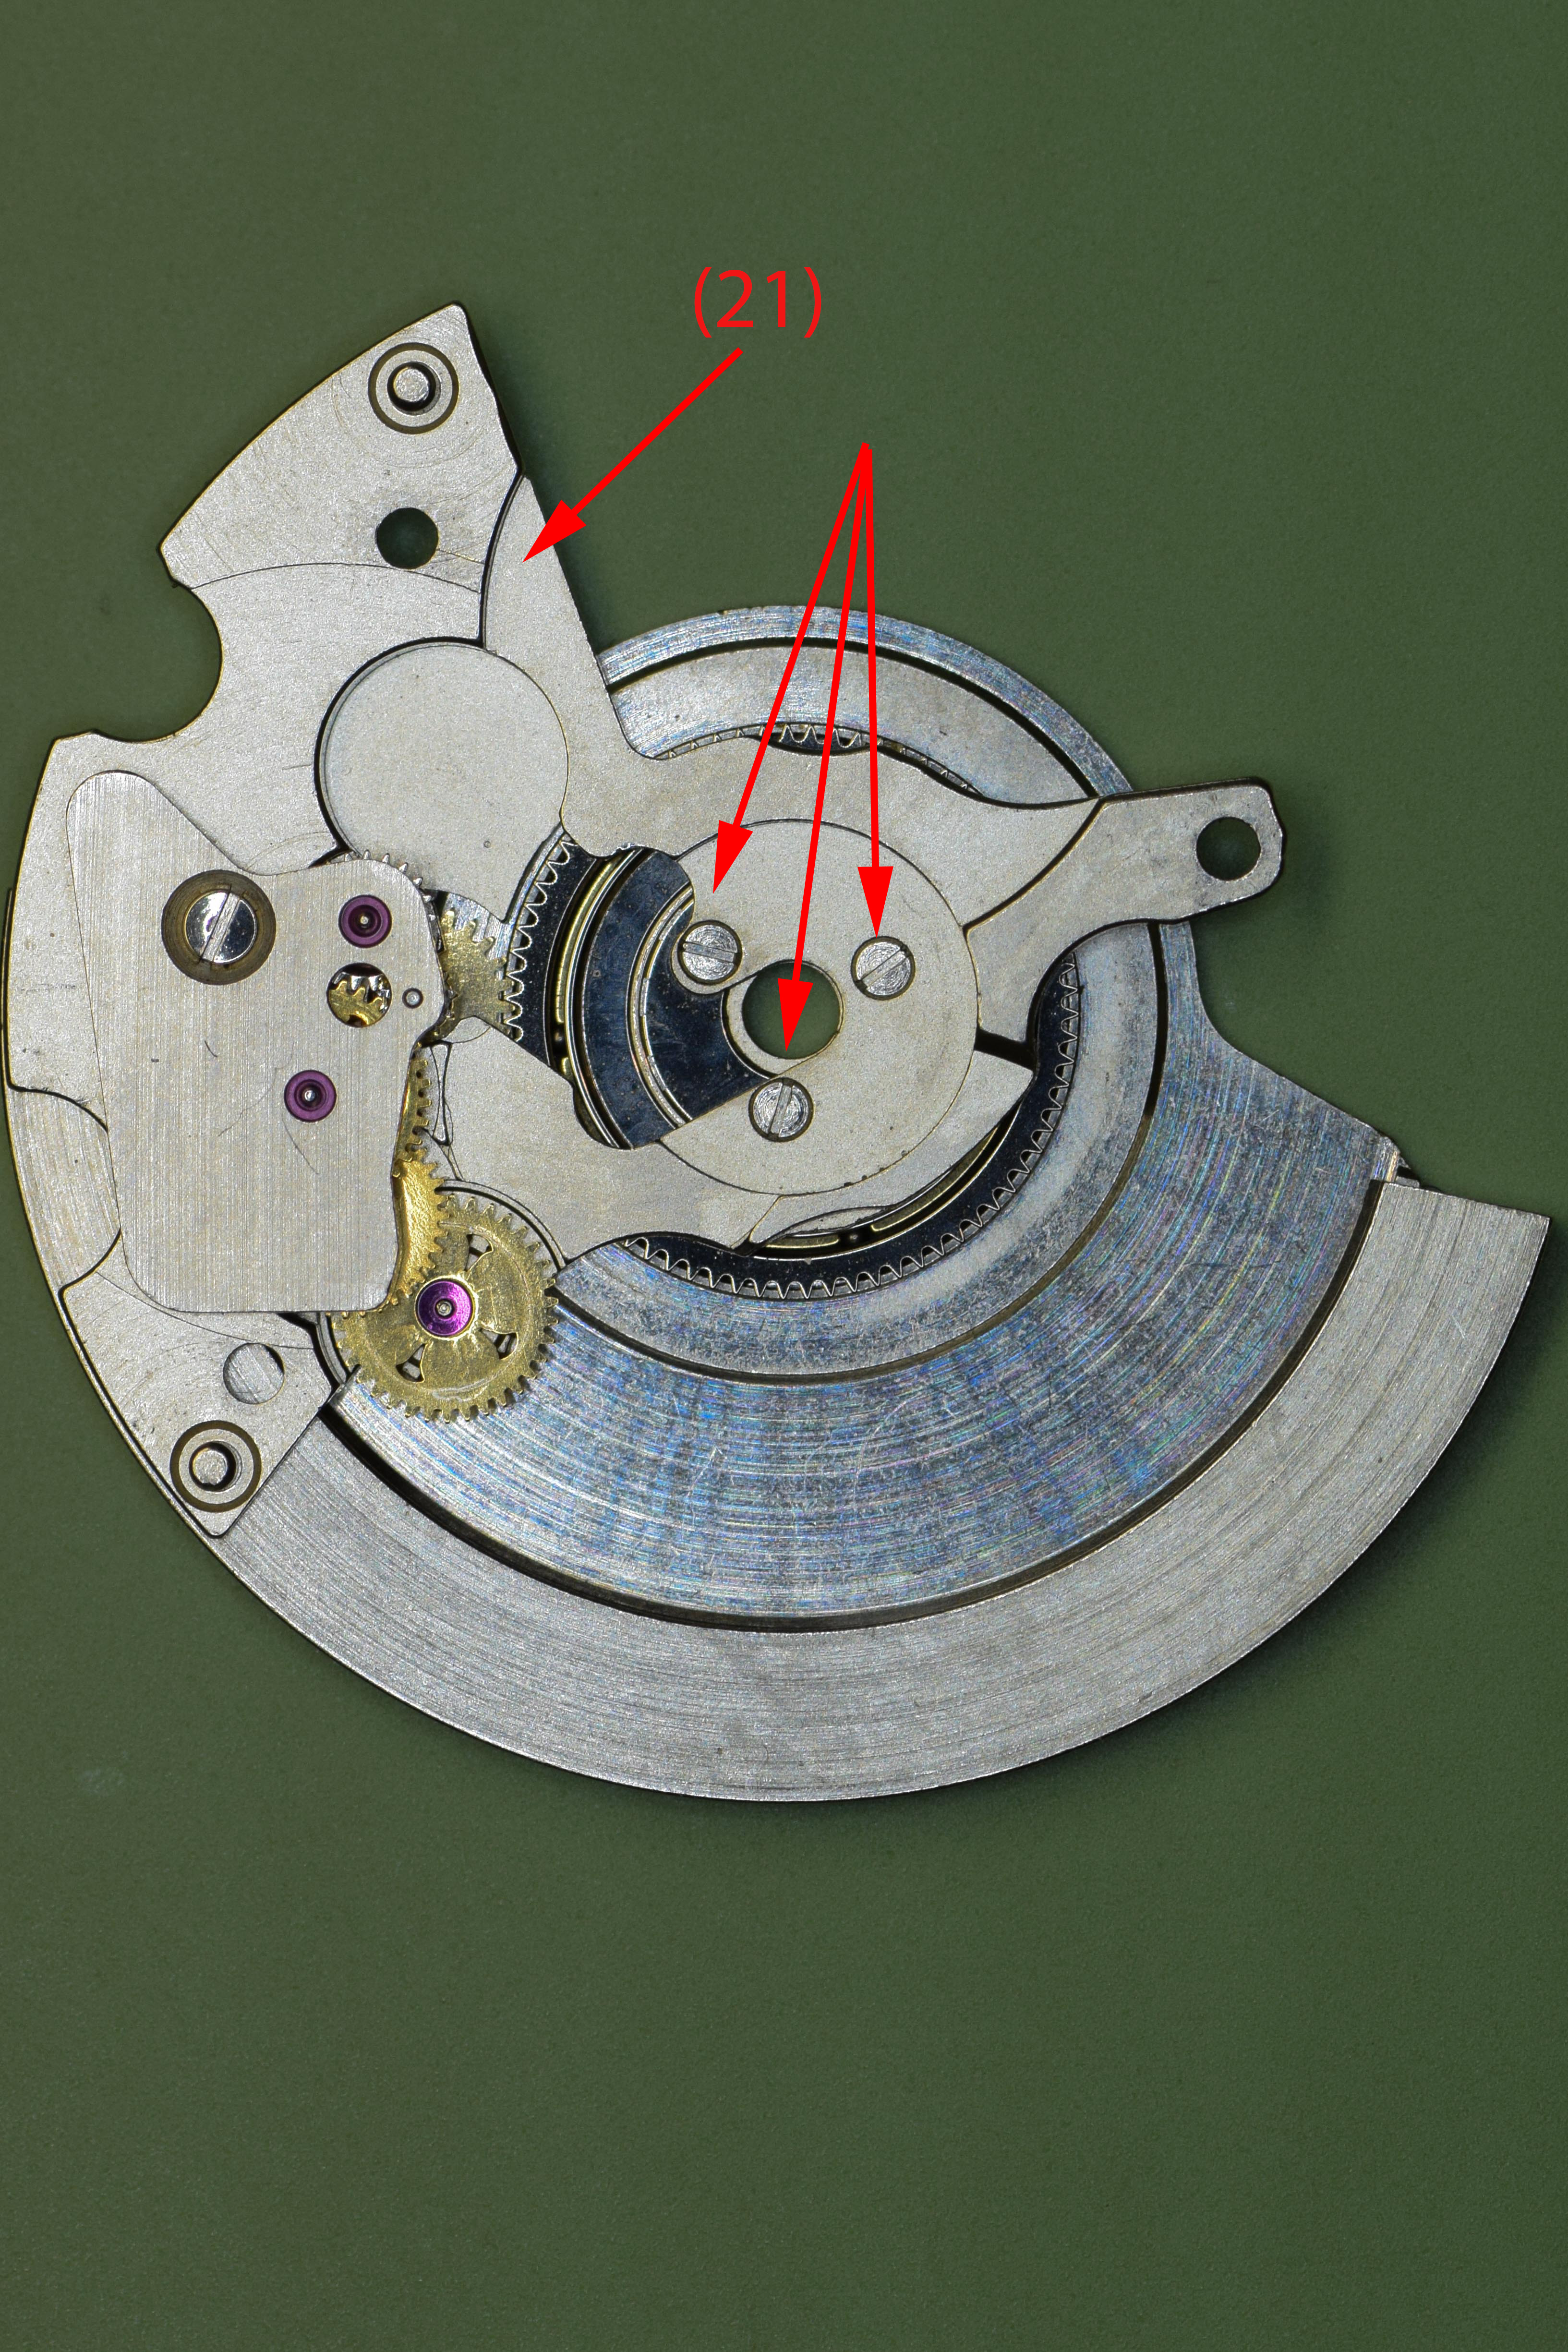
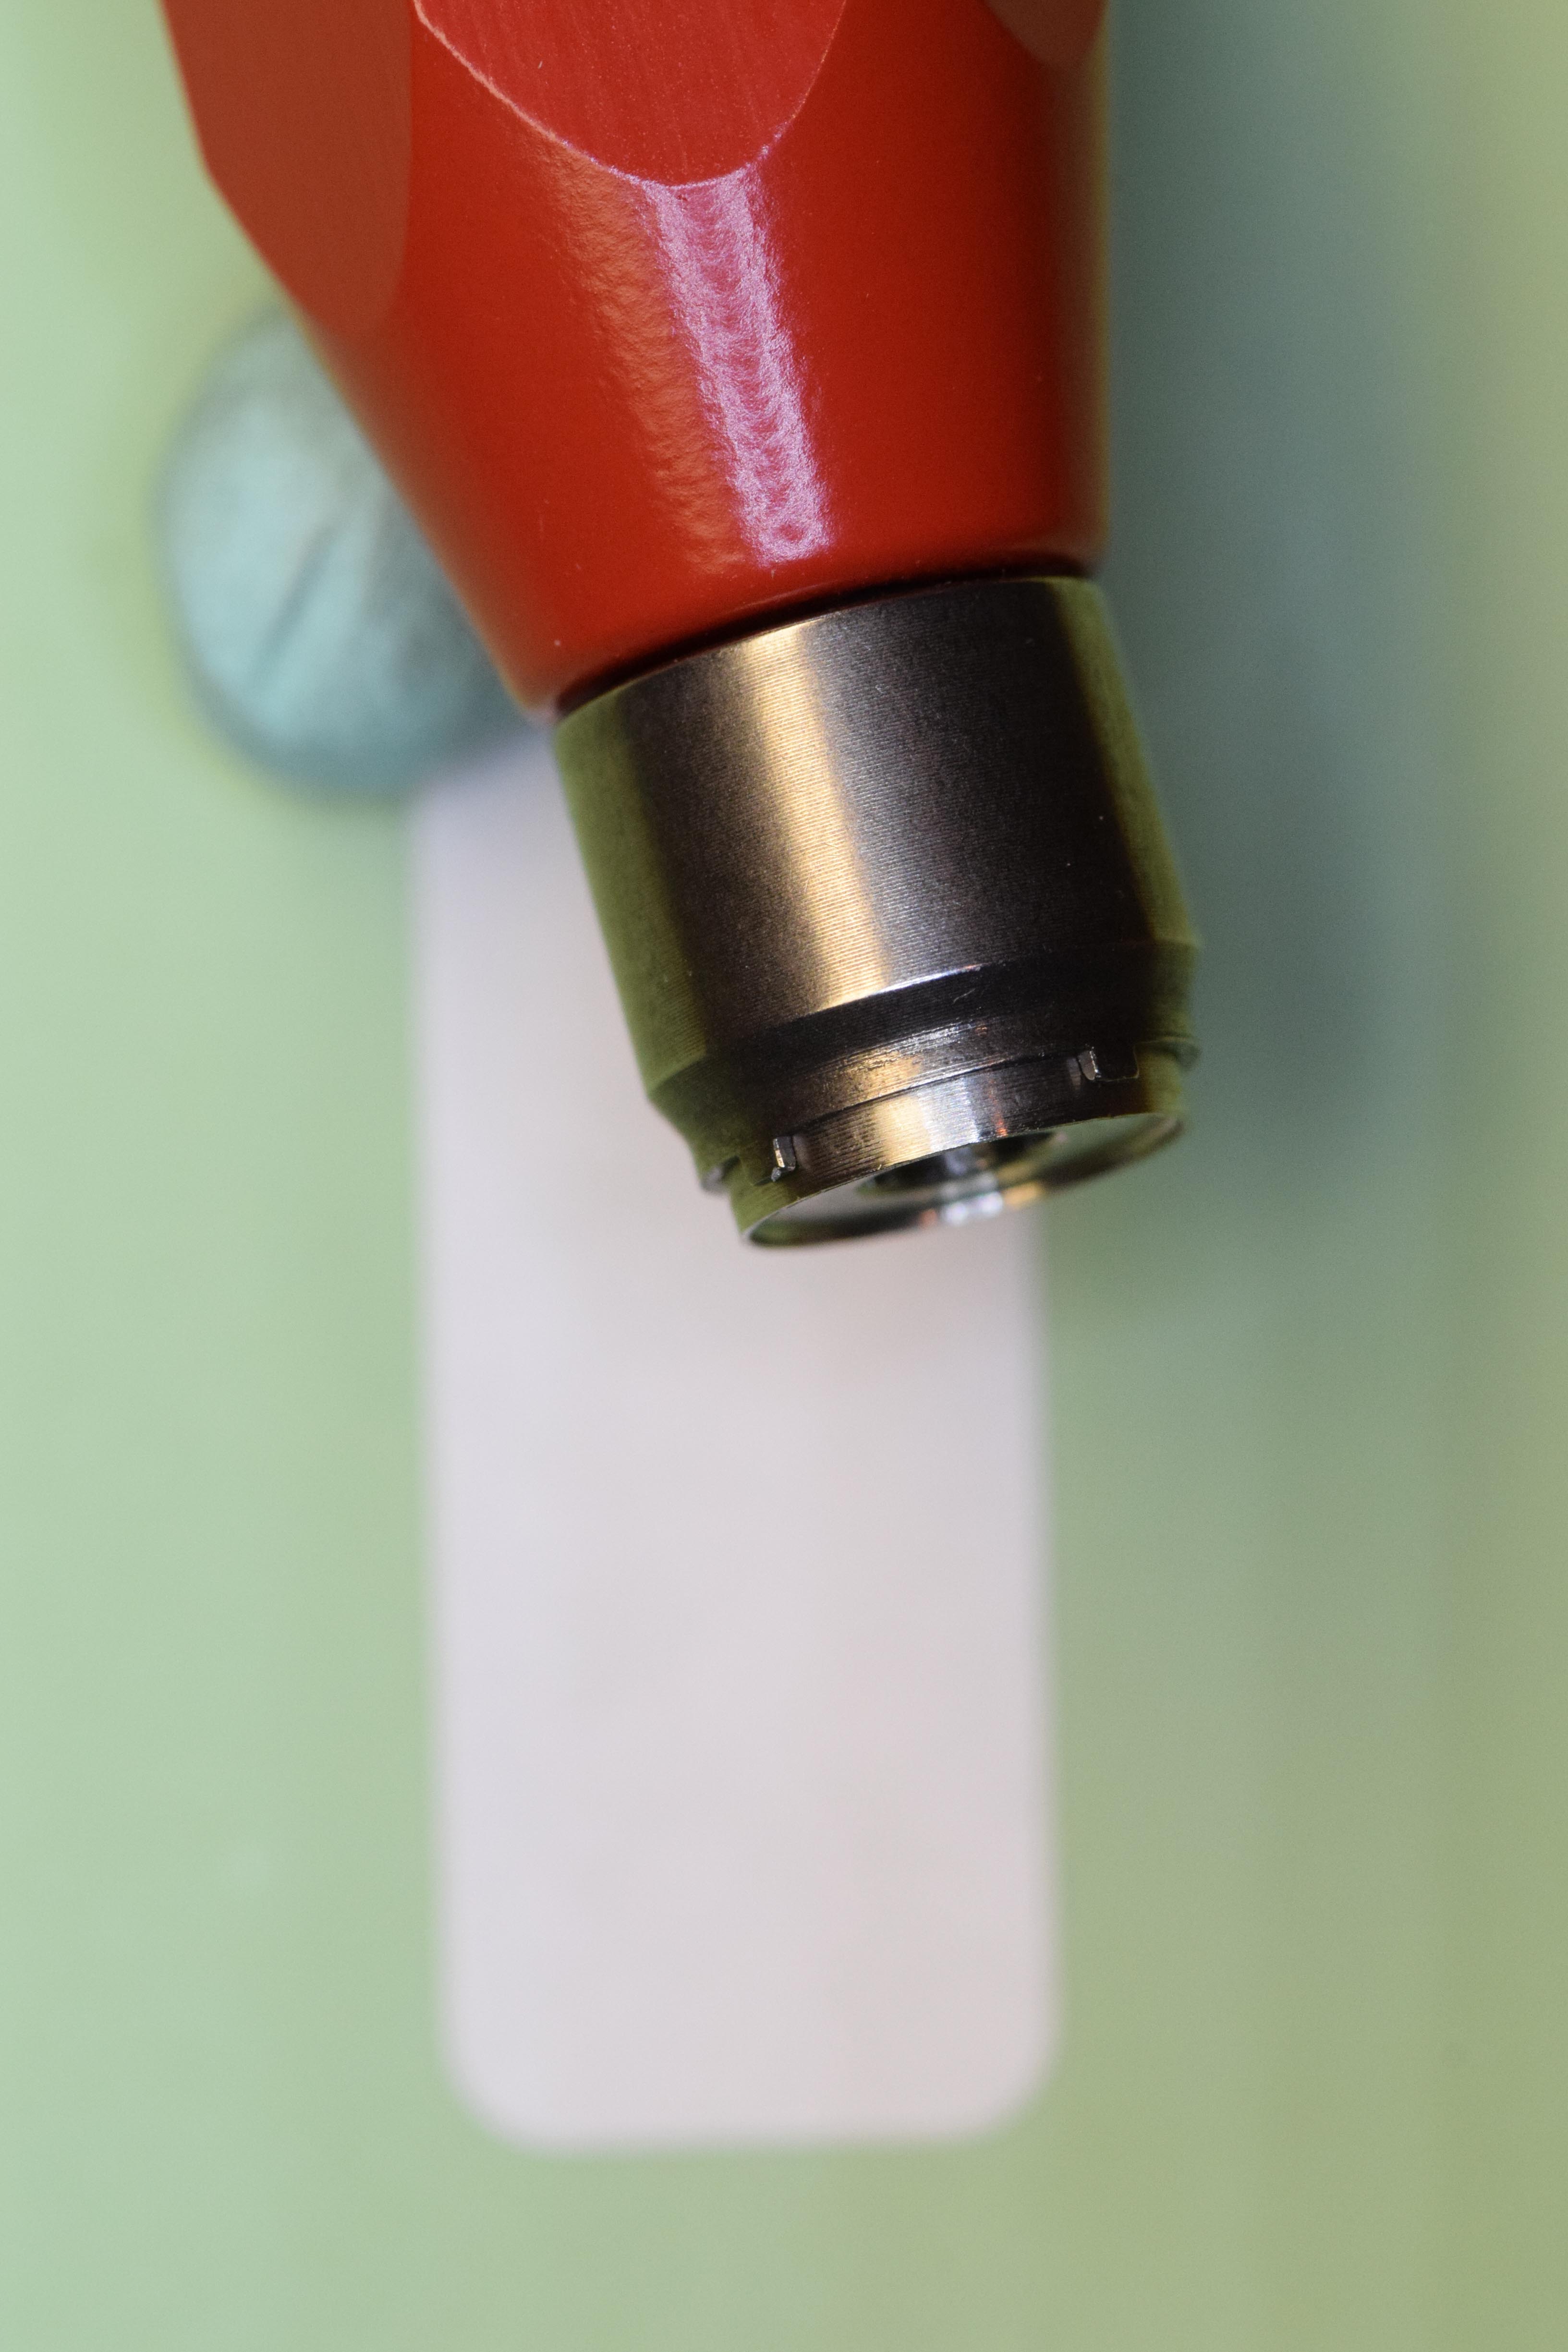
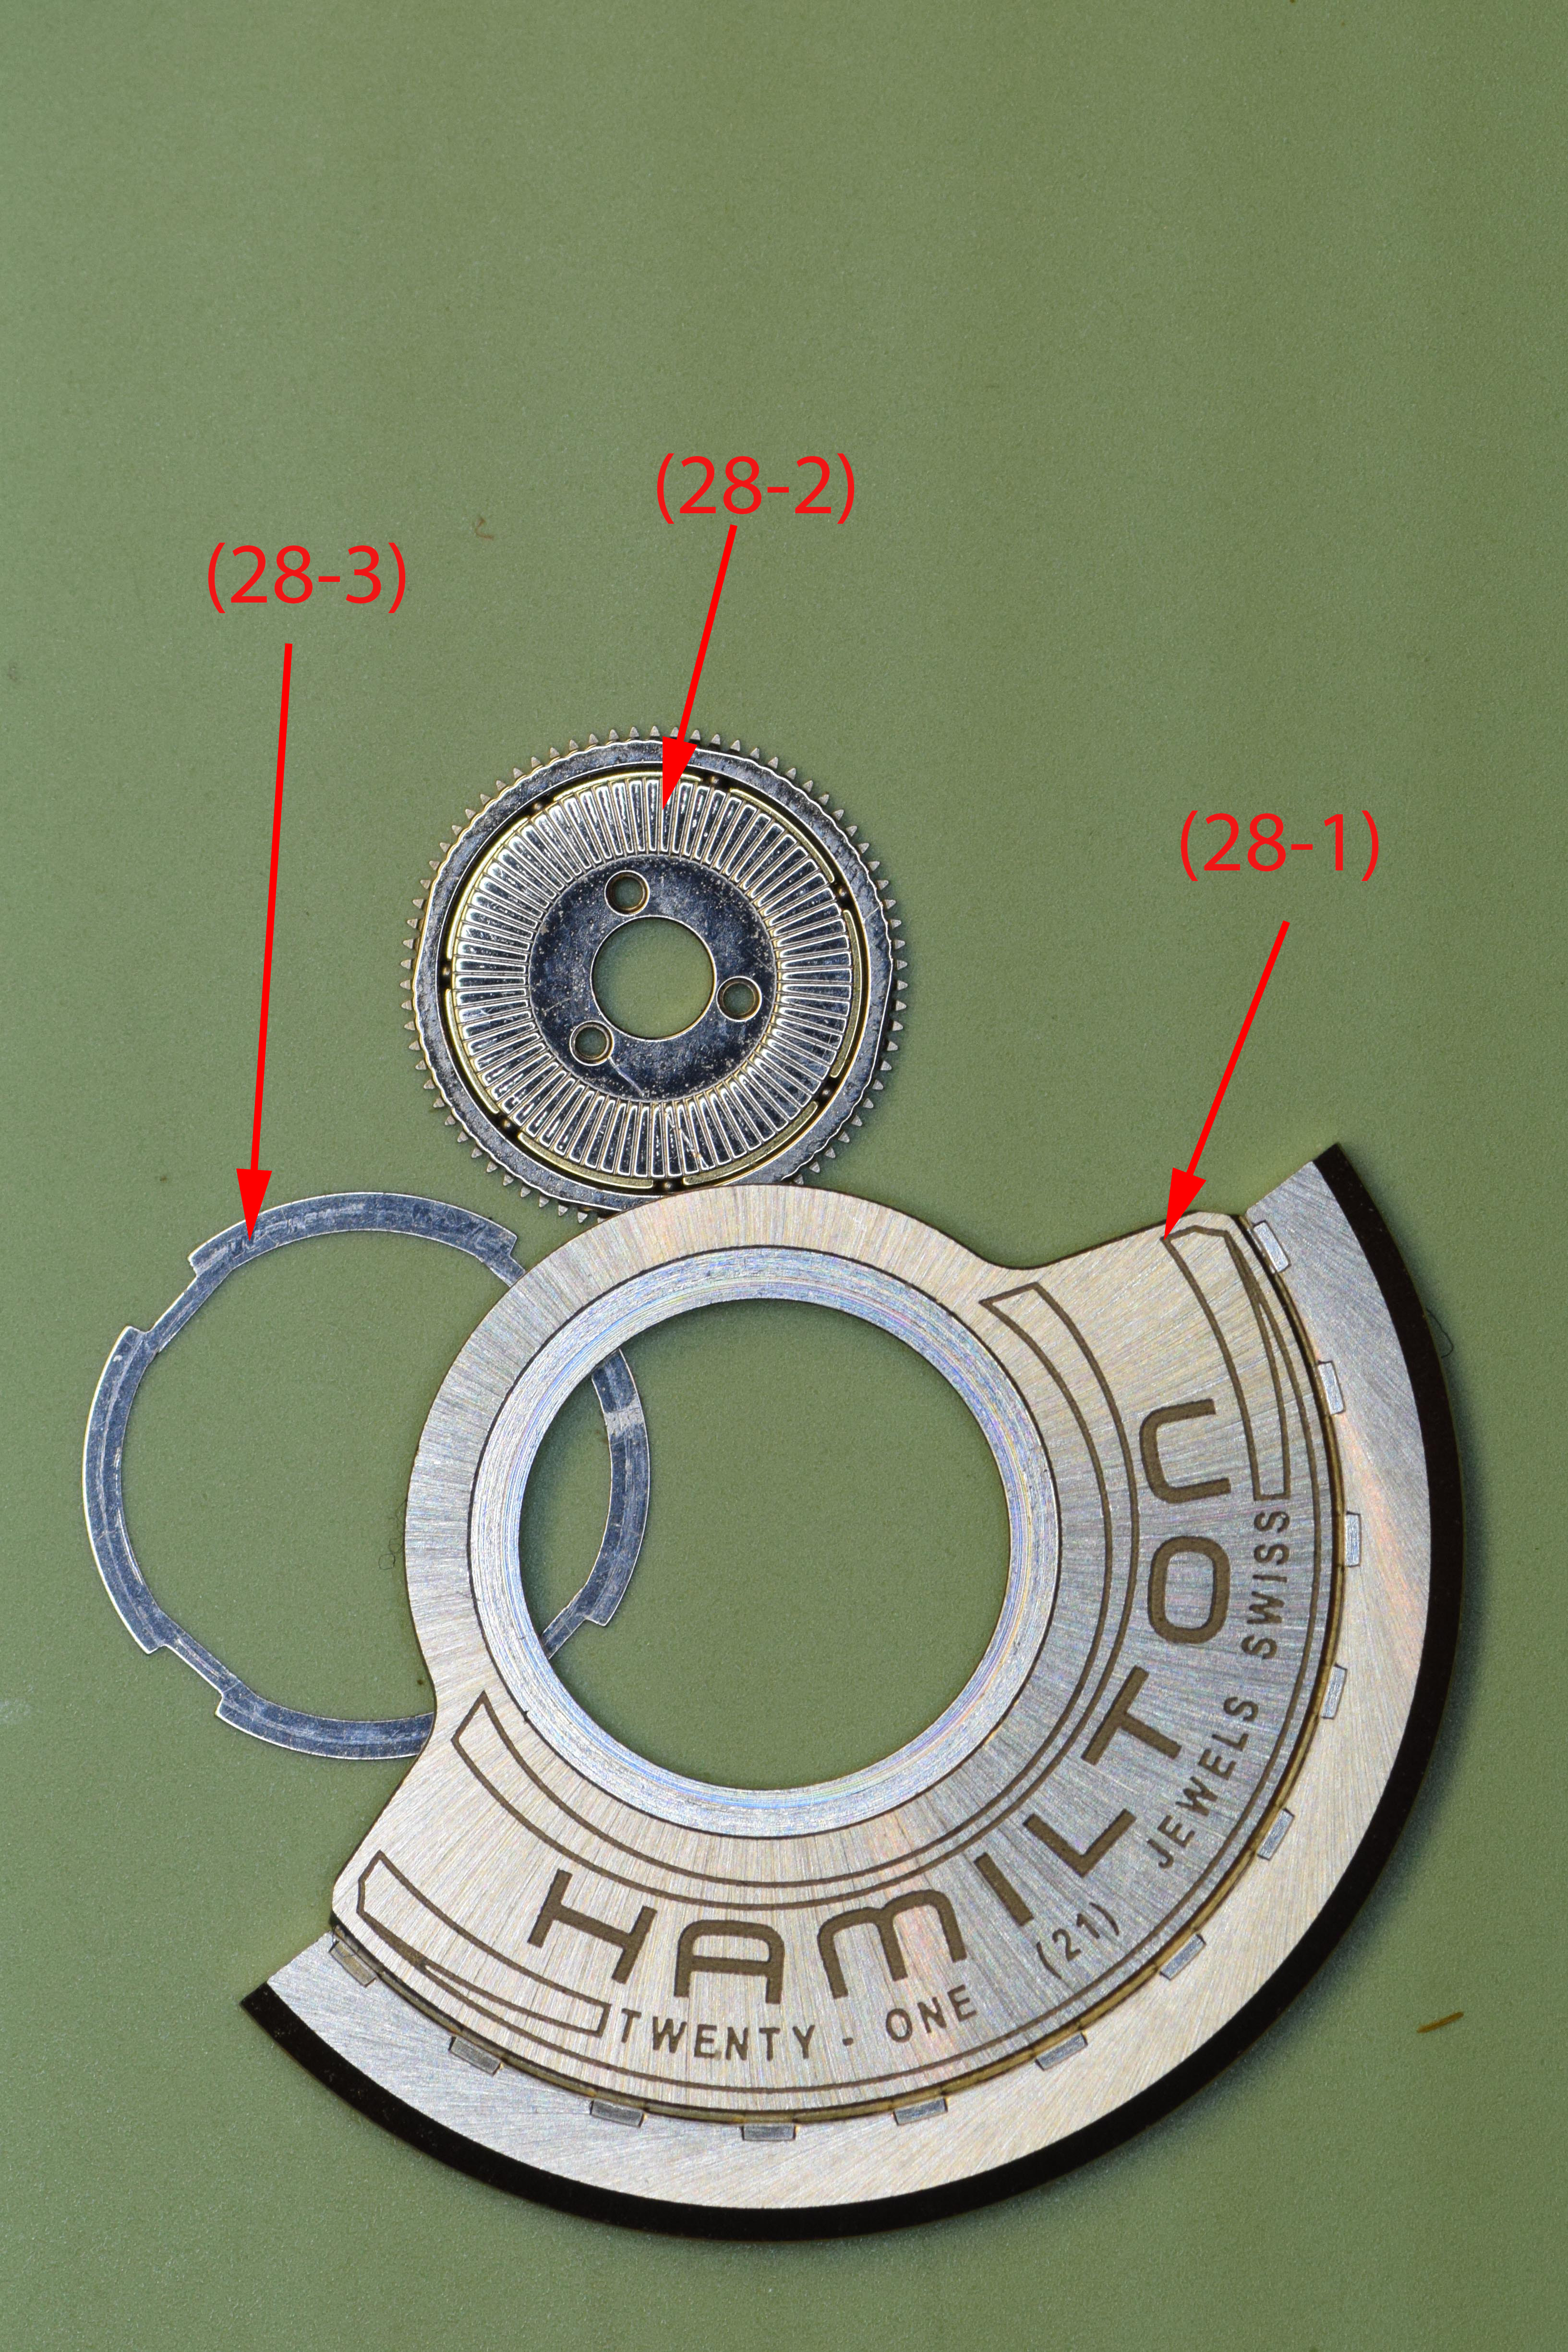
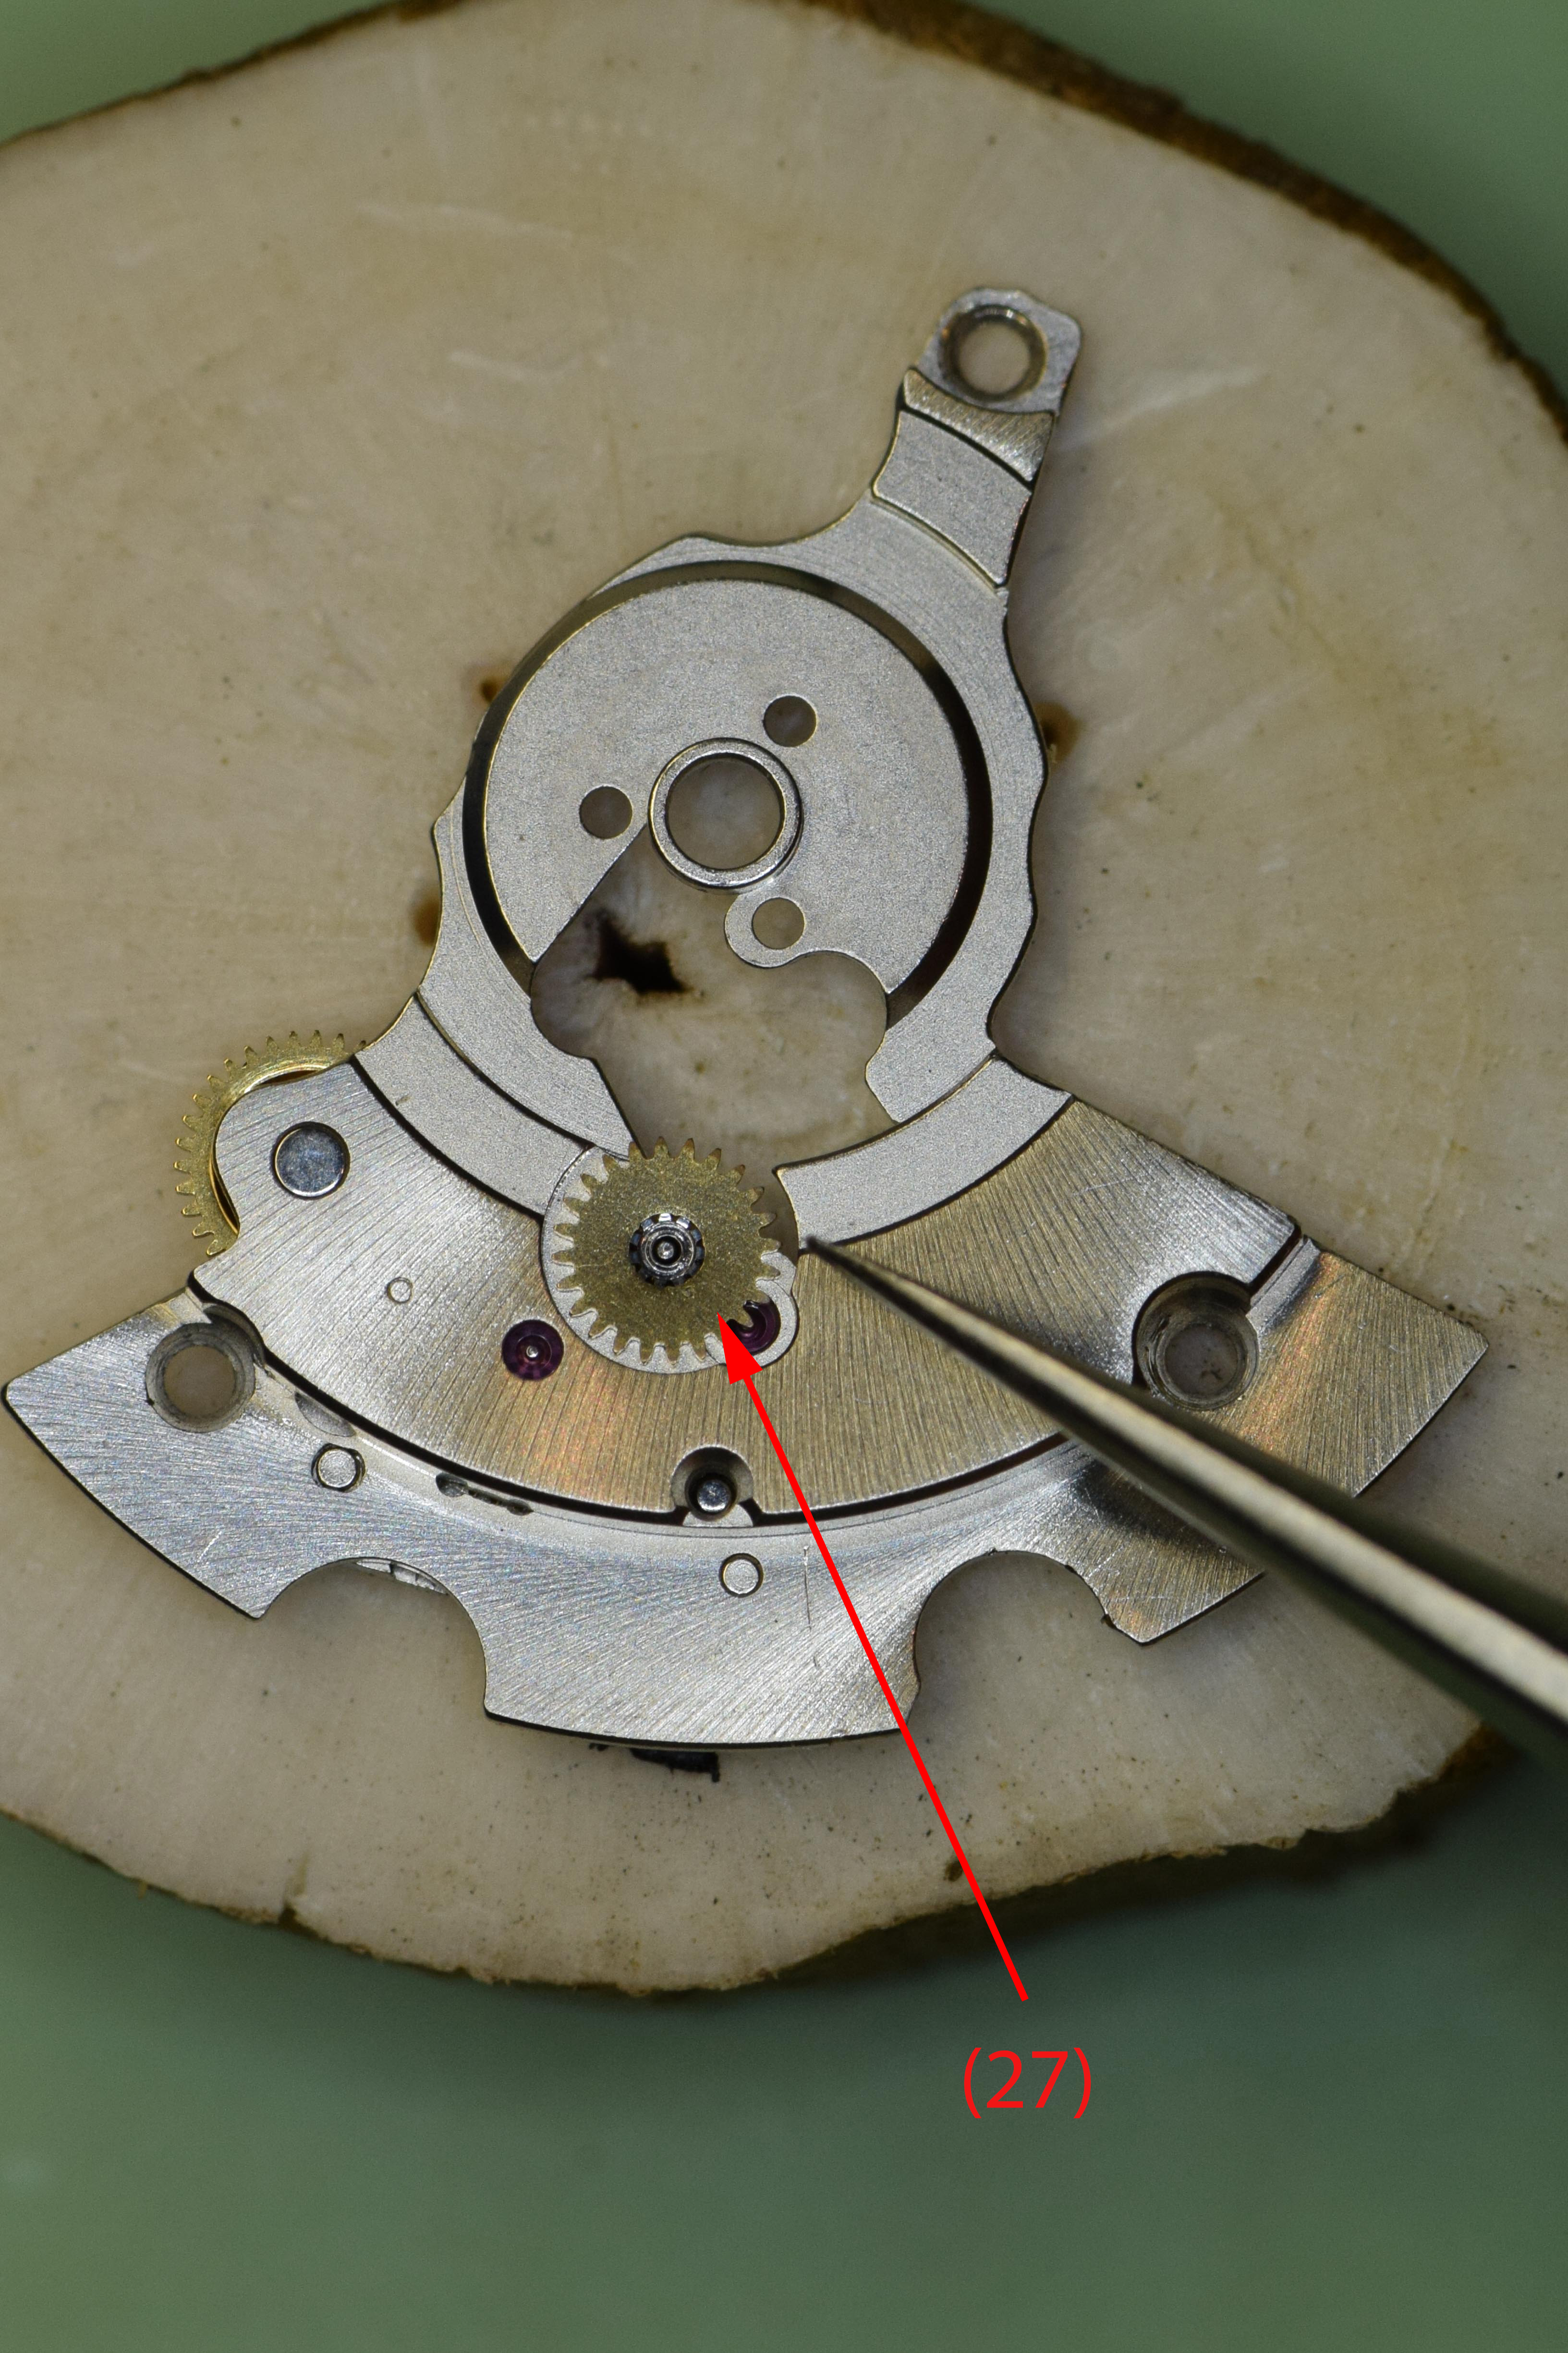
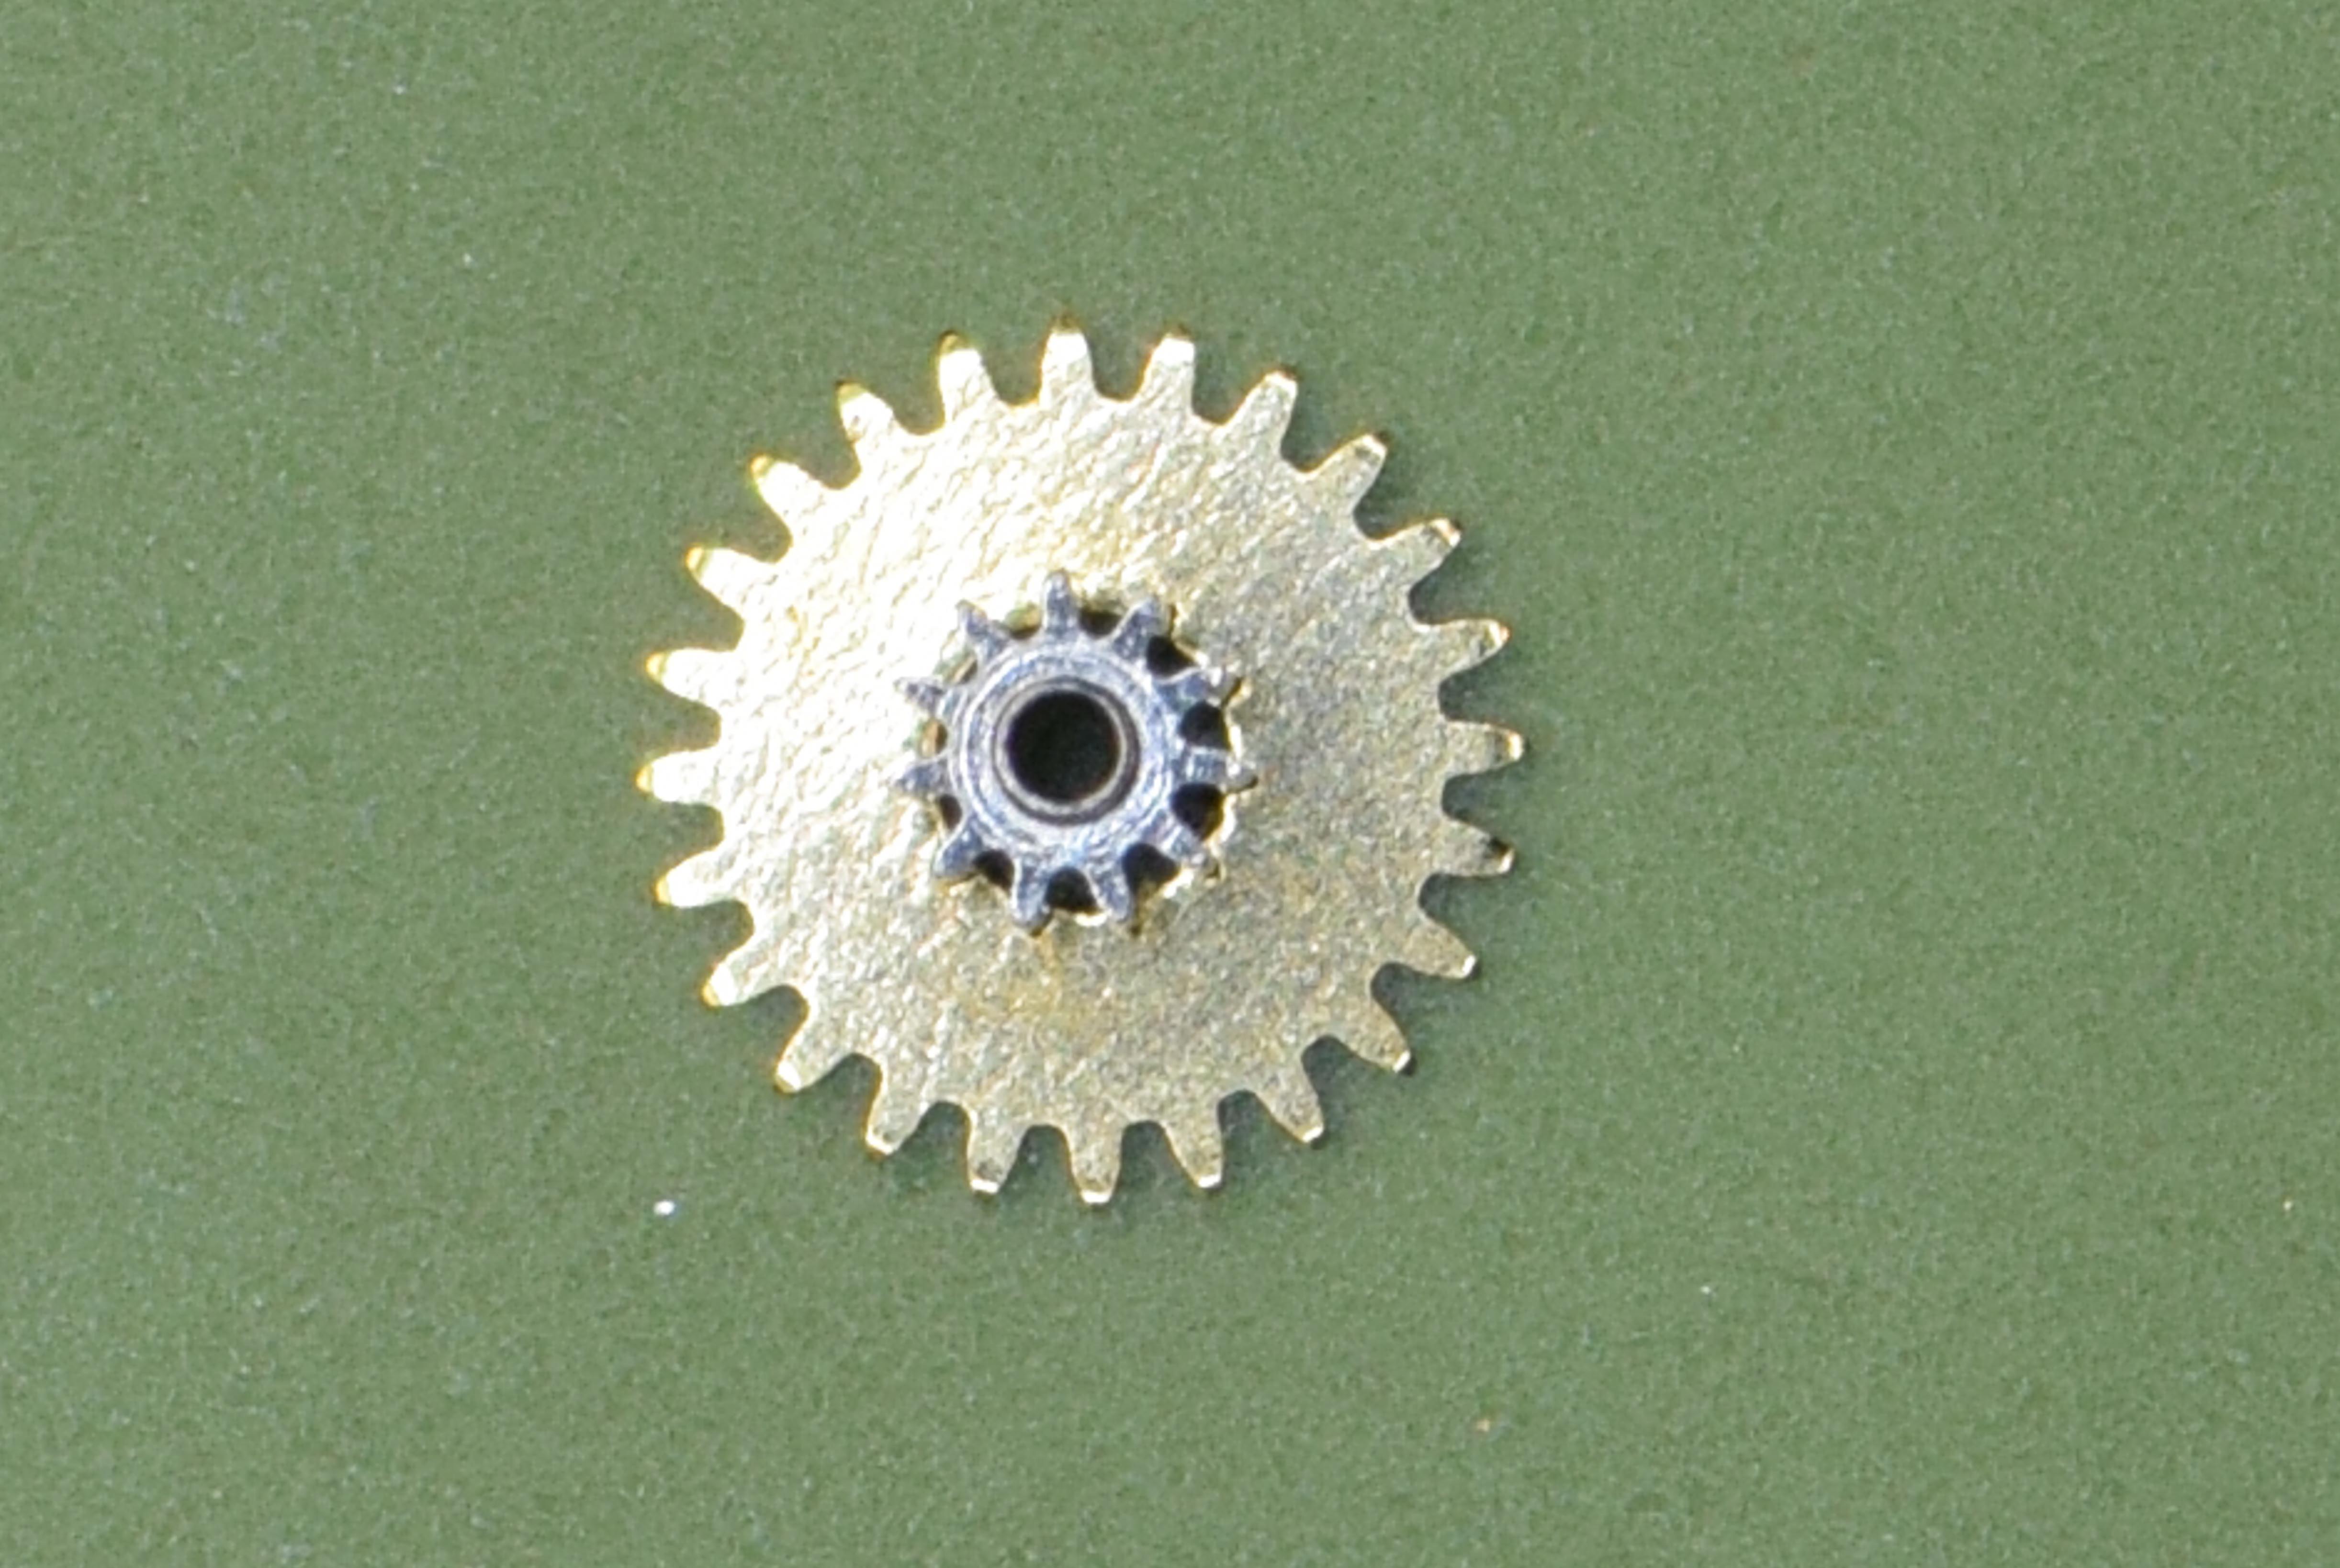
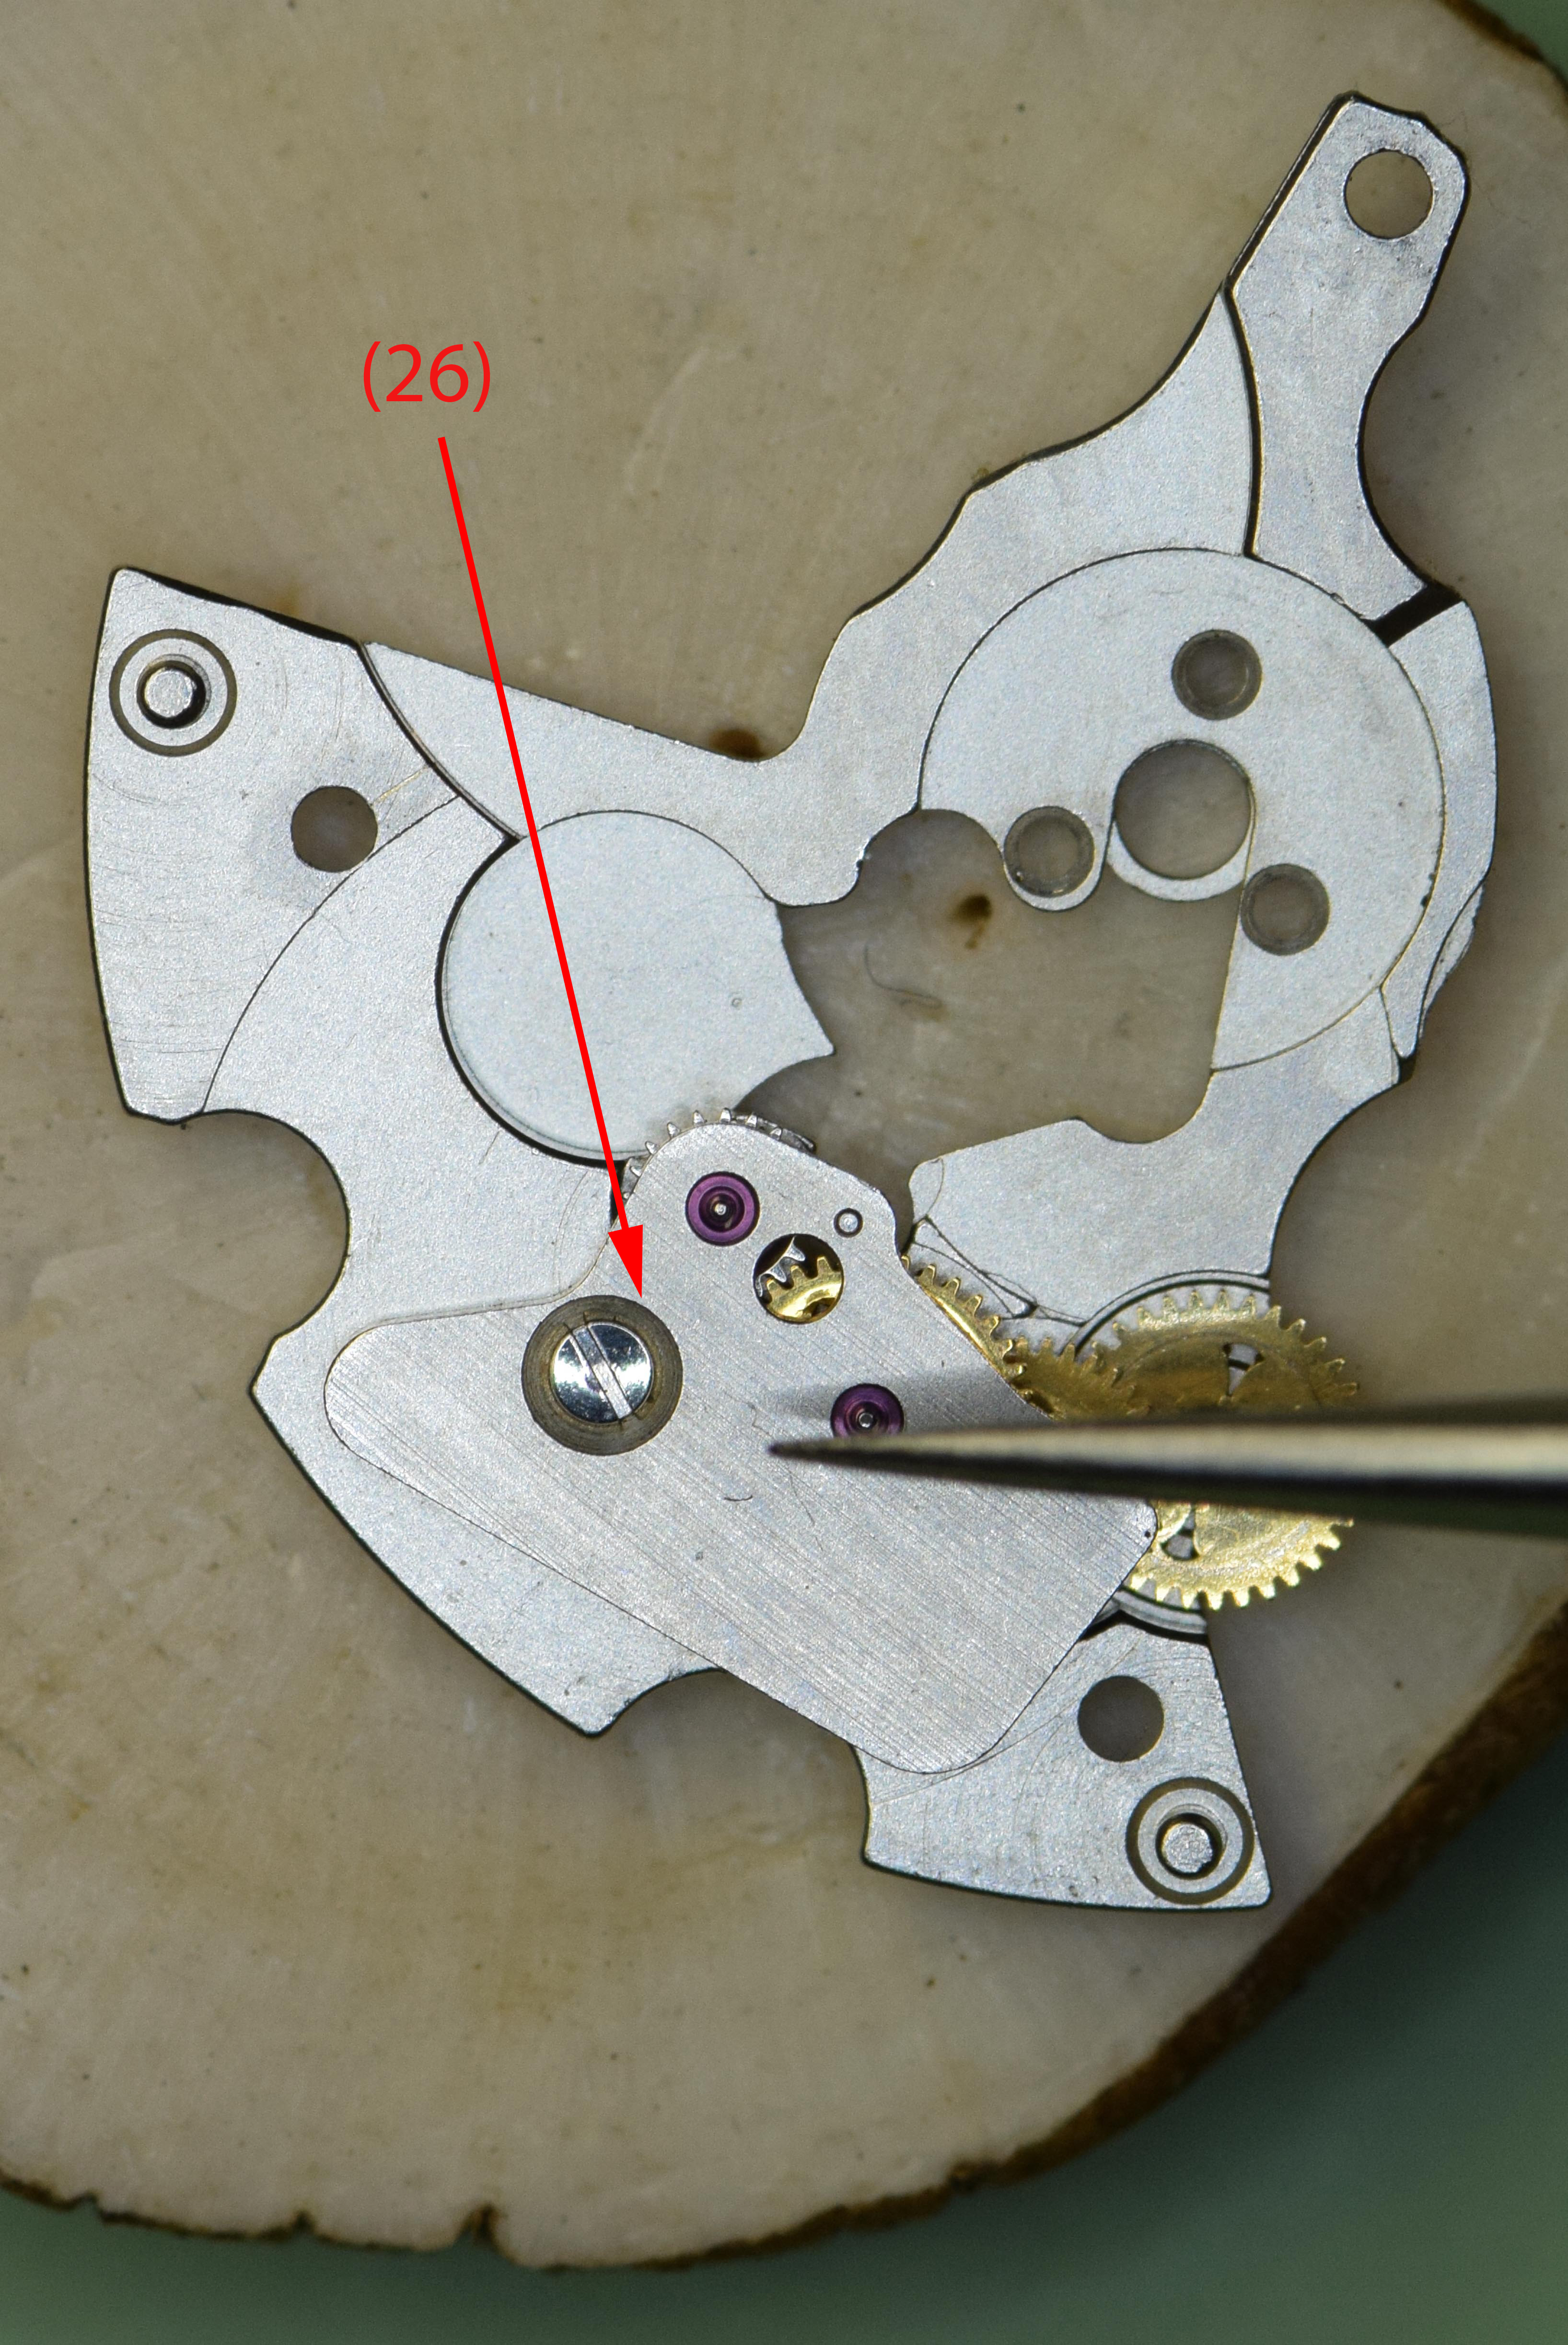
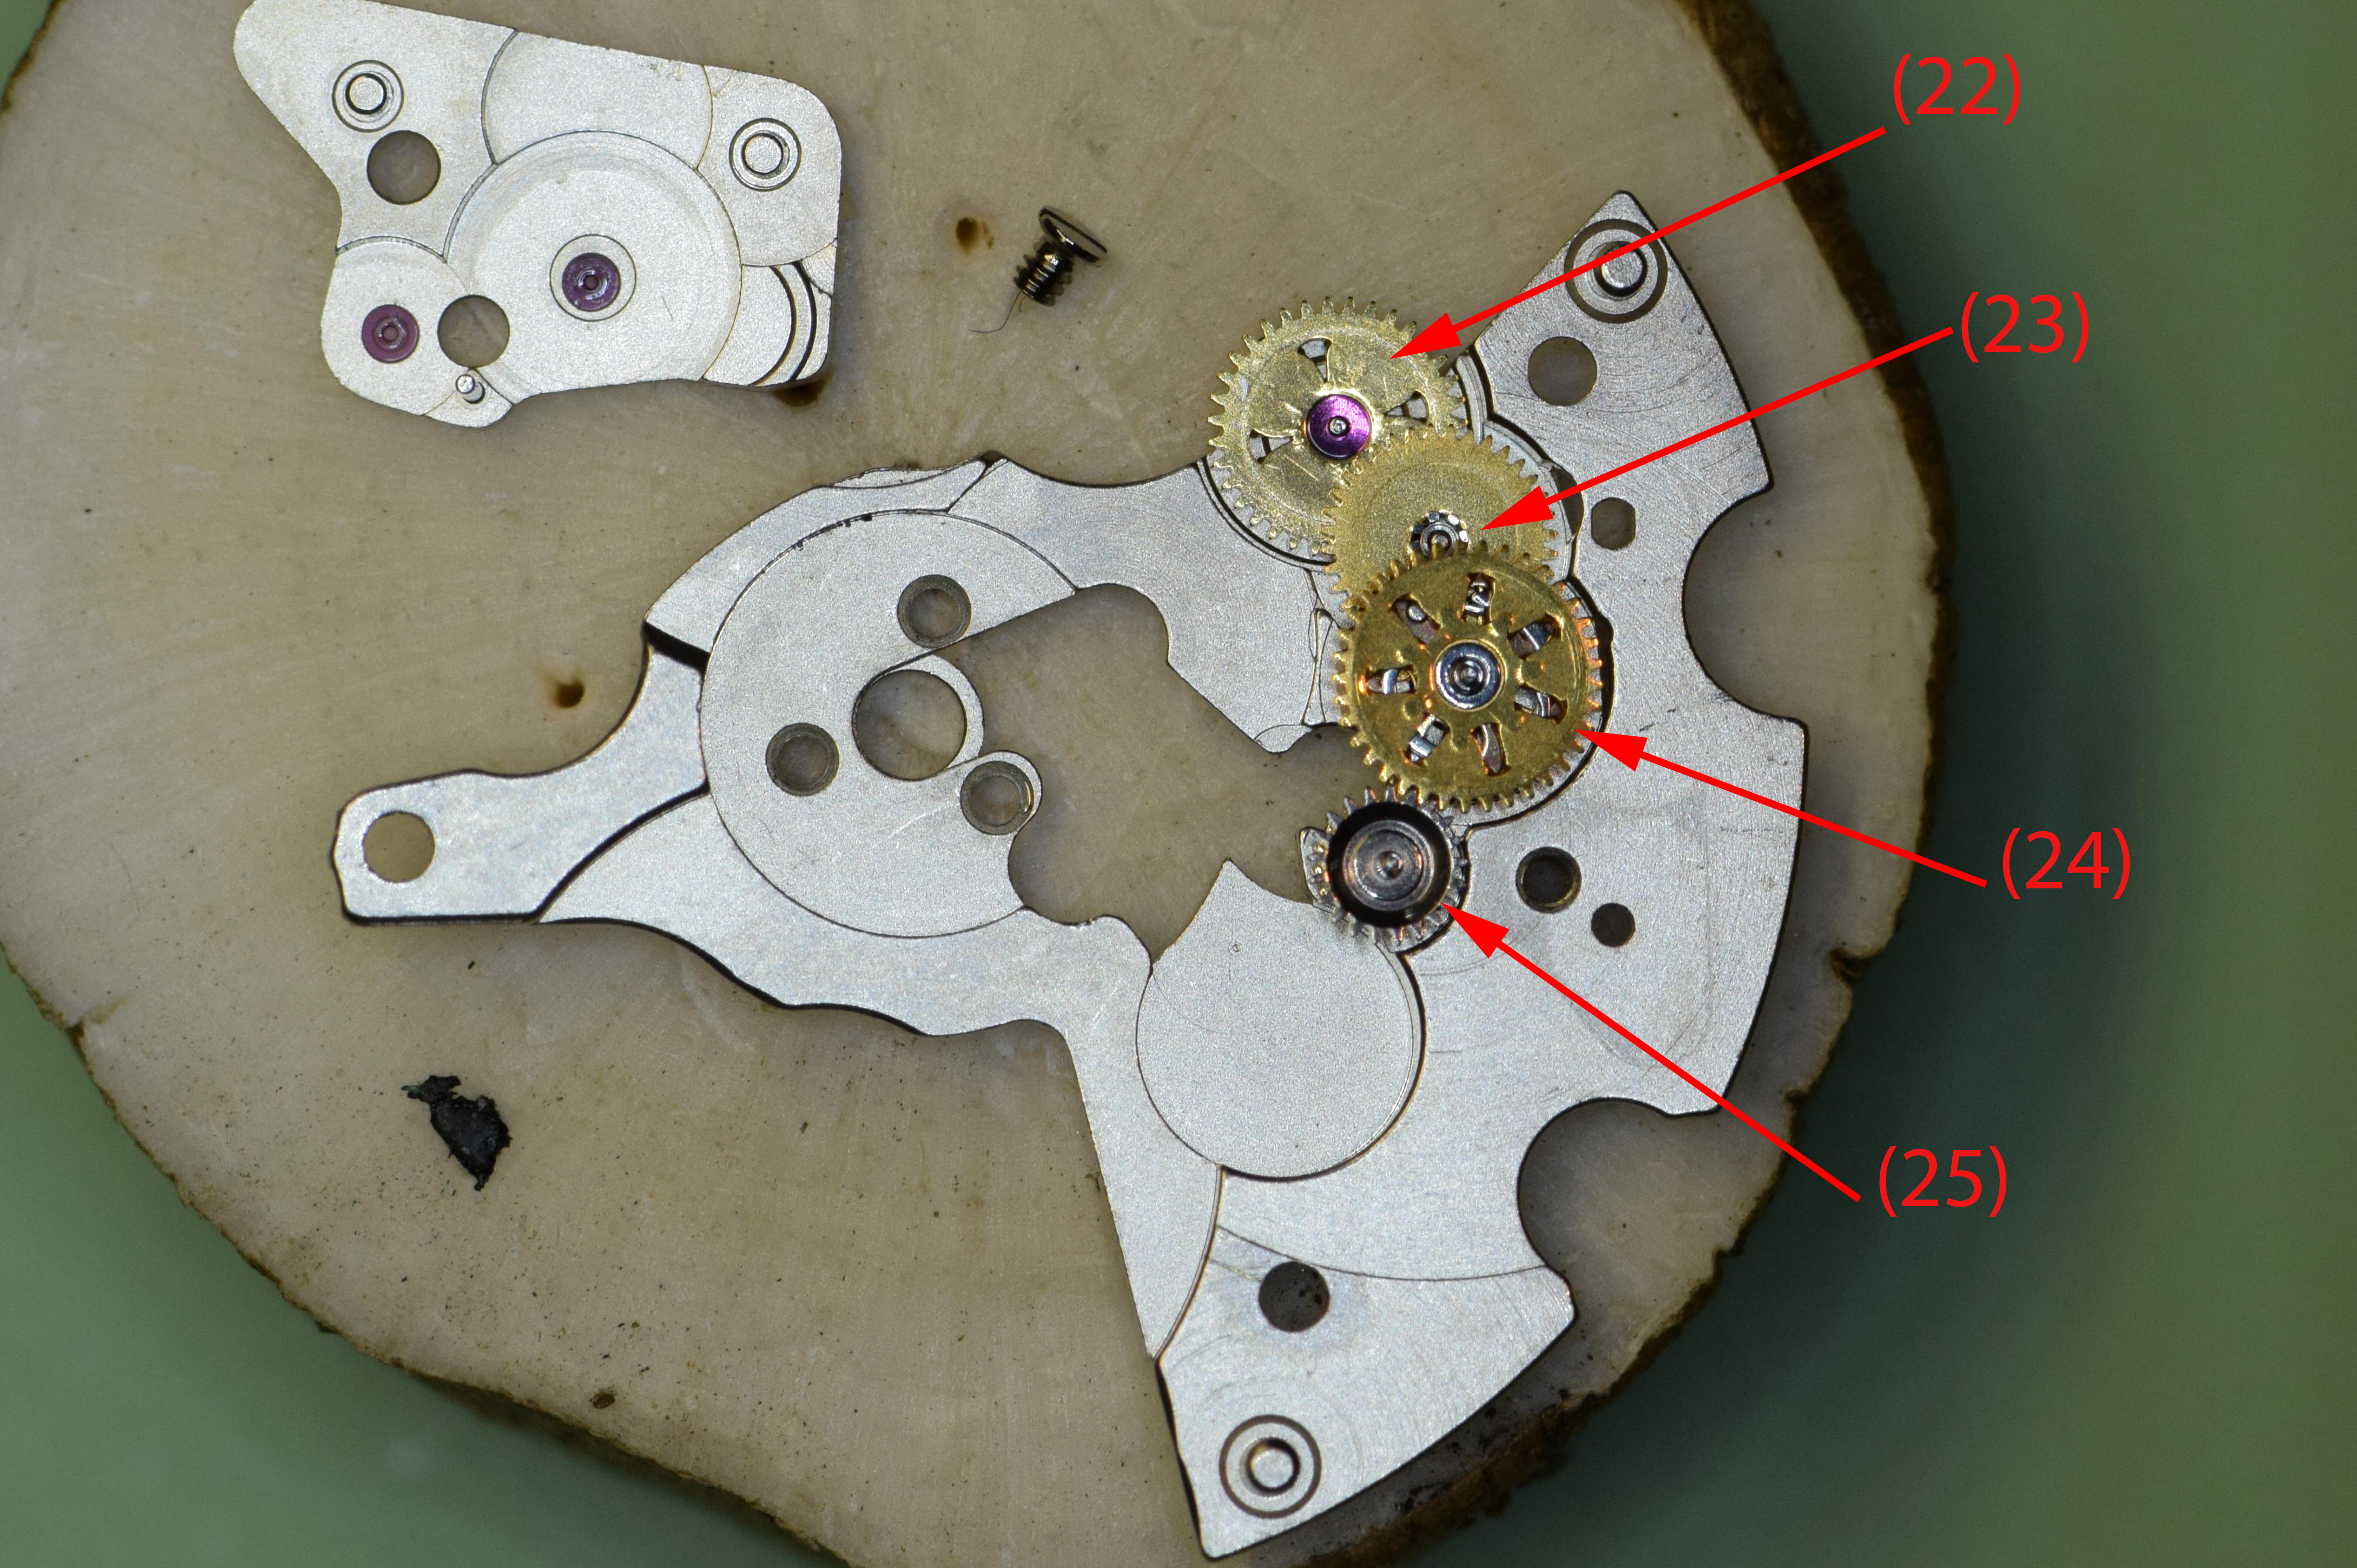
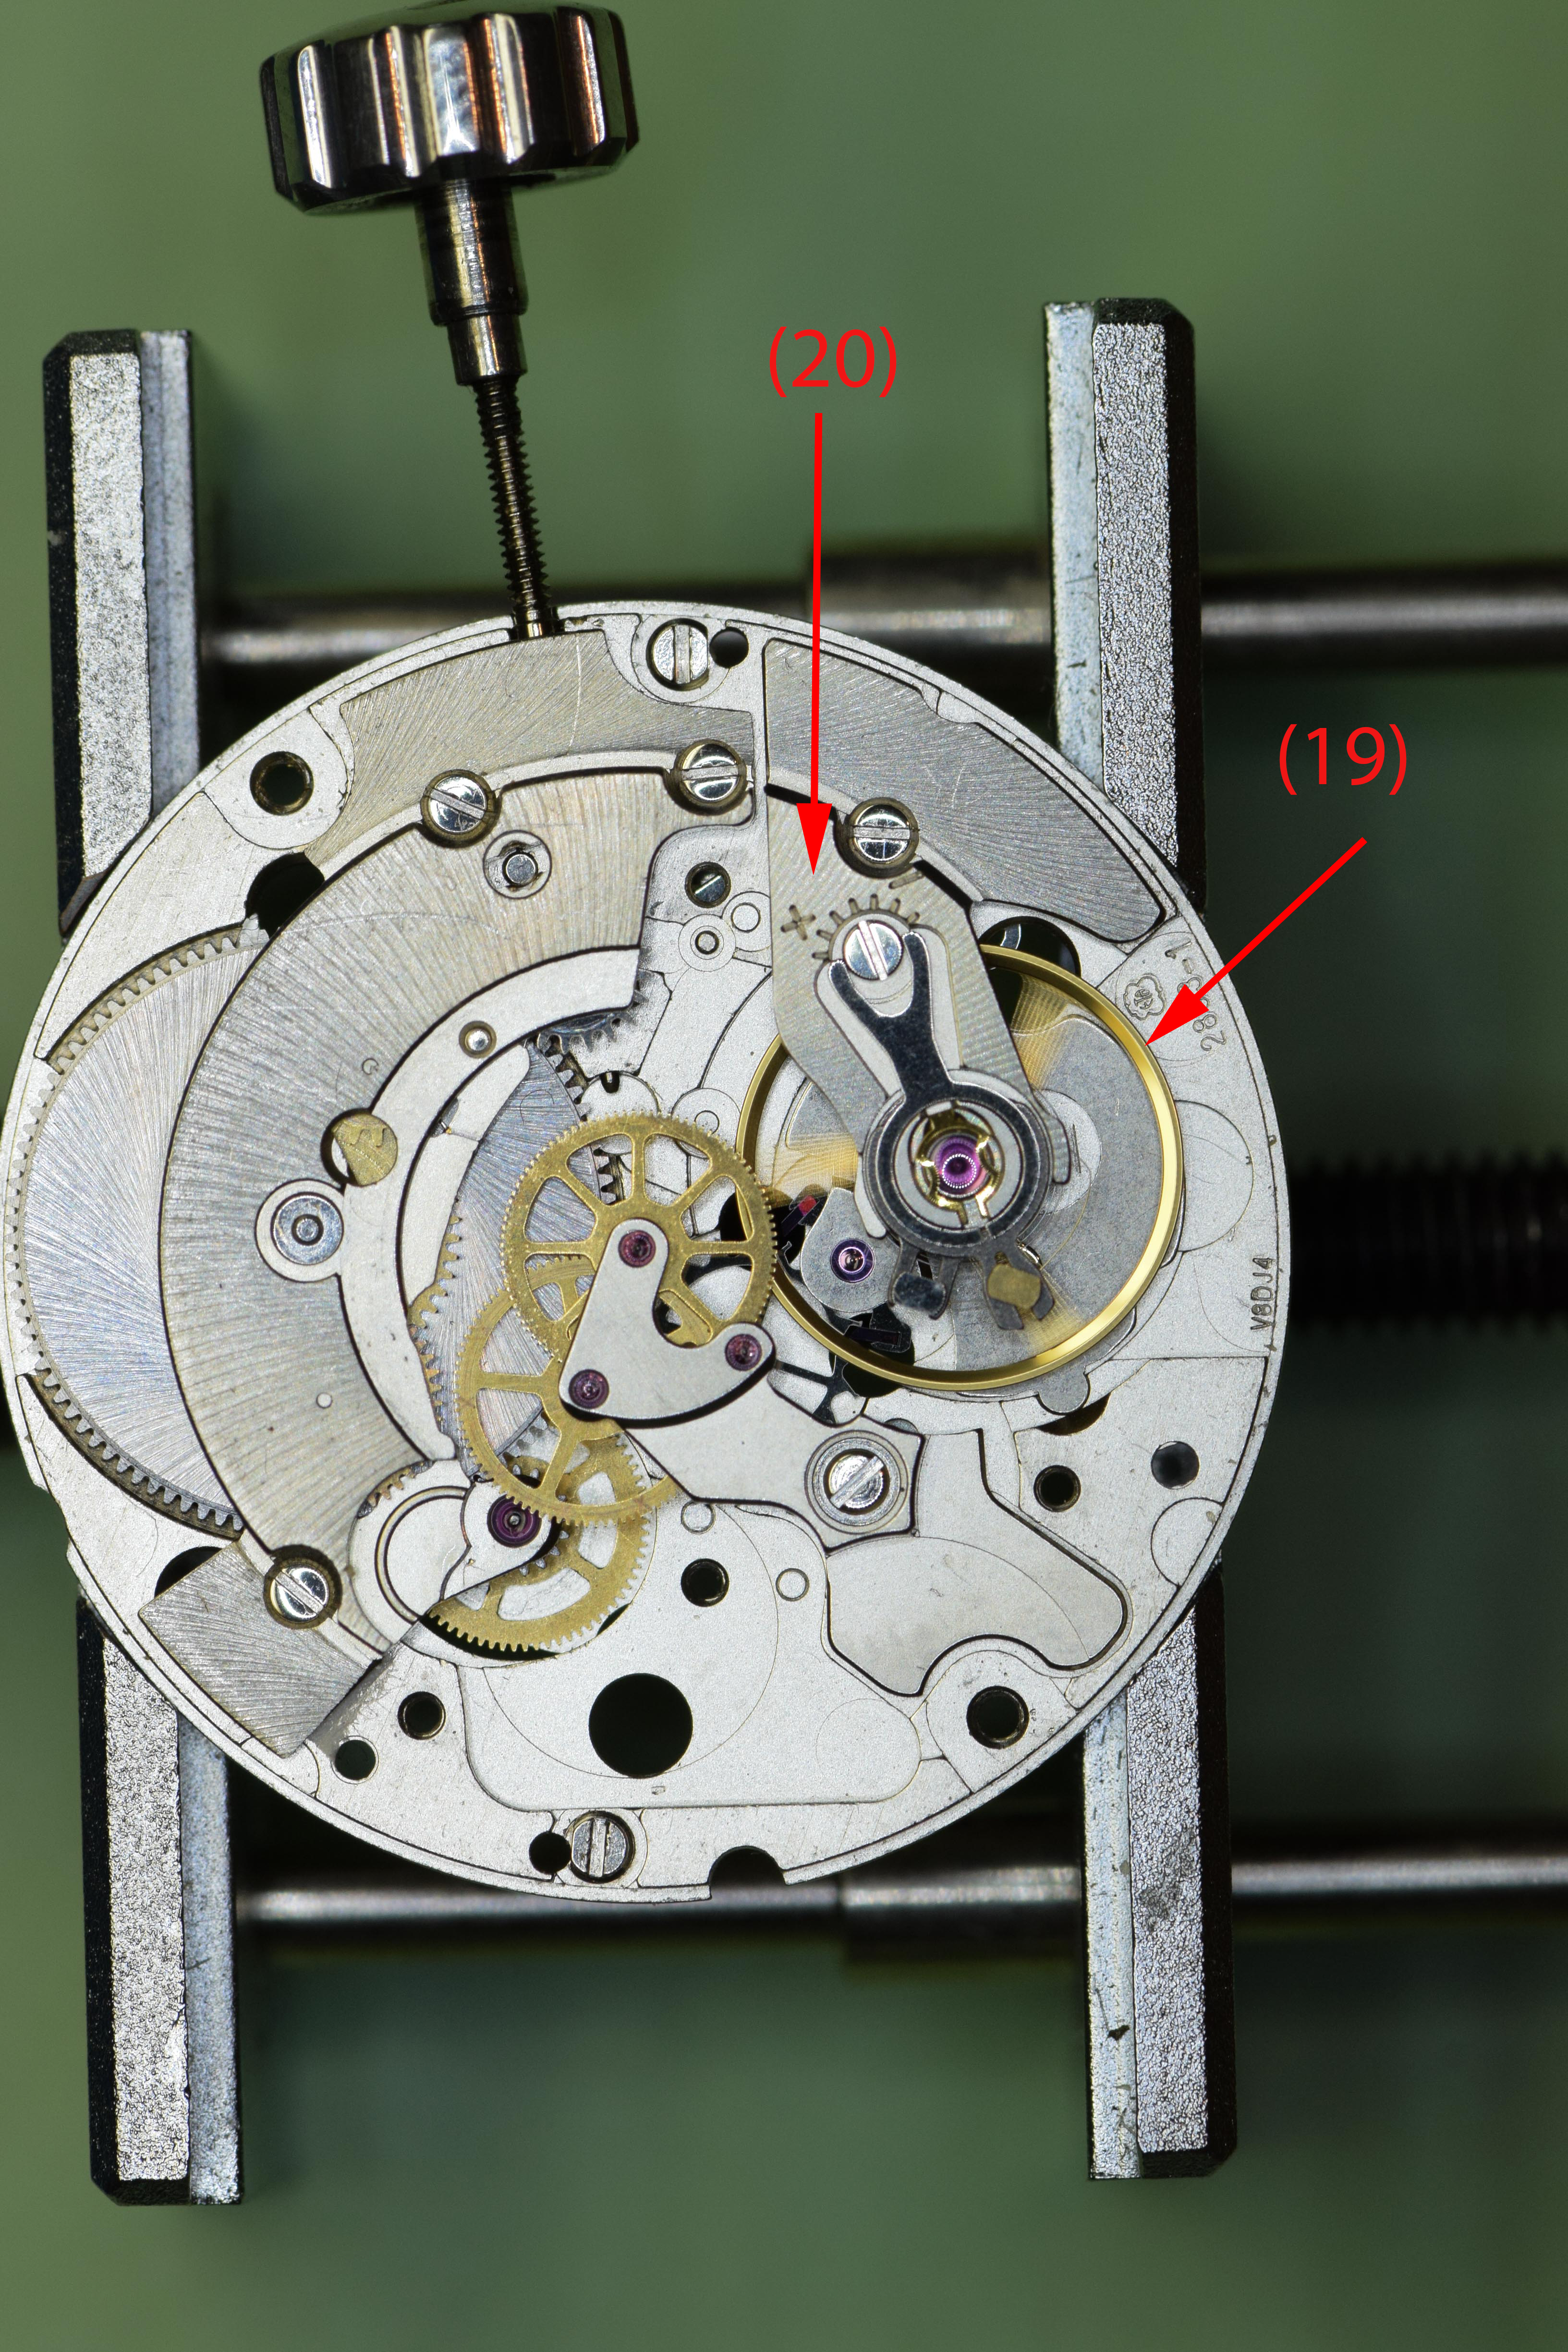
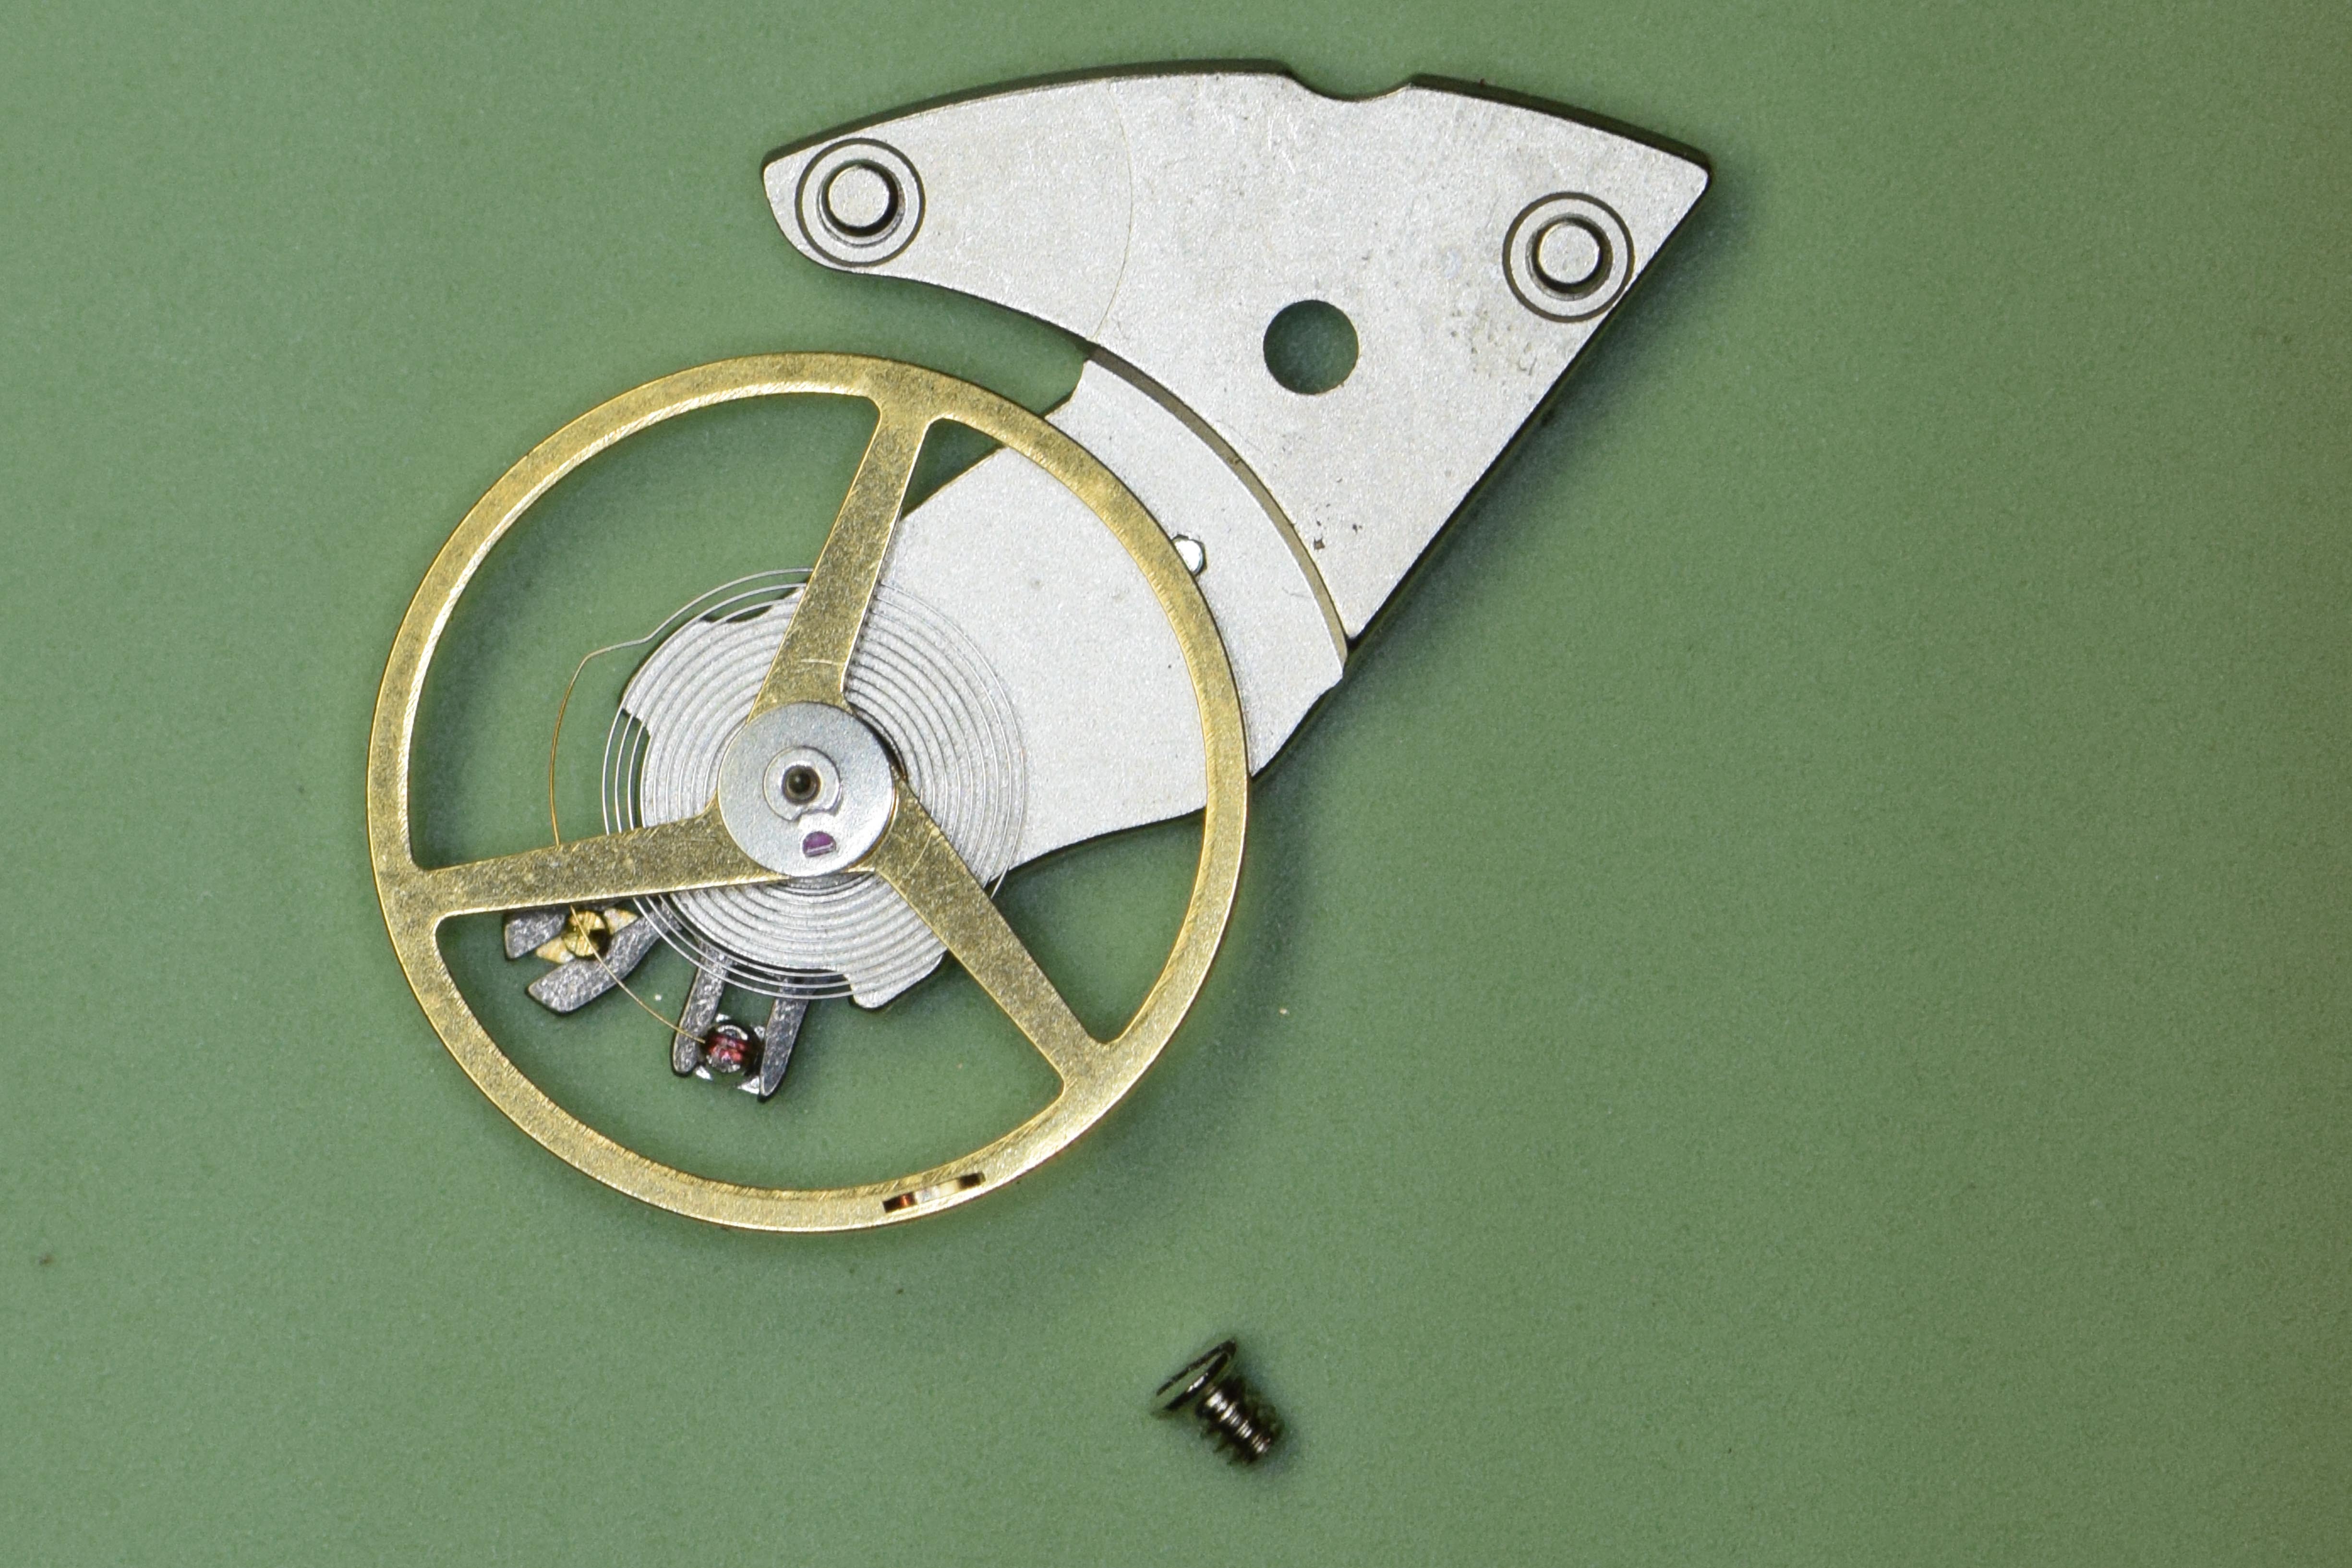
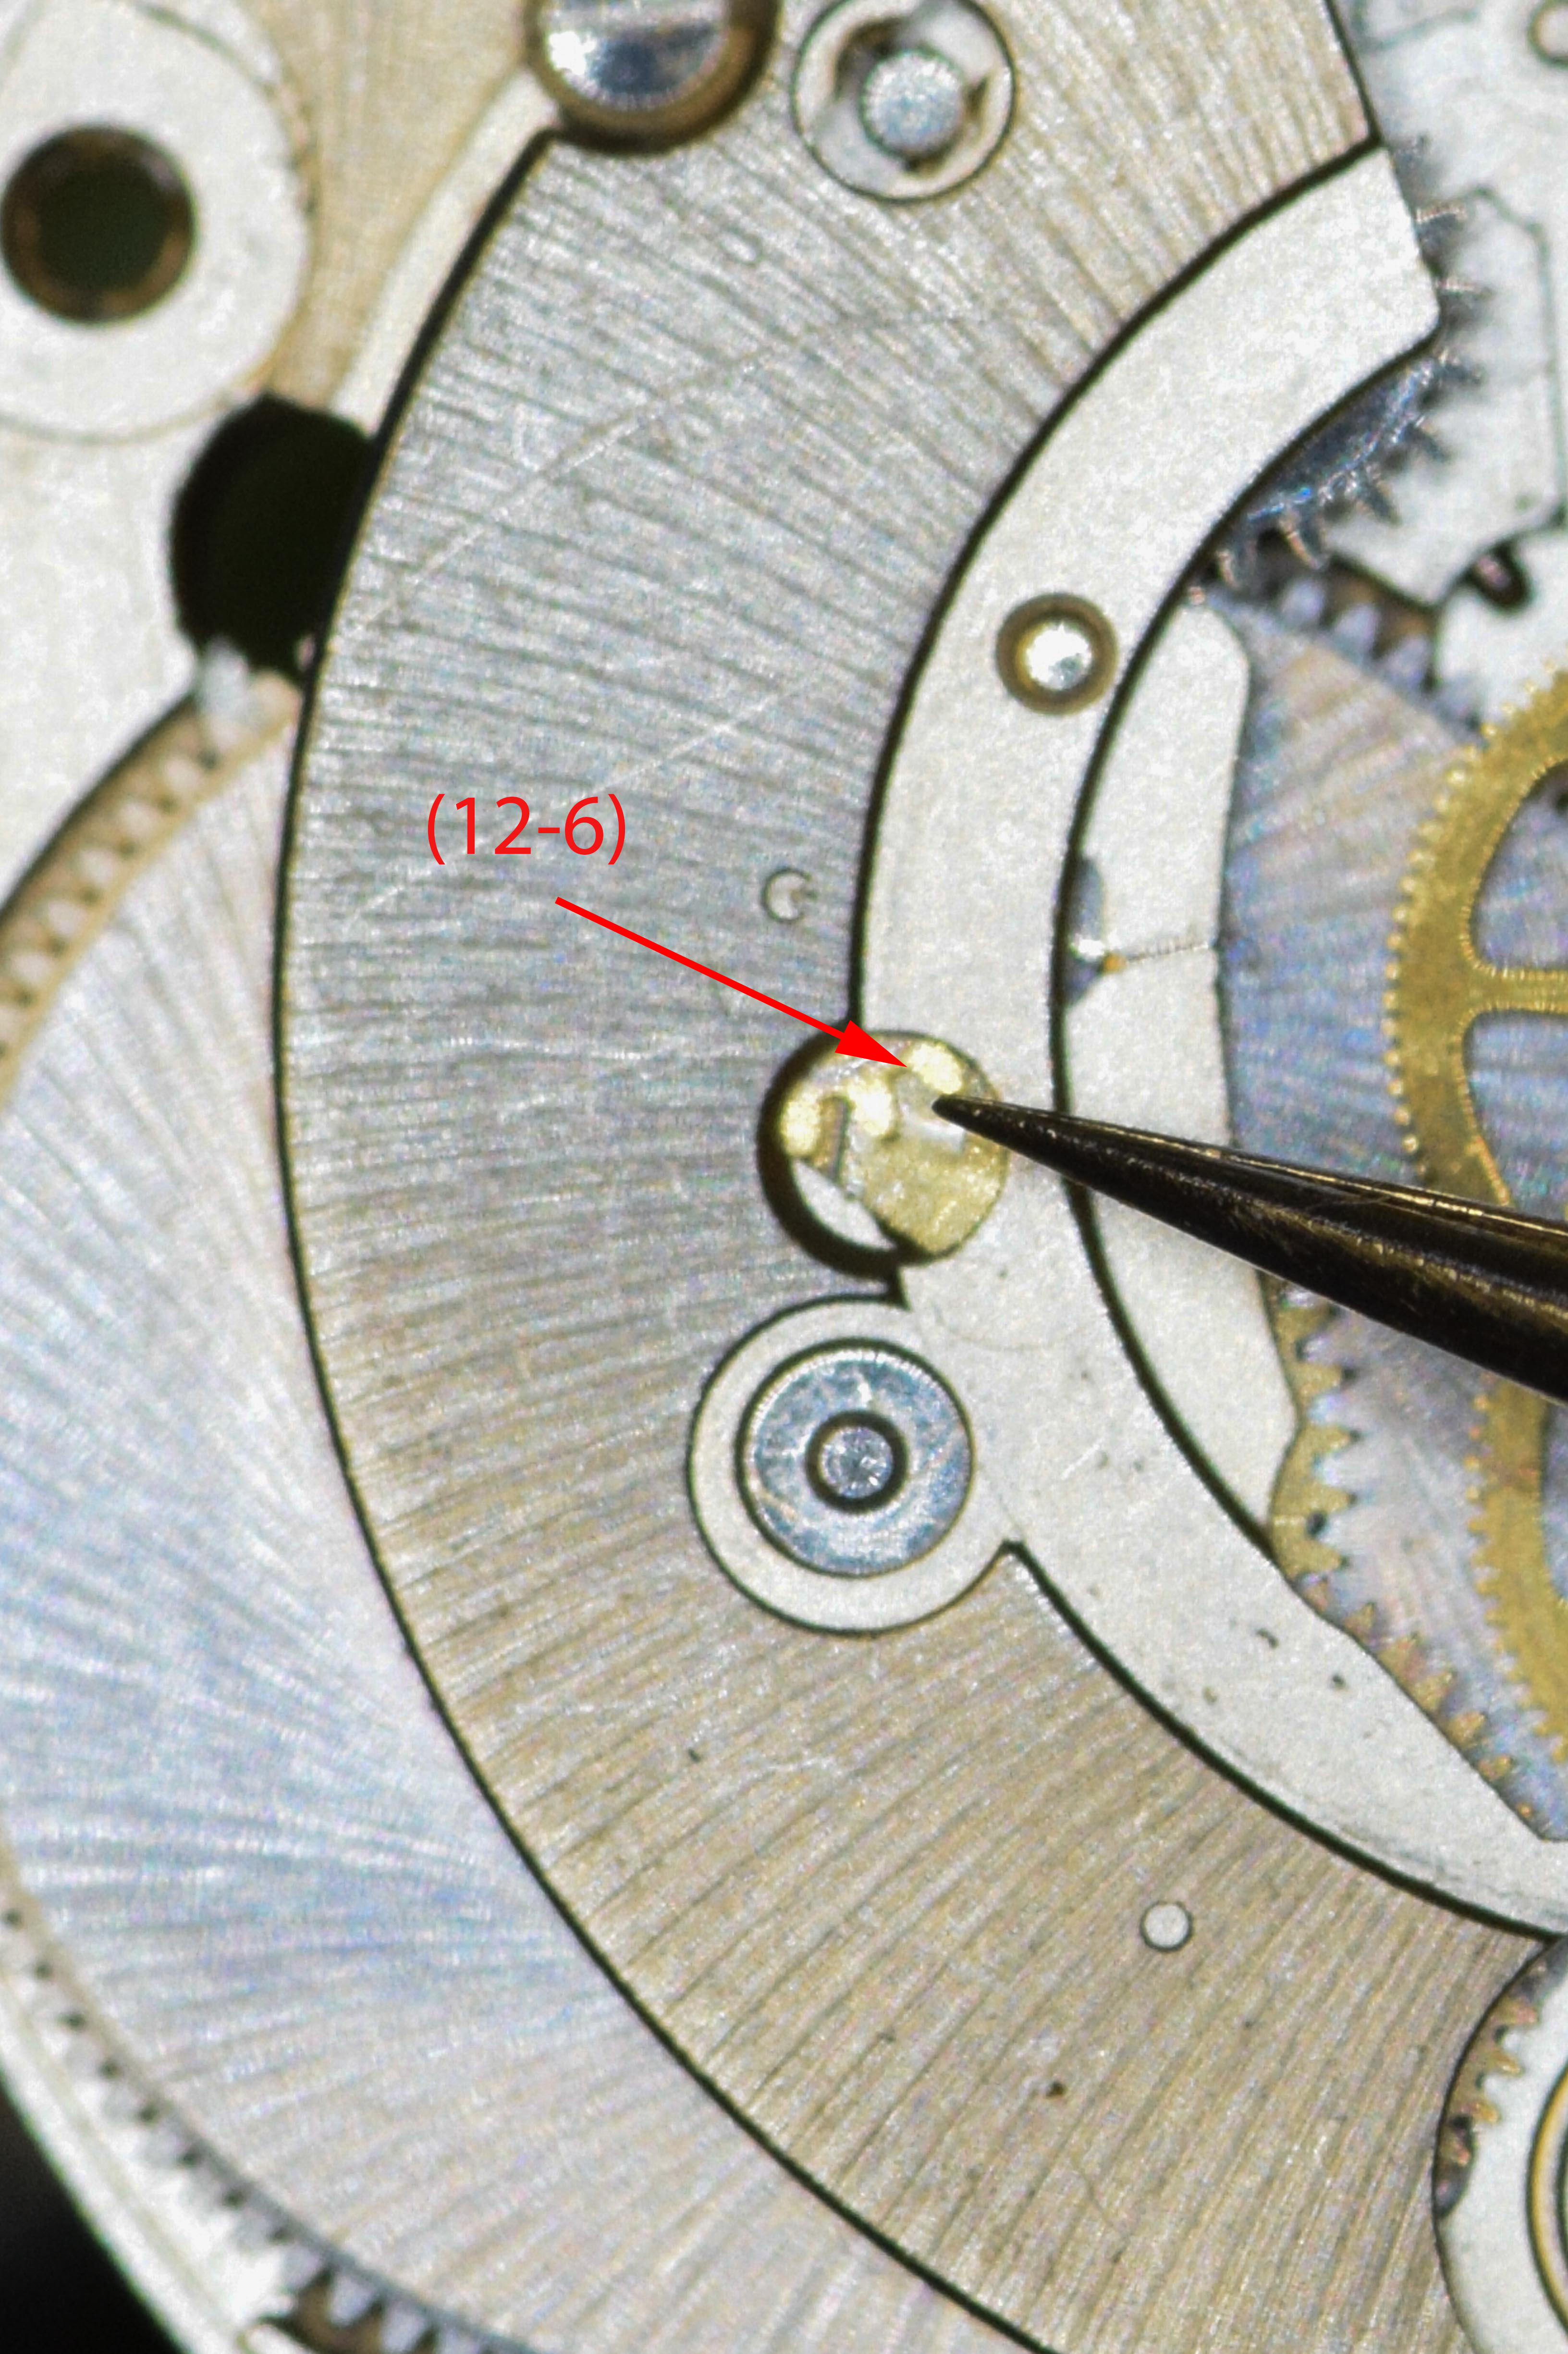
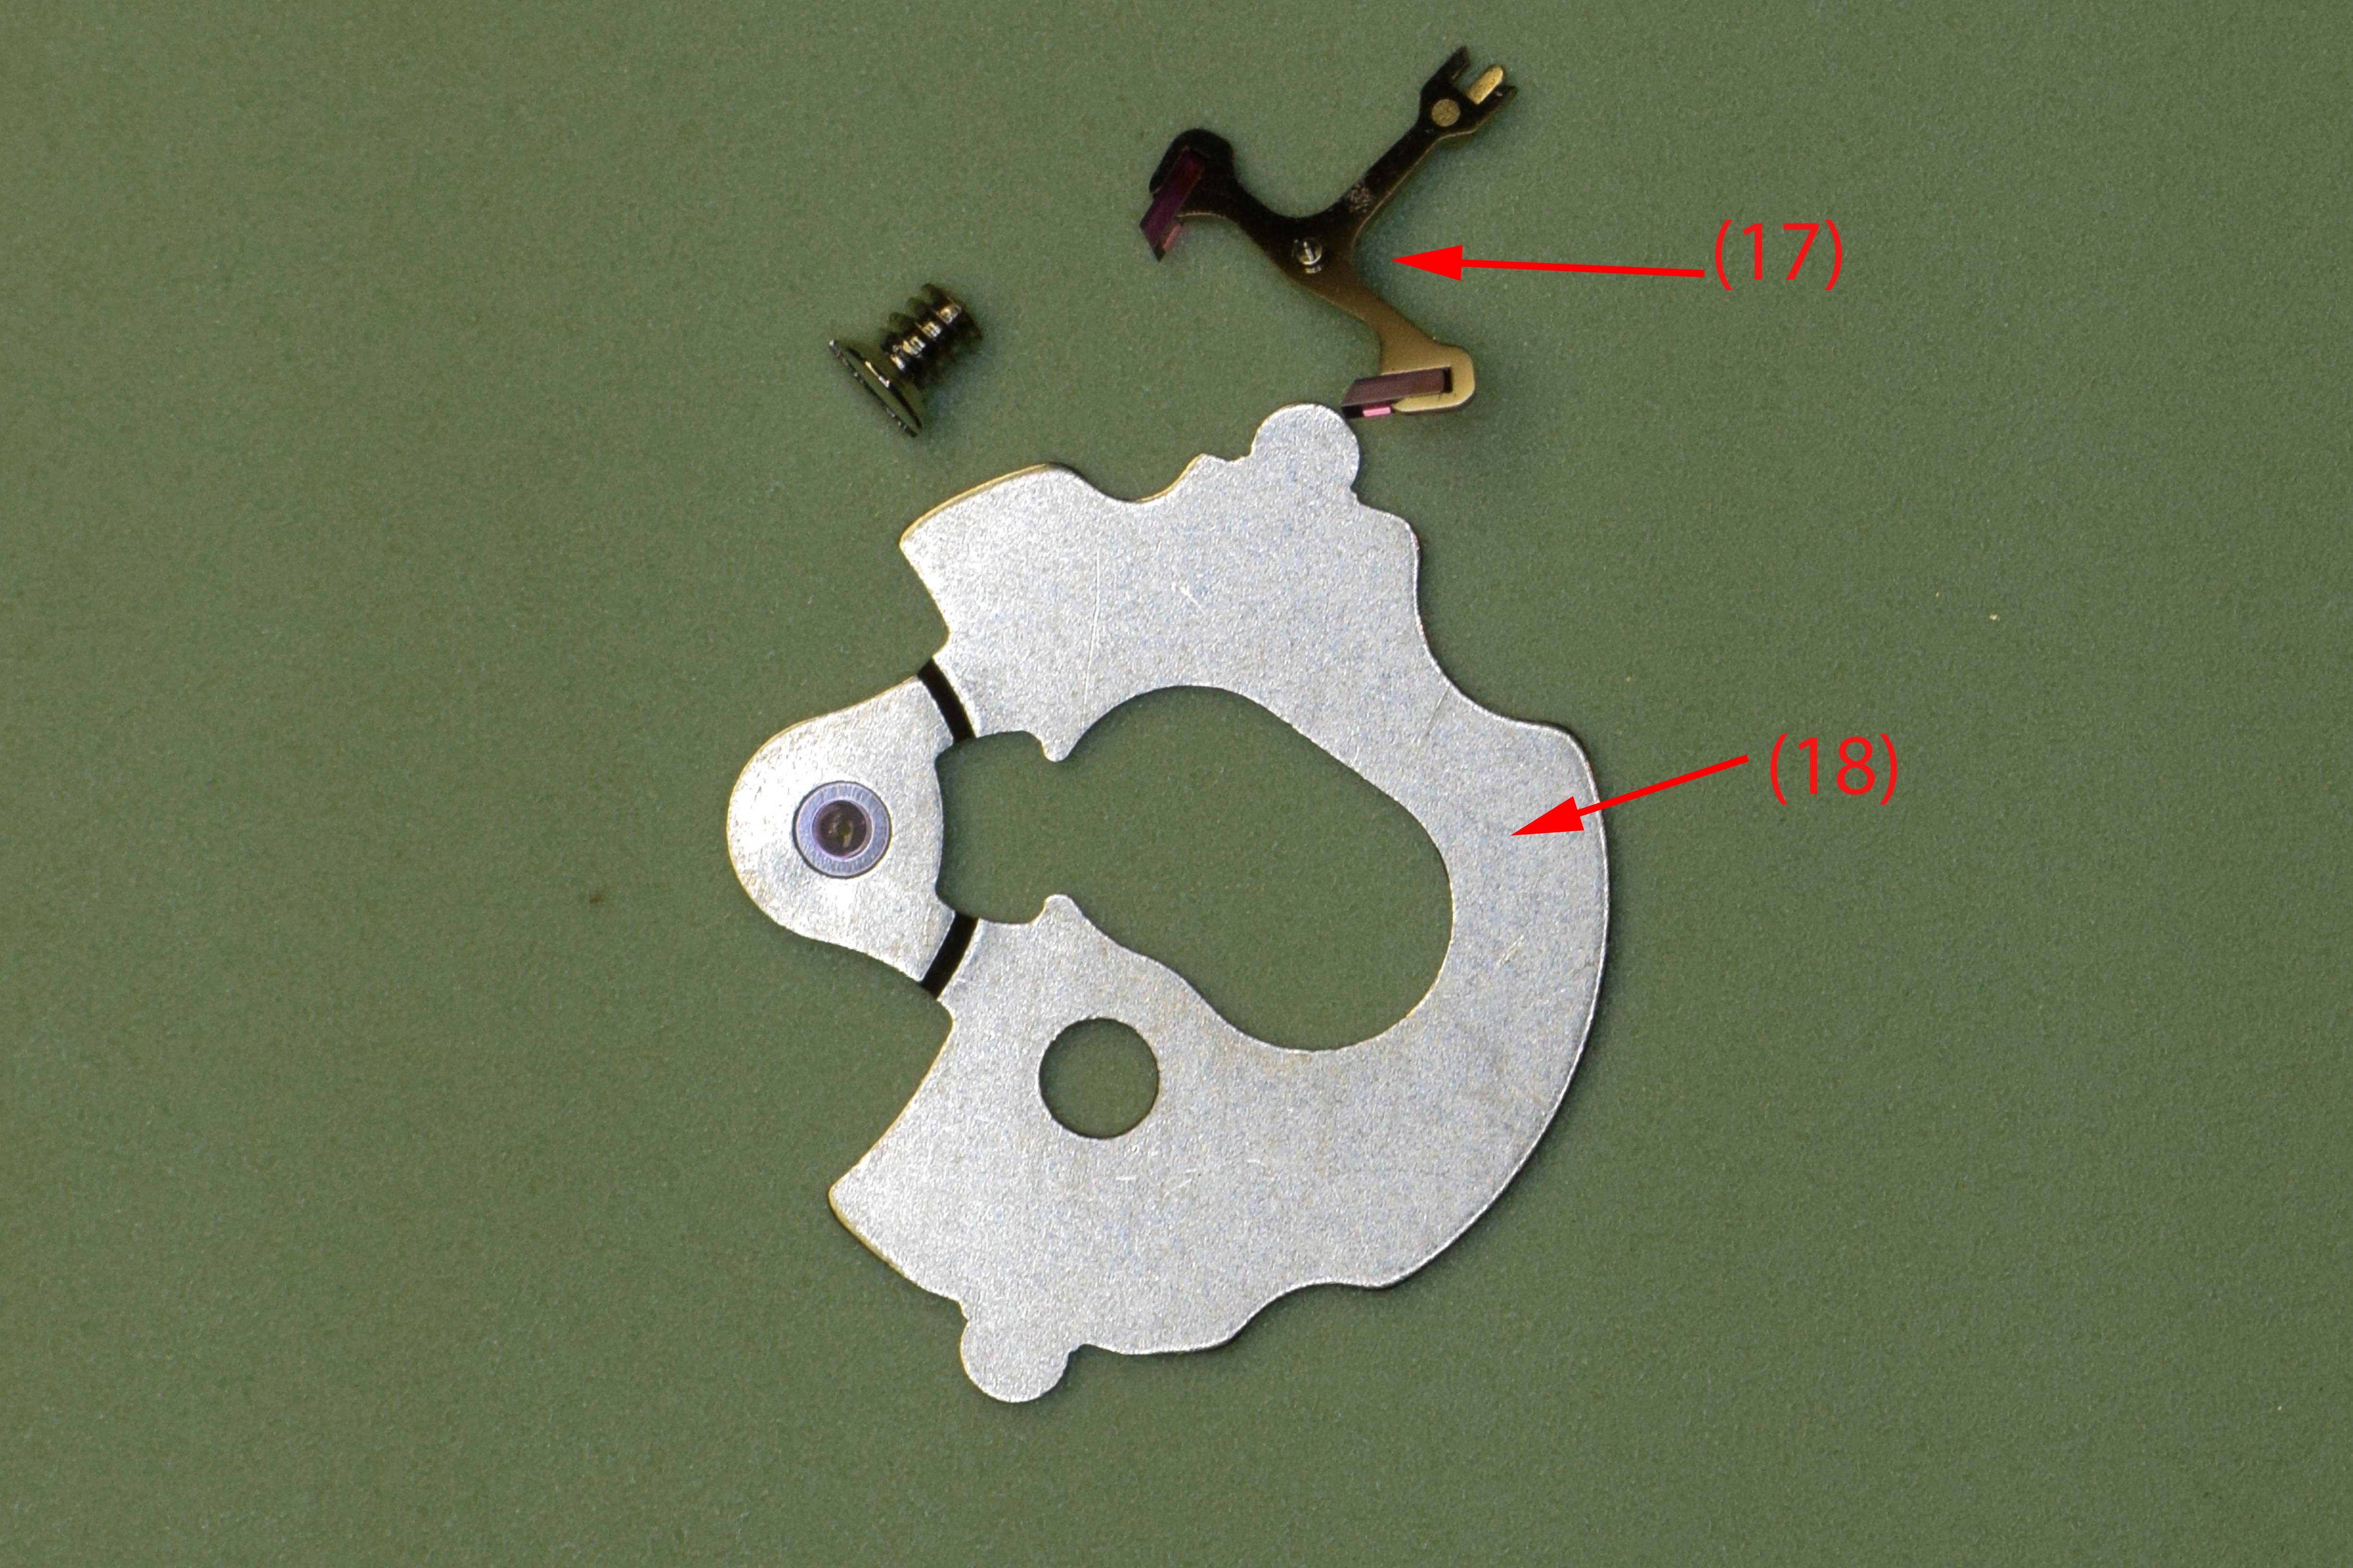
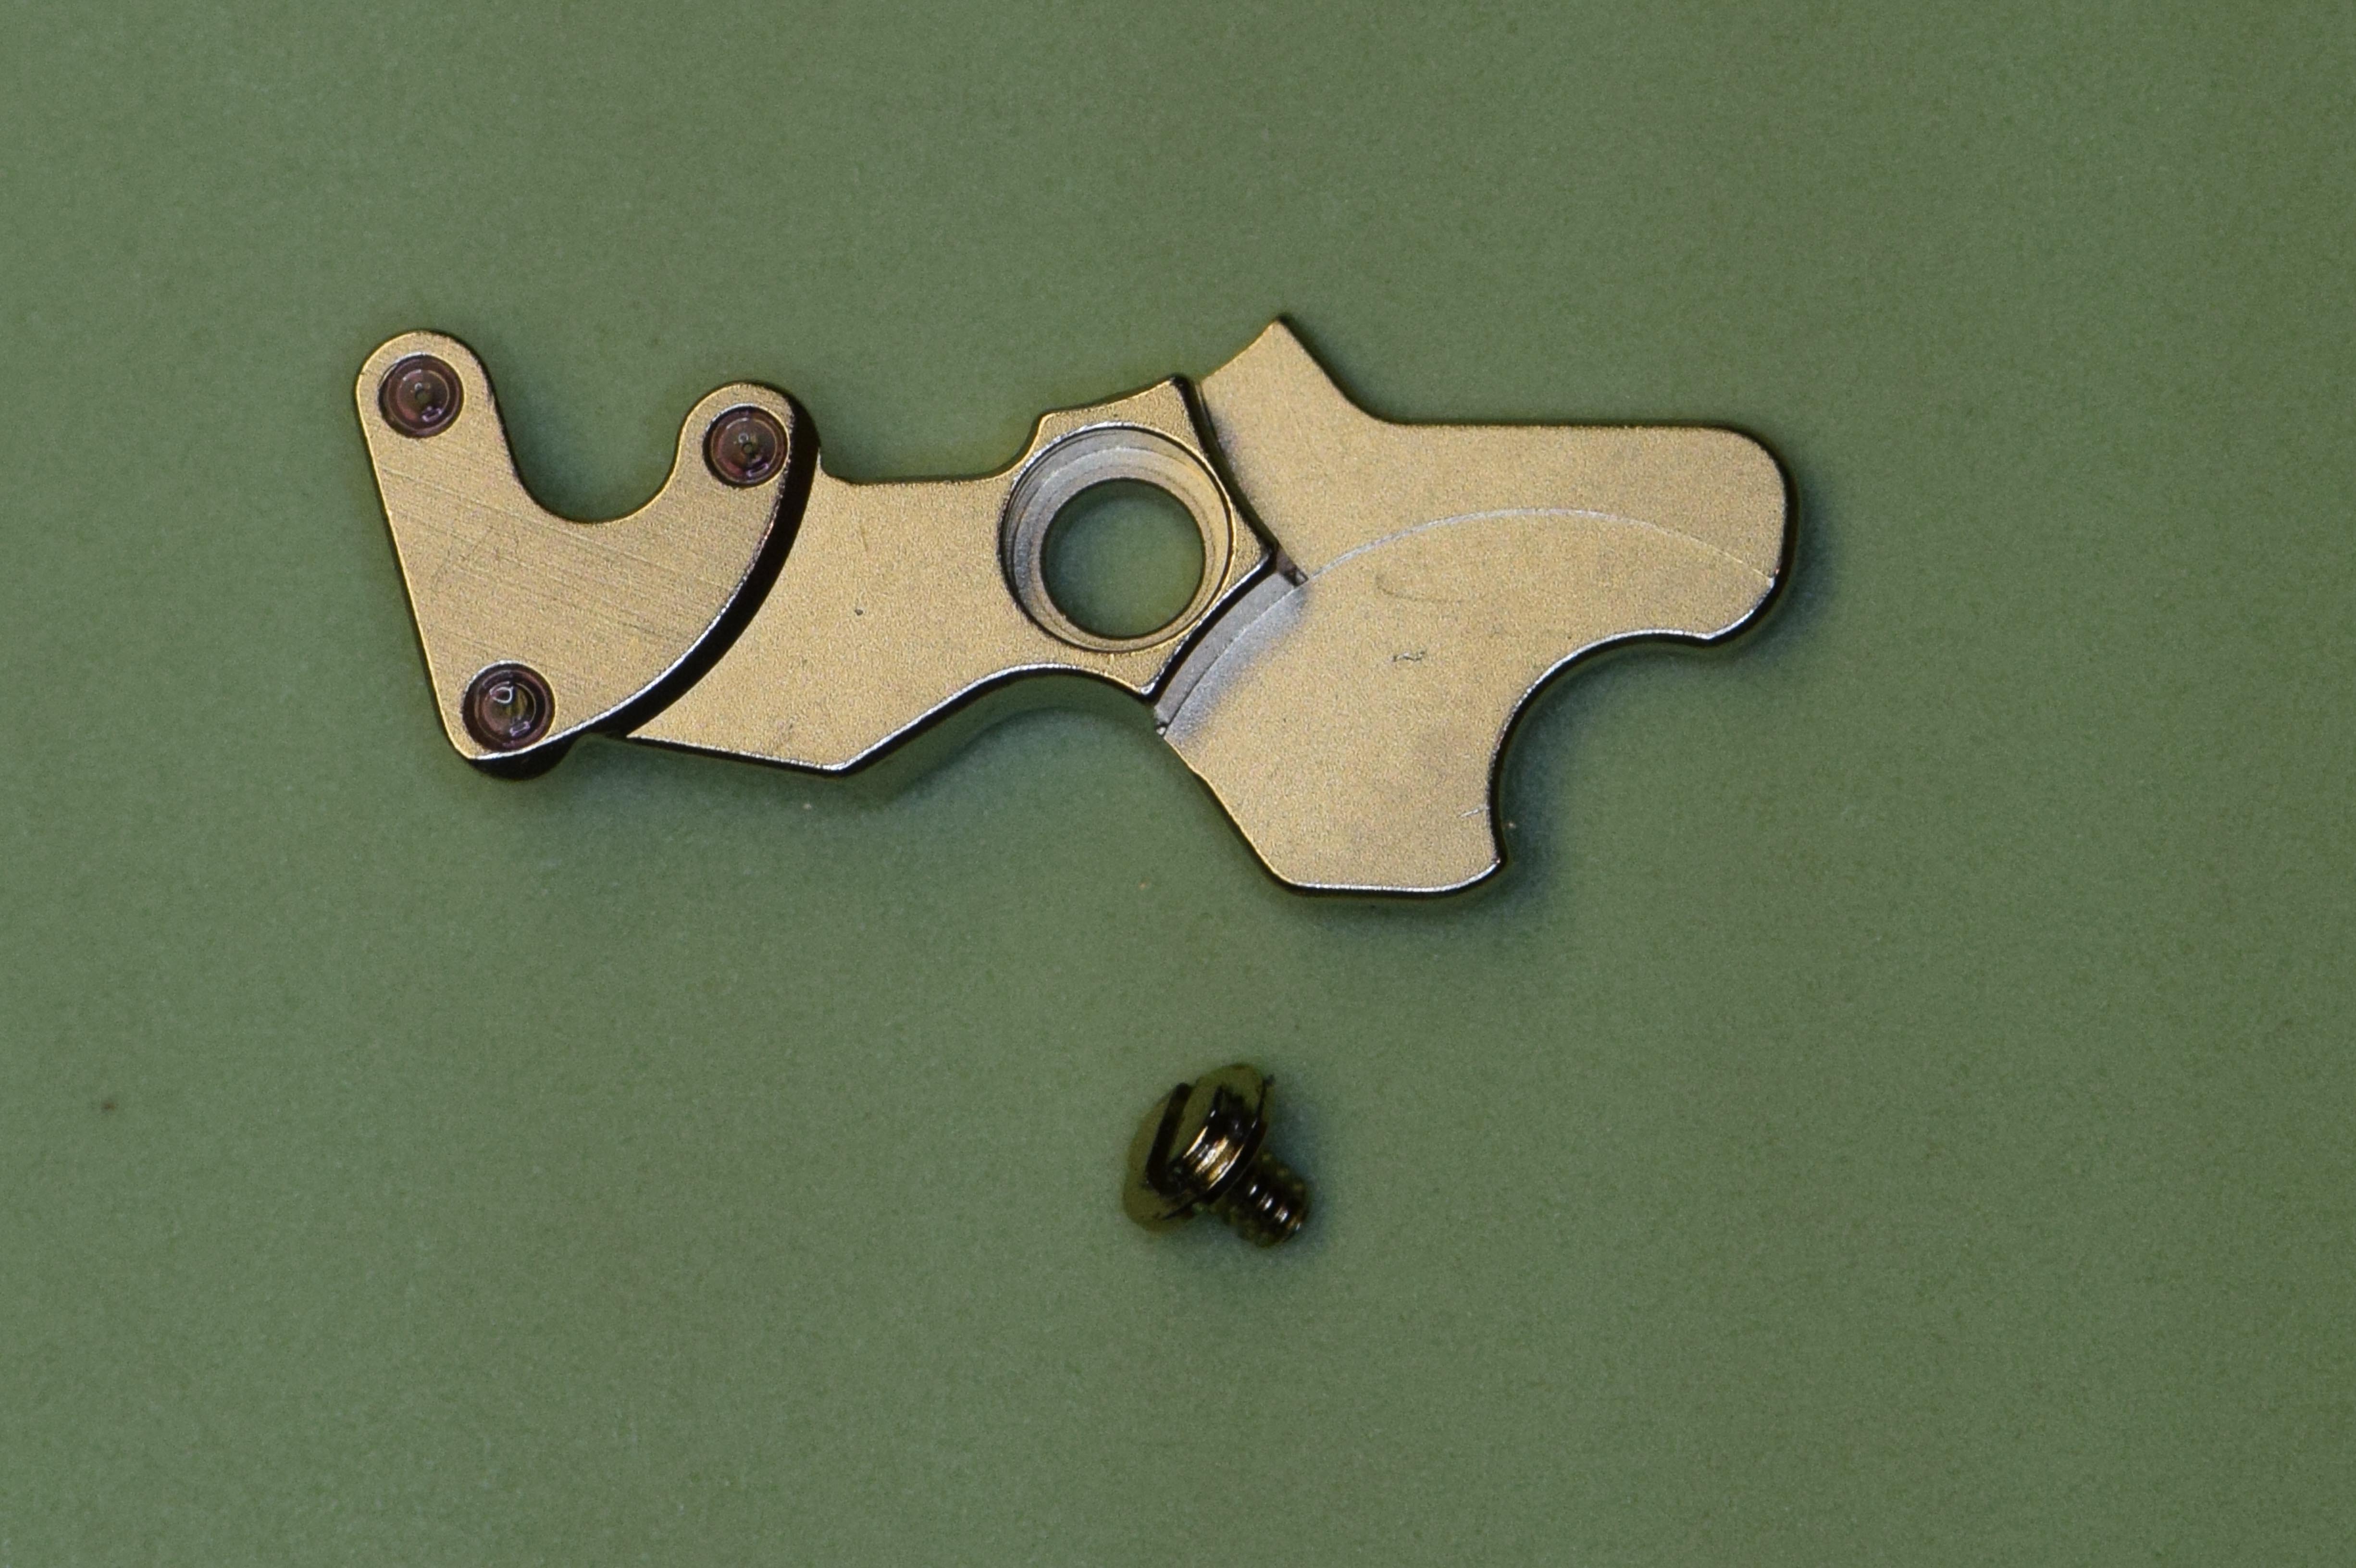
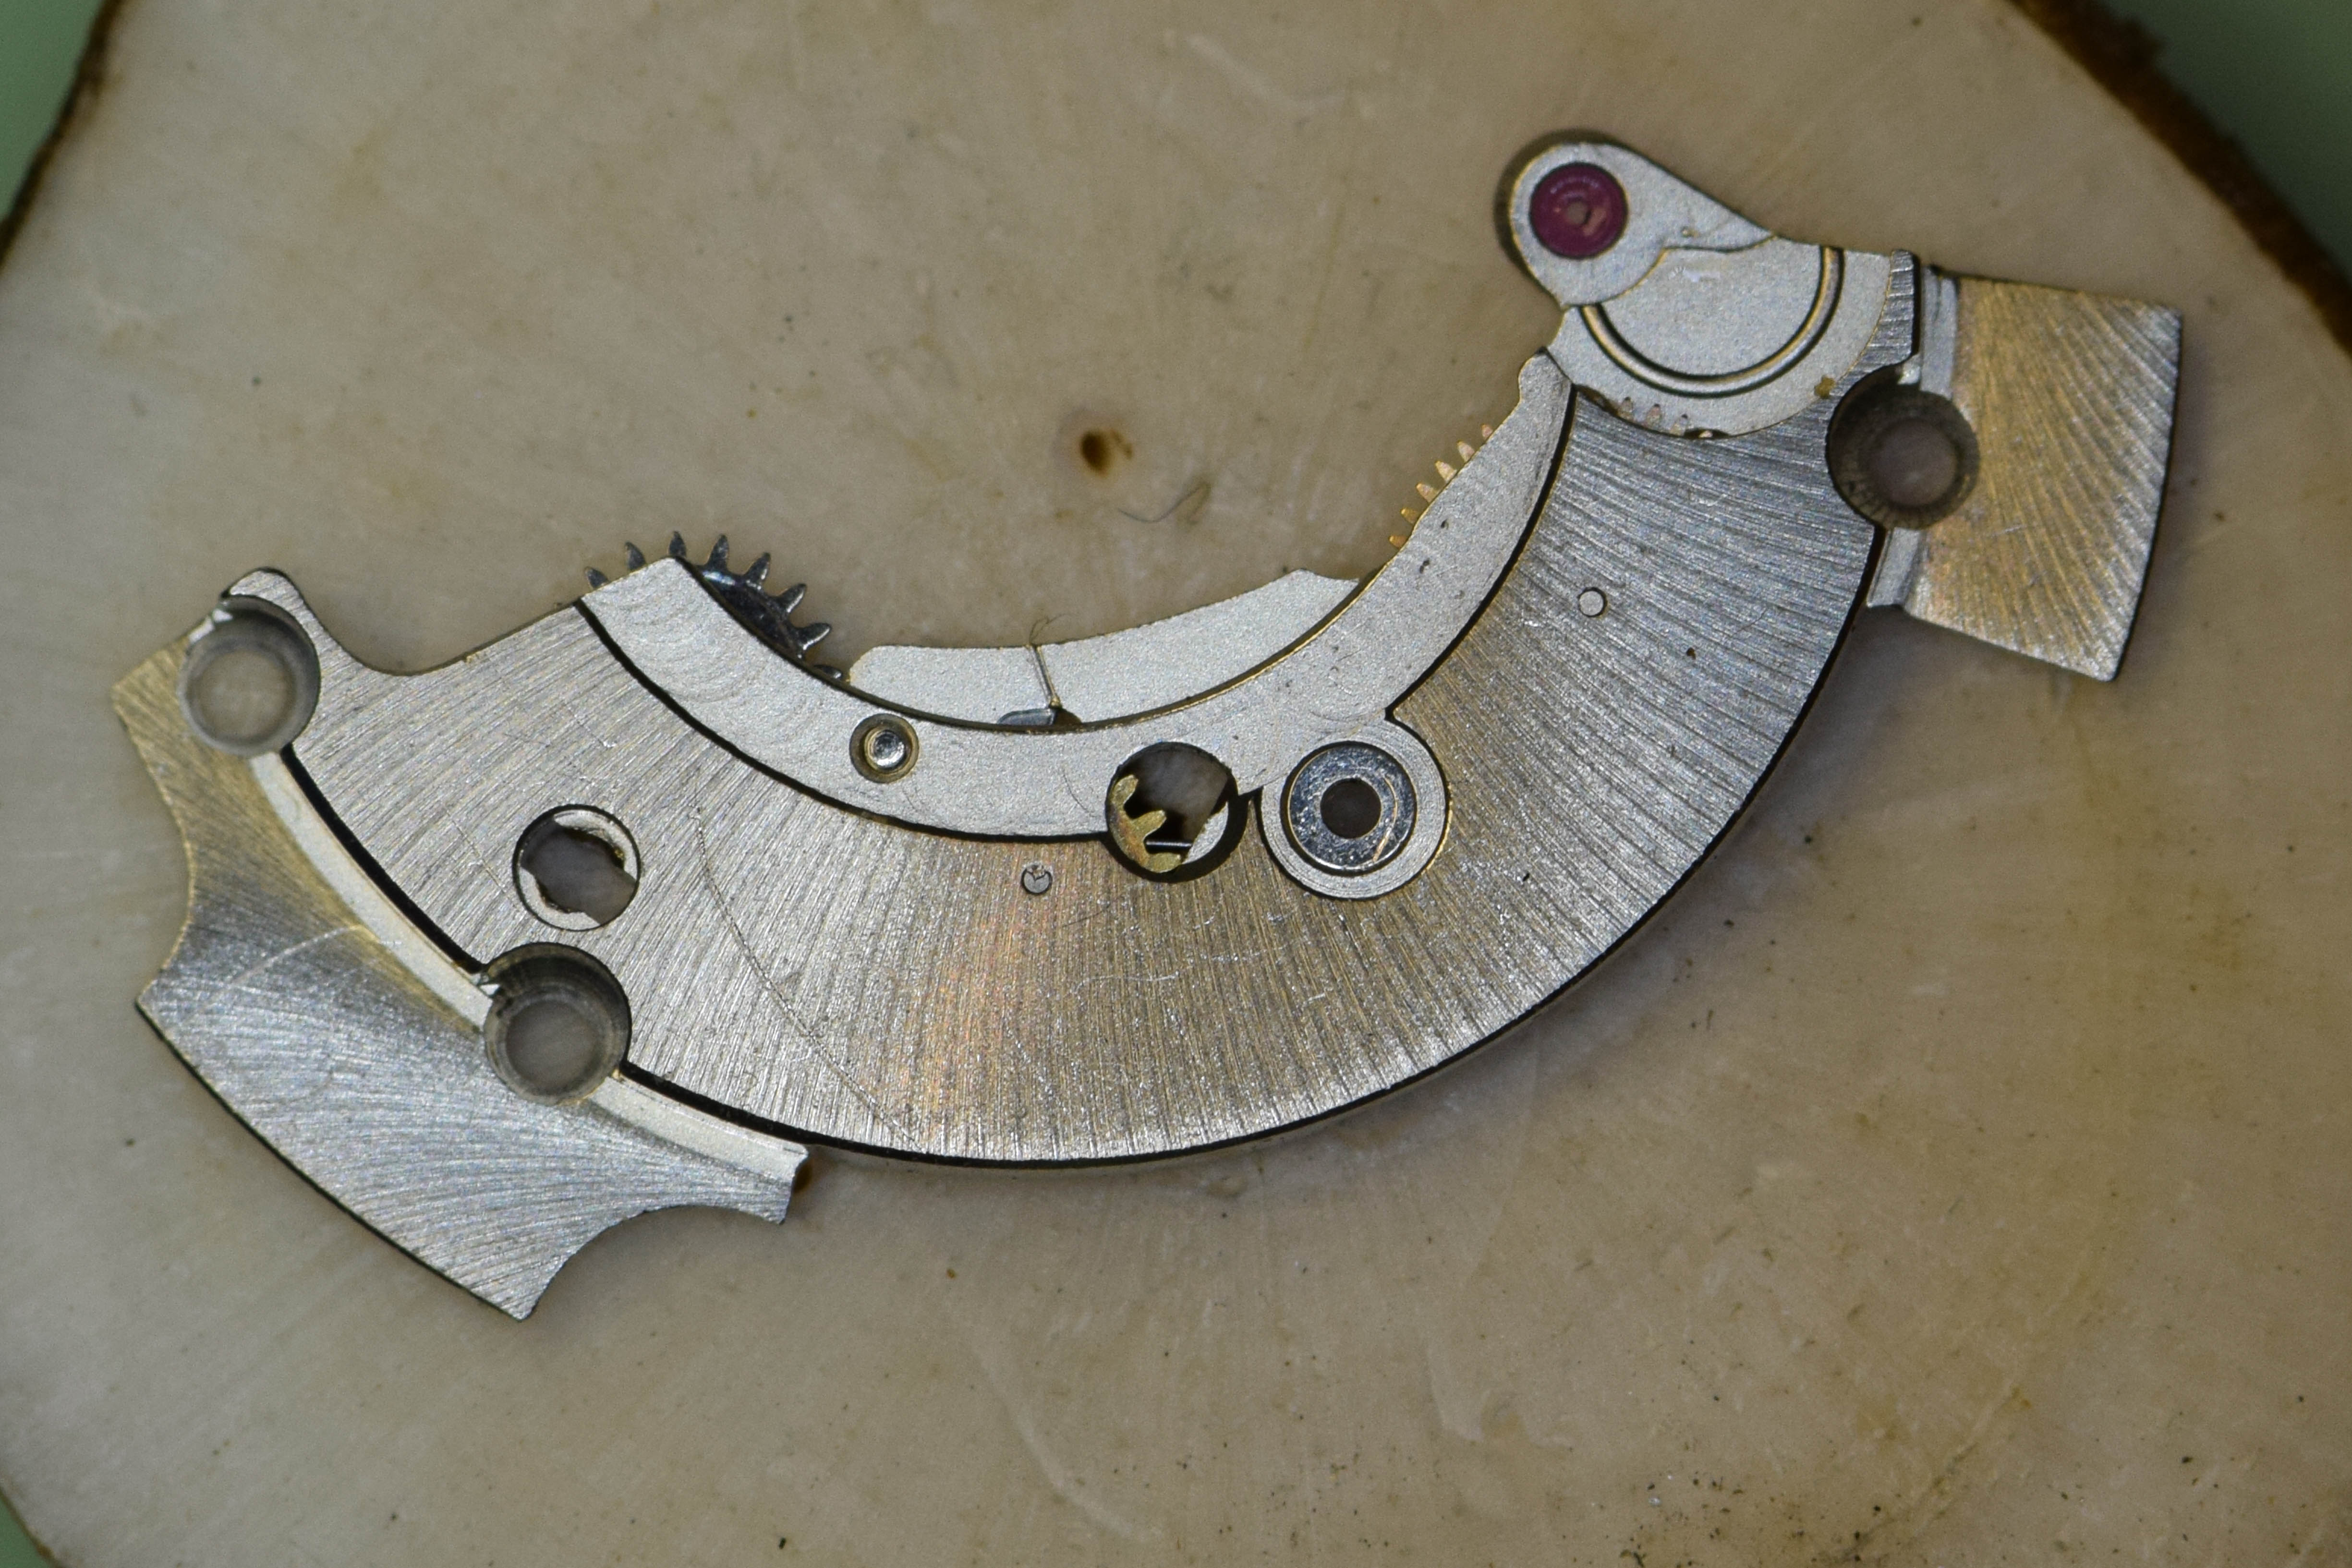
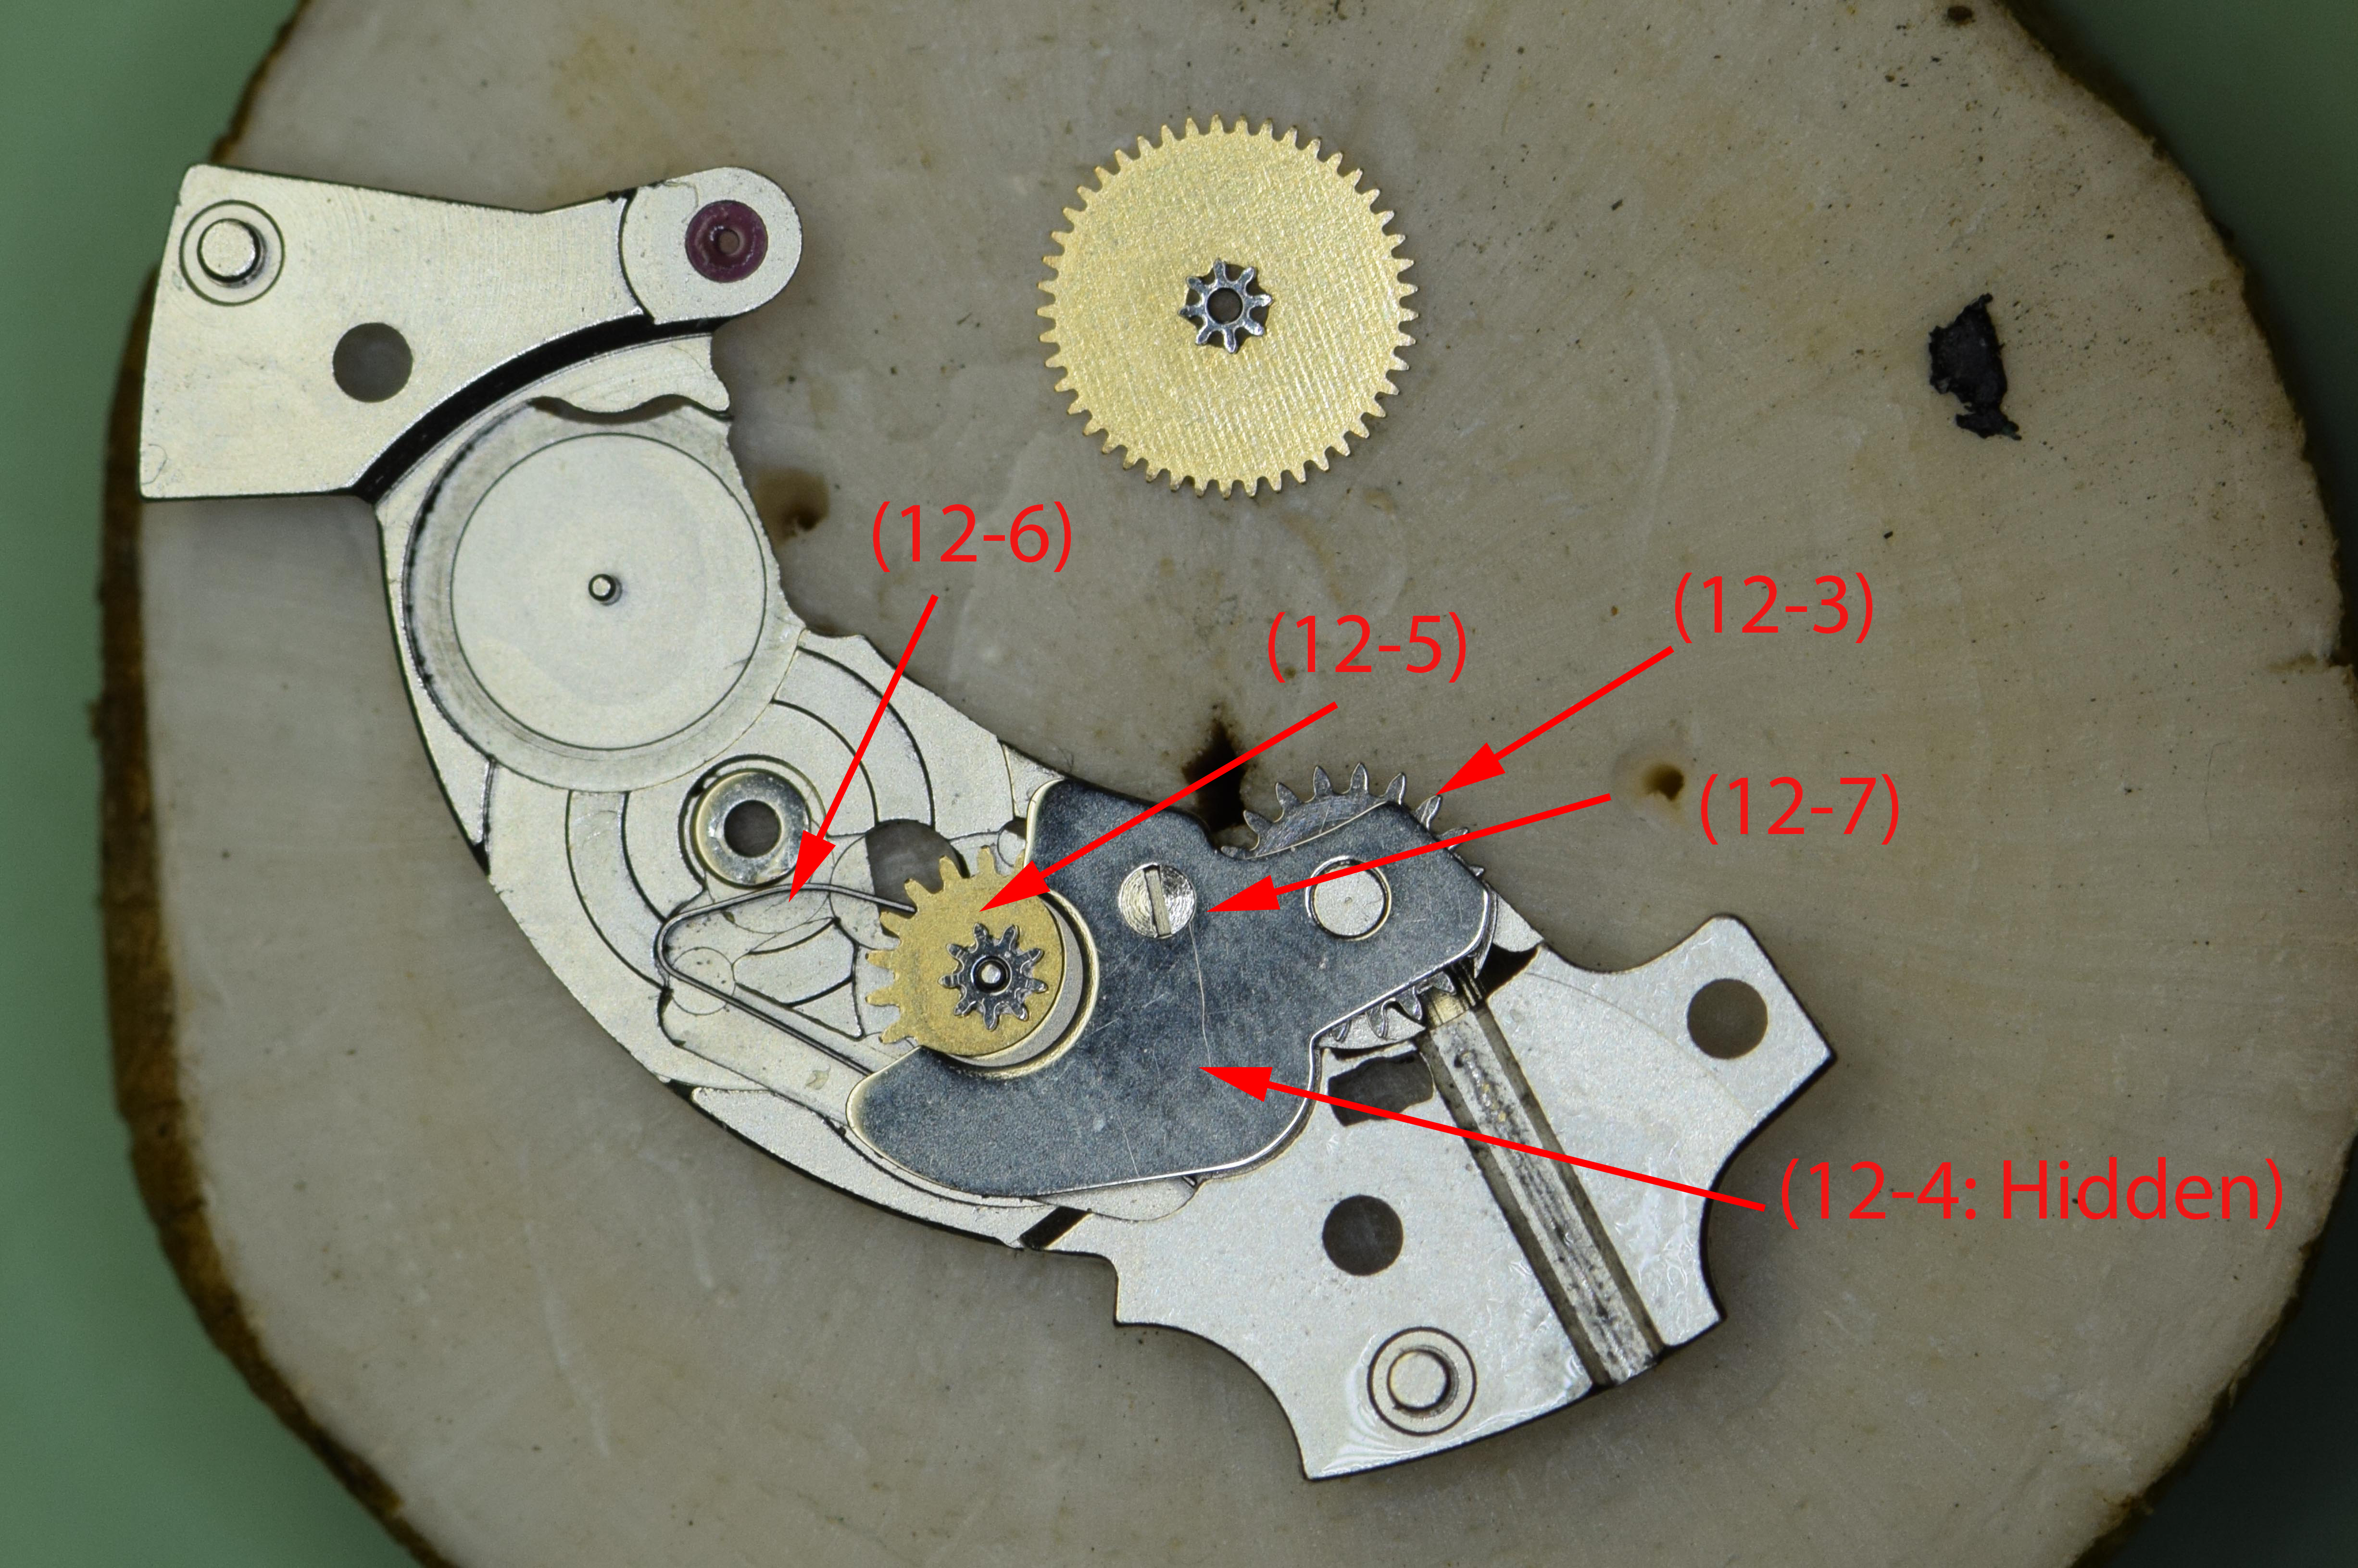
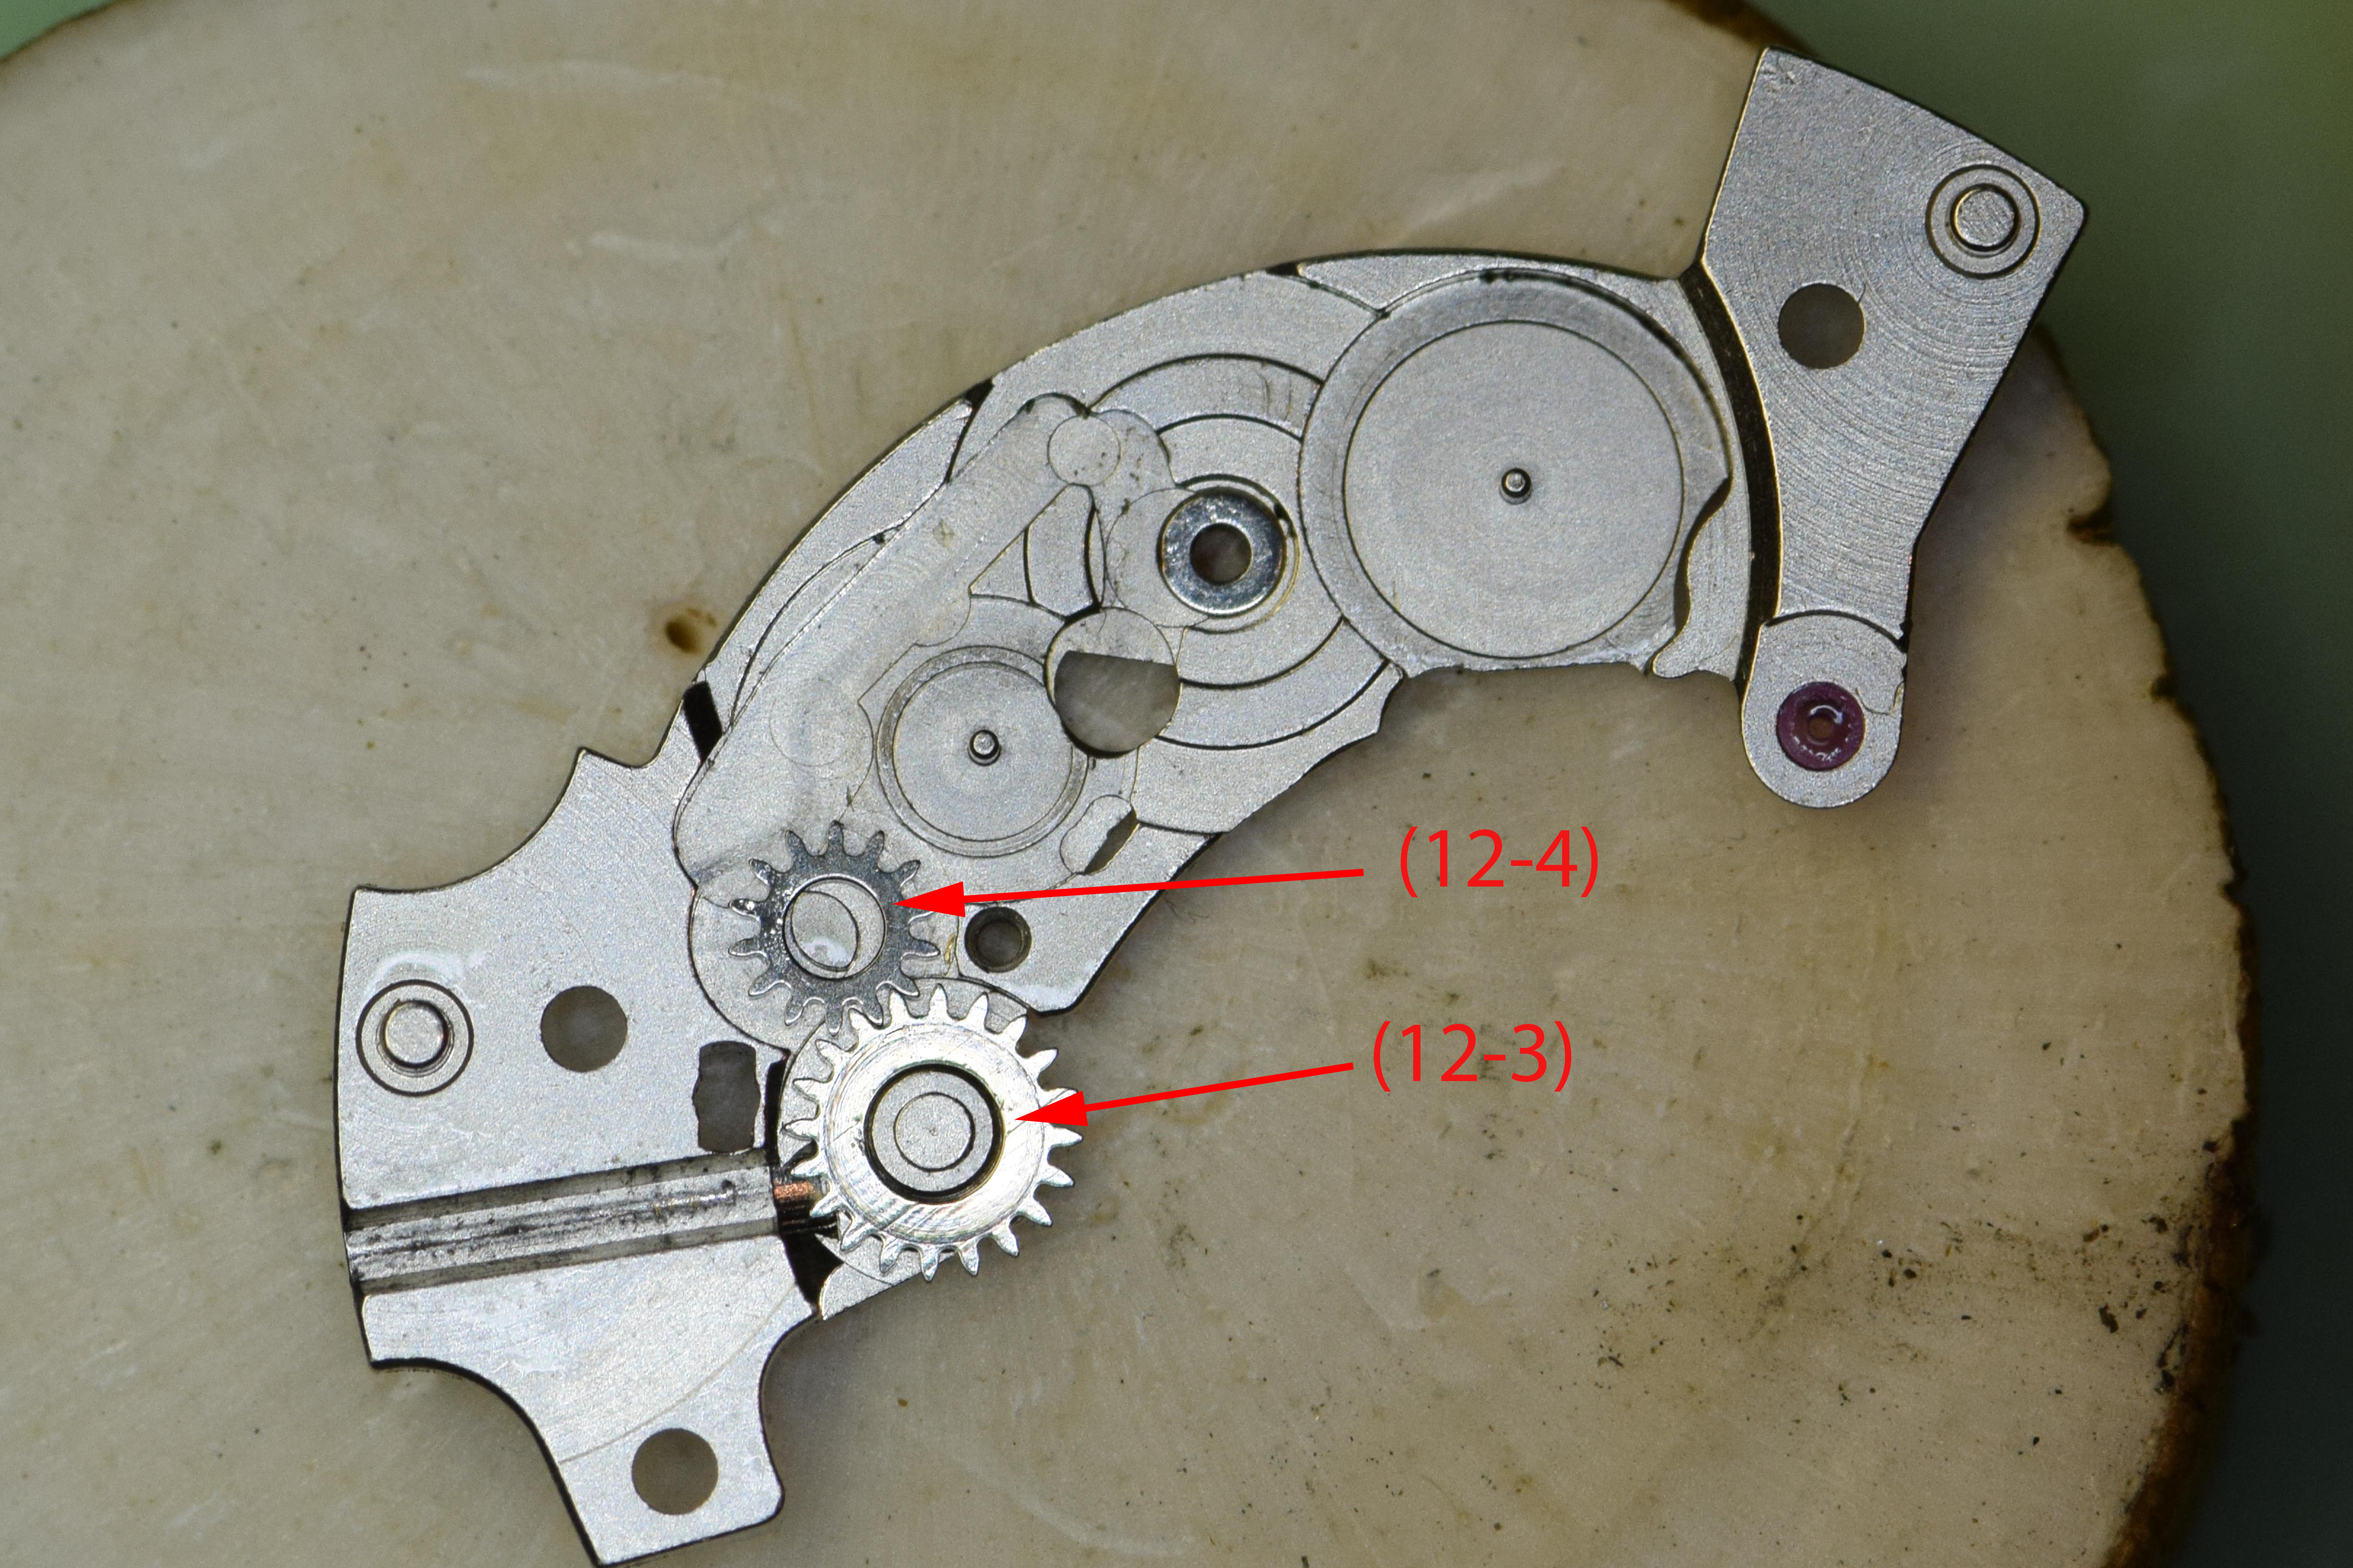
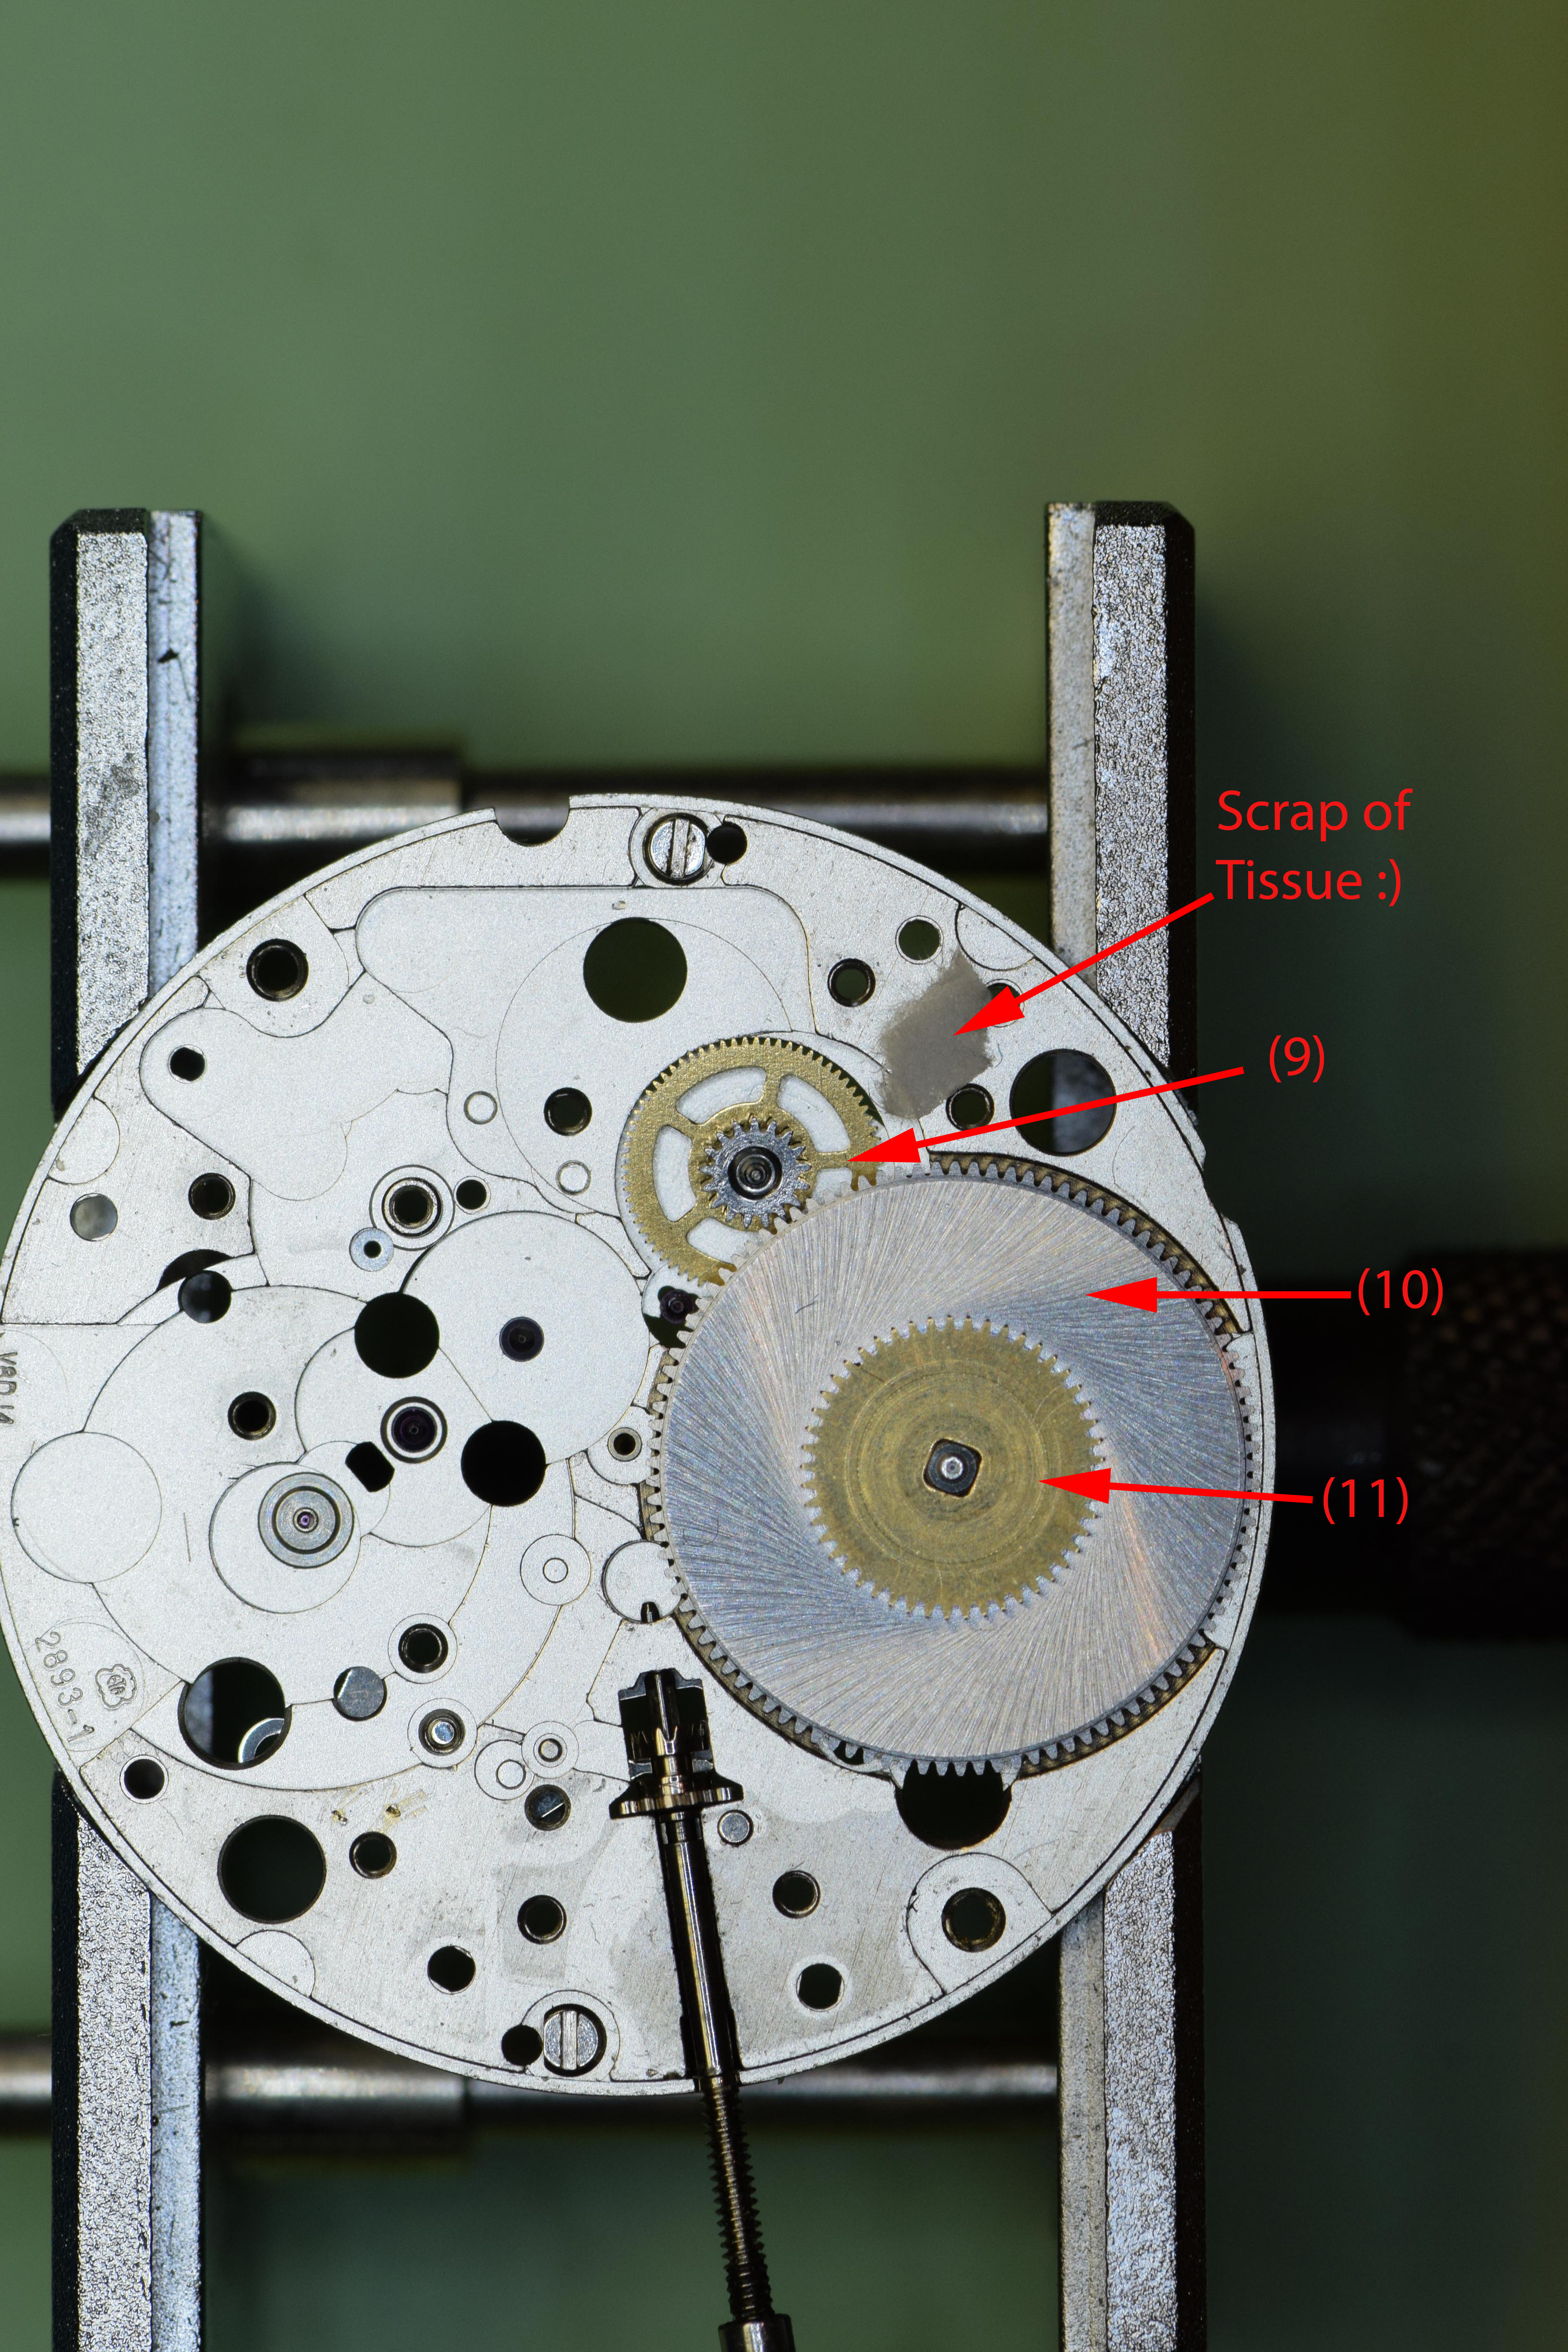
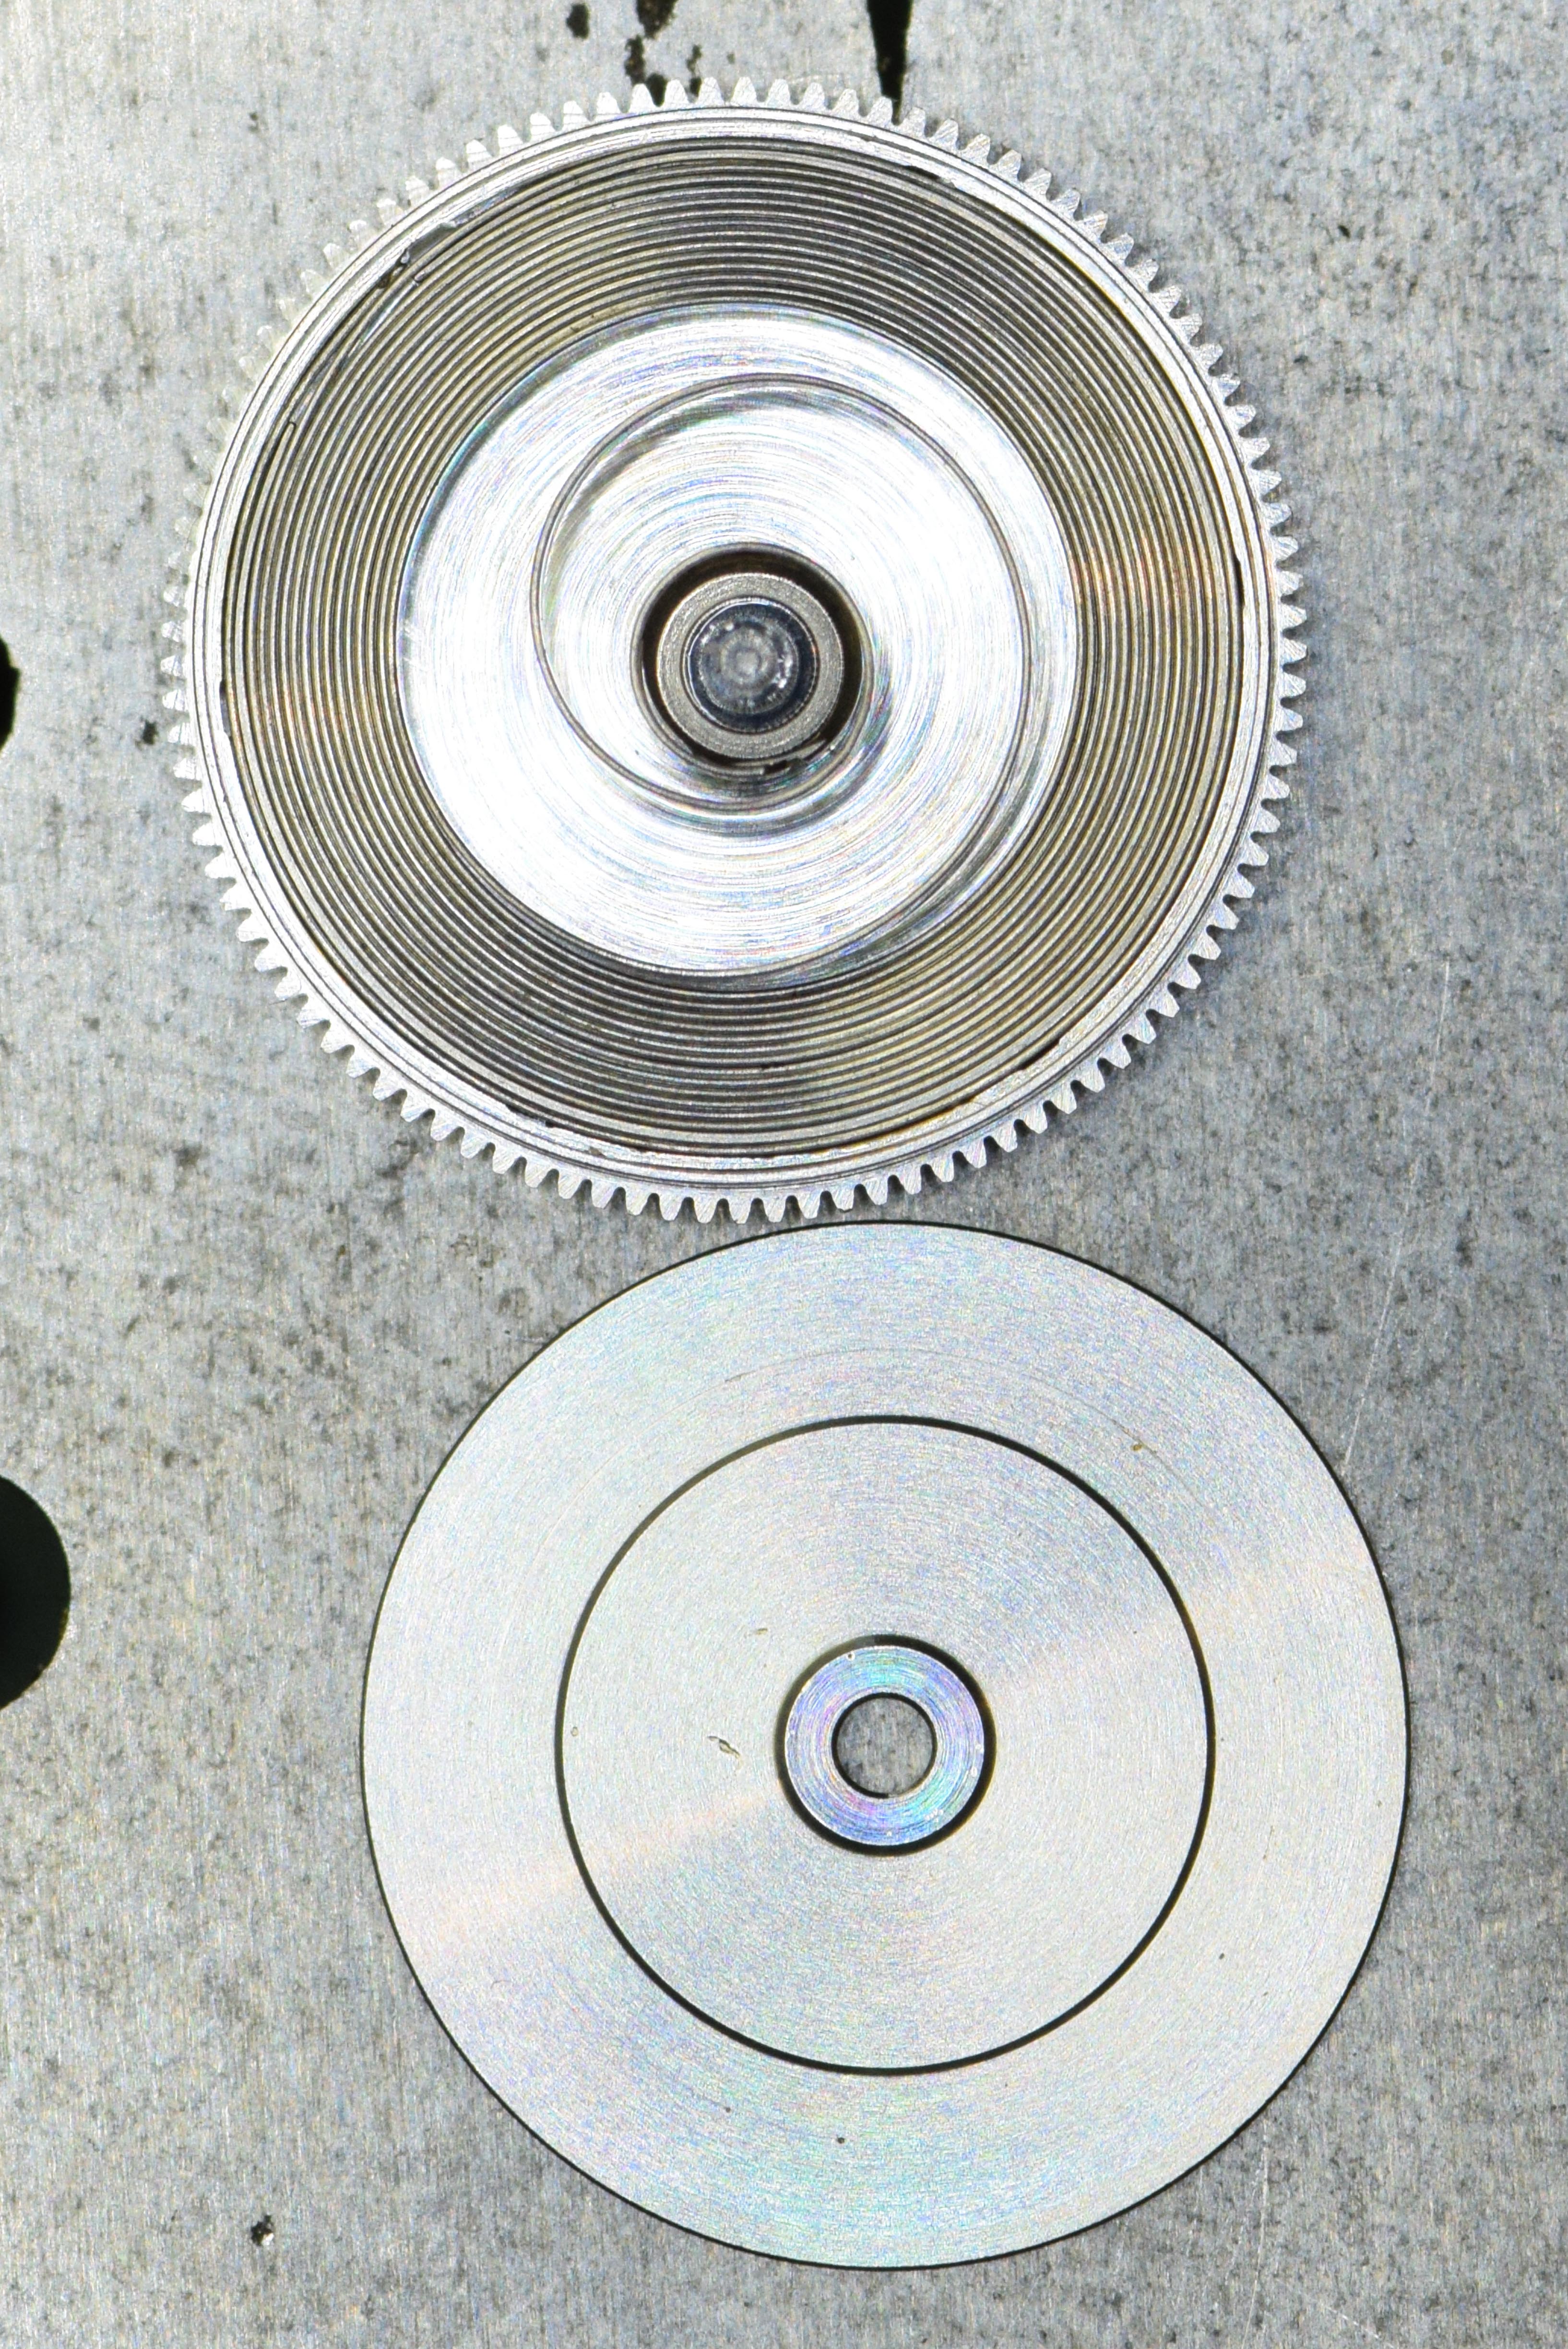
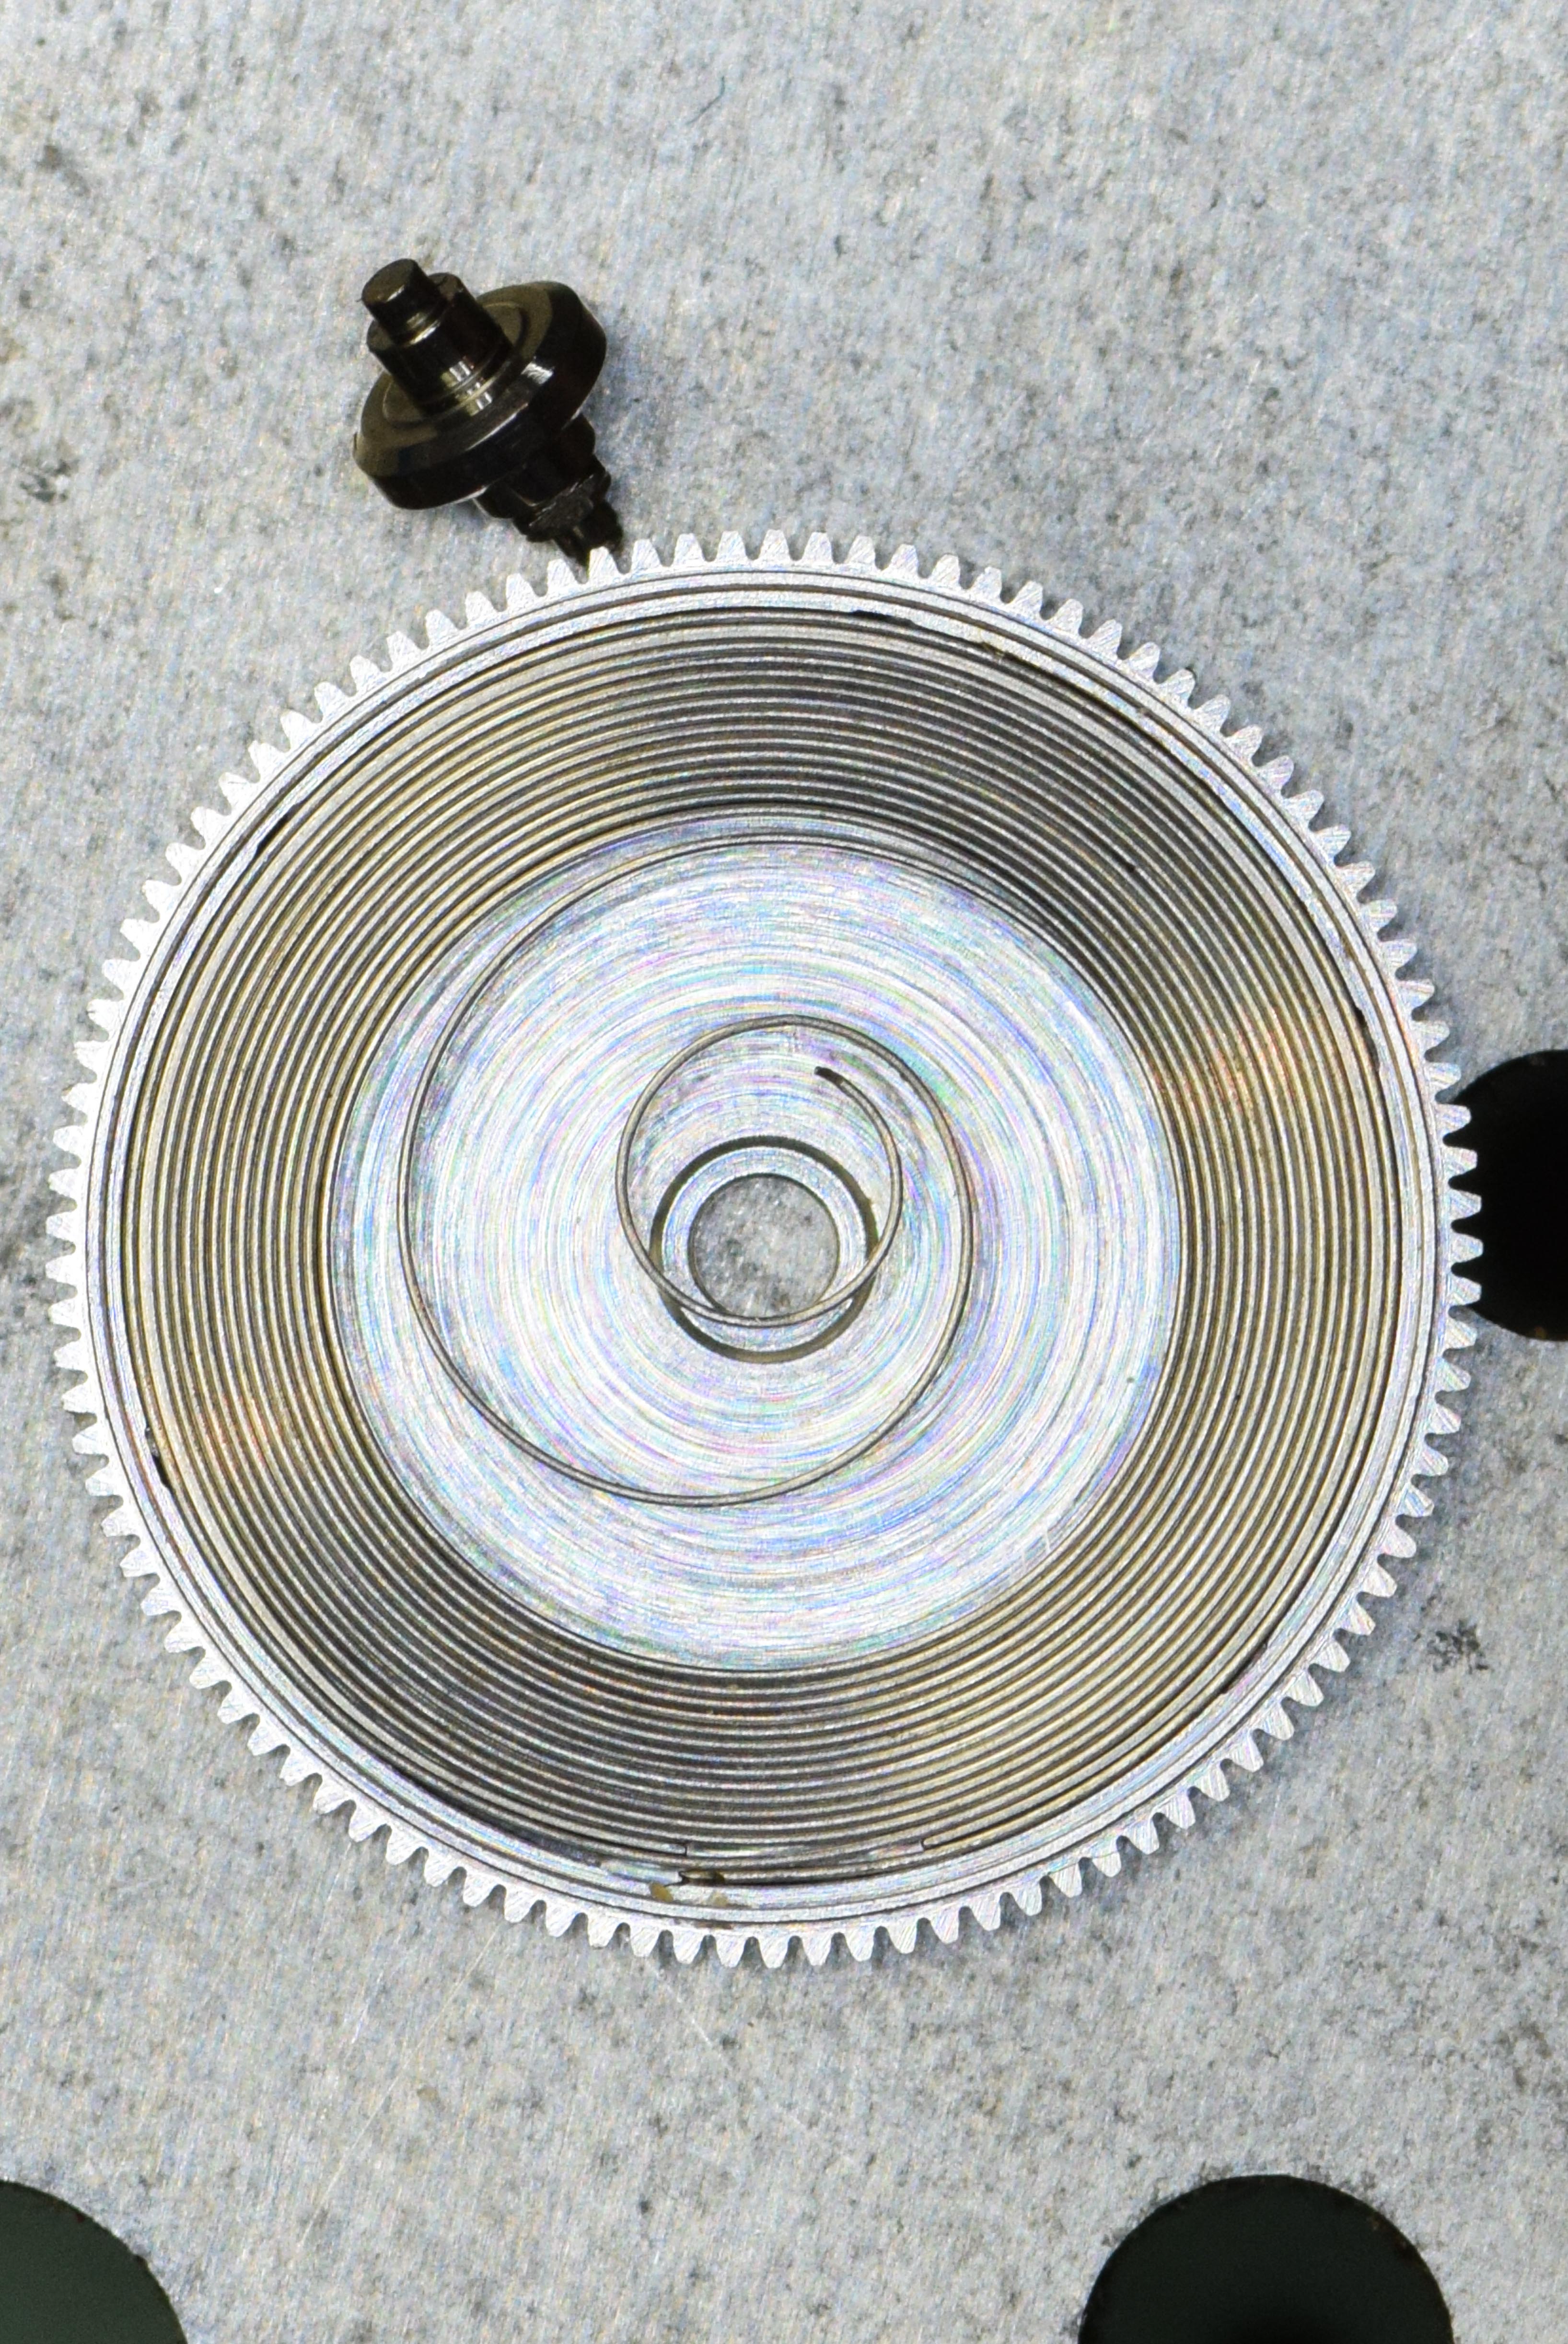
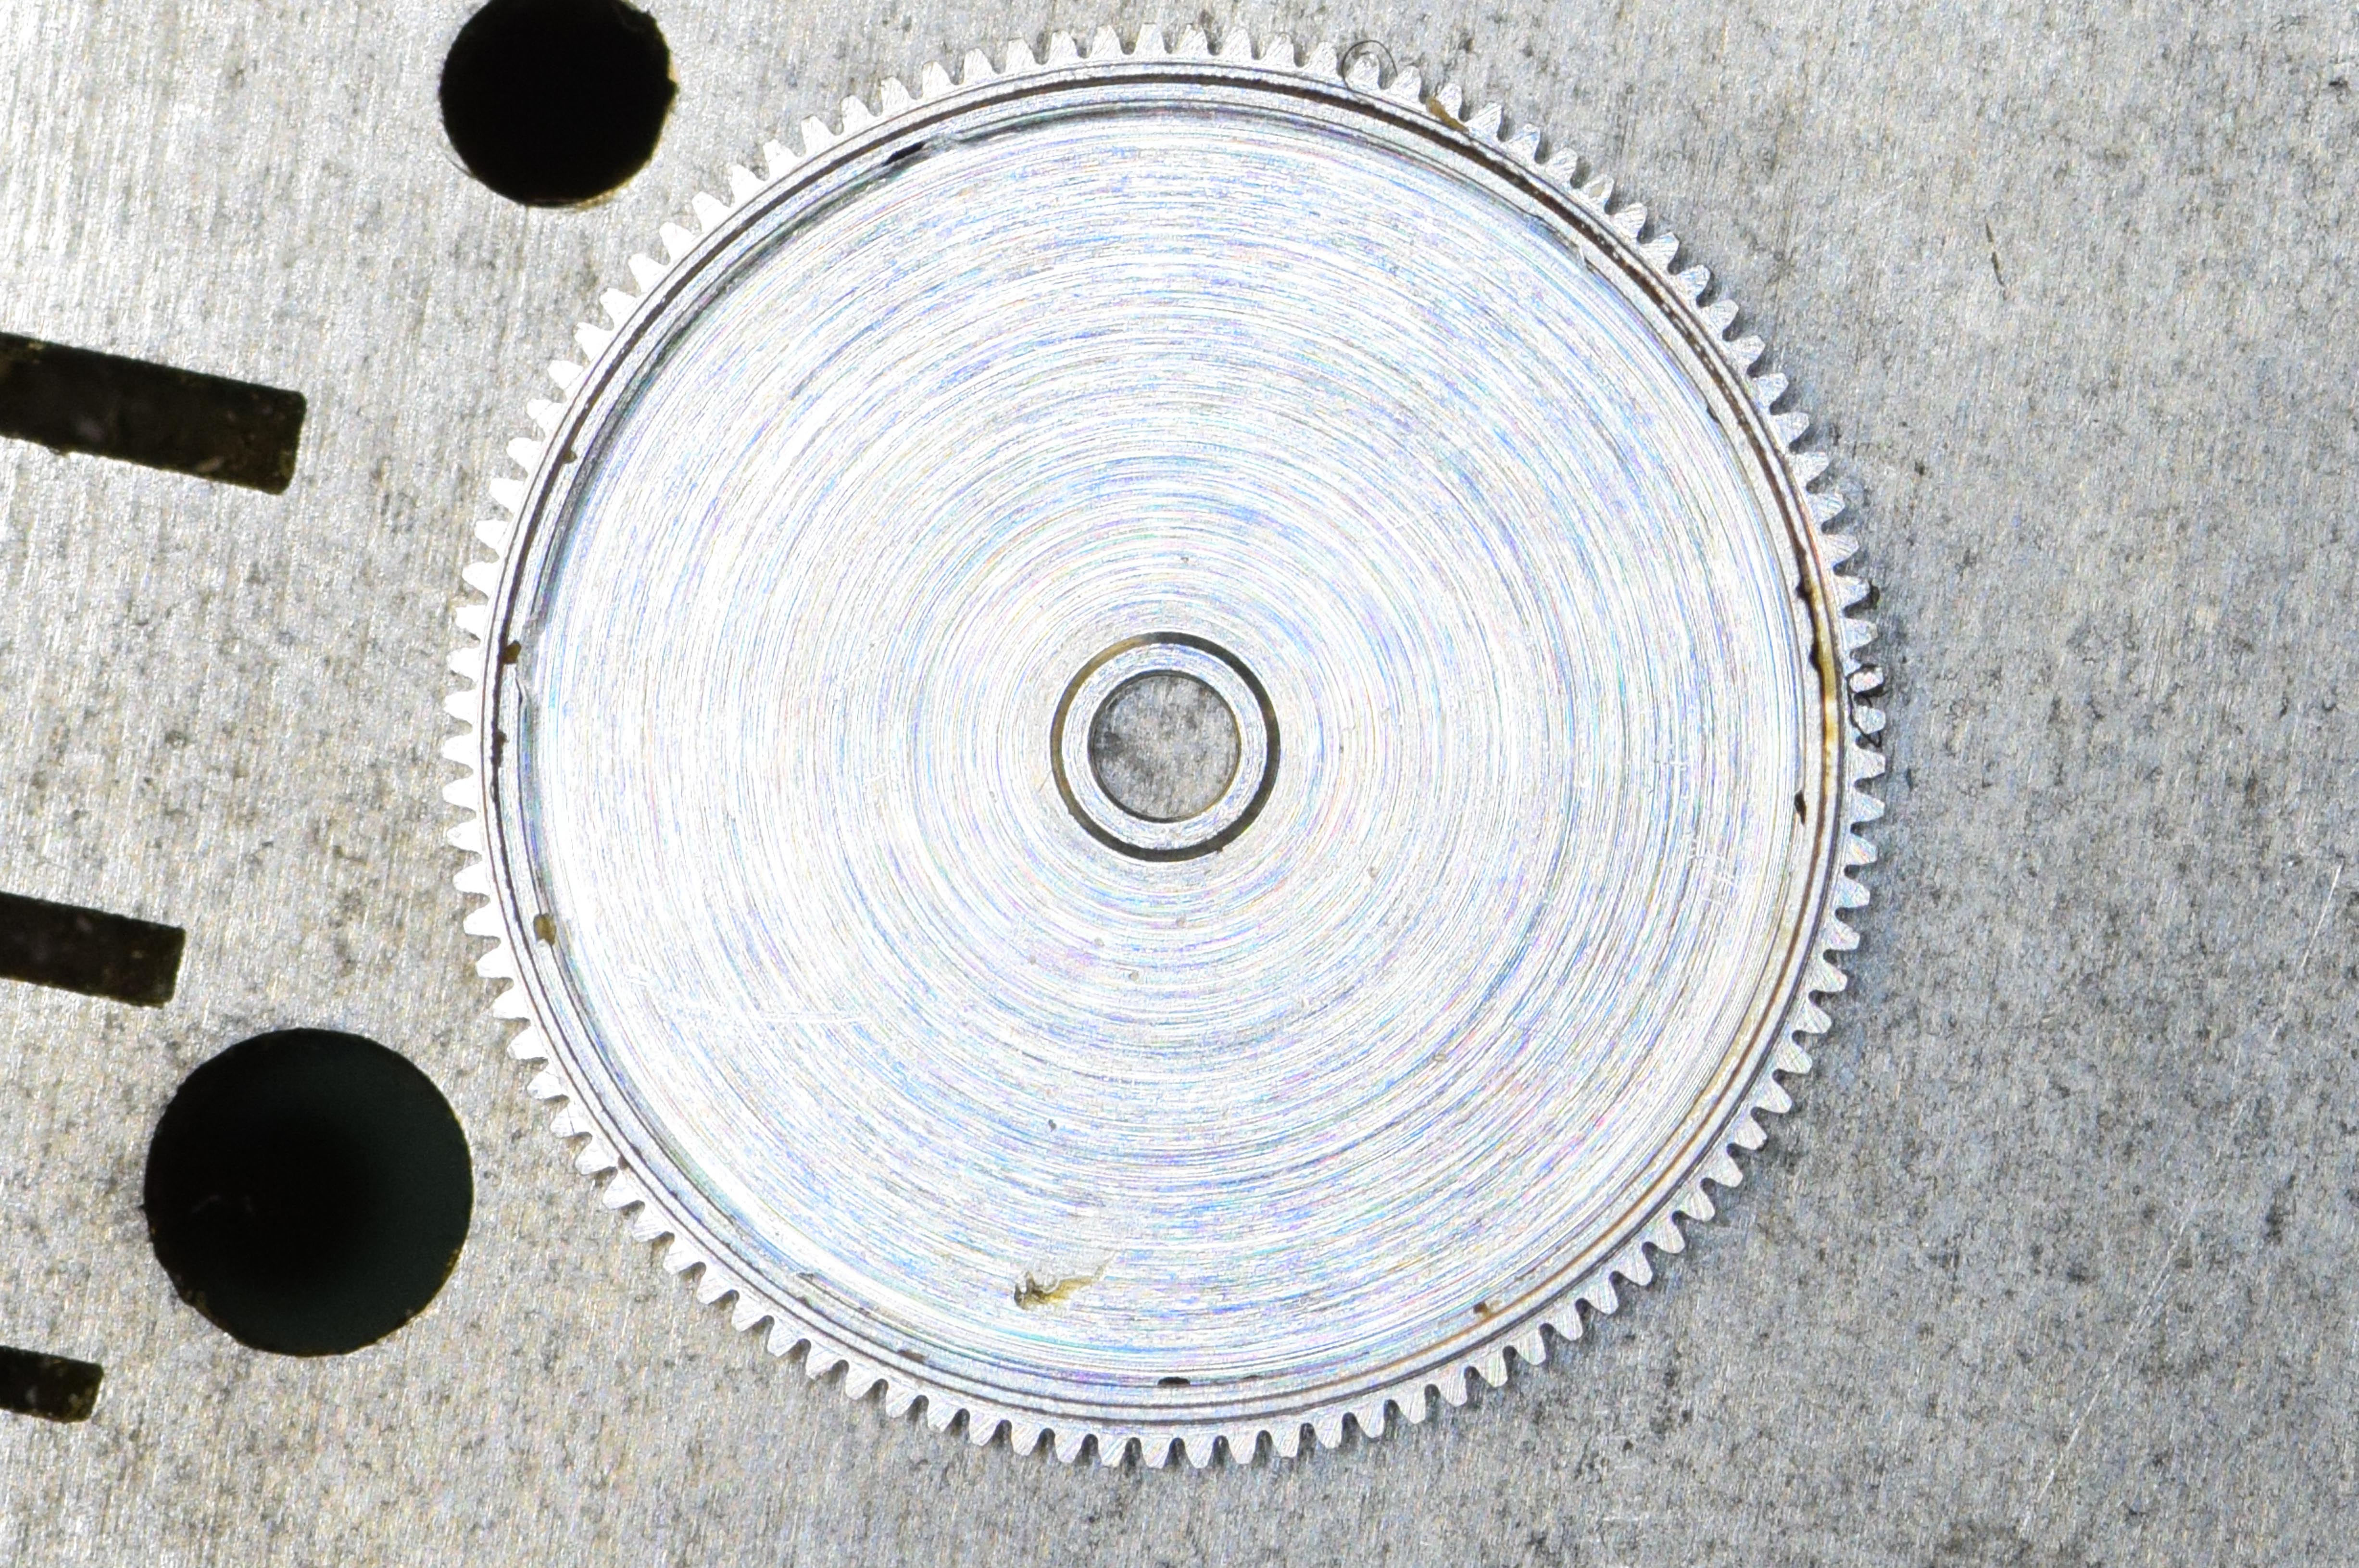
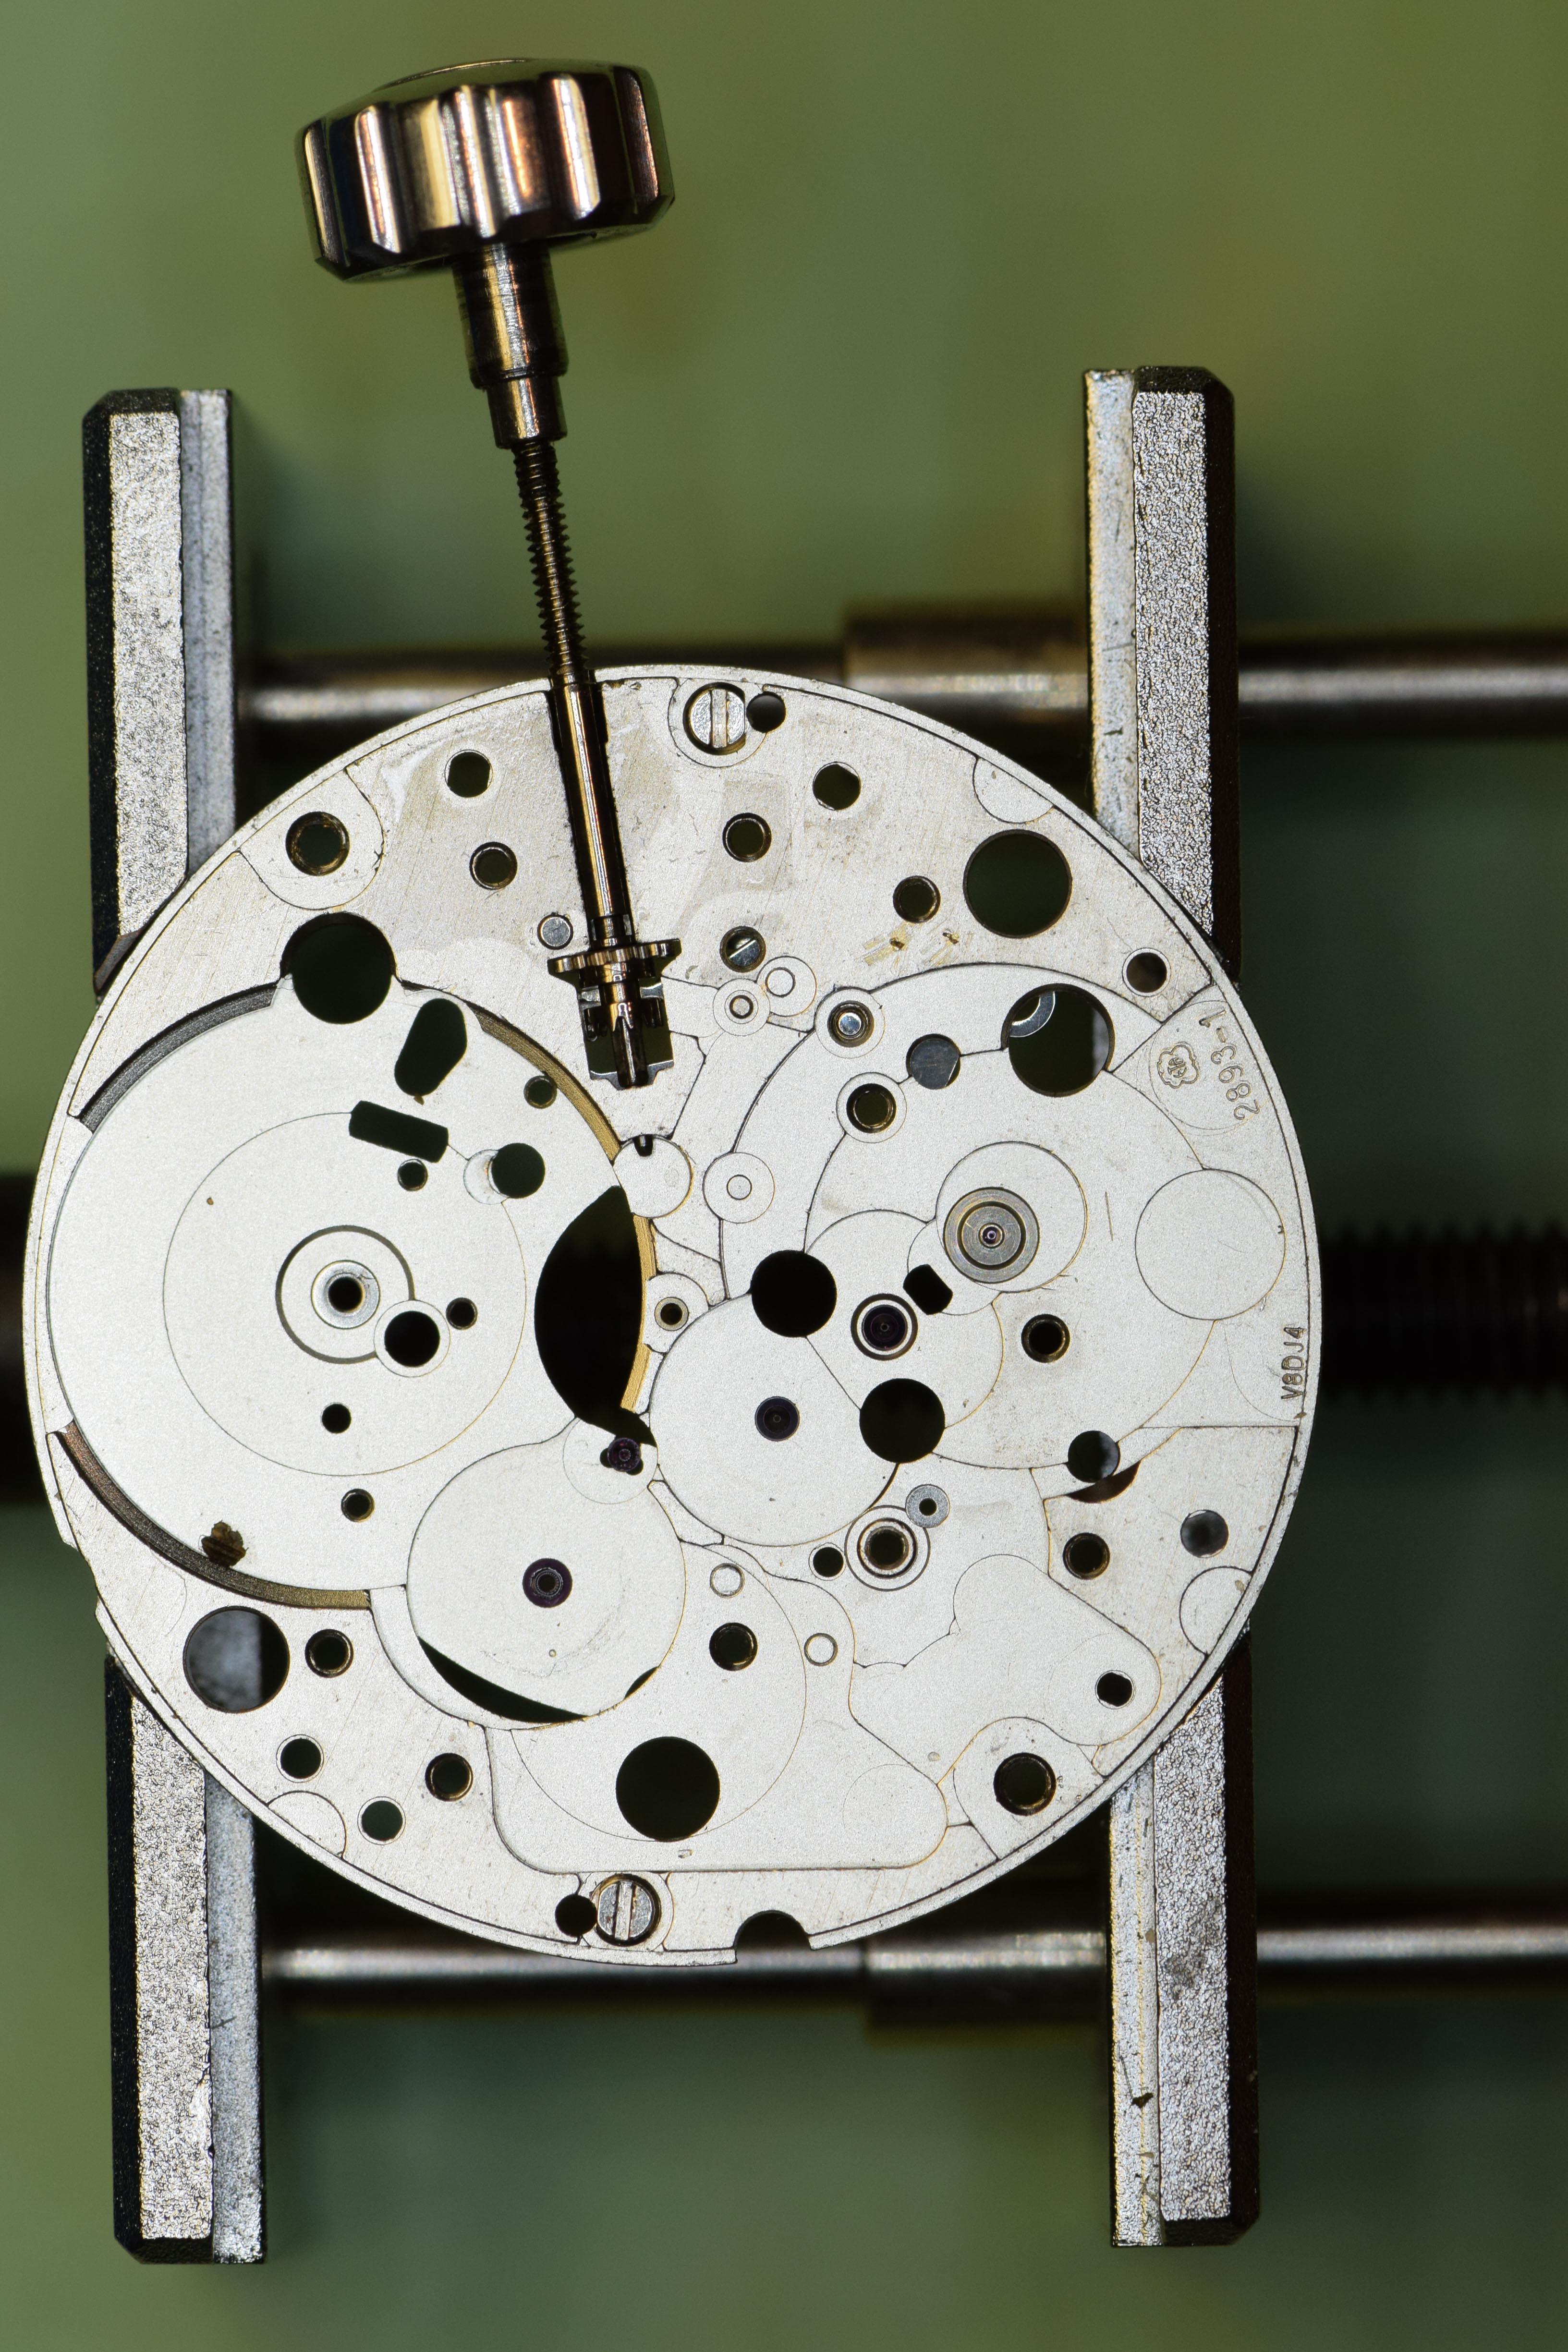
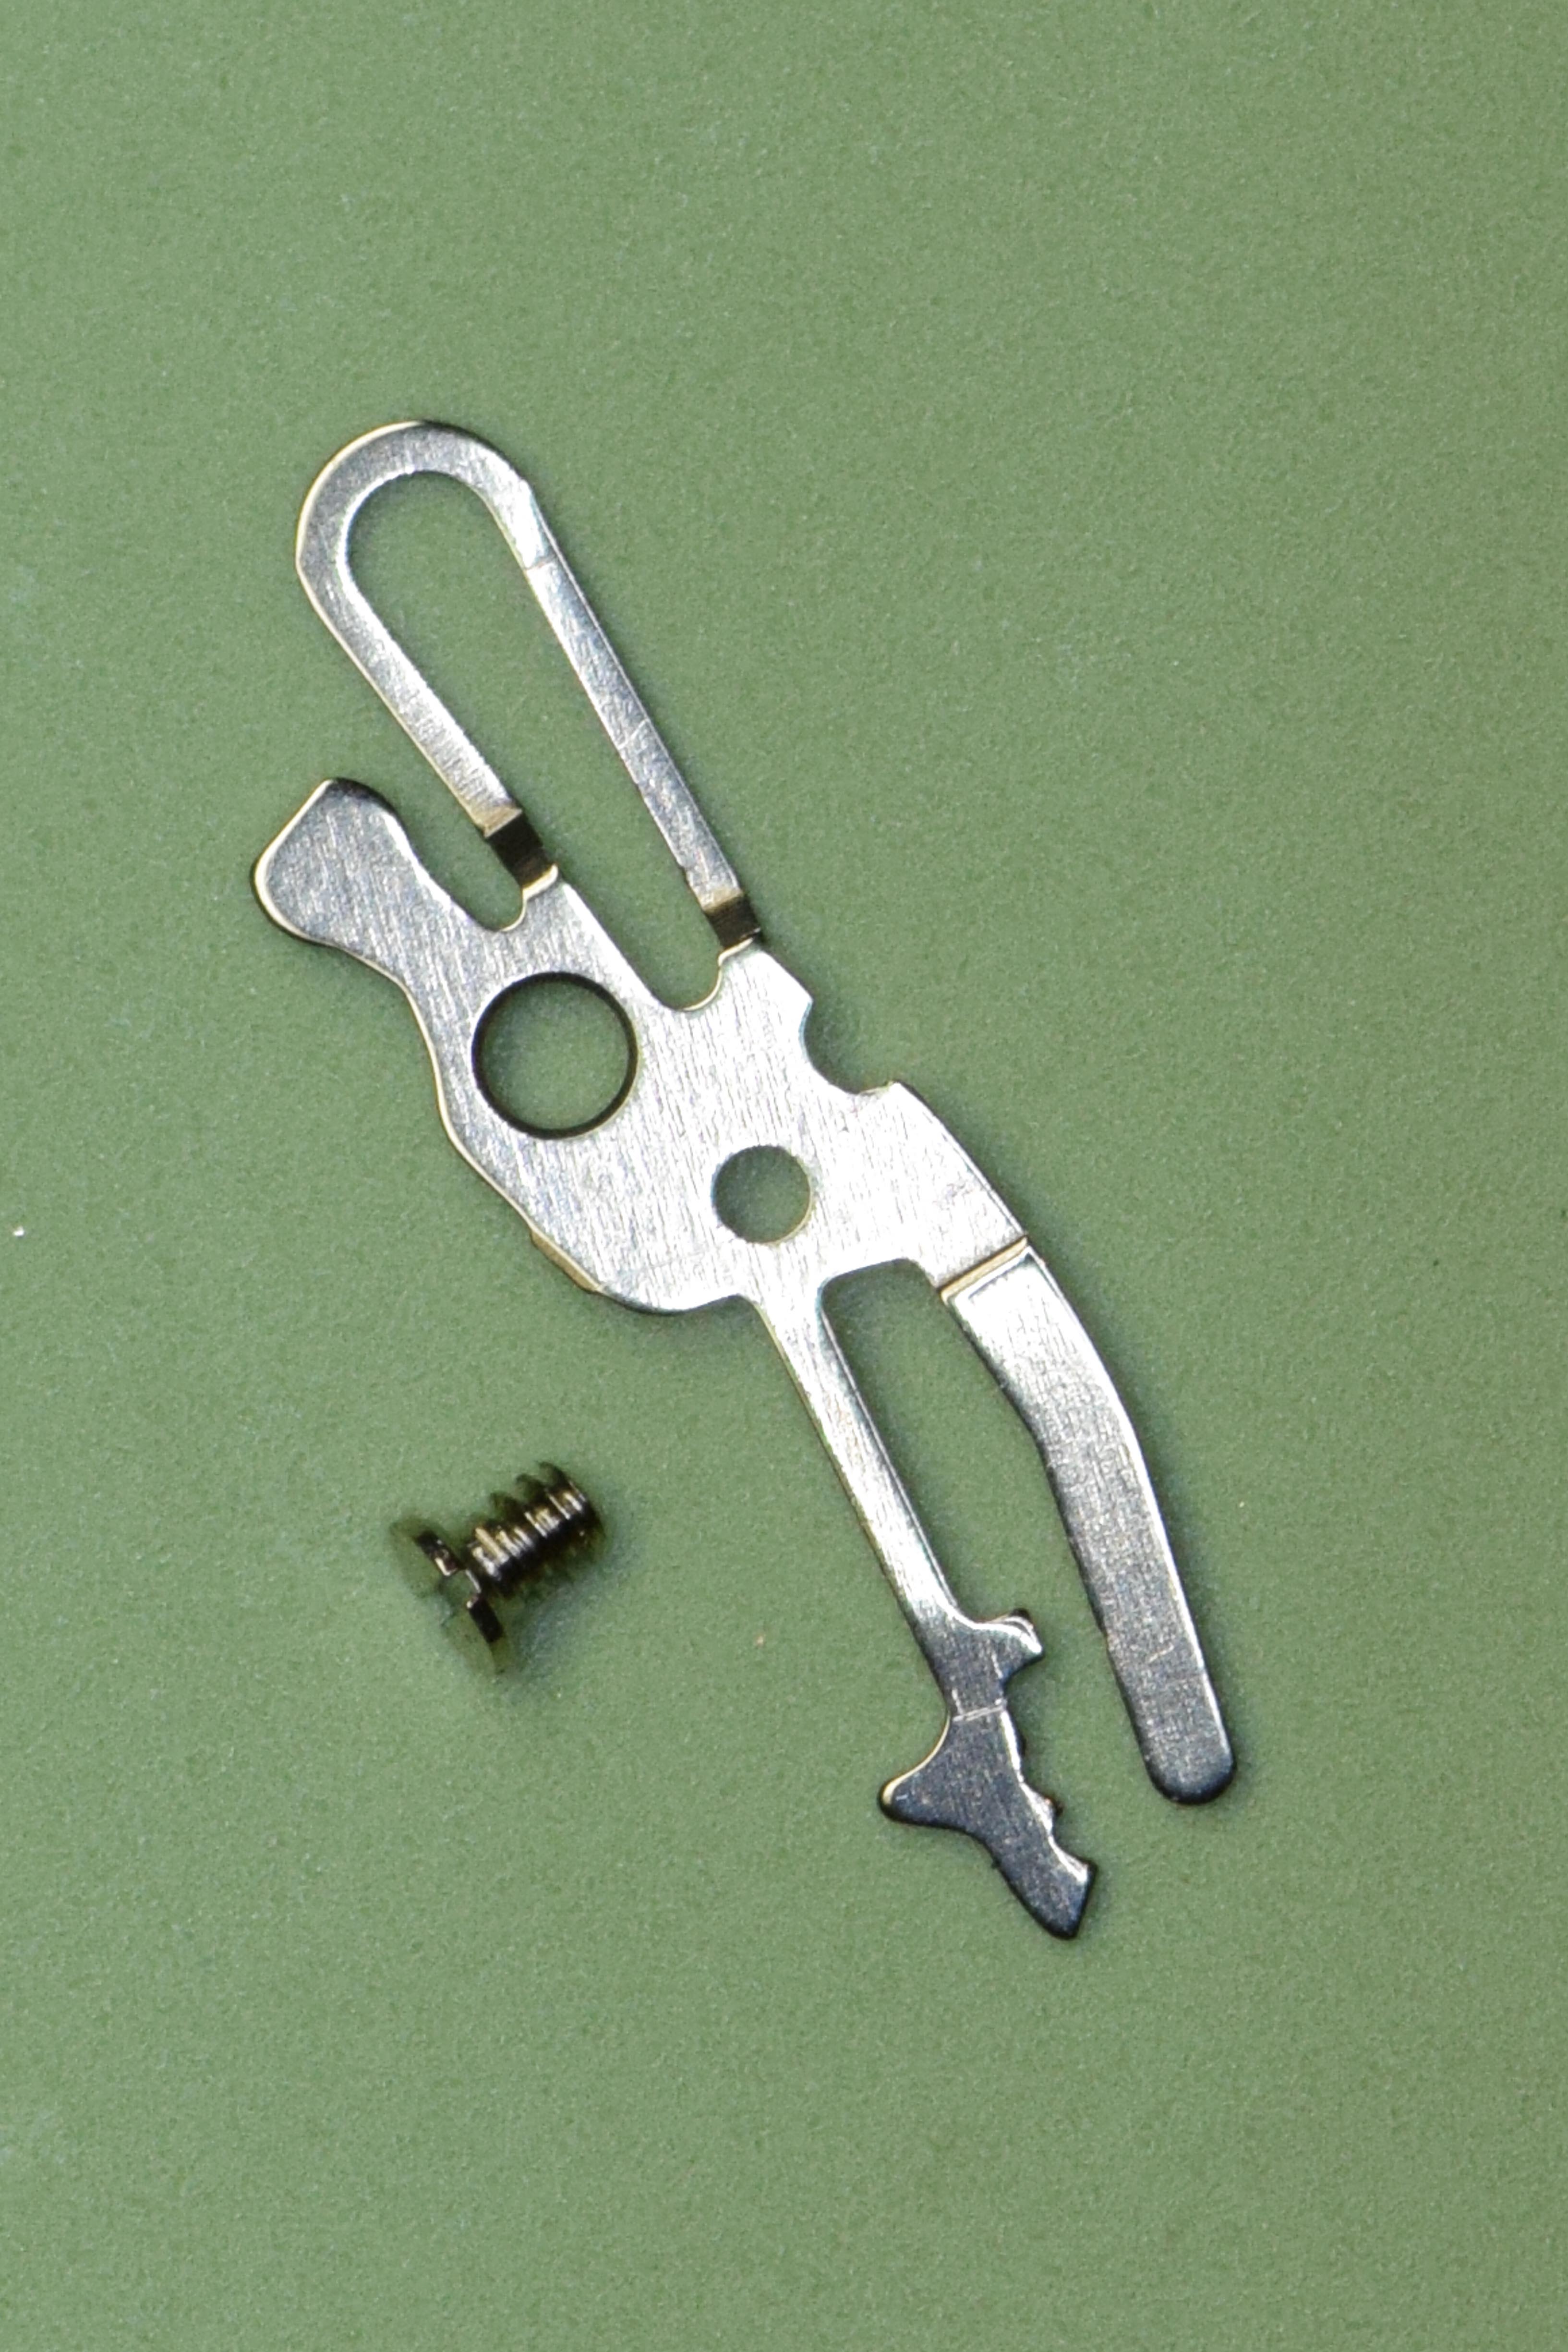
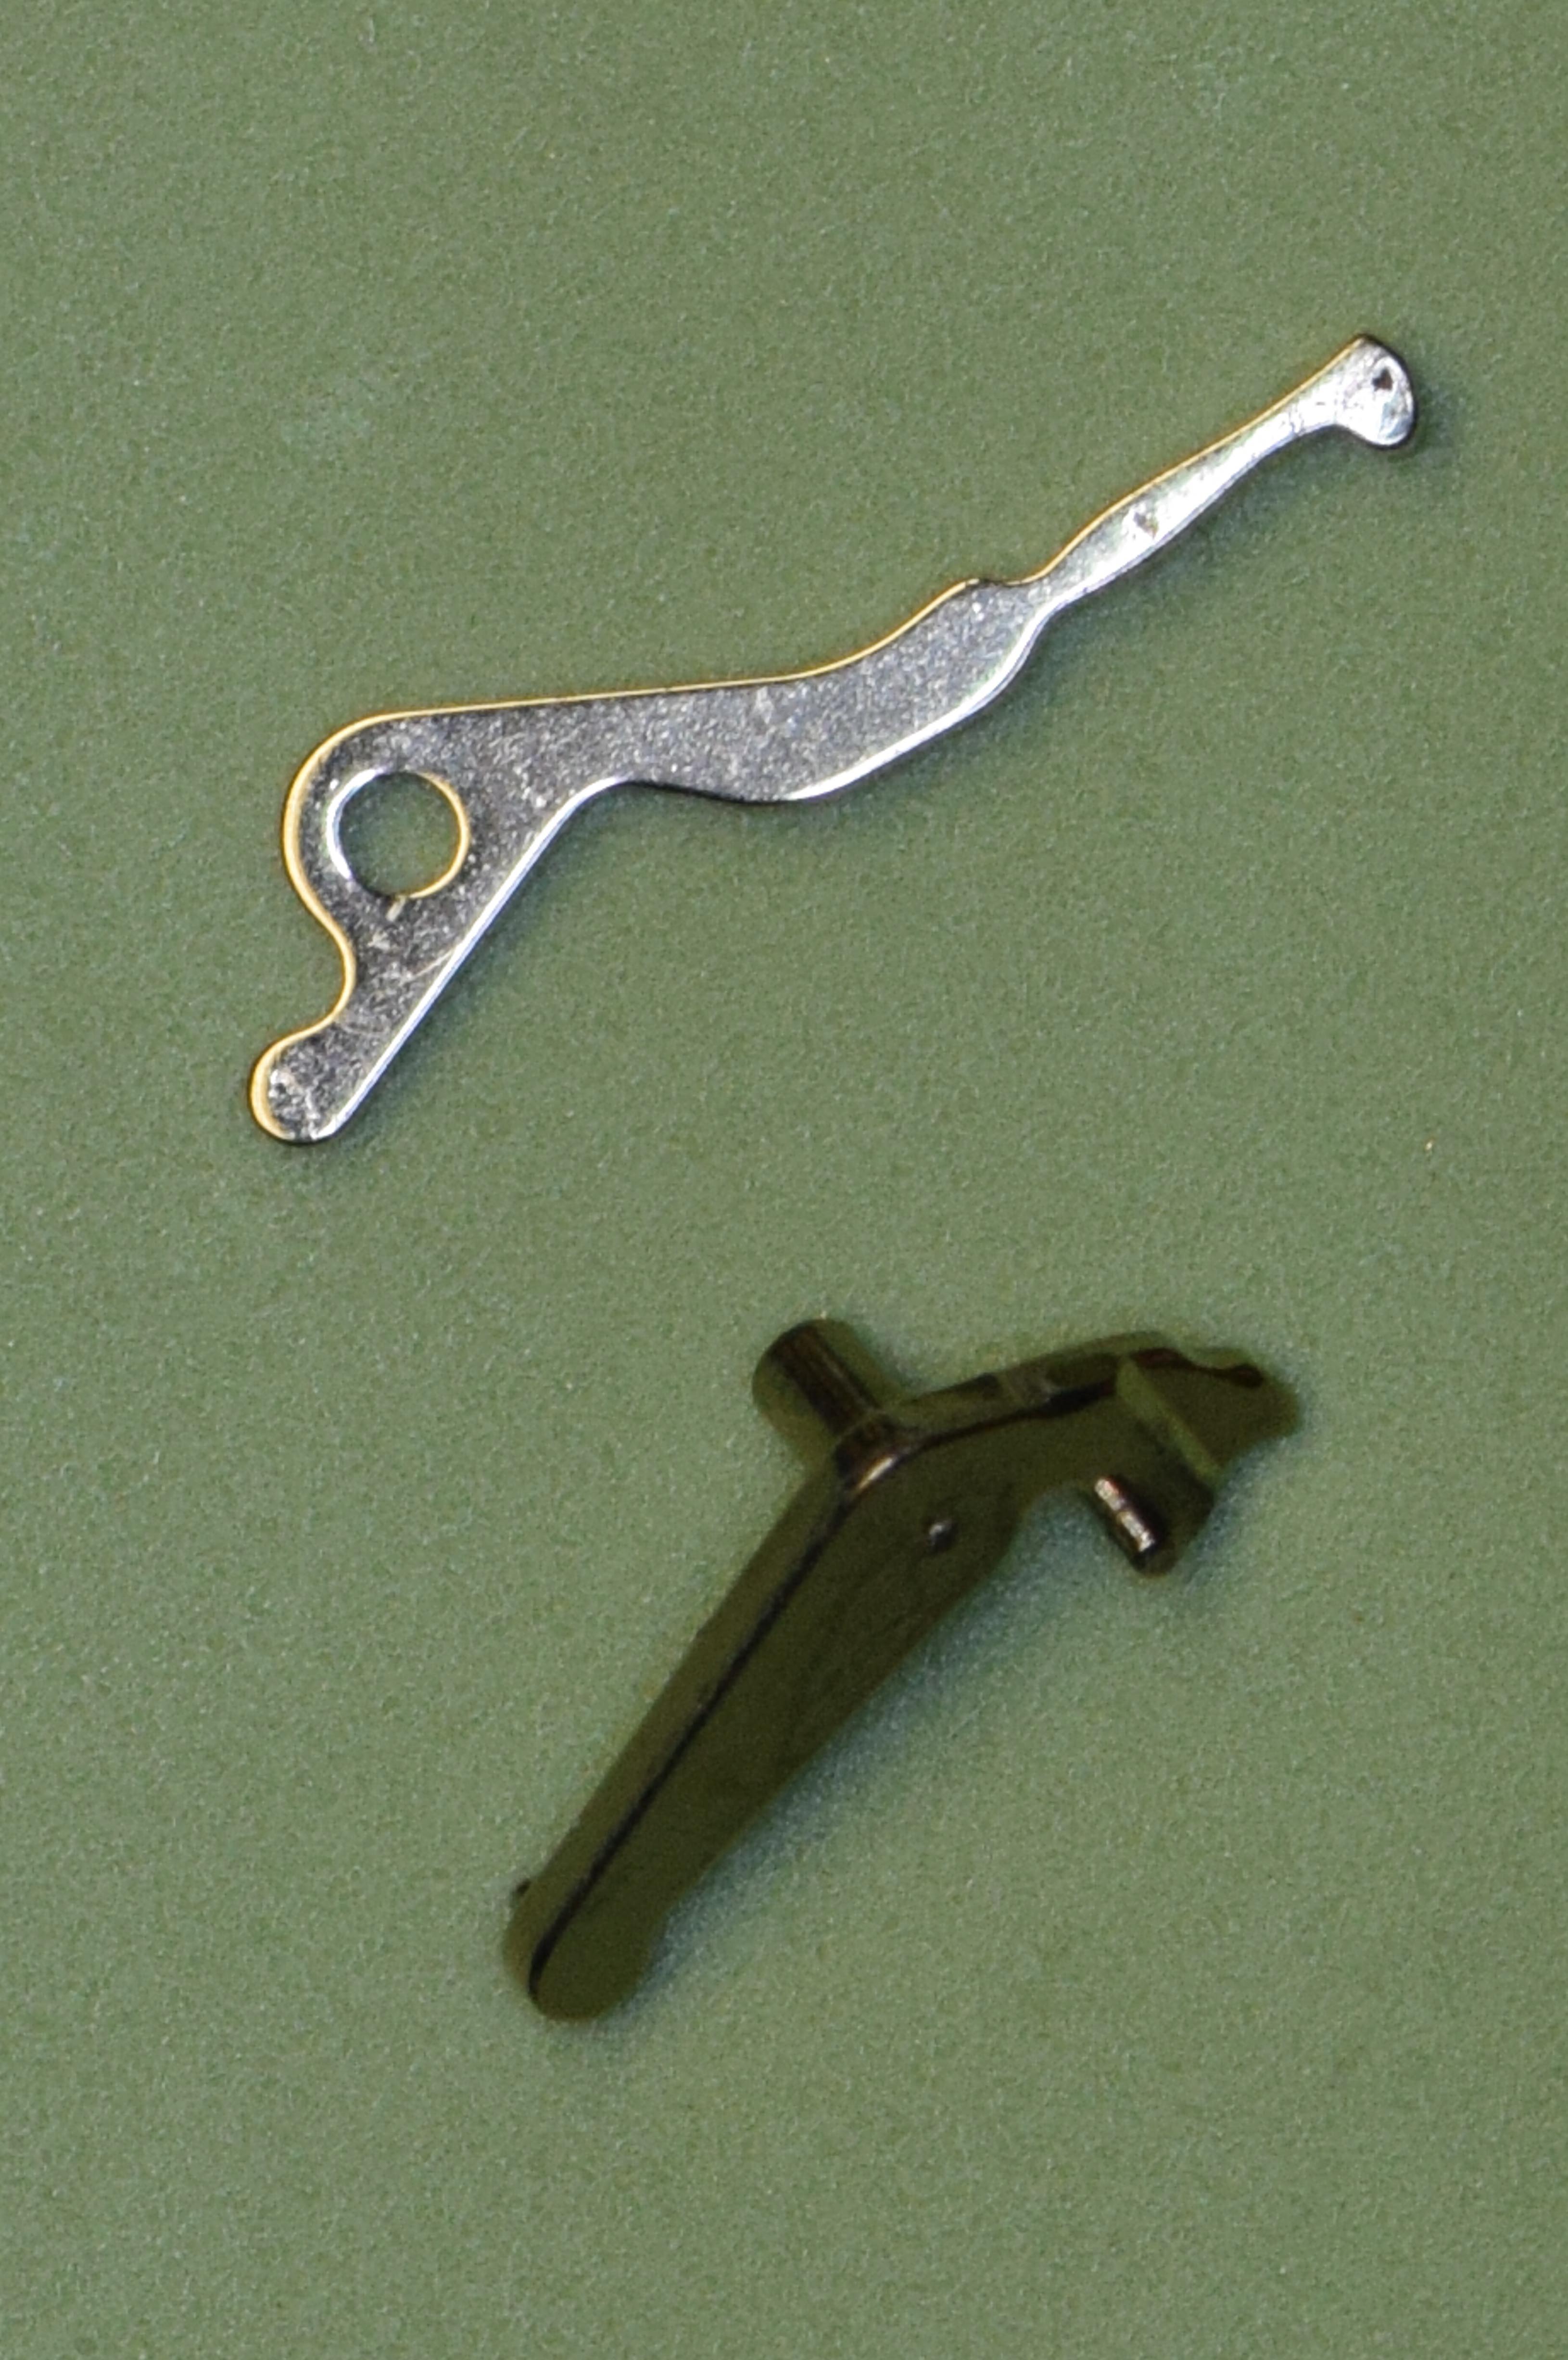
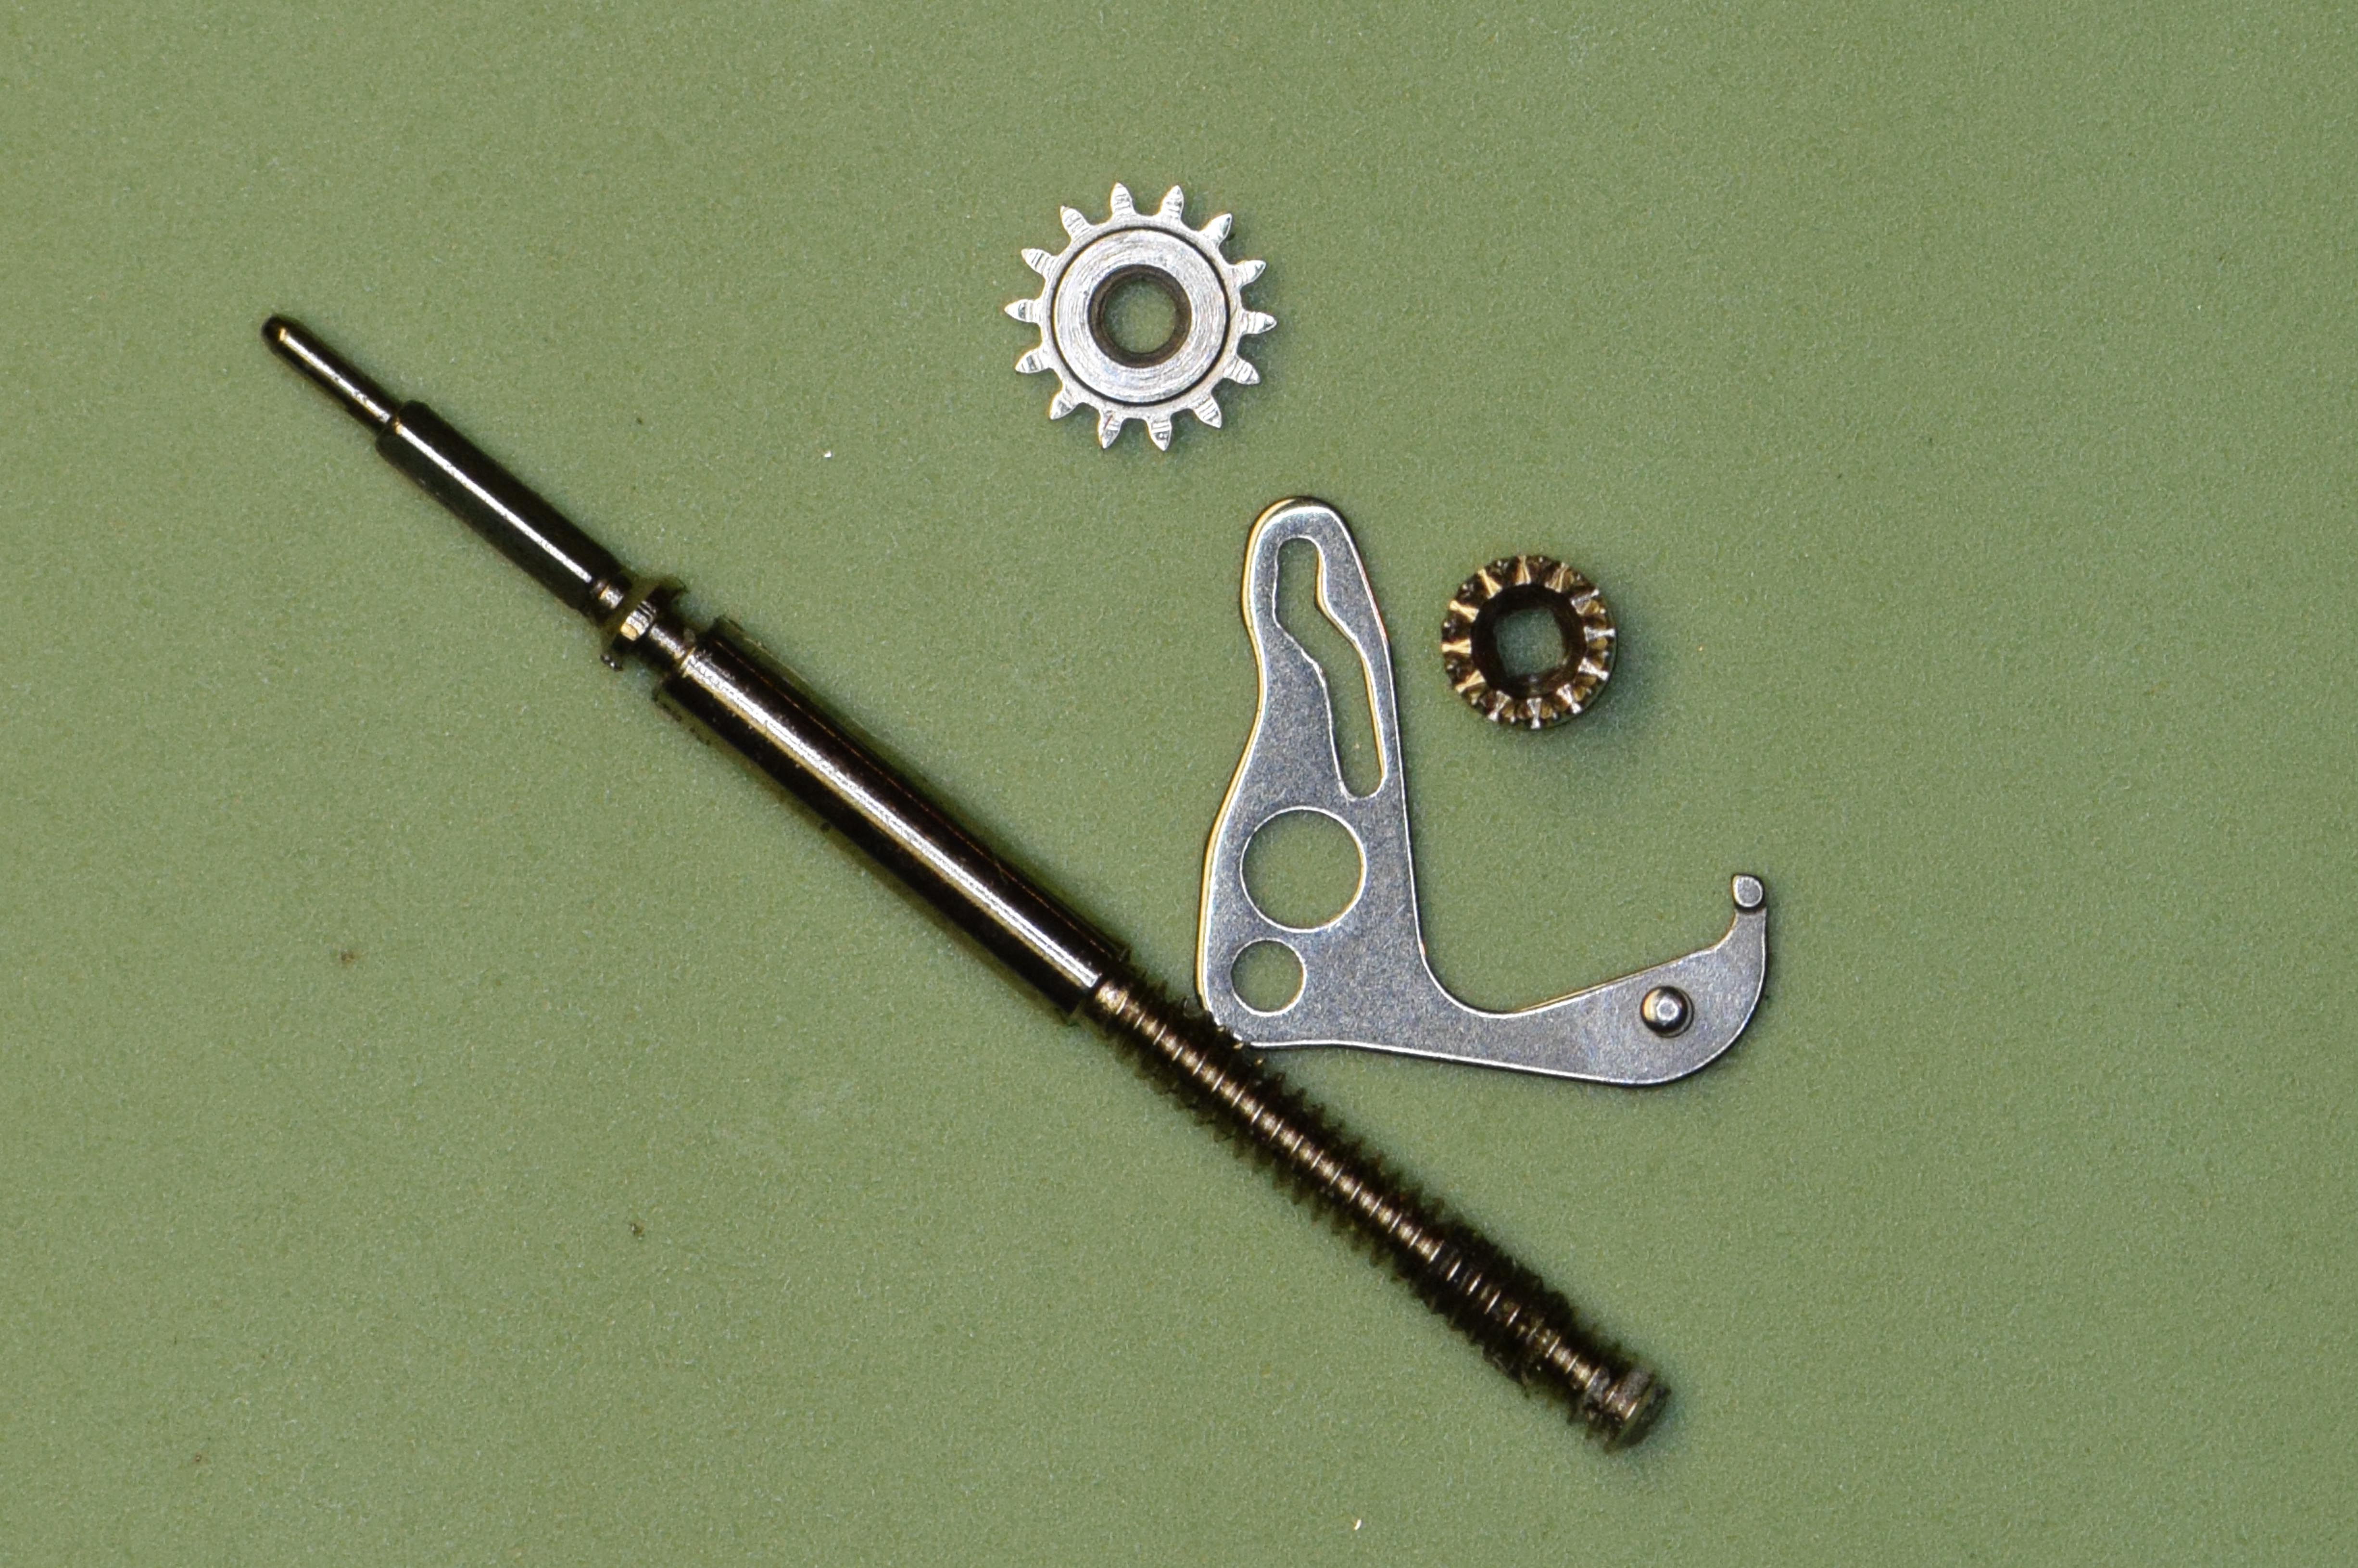
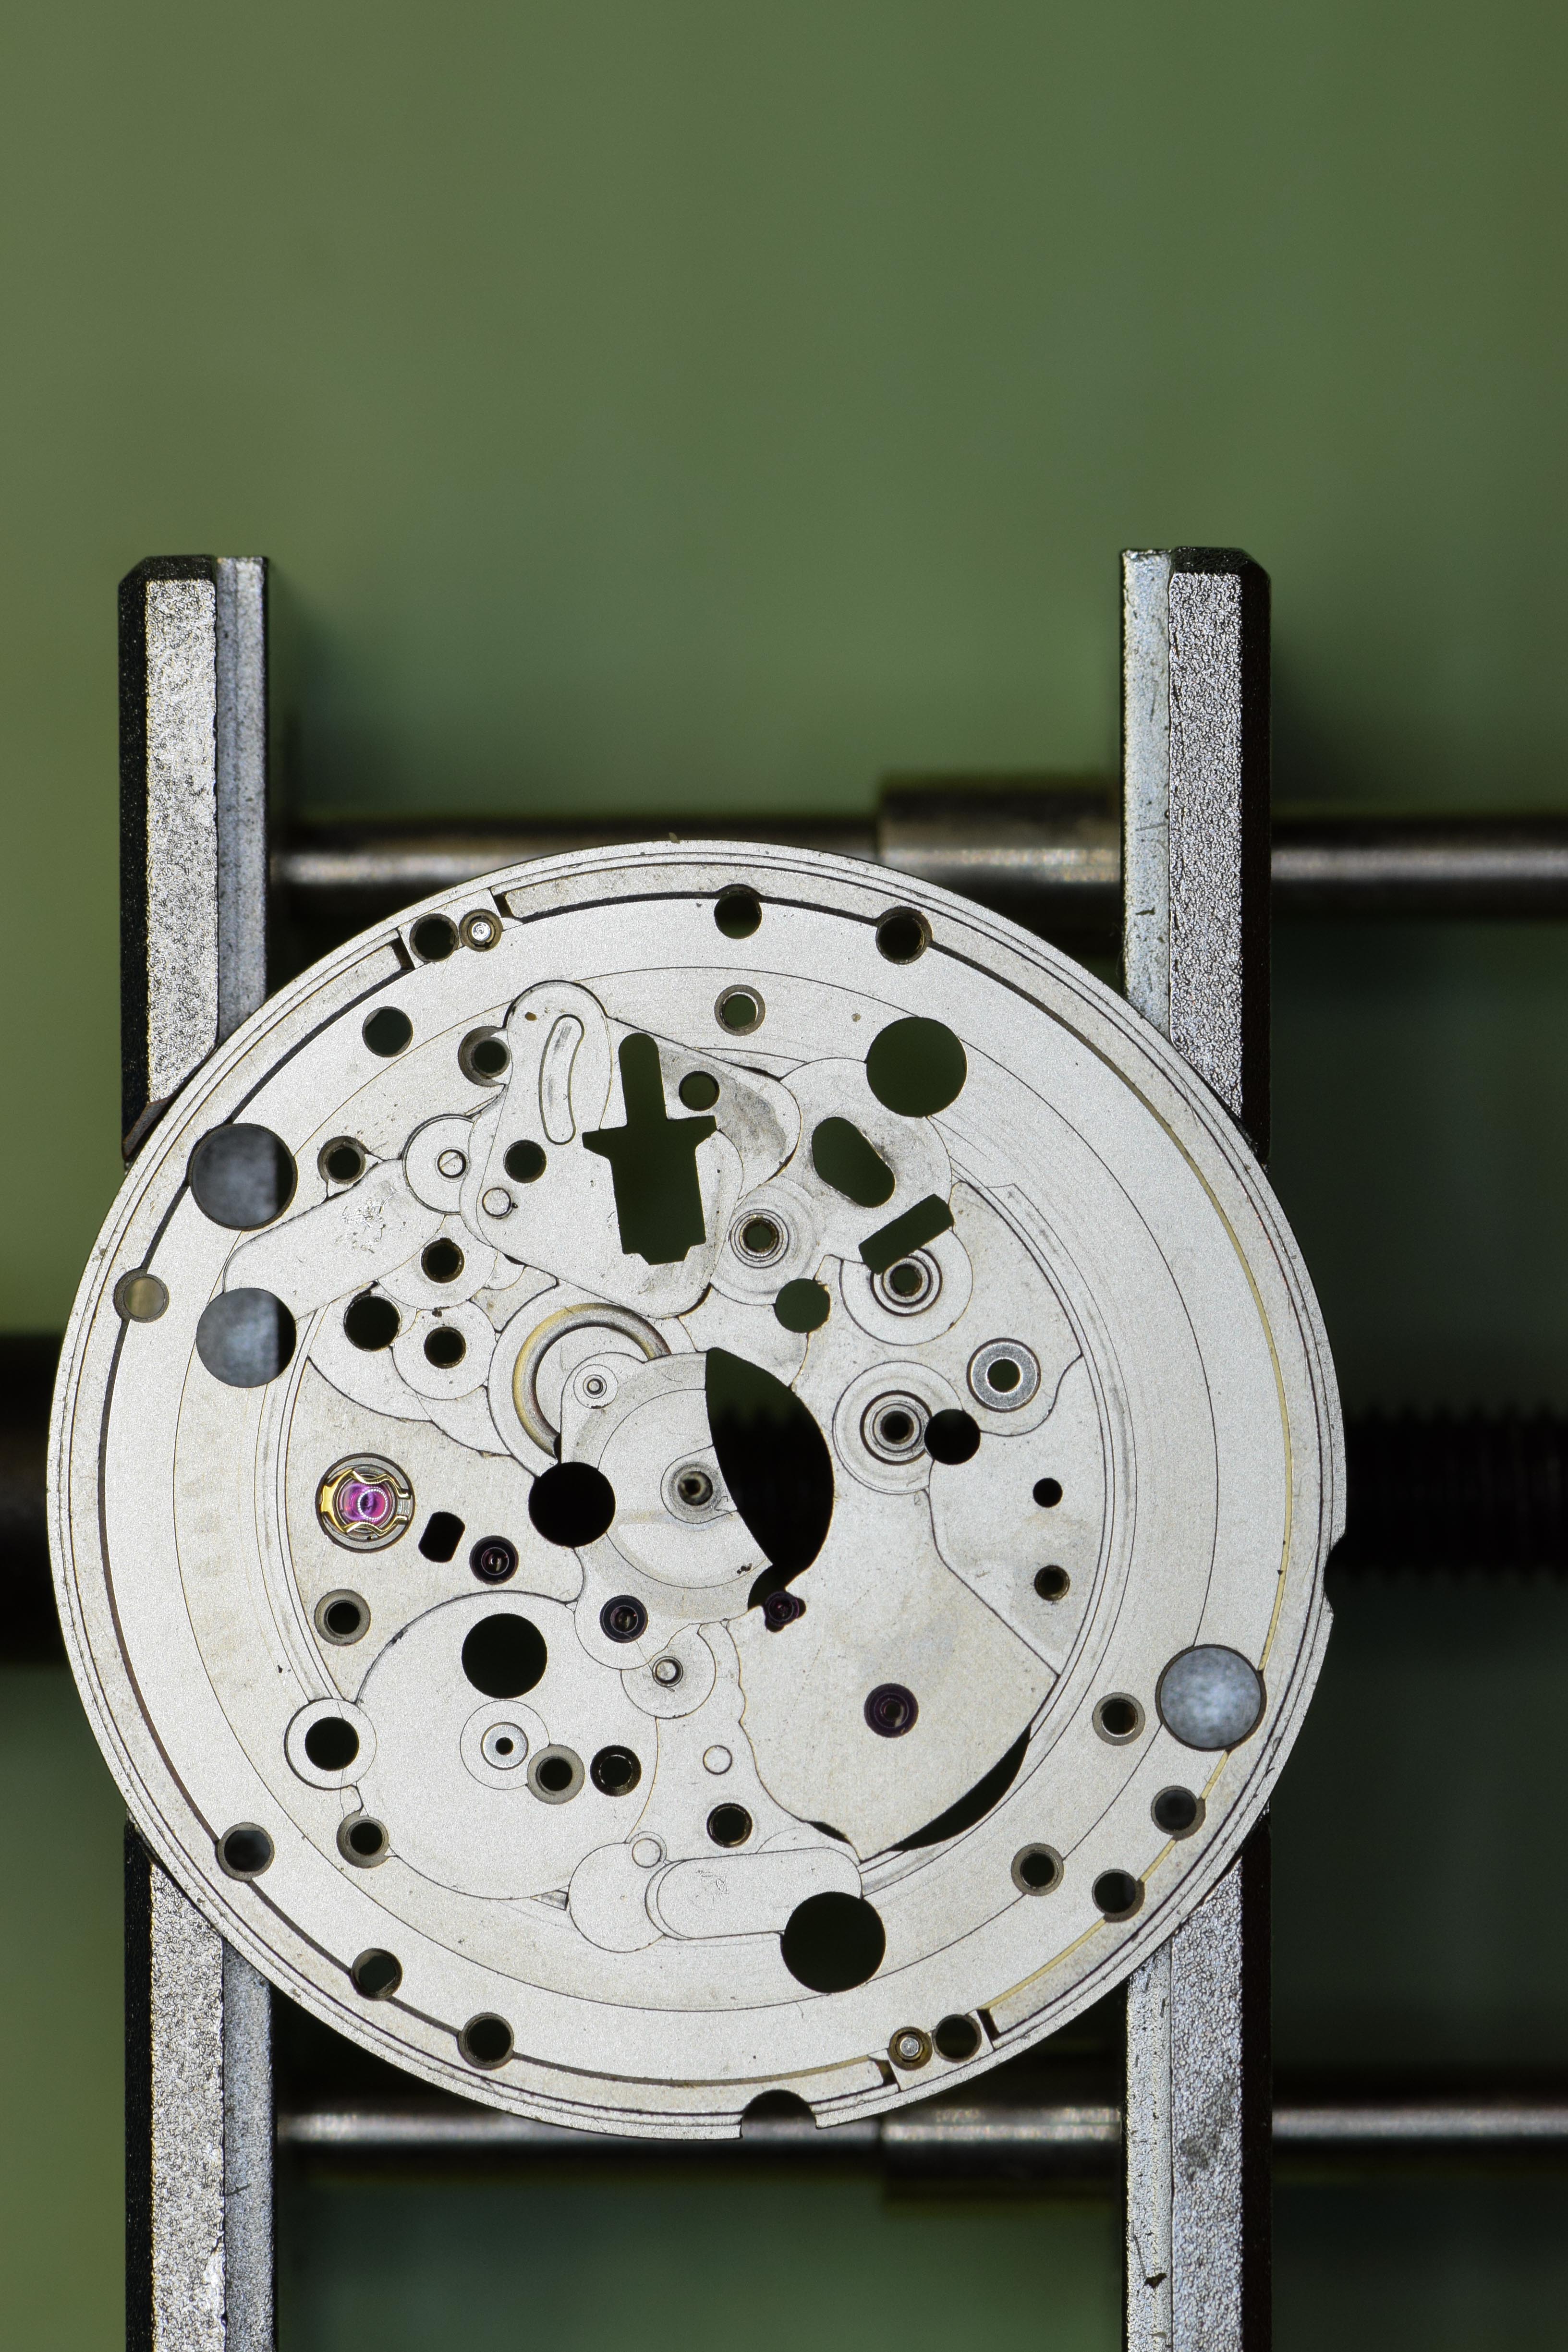
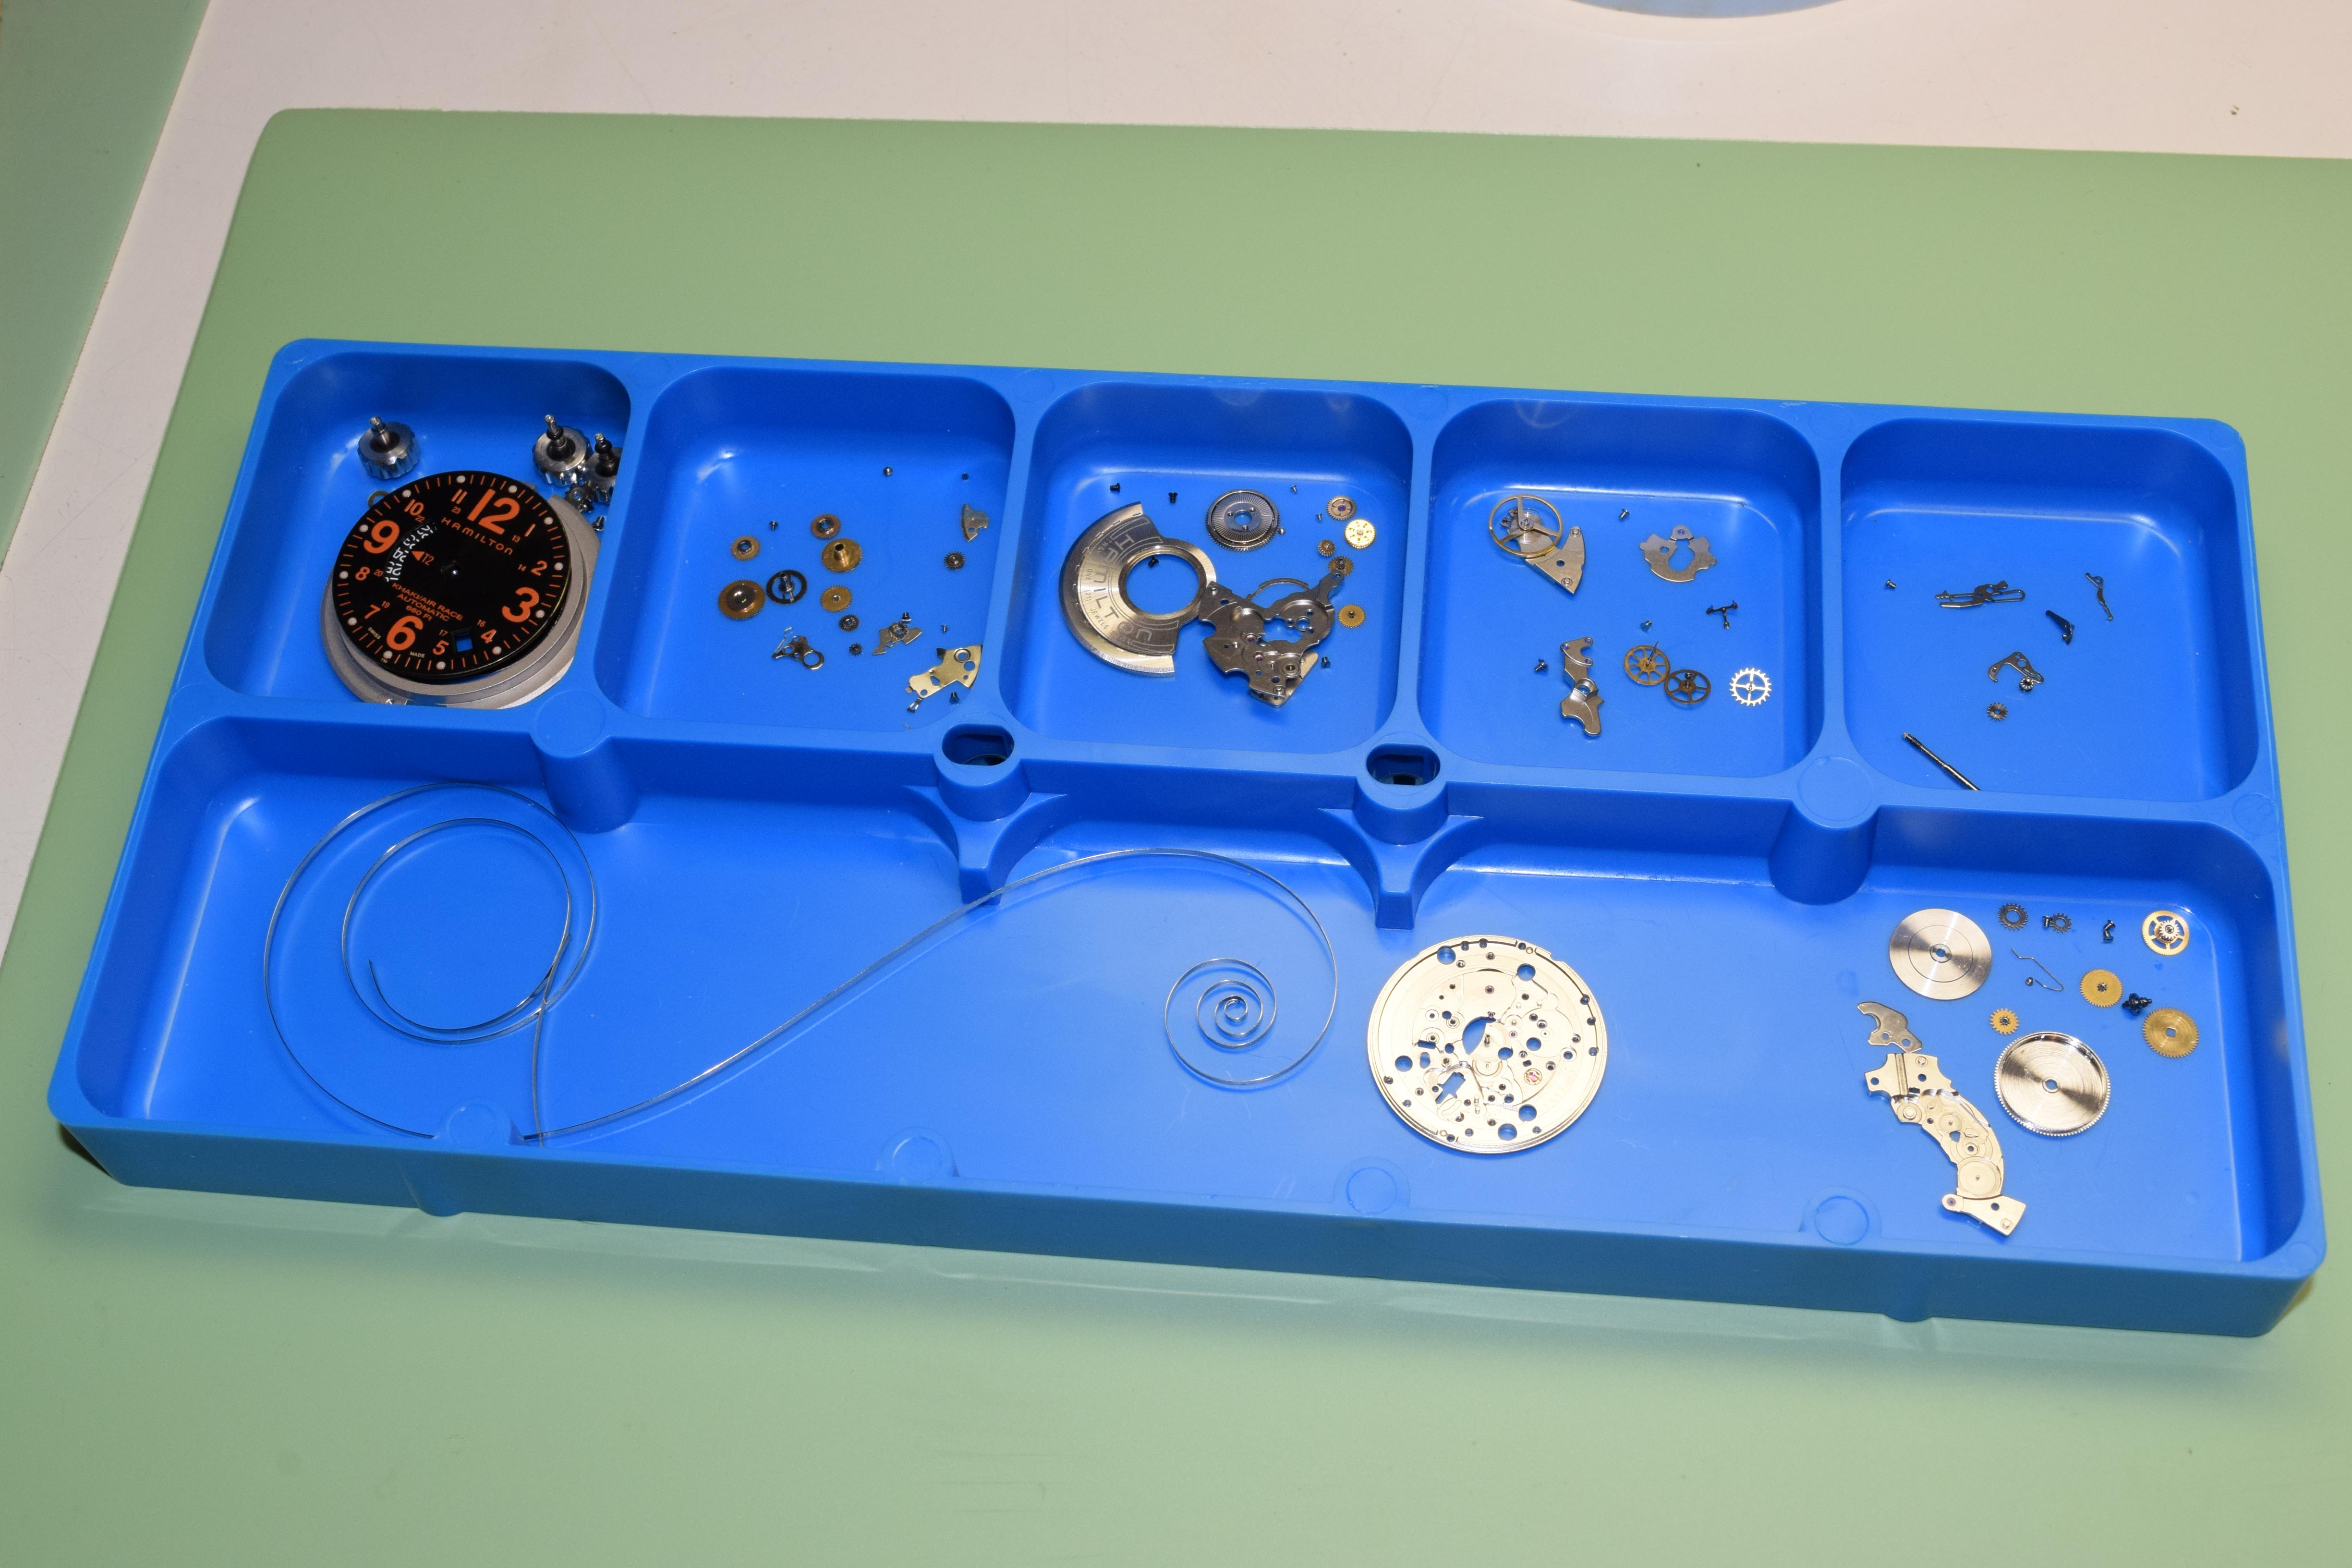
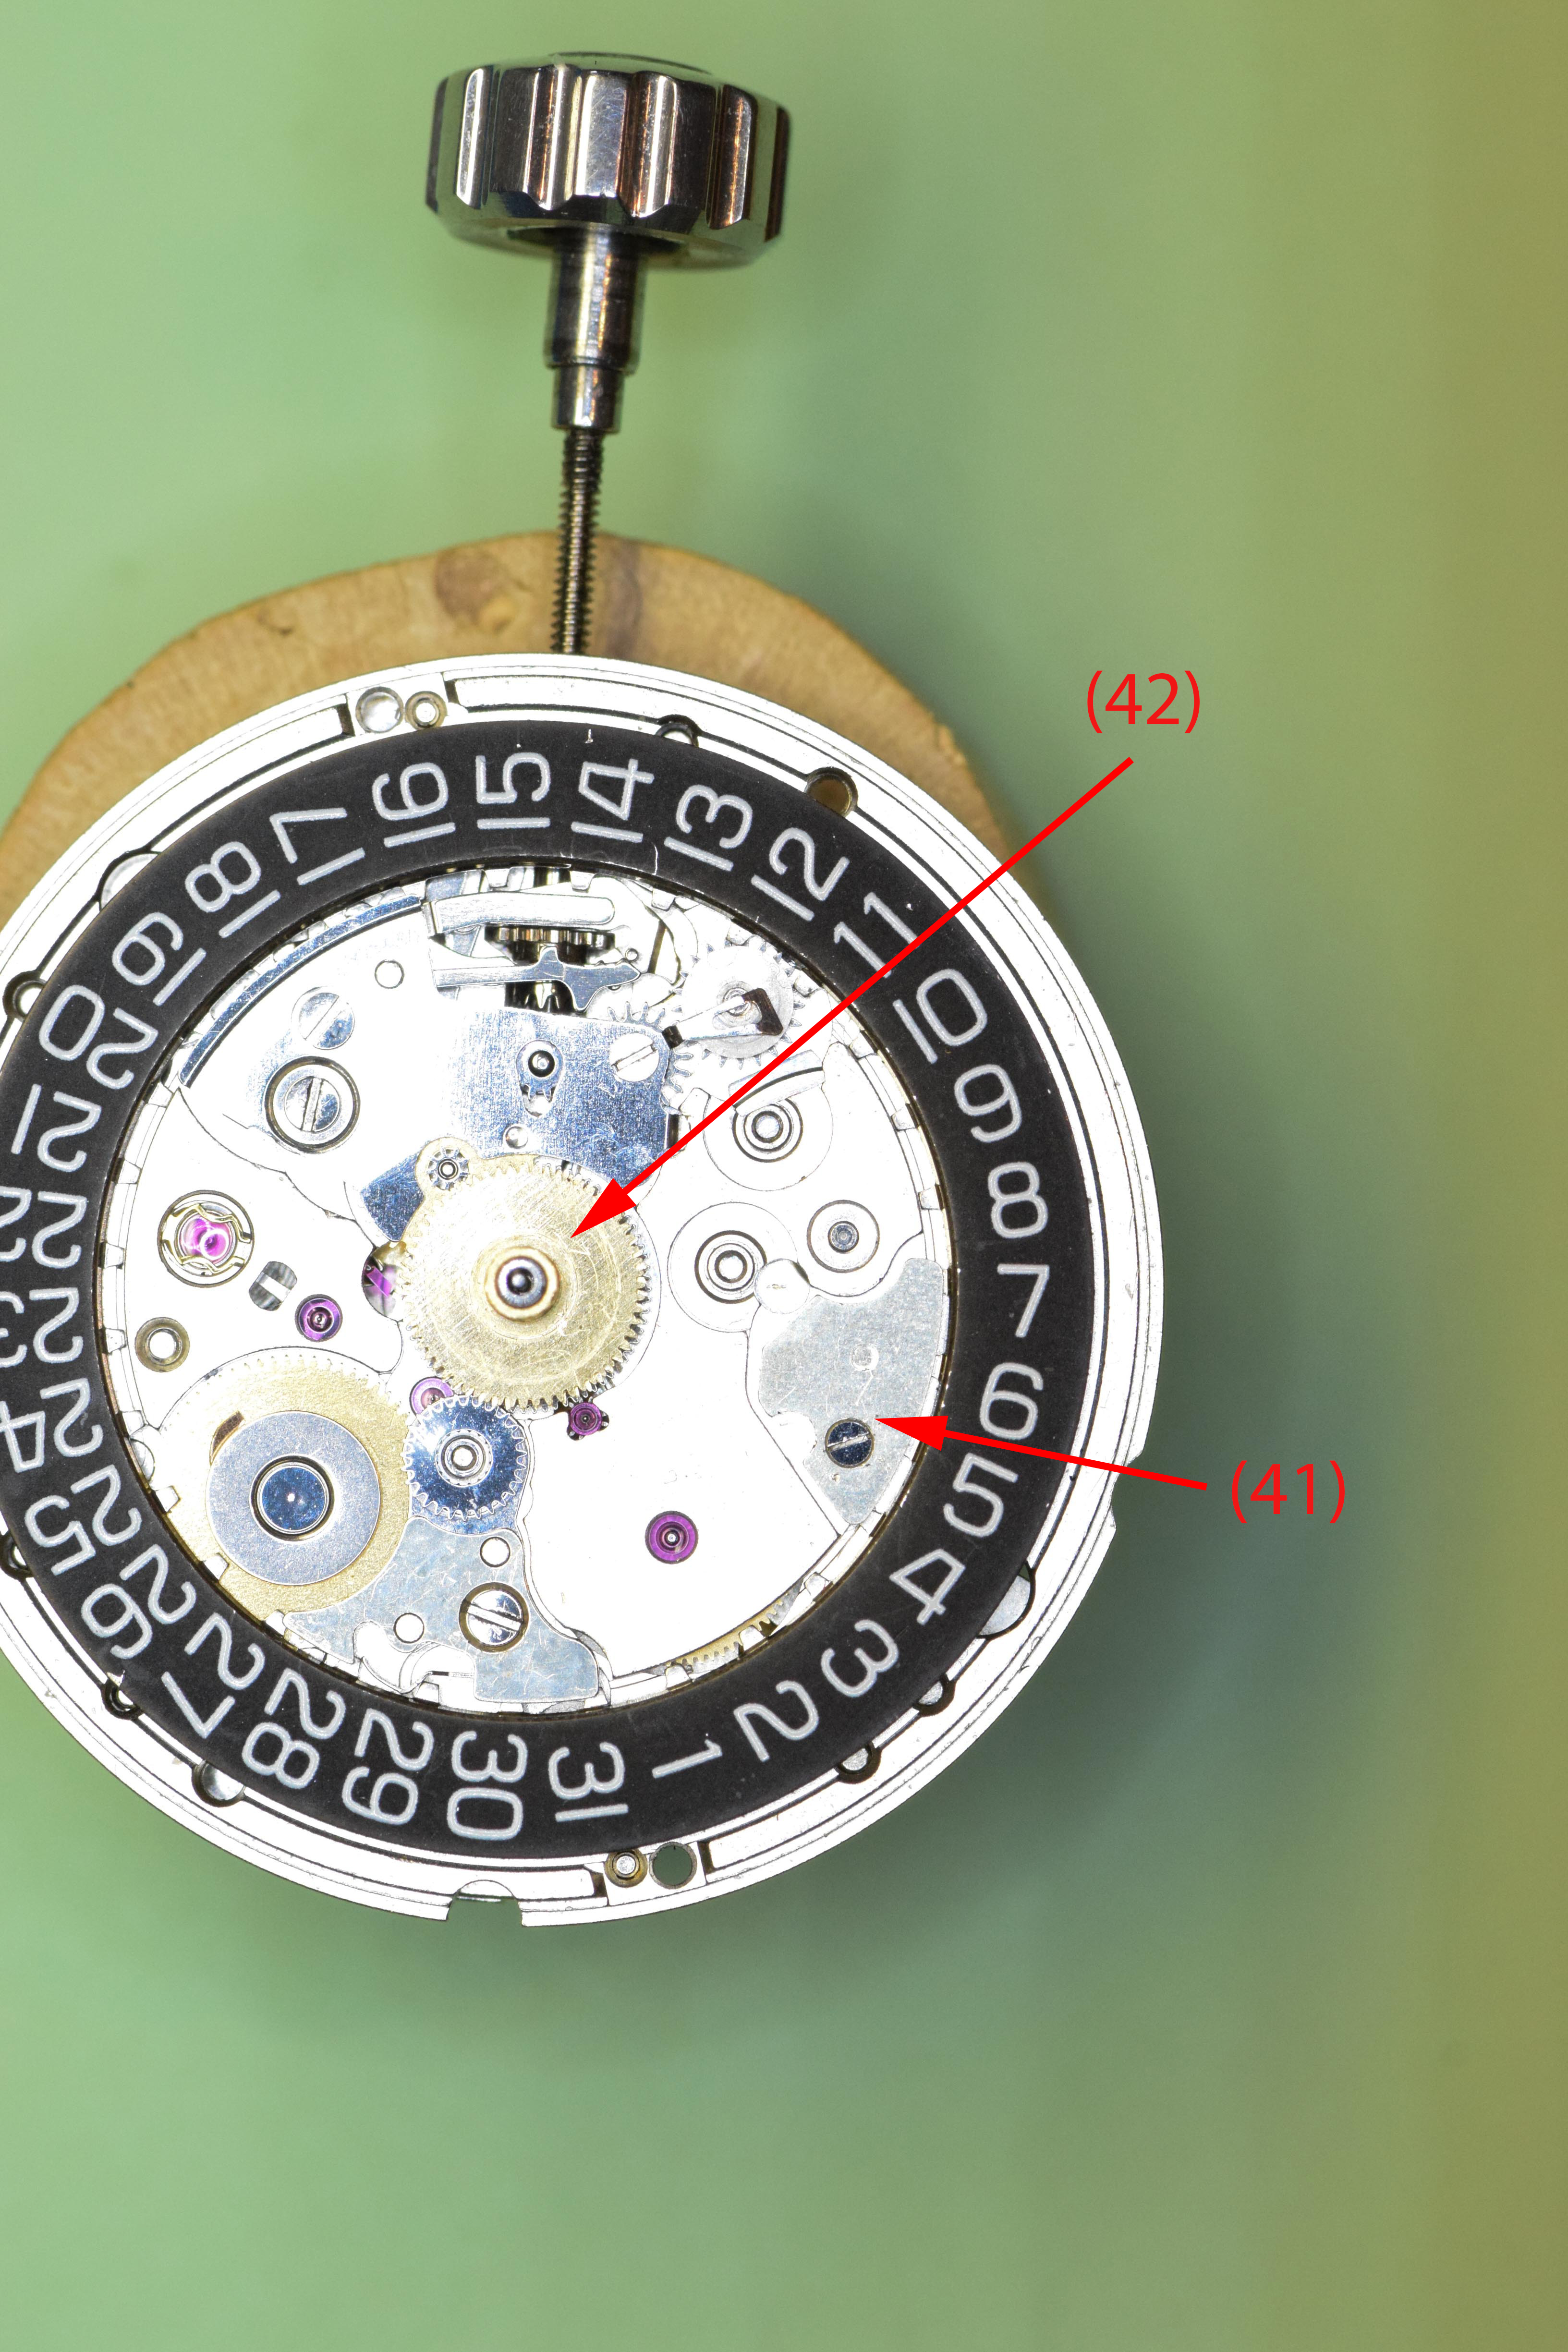
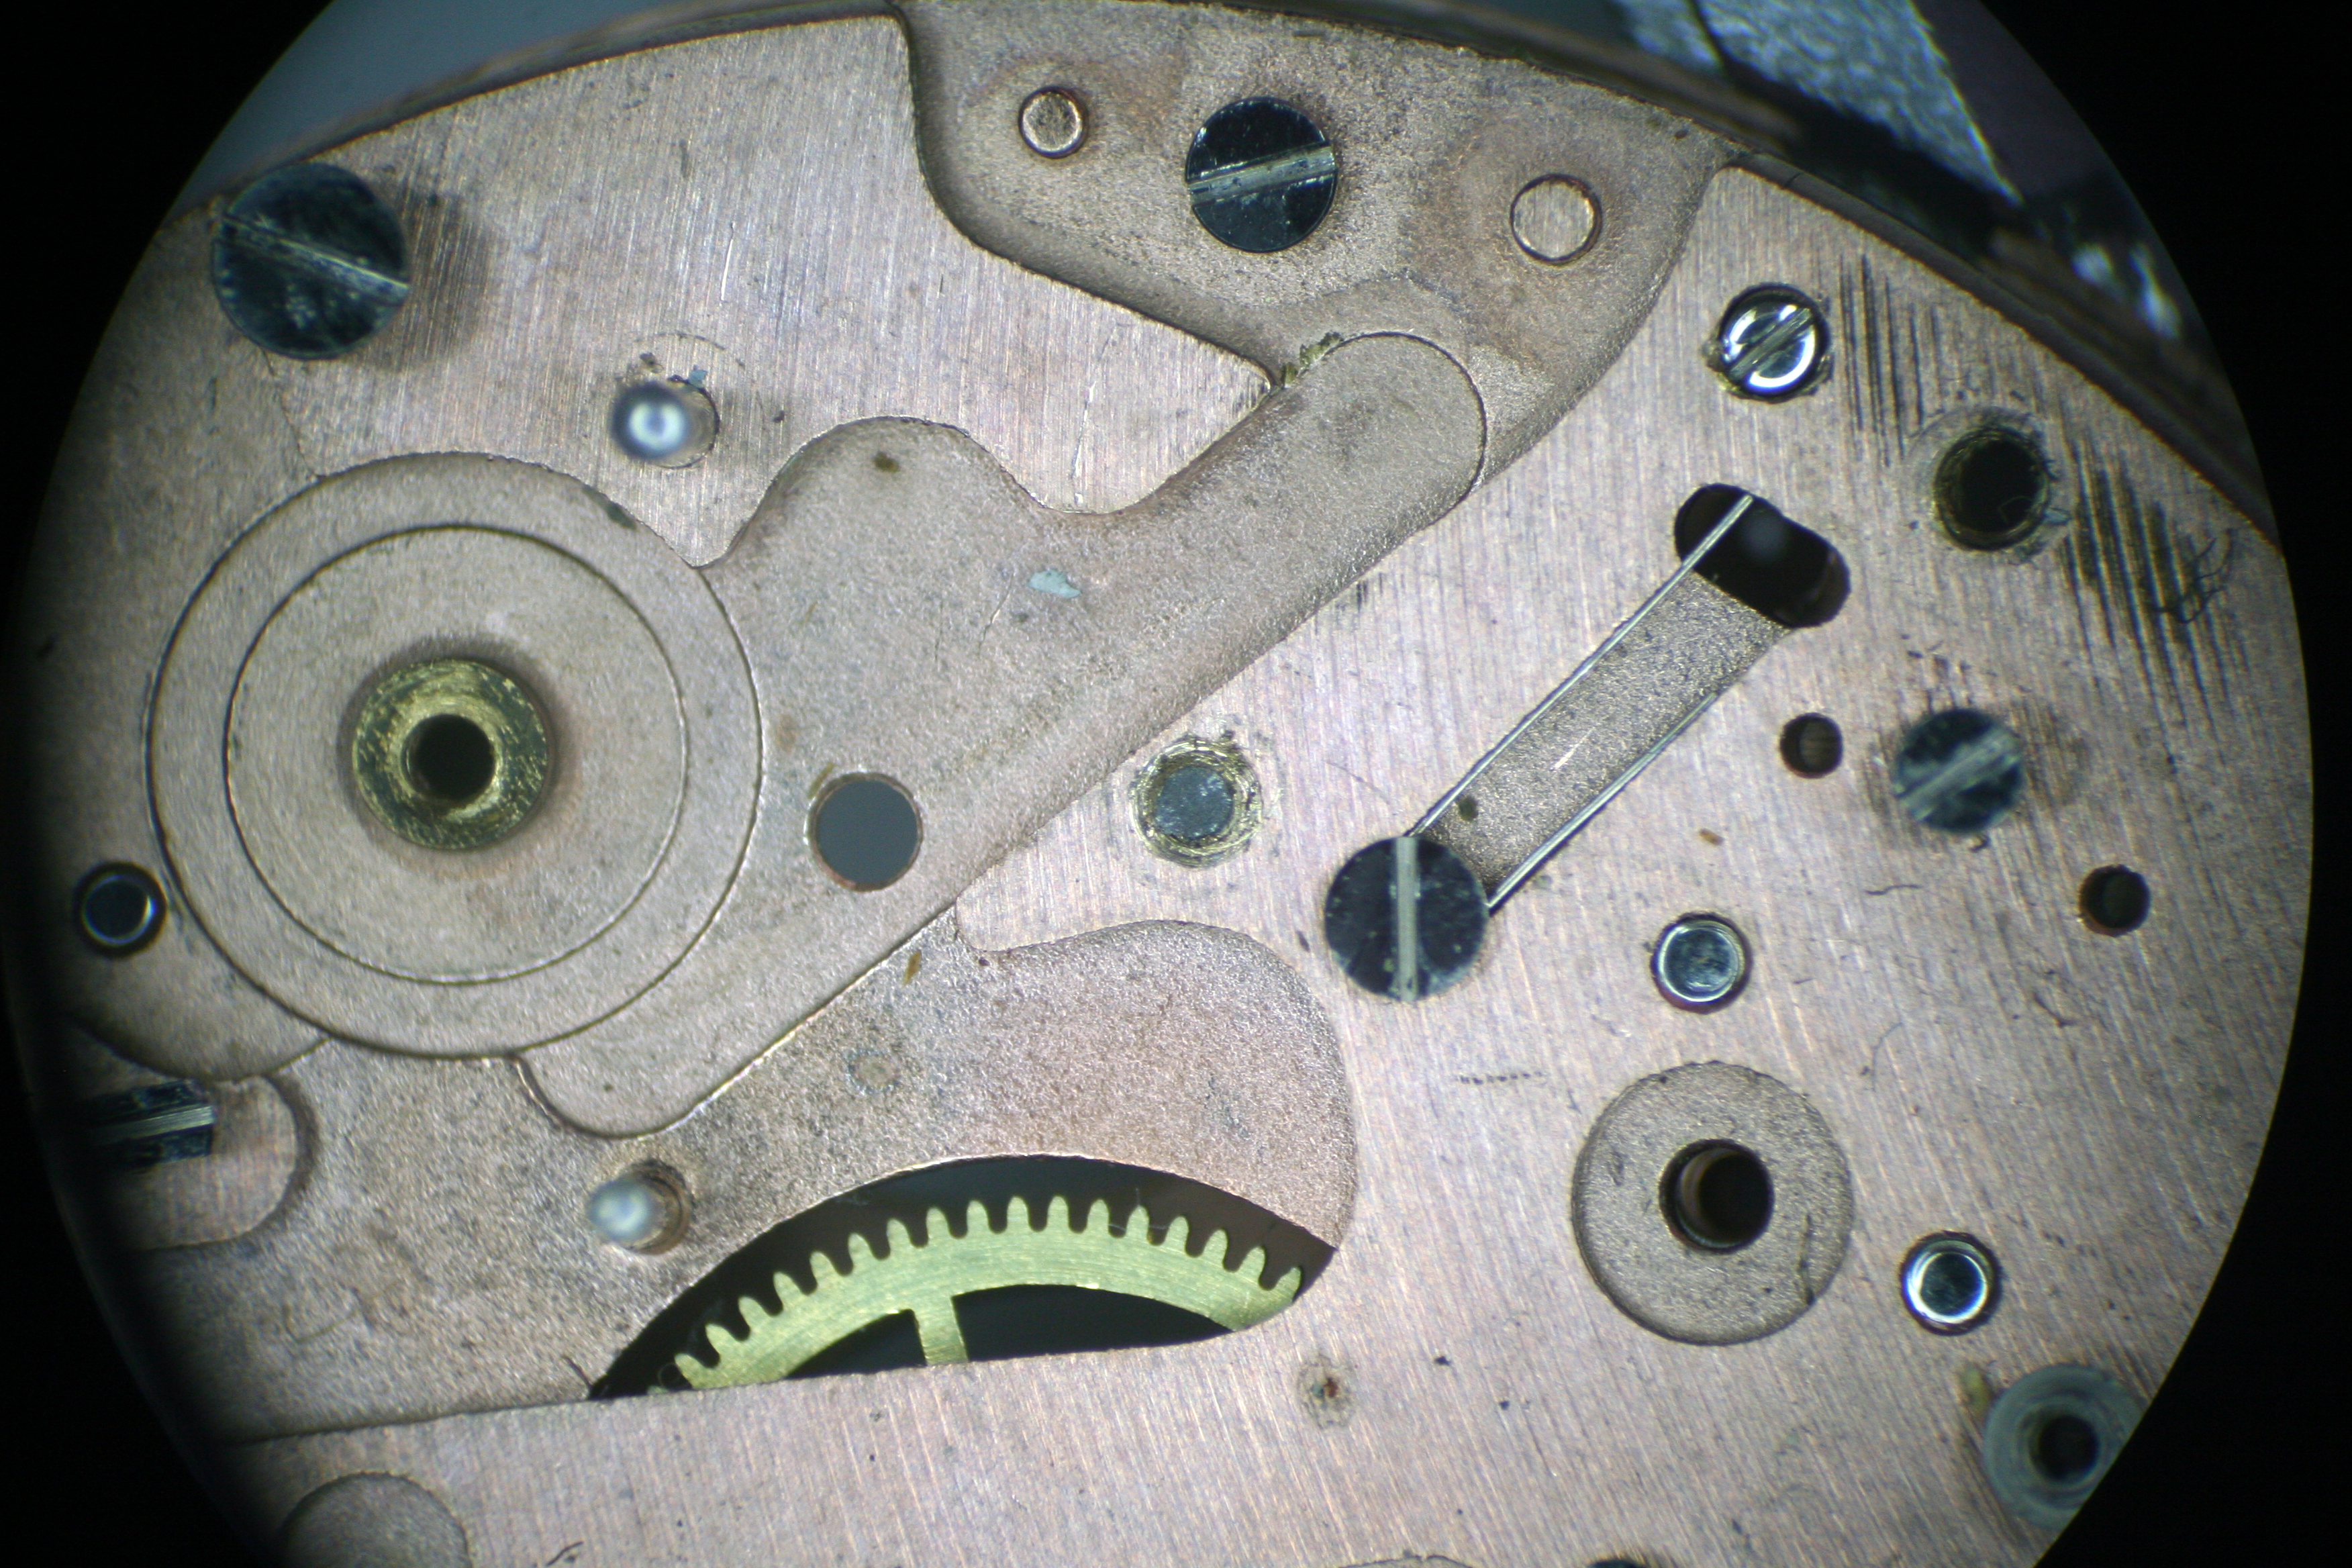
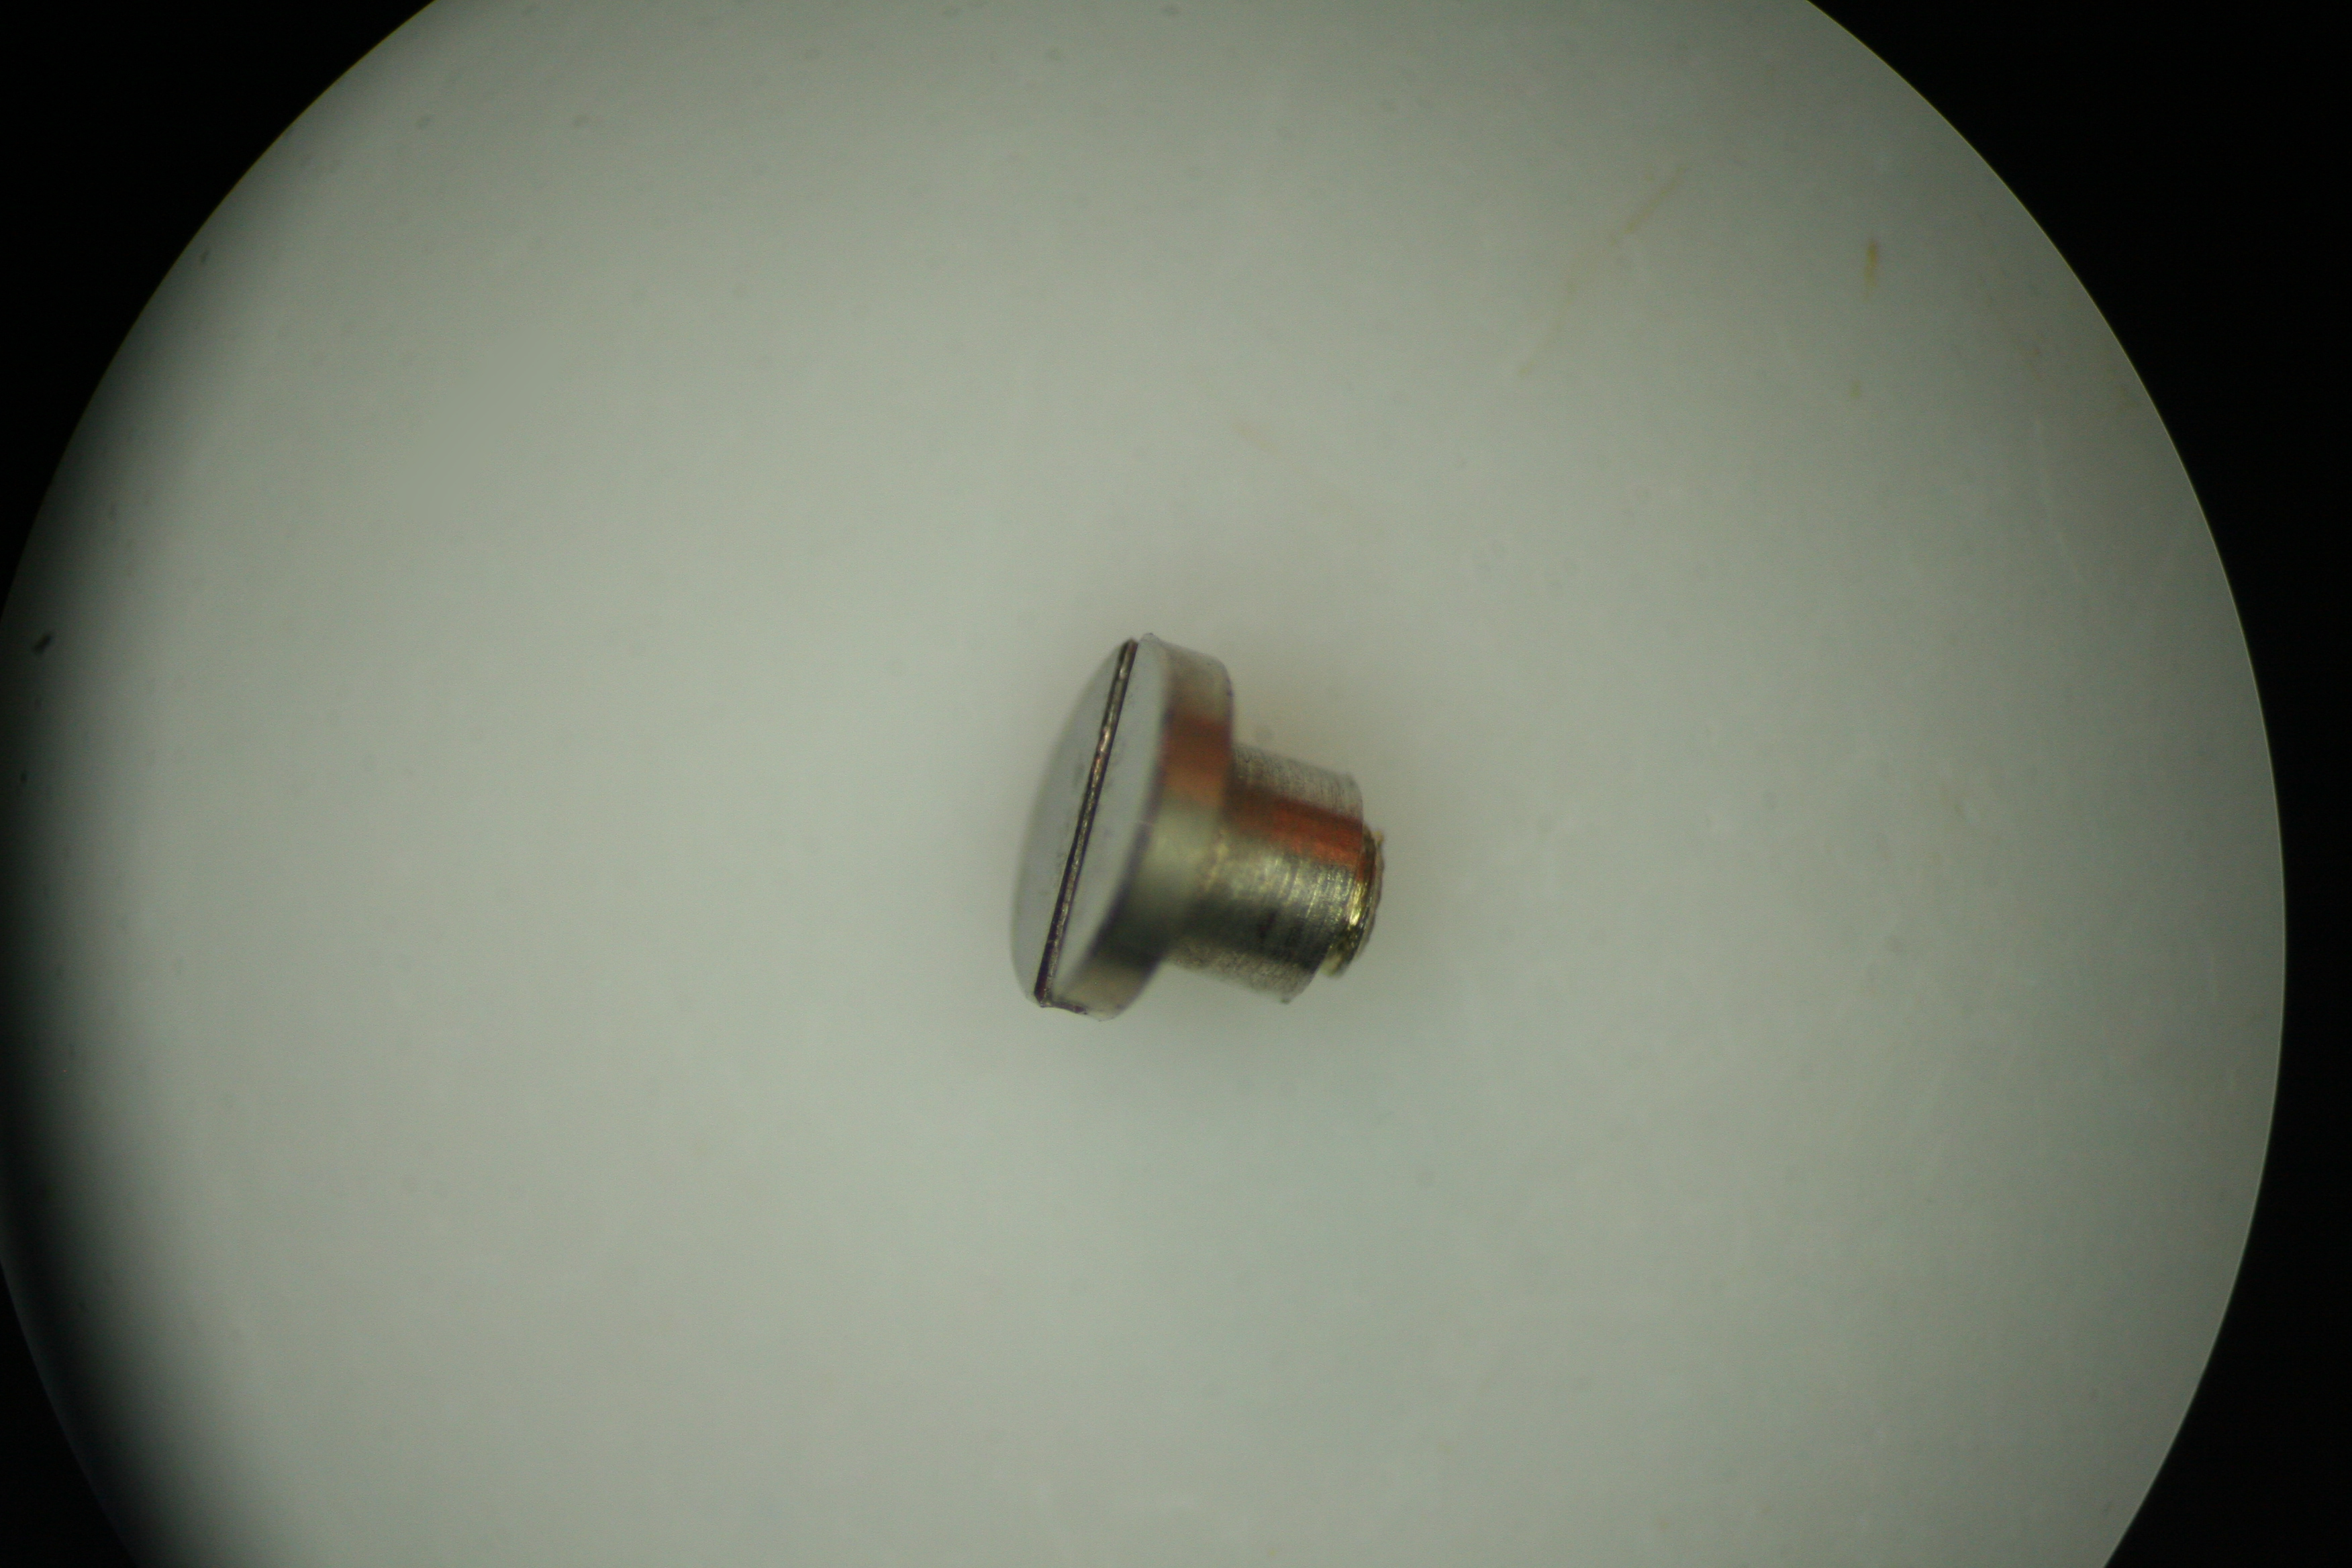
Service Walk Through – ETA 2893-1 / Hamilton Khaki: Part 1 - Disassembly This is part 1 of my service of a Hamilton Khaki – dual time zone automatic based on the ETA 2893-1 movement. I purchased the watch on eBay and it runs for a short time then stops. Looks like it could use a good cleaning. Note that the part numbers in the images and text are consistent with those found in the ETA technical document for this movement. Disassembly of this movement is quite straightforward. The only "special" tool you need would be an oscillating weight bolt tool - and you only need this if you intend to remove the ball bearing assembly from the oscillating weight, which really isn't required. In this tear down I do use the tool - only because I recently acquired it and wanted to see how it worked Off we go.... The dial shows evidence of some sloppy workmanship in the watch's past – several scratches from prior hand removal. Here you see the back of the 2893-1 with its automatic rotor - nicely signed Hamilton. The arrows indicate the location of the dial screws which secure the dial to the movement. These screws have a flat. Turn them just enough so the flat is facing the dial foot and the dial pops right off. Secure the screws so they don’t pop off during cleaning. Preparing to remove the hands – with a safety sheet in place. After removing the dial, remove the Dial Support Ring (47). This ring keeps the dial the proper distance from the second timezone disc. Without it, the disc will rub against the dial. Remove the second timezone disc, or what ETA calls the Universal Hour Indicator (46) from the center. This is a bit tricky as there’s no obvious place to grip it. I used two very small screwdrivers on each side to lift the indicator straight up. Be careful not to scratch it! With the disc removed, we can now remove the Dial Washer / Friction Spring (45), Corrector Setting Wheel (44) and Hour Indicator Driving Wheel (43). The Hour Wheel (42) can now be lifted off, followed by the Additional Indicator Maintaining Plate (41). Next components to remove are the Date Indicator Maintaining Plate (40) and the Minute Train Bridge (35). We move on to remove the Intermediate Date Wheel (39). The Date Jumper (38) has also been exposed when we removed the maintaining plate, so we remove it. Finally, we remove the Date Indicator (37) and the Date Indicator Driving Wheel (36). Now on to some of the motion and keyless work. We remove the Minute Wheel (34), Cannon Pinion with Driving Wheel (33), Double Corrector (32), Date Corrector Intermediate Setting Wheel (31) and Setting Wheel (30). This side is almost complete. We leave the setting components in place. Removing them now would be problematic as we have yet to release tension from the mainspring. Flip the movement over and remove the automatic work. After removing the 3 blue screws (seen in the previous 2 pics) we lift the entire unit up gently by the Oscillating Weight (28). With the automatic work out of the way – I notice that the Stop Lever (Hack) is missing! Will try and source one. Back to the automatic work. Removing these 3 small screws will allow the oscillating weight to come off the Automatic Framework (21). This is a special tool designed to release the Oscillating Weight Bolt I remove the Oscillating Weight Bolt (28-3) and free the Ball Bearing (28-2) from the Oscillating Weight (28-1). There was no compelling reason to disassemble this portion of the movement, but the tool worked as expected! With the Oscillating Weight out of the way, remove the Auxiliary Reverser (27). Flip the unit over once again and remove the screw and Automatic Device Lower Bridge (26). Remove the Reverser (25), Reverser Wheel (24), Reduction Wheel (23) and Intermediate Reduction Wheel (22). A view of the underside of these components – handy when trying to remember which way to reassemble. Remove the single screw and gently lift off the Balance Assembly (20) with the Balance Complete (19). Carefully let the power down by releasing the Click (12-6) and slowly letting the crown wind down. Remove the Pallet Bridge (18) and Pallets (17). Remove the Train Wheel Bridge (16). It is secured with a hefty screw! Remove the Fourth Wheel (15), Third Wheel (14) and Escape Wheel (13). Remove the 3 screws and the Barrel Bridge (12) Flip the bridge over and lift off the Ratchet Wheel Driving Wheel (12-2) Remove the screw and the Click Plate (12-7), followed by the Click (12-6), Intermediate Ratchet Wheel (12-5), Intermediate Crown Wheel (12-4) and Crown Wheel (12-3). Note that the Intermediate Crown Wheel is under the Click Plate. When I removed the plate, the wheel was stuck to it due to some old oil. Here you can see the Intermediate Crown Wheel as it was stuck. This shows the proper placement of the wheels. Remove the Ratchet Wheel (11), the Mainspring Barrel (10) and Intermediate Wheel (9). Note the scrap of tissue that found its way onto the movement. I was so focused on taking pics that I didn’t notice. Pop the lid off the Barrel Remove the mainspring arbor And finally, remove the mainspring, leaving the empty barrel The movement side is now completely bare. Let’s flip it over and finish off the keyless work. Unscrew and remove the Setting Lever Jumper (8), Yoke (7) and the Setting Lever (6) Remove the Date Corrector Operating Lever (5), Winding Stem (4), Winding Pinion (3) and the Sliding Pinion (2) All stripped down Ready for the Ultrasonic!!! Hope you enjoyed this. In case you are interested, photo equipment used was: Camera: Nikon D5300 DSLR Lens: Nikon AF-S VR Micro-NIKKOR 105mm f/2.8G IF-ED, Shutter Release: Nikon ML-L3 Remote Shutter Release (wireless) Lighting: Polaroid Macro LED Ring Flash Tripod: Vanguard Alta Pro 263AB 100


 2 points
 -
This sheet goes b4 the one above.2 points
-
Theres a doc on the net called seiko gasket coding system. used to be on SCRIBD but it's gone from there. Luckily I downloaded it.2 points
-
Today I took my Seiko 7T32 watches out for a battery replacement and dust-off...
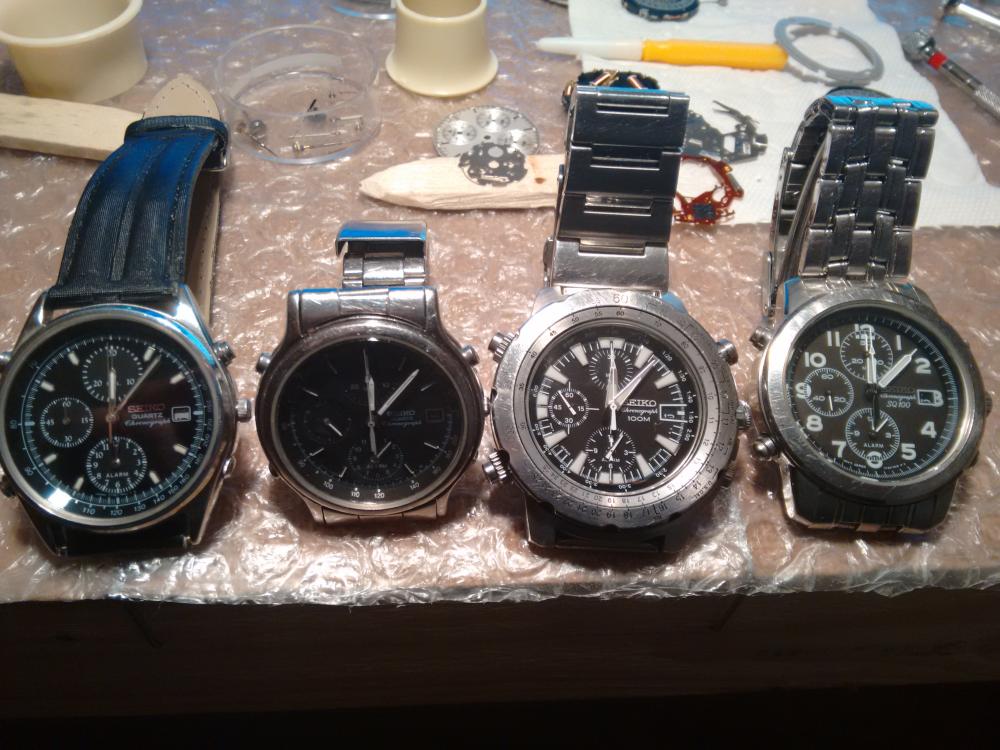 2 points
 -
I was just getting ready to give my collection of pocket watches their annual wind and I wonder why we ever progressed away from them, very sad really Sent from my SM-G920F using Tapatalk1 point
-
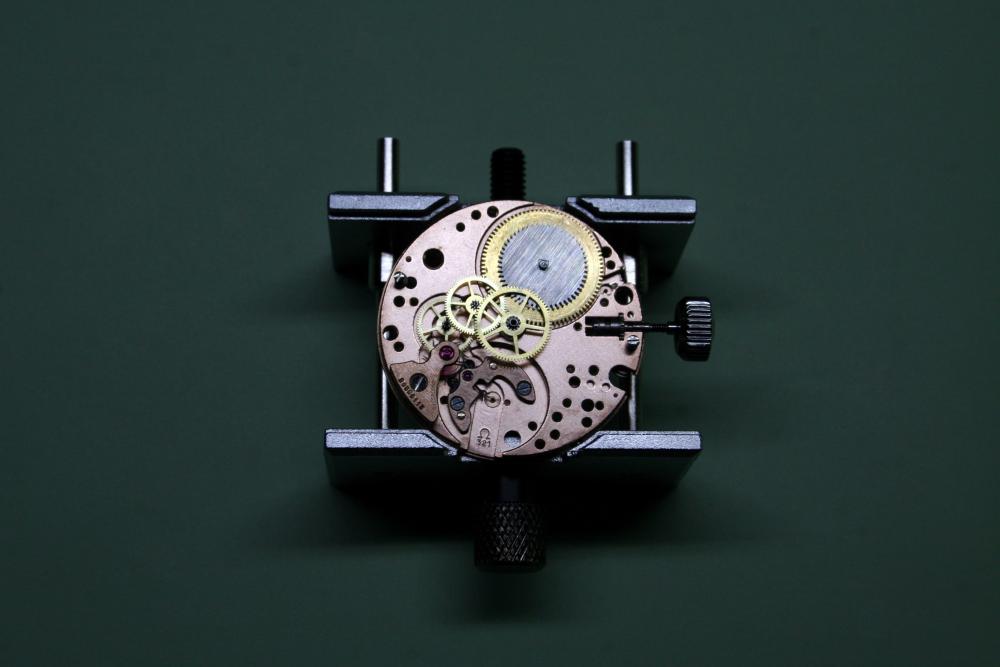
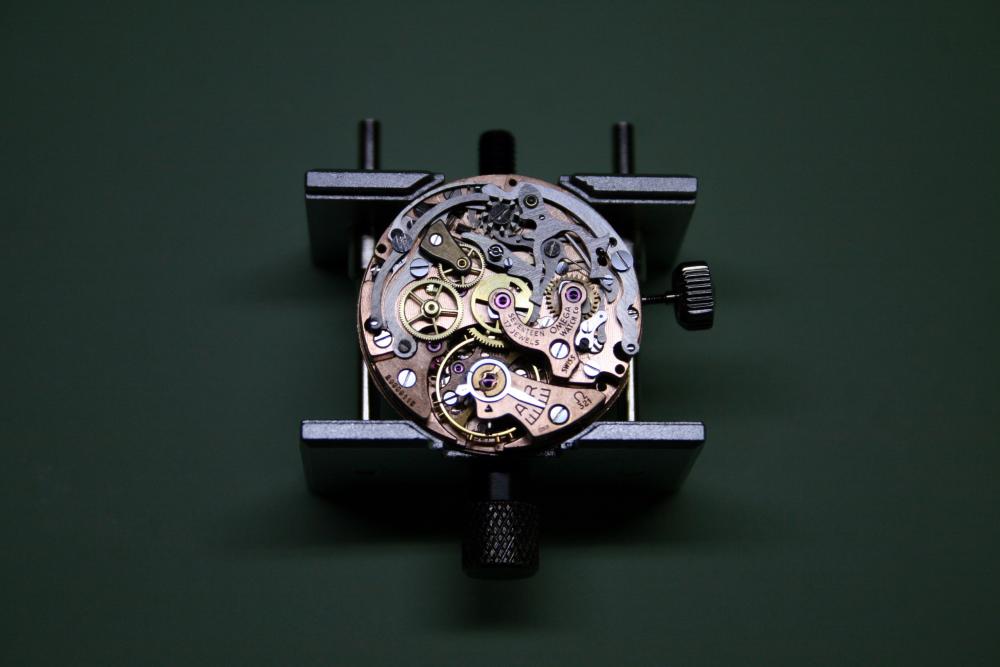
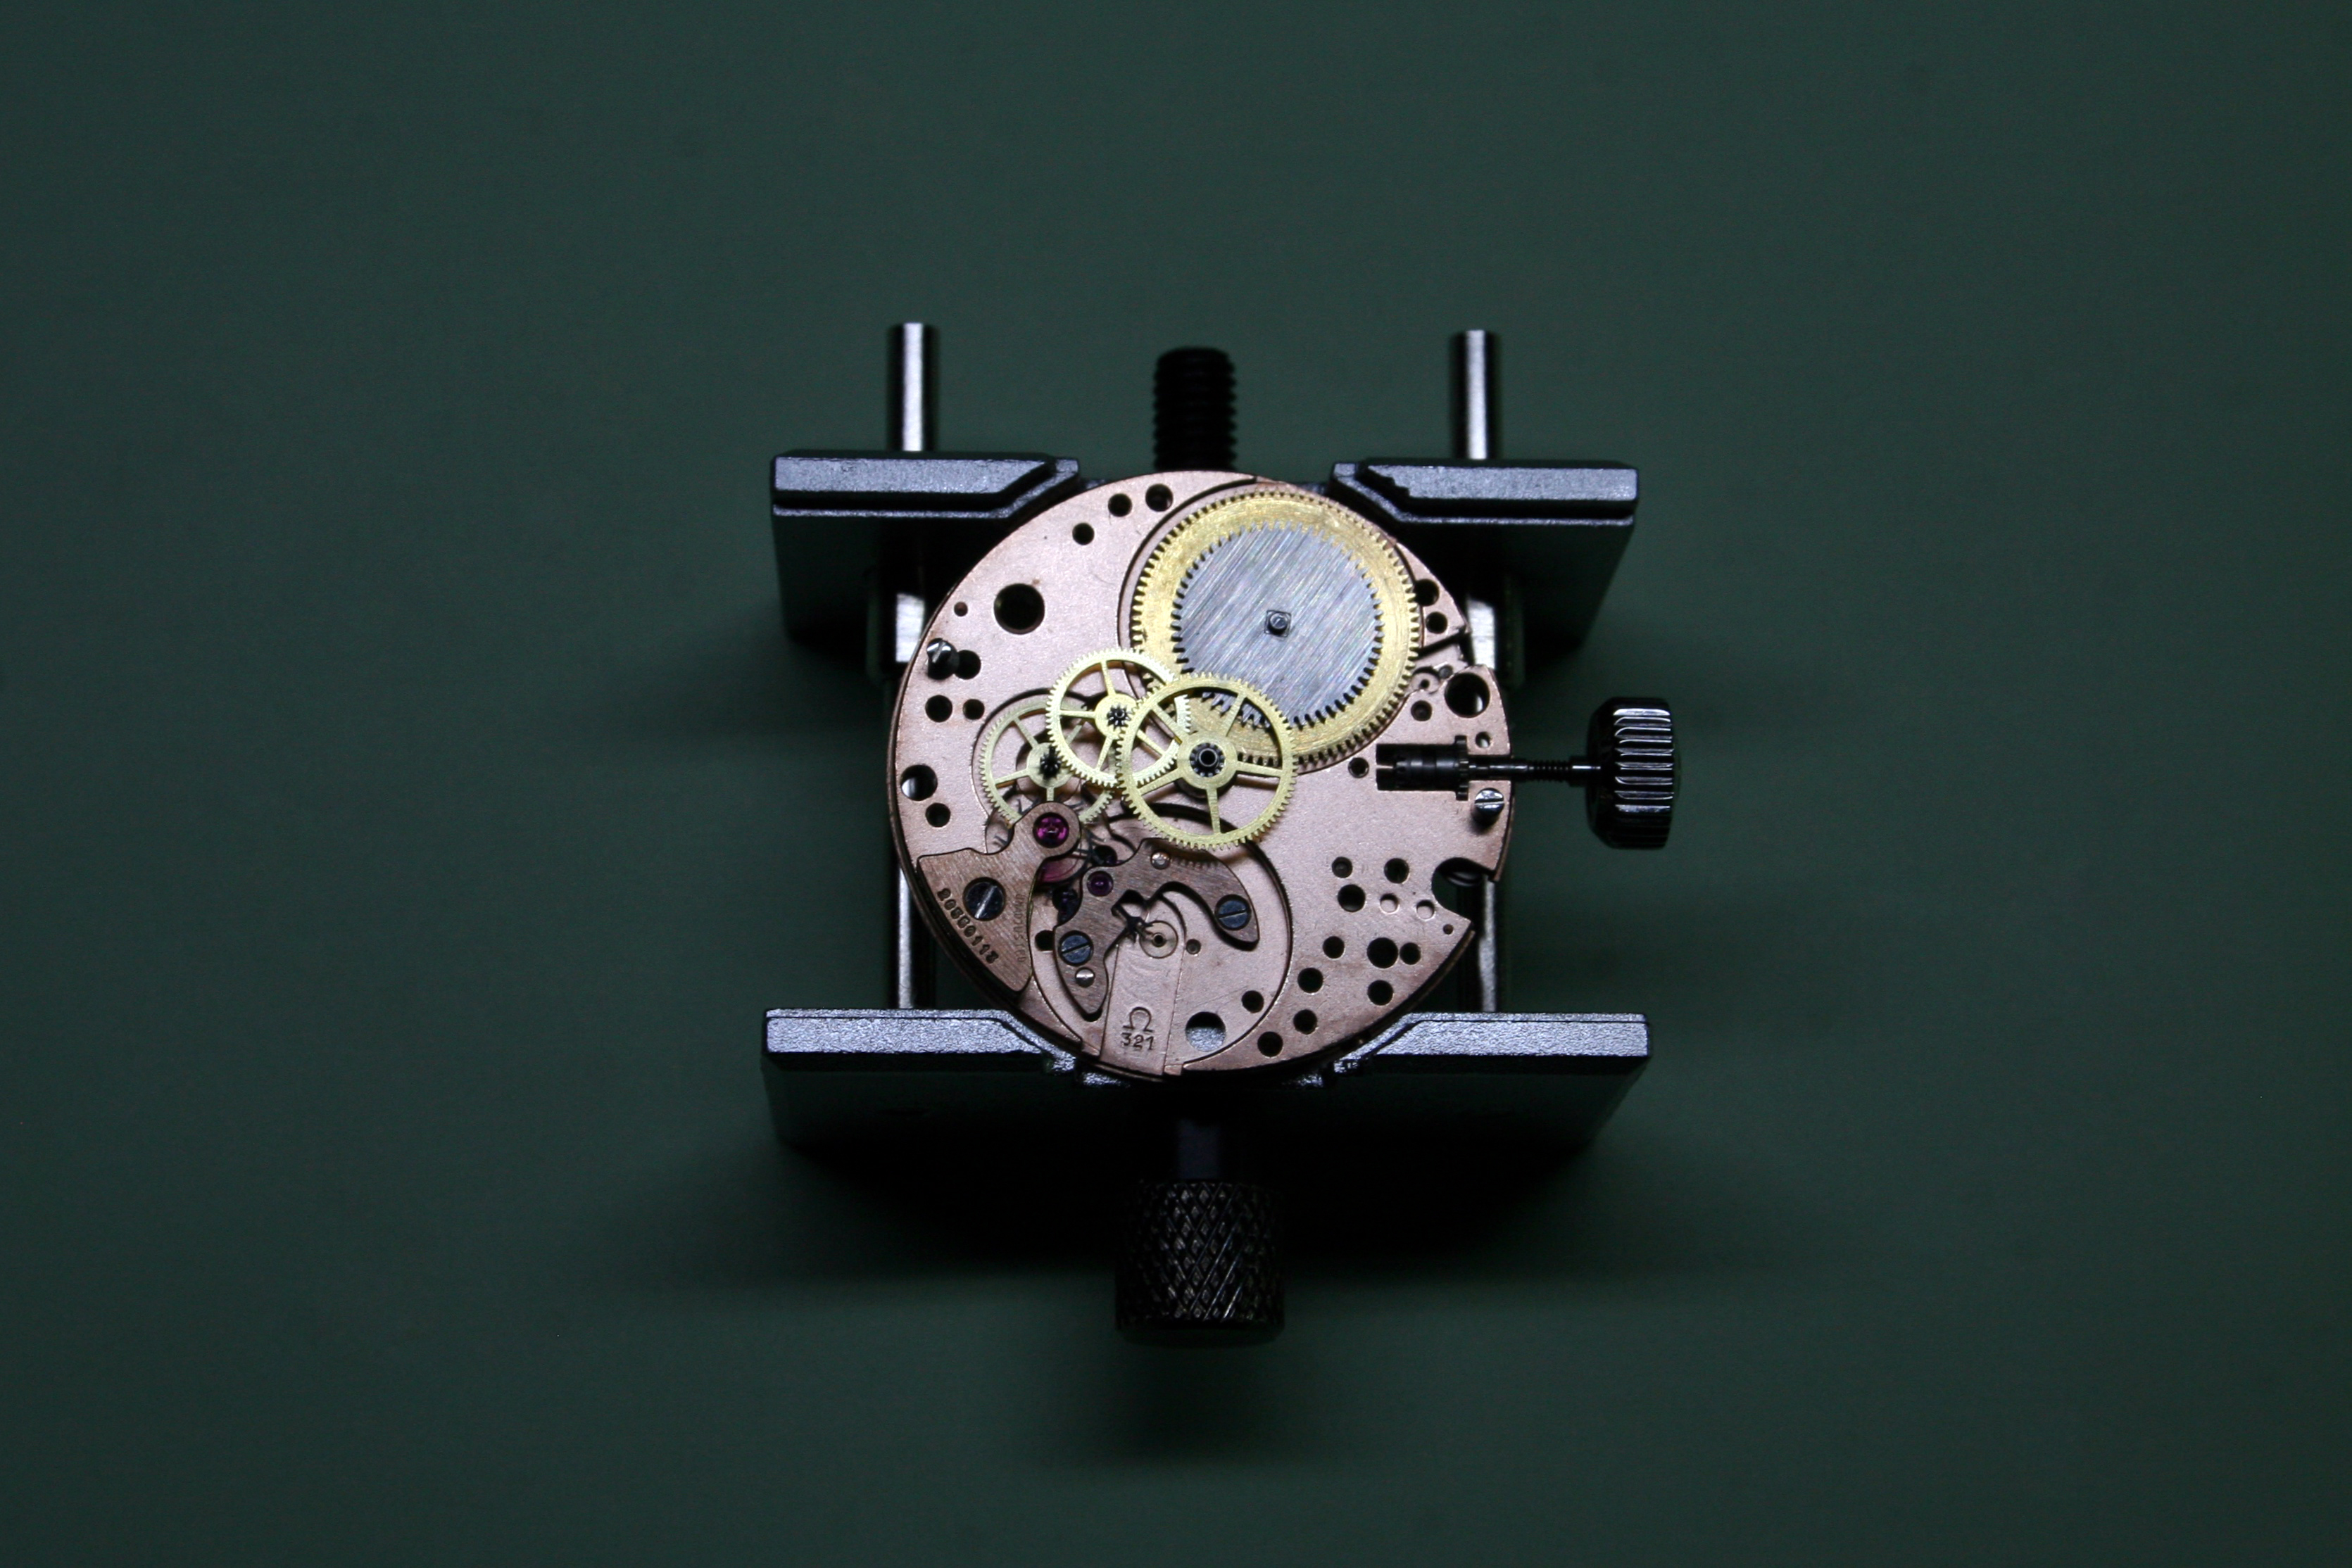
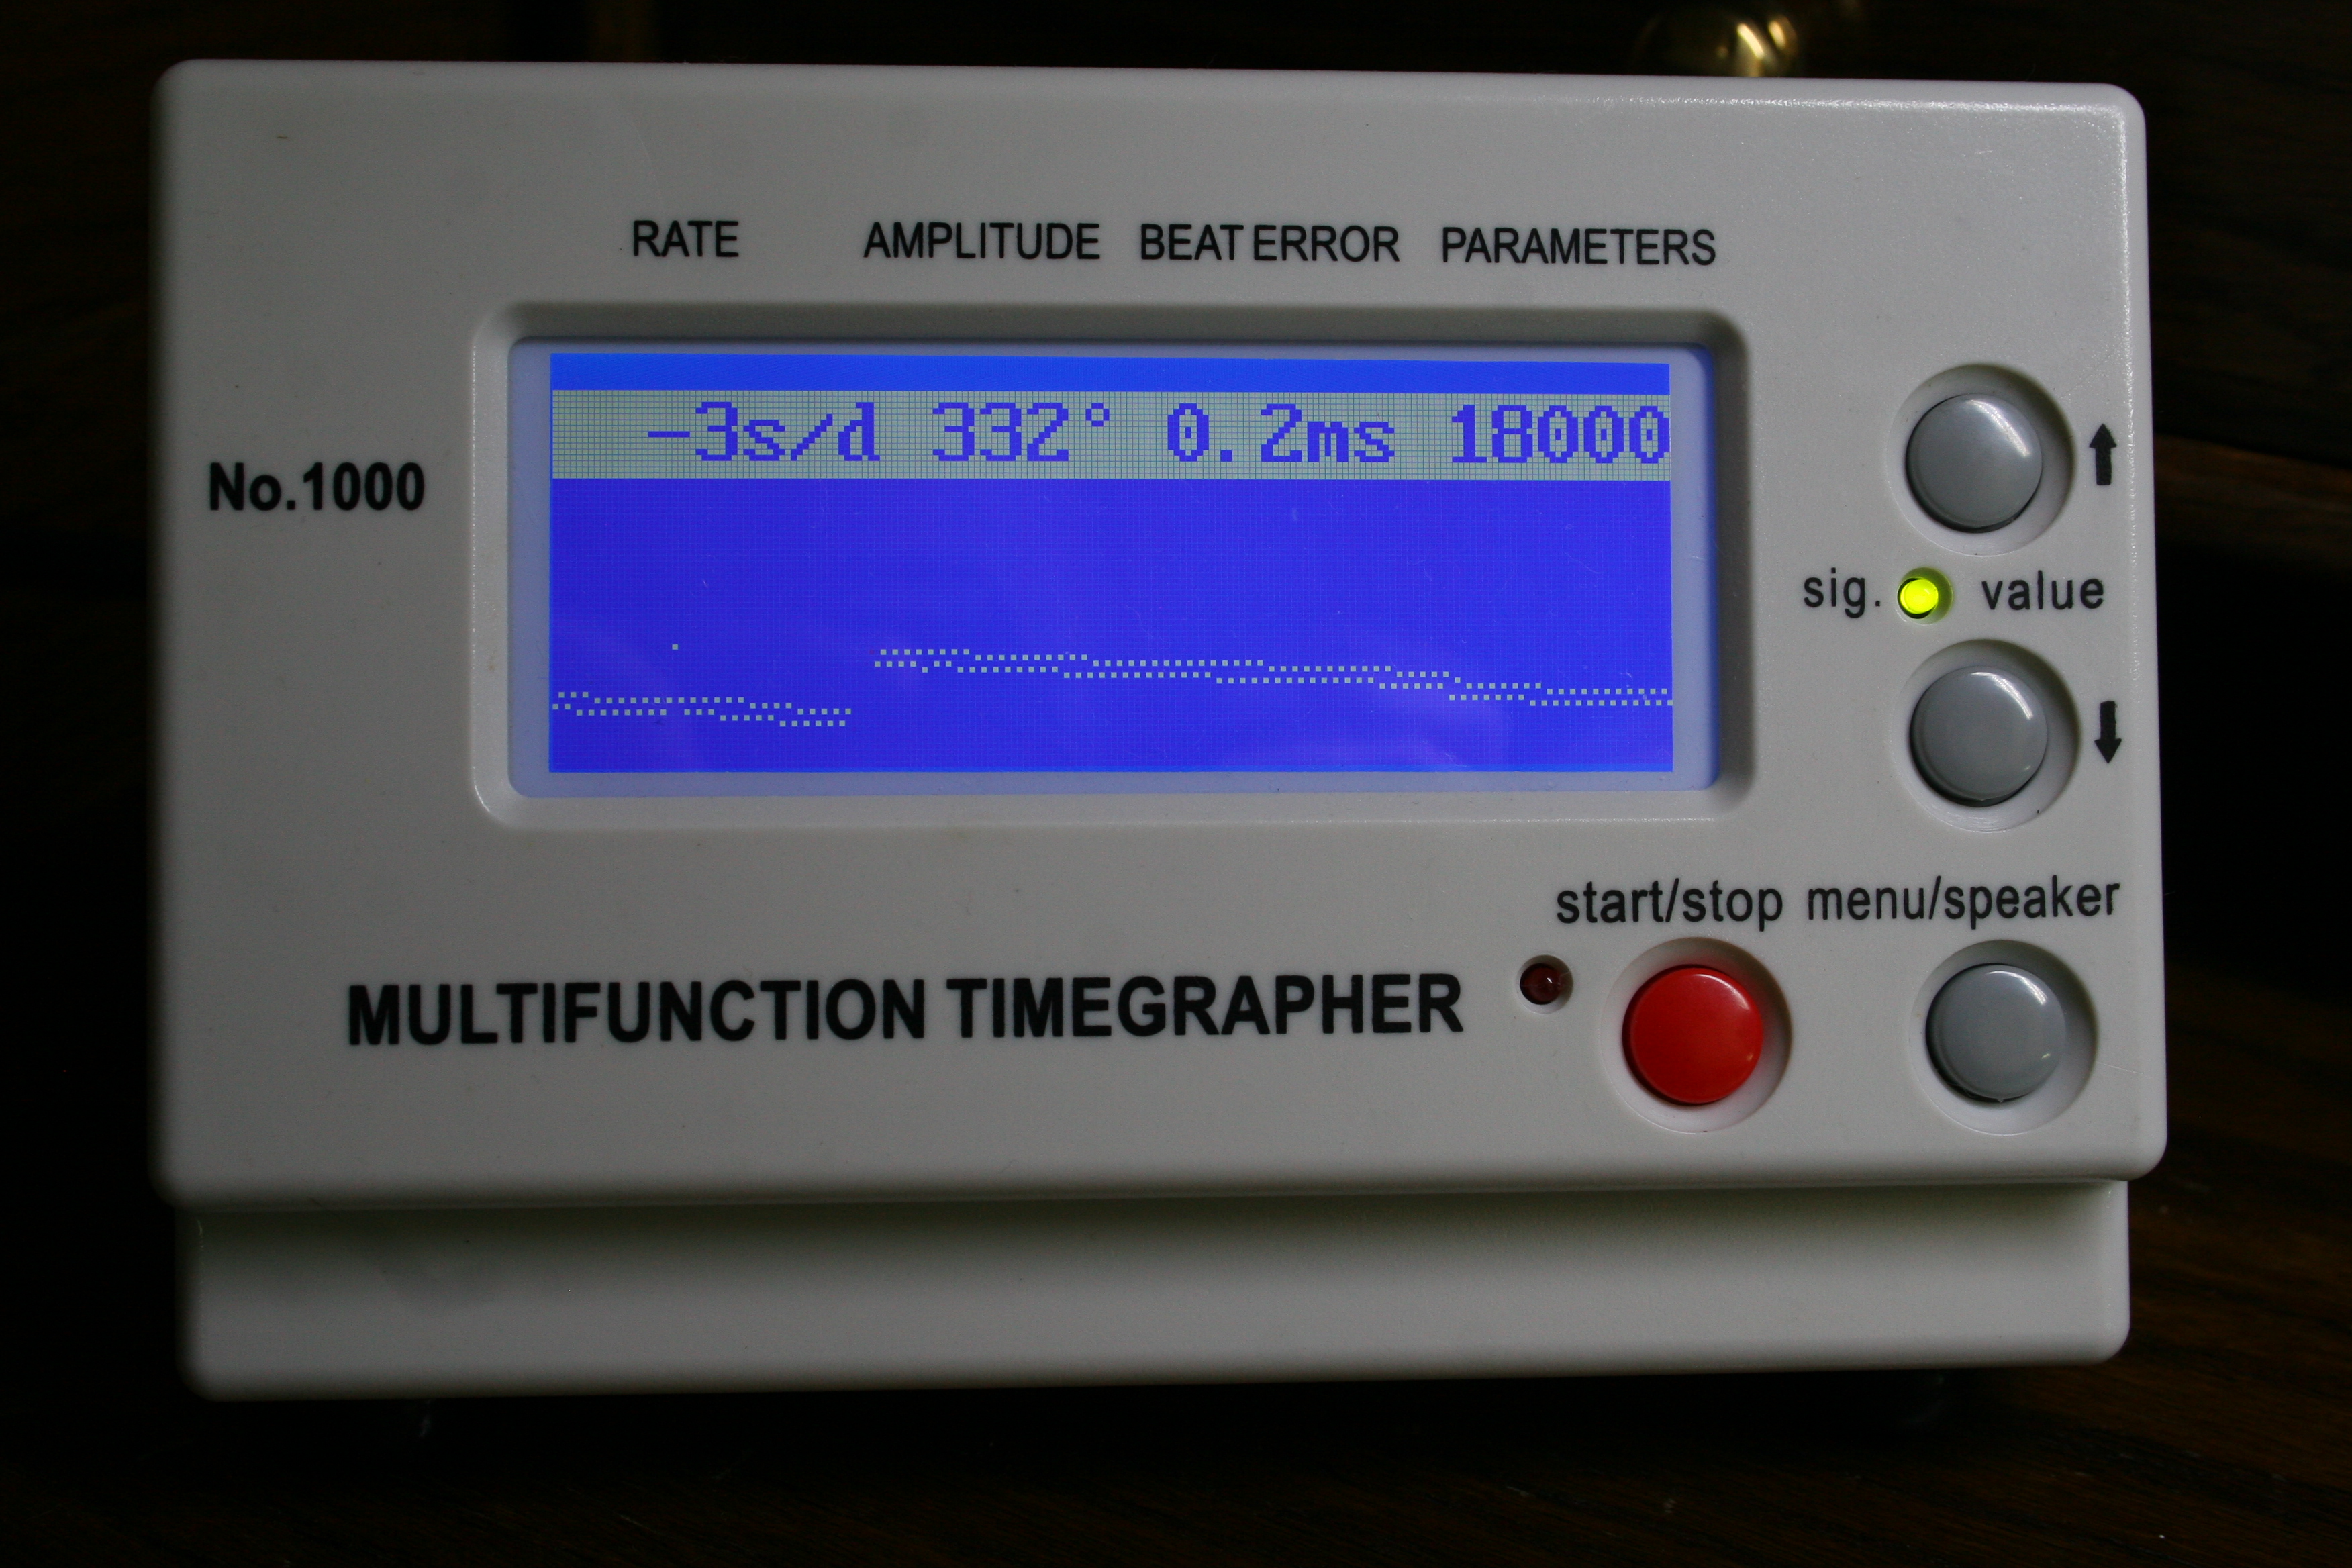
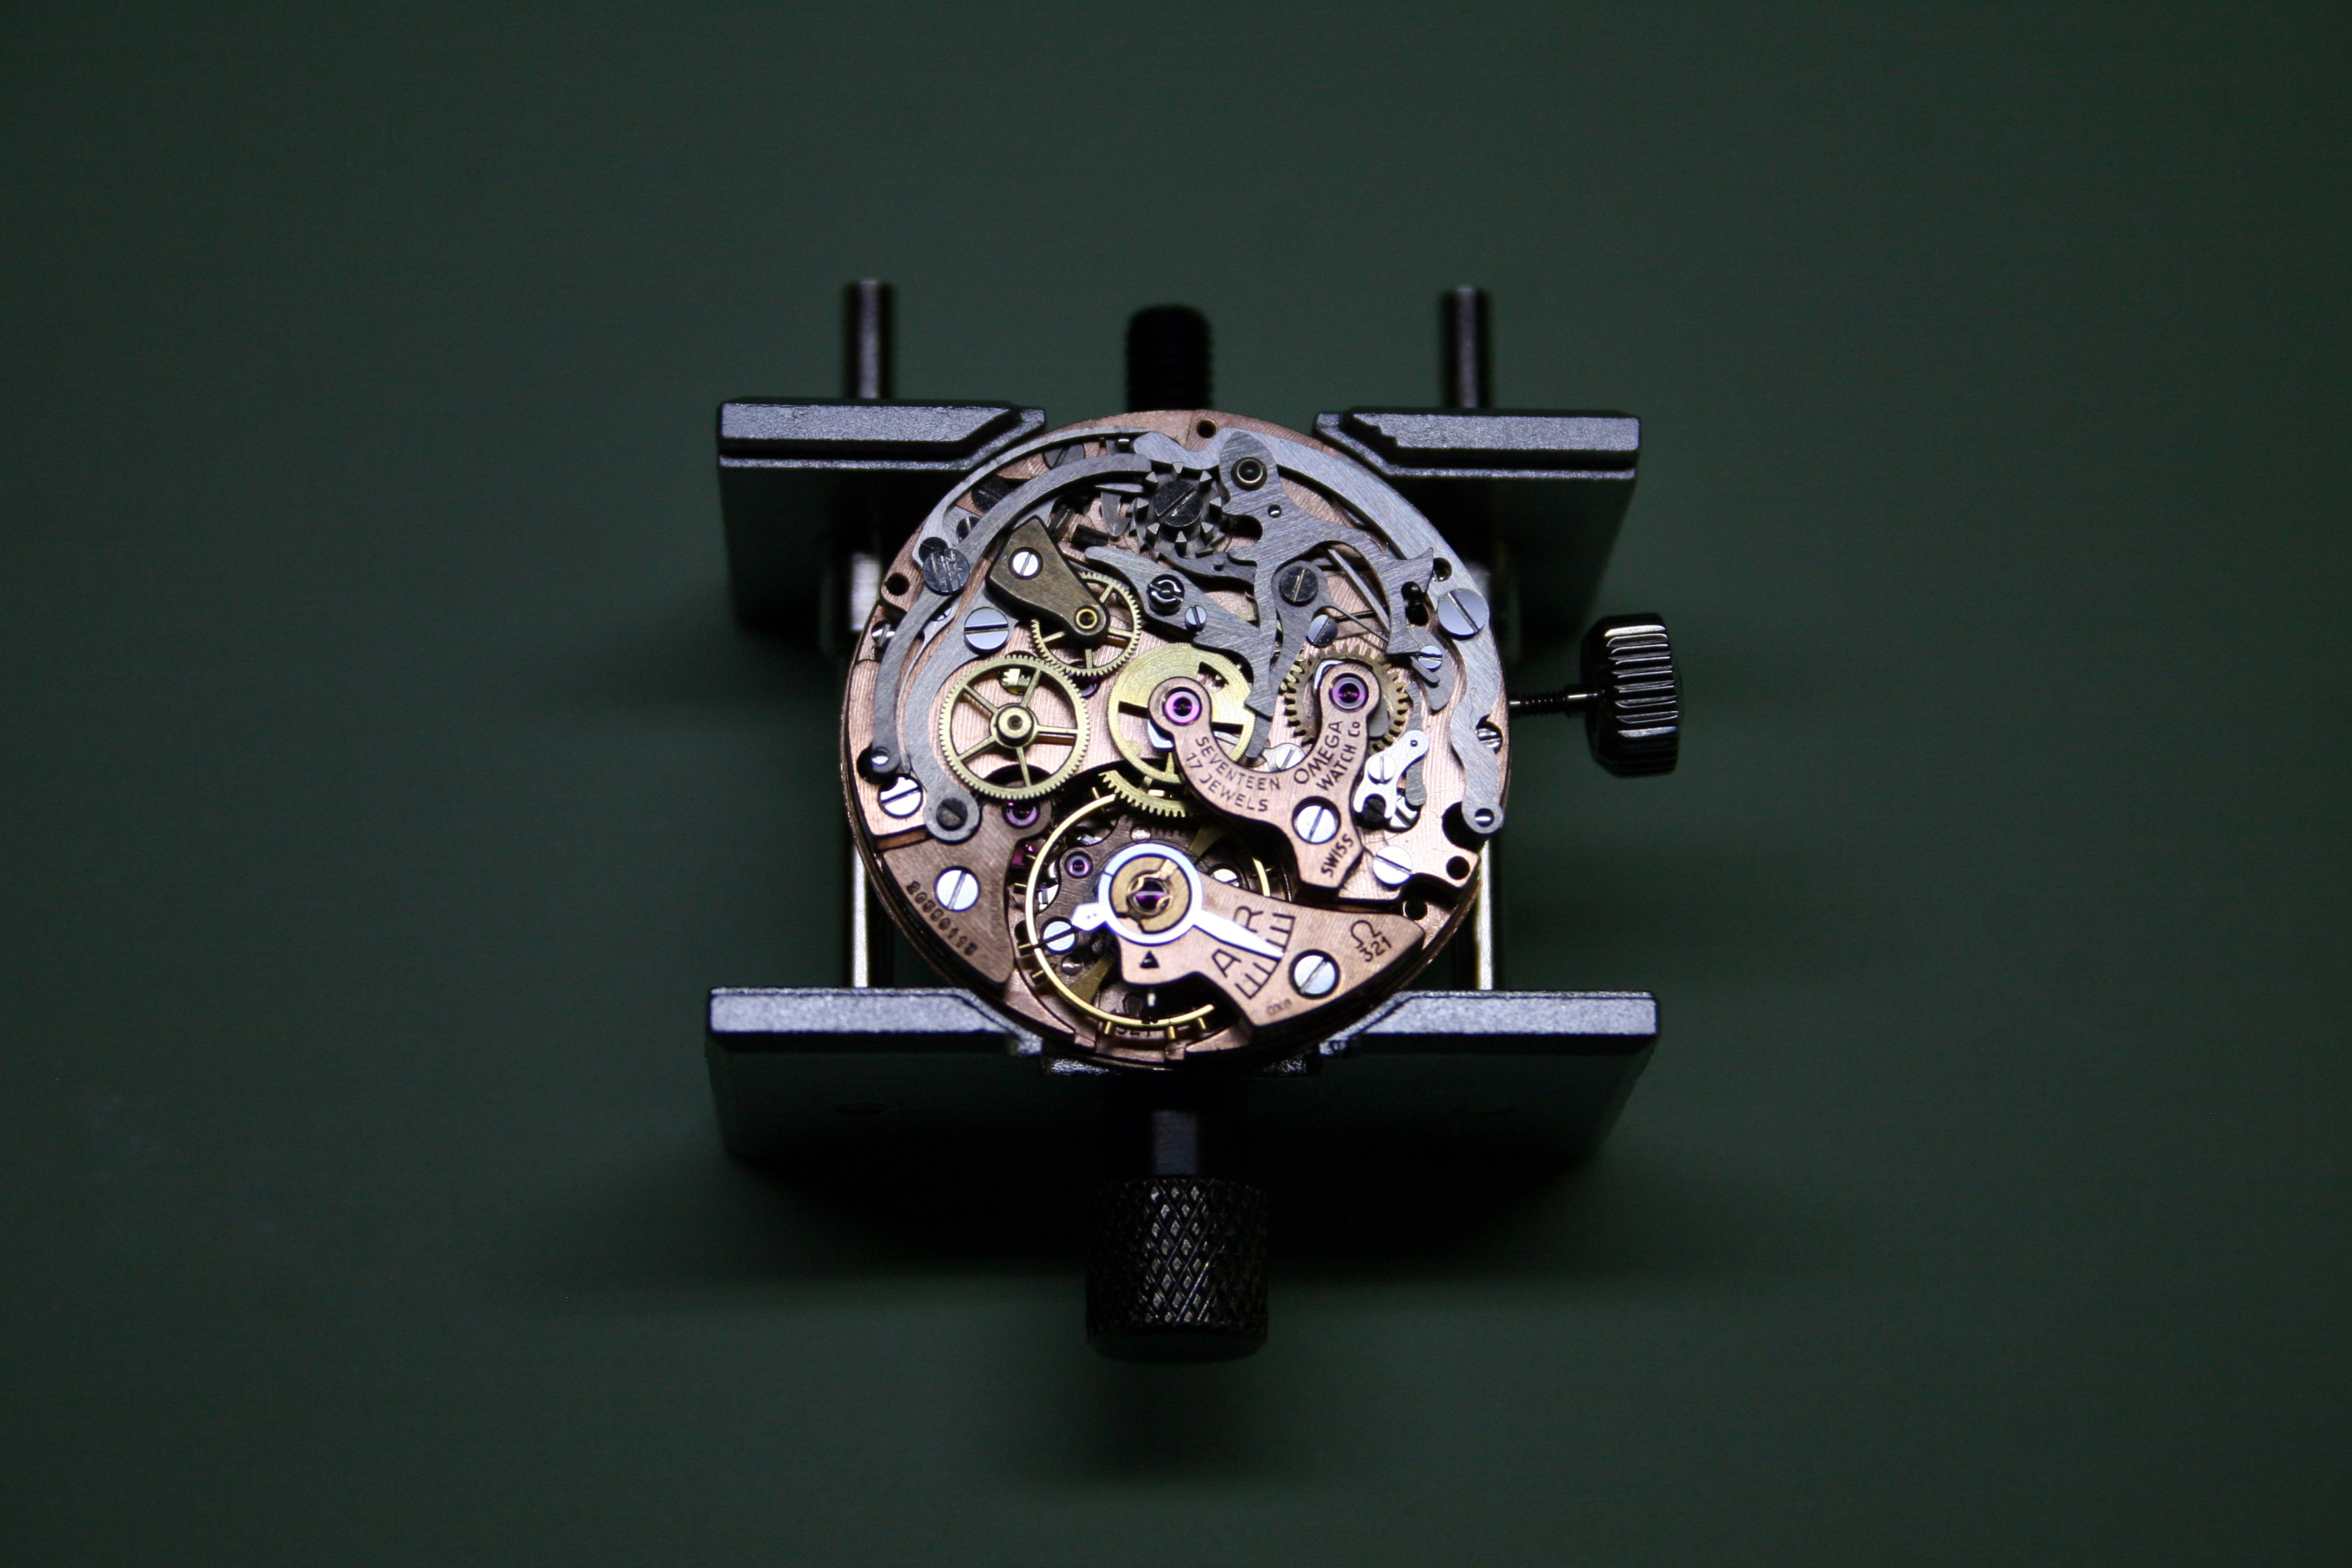
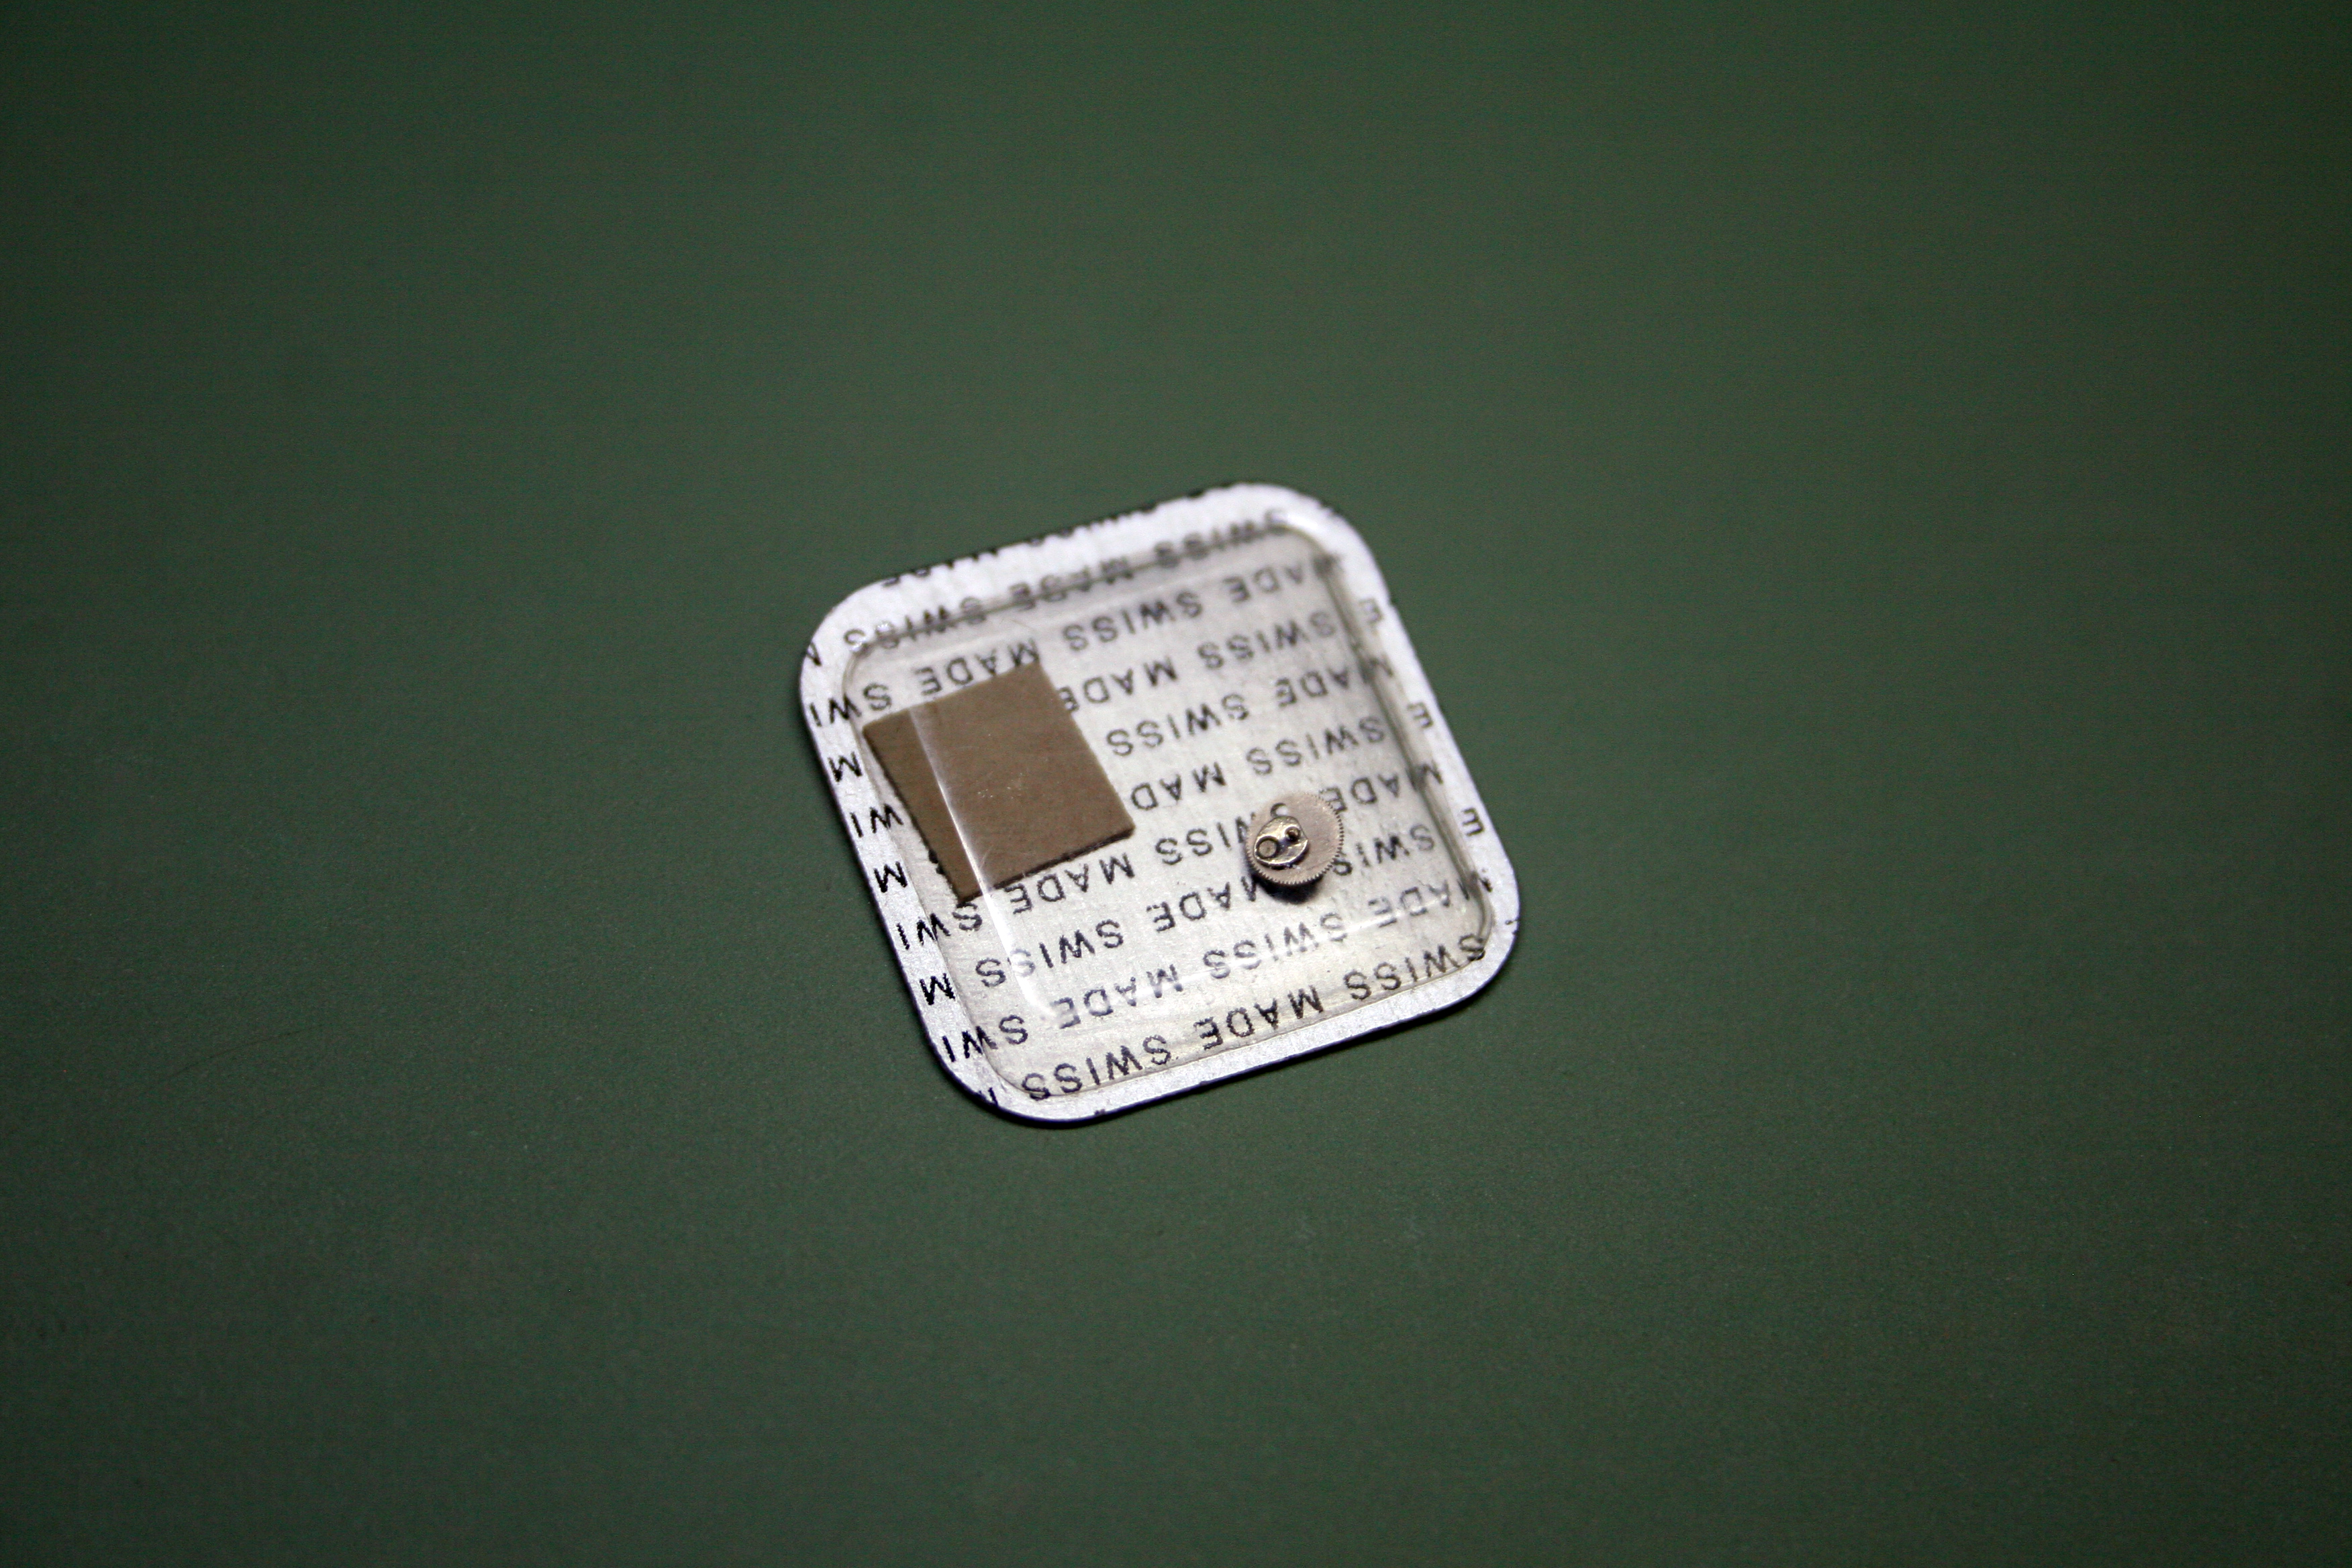
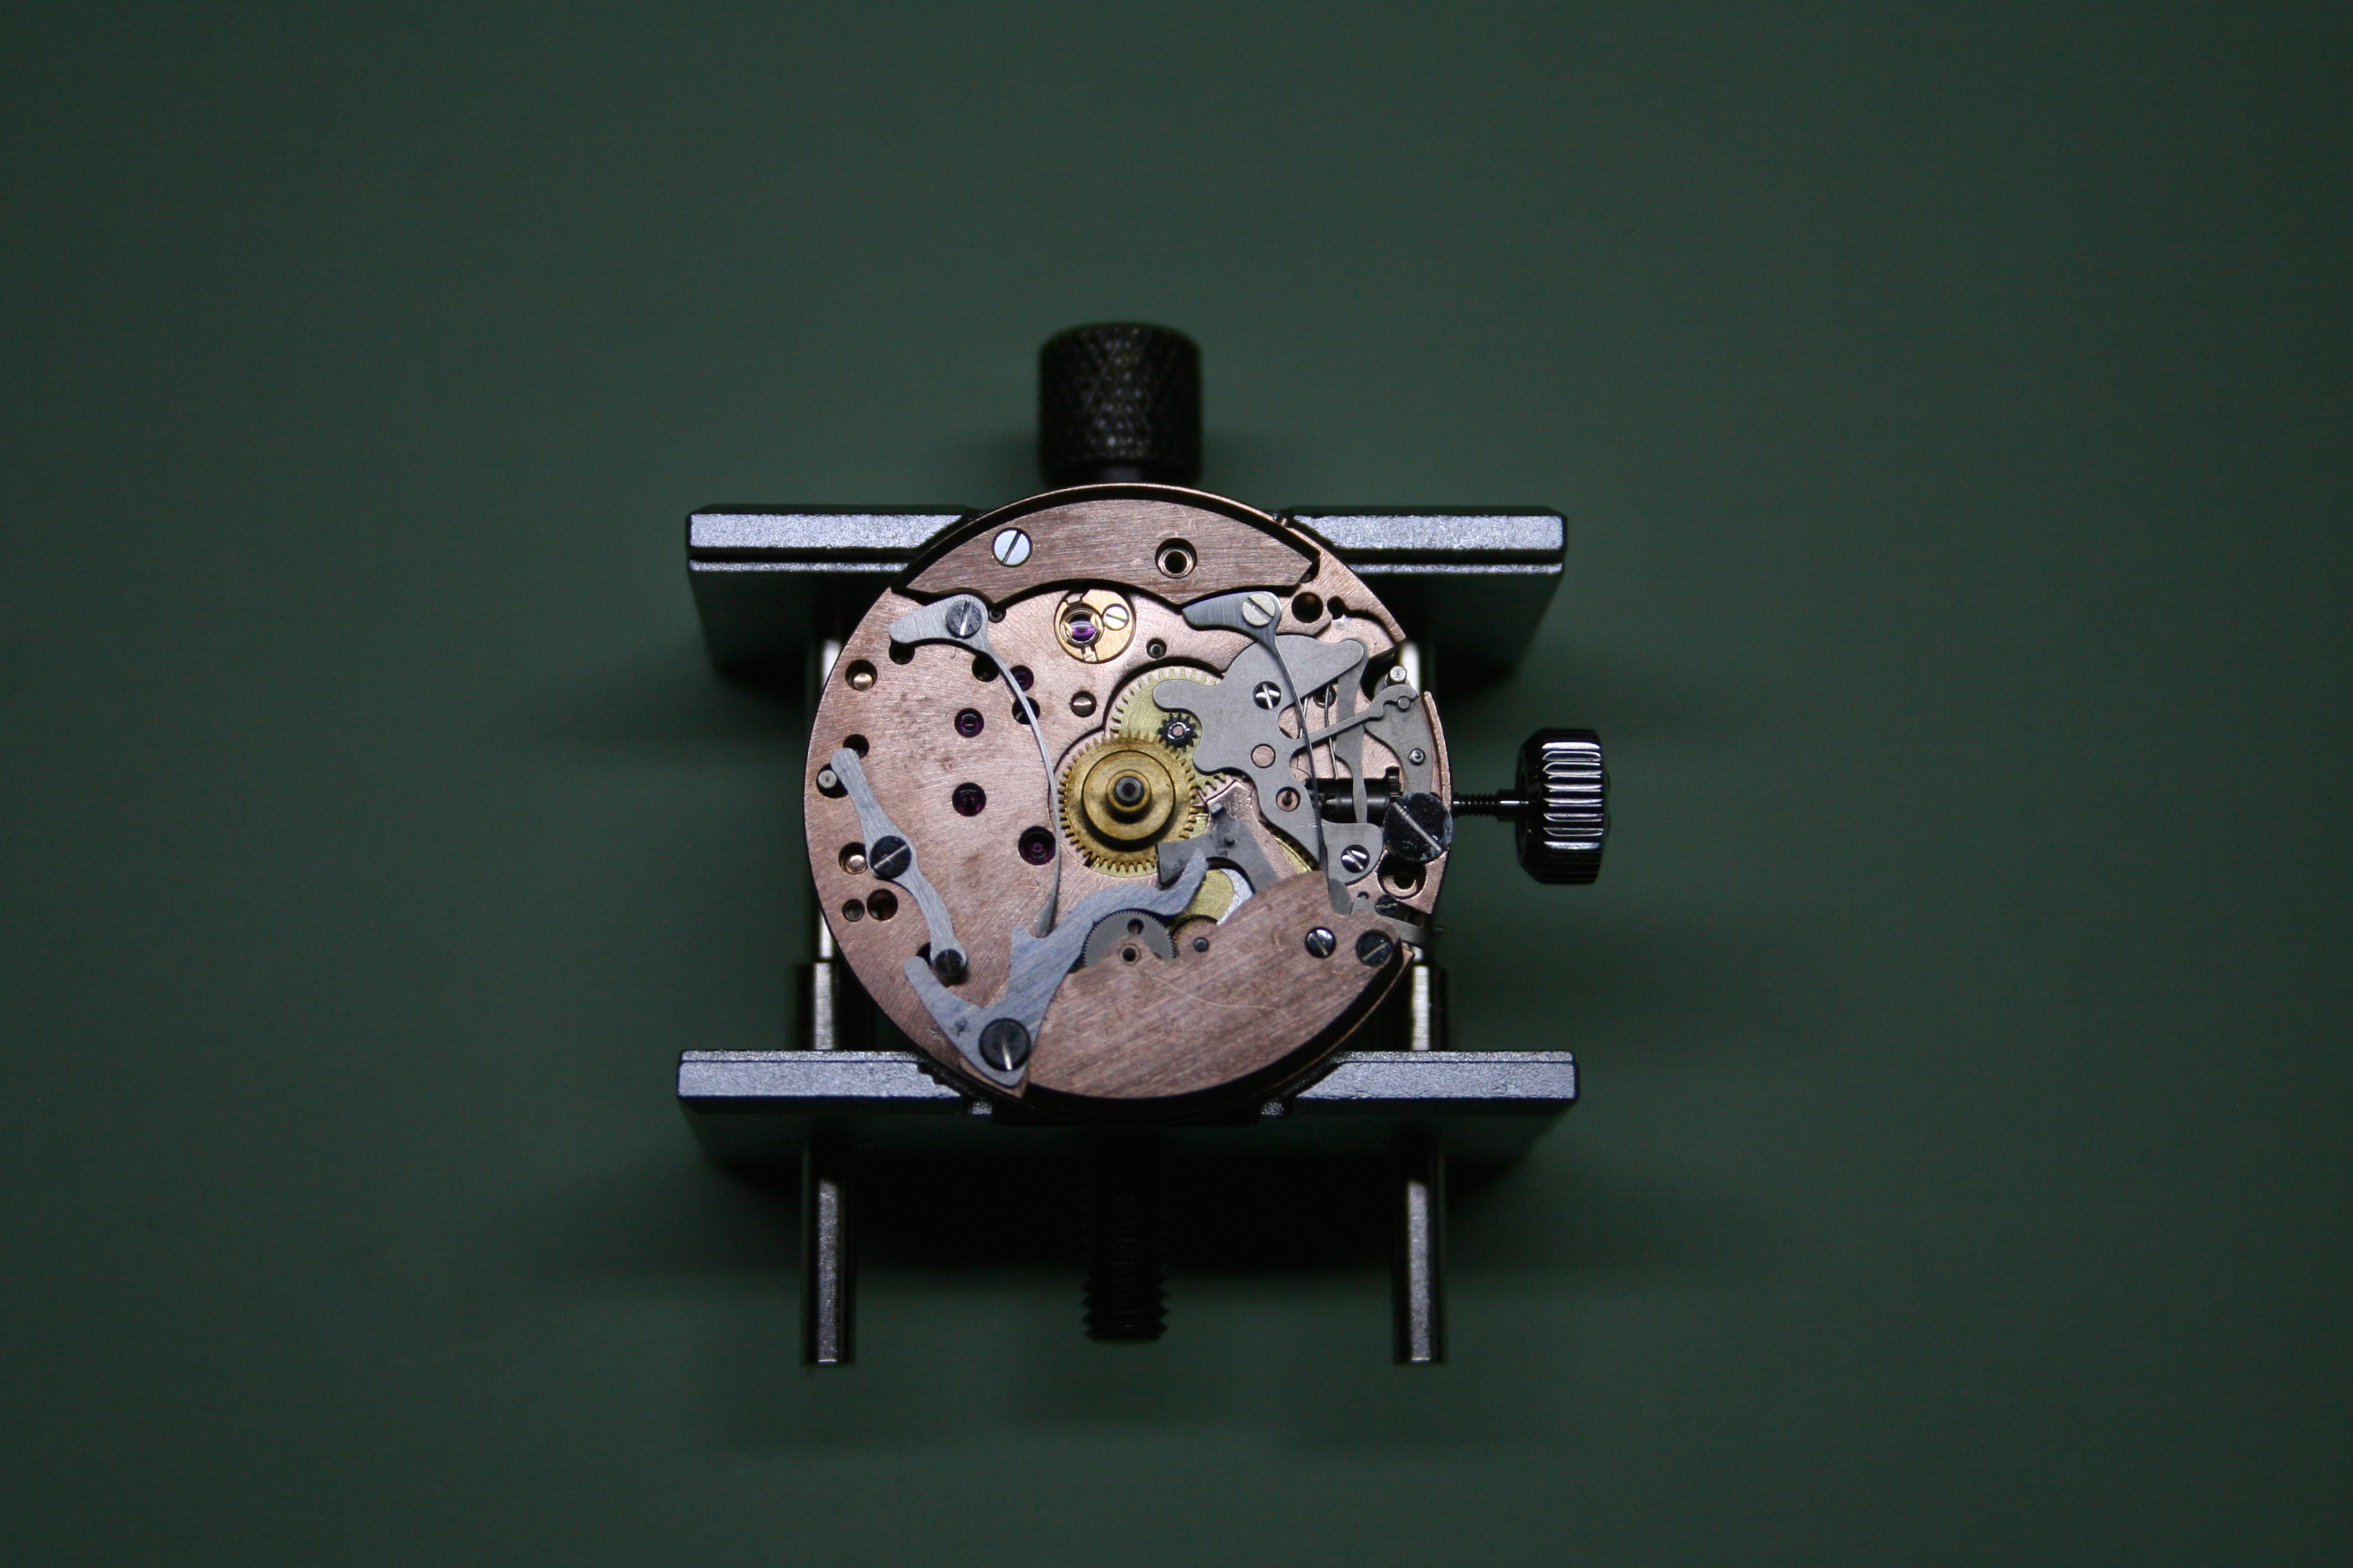
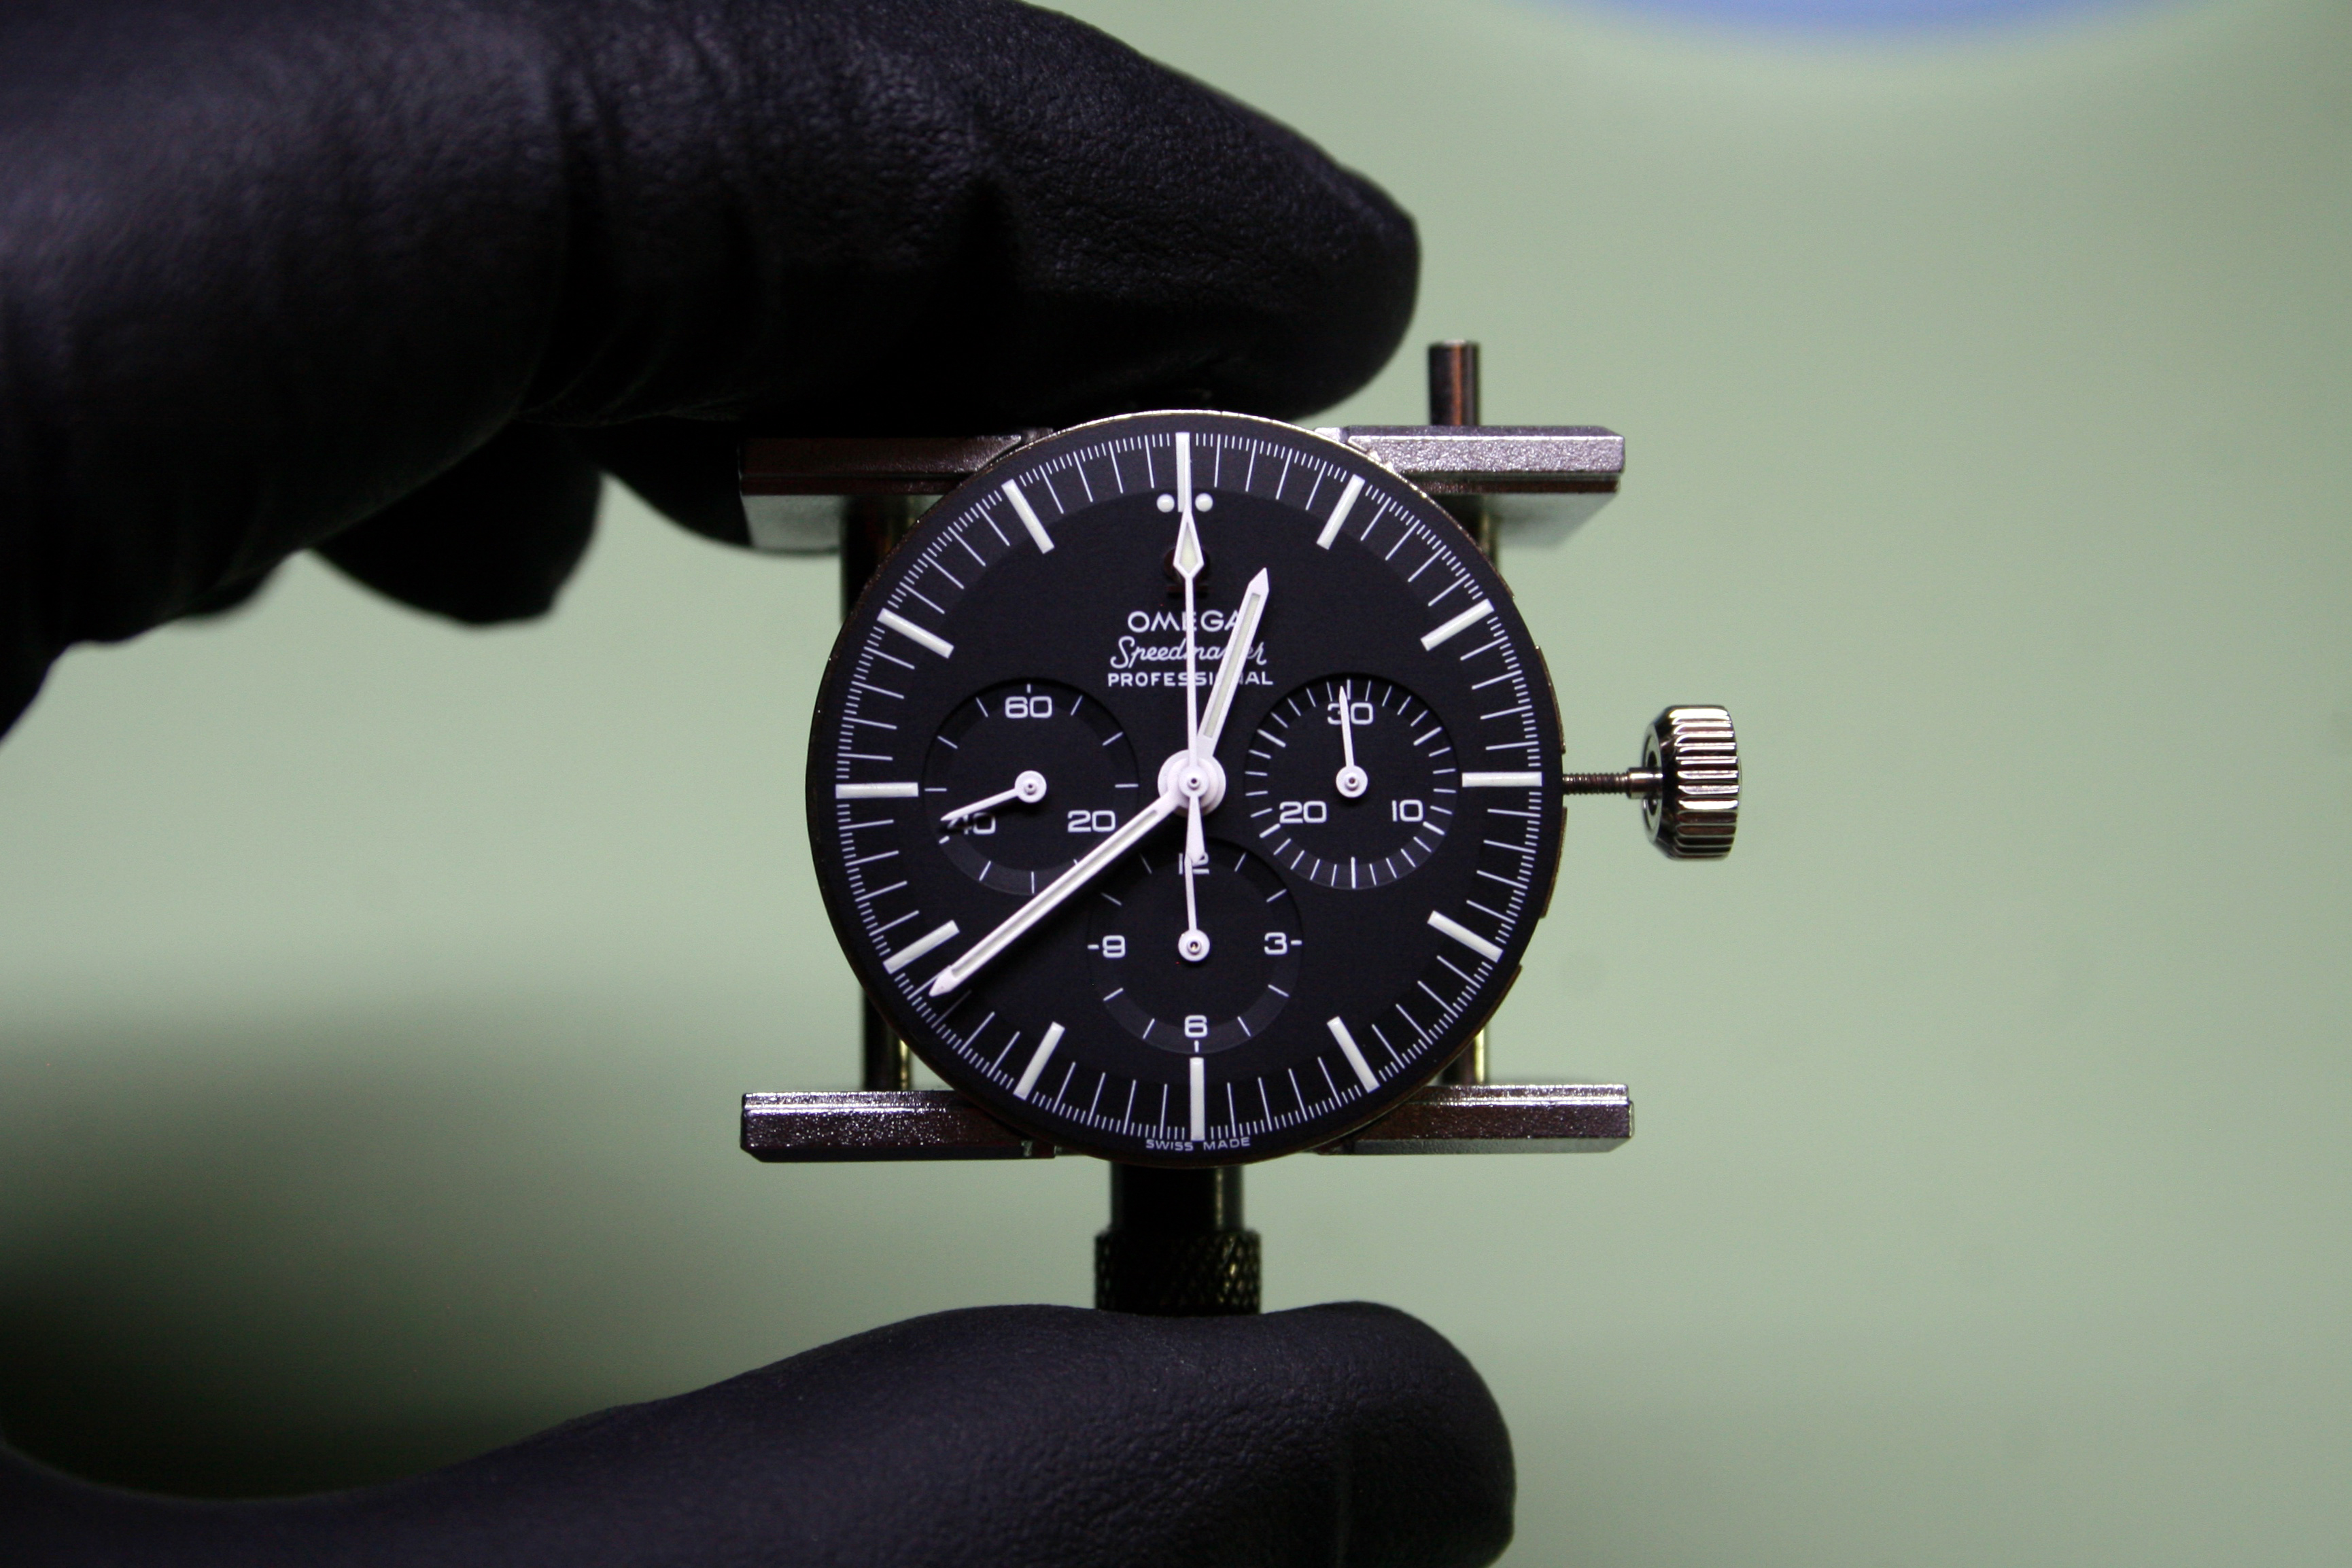
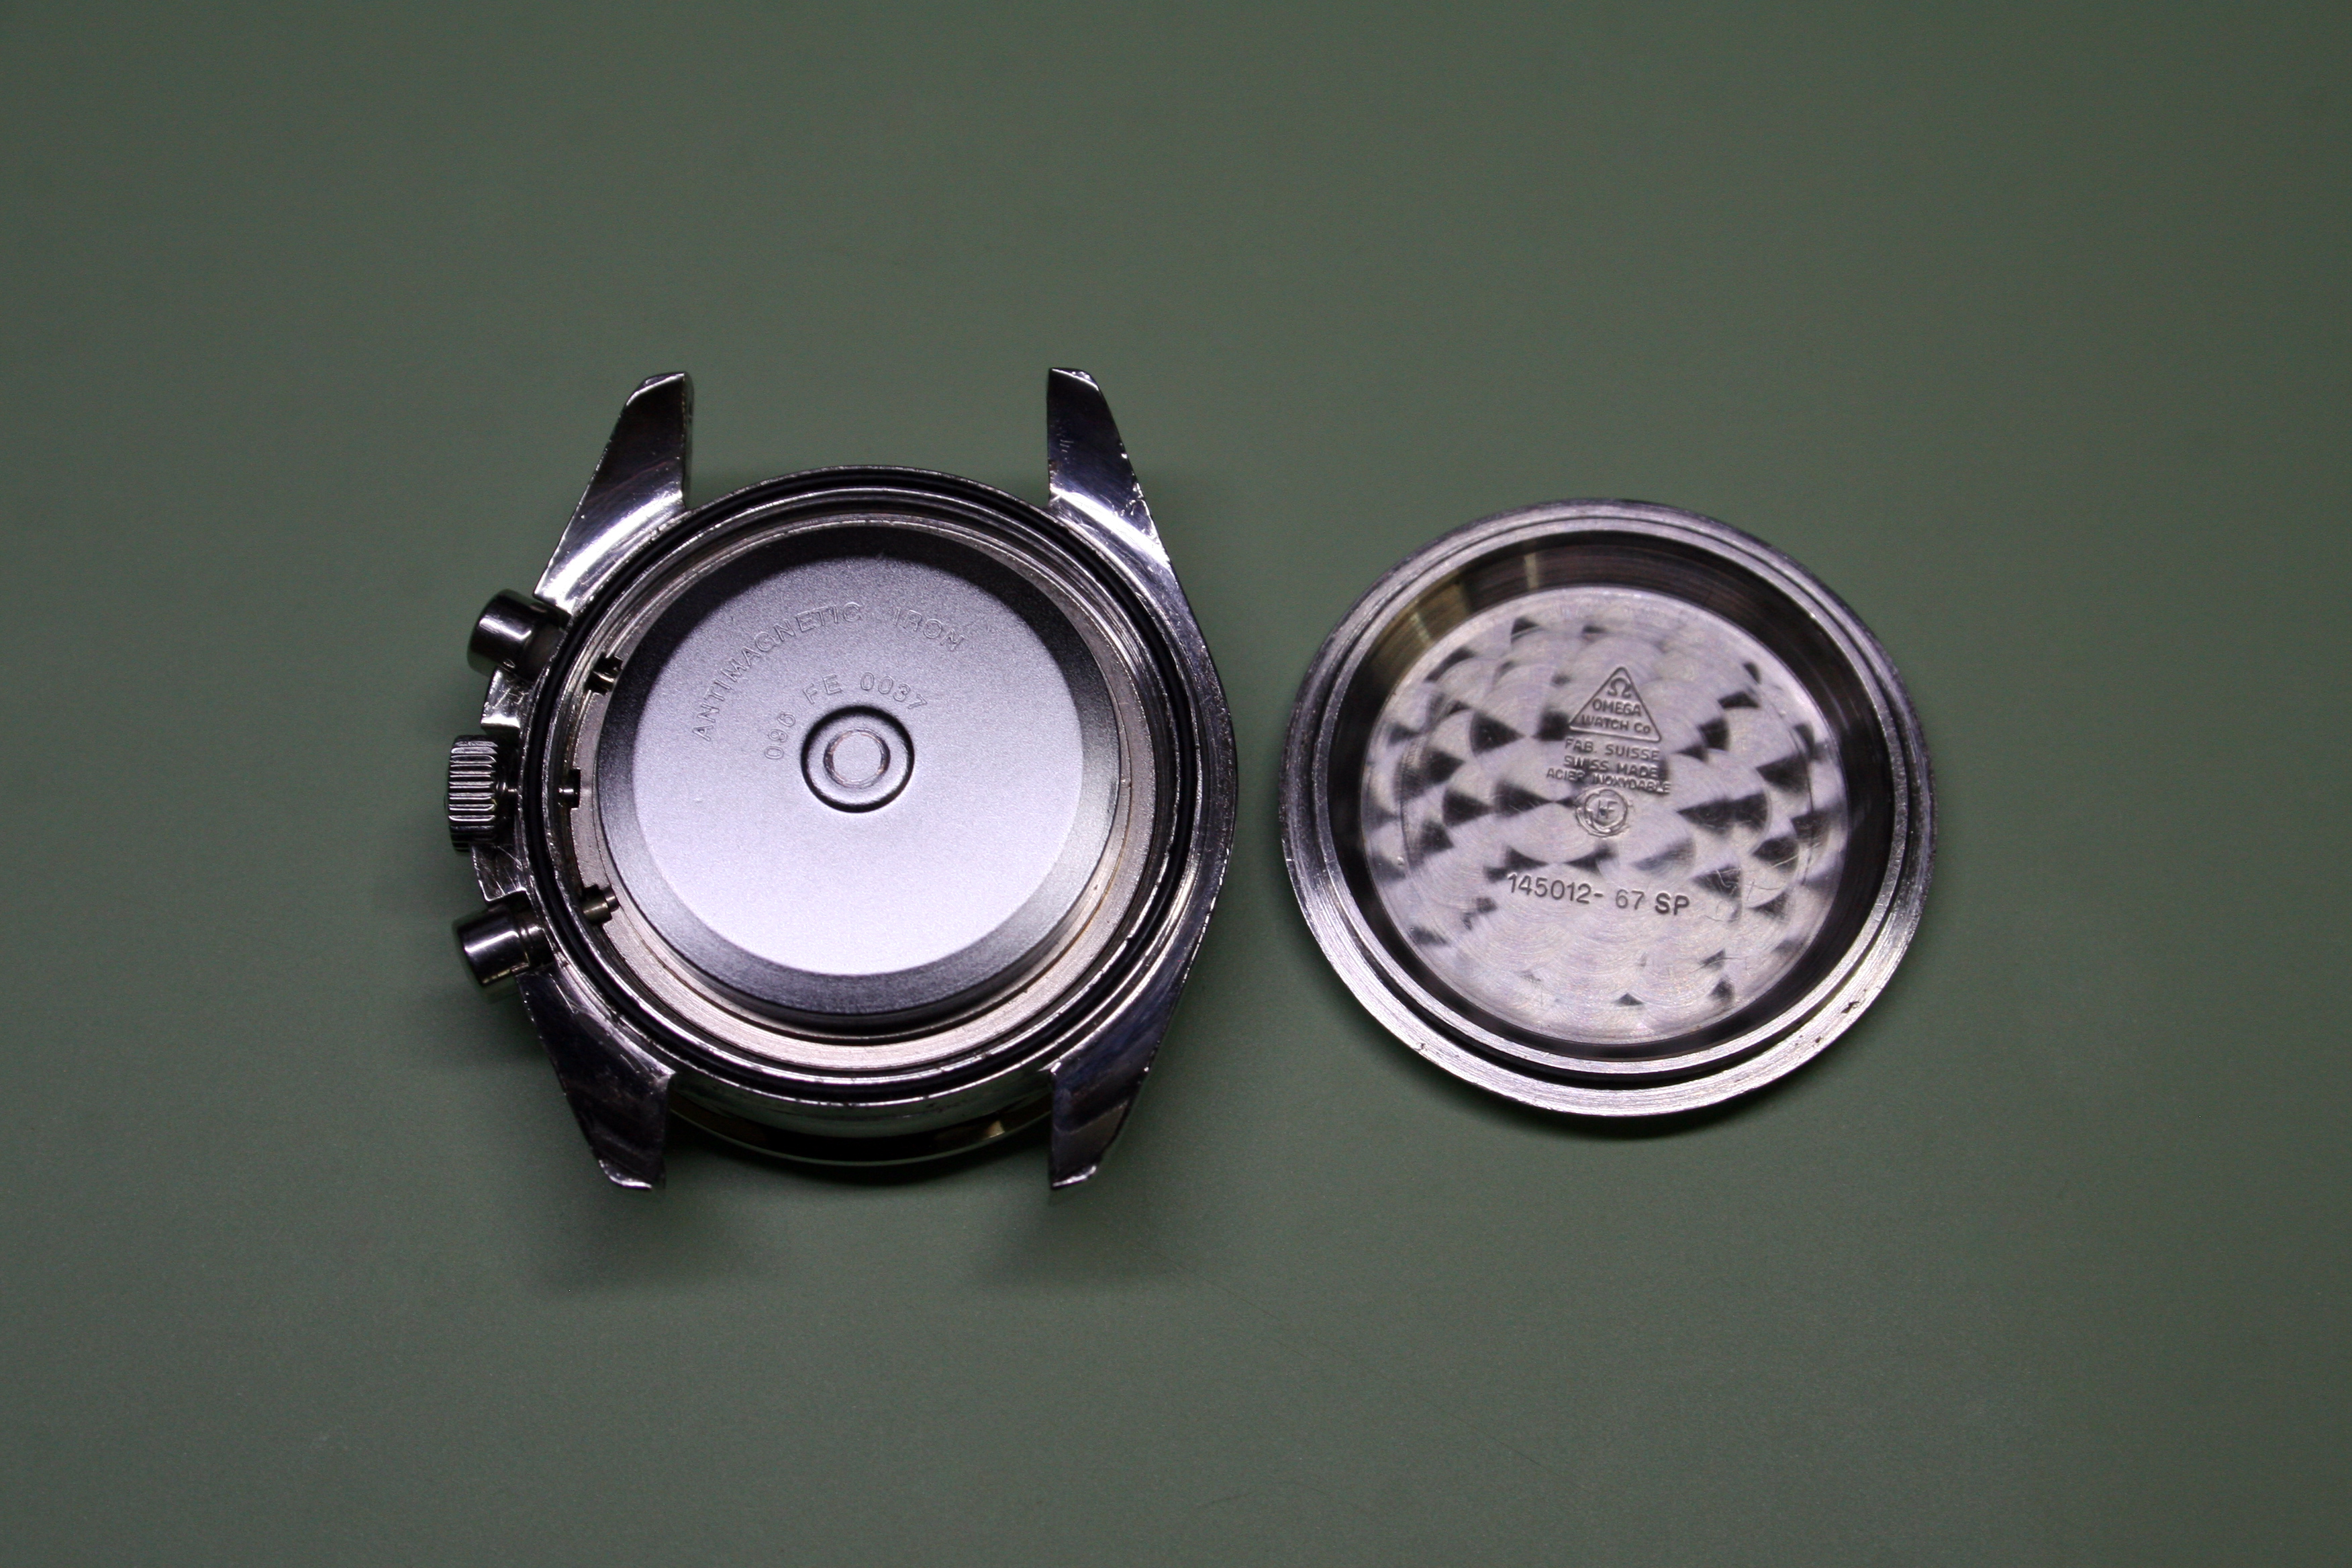
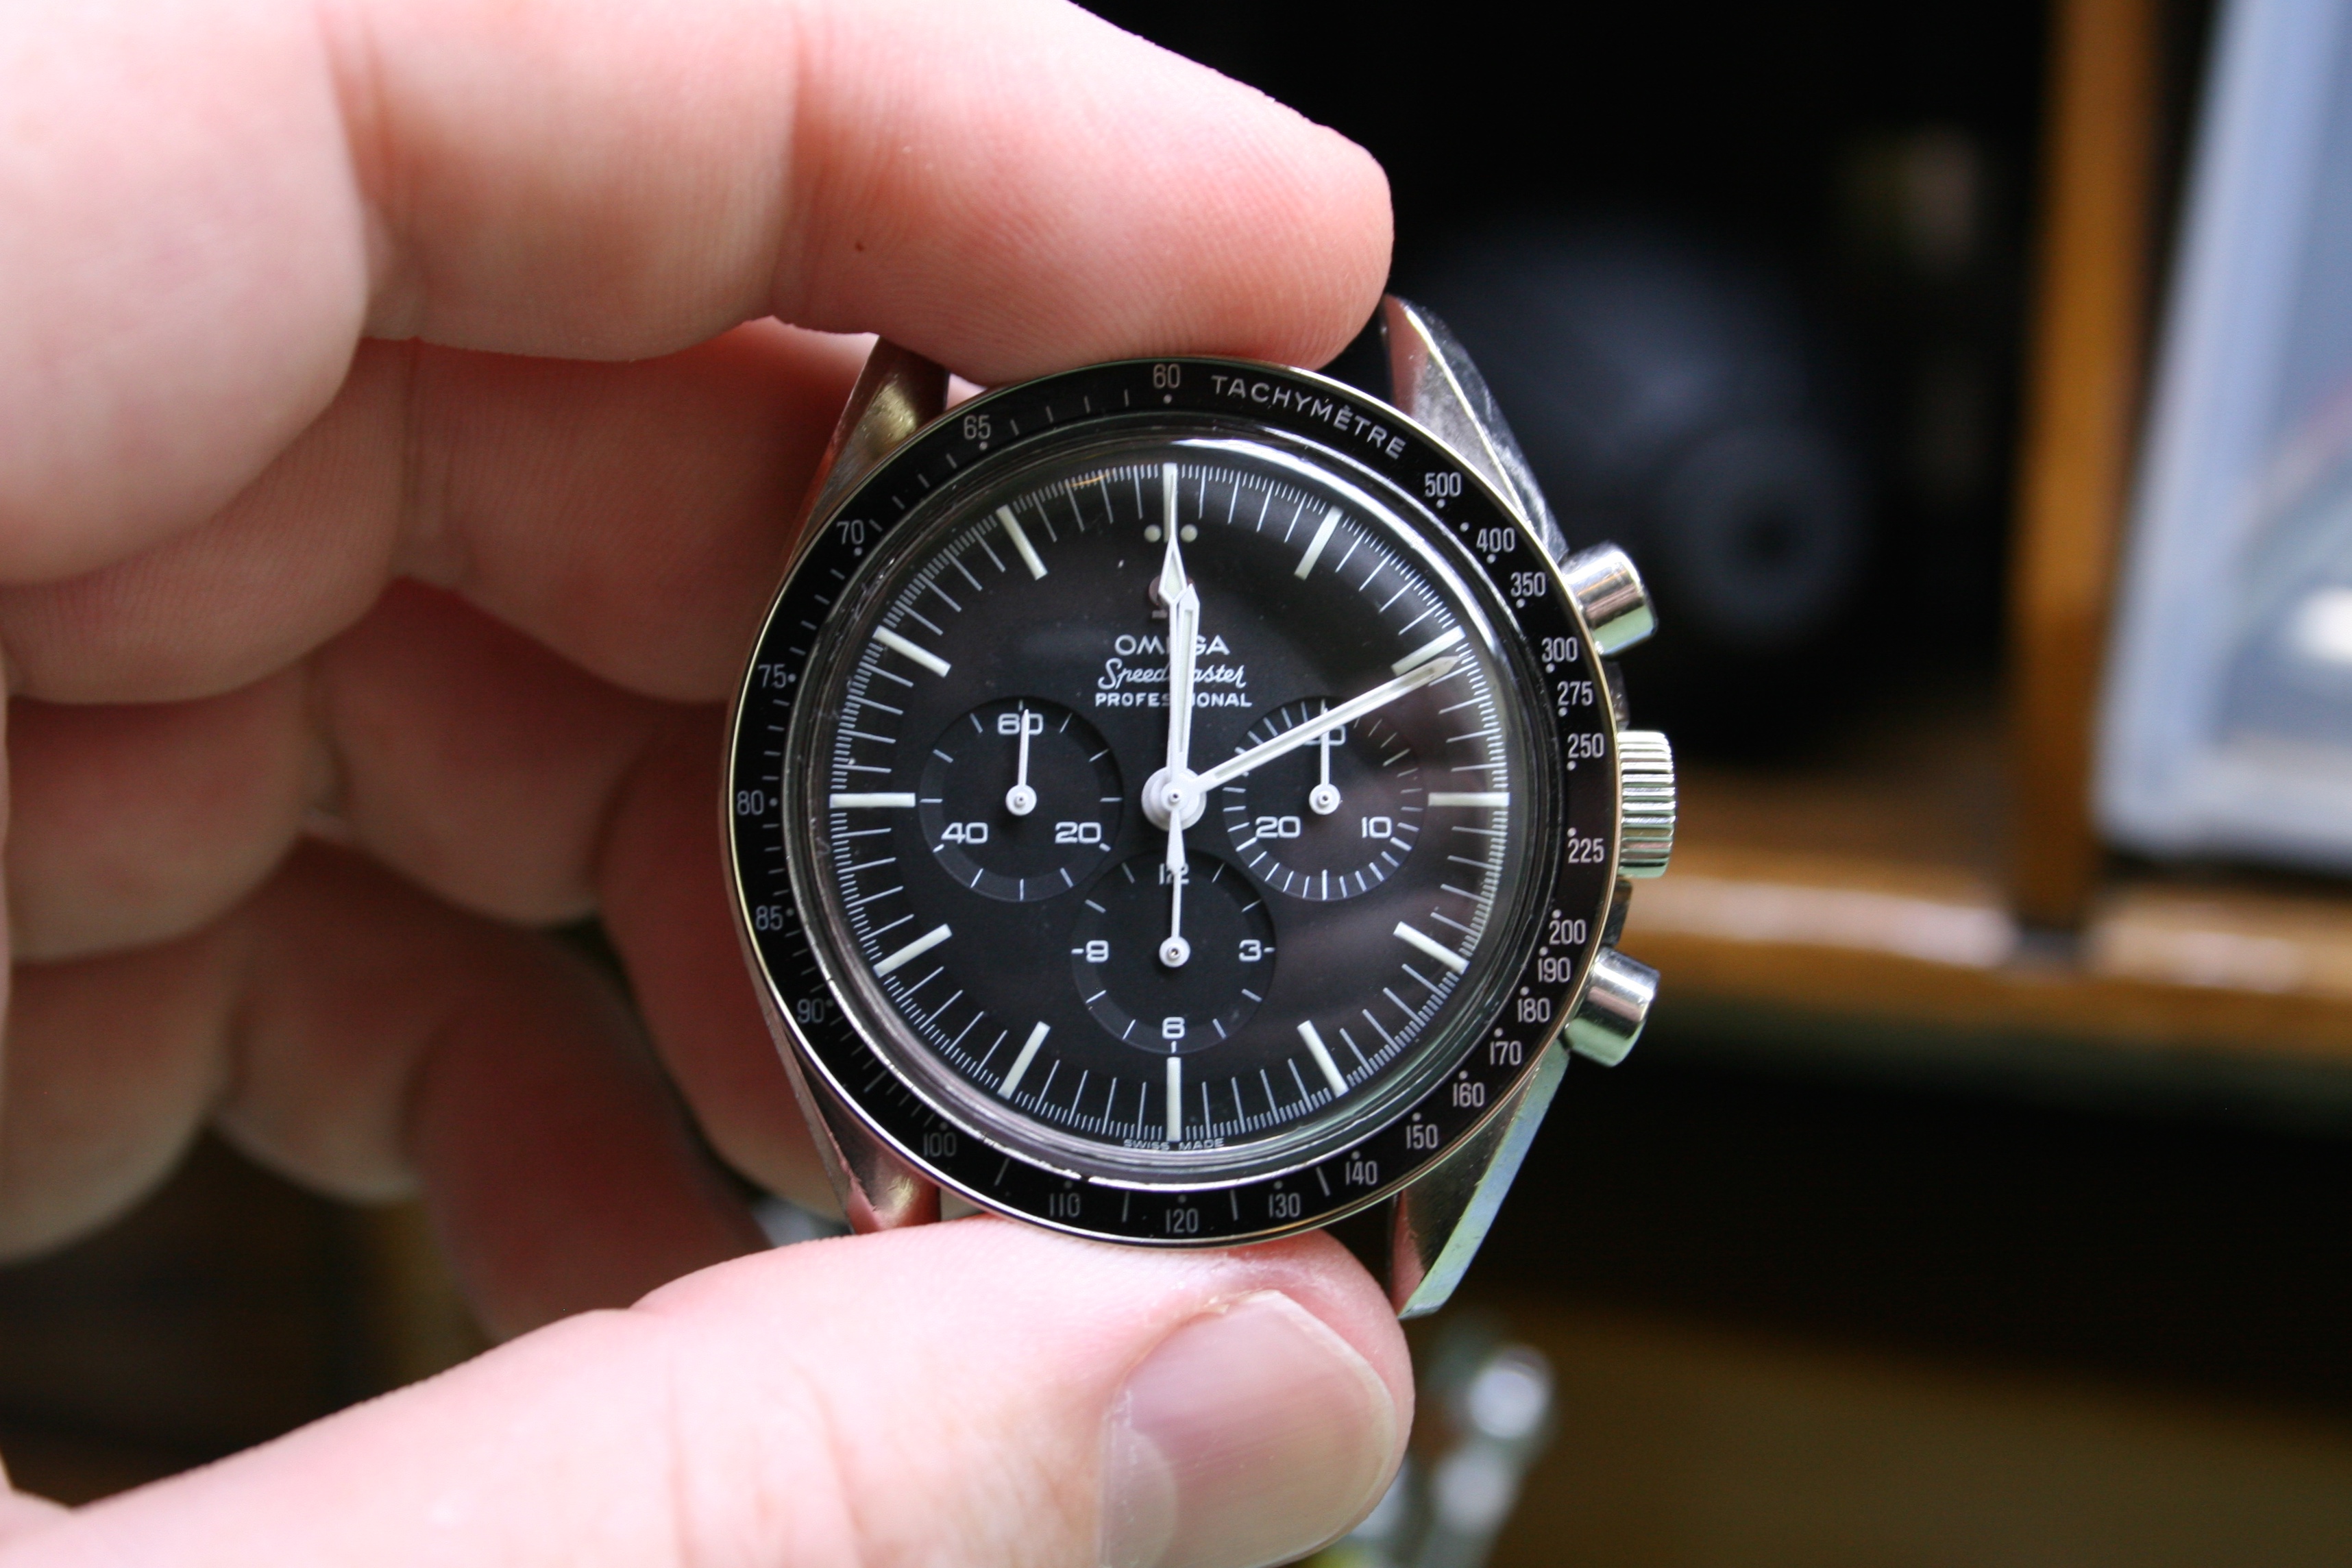
I recently completed work on the timepiece that actually got me interested in watchmaking. I purchased the movement (in pieces) for a vintage Omega Speedmaster a few months back and have been diligently working on putting it back together. It was a pricey endeavor but what I've learned from the experience is invaluable and having the watch ticking away in hand at the end of the project was reward enough. I picked up the movement in February and knew it was missing some parts. I counted the minute recording wheel and hour recording wheel as bits that were missing but also couldn't locate the minute recording pawl and pawl bridge. It turns out they were inside of the semi assembled movement but unfortunately I didn't realize that until I had already ordered replacements- oops! Included with the movement was the front case, hour, minute, and sweep second hands, and some spare parts the previous owner had acquired. He warned me that the watch hadn't worked properly before it was disassembled but I had confidence that I could sort it out. First thing I set to do was assemble as much of the movement as possible to determine what else was missing and what may be broken. It became apparent quickly that there were many screws gone! There weren't many parts missing other than those I've already noted but I did manage to lose the click spring when it shot away from my tweezers. I've since become more adept at dealing with wire springs and don't attack any of them without two hands. When breaking down the movement for cleaning I discovered that the chronograph blocking lever screw had been broken off in the plate. Extracting the remains of the screw from the plate was actually easier than procuring a replacement screw. I placed the plate in a solution of alum and warm water over night and the screw was eaten away. The steel posts and eccentrics in the plate I protected from the alum with silicon caulk which I later removed with a bit of pegwood. After cleaning, I began reassembling the watch but was stopped short when I discovered the mainspring barrel gear teeth were damaged. I replacement was ordered straight away. Now I was ready to assemble the movement. I made sure to inspect all jewels and pivots before putting the gear train together. And I was rewarded with an exceptionally well beating movement. This was a relief since I've spent more than enough time on my previous projects straightening hairsprings, truing balances, and correcting beat errors. Next the chronograph layer came together. This takes quite a while since there are so many bits to lubricate and test the motion of before moving on to the next bit. Also, with so many screws missing I had to stop several times to order replacements. Below is the movement prior to final adjustment. A screw is missing at the top and the chronograph bridge screw isn't correct but it gets the job done. I discovered that the previous owner had already procured the missing hour recording wheel so that saved me a bit trouble. And the dial side came together quickly. The hour recording wheel is turned directly by the barrel and the blocking lever wasn't set properly before I put the dial on so the hour recorder creeped which required me to go back and remove the dial and re-adjust the blocking lever. I'll remember the importance of that adjustment the next time I do a chronograph repair! I needed to purchase a replacement dial and a full set of hands as well. I could have reused the hour and minute hands that came with the movement but since they were scuffed and faded and wouldn't have matched the other four hands I sold them to pay for a whole new set. It's not something I regret though because with the new dial and hands the watch looks about good as new. The case I had was missing the caseback and pushers but I found a gentleman who was selling the case (with pushers) and caseback together so I purchased the lot. I also procured a replacement dust cover since that turned out to be missing as well. No point in doing a job unless it's done right I suppose. And there you go! I'm quite happy with the result here. It was expensive but I now have a complete and fully functioning Speedmaster. The chronograph worked without a hitch and the watch has kept impeccable time too. It took quite a long time to get this one together but the patience has really paid off. I really love working on chronograph movements and am hoping to do a Venus or Valjoux soon but my next project is a bit more eclectic- a Cinderella watch by US Time from the 1960's! This will be my first pin pallet service. (excitement!)


 1 point
 -
I will look for the before photos. To remove dents in a case isn't difficult, it just requires patience. Go to your Hardware store and by som nice Ash dowels. Cut them down to usable lengths 4 to six inches . Round off the ends of the dowels into smooth shapes sort of like a baseball bat. Smooth the end down until its very smooth so you don't do any damage to case. Now using only your hands push the dowel down on a dent & twist over and over again. soon you will notice it is starting to go away. As I said slowly and carefully Twist Push. Keep checking to see you are not doing damage."(NO HAMMER" just kneading. You can experiment with different shapes and sizes. o see what works best for you. I have one with a pad on one end to keep from hurting my palm. Also make sure the case is on a hard smooth surface or you will engrave whats on that surface into your watch case. I have had great results doing it on four watches including a very small ladies Elgin Pocket watch.1 point
-
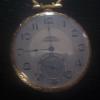
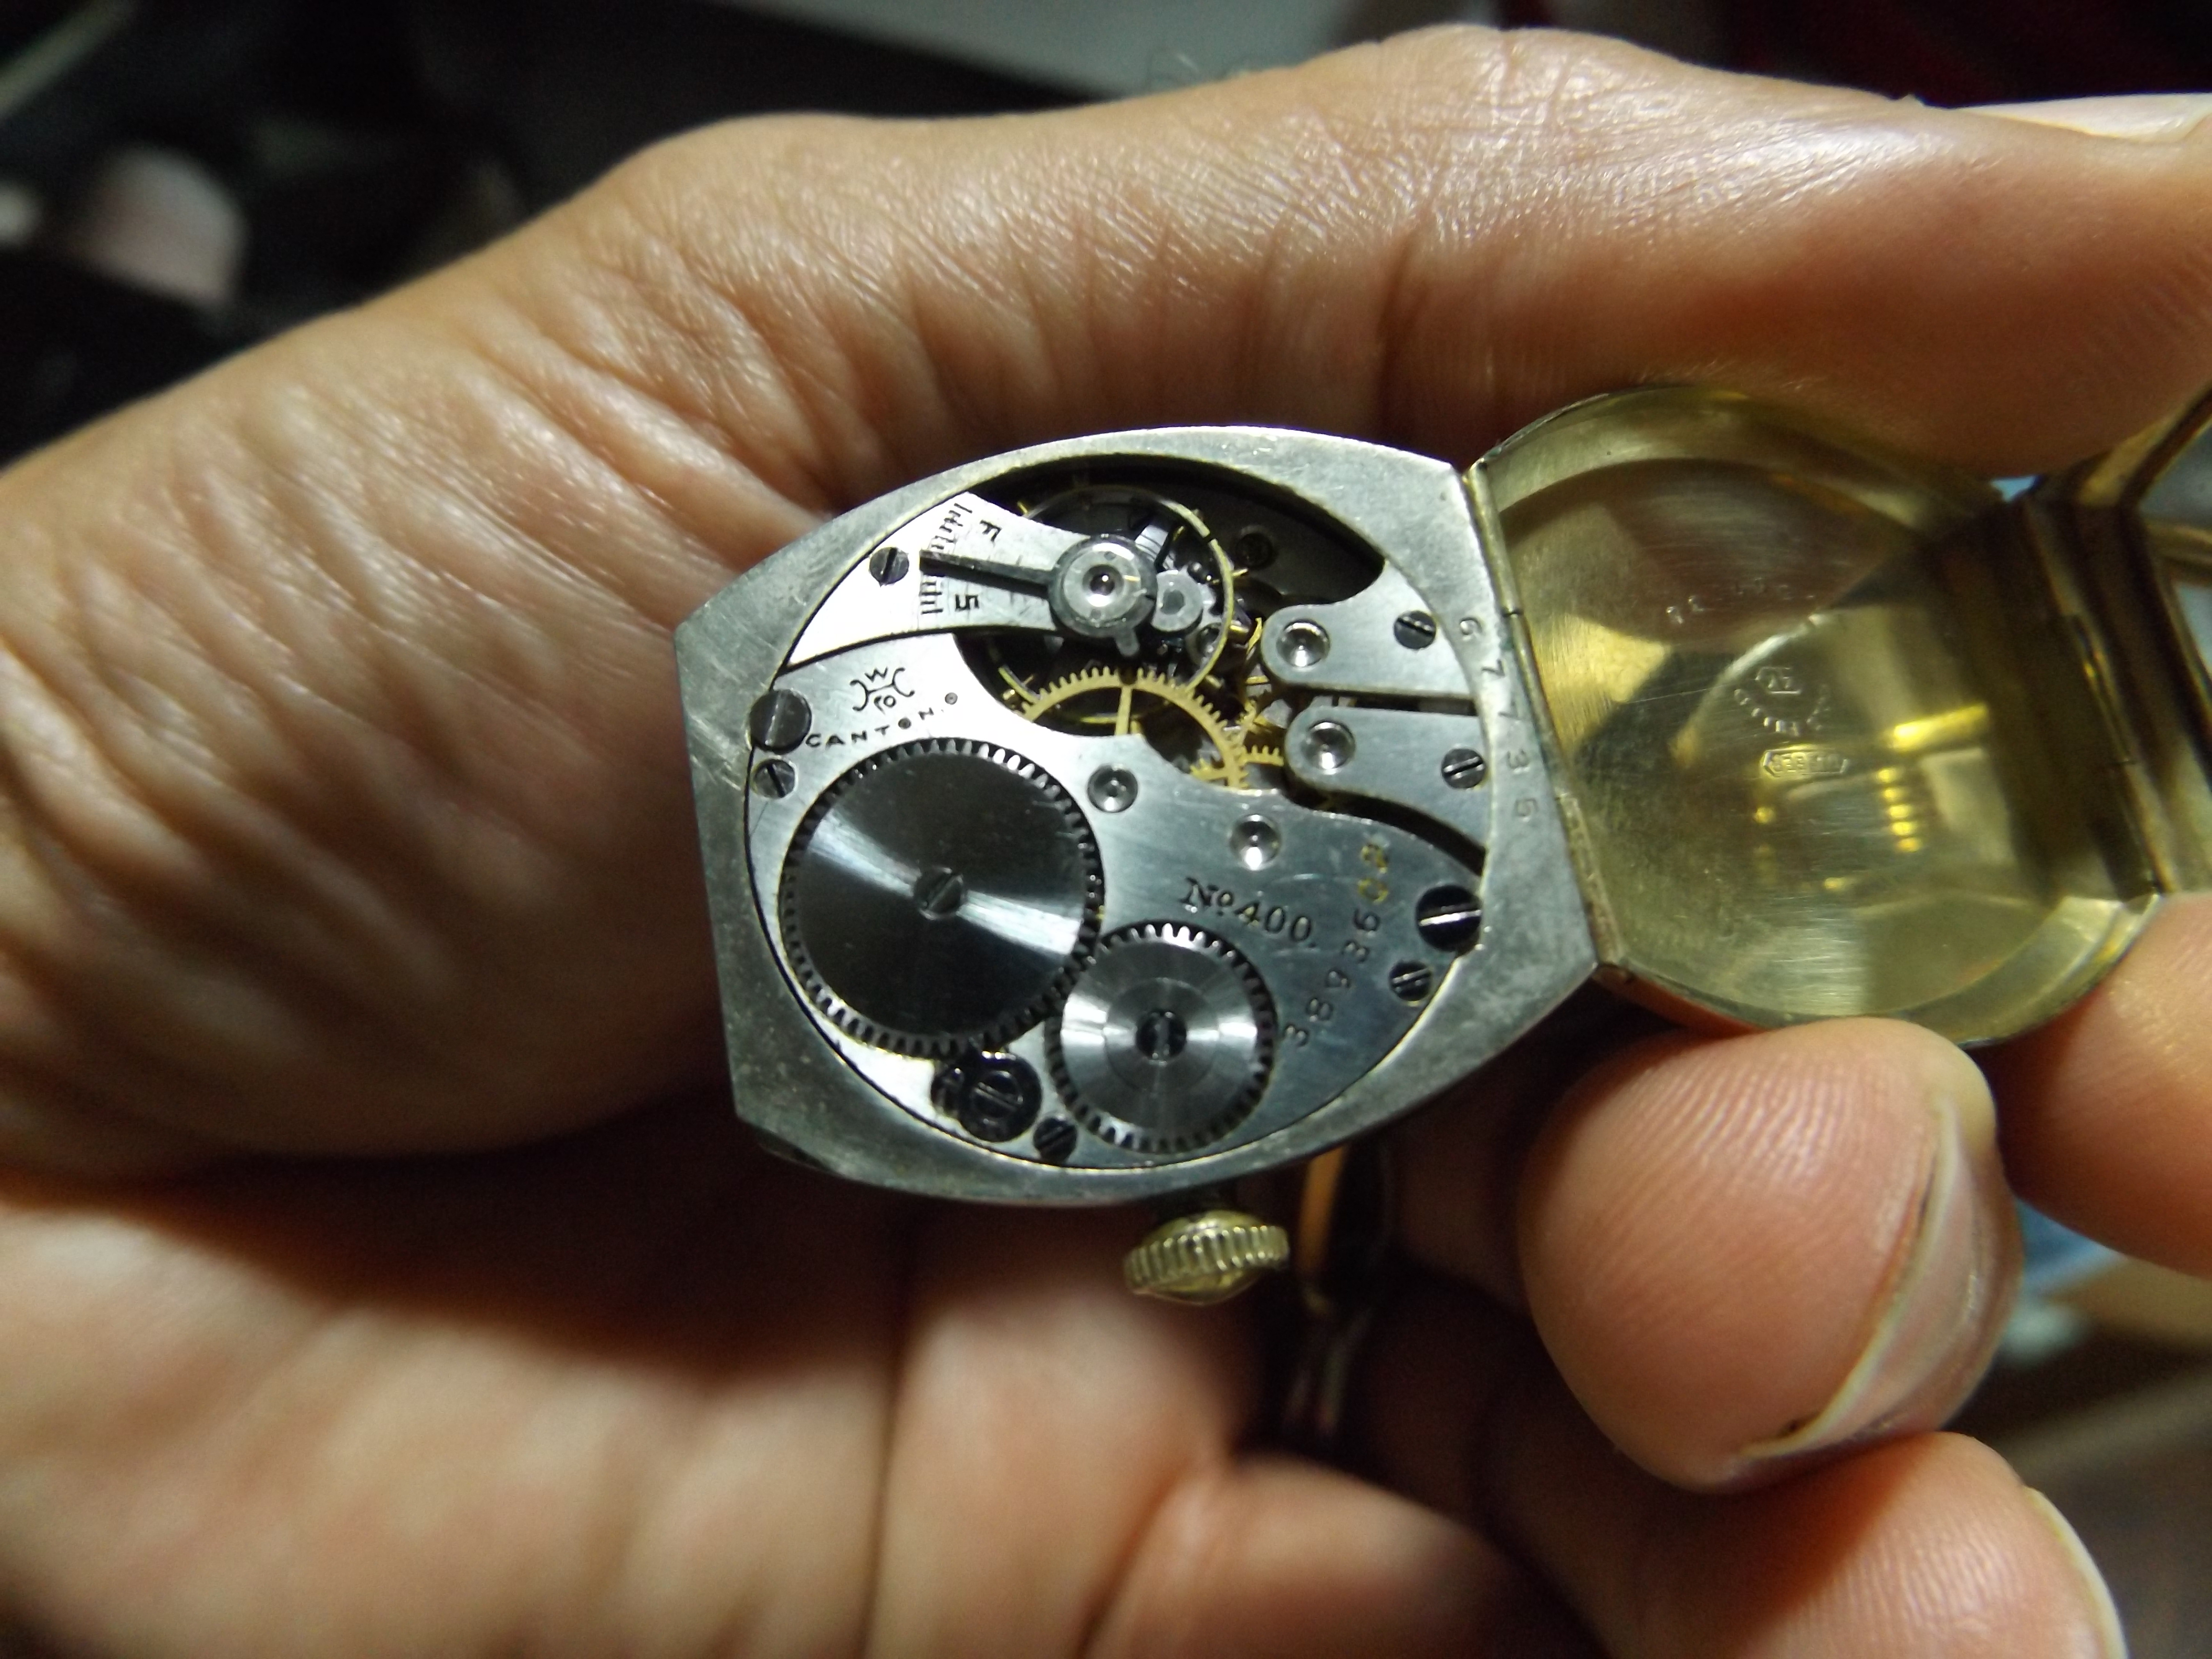
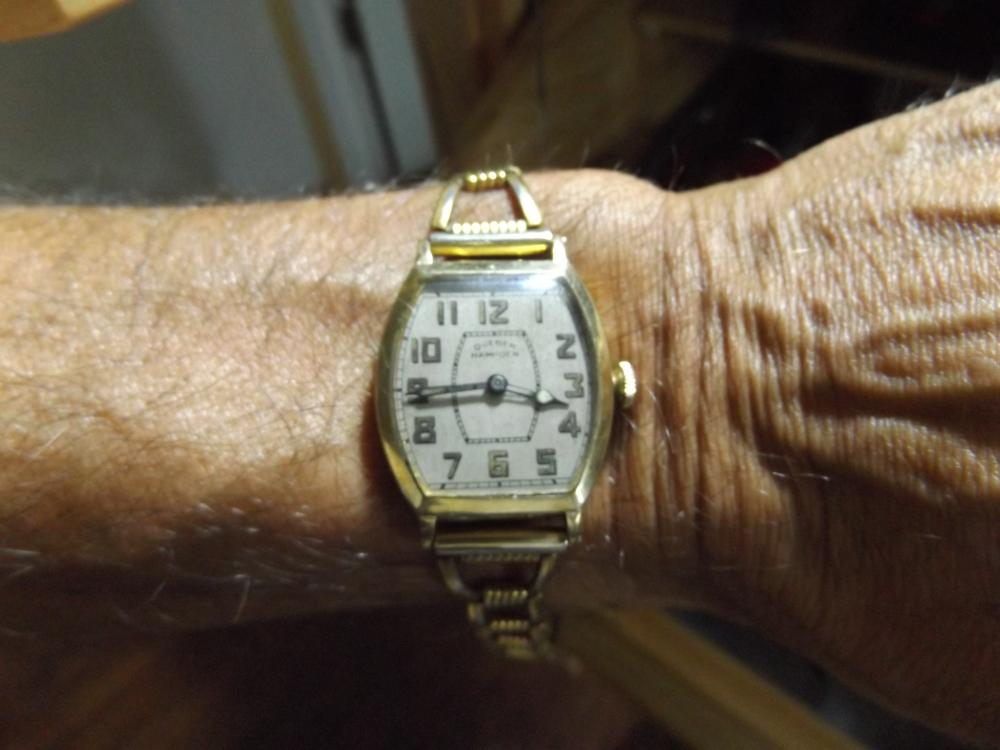
Feeling nostalgic today, oldie but a goodie, Hampden model 400 circa 1925 or so, in a Dueber gf hinged case, one of my nicest 'old' winder watches. Gotta get this one a leather strap, bracelet is a bit flimsy.

 1 point
 -
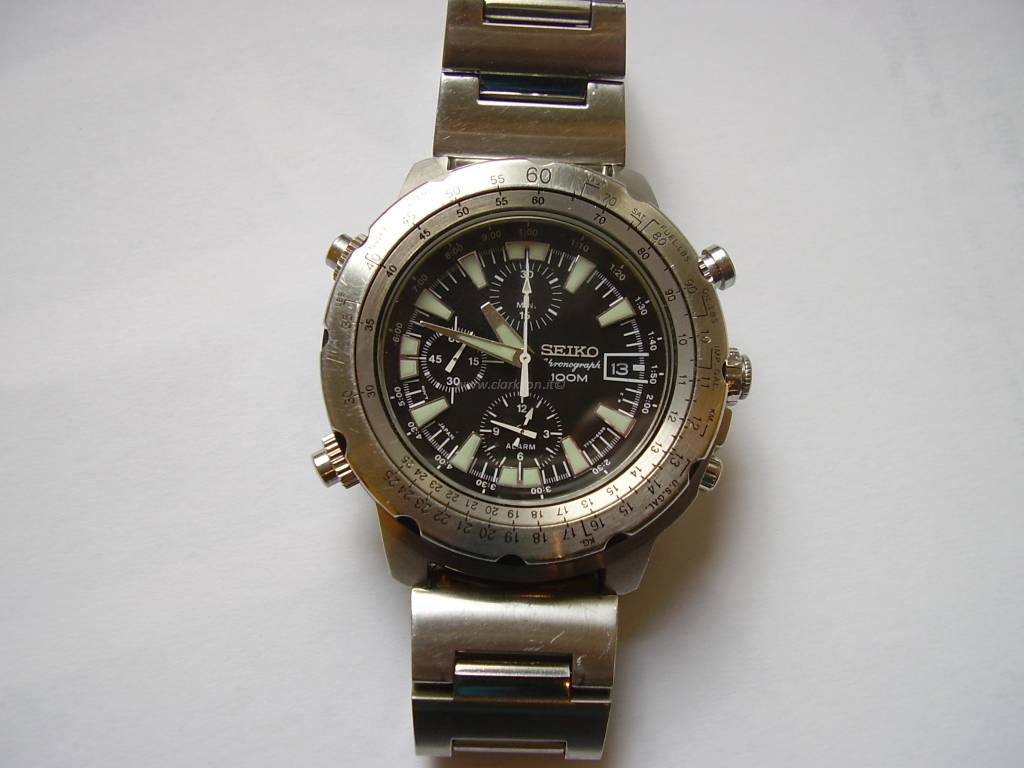
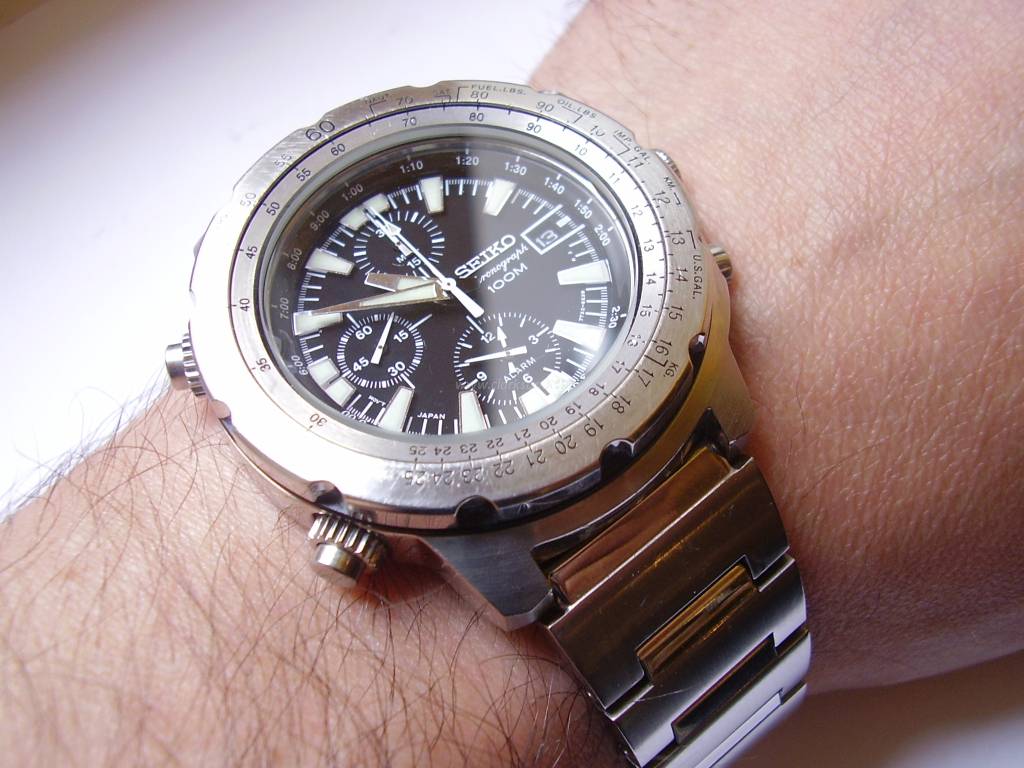
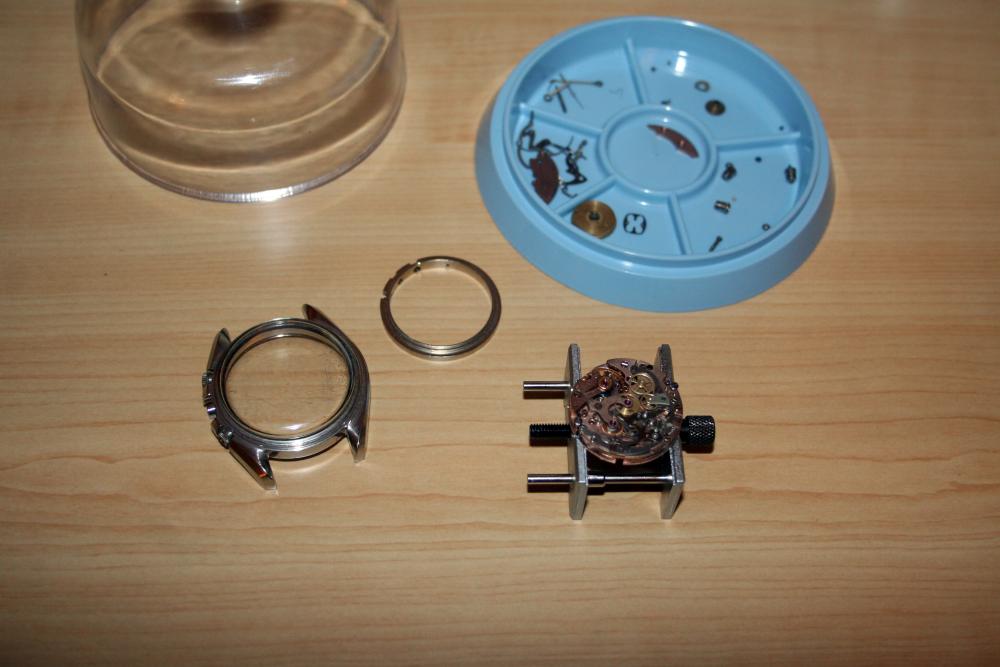
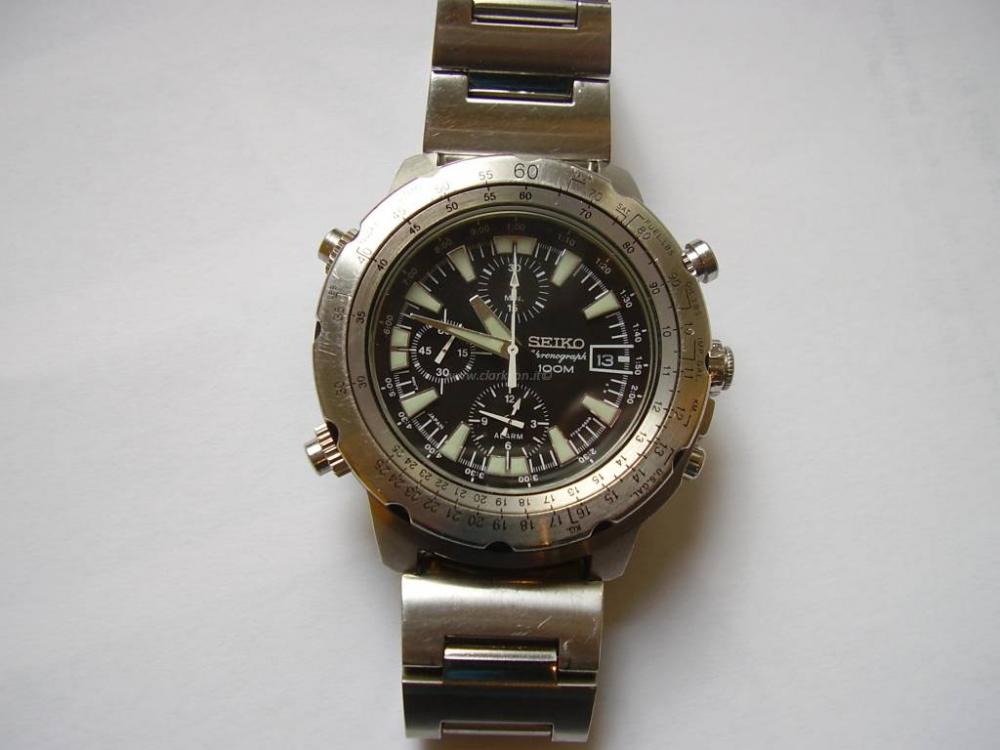
So today I went with this one... a Seiko 7T32-6N10 that I restored to it's former glory. It is a pretty hefty watch, quite heavy and bulky.
 1 point
 -
Don't mention my hobby's in front of my partner, she will moan for hours, anyway, I have 5 marine aquariums so you could say I was into fish, I also played guitar (I have 6) until a neurological problem 5 years ago which has left my left hand almost useless, I collect stamps, I also collect watches I now have 37, thats enough for now.1 point
-
Apologies for not updating, been very busy on the day job. still waiting for the Alum to arrive, God only knows where I ordered it from at Amazon . anyway I had a stroke of luck on my watch, cost more than I intended, but very much worth it. I had at the moment my AS5008 movement with a snapped screw, replacement centre seconds wheel and a possible dodgy cannon pinion. So a big project at my level of expertise for sure on an investment watch. the other night a watch dealer in Switzerland posted a gilded (same as the original) NOS AS5008 at a very fair price on eBay. i decided to take the plunge and it arrived today, and it's beautiful. i need to fit the day wheel mechanism and day wheel, from the other movement, lubricate, Maurice Lacroix rotor, and assemble. I think it may be a winner if it goes well. Nervous about the process a bit, but it's a beautiful watch, and the new movement should keep the watch going for years hopefully. after that I can take my time with the old movement and hopefully over longer time sort all the issues.
 1 point
 -
Looking at your picture again, you may get lucky with just heat and using a pair of fine sidecutters.. hell I've used nailclippers before! Anil1 point
-
I have used this type of cleaner for a long time now without problems. I use the small jam jars like the ones you get in hotels and restaurants set into tap water with the lids back on. I bought some small wire ball cages for really small bits. For general cleaning And first wash I use lighter fluid but only the sort that is pure Naptha as some fluids have other ingredients - the side of the can should advise. My rinse is pure Isapropanol as this leaves next to no residues. Check your fluids by putting a few drops on a small mirror and allow them to evaporate. If there is a residue this will be left on the glass use a dark cloth to wipe it to see. I should mention that I do not use professional kit as I only ever clean in small amounts being a tinkerer/ hobbyist rather than a pro. Buying gallons of wash and rinse along with a full machine would be pointless for me. Also this topic is well covered in the forum if you want to do a trace. Also well covered are the warnings about not ultrasonic cleaning pallet forks with jewels attached by shellac in solvent cleaners. Cheers, Vic1 point


.jpg.6225a64433578a11e0218b27c20b13f5.thumb.jpg.d82b0cd1e370f3a3a59a06afa957d184.jpg)