Leaderboard


Popular Content
Showing content with the highest reputation on 05/06/16 in all areas
-
In respect to cleaning the autowind module Alexander is sort of right... The problem is not in the cleaning but in the re-lubricating, specifically of the reverser wheel pawls. ETA standard advice is to replace the reverser wheels rather than to service them. That way the issues with lubrication go away all together. The problem is getting the tiniest amount of oil in exactly the right place, and if you over do it they just glue up all together. There are ways and means though, and I have as yet had to replace any reverser wheels. The standard work around is to clean the reverser wheel as normal and to mix up moebius 9010 1:10 with naphtha. simply immerse the wheels in the diluted oil and then let them air dry. The naphtha evaporates leaving the thinnest film of 9010 on the wheels. This is what I do and I have no problems. A (possibly) better solution is to use a specially developed lubricant called Lubeta V105 which was devised especially for ETA reverser wheels. You use it exactly the same way as the diluted 9010 and it leaves a thin waxy film over the reverser. I have not used this myself but it does seem to have had good reports from those who have, which it should as it was developed just for this job. Interestingly I have read about it gluing up reverser wheels in movements other than ETA. Then as I said, the standard ETA service procedure is to just replace the reversers and avoid any risk of having to go back in to have another go. What would I be doing in your shoes? I would strip the autowind module down, put everything through the cleaner, dunk the reversers in diluted 9010, then reassemble and relubricate in the normal way. Best of luck2 points
-
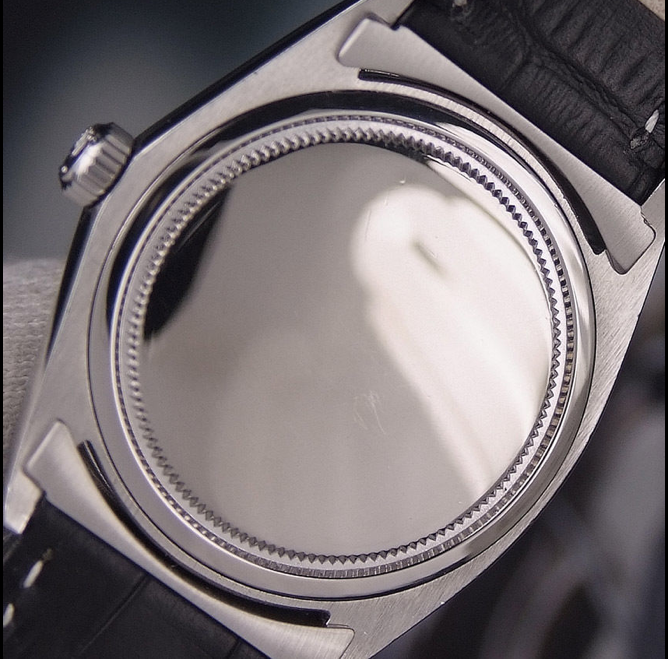
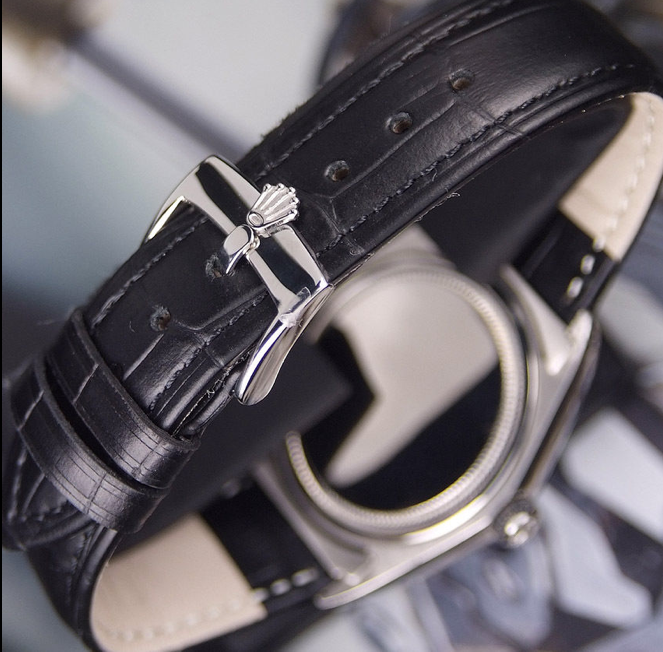
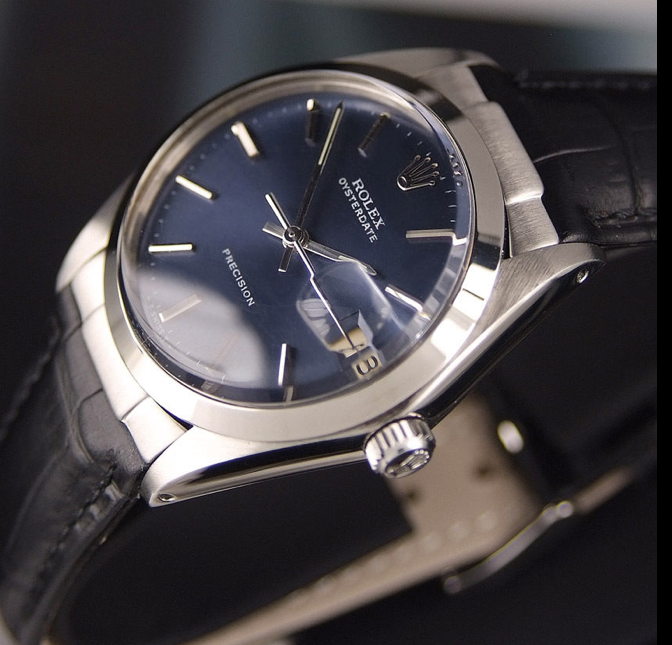
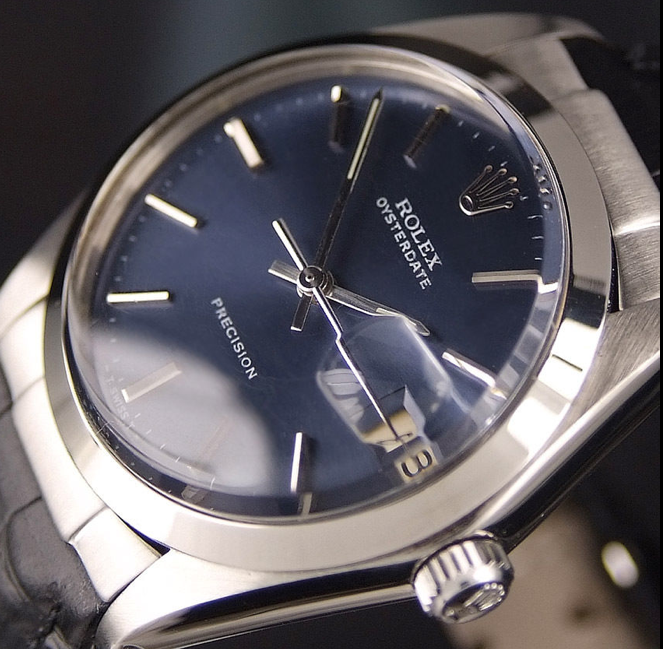
Aloha All , the post office finally delivered this Rolex Oyster Date Precision to me today . I was held up in customs since April 21 and I had to furnish paperwork to them showing what I paid for this item . After I gave the letter carrier $85 to cover duties , VAT , and another fee I finally got my watch . Yes , it has a repainted dial , but other than that , it's a beauty . I especially like the end pieces on the leather band . It's about 34 or 35mm which is about the smallest case size I will wear . All in All , I do like it .......
 1 point
 -
This is a transcript of a post I made recently over on RLT....I have had to edit some bits, as they were relevant to that forum....if I've missed something please forgive me...this is my second post, so please be kind to the newb! Way back in 1975, my lovely parents bought me a Seiko Pepsi for my 21st birthday. I had lusted over it for months, and it filled my every daily thought. Lo and behold, when the day arrived I was presented with the most fabulous watch ever. And this was even before it was made eternally famous by being worn by Commander William Pogue on the Skylab 4 mission, and thus being the first auto chrono into space (hence the nickname, ‘Pogue’), and not the Sinn as many still believe. The original watch was worn to the limit…I was in my early twenties and nothing mattered except GIRLS and CARS. I couldn’t, and didn’t realise that this watch would become the icon it is today. I didn’t take care of it…it was worn as a beater is today. The crystal was almost opaque, the case was scratched and bashed it to within an inch of its life and the bracelet was held together with wire. I put it aside and bought another watch (a Citizen ‘Robot face’…as I recall…and that’s another story!) While the original was in storage, I had a couple of house moves, and it went ‘AWOL ‘…..(nicked, I reckon…..) To cut a long story short…(Really, Rog…?) I bought a replacement as close to my 21st birthday year as possible from the Bay…..I wasn’t a member here then, you have to understand…but I soon learned what was wrong with my mine. So the dial is a really bad aftermarket item…the lume application is appalling, and the sub dial shouldn’t have concentric circles…and the case is badly marked and scratched. A new dial (and, hands up, it will be an aftermarket one, as originals in ‘as new ‘ condition just aren’t available) has been sourced…from the USA. Also a new Seiko branded bracelet, new gaskets for the pushers and I've just managed to secure a NOS set of hands. But the case is something I can do…. Case re-finishing. The case is in pretty poor condition. For those in the know, the 6139-6002/5 series has a case that has circular graining to the top surface and lugs, and highly polished sides. If yours has anything else, it’s wrong. Polishing the sides to remove scratches is fairly easy as this can be achieved with a small rotary tool such as a Dremel and felt buffing wheels and suitable polishing compounds, such as ‘Dialux Grey….rough cut’ and ‘Dialux green…finishing’. To reproduce the graining on the top surface was another challenge. The graining on the case is circular. To reproduce this without complicated lapping machines is going to be difficult….or is it? So I made a very simple jig…a square of MDF…with a spindle that would accommodate a die from my crystal press. The correct sized die was selected and fitted to the watch case with a small piece of foam double sided tape, then placed on the spindle. This allows me to turn the case in a perfectly circular motion. Luckily, the case has a raised lip (which normally holds the bezel) against which I can rest a diamond coated file. The diamond file (400 grit) is perfectly flat and will remove all scratches within a few turns without rounding the edges of the case. The file is held stationary and the case rotated slowly against it. I didn’t want to use high speed spinning tools that I thought might create more damage than I am trying to repair. This done, I change to a 1200 grit wet and dry paper and hold it to the bottom of the diamond file and repeat the process to finish. Then into the ultrasonic cleaner to remove all traces of polishing compound and grit. Very well pleased with this result, considering it cost pennies to achieve. All I have to do now is patiently await the arrival of the new dial and the re-assembly can begin. The simple jig with spindle. This was made from a cut down kitchen cabinet connector, and fits the hole in the crystal press die perfectly without destroying the thread. The crystal press die on the spindle... The before pics...damage to case... The 400 grit diamond file... The case is rotated clockwise against the file, which is held stationary to create the circular graining pattern. A piece of 1200 grit wet 'n' dry was then held under the file to finish. The after pics...very pleased with the result! Also showing the polished sides which were done with a Dremel, felt buffing wheels and grey and green polishing compounds. Finally, all the new parts have arrived and I'm ready to start the re-assembly. Just so you're aware, I haven't stripped and cleaned the movement...this was done professionally a couple of years ago.....and I'm not ready to start playing around with a rare old movement just yet. Some of you will know that I'm going to start practicing with some old movements kindly supplied by forum members. So firstly, the new dial. This is an aftermarket dial, as originals in NOS conditiion are as rare as hen's teeth, and sourced from America. Compared to the old, rubbish aftermarket dial that had been fitted, this is much better. The colour is darker (perhaps the old one had faded) and the lume has been applied properly. In keeping with a 41 year old watch, the lume doesn't glow very brightly....it would look rather strange with Seiko's modern 'in yer face' Lumibrite compound. The two dials together...old at the top. Note how pale the old one is. Also note the concentric rings on the sub...a real aftermarket giveaway. The difference in the application of the lume...Old V new... Next, the new hour and minute hands. These were also sourced from America, but are a NOS item. I'm using the original red second hand and sub hand as there is nothing wrong with them...again, the lume in these has aged so is not very bright, but right for 40 year old hands. Other new parts include new pusher and stem gaskets. So to start with, all pieces that had been removed...pushers, stem, retaining rings, springs etc went through the ultra sound M/C to clean them...the only bit I didn't put in was the yellow plastic inner rotating indicator ring, as I wasn't sure if the ultrasound would remove the printed numbers. I cleaned this manually with some Rodico. Then it was back on with the new dial. ...Followed by the hands....I found a bit of Rodico was very useful to get them positioned correctly before pressing on with a hand setting tool. The front of the case was next...first the indicator ring with its tension spring... Followed by the gasket ring and the rubber gasket which was lightly greased with silicone. Finally, all the new parts have arrived and I'm ready to start the re-assembly. Just so you're aware, I haven't stripped and cleaned the movement...this was done professionally a couple of years ago.....and I'm not ready to start playing around with a rare old movement just yet. Some of you will know that I'm going to start practicing with some old movements kindly supplied by forum members. So firstly, the new dial. This is an aftermarket dial, as originals in NOS conditiion are as rare as hen's teeth, and sourced from America. Compared to the old, rubbish aftermarket dial that had been fitted, this is much better. The colour is darker (perhaps the old one had faded) and the lume has been applied properly. In keeping with a 41 year old watch, the lume doesn't glow very brightly....it would look rather strange with Seiko's modern 'in yer face' Lumibrite compound. The two dials together...old at the top. Note how pale the old one is. Also note the concentric rings on the sub...a real aftermarket giveaway. The difference in the application of the lume...Old V new... Next, the new hour and minute hands. These were also sourced from America, but are a NOS item. I'm using the original red second hand and sub hand as there is nothing wrong with them...again, the lume in these has aged so is not very bright, but right for 40 year old hands. Other new parts include new pusher and stem gaskets. So to start with, all pieces that had been removed...pushers, stem, retaining rings, springs etc went through the ultra sound M/C to clean them...the only bit I didn't put in was the yellow plastic inner rotating indicator ring, as I wasn't sure if the ultrasound would remove the printed numbers. I cleaned this manually with some Rodico. Then it was back on with the new dial. ...Followed by the hands....I found a bit of Rodico was very useful to get them positioned correctly before pressing on with a hand setting tool. The front of the case was next...first the indicator ring with its tension spring... Followed by the gasket ring and the rubber gasket which was lightly greased with silicone. Next comes the crystal... ...followed by the bezel which is pressed on with a crystal press, and holds everything in place. Finally, all the new parts have arrived and I'm ready to start the re-assembly. Just so you're aware, I haven't stripped and cleaned the movement...this was done professionally a couple of years ago.....and I'm not ready to start playing around with a rare old movement just yet. Some of you will know that I'm going to start practicing with some old movements kindly supplied by forum members. So firstly, the new dial. This is an aftermarket dial, as originals in NOS conditiion are as rare as hen's teeth, and sourced from America. Compared to the old, rubbish aftermarket dial that had been fitted, this is much better. The colour is darker (perhaps the old one had faded) and the lume has been applied properly. In keeping with a 41 year old watch, the lume doesn't glow very brightly....it would look rather strange with Seiko's modern 'in yer face' Lumibrite compound. The two dials together...old at the top. Note how pale the old one is. Also note the concentric rings on the sub...a real aftermarket giveaway. The difference in the application of the lume...Old V new... Next, the new hour and minute hands. These were also sourced from America, but are a NOS item. I'm using the original red second hand and sub hand as there is nothing wrong with them...again, the lume in these has aged so is not very bright, but right for 40 year old hands. Other new parts include new pusher and stem gaskets. So to start with, all pieces that had been removed...pushers, stem, retaining rings, springs etc went through the ultra sound M/C to clean them...the only bit I didn't put in was the yellow plastic inner rotating indicator ring, as I wasn't sure if the ultrasound would remove the printed numbers. I cleaned this manually with some Rodico. Then it was back on with the new dial. ...Followed by the hands....I found a bit of Rodico was very useful to get them positioned correctly before pressing on with a hand setting tool. The front of the case was next...first the indicator ring with its tension spring... Followed by the gasket ring and the rubber gasket which was lightly greased with silicone. Next comes the crystal... ...followed by the bezel which is pressed on with a crystal press, and holds everything in place. Now the movement is put back in the case, the pushers inserted and held in place by a retaining ring. Each one, and the stem had a tiny amount of silicone grease added to the rubber gaskets.During this process, one of the pushers sprung out of the case. I found the pusher straight away, but it took me nearly an hour on my hands and knees to find the spring. Finally, the back was screwed on after a smear of silicone was applied to its gasket. At this stage everything is working just as it should with the hands resetting properly. I like to leave this particular chrono running, as to leave it stopped, compresses the clutch mechanism and keeps that particular part under tension...rather like riding the clutch in a car. I also never activate the flyback if I have used the stopwatch until the hand is just past 12...to flip it back from, say, 6 puts undue stress on the hand tube and could cause it to come loose. Next is the bracelet. This is a new Seiko branded item with the correct flared ends and the unique curved lug links....still in its protective plastic casing... Finally, all the new parts have arrived and I'm ready to start the re-assembly. Just so you're aware, I haven't stripped and cleaned the movement...this was done professionally a couple of years ago.....and I'm not ready to start playing around with a rare old movement just yet. Some of you will know that I'm going to start practicing with some old movements kindly supplied by forum members. So firstly, the new dial. This is an aftermarket dial, as originals in NOS conditiion are as rare as hen's teeth, and sourced from America. Compared to the old, rubbish aftermarket dial that had been fitted, this is much better. The colour is darker (perhaps the old one had faded) and the lume has been applied properly. In keeping with a 41 year old watch, the lume doesn't glow very brightly....it would look rather strange with Seiko's modern 'in yer face' Lumibrite compound. The two dials together...old at the top. Note how pale the old one is. Also note the concentric rings on the sub...a real aftermarket giveaway. The difference in the application of the lume...Old V new... Next, the new hour and minute hands. These were also sourced from America, but are a NOS item. I'm using the original red second hand and sub hand as there is nothing wrong with them...again, the lume in these has aged so is not very bright, but right for 40 year old hands. Other new parts include new pusher and stem gaskets. So to start with, all pieces that had been removed...pushers, stem, retaining rings, springs etc went through the ultra sound M/C to clean them...the only bit I didn't put in was the yellow plastic inner rotating indicator ring, as I wasn't sure if the ultrasound would remove the printed numbers. I cleaned this manually with some Rodico. Then it was back on with the new dial. ...Followed by the hands....I found a bit of Rodico was very useful to get them positioned correctly before pressing on with a hand setting tool. The front of the case was next...first the indicator ring with its tension spring... Followed by the gasket ring and the rubber gasket which was lightly greased with silicone. Next comes the crystal... ...followed by the bezel which is pressed on with a crystal press, and holds everything in place. Now the movement is put back in the case, the pushers inserted and held in place by a retaining ring. Each one, and the stem had a tiny amount of silicone grease added to the rubber gaskets.During this process, one of the pushers sprung out of the case and it took me nearly an hour on my hands and knees to find it. Finally, the back was screwed on after more silicone applied to its gasket. At this stage everything is working just as it should with the hands resetting properly. I like to leave this particular chrono running, as to leave it stopped, compresses the clutch mechanism and keeps that particular part under tension...rather like riding the clutch in a car. I also never activate the flyback if I have used the stopwatch until the hand is just past 12...to flip it back from, say, 6 puts undue stress on the hand tube and could cause it to come loose. Next is the bracelet. This is a new Seiko branded item with the correct flared ends and the unique curved lug links....still in its protective plastic casing... And finally the finished watch shots. As I said at the start, this watch is now a bit like 'Trigger's broom' with a lot of new (albeit cosmetic) parts. I don't know if I'll be allowed to post it in Mach's 'oldies' thread anymore! Anyhow, I like it better now, and I hope you do too. Thanks for looking! PS...The white fleck at the 140 mark on the bezel was a speck of 'whatever'...and is not actually there.....also I failed to notice that I had knocked the crown and moved the pointer on the indicator ring slightly away from 12. If any of you are a bit OCD about this....sorry!1 point
-
In this video I am stripping down and servicing a Seiko 7S26 SKX (Seiko 5) automatic watch movement which has not been serviced for a very long time. View full YouTube video1 point
-
Here's what I said in an earlier post on the subject:- "This is the bit that gave me the most heartache when I started. Wind the watch 1-2 turns and check that the escapement levers flicks sharply from side to side by gently pushing it with a dry oiler or tooth pick. If all is well, fit the balance wheel. Make sure that you position the balance jewel correctly regarding the end of the lever. Looking down on the lever, if it lying to the right, ensure that the balance jewel is even further to the right when you drop the balance into position. Vice versa if the lever is lying to the left. As you turn the balance cock into the correct position the balance jewel will automatically engage the lever and watch should start running. As a wee aside, when oiling a watch, do not oil the pivot jewels on the escapement lever."1 point
-
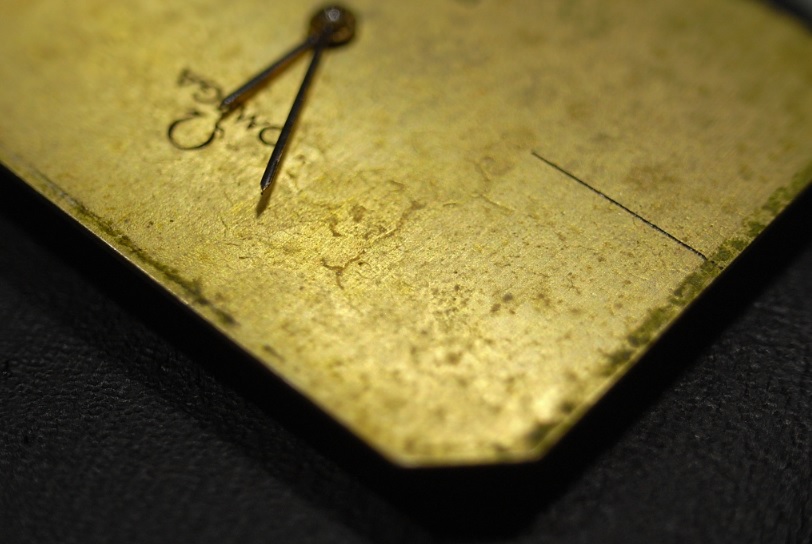
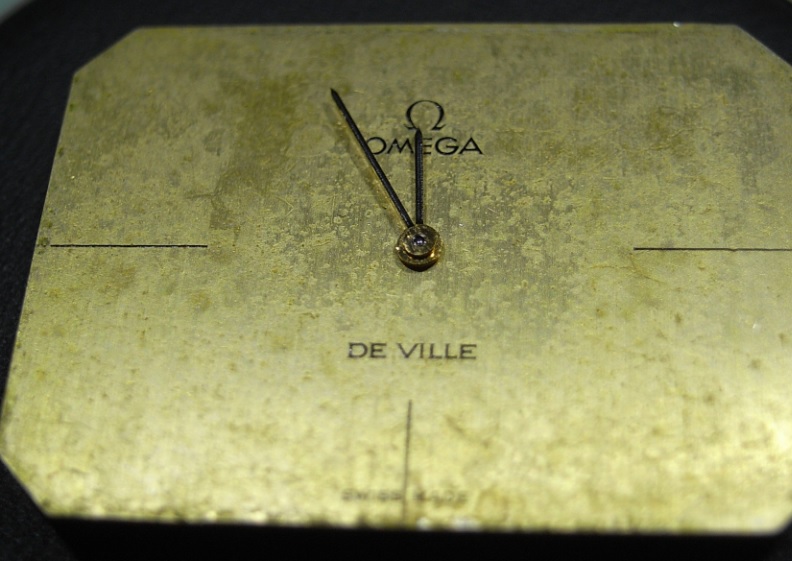
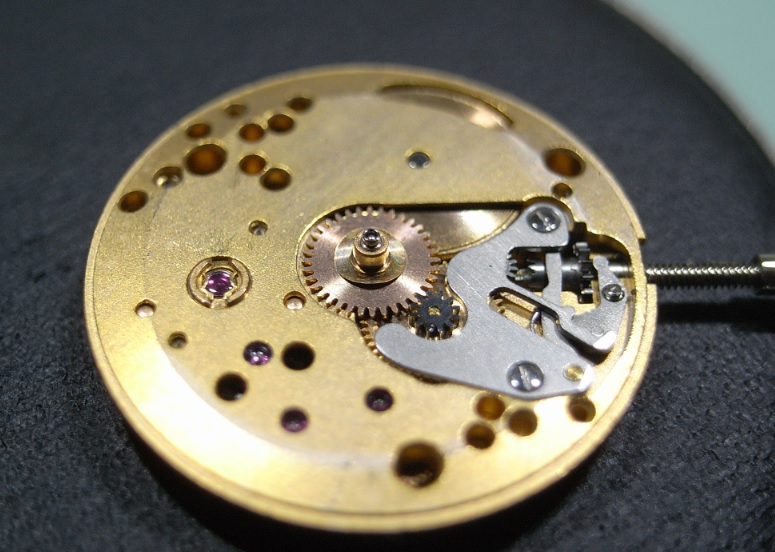
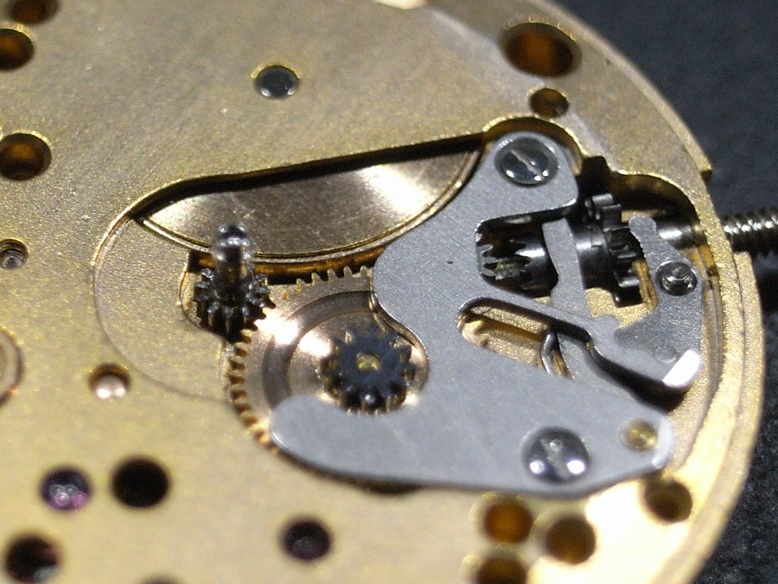
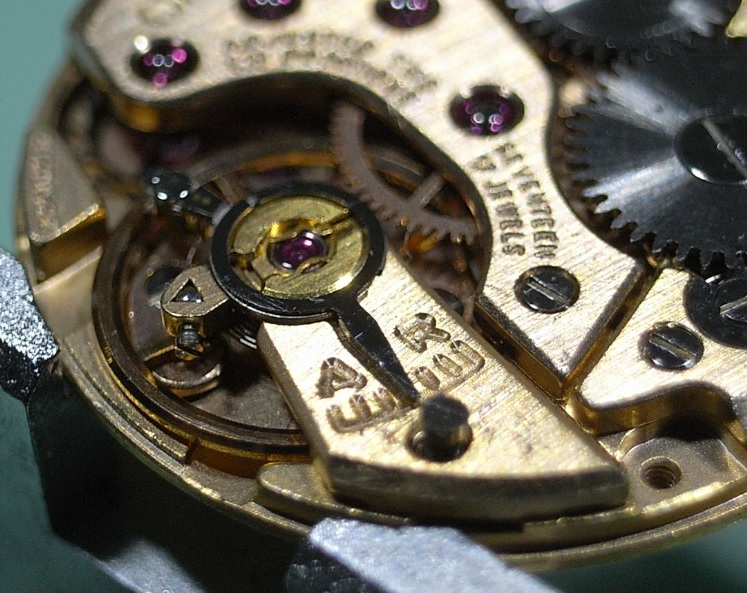
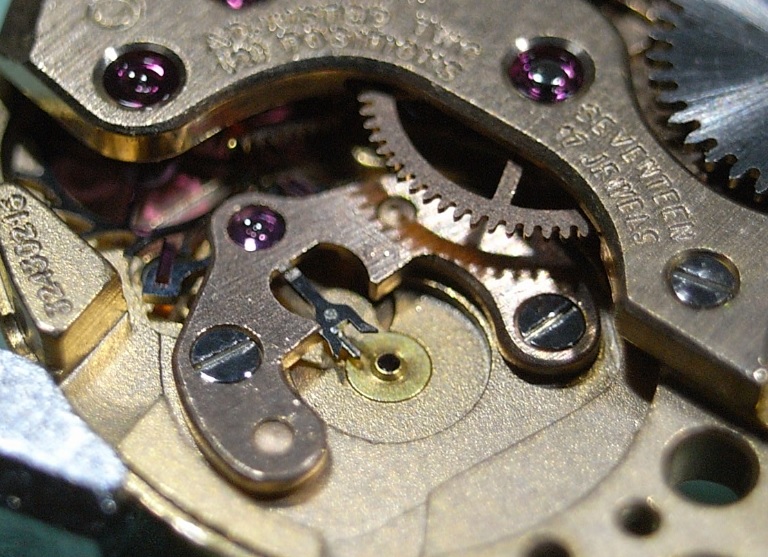
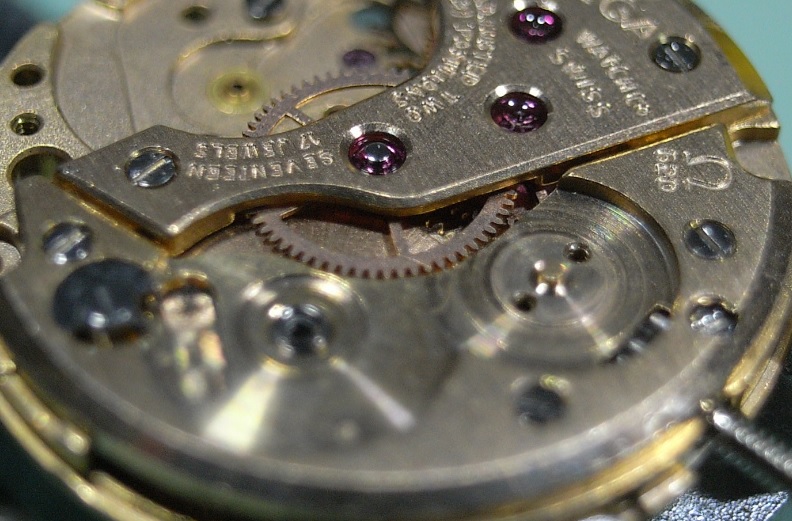
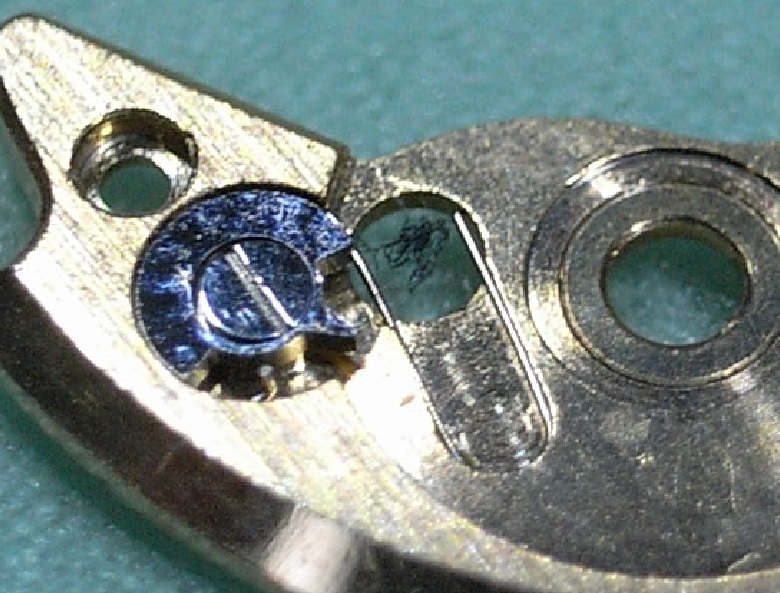
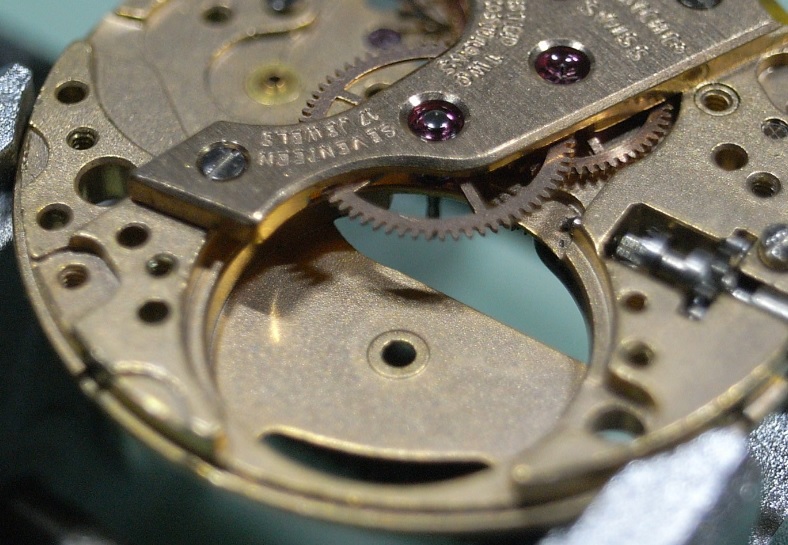
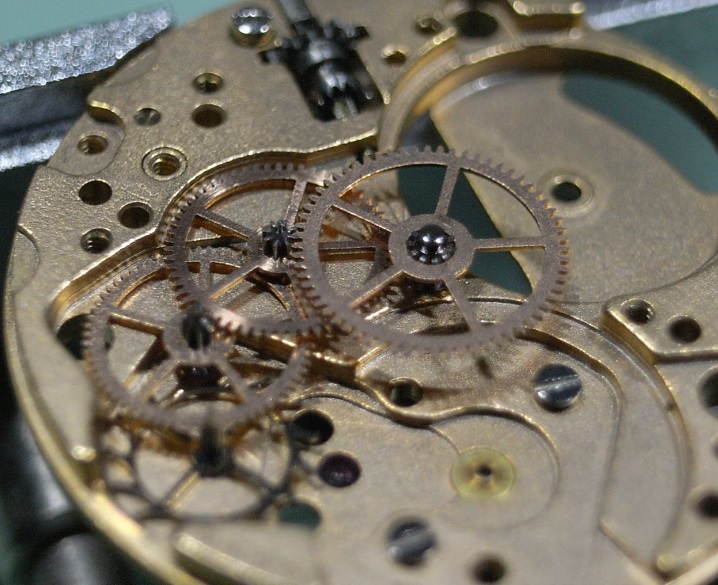
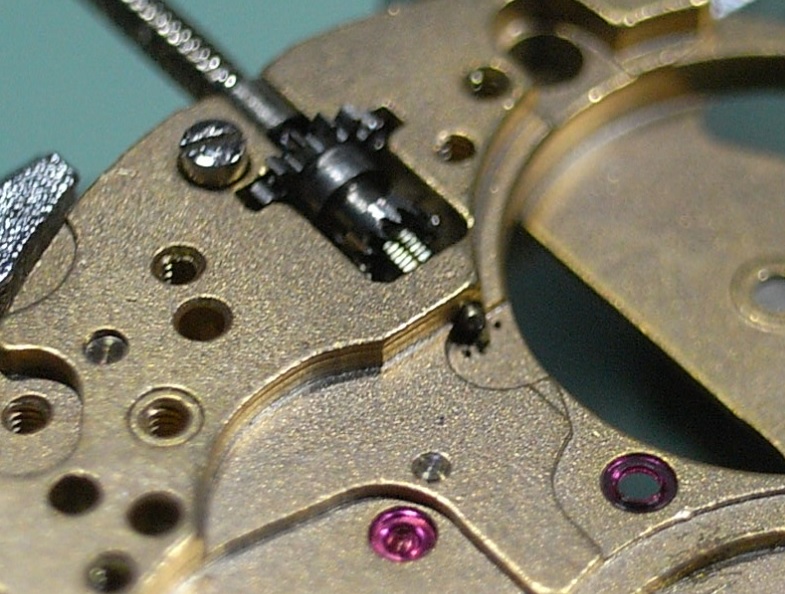
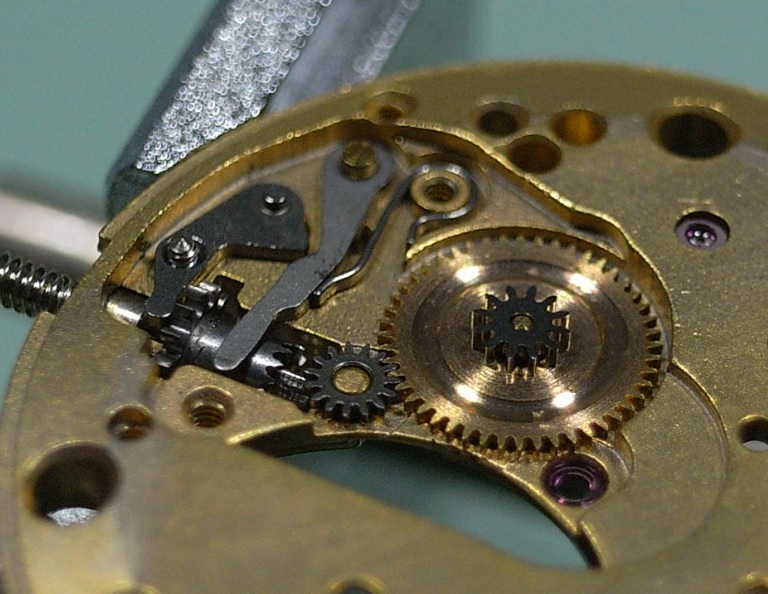
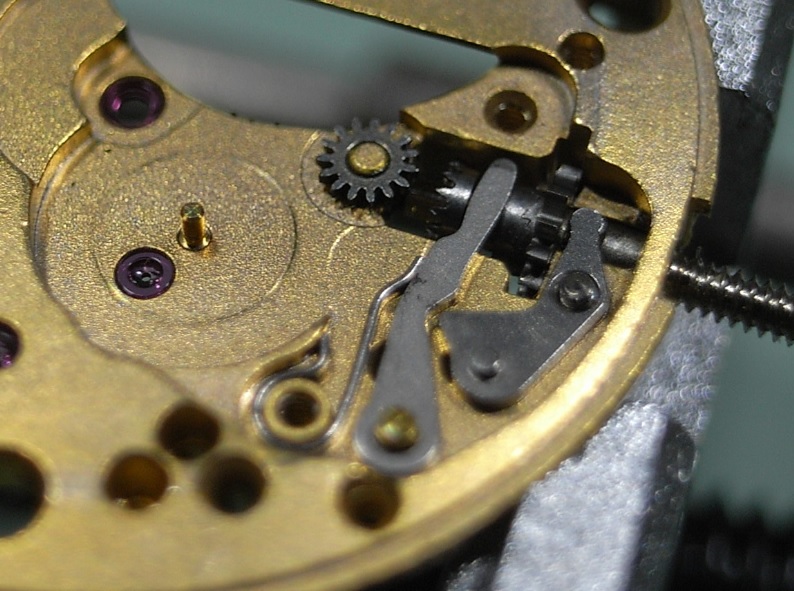
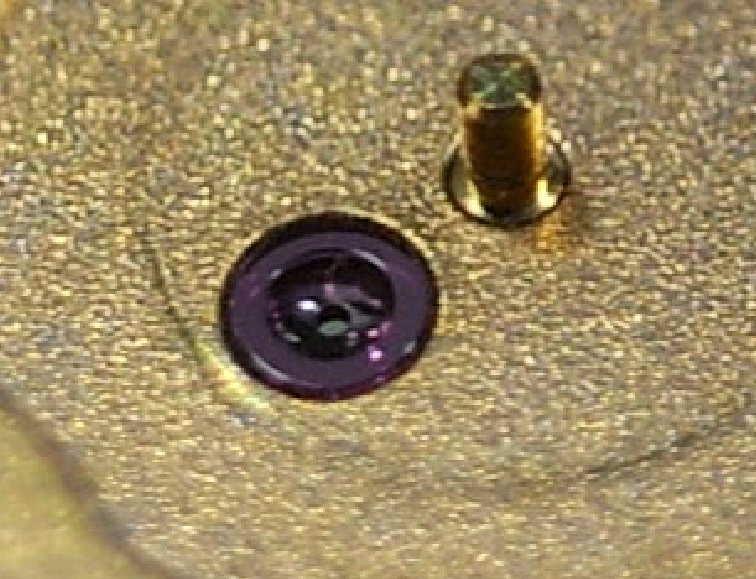
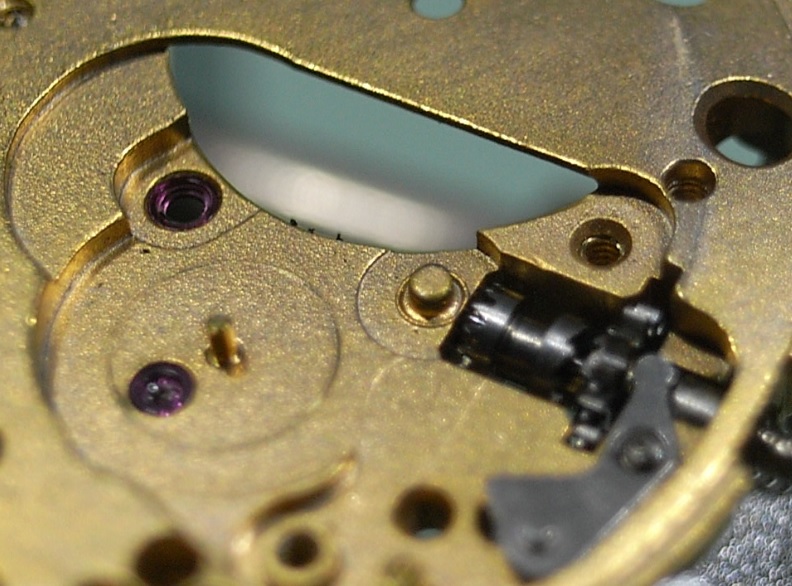
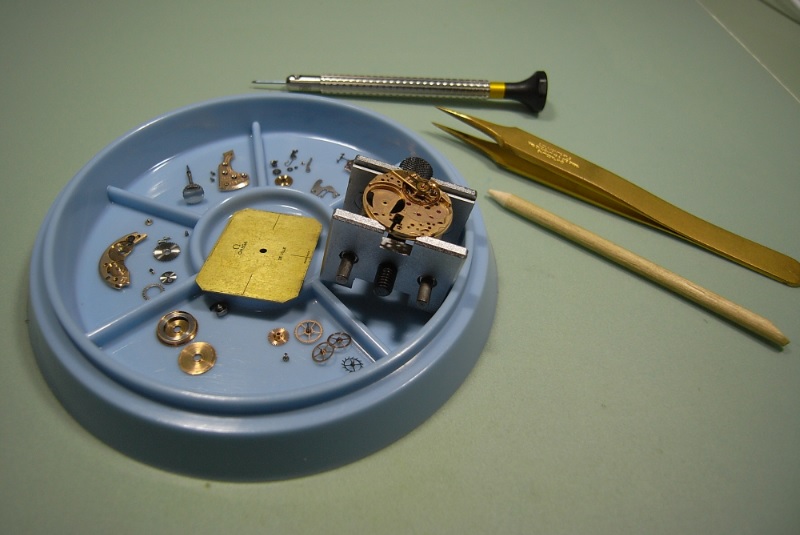
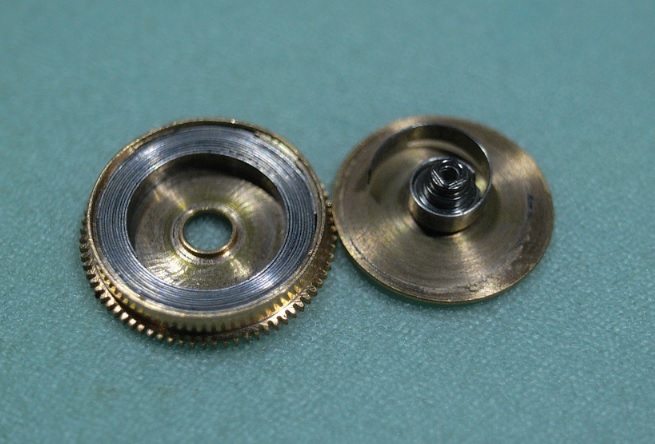
Before we remove the hands and dial from the movement, I wanted to clean the dirt that had built up around the edge of the dial. This has to be done with great caution and a gentle hand. Firstly get a piece of pegwood and a very sharp knife. With the knife, feather the end of the pegwood to create a fine bristled brush, and use that along with some Rodico to remove the dirt. Remember! Always err on the side of caution ... it's better to stop early, use the Rodico to clean away the loosened dirt, and check your progress; then to continue on for too long and damage the finish on the dial. Also, avoid the temptation to use cleaning fluids on a dial with a finish this old, as it will quickly remove the old varnish and destroy the patina. Slow, gentle, dry cleaning is the way to go. As you can see below I didn't remove all the dirt stains, and ceased when I was convinced continuing would only risk marking the dial. But the end result is still a much improved dial face with the patina in tacked. Disassembly 378_Omega 620 New.pdf Firstly lift the hands, and then remove the Dial. The Dial is held on with two screws around the side of the Main Plate. I was pleasantly surprised to find no corrosion whatsoever behind the Dial or on the face of the movement. I then removed the Hour Wheel. Once the Hour Wheel is removed, place the movement in a 4039 holder and removed the Balance. Check there is no power held in the Mainspring, and then remove the Pallets. I like doing this first before removing the Canon Pinion to avoid any possibility of damaging the Pallets. Now, turn the movement over and pull the Canon Pinion. With the Canon Pinion now removed, turn it back over to begin striping the train. Start by removing the Crown and Ratchet Wheels. Remove the Barrel Bridge. Unscrew the Click and remove the Click Spring. Note the fibres in-between the spring. As there is a suspected broken Mainspring in this movement I removed the Barrel it this stage, which can be done without any risk to the train. It also helps to access the wheels to check end-shake before removing the Train Bridge. Just as suspected the Mainspring is broken and will need to be replaced. Next remove the Train Bridge. Then remove the Wheels. As seen pictured at the end of the Stem, there was a serious lack of lubrication. Even the grease had completed dried out. Turn the movement over and remove the Setting Lever Spring. Followed by the Minute Wheel. Again the evidence of died out lubrication is seen in the jewel under the Minute Wheel. Next remove the Setting Wheel, Yoke and Yoke Spring. Unscrew the Setting Lever and pull the Crown, Stem, Winding Pinion and Clutch out. The Omega 620 Movement is now complete disassembled and ready to be cleaned. I hope you enjoyed this walkthrough, and it can serve to help.


 1 point
 -
Thanks Mark I've watched the first part. I wont say anything about the m/spring and barrel Look forward to watching part two.1 point
-
Rose gold is the name given to the colour it has a slightly reddish tint. The back should flip off you should be able to this with a case knife. It should have a glass as you can see it has a bezel and the original glass would be very thin and it would be glass and not one of those horrible plastic things. If you can open it there will be a serial number and you can look on the internet and find out the age. The broken back hinge is a sort of extra dust cap. A good jeweller that undertakes gold repairs should be able to fix that for you. If you don't have the equipment or knowledge of gold case repairs I would farm this case repair out.1 point
-
Could that be one of these snap on backs that are made to look like screw on? I ask the question because I would have expected your press to have easily dealt with it. Have a very close look at it with a loupe to see if there is a prise slot anywhere.1 point
-
Even though I can't find the activation fluid composition (yet) in this wealth of information, it is an extremely interesting source for plating and the rest ..... http://www.substech.com/dokuwiki/doku.php?id=anodizing1 point
-
I see you chose the right path in life;)1 point
-
On e-bay, look for a seller called 'Favinov.' He lists some Poljot spares, and you may find a link to other suppliers. Have had good service from this seller.1 point