Leaderboard


Popular Content
Showing content with the highest reputation on 02/08/18 in all areas
-
I'm on my way to become addicted to old chronos. Recently got my first calendar, a Wakman Jumbo. Looking forward to disassemble and service it.2 points
-
I mean this as kindly as possible, but I think your expectations are what need calibrating, not your timegrapher. A timegrapher result is only an indication anyway, it's not uncommon to find a mechanical watch, worn will keep noticeably (if only noticeable by a pedant whos measured the time loss/gain against a more accurate device) different time than a timegrapher suggests it should. I don't know anything about clocks, but I do know that as a mechanical timekeeping device, their timekeeping will never be perfect either, and a change in the temperature of the room (which presumably will always be changing during the day and season to season) the clock is in will affect its accuracy. There's a never-ending list of things you can learn in horology, perfect regulation isn't one of them, so my advice is to not get held up on it.2 points
-
Welcome to this friendly forum1 point
-
Welcome !!1 point
-
Because the owner hasn't set it to get time from mobile network, or from the Internet.1 point
-
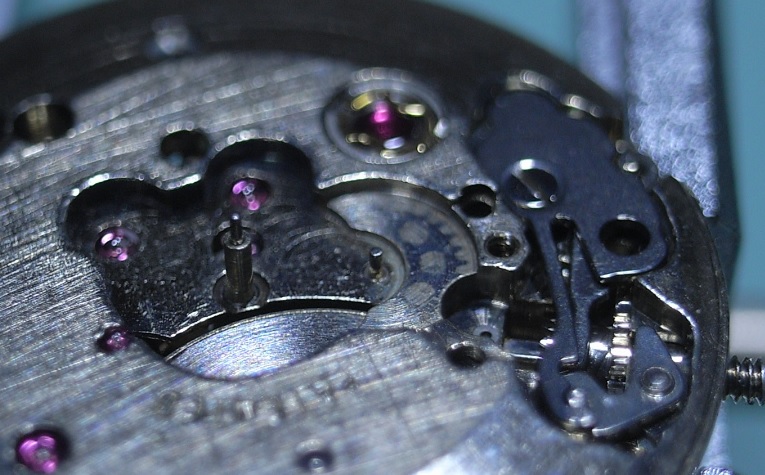
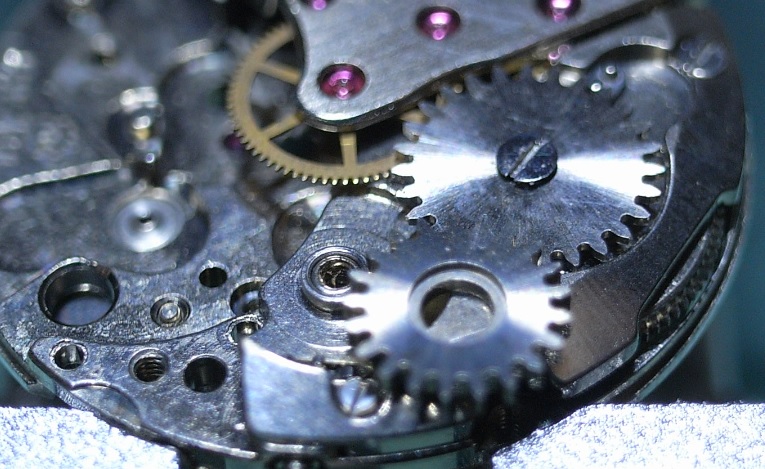
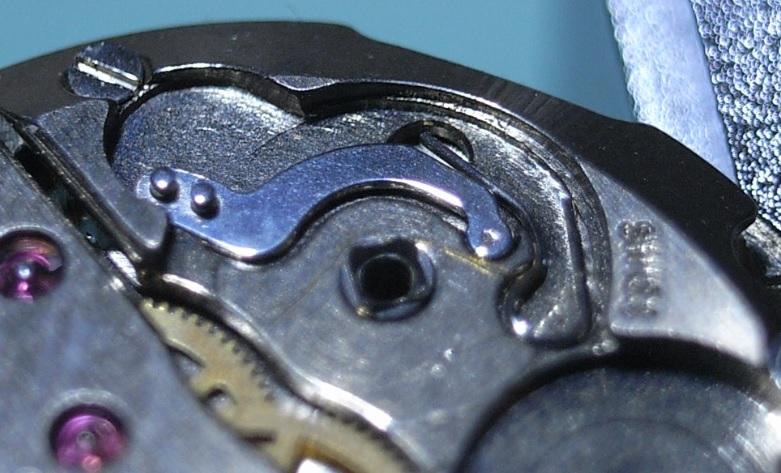
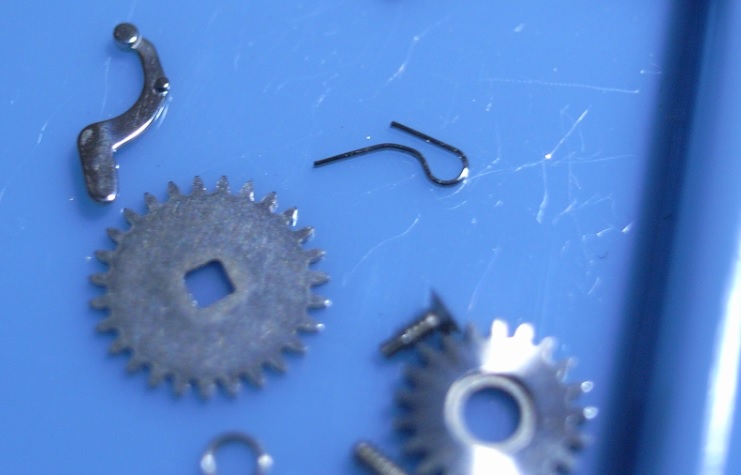
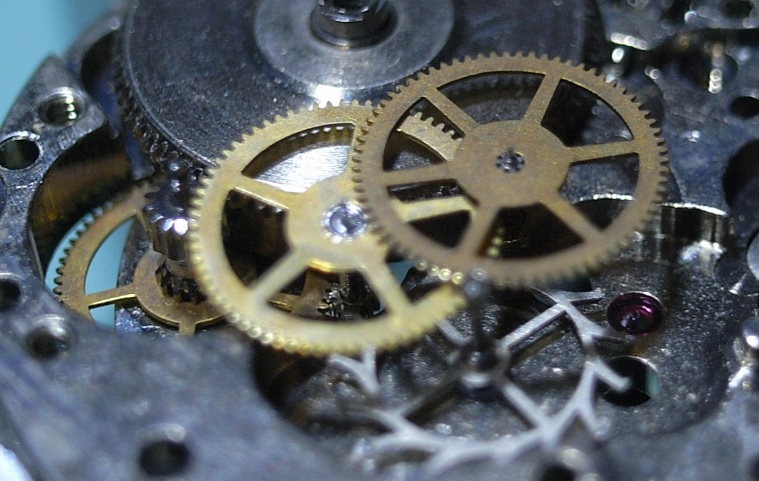
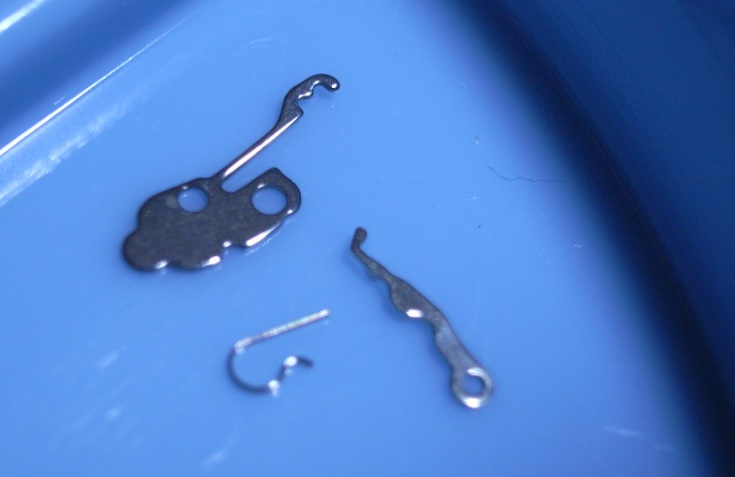
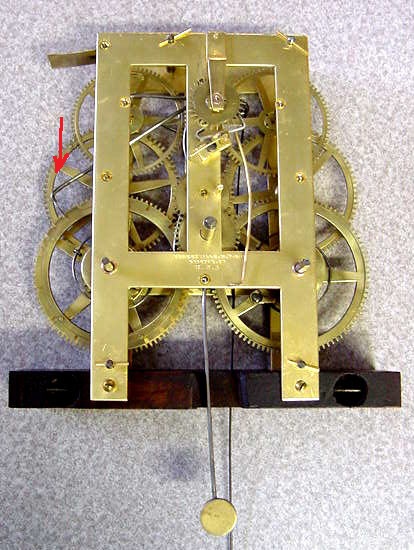
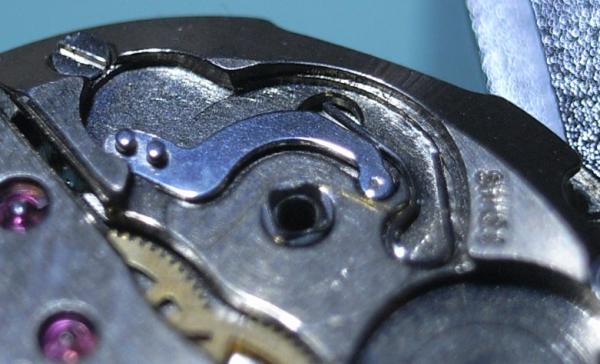
I’m going to use the same terms as show in the video so as not to confuse you. The worn stop lever (blue) needs to sit into the cam wheel slot, the green lever should lift from the counting wheel (make sure the green lever is free to lift out of the counting wheel. Make sure when the blue lever starts to rise so the green lever should also rise. When the count wheel moves from tooth to tooth the blue lever must be high enough to keep turning, only when the green lever falls in to the longer slots of the count wheel should the blue lever drop into the slot of the cam wheel. On the warning, the yellow worn pin should be at about 45 to 50 on a dial face. It should be at that position before the warning starts, make sure the hammer does not start to lift at that moment. This other photo, I have marked in red this wheel has a pin that that engages in the teeth of the count wheel which moves the count wheel forward. I hope I have not confused you. Keep me up to date. I am here to help. The strike on American clocks is not easy to understand, with it having so many levers.
 1 point
 -
I could not find a plate to attach my Pivot Polisher to my lathe cross slide, so i made one. Flattened the head of a brass screw to fit the slot then measures and drilled accurate holes. Cut the screw down and used a wing nut to tighten it down. Works perfectly and can be driven from a collet and wheel or from the rear pulleys . Sent from my iPhone using Tapatalk Pro1 point
-
Ok, this topic has probably been covered over and over, but I just got the biggest kick out of reading some of the MSDS (material safety data sheet) on popular watch cleaning solutions. One brand, I'm not going to mention names, has a cleaner advertised as "specially formulated" etc etc etc, then you look up the ingredients on the sheet and it's a fancy chemical name for Naptha, regular old naptha, and perfume (basically)...that's it...that's their "special" formula. There's another that a lot of people are probably familiar with, which contains mineral spirits, naptha, olive oil, ammonia and a little alcohol......period.....the "formula" leaves a little wiggle room for exact amounts of each ingredient, but basically it's 65% spirits, 20% naptha, 10% olive oil (ok, oleic acid, but essentially the same thing), and <5% ammonia/alcohol......and as we all know, none of these "special formulas" sell on the cheap, they're in the range of $50/gallon! I'm currently using the above formula (minus the ammonia) in my cleaner and I get excellent results, and it cost me about $15 I guess I'm just kind of venting, and I'm not knocking the companies for making good products. It just seems a "bit" excessive price-wise for basically over the counter ingredients. Oh, and hair-spring cleaners? Carbon tet, (carbon tetrochloride) otherwise known as engine degreaser! Even some brake cleaning fluids are carbon tet, so save some bucks and go to NAPA! (just kidding......or am I?)1 point
-
One note on those blue demagnetizers, dont just set the movement on them and push the button, that will actually magnetize your part. Hold the object above the unit, press the button and slowly draw it away with a slight twisting motion, repeat a few times and you should be good to go.1 point
-
I thought I would post this vid. It is a vid promoting Seiko but it is also excellent in showing how a mechanical watch works. Well worth watching.1 point
-
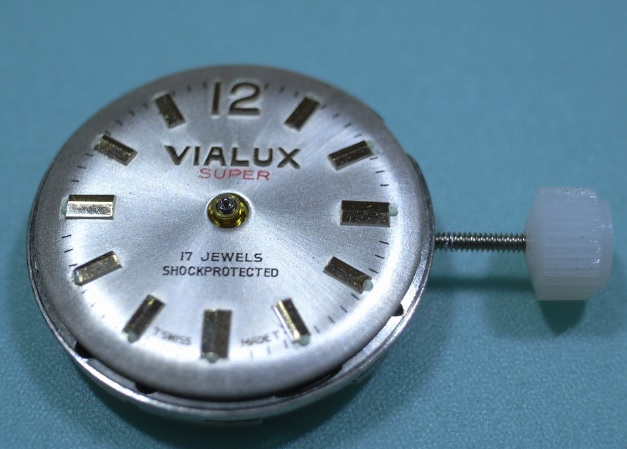
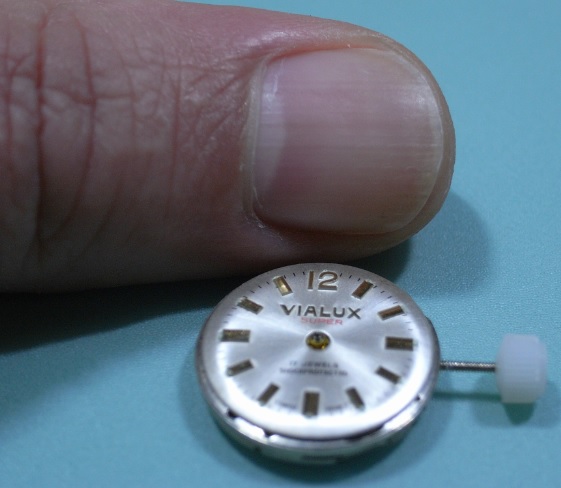
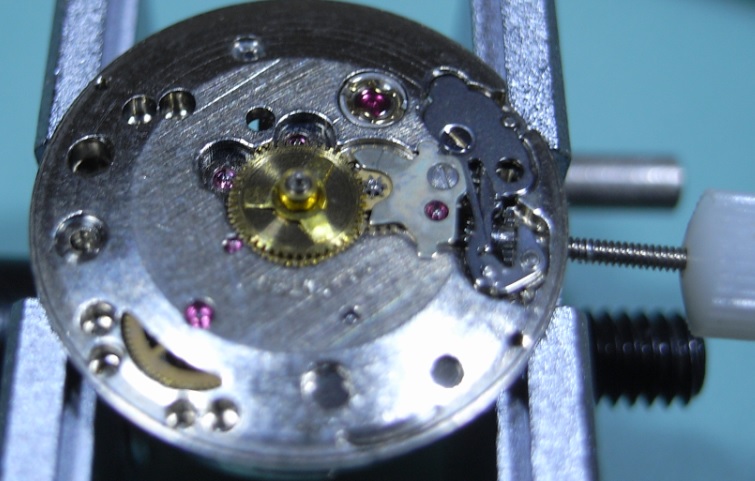
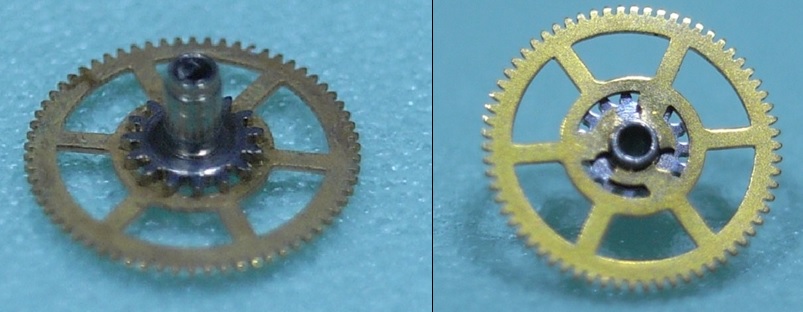
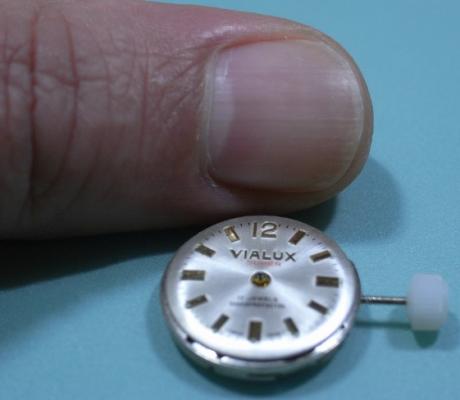
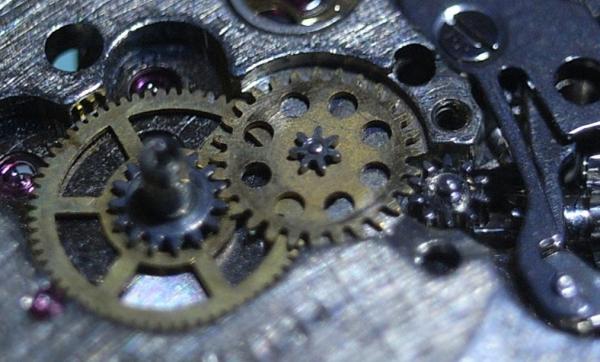
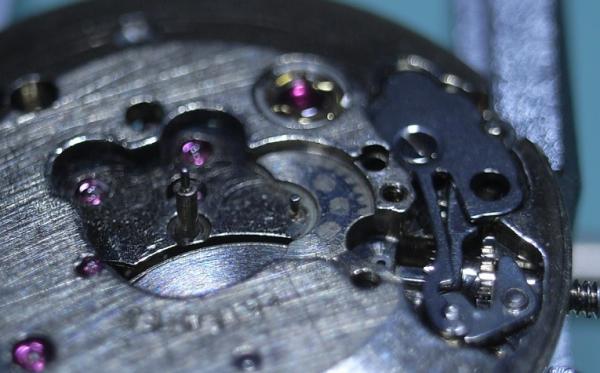
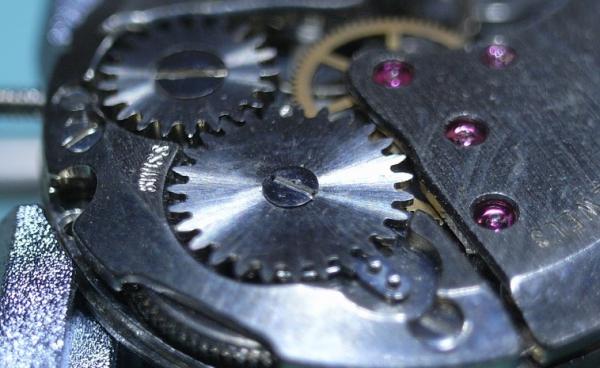
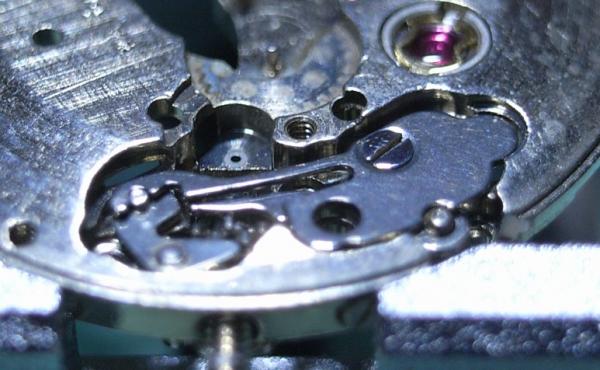
ETA Caliber 2540 Complete Service Walkthrough Looking for more movements that would expand my training scope. I found this one on the Fleabay: an ETA 2540. It's a "New Old Stock (NOS)" replacement movement, therefore it's not cased, and came with no hands. As there are many ladies watches, especially vintage ones, that are very small, this was my next obvious choice of movement to work on. As you can see next to my thumb nail, it's quite a small and compact movement indeed. Disassembly First remove the Hour Wheel, and leave the tension spring in place. Remove the Minute Wheel, Canon Pinion with Drive Wheel, and the Winding Pinion. The Canon Pinion on this movement isn't the standard fiction fit, it is a "Circlip" type fitting with the Driving Wheel. Therefore no pinion puller is required on this movement. Below is a reference photo. The motion work is now removed, so it's time to turn the movement over. With the Movement turned over, release all tension from the Mainspring. Remove the Balance. Remove the Pallet Cock and Fork. Remove the Crown Wheel and Ratchet. Remove the Click and Click Spring, then the Barrel Bridge. Here is a reference Photo of the Click Spring. Remove the Train Bridge. Remove the Second Wheel, Third Wheel, Intermediate Wheel, Escape Wheel and lastly the Barrel. Finally turn the movement back over, and complete the disassembly by removing the Keyless Work. Remove the Setting Lever Spring. Remove the Yoke Spring and then the Yoke. Then remove the flip the movement over and unscrew the Setting Lever Screw. Pull the Stem out and the Clutch Wheel and Winding Pinion will fall out. Here is a reference photo of the Yoke Spring. Disassembly is now complete.


 1 point