Leaderboard


Popular Content
Showing content with the highest reputation on 03/03/16 in all areas
-
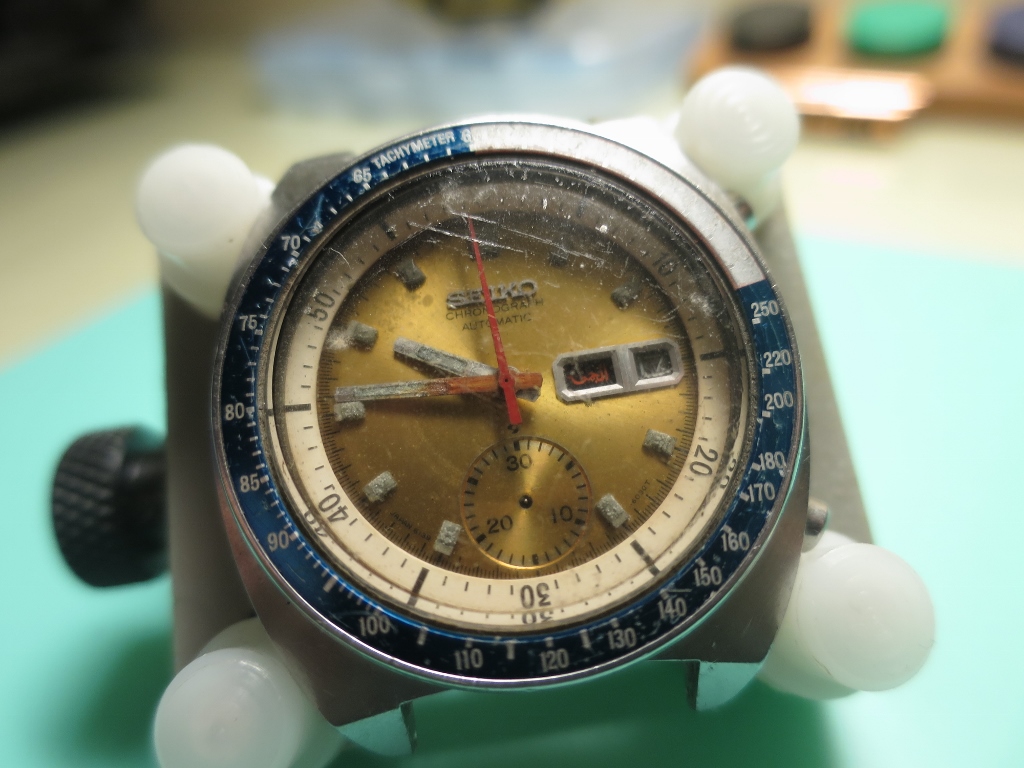
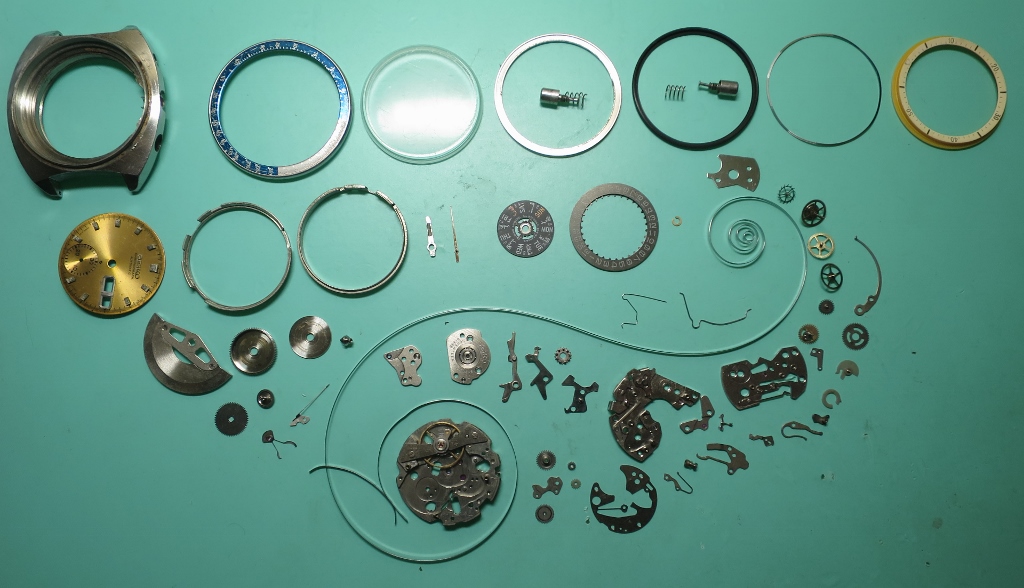
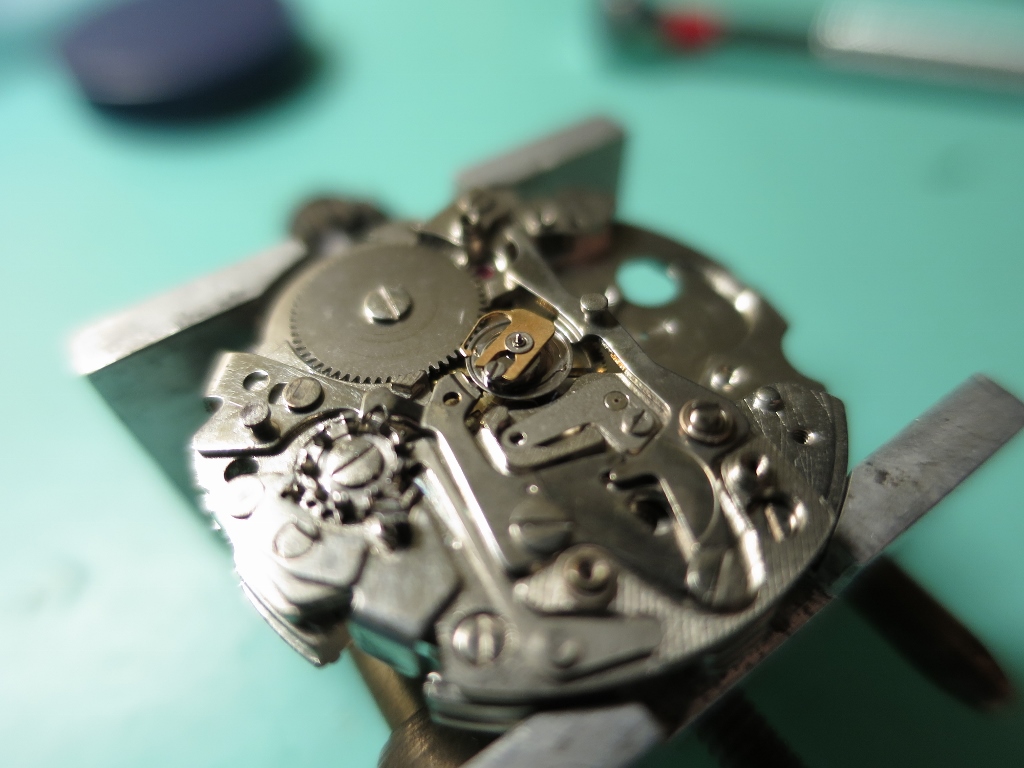
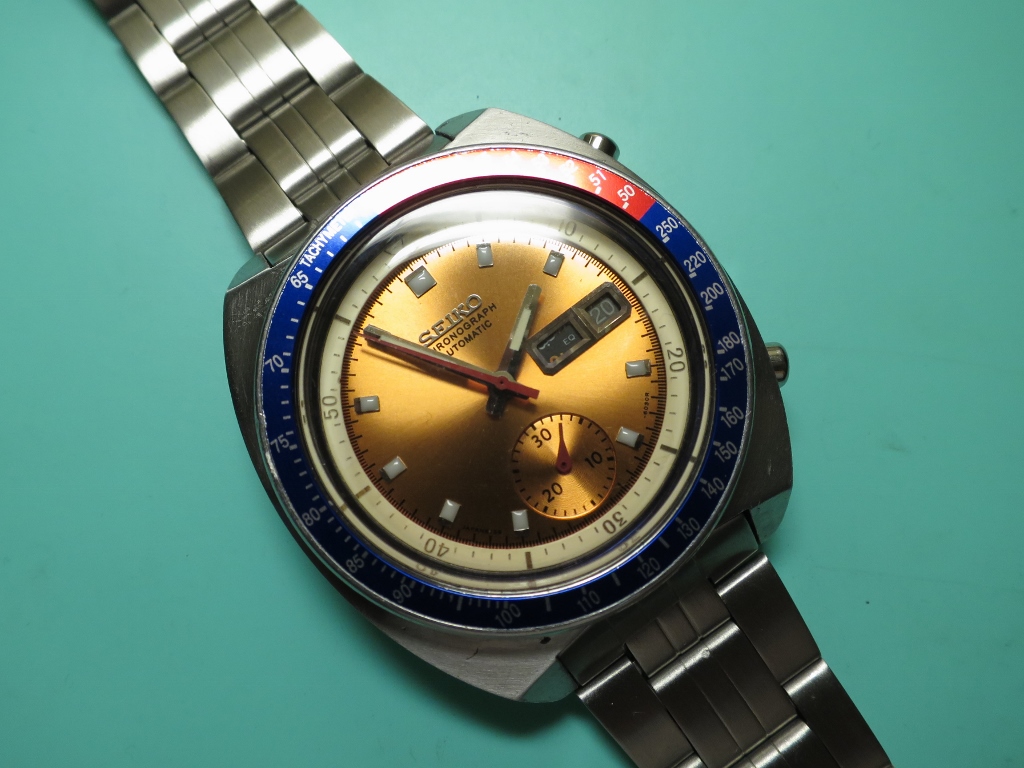
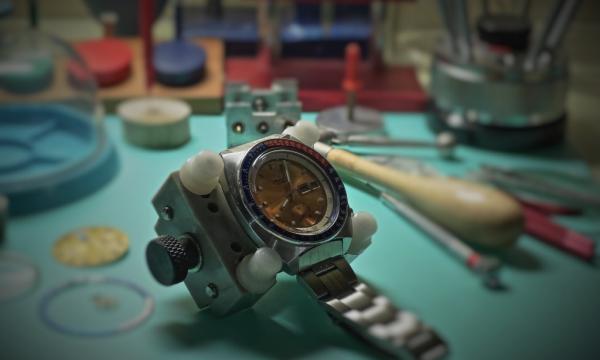
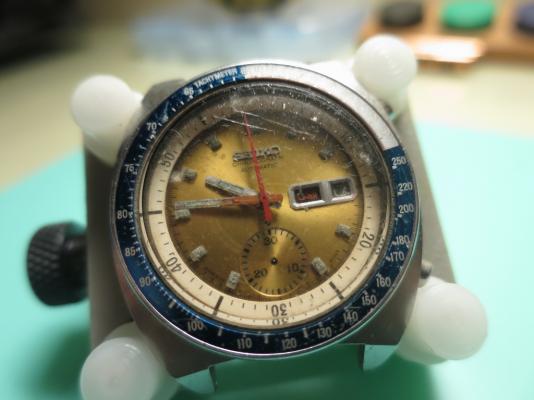
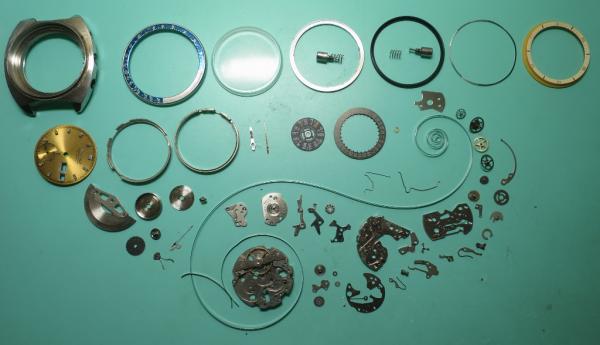
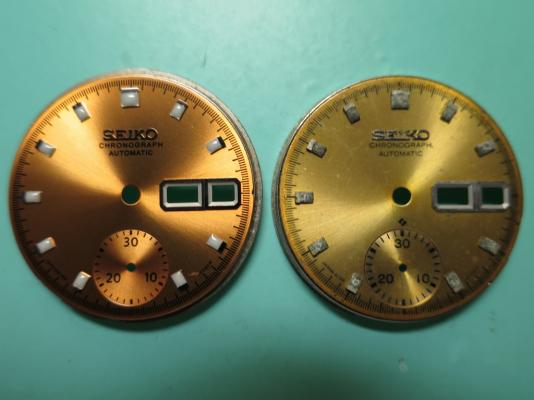
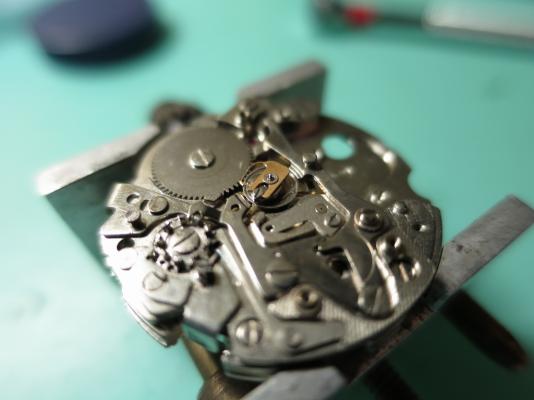
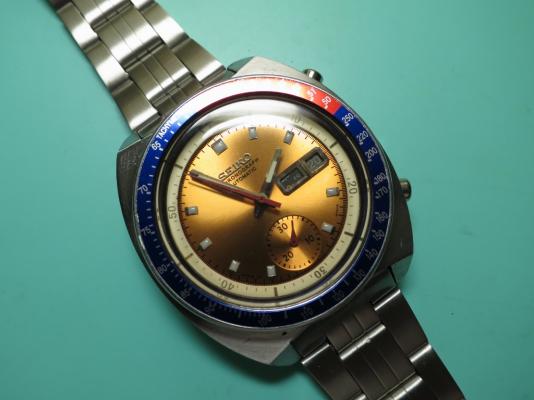
I got this Seiko 6139-6002 for pennies on the dollar albeit it was not working, in poor physical condition and with missing and damaged parts. I used after-market parts to “restore” this watch to a portion of its lost glory. This will go down as one of my favorite repair and restoration projects.
 1 point
 -
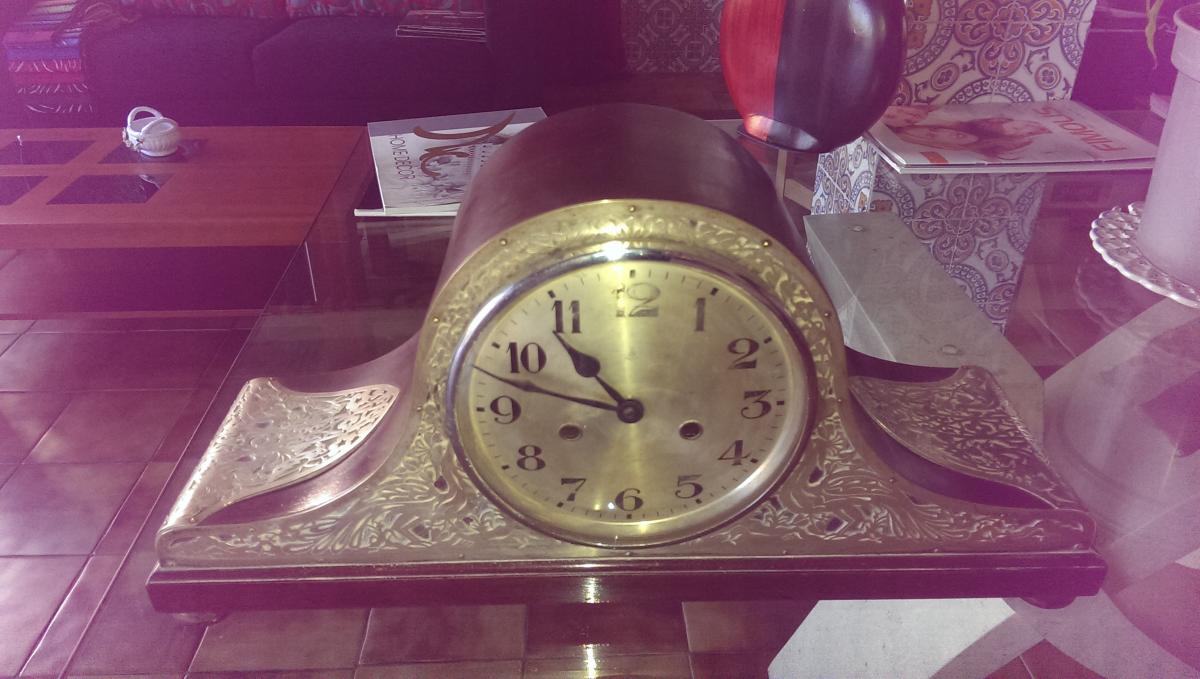
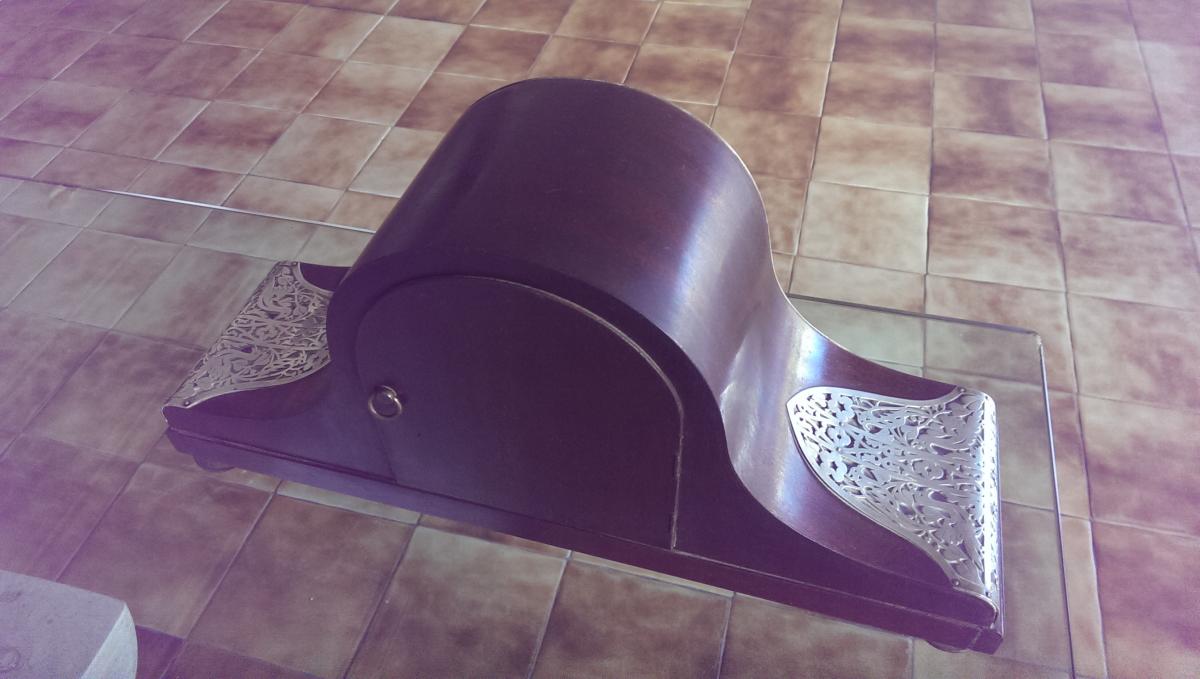
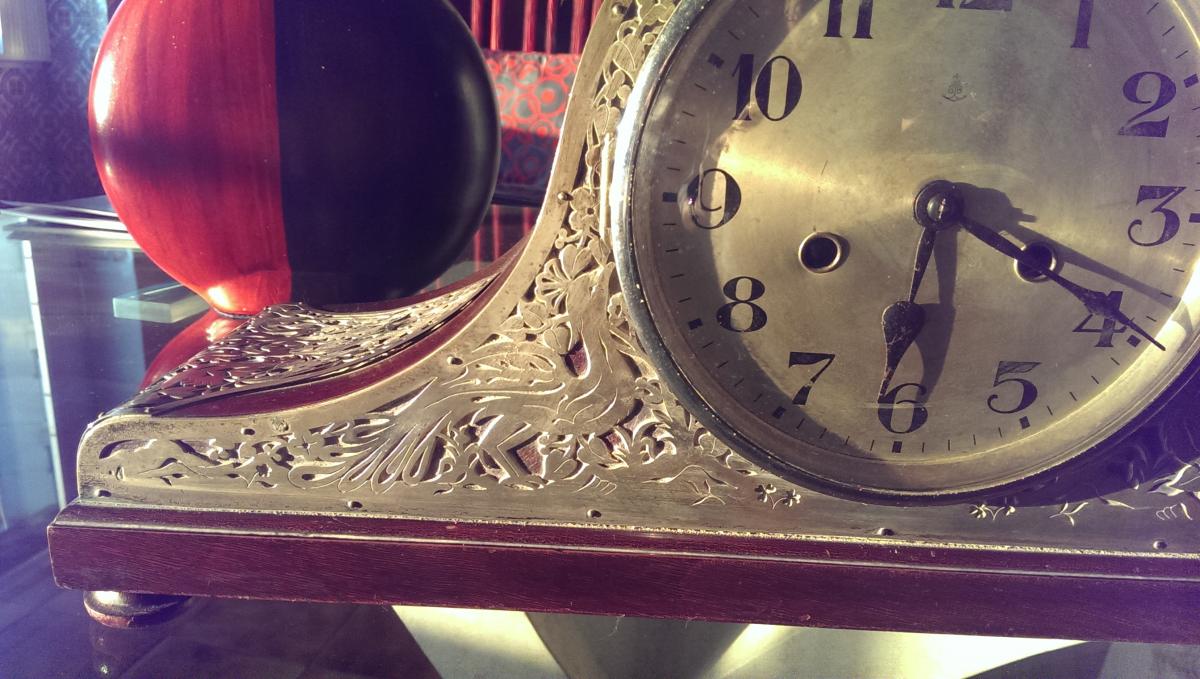
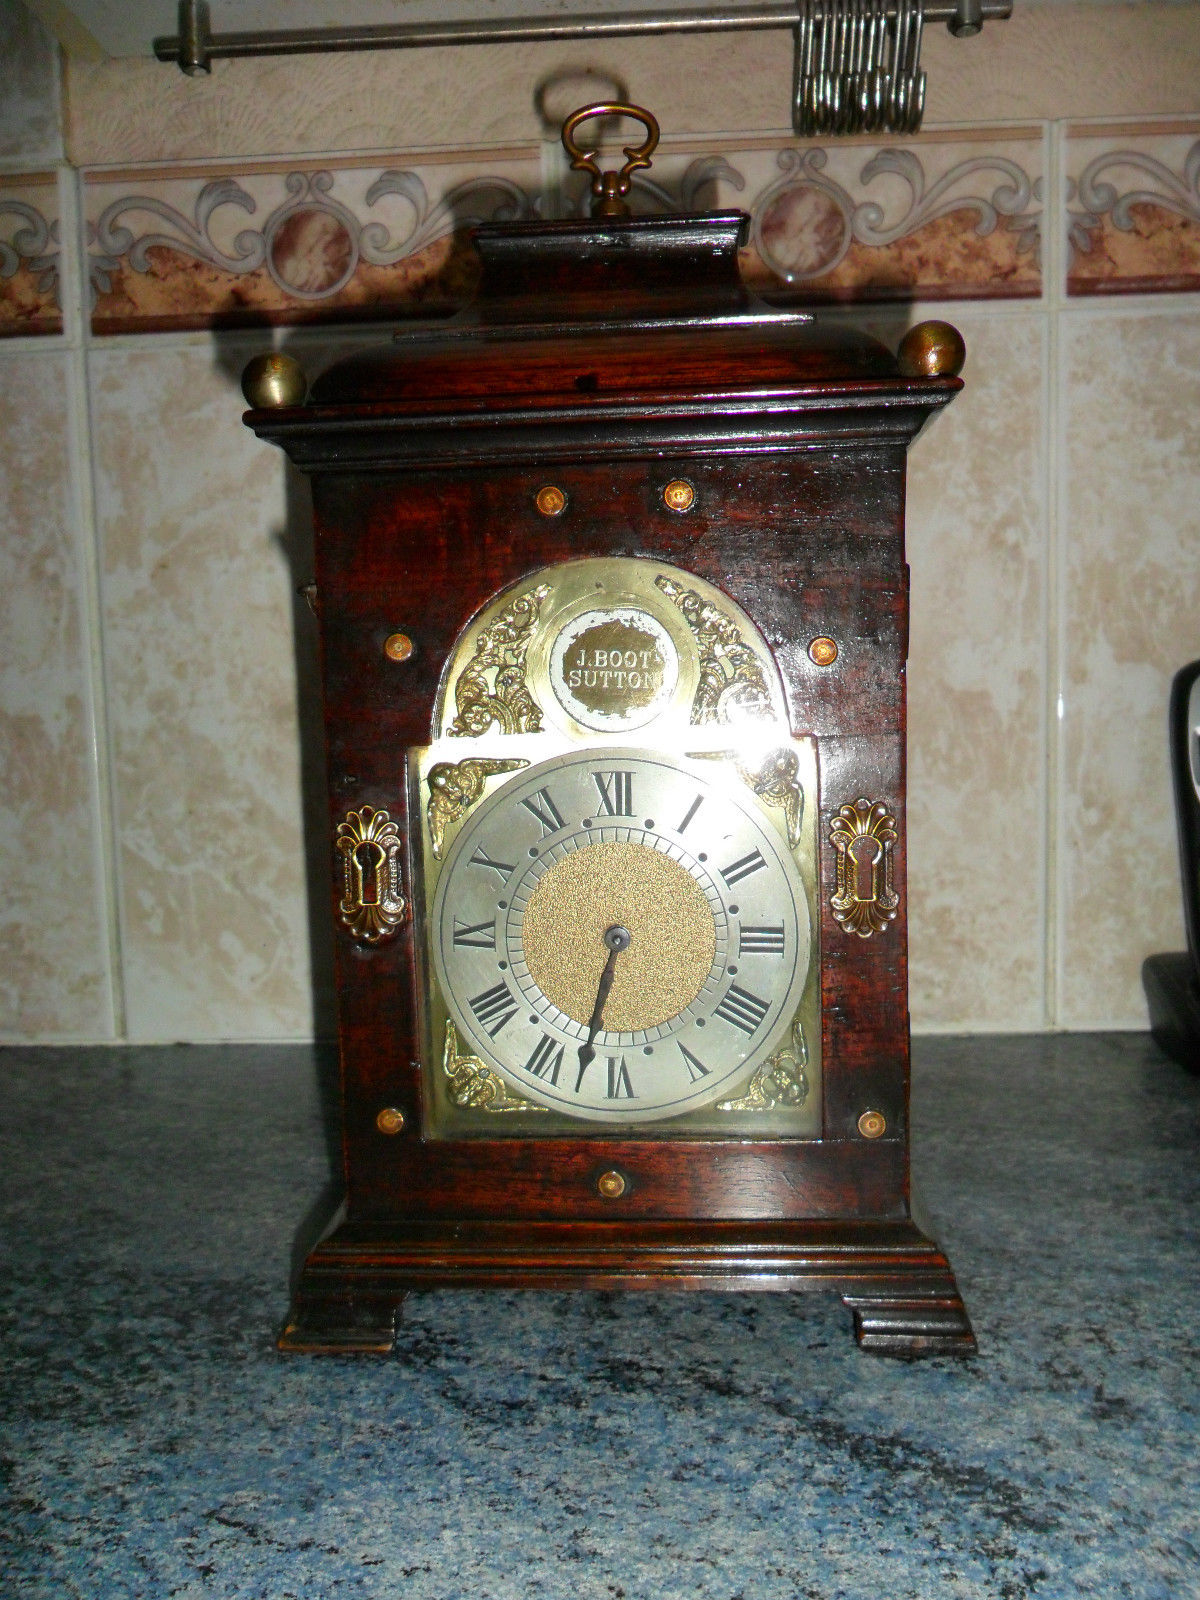
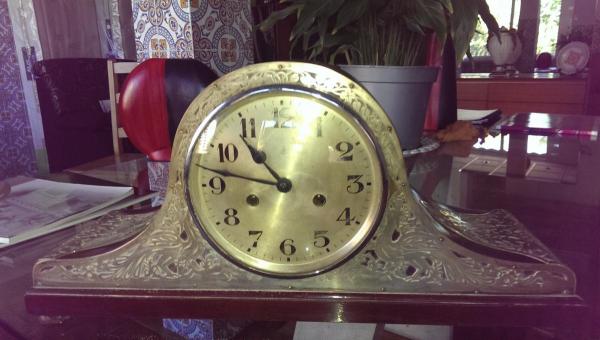
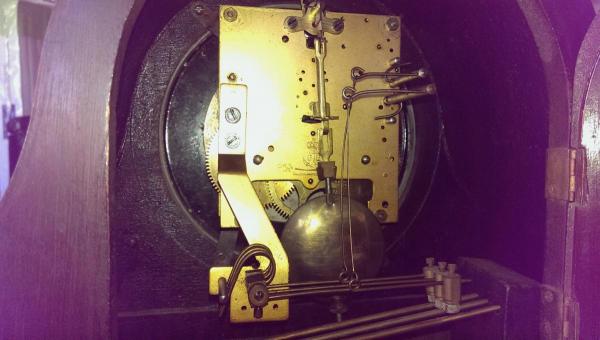
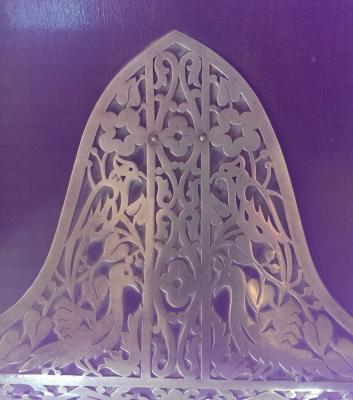
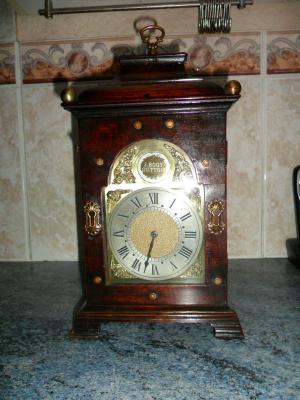
A friend of mine asked me some information about a clock he has inherited. As I don´t know anything about clocks I took some photos and said him I'll put them in the forum asking for some information from the experts on the subject. Nevertheless I did some investigation, and now I know it is a Gustav Becker, but noting more. In the movement back plate, besides the GB symbol I just see a P14 and I didn´t see any serial number. The clock as you can see from the photos, (sorry for the poor quality), has a nice wooden case with beautiful silver ( I think! ) ornament, of which you can see some details. The clock is working perfectly, with a nice sound when passing hours and half-hours. I would like to have some more information about posssible manufacturing year, quality of the movement and its rarity (or not!). Thanks!


 1 point
 -
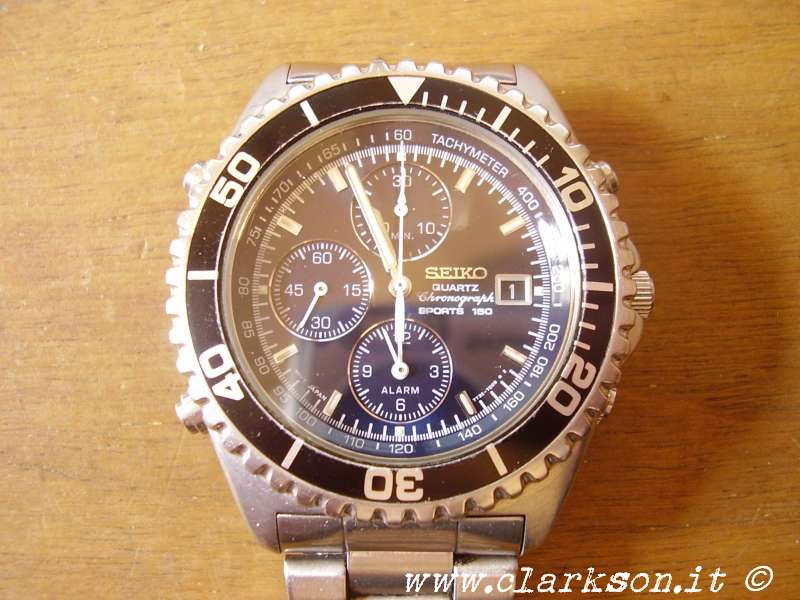
Today I finished working on this Seiko 7T32-7C20 and wore it with pride...
 1 point
 -
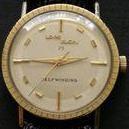
Pocket watch movement or ordinary handwind movement? It will make that so much easier with a picture or what movement it is? If i look at Patria 15 jewels. 921918 is probably some kind of serialnumber?1 point
-
hello jdrichard, Here is a pic of what I got, The advice from George is as always sound and he advised me the same thing which I copied - I "borrow" one of my wifes crafting jewel pickers that she used in her cardmaking. Cheers, Vic
 1 point
 -
JD, you have to place the hands onto the pivots. The tool is only used to press the hand on, it does not hold them. The tool allows this to be done with a delicate touch and accuracy. I use a jewel picker upper to pick up the hands without the fear of scratching them with tweezers. This is a tool with a tacky gel tip. Have a read of this thread for information on the picker upper. http://www.watchrepairtalk.com/topic/1385-best-way-to-pick-up-jewels/?hl=%2Bjewel+%2Bpicker+%2Bupper#entry131441 point
-
I had almost completed my first strip, clean, lube and reassembly. I was servicing one of my vostoks with a 2416b automatic movement. I got it almost totally reassembled. When I put the rotor back on I noticed it didn't turn quite as freely as it should and was rotating the stem as it wound. Which I'm pretty sure it shouldn't do. So I go to strip it down and find where the resistance was coming from. When I removed the auto winding bridge, the reduction wheel upper pivot was stuck in its jewel. Not thinking, I slid my tweezers in between the wheel and the bridge to try and pry it out of its jewel. Needless to say, I broke the pivot off in the jewel. I guess I found where the resistance was coming in. I guess I'll chock it up to a good learning experience. The worst part is that now I'll have to buy a new movement to replace this one. They aren't expensive at all really. But shipping from Russia (or the Ukraine) to the US takes ages. Which I guess will help instill a little more patience for the next time. Here are a couple shots of my "handy" work. Sorry for the quality, only had my cell phone camera available.1 point
-
Thanks Bob, I welcome all puns! will take one for a spin.1 point
-
We've all done that, so don't be to hard on yourself. You have done well in tackling such a task. We all learn by our mistakes. Those Russian watch movements aren't made using the best of metals.1 point
-
I'll second that!1 point
-
As the topic says a little fun. See if you can tell me what is wrong with this clock. A hint it isn't to do with the period of the clock.
 1 point
 -
If this is your first strip and clean I congratulate you. Most people would start out on a small alarm clock or a pocket watch sized movement. You have done extremely well and anybody can break a pivot so don't beat yourself up. Sent from my iPhone using Tapatalk1 point
-
my watch is a little wrong. but I still maintain it and adorn it. :D because it contain different sense to me1 point
-
I'm wondering if the dial washer has been left out during one of the repair. If it's missing it could allow the hand wheel assemblies to move vertically and possibly slip out of gear. Possibly replacing the 24 hour was required and fitted during the first repair, but without a dial washer problems similar to what you describe may happen.If your watchmaker really knew his stuff, he would know that there are no timing marks on any of the gears, as all the hours and minute hands would be fitted a 12.00 just as the date trips. After that everything is set from the crown in the normal manner. Another thing, there is no way the tension in the date jumper will go out during normal use, it would have had to be damaged during disassembly or reassembly. There is a very good chance there is an issue with the spring after he has messed about with it, which is a shame, as it wouldn't have been related to your initial problem.1 point
-
Timezone, for your own security I have taken the liberty of removing your name and address from the open post. I strongly advise that you only give this type of information via PM (Private Message).1 point
-
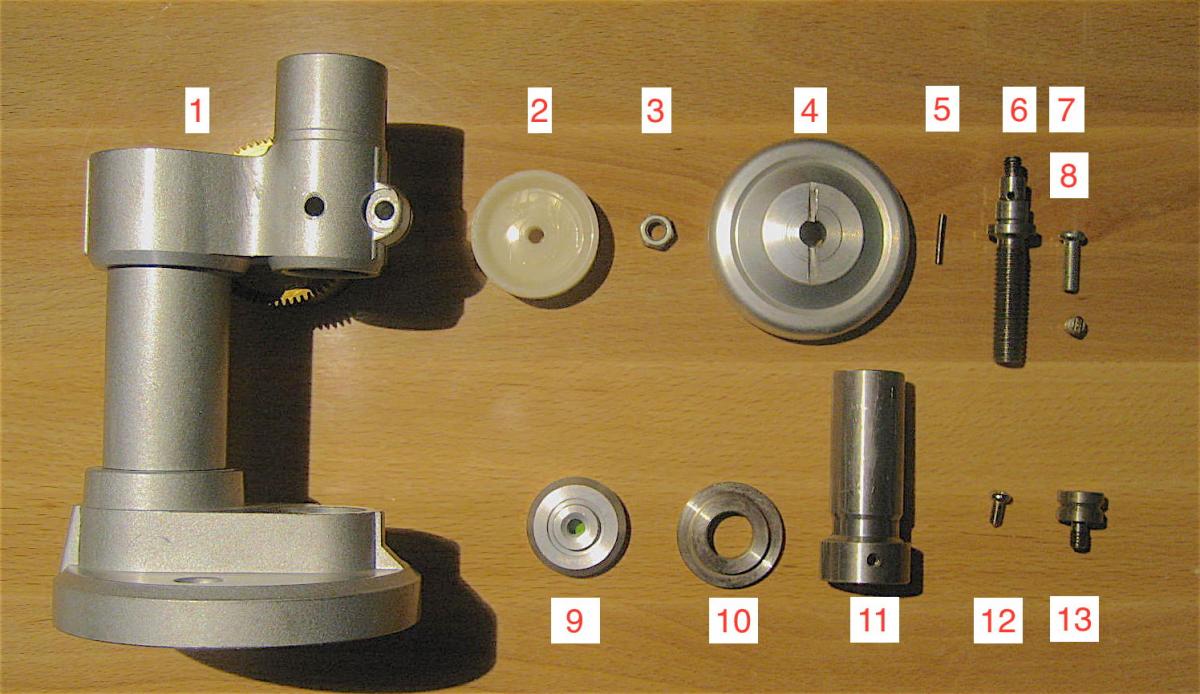
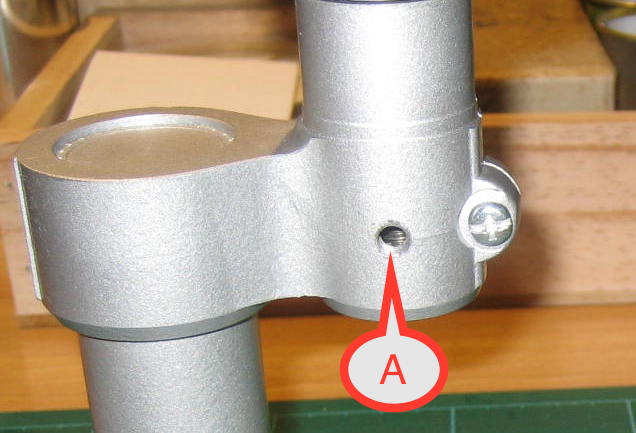
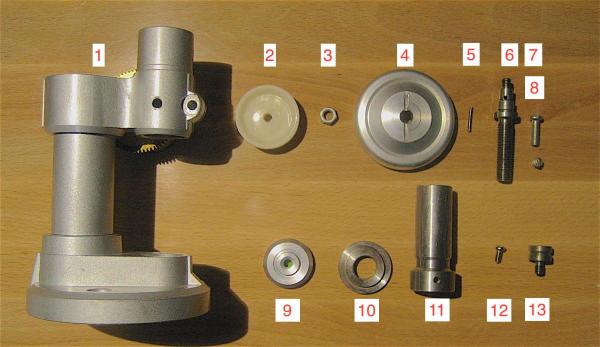
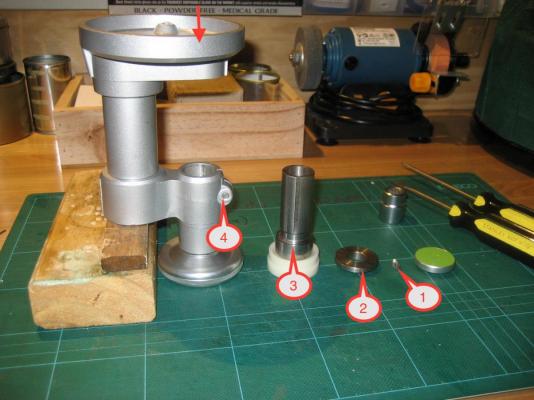
In case this helps, here's a breakdown by parts 1 - Press Body 2 - Top Die 3 - Wheel Nut 4 - Wheel 5 - Wheel Pin 6 - Piston Screw 7 - Piston Tension Screw 8 - Piston Groove Screw 9 - Bottom Die 10 - Die Platform 11 - Piston 12 - Piston Die Holder Screw 13 - Piston Die Holder
 1 point
 -
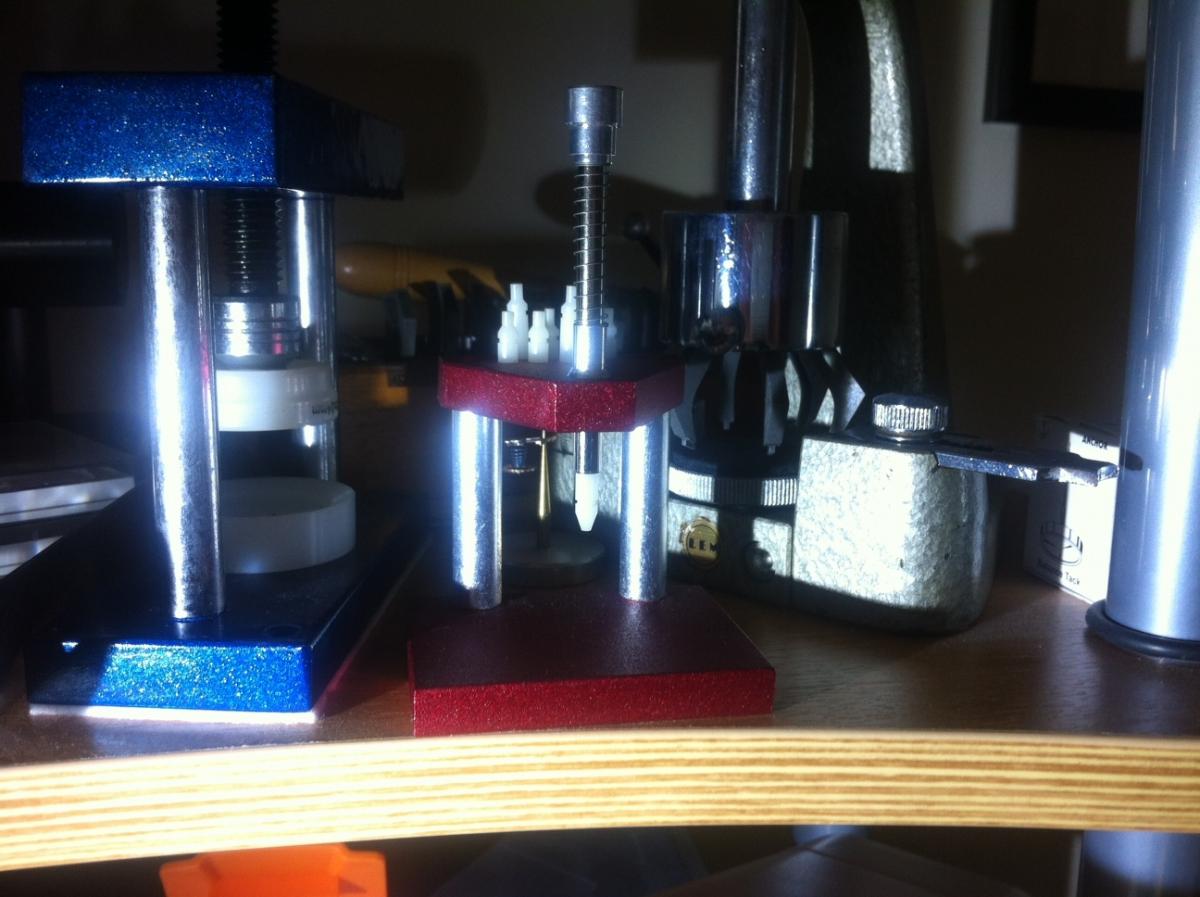
OK, it's quite easy. First - DO NOT try to undo the screw marked A, it's tongued to fit the groove in the piston (mine shown removed after disassembly). Remove the dies from the piston and the base (white and green items in the pic below). Invert the press and support the platform over the edge of a bench or similar. Use a brass drift, dowel or other suitable tool to drive item No 2 down in the direction of the red arrow and remove it. Turn the press to upright and screw the piston (No 3) down until it disengages from the screw, you can then jiggle it out of the press. You can then remove the groove screw and any other parts you wish to clean and lubricate. Assembly is just the reverse, the base die holder can be pressed in last of all. Screw No 4 is used to tighten the cylinder to keep the piston nice and centred, just tighten it enough to remove any side play. Now that I have mine apart I'll give it a clean and lubricate :lol: Hope this helps. Cheers Jim.

 1 point