Leaderboard


Popular Content
Showing content with the highest reputation on 01/24/16 in all areas
-
You should be able to buy a block of French chalk and what is called a chalk brush. You brush the chalk across the brush then brush the brass part, you do not need to brush the part hard, just a little light brush is all that's needed. I would then use my blower and blow away any access. It must be French chalk, no other will do.2 points
-
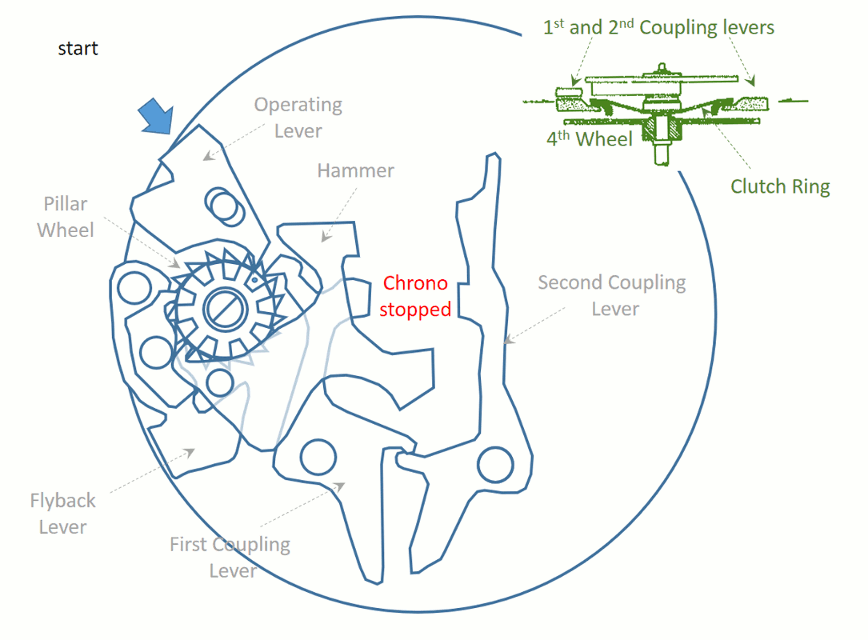
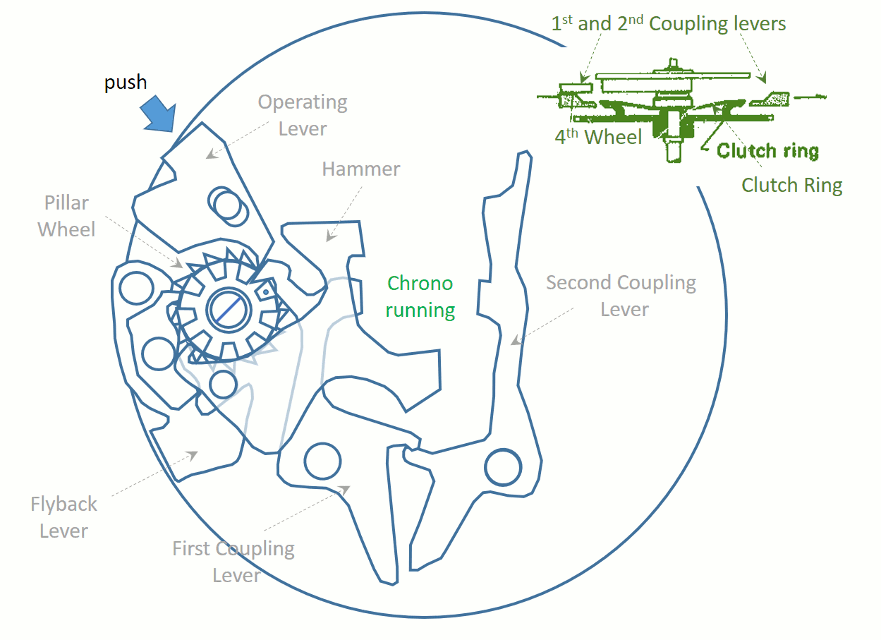
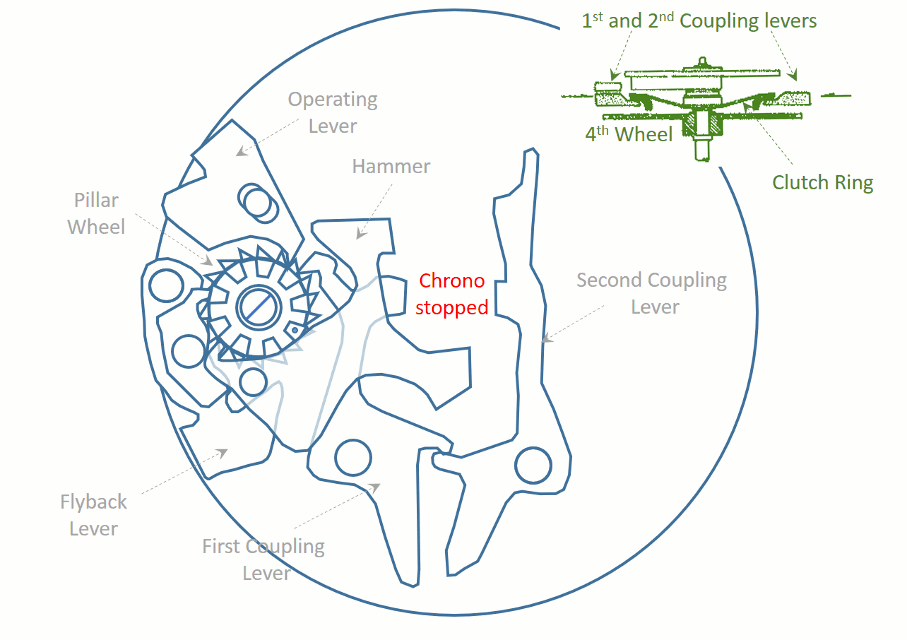
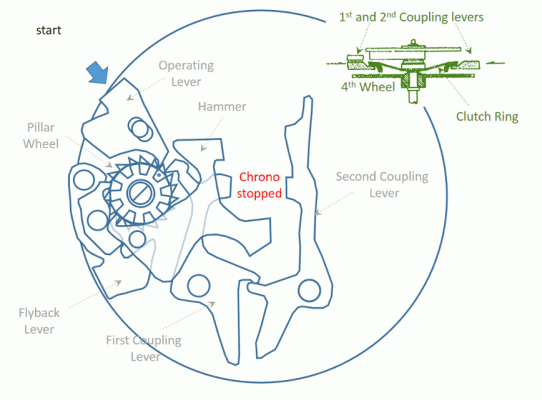
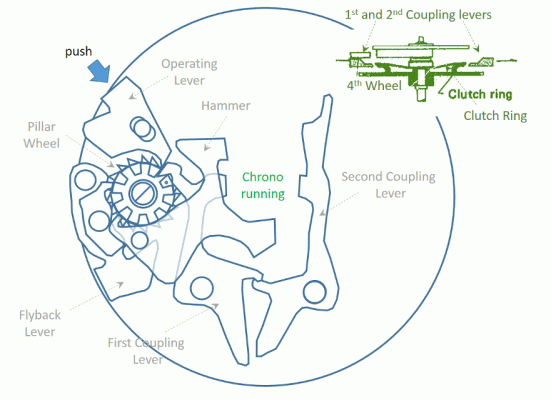
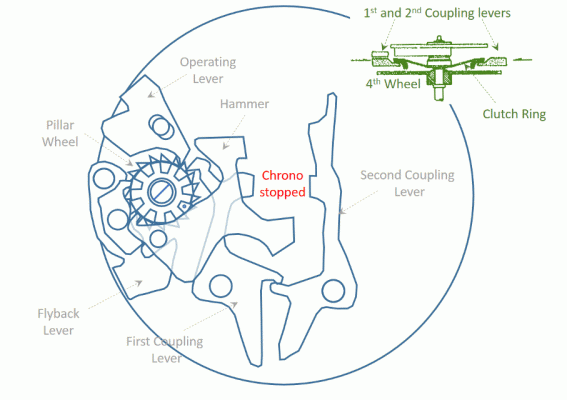
I believe that the best way to assemble and fix a movement is to first understand how everything about it works. So I made some animations to help in understanding how the chronograph assembly works. The Seiko 6139 features a column wheel and a vertical clutch. The chronograph second engages and engages with the 4th wheel via a clutch spring. The clutch is controlled by the first and second coupling levers. See how pressing the operating lever rotates the column wheel, which in turn, controls the coupling levers. While the chronograph is running, pressing the flyback lever will have no effect. But when the chrono is stopped, pressing the flyback lever will activate the hammer, which in turn, resets the chronograph second wheel and the minute recorder wheel. I hope these animations were helpful.
 2 points
 -
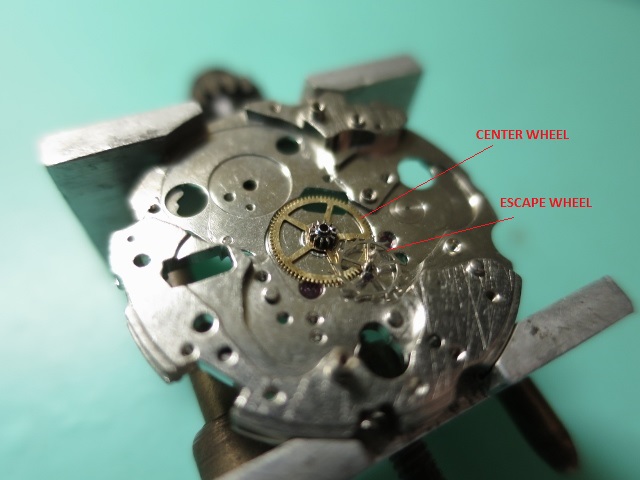
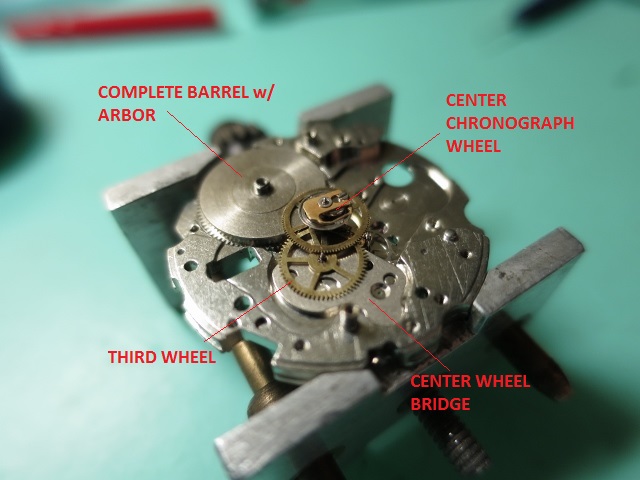
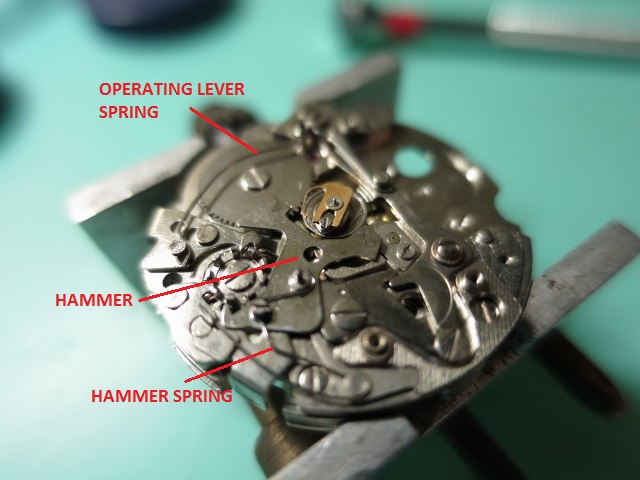
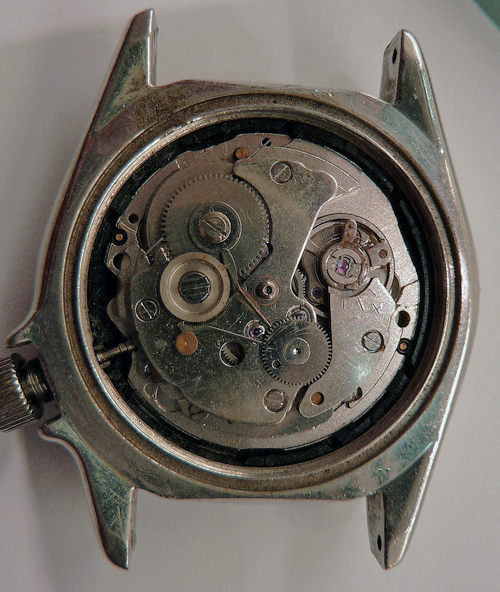
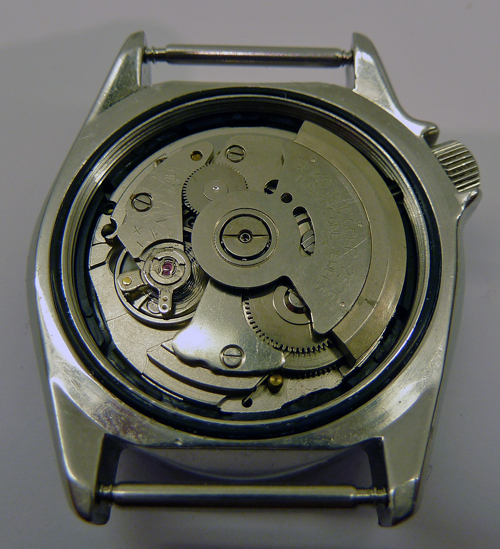
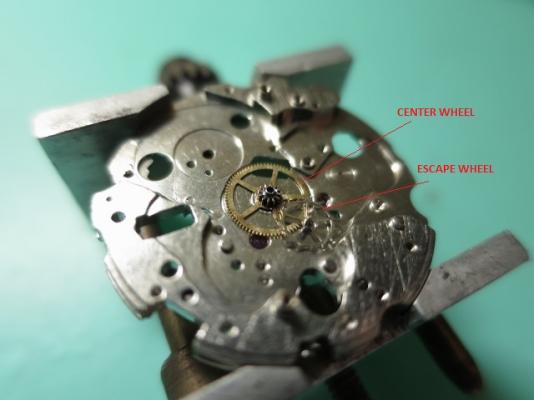
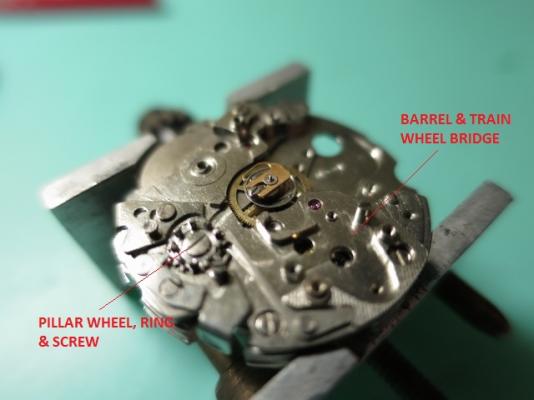
Good day,everyone! Finally had some time to update this post. I will now describe how I assembled the movement. But first, let me refer you to some documents that helped with the the service. Of course, the 6139 service manual: http://www.thewatchsite.com/files/Seiko%20Technical%20Manuals/6138A.pdf That document is for the 6139A. The movement I serviced is actually the 6139B: http://thewatchsite.com/files/Seiko%20Technical%20Manuals/6138B.pdf There are minor differences between the A and B variant but the 6139A service guide will do. I find Polly's Seiko Calibre 6139 Amateurs Guide: http://www.thewatchsite.com/39-watchmaking-tinkering-reference-materials-how-s/43929-seiko-calibre-6139-amateurs-guide.html I started the assembly my installing the center wheel and the escape wheel onto the main plate. ...followed by mounting the barrel assembly, the center wheel bridge, the third wheel and the chronograph wheel. The pillar wheel is then installed onto the barrel and train wheel bridge. Then I installed the assembled bridge. In my case, it helps not to install the pallet fork or the click wheel first. Freely rotating wheels help in aligning the pivots to their respective jewels. I then lubricated the pivots with Moebius 9010. Once the third wheel and escape wheel pivots are lubricated, i then installed the intermediate minute wheel recorder holder. After which I installed the coupling levers. I also installed the ratchet wheel. Next, I installed the hammer and the springs. ...to be continued.


 2 points
 -
When it comes to cleaning these clocks I always used Brasso and a soft polishing brush and an old piece of cloth. All brass parts would be polished with the brasso then washed out in petrol, dried in sawdust and then chalked. The platform all the brass cleaned with brasso and washed in the same way, then dried, all the parts would be put into a watch cleaning basket and put through the cleaner. All the screws would be polished with small needle files buffed with different emery sticks until highly polished and then blued. The only screw not blued is the one that is adjusted for the depth to the contrite wheel. The reason I used French chalk is it stops tarnish, it is a very old method. The cleaning and polishing would be the same for the case, then finished by lacquering.2 points
-
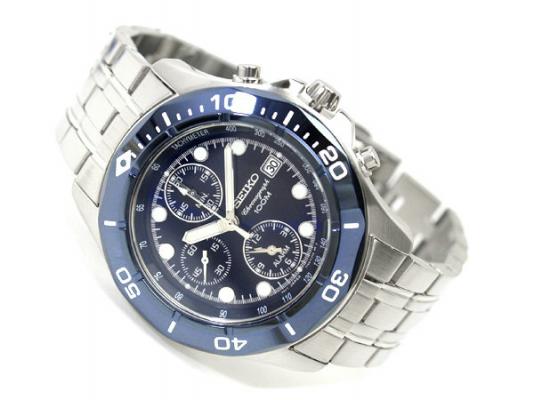
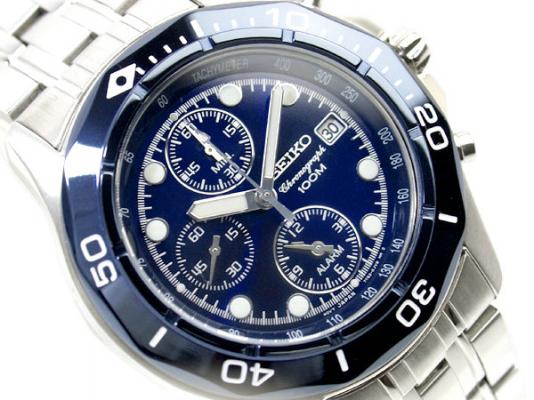
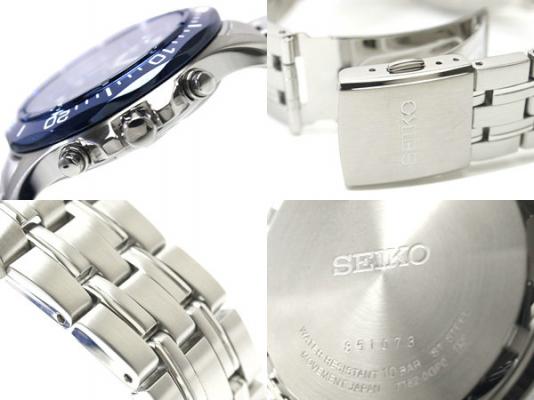
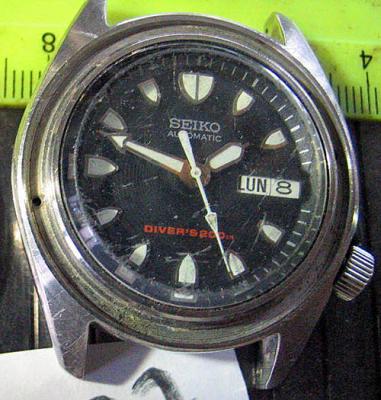
Seiko SNA793 BNIB (NOS)
 1 point
 -
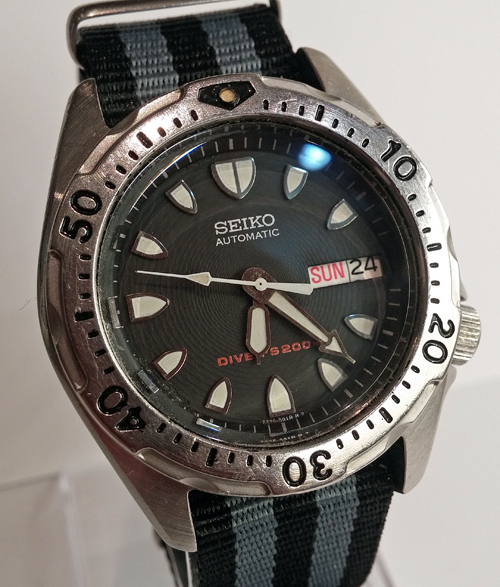
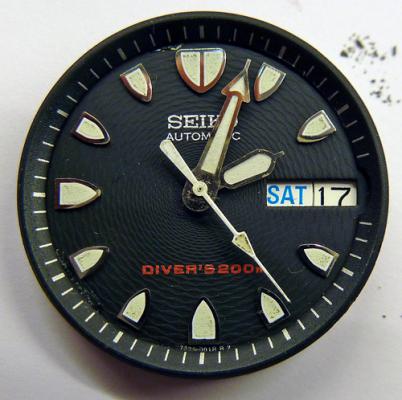
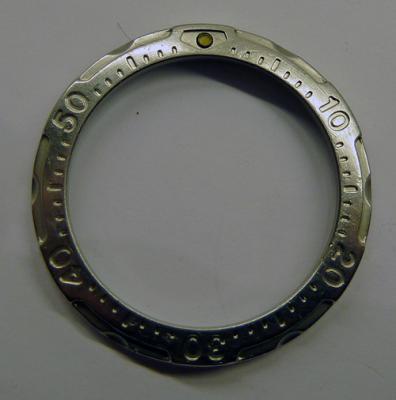
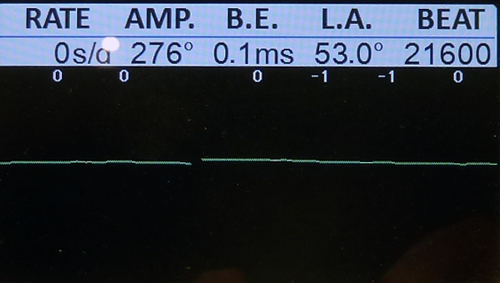
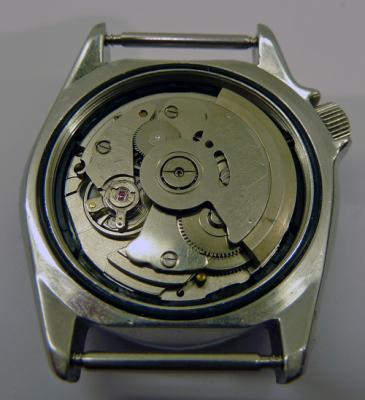
After a recent request from my eldest daughter for another mid size Seiko diver, I came across this item from Ramon aka thewatchcollector on fleabay: No bezel, 0050 caseback & not running but cheap & challenging, he's watches are just what I like. I have a bought a few from him in the past & they all scrub up well. Very mucky movement from a hard life in the Philippines: The chapter ring has been glued to the dial, the feet are detached, the four marker is loose, lume is grubby & the dial is marked: Manage to track down a bezel from speedtimerkollektion lacking some paint: I wont go through the stripdown of the movement as it has been well covered here and elswhere but after a few hours of VIM & the wire brush its back in the case with a new balance (the old one being a bit rusty): Glad I put the new balance in as it looks good on the timegraper: Dial cleaned & tidied (will need to re-fix the feet though, its a tad out), bezel repainted, new crystal, new o-rings & (just for a change) a nato strap:


 1 point
 -
Wow! I'm gobsmacked. What a wonderfully clear explanation of the mechanism. Thanks so much!1 point
-
here is the correct tool for Rolex type case backs1 point
-
Excellent work Joel, and thank you for taking the time to make the animated illustrations.1 point
-
Don't forget if bushing is undertaken it should be invisible to the naked eye, with the oil well you shouldn't be able to see that a bush is in place, so these ready made bushings are not good enough you should always make your own on a lathe. Back to bluing screws, I used an old copper penny over a spirit lamp, when the right shade of blue is obtained drop the screw in oil I used 3 in one, this adds a nice shine to the screws then clean in a cleaning machine. I had an old machine just for this type of work.1 point
-
Hi Dave The safety roller is there to prevent inadvertent release of the escape wheel by locking the anchor via the guard pin so that the anchor is held at one bank or the other until the balance returns to centre. Here is a good discussion on the subject from Timezone. http://www.timezone.com/2002/09/16/the-anchor-escapement/ Cheers Jim1 point
-
One of my other hobbies is furniture making, and it's supposed to be all fine furniture, as in no compromises on quality and the "look". I have now completed the desktop extension that is at the heart of this thread and I can state that it is probably the most utilitarian, aka, ugly, piece of furniture I've ever built, as you can see in the attached photo, with nary a dovetail joint anywhere. But, at least so far, it works, though whether it will survive the test of time remains to be seen. The height seems right, and I can comfortably rest my elbows on it, and I can spread them out also. The 2 drawers will accumulate lots of junk in short order as they're roomy. And I do have a gas lift chair so should I need to adjust my height for some reason, it'll be easy. Thanks to you all for the great advice you gave me. Now I need to do something constructive with it I suppose! Like fix watches perhaps?
 1 point
 -
Here's some info.... Parts : tech Guide 5Y22A_23A_30A_31A_32A_39A.pdf1 point
-
Looks like a Hangzhou 90001 point
-
Seemples!
 1 point
 -
Here is where I do most of my work My big lathe, mill, polishing gear etc are in my two other worshops.1 point