Leaderboard


Popular Content
Showing content with the highest reputation on 07/15/24 in all areas
-
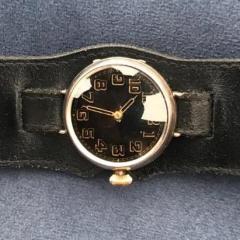
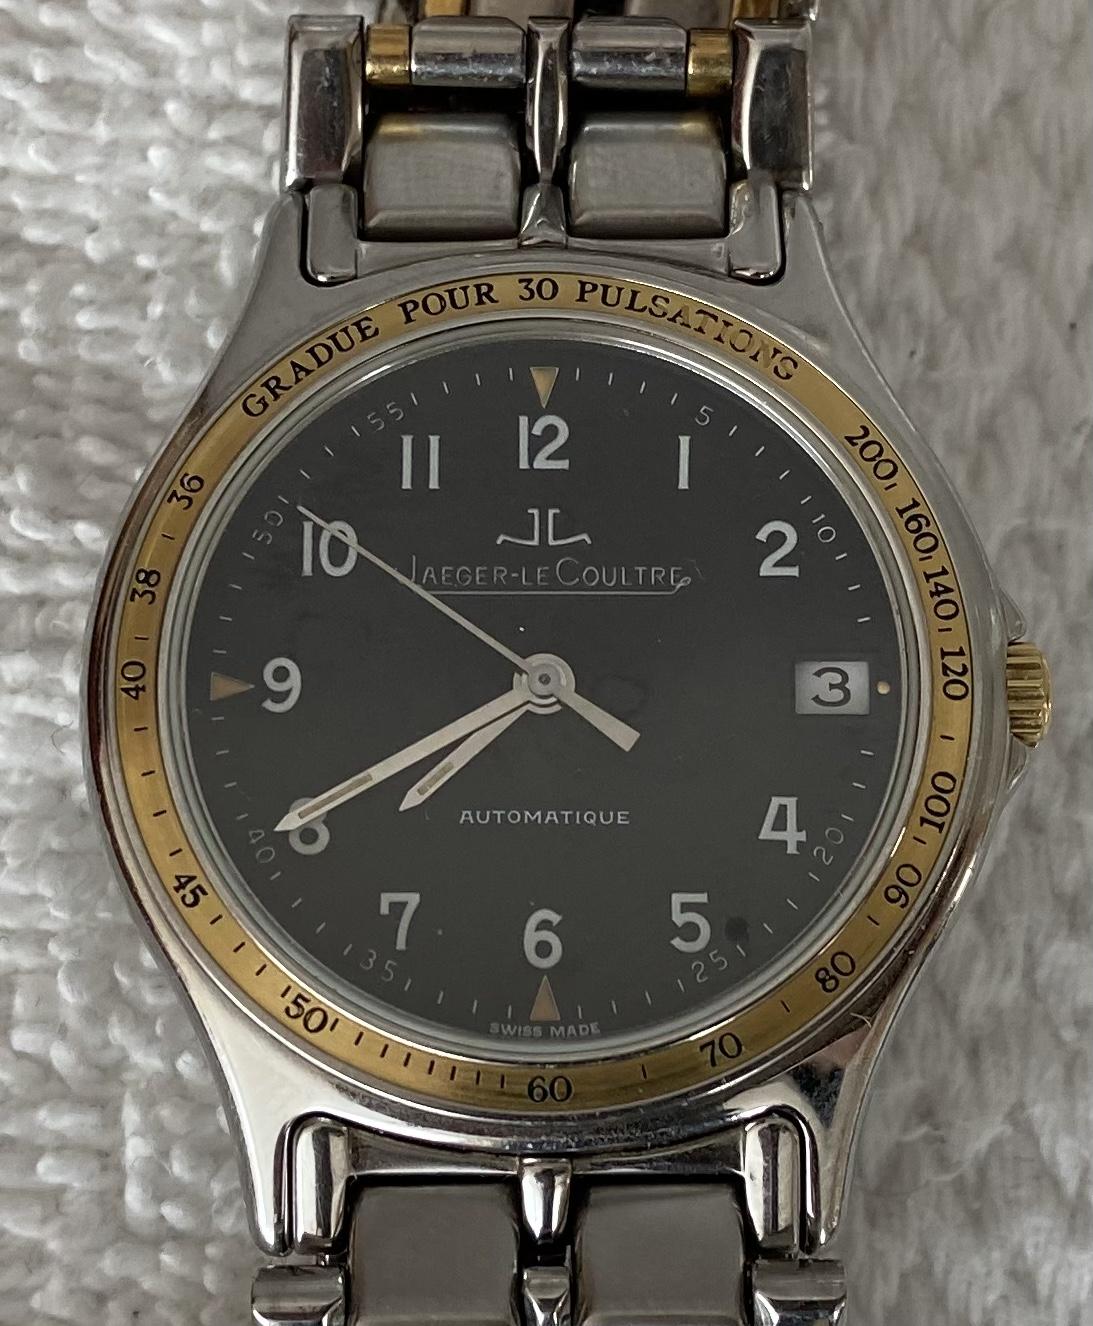
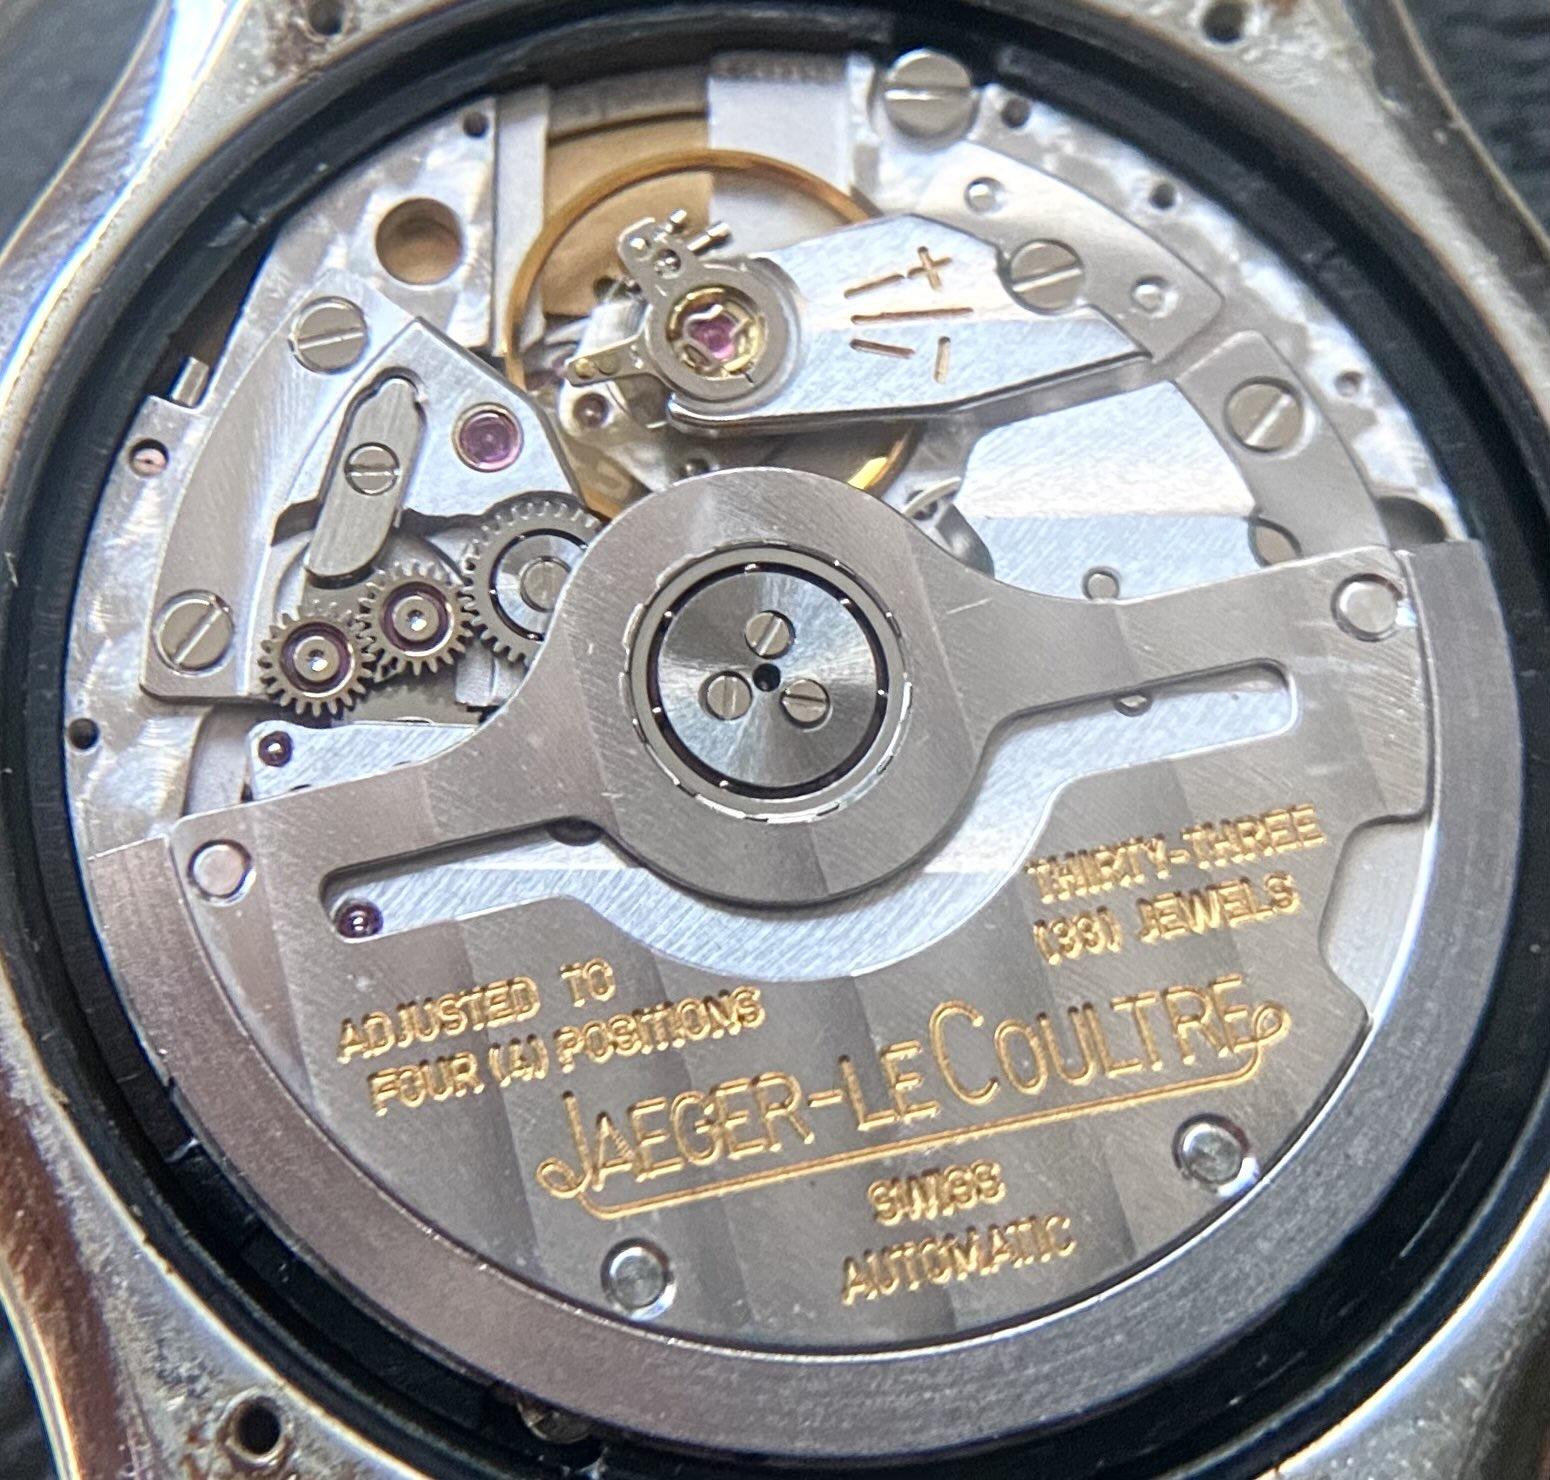
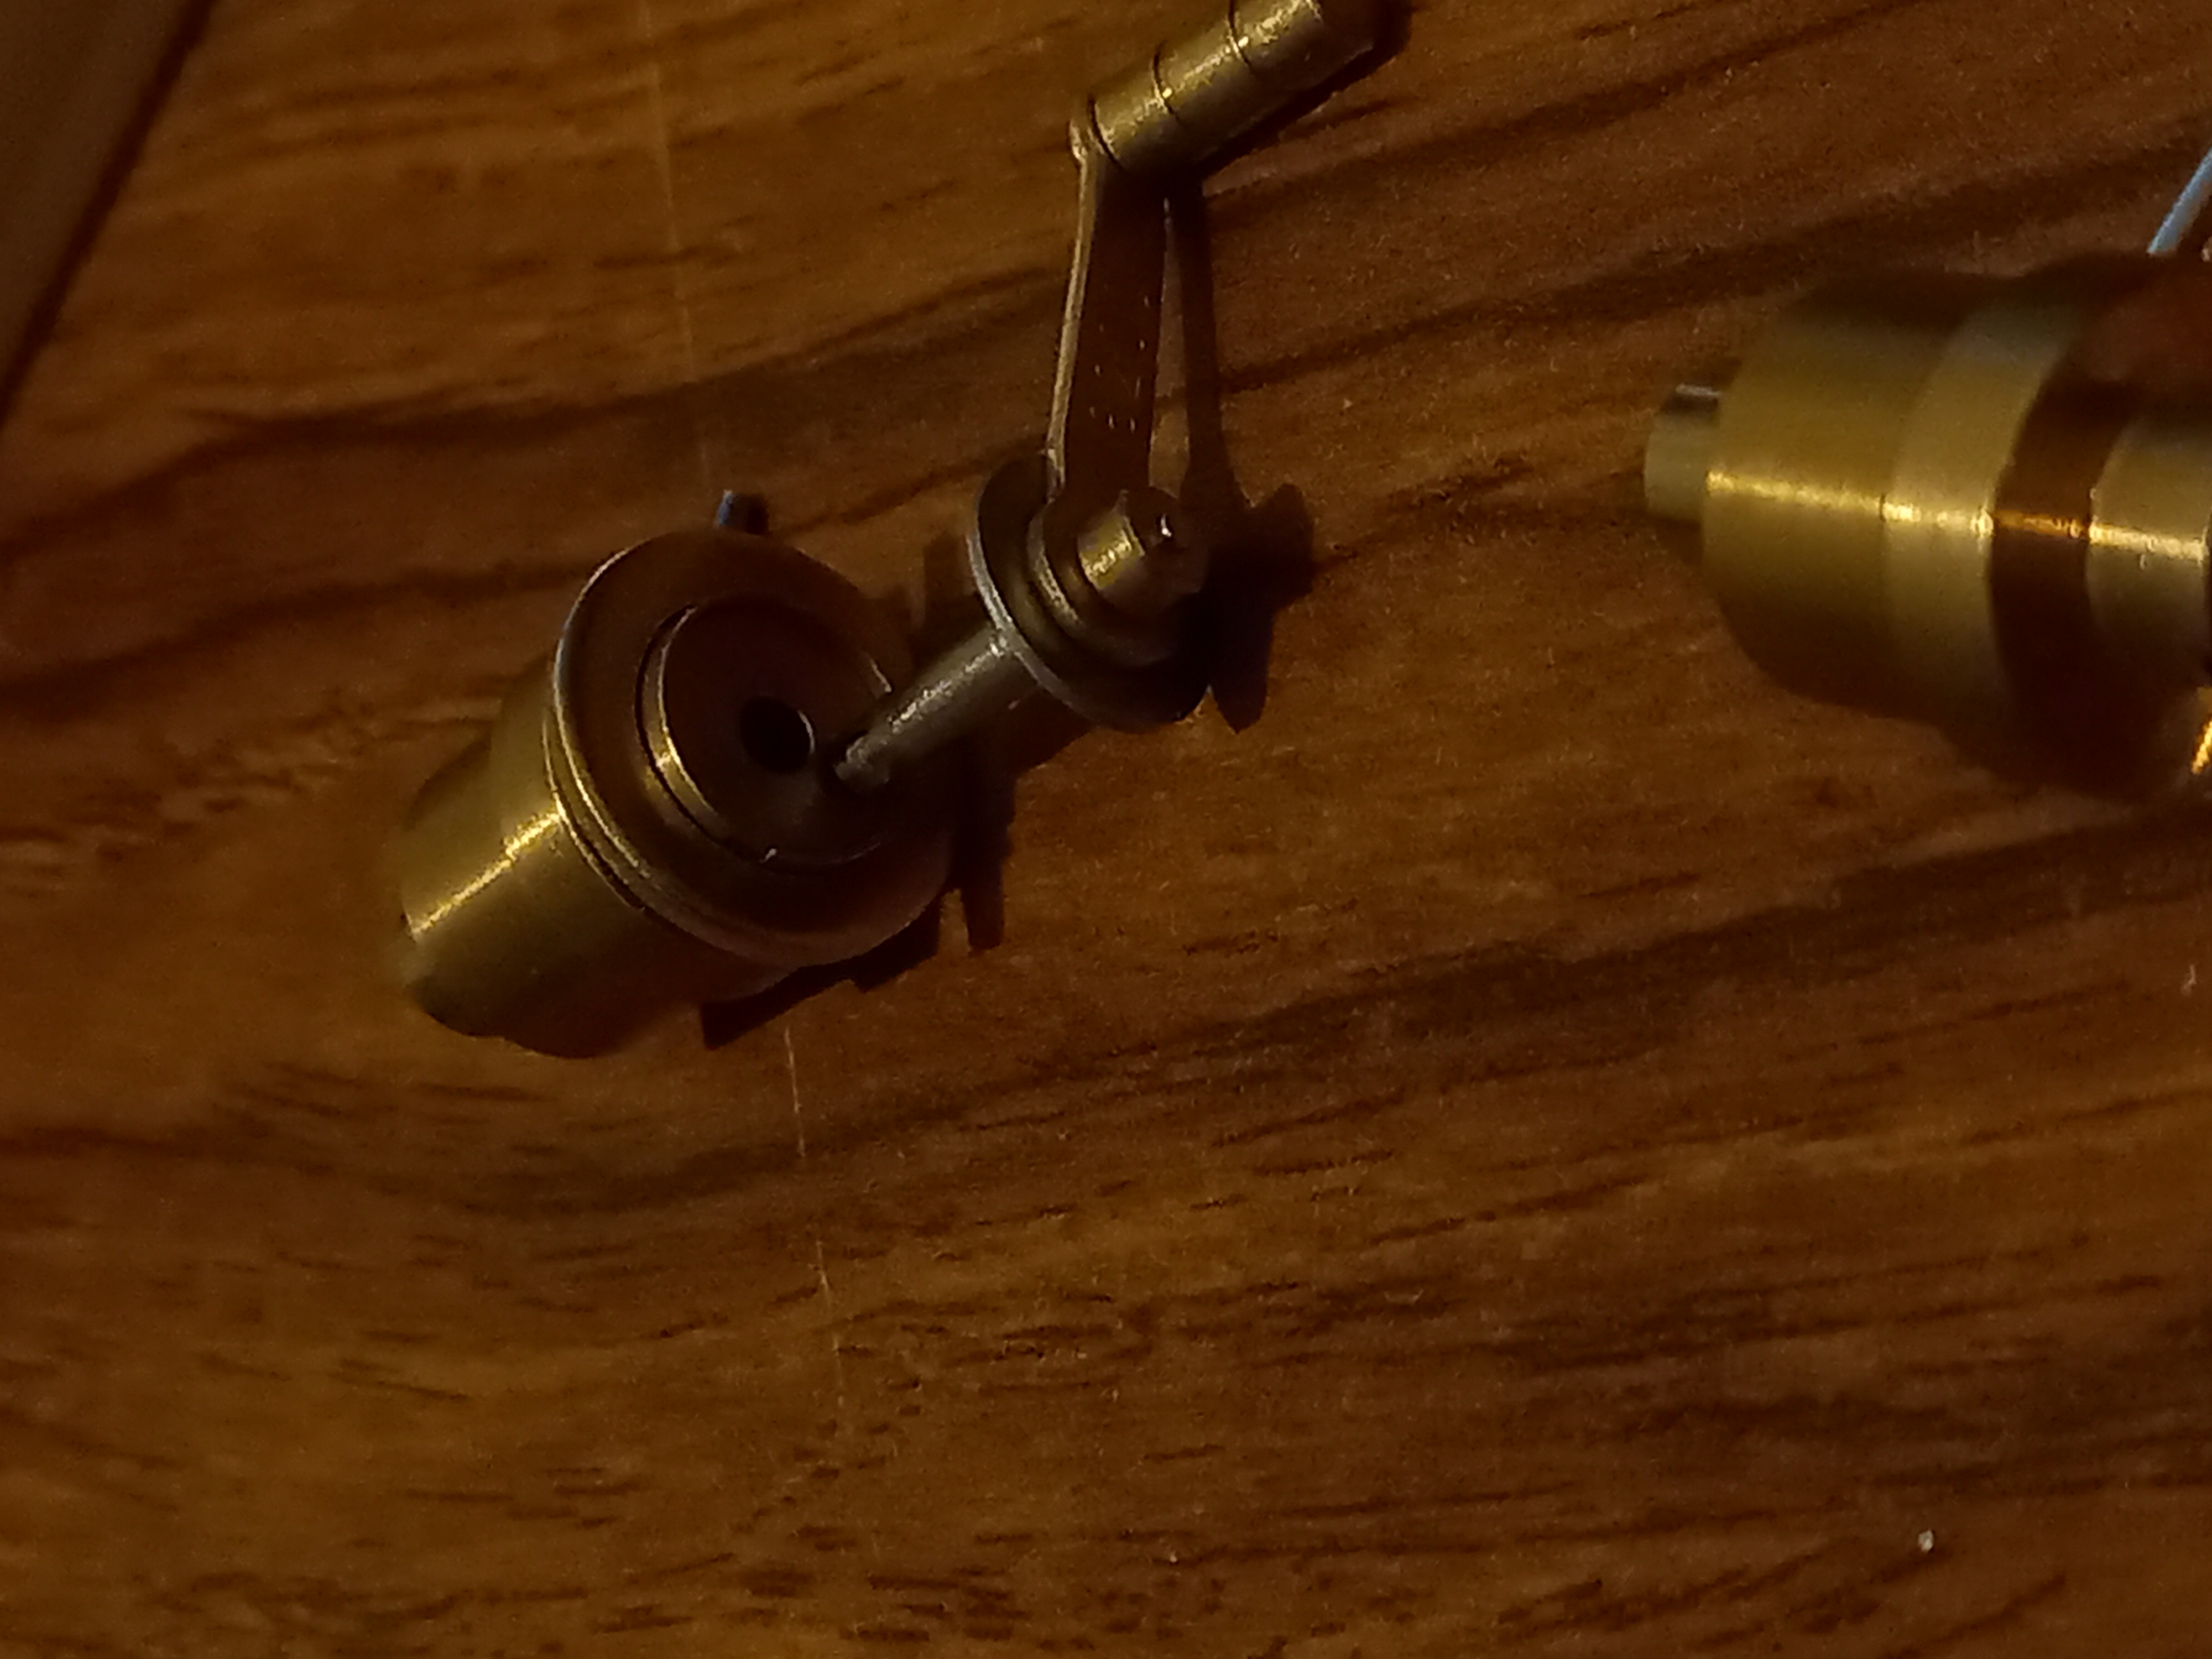
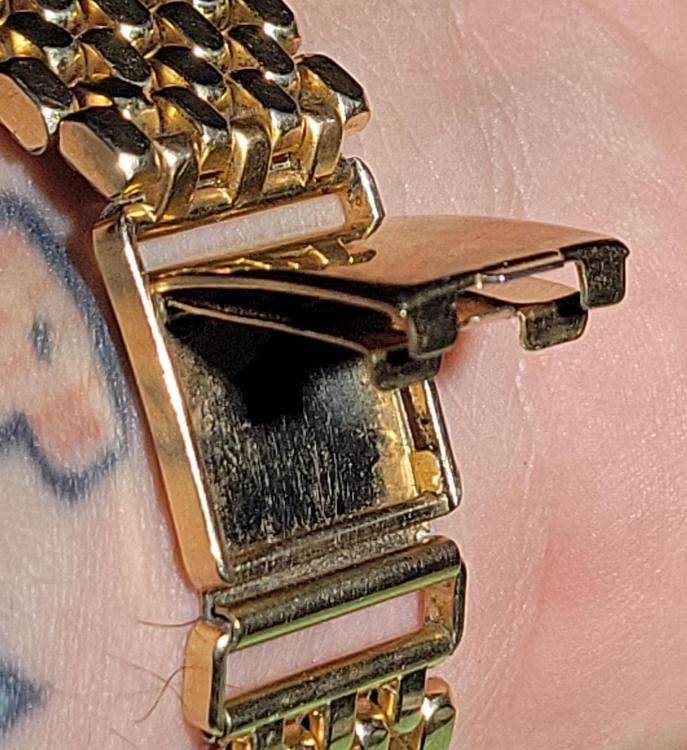
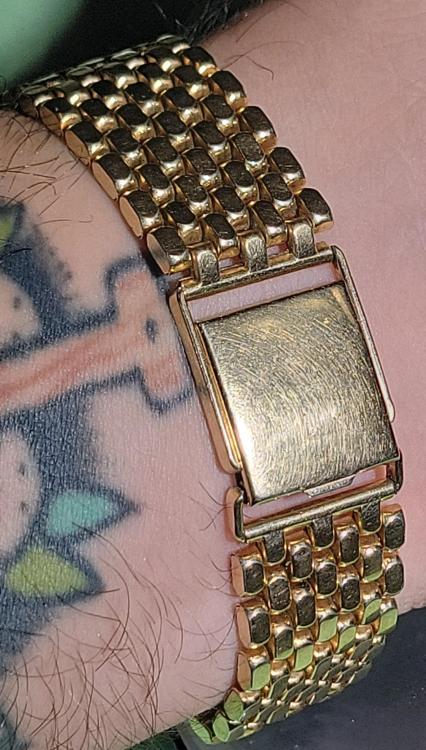
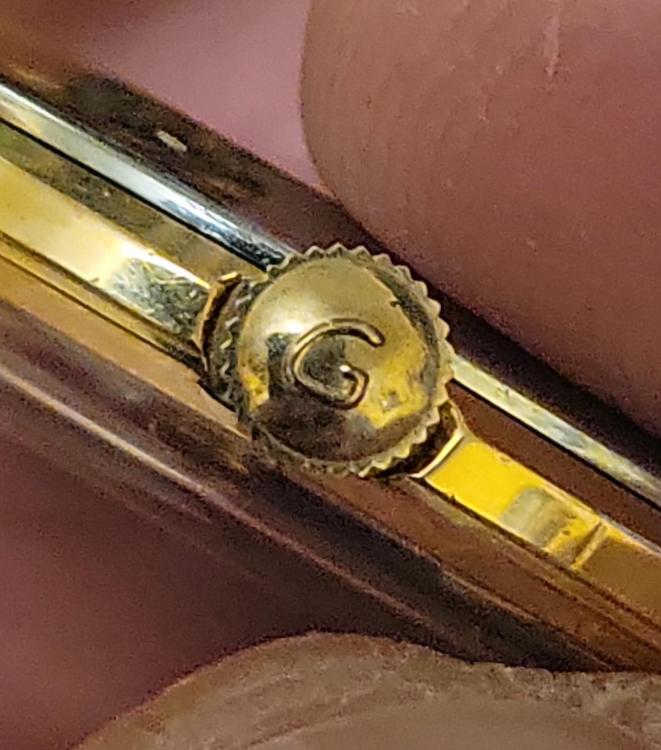
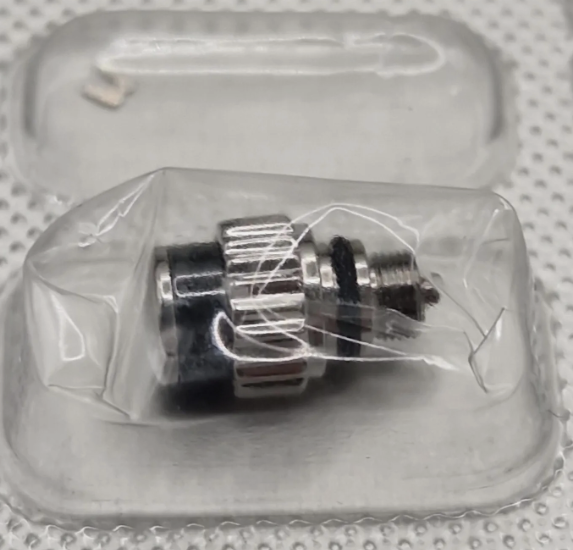
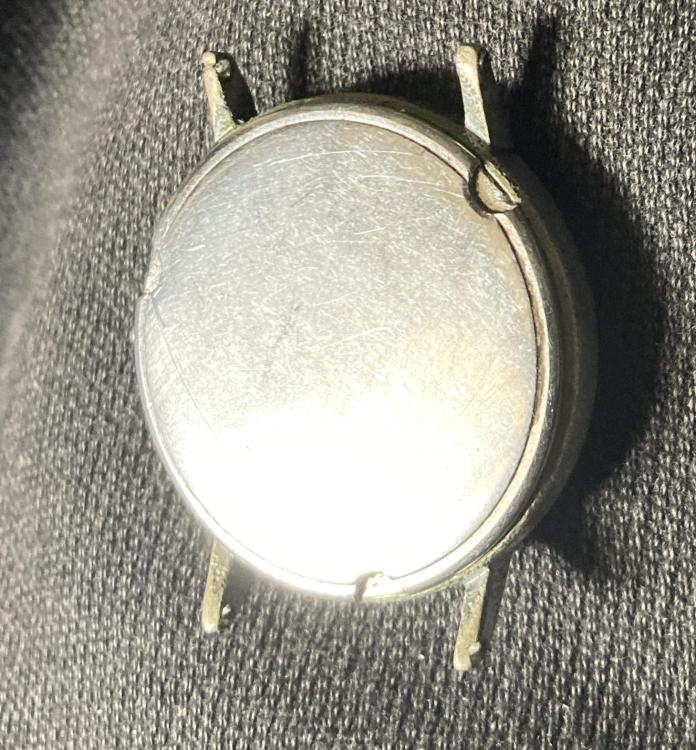
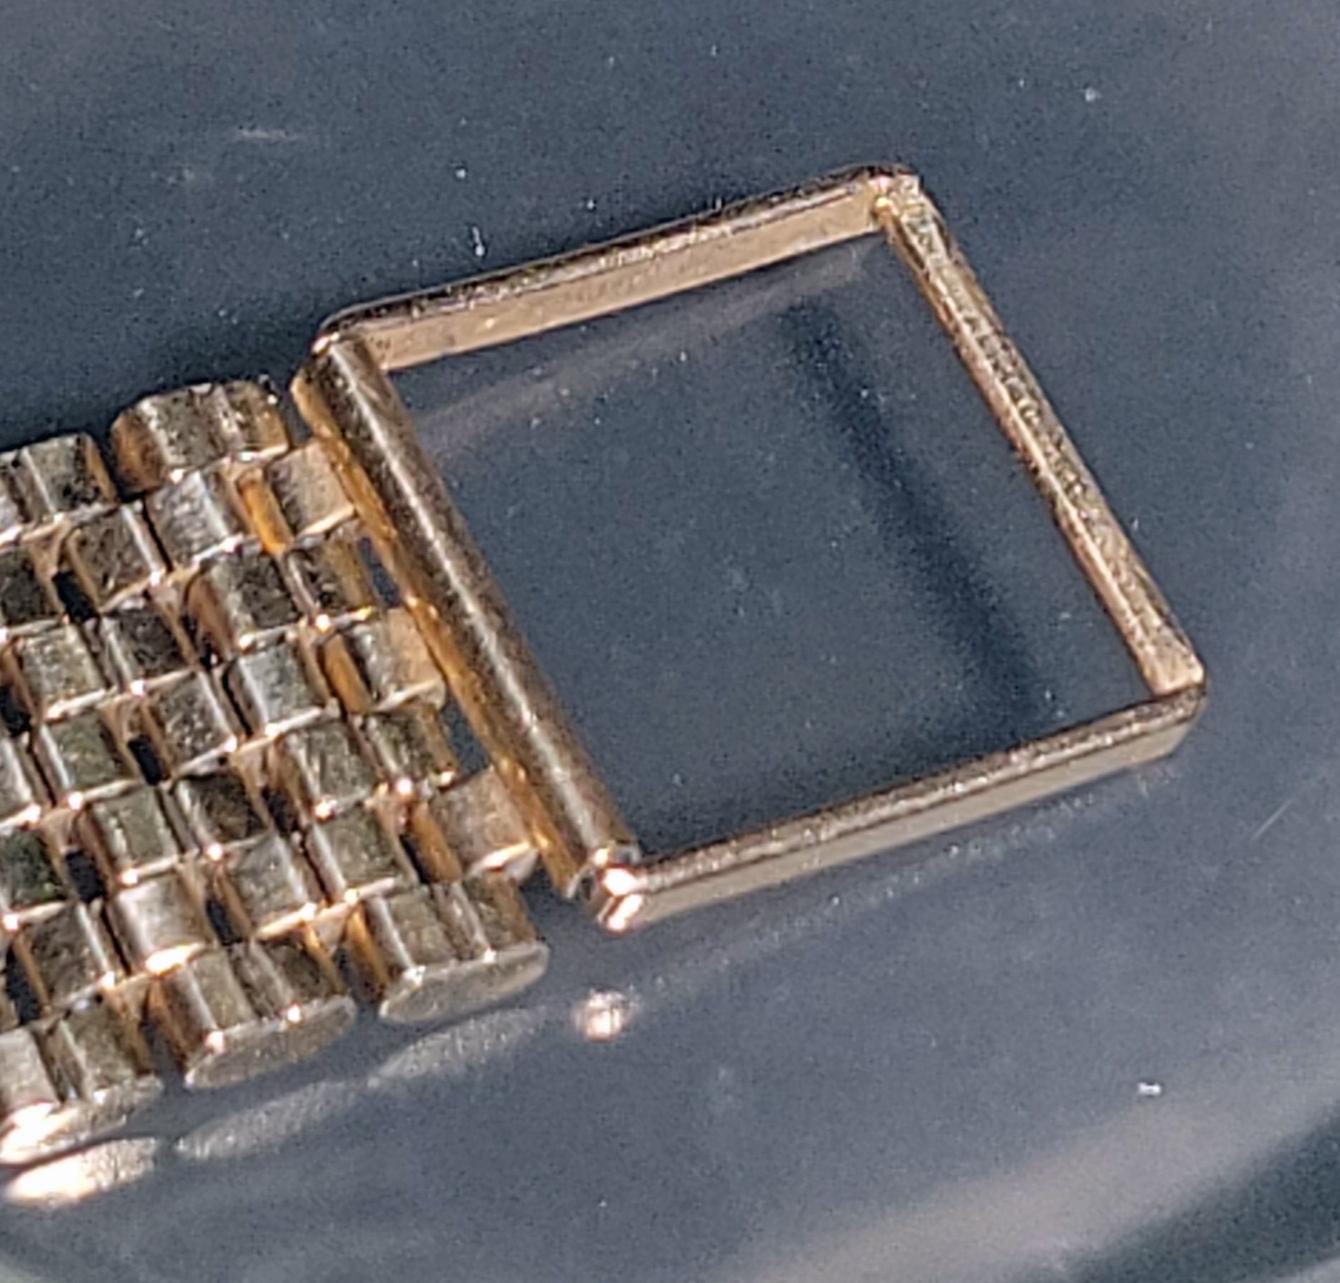
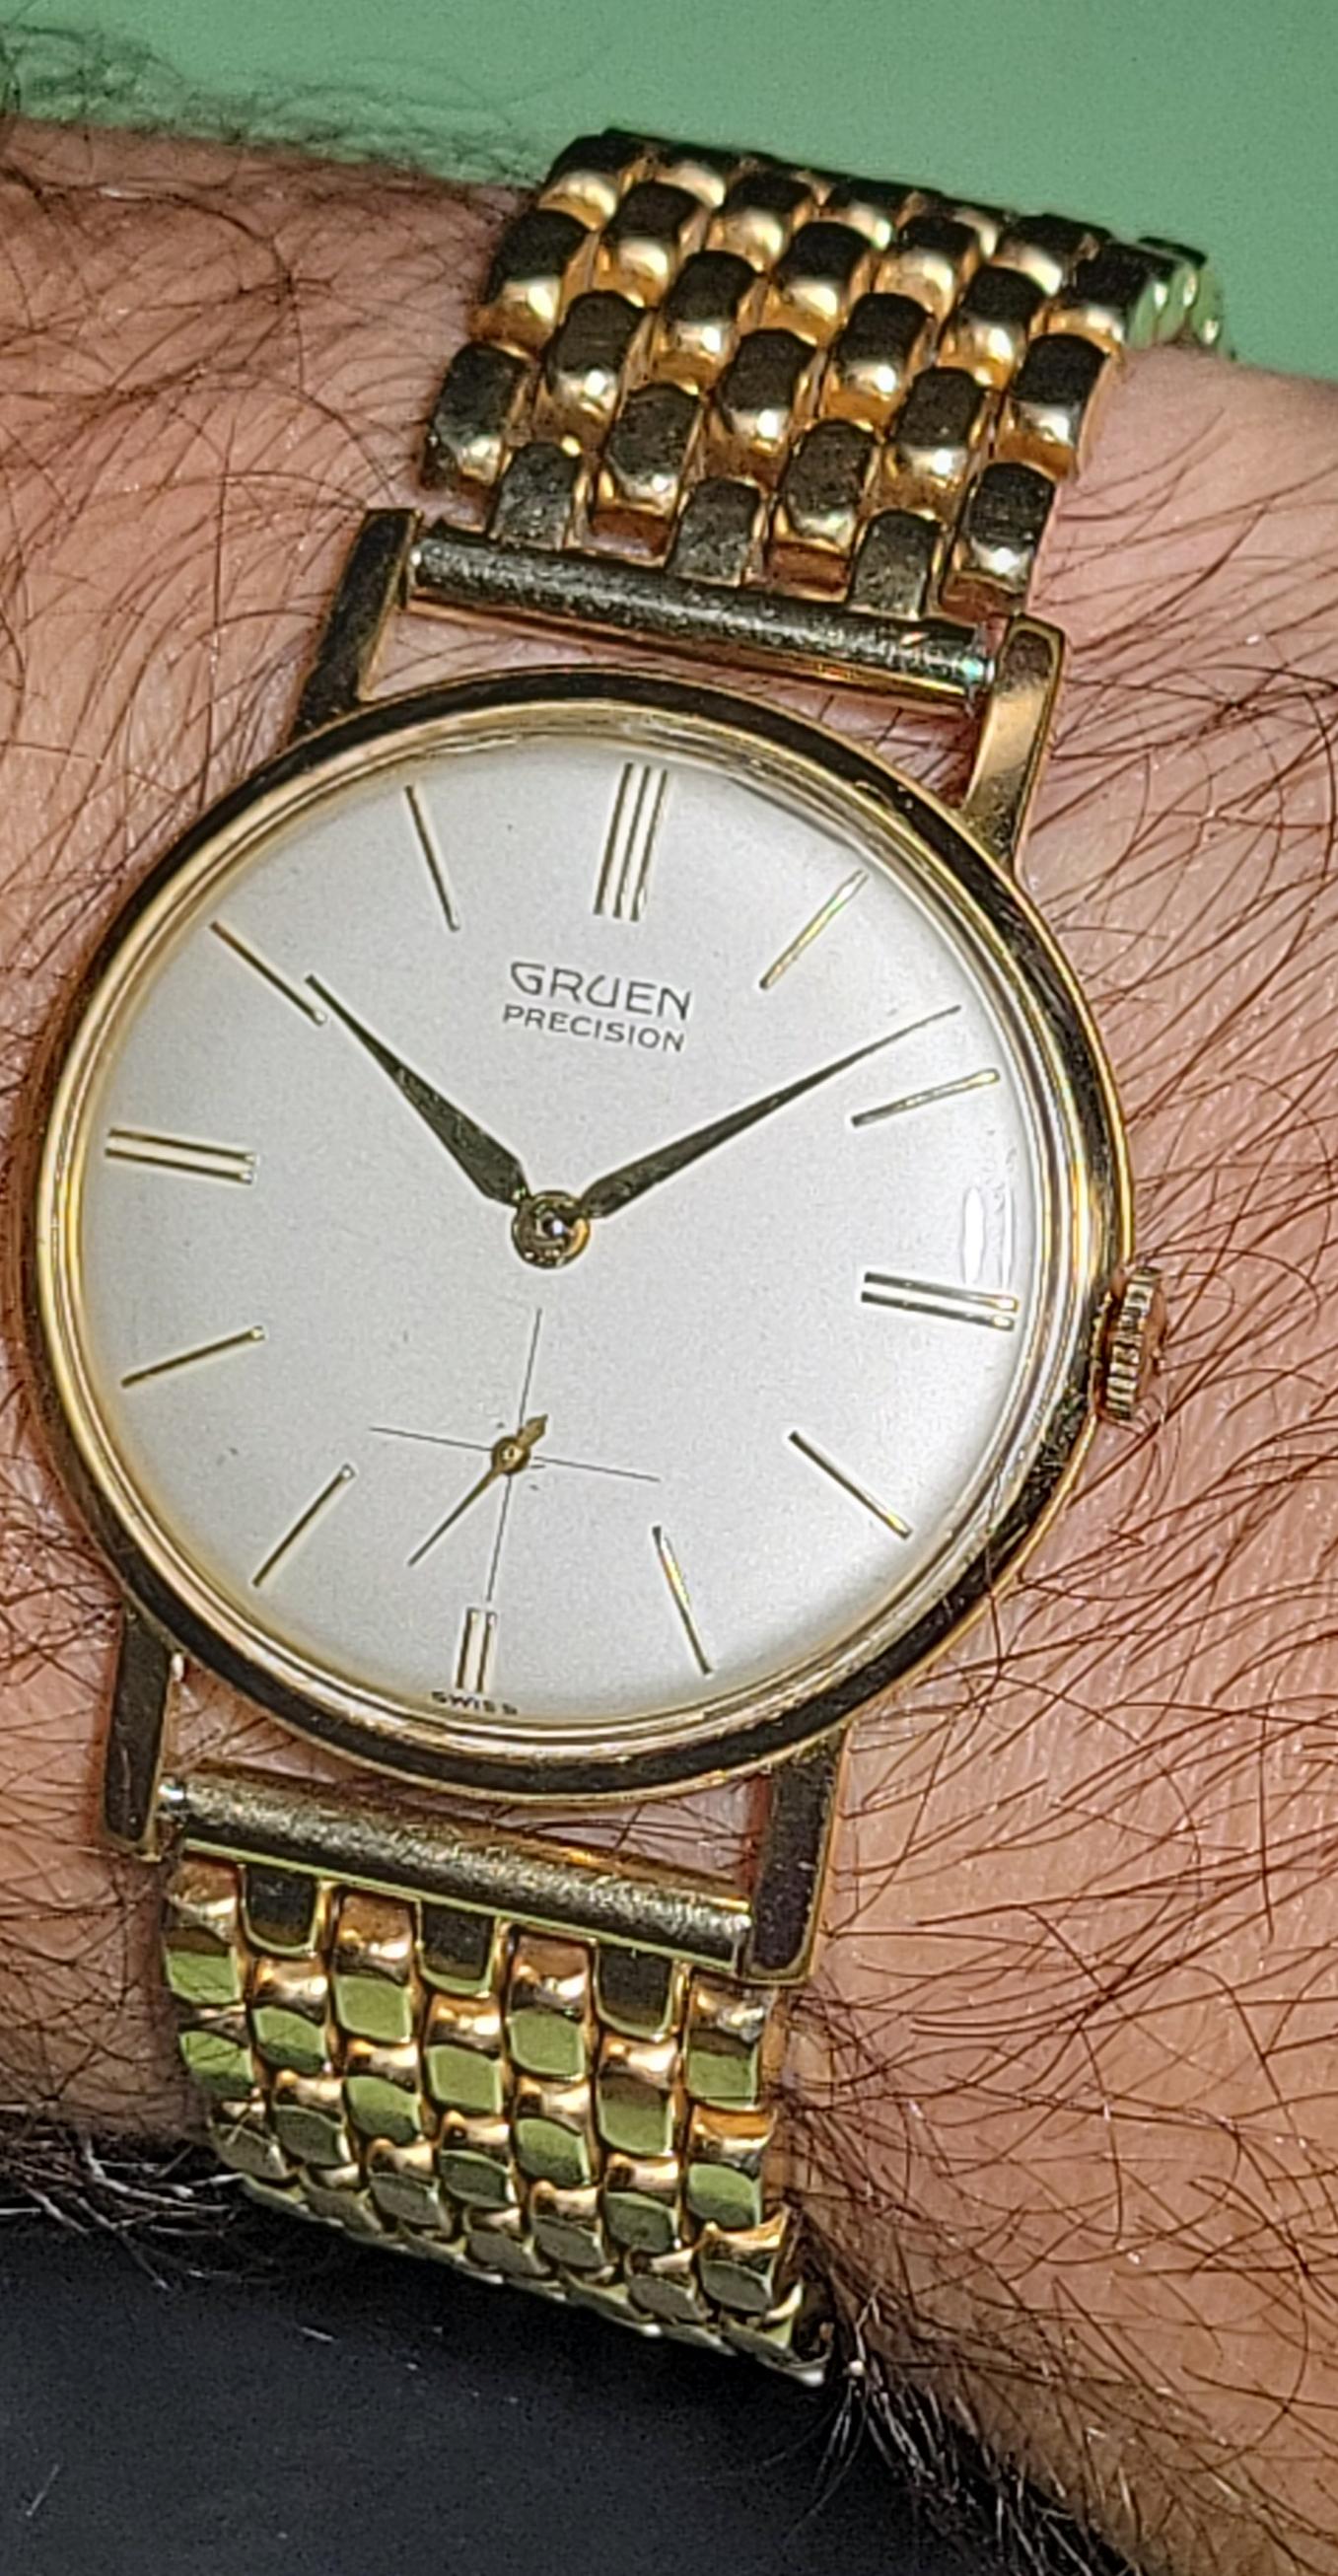
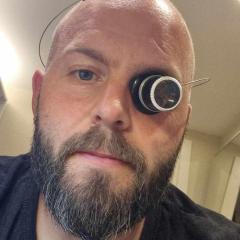
Finally getting back to this project! I sourced a new stem and branded crown. Predictably, I promptly cut the stem too short. I bought a new one, but thought I'd try shimming it out a bit first, which seemed to work just fine. The bracelet has a neat clasp I've never seen before.


 5 points
 -
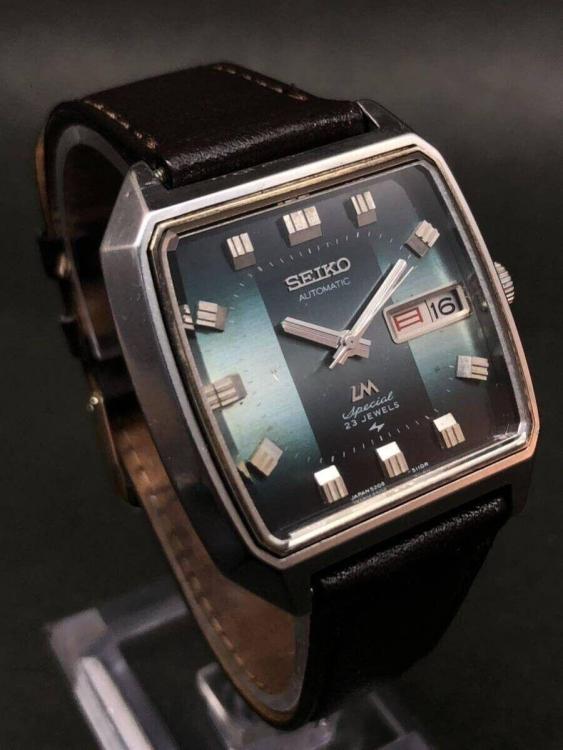
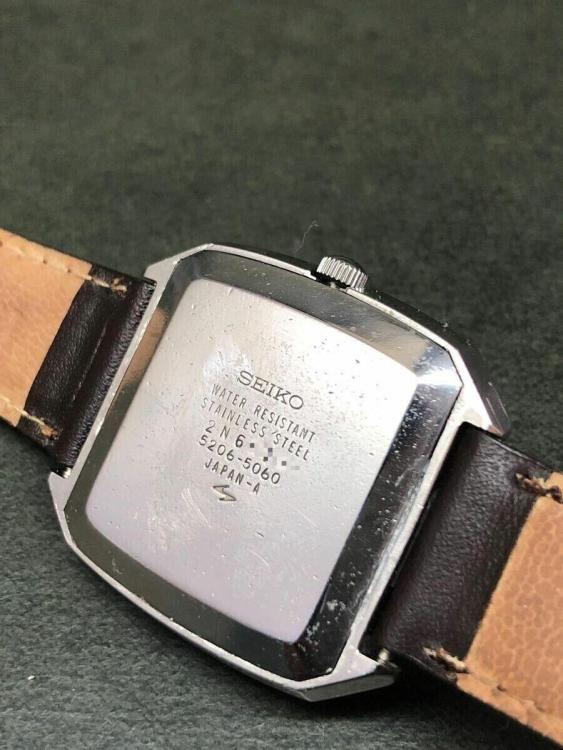
Once again testing my luck with a watch from Japan. Been on the lookout for a Lord Matic Special for quite some time now, and this 1972 5206-5060 square case just came across my feed at a decent price. Allegedly in running but unserviced condition. Fingers crossed!
 4 points
 -
I copied one from a YouTube video by Treetopspider - Home Made Mainspring Winder (2020) (youtube.com) Then bought some copper pipe reducers to contain the spring when compressed, just need to cut a slot in the reducer to allow the end of the spring to be held by the hook. I works well.3 points
-
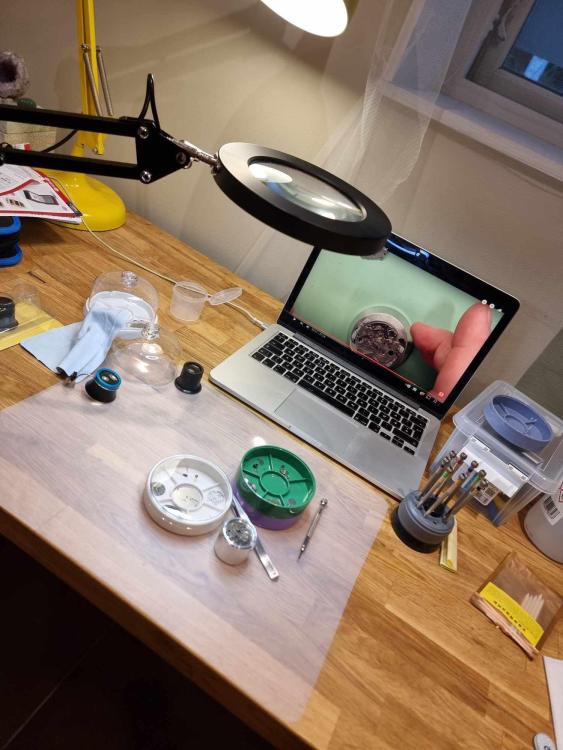
Thank you so much for the warm welcome! And even a fellow Norwegian I already love this forum! My first and only little project so far was a Seiko KZ211K1 / Landshark / Atlas 7s36 movement. I have a friend who is a real watchmaker and he told me this was a pretty bad decision for a starter movement, but now I have already dissembled it so its no way back Im afraid. One of the first screws I ran into was so small you have to use a custom screwdriver from Seiko or make one yourself of your smallest one. That felt like to big of a challenge on my first hour... but I somehow managed to get it done, and It felt so good! Next step now is cleaning. I have tried to learn what chemicals to use, but I understand this is a somewhat complicated subject. And we seem to have pretty strict rules in Norway so a lot of the brands and chemicals I see online are impossible to find. I think I will start with IPA which I already bought, and maybe buy Zippo Lighter Fluid? Honestly, this movement looks so clean, which was somewhat of a disappointment. The movement would probably be a lot better off If I had just let it be. But at least now I can learn some stuff. A few things i learned: -I loved working on these small things. -The parts were a lot smaller than they looked on youtube -I need to focus on taking my time. I was rushing and making mistakes because of it. Cant wait to find another evening to work and learn!

 3 points
 -
Hi all 40 year old guy from Norway here. I started getting interested in watches only about three or four years ago when I randomly stumbled upon a watch restoration video on YouTube. I had no idea what I was looking at, but I found it relaxing and therapeutic. I started using it as a sleeping aid late at night For the last few years I have been obsessing over watches in general. I am reading books, looking at youtube videos, reading forums and listening to podcasts. Buing and selling a lot of different seiko, citizen, and some others here and there. But now the last month or so I started to think I might want to try some restoration myself! That pushed me to buy an online course (that I got a big discount on, but wasn't too impressed by) and also watch every youtube video I could find about the subject. I also bought a few books, including "Watchmaker" by George Daniels. One of the first things I learned was that I didn't even really know how a mechanical watch really worked. I mean I thought I did, but I didn't. I still don't really understand how everything works, but Im learning every day. I have ordered SO much tools and equipment and built a small workspace in our basement. The tools range from premium swizz to temu When I find the time I want to start to practice on my own cheaper watches, before moving to some buy-to-restore projects. Hope to learn a lot from you all! -Kruttskjegg (which translates to gunpowder-beard or something2 points
-
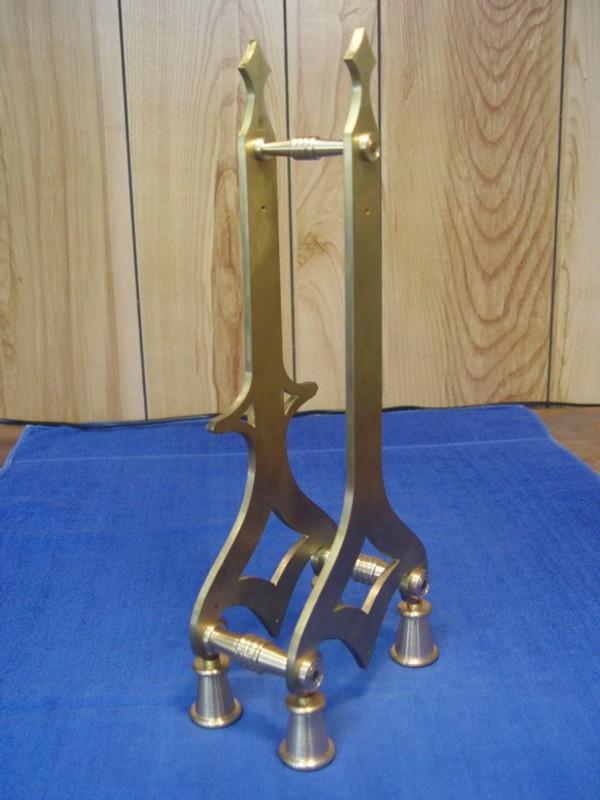
Oldhippy suggested I make a video how I strip, clean & polish the brass parts of a torsion ( Anniversary) clock ready for lacquering, it’s not the only way but it’s the way I do it. Dell2 points
-
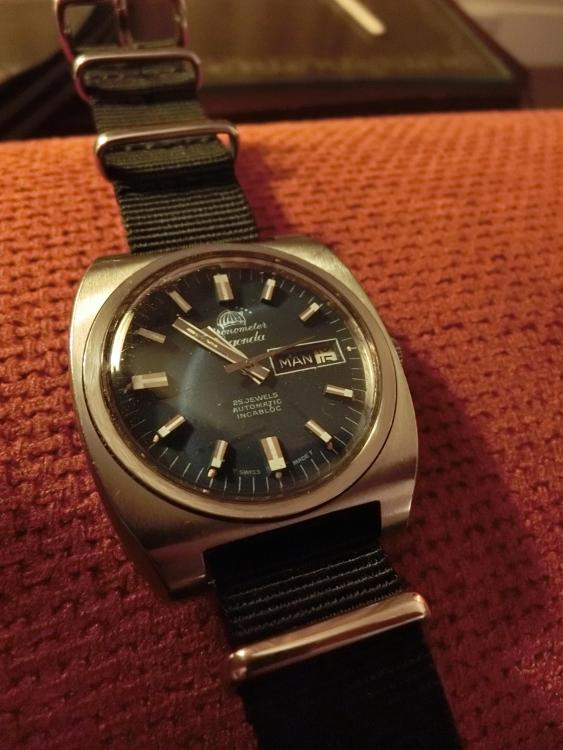
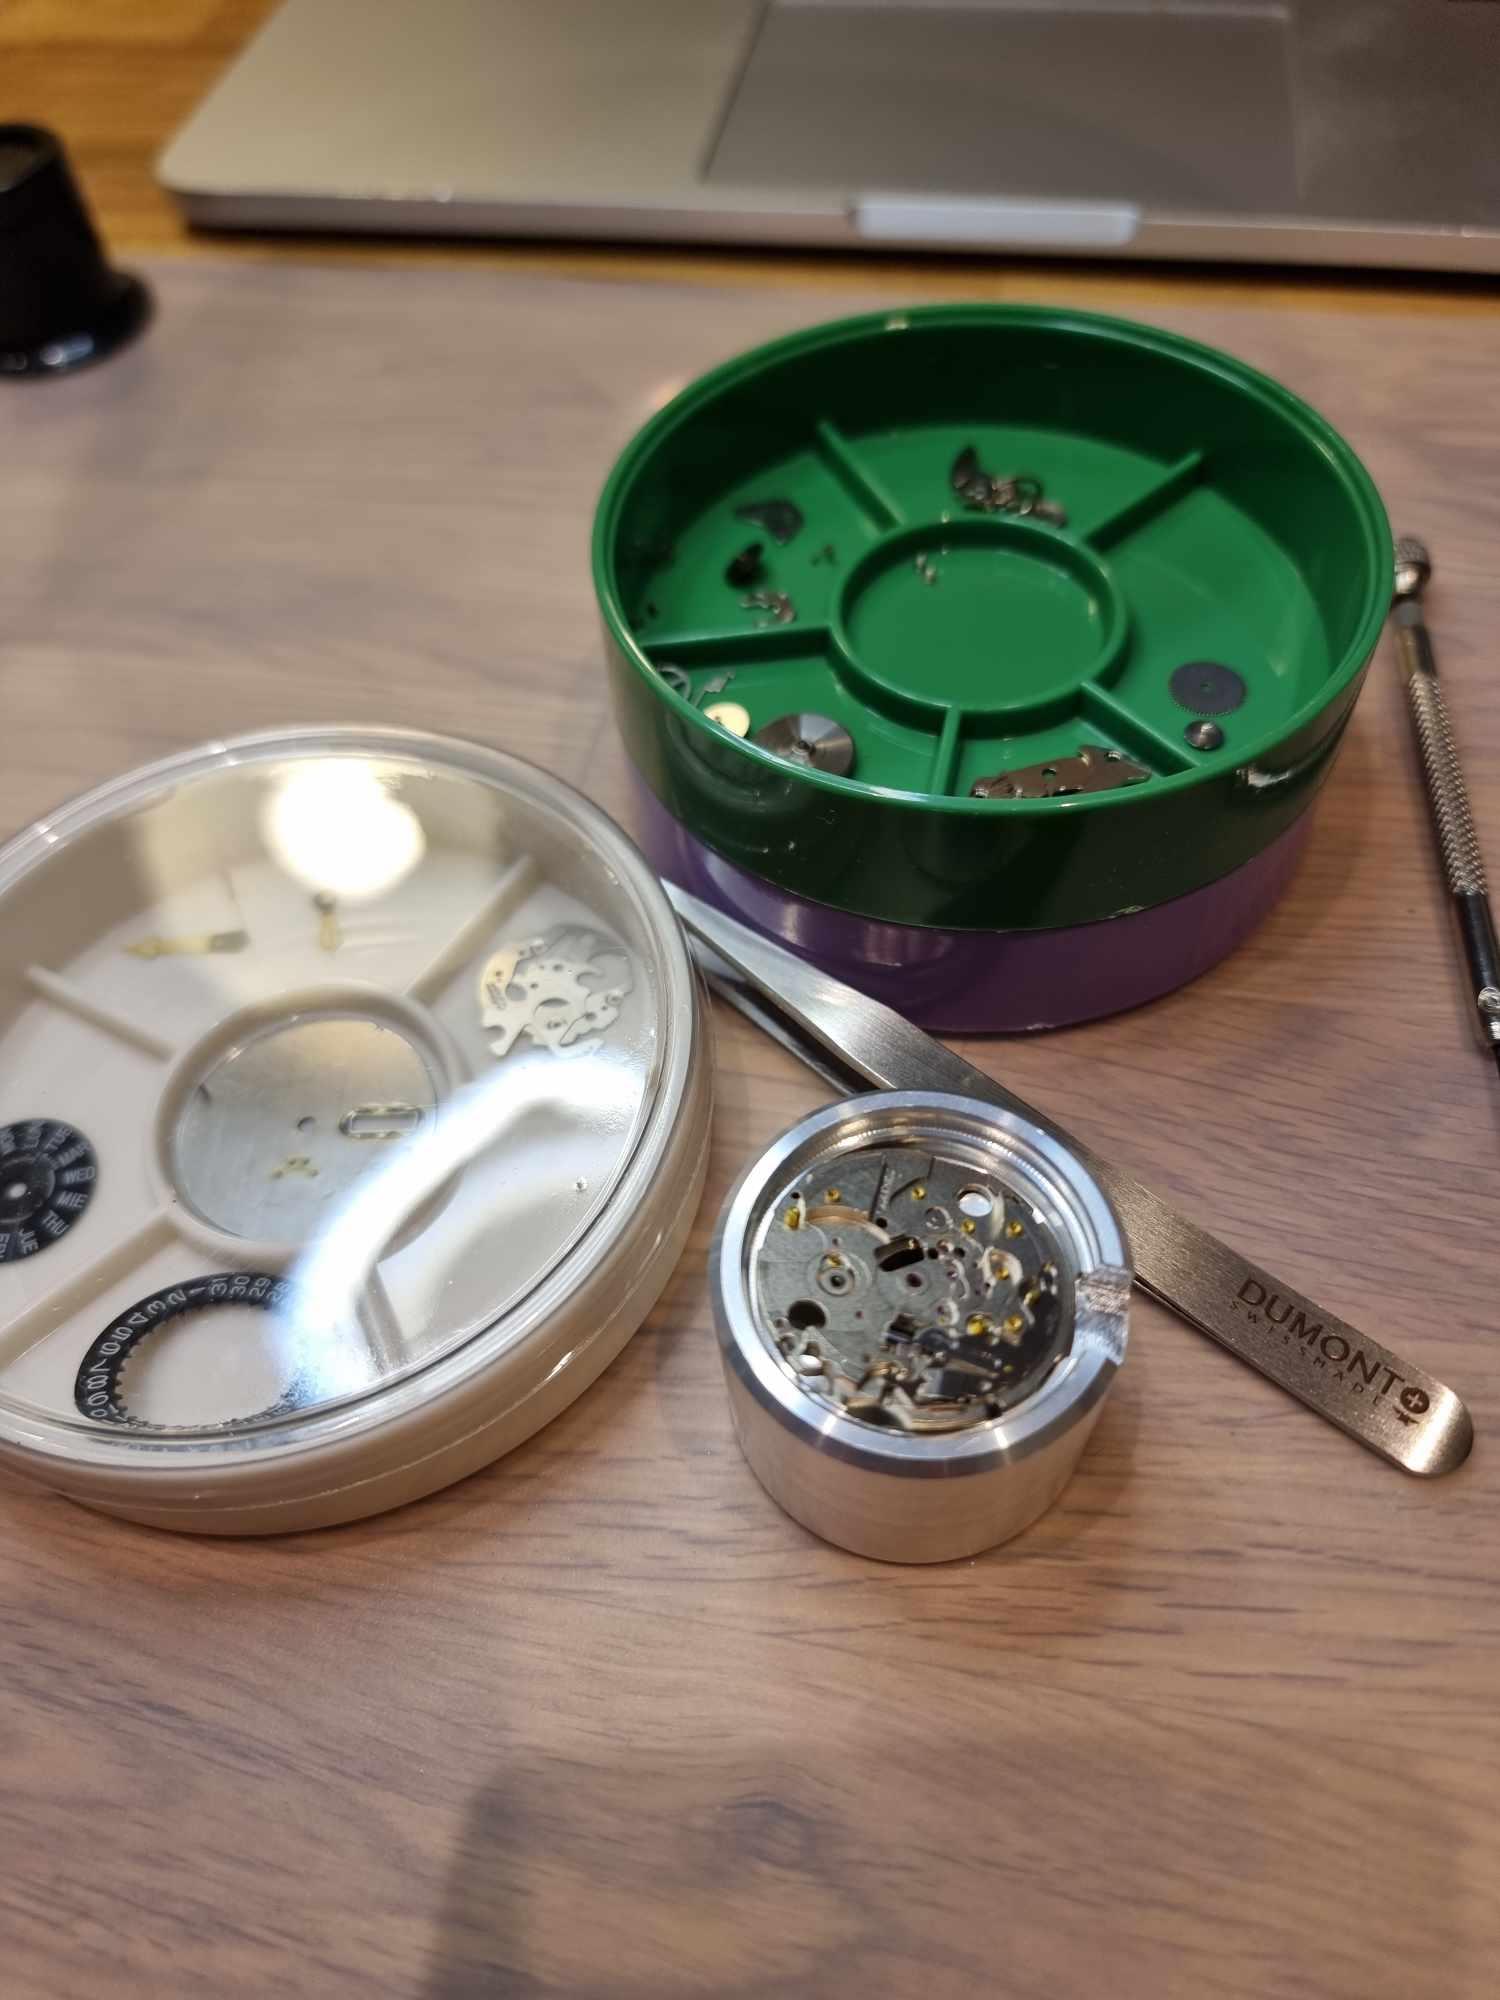
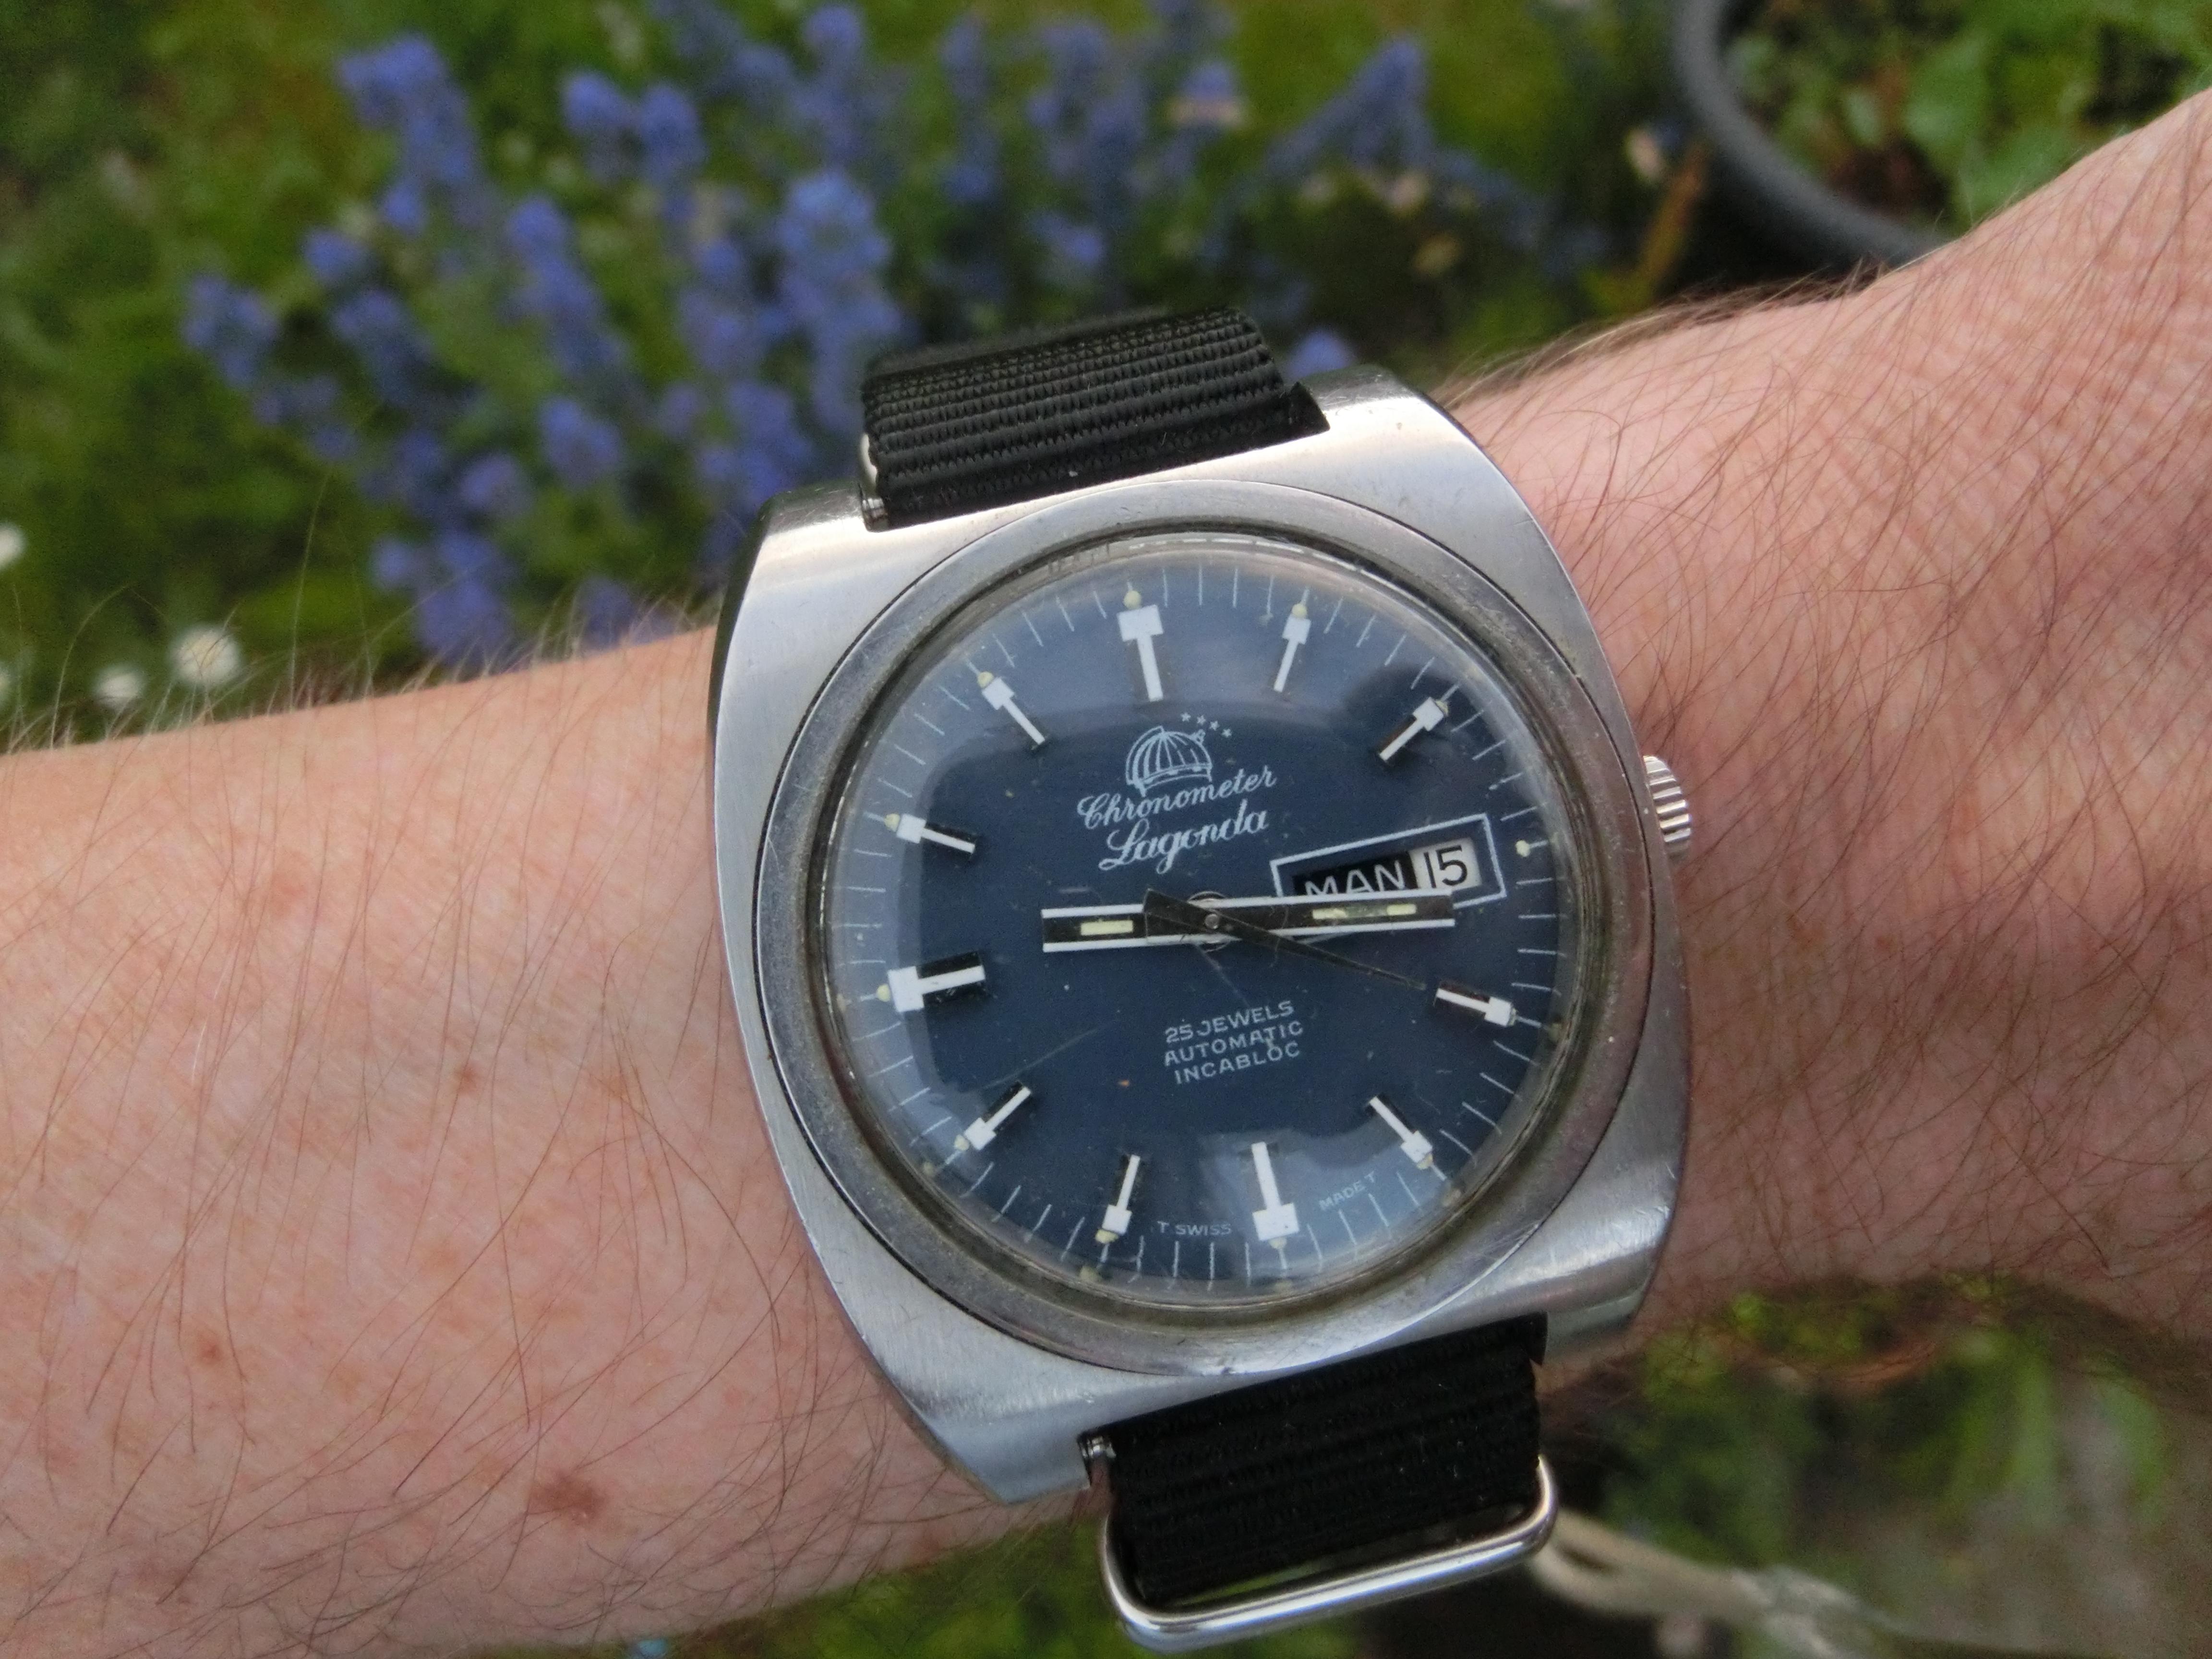
I'm not sure why photographing blue dialled watches seems to be that little bit more tricky than other dials. In reality this watch looks pretty much immaculate, but the moment the camera points at it, 1000 motes of dust land on it, and the camera (or perhaps the photographer) entirely fails to do it justice. There is a bit of a story to this watch, which I may share at a later date, and one of the other members of WRT will almost certainly recognise it. Suffice to say it hits the spot nicely in every way, but particularly when it comes to blue. My sincerest thanks to its previous owner for letting me have it, and I hope the beaver settles in to its new home comfortably. I'm also not quite sure why there seems to be a particular shared fondness for blue dials. Perhaps it has something to do with this.


 2 points
 -
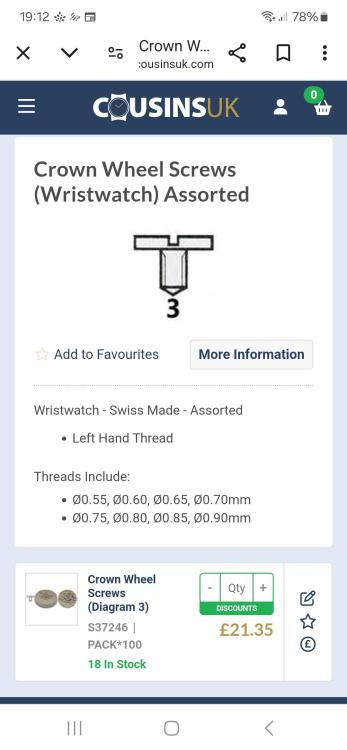
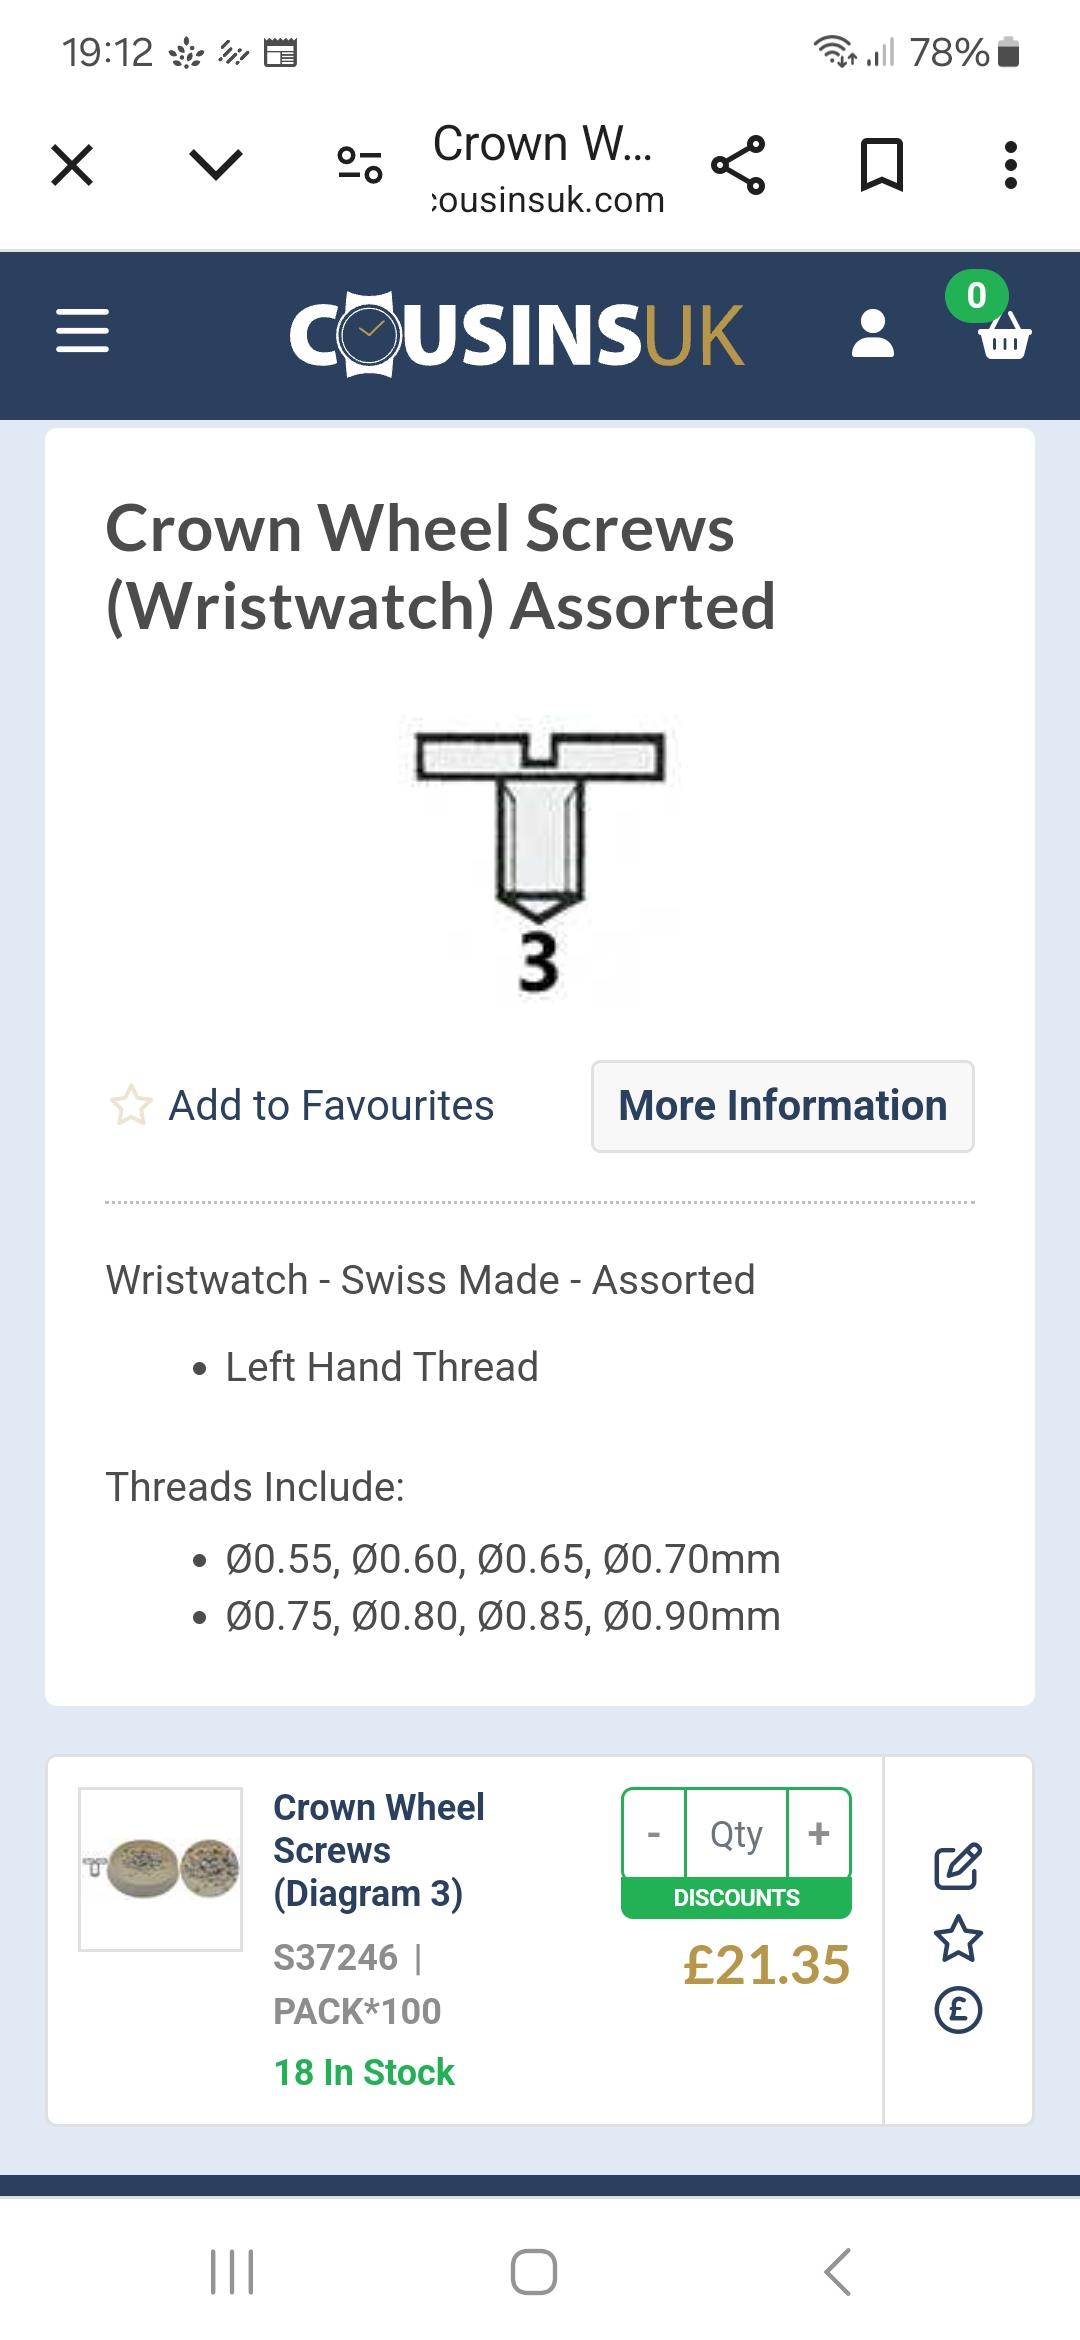
Generic crown wheel screws are available and so are assorted screws. Here's an example.
 2 points
 -
When I go to work today I will ask how many of the crowns disassemble for changing the gaskets as that's something they do On a regular basis and to be honest I don't pay attention to what they're doing when they're changing the crown gaskets so maybe they do disassembled but I will ask today find out how many disassembled.2 points
-
Hah! I was just about to withdraw my last question, as I found it addressed elsewhere on this site, and I didn't realize what a can of worms I was opening up!2 points
-
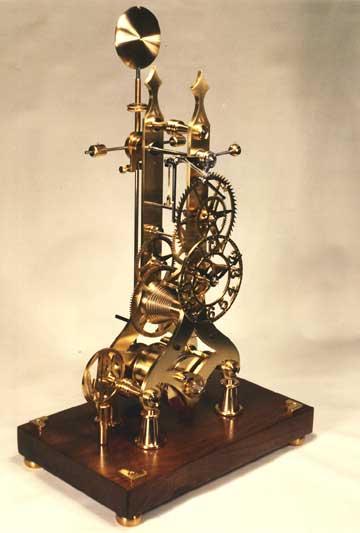
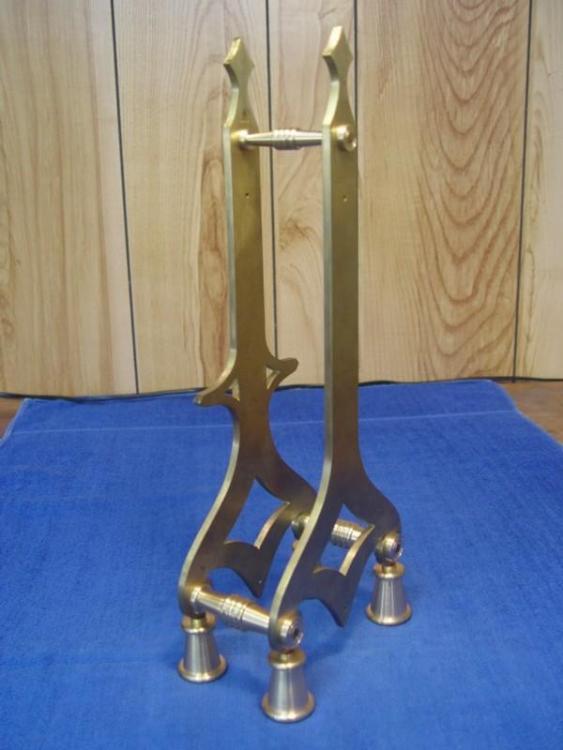
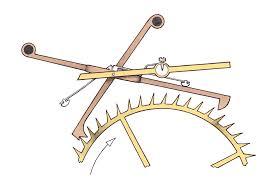
Just thought I would add a pic of the W R Smith skeleton clock for those who haven't seen one. This is what it should look like when I am finished. With the Grasshopper, compound pendulum and fusee, it's probably not a good choice for a beginner's first clock, but I was too inexperienced to know any better at the time. Fortunately Bill Smith's plans and construction book are very detailed, so hopefully I will get there eventually.
 2 points
 -
Seiko really made some interesting pieces in the 60s/70s. This one I recently acquired from Japan Very Japanese case design. 7019 movement, not running. Usually vintage Seikos are runners so it's gonna be interesting to see the reason. This one is still on the way: Very dirty and very cheap. Dial has some obvious damage but I like the rugged look. I hope the case and bezel will clean nicely.
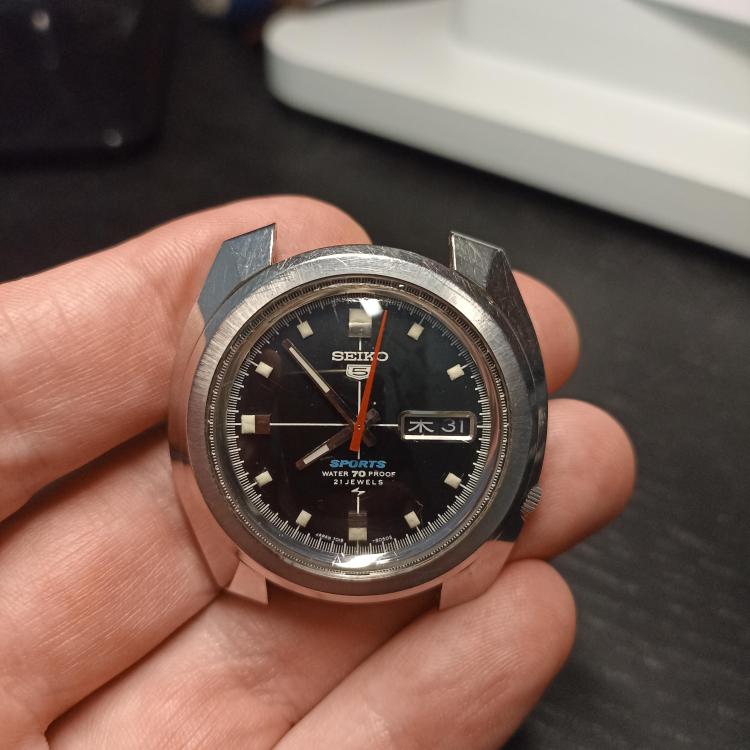
.thumb.jpeg.41675e4c379a83213ccf286a123c75bc.jpeg) 2 points
2 points -
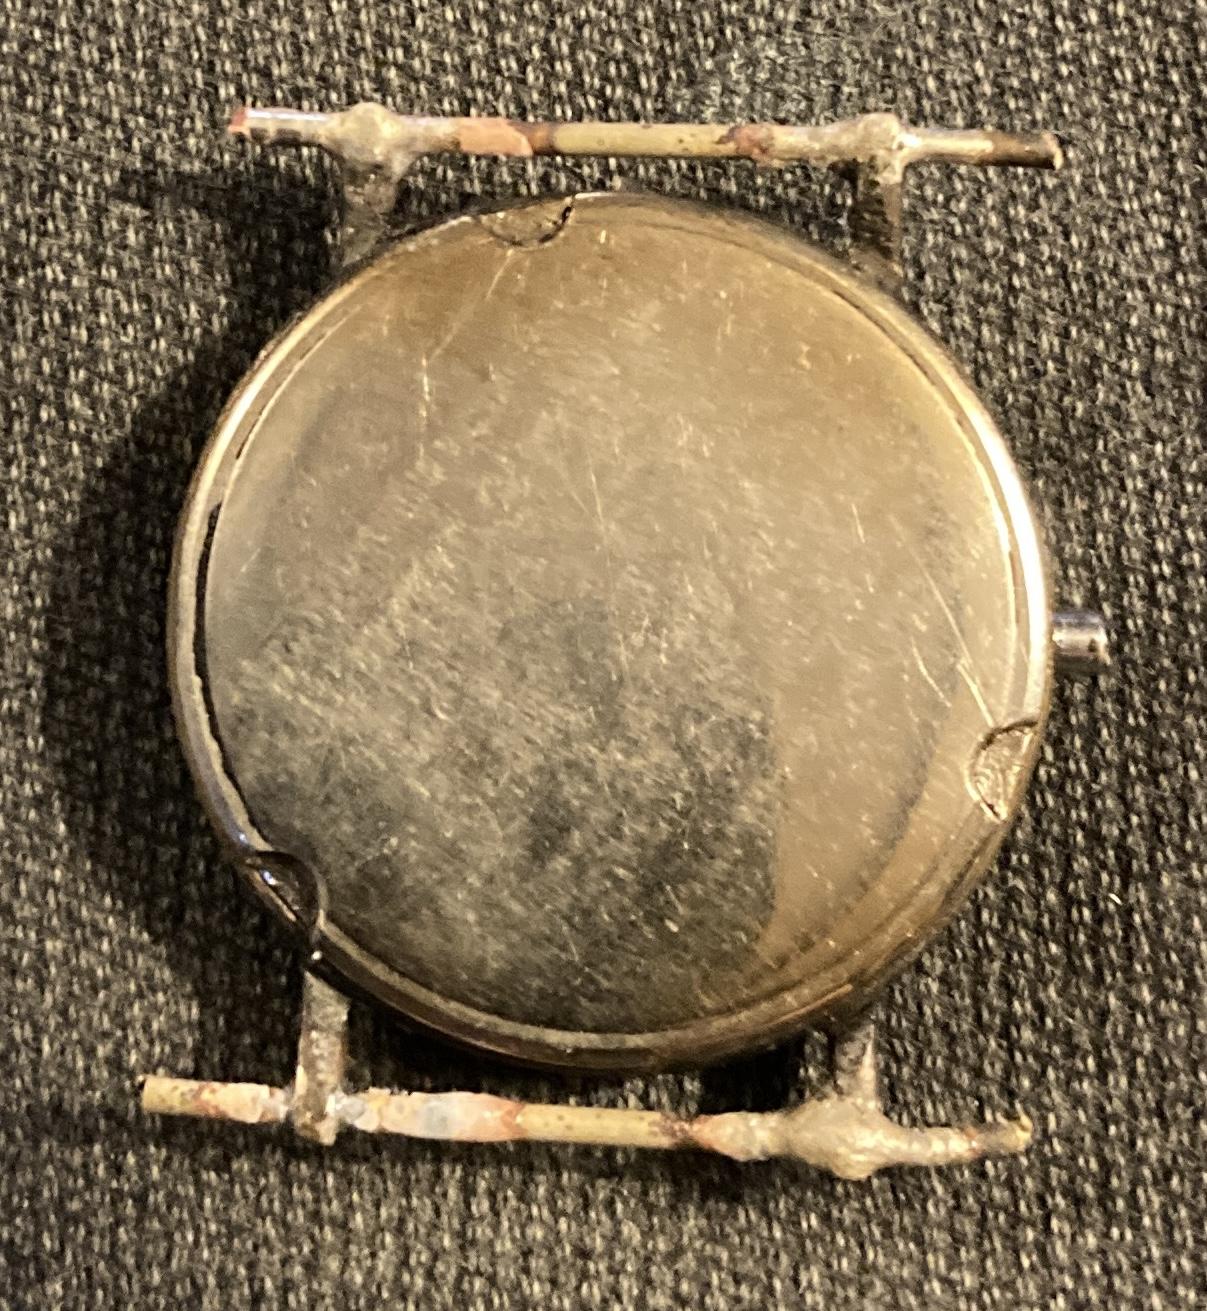
It's surprisingly easy. I drill out the holes to 2.0mm, or if they are too oval I enlarge them in the chosen direction using a 1.0mm drill bit as a milling cutter. Brass and nickel cases are soft enough that this works fine with a Dremel. I then insert a single piece of brass tube with the correct ID right through both lugs. I have tried it using two separate pieces but they don't stay straight and there is always a risk that the tube becomes blocked. The tube is about 1/4" over length on the outside. I then braze into place using Tenacity No.5 flux and 55% silver brazing rod (silver solder), heating with a chef's blowtorch. I pre-heat until the flux melts, then place a small piece of pre-cut filler wire on one side using tweezers and use capillary action to pull it through to ensure full wetting (place one side, heat from the other). The filler has a wide enough melting range that I can add a bit more if needed to fill a wide gap between the tube and the lug if it was particularly worn, like the area which had worn right through. I then trim fairly close to the lugs with a cut-off wheel in the Dremel and file up with diamond needle files. That's the stage shown in the original pictures. The two pictures added here illustrate the steps. You can see there is rather more excess filler on two of the lugs (although not as much as it first looks like as the flux residue has not been removed at this point) - those were the ones with missing areas so I went back and added a bit more before cutting off the tubes to length. Alec
 2 points
 -
Hi all - just joined as I’ve always been fascinated with watches of every ilk and just starting to enjoy purchasing a select few favourites. As I’m knocking on a bit I’m also thinking about being a bit more hands-on with watch repair/build as retirement hopefully beckons in the coming years. I’ll be having a good rummage around the site so I’m not asking old questions long since answered and hope to get to know some of you in due course.1 point
-
I believe the base calibre is an AS 1203 and if you look on Emmy or Borels there are a number of calibres that use the same screw. https://www.emmywatch.com/db/part/screw_crown_wheel--5420_375/a_schild--1203/ http://cgi.julesborel.com/cgi-bin/matcgi2?ref=Y`\EVGZJ Don't know where in the world you are but Cousins has them for the AS 1123 https://www.cousinsuk.com/sku/details/as-movement-parts/as112354201 point
-
I went ahead and used a round smoothing broach and ever so slightly smoothed the balance wheel hole. I also added a wee bit of oil to the hole. The staff still had a fair amount of tension going in, but after a few taps got seated. Hopefully this works; I have yet to try it out.1 point
-
Welcome to the forum Phil, enjoy1 point
-
Hi Folks. I'm Chris, retired after 40 years in the software development industry. I became interested in clock making about 15 years ago, but have not achieved much yet. I am part way through making a W.R. Smith grasshopper skeleton clock. I spend a lot of time discovering all the mistakes that can be made by an apprentice without a master. So far I have made the plates and pillars also cut and crossed the third wheel. (Made from engraving brass sheet.) I also have some old pocket watch movements that I hope to learn to repair one day. I have an AWT Webster Whitcomb lathe that I bought on eBay back in the noughties. I am powering it with an old model aircraft starter motor from 1980, and a pulse width modulator speed control that I built from a kit. I also have a 10x22 Chinese lathe for the larger parts. Cheers to all, Chris.


 1 point
 -
I'm sure you will achieve your goal. Keep us up to date.1 point
-
Servicing videos online are always quite interesting. One of the problems with some of the channels especially the ones that are extremely popular is do they really have to do it correctly? When you're making an entertaining video does it have to be done technically correct and the answer is of course not because they're making lots of money off making entertaining videos. I'm attaching a slightly different lubrication chart. We end up with the interesting problem of two cannon pinions with one of them for the friction and the other one has just sits there. You look at the parts list the center wheel with its short cannon pinion is shown as one component. Which we give the impression that normally they would not come apart. Because if they normally came apart it seems like they would be listed as two separate components. Normally yes we would use grease but very clearly their using 9010 which is a light oil. I don't suppose you have a replacement one in case disassembly does not work out well for you? Seiko-Oil-5606A.pdf1 point
-
If you look at horological literature that's available you will find very little on servicing like lubrication. This is because the literature when scanned into a PDF is primarily done for parts availability. Then it depended upon the particular watch company but a lot of them made the assumption that would know what you're supposed to be doing and they will give you a oiling chart for anything that you should already know how to oil it. Even give us the reference where is it covered? Then which lubrication are you going to use? Oh and there's a easy way to know if you're doing good or bad. The general consensus of a sizable percentage of the people on this group are properly serviced watch should do at least how many degrees of amplitude? If you think lubrication is controversy then minimum acceptable amplitude well if you do wrong you won't get your minimum amplitude and your life will be terminated. Yes the group does not tolerate amplitude failure.1 point
-
Hello and welcome from Leeds, England. Hello and welcome from Leeds, England. It helps to know your location, for sourcing parts, materials etc.1 point
-
You seriously want to start a poll among this crowd on lubrication?1 point
-
Welcome to the WRT forum.1 point
-
I remove the canon pinion, inspect, clean and grease it. L v105 and alcohol mixture is prefered, cuz not a single spot is left uncovered .1 point
-
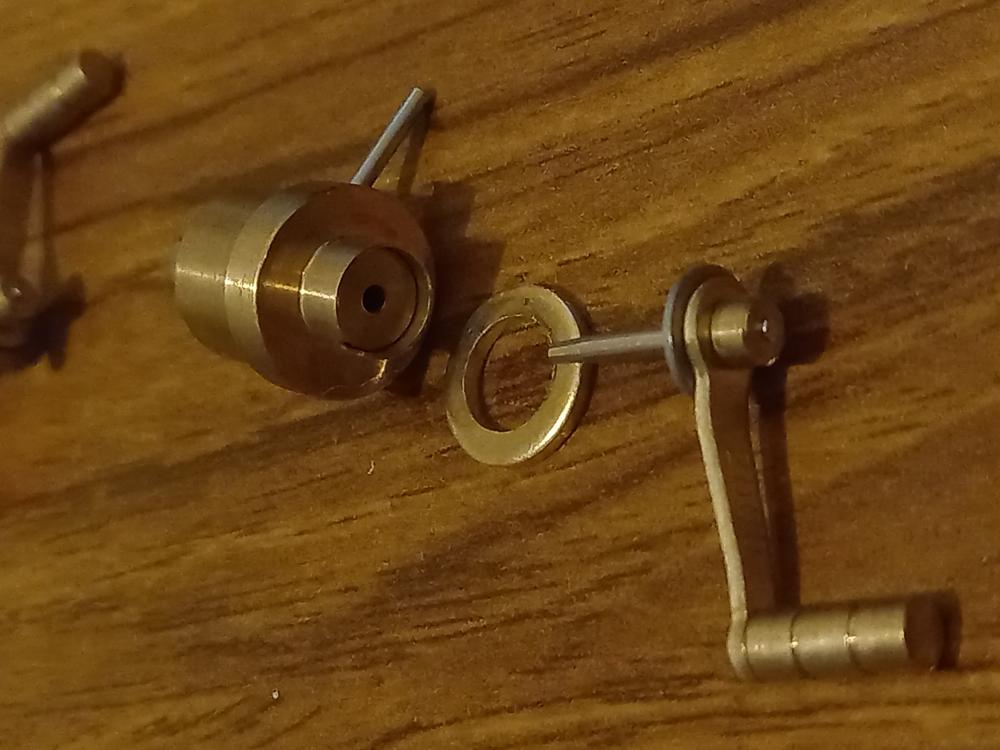
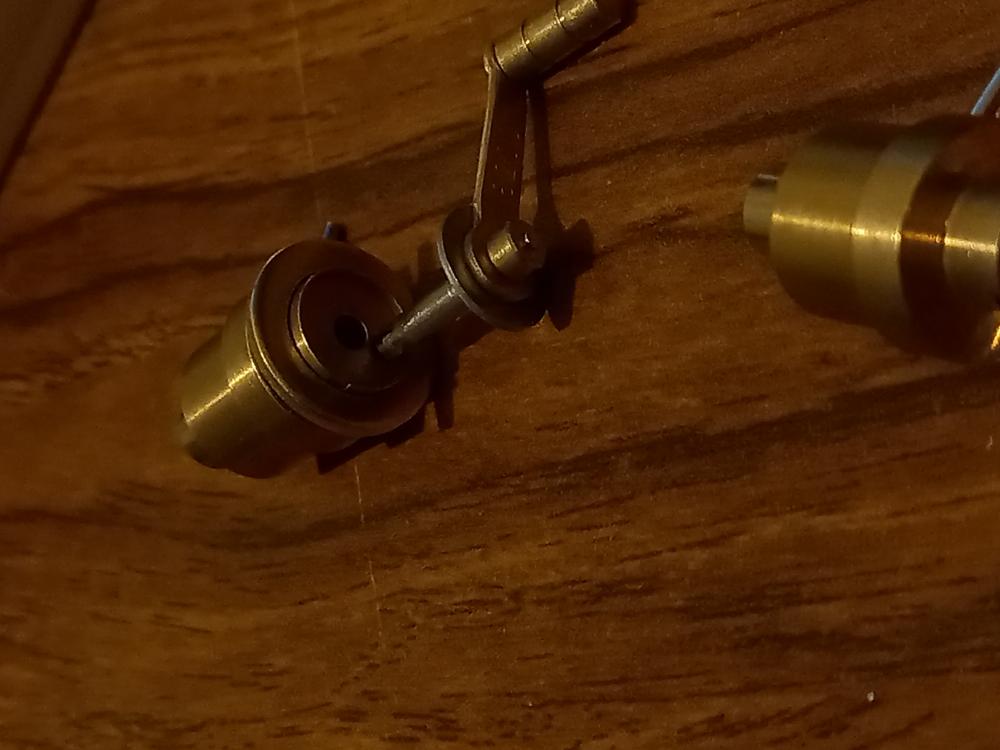
I hope it's OK to reply to this older thread. Here are a couple of pics of the mainspring winder I made using Joe Collins's design. You can see that I have added a locking collar at the brake block end. This is just an extra safety feature to prevent accidentally releasing the winding arbor from the chuck while the spring is under tension. I haven't actually used or tested it yet, as I still need to add spring hooks to the barrel and arbor that I am making.
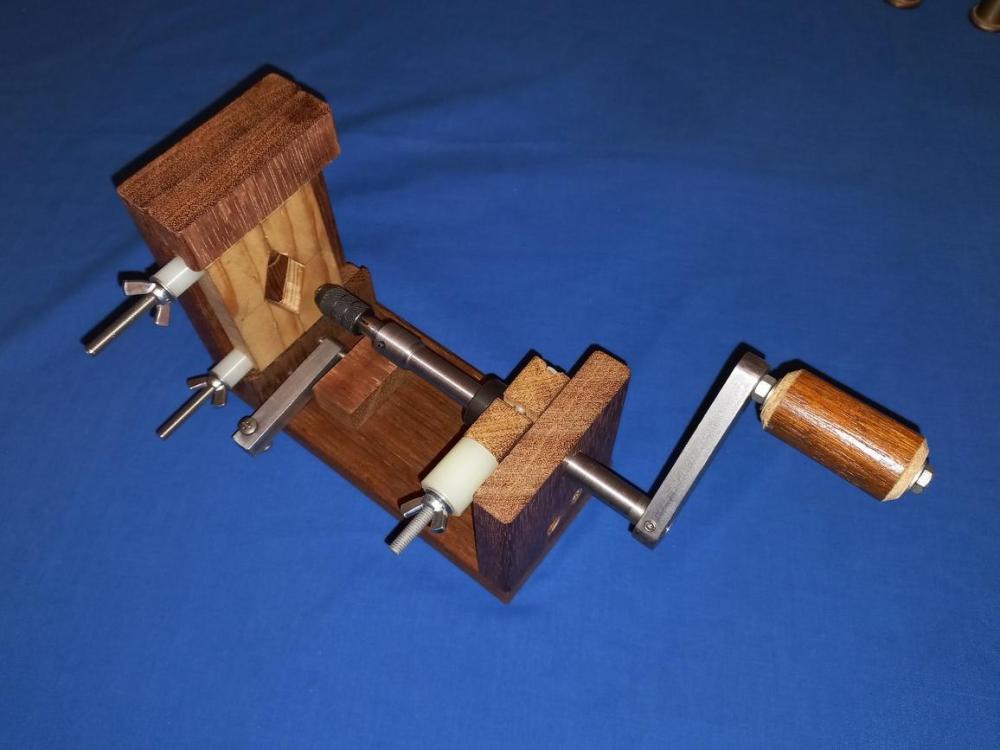
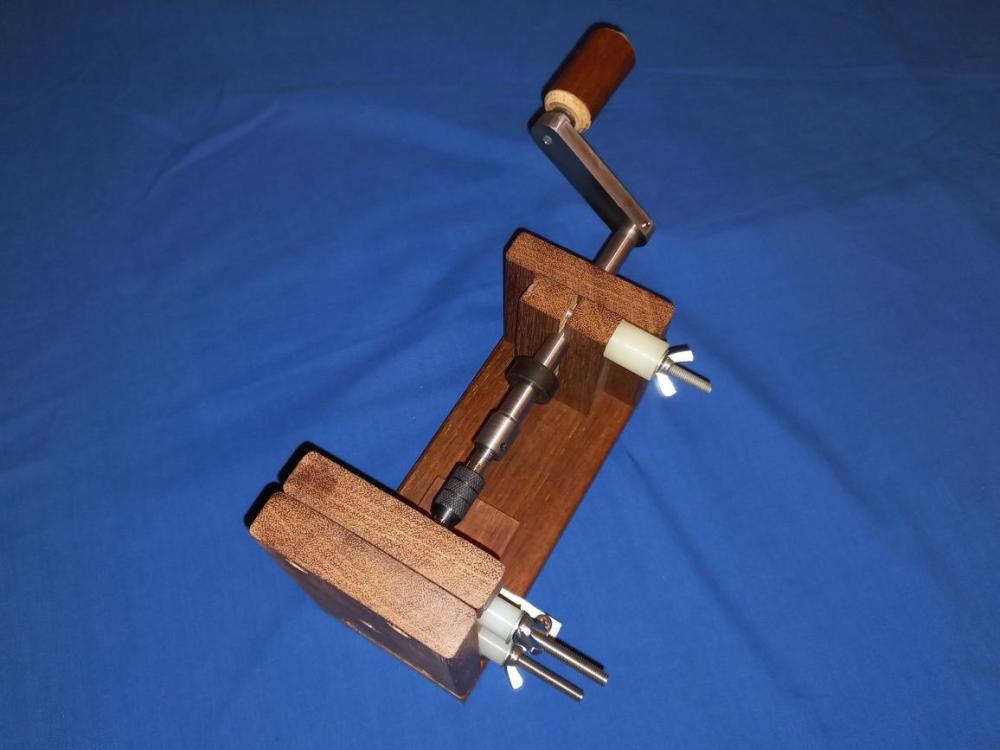 1 point
 -
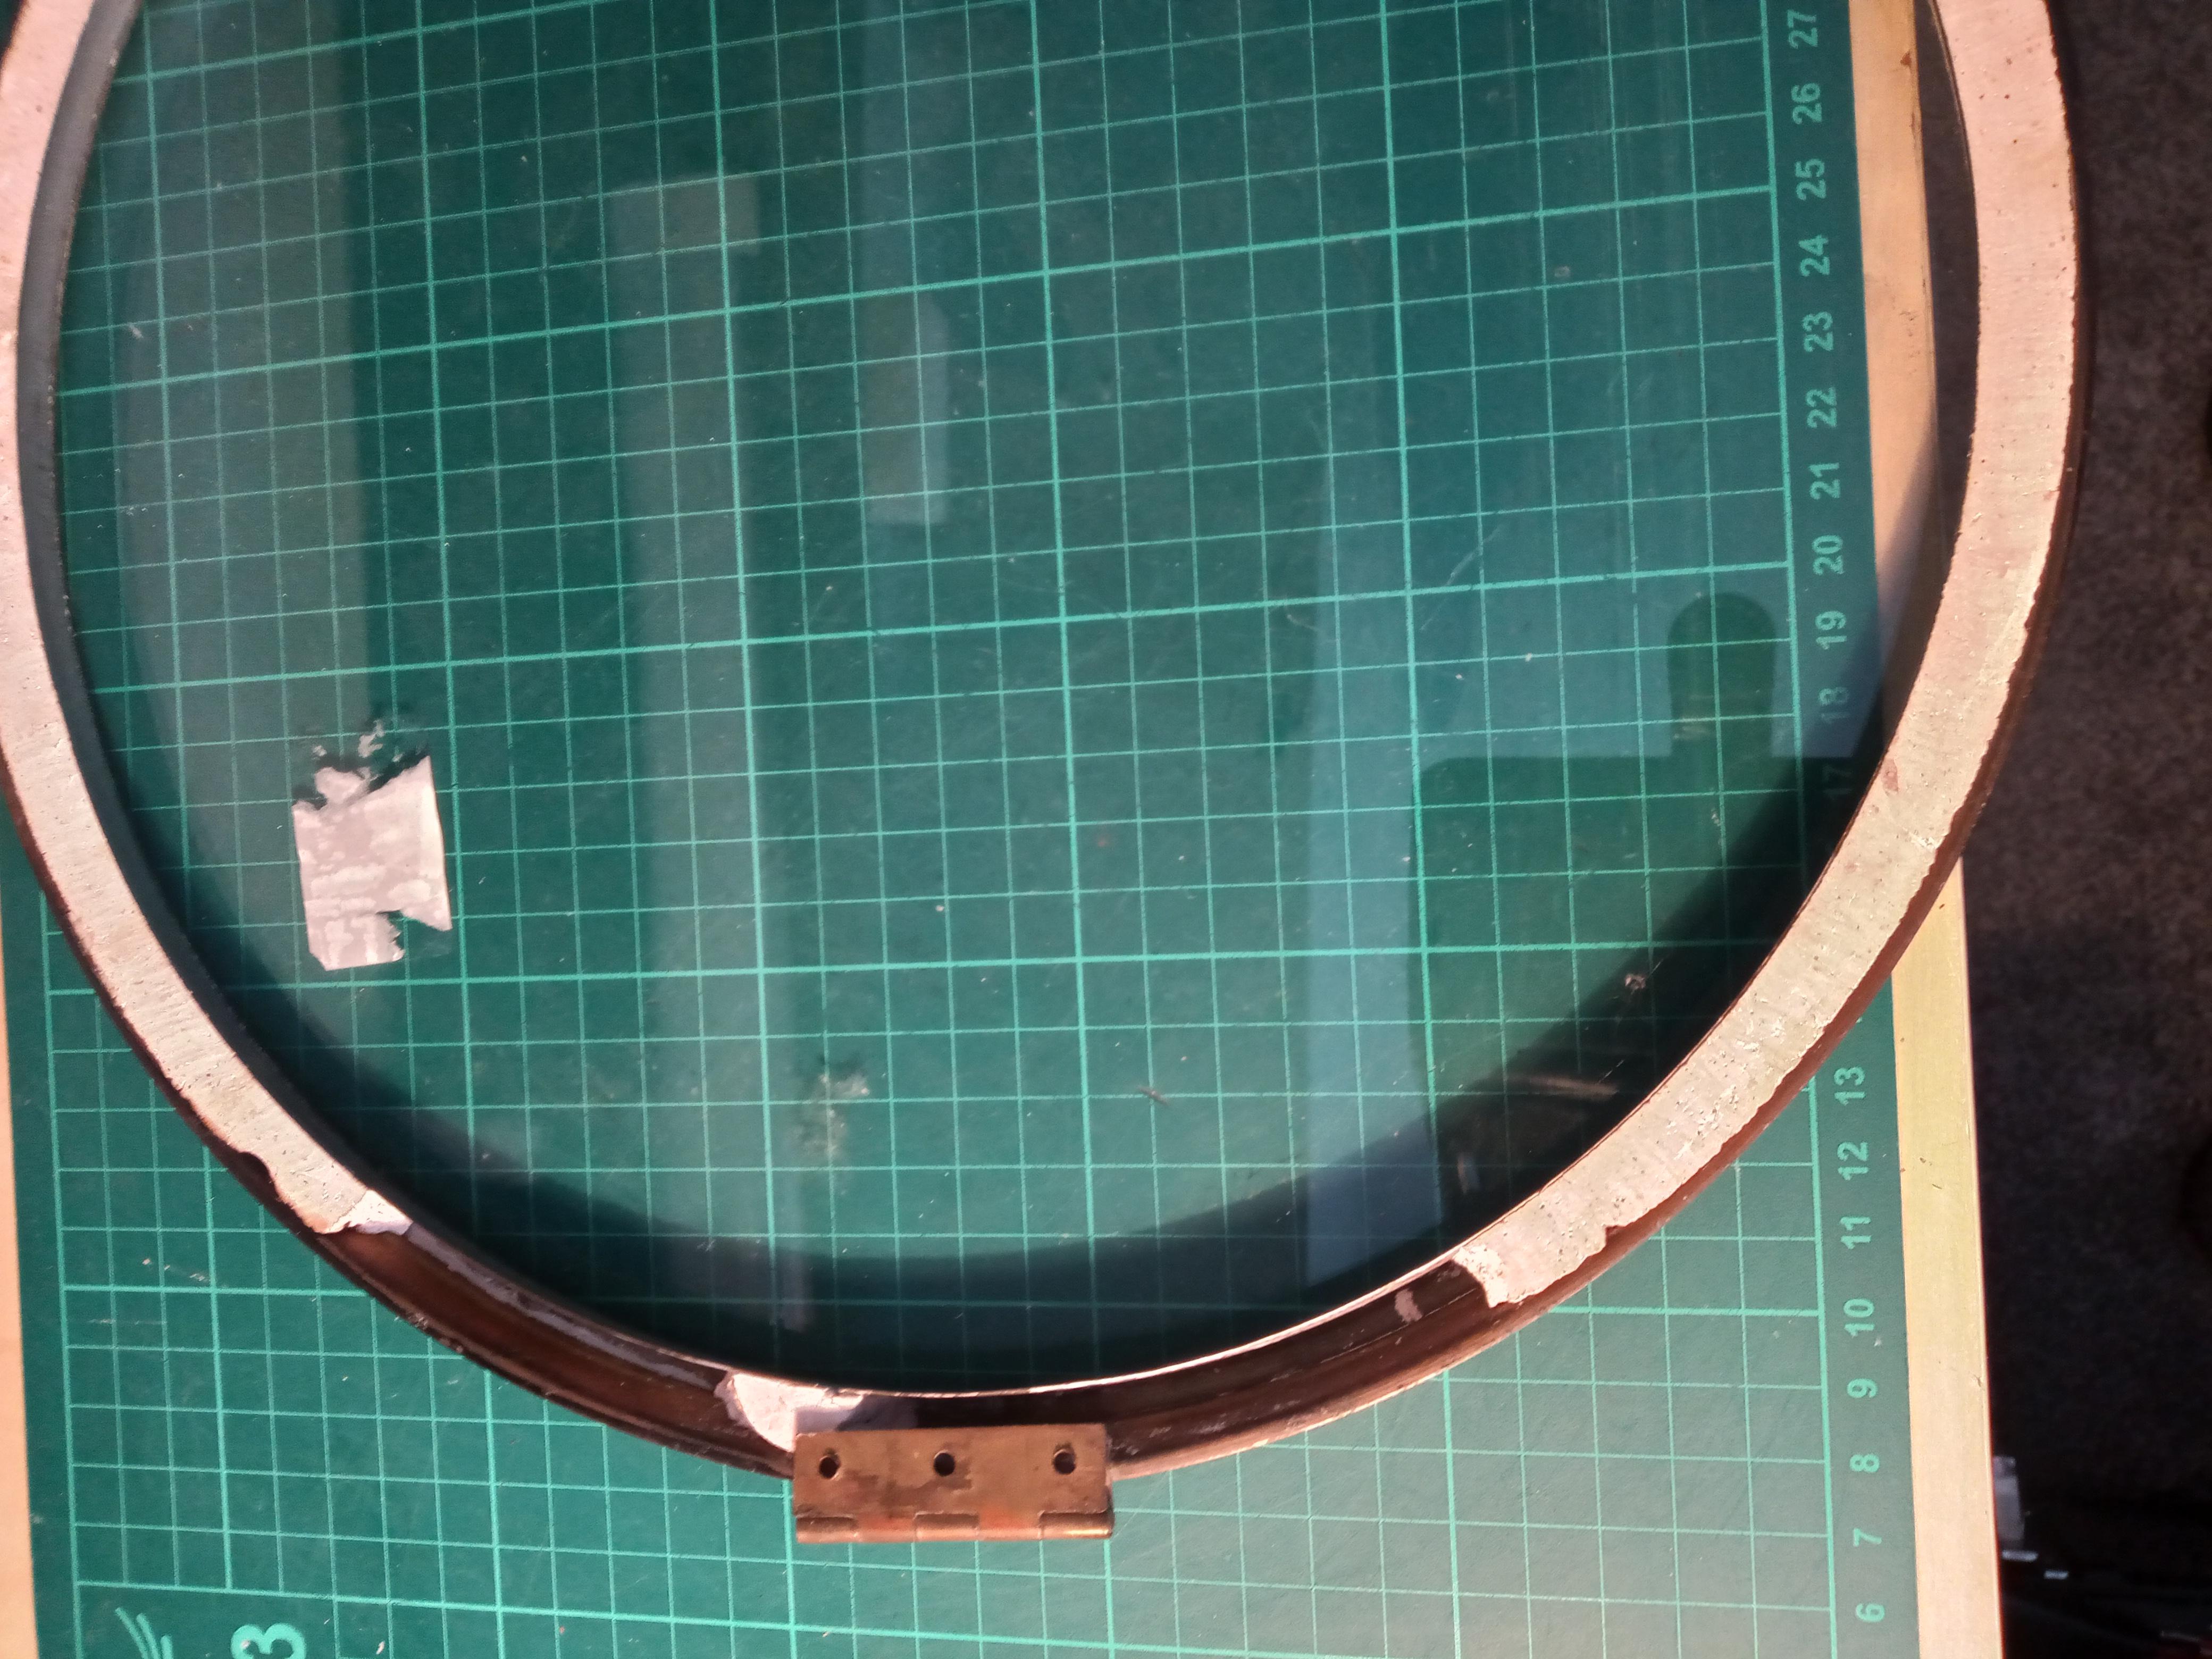
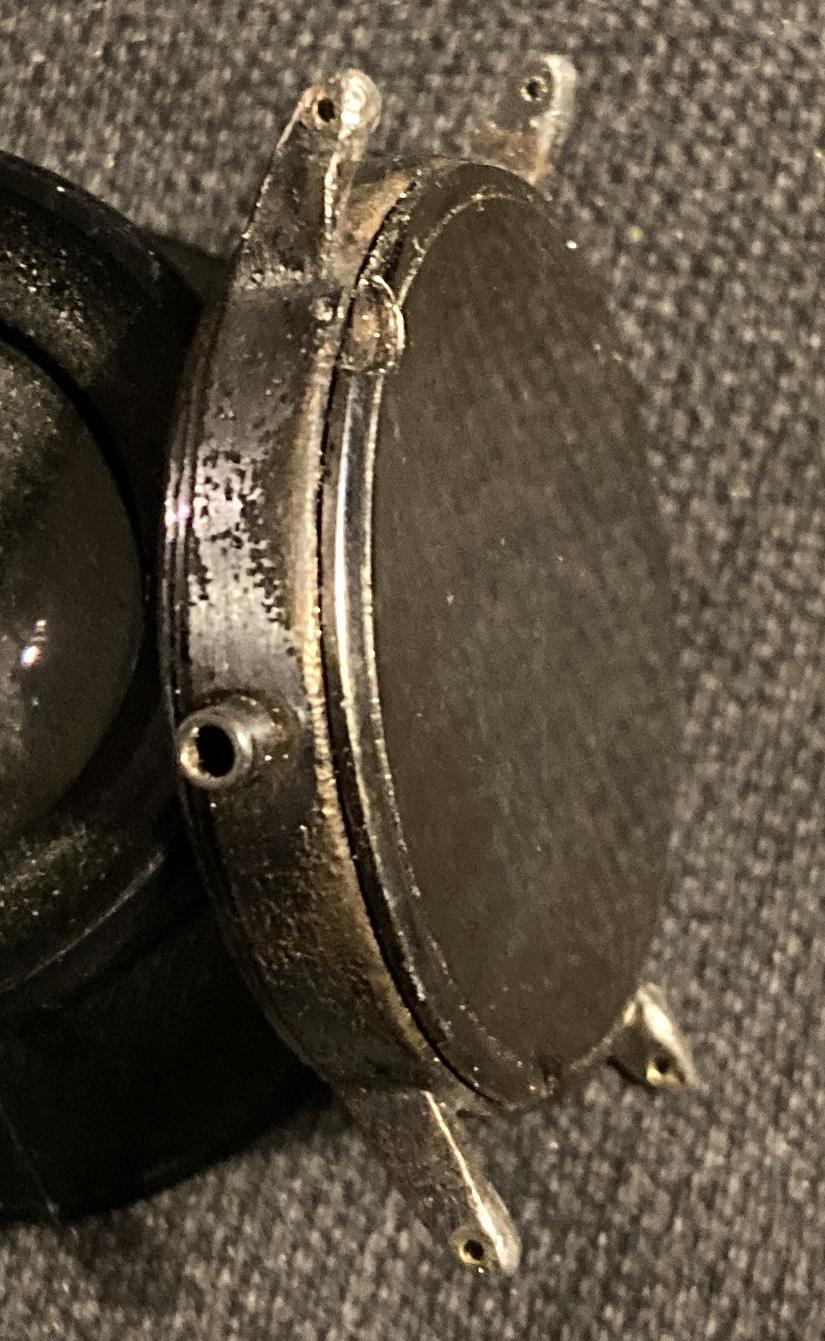
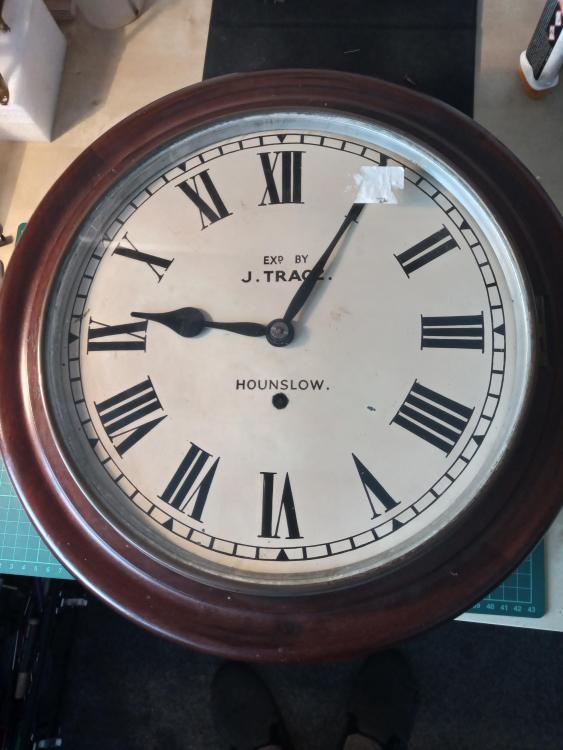
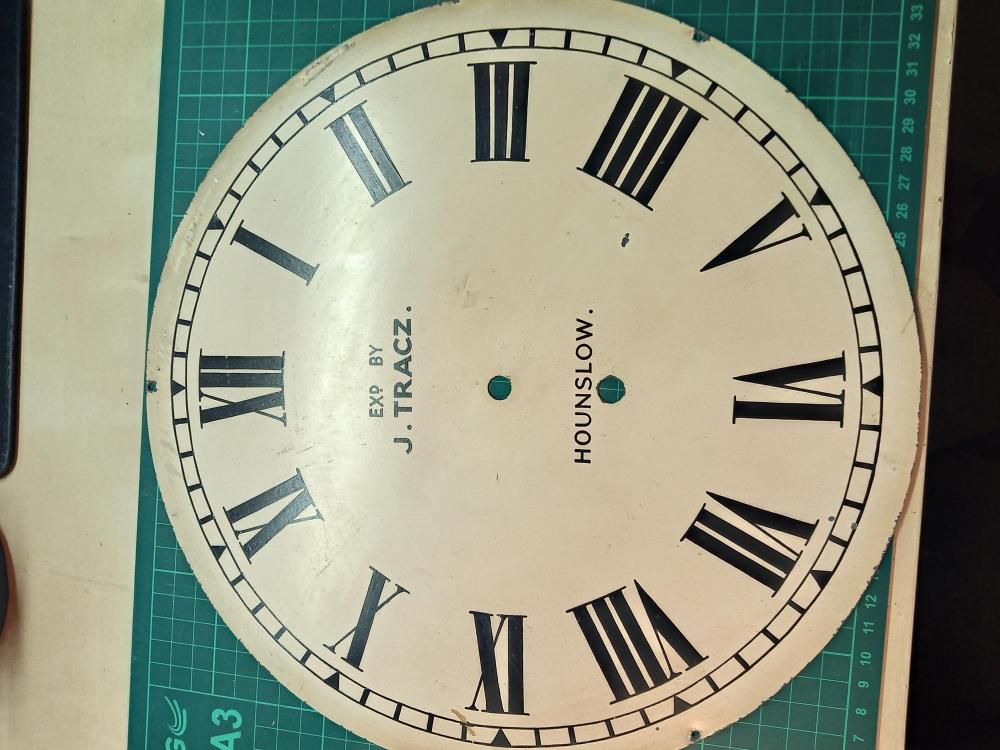
Hello all, my latest project is a dial clock with an Ansonia movement (pics attached) I am hoping somebody can help me with a few questions I have about it. The first relates to the makers marks on the movement - I can't find any reference to what they mean - is it possible to date the movement from them? The second is regarding the bezel, the rear of which appears to have been filled with what looks like Plaster of Paris, some of which is missing - does anyone know what this material is and whether it is likely to be a repair, or were these clocks made that way? Finally, the face is marked 'Exp by J Tracz - Hounslow' I can't find any information about J Tracz, so any information about that would be welcome, also the face is a bit grubby, but I am unsure how to clean it without causing any damage, so would appreciate any suggestions about the best way to do that Thanks in advance
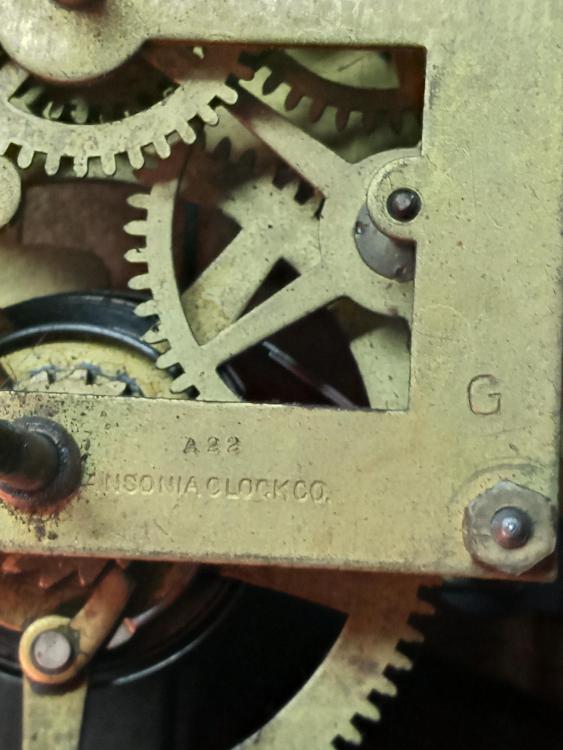

 1 point
 -
I think the EX.d is examined. Just like watches the movement was bought, examined and a dial, case etc fitted. Ansonia were American clock manufacturers.1 point
-
the plaster of paris on the bezel is fine, its how its still done, the name is most probably a jeweller/shop and not the clock maker so difficult to locate any information on that.1 point
-
Yes indeed. I haven't started on the escapement yet. I've done the barrel, and presently working on the main barrel arbor. I plan to make my own single point cutters for the escape wheels (There are two on this clock.) The hardening and tempering process should be interesting.1 point
-
Thank you for your introduction and welcome to this friendly forum. We all look forward to your contributions and continued involvement. If there is anything we can help you with don’t be afraid to ask. Nice clear photos can help a lot. Grasshopper escapement certainly not easy to make. For those that don't know what it is here is a picture.
 1 point
 -
Hello and welcome from Leeds, England.1 point
-
Top left corner of the pack in its own section
 1 point
 -
Wrap some aluminium foil around the stem end and install the crown on it. Rgds1 point
-
This never really stops for me. And more than parts, it's how small tools are. Something that looks as long as a wrist in a photo invariably turns out to be smaller than my little finger when the eBay package arrives.1 point
-
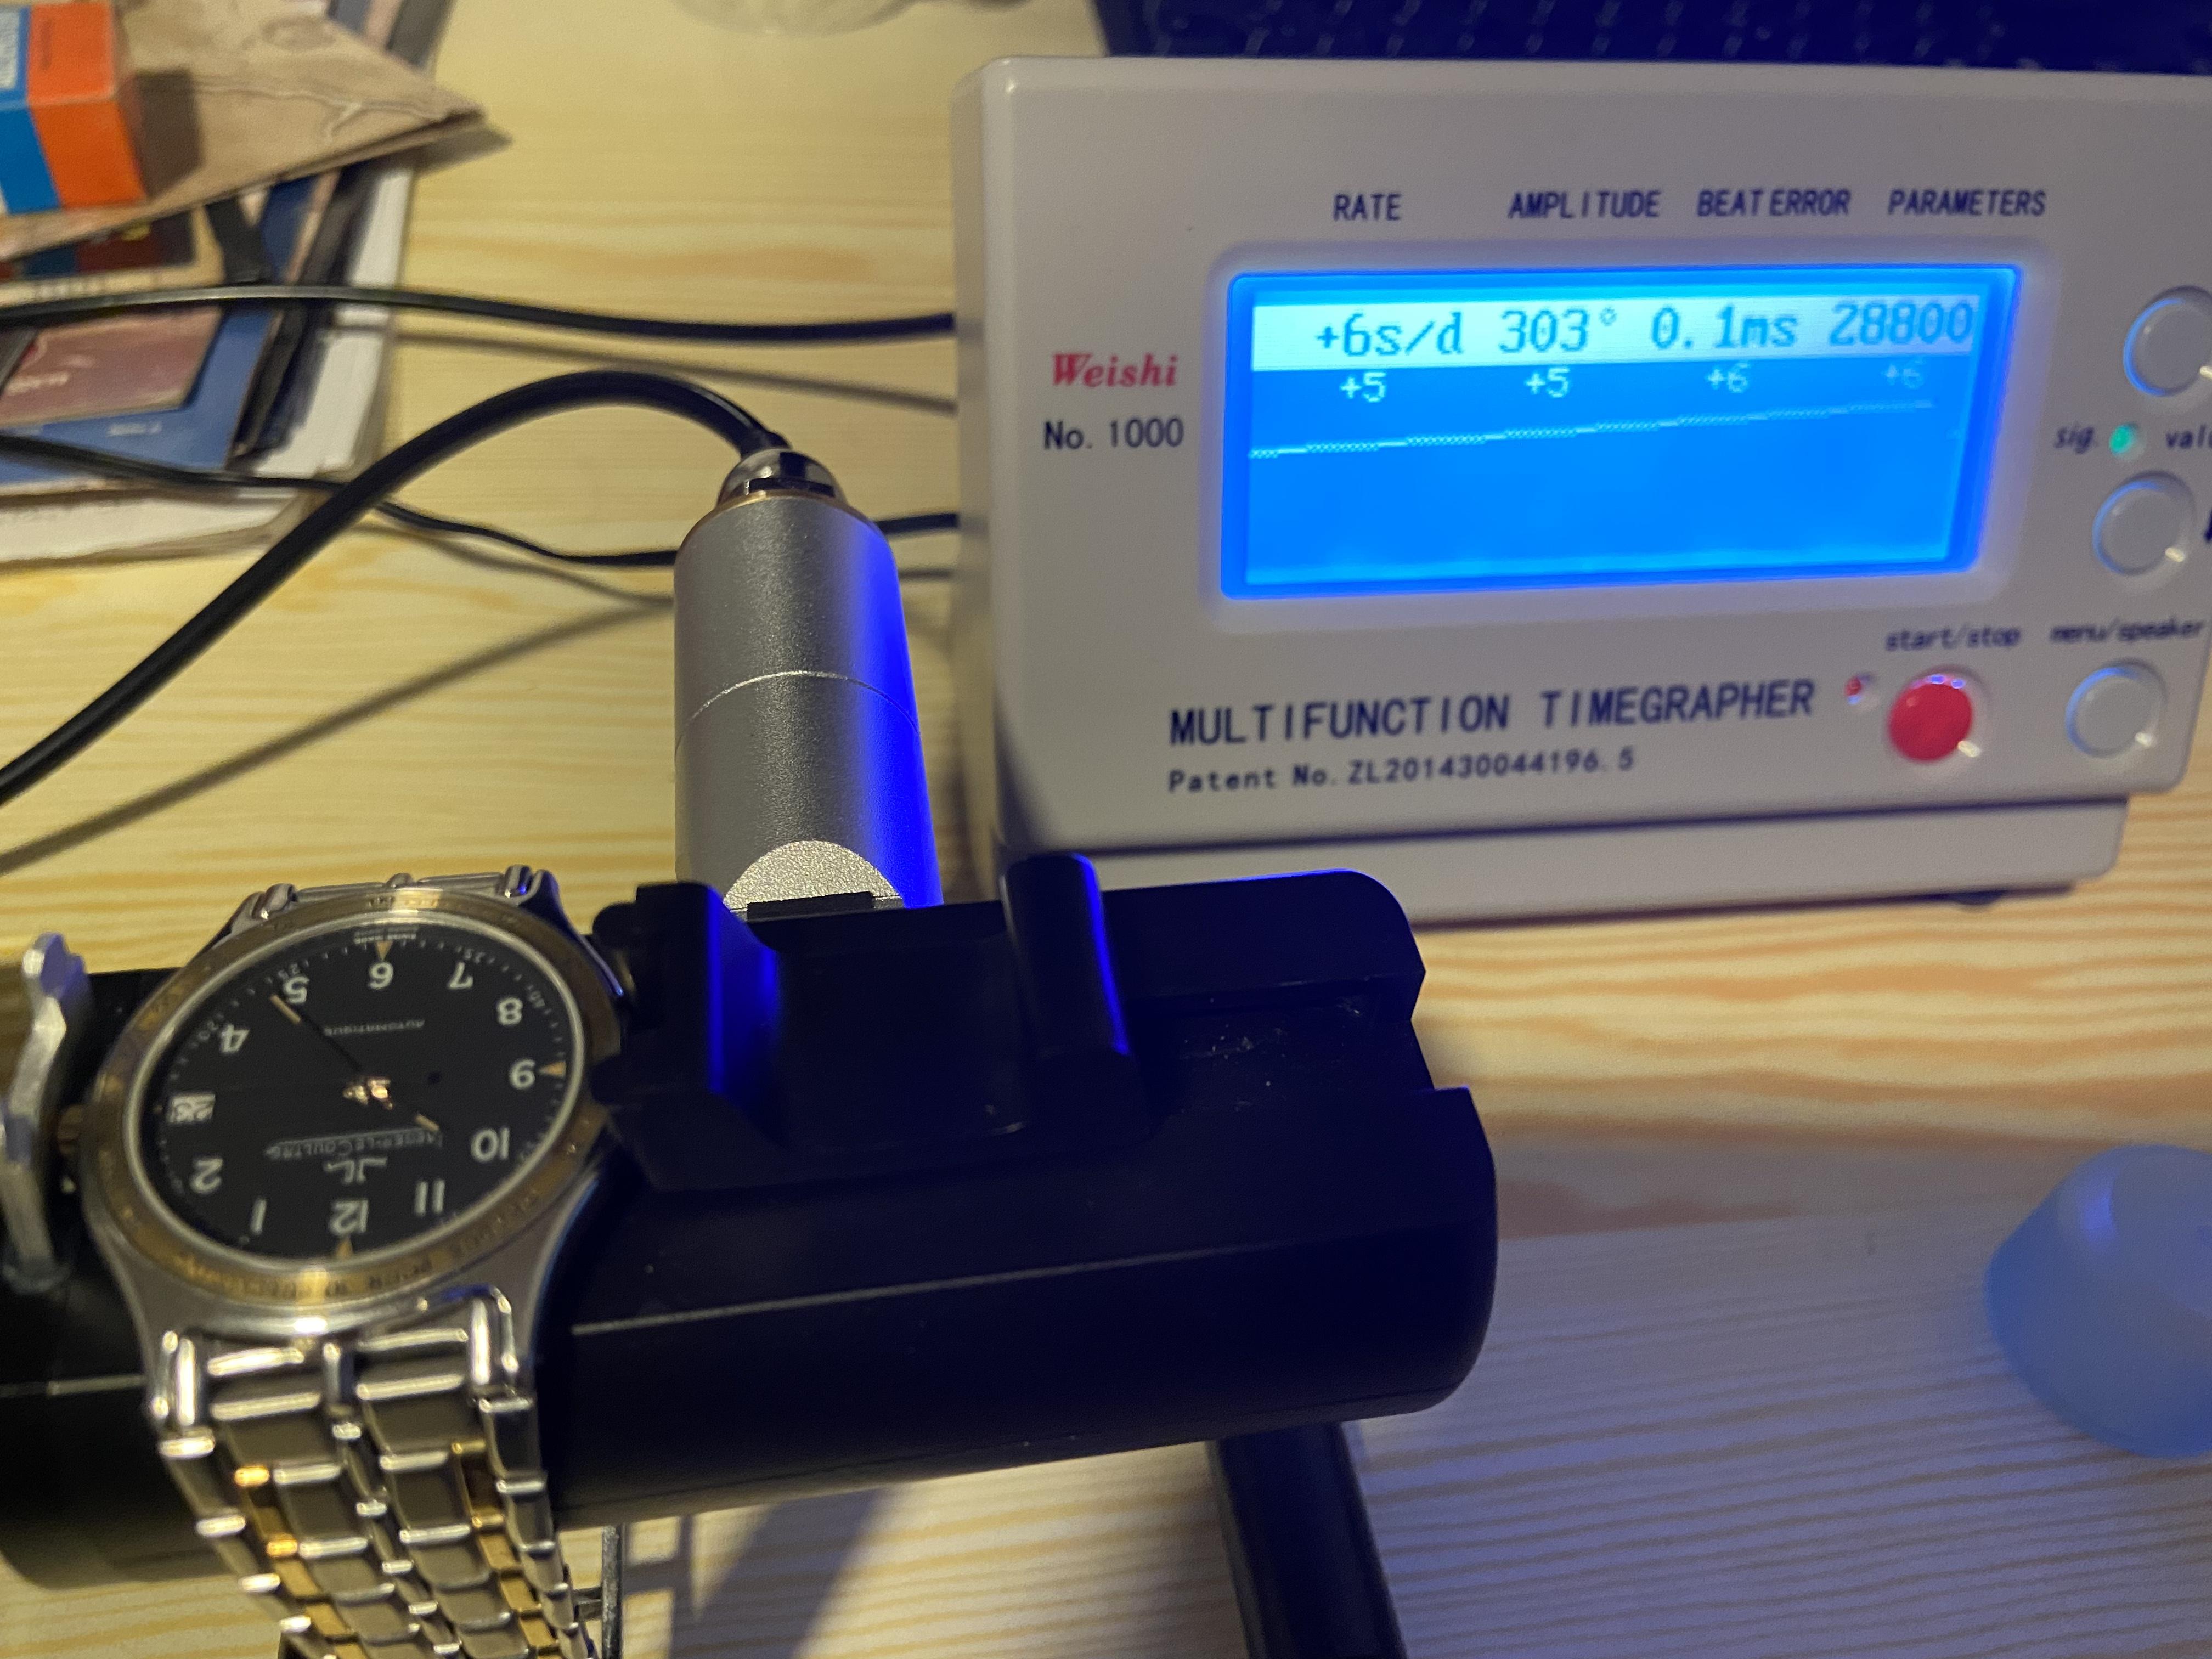
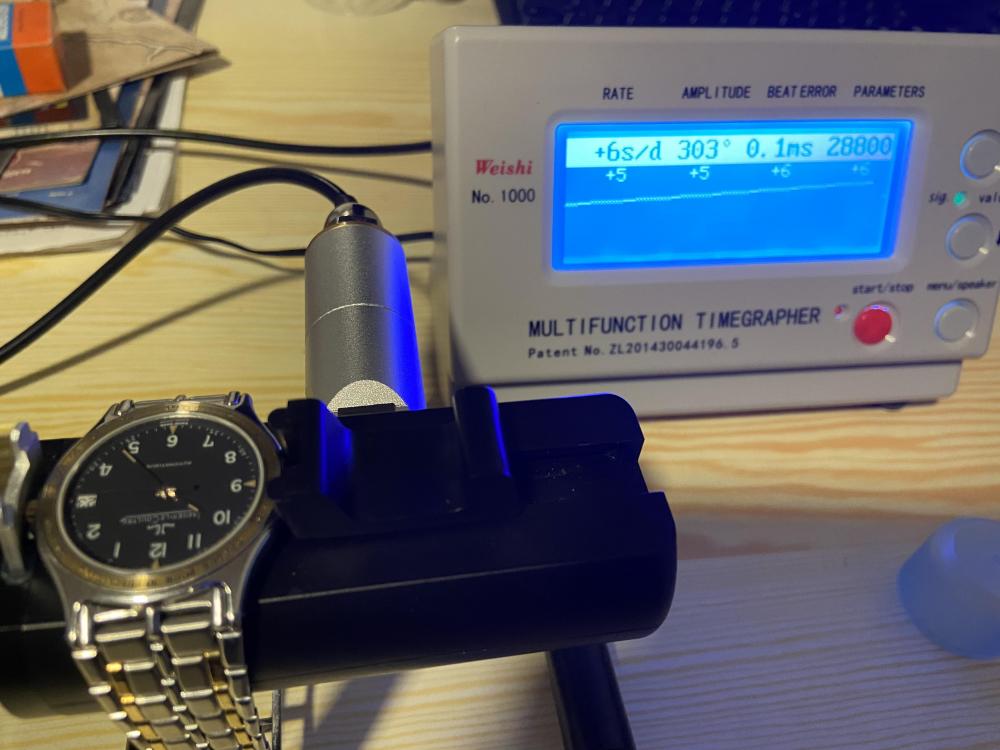
You,l love its TG print out, some escapement on these look as if a Grand Seiko. Wear it in good health.1 point
-
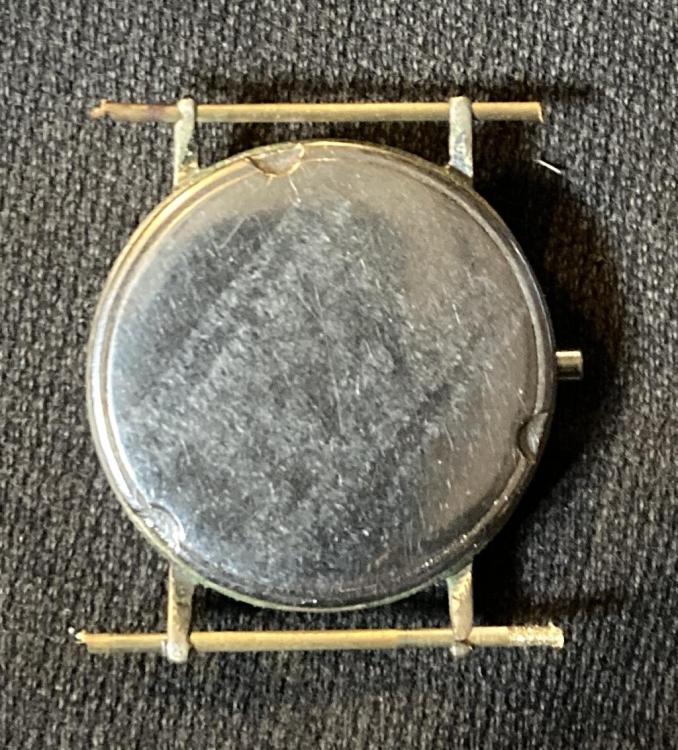
Restoring plated cases is certainly not a commercial proposition. In a way, that's why I have had to do it. Many of the watches I am interested in come from an era of plated cases so I would be very restricted if I stayed away from them. If it isn't worth anyone else's while to fix them I end up doing it myself. This was yesterday evening's lug repair - one lug on each side was worn right through and the other was paper thin; now taken back to the correct size for a spring bar pin. Alec
 1 point
 -
Welcome @MartinF! Nice to see more Scandinavians. I myself live in Sweden but have Denmark in my heart. I couldn't agree more. Never use force. Get a bigger hammer!1 point
-
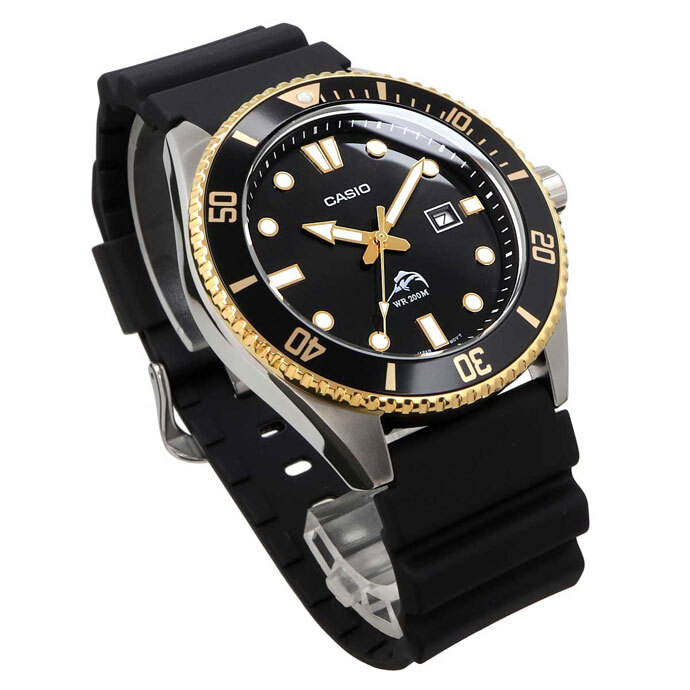
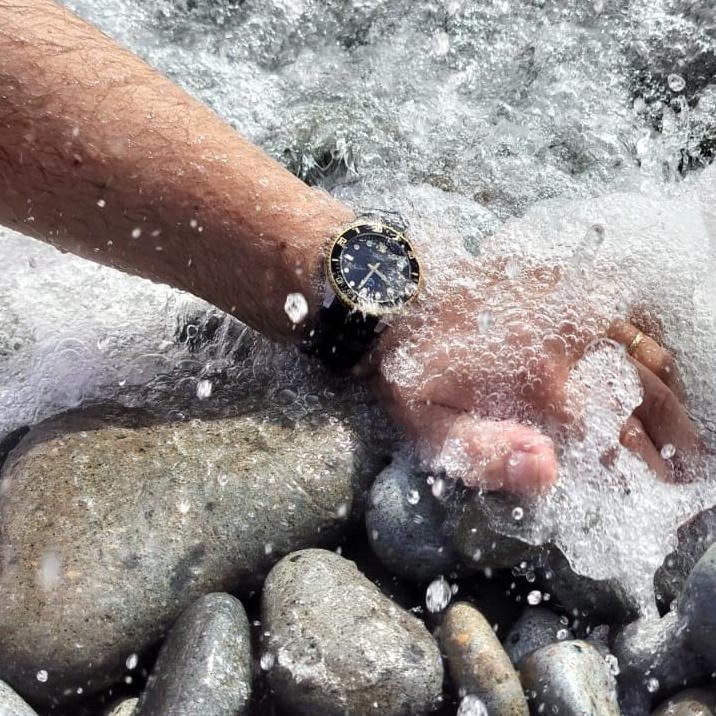
So, here it is in action at the Mabua Pebble Beach in the Philippines. The Philippines has an extremely humid environment overall but it keeps ticking perfectly. I am happy with my choice of watch for this vacation.
 1 point
 -
Occasionally you need to apply force but as in most things, it's knowing how much. Watch the videos of @Jon hammering like hell to remove a bezel. One thing to look out for is left handed screws, particularly on ratchet wheels.1 point
-
Dissolve in acetone. The glue that is.1 point
-
So, how did you get the superglued nut off the caseback? Or, are you wearing it with the nut?1 point
-
Hello hallftimer here old man trying to keep his mind working 7 was a 77 years old didn't think I see sixty was told I never see 21 was a little wild in younger days been self-employed since I was 21 except for 2 years around equipment and automotive business owned automotive repair and auto parts store until retired had massive stroke in 2011 reason for retirement but have made great recovery can do almost anything I want but can't take the heat or heavy labor have limited use of left arm and hand bud can place it and hold with it, so I'm doing good have always like working with my hands and now looking to just keep my mind working also doing CNC wood routing and sign making and selling on ebay1 point
-
Thank you for your introduction and welcome to this friendly forum. We all look forward to your contributions and continued involvement. If there is anything we can help you with don’t be afraid to ask. Nice clear photos can help a lot.1 point
-
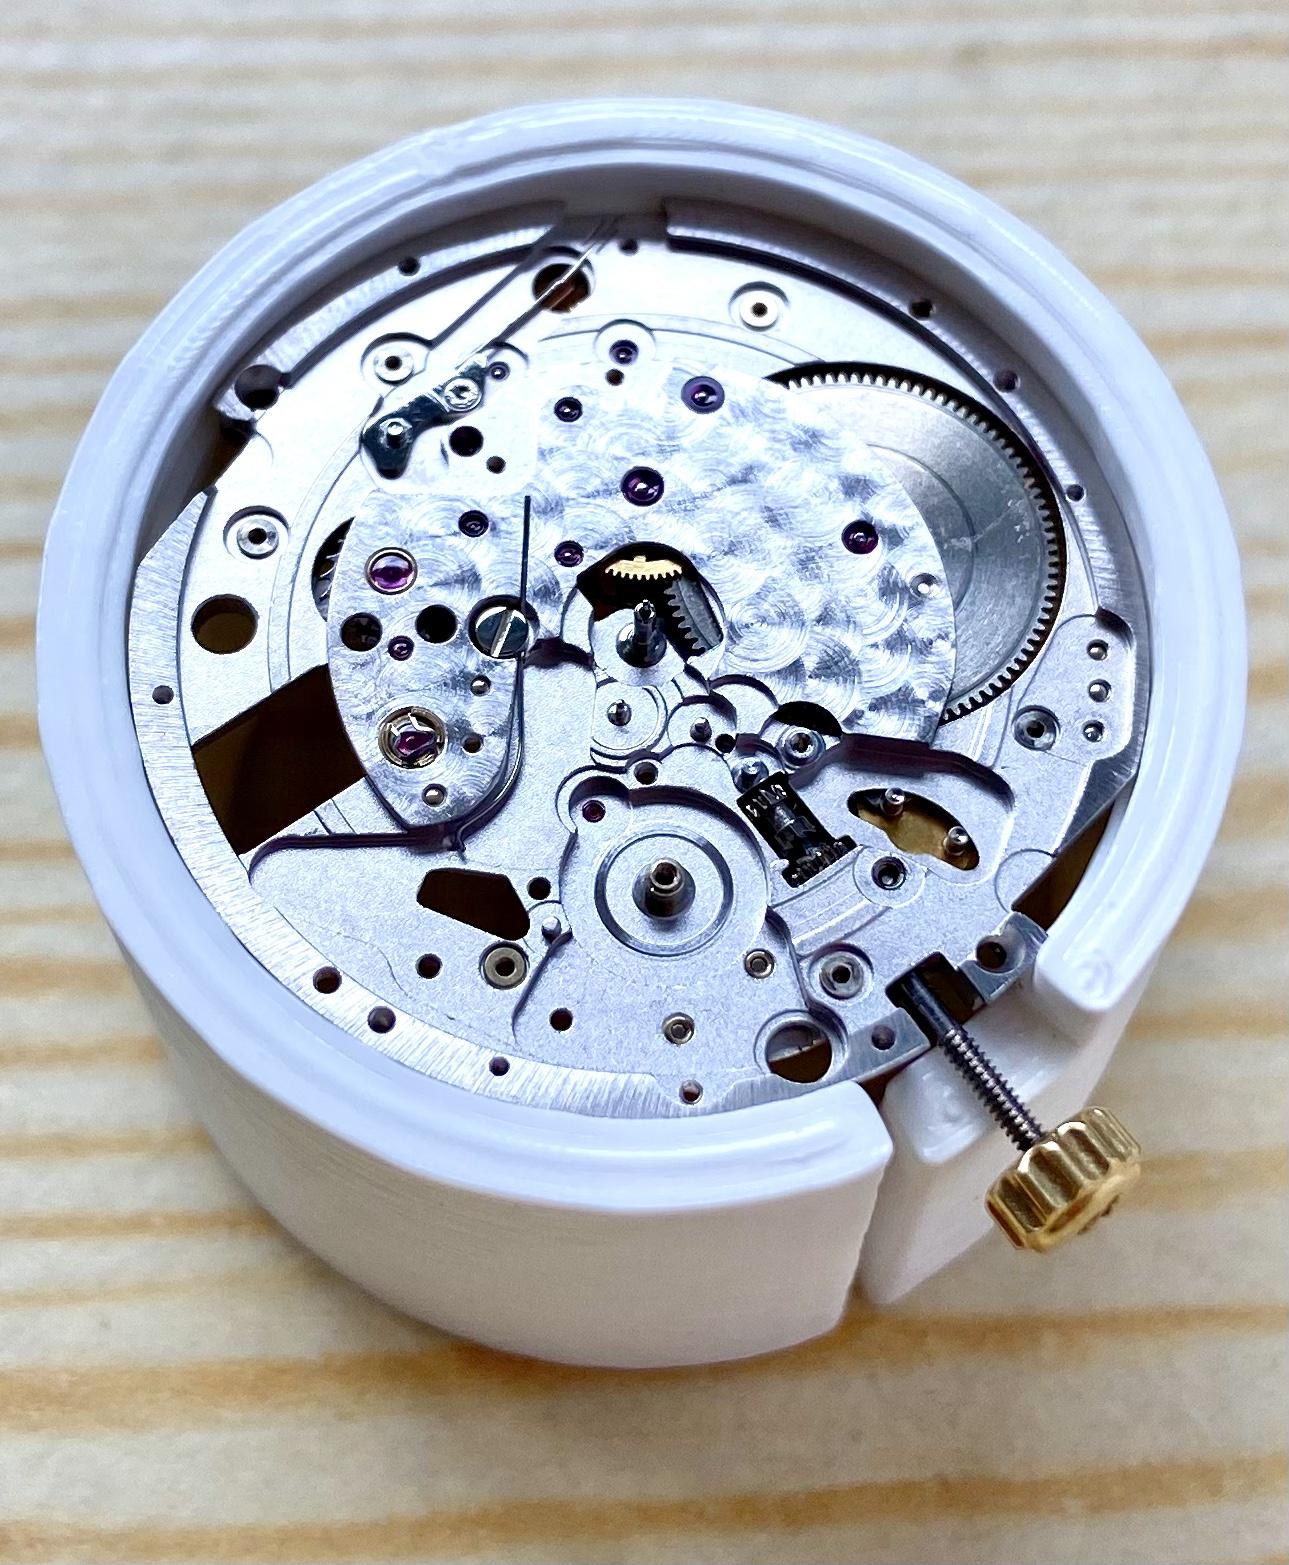
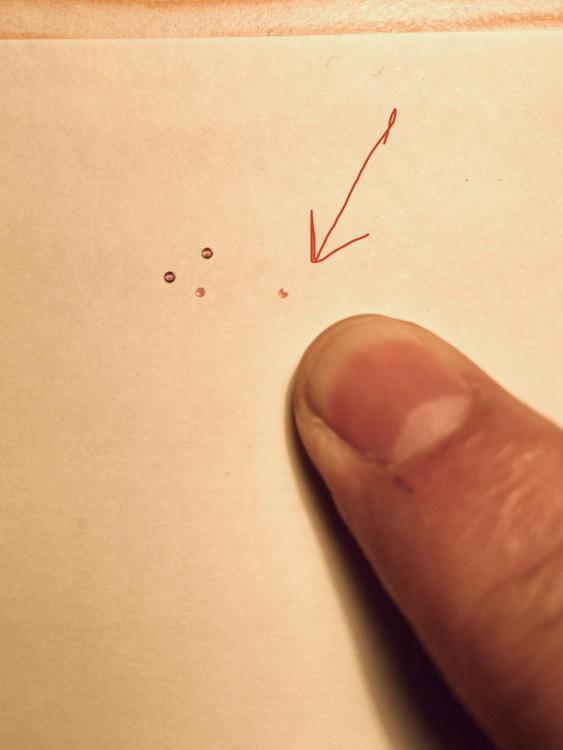
My JLC Heraion with caliber 889/1 needed a service. Having gained experience with several other (cheaper) watches I decided to try it myself. Being totally aware that I wouldn‘t get any spareparts if something might go wrong I was willing to let it serviced by JLC (about €800,-) if an accident should happen. Preparing my work I found a technical guide for the partially identical 928/2 at cousinsuk and a workthroug by the WatchGuy (AP Royal Oak with JLC 889/1). I designed a movement holder with a free CAD program and 3D printed it with my Ender 3. This holder supports the movement much better than my vice type holders. I didn‘t put me under time pressure in any way and just worked on the movement when I felt totally relaxed. A week later I had successfully disassembled the movement. Some screw hads unfortunately showed that I was not the first being inside this watch. The jewels of the fast reving wheels were totally dry and clean (!) showing that modern oils don‘t gum up but do eventually evaporate. I successfully cleaned the parts in pharmaceutical petroleum ether 40/60 and One Dip. The escape wheel and the pallet fork got epilamed. What happened to be the most challenging task was handling and oiling the super tiny capstones (0,9x0,12mm). One of them slipped out of my tweecers. My heart stood still for a moment. After hours of searching I gave up. I suspect the tiny particle landed on my clothes, skin or hair where it couldn‘t be seen. After some research I found that it is a standard KIF 508 which I could order with Boley. This time I was lucky For oiling the combined stones (fixed cap) of the escape wheel I found help in this forum. Meanwhile the watch is ticking healthy again and shows good results on the time grapher.


 1 point
 -
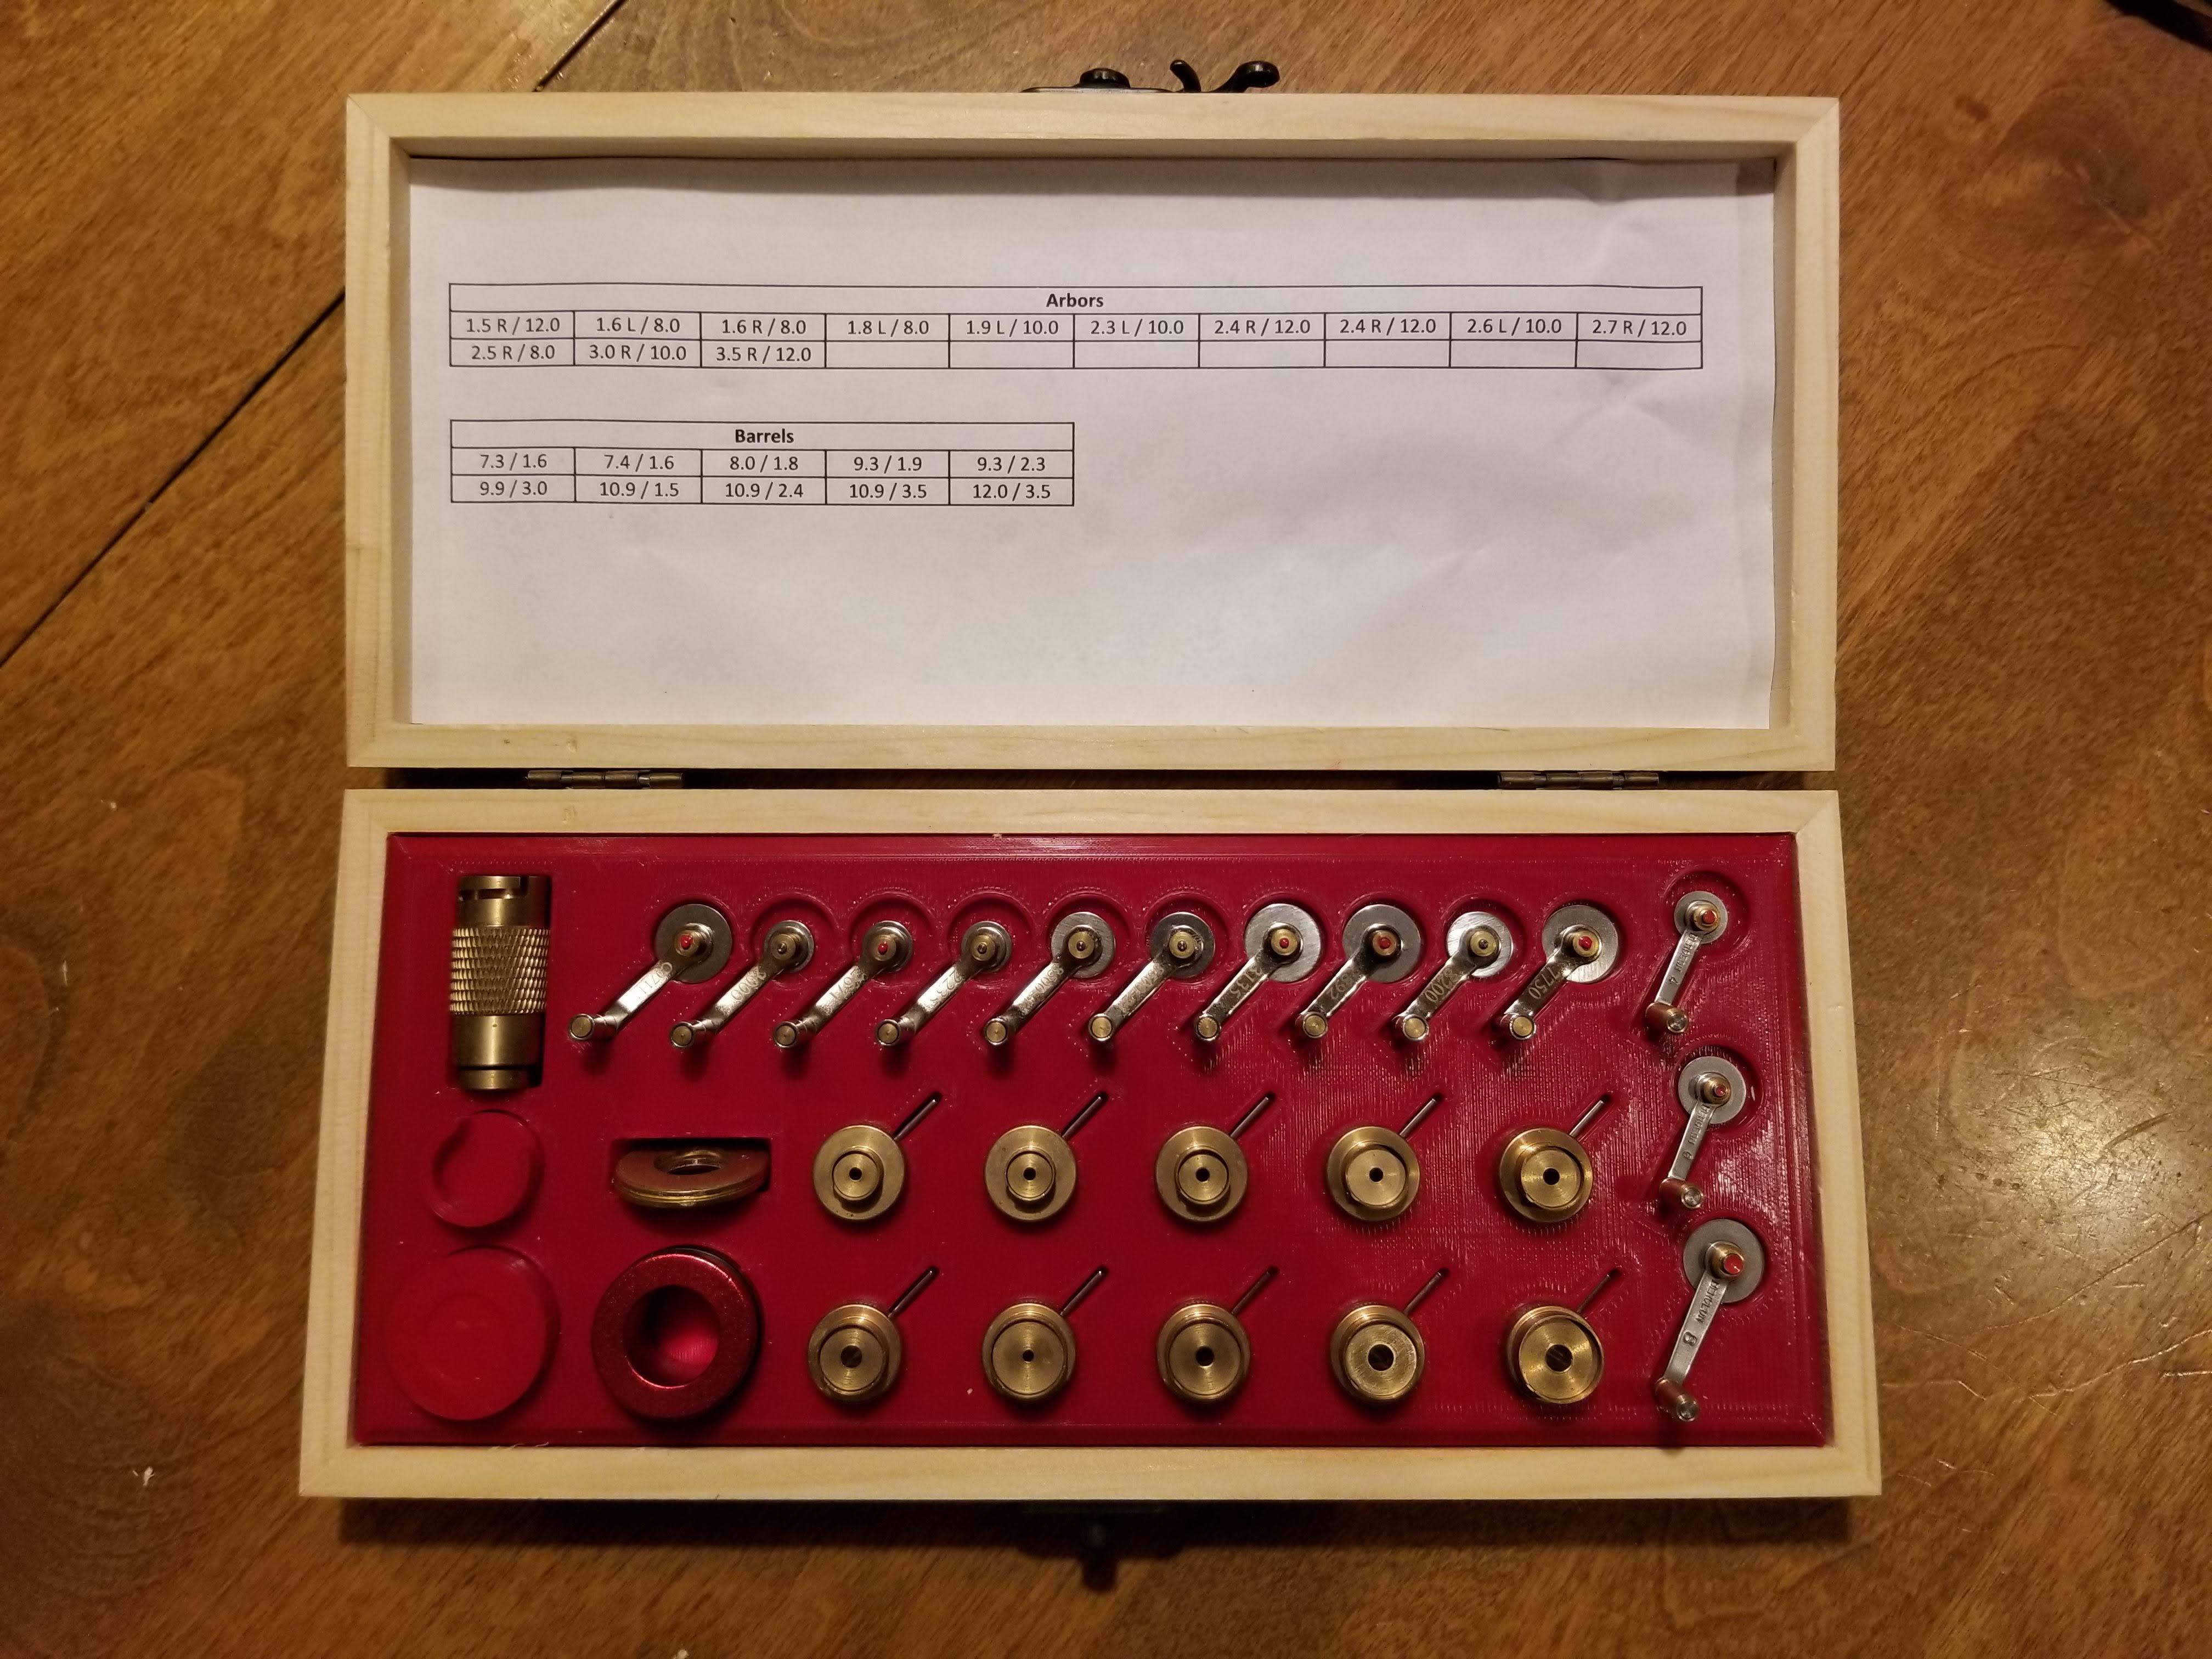
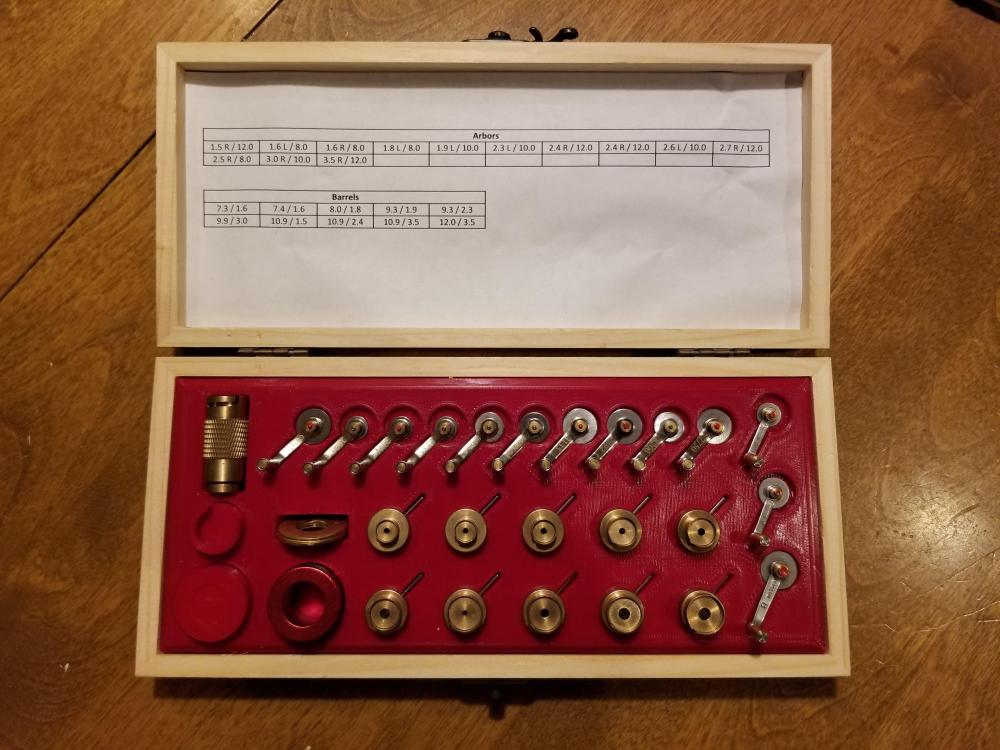
You can modify the cheap Chinese set to make it more of a generic set. I did that with several of the winders from my set, by drilling out the arbor hole to a larger size. I chucked the pusher part of the winder in a vise and slowly drilled out the arbor hole. If the winder comes apart in doing so, just push it back together. With my modified set, it is easier to find the combination of arbor and winder that I need for a particular mainspring. I went a bit further by buying the Bergeon #6 and #8 arbors (arbors only, not with the winders), which gives me arbors of 3.0mm and 3.5mm diameter, respectively. The largest arbor from the cheap set was 2.7mm and that was too small for some of the vintage mainsprings that I was working with. Well, I also bought the #4, which turns out that I didn't really need. If you need a left hand wind but only have a right hand arbor (or vice versa), You can do one of two things. Wind up the mainspring into a winder, preferably a bit smaller than you would normally grab, push it into the winder that is a bit bigger than the first, then push it into the watch barrel. Or you can make up a series of brass washers, drilled out to different diameters, grab one of those to push the mainspring into, flip it over and then push it into the watch barrel. Attached is a photo of my modified set and a chart that shows winder sizes. Mainspring-Winder-Size-Charts.pdf
 1 point
 -
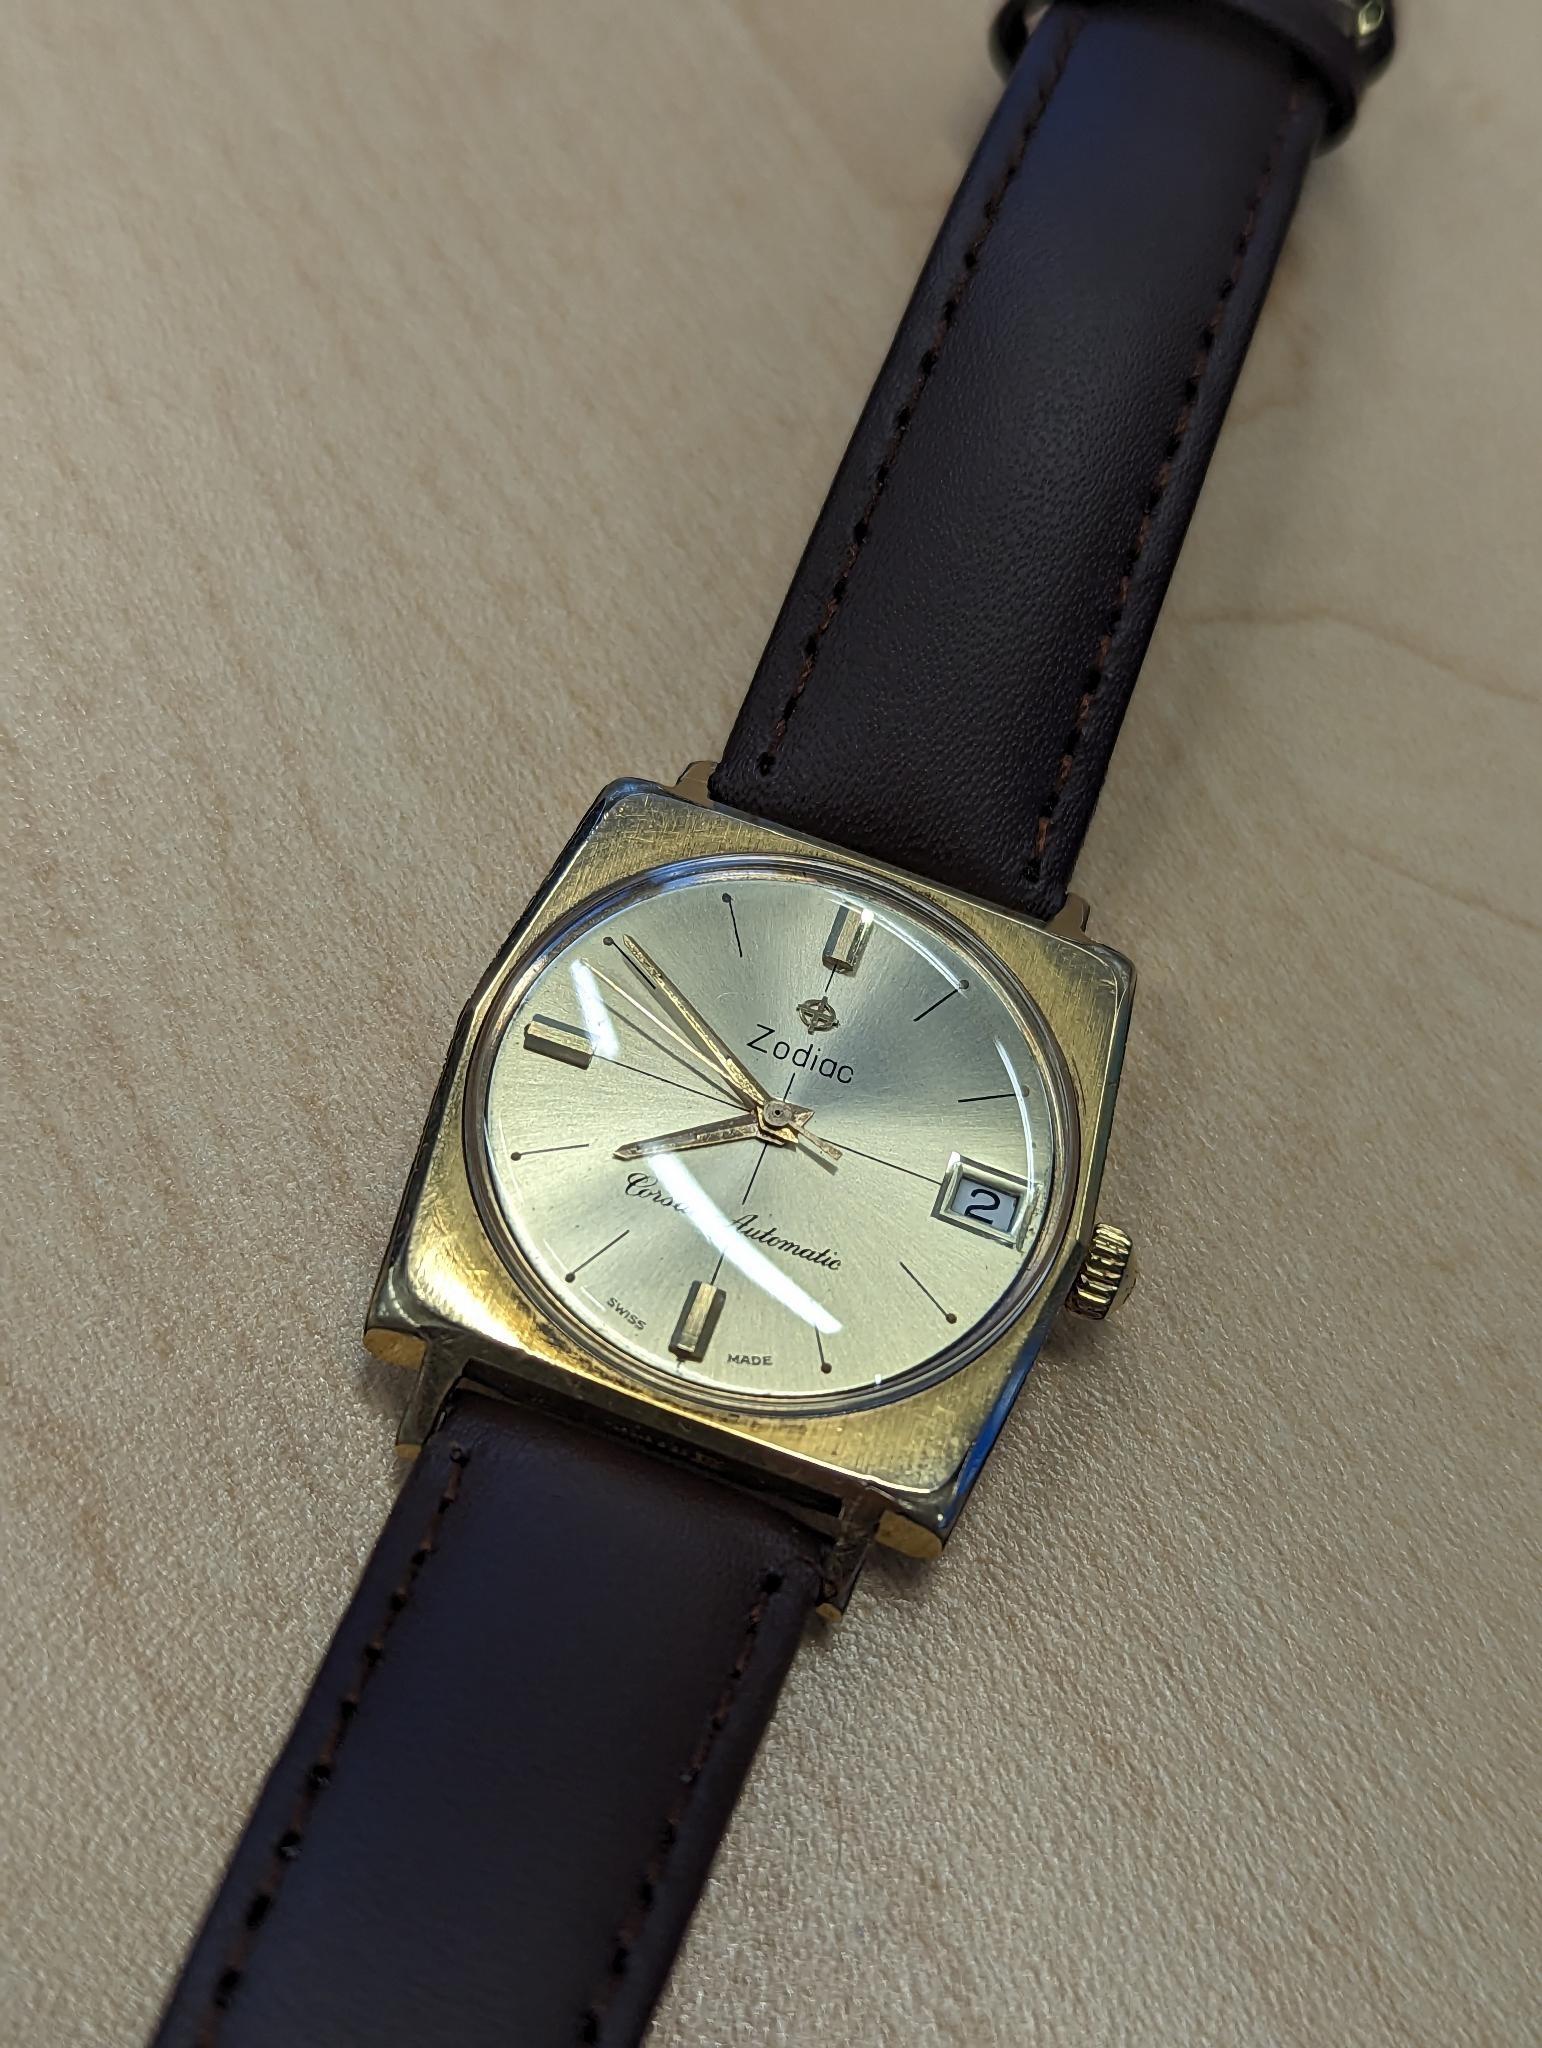
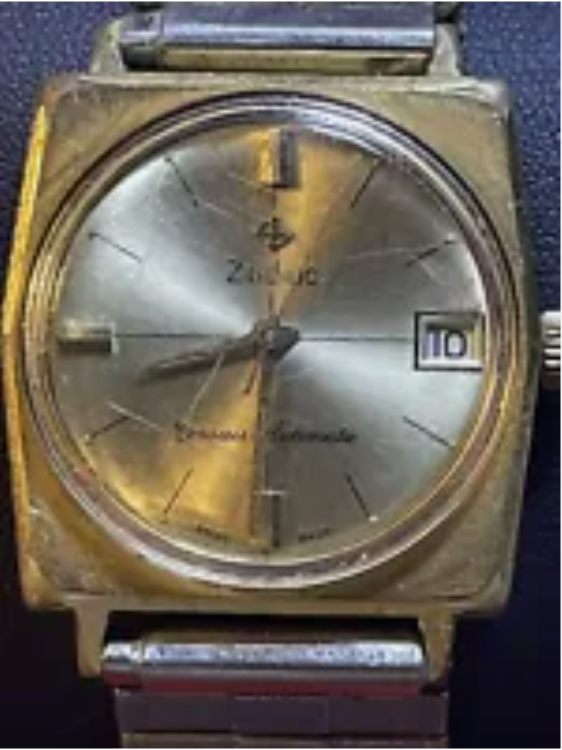
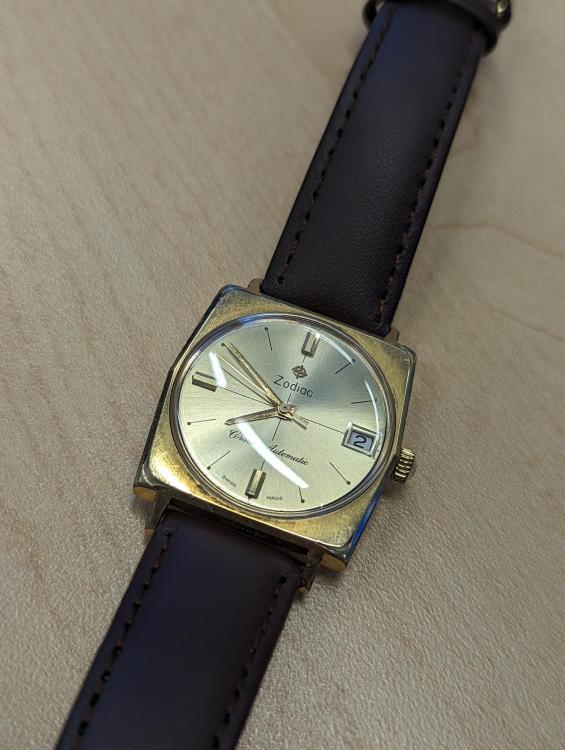
It was a public holiday here in the UAE on Friday, so I decided to put it to good use and work on a watch that has been on my to-do list for a while which is an automatic Zodiac square watch. The build went well, however I am still ironing out the bugs in my scope camera and ended up losing all the photos I took of the pre-build and build this also made the re-build a challenge as the calendar works side was a little unusual (bridge over the cannon pinion). So only have a picture to show of the before and finished watch, the dial was in great shape under a beaten up crystal which I replaced. I didn't do much with the case as the plating was already starting to wear, so just a quick polish with some Flitz. Here is the before: And here is the completed watch:
 1 point
 -
Finished off the set with a 3D printed holder. If I had to do it over, I'd not have gotten the Bergeon #4 handle, as the cheap set has a couple of handles that may suit.
 1 point
 -
The washer are deeper than any new mainspring holder. The two smaller washers are 13 mm in depth and the Large one is 17 mm. I don't think there are many mainsprings that are above 12 mm. I have used tweezers to push the springs out of the brass washer and into the barrel. Point, top and flat. I could use a screwdriver I suppose. I always measure that the inside diameter of the washer is less than the inside barrel diameter. Sorry, no photographs of the springs. Will do when I next place a spring. For information. The packs that I purchased were 3 sizes. M6, M8 and M10. https://www.ebay.co.uk/itm/153732007183?var=453981000801 Suppose I could have purchased these. Would have been less filing. https://www.ebay.co.uk/itm/133013267762?_trkparms=amclksrc%3DITM%26aid%3D1110006%26algo%3DHOMESPLICE.SIM%26ao%3D1%26asc%3D20201210111451%26meid%3De2e1f47f99794a508ce6b249478247b7%26pid%3D101196%26rk%3D2%26rkt%3D12%26sd%3D153732007183%26itm%3D133013267762%26pmt%3D1%26noa%3D0%26pg%3D2047675%26algv%3DSimplAMLv5PairwiseWebWithBBEV2bAndUBSourceDemotionWithUltimatelyBoughtOfCoviewV1%26brand%3DUnbranded&_trksid=p2047675.c101196.m2219&amdata=cksum%3A133013267762e2e1f47f99794a508ce6b249478247b7|enc%3AAQAIAAABMPzGgyhK8D4QCApcBuWVQe1qsoN395NgJVWTF7eo2rfipPwdfCio0EI4F5H%2Bx0wtS8%2Fu%2Fr%2FRUxEZ1KxNtbAGuwQqNawa9Mz45LW45pYy0nujlbWP4ofGoZQT5ZMVaNP0FJLG1A2vn5OR1%2BWJrZIvd3%2FpjZ7ypYLXyCNON6DZc8B0bZv21L34UD8Ifvb%2BIeDPhnSwEX1q9OQSkuxqFzPiTFgjz3MATCHuuyA1DrSVUBMJQG14IselWpDqY0mXlh8%2Bgehs%2FDLd6pT7IfJeLDUO3Dfb%2FXerGl%2FzJSybaHovbo6sVM7pCsNiztMBr0xDKuNqMwQEGX%2BQUw4f8nlKVt8mMy52gAn8QWQIH%2FFonSh1DsryGhprfMx9HYjGdv327Jf9LBEXQhIYDcg8YpMKnNCL%2FVQ%3D|ampid%3APL_CLK|clp%3A2047675
 1 point
 -
Do the wind right. Place it in the washer. Turn the washer over and push the spring into the barrel as though it were a new spring.1 point


.jpeg.e9a9728a944c9ff8cf42edb1a6a8cecc.jpeg)