Leaderboard


Popular Content
Showing content with the highest reputation on 08/27/22 in all areas
-
Technically, the best way to go about doing this sort of work (hairspring manipulation) requires you to remove the hairspring (and collet) from the balance wheel. Once the hairspring is off the balance wheel, you have a much easier time massaging the hairspring into the correct shape. Some experts are able to do hairspring work on the balance wheel, but that requires much more skill. Since you’ve managed to get a replacement balance wheel anyway, it might be worth your time to explore how well you can massage the hairspring back into shape.4 points
-
How about gluing an oilier into the bottom of the oil bottle cap? Extra oil on oilier goes back in bottle when you screw cap back on. no waist.4 points
-
Well, I did do a service on this one and I must say it was fun. For those chasing amplitude, this one clocked in at just under 300deg after I was done and I was pretty gobsmacked by such performance on a 60’ish year old movement with the original main spring. I did a video on it for those that are interested: Vintage Titus Swiss Watch Service - full of old oil! https://youtu.be/DNNjndqLbAM3 points
-
I use a *gasp* stiff tweezer. Not the ideal, but in most of the stuff I do I seldom need to touch the regulator pin unless I've taken off the HS for whatever reason. It helps that I work under a stereo microscope, I'm not sure I'd be comfortable using a tweezer with a loupe as you don't have great depth of field2 points
-
I’m a newbie and the thing that made the biggest difference for me was getting some good quality tweezers. I would rate a microscope as my next best investment. Good luck !2 points
-
Absolutely yes. The actual cock geometries are exactly the same. I literally tested this for myself because of the similarities between all the 7xxx series movements over the years2 points
-
You are replying ok Tadas. This looks ok as far as lighter fluid goes if your translation is correct. Distillates petroleum, so naptha. Light and low boiling point will mean a light naptha this would evaporate more quickly than a heavy naptha which is an advantage from a parts drying aspect. If using in jars in an ultrasonic just ba aware of the low boiling and flash point, so do not use a heater if it has one. Ultra sonics can heat up without a heater so also keep an eye on the temperature of the water in the tank. Yes ipa can dissolve shellac also any other jewel adhesive will. So if you are going to rinse after the lighter fluid clean, do so quickly with the balance assembly and pallet fork and dry them quickly on watchpaper and with a puffer. I would advise doing them separately in a shallow jar so you can get them in rinsed and out and dried quickly and efficiently then there is less risk to the shellac. If the amount of shellac adhesive used is small and less aged then obviously the risk is higher The other watchparts will be ok in the ipa for any reasonable length of time.2 points
-
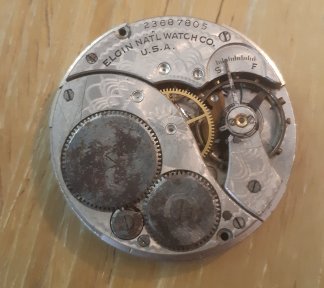
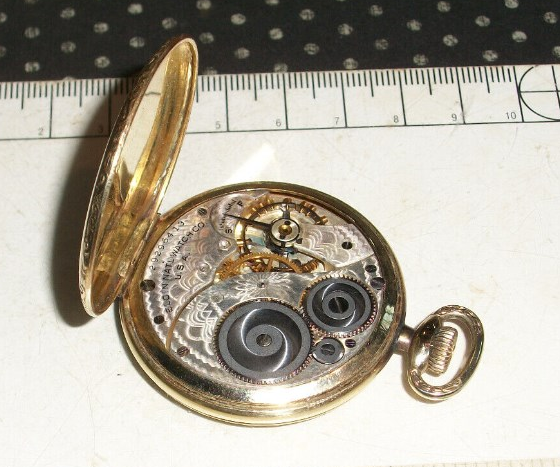
Hello Everyone, A very interesting thread. I'd like to contribute a little if I may? I am current developing a paper entitled "Why (and How) We Clean Things" for publication next year. I think I'll be including some of the wisdom imparted in this forum, but I would like to continue developing it so it meets the right standard for inclusion. My visiting this thread was prompted by a decision to rehabilitate the Winding Work of an Elgin 12s Pocket watch, which in and of itself was part of me attempting to develop better Watchmaking skills in terms of physically manipulating watch parts. The practice Pocket Watch movement I bought has a lot of issues, and the Winding Work seemed to be in trouble and as good a place to start as any: The thread is located here: https://bit.ly/3RghCG4 In it, I talk about what might be the best protocol for removing the Winding Work wheels from the movement, seeing as they are quite "rusty" and a real potential existed for them to have been "rust welded" to the movement or their securing screws. I used a solvent to "loosen" the rust between the screws and the wheels to the point where I could confidently attempt a removal, and the removal was a complete success with a minimum of damage. Having thought about it a bit, the overall challenge we all face in this situation, as I see it, is to eventually know how to perform: 1) Isolation: The removal of "rusted" components from their host mechanism in the least damaging way possible 2) Eradication: The removal of as much "rust" as possible from the surface of the component 3) Surfacing: The beautification of the component via some form of surface treatment (polish or abrasion) 4) Prevention: The "rust proofing" of the component to prevent "rust" from recurring Q: Does anyone have any modifications they'd like to apply to this overall protocol? While preparing this post, I did some (light) background research on "rust". Here's one of the more useful resources I found: TYPES OF RUST Red Rust Hydrated oxide Fe2O3•H2O (from high oxygen availability and high water availability) The most common type of corrosion is uniform corrosion. This is where an even layer of oxidation appears across the surface of the material. When metal is exposed to high volumes of water and oxygen, the iron oxidizes with a contaminate, creating “red” rust. Yellow Rust Iron oxide-hydroxide FeO(OH)H2O (high moisture) Yellow rust is present in metals that are found in large amounts of standing water. This type of rust is usually found in a solvated state, commonly found near sinks and bathtubs. Brown Rust Oxide Fe2O3 (high oxygen/low moisture) Brown rust can react even with lack of moisture, compared to the others highlighted above. Unlike red rust, brown rust can form as non-uniform corrosion, appearing on specific areas of the material rather than the overall surface. The manufacturing process can usually be the result of brown rust when contaminates are found on metal surfaces. Black Rust Iron (II)oxide – Fe3O4 (limited oxygen) Black rust can form when oxygen cannot reach the material, perhaps it is trapped and covered by another material resulting in a stain-like reaction. Unlike the other types of rust, black rust does not produce as quickly and is not as common which makes it easier to combat. Source: https://bit.ly/3Aq04Ak PROPOSED RUST MITIGATION PROTOCOL Stage 1: Isolation Various strategies were suggested to me in terms of getting my rusted components off safely, or isolating it. One source suggested "Turpentine Spirits", another source advised me to use "a drop of WD-40". In all cases, what the friendly advice was trying to do was identify a liquid that would penetrate the matrix formed by the rust between what had formerly been discrete components, but which had turned them into what we typically call a "rusted together mass" or "lump". Other products that might fall into this category are specialized penetrating oils (mouse oil, 3-in-1 oil), non-specialized oils (motor oil, castor oil, coconut oil) and liquids that contain different types of acid (Coca-Cola, Vinegar). For Stage 1, what seemed to be most advisable was the application of a liquid that not only had a chemical effect in terms of removing rust (solvent) but also assistance in the mechanical process of detachment of the component from its host mechanism (lubrication). Stage 2: Eradication With the component isolated, the next stage involved a 3-part process: (A) Washing away whatever liquid was used in Stage 1; (B) A physical pre-treatment stage that involved removing as much rust as possible via mechanical means; and (C) An effort to "take away" as much of the remaining rust as possible by converting it to something else in place or in solution using chemicals in solution. Acetic Acid (Vinegar) and Phosphoric Acid (Coca-Cola) are both popular over-the-counter solutions, as are specialty products like Evap-O-Rust and its analogs. Stage 3: Surfacing In my case, I wanted to give the components an attractive look, considering that was how they started out when the watch was not "rusty". Here's a photo of a similar watch with a Winding Work in better shape - probably very close to what it looked like when it left the factory: This type of patterning on the Winding Work wheels is typically accomplished using a combination of industrial techniques and various approaches to and types of abrasives, which I am exploring elsewhere: https://bit.ly/3RghCG4 Stage 4: Prevention With the components totally rehabilitated, the next challenge is to prevent the recurrence of rust. Many strategies are applicable here, but they all boil down to developing an effective barrier between the component, air and moisture. I am also exploring this elsewhere: https://bit.ly/3e3gwPD CONCLUSION Overall, it looks like something as simple as removing a couple of pieces from the Winding Work mechanism to help them look and work better spiders out into a huge integrated challenge that draws from not a few disciplines. For me, that's great - because I have a lot of background from other pursuits that I can apply to this domain. For newcomers, a guide like this may save them time, money and heartache should they irretrievably damage a "rusted" part because they didn't have a map to follow. Best, g. ----
 2 points
 -
What is wrong with the easy way? I put a drop of fluid on a carefully cleaned hand mirror and let it evaporate. If the drop leaves no visible residue the liquid is clean. The mirroring surface allows recognizing the tinyest trace of contamination.2 points
-
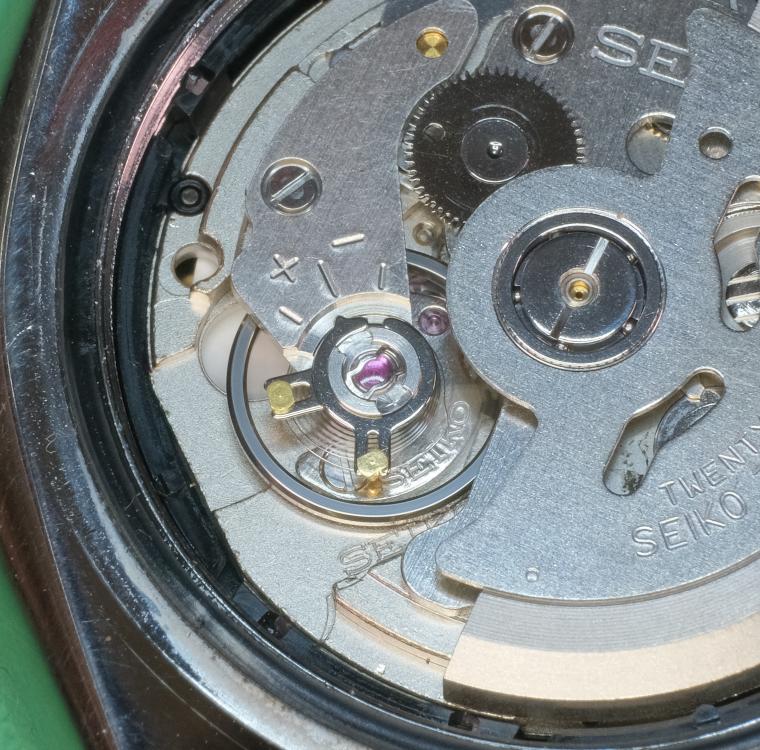
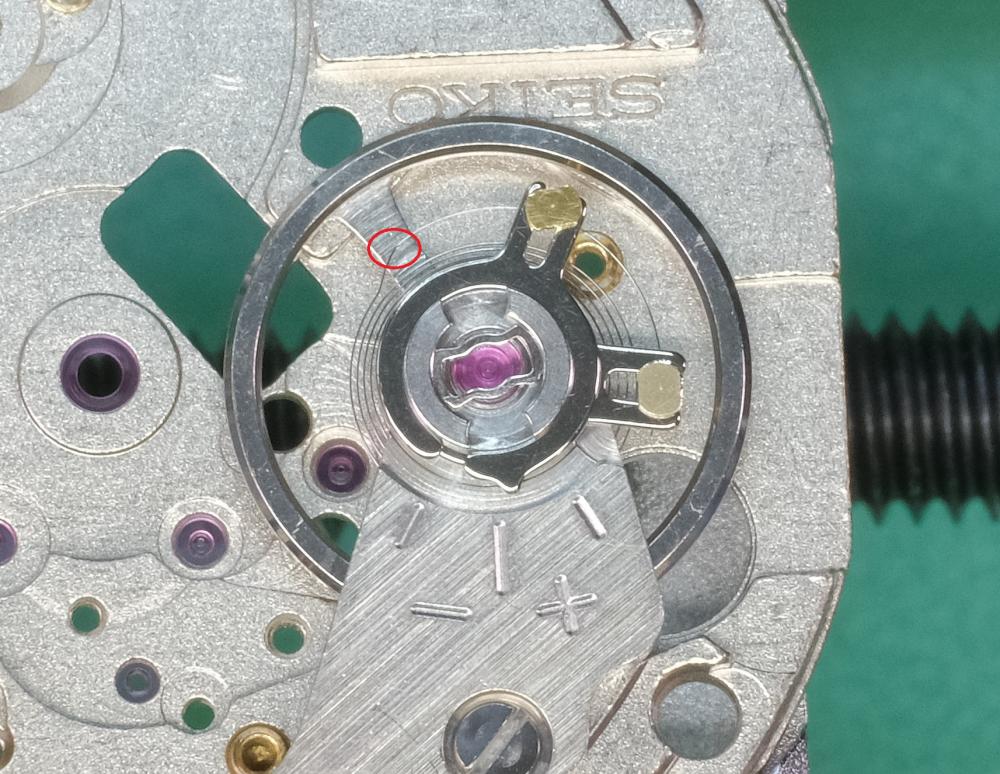
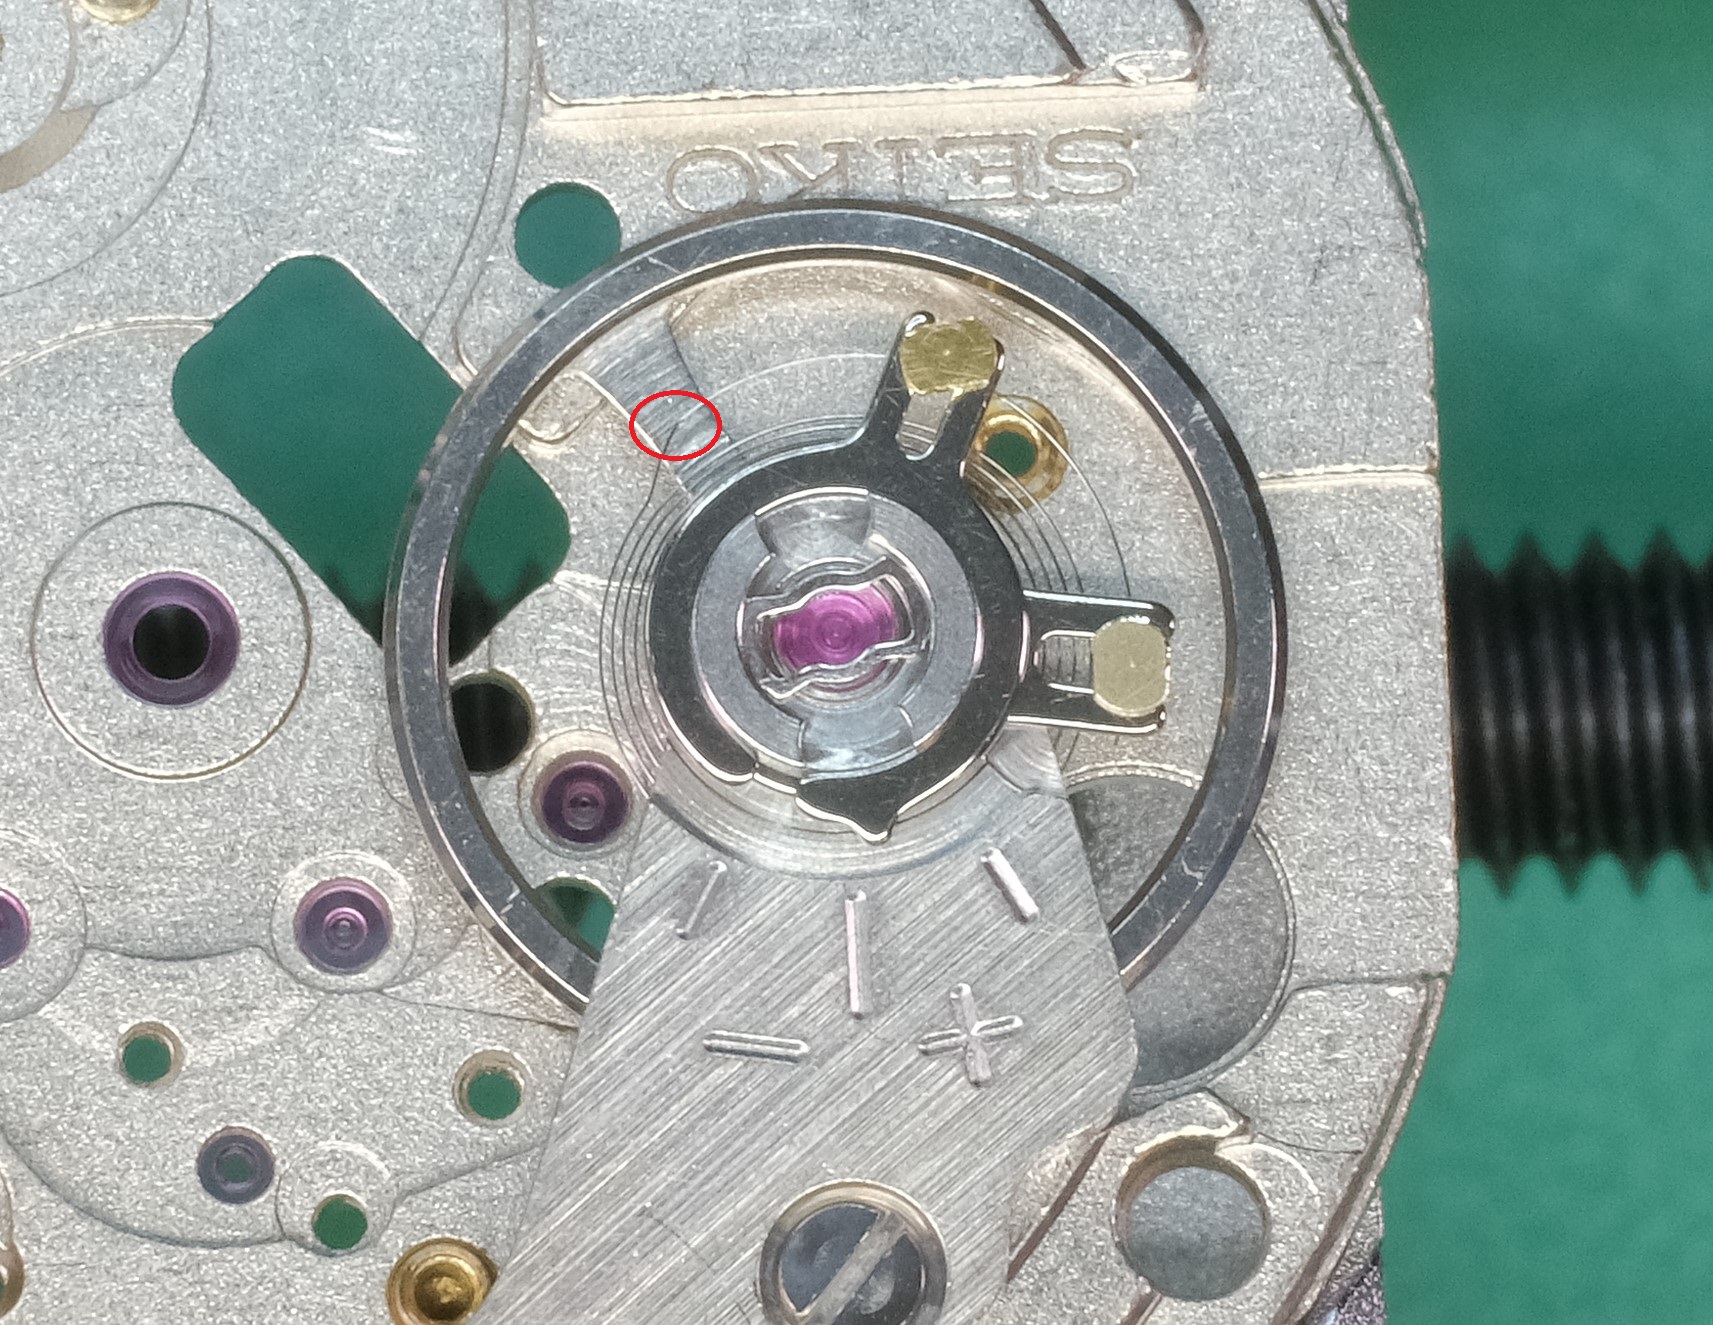
You know, I was recently informed that some hairsprings were suspect on the 7S26 B version specifically, these were quickly changed to the C version for this very reason. Case in point, I got an SKX in a day or so ago. It was purchased in 2009 but never ran right so it ended up in a drawer. When I got it, it was running but way too fast. The TG couldn’t even get a proper reading before resetting. I opened it up and wouldn’t you know it, a bunched up HS exactly as you got: I was the first to open the watch and based on the confirmed history, it left the factory like this. It turns out that the first kink of the HS was slightly too sharp - after gently smoothing it out very, very slightly, this was the result and I’m happy to report the watch is running perfectly now for the first time in 13 years. Now I’m not saying that this is relevant to any and all HS faults out there, but when it comes to the B versions of the 7Sxx series, it’s apparently a known issue
 2 points
 -
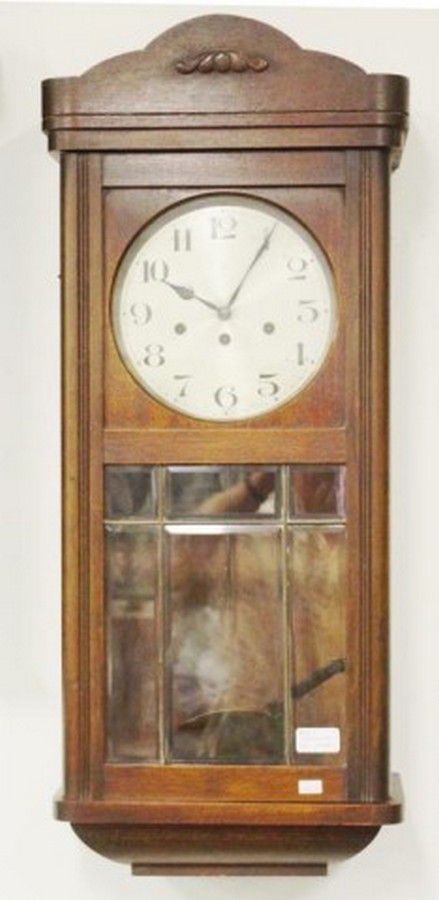
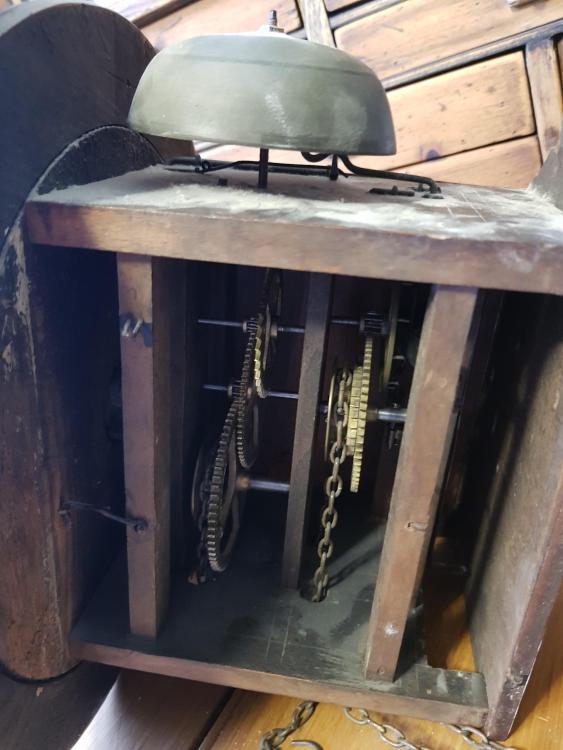
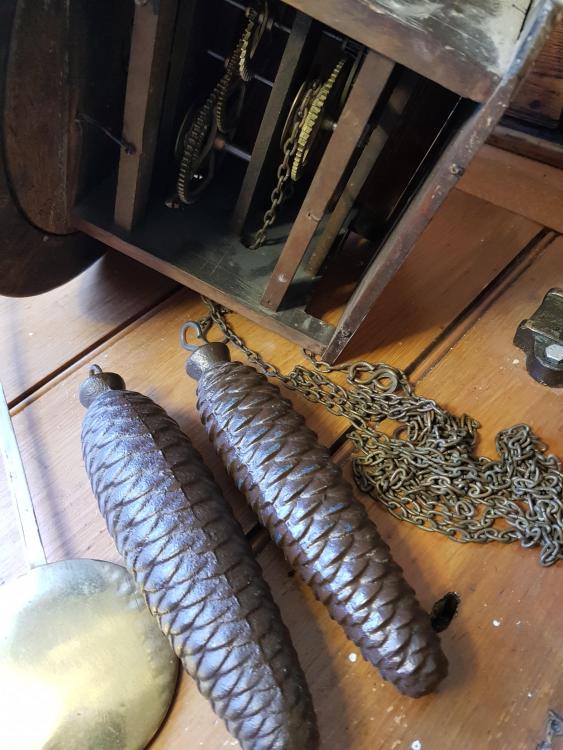
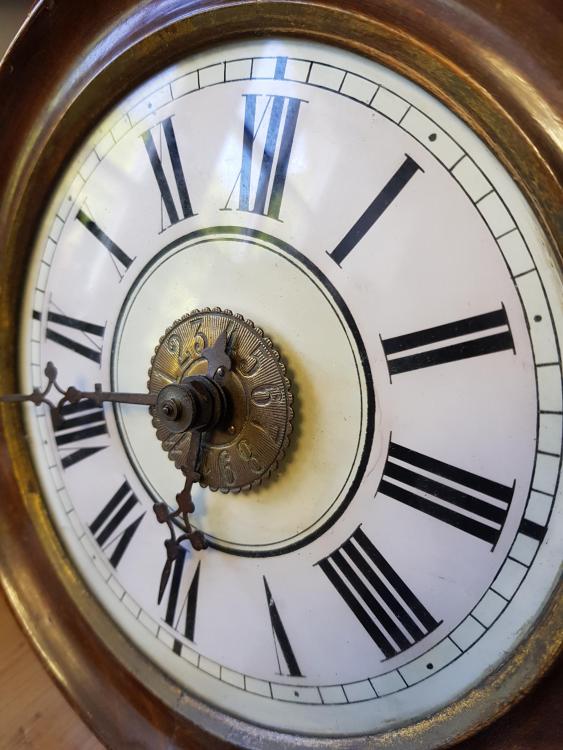
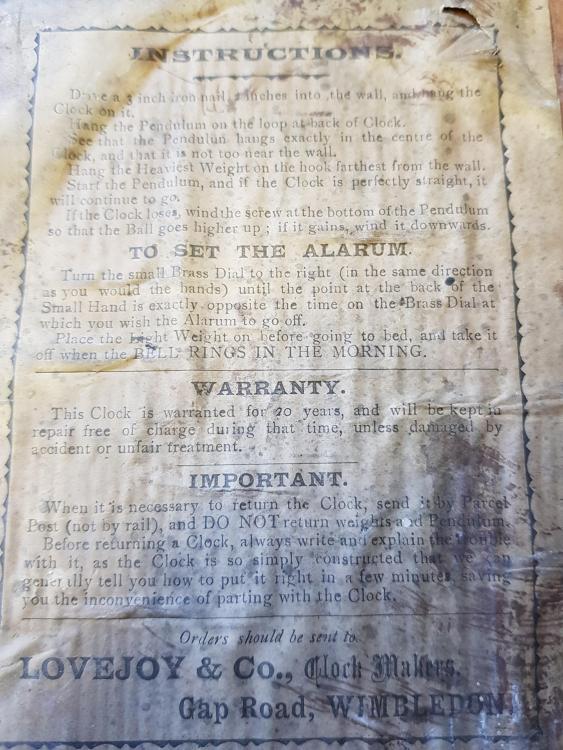
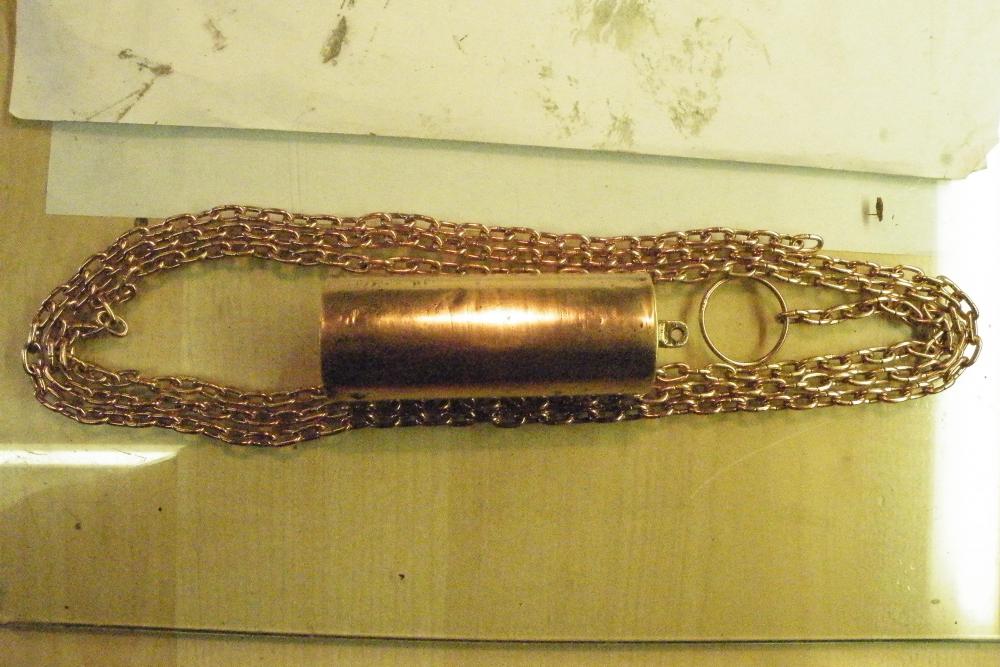
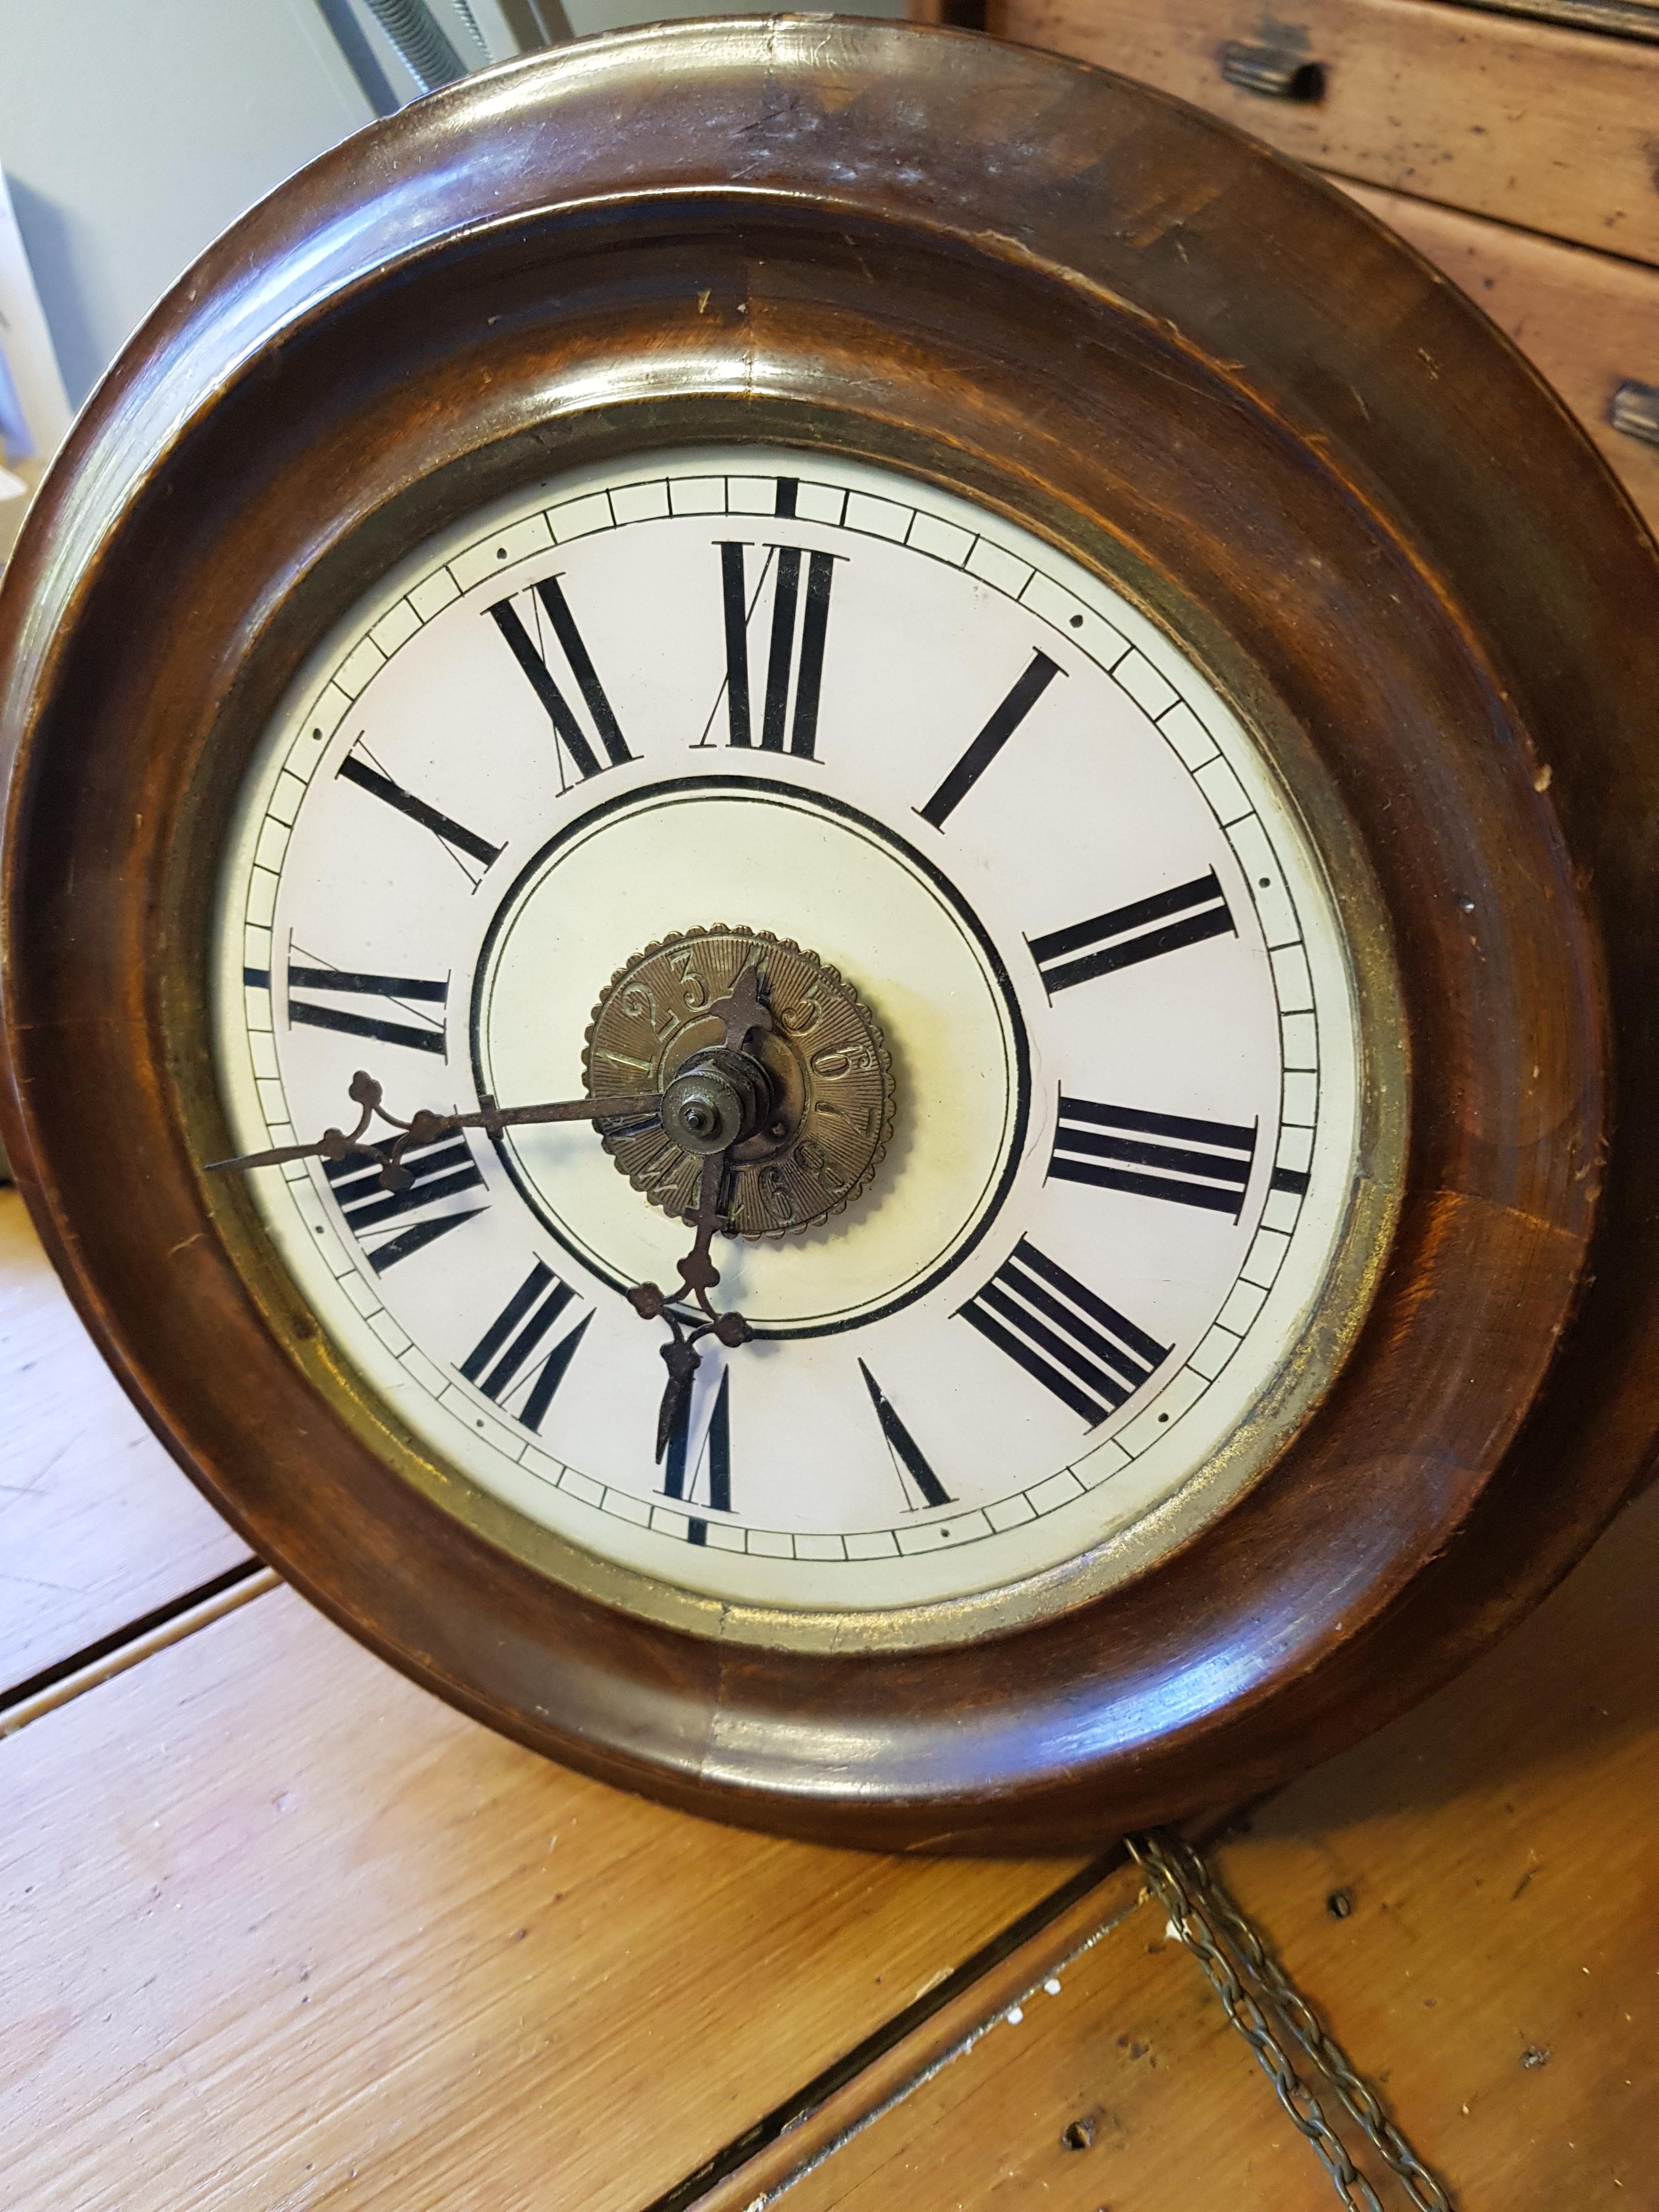
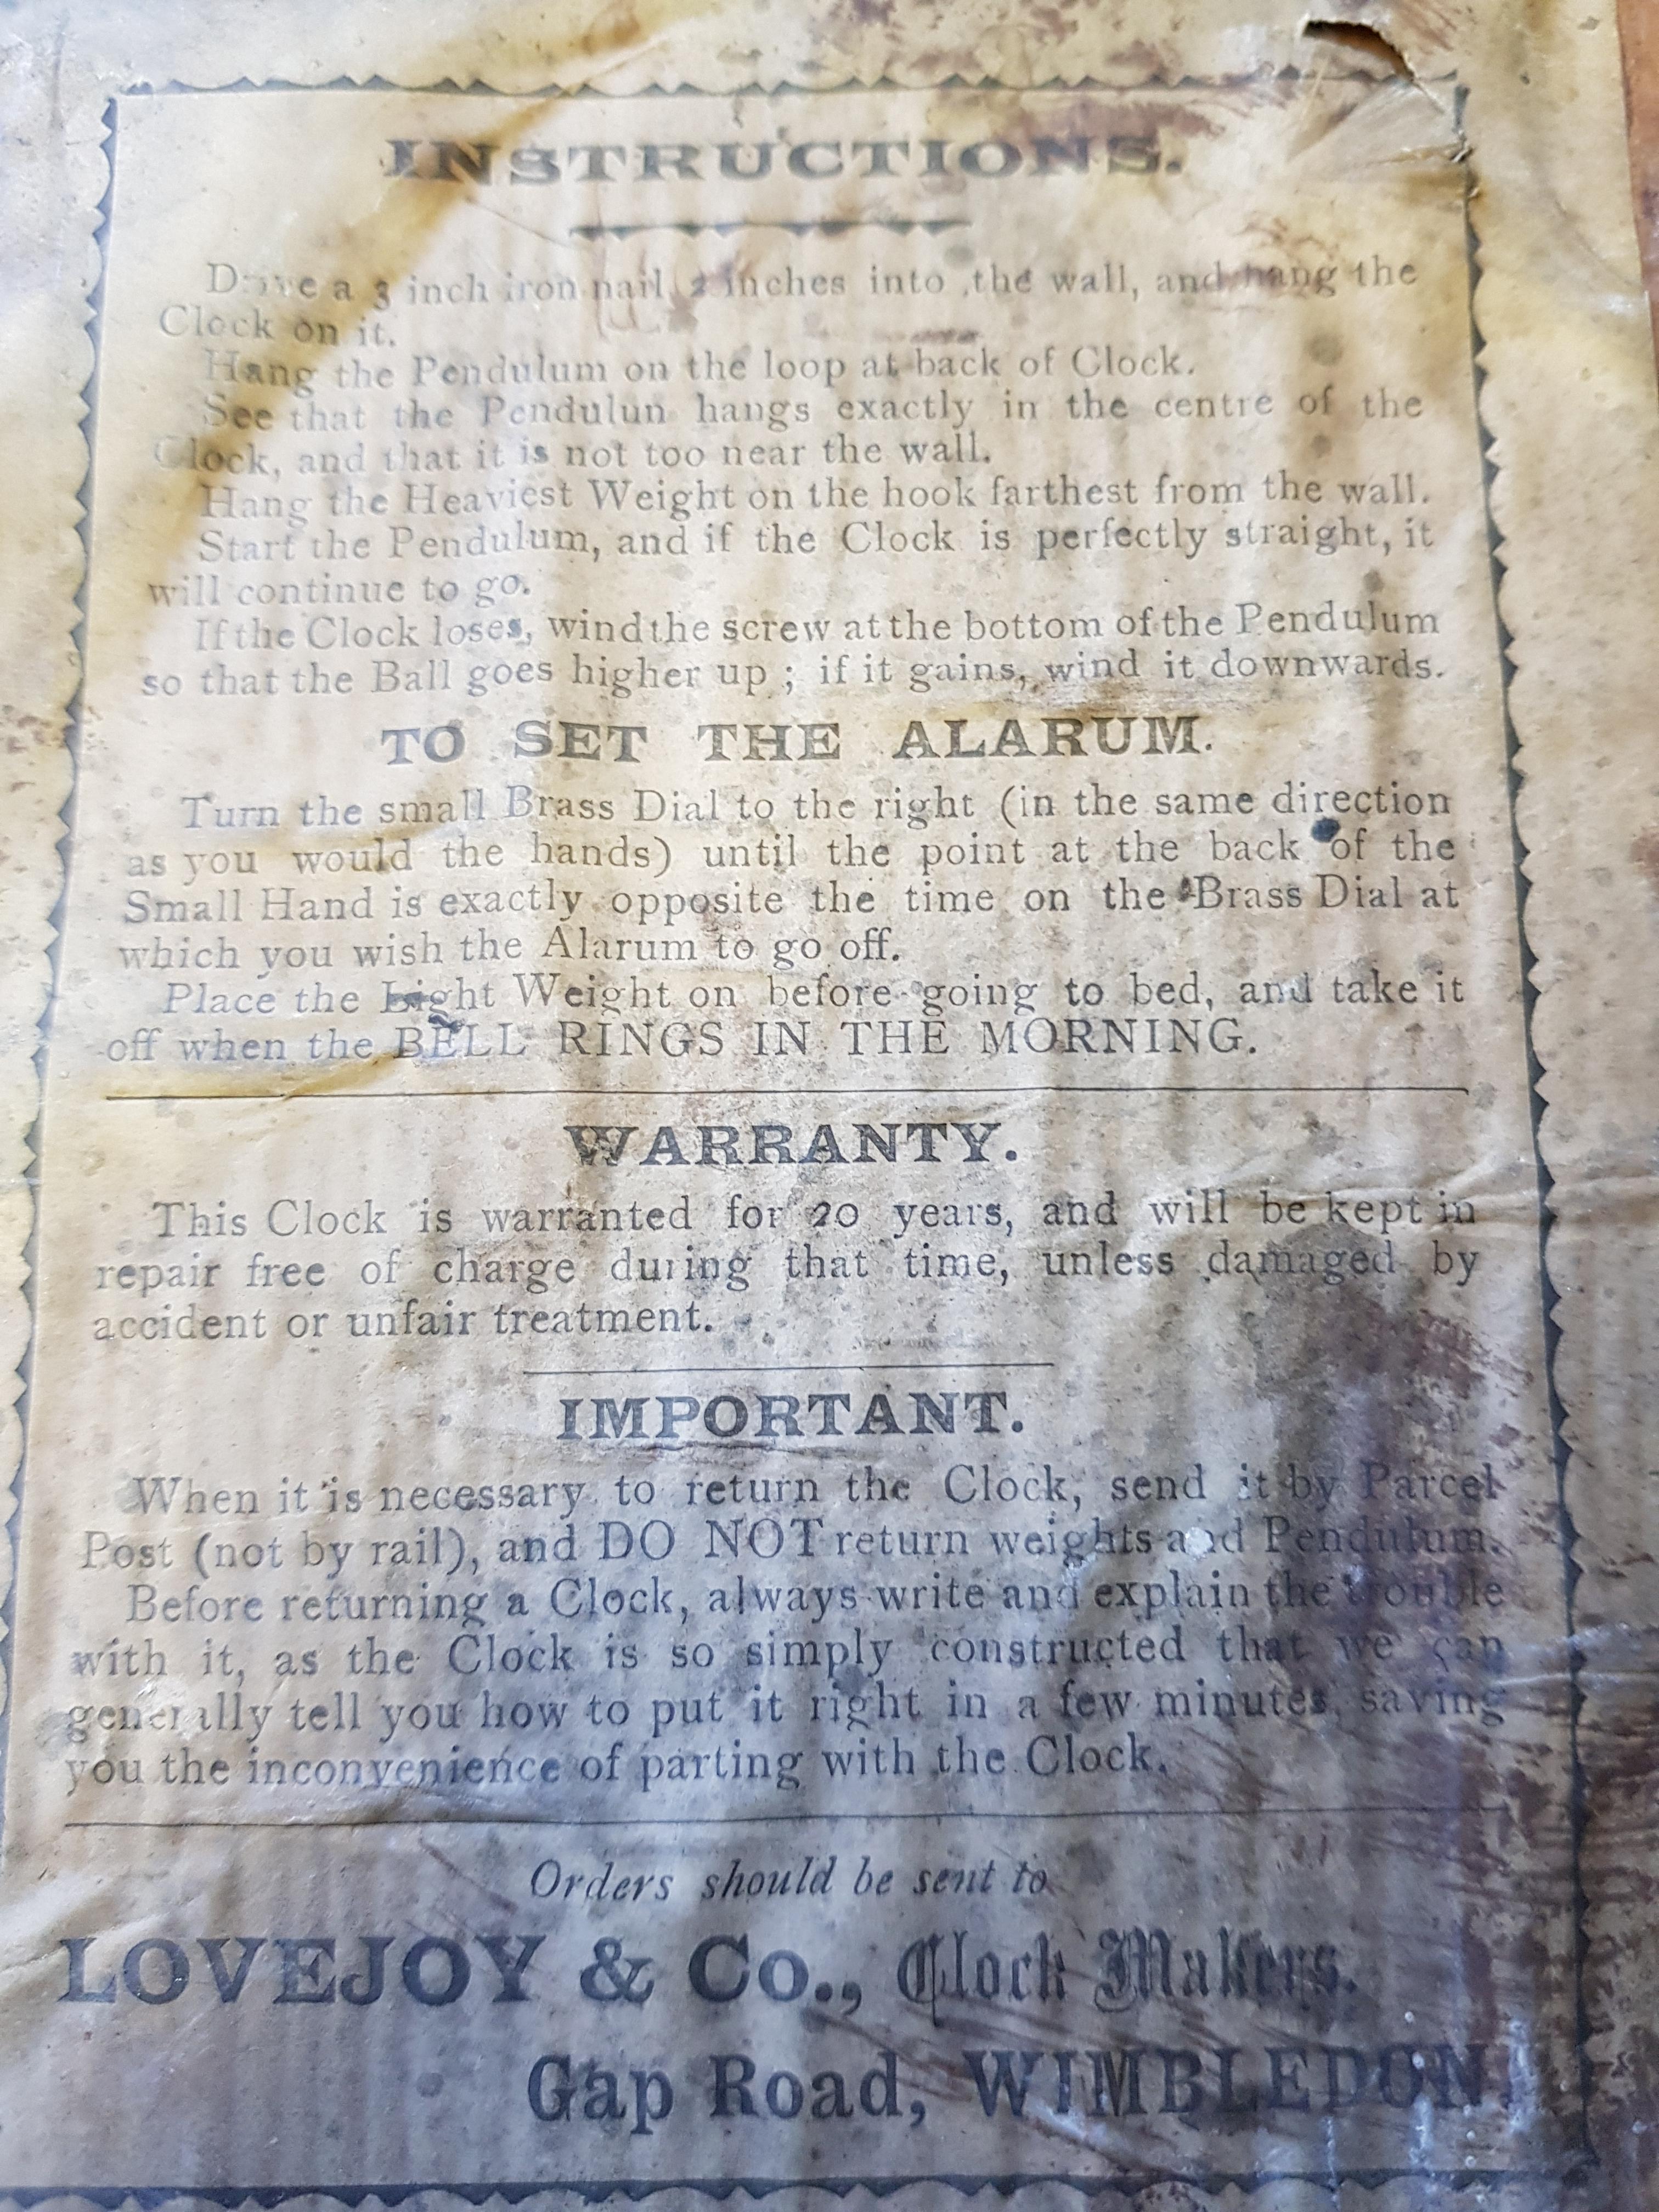
Hi, I've just picked up this charming little postal clock. Looks to be in good order but I'll find out more when I strip it down. Early 20th century Lovejoy & co. My one query are the weights, I only thought cone weights came with cuckoo clocks....any thoughts? And any other information is always gratefully received.

 1 point
 -
Good idea, and putting penetraing oil around the jewel reduces the risk, though I don't think there is much of a risk, I done lots of such jewel adjustment and don't recal breaking one. Good luck1 point
-
Unfortunatly the OP has financial constraints and is/was looking to make use of what he has not shelling out for another expensive product. Kulber P125 was discussed on the nawcc site, and Henry B Freid used graphite / oil paste , so there are vairied alteratives on the market.1 point
-
8217 is probably the cheapest option for braking grease. All the other lubricants you have does exactly the opposite.1 point
-
Hmm er NO it wasn’t here Colin thats because we know what we're talking about and other forums dont obviously. Because this is the best watch repair forum in the world OBVIOUSLY (Shakes head in dismay). Bit disappointed here Colin . I know unbelievable Gert isn't it . If a big ugly thing comes pacing up your driveway looking like its on a mission Col, you need to start running mate. Because thats my missus coming to sort you out.1 point
-
Aw mate you ARE a gem. If its ok with everyone else I'll have the 2 phones and the microscope. I love you even more now1 point
-
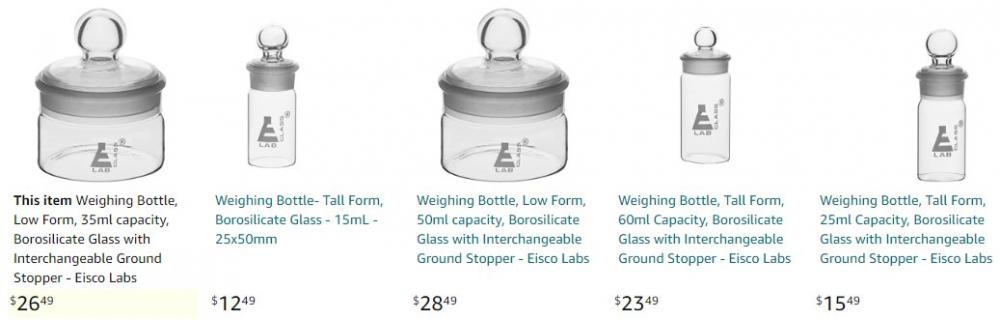
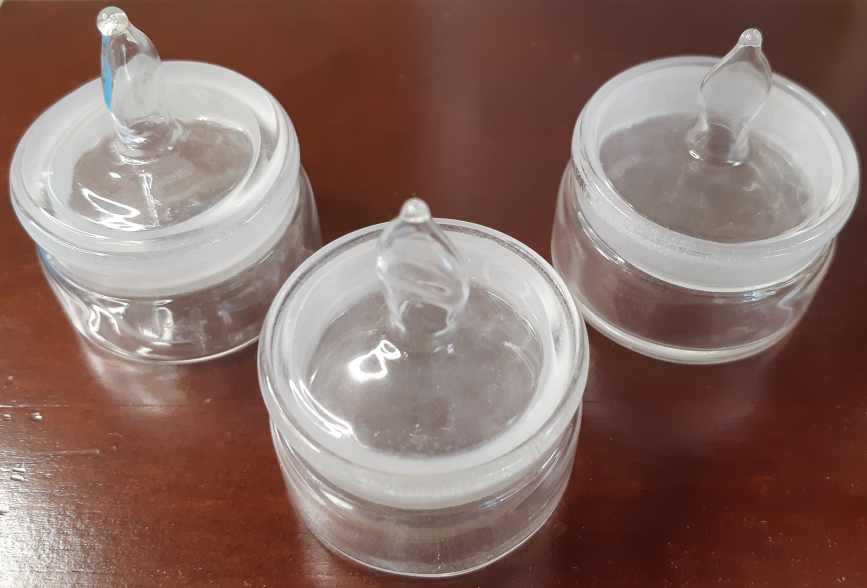
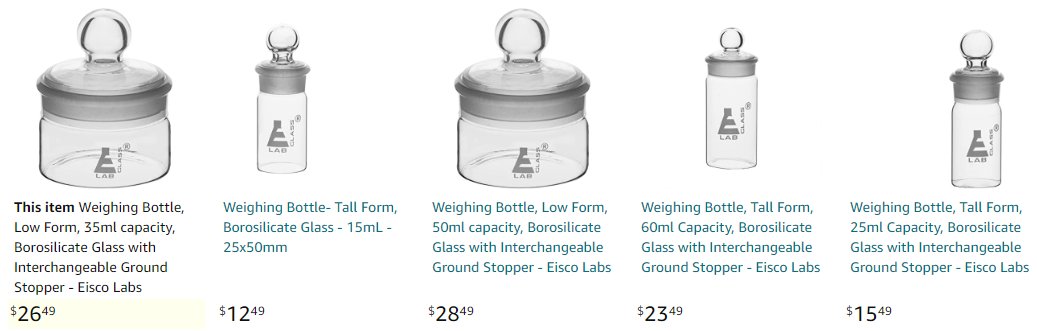
@dadistic Have you seen these on Amazon? I use the 35ml one for balance cock/hairspring and pallet rinse.
 1 point
 -
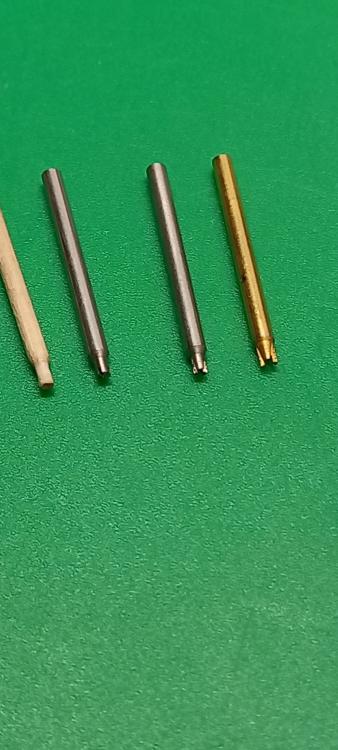
Without a doubt jon The tools you mention can be bought. Here a homemade toothpick version that got me out of a fix and also 3 sizes of the correct tool.
 1 point
 -
Hi tony. Can we have a nice close up macro shot of the top pivot. This one is prone to getting bent when replacing the train bridge. It can be the last one to place and its the smallest of the trainwheel pivots. One trick is to place a screw in the bridge very lighty and work the train wheels in one by one without trapping them.1 point
-
Hand removal lever on the left, HS removal lever on the right.
.thumb.jpg.2a5efbcb9e535ffc9d9fa0309bb785bb.jpg)
.thumb.jpg.a95b97b085994bb4e68c127425182658.jpg) 1 point
1 point -
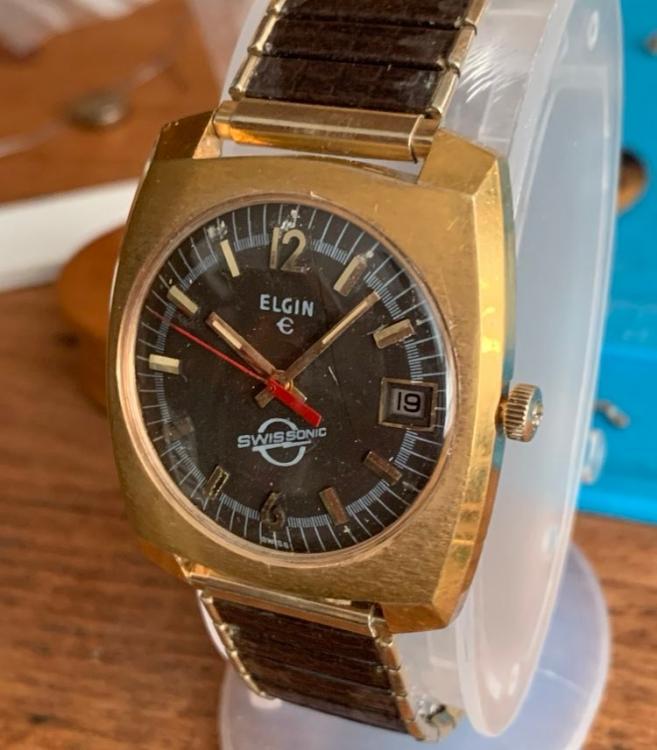
cracked crystal, missing sweep and dead circuit board . Brown! yep a 1970's color all the way. Can you just see the brown corduroy pants with platform shoes, wide collar shirt and suede padded elbow sports coat? https://www.instagram.com/p/ChvssuSDNTWDLZ3nVwK1SQ8evvYjZWk7P48-CM0/?hl=en1 point
-
a bit more tweaking today and seems to be doing fine. the center wheel pinon has bend so the seconds hand needed a bit of fiddling. Here she is - Dial has the scars but for a 50+ year old watch it is not bad at all.
 1 point
 -
Only joking fella, love you to bits. Your focused detailed explanations and descriptions just show how passionate you are about your helpful writings. It did make me laugh though when you included the clean apparatus and put all materials away step lol. Its the sort of addition i would add if i were taking the pee lol. Which is pretty much all the time.1 point
-
Follow the good advice from @Neverenoughwatches ! My comments : I find it easier to disassemble the watch and put component assemblies together in tray compartments - e.g. gear train and bridge, keyless work, barrel bridge + arbor, crown wheel etc. Then I clean each assembly at a time in a small beaker floating in the water of the ultrasonic. That way you don't need much cleaning solution. I wouldn't seal the jar - pressure could build. Just work in a well ventilated area (with no sources of ignition!). There's no problem using the heater (I set mine to 40C). You can see the vapour boiling off but it can't ignite without an ignition source (and you could just put something over the top of the jar if it did) I would recommend pegging all the jewel holes first. Depending on the ultrasonic, 3-5 mins in the cleaner should do. Leave to dry, or blow dry - doesn't need to be totally dry. As @Neverenoughwatches suggests, you really need an IPA rinse as lighter fluid leaves an oily residue. I don't know if dipping is enough, but when I used IPA rinse, I did as the cleaning - components in an open beaker in the US for a couple of minutes. EXCEPT parts with shellac, i.e. pallet fork and balance wheel, where I did 30s - 1m. As long as the shellac is old, you will have no problems with dissolving. To clean the balance - as is common, I have the balance fitted to the bare baseplate. I remove the balance jewels, though some leave them in place. It's the safest way to clean the balance.1 point
-
It might be quite common Gert as the Huntana h/s i was fiddling a while ago was very similar. It did have some vertical bend issues, but a little tweak on the end curve bend centralised the coils nicely. It was the VD one lol. The photo posts showed it very bunched up. Great video on the Titus btw matey1 point
-
Graham. I say what hell are you taking. I want some1 point
-
I would like to repost that I have solved my problem. The jewel was not clean enough. After cleaned up and tested for one full day the oil looks the same. Thank all of you for your help. After one day (I'm sorry it's a little out of focus but the circle looks the same):
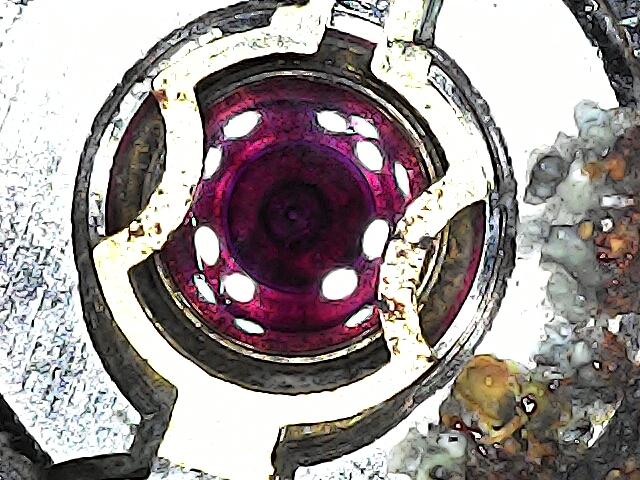
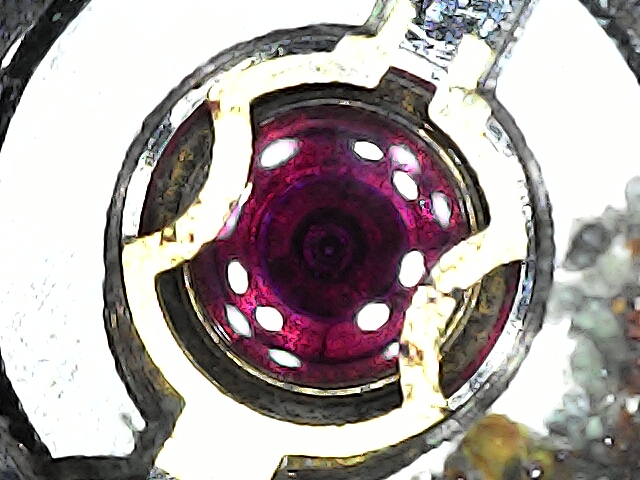 1 point
 -
That tells me a lot. It also has to be in keeping with the top, so not to be over powering to the eye. This is a photo of the sort of bottom you should consider, I can see by your photo it is almost the width of the case. Old glue marks can tell you a lot.
 1 point
 -
Have you got a microscope? Especialy for a beginner who lacks of daily practice over years the threedimensional visual feedback is a gamechanger.1 point
-
Hello @dadistic, Sure, here's a couple of photos. I have several different (larger, smaller) sizes that I am procuring from China as part of an "Enthusiast" oriented Watchmaking Starter Kit that I plan to start marketing this Fall. I found professional watchmaking suppliers really expensive, and the sheer number of things you need to get started pretty daunting...so I am thinking a value-oriented Watchmaking Starter Kit makes sense. What do you think? As for the RONSONOL protocol, I am going to do it on my side anyways because the product you found is probably not as widely distributed as RONSONOL, and there's a LOT of it in that packaging (1 gallon!) My take is beginners just need a small amount of "something" to get started before buying stuff in bulk. After all, they may end up not liking this hobby (horrors!). g. ----

 1 point
 -
I just use a little glass eyedropper with a small rubber bulb at the other end. Easy to clean if I need to, and I never suck up so much oil that it touches the rubber.1 point
-
Hello matey. Have you read the recent discussions on cleaning with lighter fluid. Might be worth a post up of the zippo ingredients label . Ipa provides a fair rinse but be mindful of the rinse time with the balance wheel and pallet fork.1 point
-
They do come with what are called fern weights. I have even seen them with ball shaped weights. There are variations with pendulums many are long thin wires others are brass or wood. You should be able tell by the crutch and how wide space you have when you tread the pendulum through. Mid Victorian I would say and more then likely the movement is Black Forest German. Also know as Wag on the wall clocks. Look out for split brass bushes and inside roughness.1 point
-
Hi the weights are cuckoo clock ones, I repaired one two years ago and re weights were lead encased in a brass sleave as per the picture below. I have had tow of these wooden framed clocks the second one had copper chains not brass. Also when dismantling take many pictures, the bearings are brass inserts into the wood and the hour wheel used a type of soft rubber compound as the friction from the mains haft to drive the hands.
 1 point
 -
There are many years of thread posts in this "General" sub-forum. In an attempt to better organize and categorize these threads I have created a number of sub-forums within the main category of "Watch Repair Discussions, Help & Advice" over time (a long time as it's a painful job), many of the posts within this General sub-forum will be moved to a more appropriate sub-forum depending on the subject. Please help by taking a quick look at the sub-forum titles and post in the appropriate section and as a last resort, if you do not find an appropriate sub-forum for your subject then you may post here. Thank you for your co-operation1 point
-
Hi It will never be perfect, its a case of making it presentable and workable. problem is not removing too much metal during polishing.1 point
-
I wouldn’t use a disposable syringe at all when doing analytical work, unless the disposable syringe is one of those without the rubber plunger. Those are more difficult to find. Best practice is to use a Hamilton glass syringe with PTFE plunger. However, if you plan to use a steel needle and only use the volume inside the needle to transfer watch oil, it should be ok. However, you need to use a new needle each time. Not sure if that is economical. Take a look at this website https://www.medicaldesignandoutsourcing.com/what-is-the-difference-between-two-part-and-three-part-syringes/ “Occasionally a researcher or engineer may have difficulty identifying the source of various contaminates in their process. Sometimes the source is either the rubber or silicone oil found in common three-part syringes. If that becomes apparent in your process, there may yet remain another low-cost option by way of a two-part syringe. Two-part syringes are slightly different because they do not use a rubber tip on the plunger to create a vacuum seal. Instead, these syringes have been specifically designed to not introduce additional materials such as rubber or even silicone oil.”1 point
-
No problems. Life is all about passing on what we have, which I believe is good karma. Send me a private message with your address and I'll send you a ready made pegwood tool that you need and another stick of the 'primo' pegwood. The same tool works well on Kif shock-proof springs and others that are non-captive springs1 point
-
If there was a part fitted on the bottom of the case you have then you should be able to see the outline. Can you take a photo of the bottom for me please.1 point
-
Why the hell do idiots design such things. They certainly don't think of the watchmaker who will have to replace the battery.1 point


.jpg.c218b485ef0d3b5ef3b9568d23f4b5b6.jpg)
.jpg.dddea0b63d0ec84f5389e0c4f64cce6c.jpg)