Leaderboard


Popular Content
Showing content with the highest reputation on 02/25/21 in Posts
-
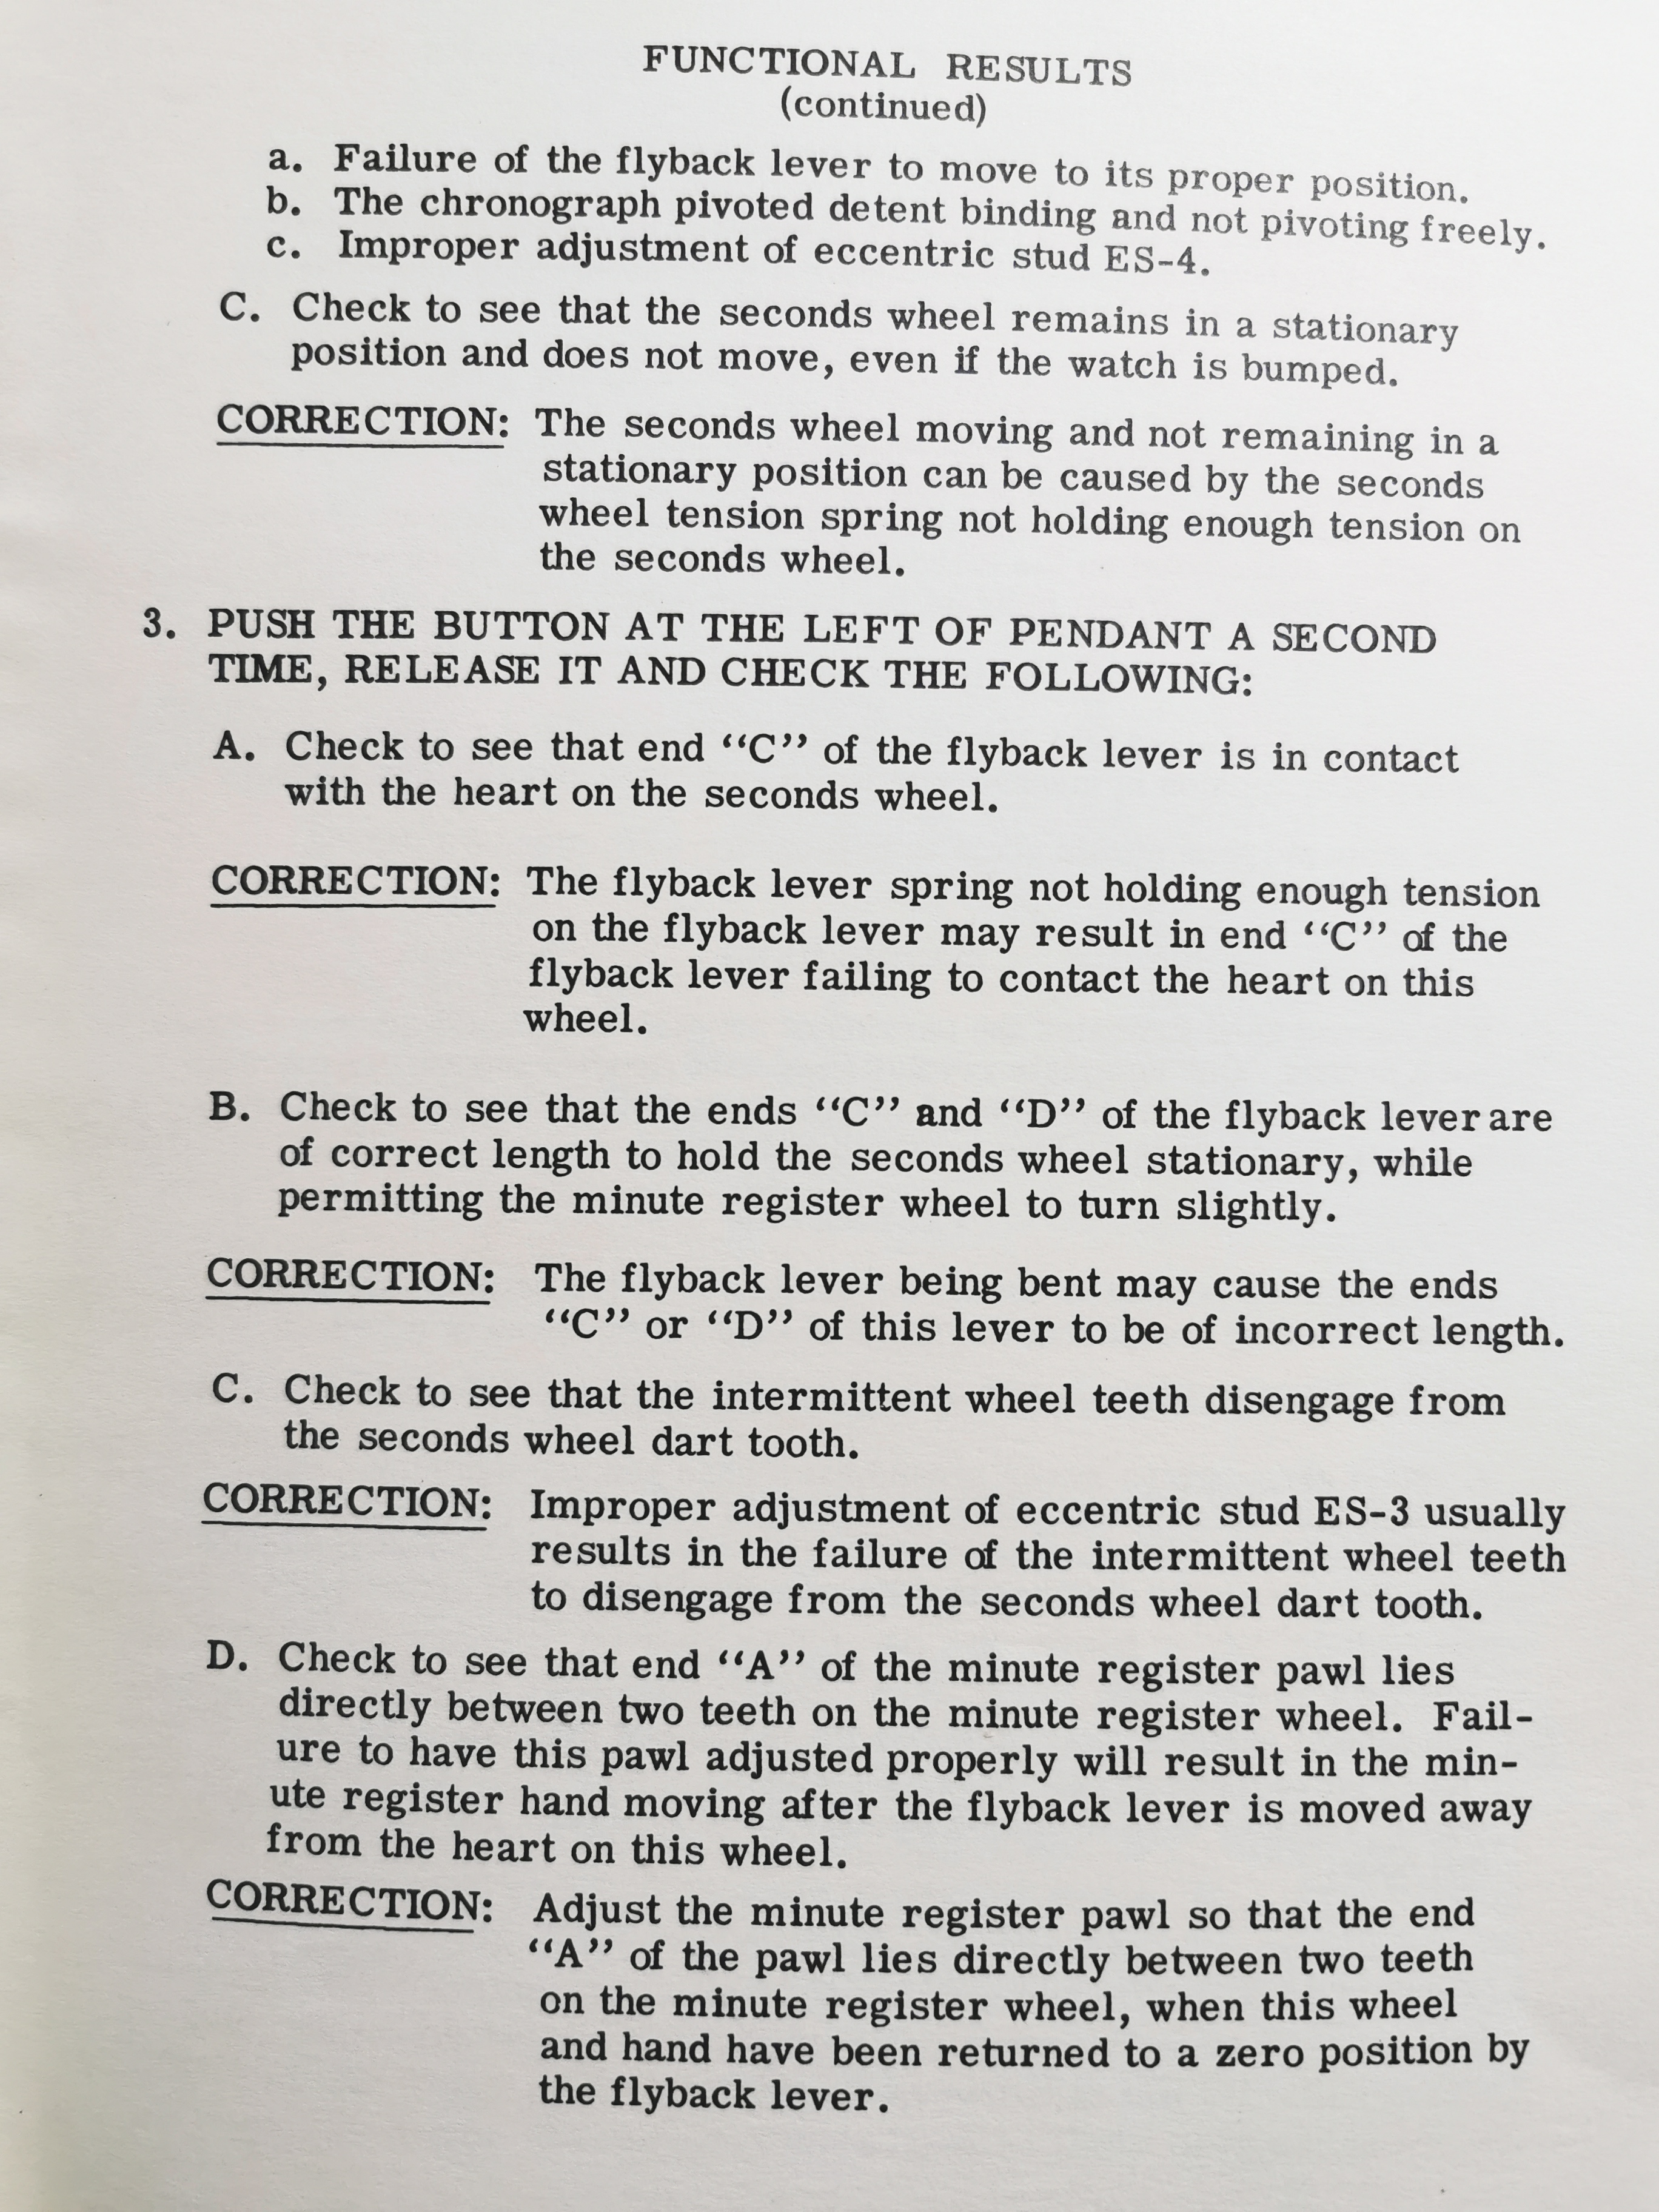
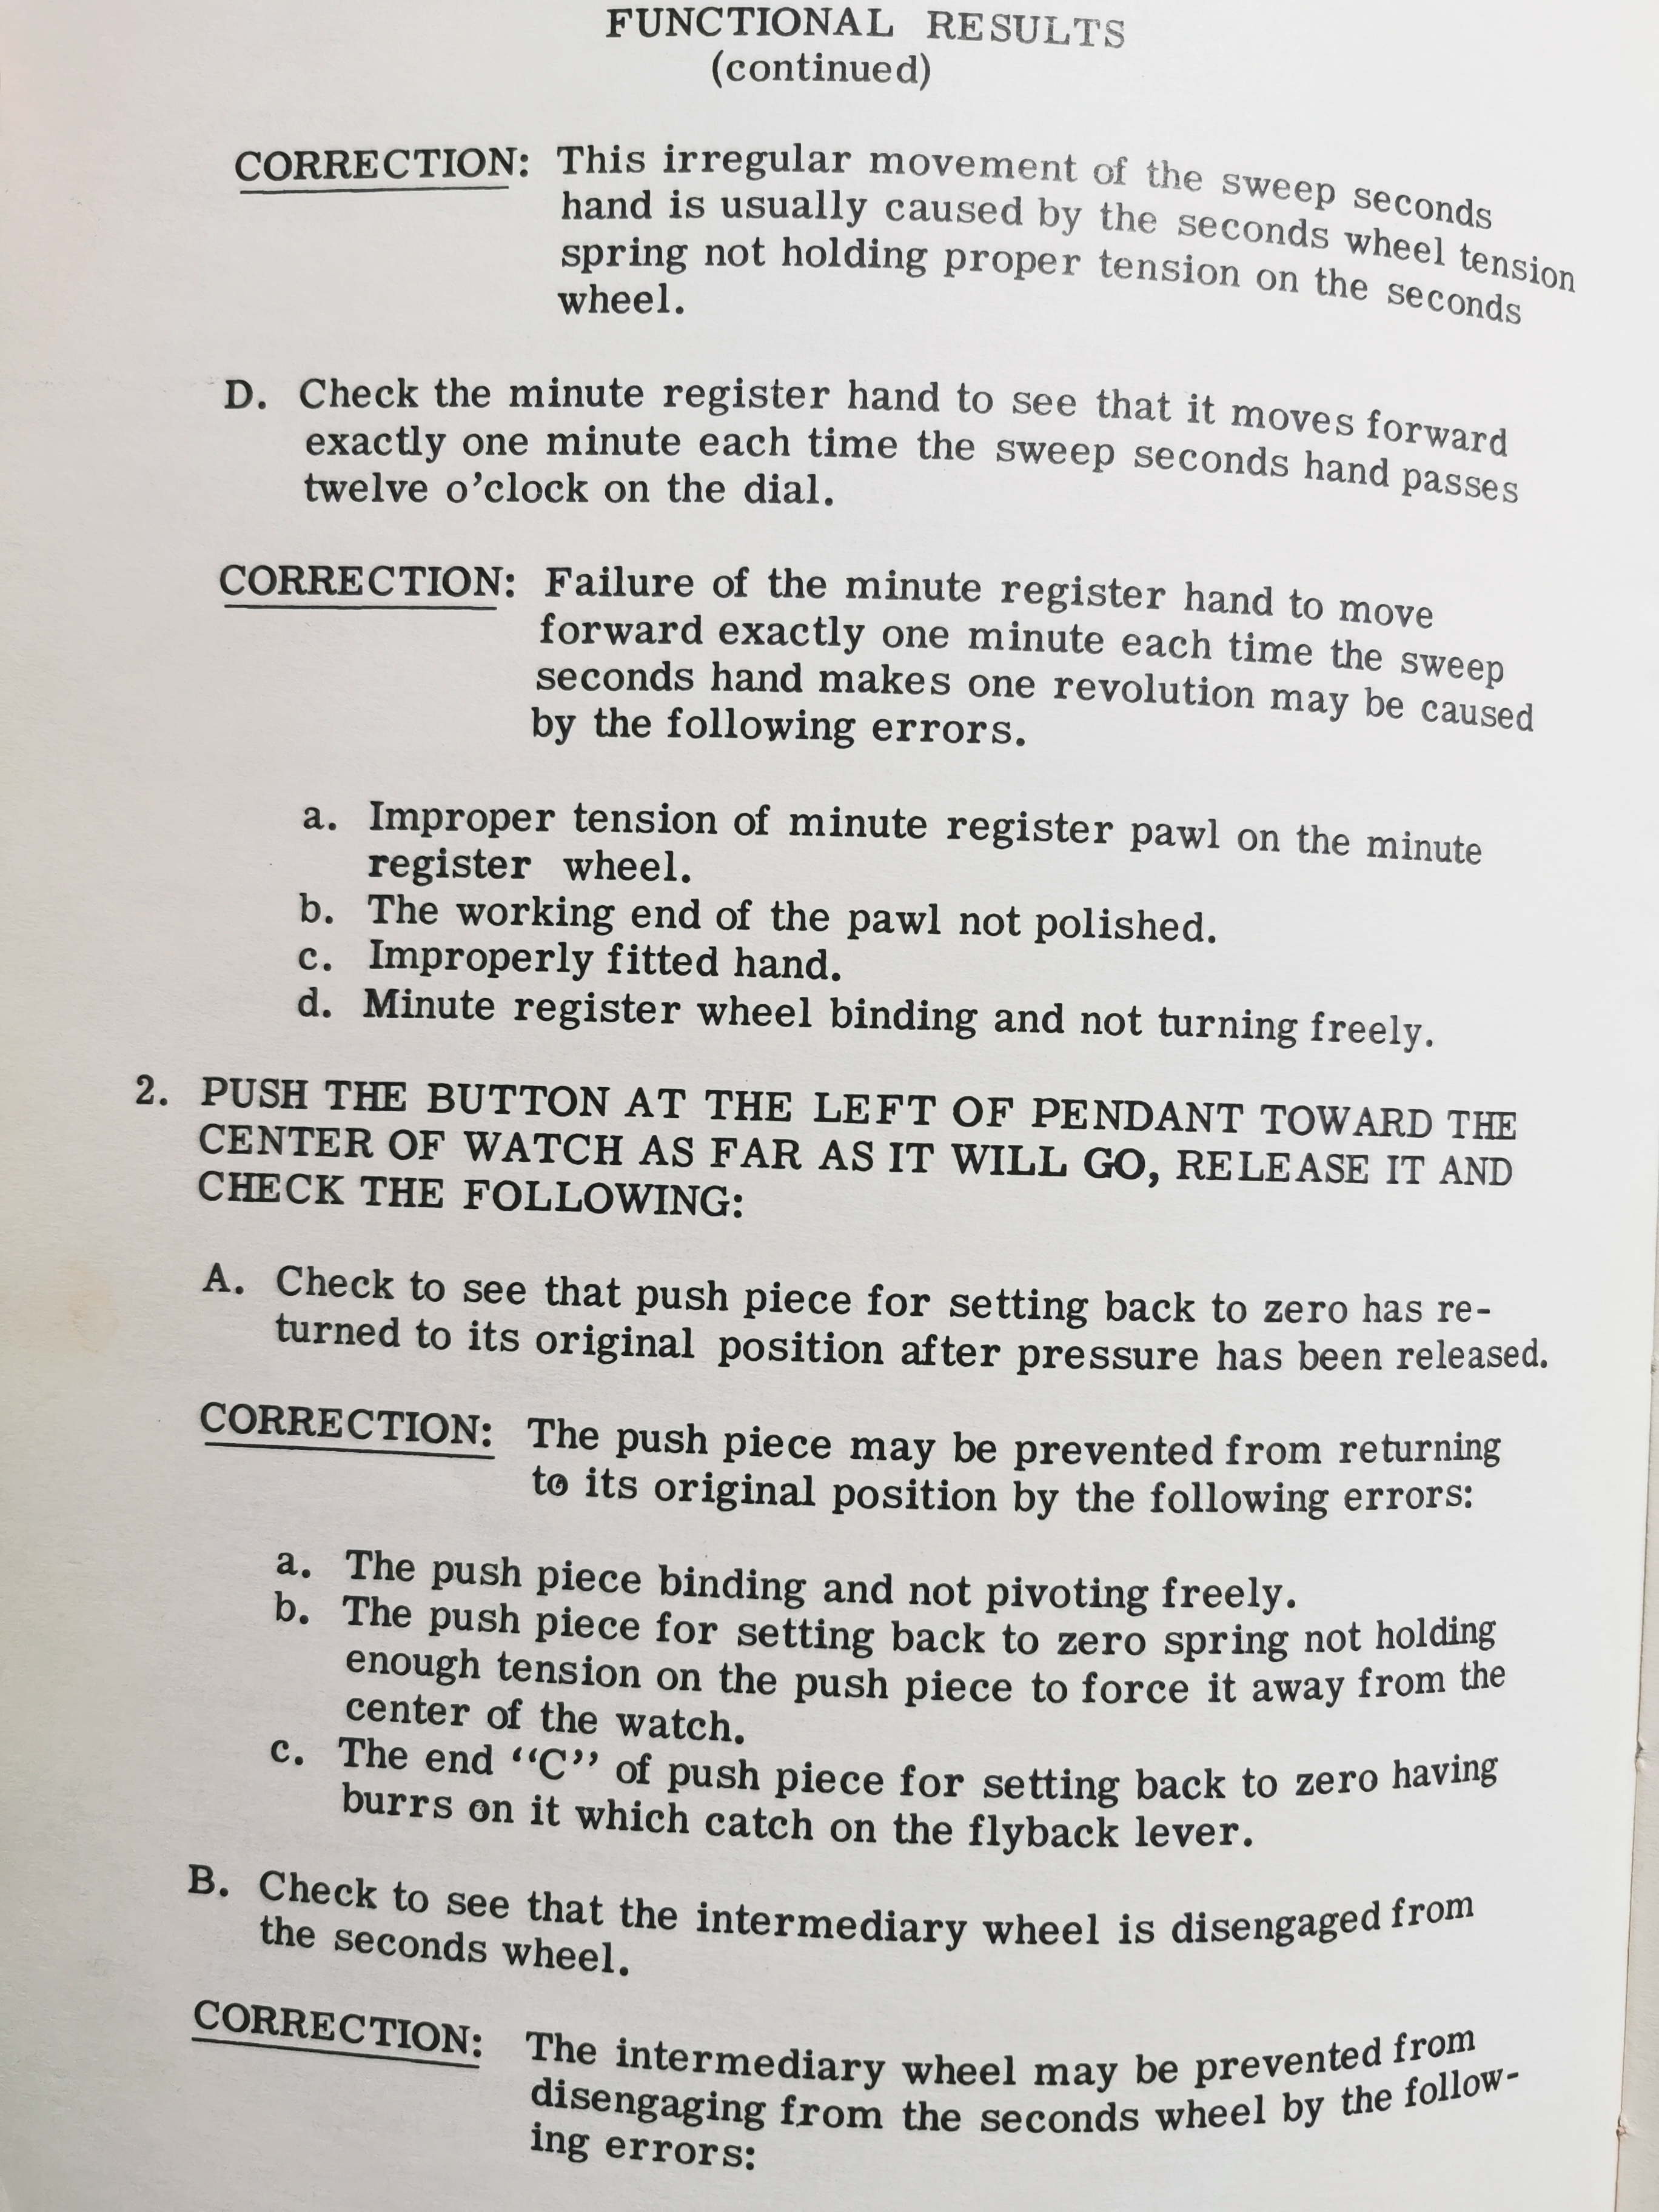
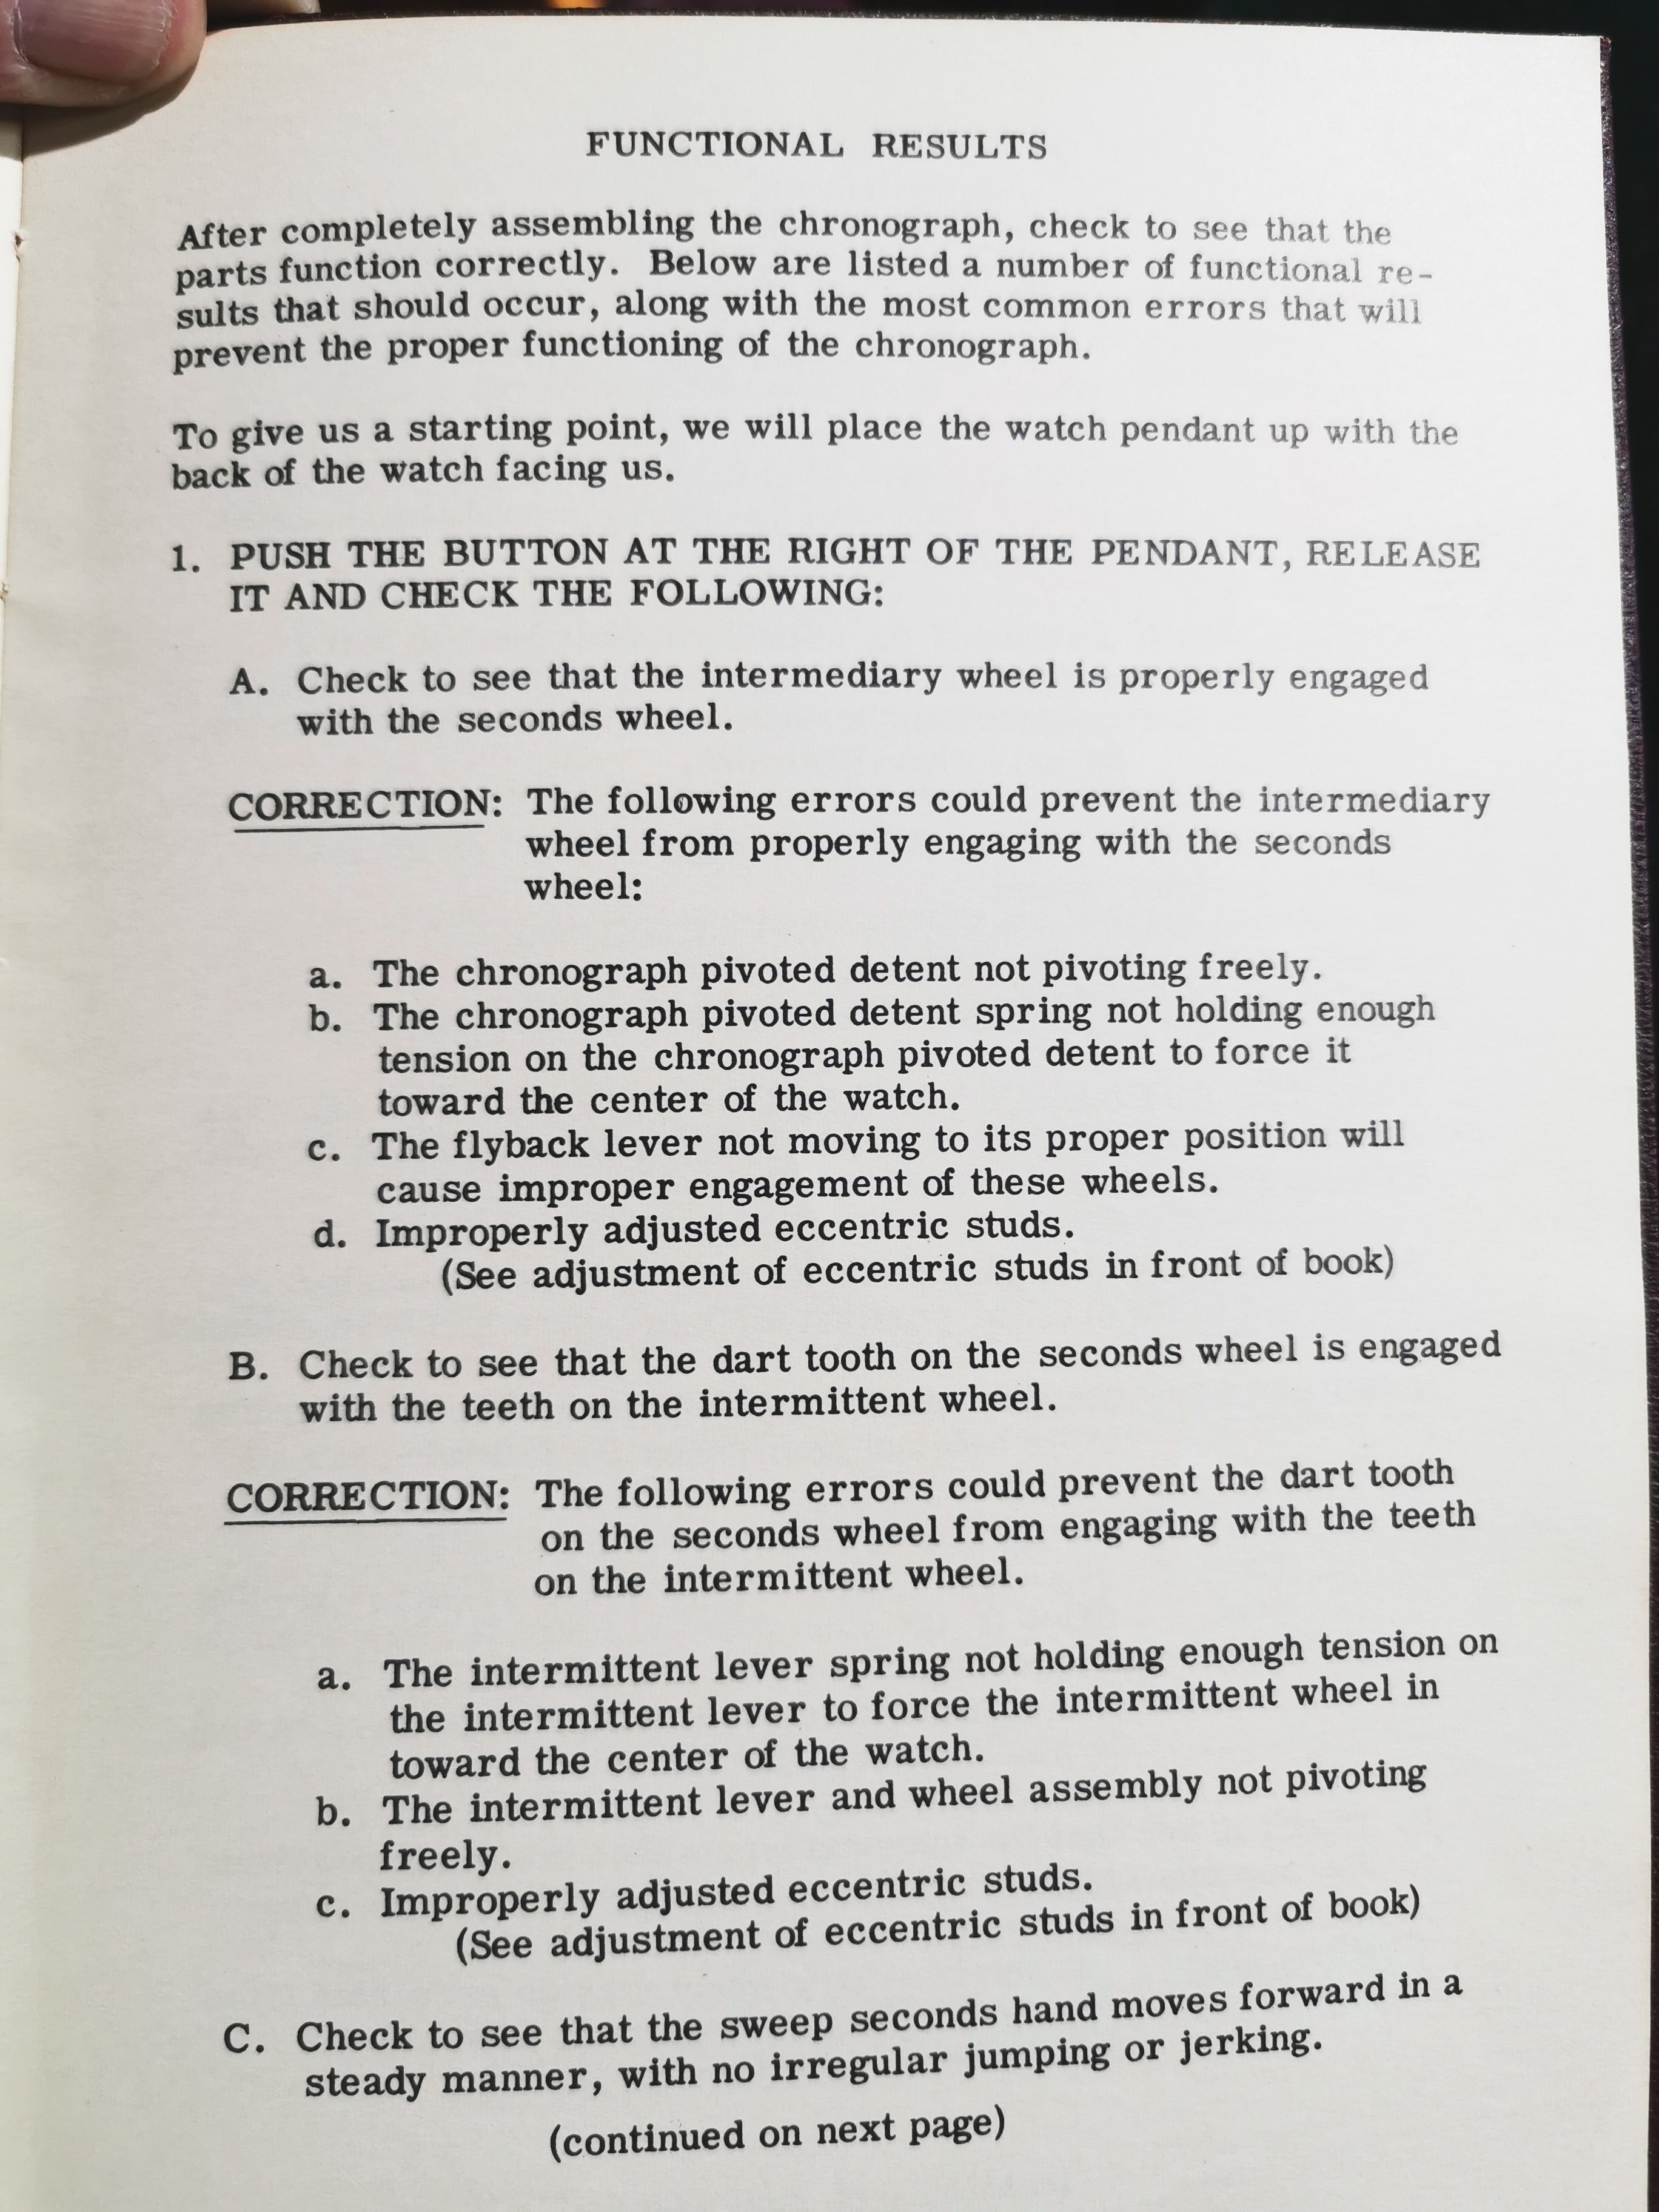
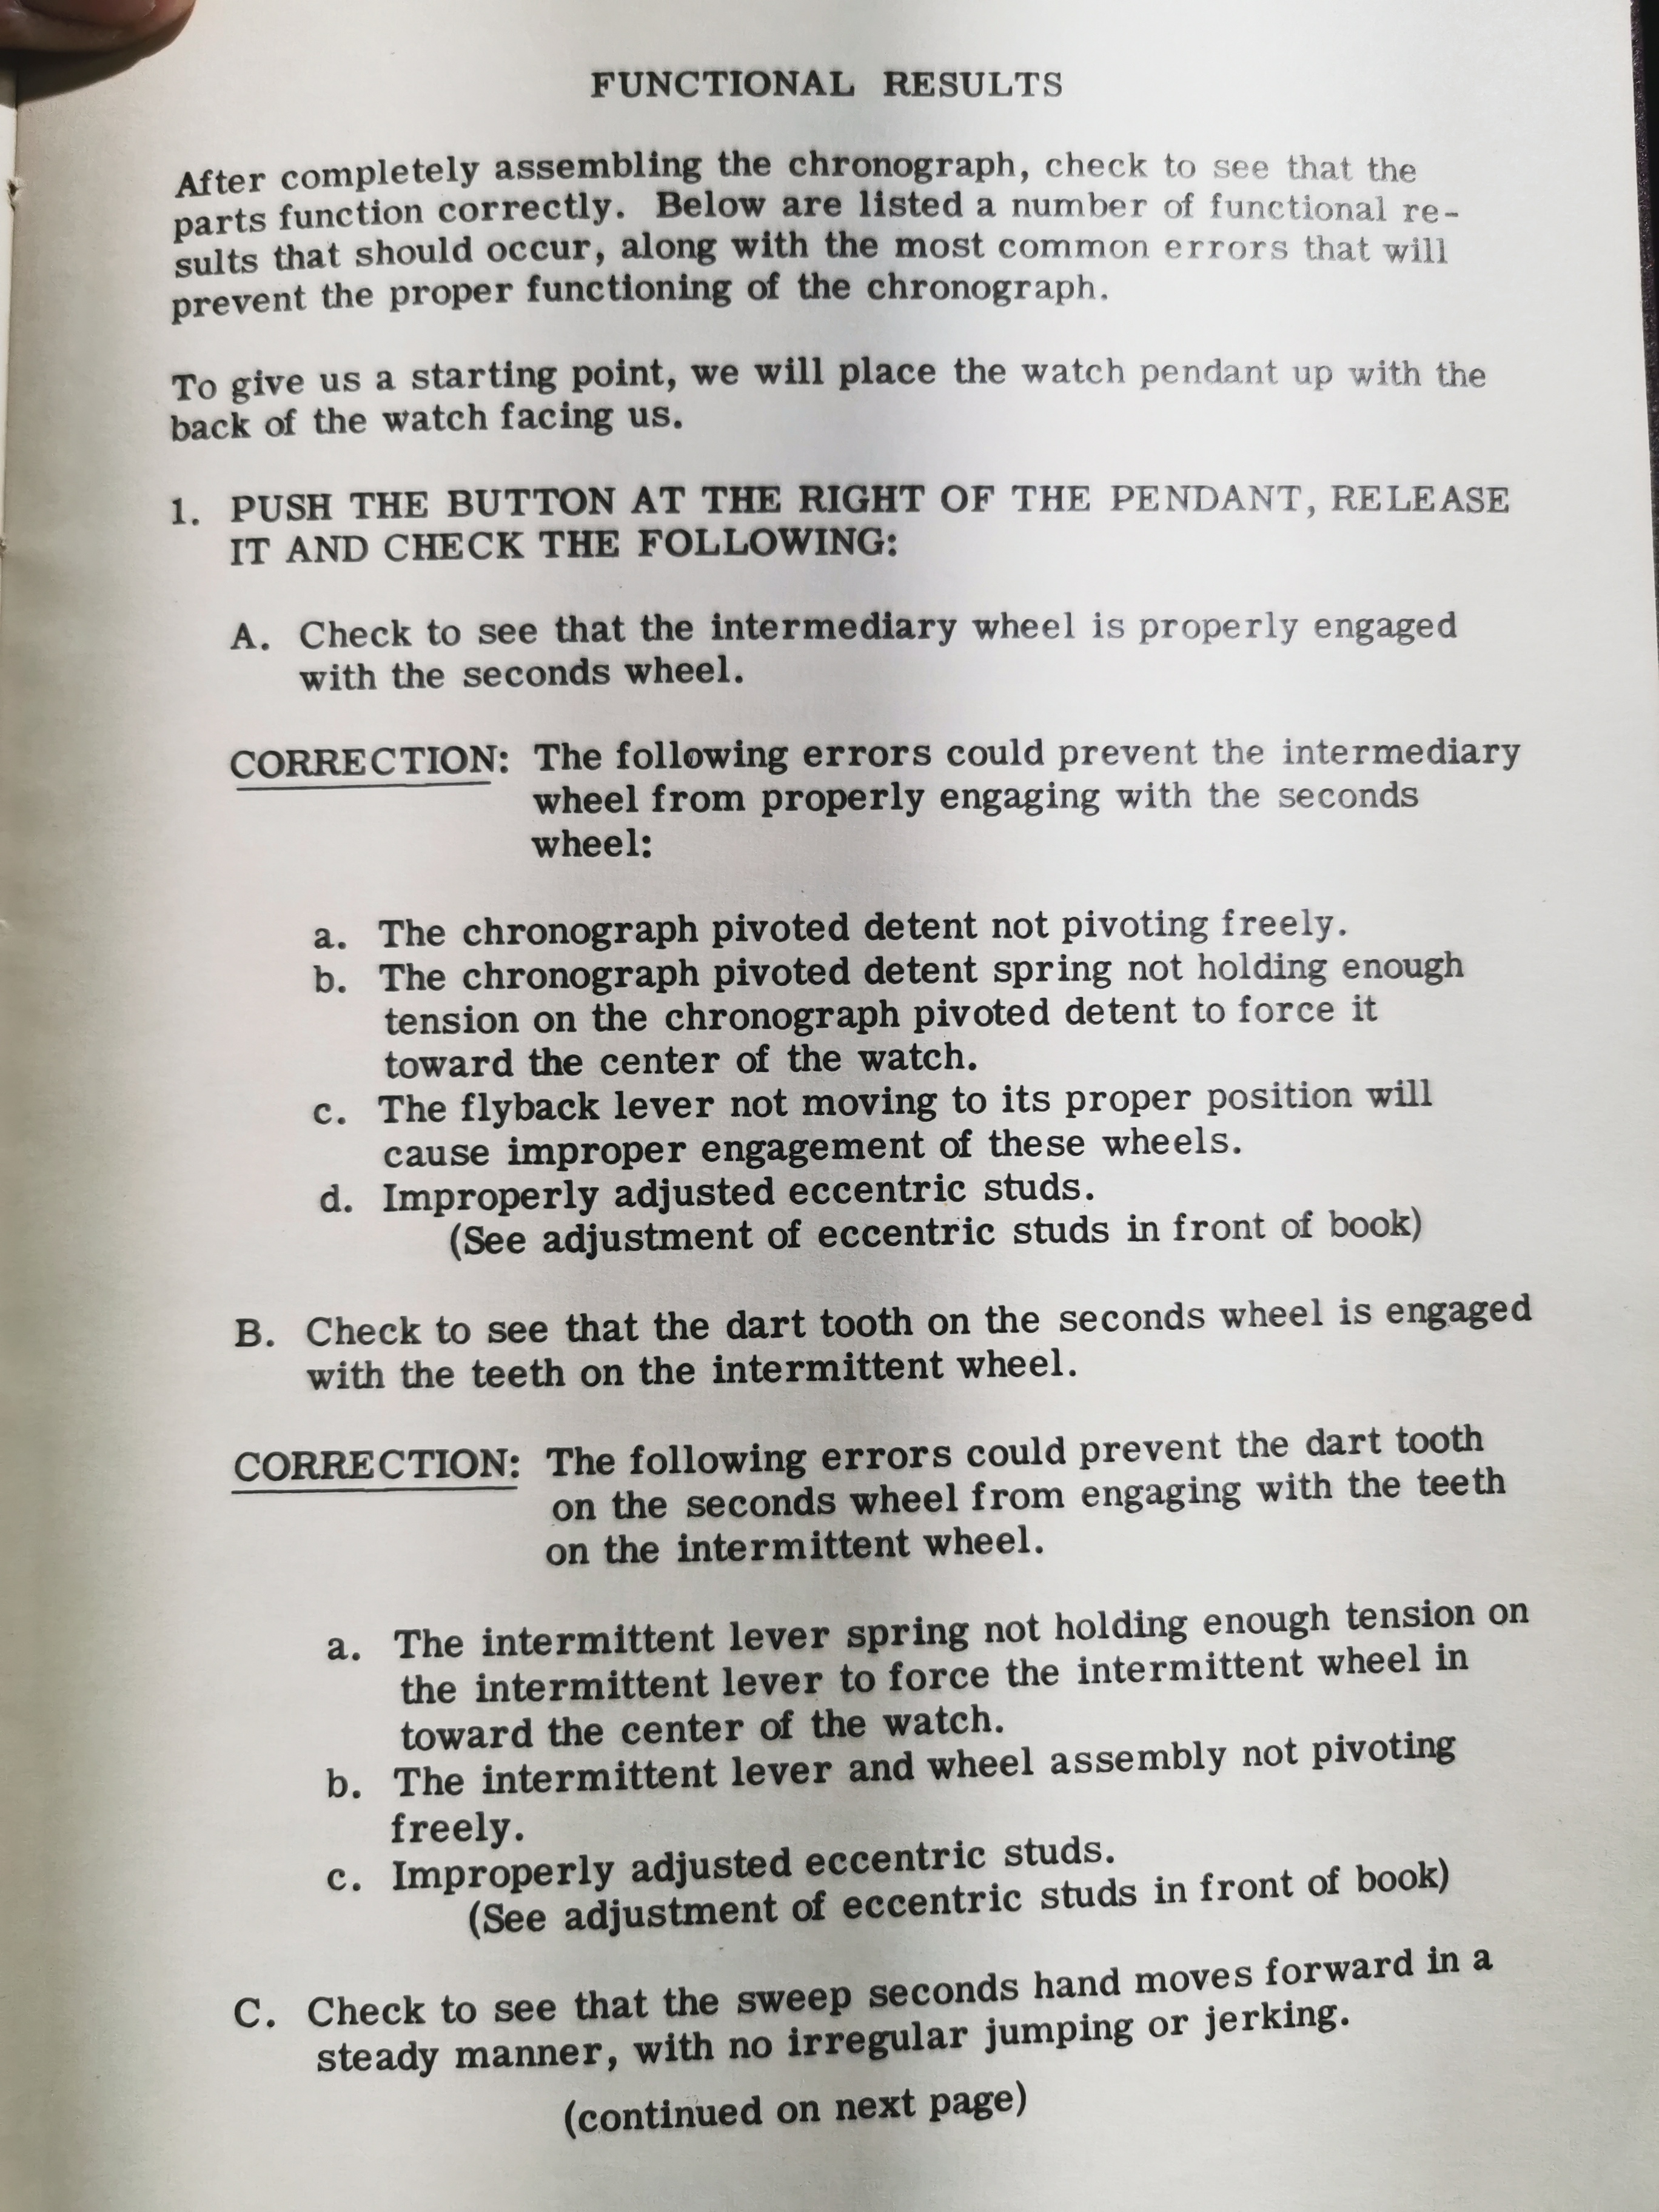
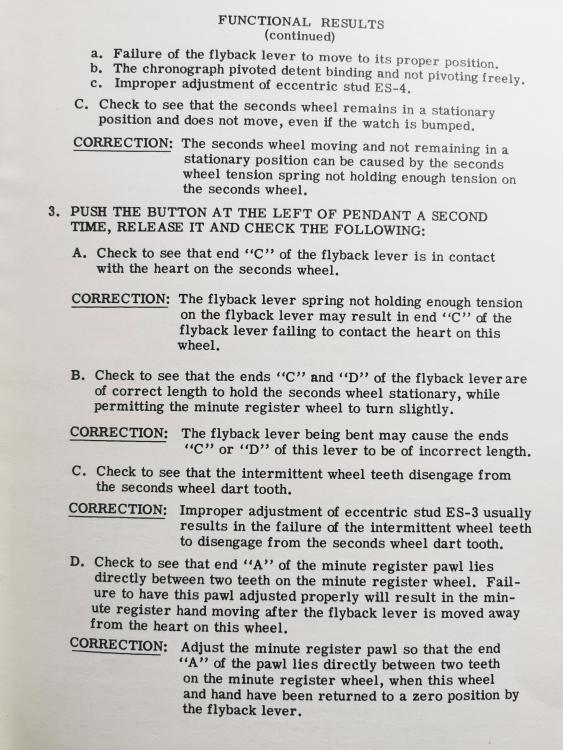
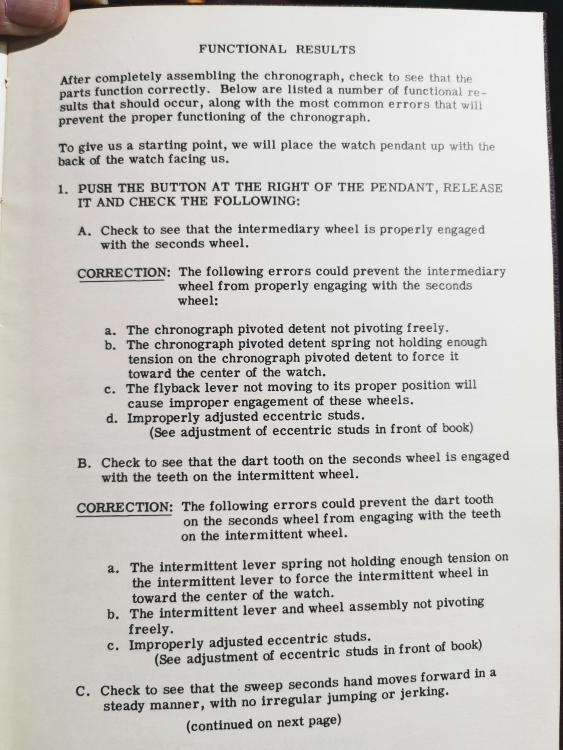
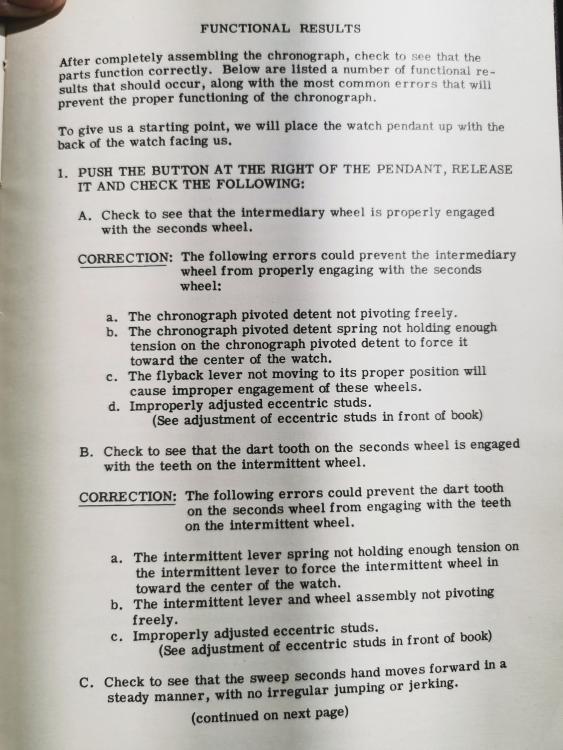
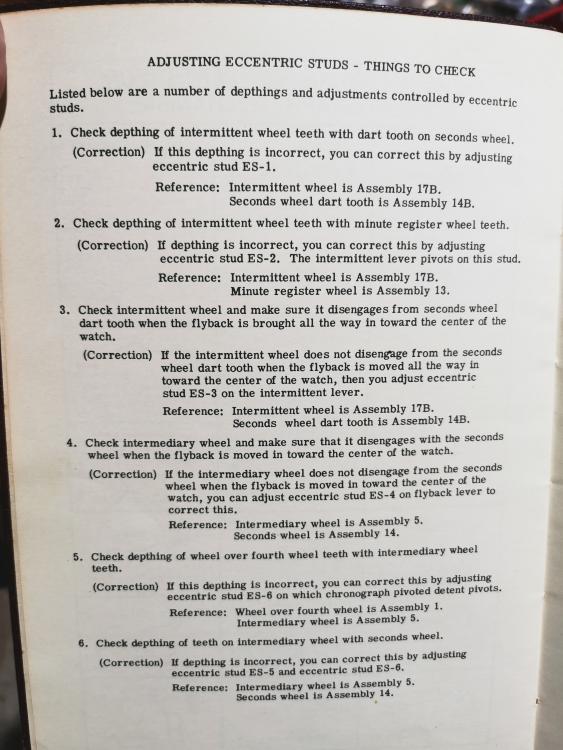
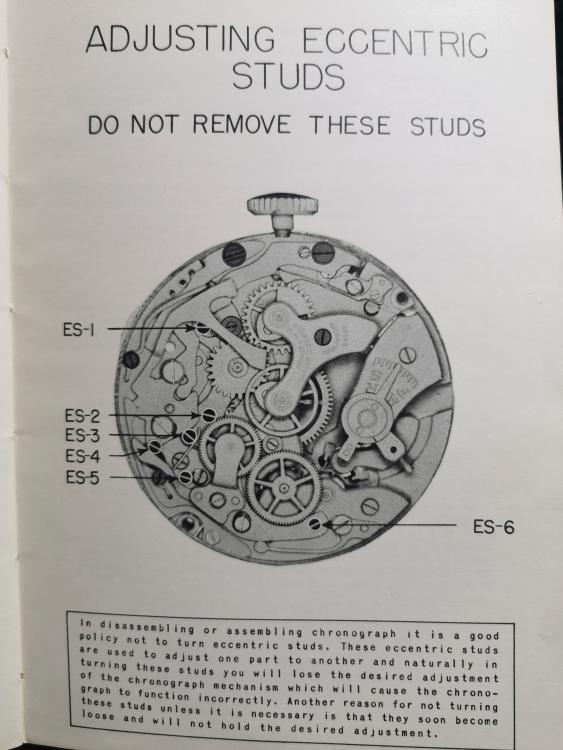
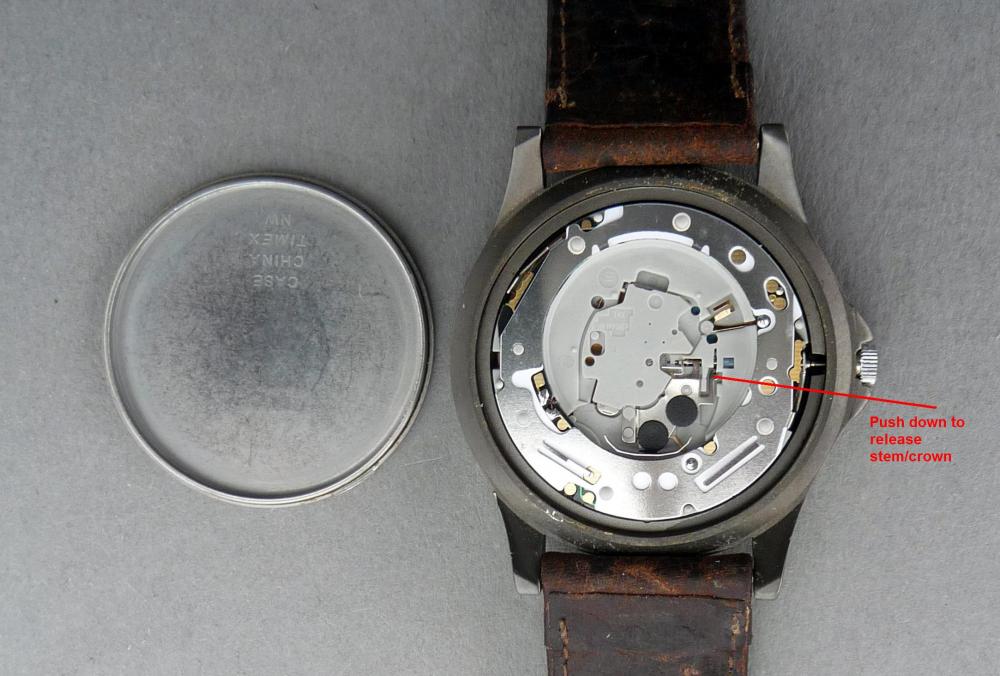
This may help you after you have assembled the movement

 3 points
 -
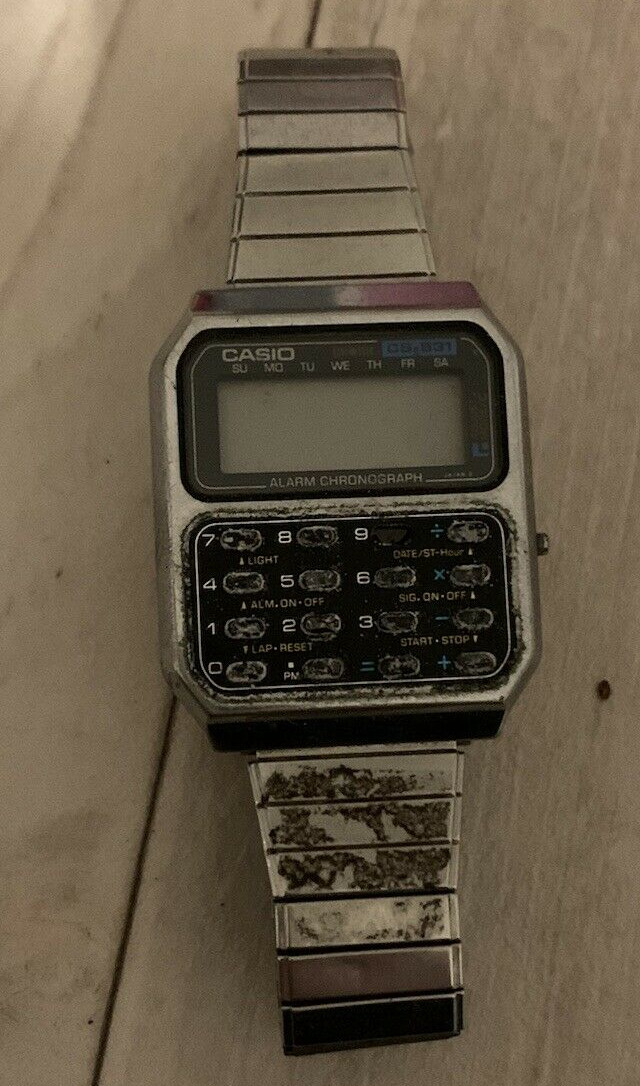
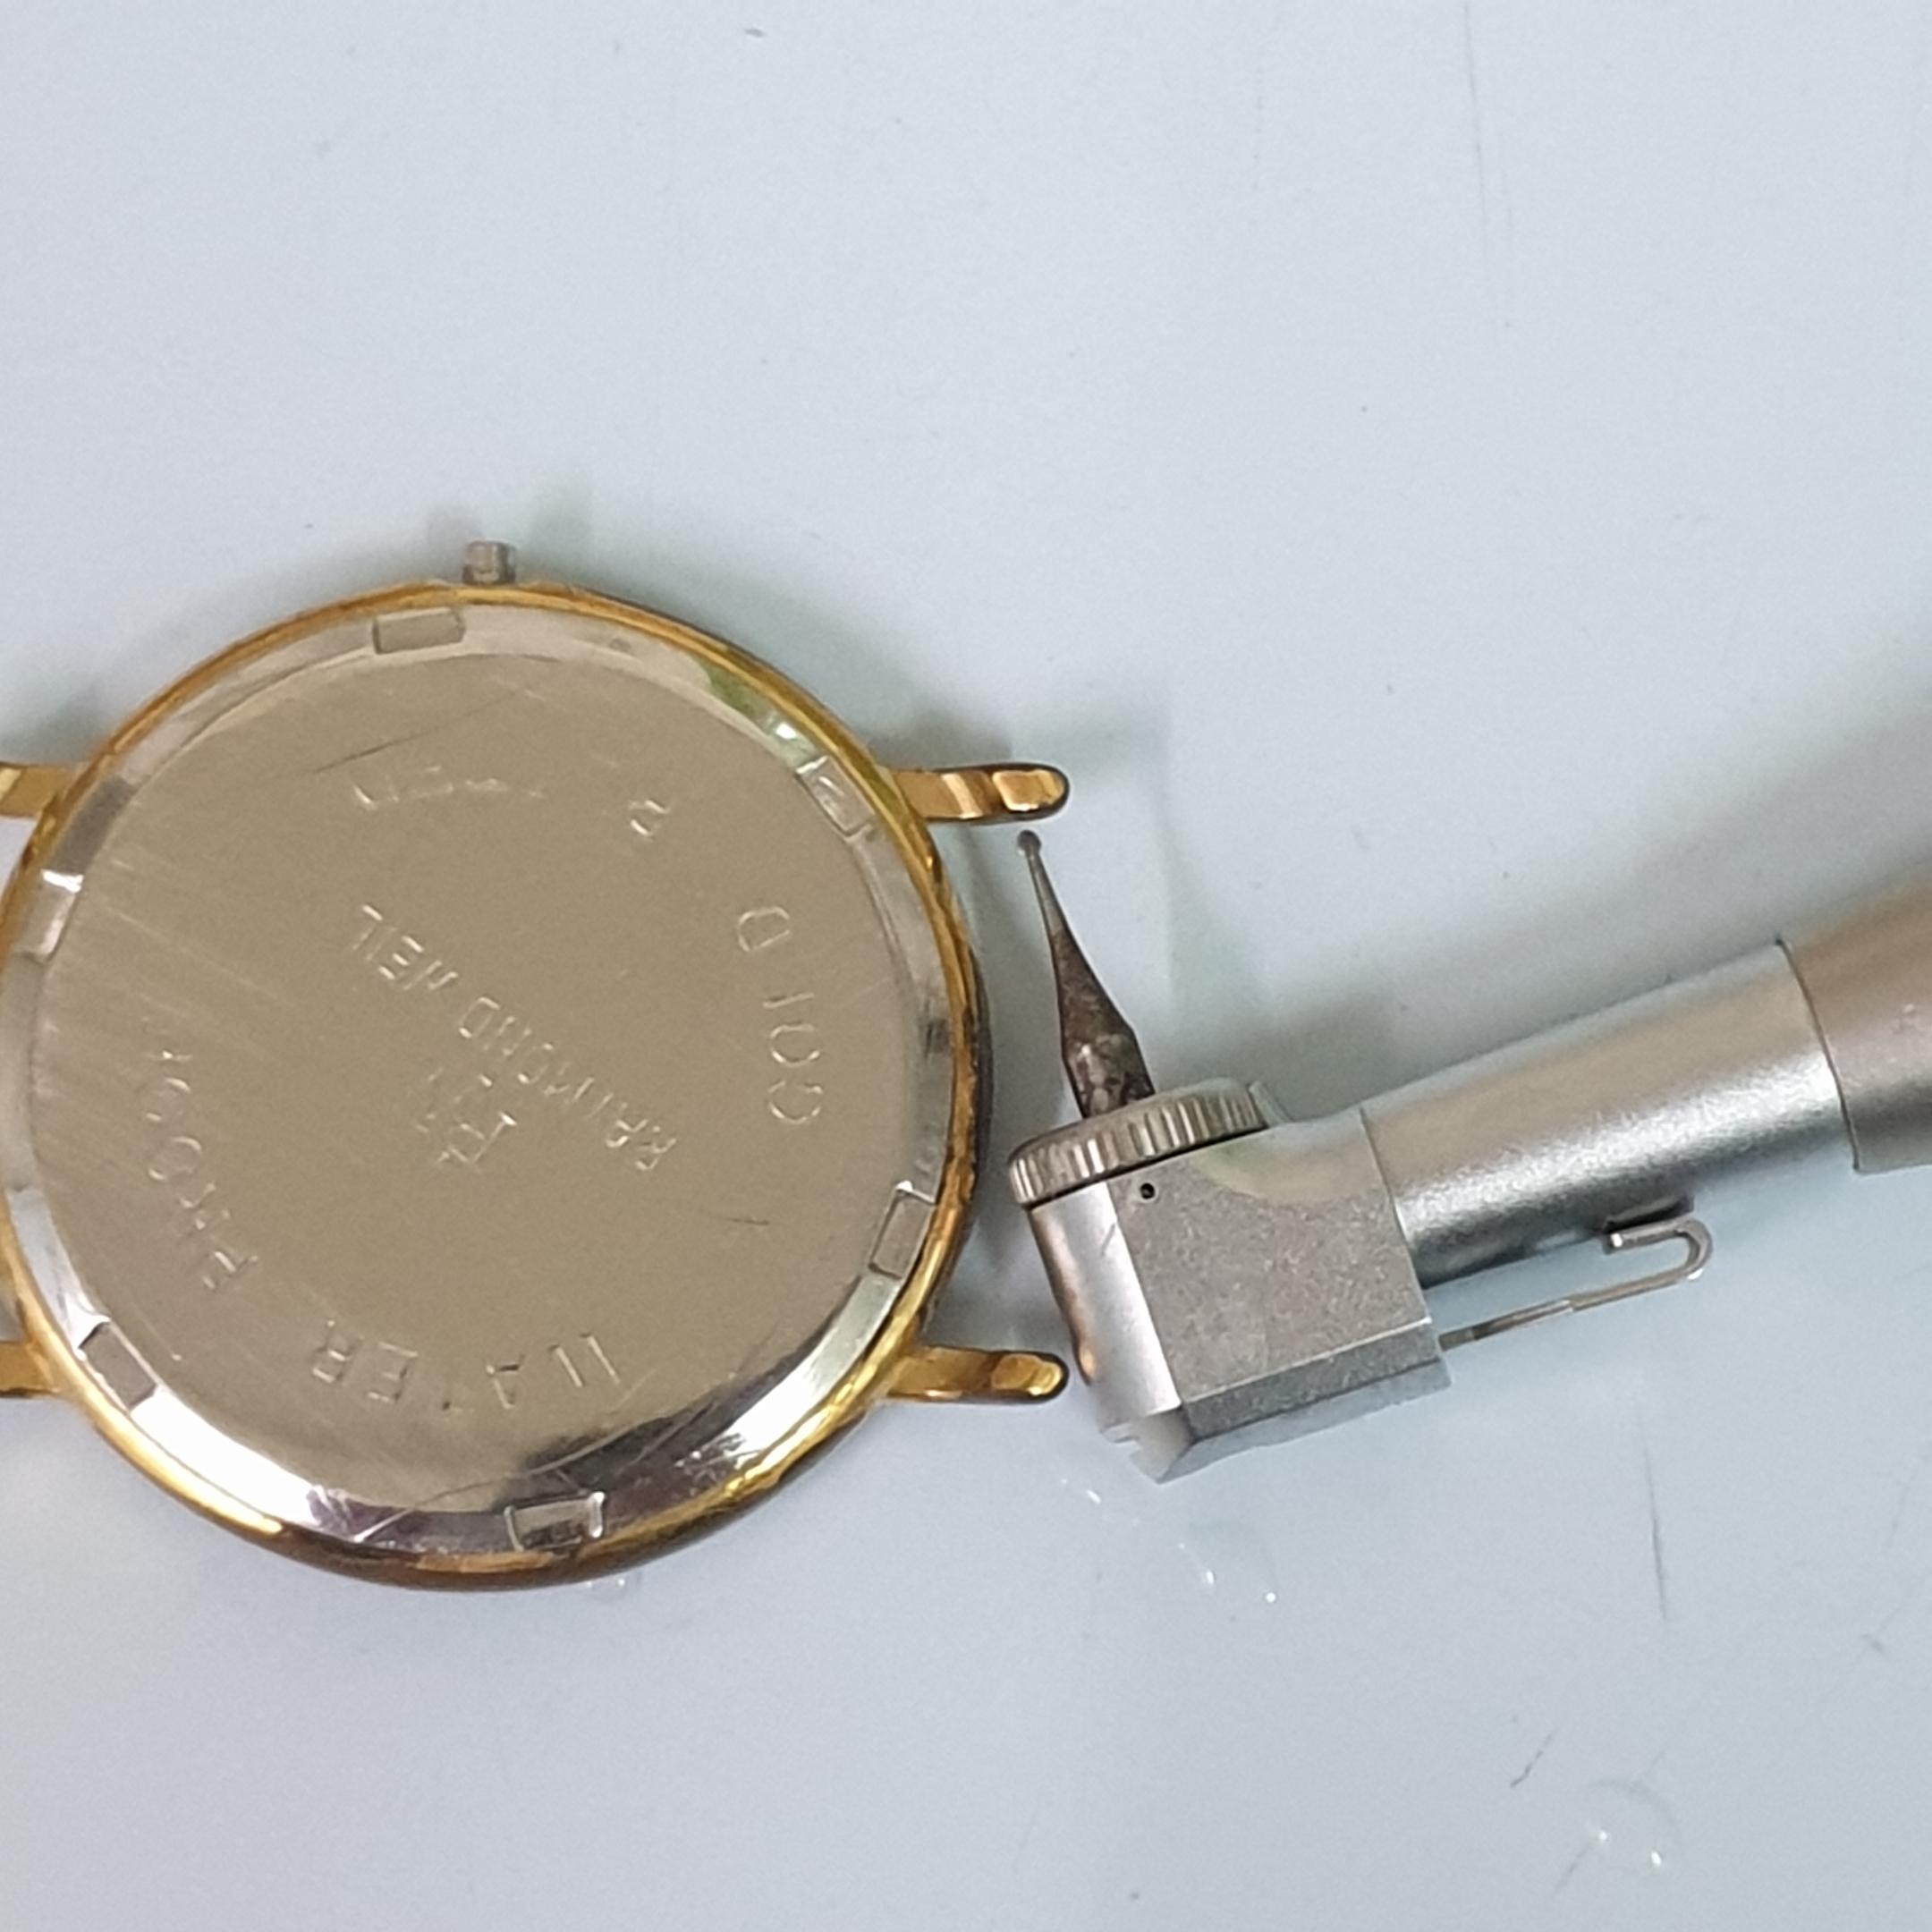
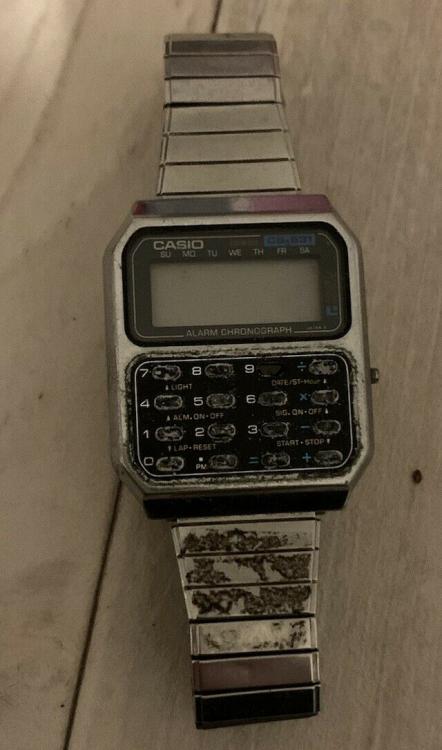
A rather scruffy Casio CS-831 is on its way. Released in 1983 with a stainless steel case, and Casio build quality, these were arguably the must have calculator watch of the day, and one of those gadgets that I nearly bought, back then but couldn't justify the price for at the time. Well there is no problem with the price of this one, it easily will make it in to the 404 club, assuming I can get it working and make it look a little more presentable. I'm not sure the bracelet is original, but I have a couple of suitable Casio bracelets in the junk pile if it isn't.
 3 points
 -
From a restoration perspective, the proper approach is to "rub in" another jewel. You can open up the thin lip that secures the old jewel (with a lathe or with some jewel opening/closing tools), put a new jewel in, and then close up the lip again. Those tools pop up on eBay on occasion and sell for a lot. It is not as hard or daunting as it sounds. Fried's books (either Watch Repairer's Manual, Bench Practices..., or both) give a good tutorial and breakdown. But from a practical perspective, do a search for "friction jewel converters." I have an example of using them here on a old 7-jewel watch I worked on for fun with my son. The converters solve the problem noted above, that jewel settings are huge, and putting a friction jewel of the same diameter in the plate looks really weird. The friction jewel converters look like a setting. You ream the inner hole of the converter to the jewel diameter (if necessary), friction fit the jewel in the setting, and then friction fit the setting in the bridge.2 points
-
That's gold. Just what i was looking for. Thank you both so much.2 points
-
Hi there, hope this helps its from ESEMBL-O-GRAF for cal 51, as nickelsilver says they are the same, pretty much.
 2 points
 -
It's in the Esembl-o-Graf books, at least the 51 is, and all the Landerons are pretty much the same. I used to have a link to all the books online but they've become hard to find, here's a link for the 51. http://www.clubderelojeria.com/archivos/01LANDERON51.pdf2 points
-
Before you go out and buy a dental drill.... I tested the smallest drill I had, a children's handpiece. The angle is probably worse than using a long bit from the side of the opposite lug.
 2 points
 -
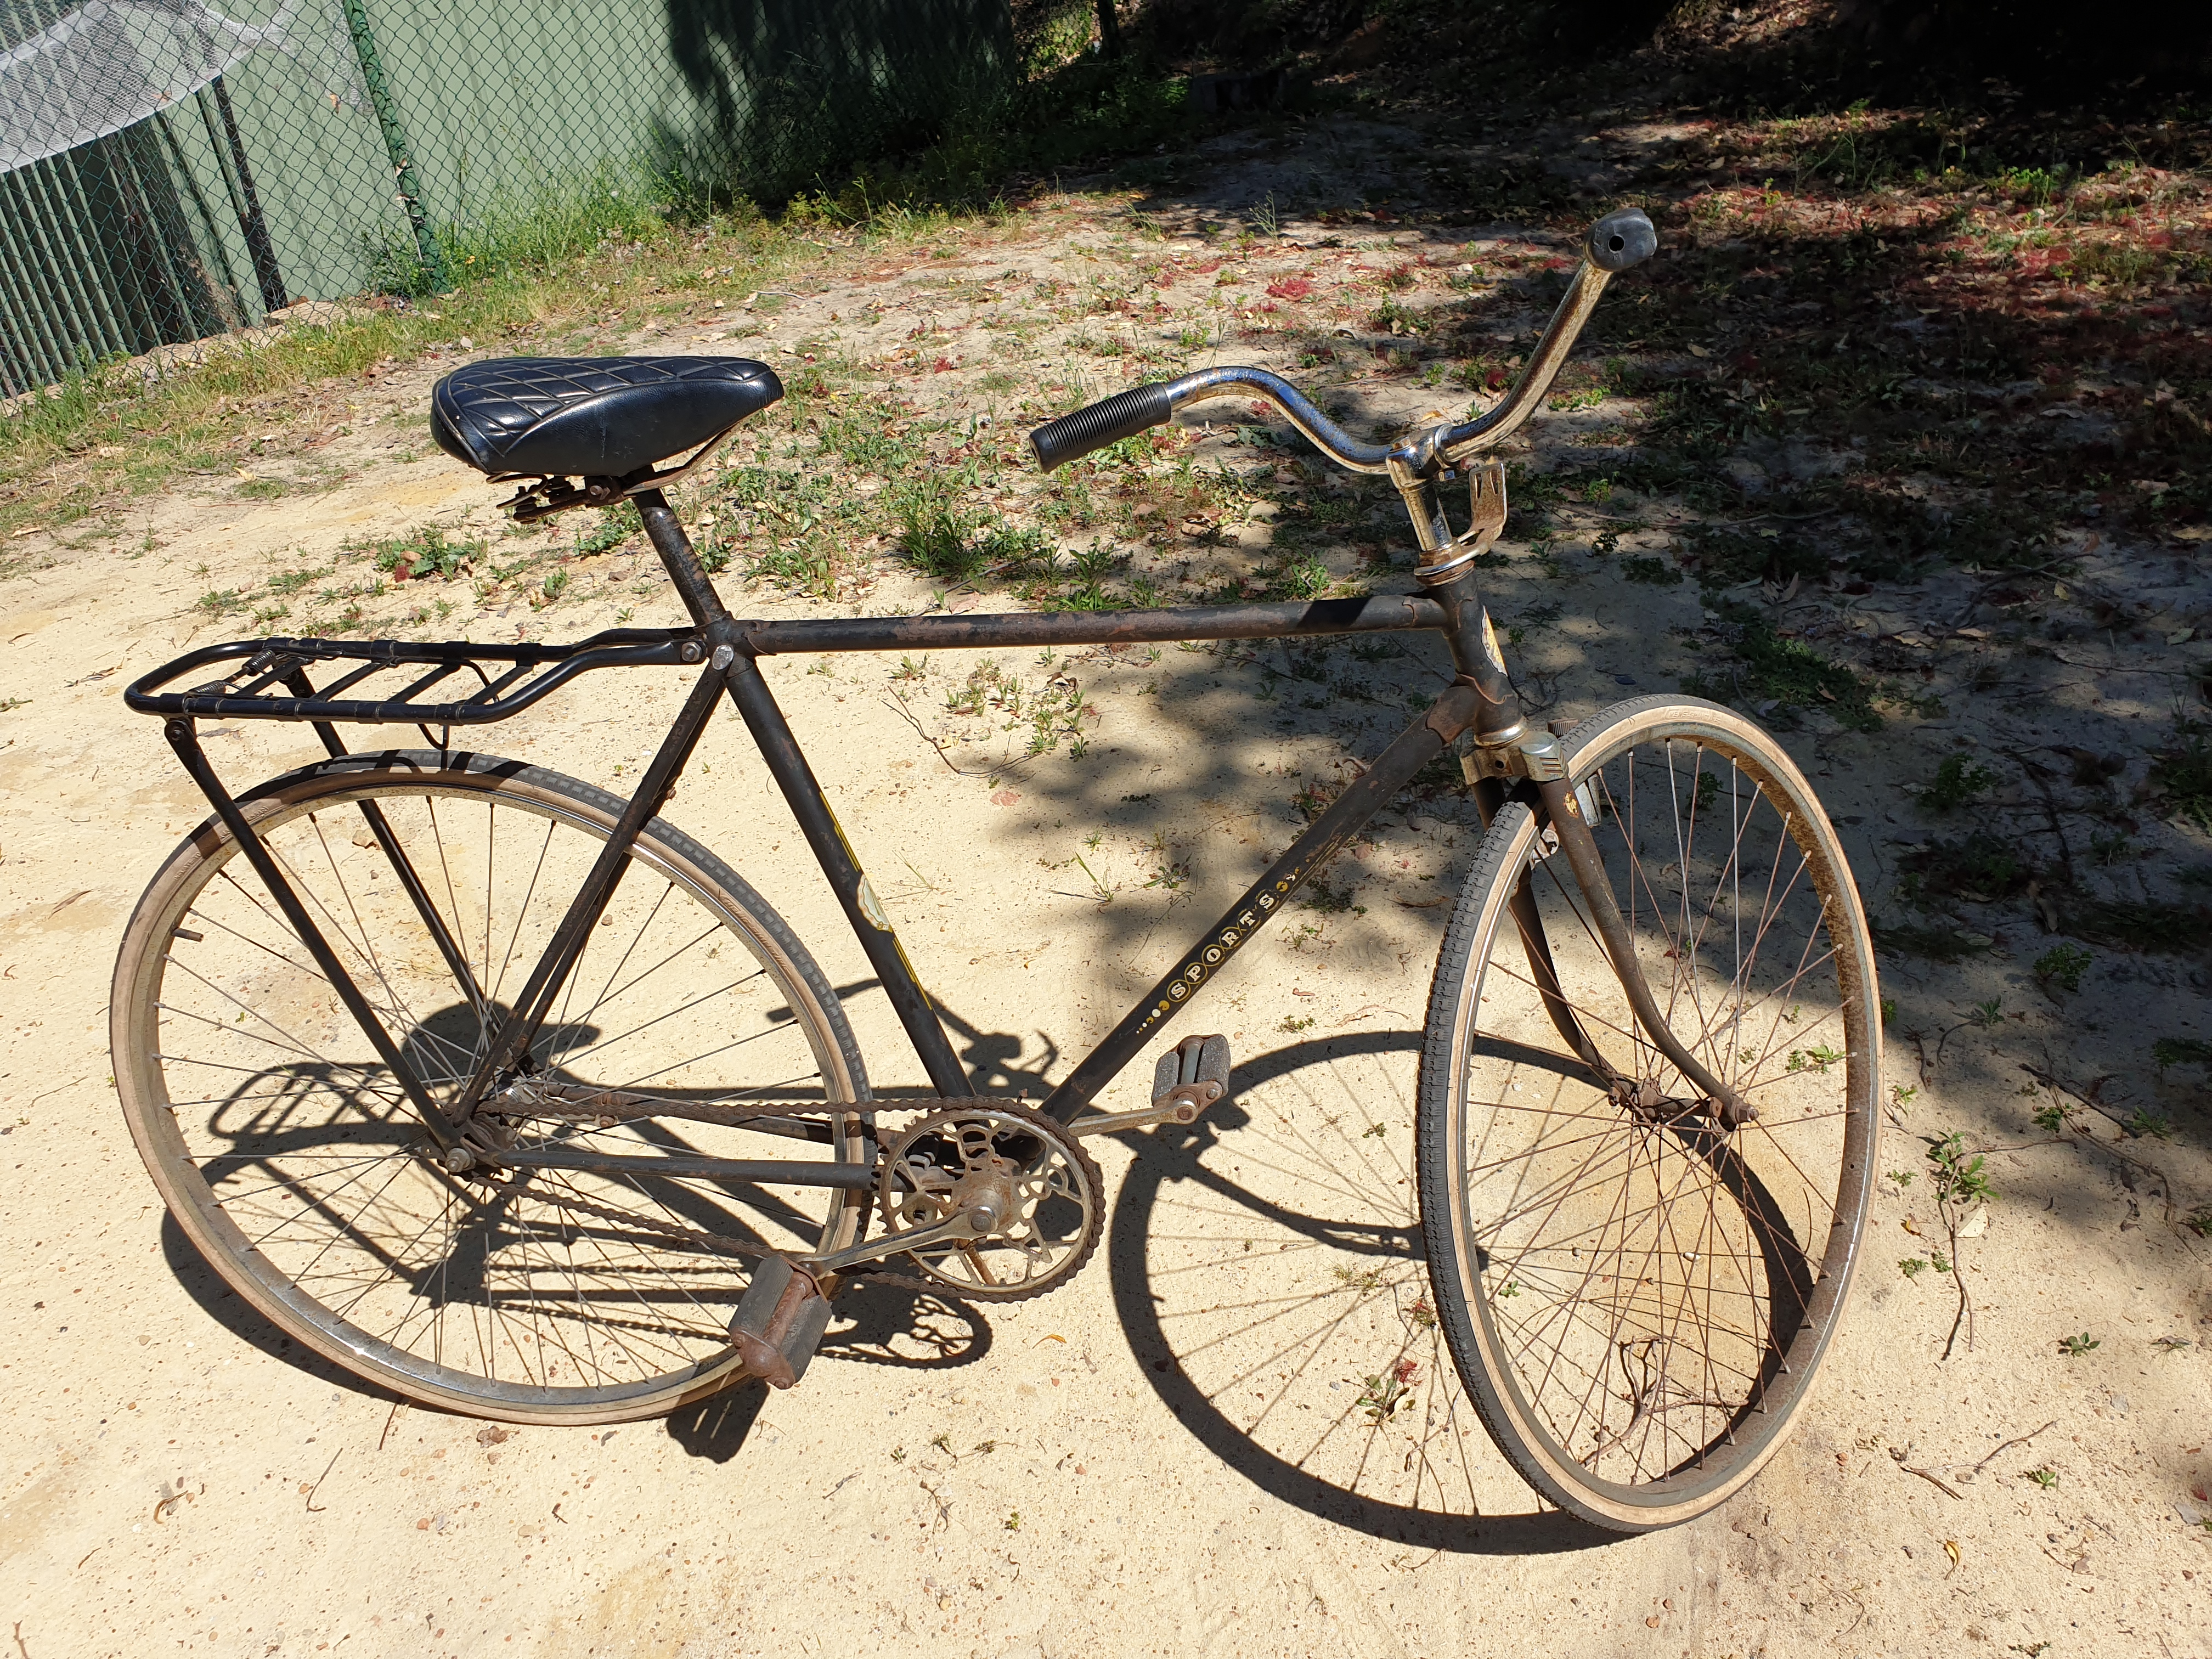
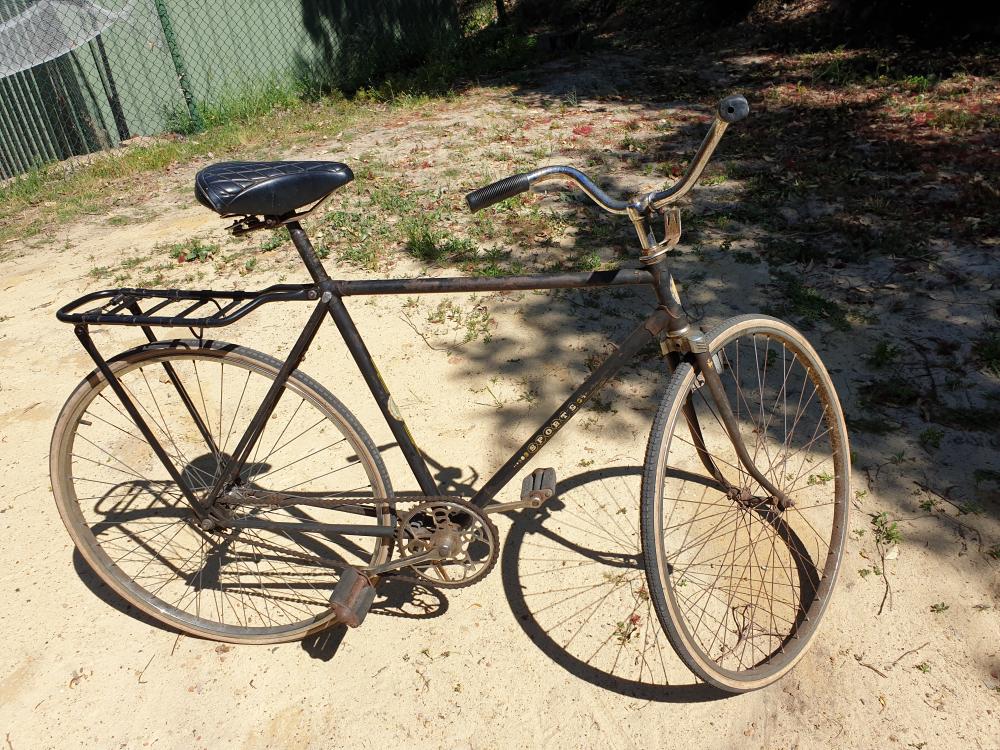
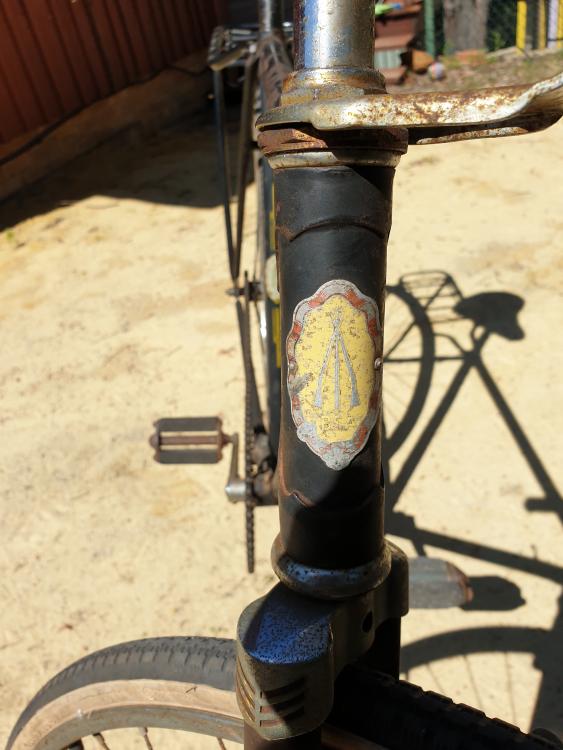
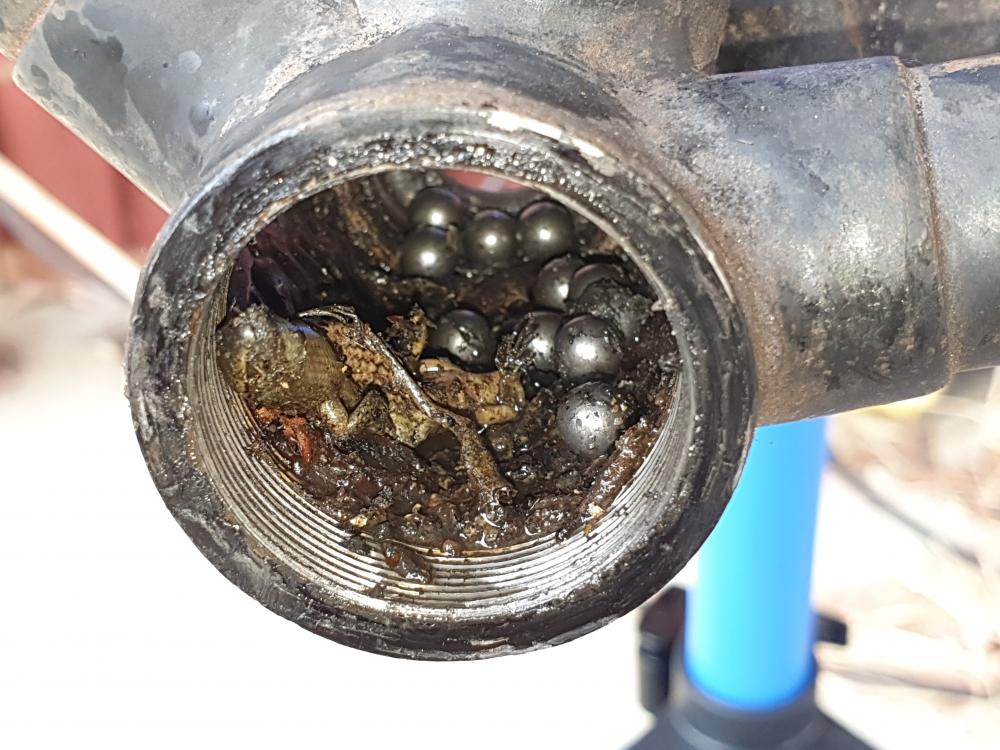
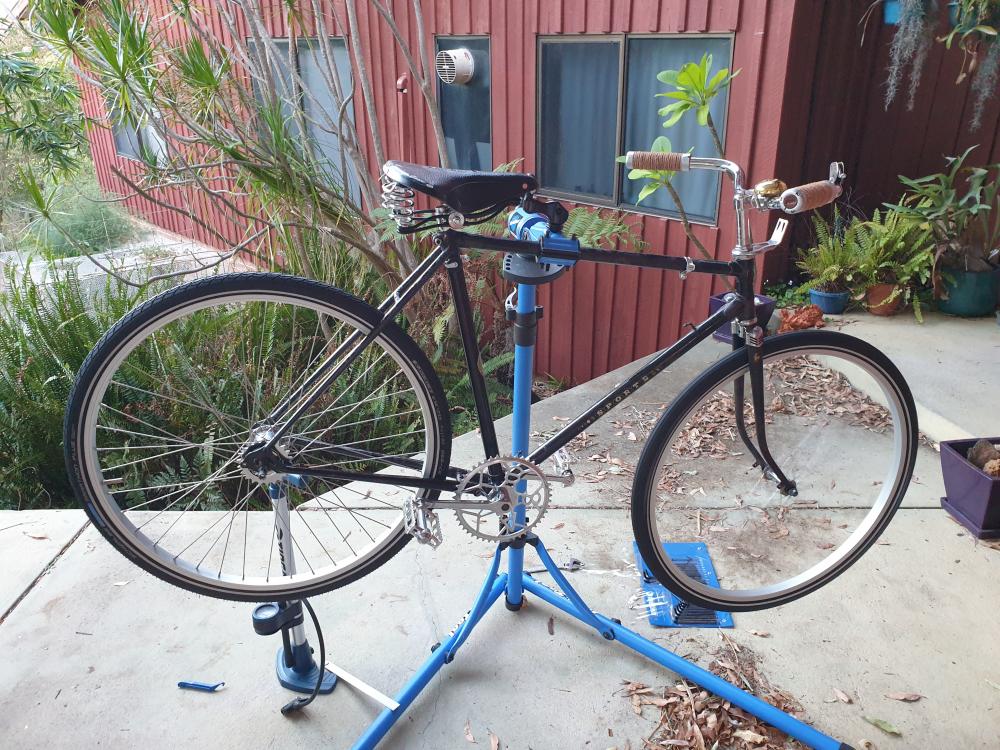
I don't know if anyone had noticed, but I haven't been on here for a few weeks as I have been distracted by something else on and off for the last few months and it has been taking a lot more of my attention over the last few weeks, but its nearly finished now, so I have time to come back to here. In November last year whilst browsing 'Gumtree' (Australia's version of Craigslist owned by Ebay) I looked up 'BSA' to see all the nice motorbikes I can't afford to buy and in amongst them was a BSA bicycle. It was made in the 1960s so not a 'real' BSA bicycle, but a BSA badged Raleigh Bike as BSA had sold them the rights to make bikes in 1959 or 1960, but it still has the BSA logo head badge and BSA written in the cranks and best of all it was cheap. So I snapped it up. The bike had the incorrect seat, stem, handlebars and wheels, so I really was just buying it for the frame, forks and cranks. When I started to strip it down I got a surprise in the bottom bracket in the form of a dead lizard (skink) it was still pretty fresh so I can only think as I removed the seat a few days before stripping the rest of the bike it climbed on the bike and fell down the seat tube and got stuck. With the bike stripped down it got given a wash and about 8 hours polishing with T-Cut on the frame being careful not to damage the pinstriping and all the chrome was given a long bath in a weak solution of oxalic acid then just a rinse with clean water and a wipe with a rag and it all came back looking like new. Then I sourced the correct 650A rims out of the UK, a 1966 Sturmey Archer 3 speed AW hub, period correct front hub and after servicing the hubs sent the wheels off to be built. Meanwhile I got the correct seat post and a new Brooks seat as the bike would of had originally, the correct style handlbars and I took a liberty and bought some Brooks plump handgrips and a new English made brass bell then sounds cleaning and loudly enough to be fitted to any good clock. Since taking this photo I've fitted the chain and measured what size brake calipers I need and they are in the post along with a replacement handlebar stem and once they are fitted the bike will be ready to ride. It's cost me probably more to fix this bike between the parts and tools I purchased to work on it than a new reasonable quality bike, but this bike is way cooler than any new bike I could buy, plus it looks good leaning against my 1961 C15 BSA.
 1 point
 -
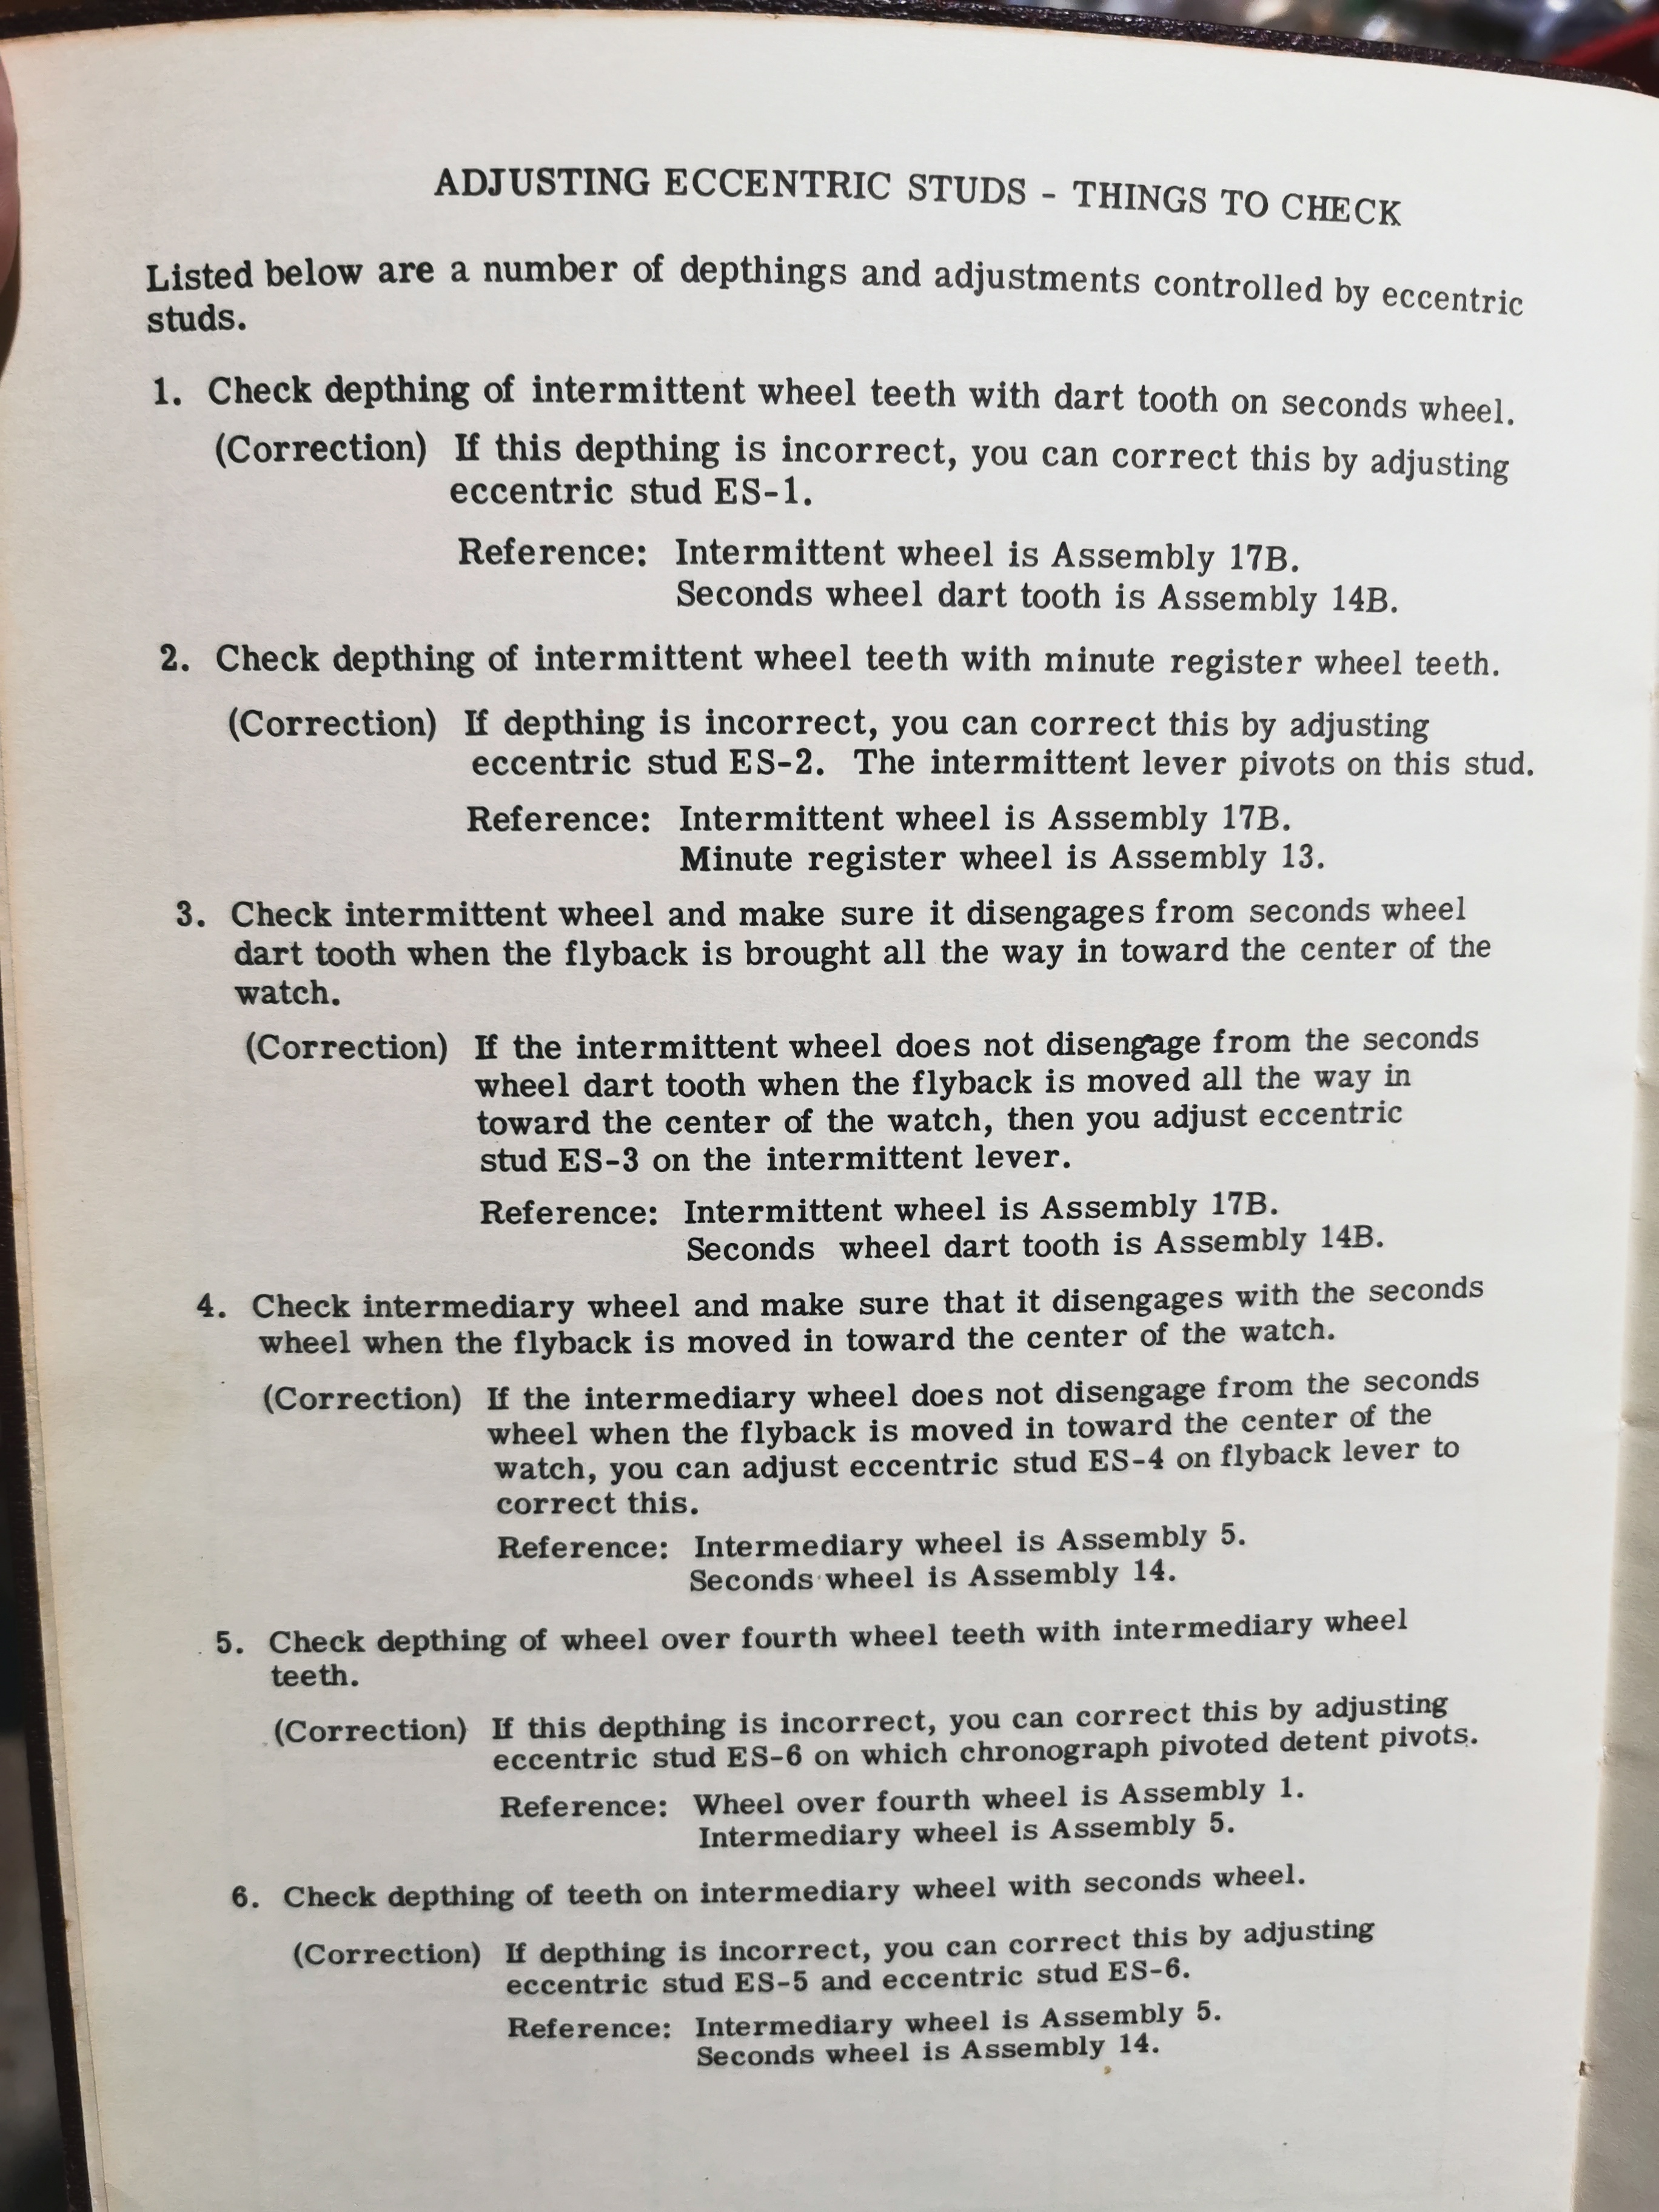
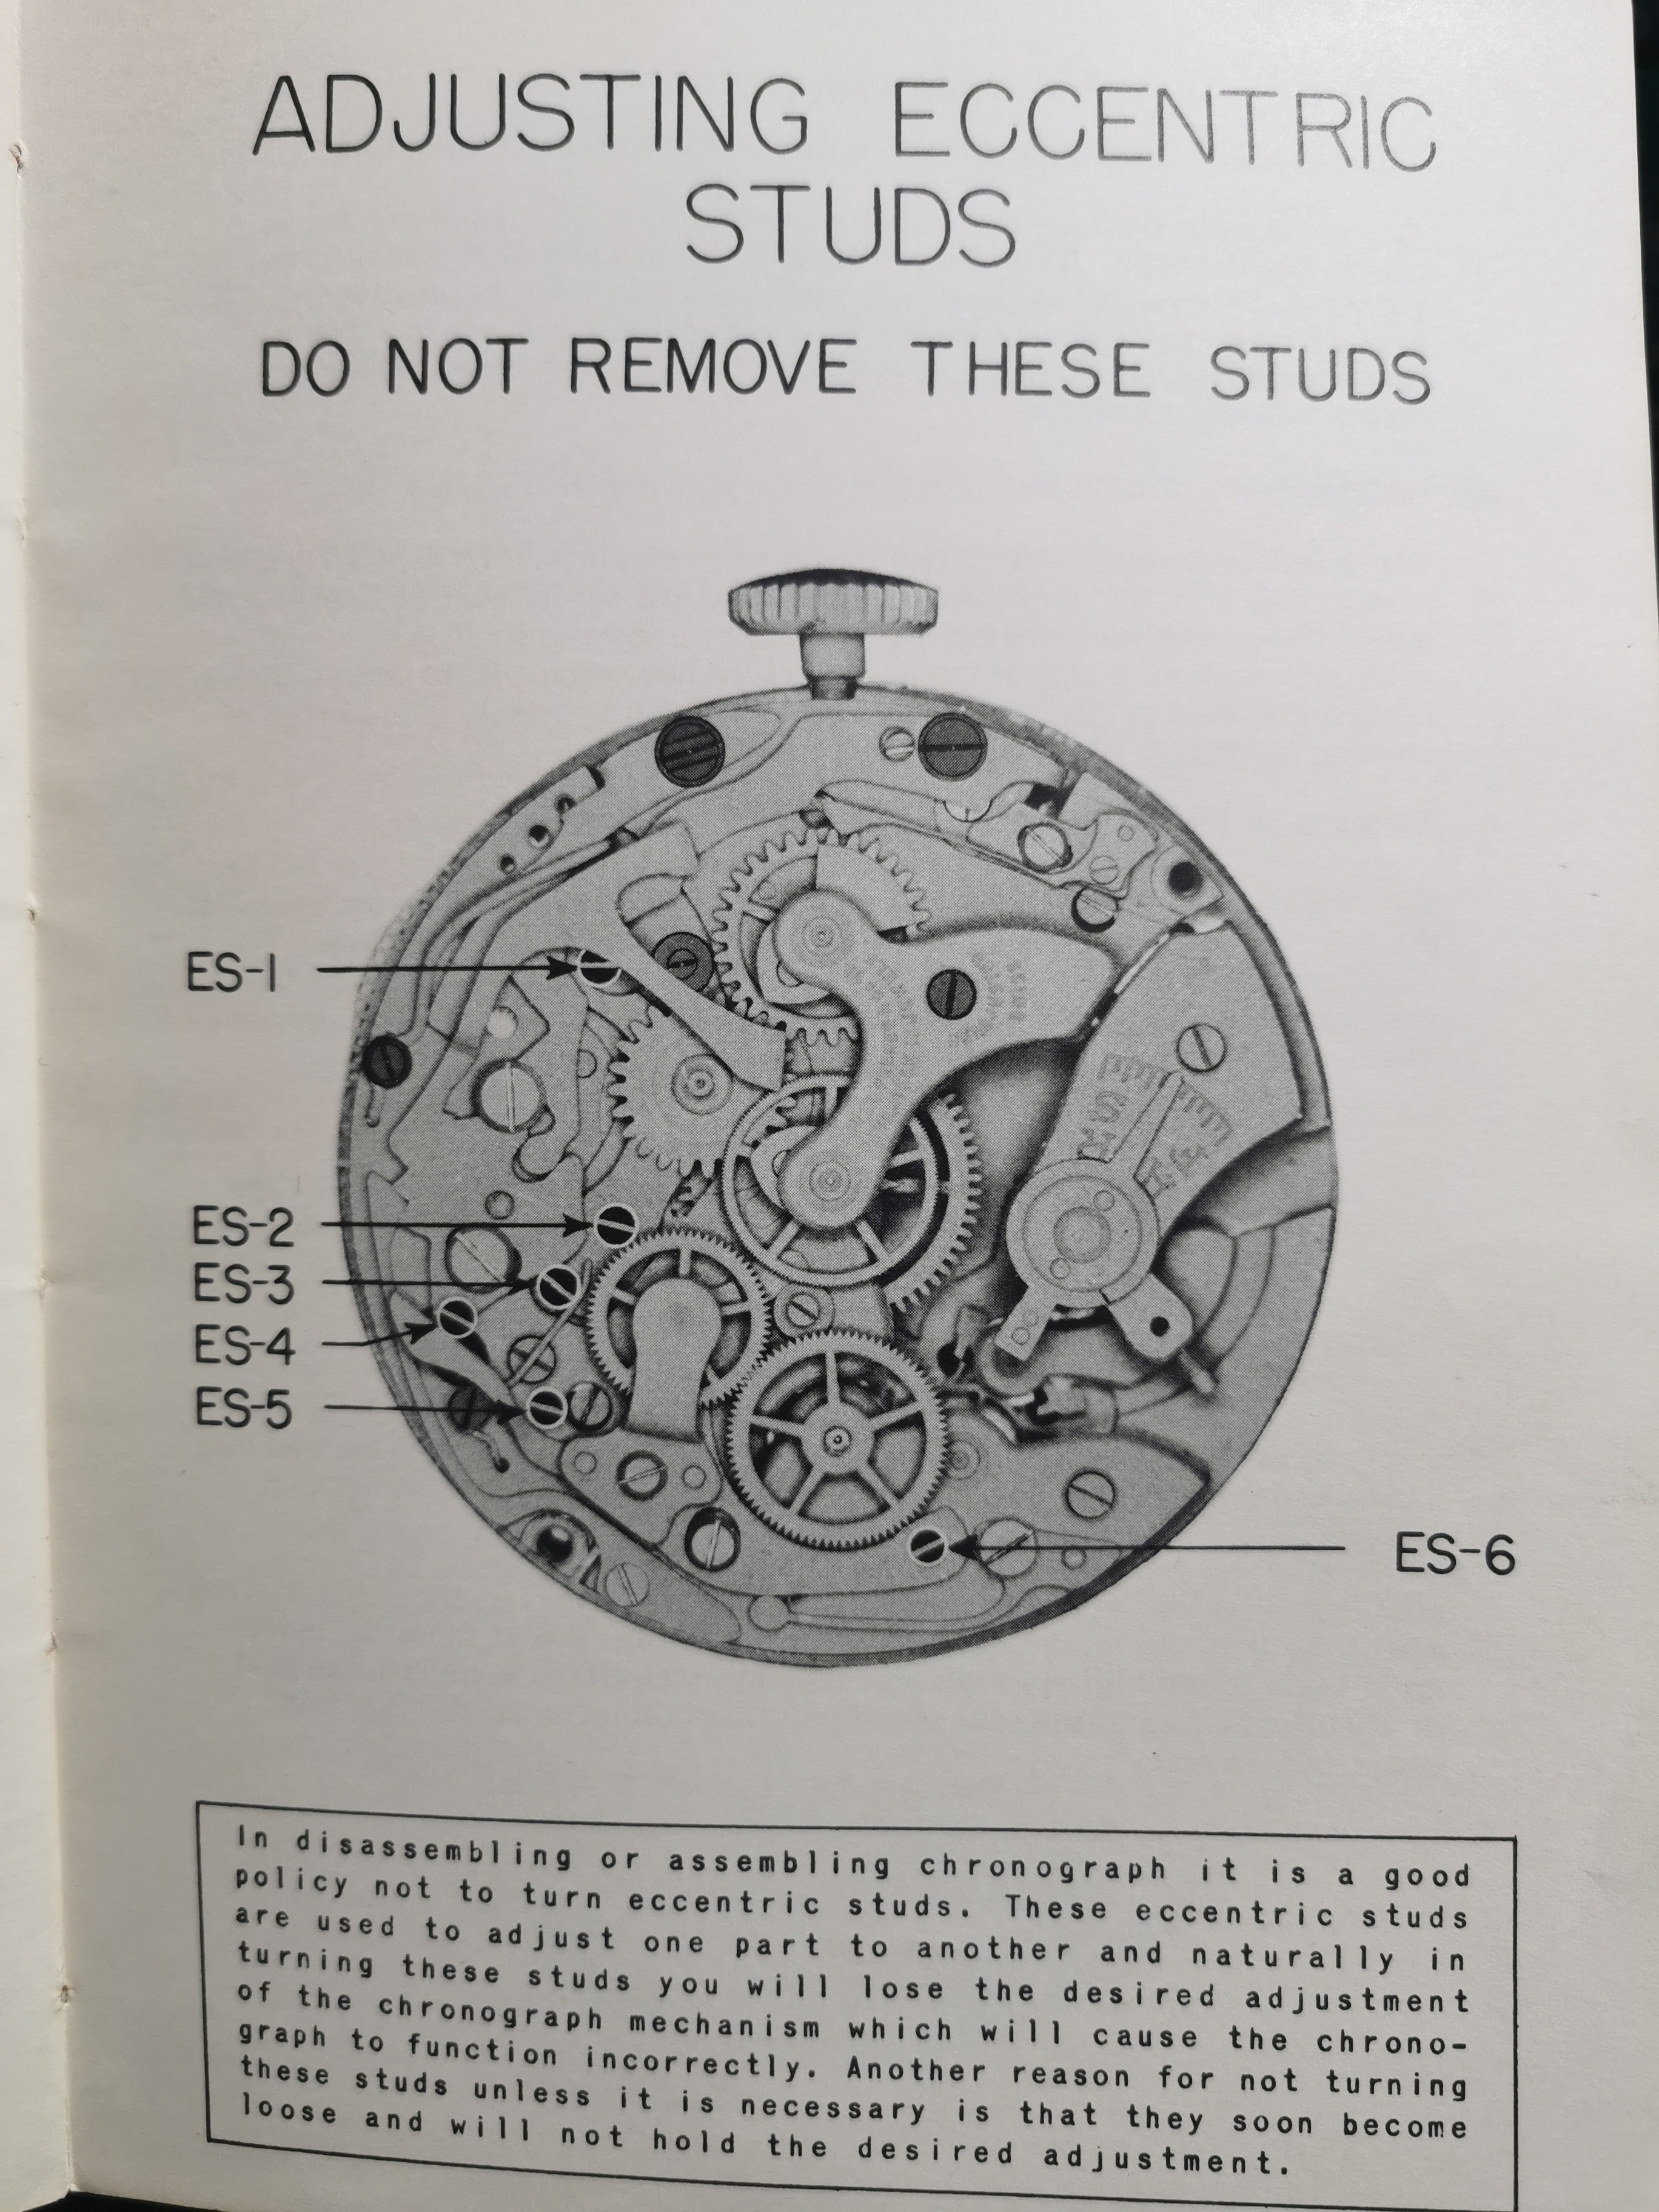
I am in the process of restoring a Landeron 50, and all the eccentrics are out of whack. Some I've managed to adjust correctly by trial and error- the depthing between the driving wheel, coupling wheel and chronograph runner. But the others have got me going round in circles. It also seems to me that there is probably a correct order in which to adjust them. So, my question is, does there exist either the original technical guide that explains how to adjust all the eccentrics, or a guide/tutorial written by anybody that explains it? (I have looked for both without success.) And if not, can somebody please make one? (...ahem, Mark?)1 point
-
I had no idea anyone had produced "friction jewel converters" ! Haha. I have made them many times though. It's a quick lathe job, and when done neatly you have to take the bridge off and look underneath to see that there isn't an original rub in jewel in a rub in setting. Having nickel bar is handy at it blends very well in german silver movements, for a high end gold plated movement with a visible setting the converter gets plated.1 point
-
You can ream out the old rub in setting and put in a friction jewel. The issue is the new jewel is now significantly bigger in diameter than the original and it's unsightly. Sometimes you can get a friction jewel in the old setting and manage to re-rub the brass and it will hold. Rub in jewels are out there, like Tmuir said, but they are often a jumbled assortment and it can be a real trick to find one that matches both the old setting and the pivot.1 point
-
AS/ETA/ESA 536.121 are the same. Schematic diagram may exist, otherwise, you should take picture as you disassemble to the keyless, show us a picture of it please. Regs Joe1 point
-
Rub in jewels do turn up on Ebay, but are rarely listed as rub in jewels as usually the person selling them does not know the difference. Just keep searching for watch jewels and you will eventually find some, but whether they will have the size you want is another story.1 point
-
Finally got word from Horia. It appears they tried to send me an invoice with instructions for of how to make the payment, but for some unknown reason the delivery failed. Anyway, their second attempt worked just fine. So, I've made the payment, in total $121 with shipping and banking fees for an order of two forks worth $44. Yikes! ? Anyway, a lot less expensive than trying to find another Steiner Jacot tool in the same condition. So, feeling pretty happy! Again, thanks @nickelsilver!1 point
-
For sure. That would be money better spent on a lathe, which would serve well for pivot finishing and literally countless other things.1 point
-
I don't have that trouble I'm retired and divorced. ?1 point
-
Come on now that's a bad attitude it's all set up it's almost perfect other than the price. Then in the early days of electric watches the watch companies came up with all kinds it interesting things. I was trying to find a picture of a movement holder that Bulova made instead I found the patent. Doing it idea it allowed you to run the watch with a battery or his clip your leads to their test wires and run the watch that way. That I find the hook type micro grabbers work really well on quartz watches Bulova US3848484.pdf1 point
-
Nicely wrap the watch stuff you buy as her birthday gift. ? lol.1 point
-
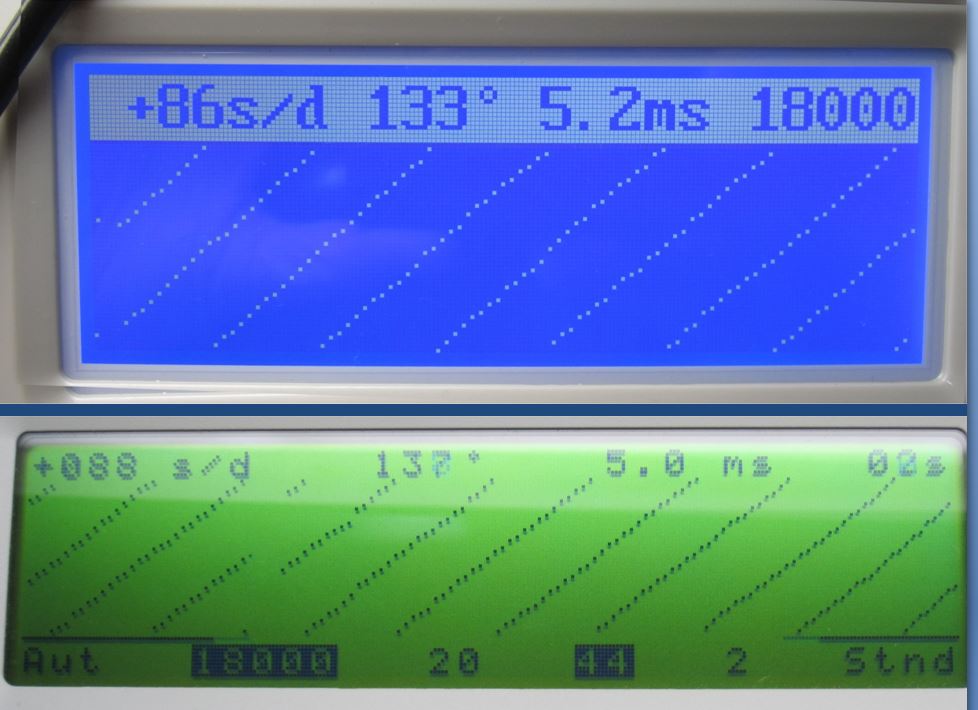
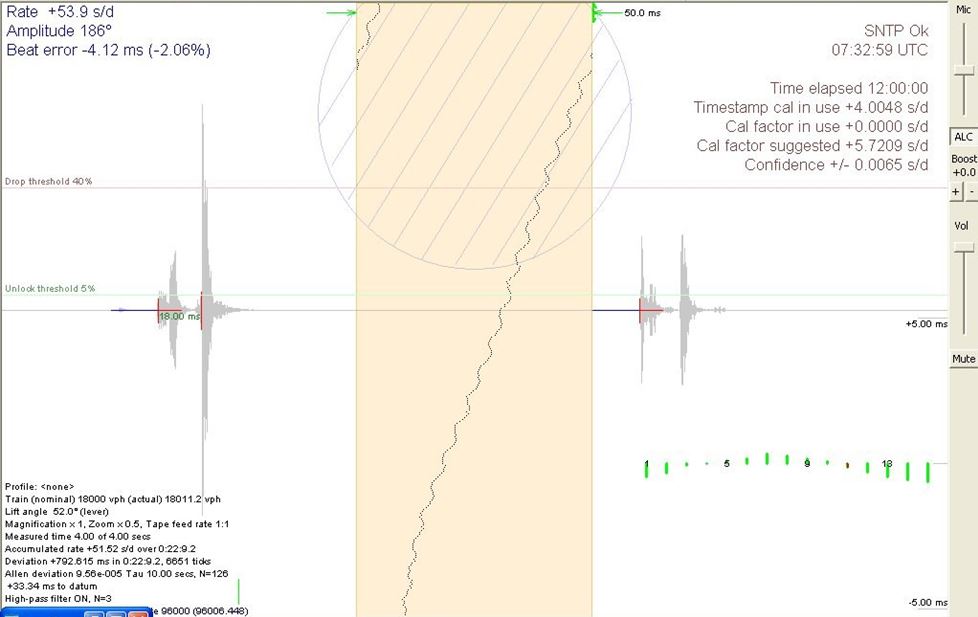
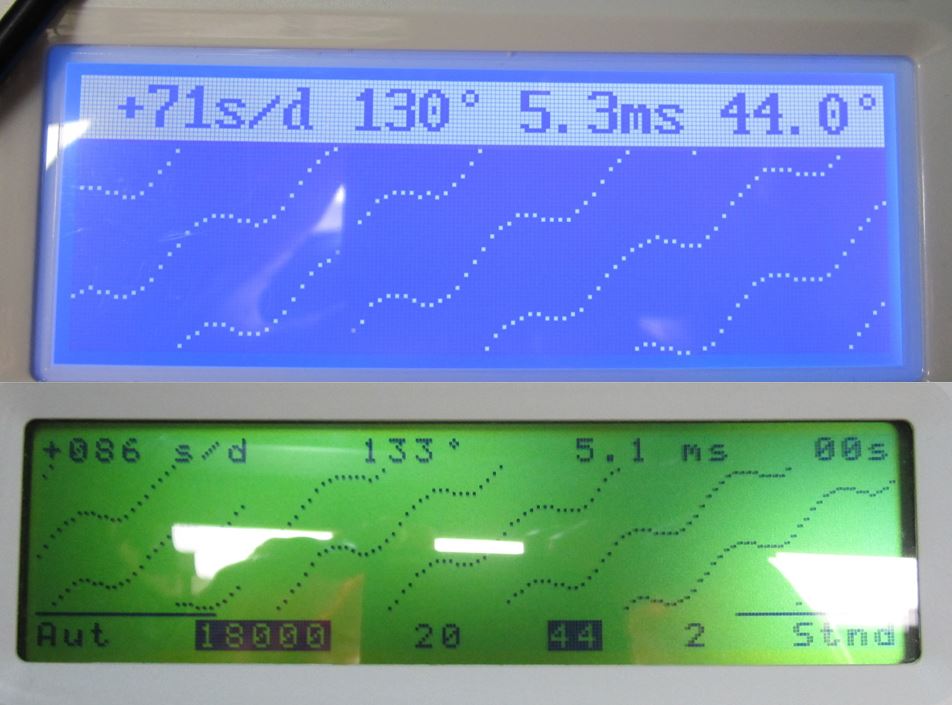
If you have uneven power fluctuations you'll see a change in amplitude and usually that results in a line spacing difference. Your lines are perfectly spaced at least consistently spaced indicating something else? I'm attaching some images I was once doing a comparison of timing machines and the person who loaned me his Chinese machine loaned his watches. Normally watchmakers would demagnetized the watch before placing it on a timing machine or even before working on them here I just timed of exactly as they were found. So you'll see the images the effect of a magnetic field and then after it was demagnetized. If the stones are upside down you'd have lack of end shake. If the Springs were weak or possibly not quite right I don't think it be an issue. If you look at fully wound up versus 24 hours it looks like? The typically dial up and down should be the same when you go to the pendant or crown positions you always lose amplitude. If we ignore the the numbers kind of everything looks right in that 24 hours later you have less amplitude. It just looks like you're losing a heck of a lot of power consistently someplace or you just don't have power.

 1 point
 -
Here is a link to a simpler method https://forum.replica-watch.info/forum/tutorials/7009925-how-to-reattach-dial-feet-without-an-expensive-machine enjoy1 point
-
Hi here is a link to explain how its all done http://www.dirkfassbender.de/dial-feet-soldering-machine.html By building the simple gallows rig and using a soldering Iron on the wire the same job can be done foot wire is 0.6mm and the heat transmits down the wire to the dial melting the solder paste ( flux/solder mix).1 point
-
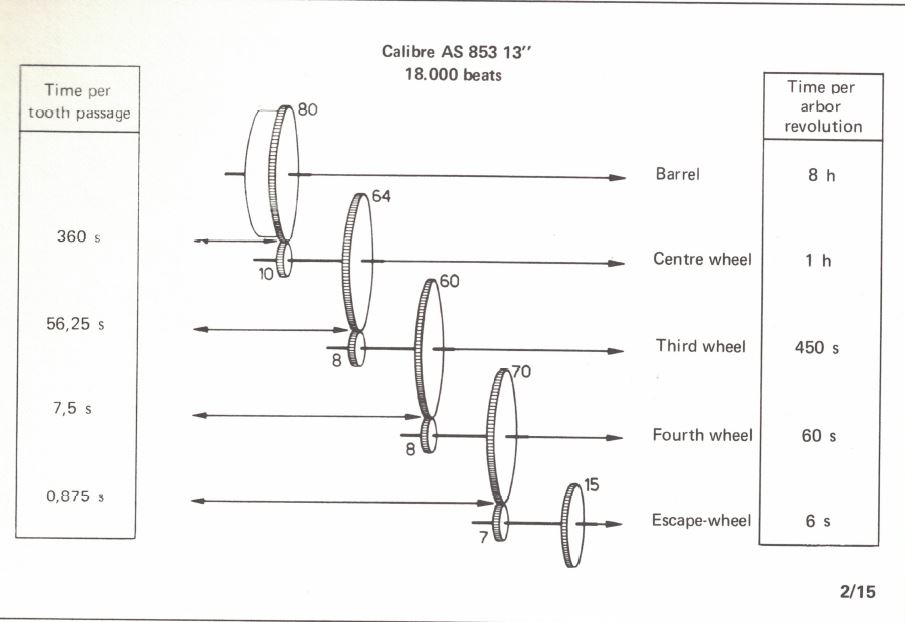
With a set blued steel mainspring that's in desperate need of being replaced you can still verify that a watch is functional and you would have more than 160° of amplitude. At least for a little while it's not going to have the running time of a mainspring that's in proper condition. You repeating pattern could be magnetism or something in the gear train. I'm attaching an image it will differ depending upon the gear ratios of the particular watch but ill give you an idea. Then the picture came out of a manual for timing machine. Even though it's an older machine 90% of the manual is still relevant for modern timing machines well worth the read I'm attaching that also. Then your amplitude and the way the rest of the watch looks just doesn't look quite right. Usually a really low amplitude everything gets magnified beat looks really bad everything will just look bad euros almost looks to good for that low of amplitude. Which is one of the reasons I'd like to see timing and more than one position which you should always do anyway. Plus the oscilloscope view. 1556614207_GreinerMicromatTimingmachine.pdf
 1 point
 -
At last, problem solved. Thanks, all the same.
 1 point