Leaderboard


Popular Content
Showing content with the highest reputation on 10/05/16 in Posts
-
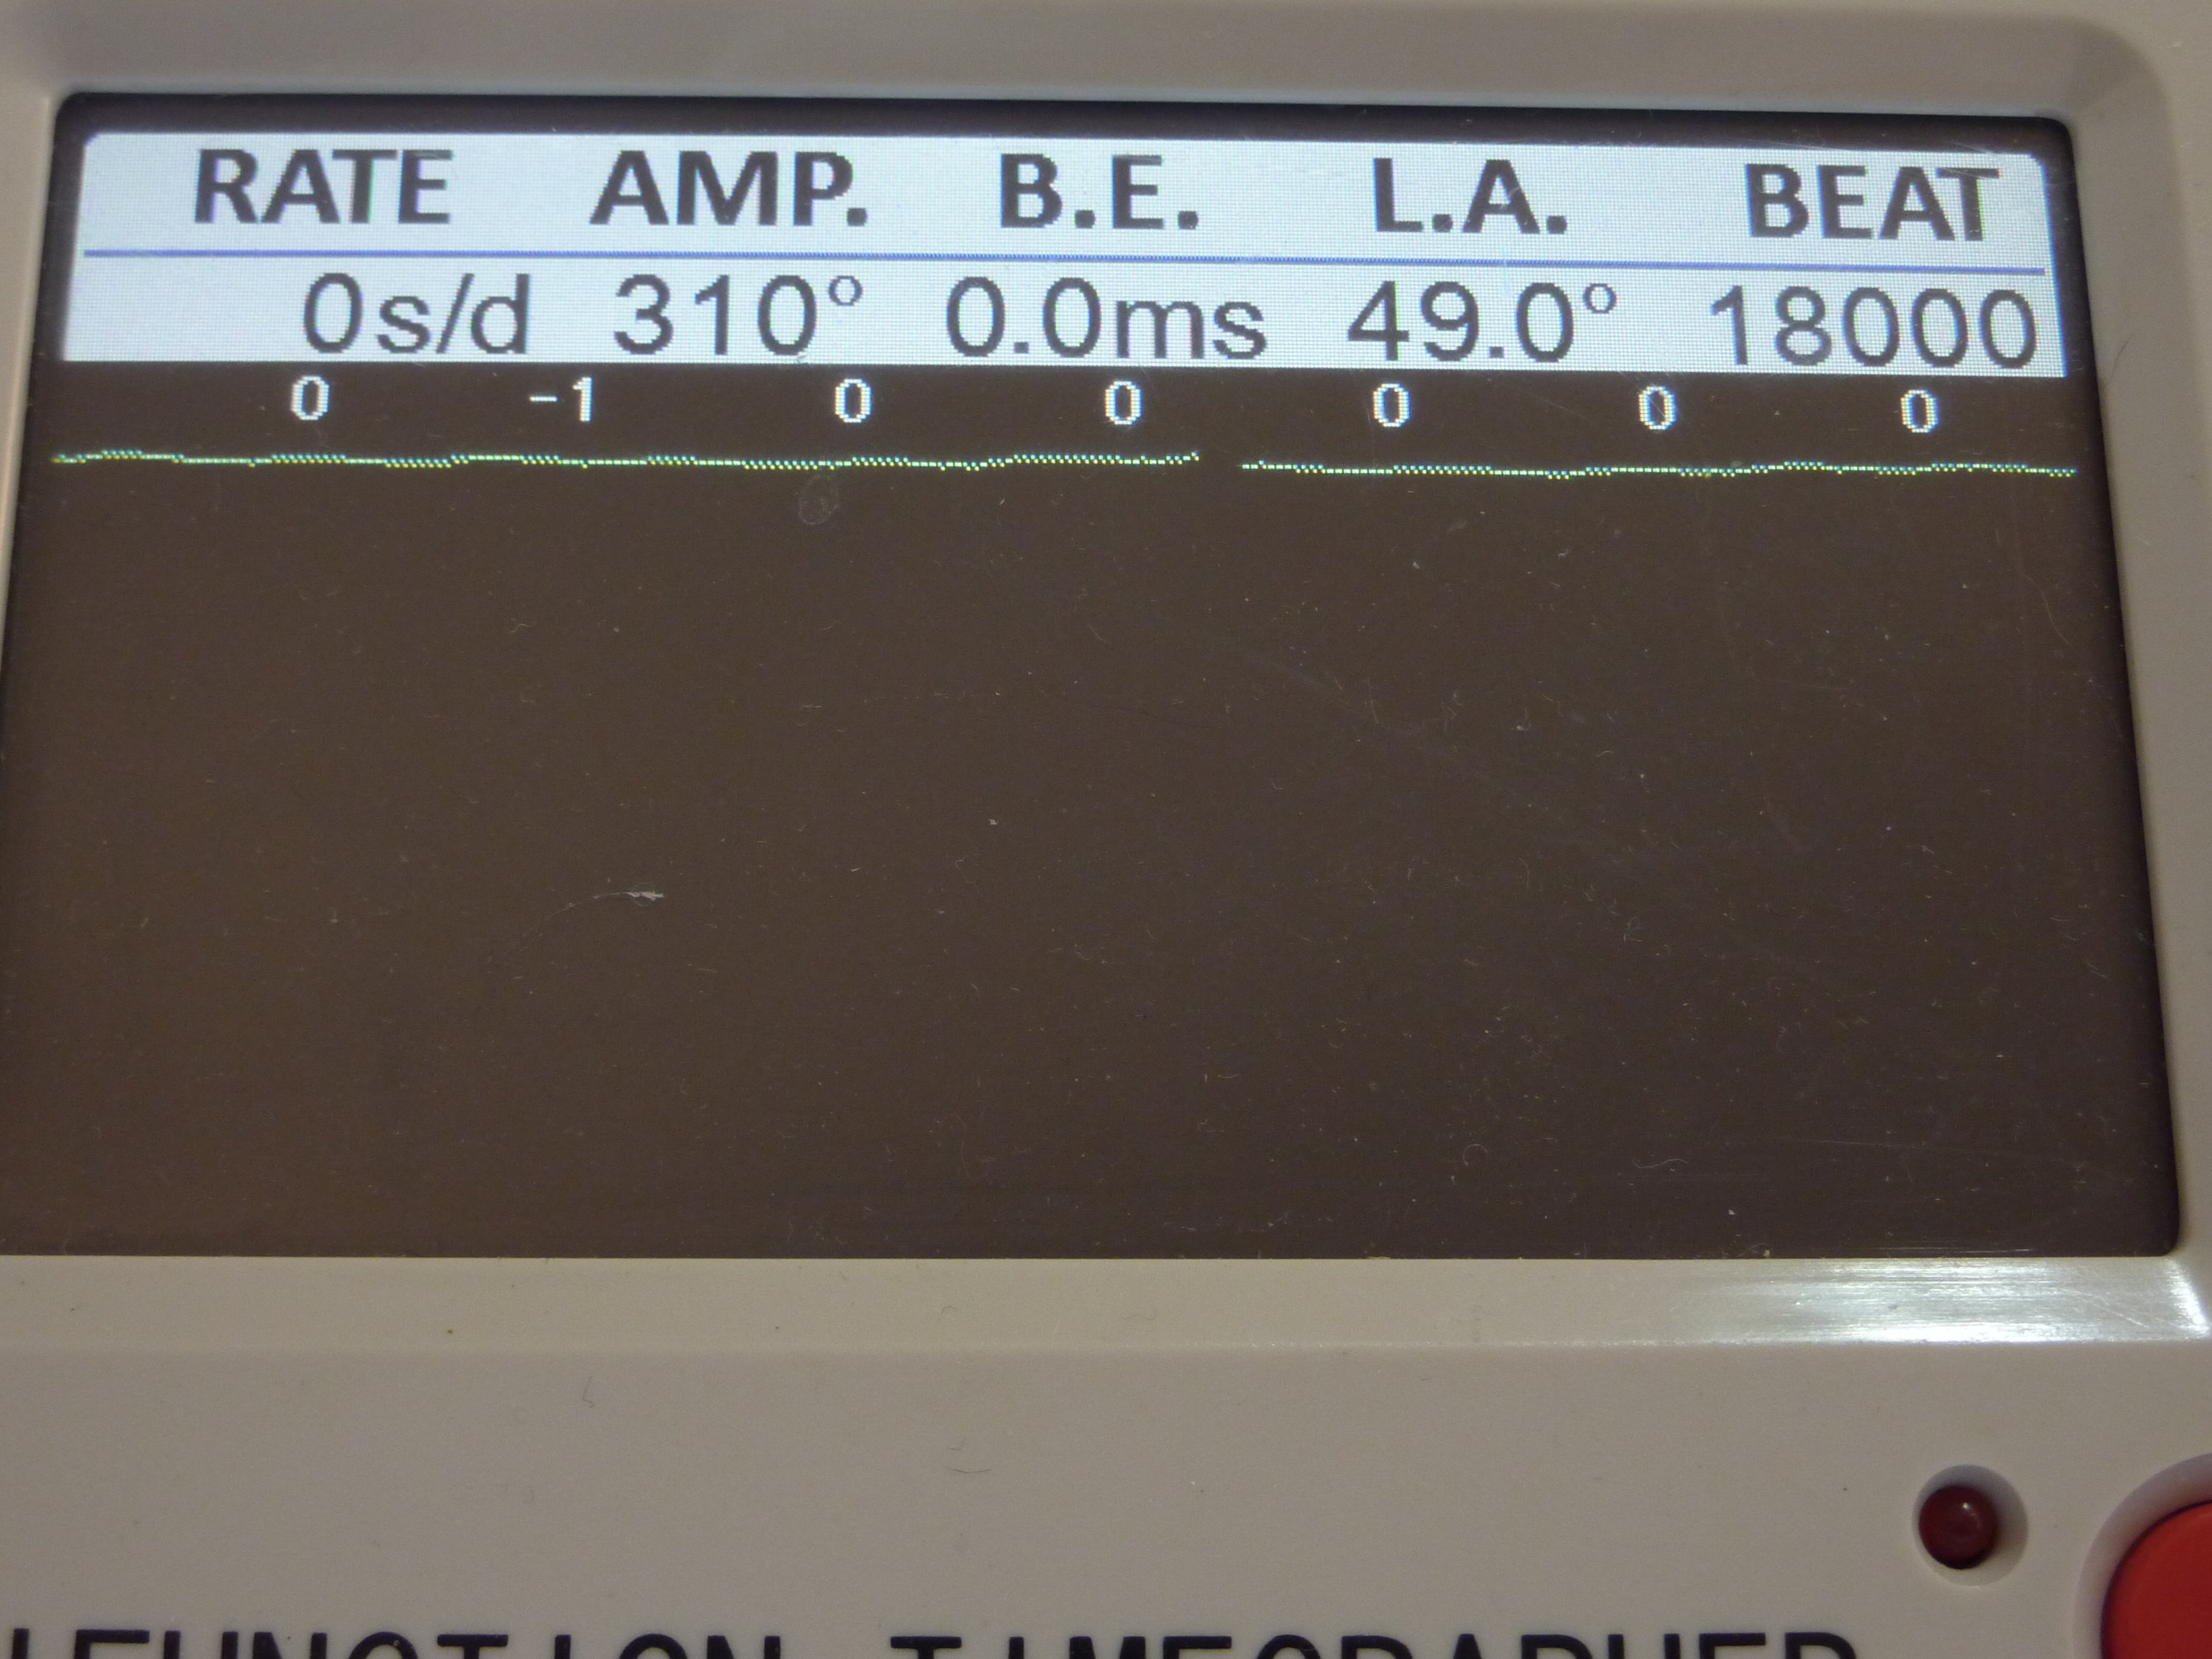
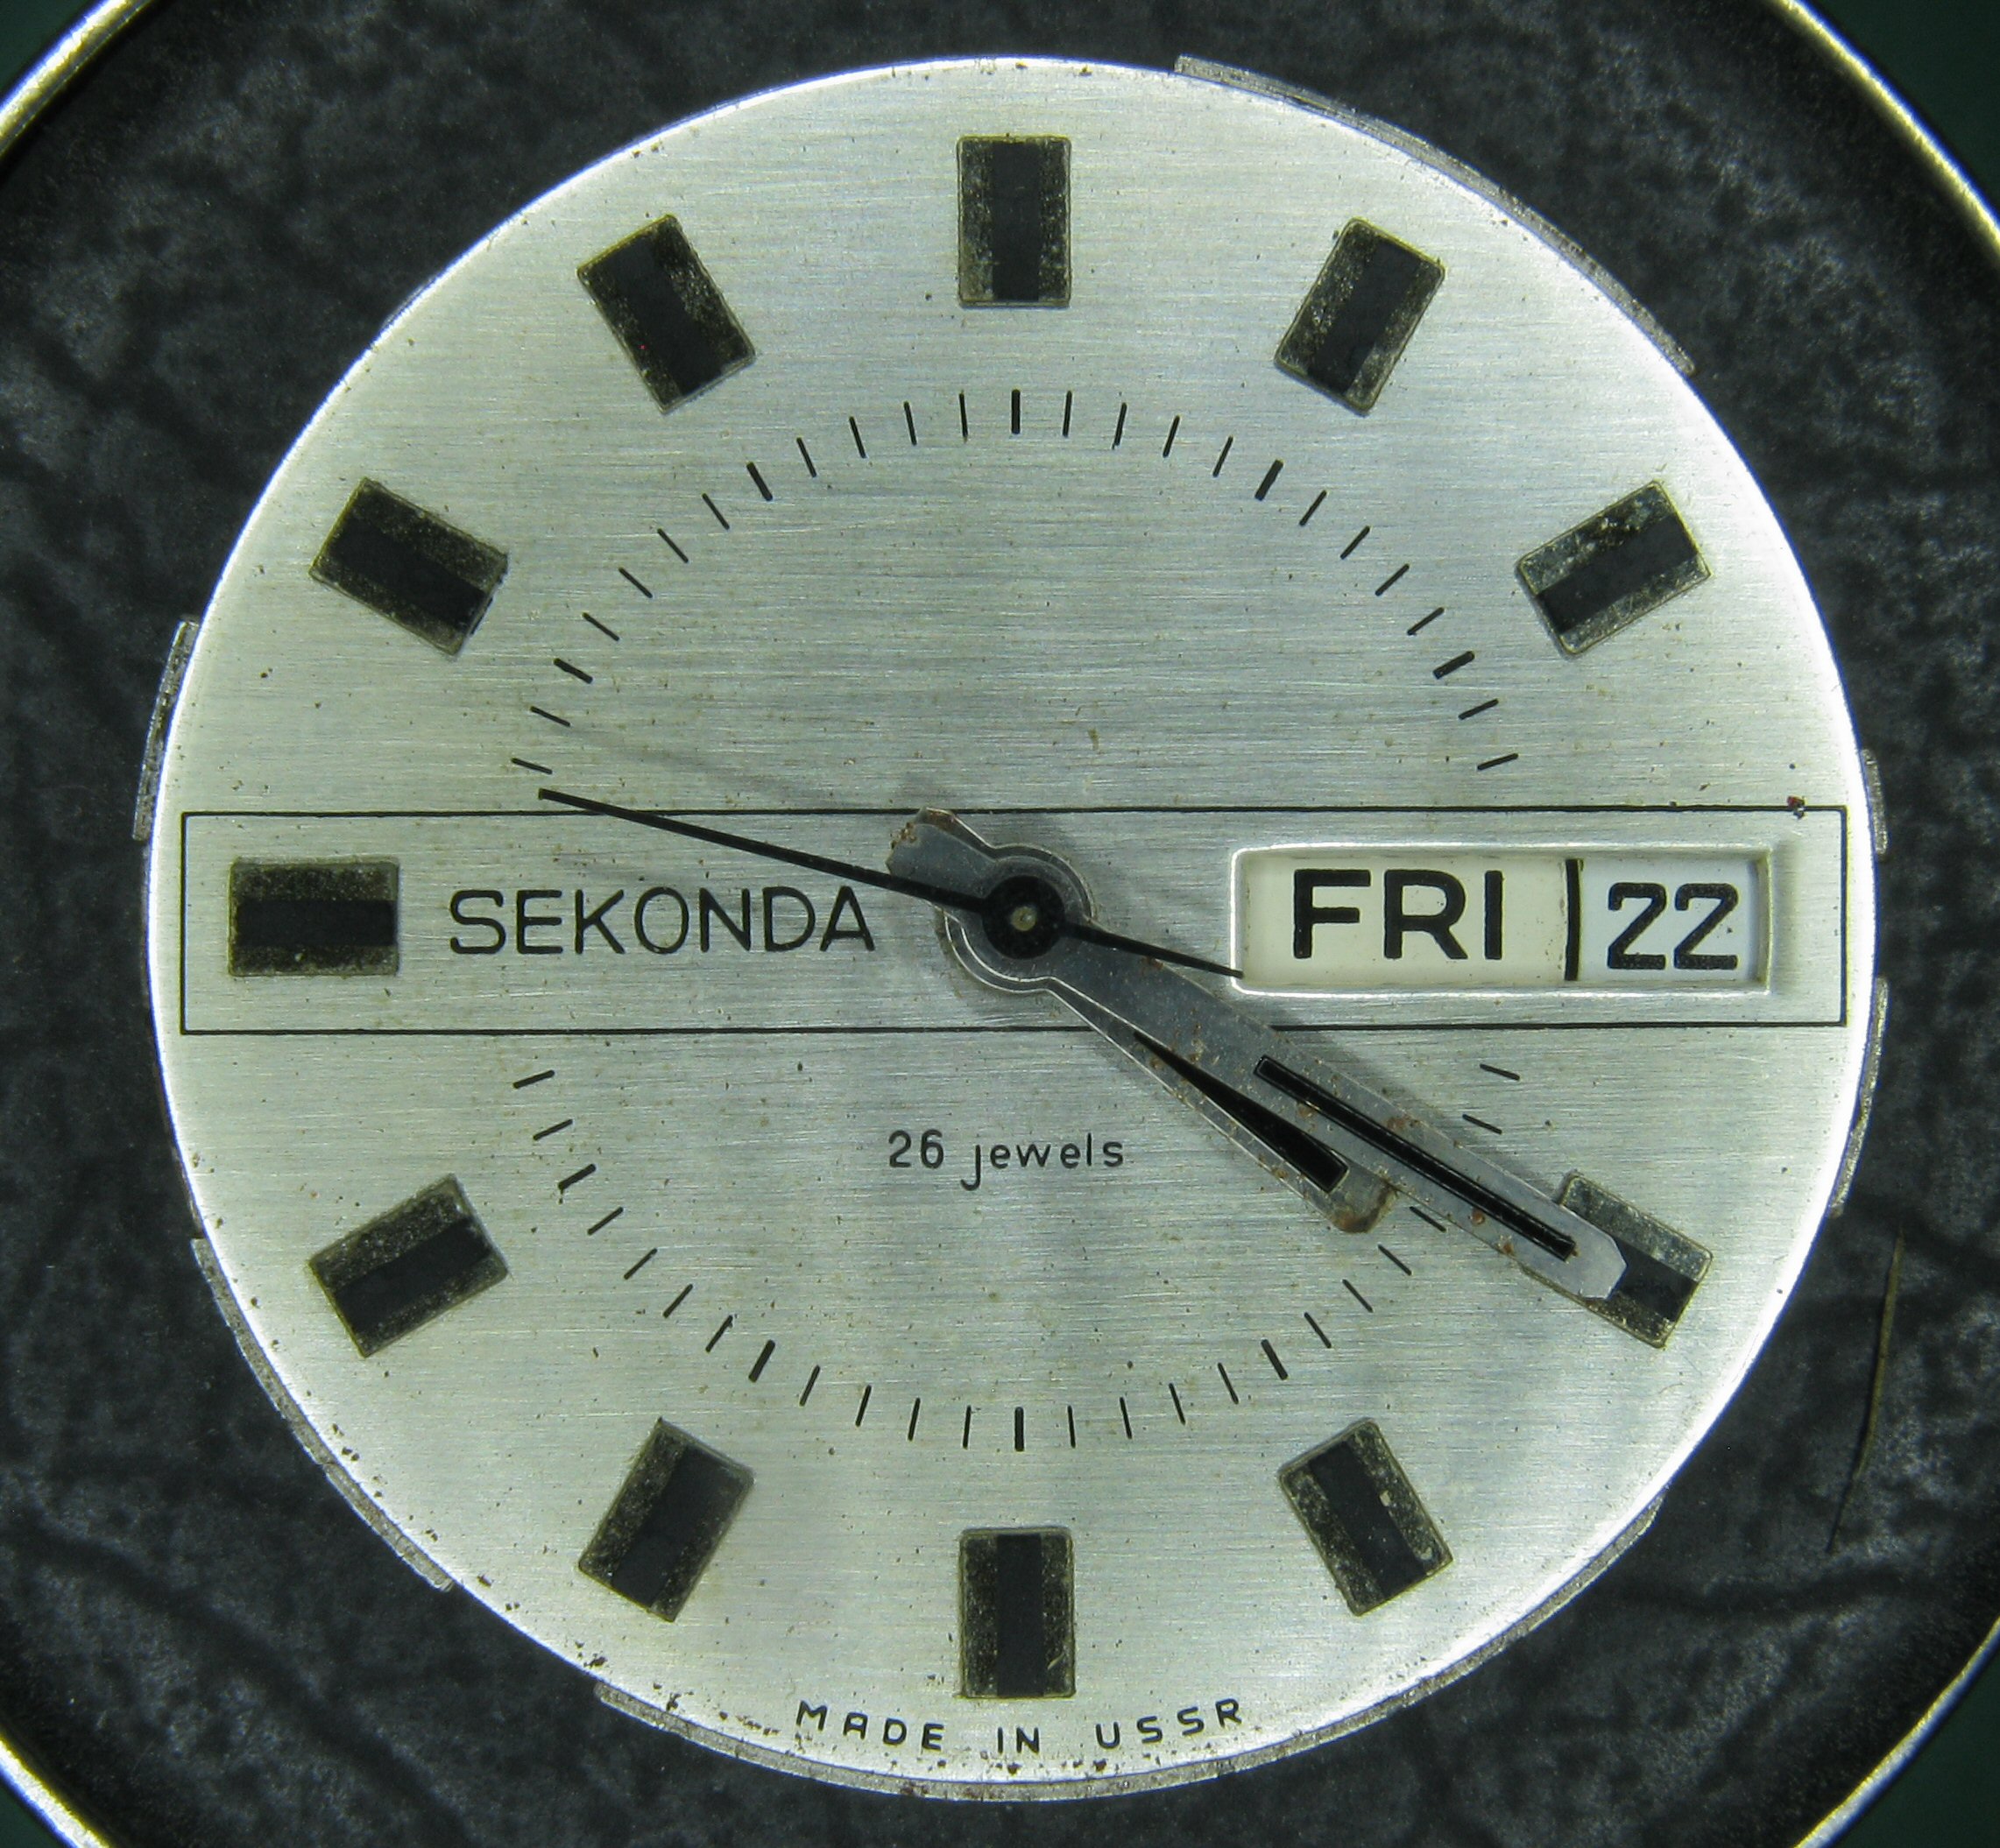
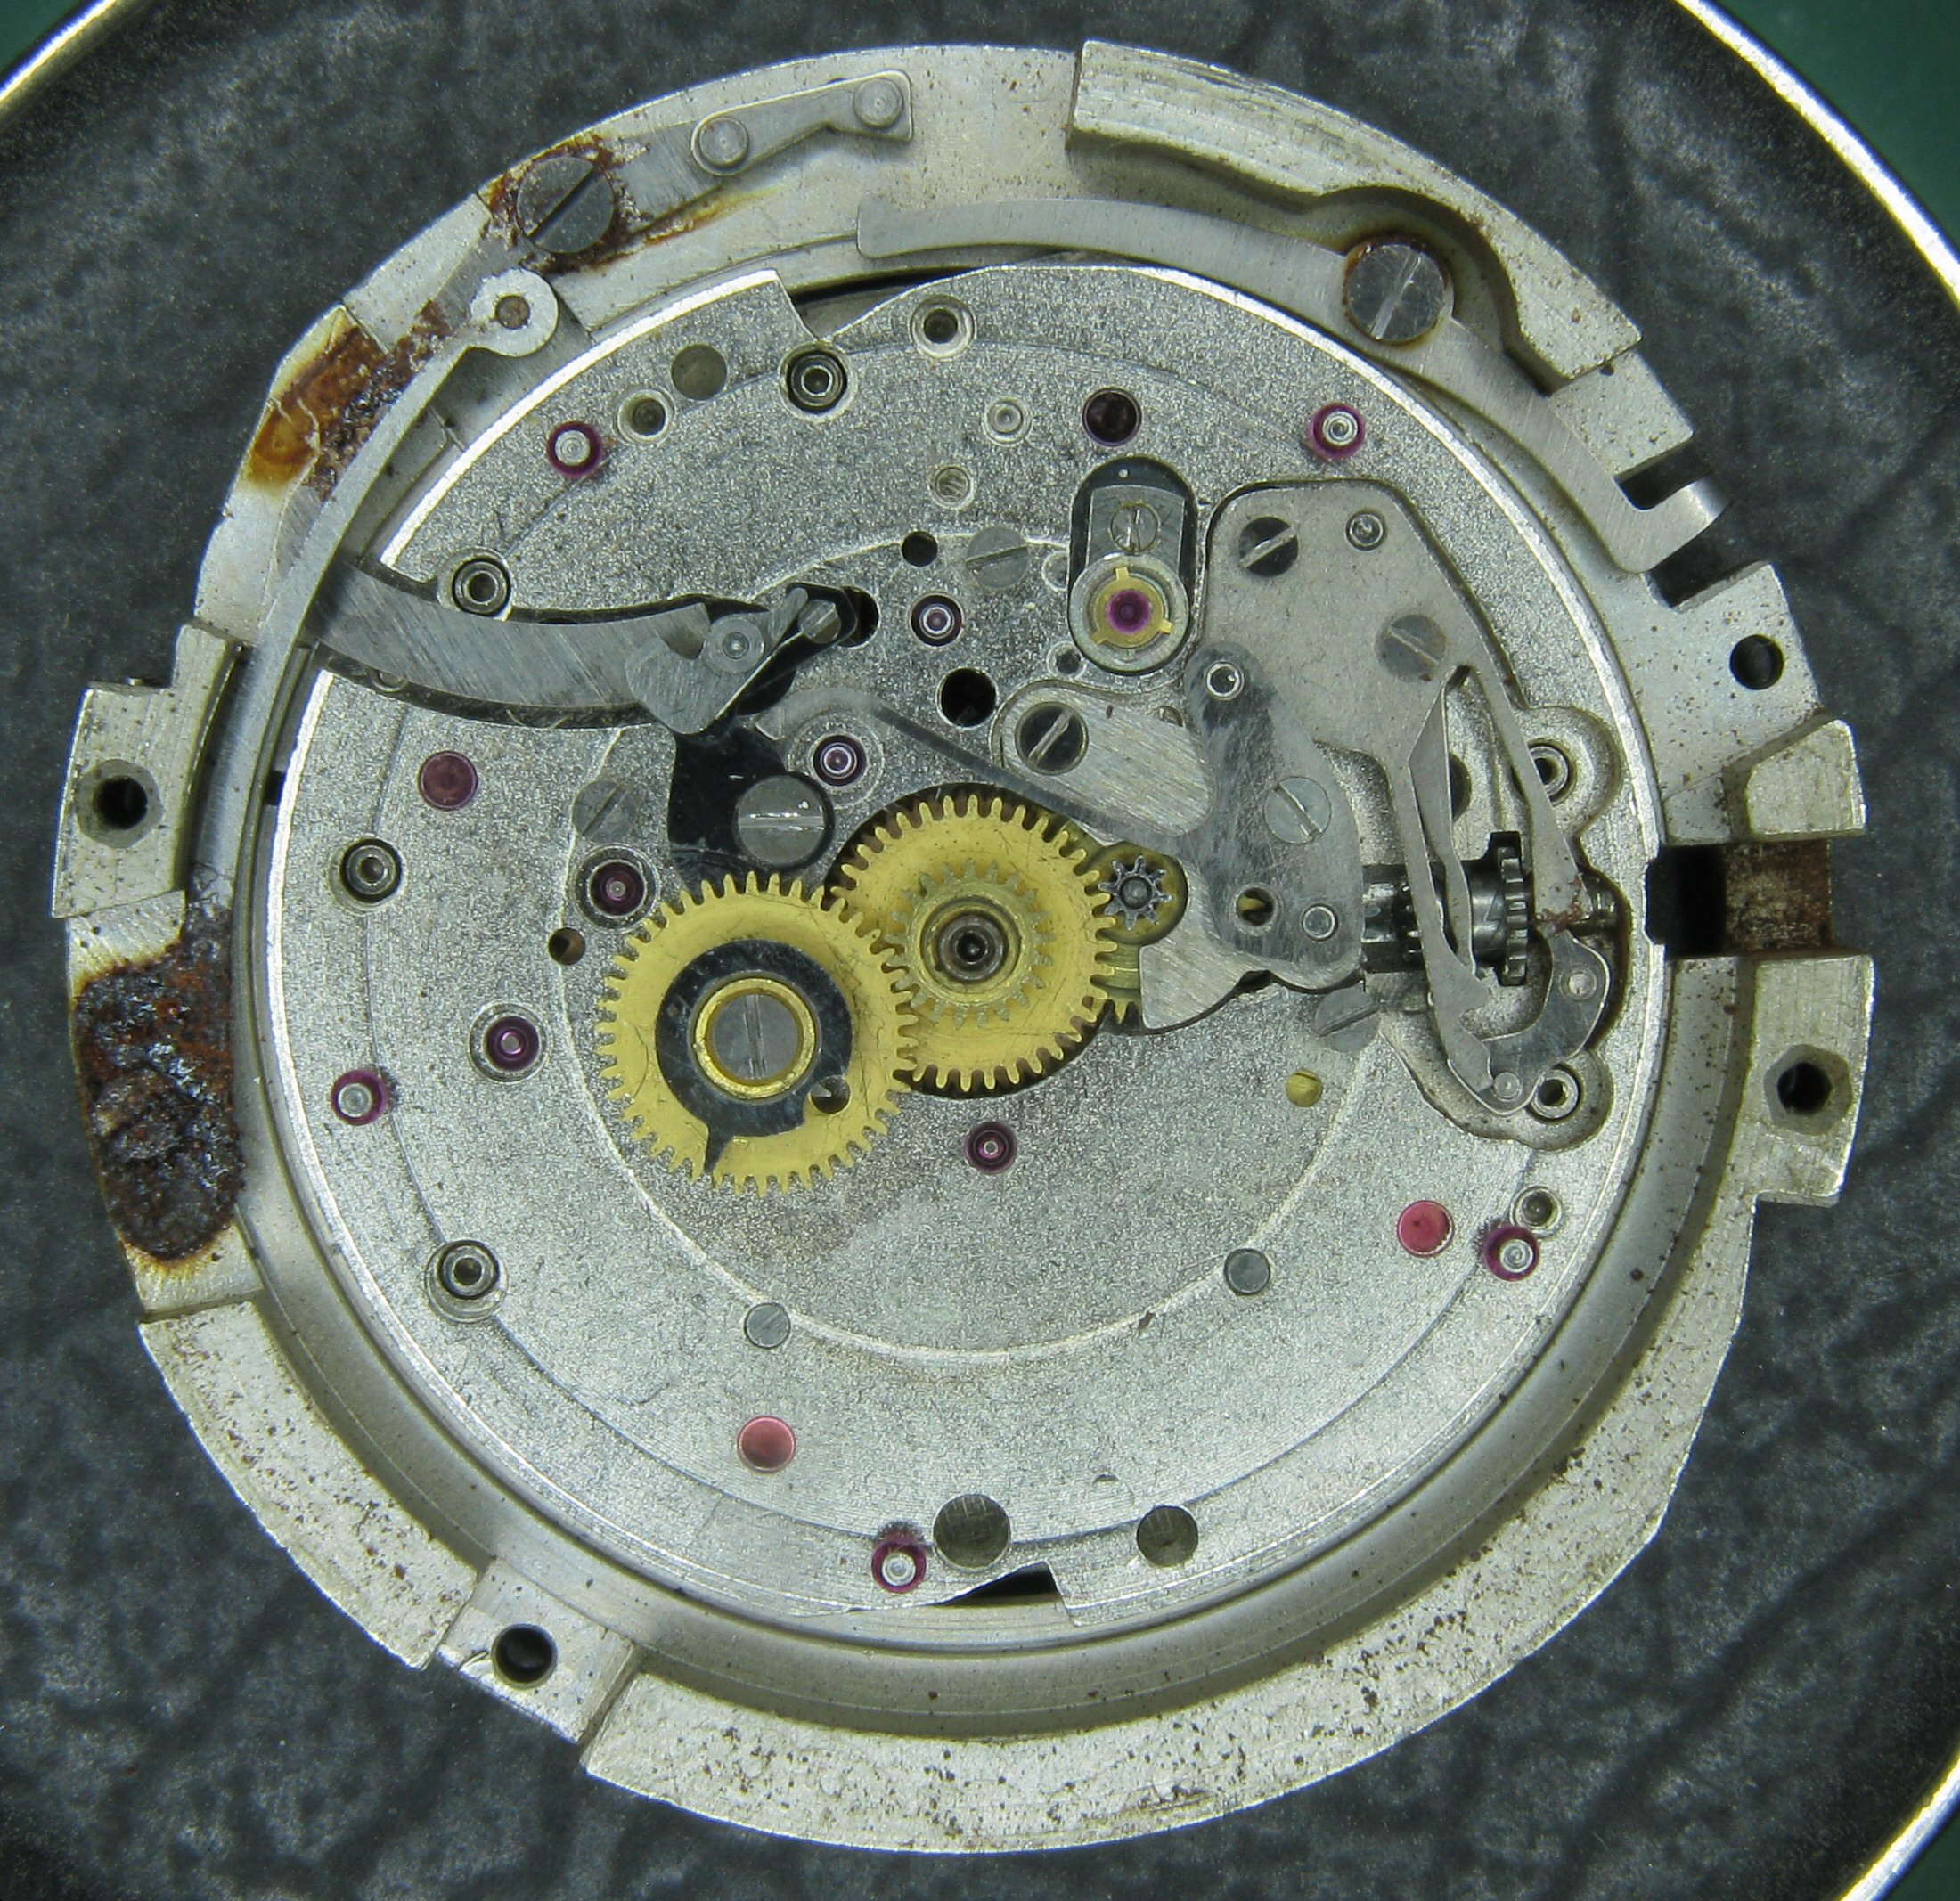
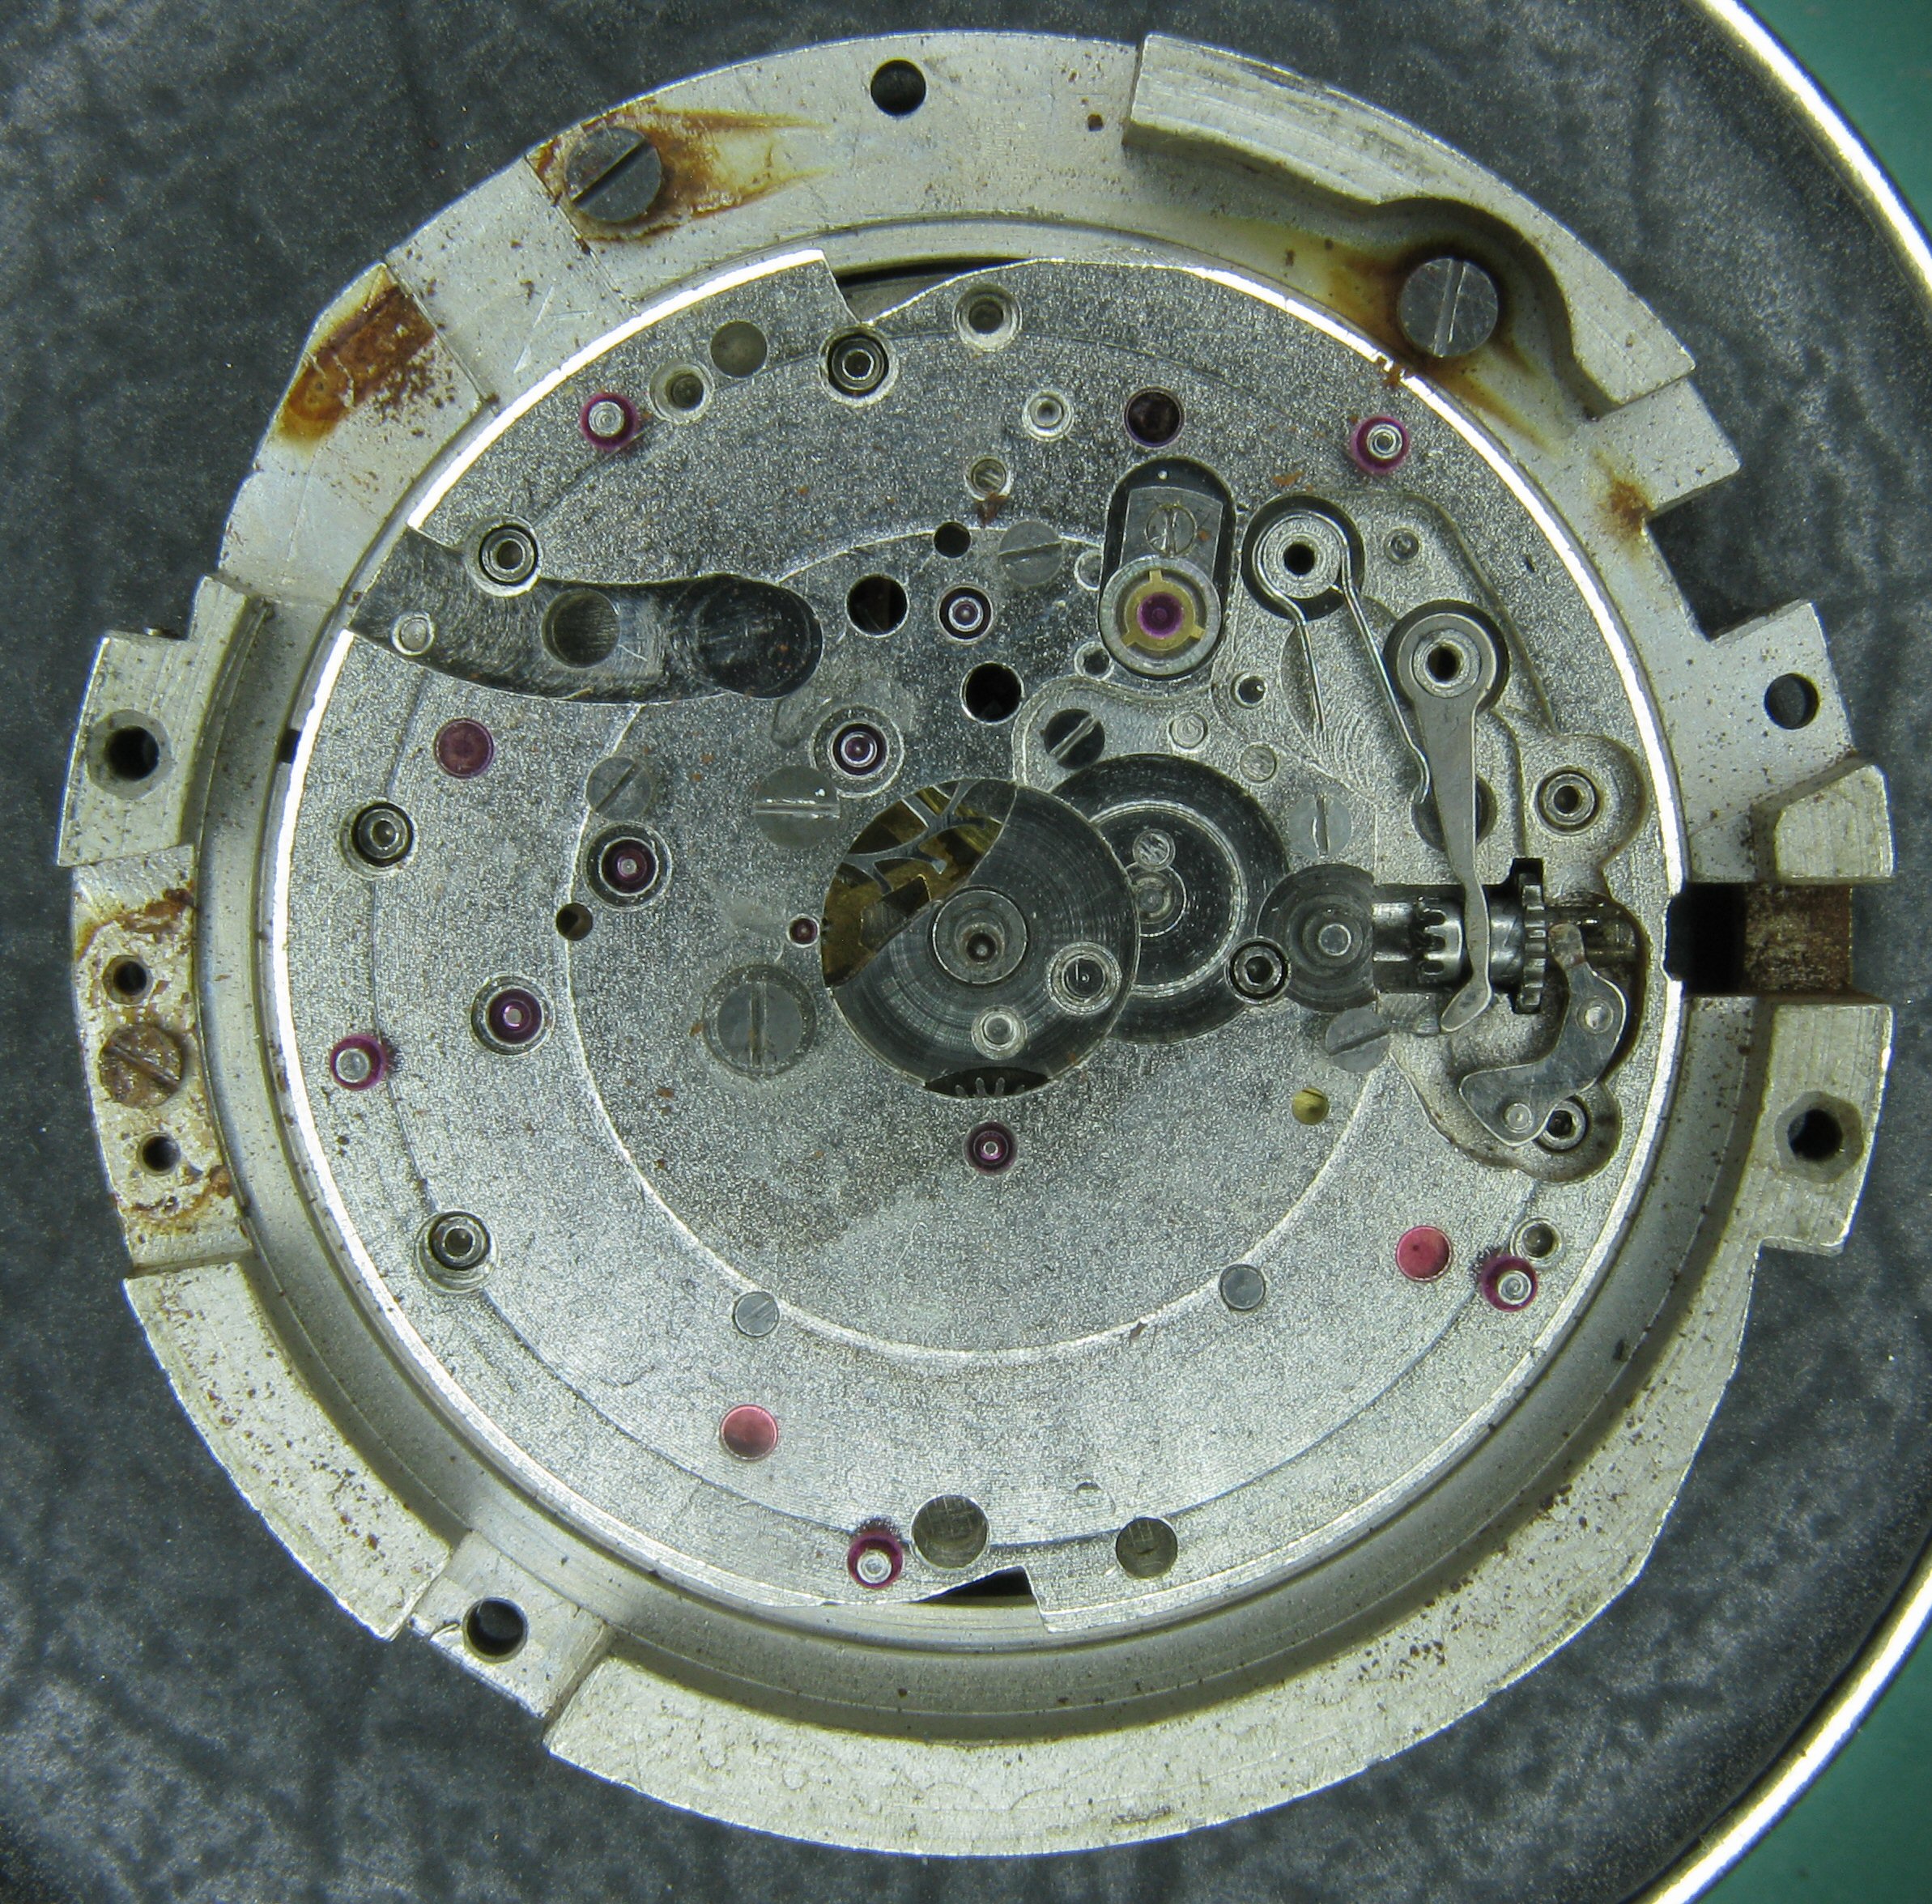
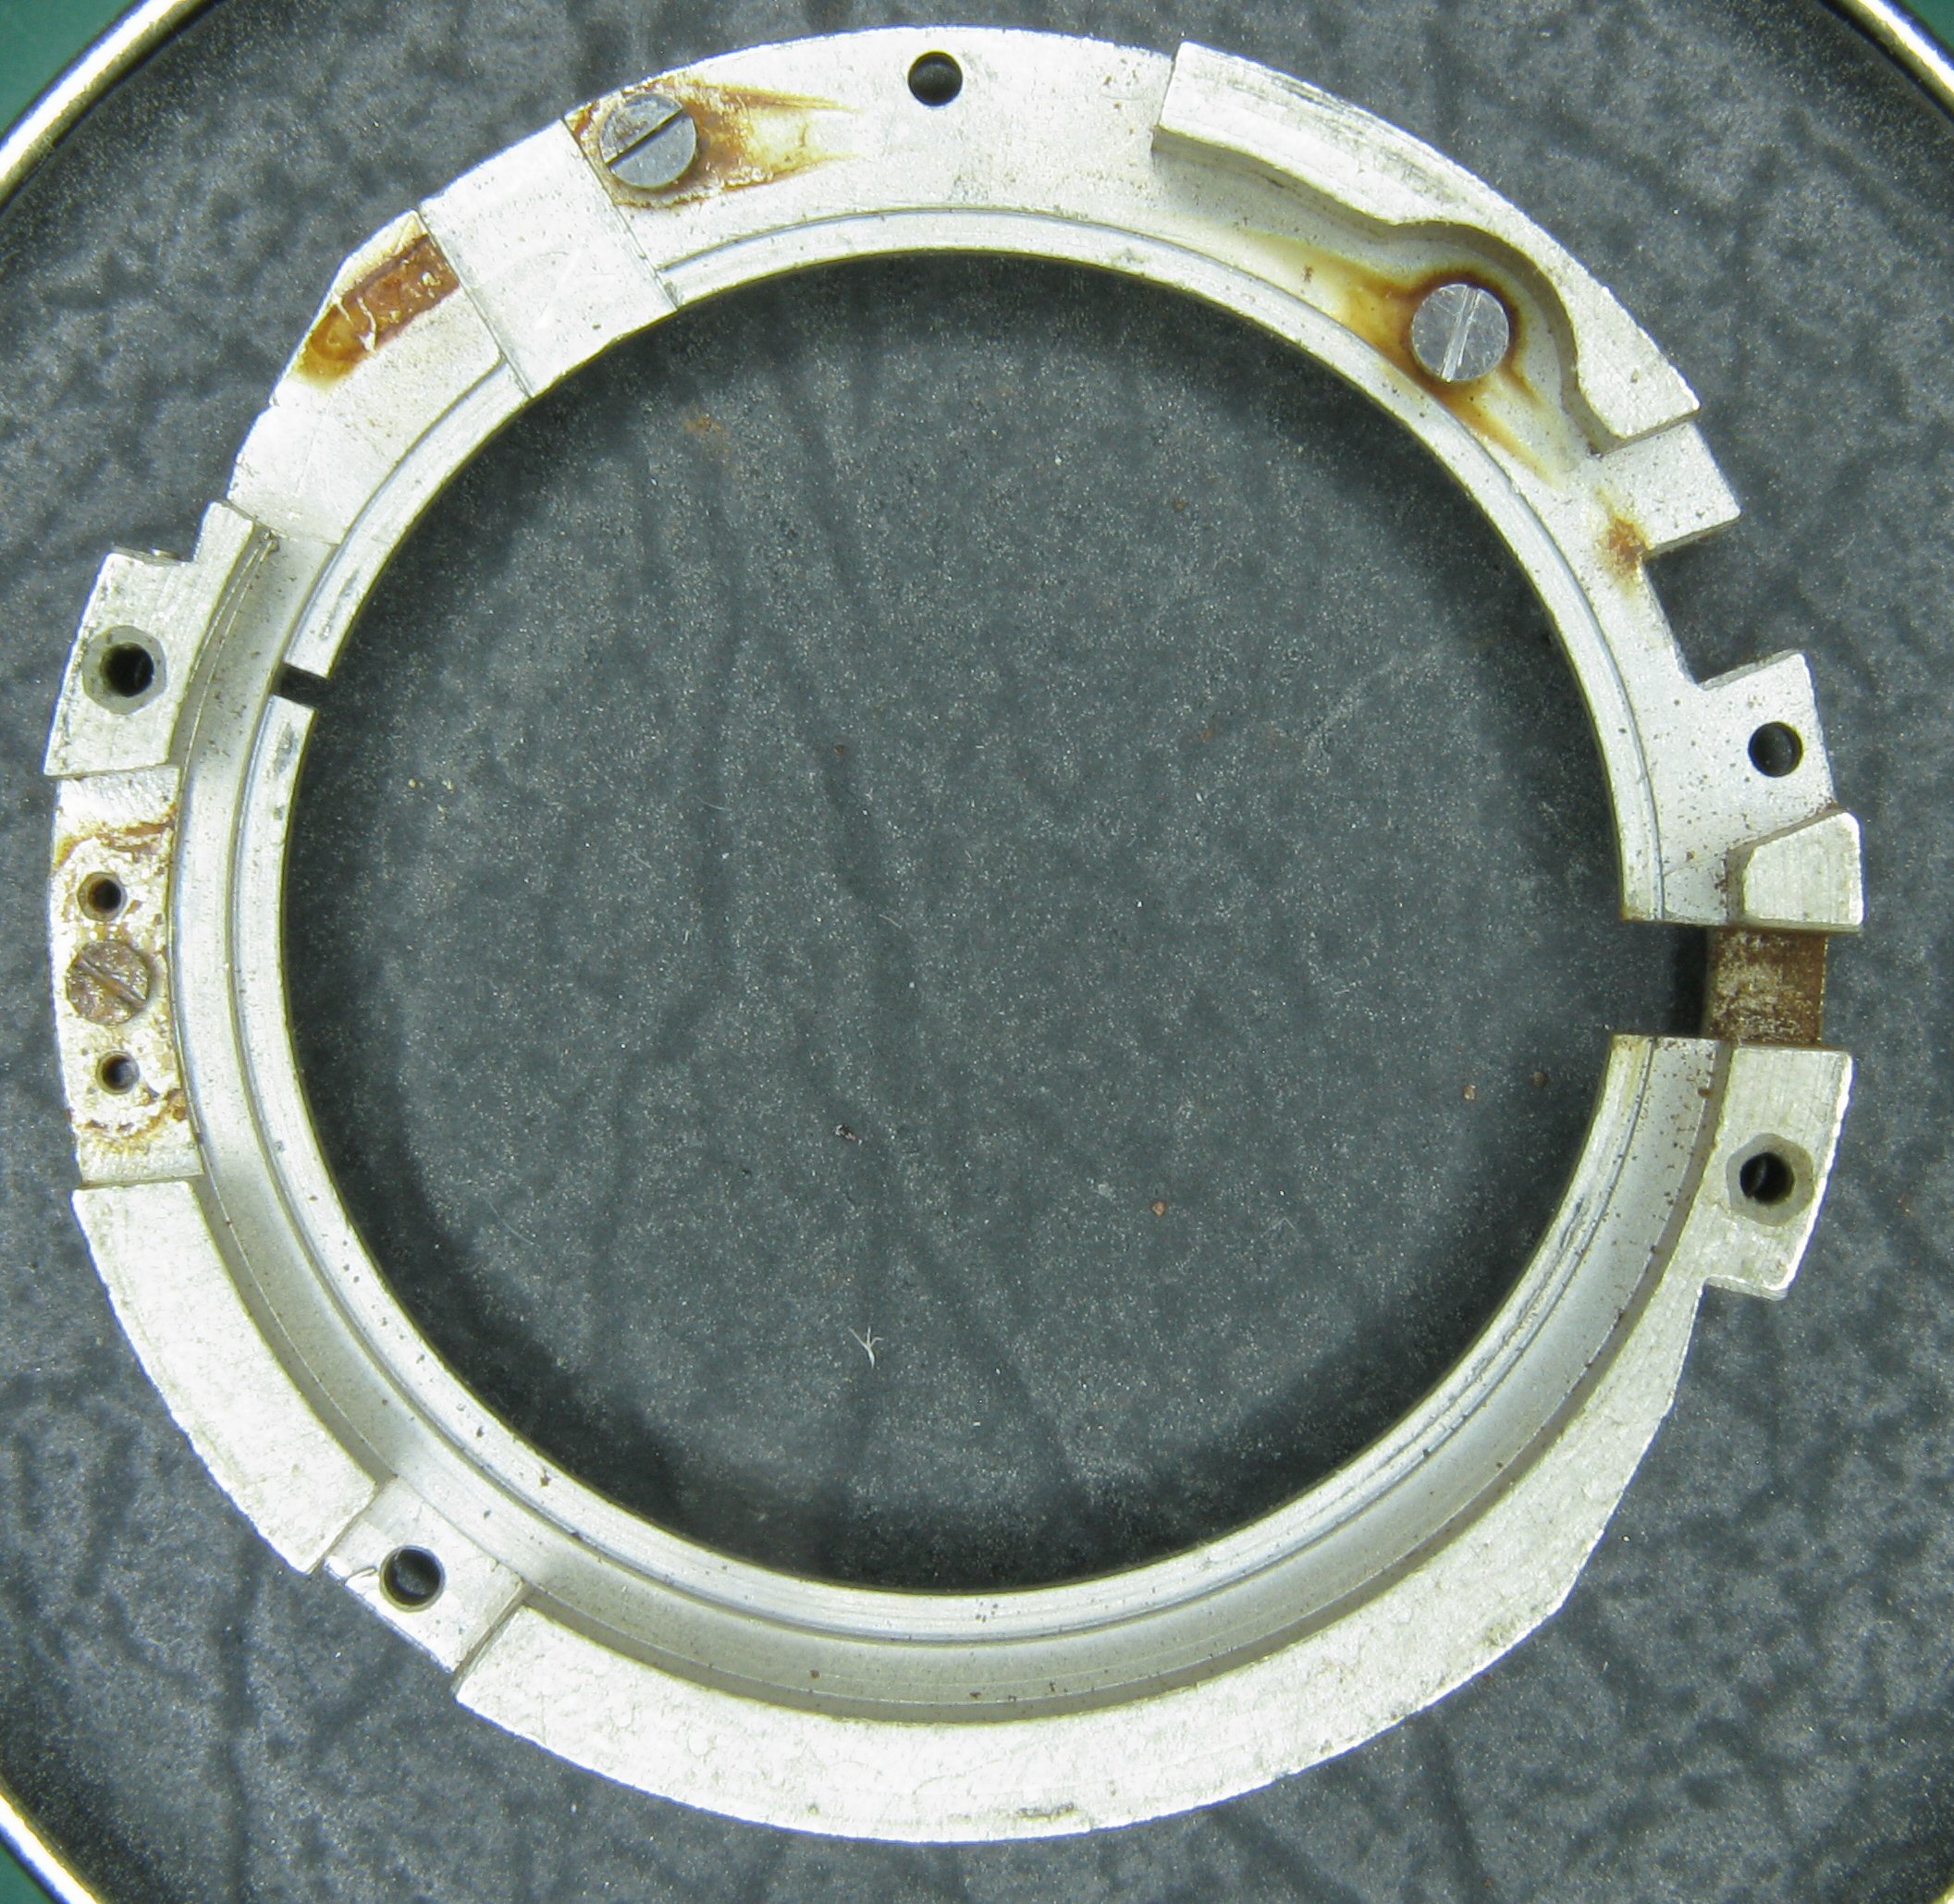
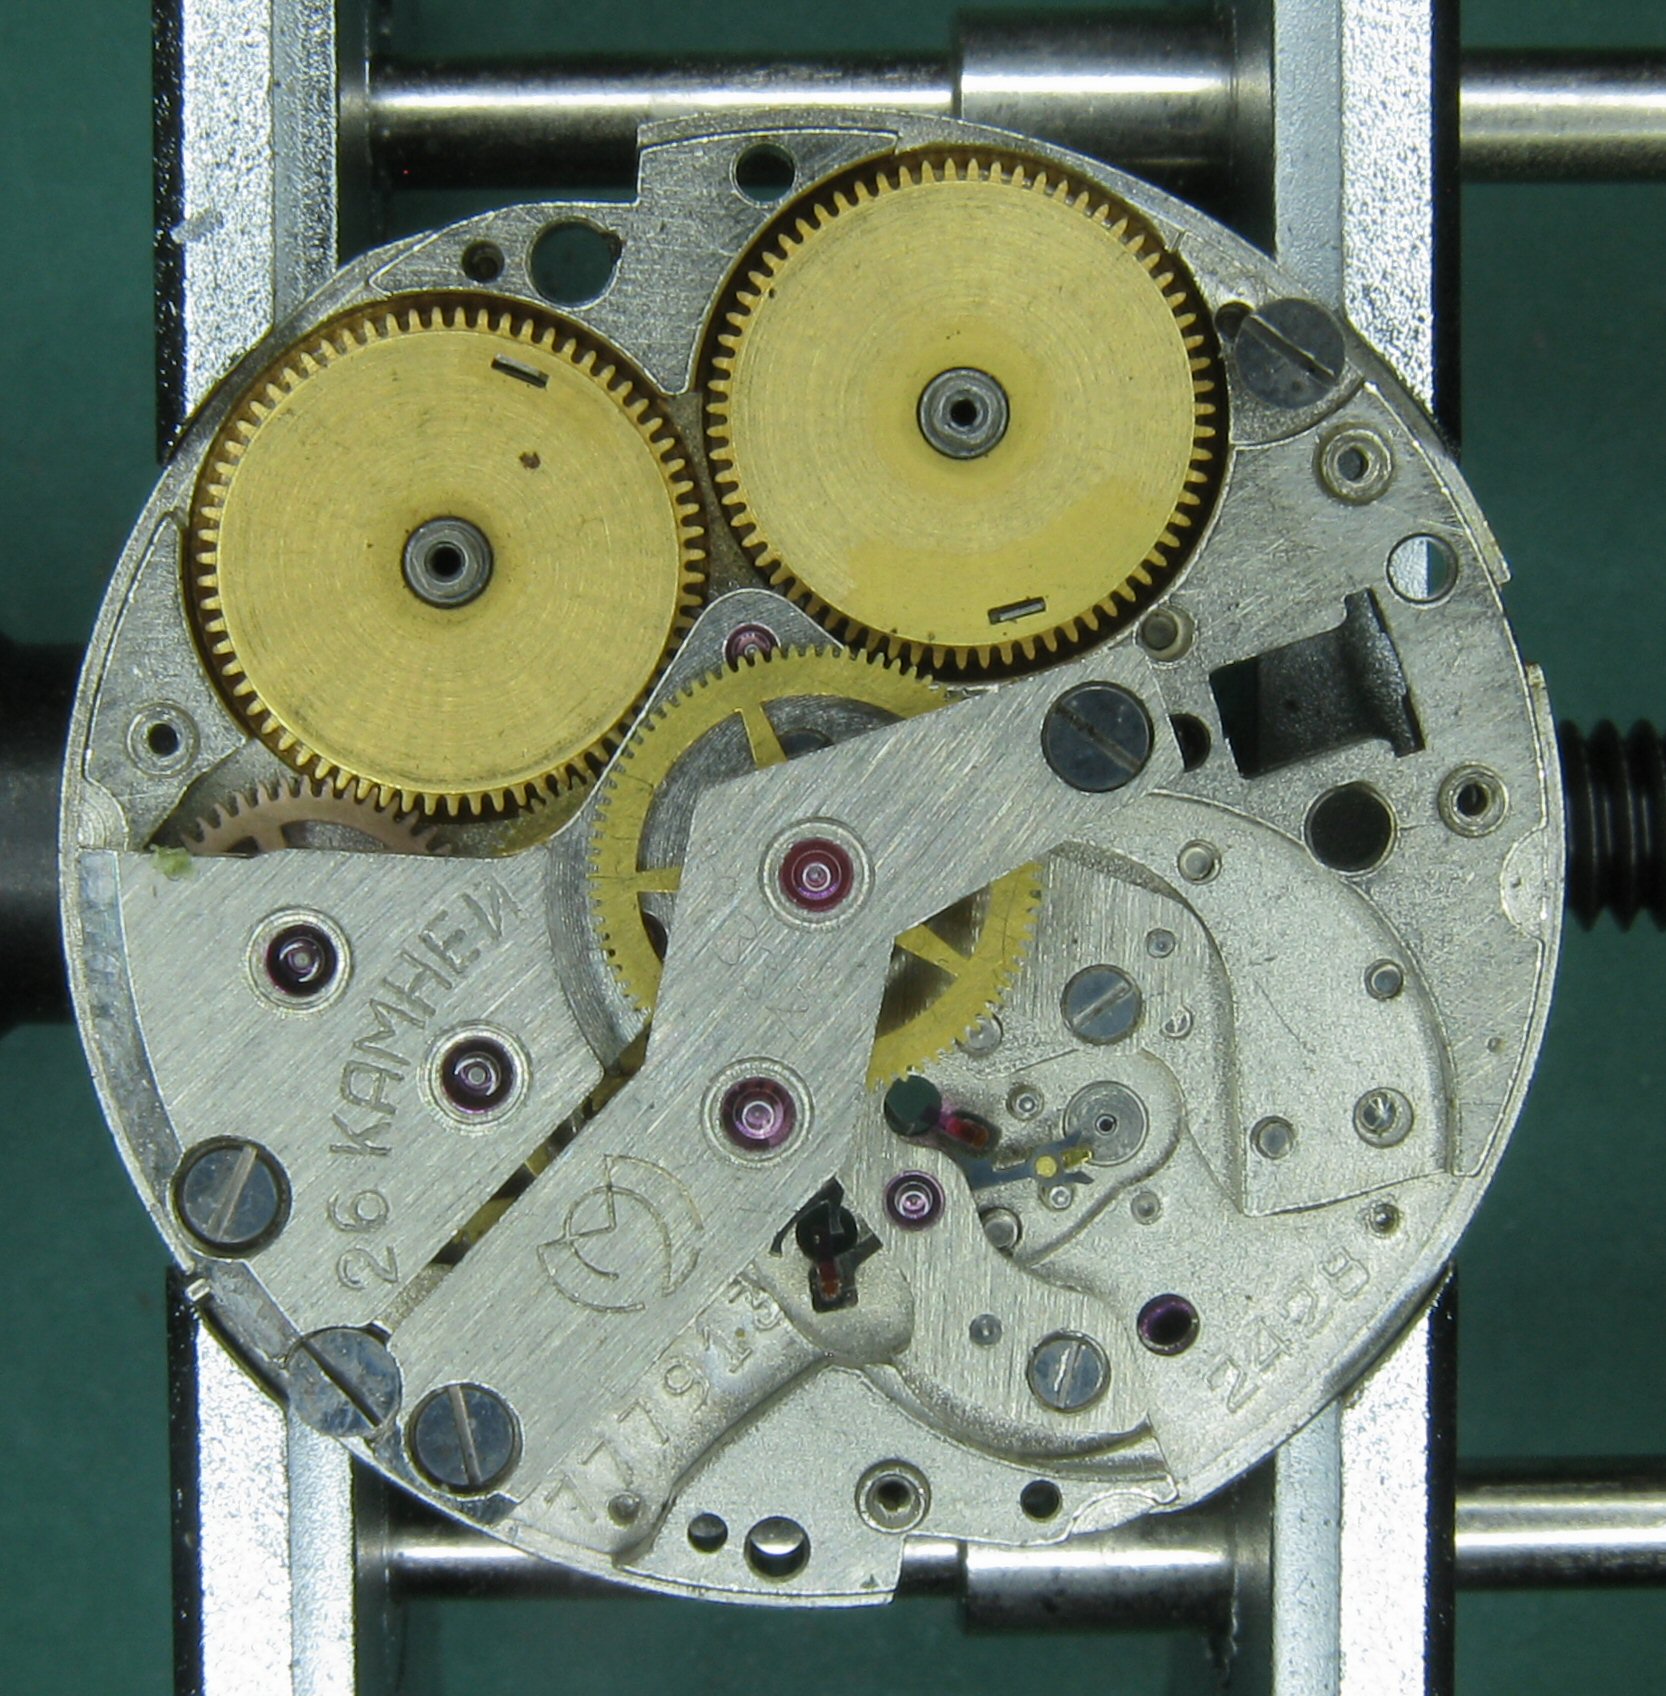
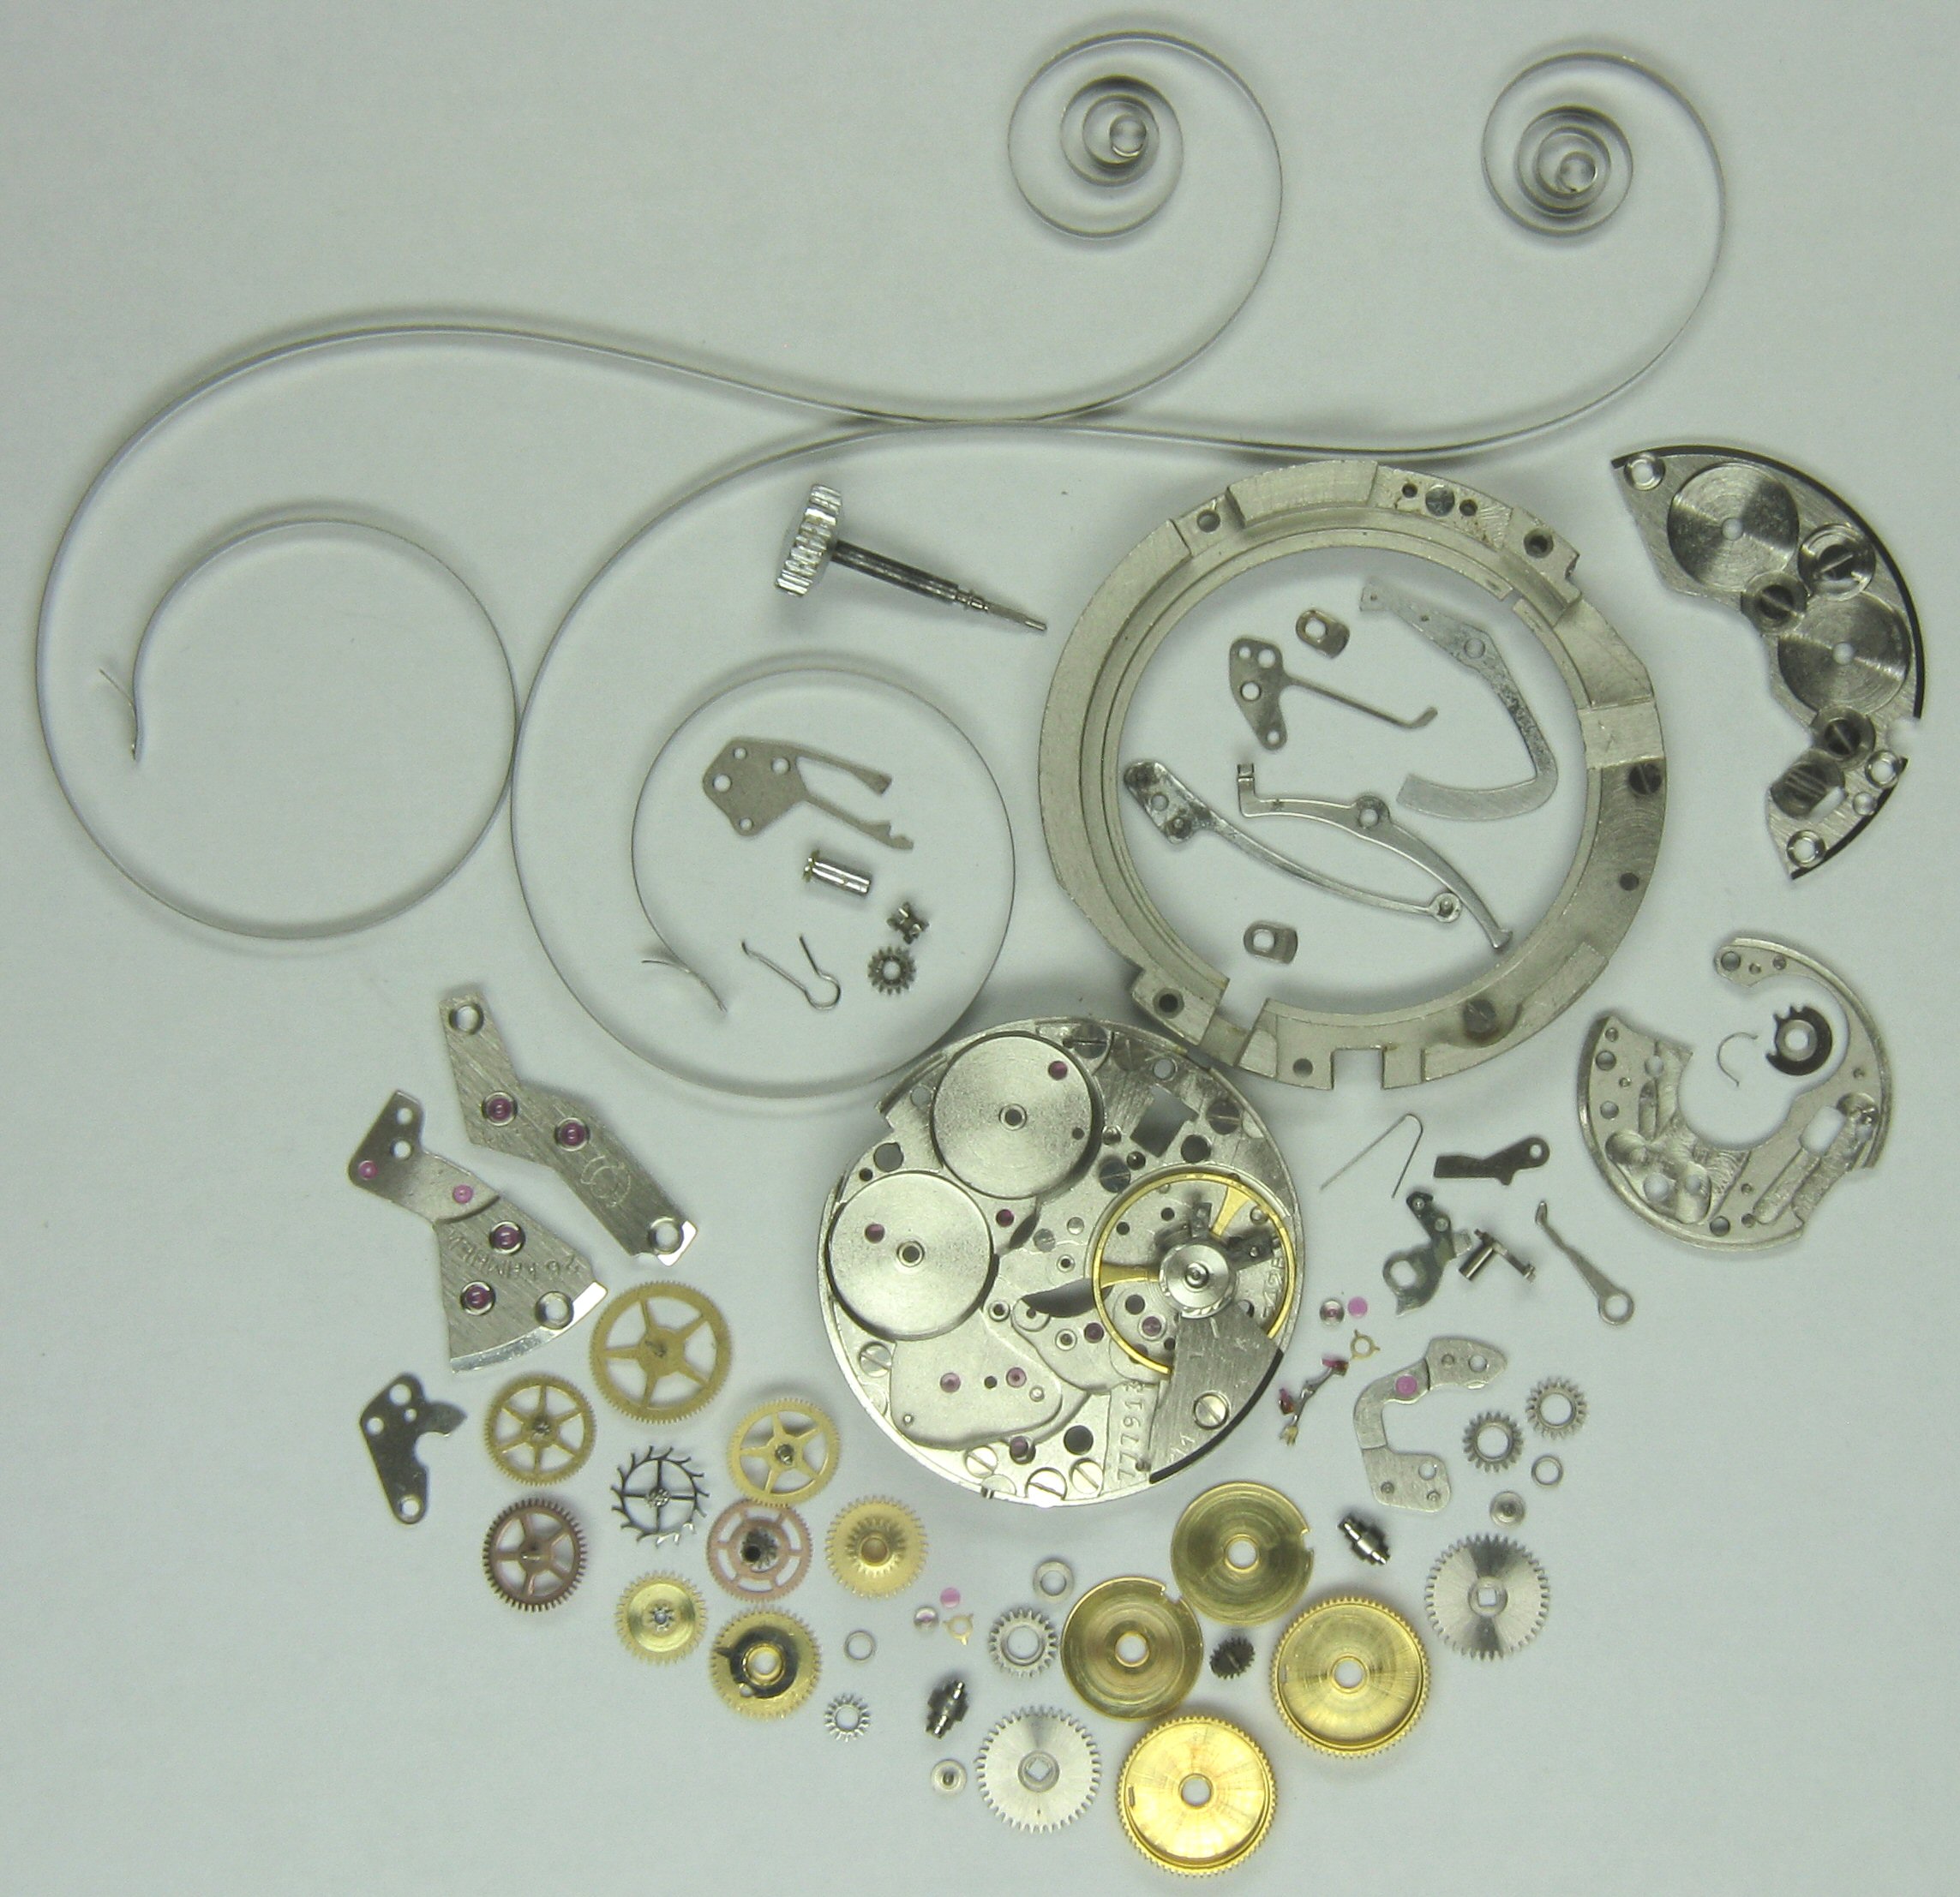
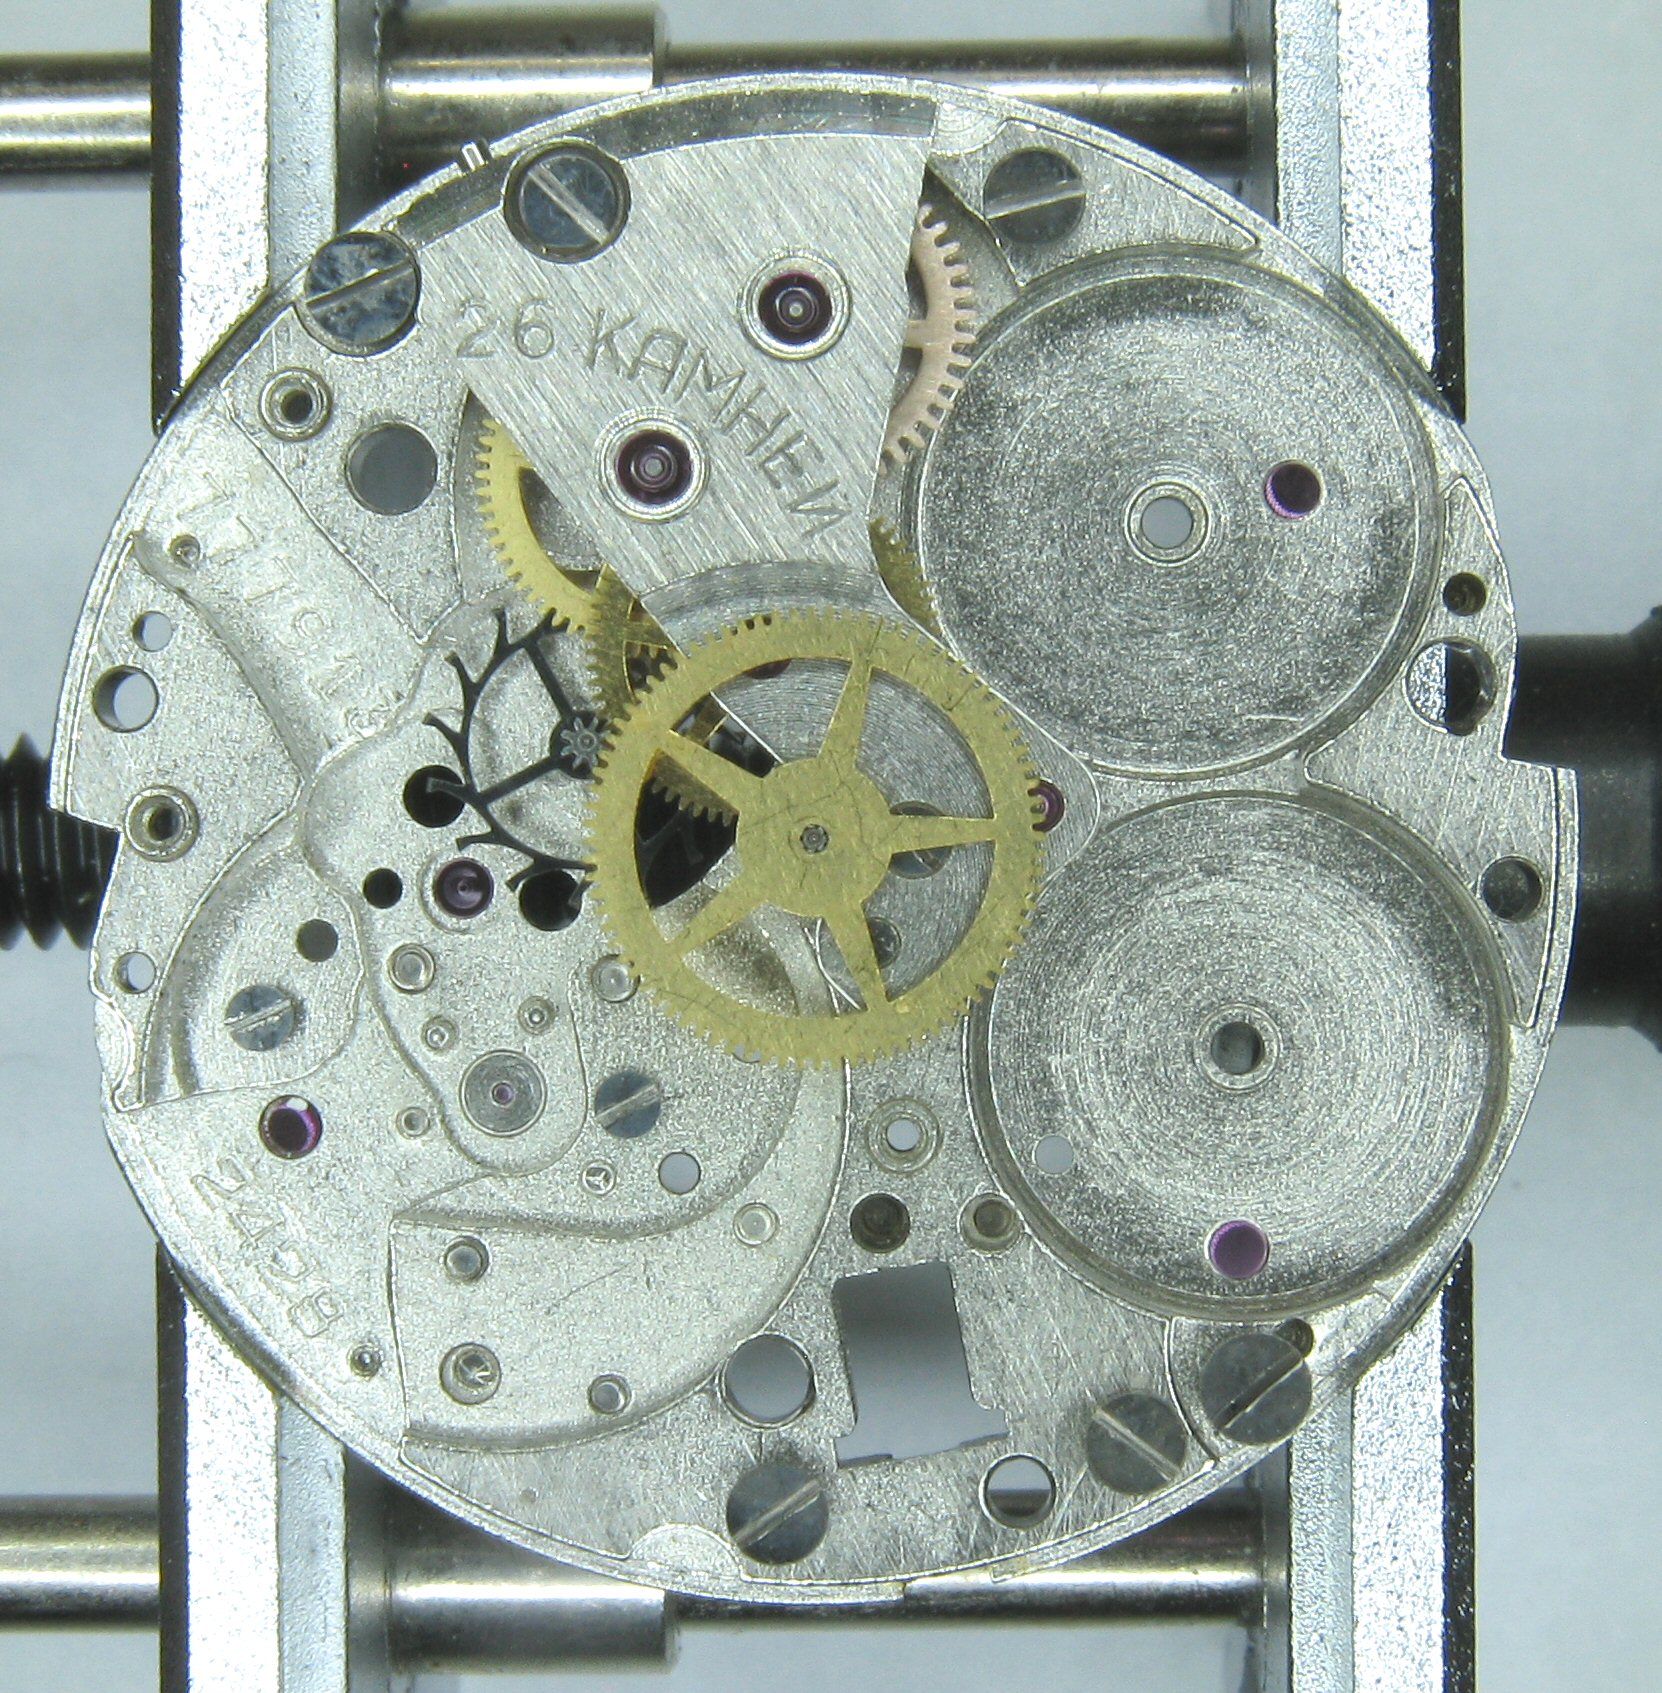
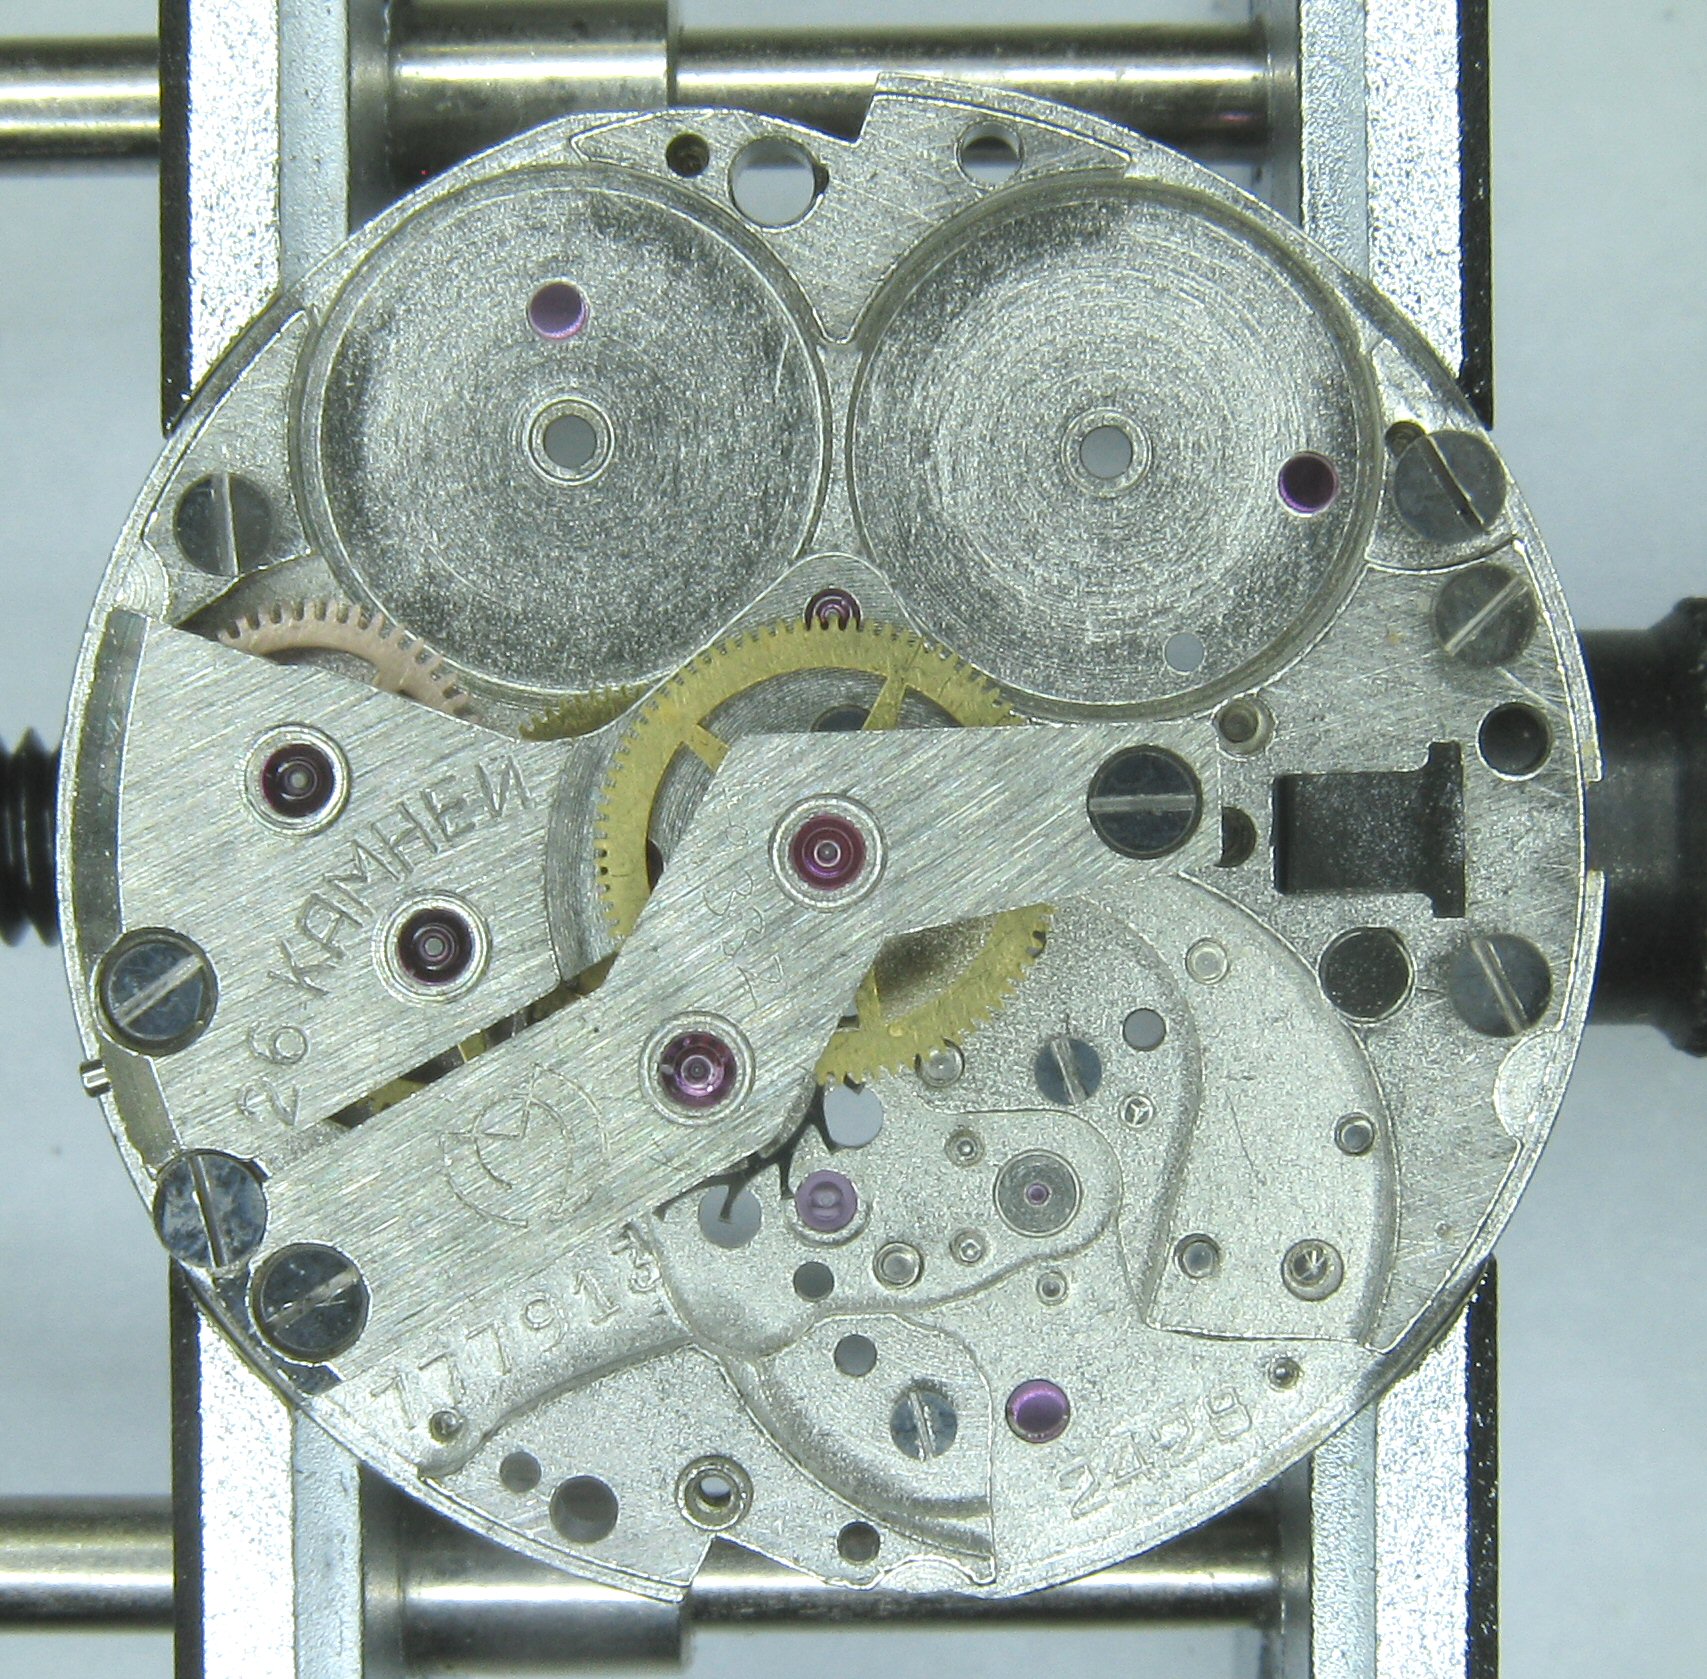
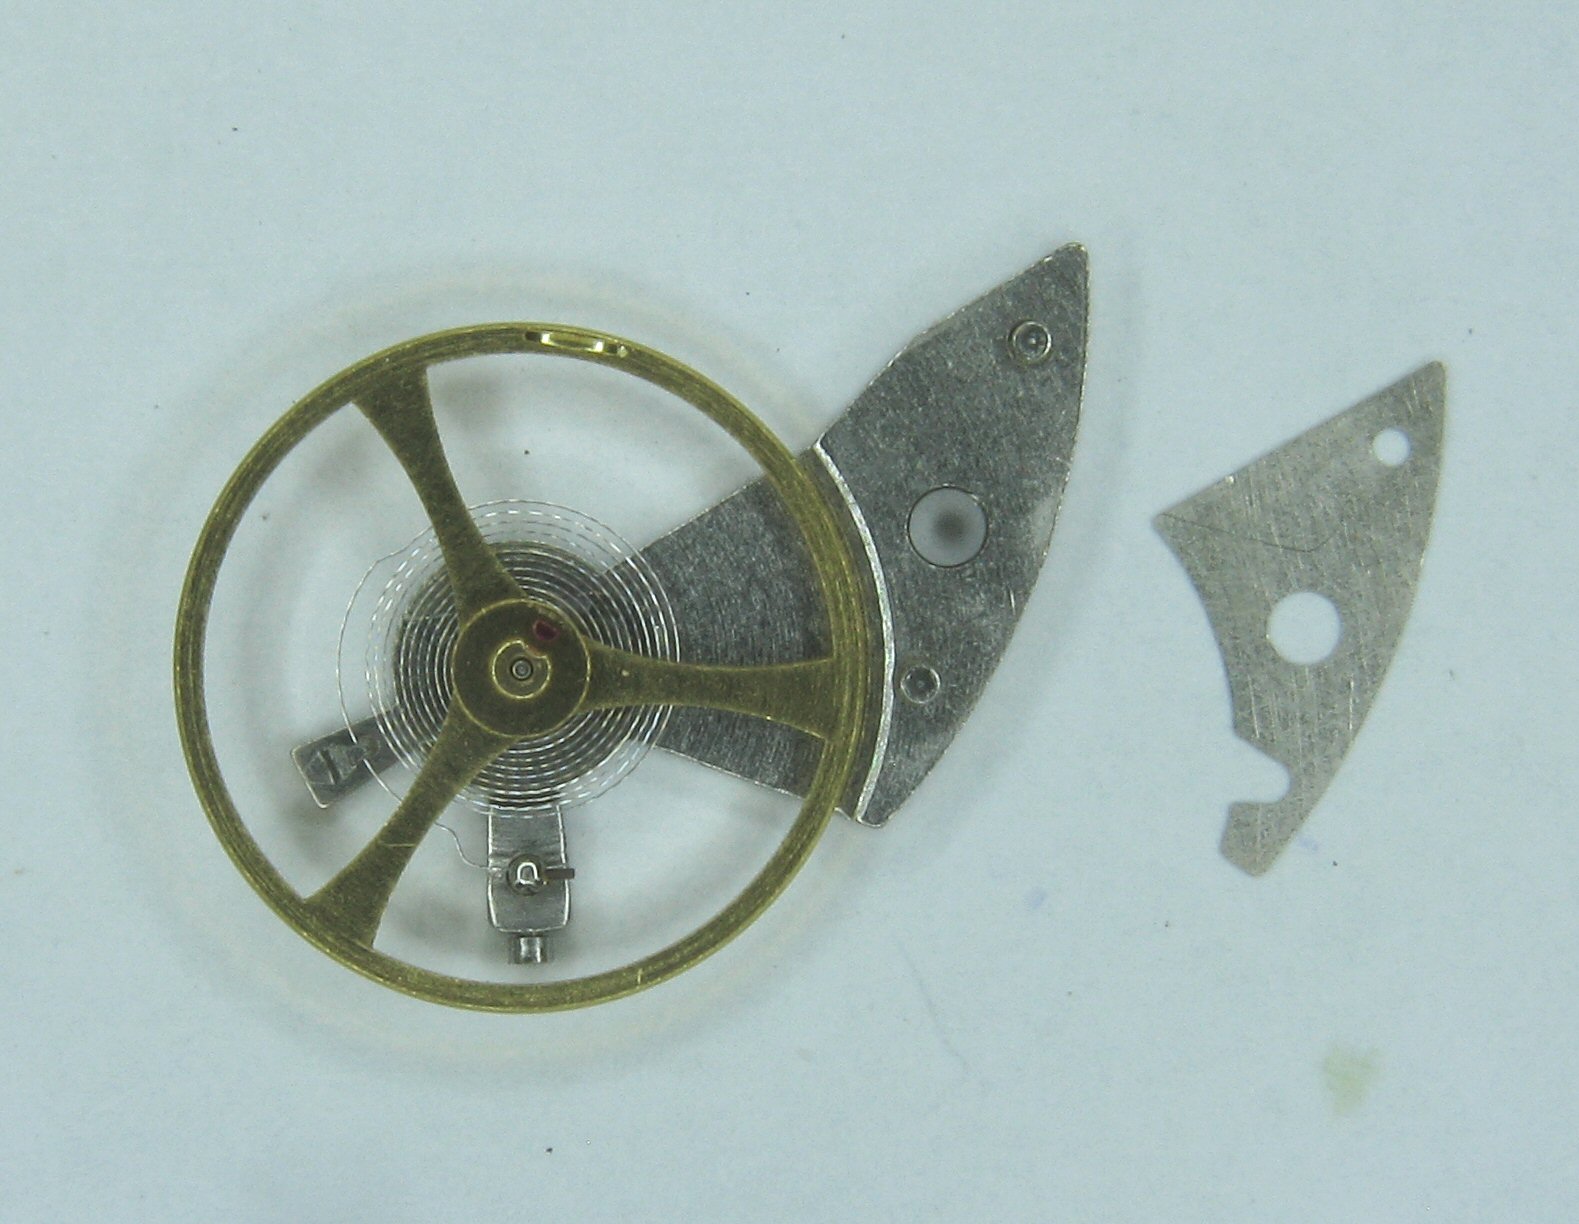
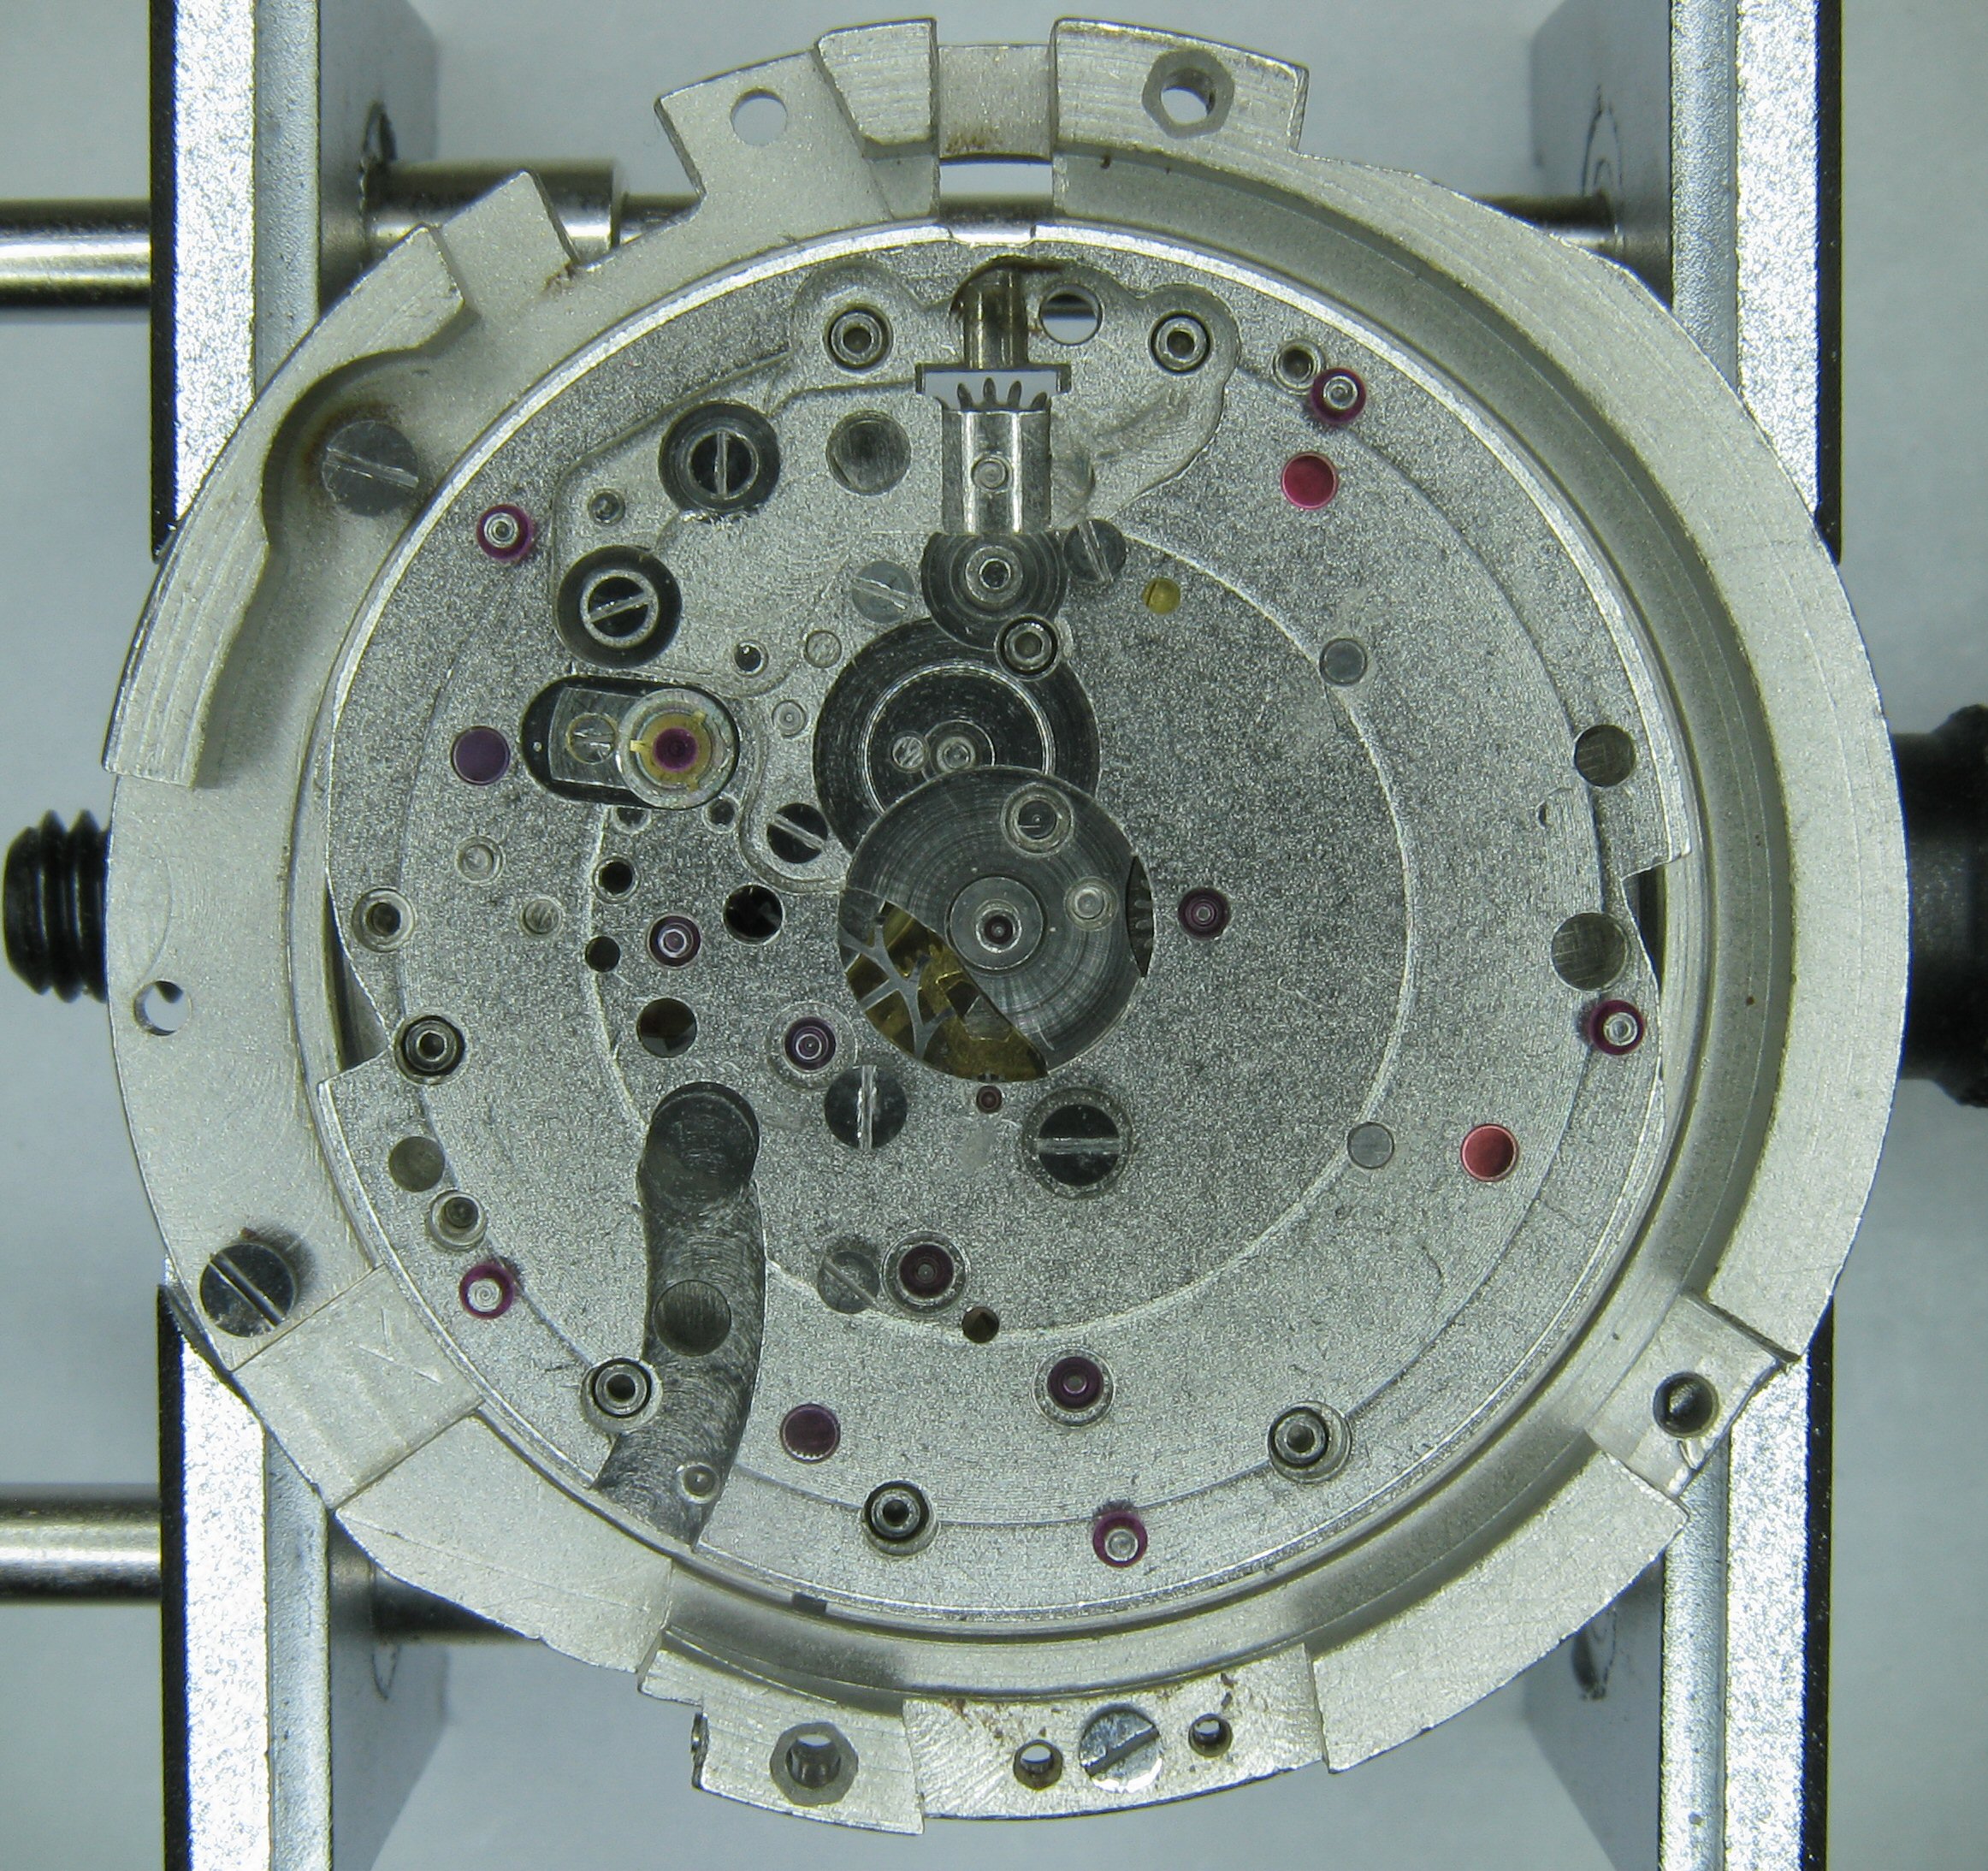
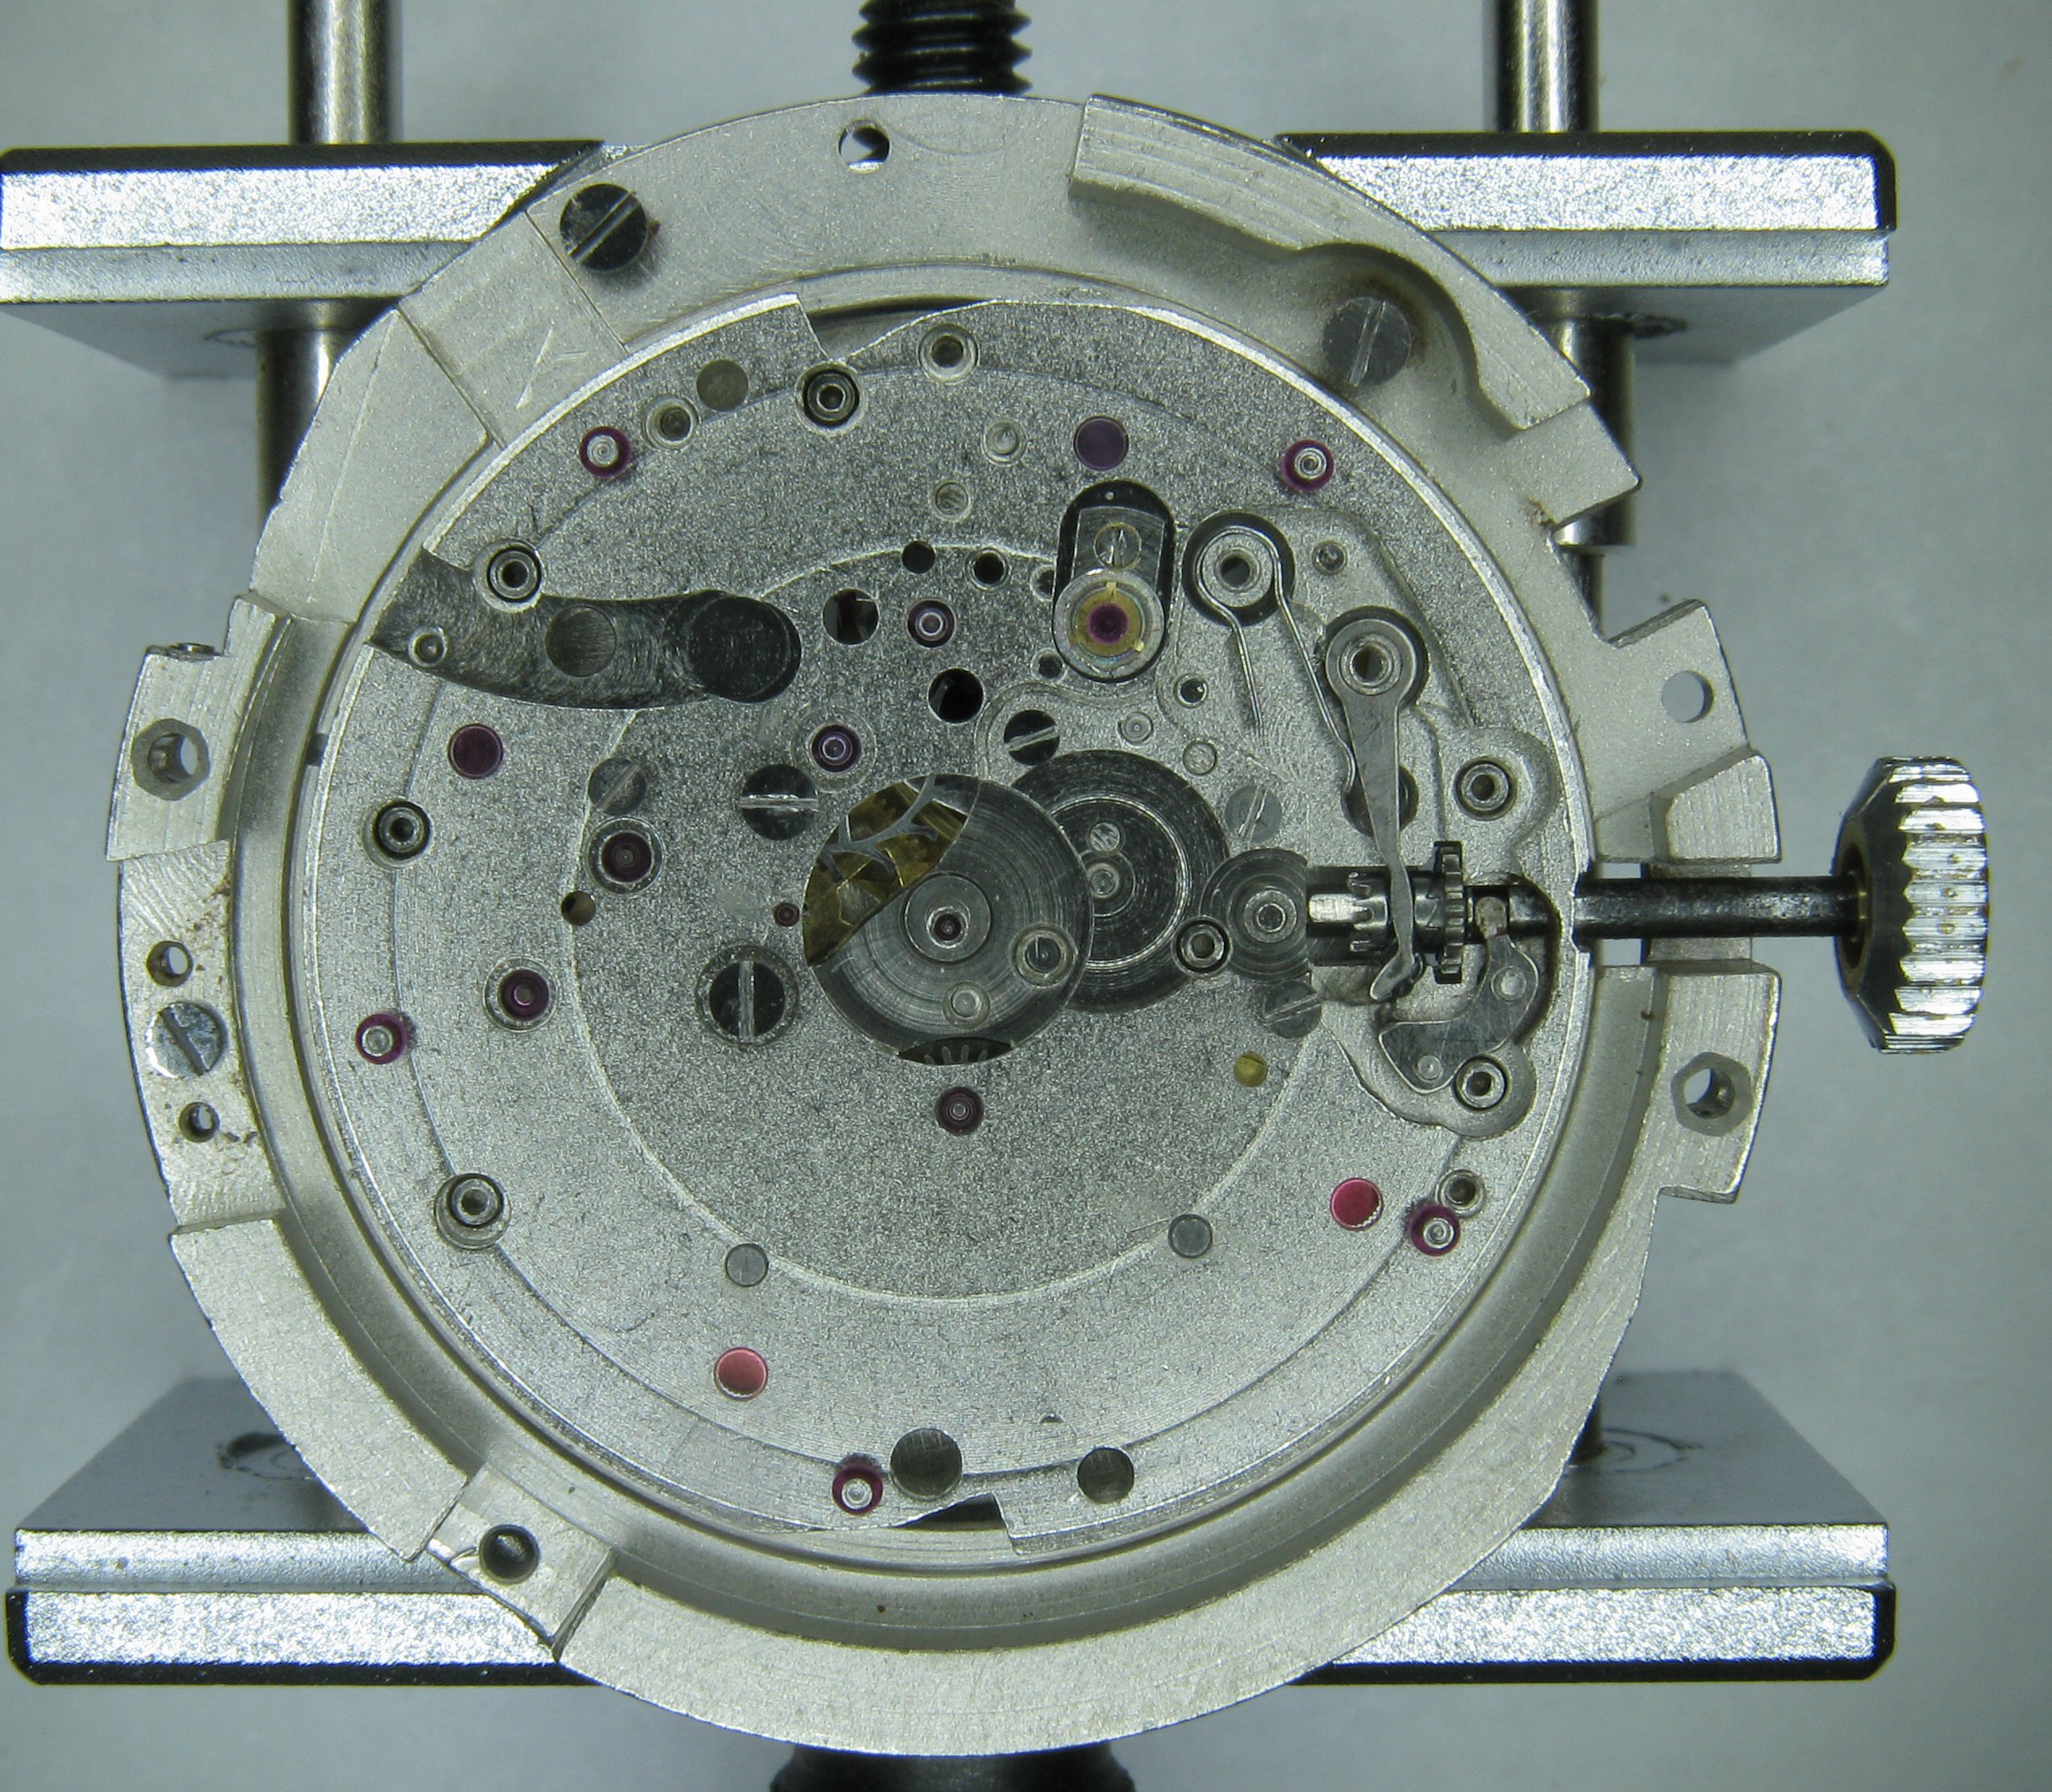
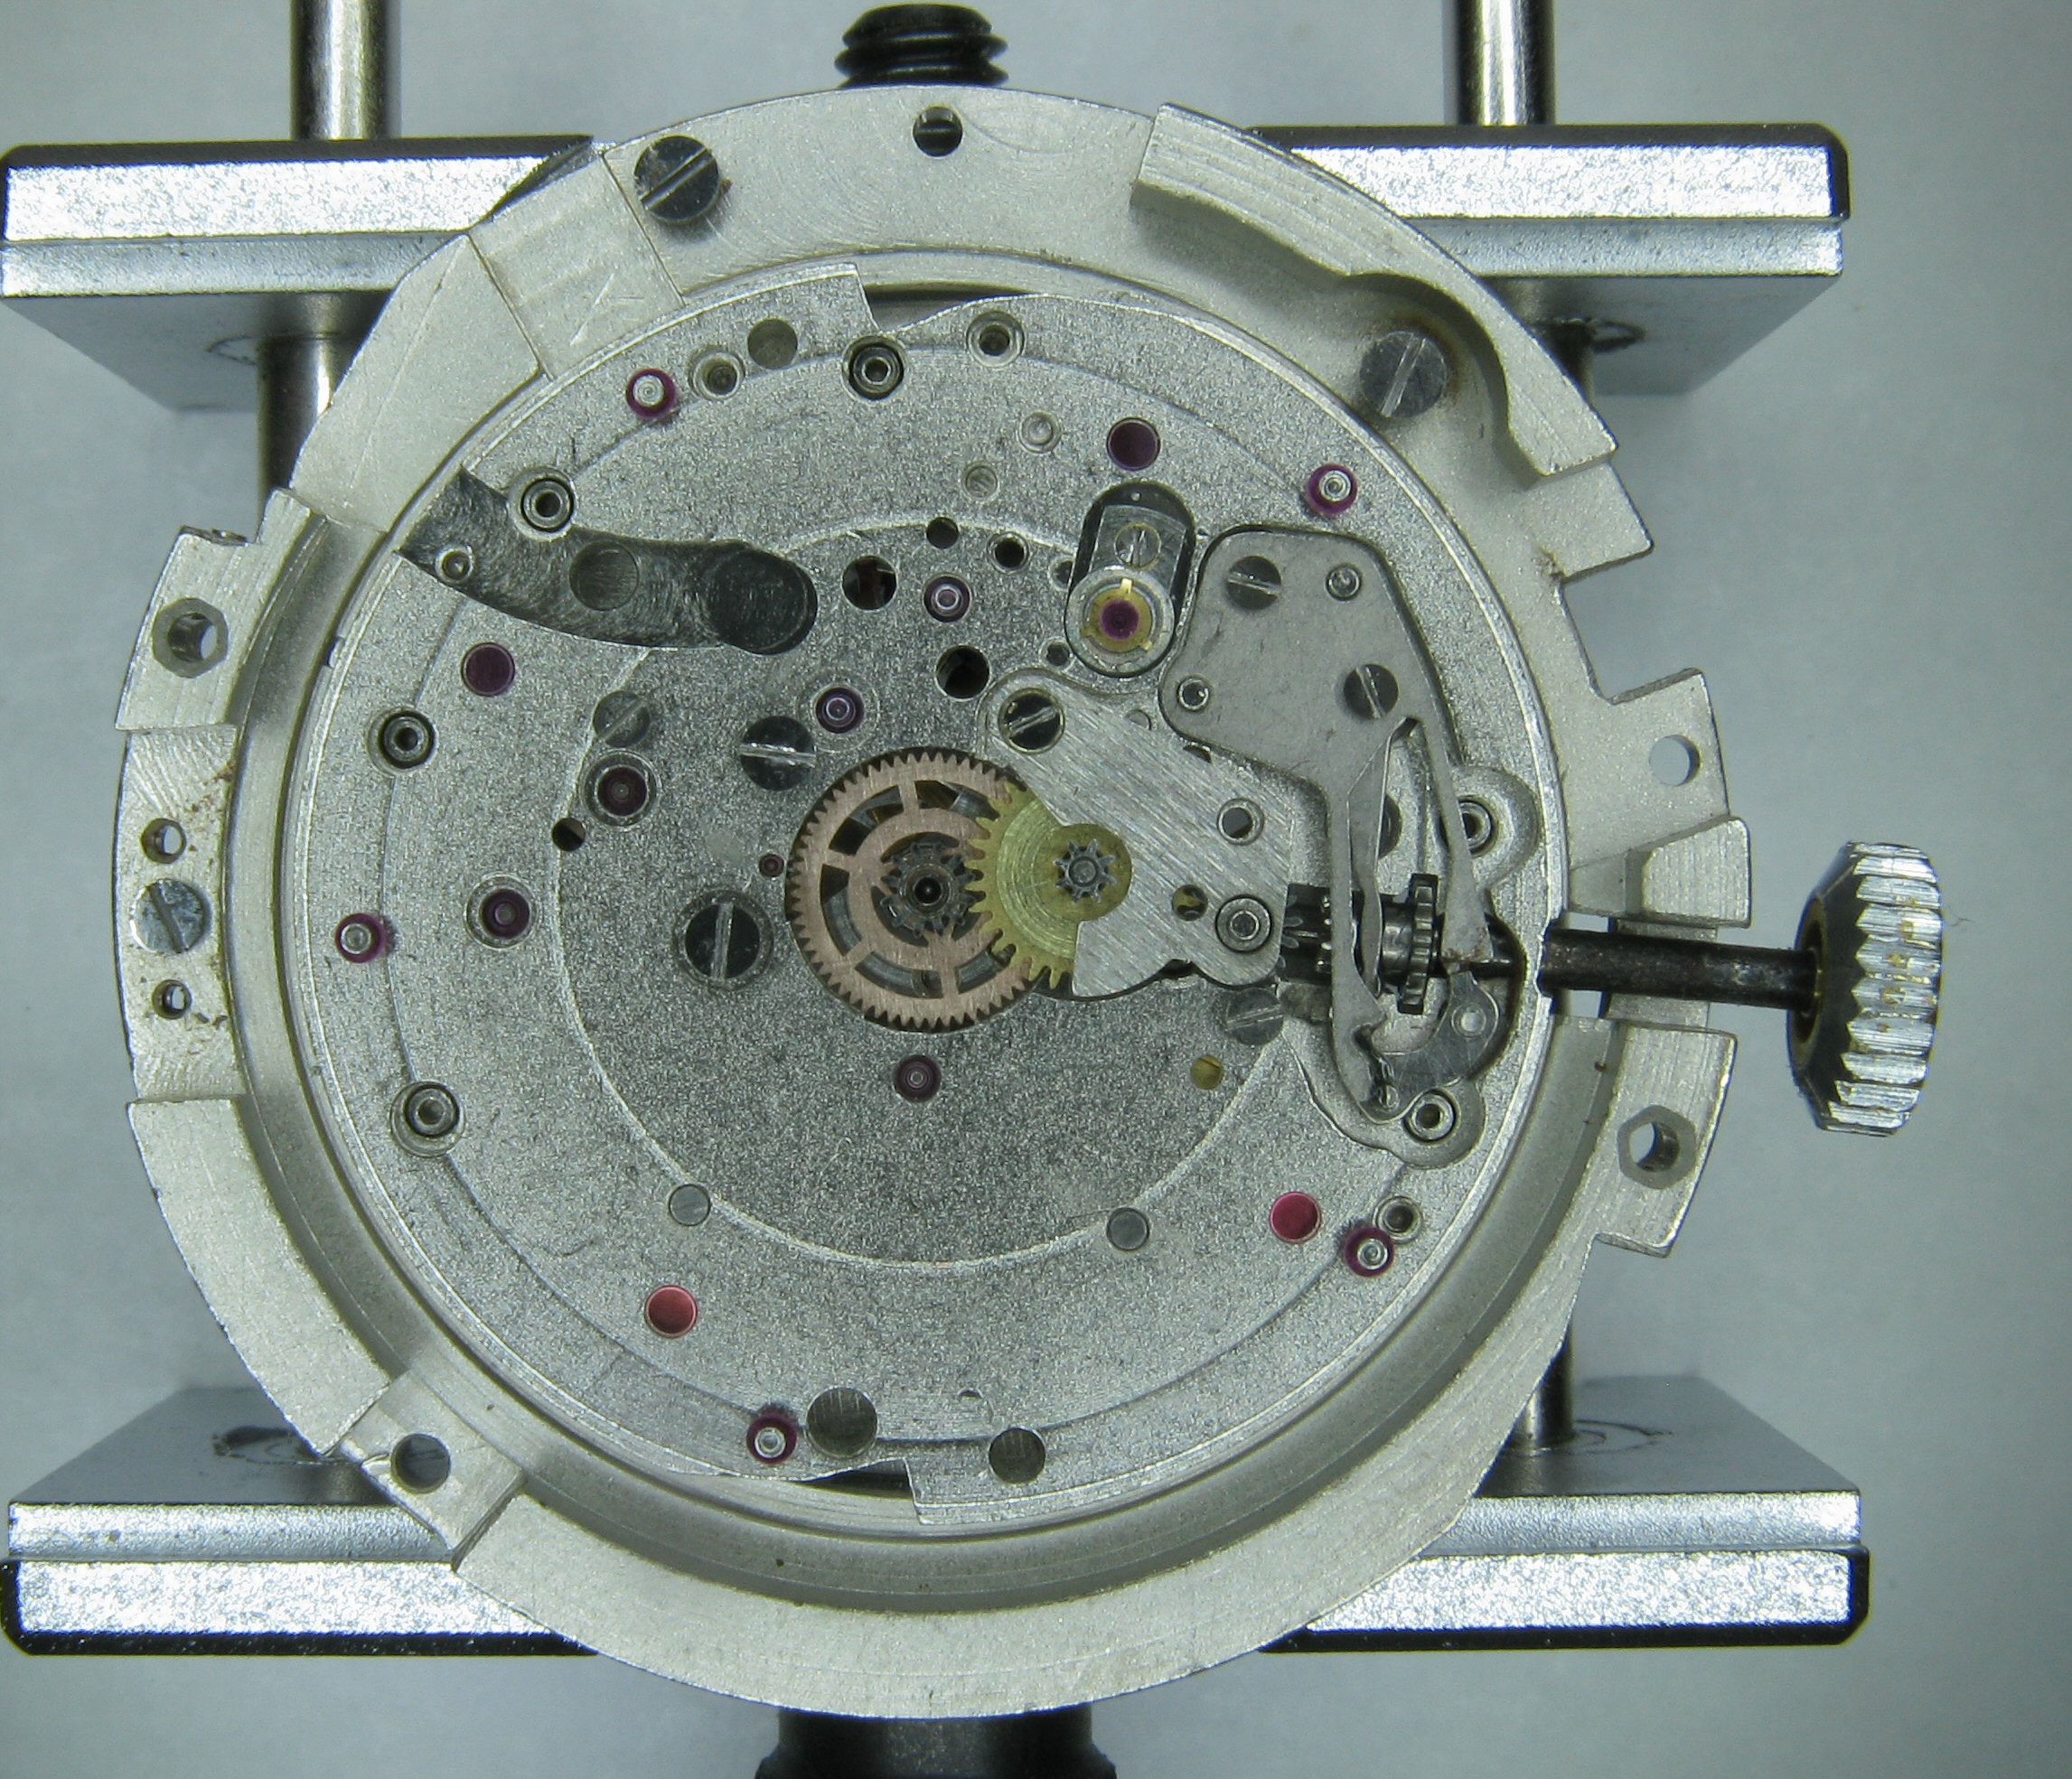
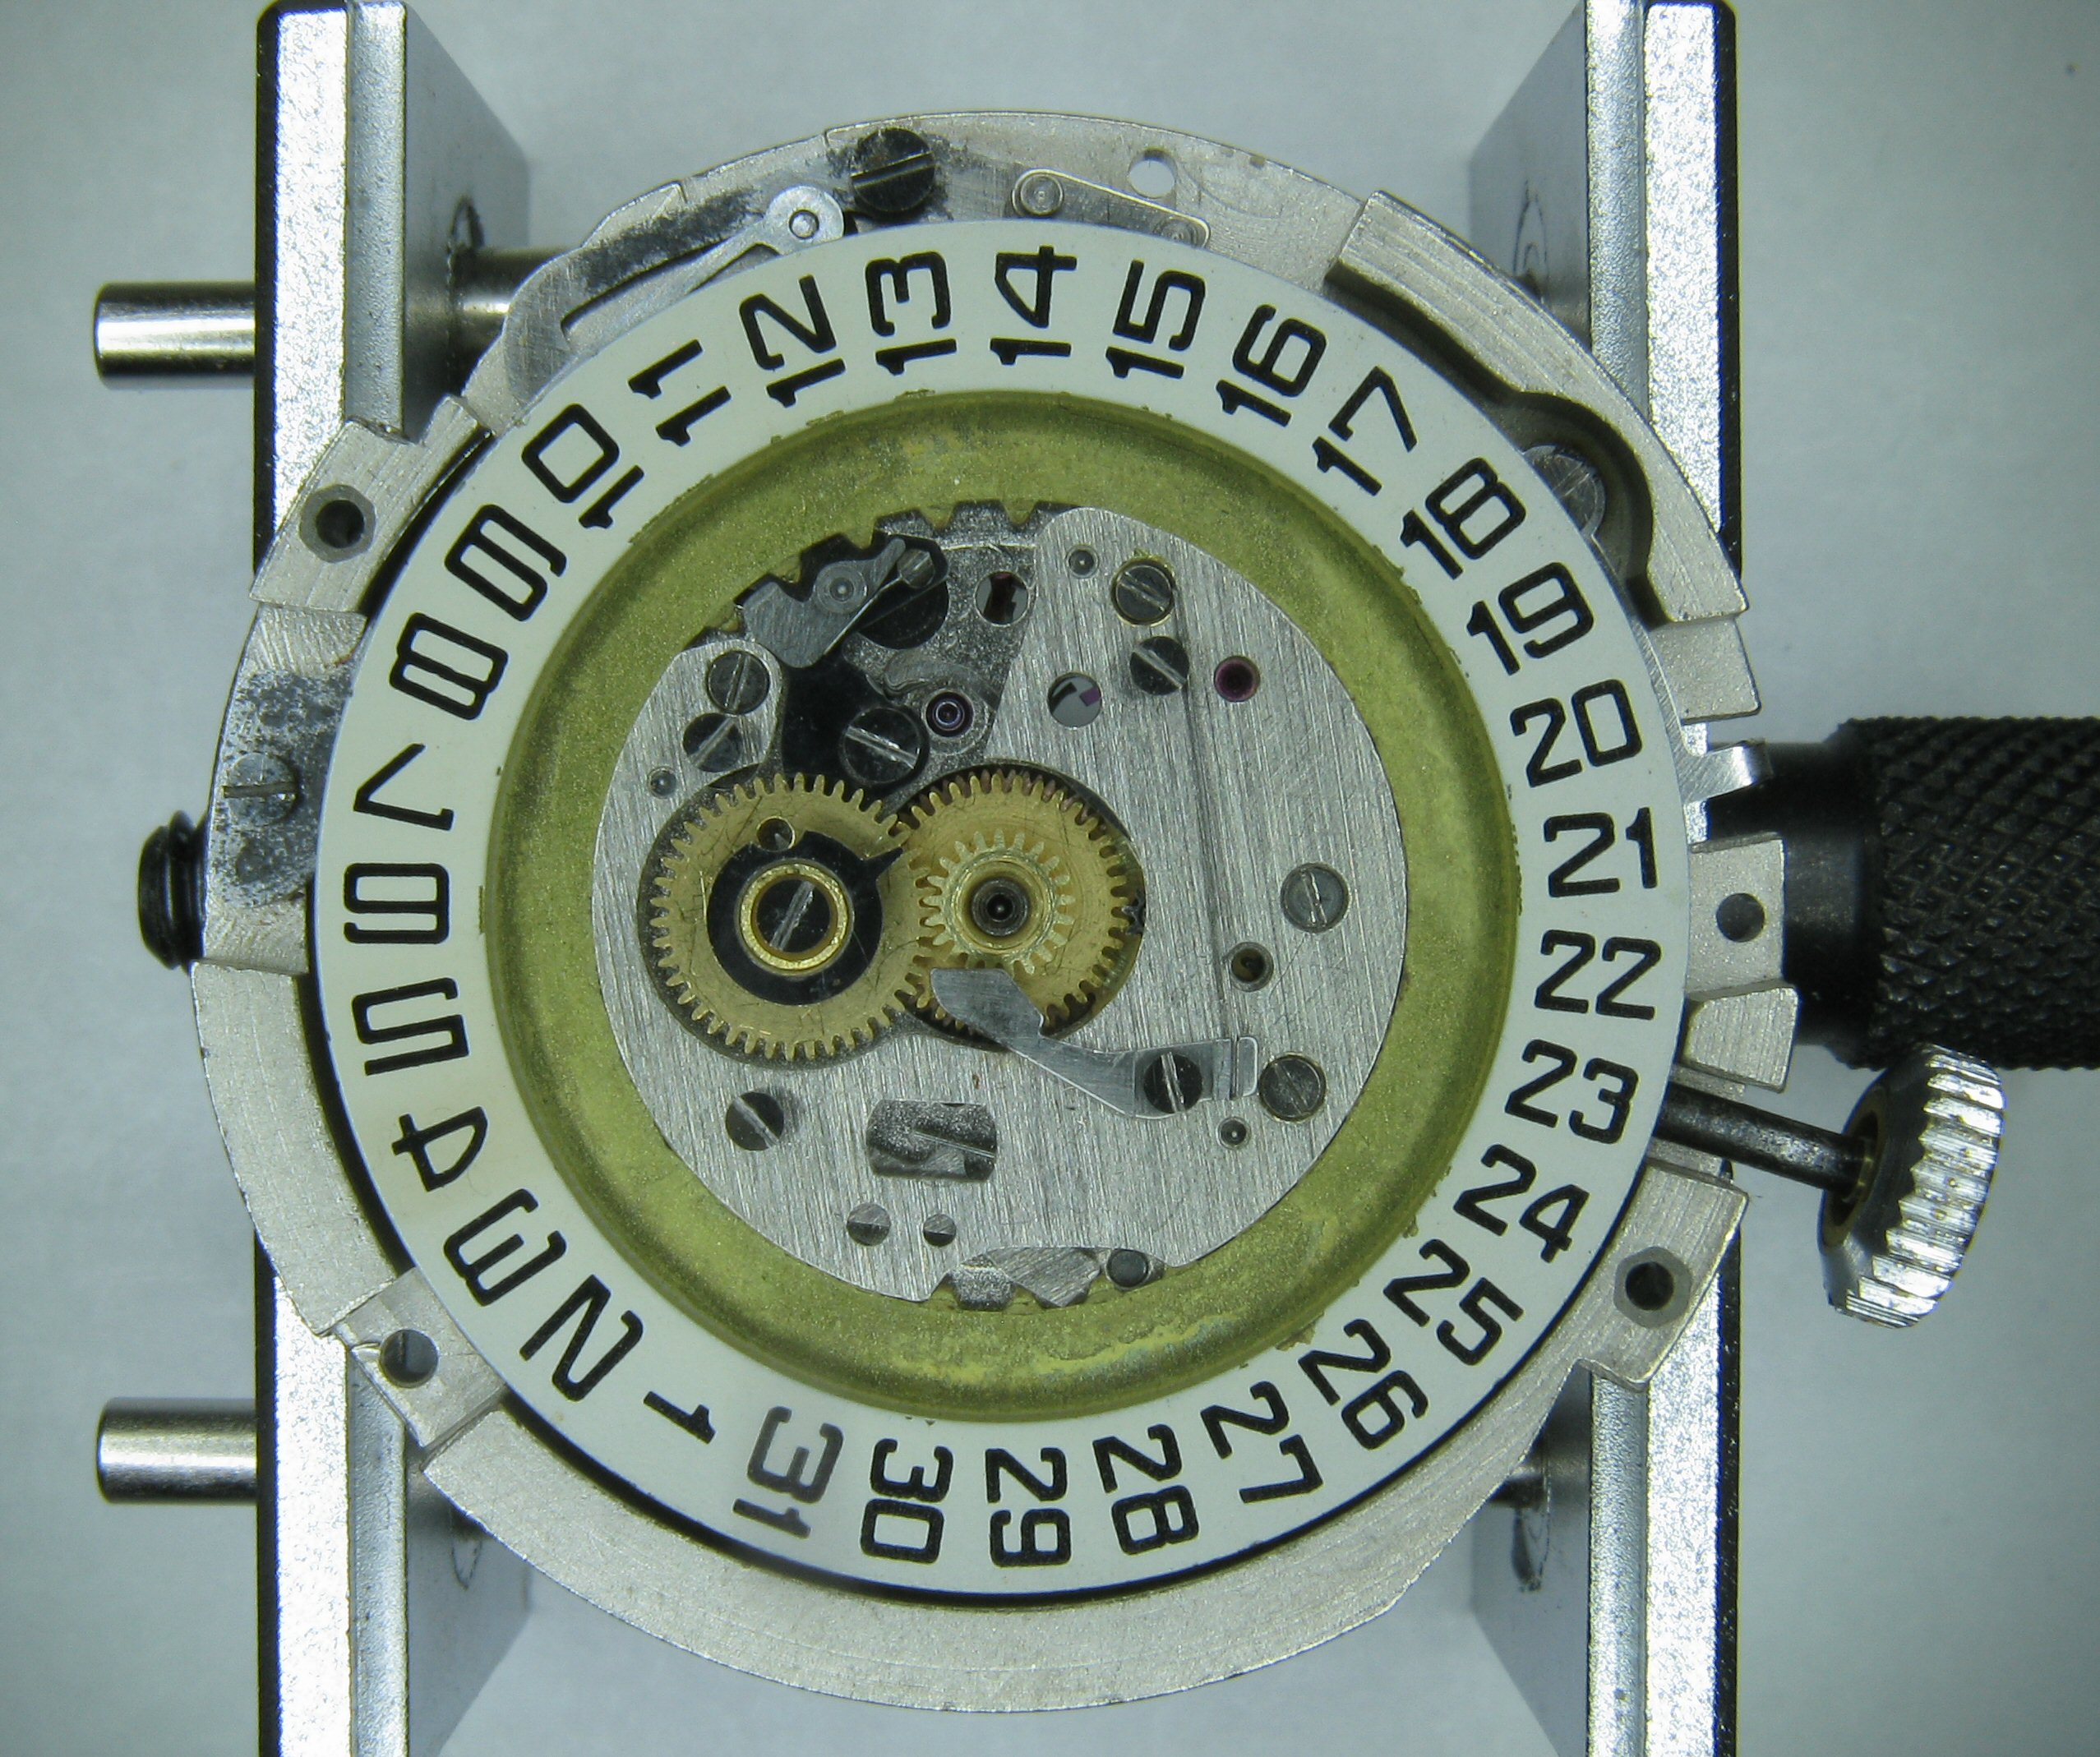
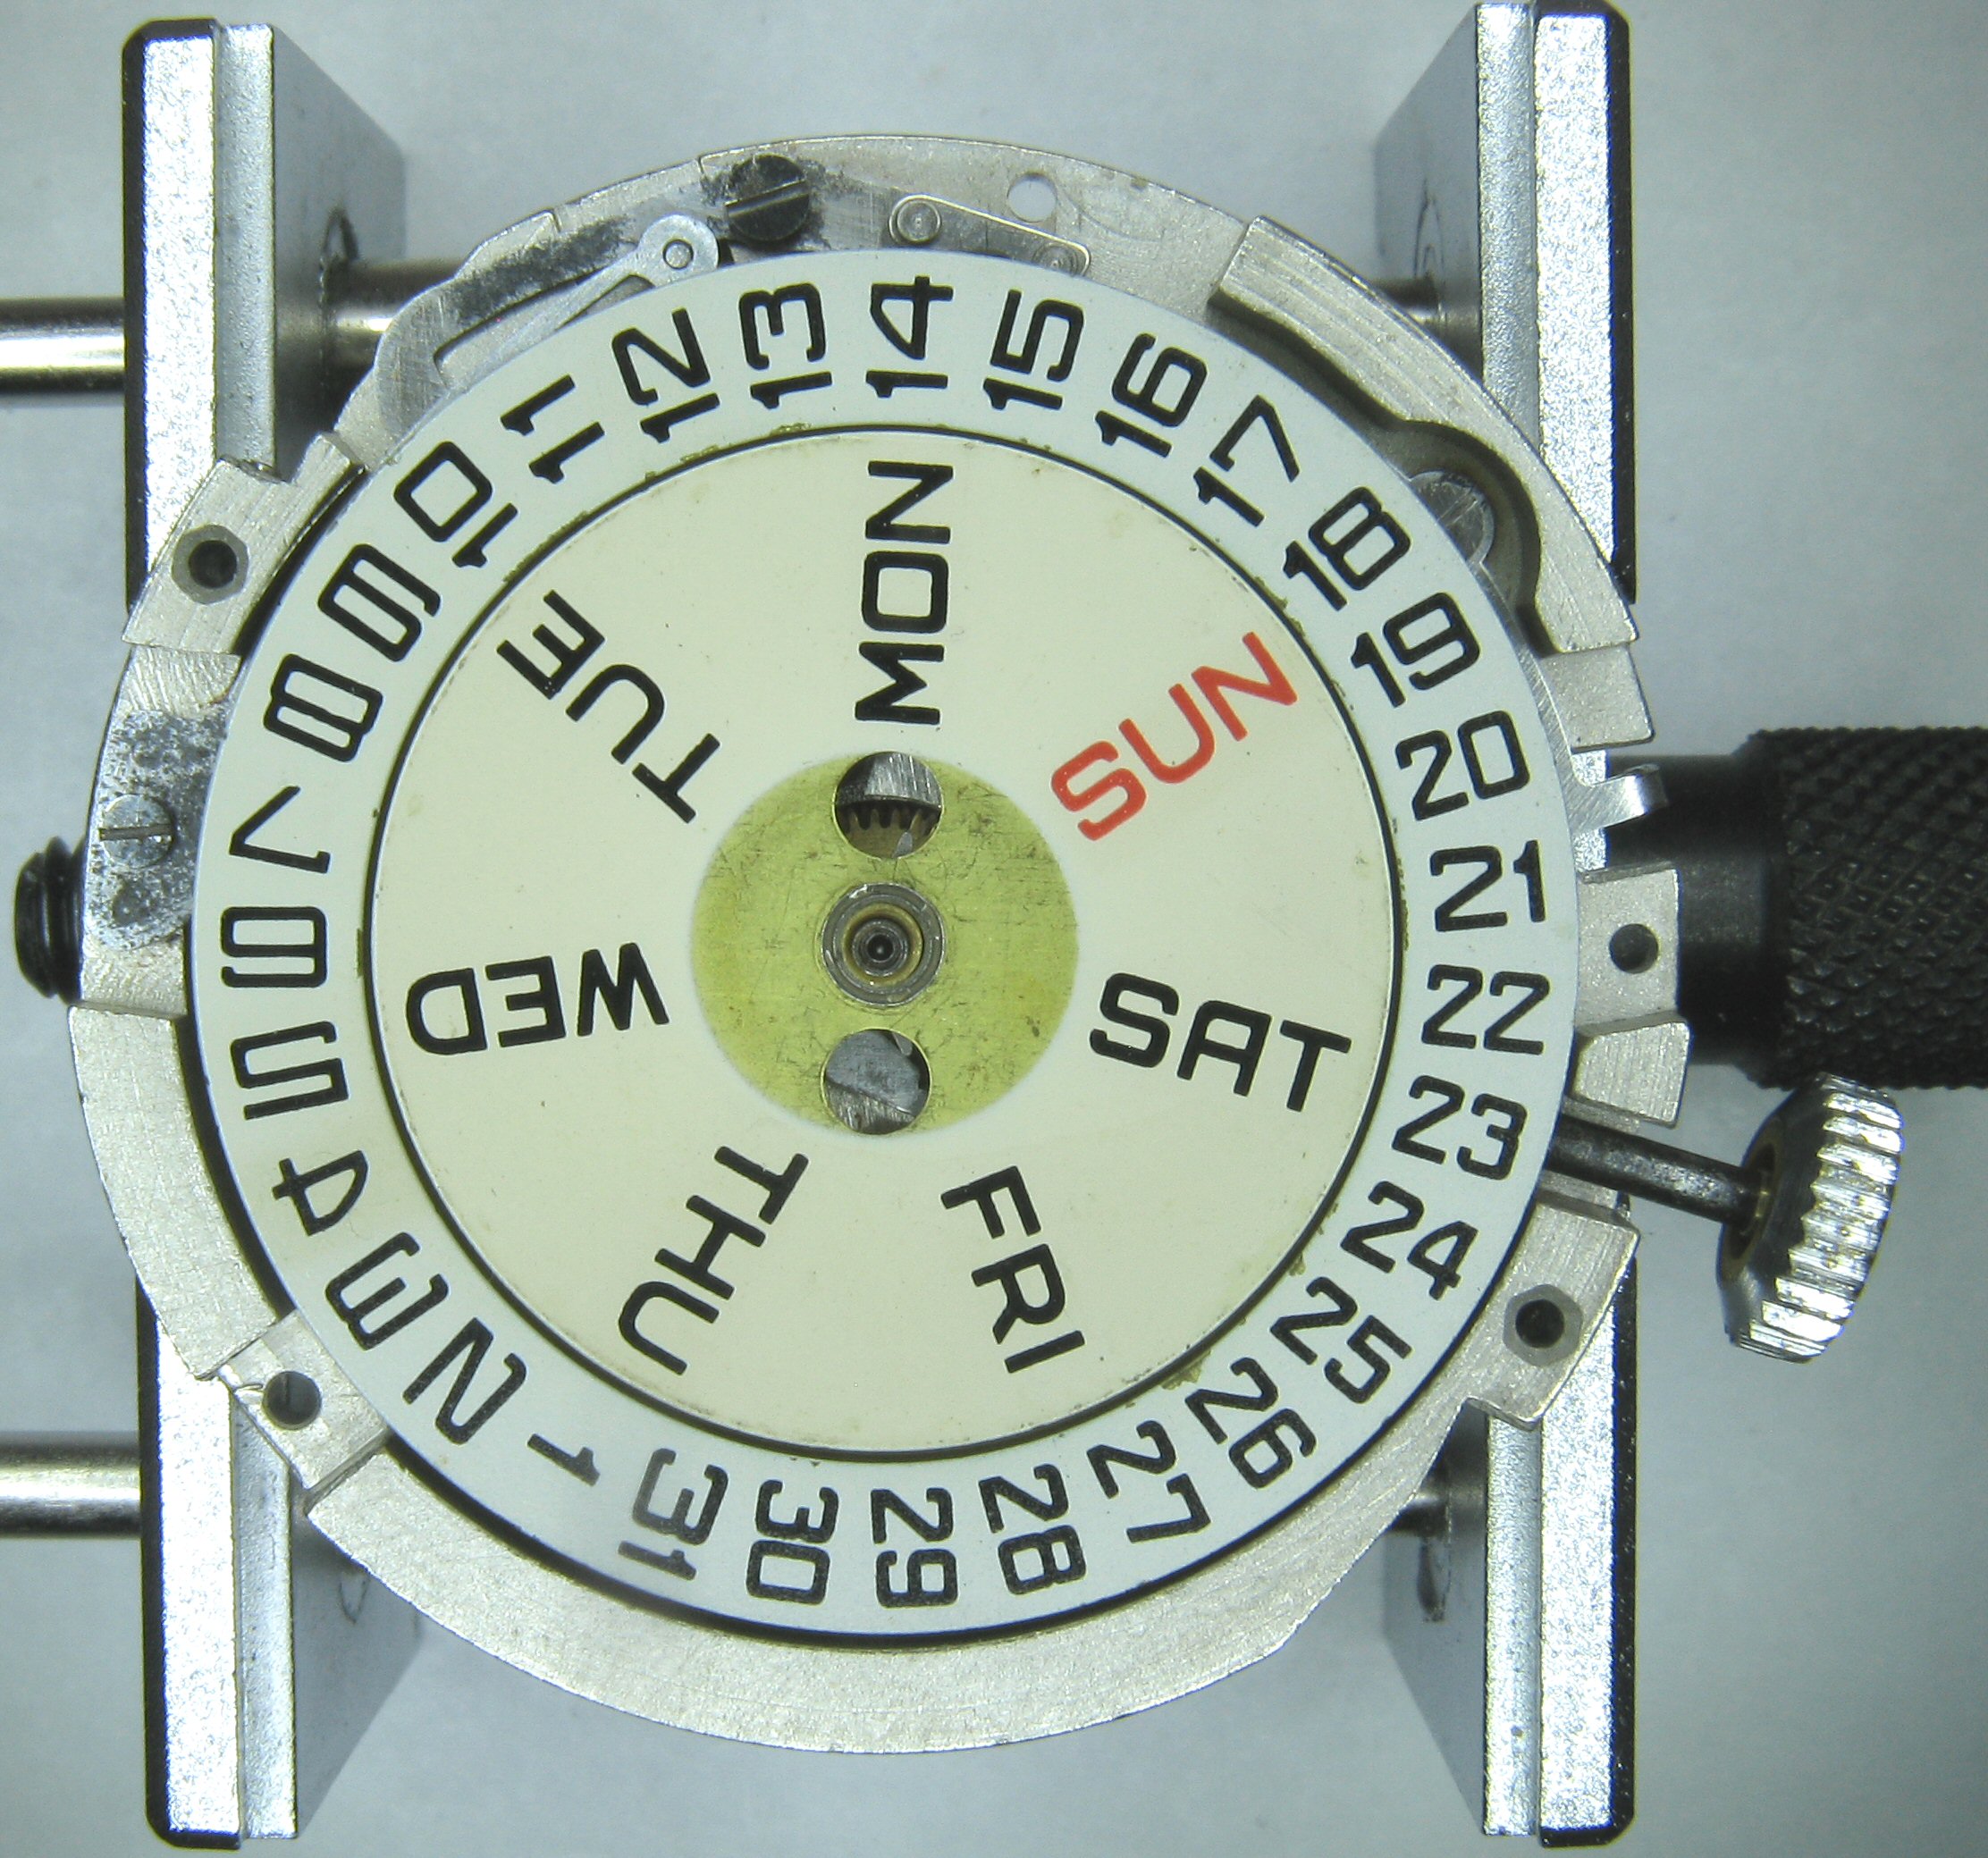
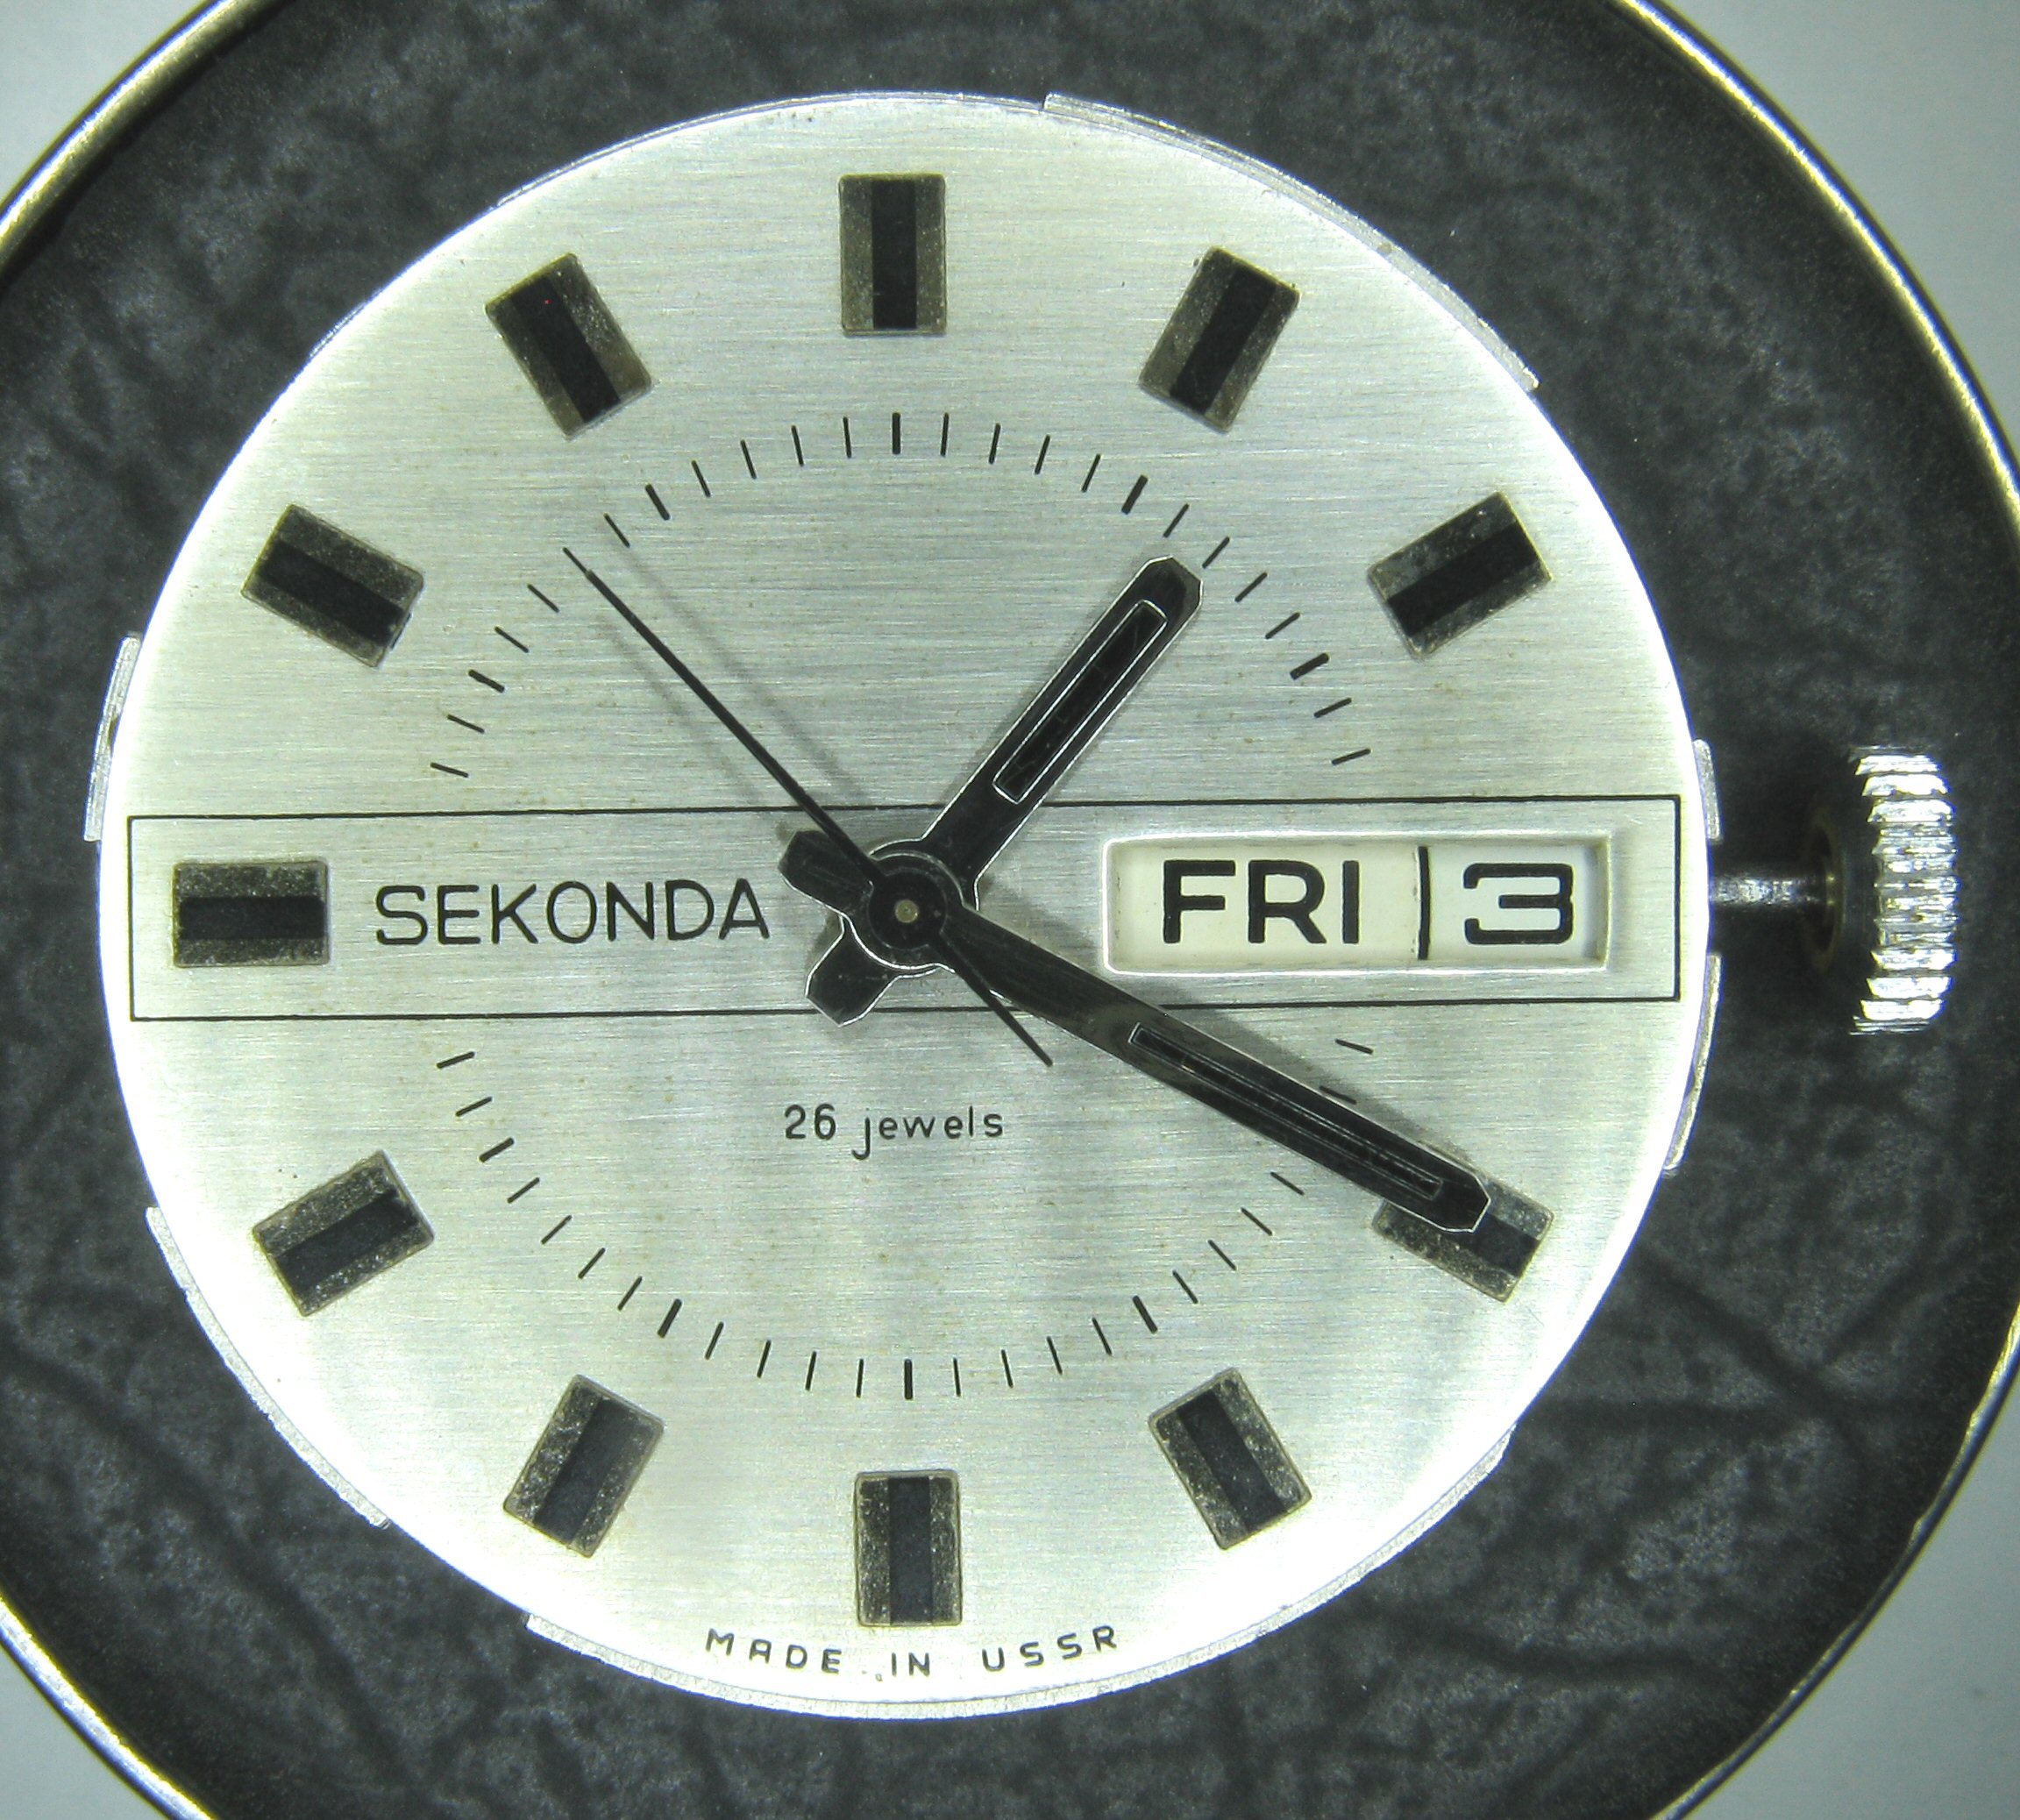
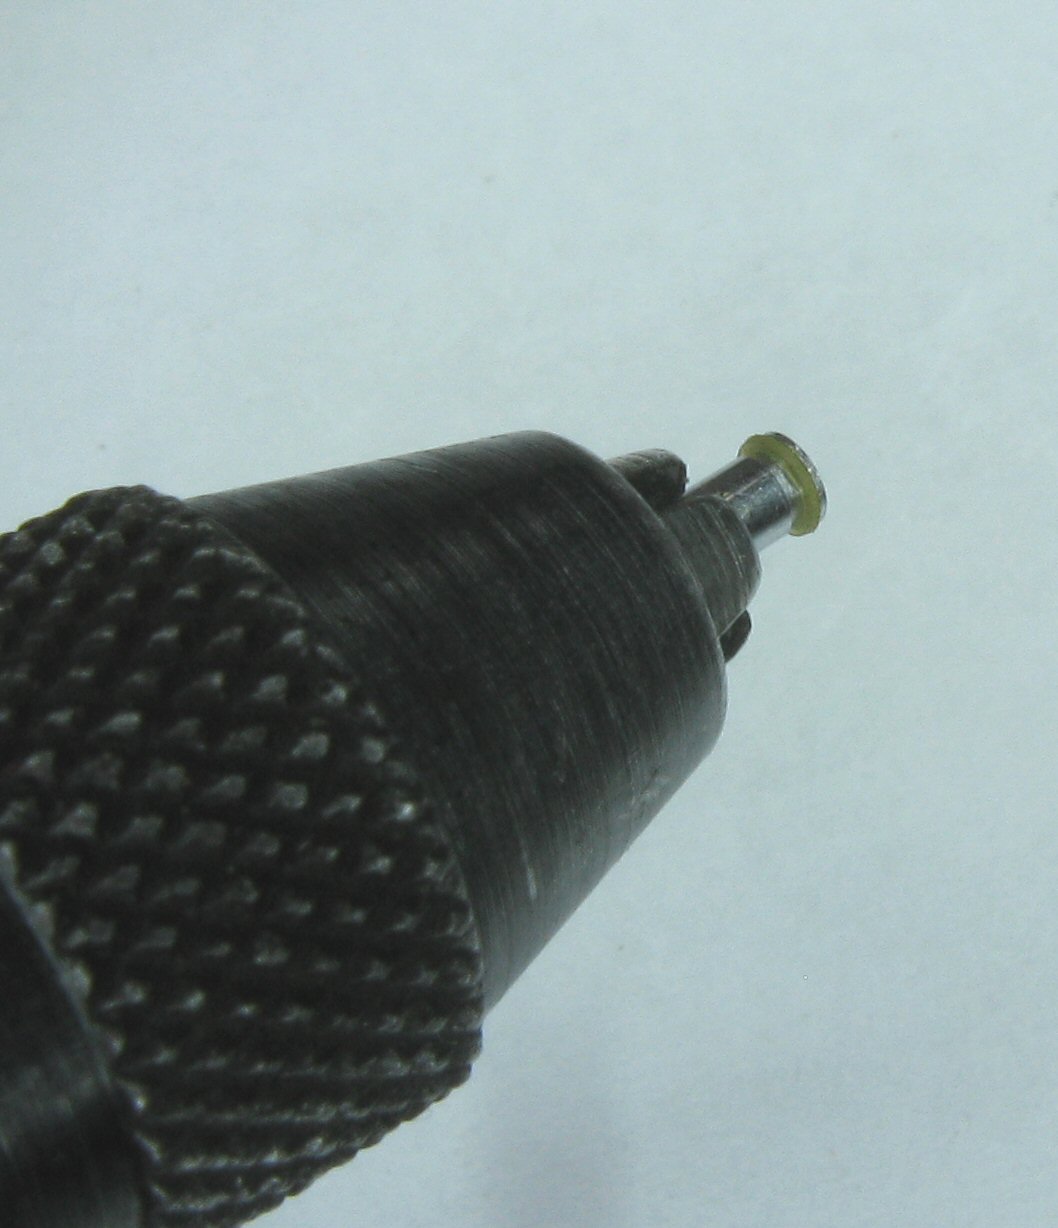
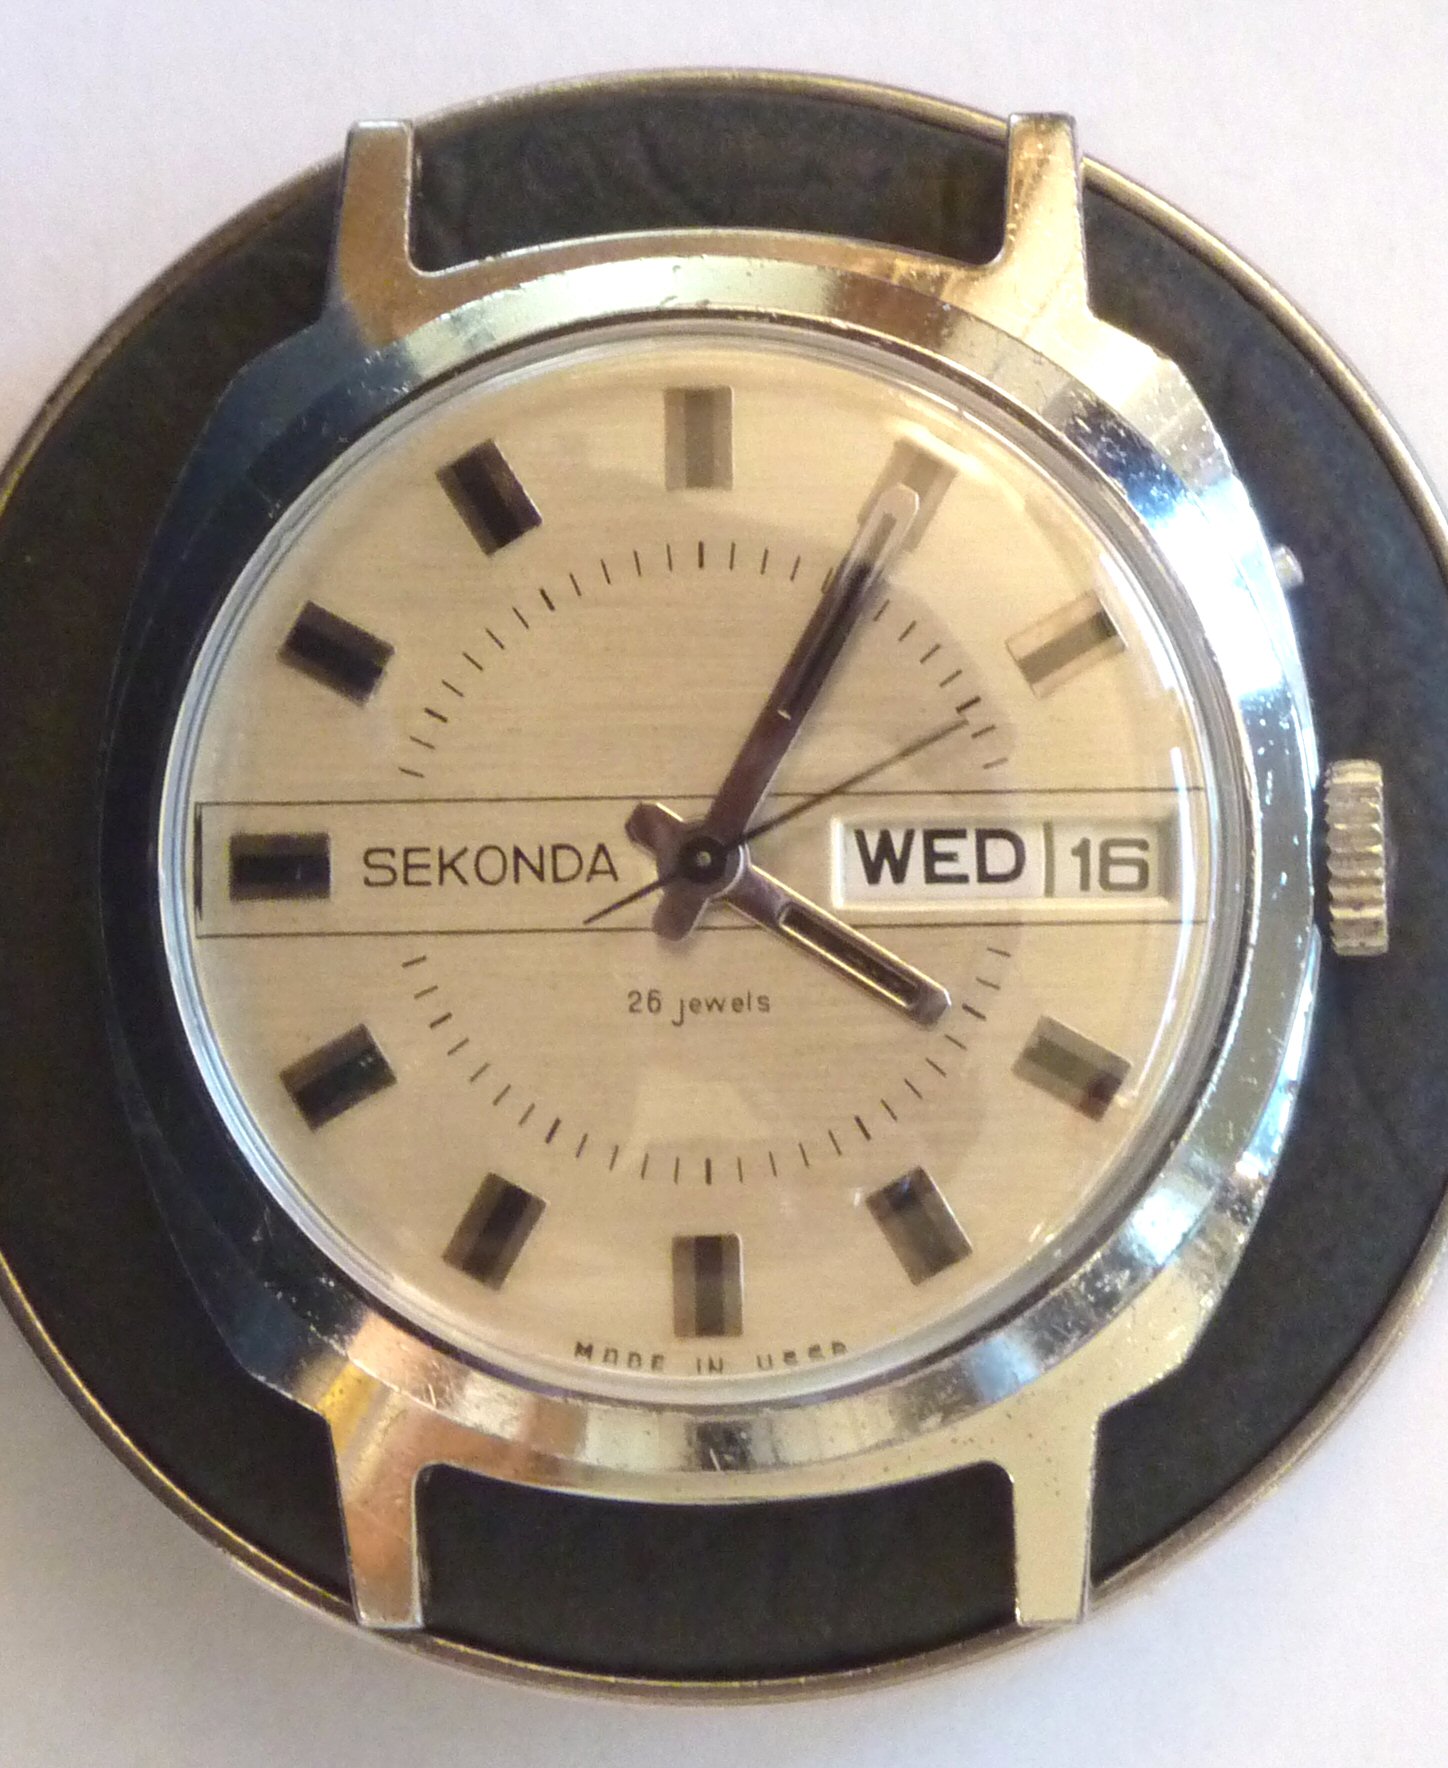
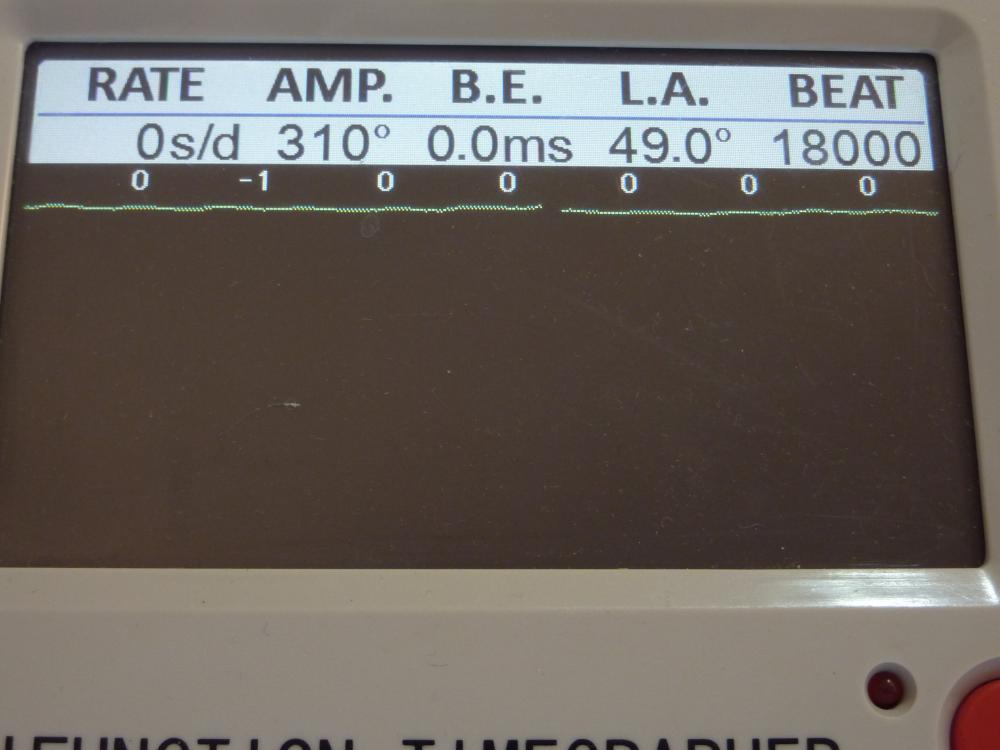
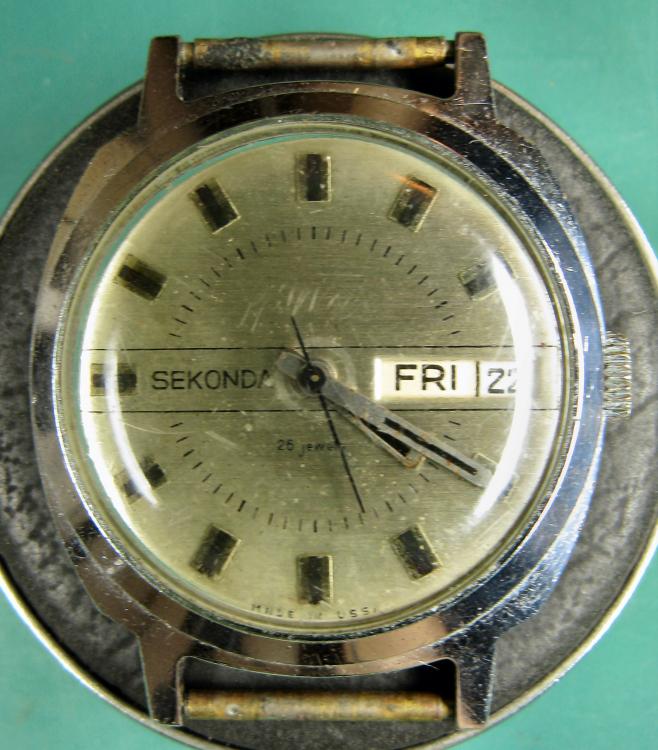
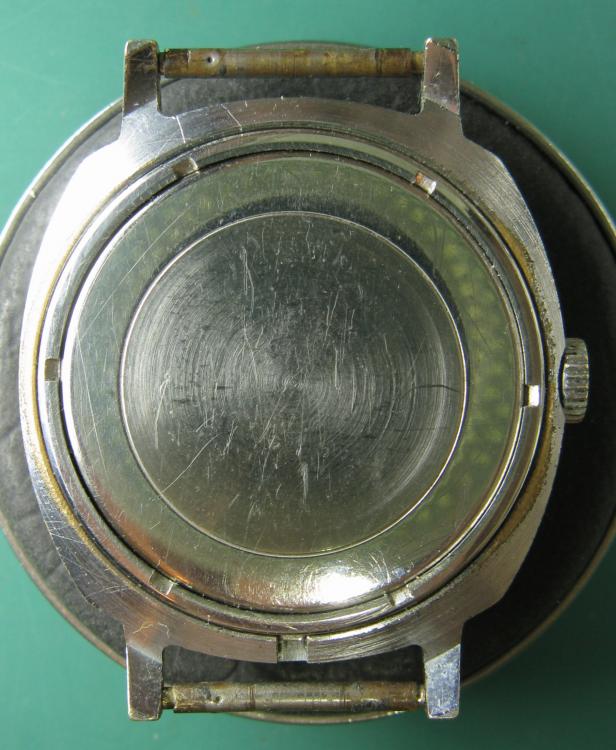
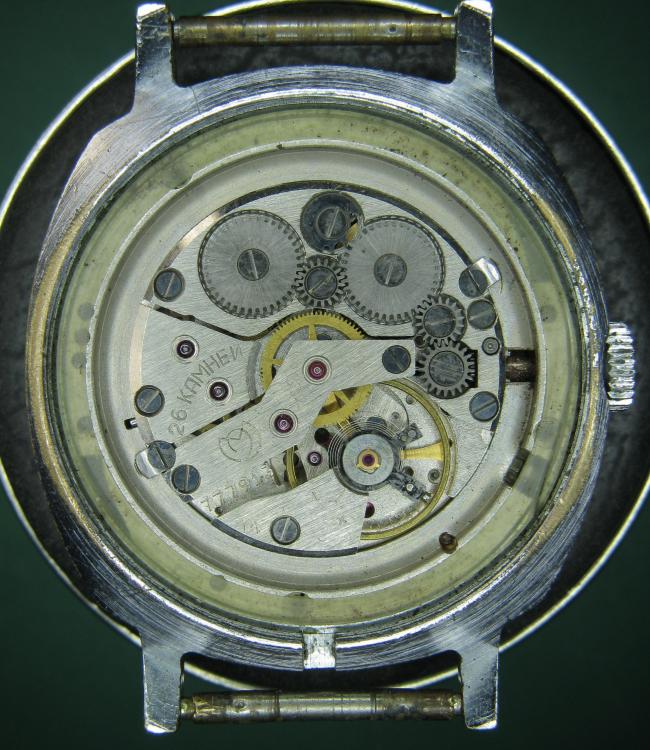
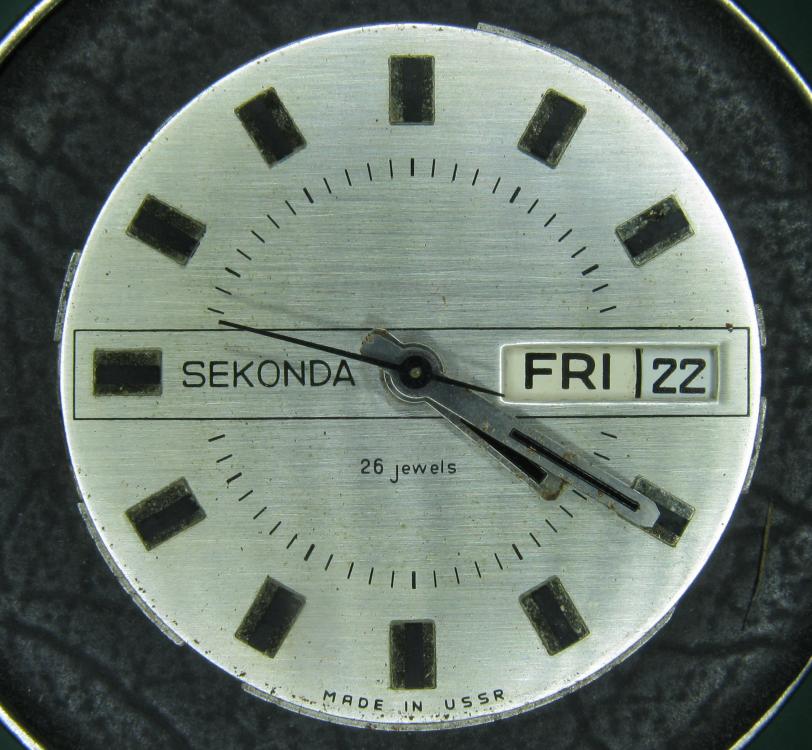
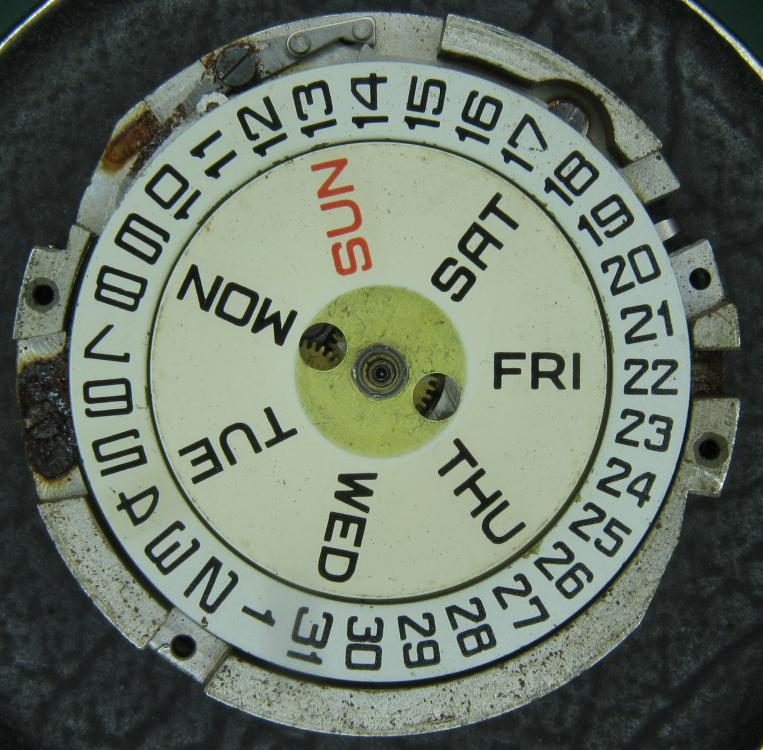
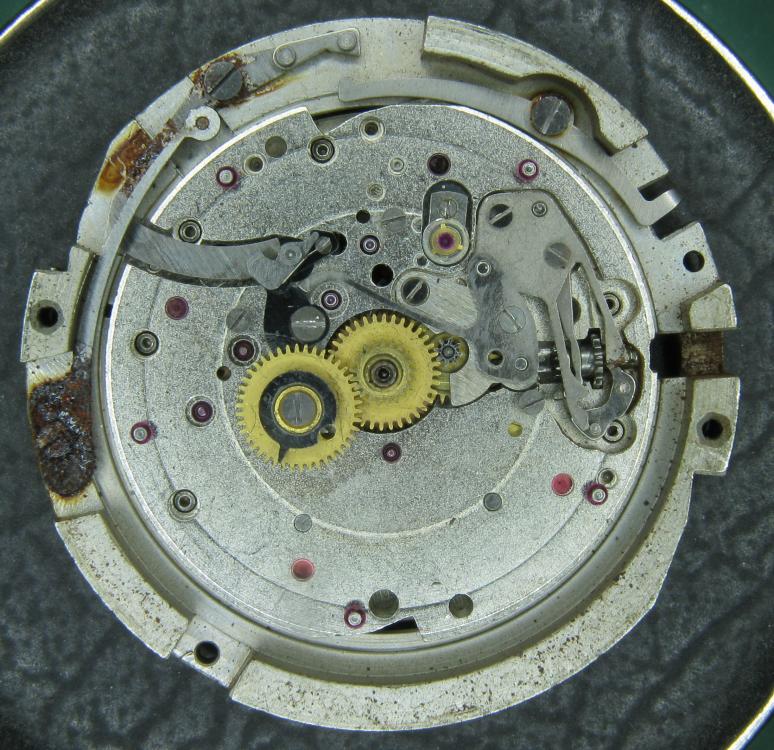
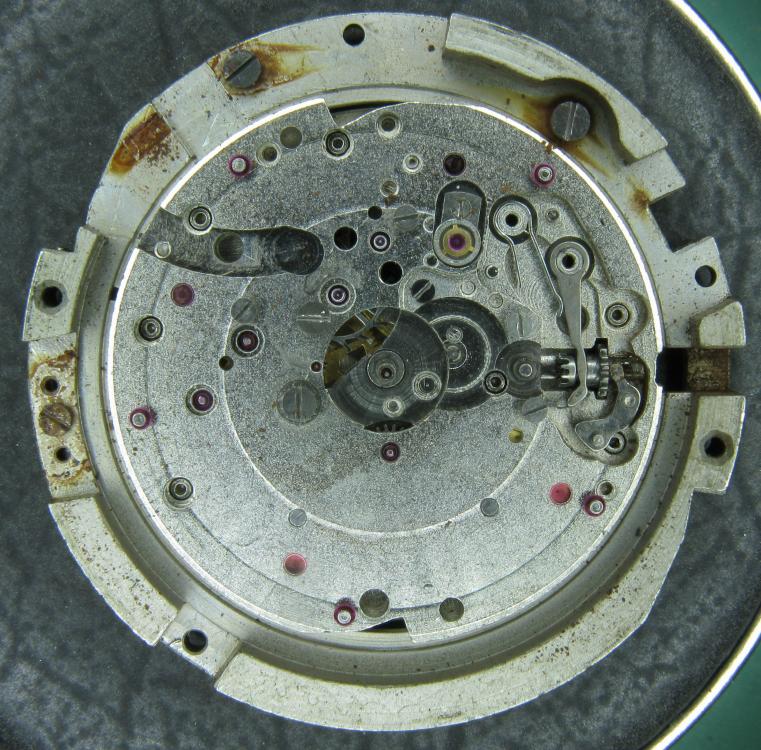
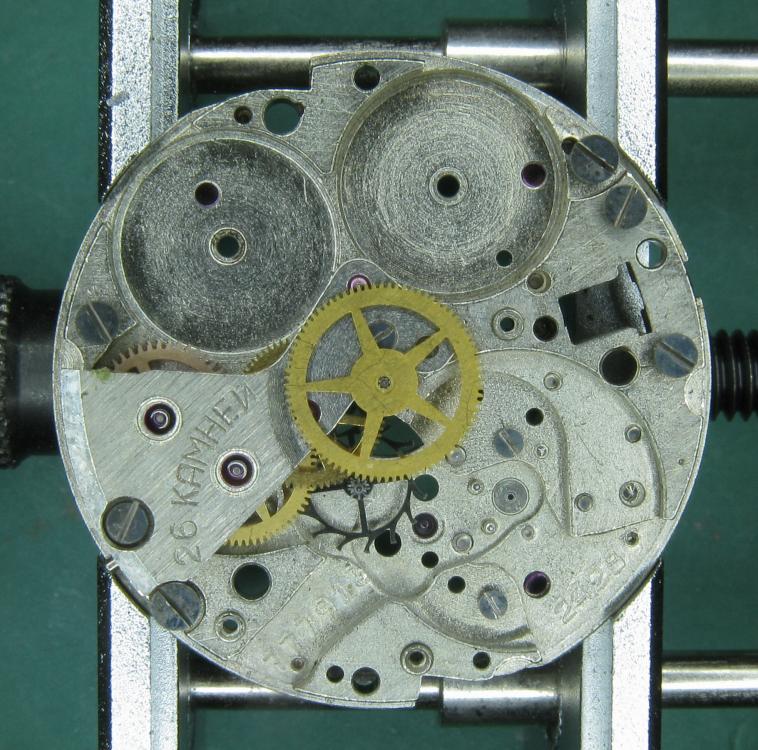
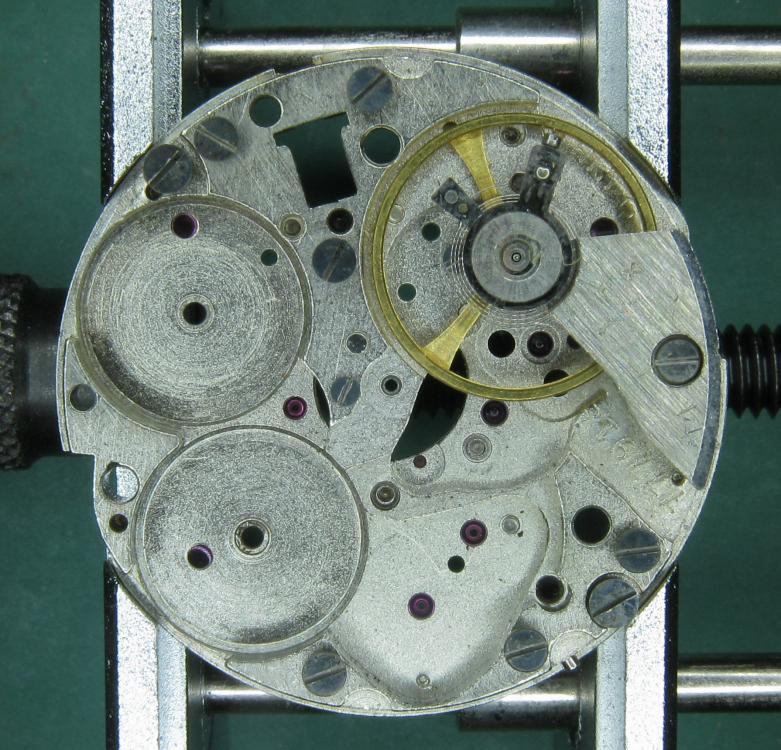
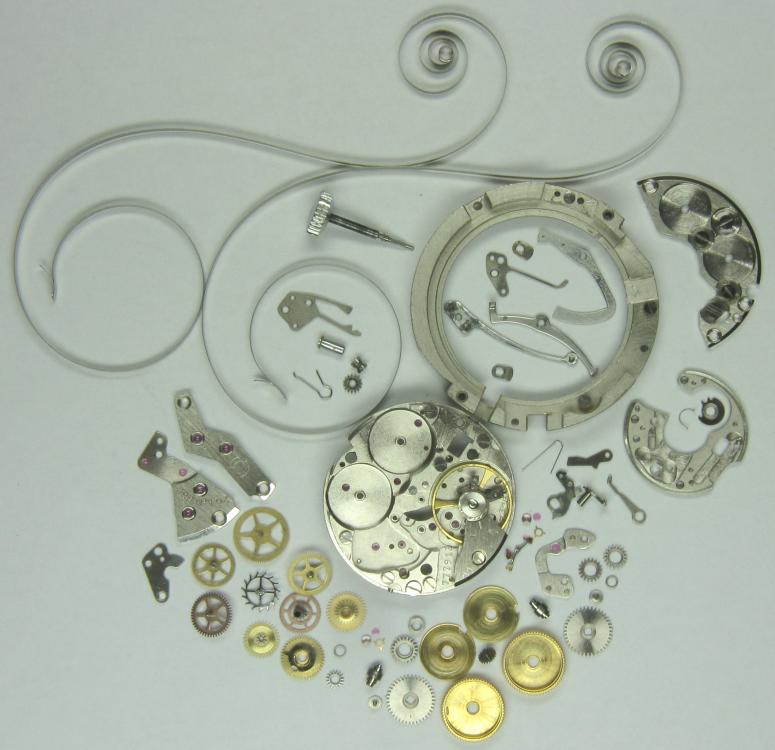
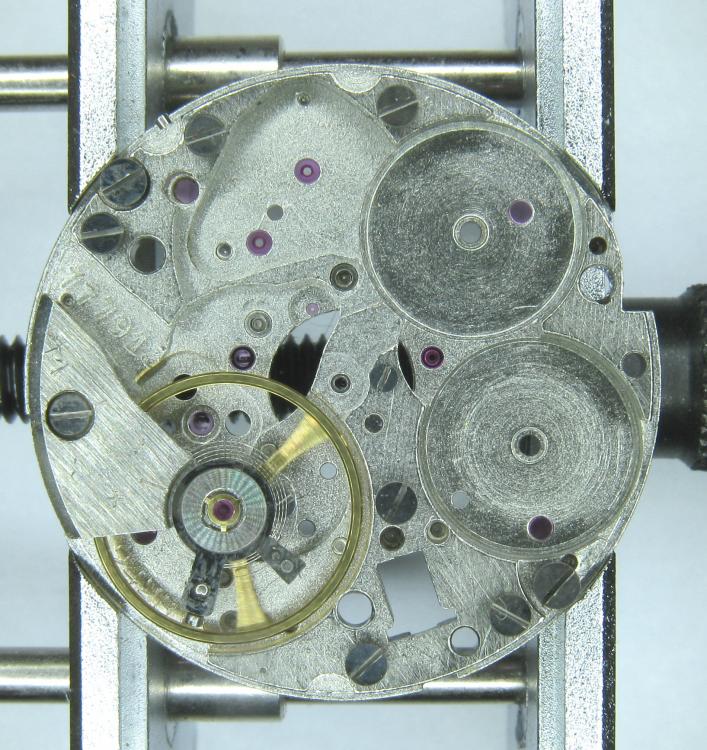
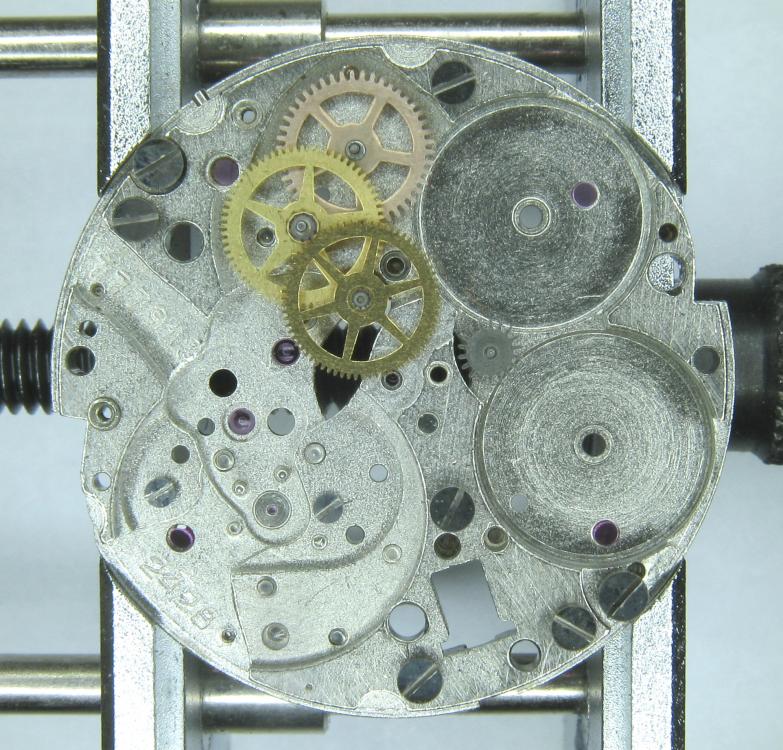
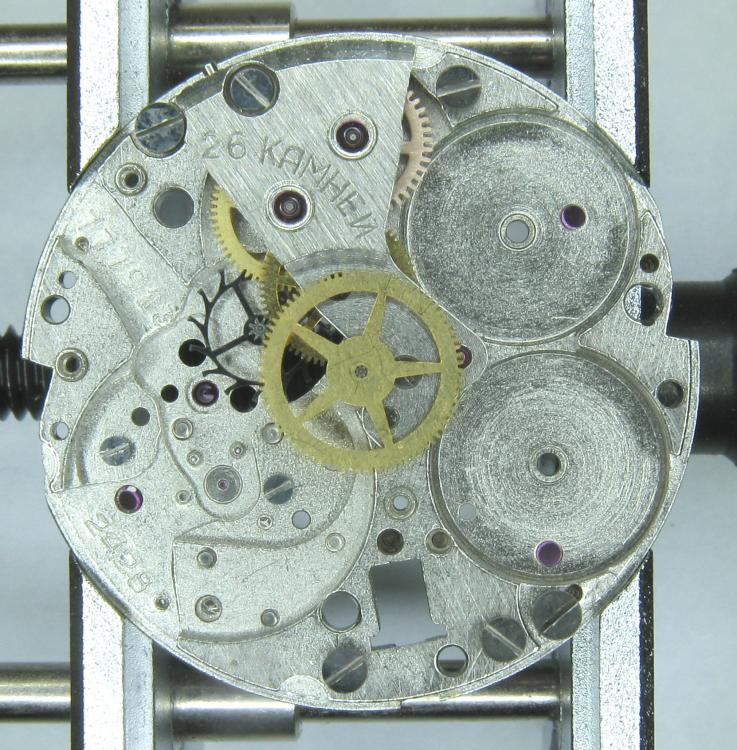
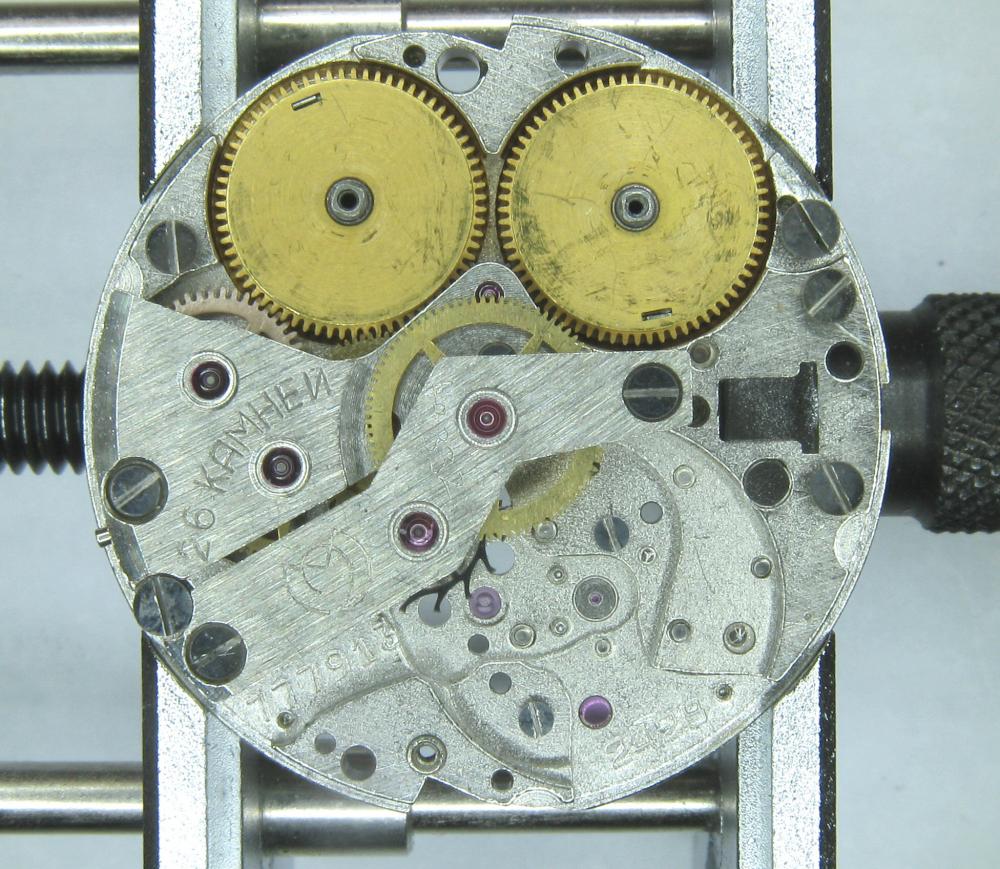
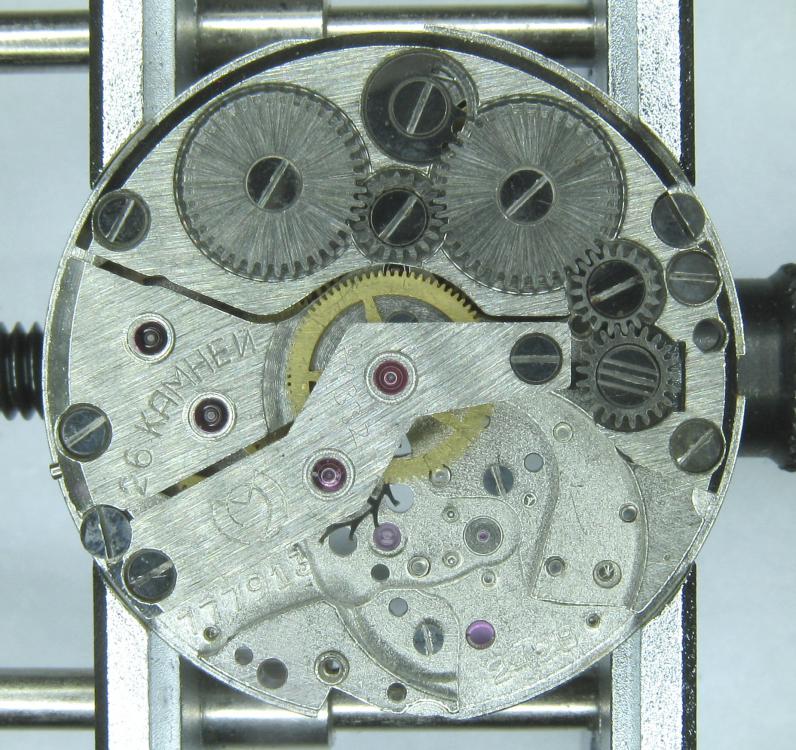
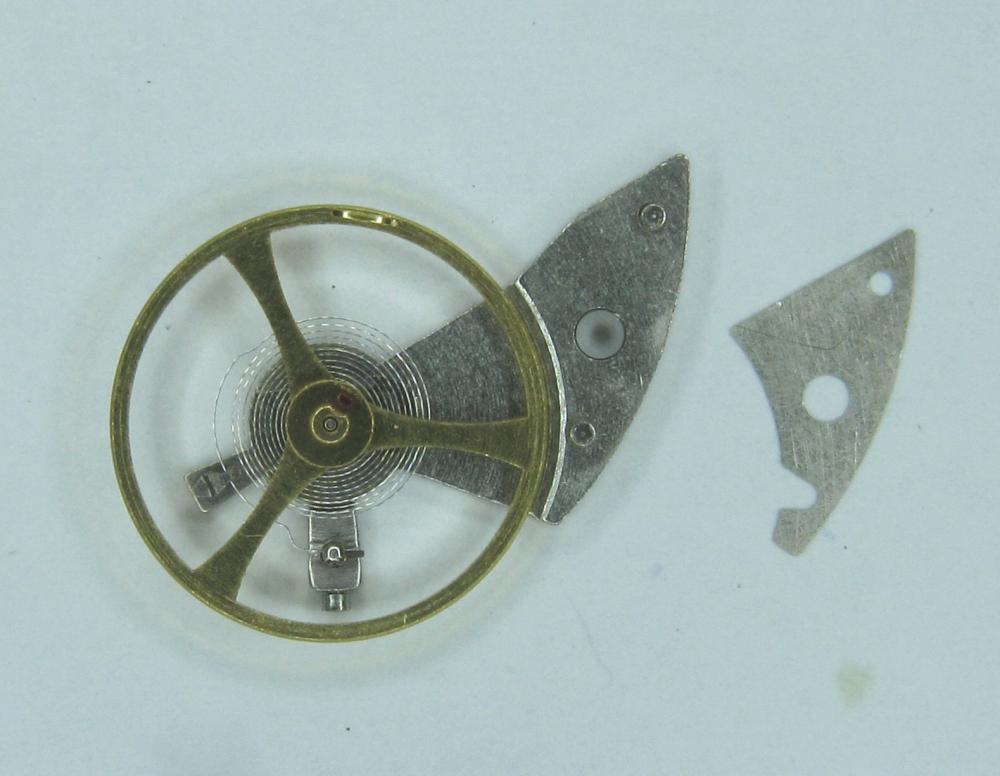
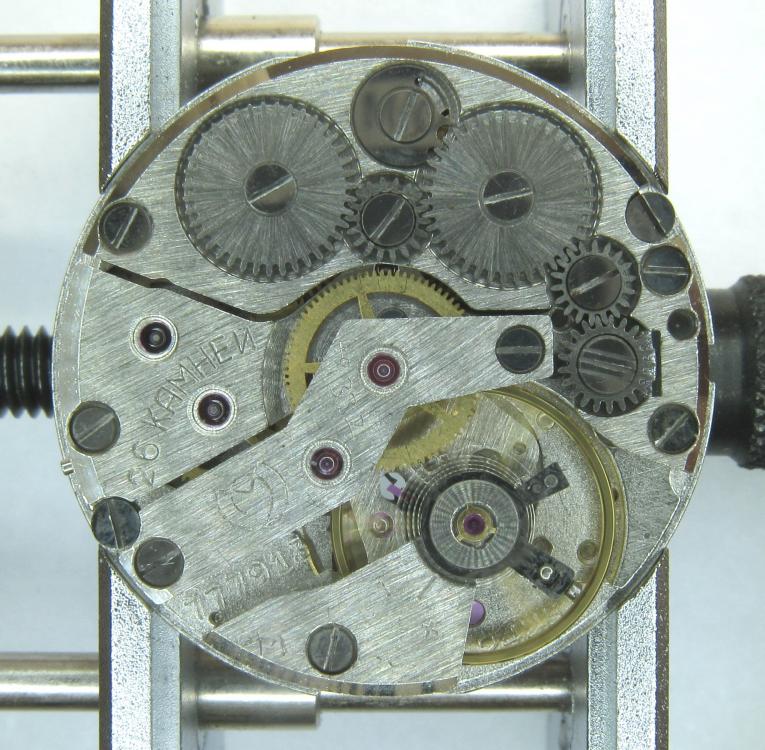
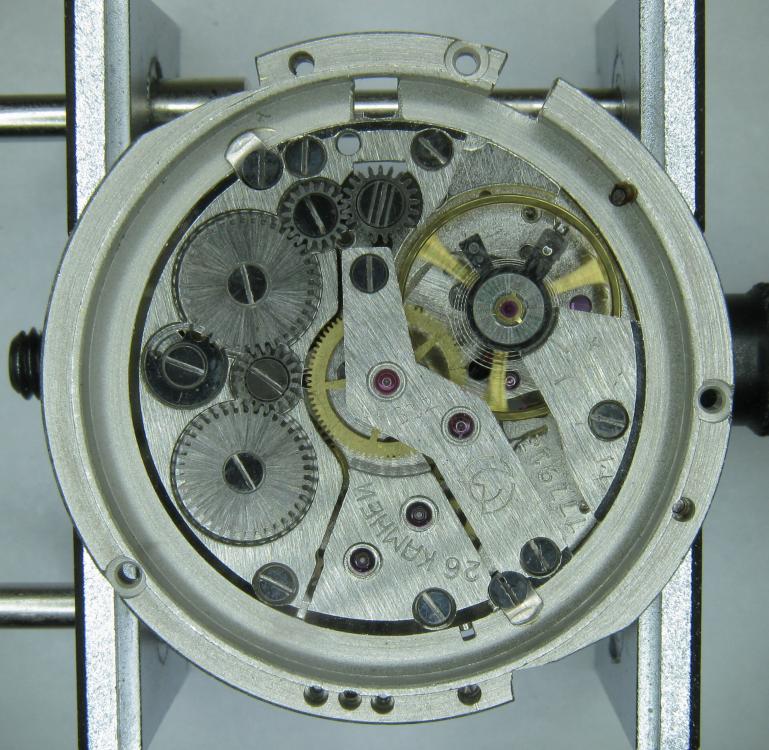
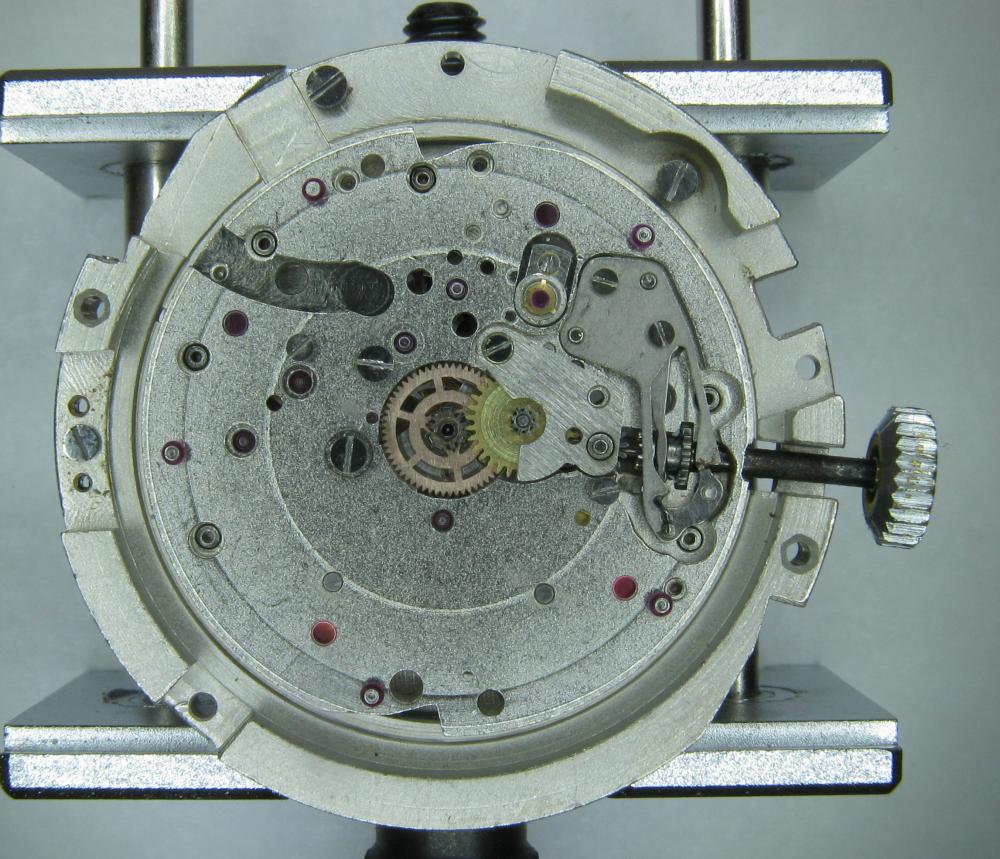
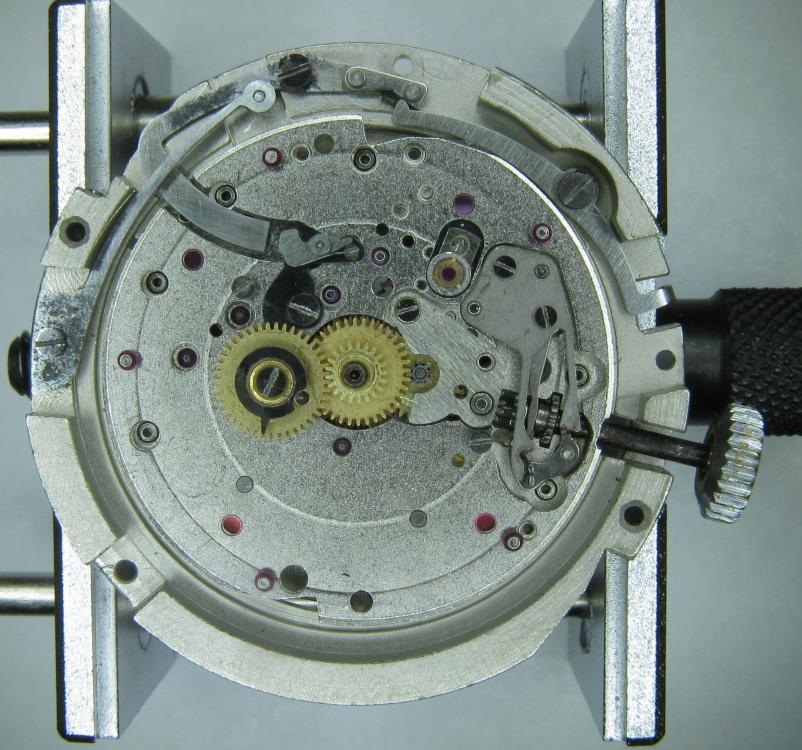
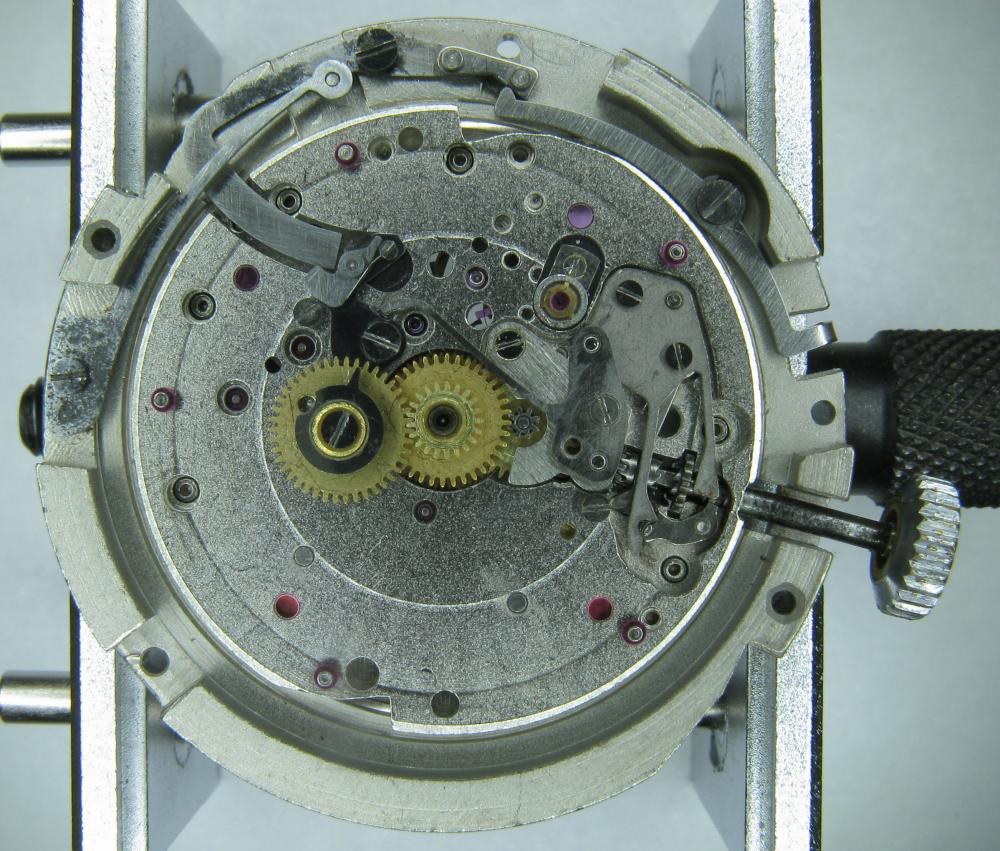
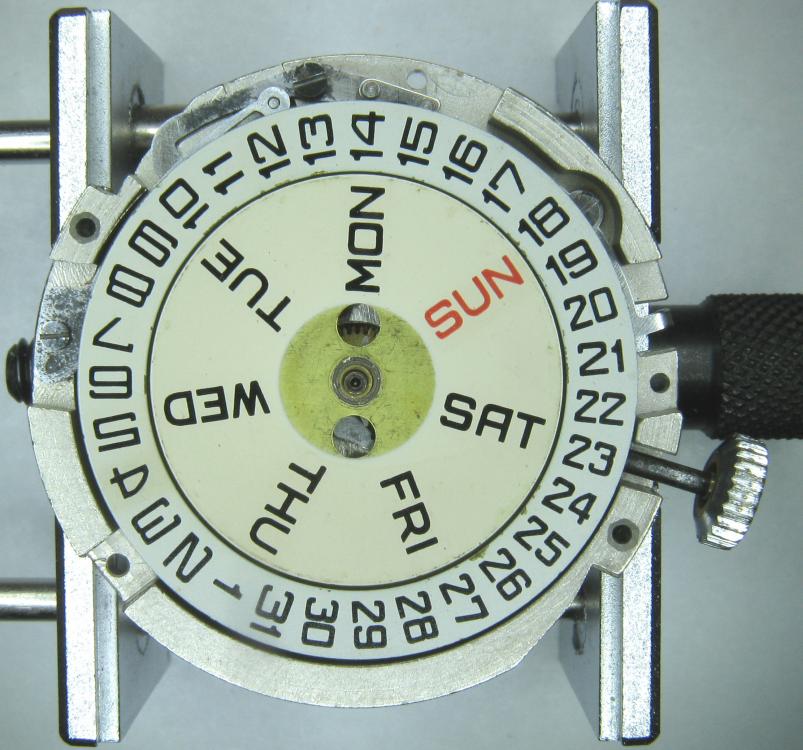
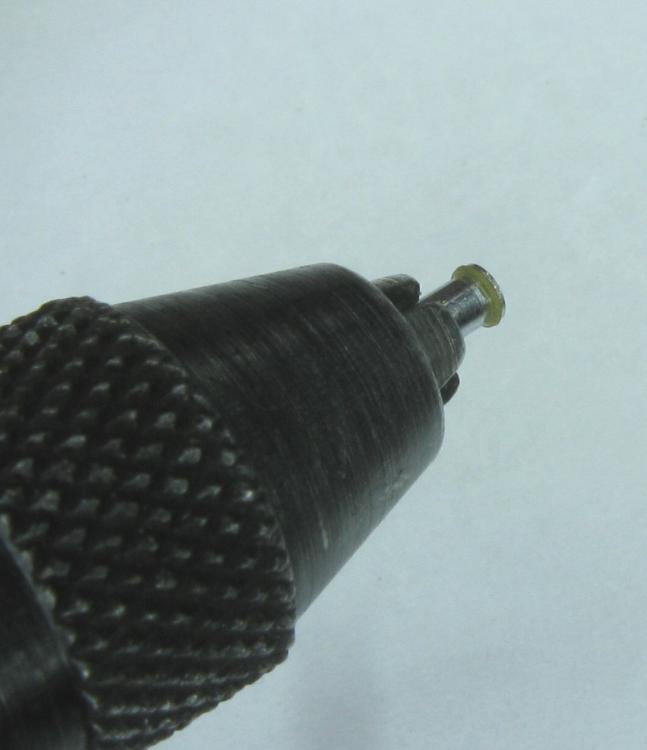
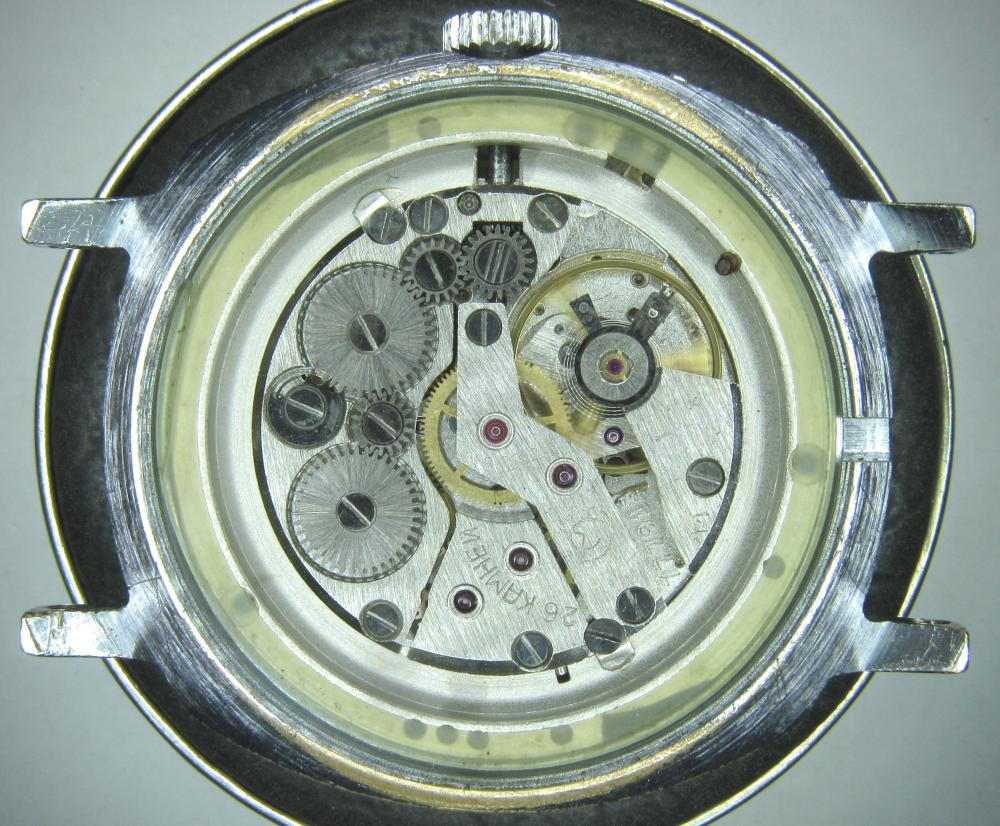
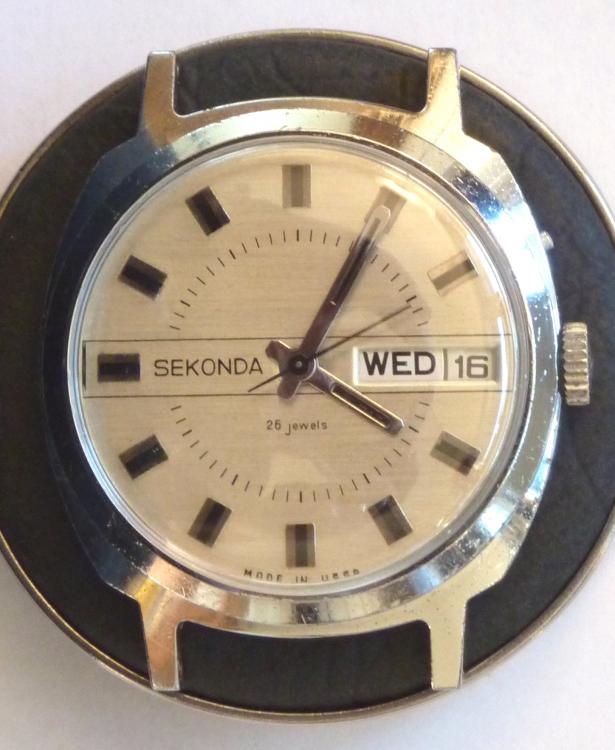
I haven't done one of these for a while and as this is my 1000th post I thought I would do something a little less ordinary. As the title says it's one of those crazy Russians, a USSR Sekonda from the 70's sporting a Slava 2428 in all its quirky glory. This one came to me as a non-runner and a preliminary investigation turned up a broken balance pivot so it went into the "to do" box until I could source a replacement, which it turned out I had all along from another watch previously scavenged for parts a while ago, as I discovered during a recent tidy up. So here goes...... Looking a bit sad, a grubby face and a bit of corrosion on the hands, and as already mentioned, not running. Also the date corrector pusher which is above the crown is jammed in. It's obviously seen a bit of wear in its time as the plating to the rear of the case has started to go through. Inside doesn't look too bad. Dirty and dry for sure but I've seen worse. The stem however suggests that things may not be so good further in. Uncased and the dial doesn't look so bad. The hands may need a bit of a spruce up. Oh dear... with the dial off the hint that the stem was giving earlier becomes a grim reality and the reason behind the frozen date corrector is clear. Heavy rust around parts of the date quick set mechanics has seized everything solid. With the day and date wheels out of the way and safely bagged the full extent of the problem can be seen, and maybe it's not quite so bad after all so long as none of the screws shear off as I try to undo them. Success.... all the screws out and nothing stripped. The rusty parts have been carefully rubbed down and are now enjoying a strong cup of tea.....to stabilise the remaining rust deposits. And here is the first quirky bit, all of the date quick set mechanics are mounted on the movement ring, not the movement itself. Strange but true! The movement now flipped, balance cock and barrel bridged removed, and the second and third deviations from the everyday run of the mill design philosophy become apparent; that curiously asymmetric pallet fork, and those tandem main spring barrels. The first of the going train bridges removed .... ... and with the second train bridge and wheels removed, the replacement balance is installed without jewels ready for a spin in the Elma. And here we have all the bits nice and shiny out of the cleaner, with as much of the rust issue dealt with as possible. Is it me or are there a hell of a lot of wheels in this little baby? Both main springs are in good shape so they are greased and rewound into their respective barrels. I don't know if it was strictly necessary but I did take the precaution of keeping the barrels, lids, and arbors together as sets during the cleaning process so that the same bits went back together as came apart. Balance jewels inspected, lubricated, and reinstalled. The hair spring is pleasingly flat, parallel to the balance, and concentric, and once set in motion the balance doesn't seem to want to stop. A good sign... In goes the first set of train wheels along with the idler that couples the twin barrels together. With the first train bridge in place the escape wheel and centre seconds wheel are installed. Second train bridge goes back on followed by the tandem barrels Barrel bridge with all of those amazing coupling wheels to keep everything turning the right way all the way back to the crown wheel and its clearly marked lefty screw. At this point all of the pivots have been oiled and a quick test of the free running of the train is done. A couple of clicks on the ratchet wheel and the escape wheel spins nicely down and then back with just a little recoil. After that the pallet fork goes back in and the pallet stones are lubricated. Typical of many Russian watch movements, the balance cock has a shim. Whether or not these were available in different thicknesses so that end shake could be adjusted I have no idea. I've never had a problem swapping them between watches though which suggests that they are all the same thickness. Balance back in and that lovely moment when it starts to beat again. And then back into its big metal spacer ring come date quick set extension. Time to rebuild the dial side. It's a bit cleaner now. Keyless works back in place. Motion works reinstalled. Incidentally, as can be seen here 5 of the 26 jewels are vertical rollers for the date wheel and 4 are set into the main plate for the date wheel to ride over. Cynical marketing ploy anyone?? The date corrector mechanics are reinstated into the movement ring, all now free running. Most of the rust damage cleaned up reasonably well but there is significant pitting at one end of the spring. If I ever find a donor I will replace the worst affected parts but for now they work and the rust has been stopped. Calender wheels back in place. Date wheel back in place and the day wheel jumper and spring installed. Day wheel drops into place. Dial and hand back on following a clean up and a little fresh black paint in the hands where it was beginning to crack. This is the date corrector pusher and is I suspect the origin for the water ingress that caused the rust damage. It has a little neoprene seal on its back face so that the spring tension should seal it against the inside of the case. It was bone dry and all it would have taken is a little dirt stopping the pusher from closing properly and its an open invite for any contamination that comes along. Now cleaned and re-lubricated with silicon grease it will hopefully keep the water out. Re-cased and ticking away nicely. With the exception of the date corrector pusher issue these are well designed cases. Although they make no claim to water resistance they do use a design similar to that used in the Vostok Amphibia cases, with a thick gasket, a steel back that drops into place, and a threaded clamping ring to hold it all together. Looking a lot happier than when this all started. You can now see the date corrector pusher protruding from the side of the case above the crown so it is definitely sealing against the inside of the case. A new crystal allows the cleaned up dial and hands to look their best. And there is something about the dial layout and hands that just seems so Russian to me. I really like it. And of course the proof of the pudding.... This is dial down. DU was almost the same, only difference was amplitude which fell to 298. The vertical positions showed a tiny bit of beat error, up to 0.4ms, amplitude down to around 275, and slight rate errors, coming in at -5 s/d at one extreme and +3 s/d at the other, quite a respectable result. Maybe those crazy Russians aren't quite so crazy as they first appear. The little design quirks here all add up to a nice piece of engineering. The train wheel layout, and the asymmetrical pallet fork allow for a comparatively large balance wheel for this size movement (thinking about it without the date quick set and the extension ring). The use of 2 main springs running in tandem allows for a more even torque delivery as the springs wind down which should help to reduce isochronism errors, while also making good use of the available space. It all actually makes quite good sense in a kind of lateral thinking sort of a way. If you should be tempted to go for one of these then I would suggest that the earlier USSR ones are the better ones to go for. The later "Made In Russia" versions at some point were updated to a 21600 train, but weren't so well finished, and that date corrector/spacer ring became plastic with the mechanics riveted on, presumably to reduce costs. Bit of a shame if you ask me. If you made it this far then I guess I haven't bored you to sleep. Thanks for reading.


 6 points
 -
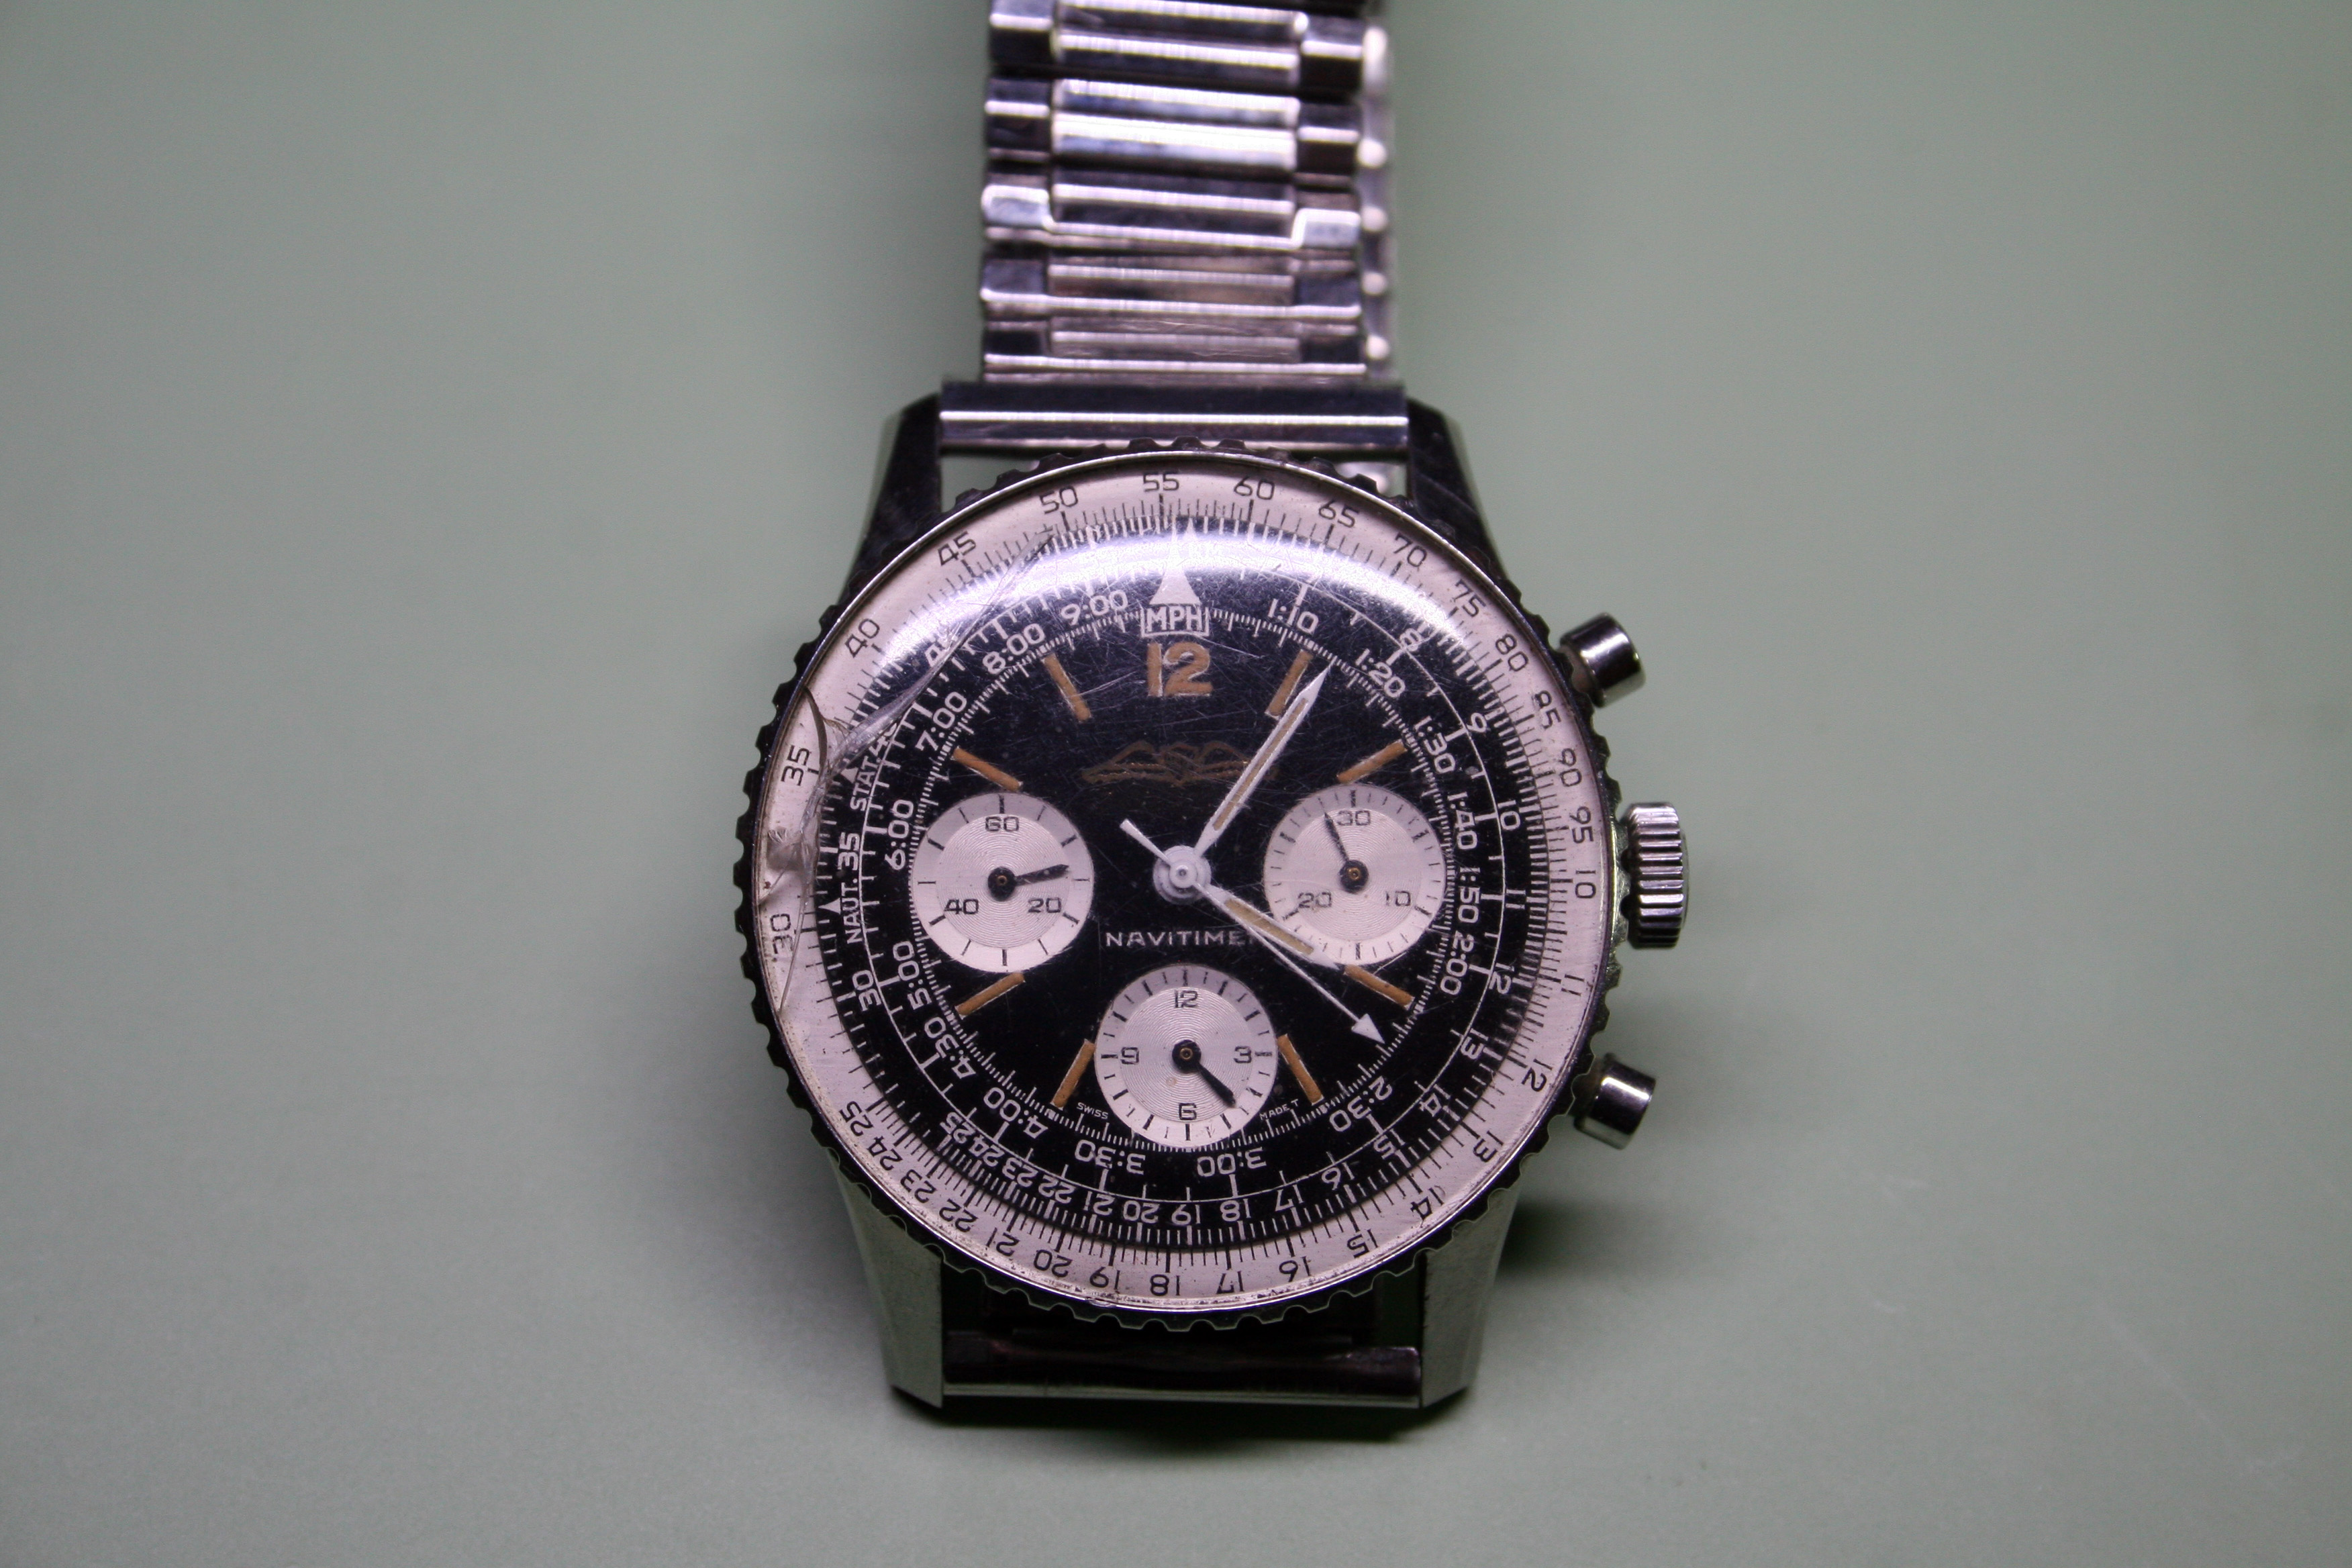
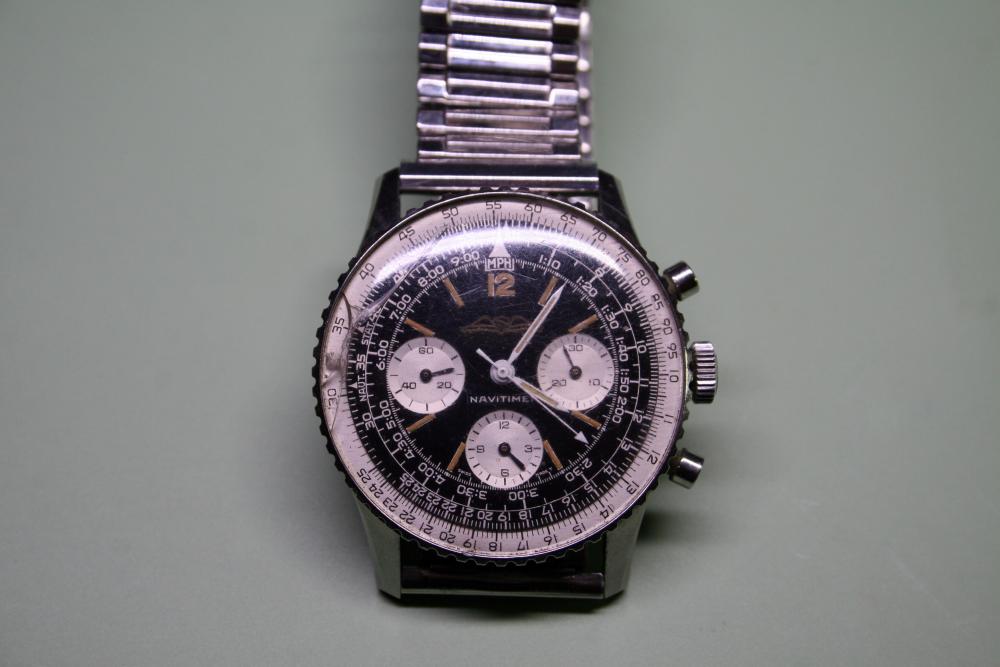
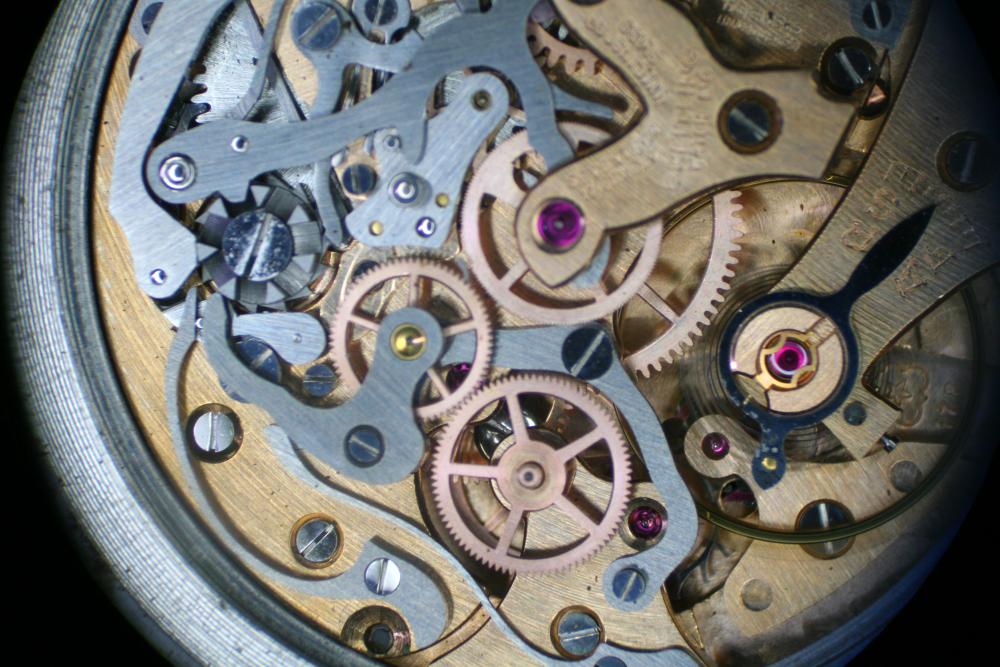
Sometimes you get lucky and for me, it looks like this is one of those times. Here I have a vintage Navitimer that I picked up for a fair price but also with a fair bit of risk involved as it was bought online and in non-working order. Under inspection following receipt I discovered that dial wasn't seated properly and pushers were jammed. Things were indeed looking bad. Imagine my relief upon seeing this under the microscope. That would be a case screw hiding under the fourth wheel! Unfortunately it's sheared off in the case, but the good news is that the movement started ticking merrily away once the screw was extracted and with the works unjammed the pushers are operating properly again. With luck, a simple cleaning, alum bath, and a new case screw will be all this one needs. (knocking on wood)
 5 points
 -
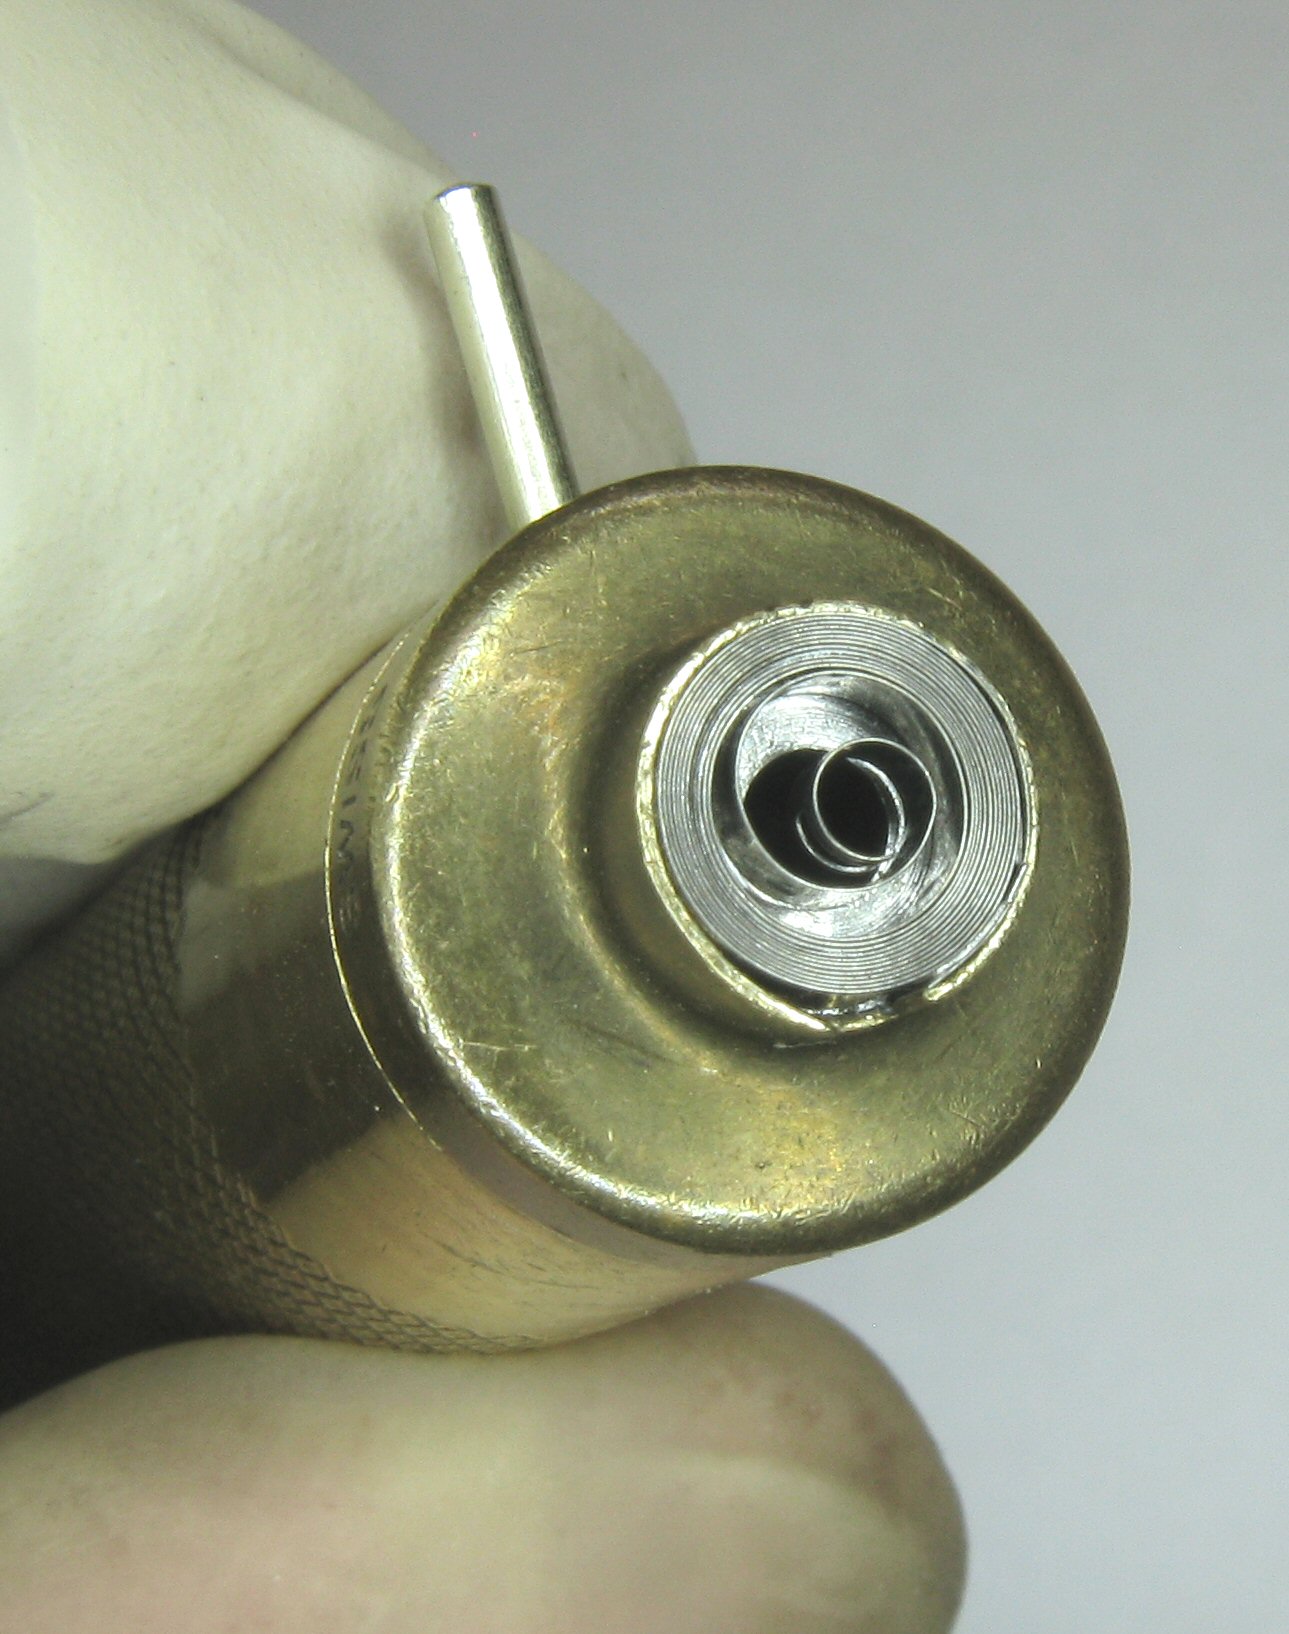
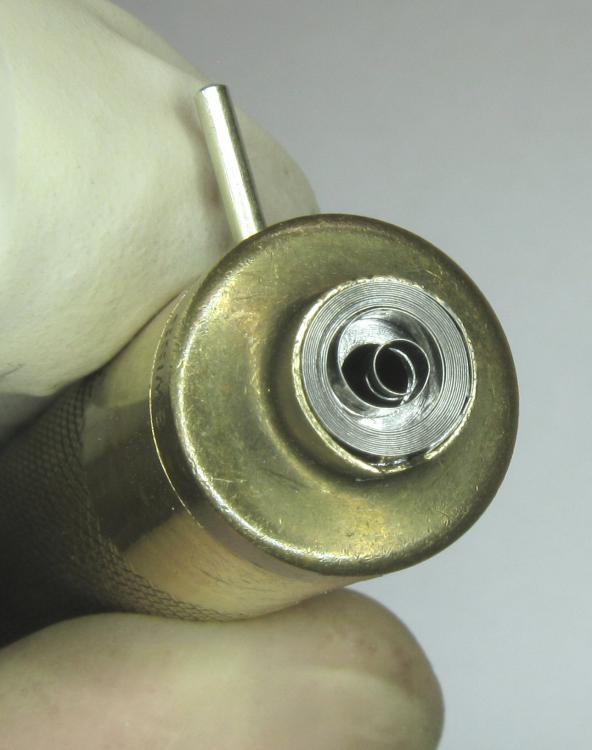
Well here's where I'm at right now. The following is with a donor crown that also had a faulty clutch, and is one of those throwaway types of crown without the unscrew spring/stem chamber. I decided to attack this chamber from the other end, the part that fits to the inside of the actual crown. First to separate the clutch chamber. DSC07792 by Micky Aldridge, on Flickr Then, carefully filing down the rear end, I exposed the internal spring. DSC07795 by Micky Aldridge, on Flickr Then with the whole assembly taken apart... DSC07793 by Micky Aldridge, on Flickr I then hunted for a suitable piece of round shaft metal to use as a plug to push the spring into the shaft so the spring is under tension, but not too much as to disable the crowns clutch functionality. Into my staking set it goes.. DSC07796 by Micky Aldridge, on Flickr I found that a fixed bracelet link shaft was a suitable size to use, so matched a stake, and paired everything up.. DSC07797 by Micky Aldridge, on Flickr Perfect, so then I mixed a tiny amount of JB Weld, and applied to the lower part of that bracelet fixed shaft, then used my blower to blow it down inside the clutch chamber. Now the wait for it to cure, and then if all good, i will refit the clutch shaft to the crown also using JB weld. Fingers crossed, if this works, I know how to repair crown clutches on those crowns which would normally be thrown away2 points
-
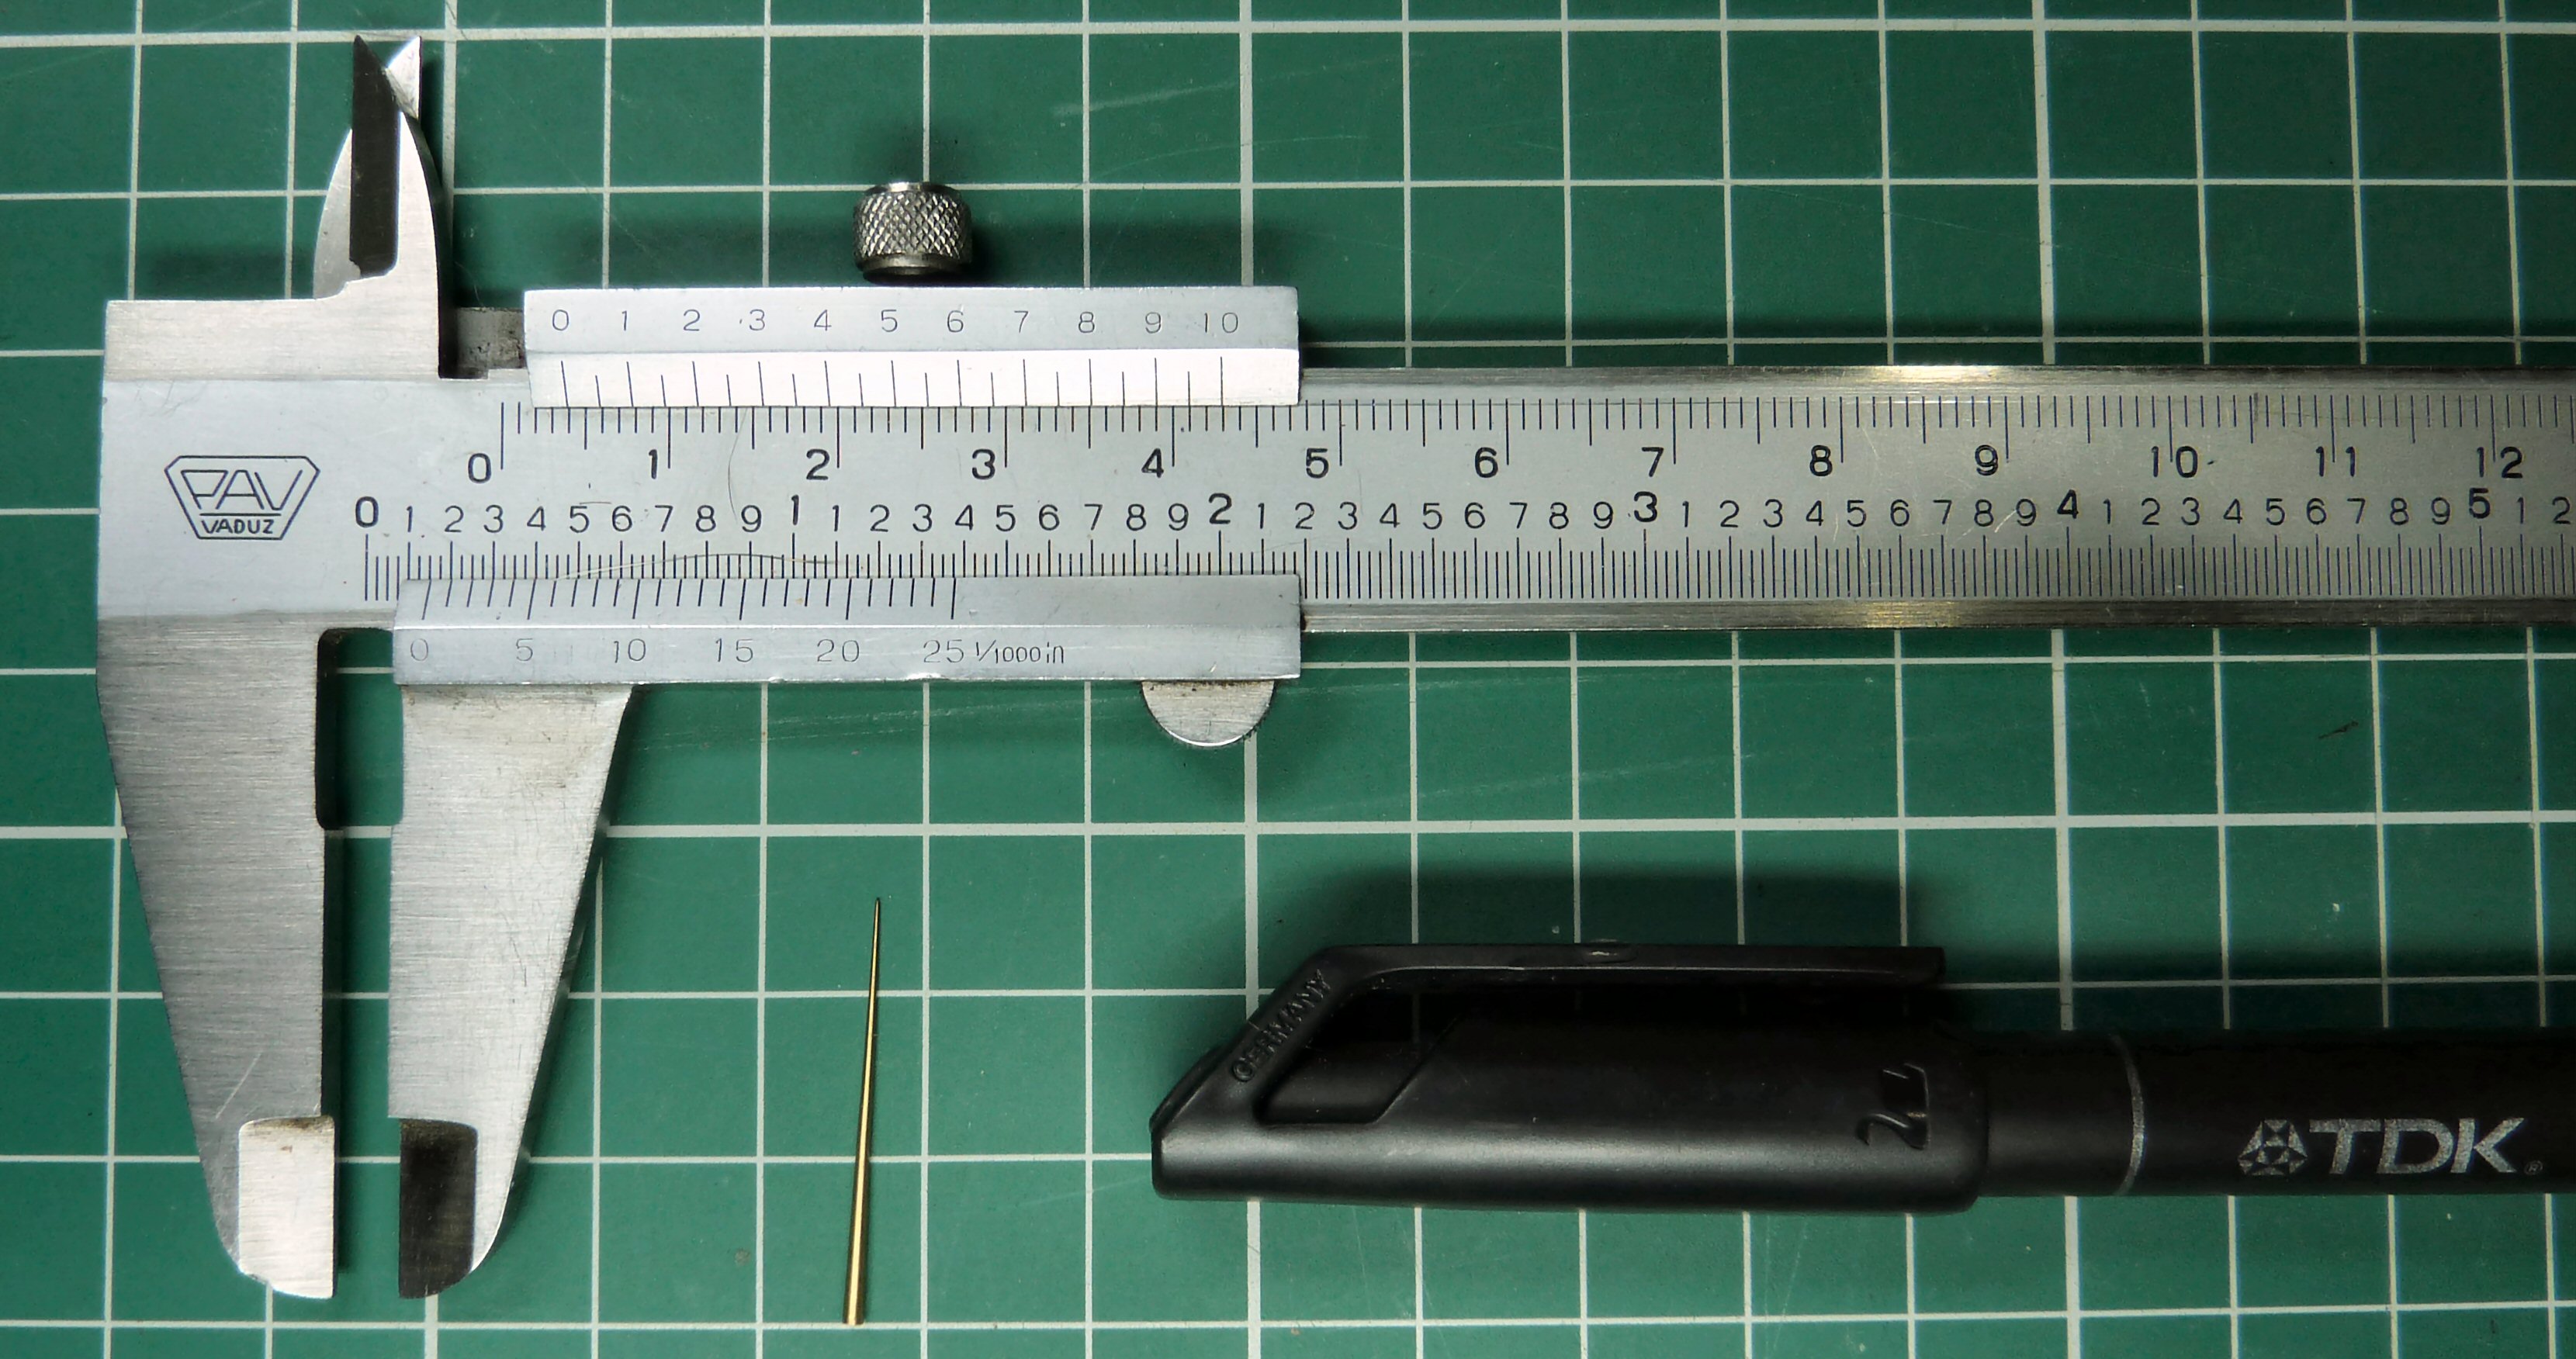
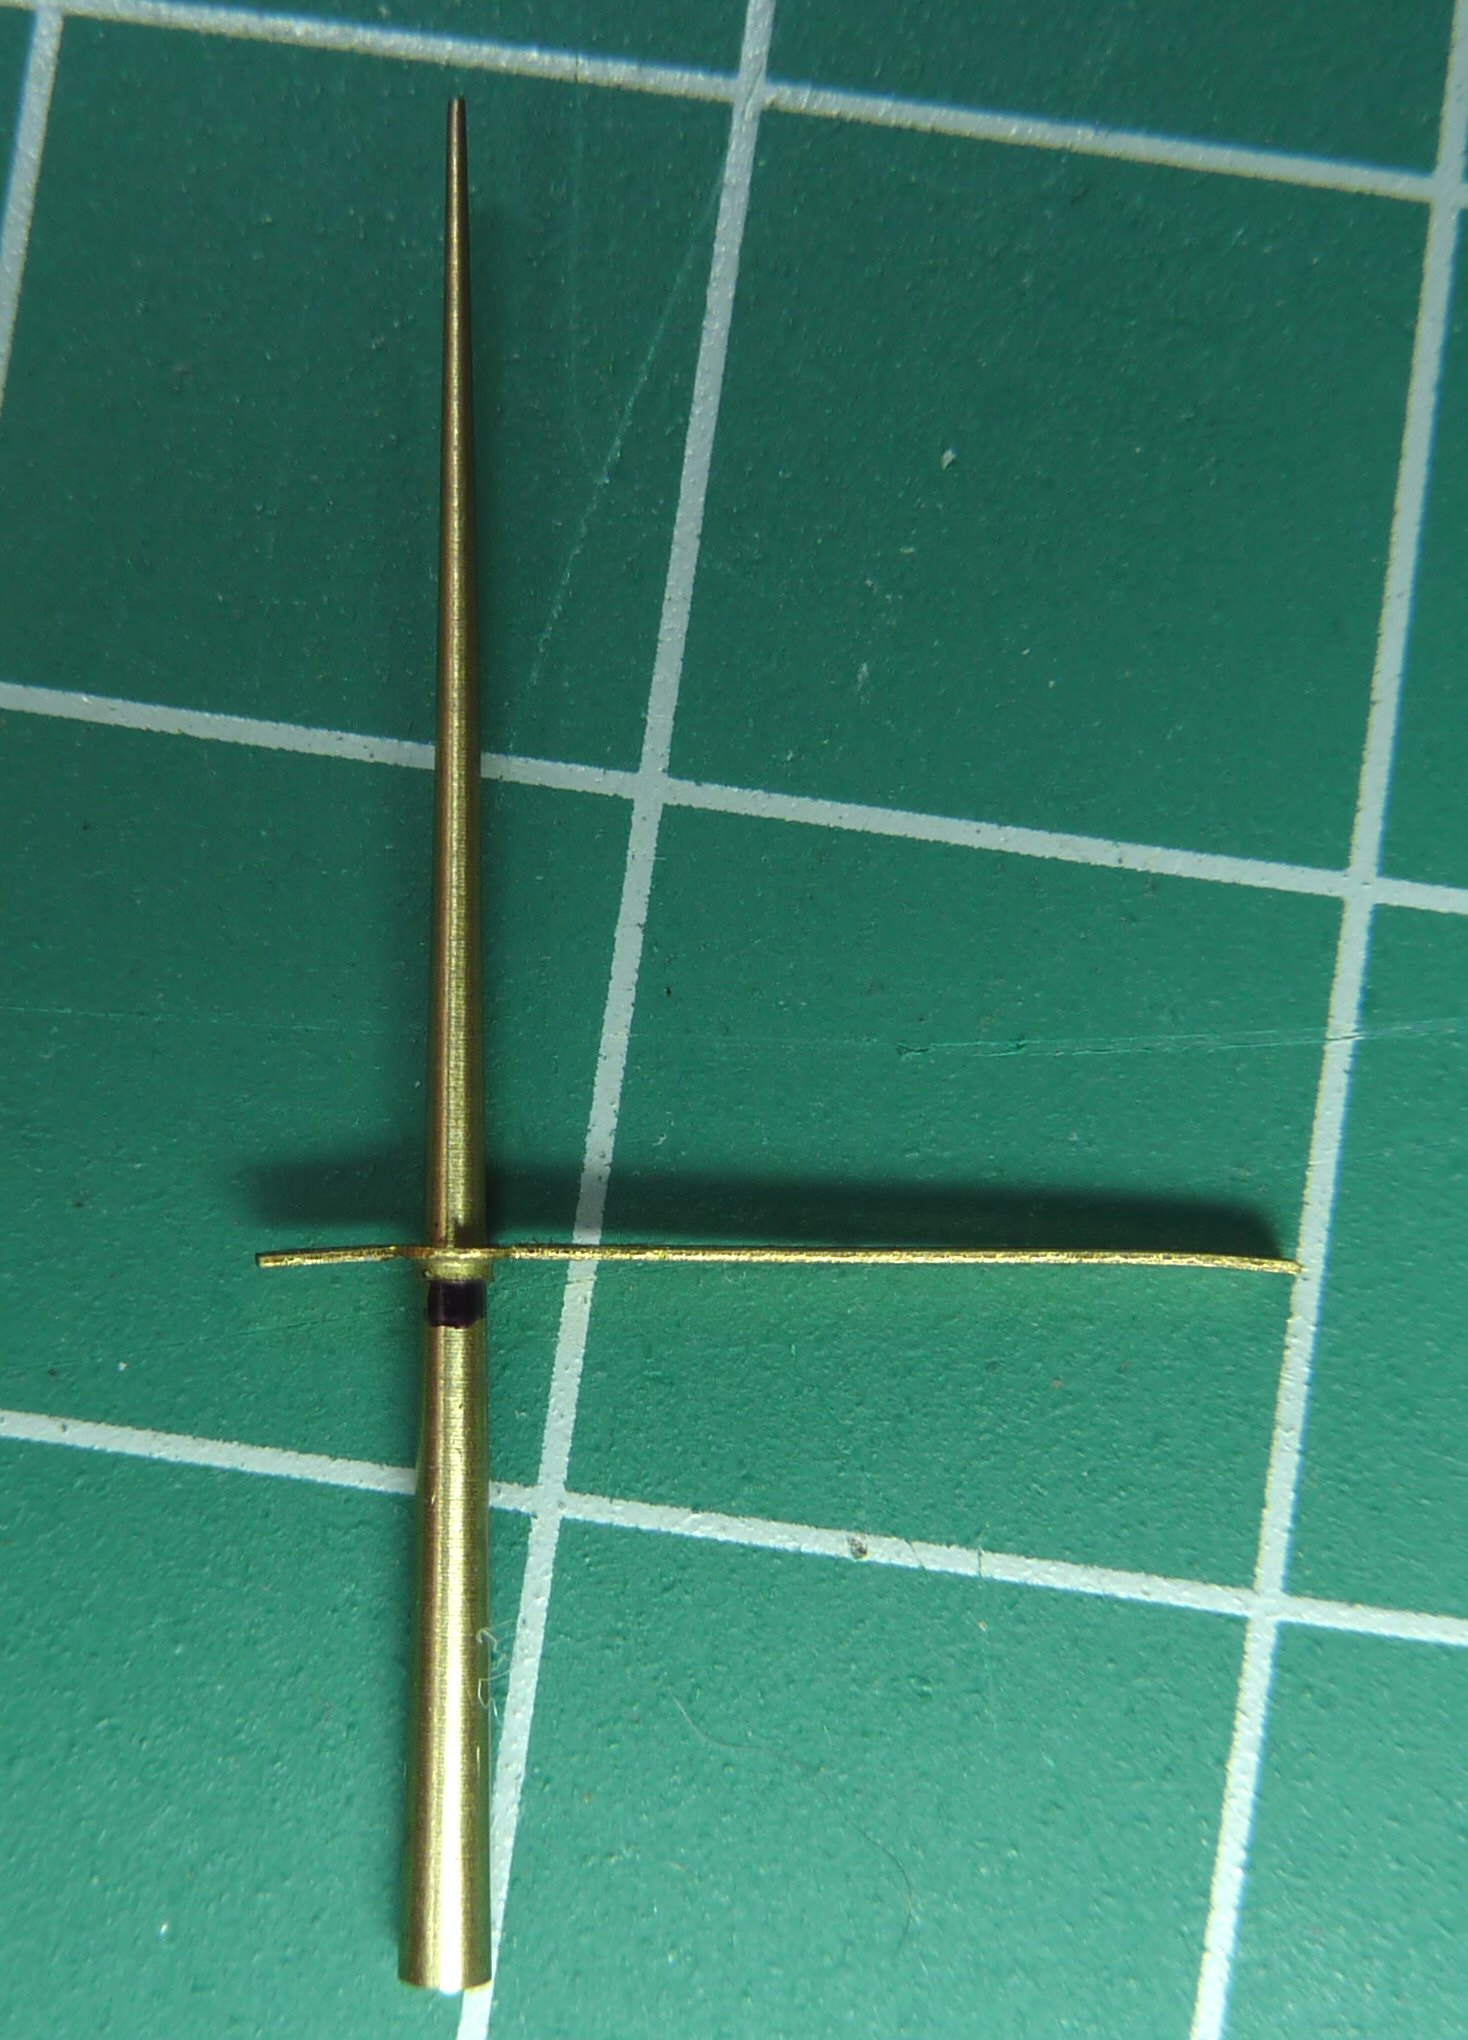
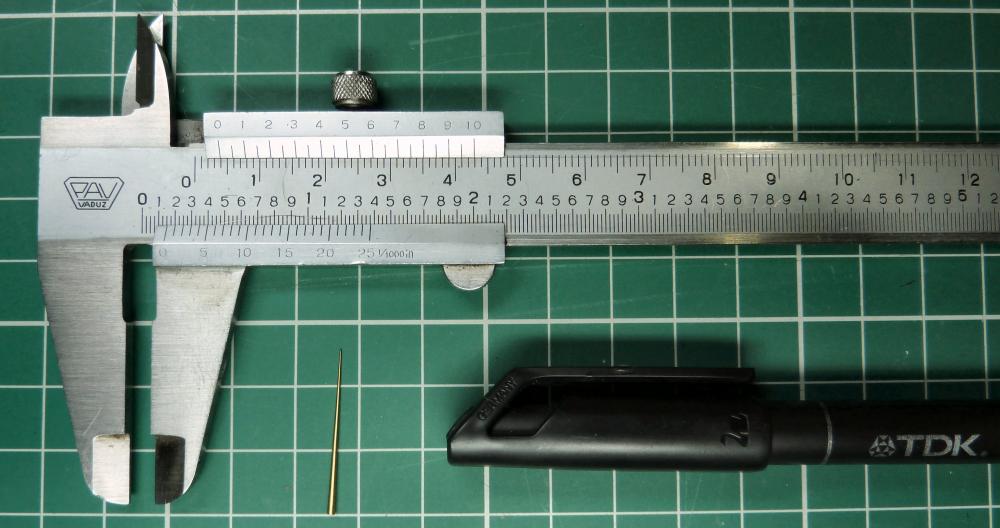
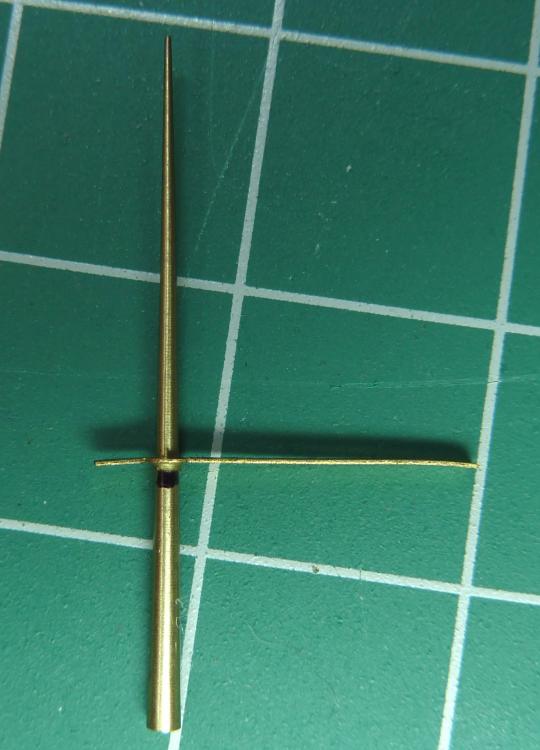
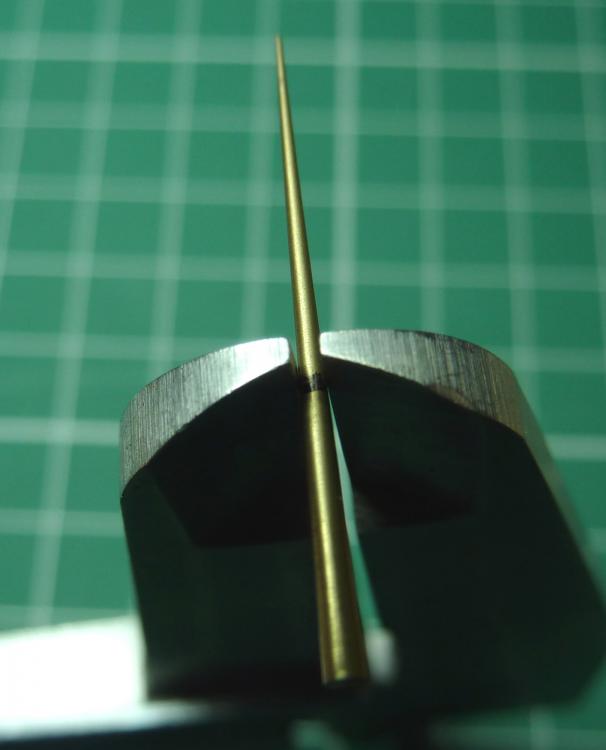
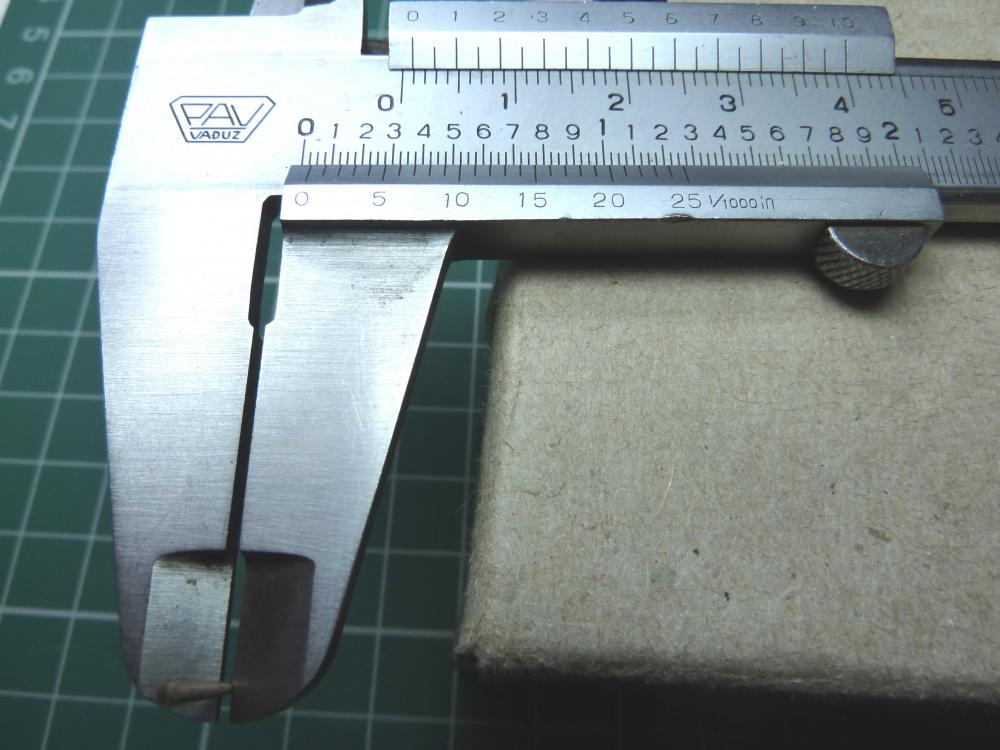
I have looked covetously at those Bergeon hand gauges on many an occasion, even put in the cheeky bid only to loose out to someone with better finances, but the truth is I simply can't justify the cost. Measuring the inside diameter of hands is something that I don't often need to do but when I do need to I use the poor man's approach :-) A brass taper pin, a CD pen, and a vernier caliper. The taper pins can be obtained in a variety of sizes from clock supply houses for not very much and are extremely useful in all sorts of situations. This one goes down to 0.2mm which is fine for most hour and minute hands; seconds hands may require a slightly smaller pin. The hand slides down the pin until it stops, and the pin is marked with the CD pen. This is a minute hand for an ETA 2783. With the hand removed the pin is measured at the pen mark using the vernier caliper. In this case 0.9mm. As I said, I rarely need to do this but when I do it's when I am sorting through my collection of salvaged hands to try and find one to fit a particular job, in which case I actually adopt a slightly different approach. I measure the post that I need to find a hand to fit. Then using the caliper I locate the point on the taper pin that corresponds to the required diameter and mark it with the pen. I then simply drop the potential candidates onto the pin and see how close they get to the mark. If they are too big then they will drop to below the mark and are rejected. If they stop at the mark then they are the required size. If they stop above the mark then depending on how much too small they are they are either rejected or broached out until they fit. Simples
 2 points
 -
Recently, I took a chance and purchased a 'non working' Omega 1342 wrist watch off Ebay uk. When it arrived, I quickly learnt that the battery (388) is no longer available and a 329 battery, along with a separate plastic gromit around it to fill the extra space that the smaller battery doesn't need. Whilst waiting for those items to arrive, I stripped the watch; cleaned it and re assembled/oiled it, ready for the new battery etc. With the new battery and gromit fitted, the watch refused to work. Very soon I discovered that the (Yes, you've guessed it) stepper motor was U/S It took me a while to source a replacement motor, but I did find one.........in Sweden........and at a very high price. A week later, it duly arrived and I eagerly installed it. To my dismay..........no pulses to the stepper motor and something that I should have checked before sending off for the new one. So, it means that the module board is also faulty and, aha, I know where there is one! See if you can guess where. Yes, that's correct and 10/10, good ol' Sweden..............once again! Now, the thing is this. With both of these items being faulty, what are the chances that they MUST have both failed at exactly the same moment in time, because once one fails, the other one won't be able to run to its demise! Very strange, that............. spooky! Or, is it possible that someone put both of those faulty parts in the watch to sell it as 'non working' and auction it off to some mug. (That'll be me!) No, people aren't as devious as that............are they? Surely not! Oh, by the way, there's no strap on this watch either and it needs an Omega 9.3 - 23mm S/S bracelet 1181 215 No 32. Aha! I know where there is one! Wrong! Not in Sweden.............in Bury St Edmonds, UK. So, all in all, a VERY expensive learning curve. As I write, I am waiting for the module to arrive. Once everything is in place, I'll report back; with pictures. If this story has aroused any sympathy within you, you can always send cash donations to me.................in my padded cell at the local nut house! Watch this space! Len.1 point
-
I have a few of those in line, but I wanted to destroy first the ones I would likely not wear :-)1 point
-
Hi all, It has been some time, but I wanted to provide an update on my incabloc adventures. I finally was able to successfully fit a new spring onto the block. As I had suspected, a staking set was what I needed (and it took some time, but I sourced one at a reasonable price on ebay). Took the bloc out, refitted the spring, secured it (without the jewel) and used a larger stake to fit it back in (with support from the other side to ensure it is flush) without hitting on the spring. After oiling the incabloc jewels on both ends, the balance started finally moving with a reasonable amplitude and the movement continued ticking merrily throughout the night. So that's a huge success for me, as it is the first movement that I took apart that I was able to reassemble in a working fashion :-P Next step will be to disassemble again and then oil all the required spots (I assembled it dry for now, safe for the balance jewels), then assess performance. Greetings, Olivier1 point
-
Woah! I love the racing holes....and that green contrast stitching is outstanding, JC1 point
-
My Flightmaster wearing its newly arrived bespoke strap all the way from Indonesia1 point
-
Please take it to a watchmaker for a service. If you manage to regulate it without breaking it, it will still need a service...1 point
-
And then it will be a happy ending with a very nice watch ticking...errrr, pulsing, on your wrist!1 point
-
i'll stay broke and keep breathing,,,,1 point
-
How about now!! Nothing like striking while the iron is hot...1 point
-
Welcome to this friendly forum. You have certainly been through a hell of a lot. I'm a bit older then you and my eyes aren't to good due to diabetes. I like to help out here which helps me I'm more a clock person then watches but have a very good knowledge of both. Looking forward to your input.1 point
-
Welcome Rob! It is a great story and your angel is awesome too! You are the kind of people, kind and helpful, that we like here! Good people! And as you can see, that spirit abounds in our site. So, enjoy and looking forward to more! Cheers, Bob PS. By the way, where in Florida are you? If it is not too much to ask. Don't feel that you have to answer that or any questions at all though. I'm just curious being in Miami, Florida for the moment...and past 20+ years.1 point
-
Welcome captain yappy its good to have someone with your experience here, at some time while i was reading your post thought i was watching hollywood movie, you are great writer . Its marvelous you are back at bench after all that bad things happened to you, looking forward watching your posts. Wish you the best from now on in your life1 point
-
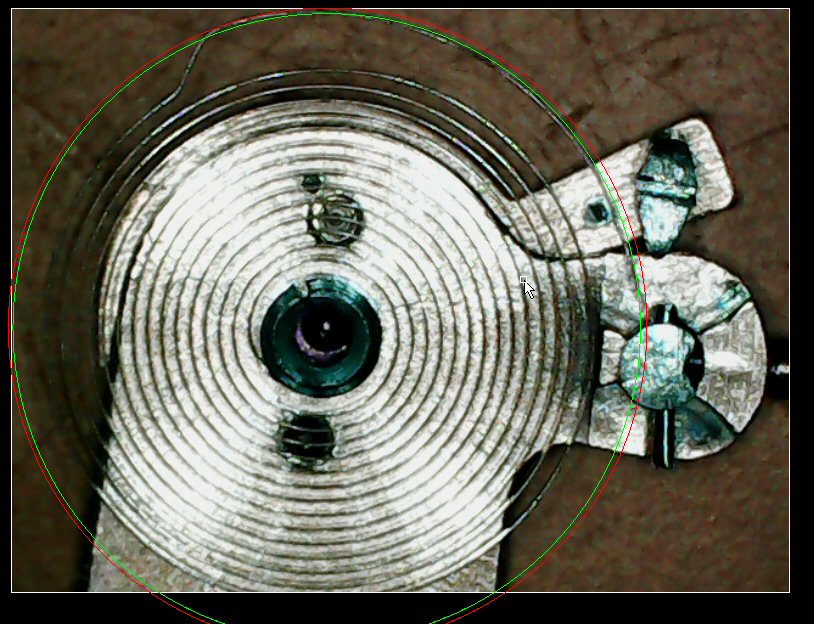
Just a thought but I always get suspicious about the point the HS exits the stud. I have sorted out more out of flat and off centre hair springs by tweaking at the stud than anywhere else and I reckon it's because it's the most vulnerable point if the balance cock is handled carelessly or if there is a struggle with the tweezers trying to remove the stud from the mounting. Looking at your pics it looks to me like the terminal curve spacing (to the next coil) is less at the stud than at the dog leg. The difference between the red and green circles. If you slacken the bends at the dog leg it will reduce the spacing at the dog leg, and if you slacken the bends at and just after the stud it will increase the spacing at the stud; in either case you will need to gently reprofile the arc between the two points. Also, it looks as though both approaches should be possible without adversely displacing the collet from the balance pivot, and could even be used to improve this alignment. What we can't see though is the where the central point between the inner curb pin and the inside of the boot is. As this is the point you need the hair spring to be at, without knowing where that point is it is impossible to say which of the two adjustments is correct, or if you need to do a bit of both, which I suspect is the correct answer. If you measure the distance between the centre of the balance jewel and the inside of the inner curb pin and carefully draw a circle on a piece of paper with that diameter using a pair of compasses. Place this template onto a piece of cork board and pin the hair spring to it so that the pin goes into the centre of the circle you will be able to use the circle as a template for the terminal curve. You do need to ensure that the collet is held firmly on the centre of the circle.
 1 point
 -
I think you need to take the keyless work out and check each part, look for wear and make sure each part works as it should. When you have the keyless work out, Just put the stem in and see if it sits well and doesn't move from side to side in the hole, Is there any wear marks in the plates? Is the stem in good condition, no signs of wear, right screws are used, no screw protruding or fouling the keyless work. Sorry to say I don't think there's any other way in sorting this apart from removing the keyless work and starting again.1 point
-
The small part is nothing to do with the rotor mech it looks like a roller table jewel and half a staff. Your last picture is the one i was interested in the pawl jewel fits over that little post now remove the bearing housing 3 screws so you can see the pawl underneath when you've screwed the bridge down after putting the pawl and other wheel in place place the bearing housing back on top rotating it until the post engages with the pawl jewel hole then rotate until the 3 screw holes ate aligned and bobs your uncle.1 point
-
Is there a post for the jewel to sit on on the bridge I can't tell on your photos1 point
-
Hi, just thought there is an excellent video of Marks that will give you an indication of what you are dealing with. https://www.youtube.com/watch?v=cfVNqRgpY5A It really is worth watching them all. Good Luck1 point