Leaderboard


Popular Content
Showing content with the highest reputation on 08/15/16 in Posts
-
Not if you compare it with one of these!
 3 points
 -
Sorry here is the link.3 points
-
Must have been drunk when i wrote this I can't even understand my own text?2 points
-
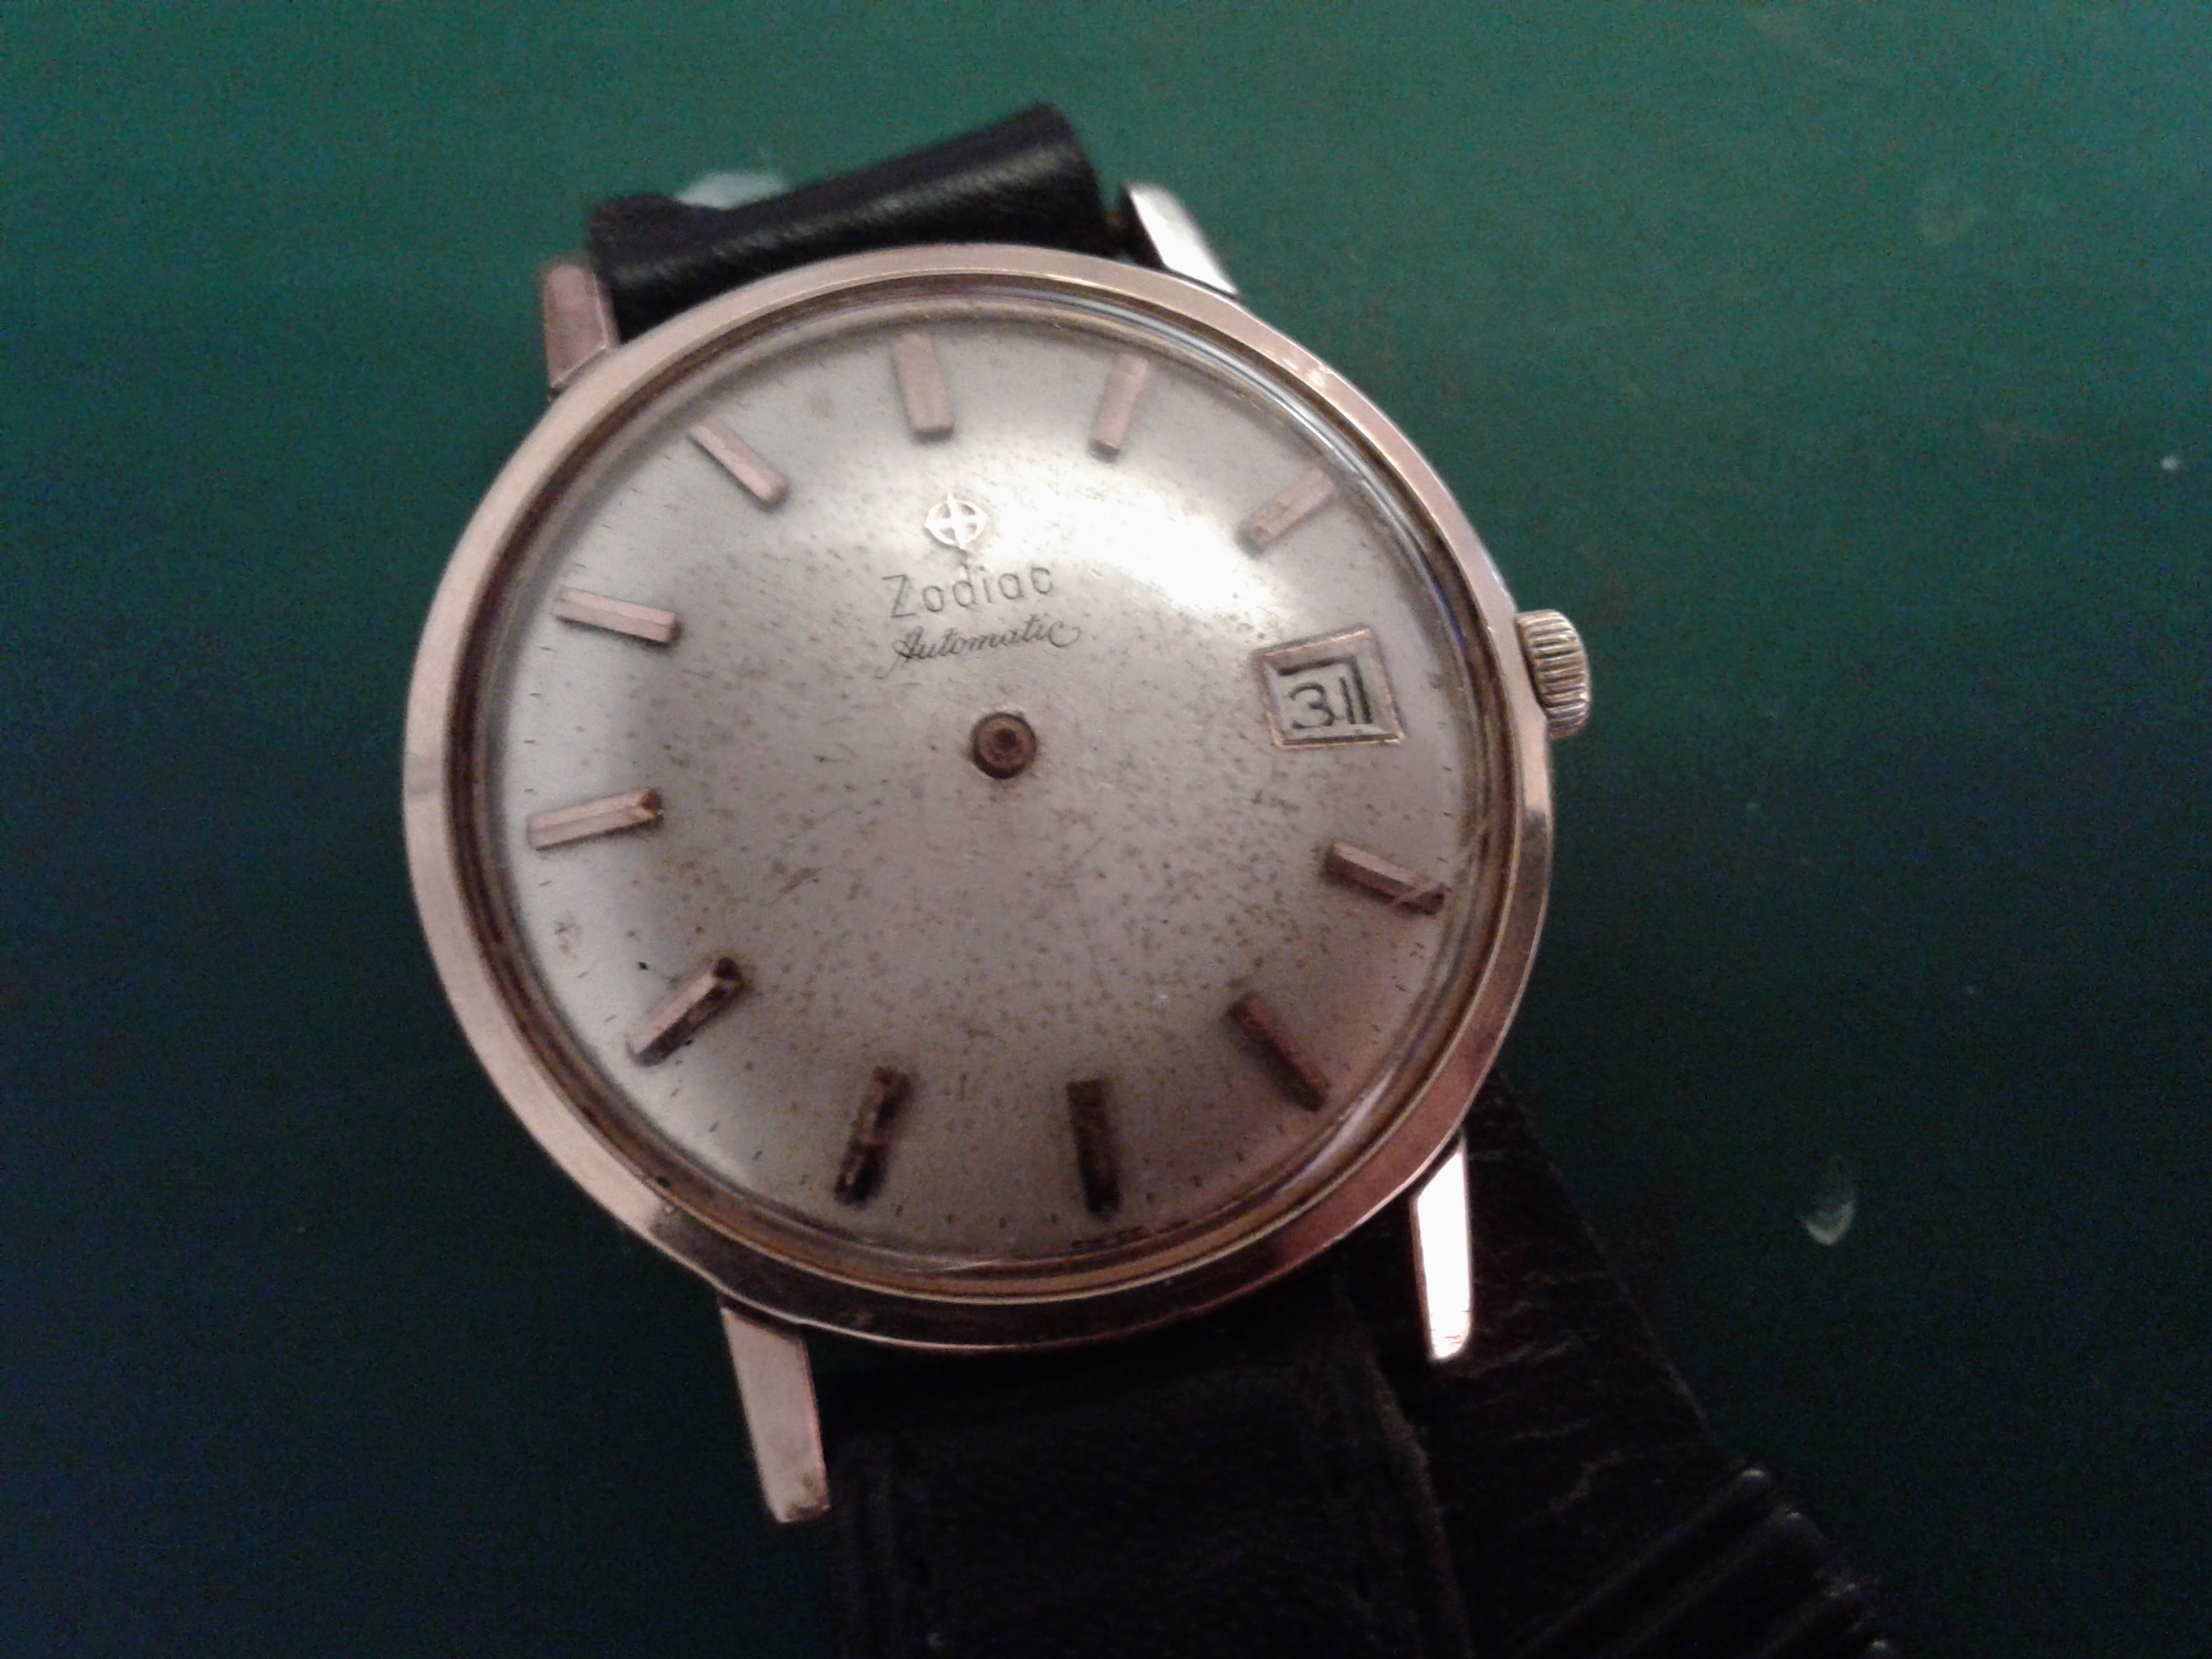
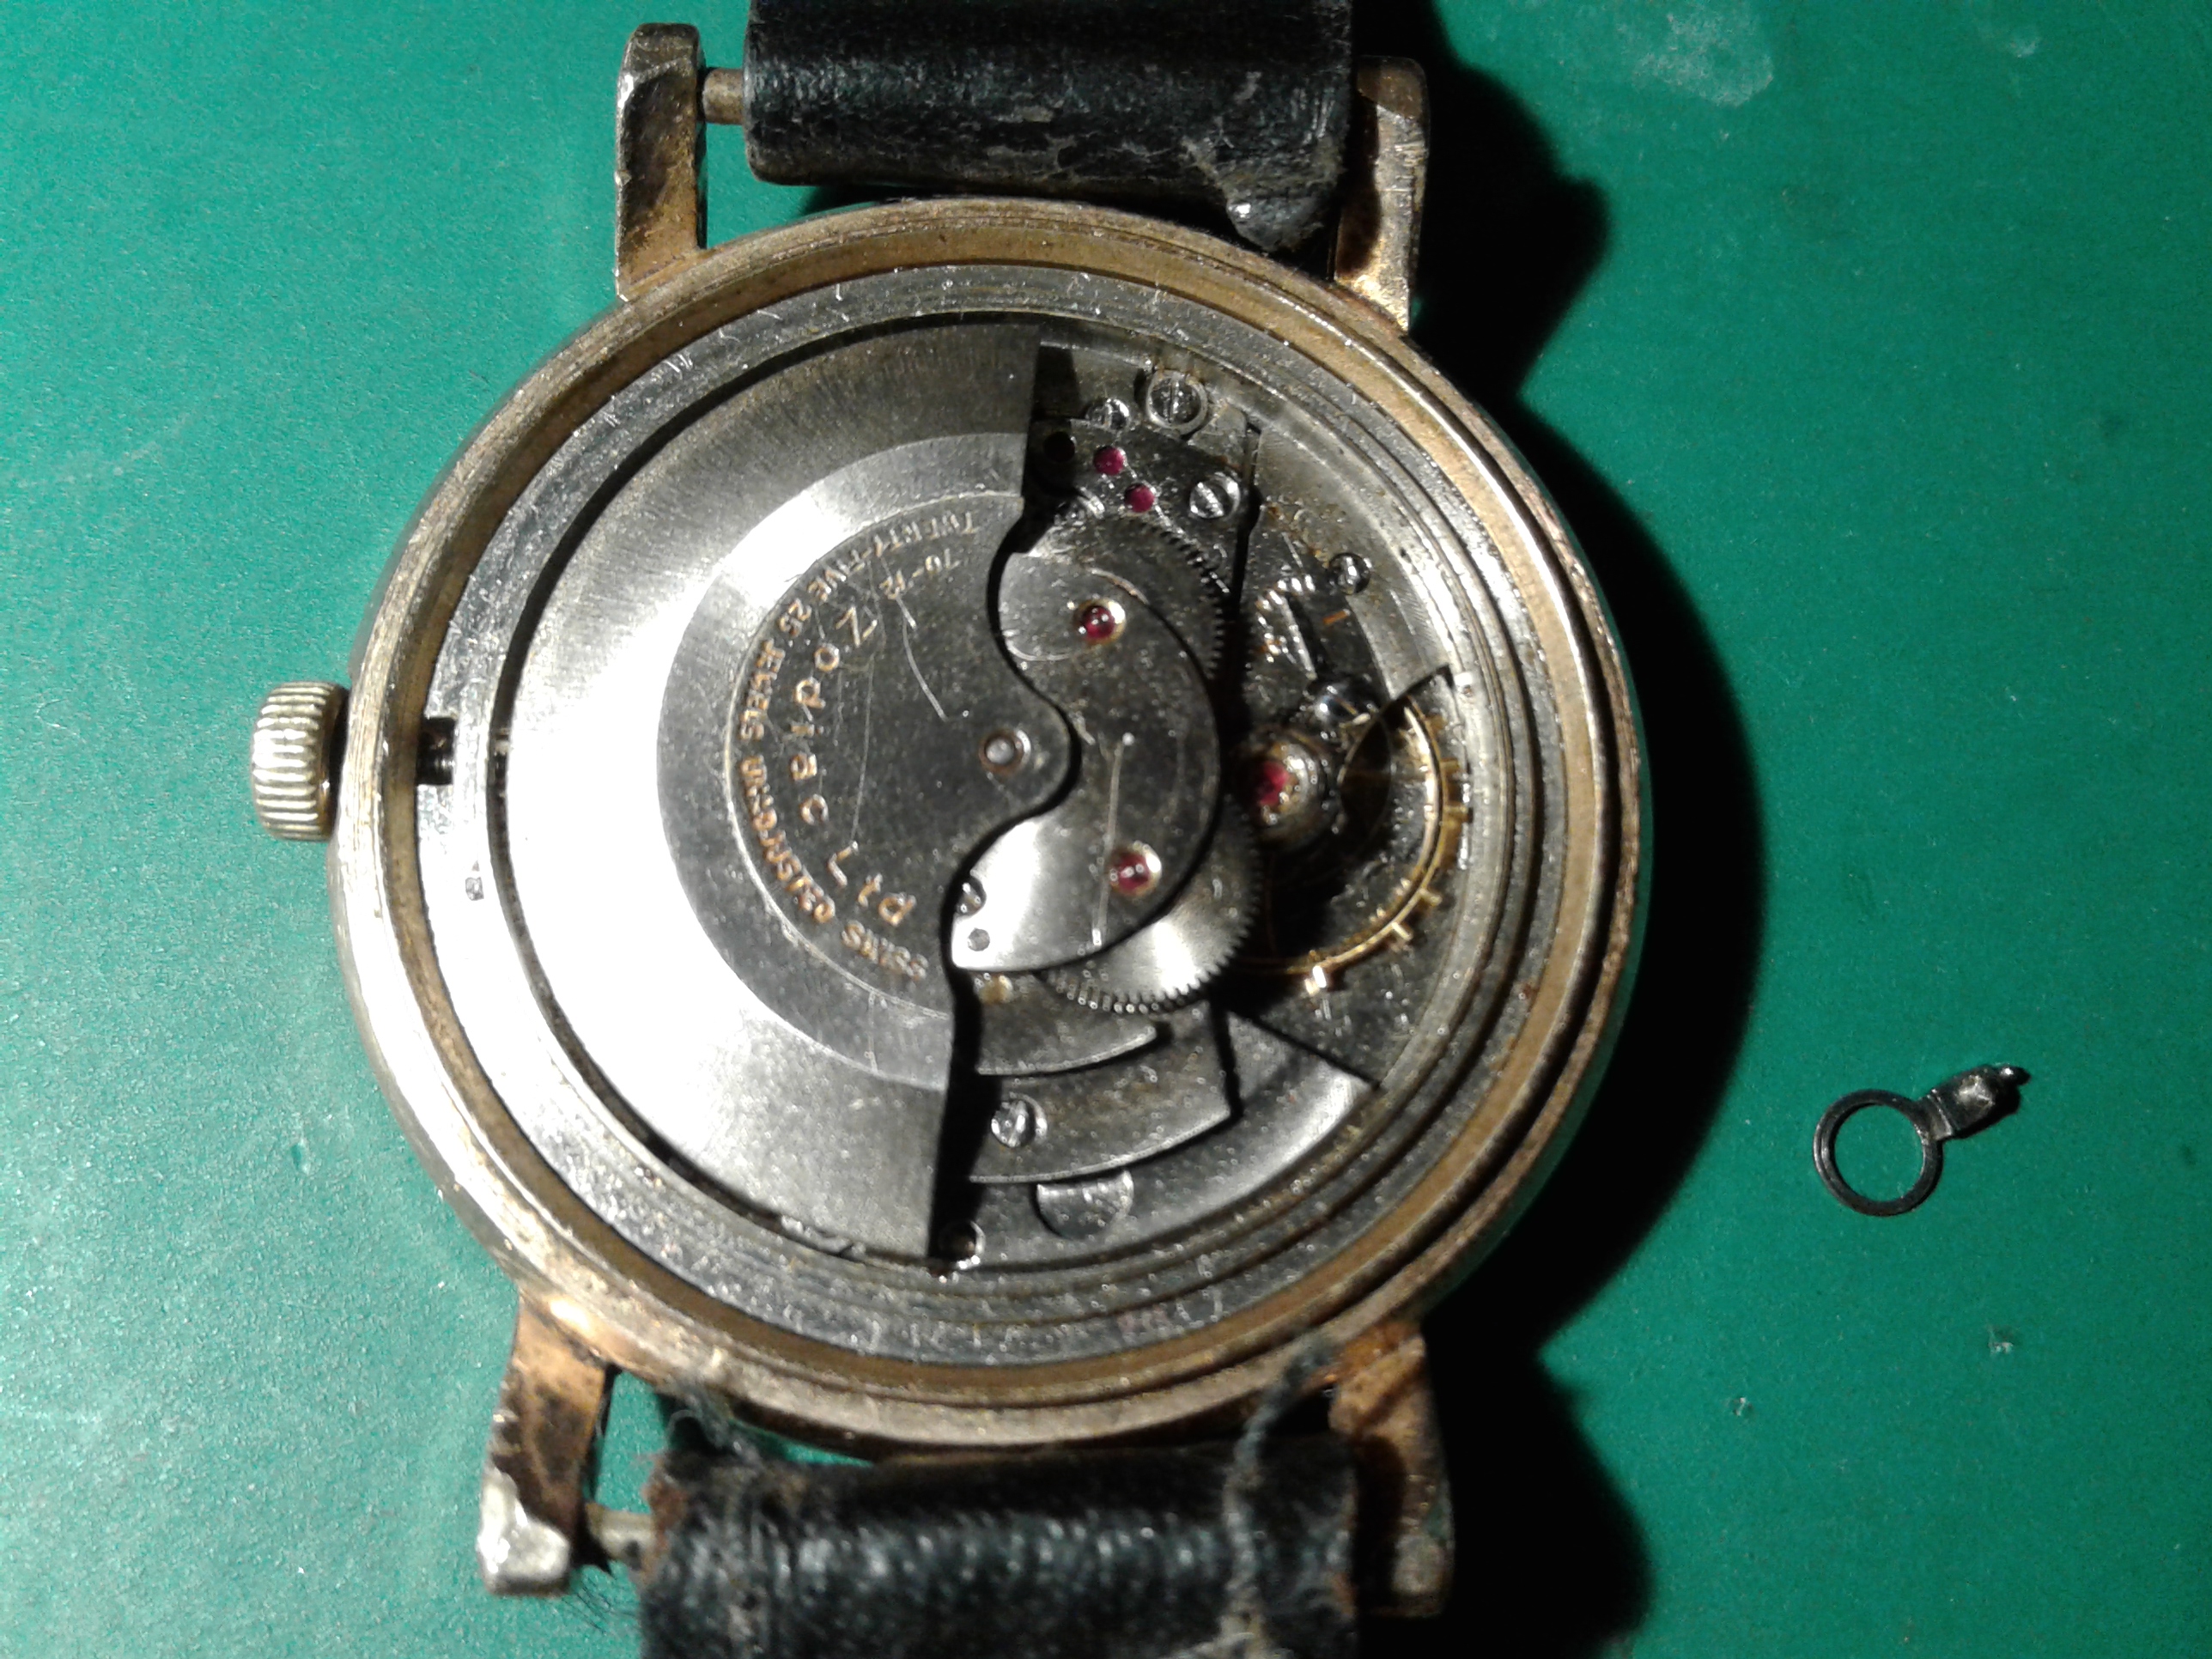
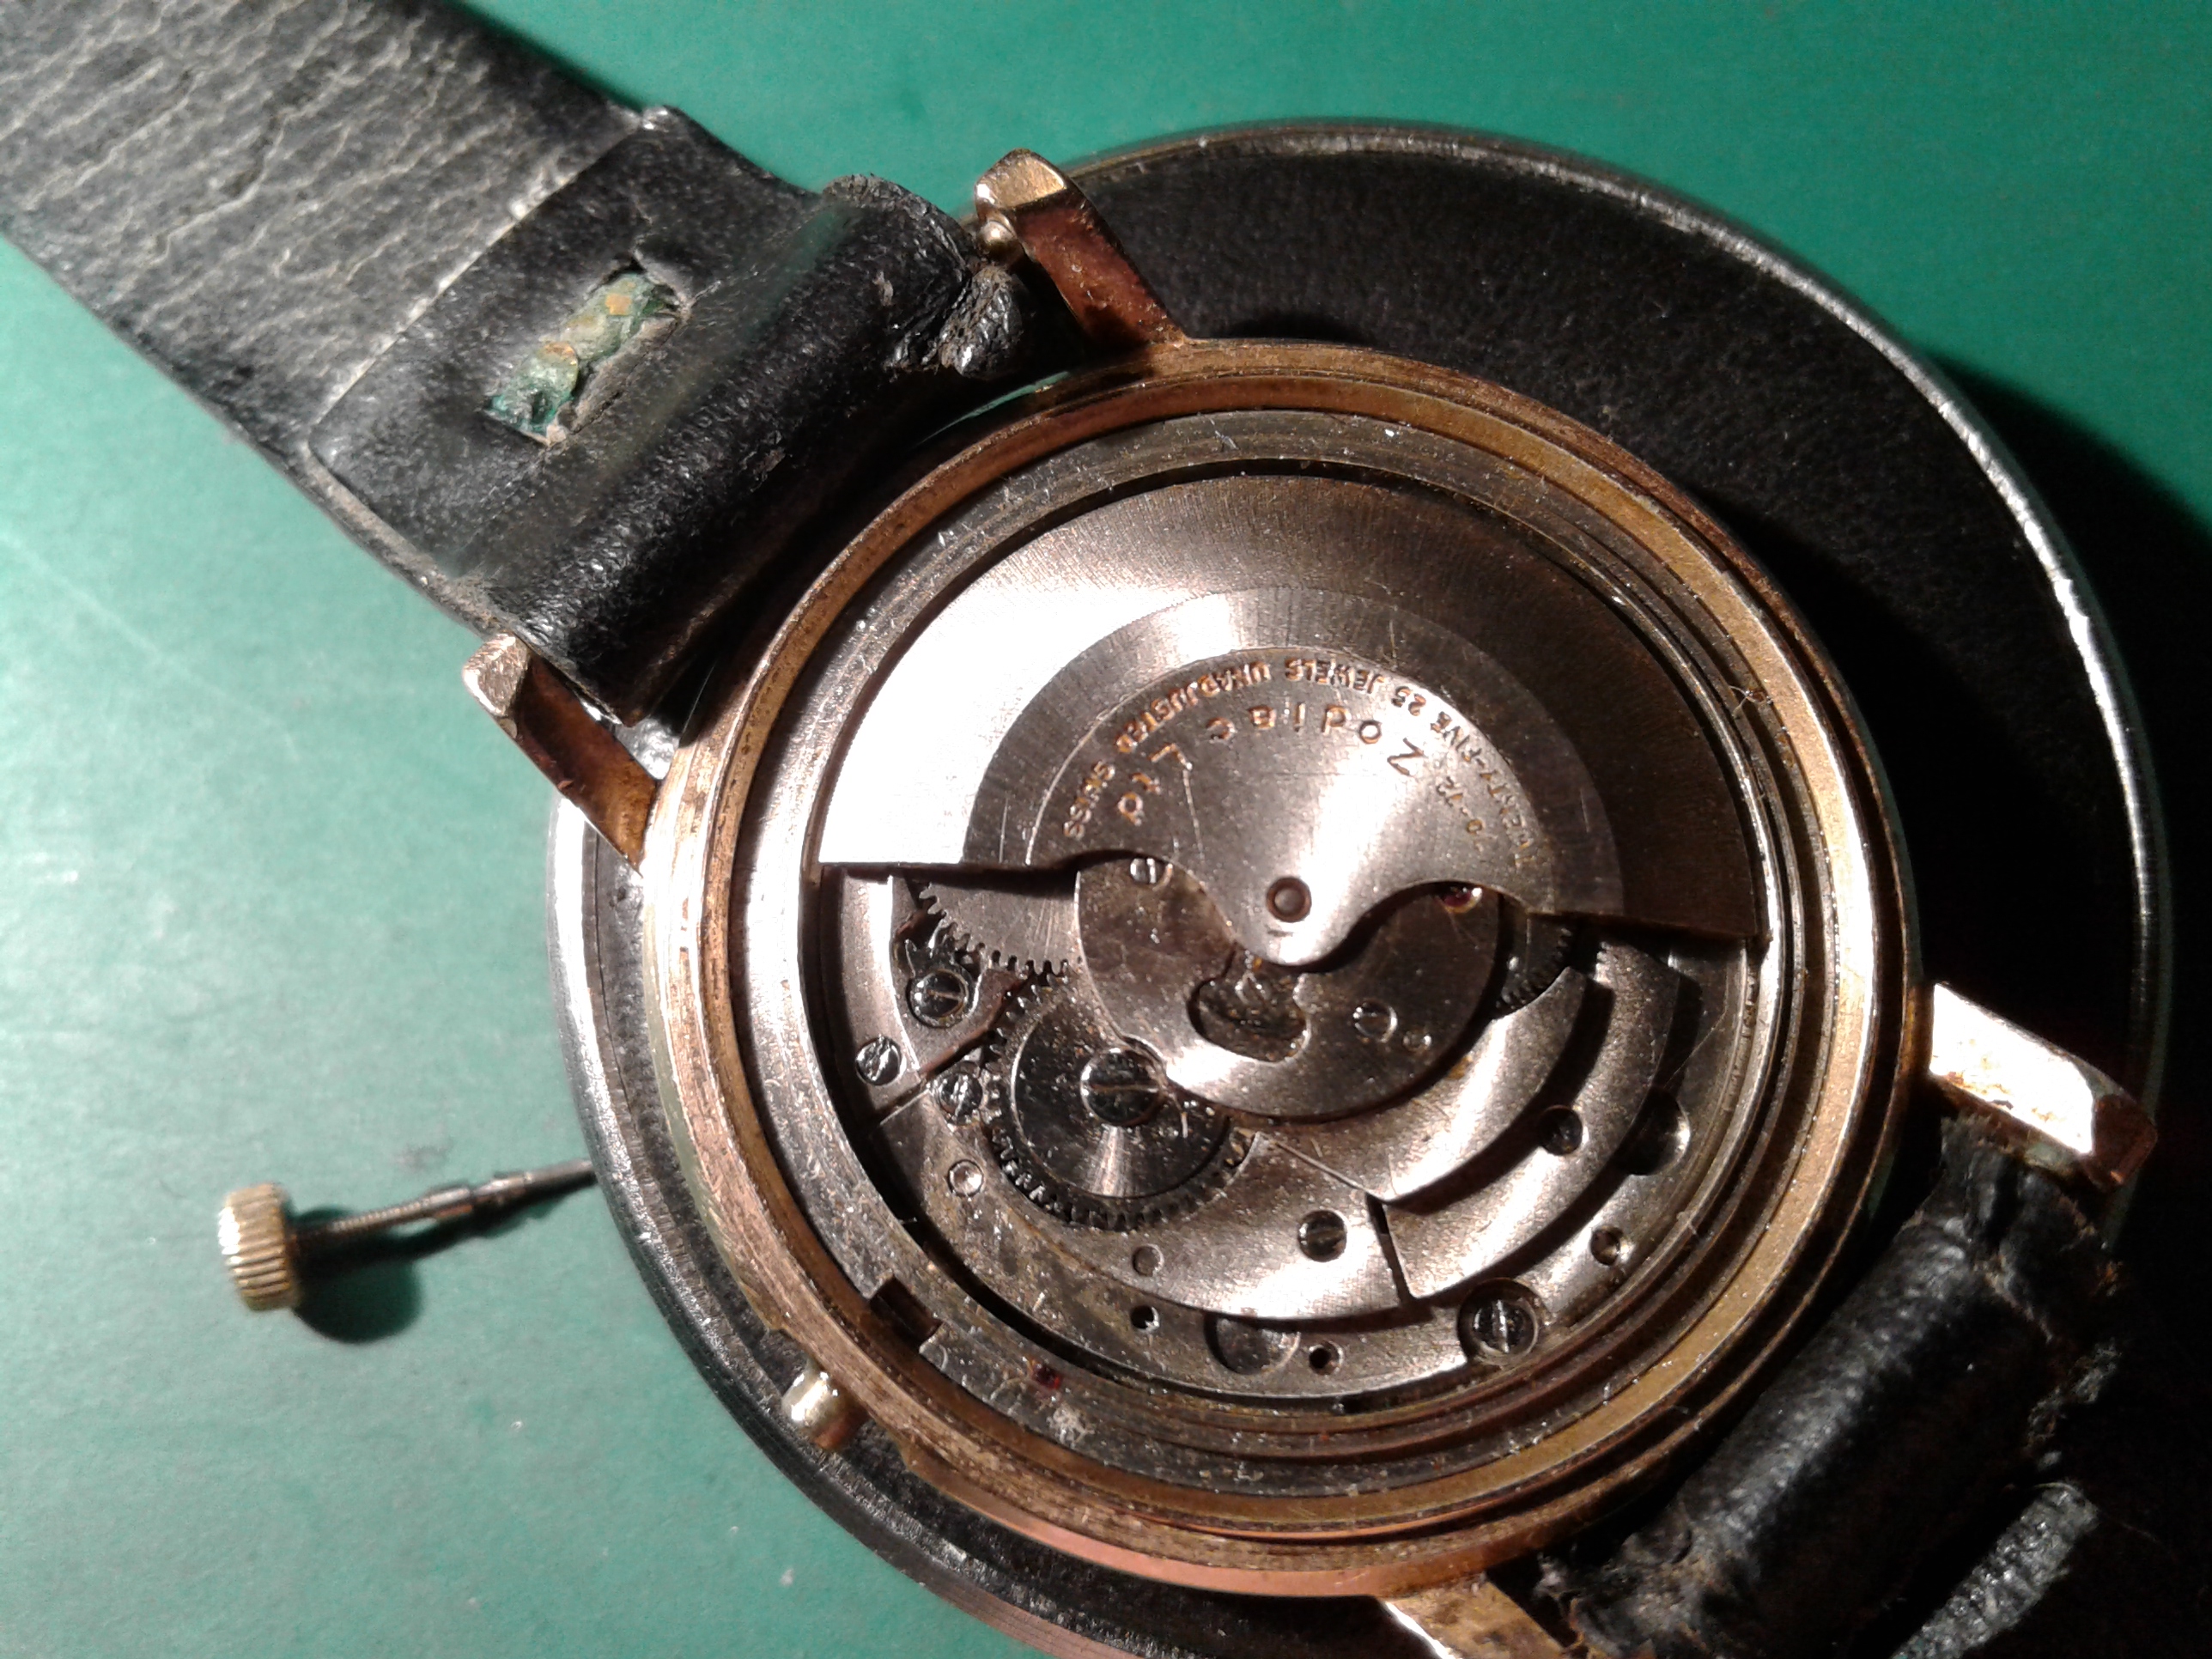
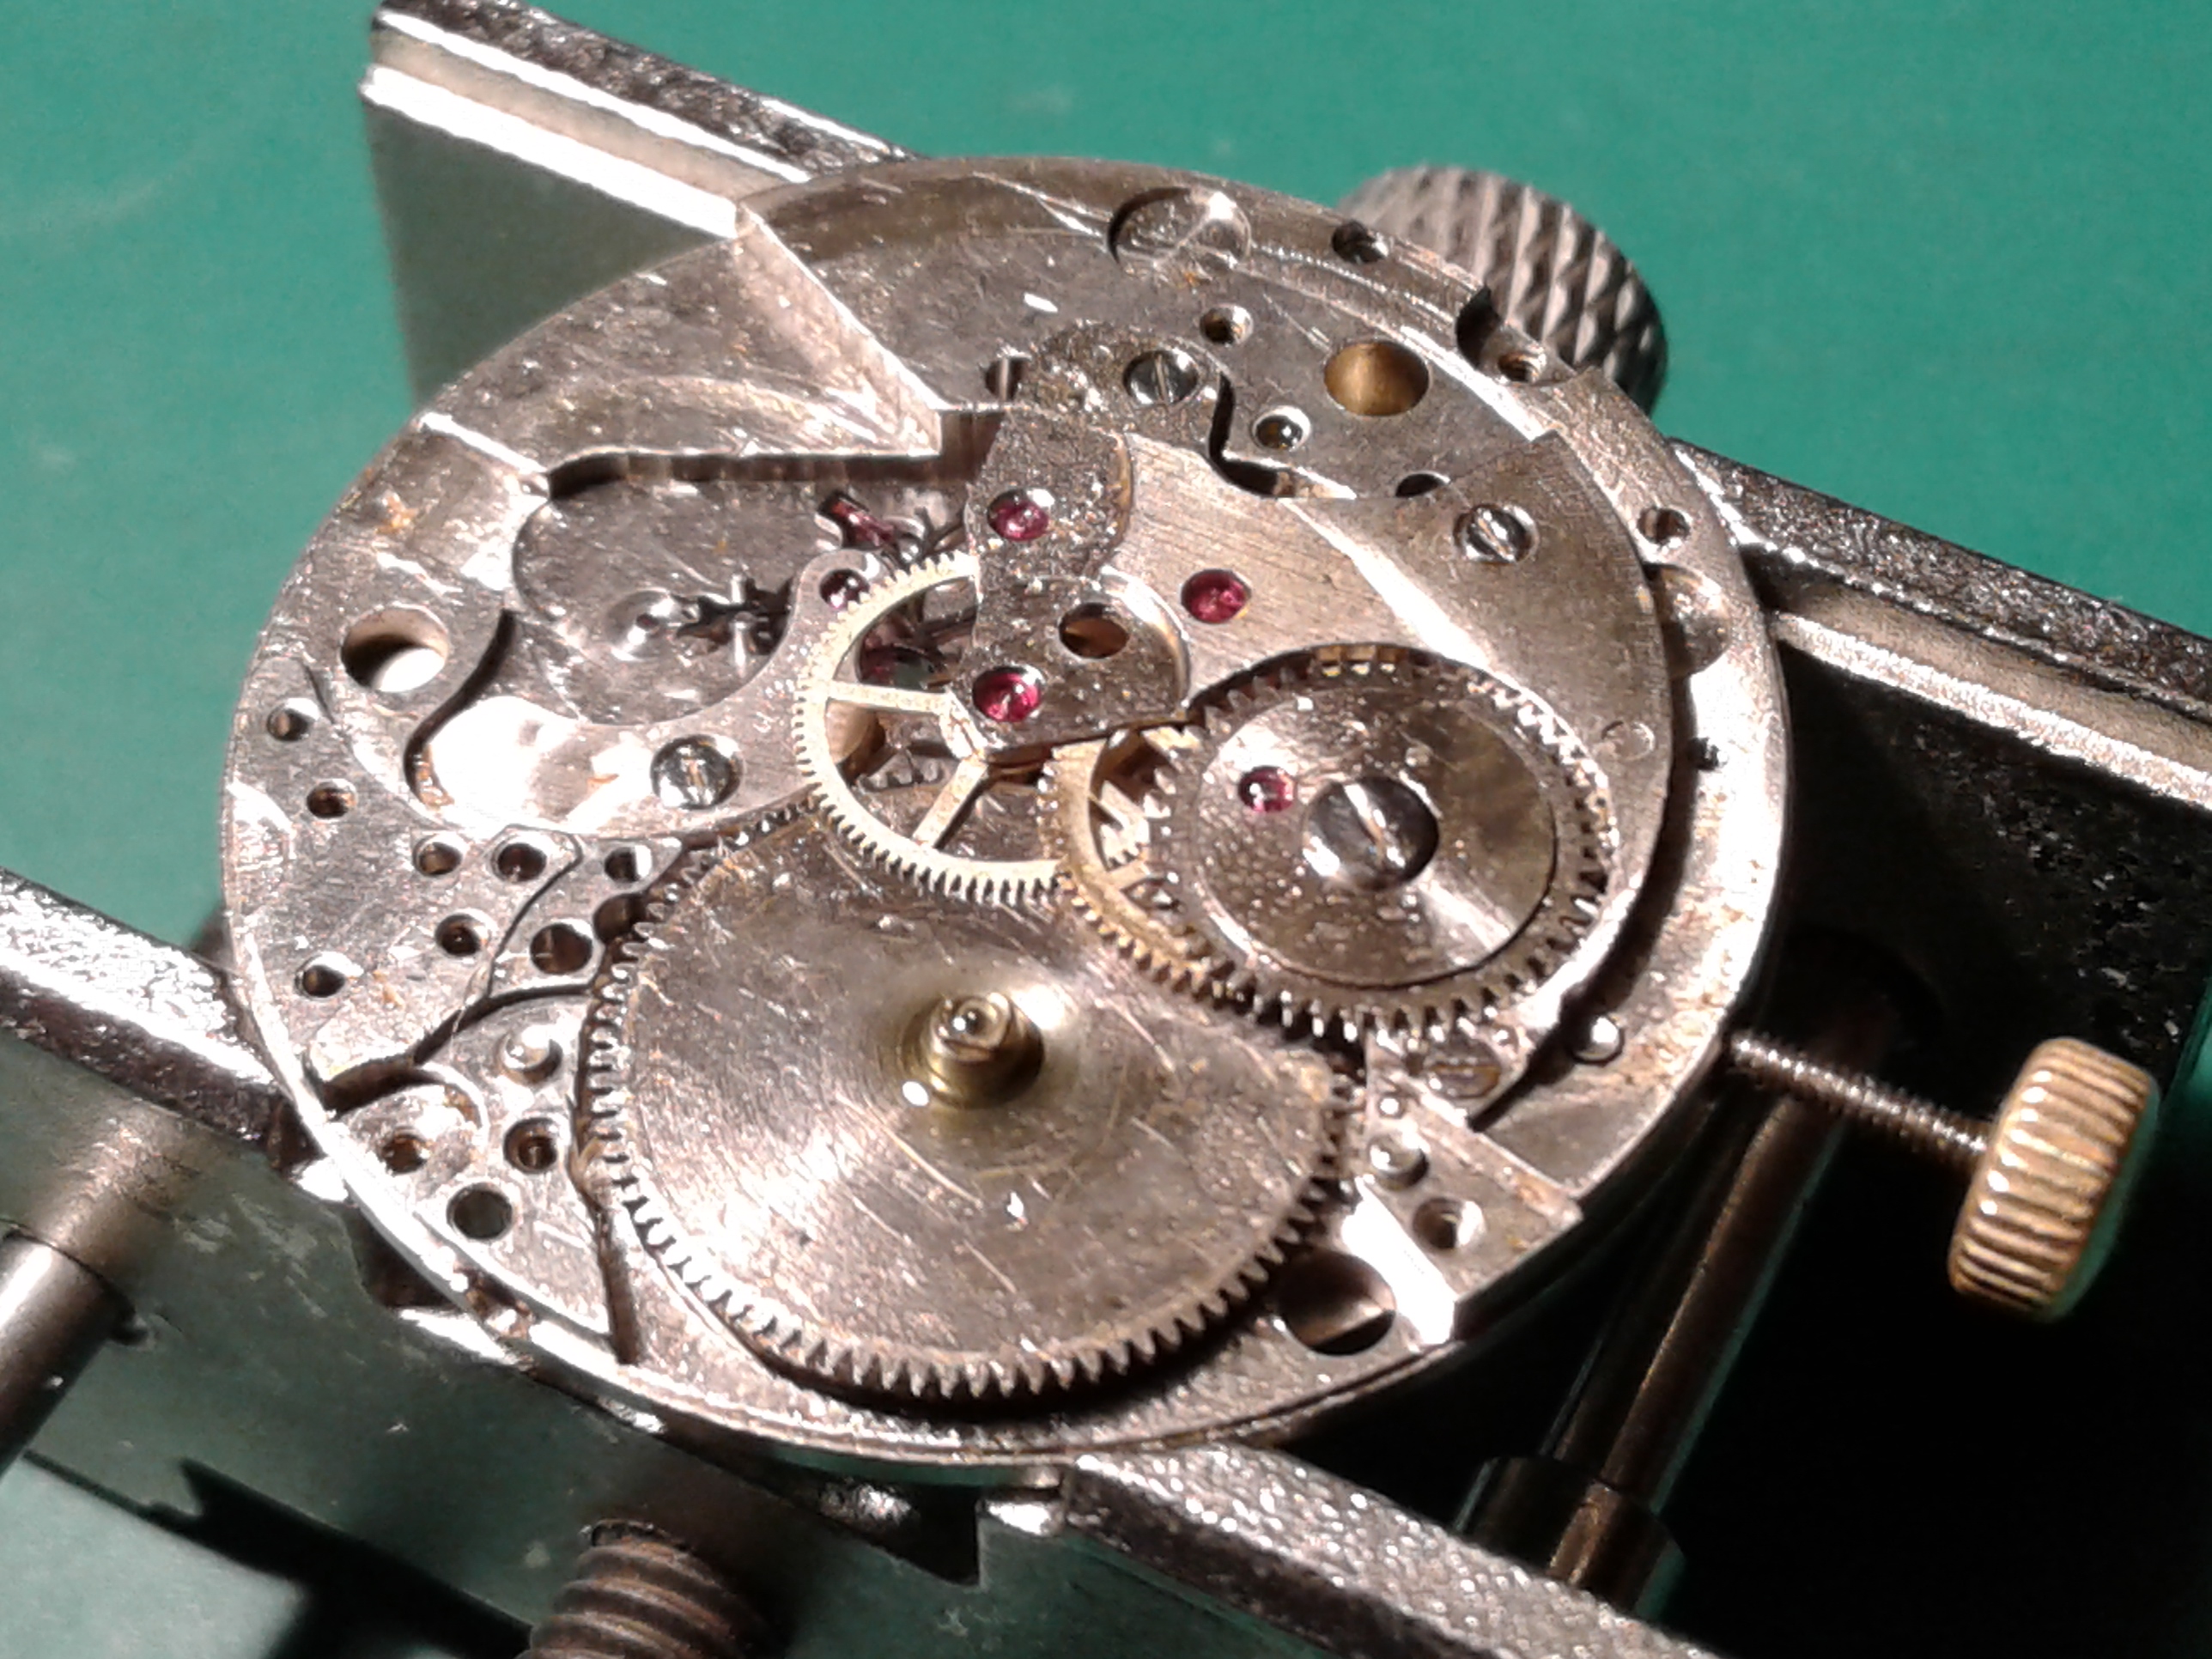
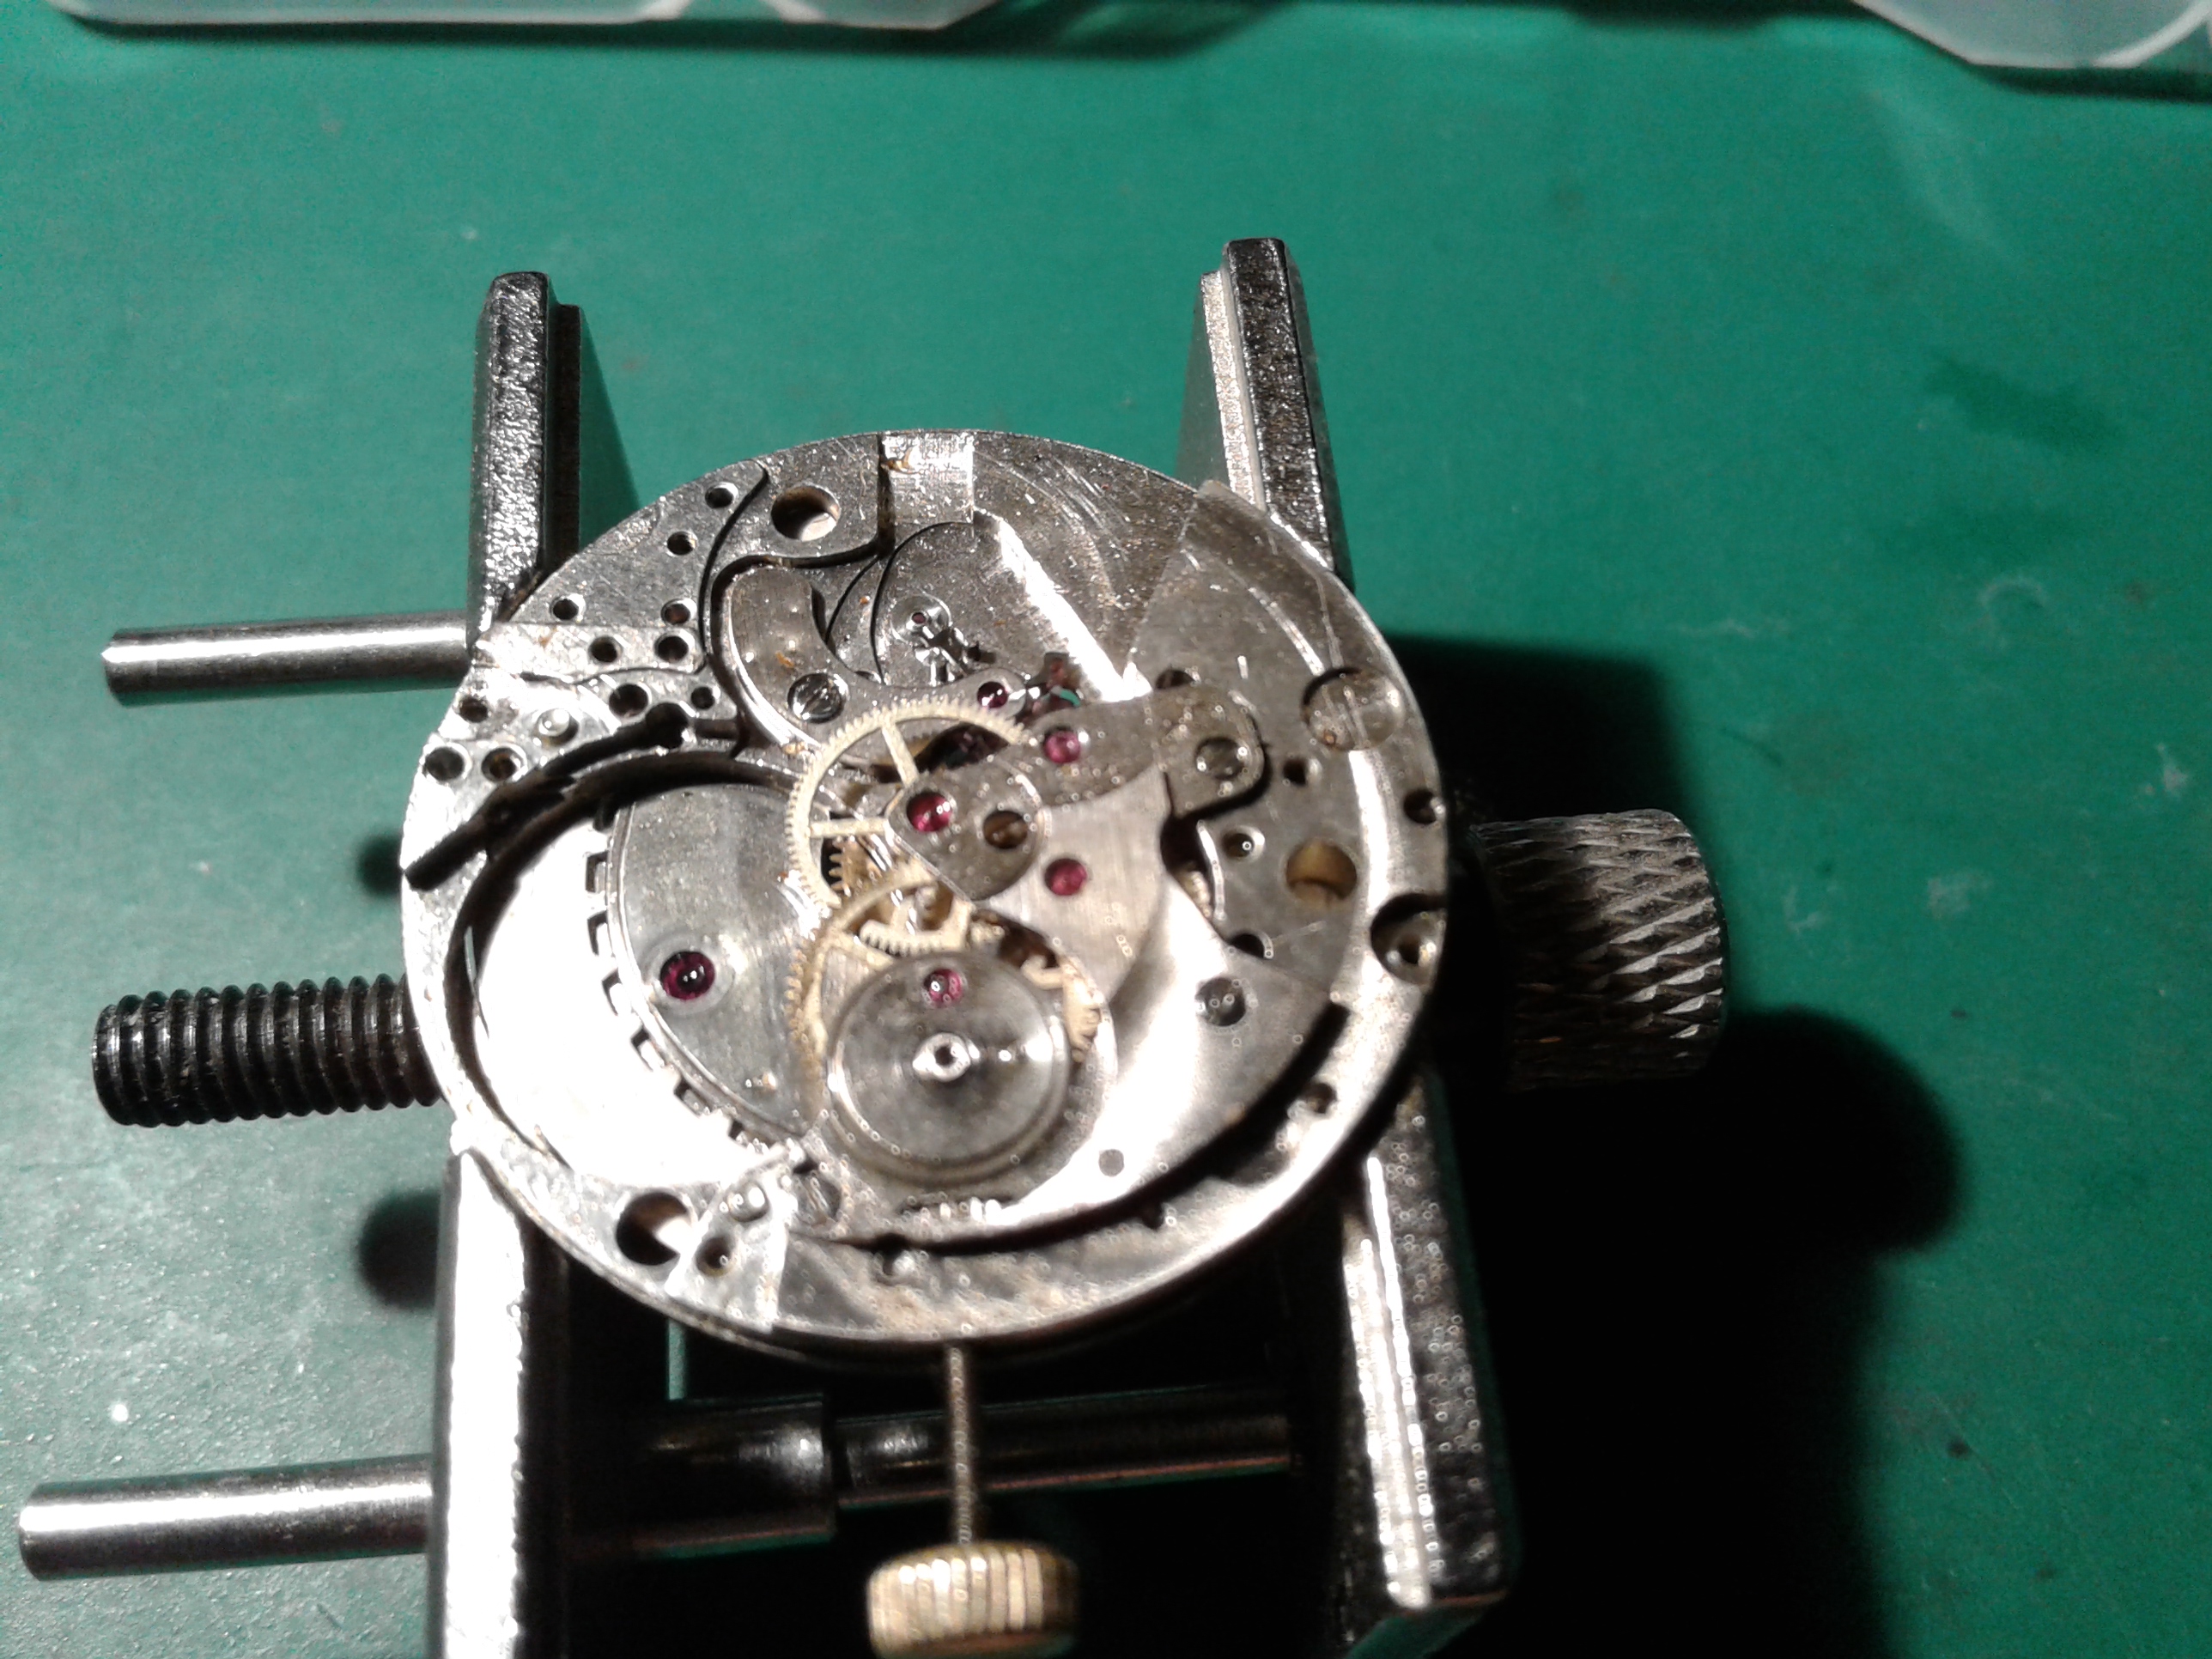
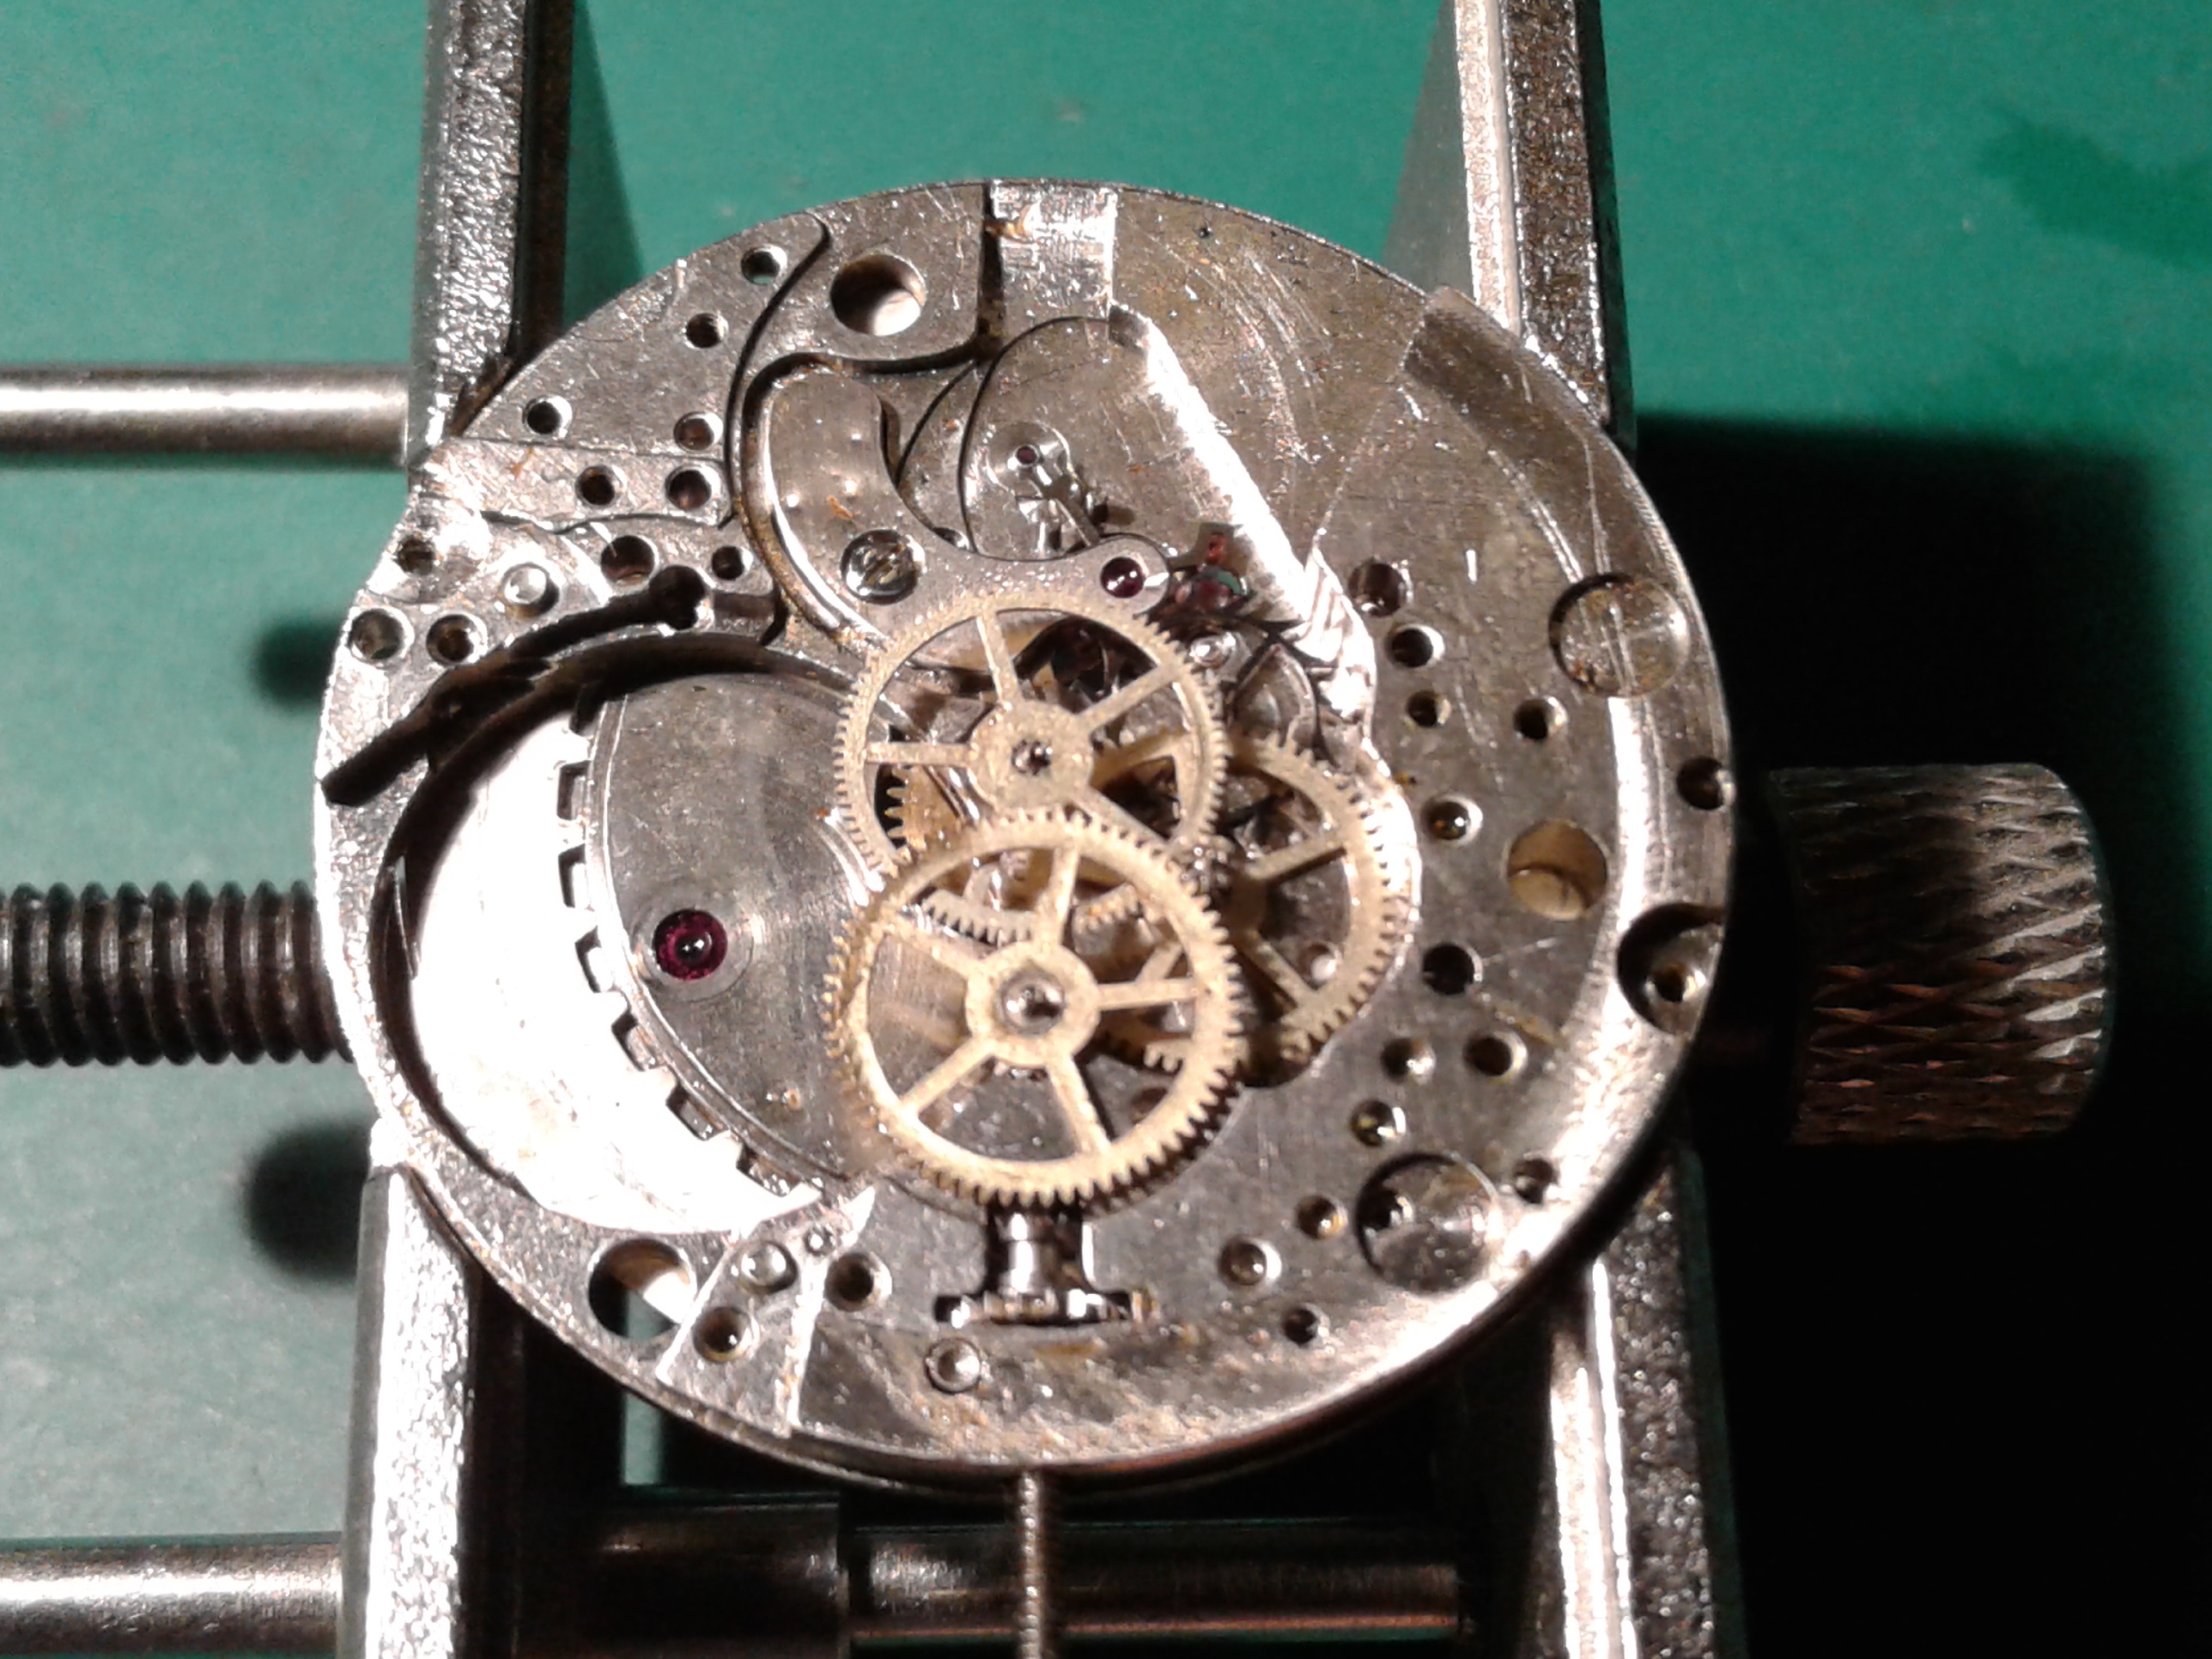
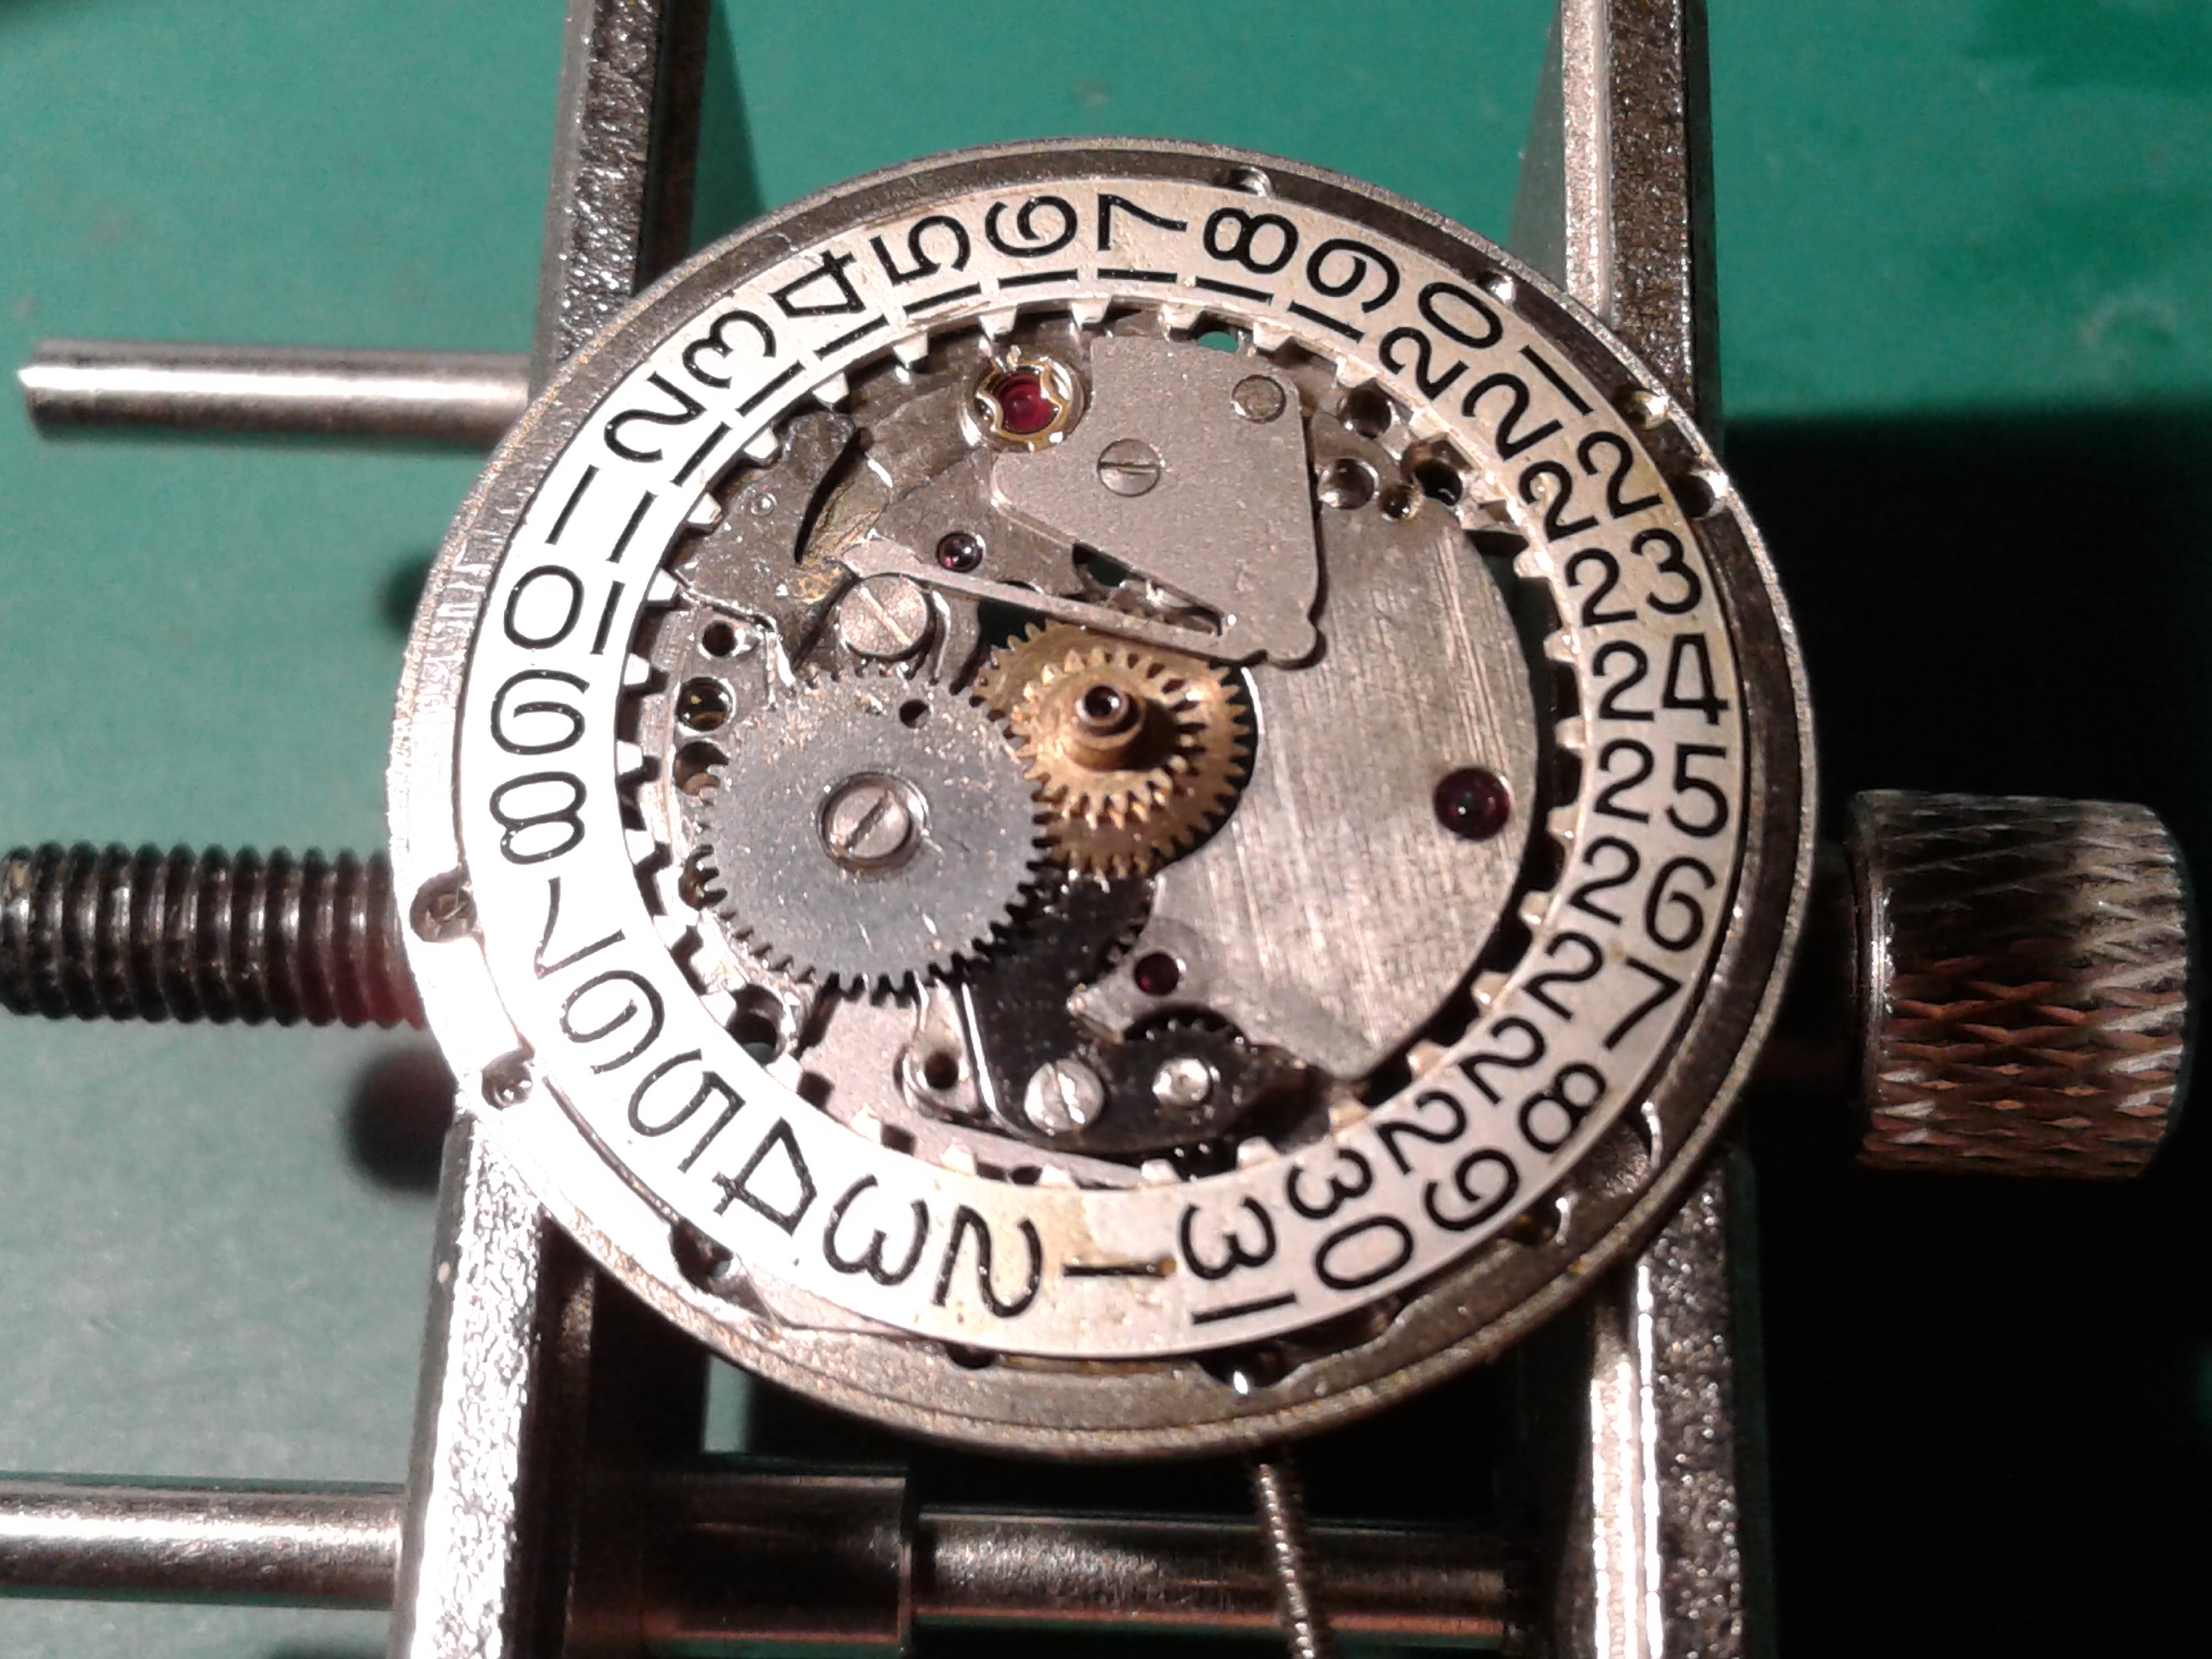
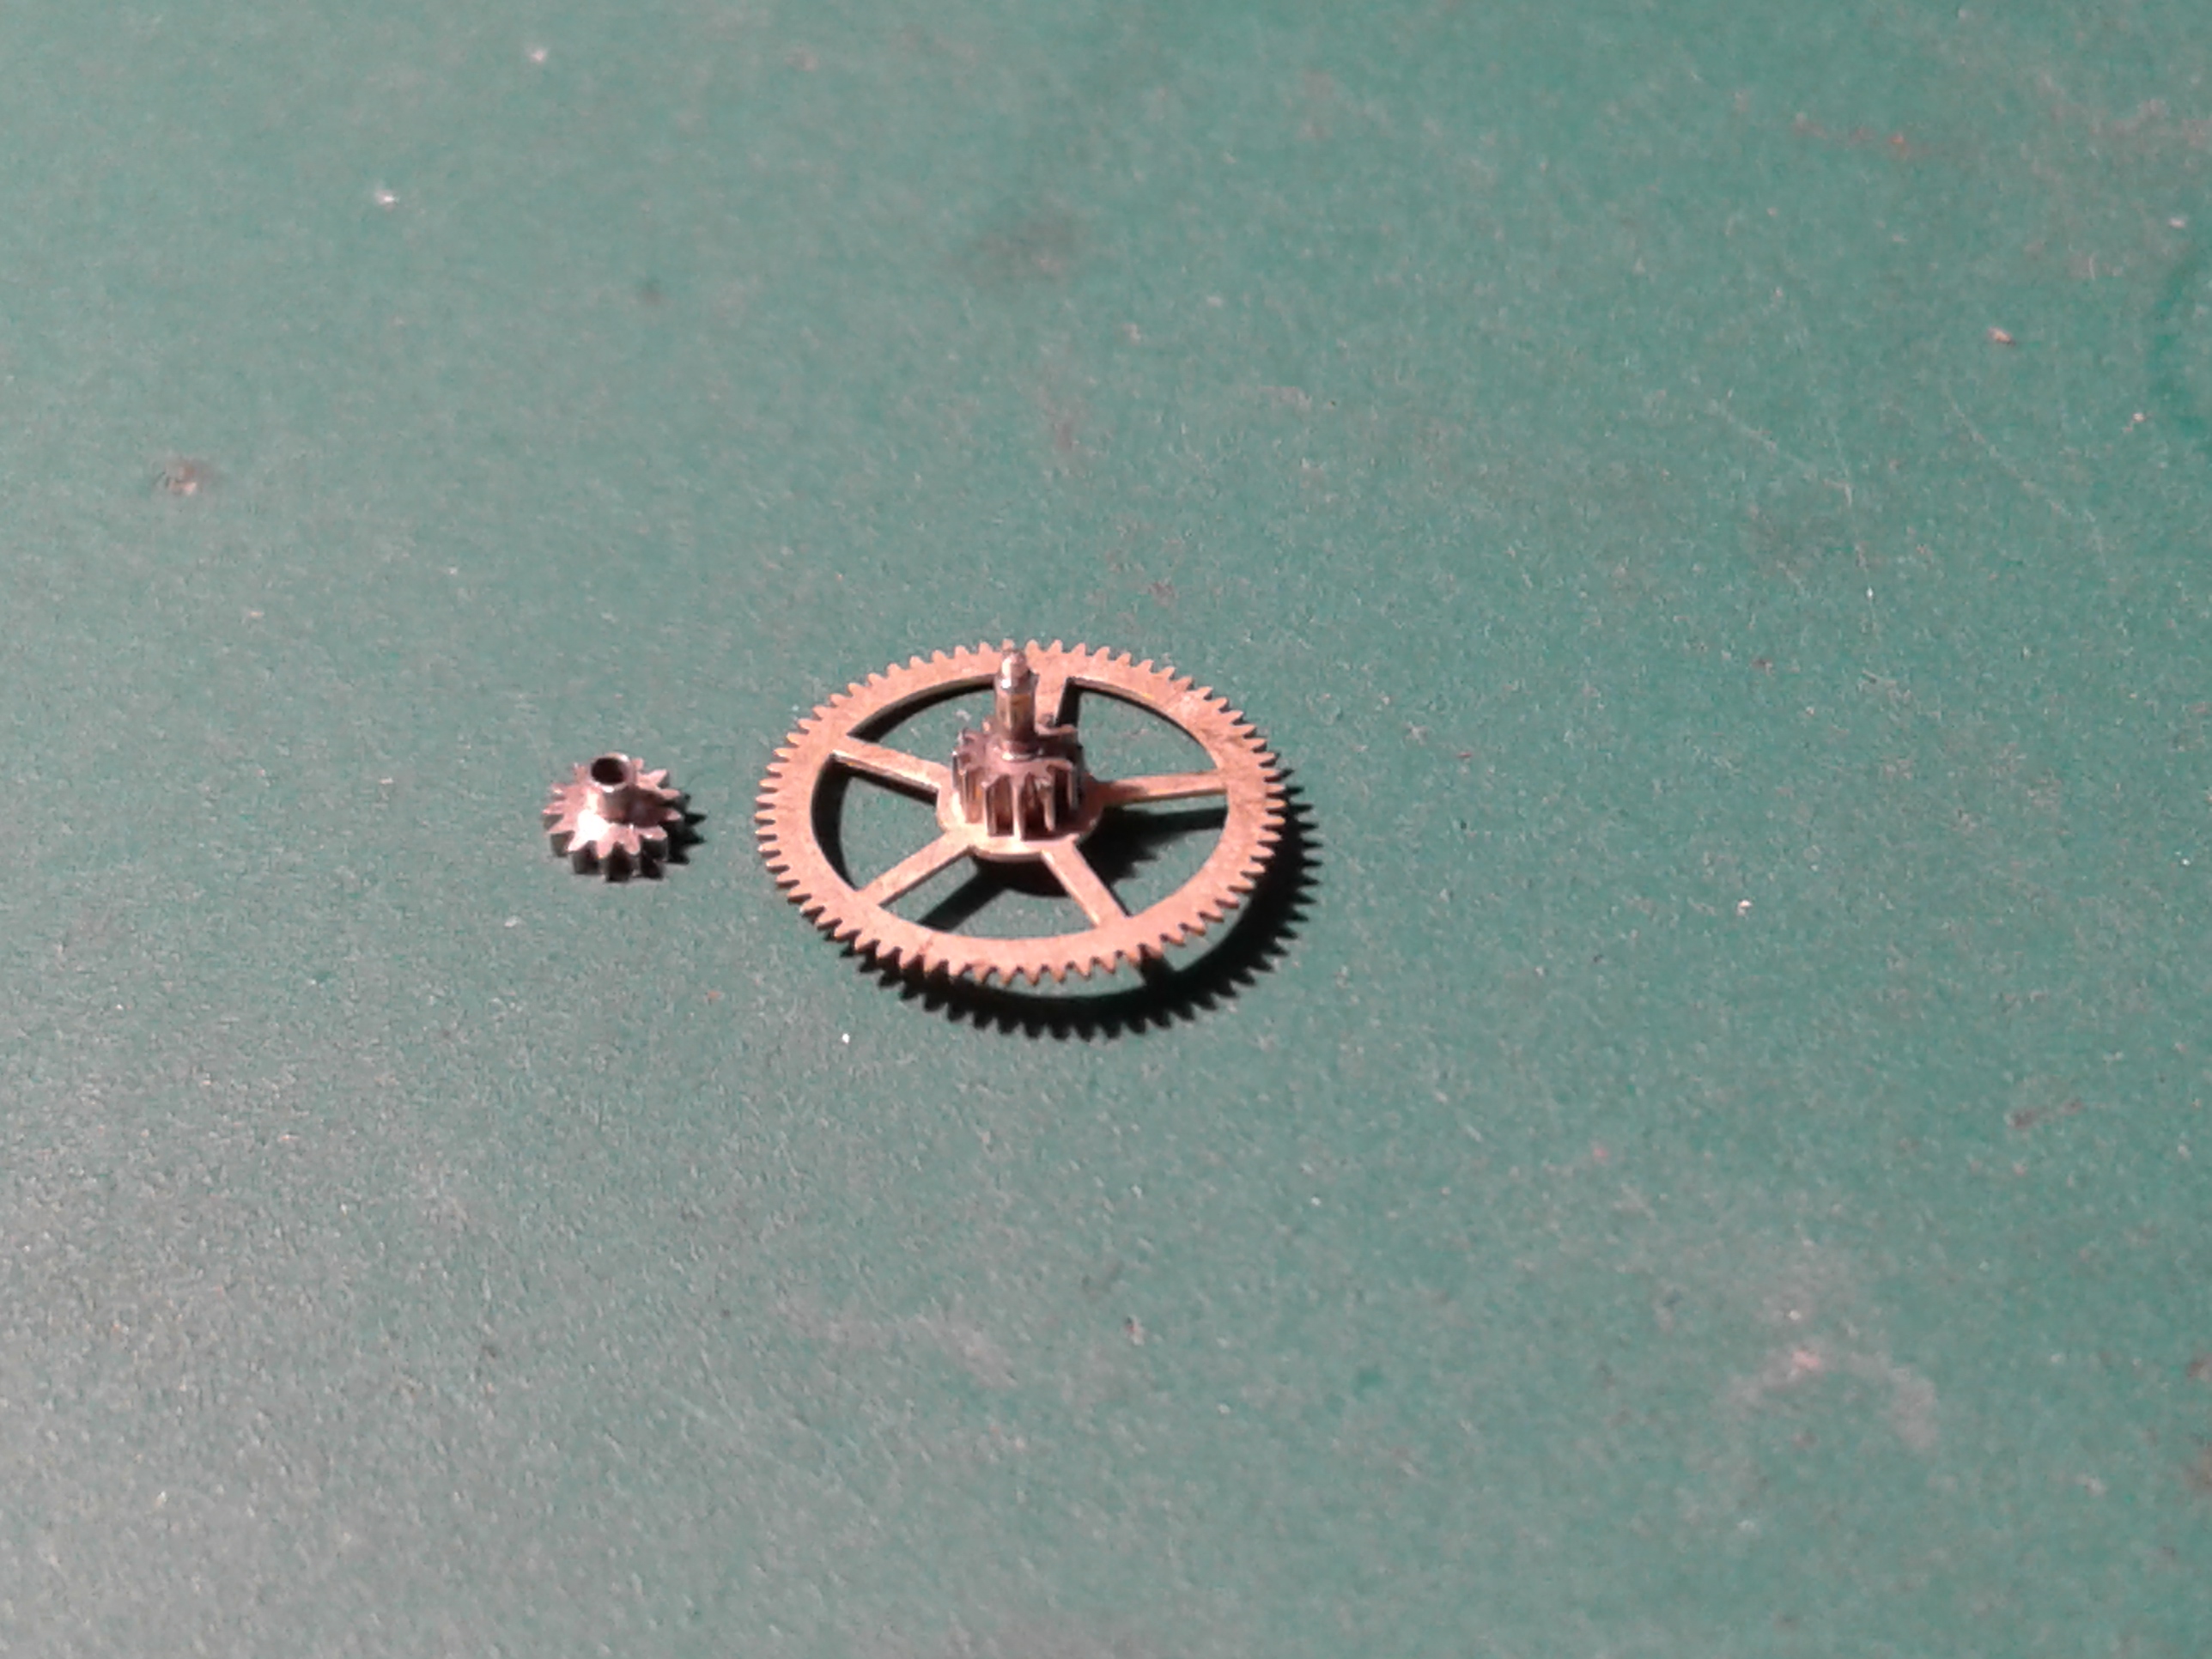
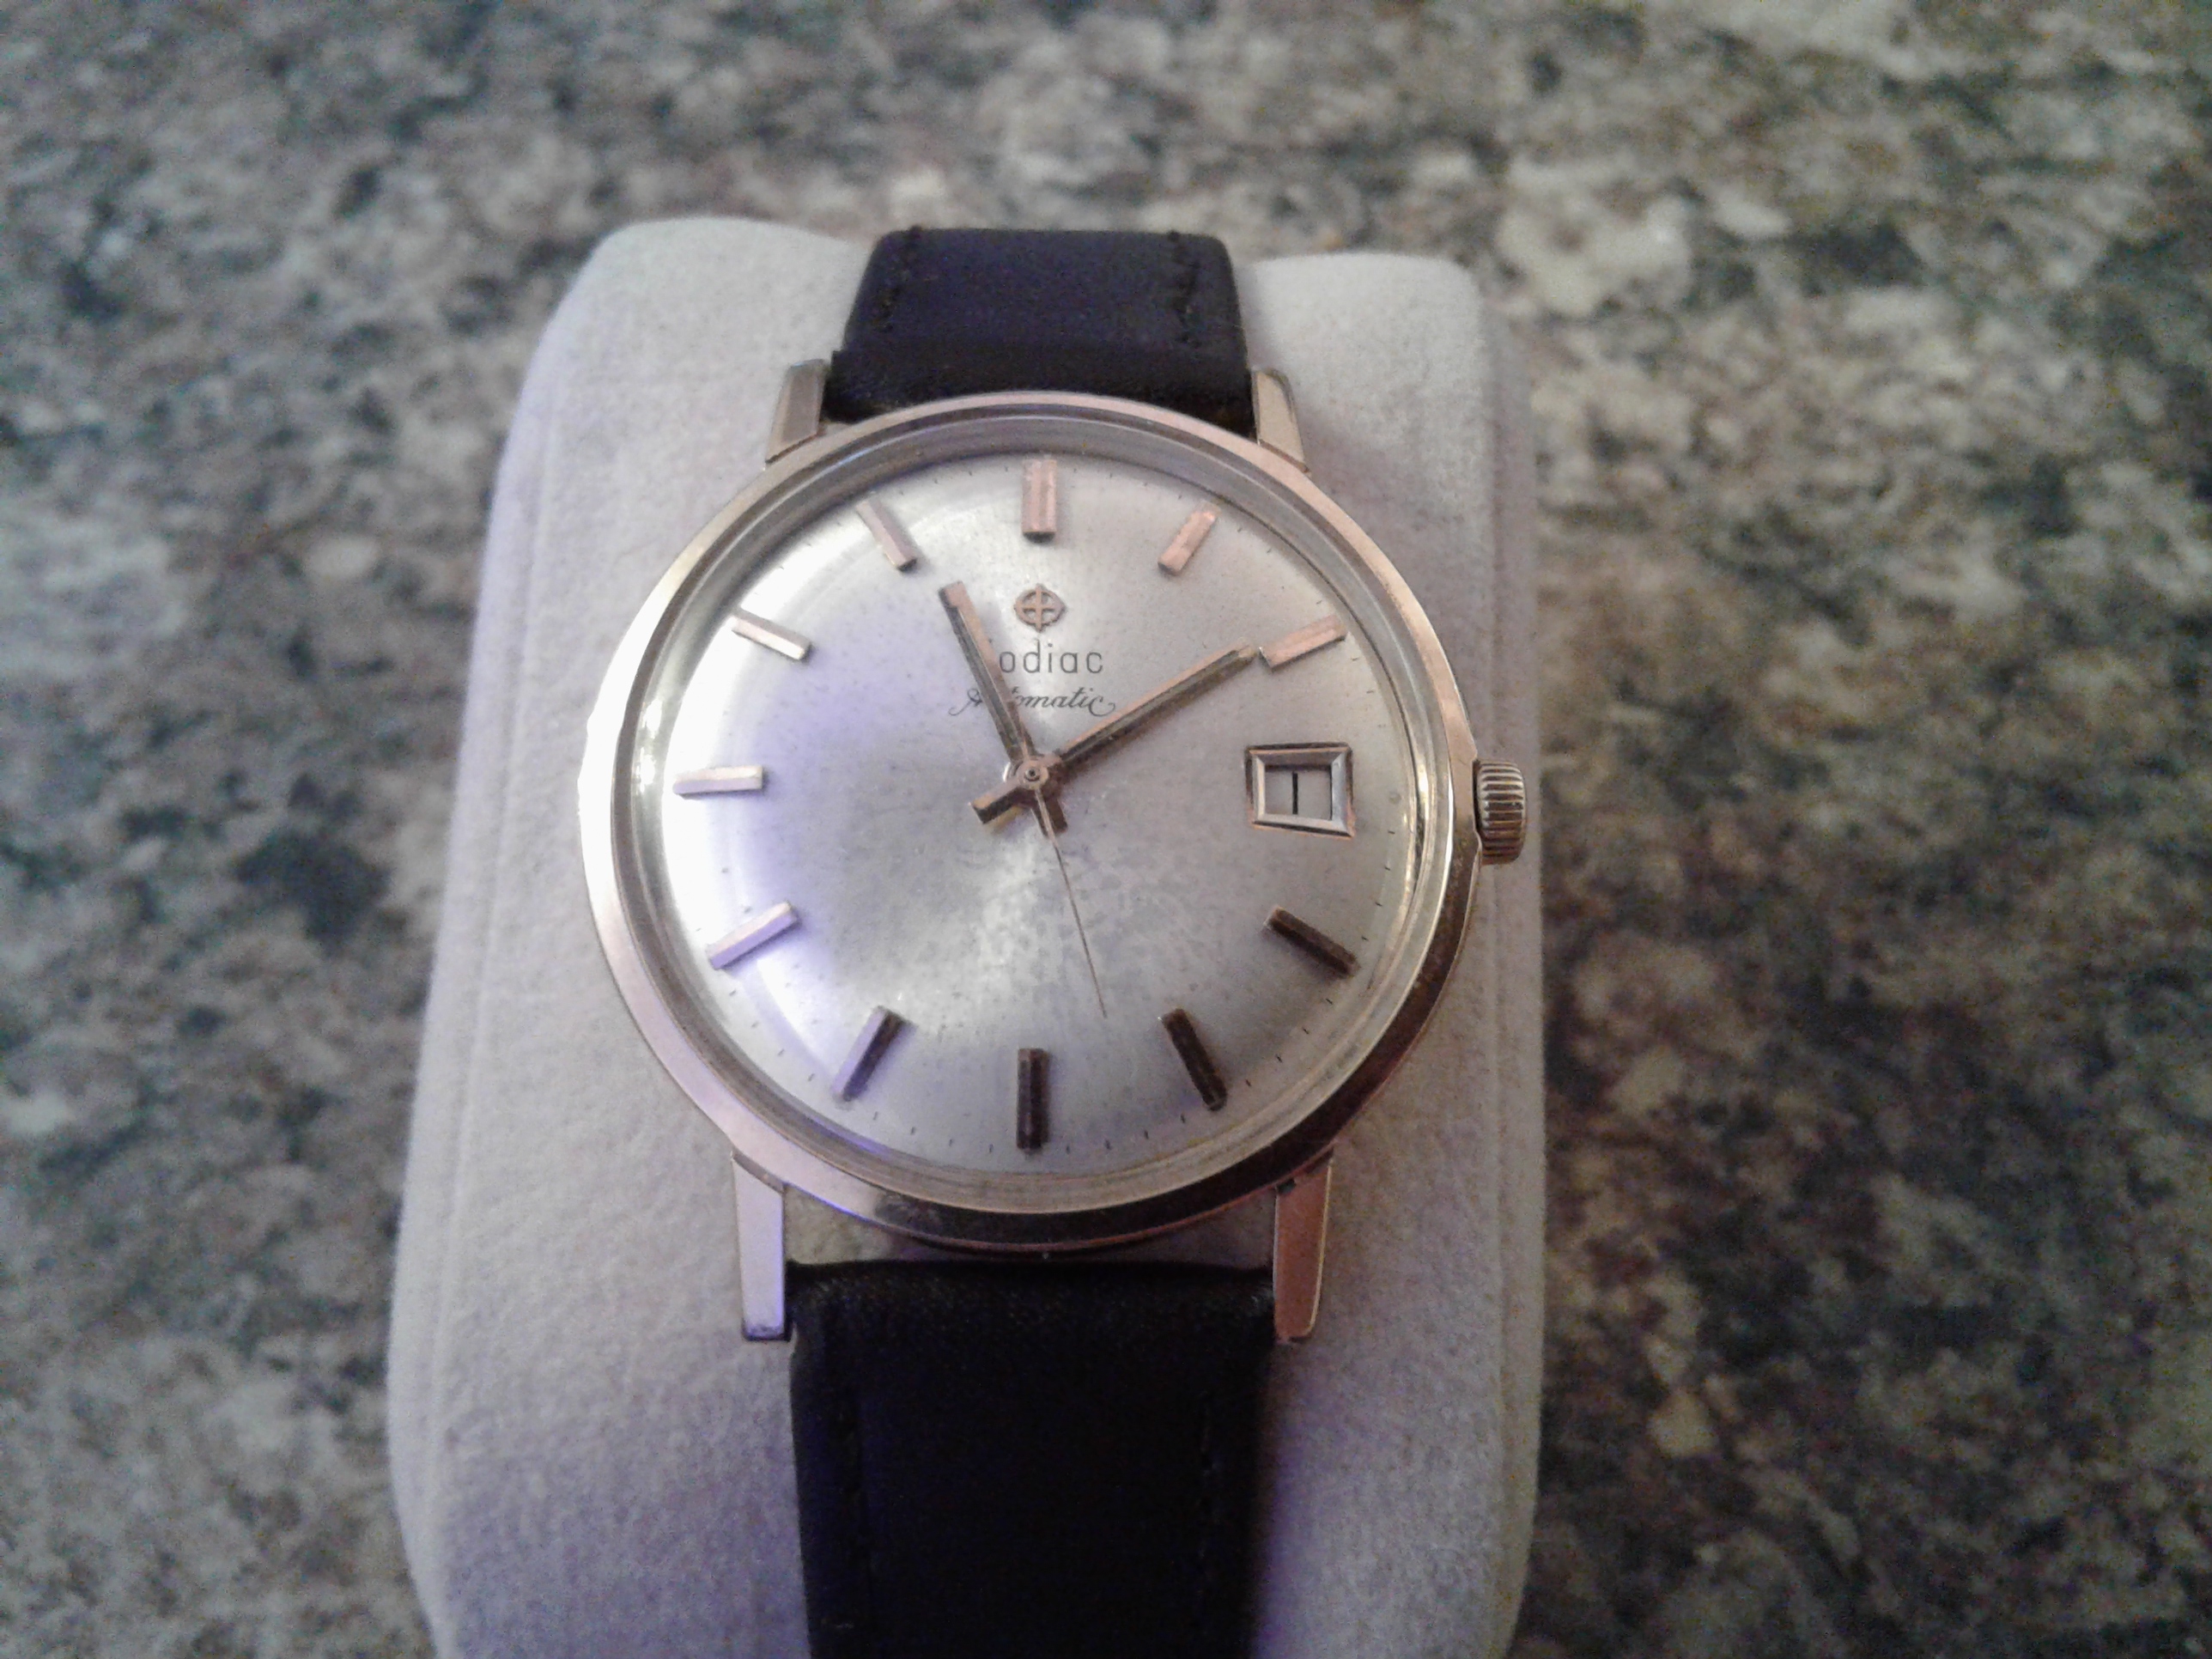
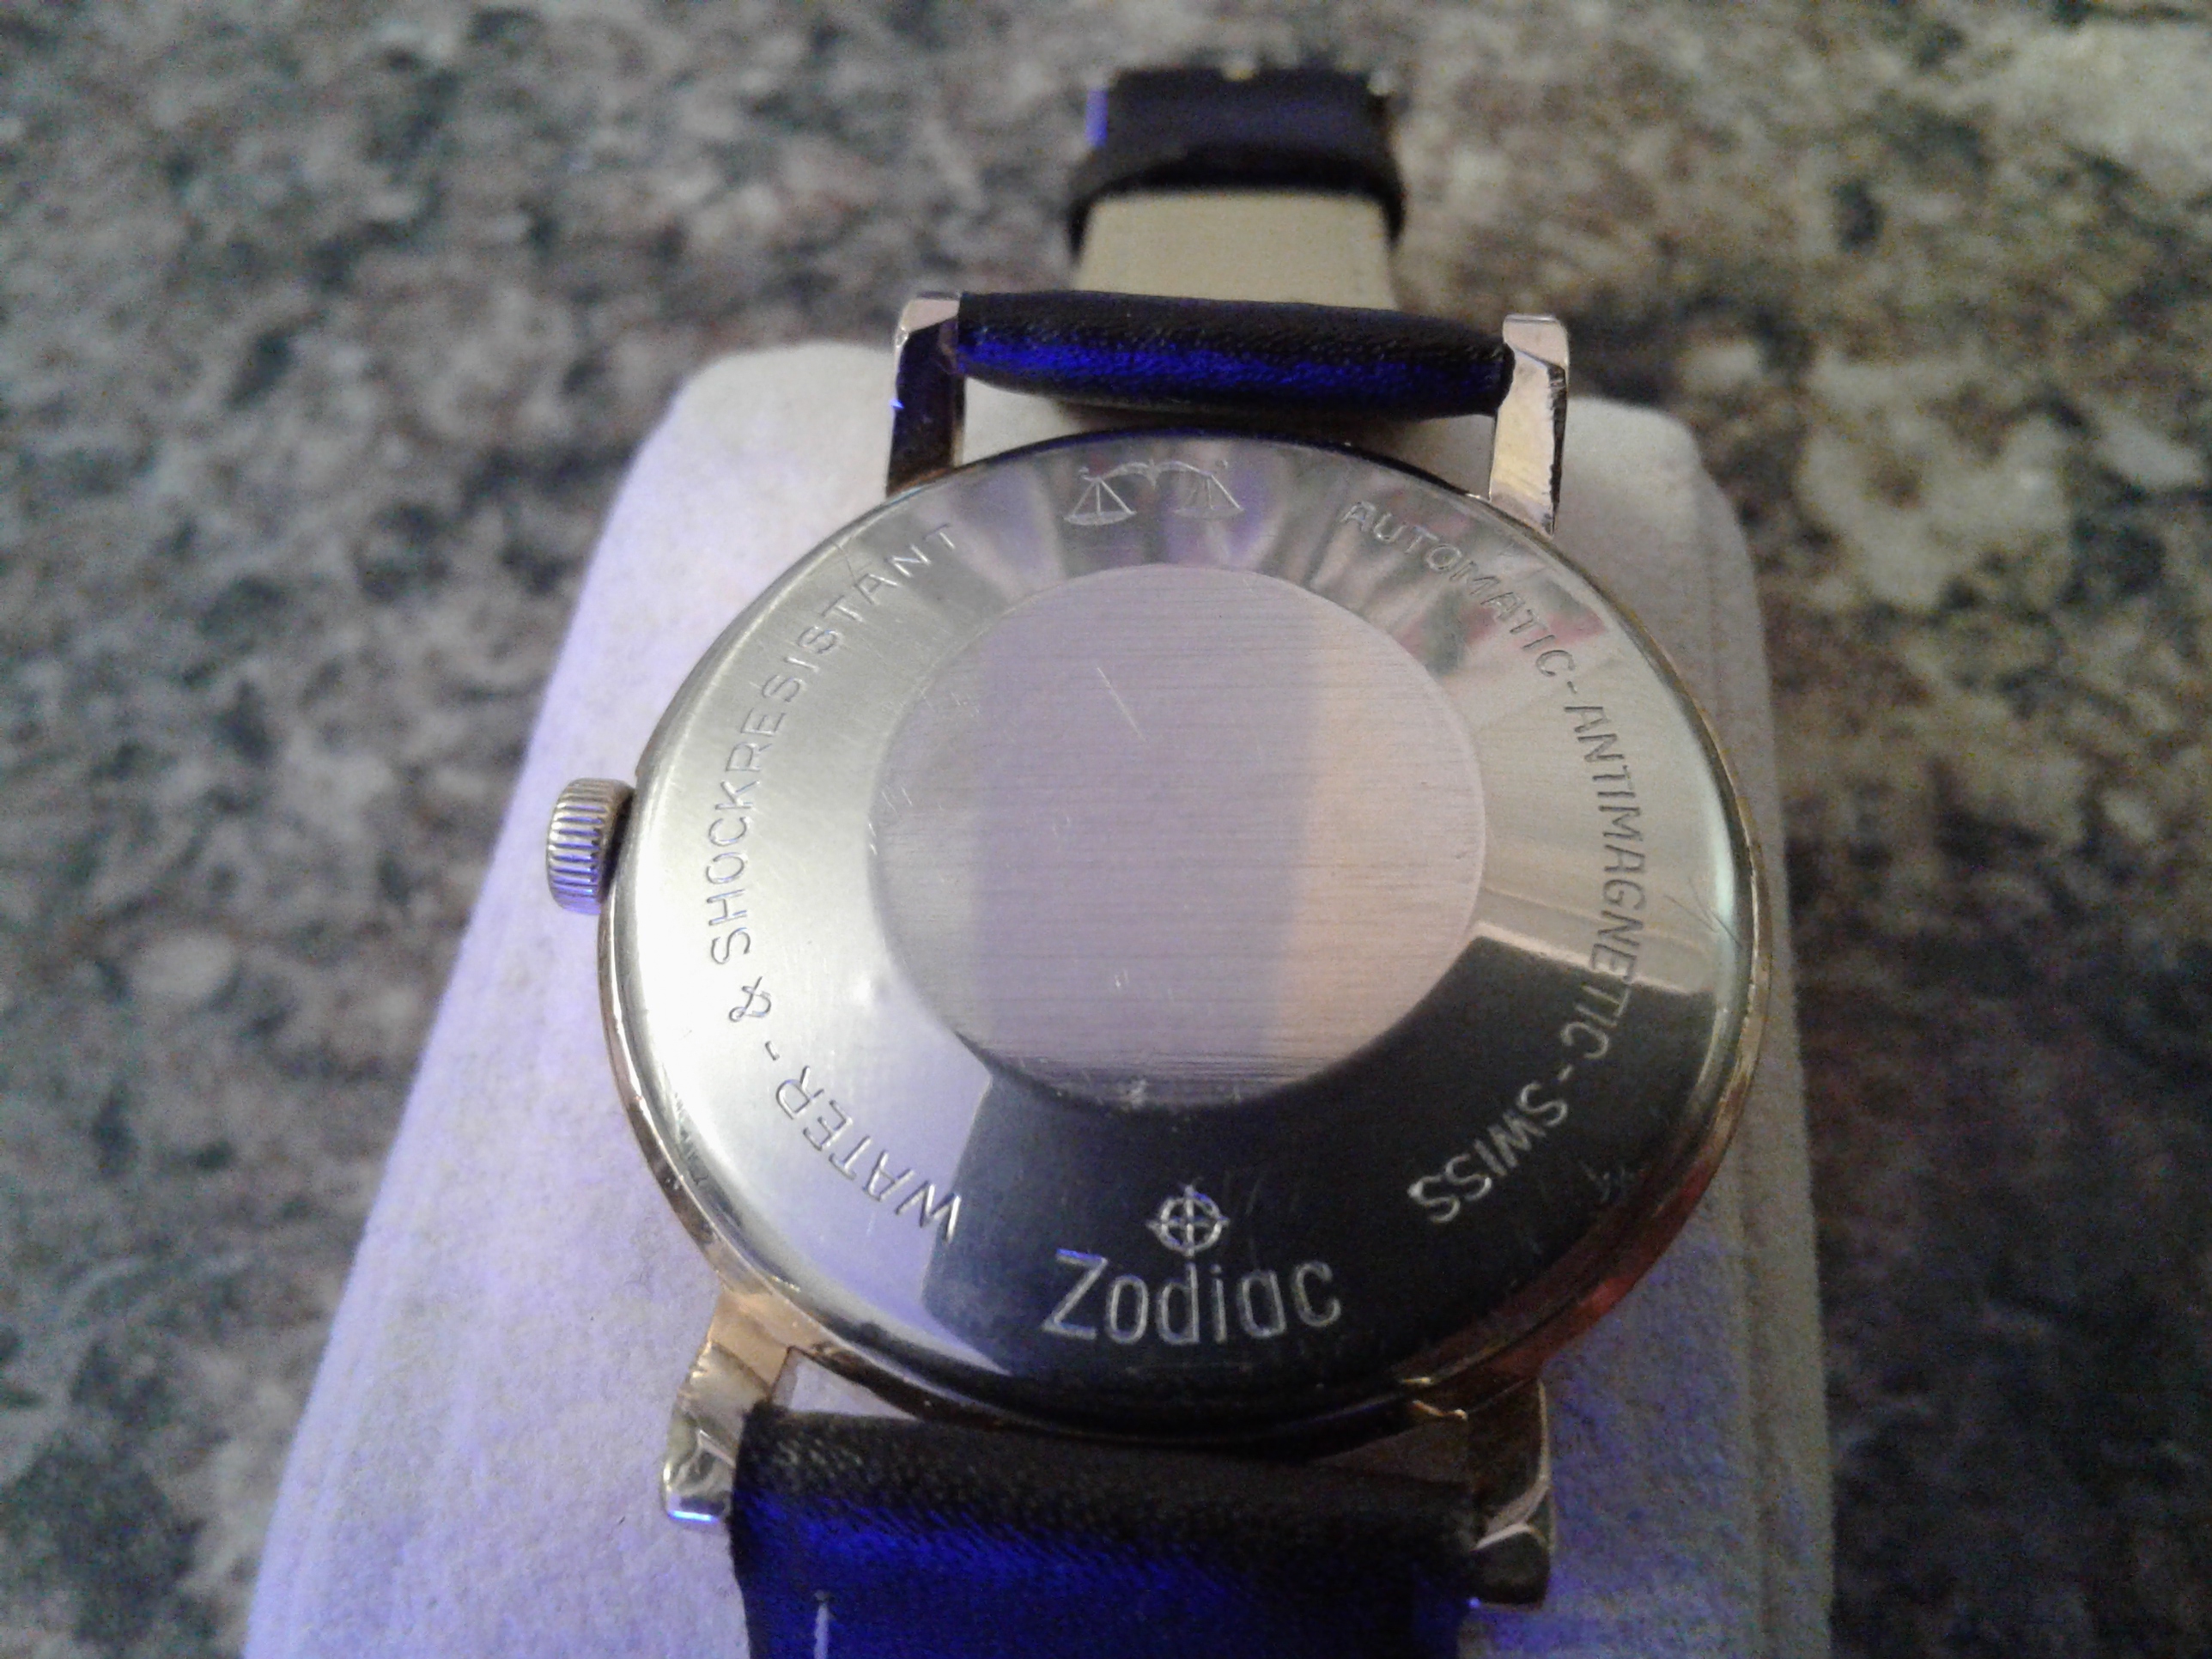
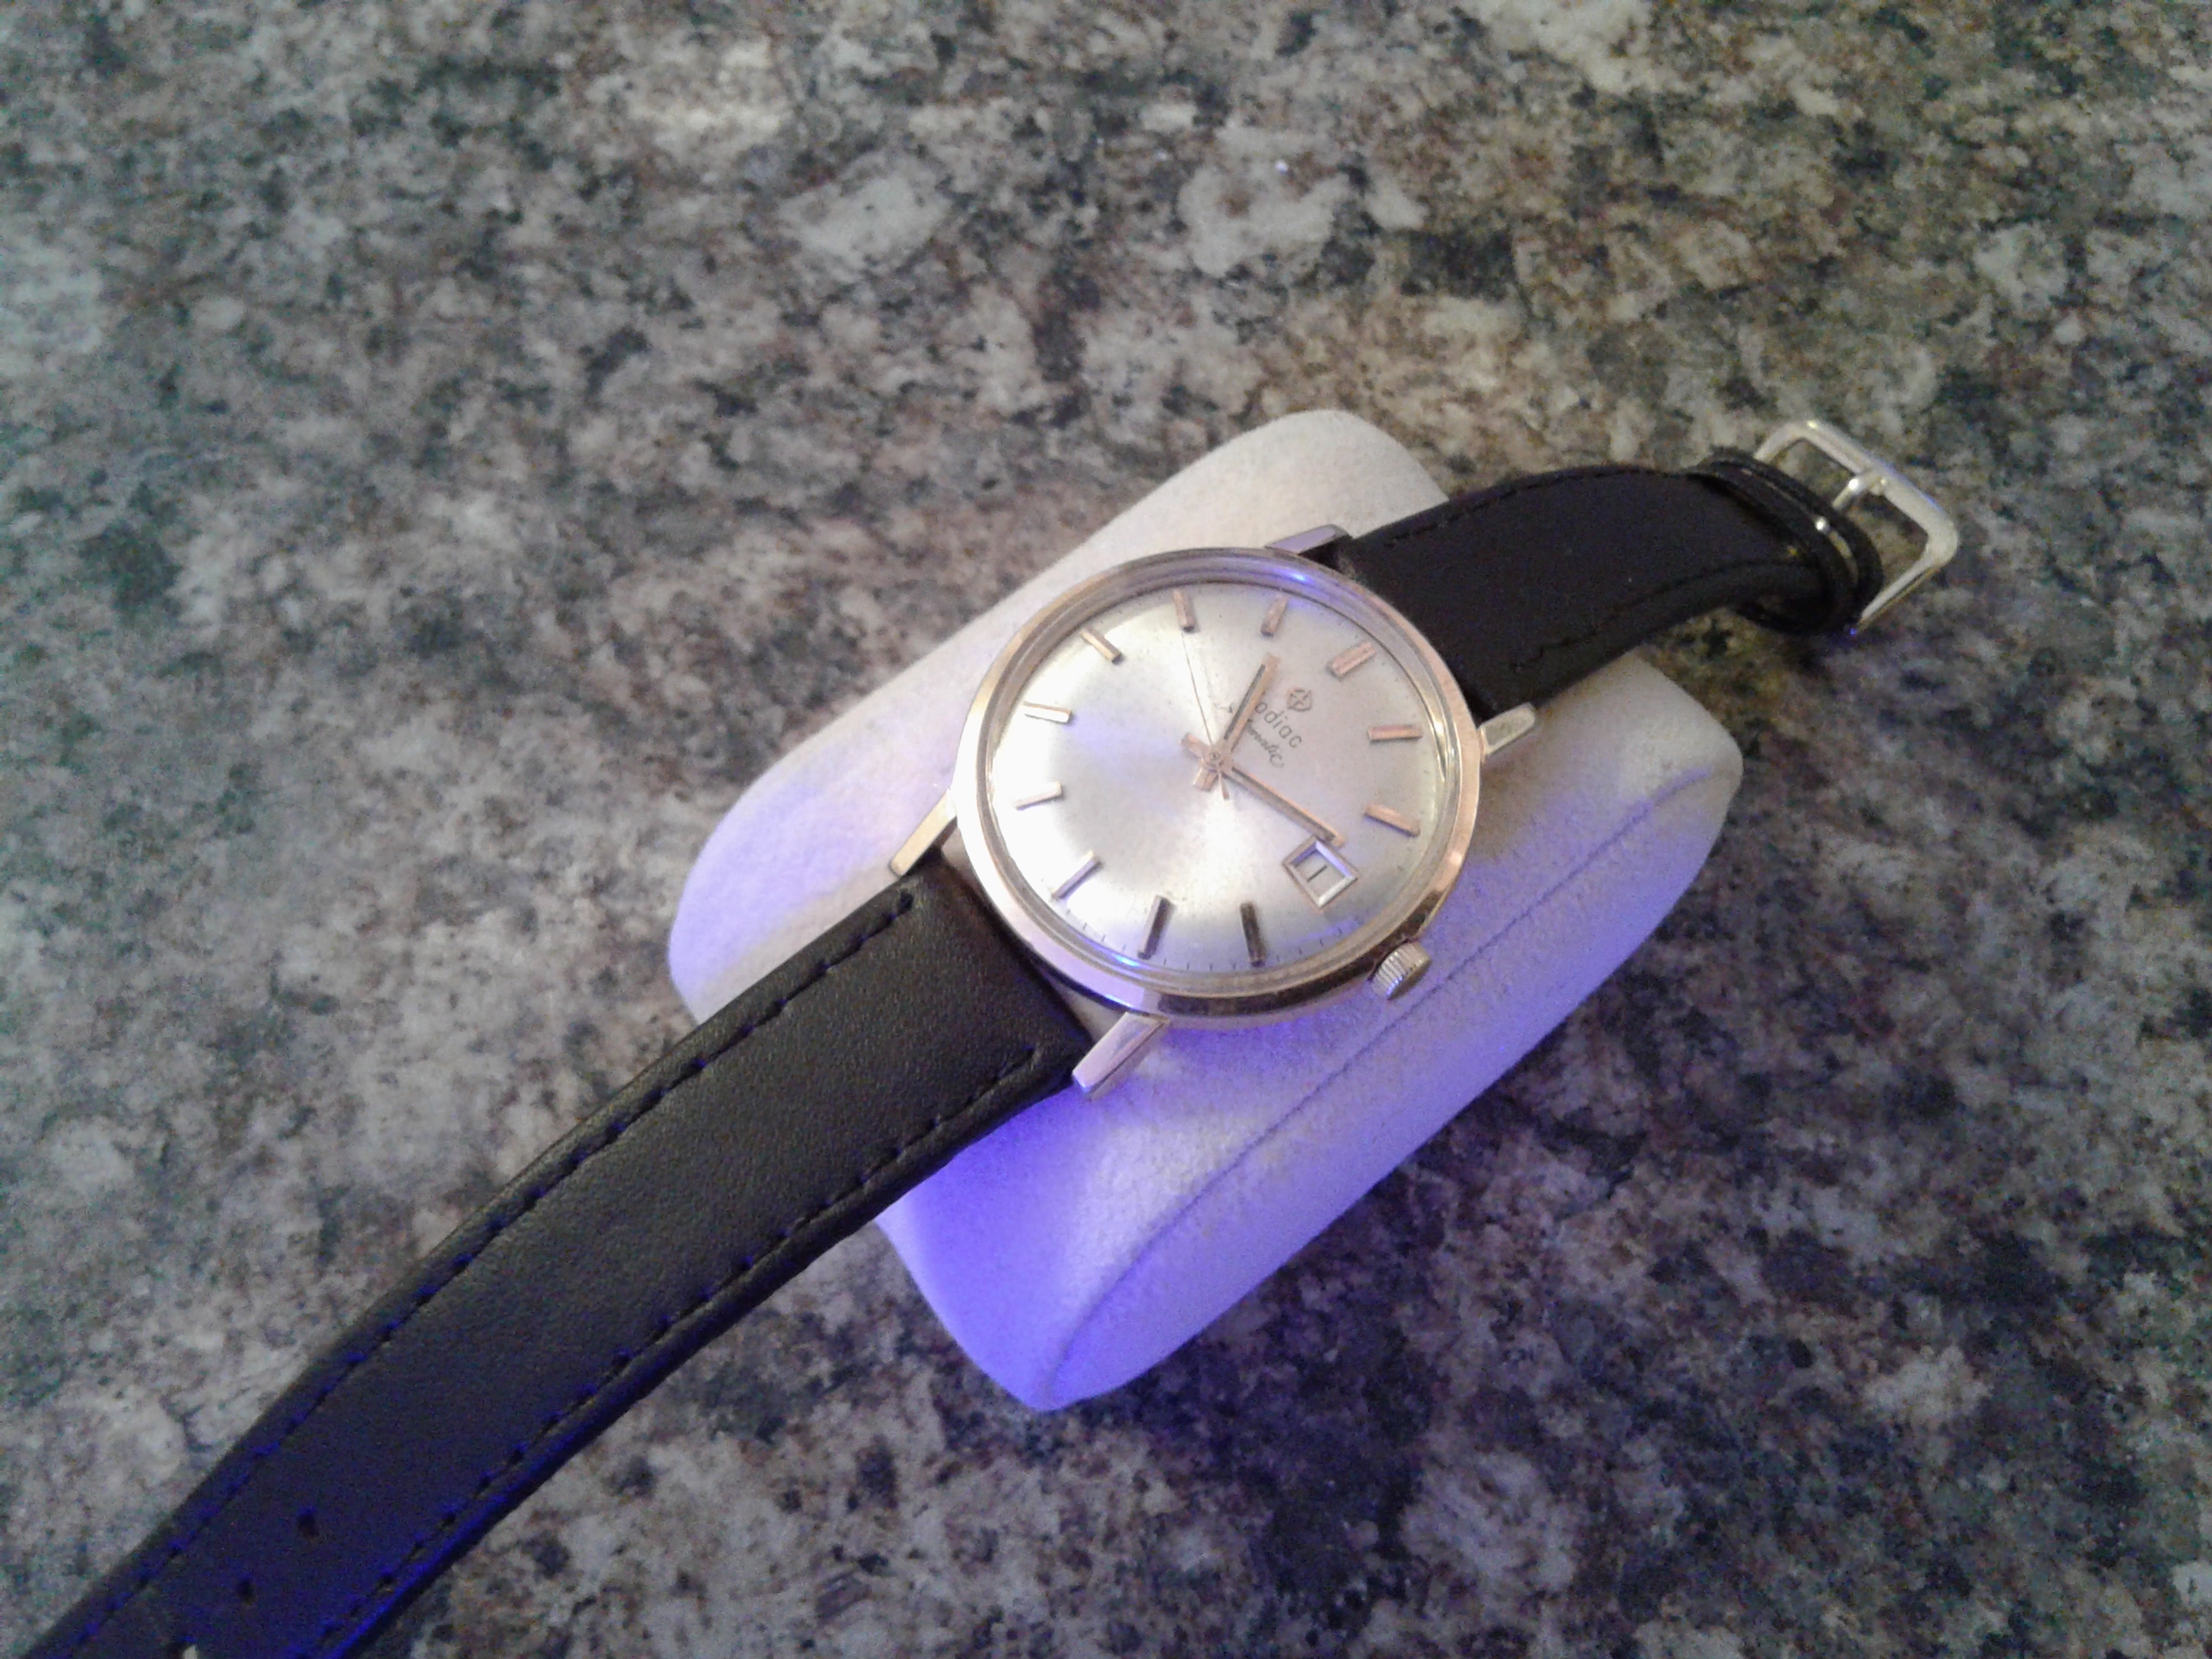
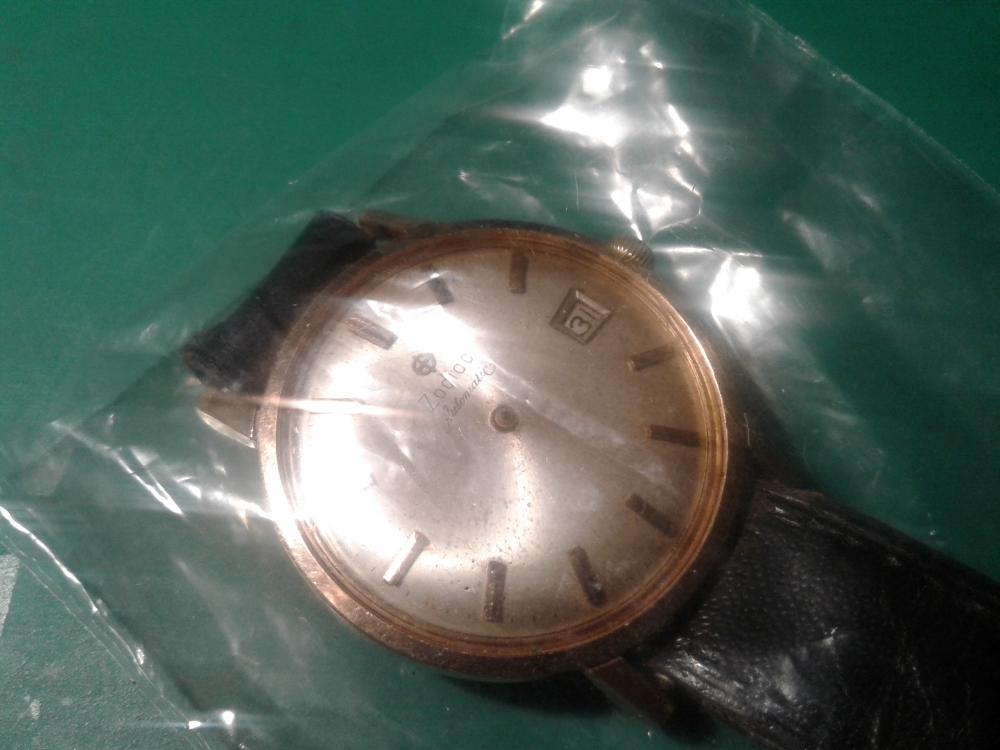
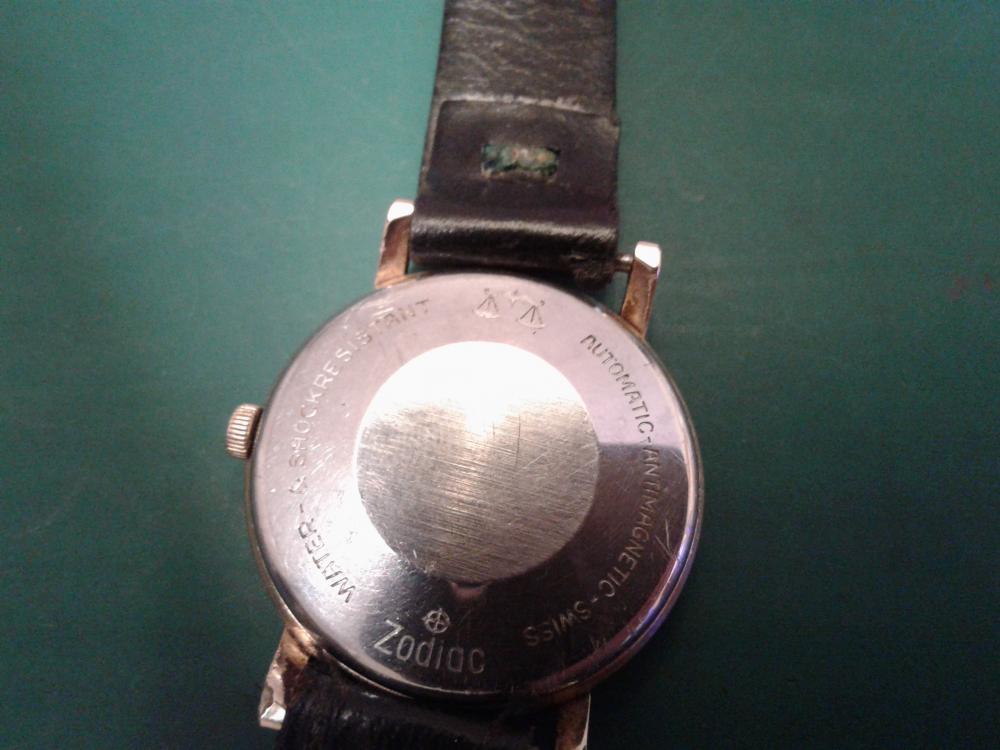
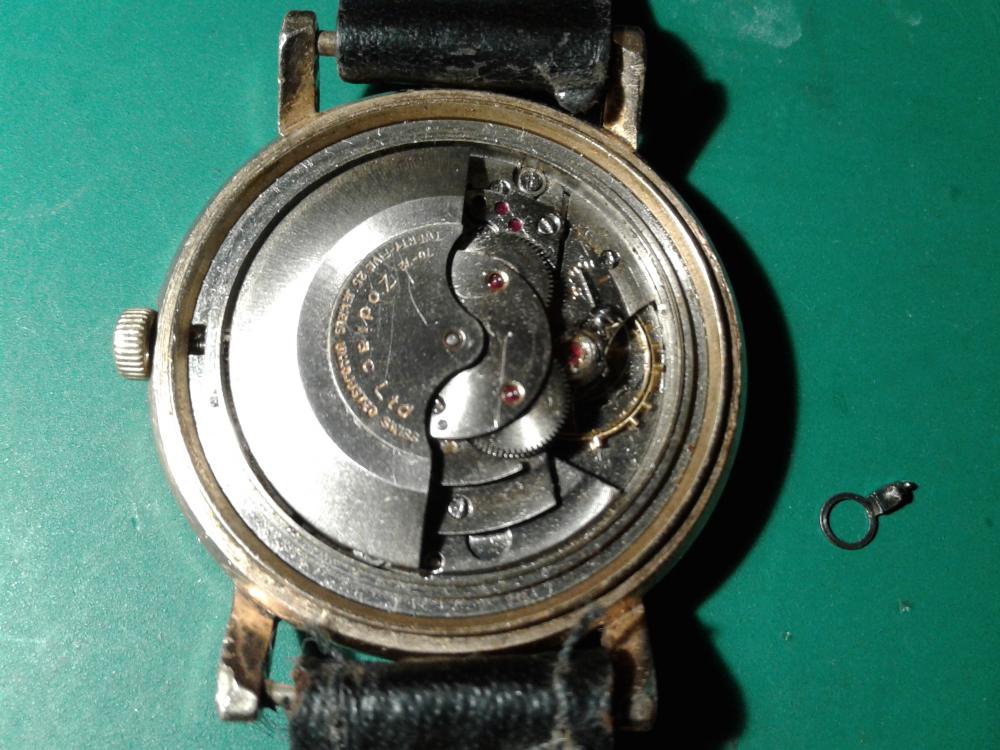
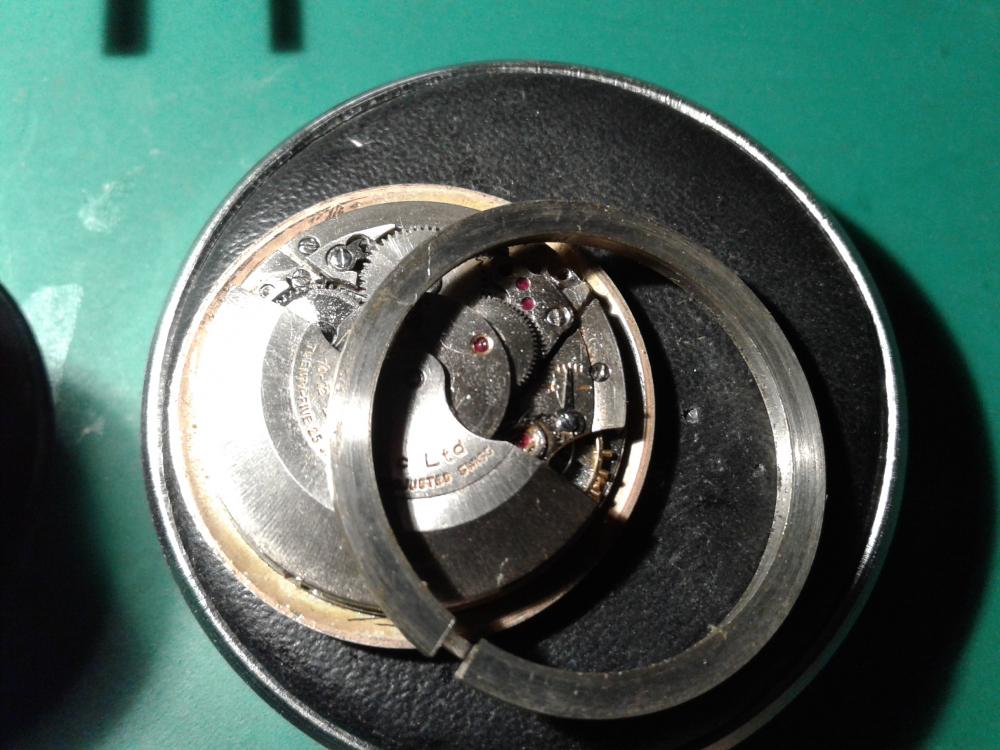
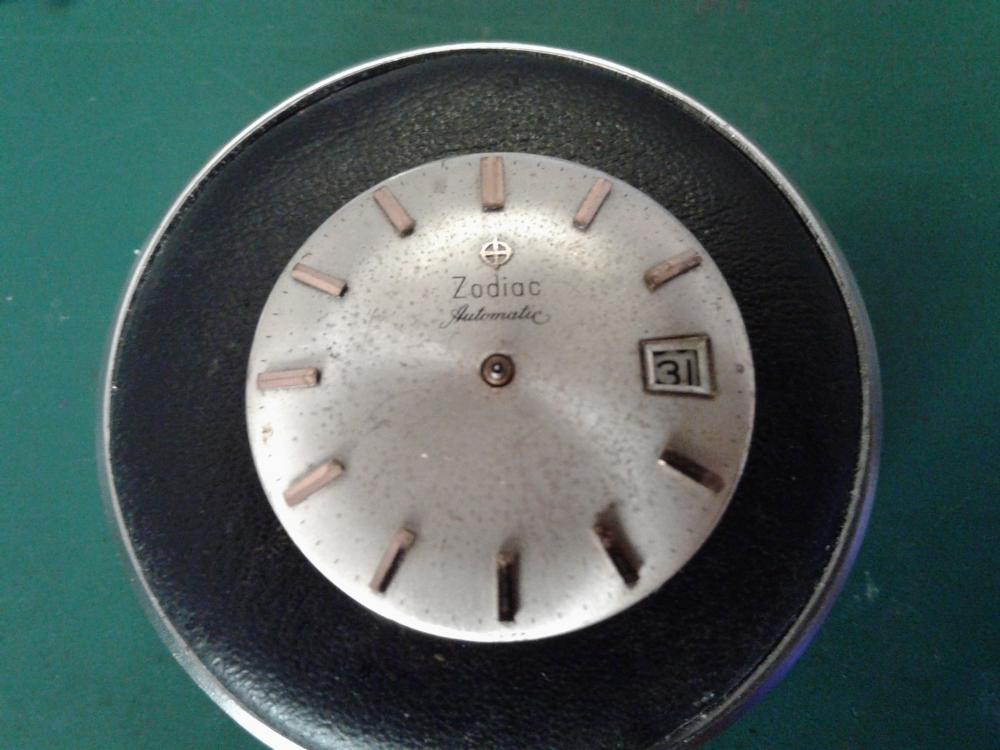
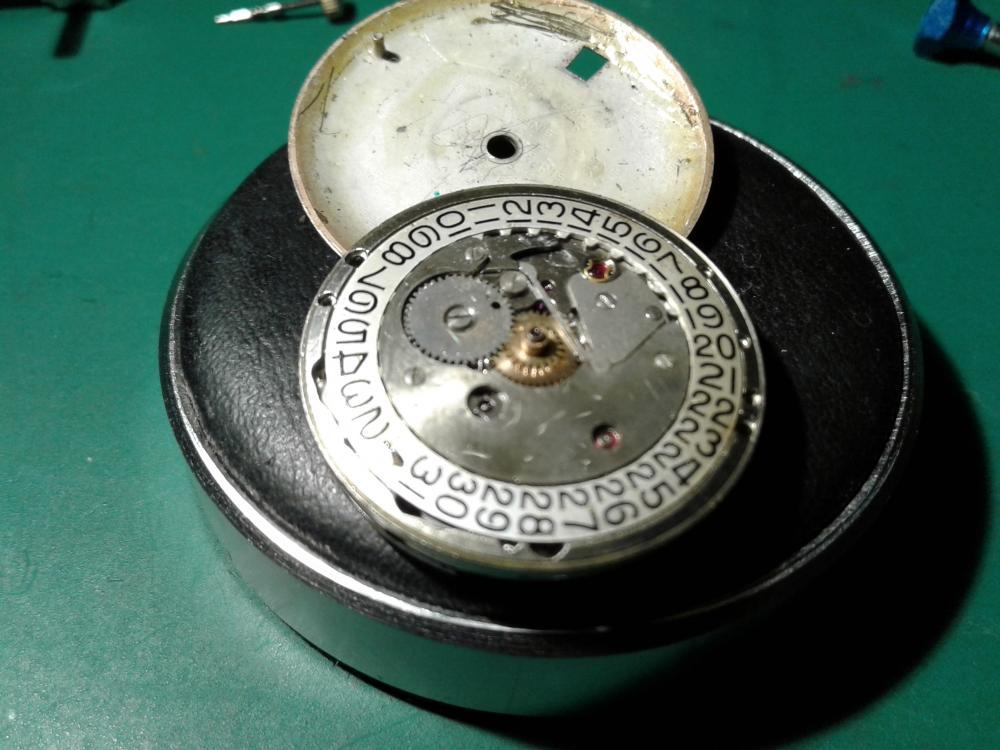
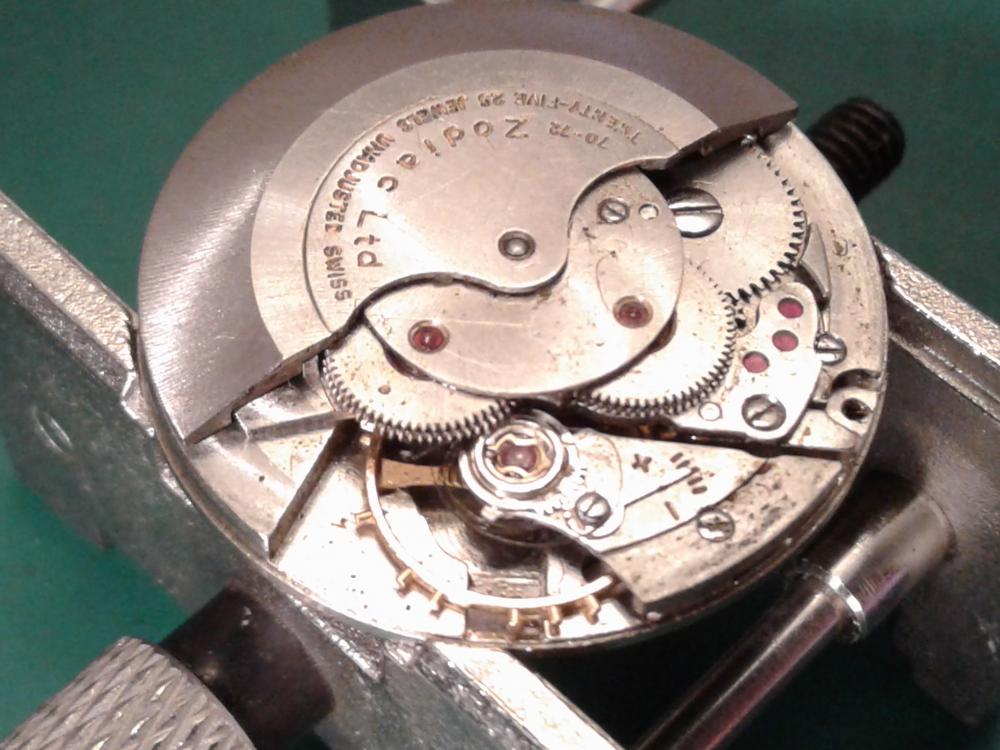
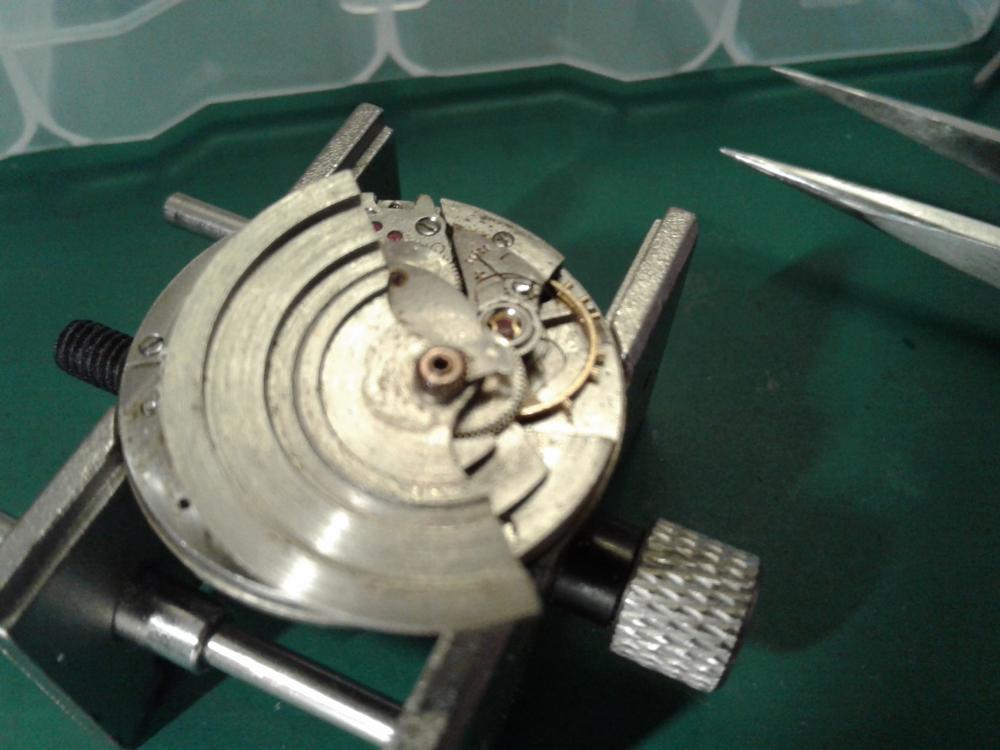
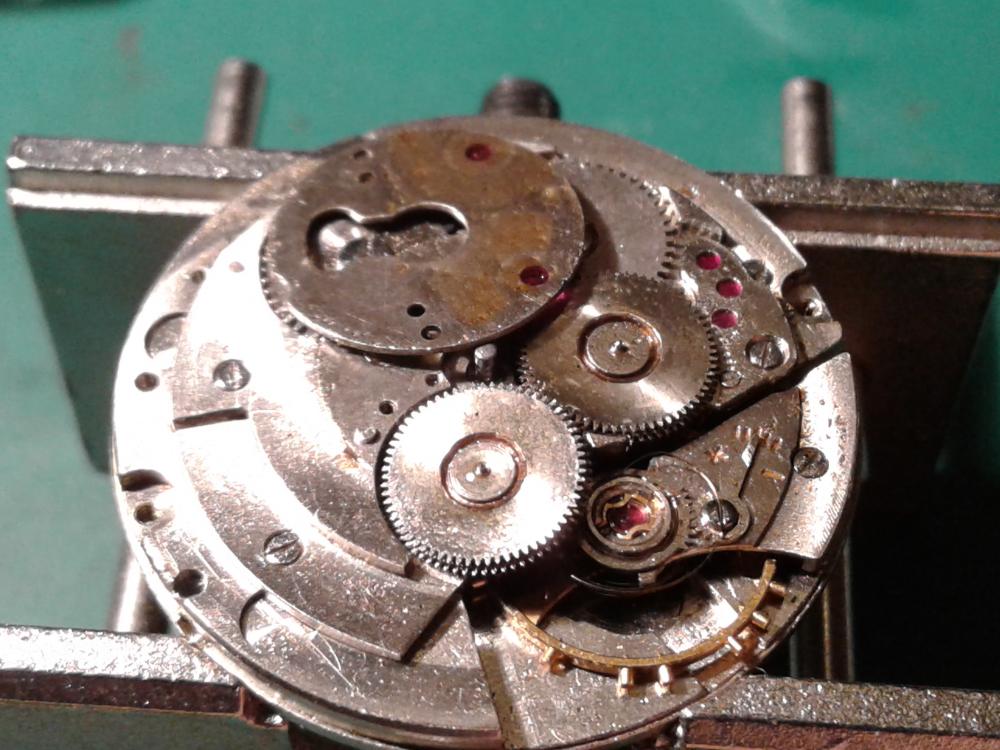
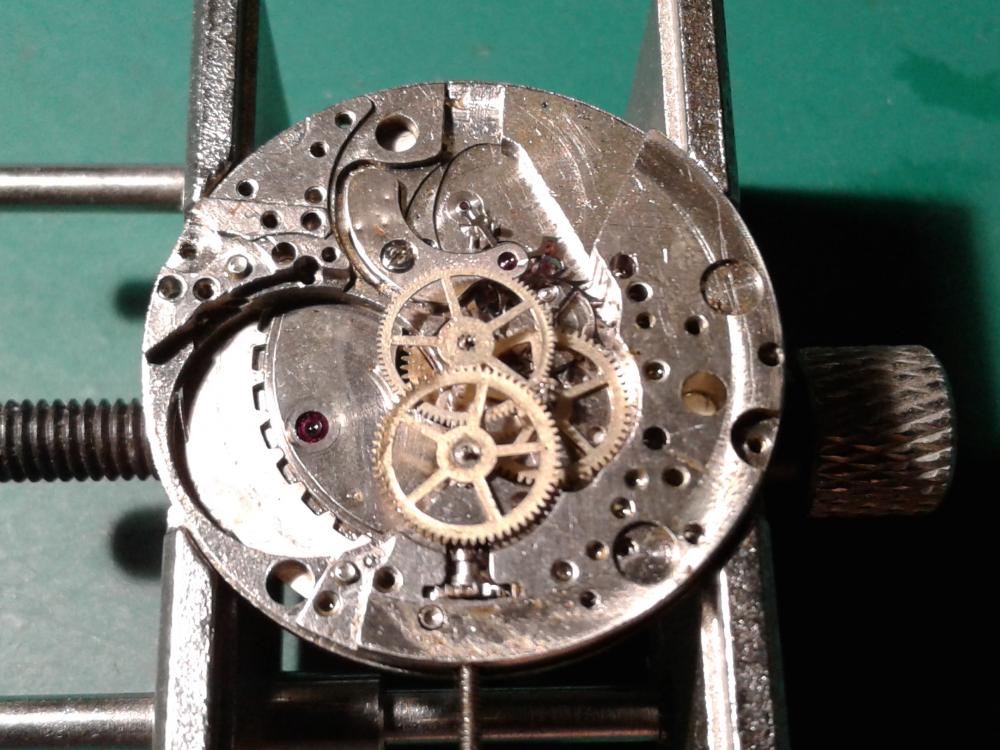
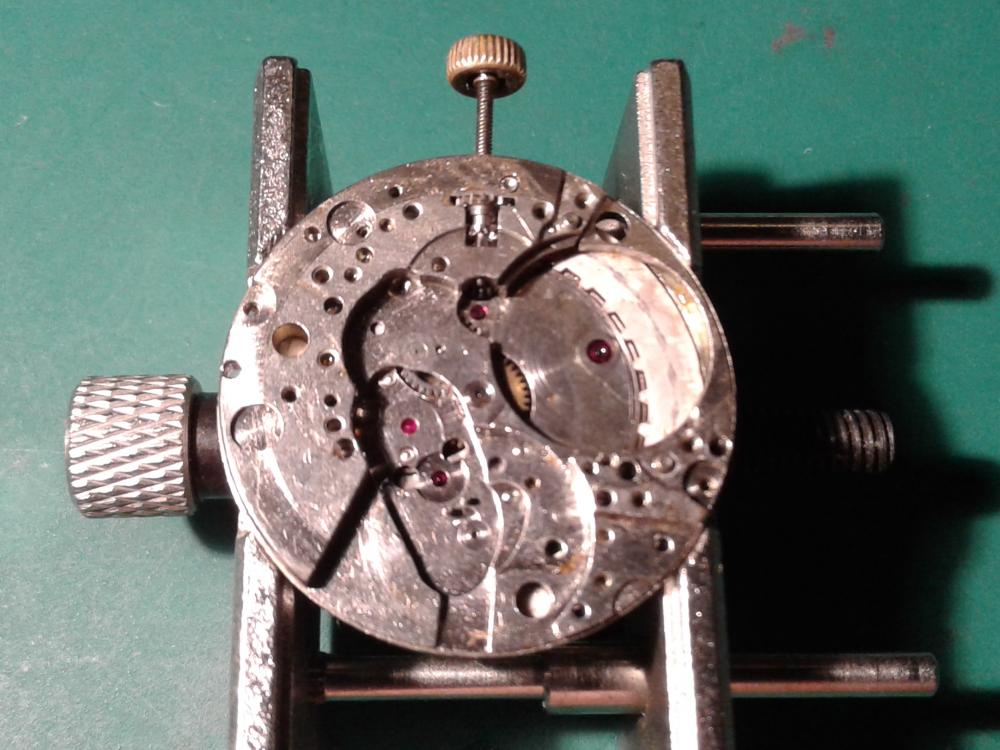
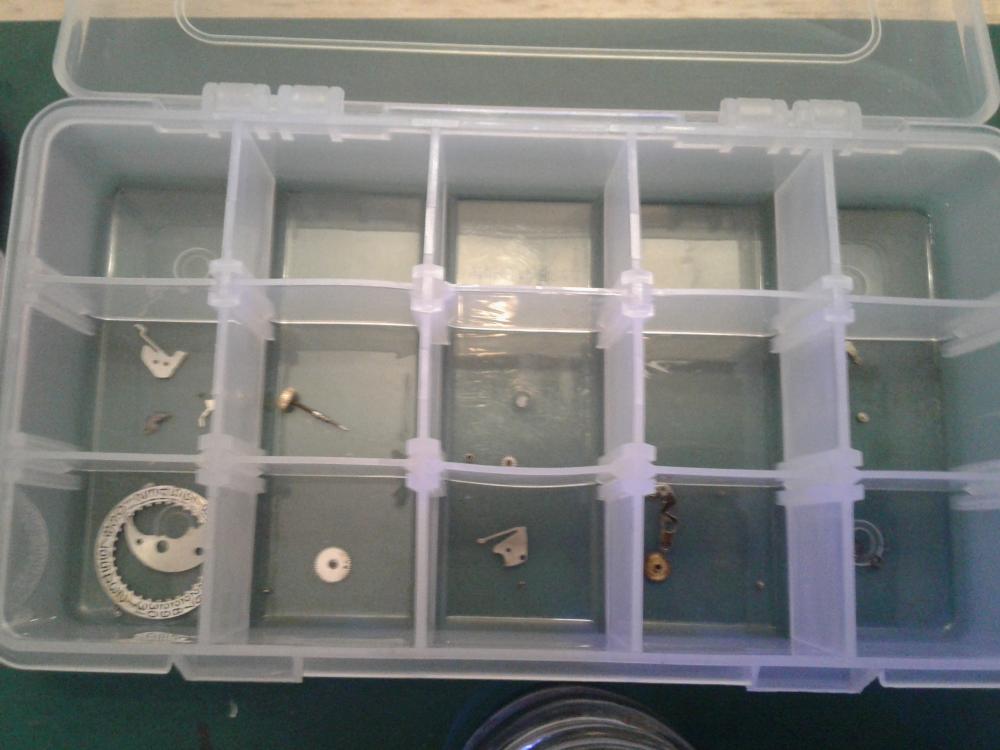
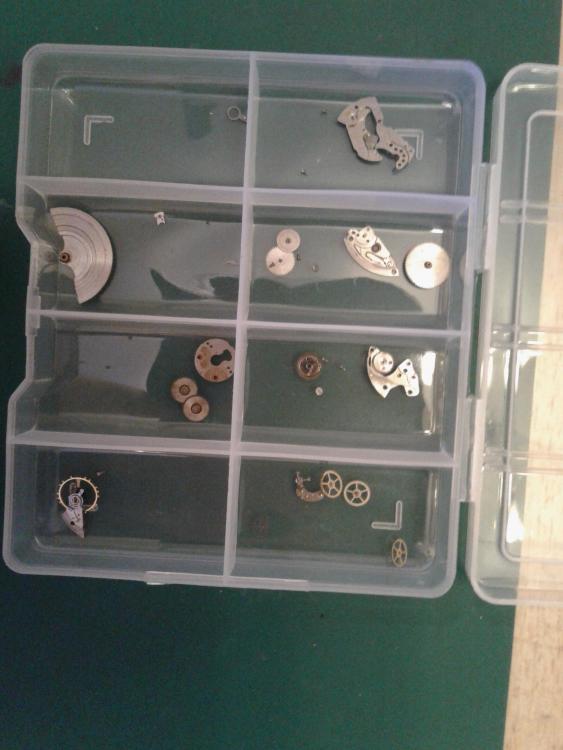
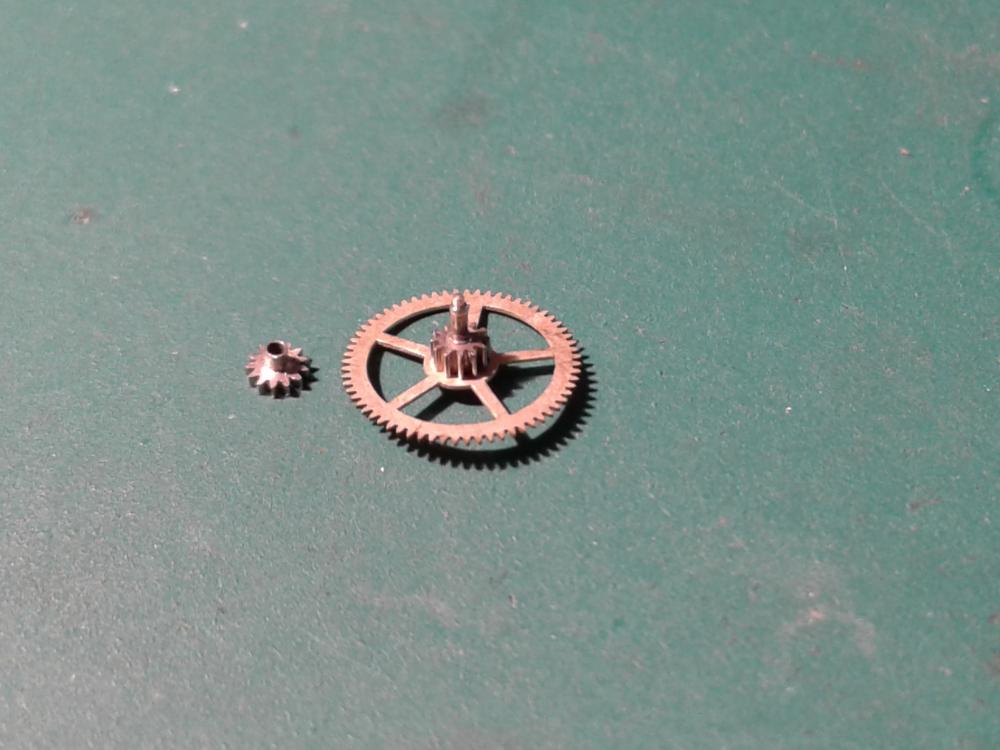
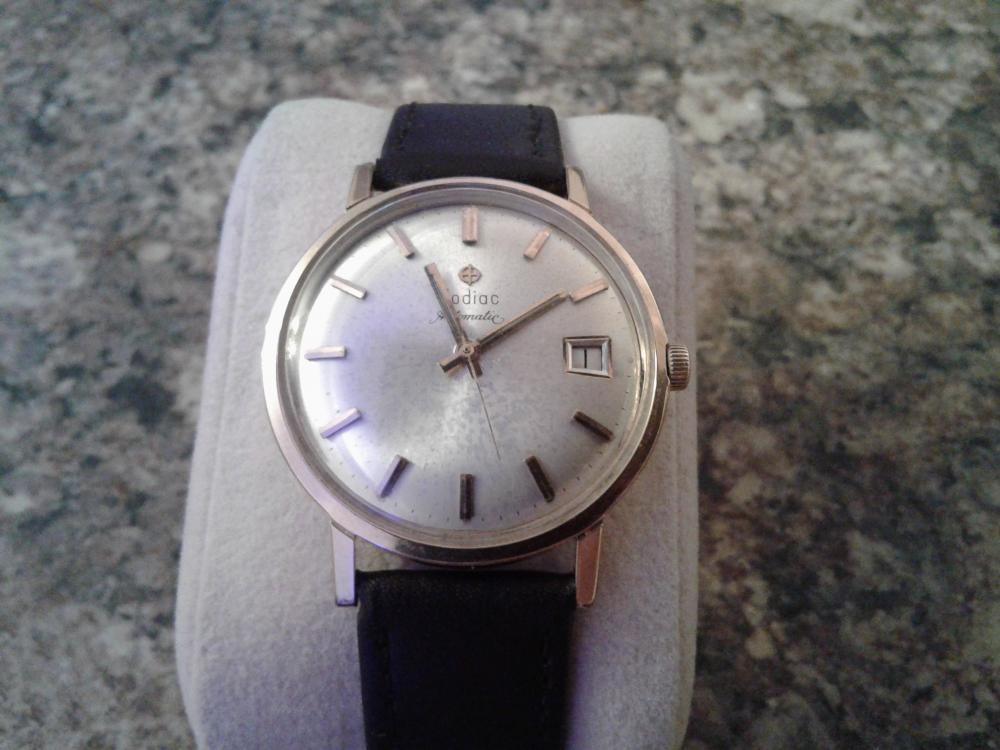
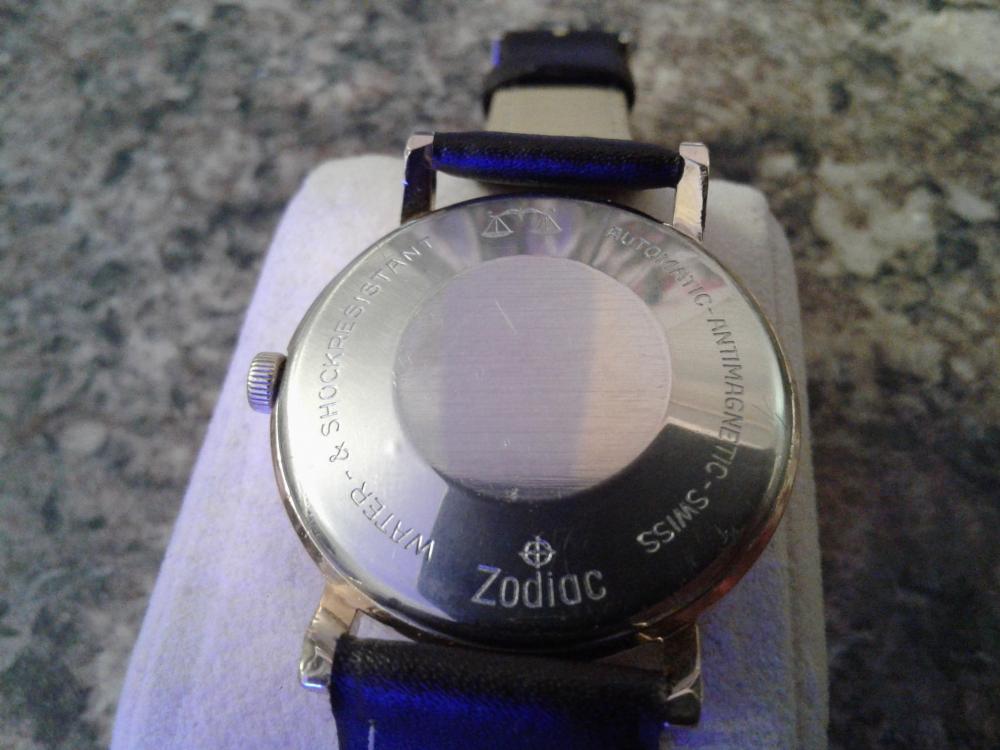
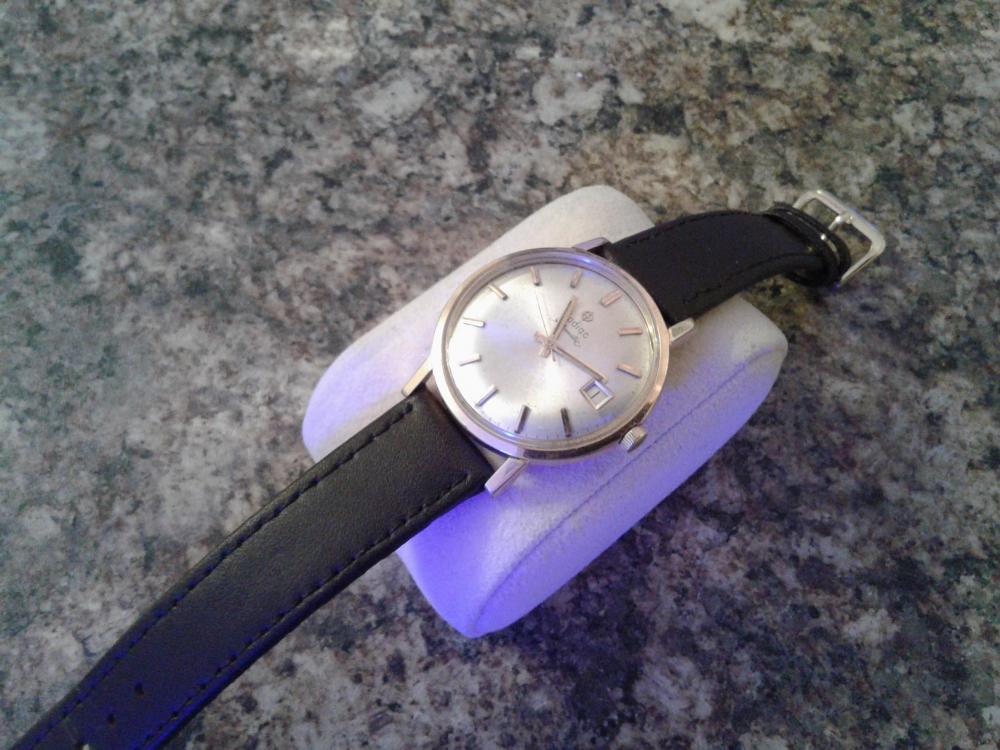
I was lucky enough to win on the bay a Zodiac 70/72 automatic at a reasonable price. I knew the hairspring was shot but wasn't expecting what I found. On receiving the watch and opening the bag I thought I know that smell "OIL" Looks ok dial needs a bit of a clean but the case is in good Nick. The back shows hardly any wear so a good polish should sort that out. So I open it up and once again the over powering smell of 3 in 1 hits me like a slap to the face. The stud holder has come off but luckily is in tact. I start to strip down the movement. Out of the case and case ring removed. Dial looks ok hopefully dust a light wash in soapy water will get rid of the oil and remove alot of the spotting. Dial removed and my first glimpse of oil. Flip it over and take a closer look it the movement the hair springs a mess and the balance is wobbling like a 16 year old on a night out. Rotor off. Reversing wheels a bit of staining and more oil. Auto wind wheels and balance removed now like a fool I forgot to take a photo of the spaghetti mess of the hairspring and the staff had a broken bottom pivot. I decide to drop John at obsolete watch parts an e-mail and luckily he has a complete balance at a very reasonable price and further more if I post the movement to him when I've cleaned it as we are unsure whether its the correct one for the movement as according to J boreal the base caliber was a AS 1649 he will try it before I buy bit now that's service for you . Look at the oil its dripping in the stuff. crown and ratchet wheels Now the barrel on this caliber is a sealed unit and has wrote on it very faintly do not open. But I'm not worried about it being oiled it has enough oil on it to last forever. Look at all that oil its been dipped I'm sure. Barrel out. Train bridge off. That side is stripped just alot of oil and a bit of staining. Dial side more oil date ring a bit stained. Oily That's It stripped down and ready for the ultrasonic. The cleaning went well and the assembly was just a reverse of the strip down. I then sent the movement of tho John and he fitted the balance and returned it all within 2 days the man's a star. On reassembly and leaving to run after I had adjusted it on the timing machine I noticed the hands were only moving 5 minutes in the hour. This was the culprit a slipping clutch wheel on the offset cannon pinion. Luckily Rogart69 heard my call for help and directed me in the right direction as to how to tighten it many thanks to him. So here it is running nice and looking good.


 1 point
 -
This is what I've been watching over the past few days. James a real clockmaker. He brings back memories to me because his type of work is very similar to what I did. His workshop is better equipped then what mine used to be, James has some very good tips and his way of working is top and first class. So if you are interested in clocks and how we go about making parts sit back and enjoy his videos.1 point
-
Recently I got an early 214 from 1963 that had a faulty coil. The coils on these are in two parts, a cell-coil and component coil, joined by three fine insulated single-core wires. The Cell coil had gone O/C due to water/battery leak rotting out the fine wires where they attach to the soldered binding-posts--Mainly because Bulova hadn't covered a small section of the wire with any protective varnish. A replacement cell-coil was bought from the guy in Bulgaria and the old one replaced on the coil assay. Fitting to the movement, it didn't run. It would go for about 5-10 seconds after plucking the fork, but the hum would slowly die away. I assumed the resistor and capacitor were messing round --so replaced these in the component coil side. Still the same. I checked the transistor--but it looked good in testing--I replaced it anyway, using a silicon device tacked in to test, altering the bias by changing the resistor from 3.9 meg to 2.2 meg, to accomodate the different bias requirements between a Silicon and the old Germanium device it was replacing and tried again. Exactly the same! I monitored the current using my home-made PSU, it would initially pin the meter and that would die away to 5uA, but the movement still not running and no hum either. Plucking the fork, it would run for 5-10 seconds, then the hum would die away, and no appreciable difference in current draw. The clue was the constant current it was drawing after the initial pulse. It was perfectly clear when I dragged the Scope out and checked. The coil set was oscillating at 200 odd KHz! When the fork was plucked, the 360Hz was modulating the 200KHz. I guess a Long-wave radio could have picked it up if it was close by! Fortunately,--Bulova had also run into this problem as well and on some coils added an extra capacitor to the component-coil to damp out the radio-frequency oscillations. A 0.01uF (1 Nanofarad, 1000pF) cap was installed at the point the wires from the cell-coil attach to the component-coil. Its placed between the leads of the drive coil (Red wire) and the feedback coil (Green wire). Doing likewise with an 0805 1nF SMD cap cured the issue completely and the movement runs normally, even self-starting--with lots of wires and components hanging out of it! I just now need to rebuild it all properly and neatly into the component-coil recess--Which should be fun!. I'm guessing that the inductance of certain Cell-coils must be just right to cause this oscillation so they added the extra cap on those causing troubles.1 point
-
Well I'm graduated and this thread is ended!1 point
-
Ooh, 51mm! Didn't spot that. 51mm is a pocket watch, not a wristwatch... S1 point
-
Look up PlusGas, it's excellent stuff.1 point
-
I was looking at Jeffc83 posting showing the Helbros, in my travels I picked up a Gruen for spares/ repair that bears a remarkable similarity, I was attracted by the date at 6 and it does tick for a while so I live in hope. Makes me wonder if there was a relationship between Helbros and Gruen but apart from the American connection there does not seem to be one Cheers, Vic1 point
-
A real watchmaker & a real comprehensive workshop. Really worth a look at these vids.1 point
-
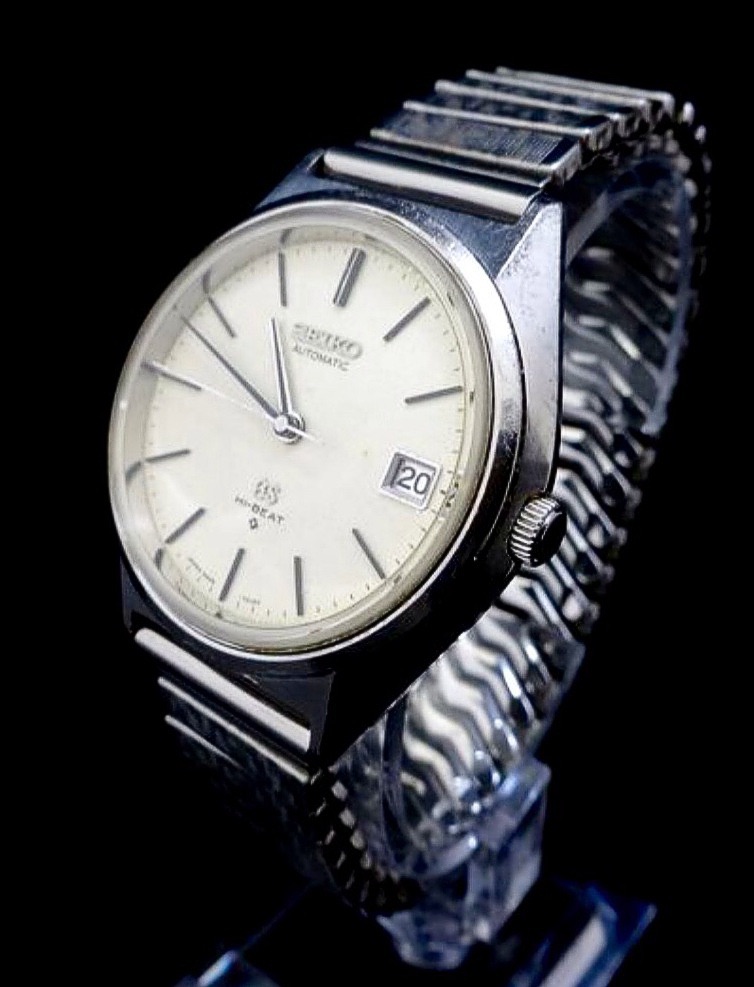
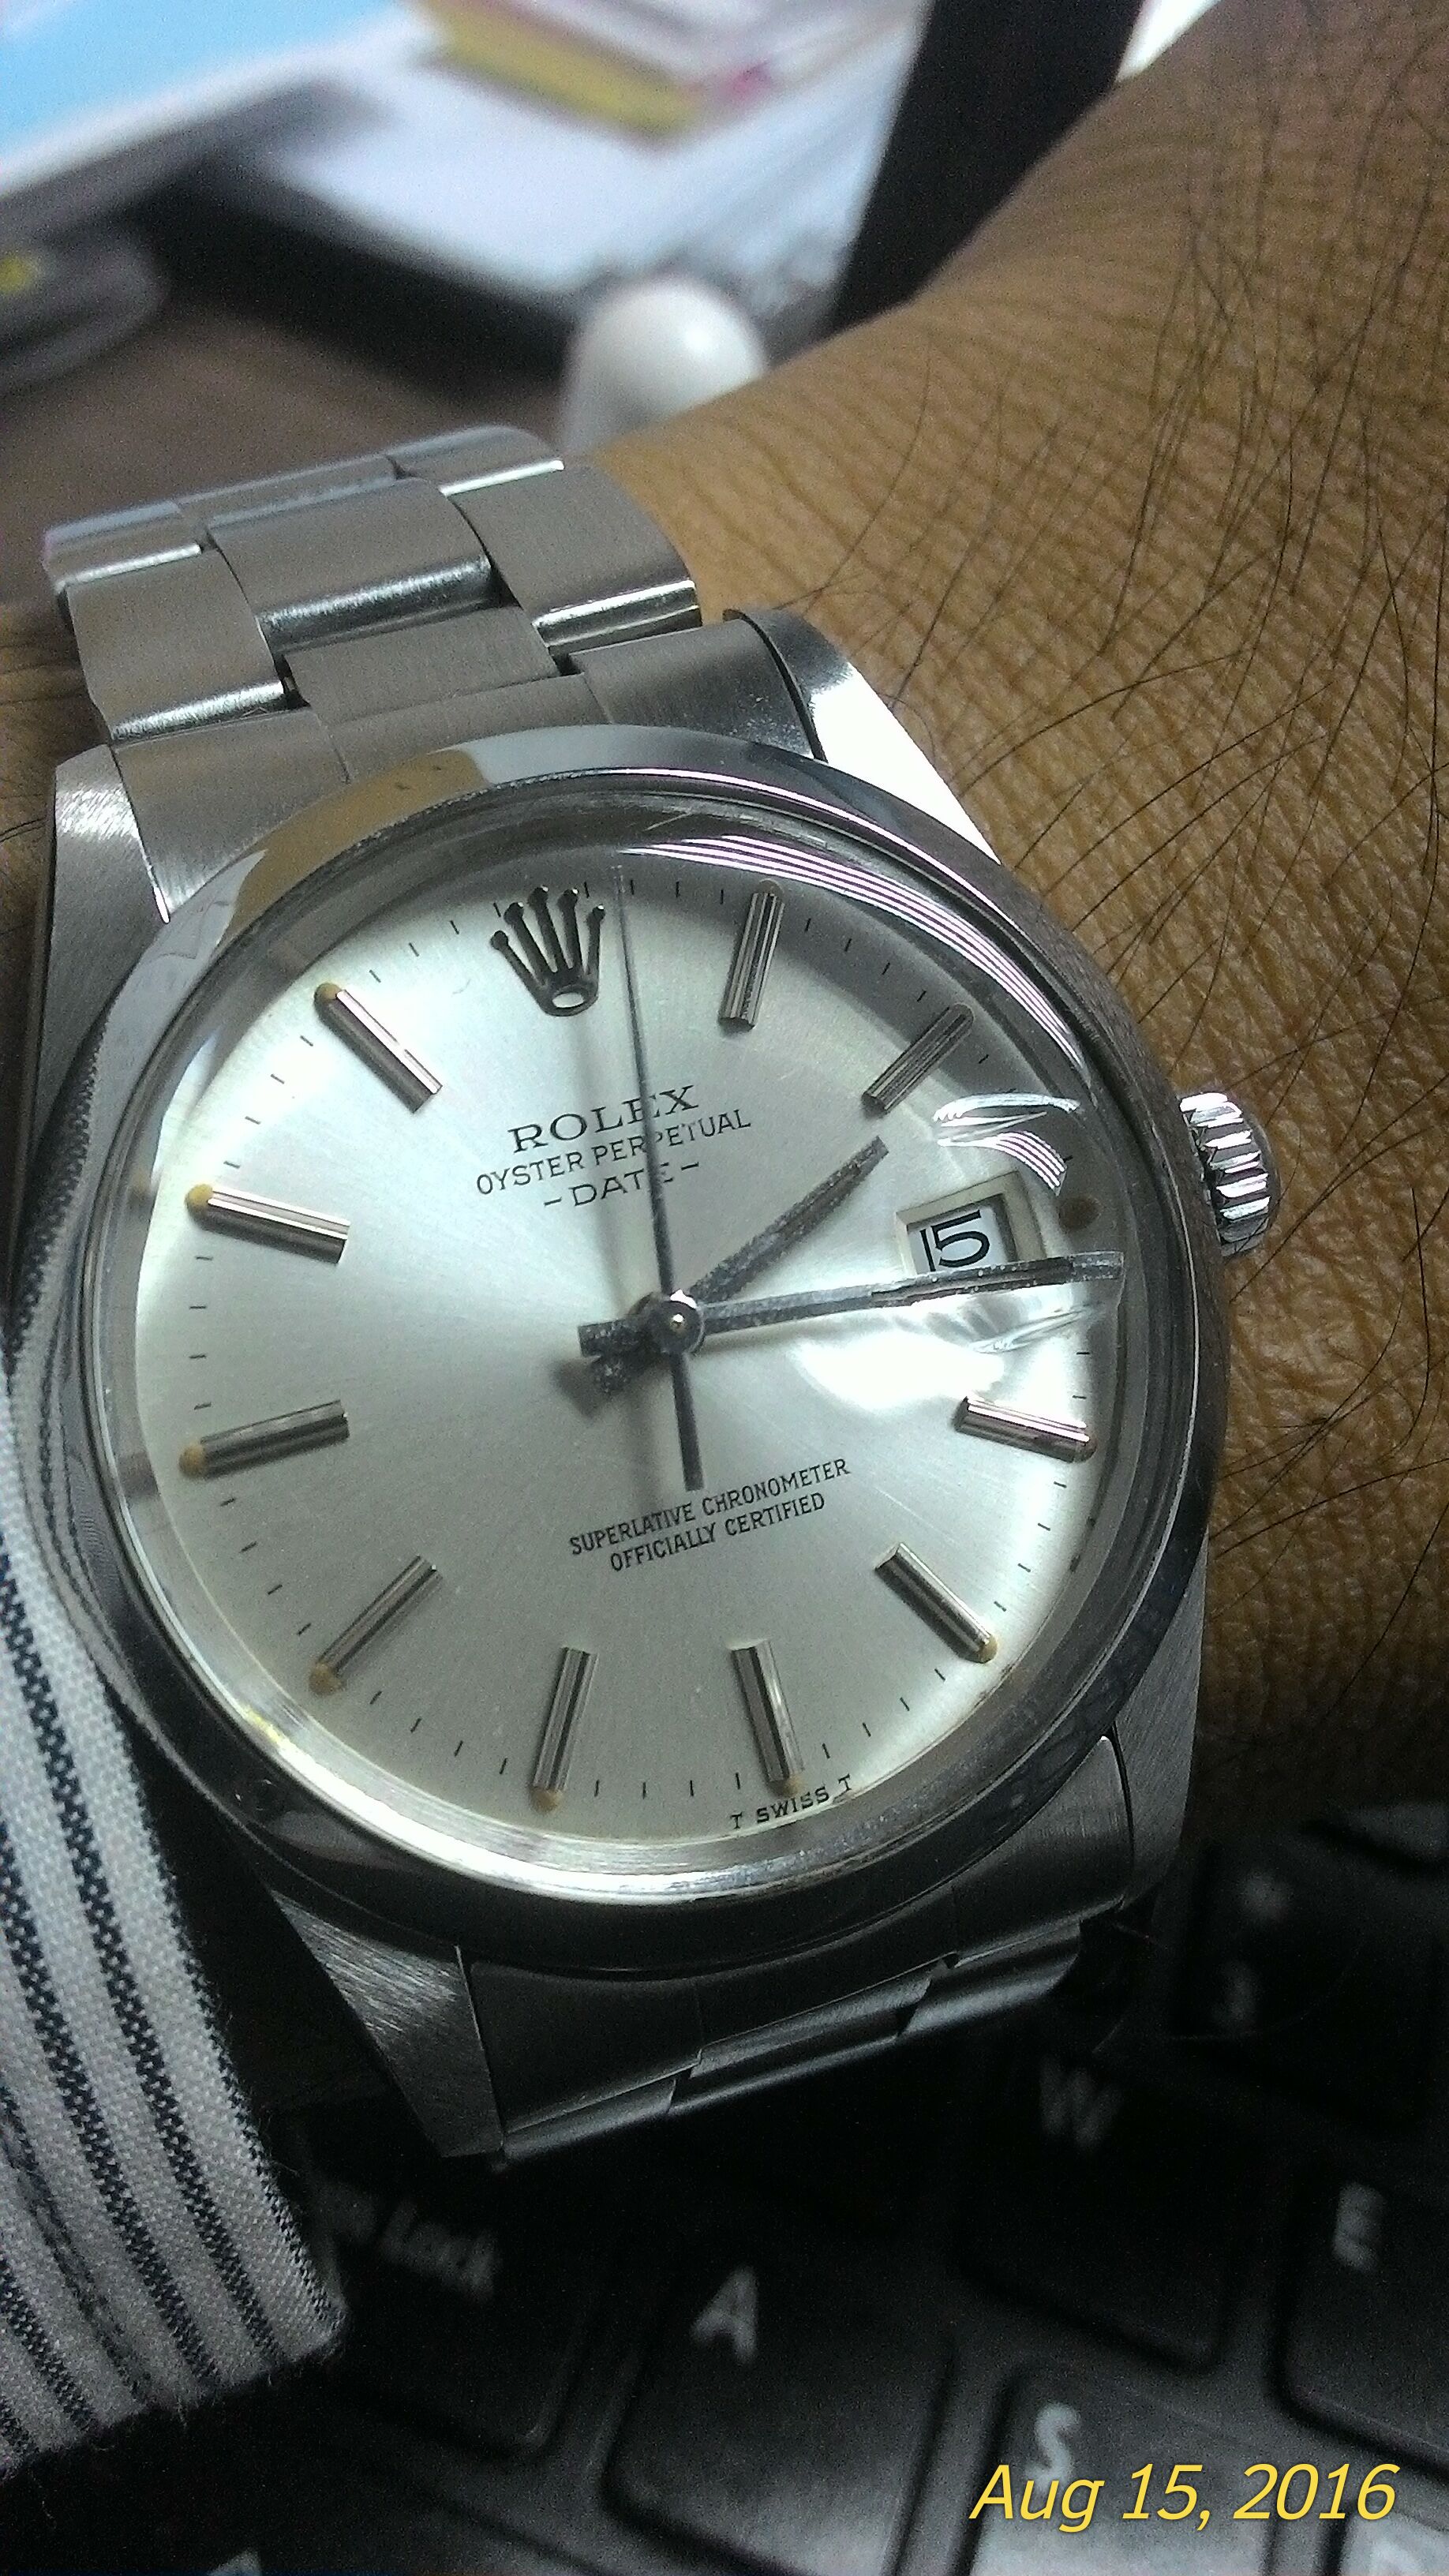
Well here's what I'm wearing today! About as far from Seiko as you can get. A 1980 Rolex ref 15000 with 3035 movt. Anil
 1 point
 -
JDM, A number of years ago I purchased a SINCERE lathe from China. It is a Geneva style light duty lathe roughly patterned after the Bergeon, Lorch, Wolf Jahn Geneva style lathes. When I bought the lathe, including the cross slide and collet holding tailstock, the cost was around $450.00. The motor was an additional $200.00. I later purchased the milling attachment, spring pulley assembly, dividing plate assembly, sensitive drilling kit, tip over rest, file rest and the extra long bed. In all everything came to around $2000.00. Once I took the spindle out, cleaned it, lubricated it, installed an O-Ring seamless belt, and adjusted it, the spindle run out was almost undetectable. It is a fine high precision watchmaker lathe that produces a beautiful turned finish. That said, it is a small light duty machine that is not suited for heavy duty use. As long as the machine is used for small watch size parts and not pushed hard, it should provide many years of service. The swing is the same as other watch lathes and should be able to take a light clean up cut on a watch case. Aside from being a good quality machine, what makes the Sincere lathe a good choice over other watchmaker lathes is its affordability, and the fact that the accessories are also affordable and available. As long as the machine is used to take light cuts with small cutters and drills it should function beautifully. david1 point
-
You must have a nice stash if you just happened to have that crystal. I have a big pile of tehm but never seem to have the one I need!1 point
-
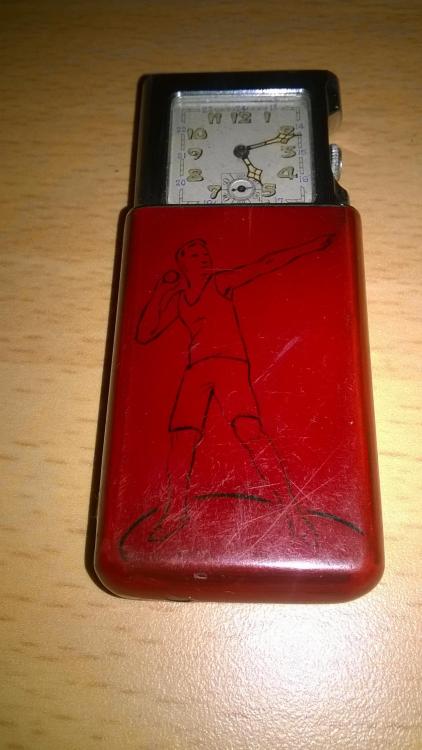
Hi, we were recently donated this watch for our museum collection but don't really know much about it. From the style it looks 1930s/40s and has a picture of a shot-putter on the front. The watch itself is spring loaded and originally would have clicked inside the case when not being used (it now doesn't click). We're thinking it must have been bought for some special event or something like the olympic games as a shot putter is a very specific thing put on a watch! Any information anyone could give us would be brilliant! Thanks!
 1 point
 -
or do you prefer it ?
 1 point
 -
Very cool watch! I don't think I'd be able to resist taking it apart1 point
-
Great walkthrough and nice end result Cad. Thanks for taking the time to photograph and document your journey. I wish more would do this!1 point
-
The answer to my original post. It's what is called a marriage, a clock movement is put into another case very popular with Longcase clocks, many of you know these clocks as grandfather clocks. The case is fine looking and it has the correct description. The movement comes from a different case and is what is called a drum fitting movement. What gives it away is as clockboy said the dial and hands, if you look carefully the fitting of the hands is incorrect they should be held with a collet and pin, not a nut, the centre wheel has been altered to fit the dial, hands are bad they are modern they are not fine which you would expect if original. The platform is a complete replacement and is nothing like what the original would have been. Thanks for the input and it made it fun and games so everyone who took part you each win a peanut.1 point
-
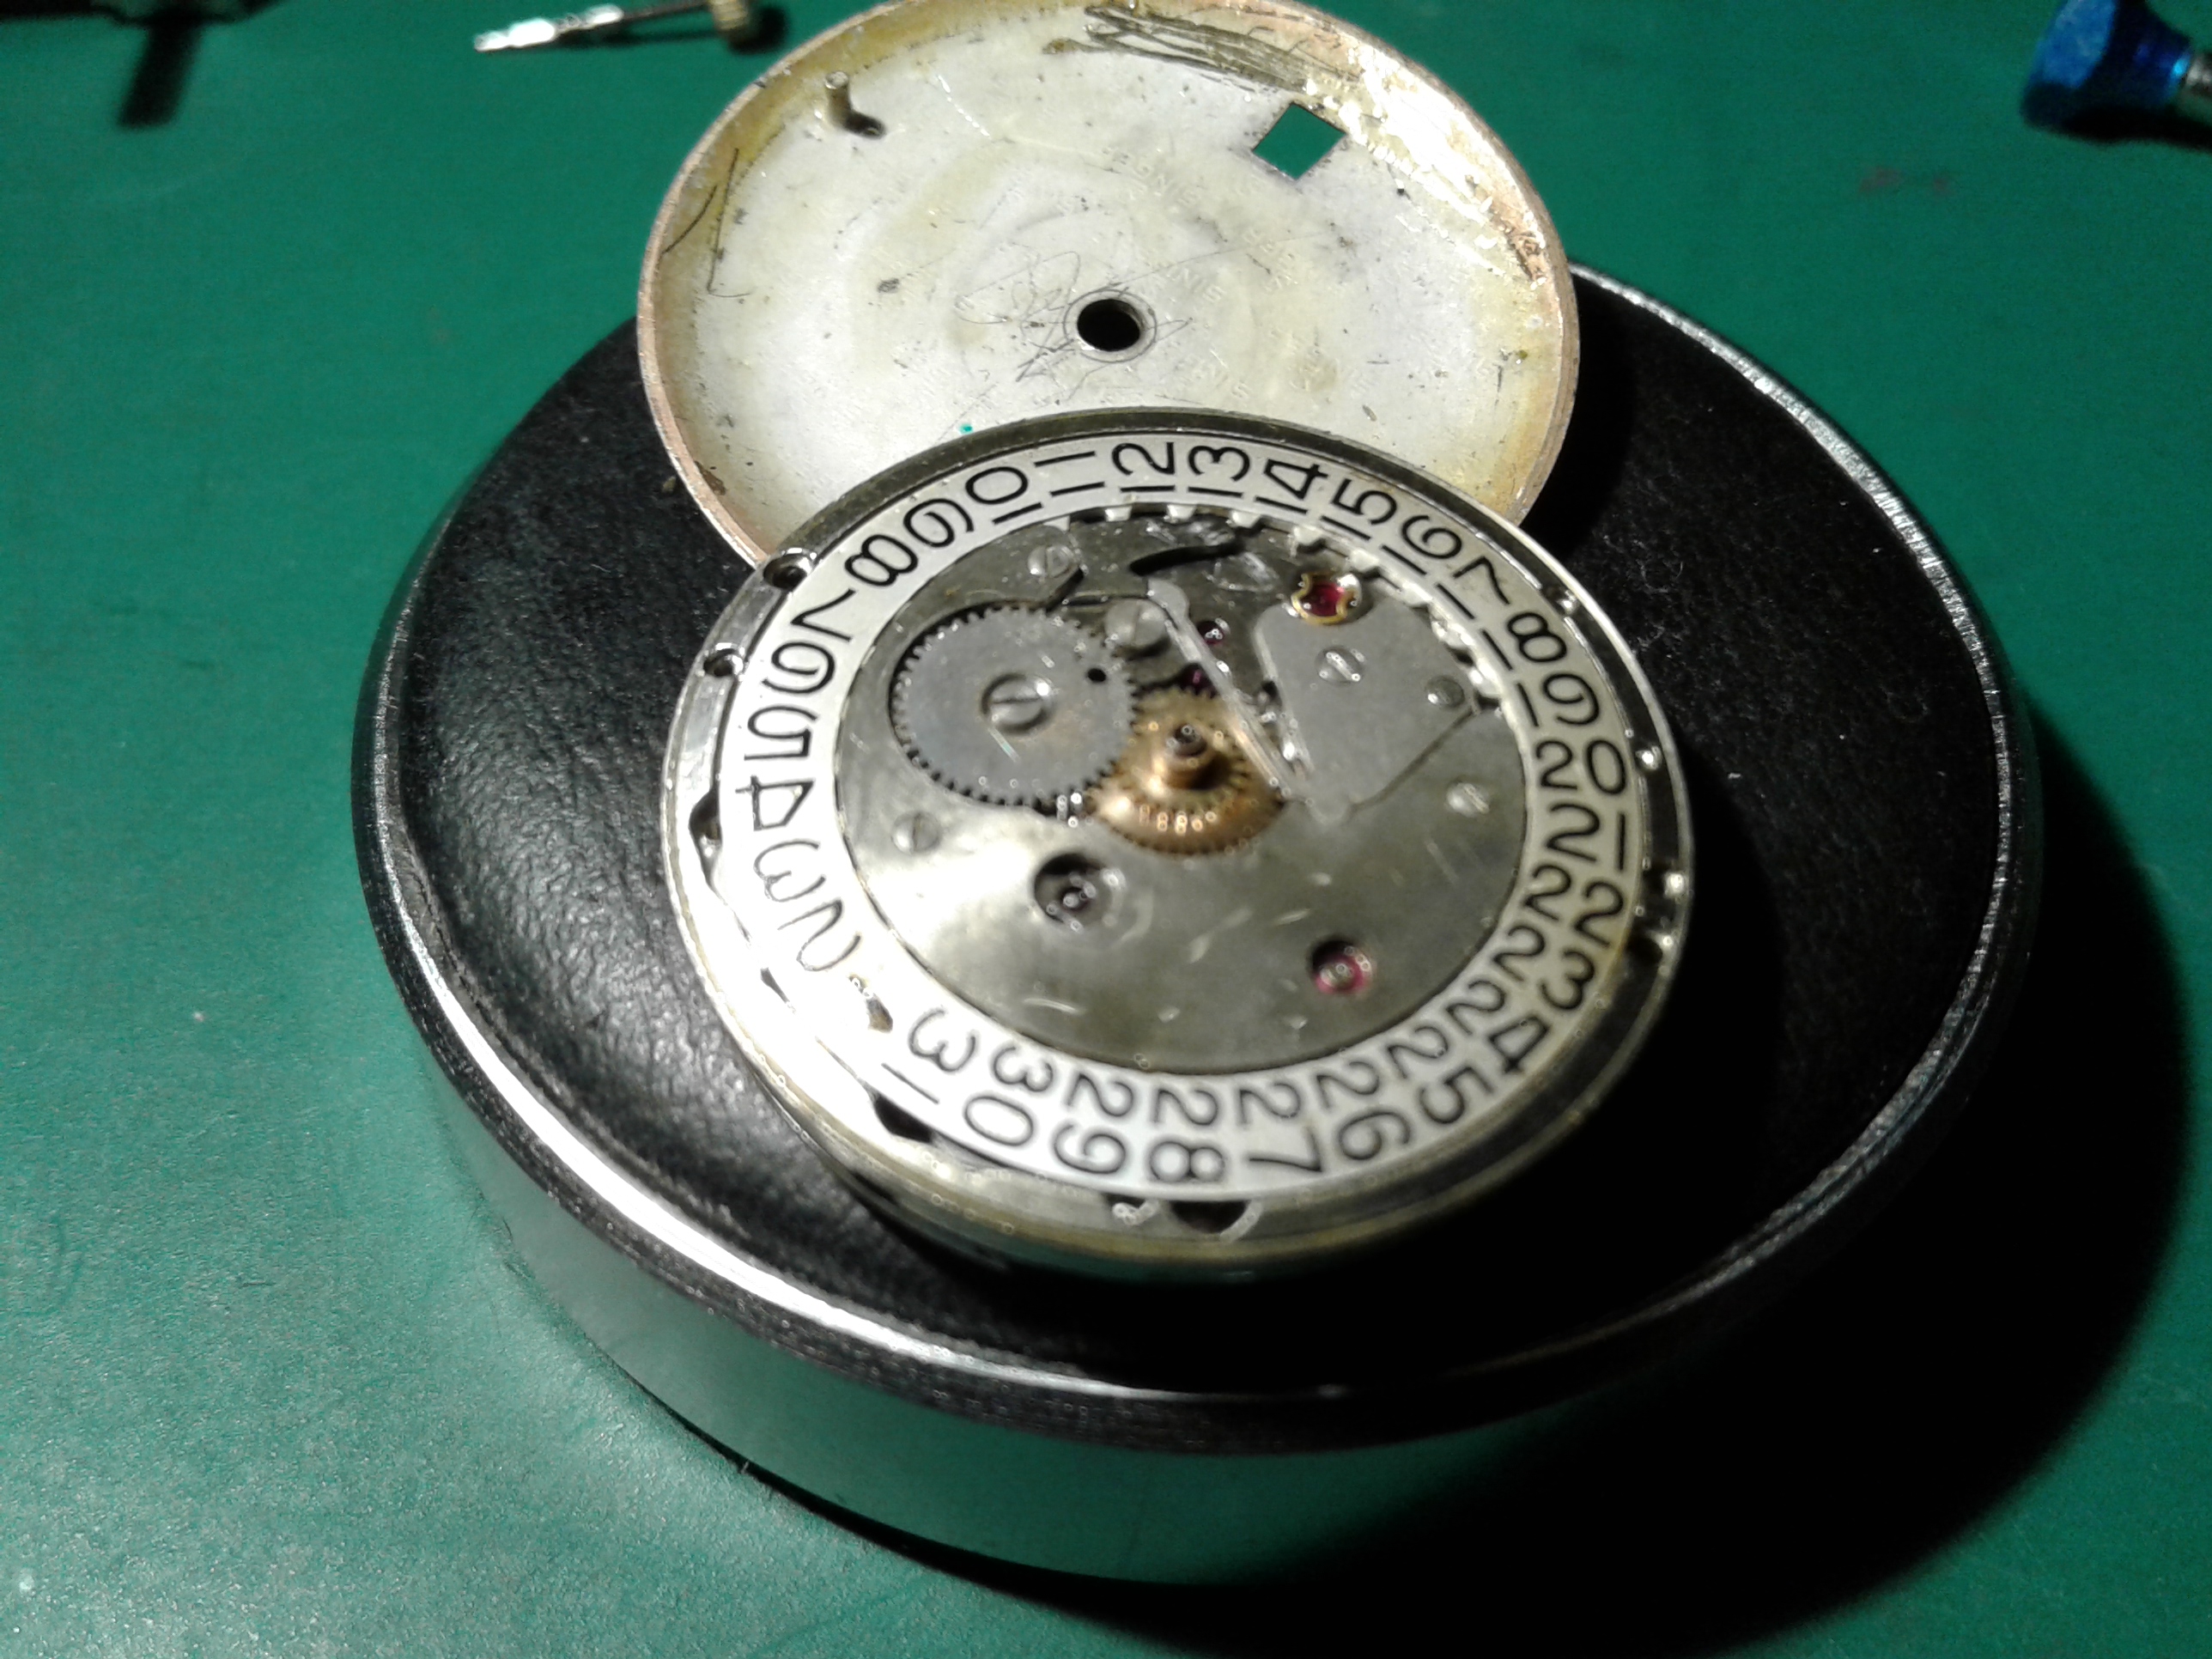
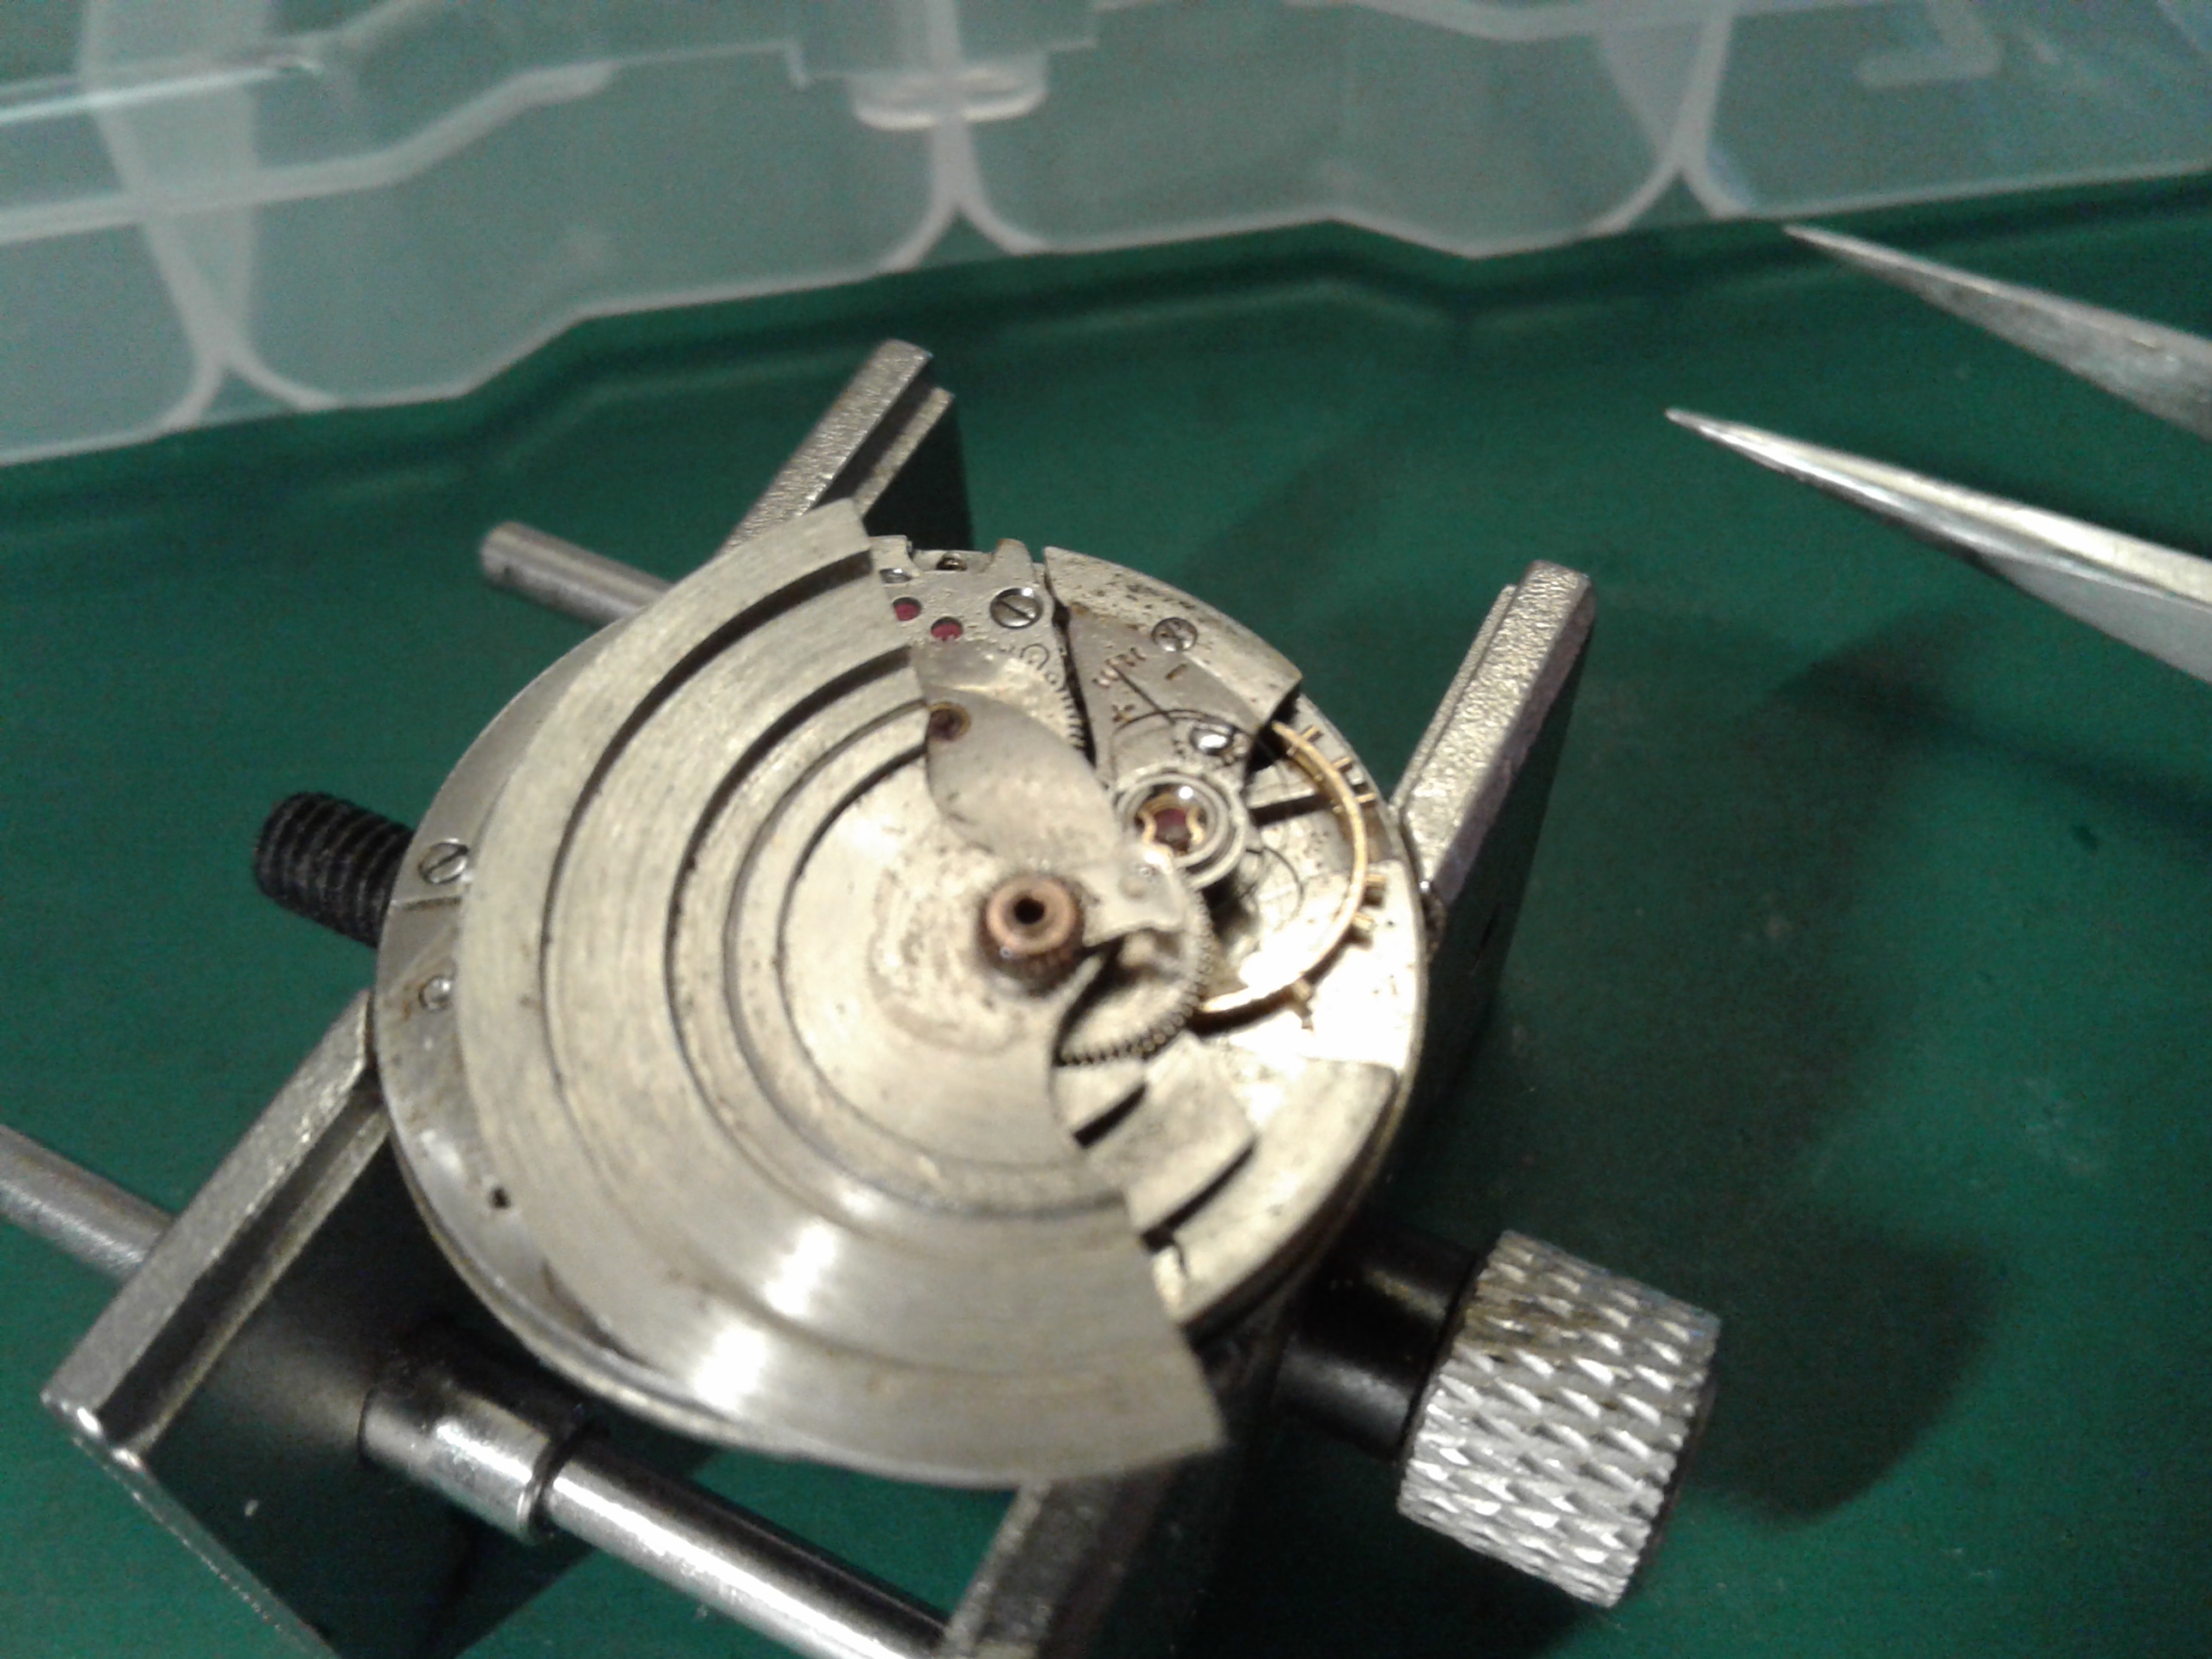
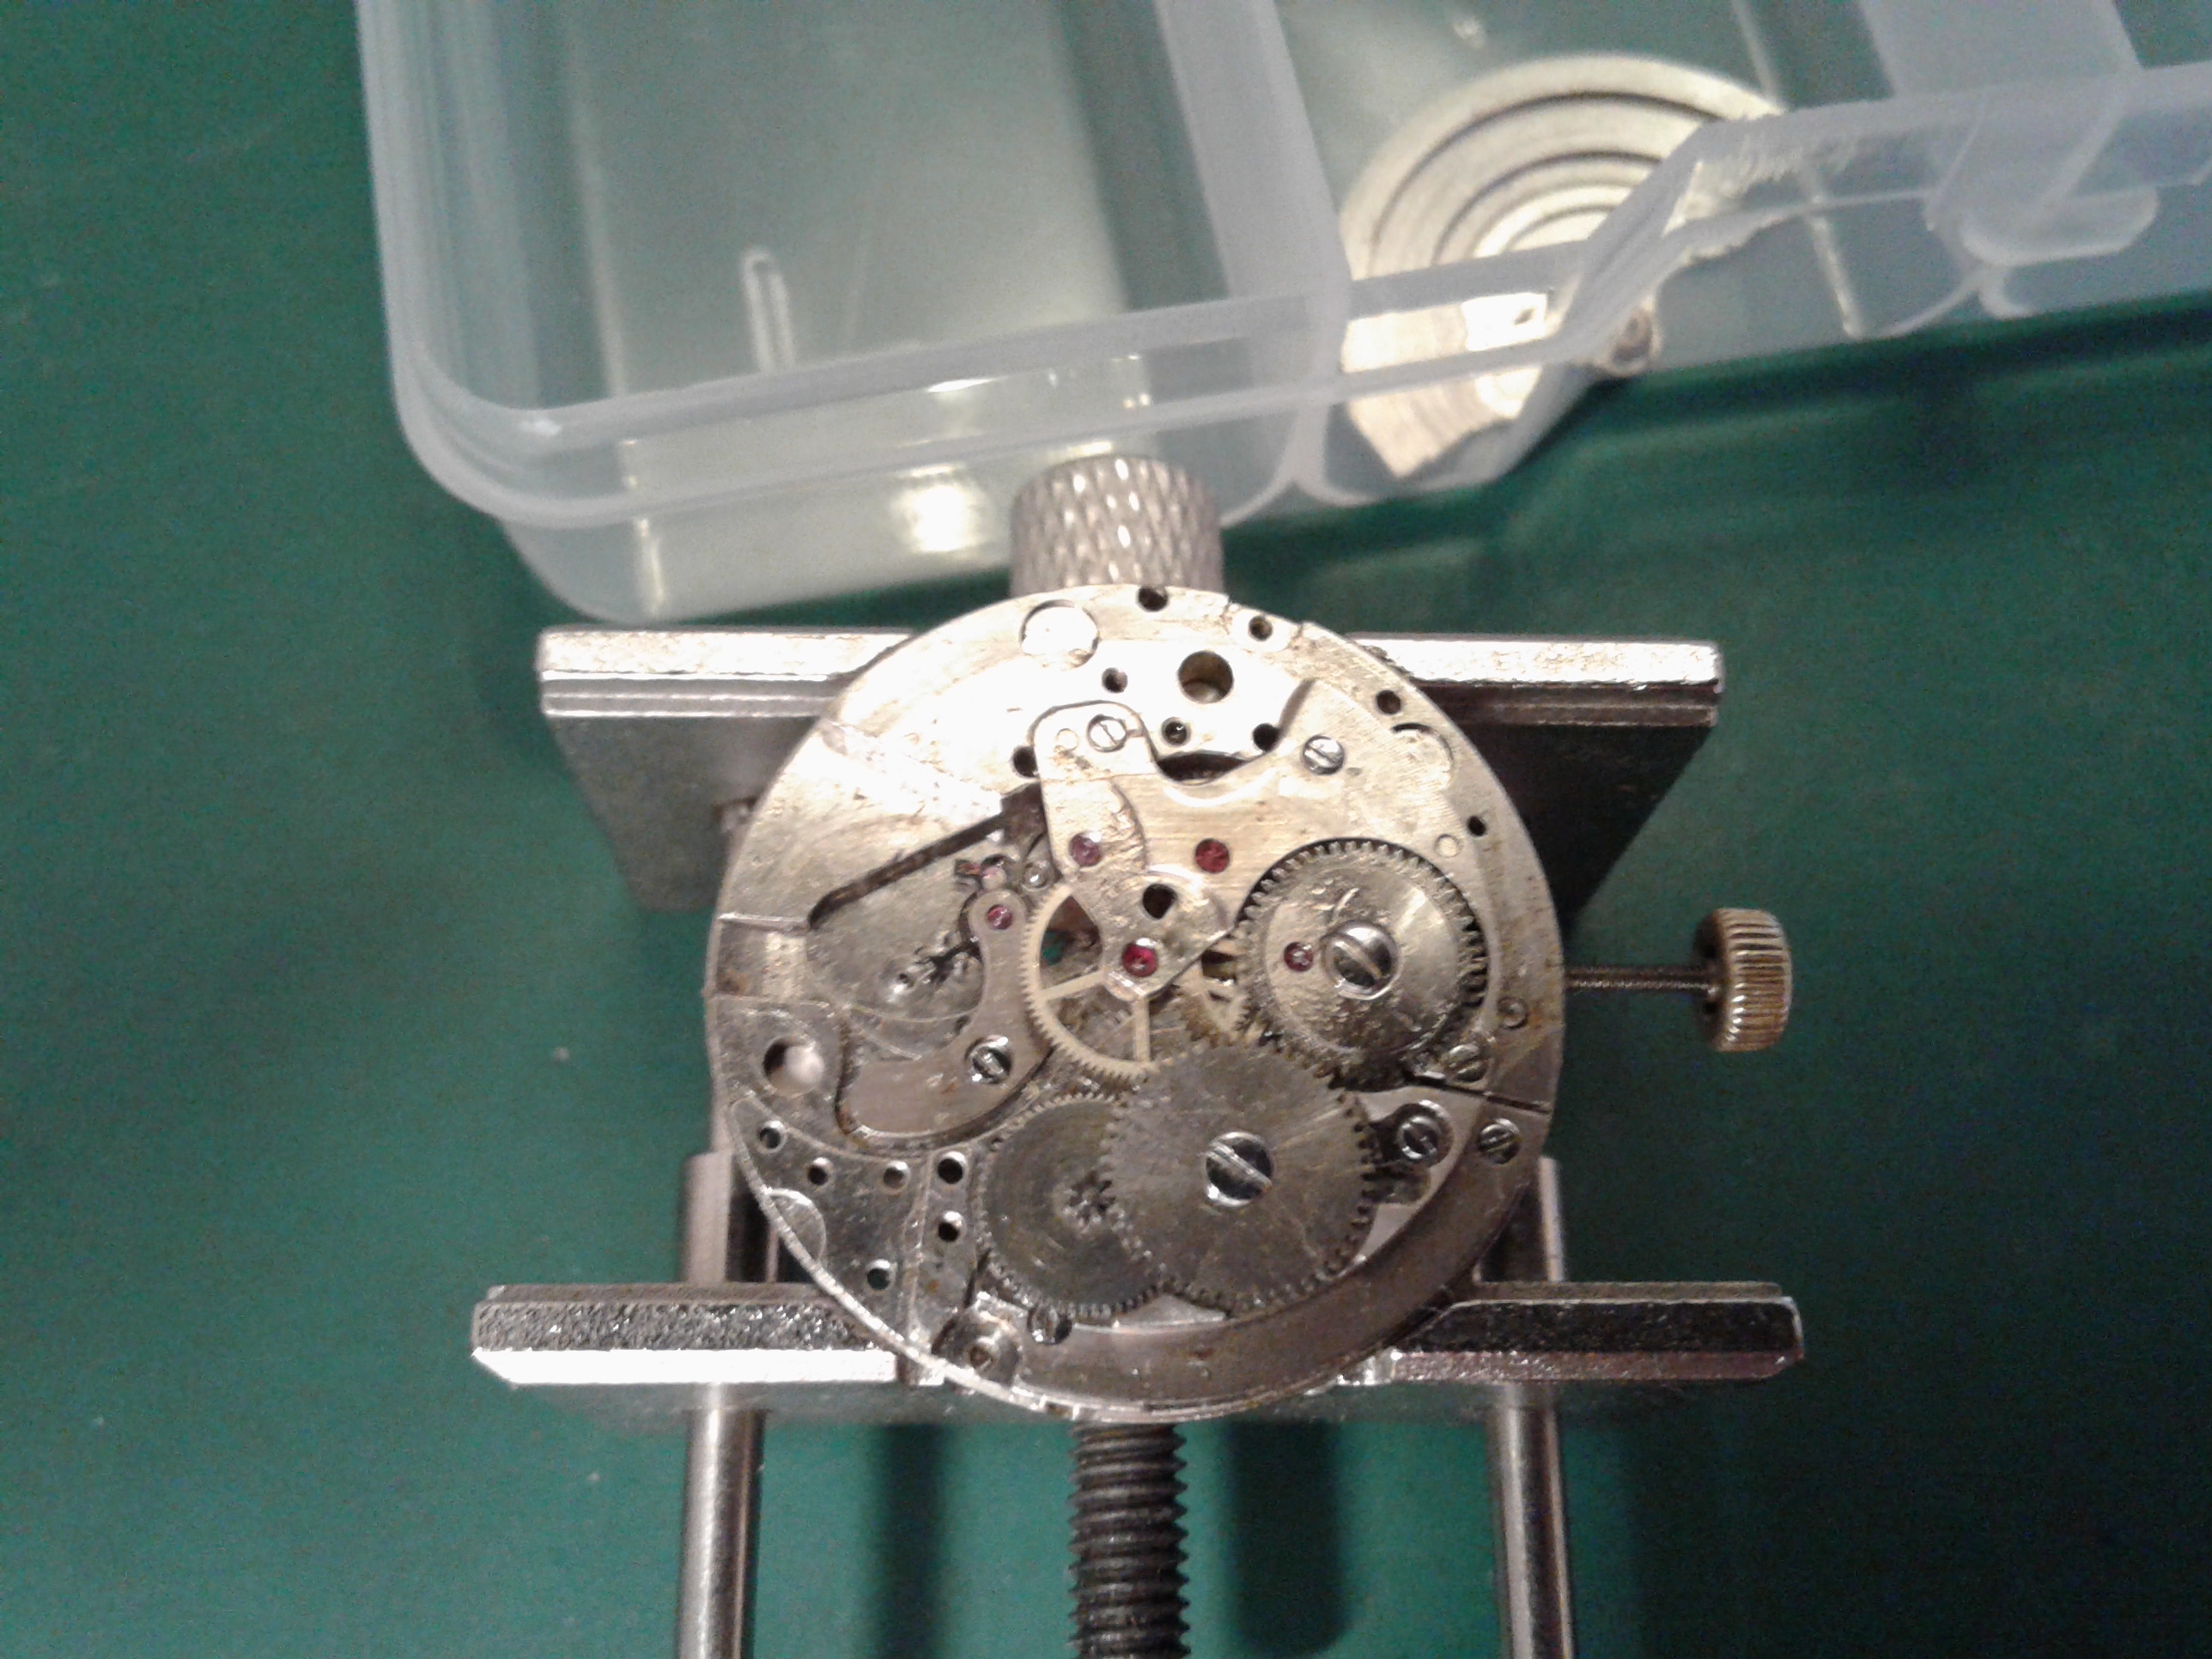
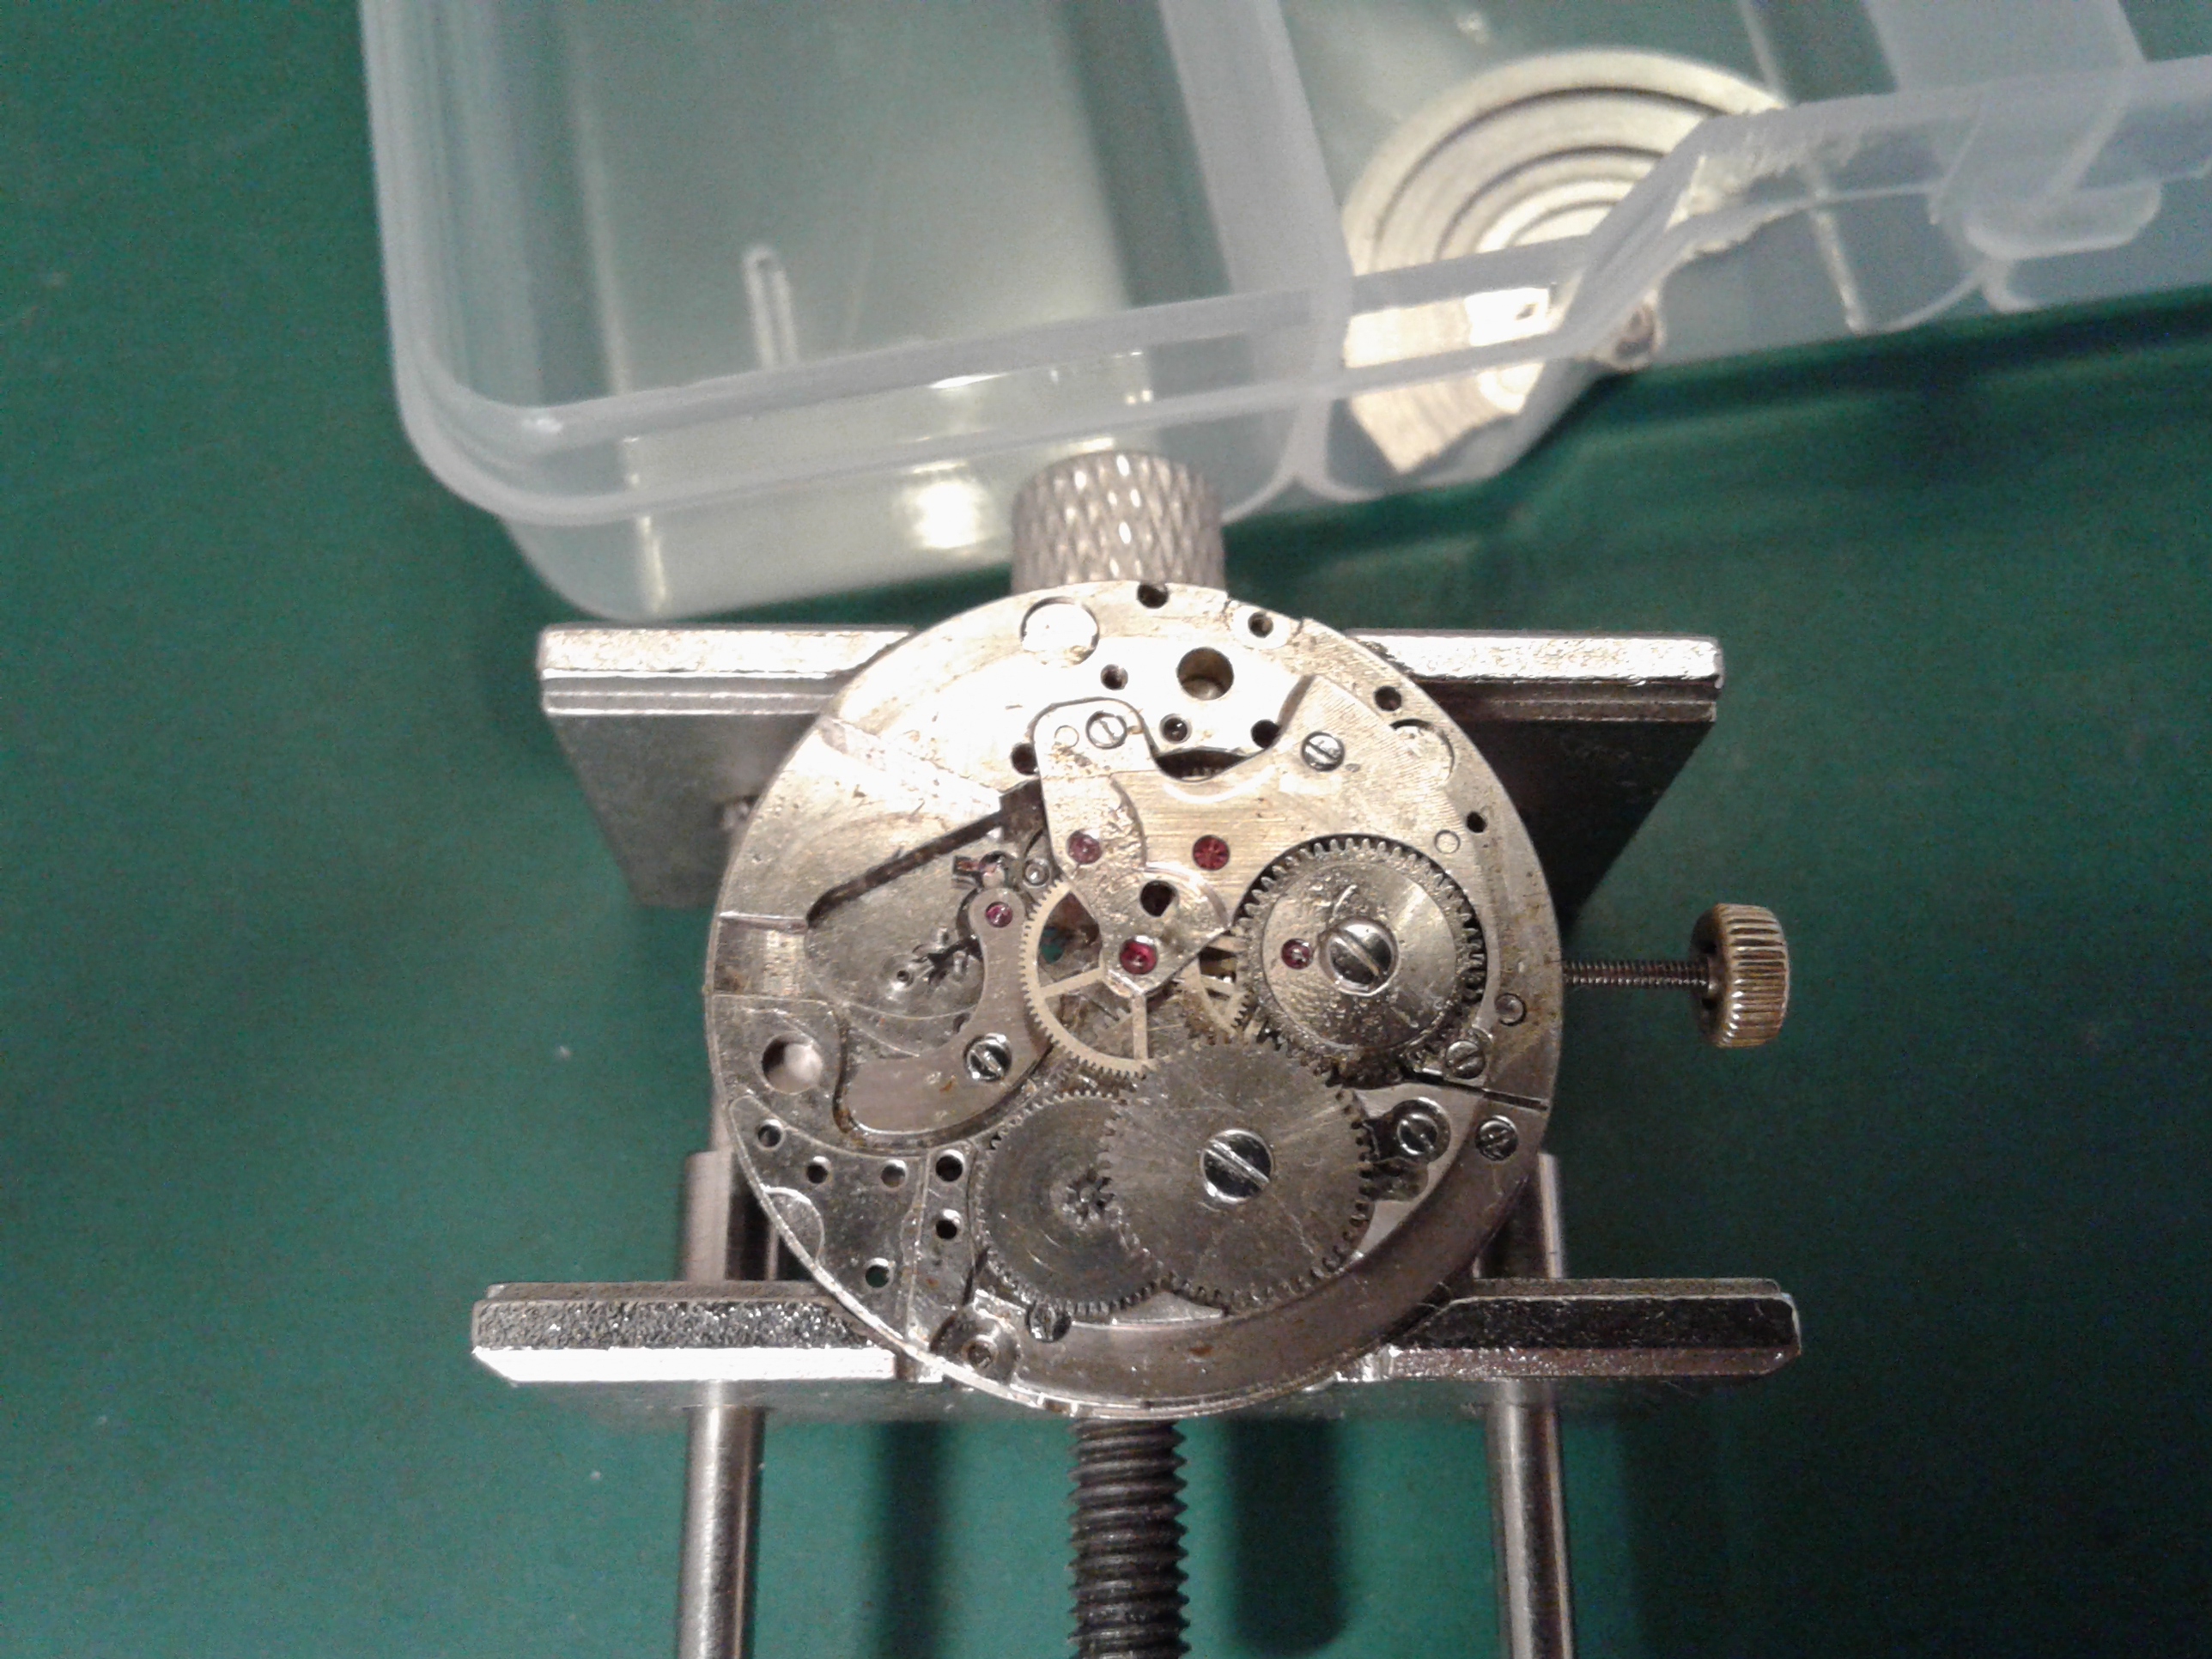
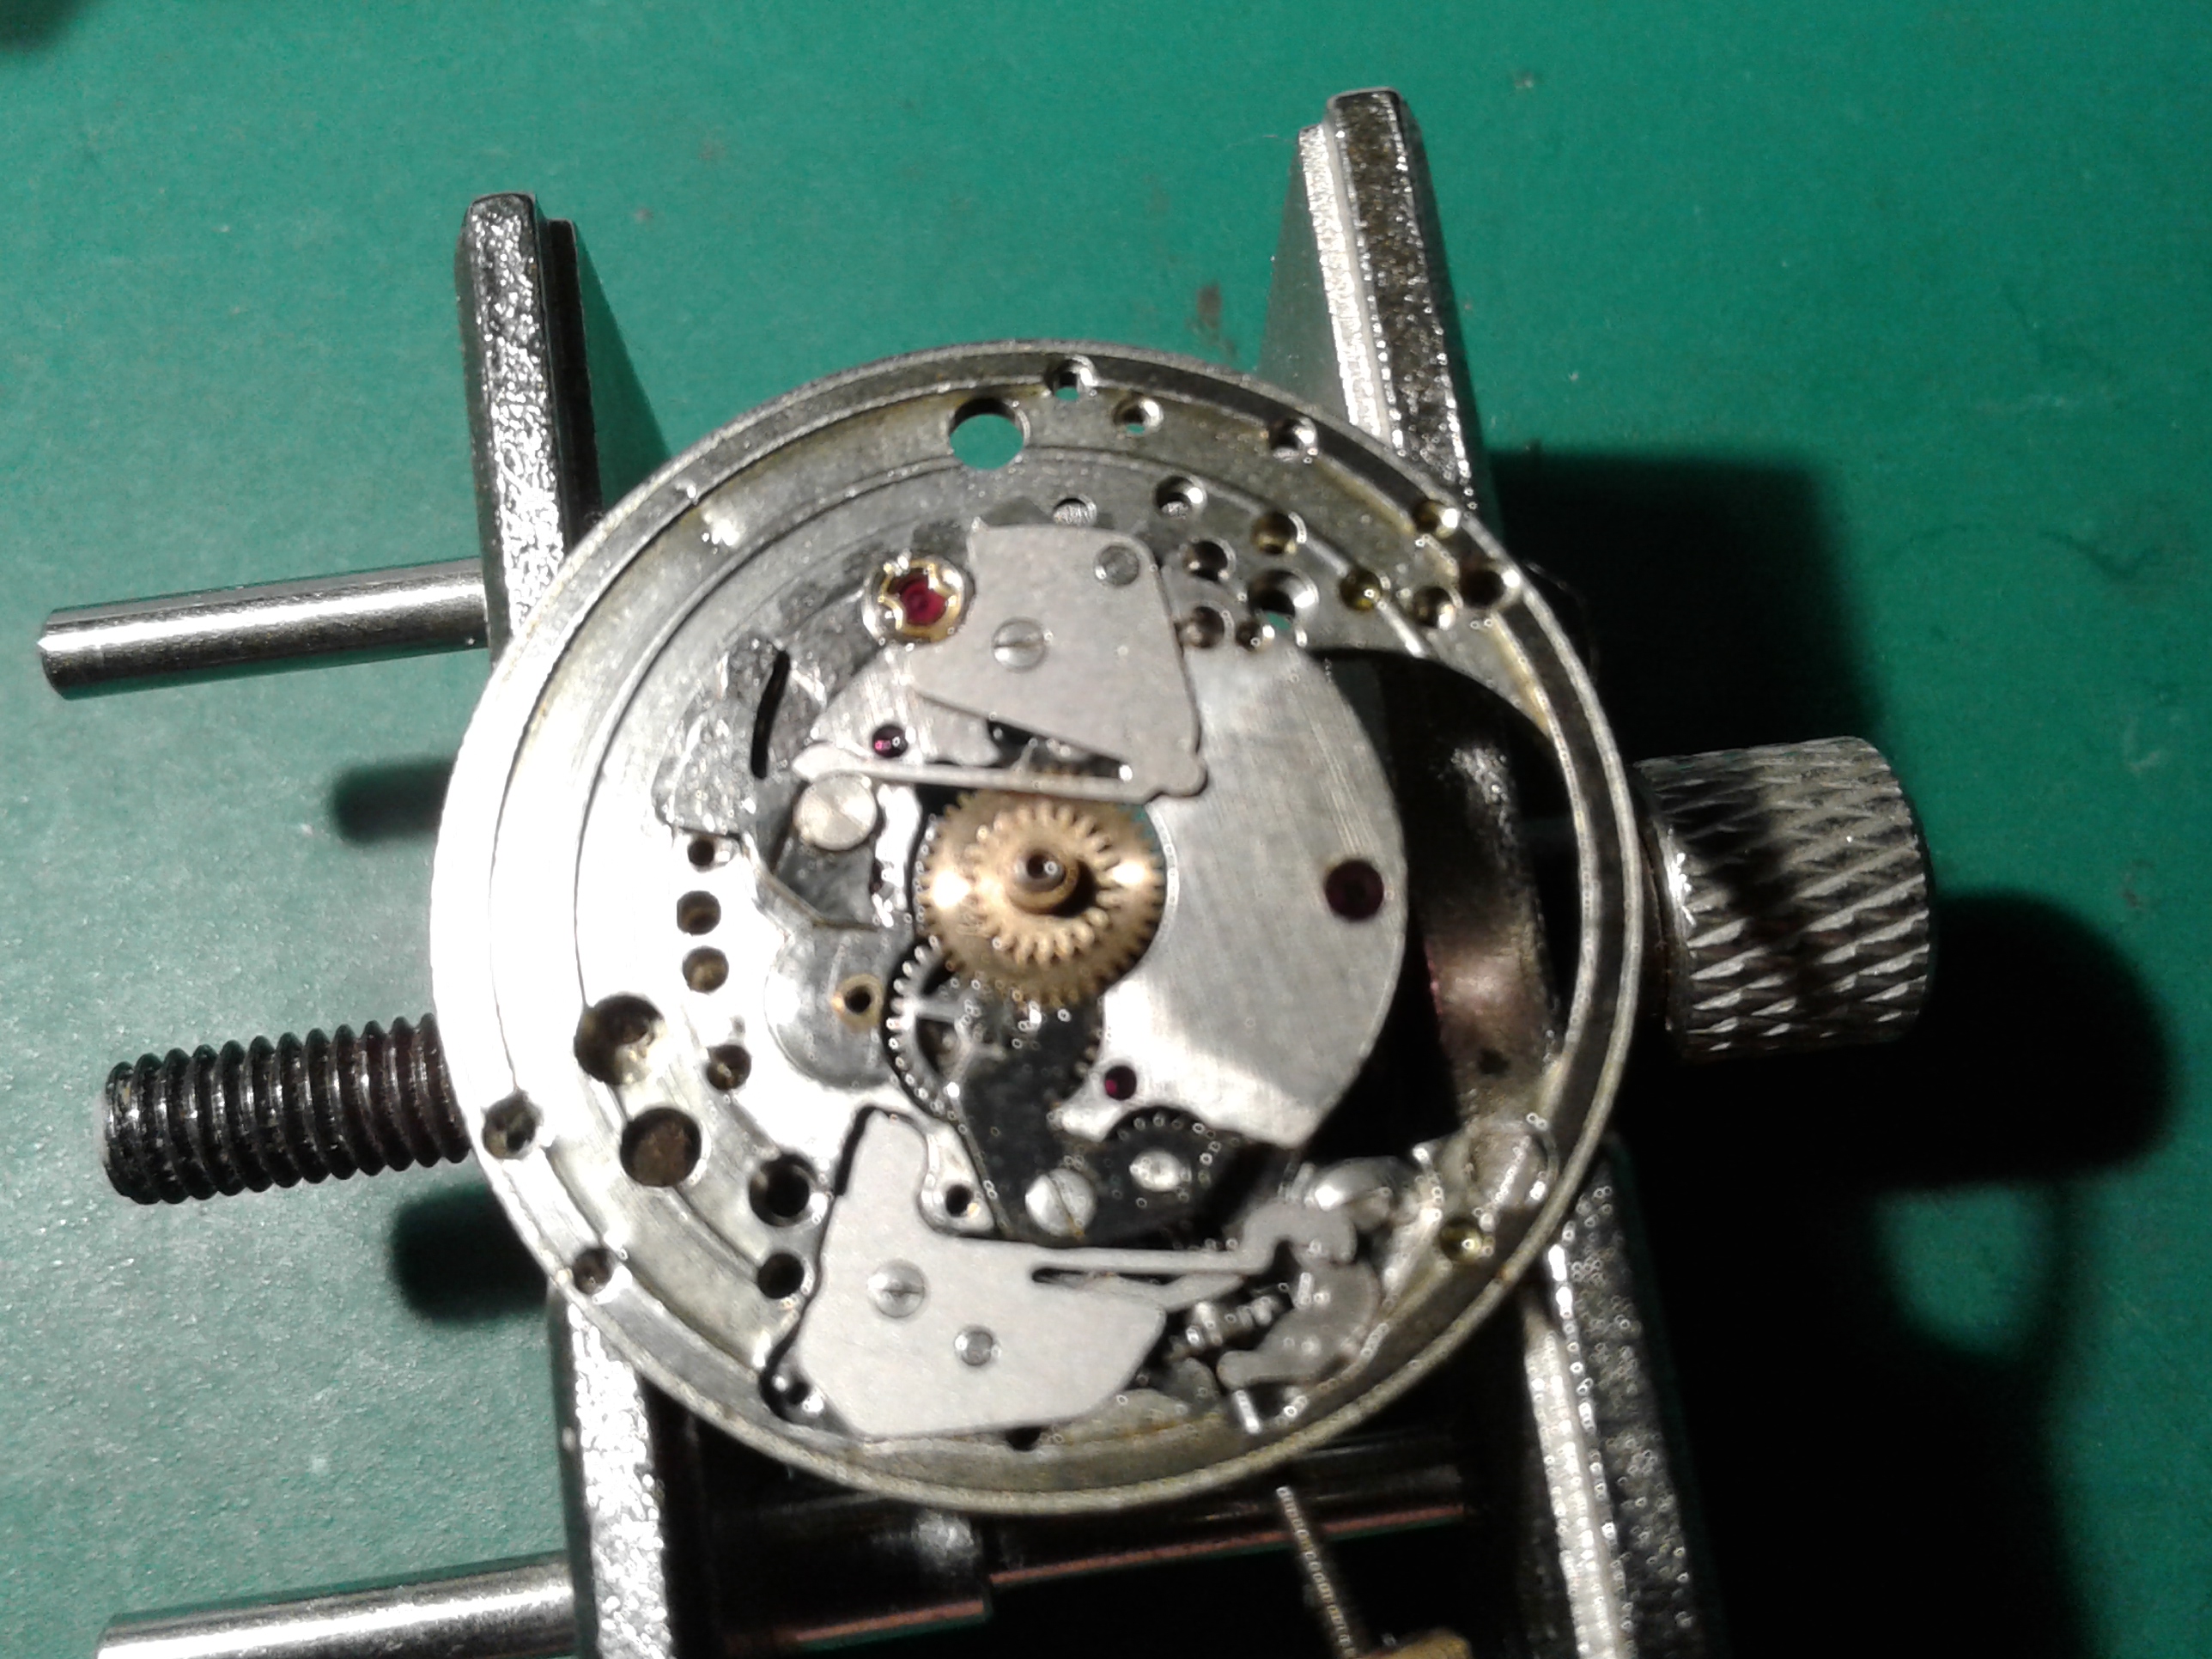
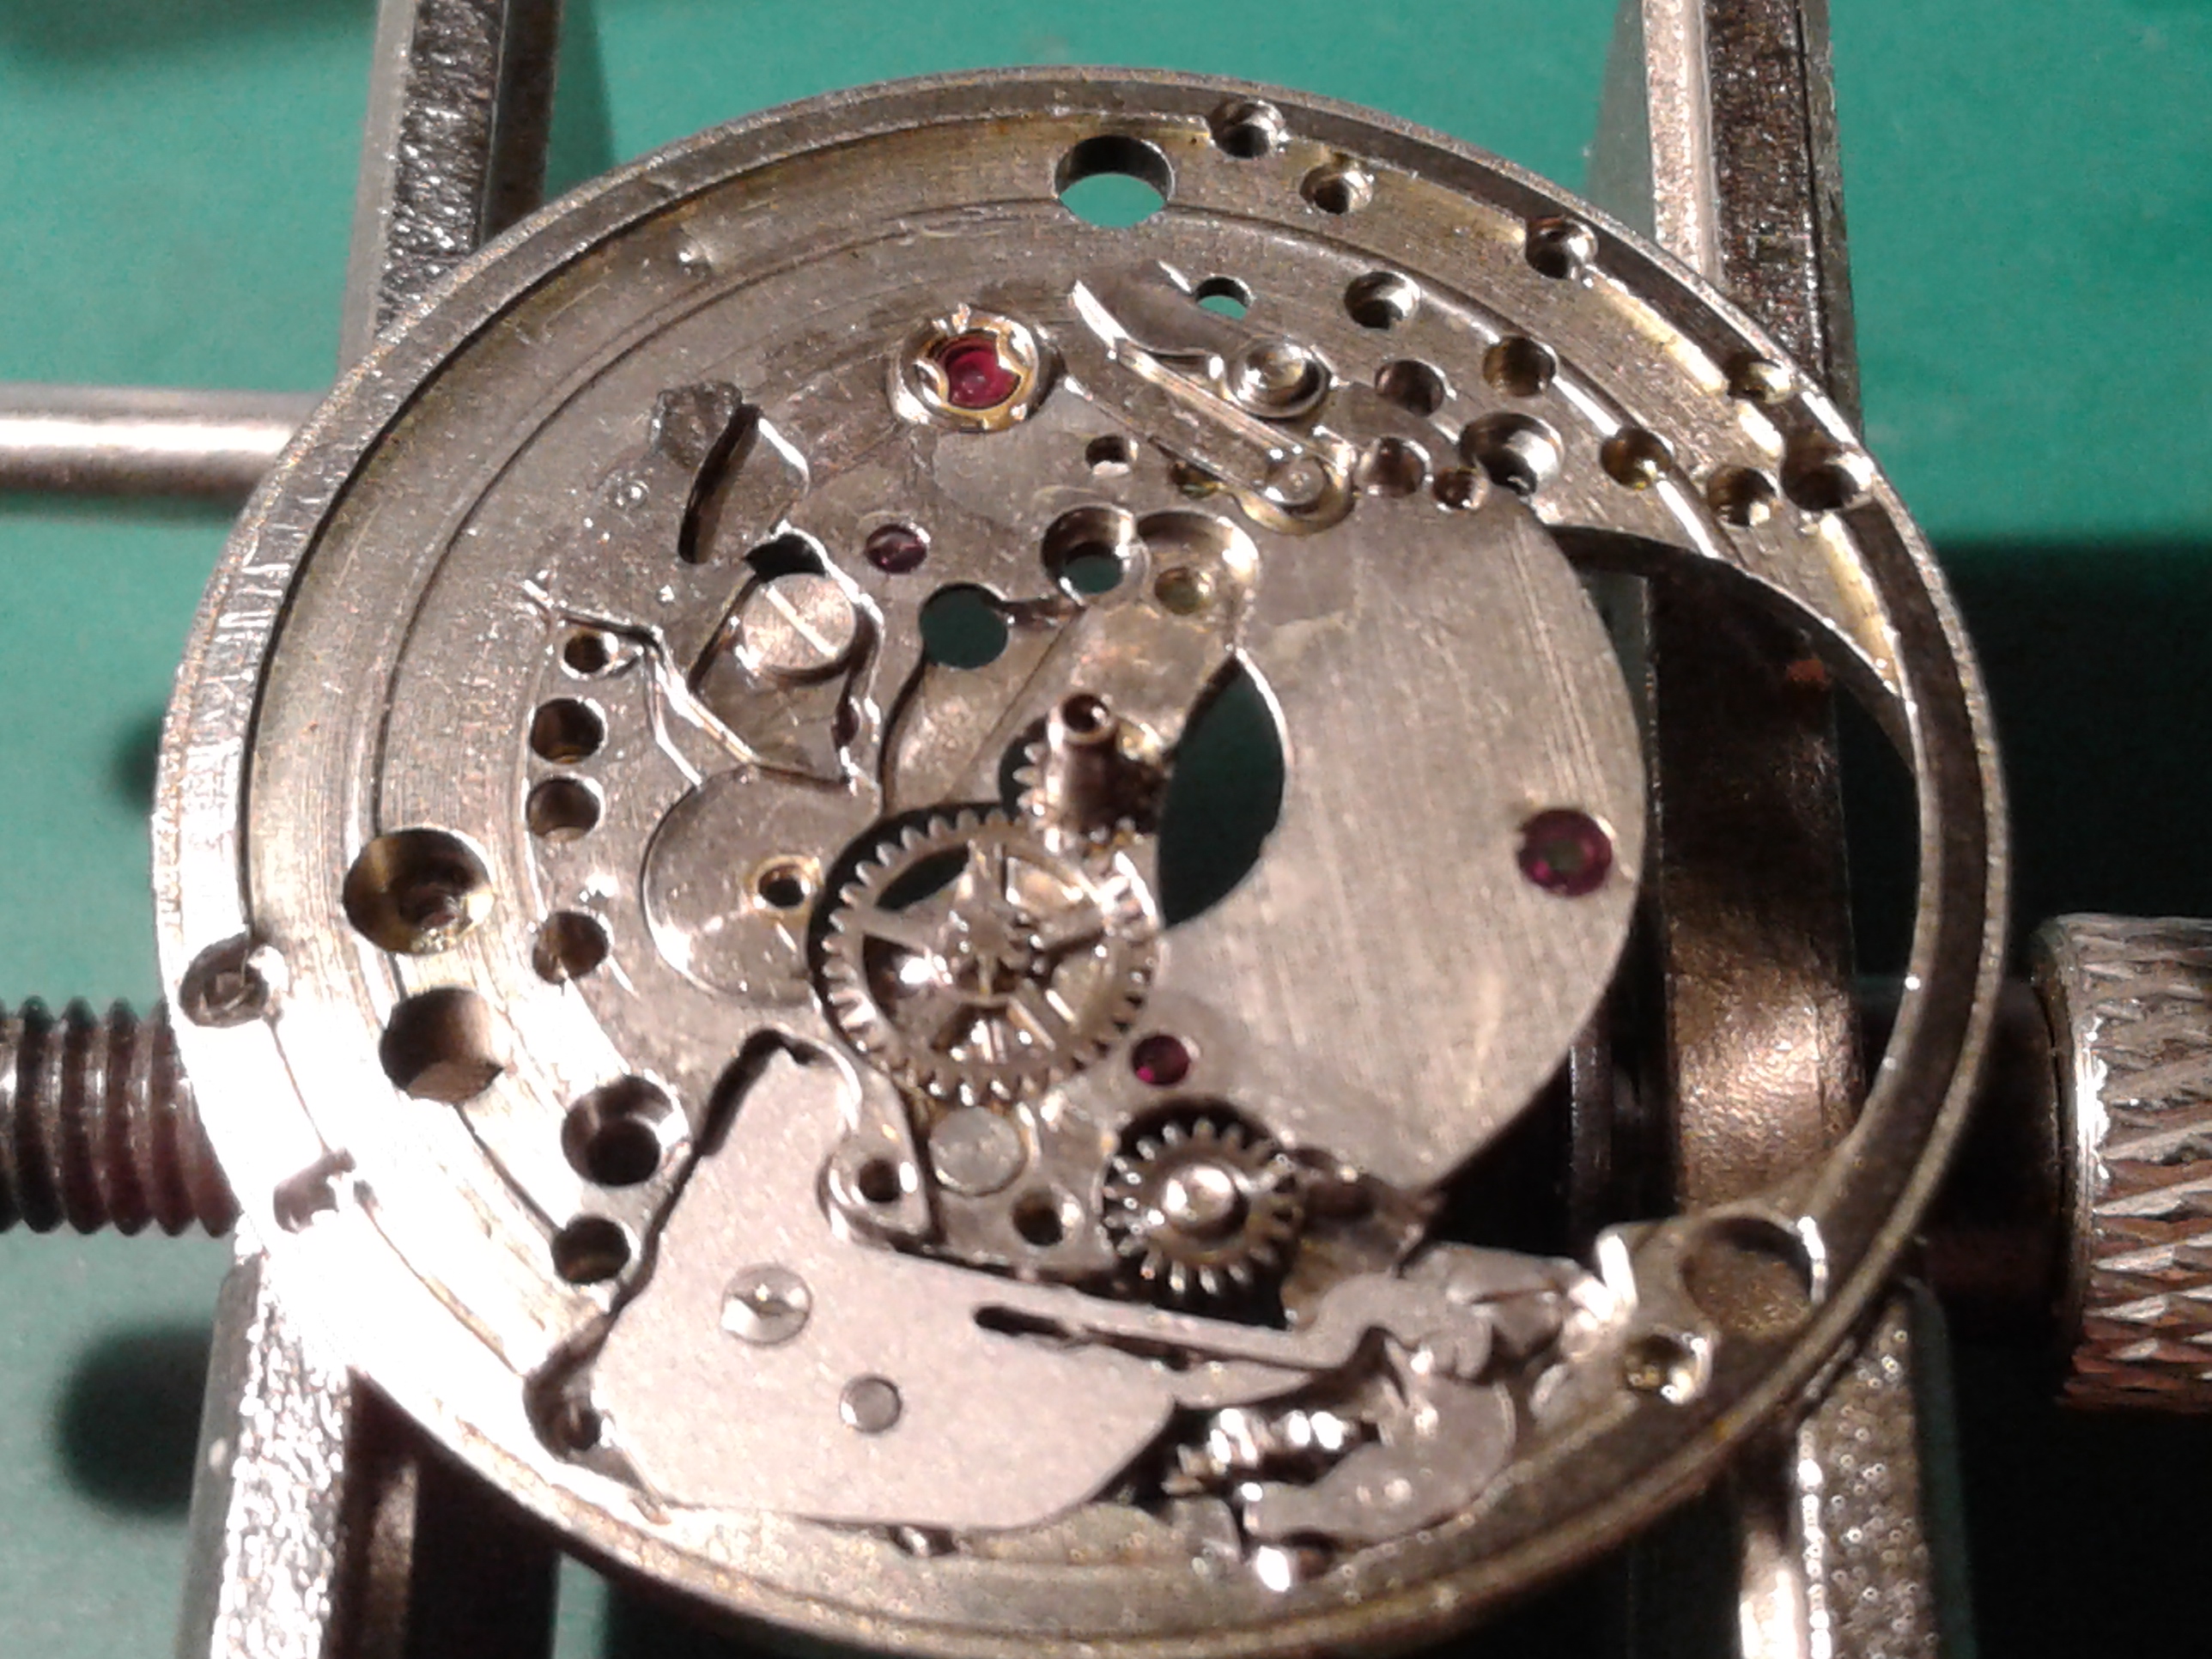
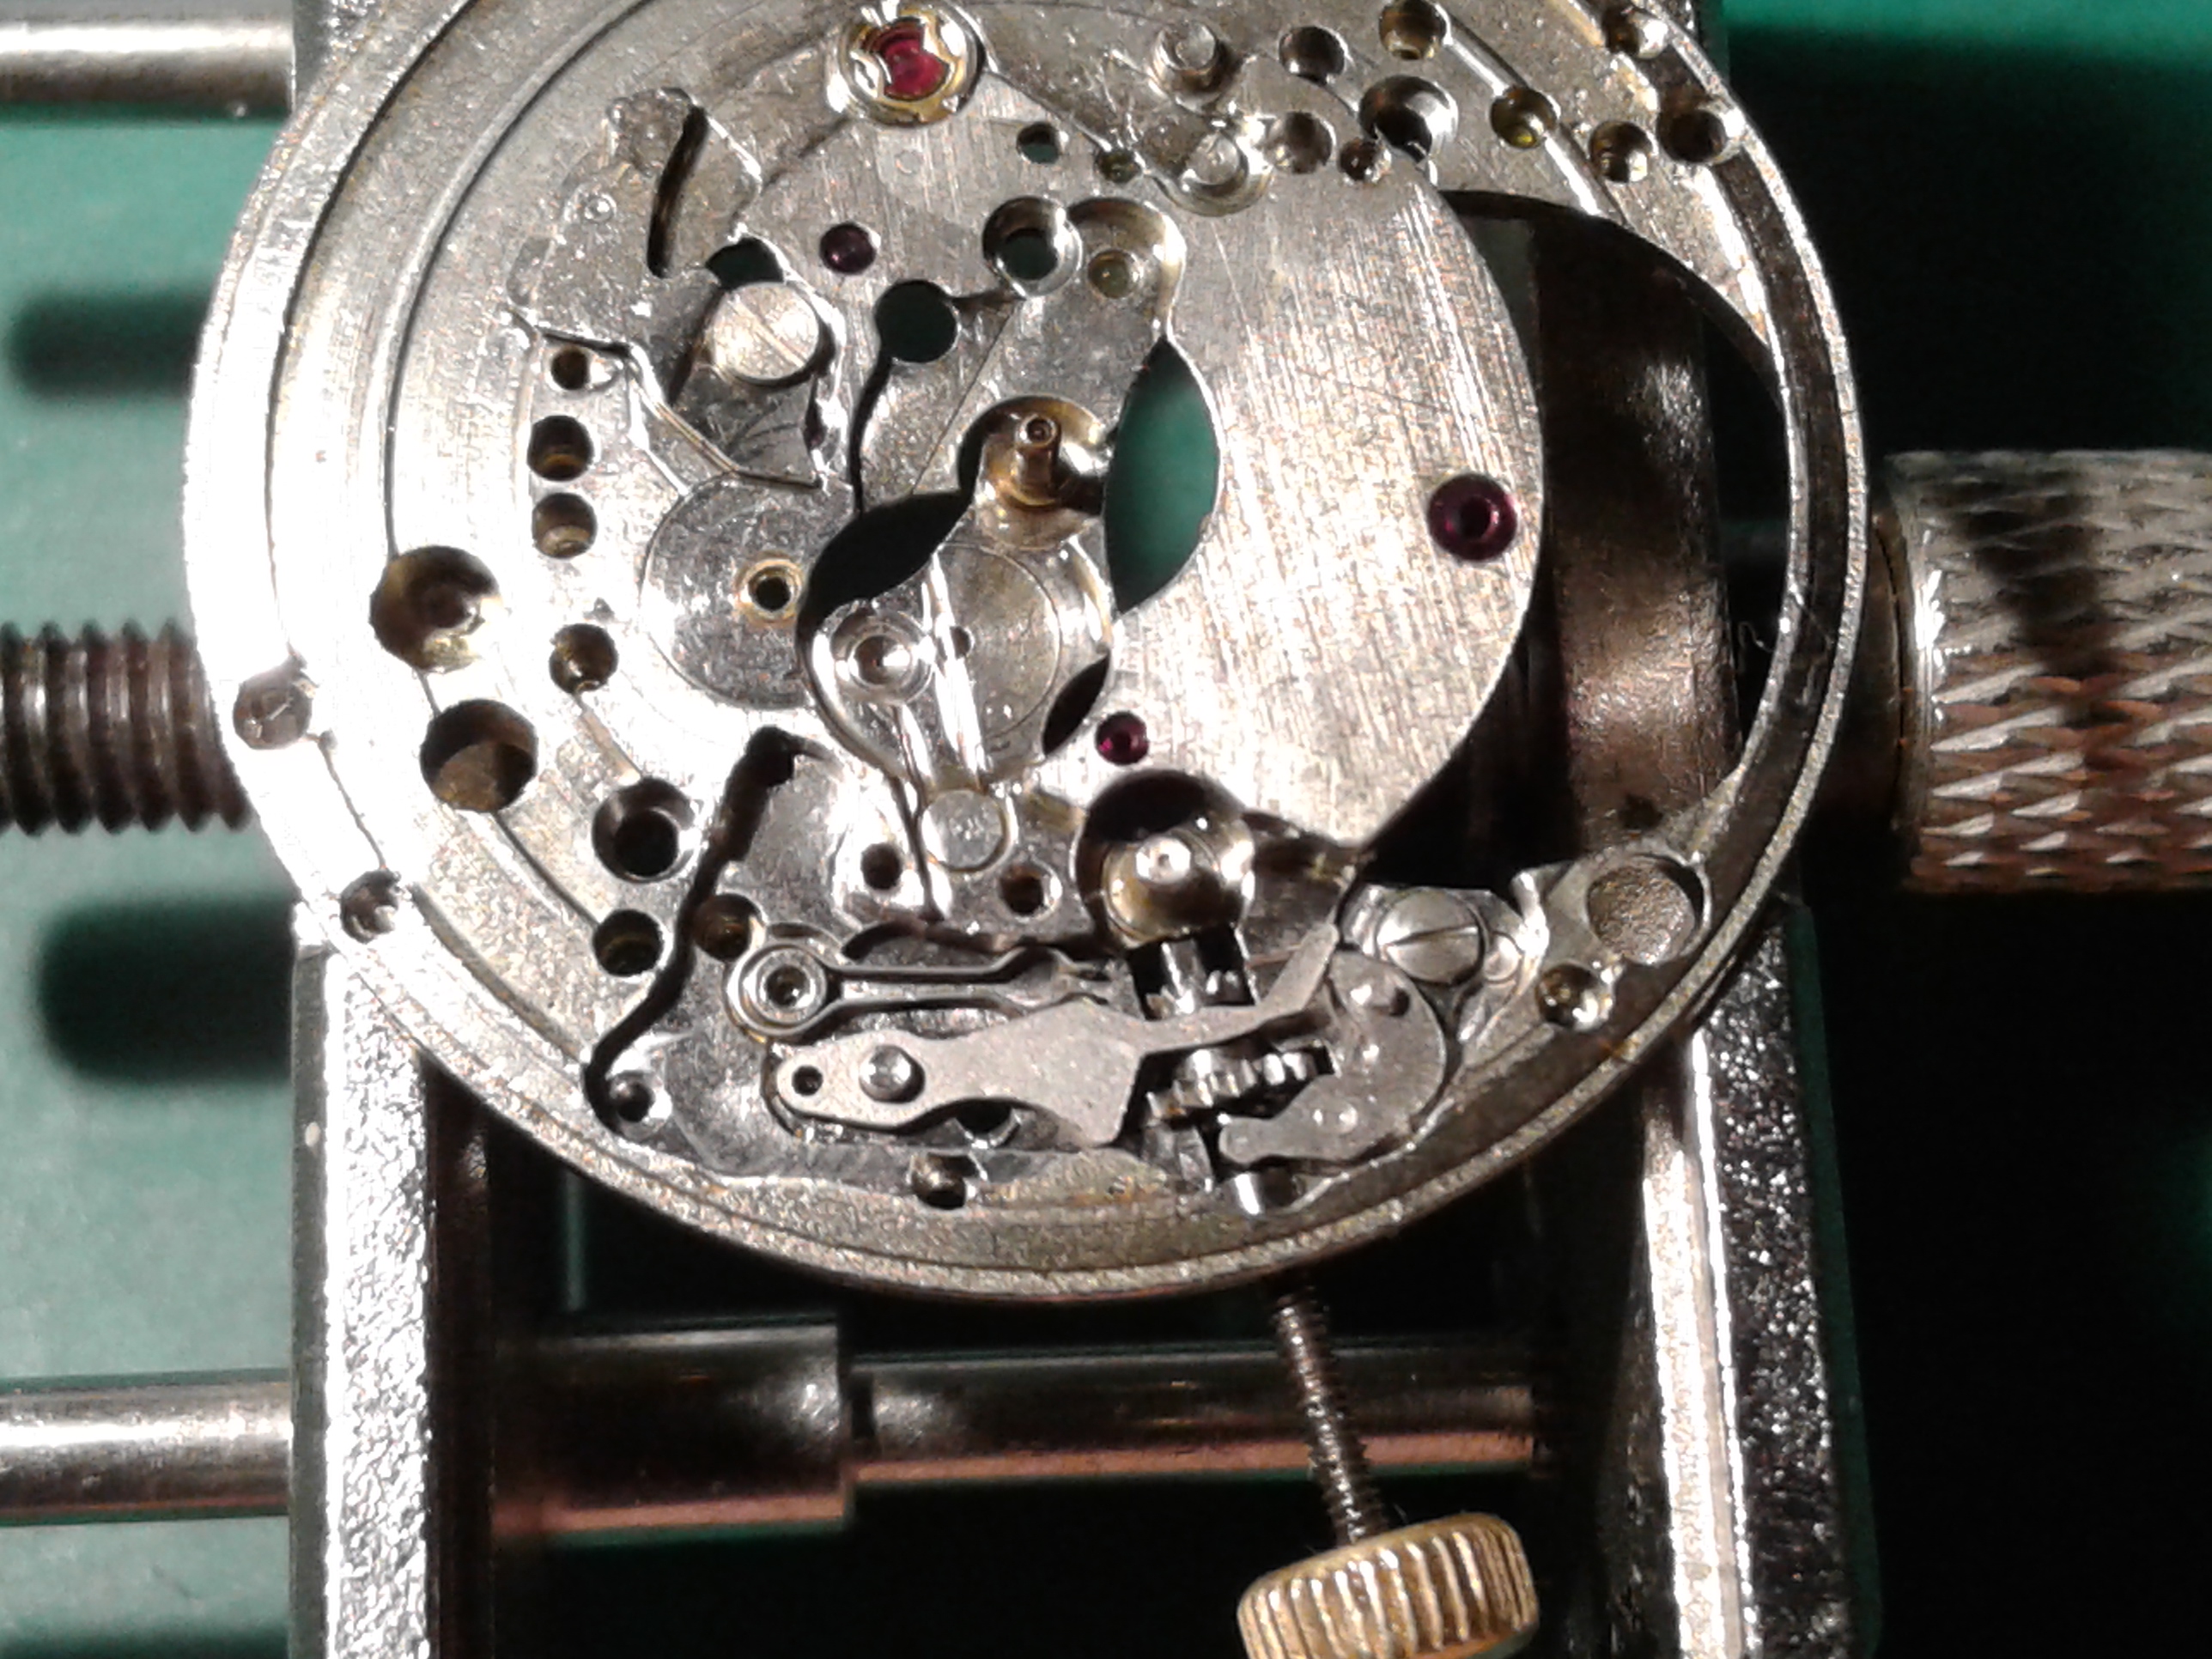
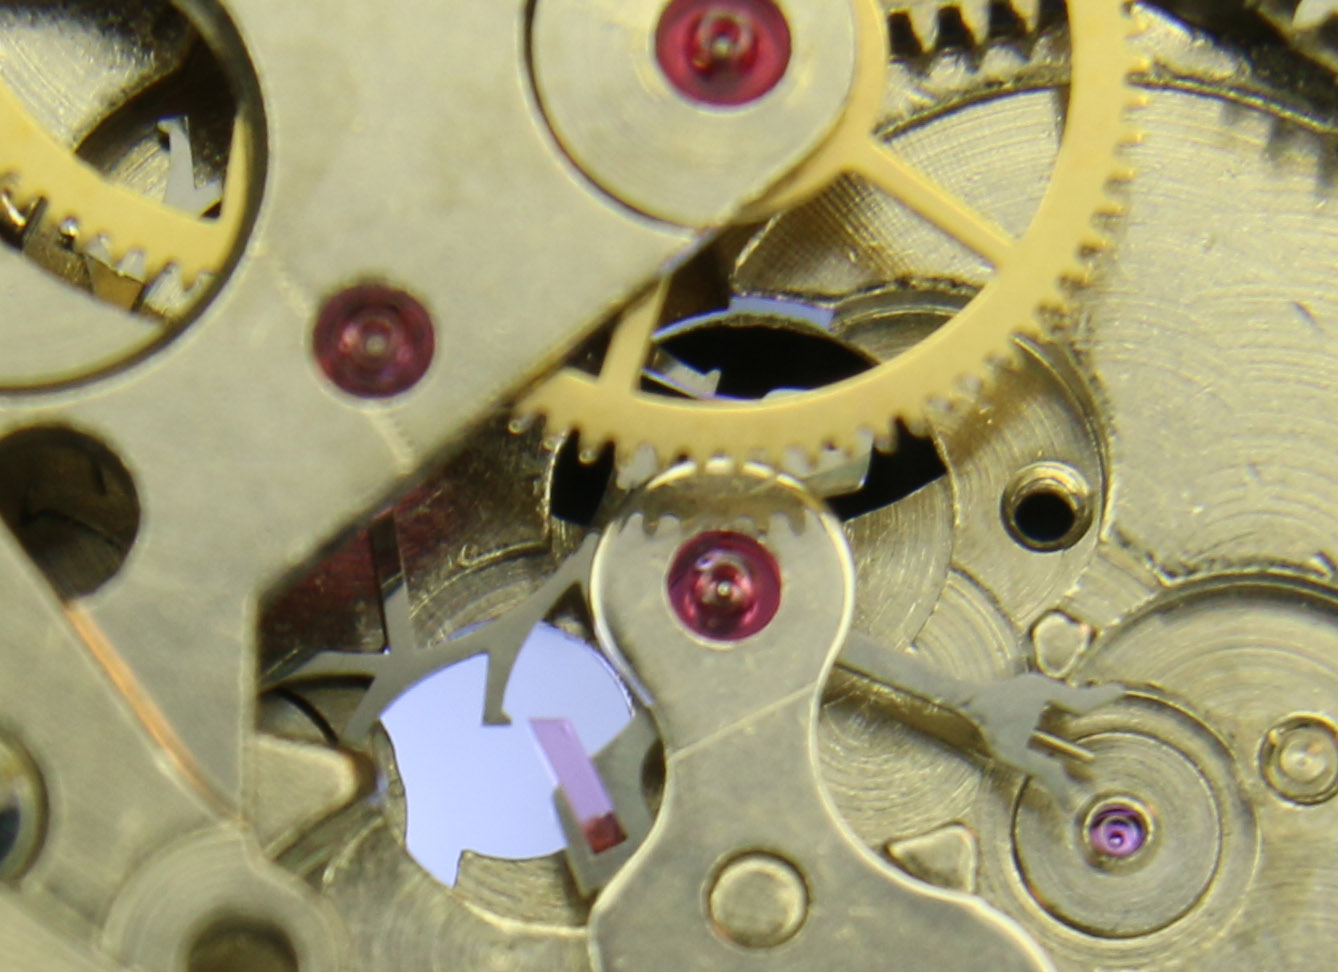
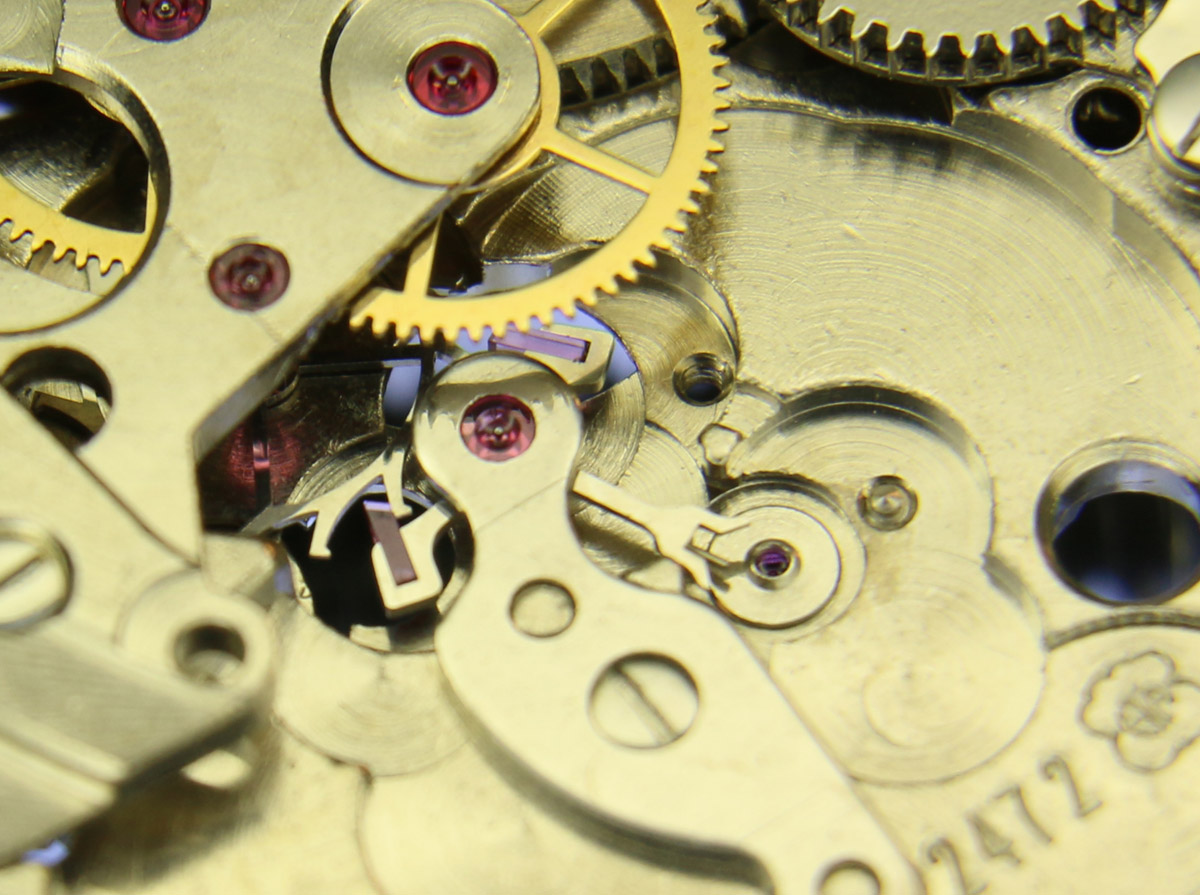
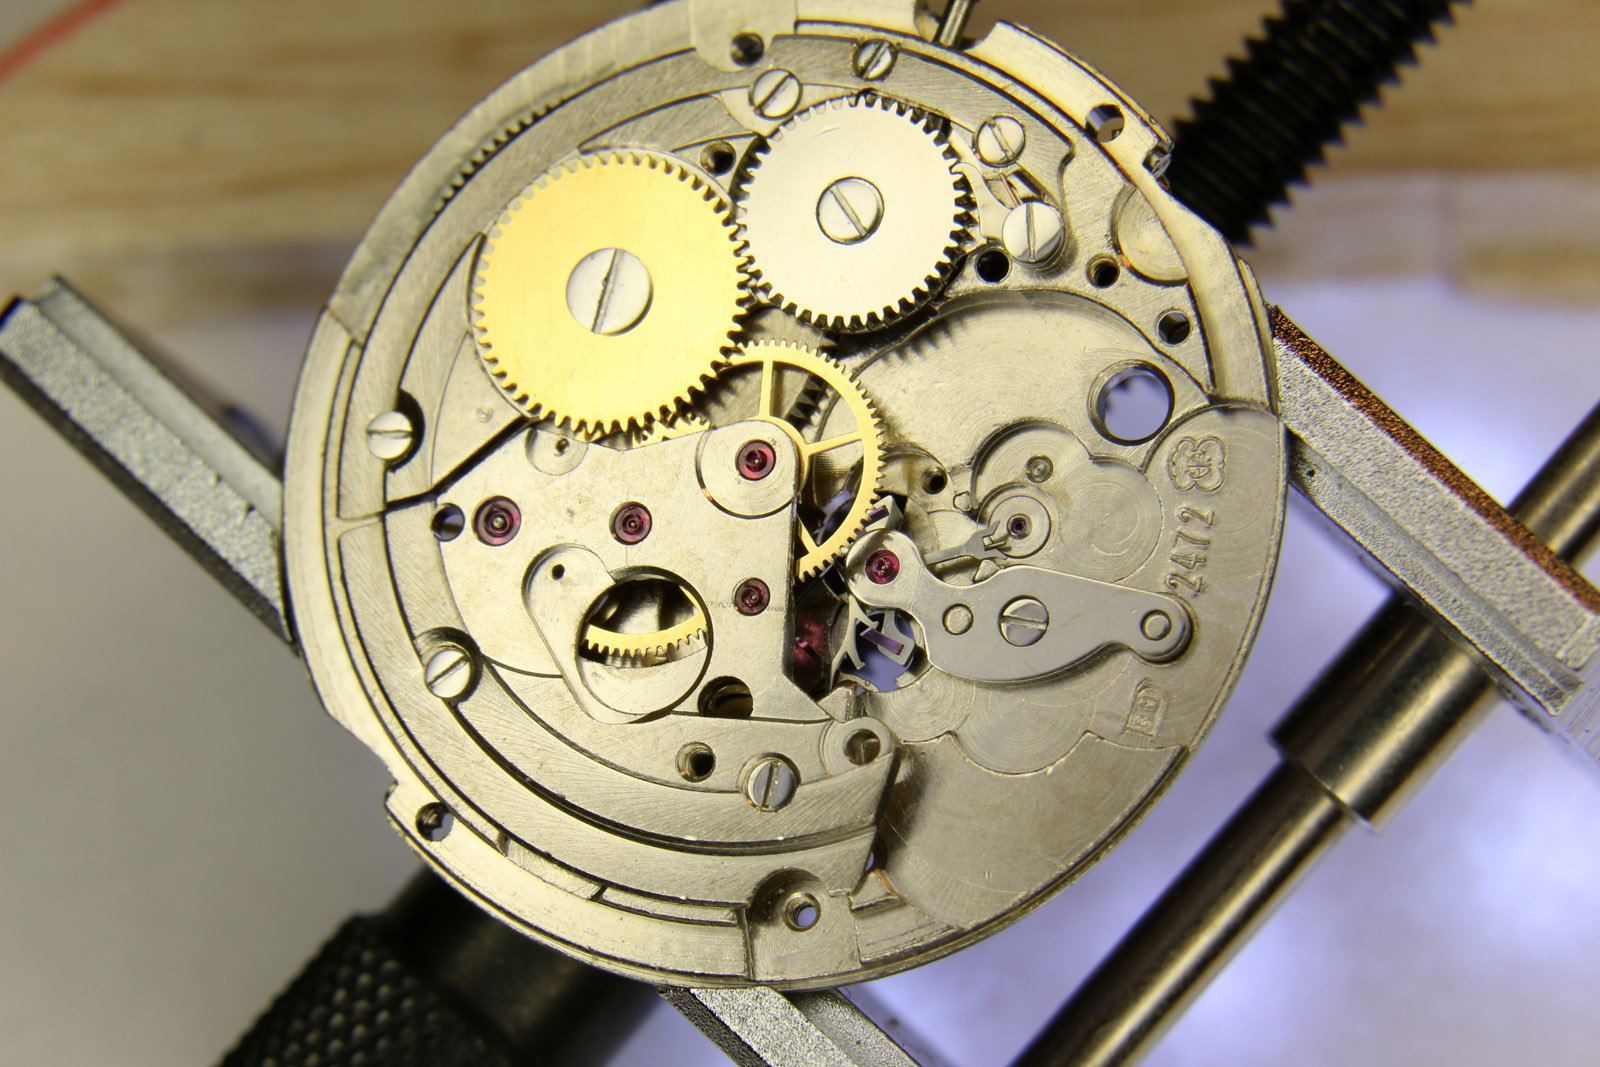
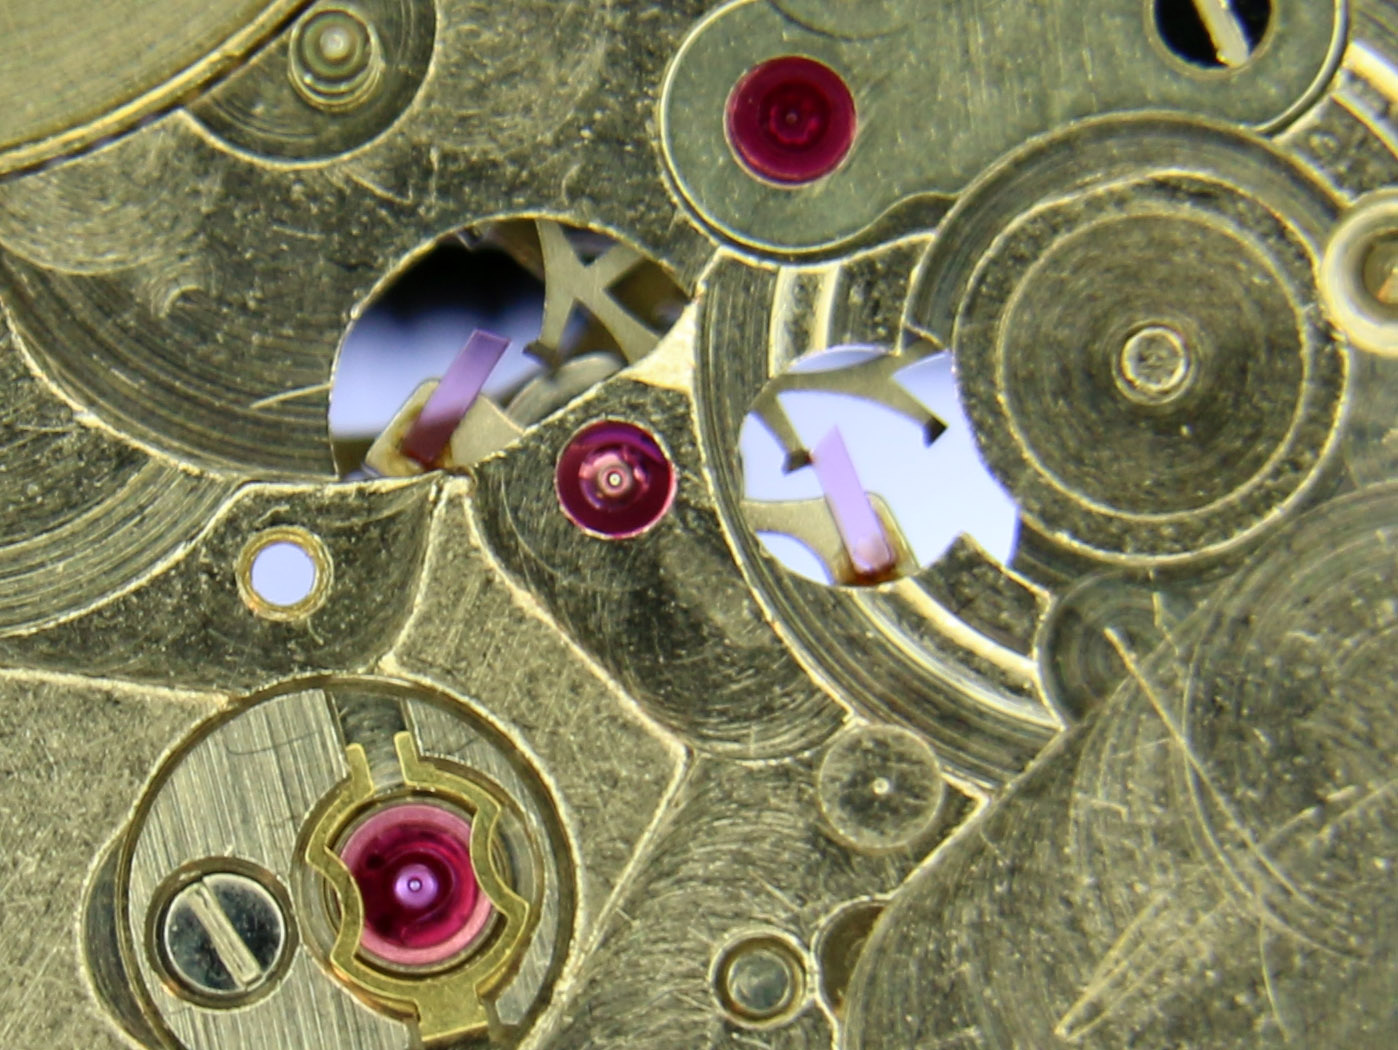
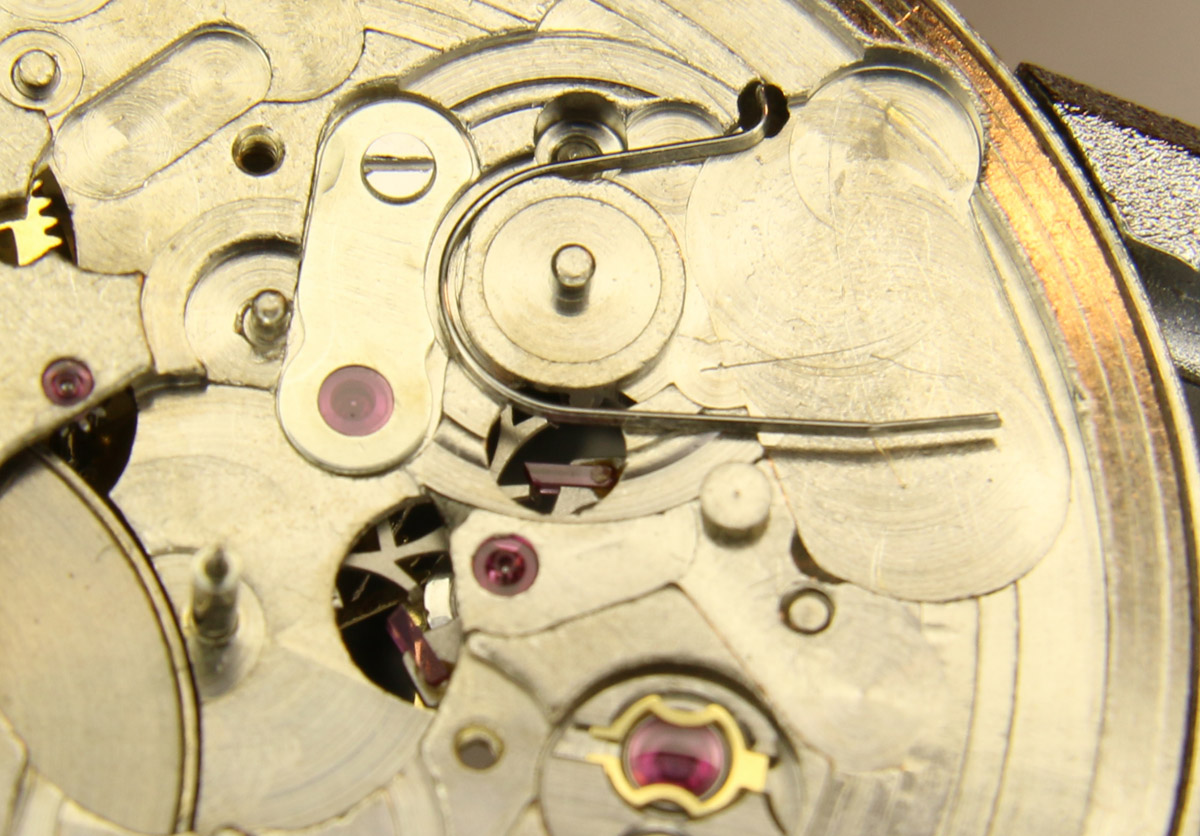
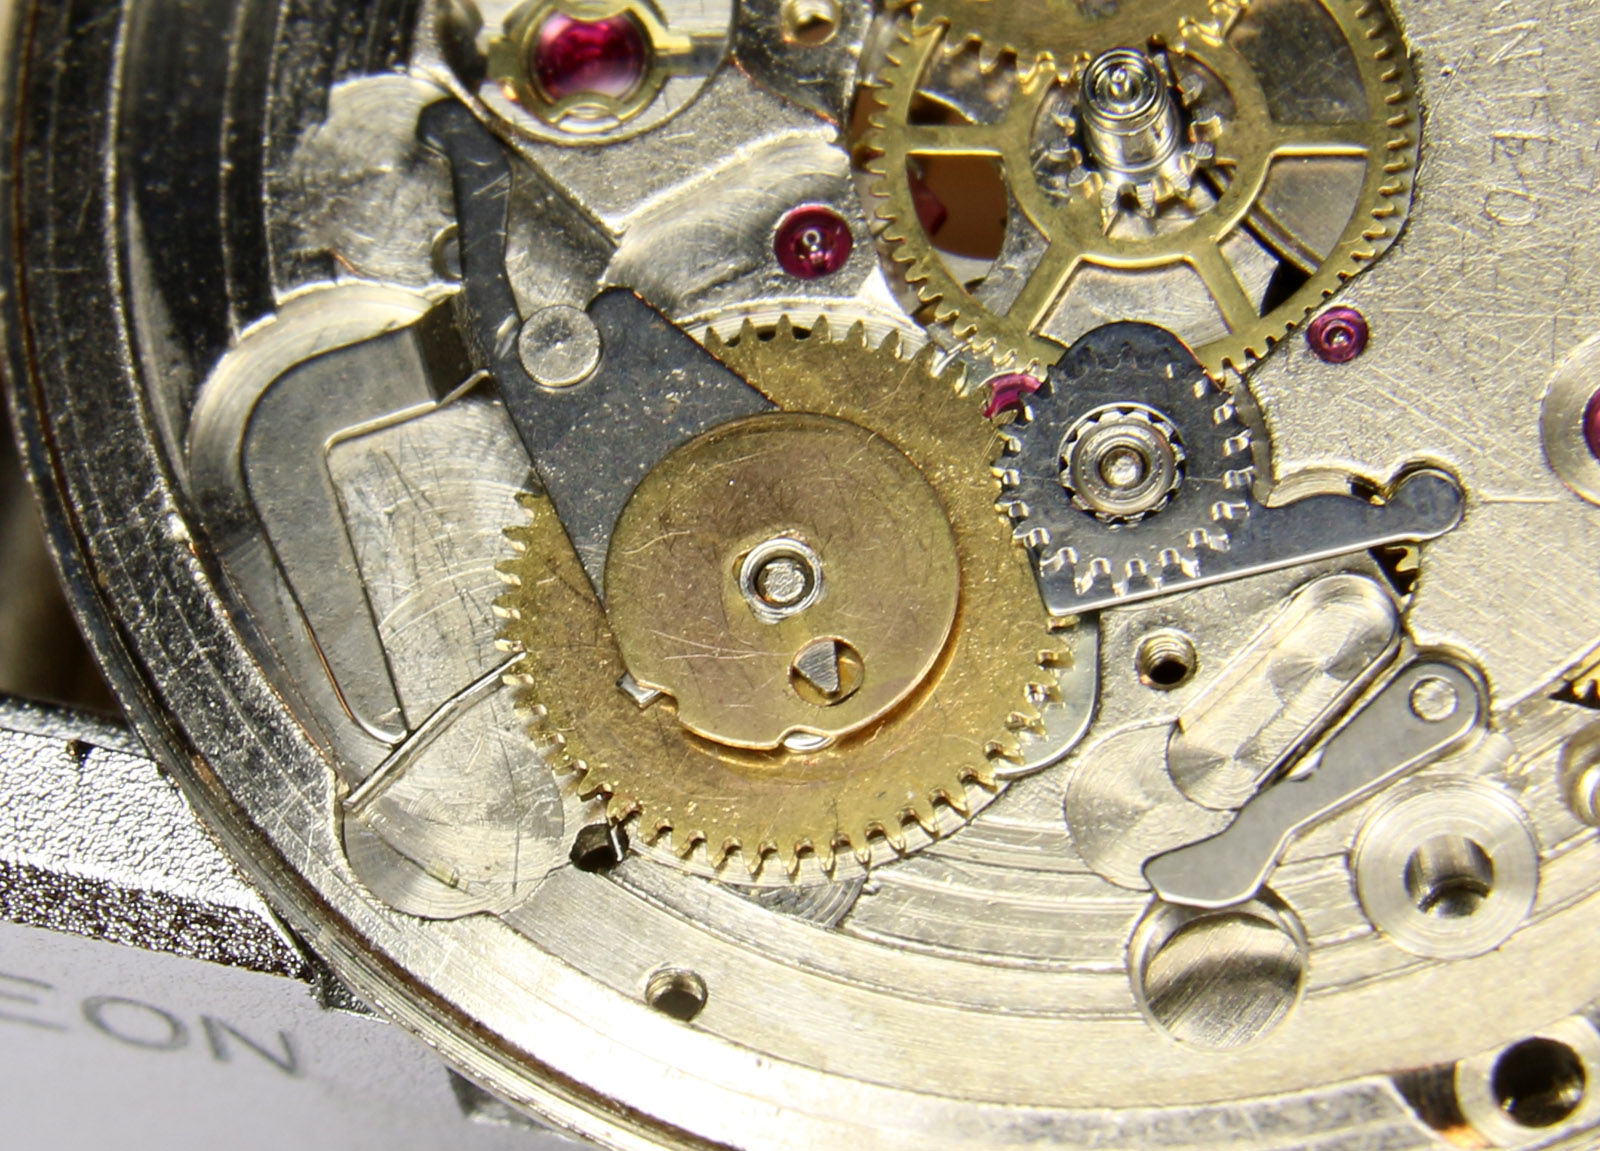
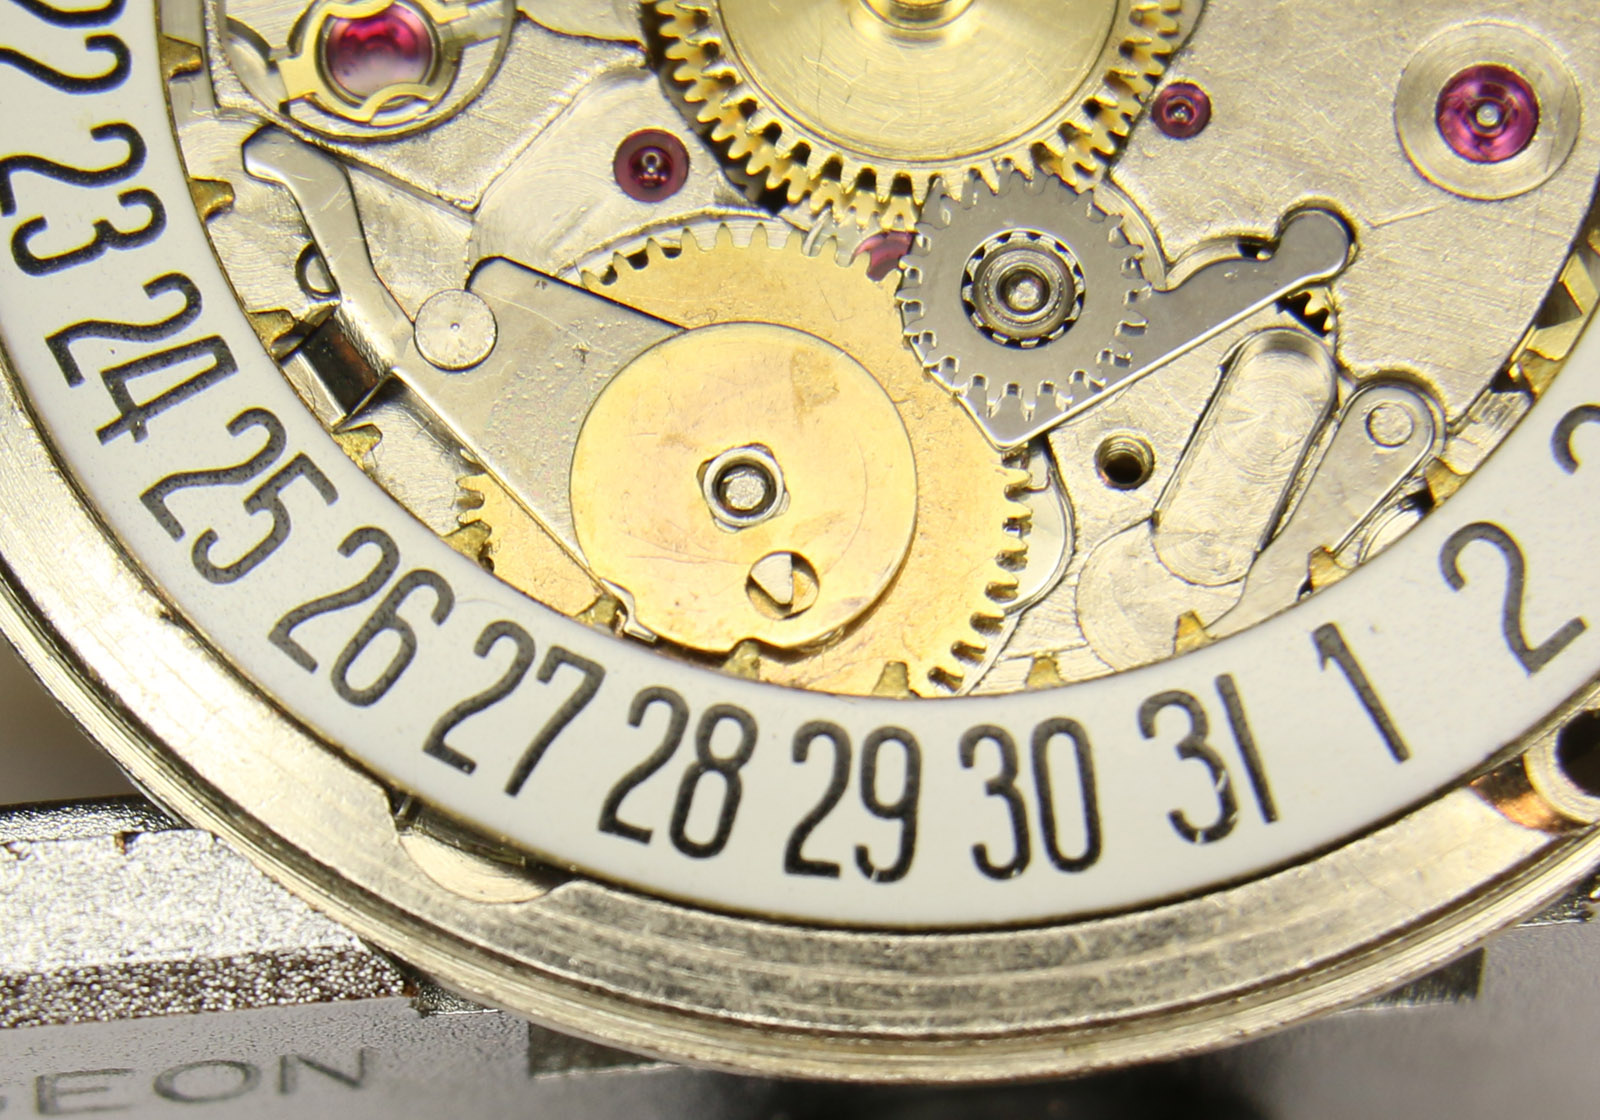
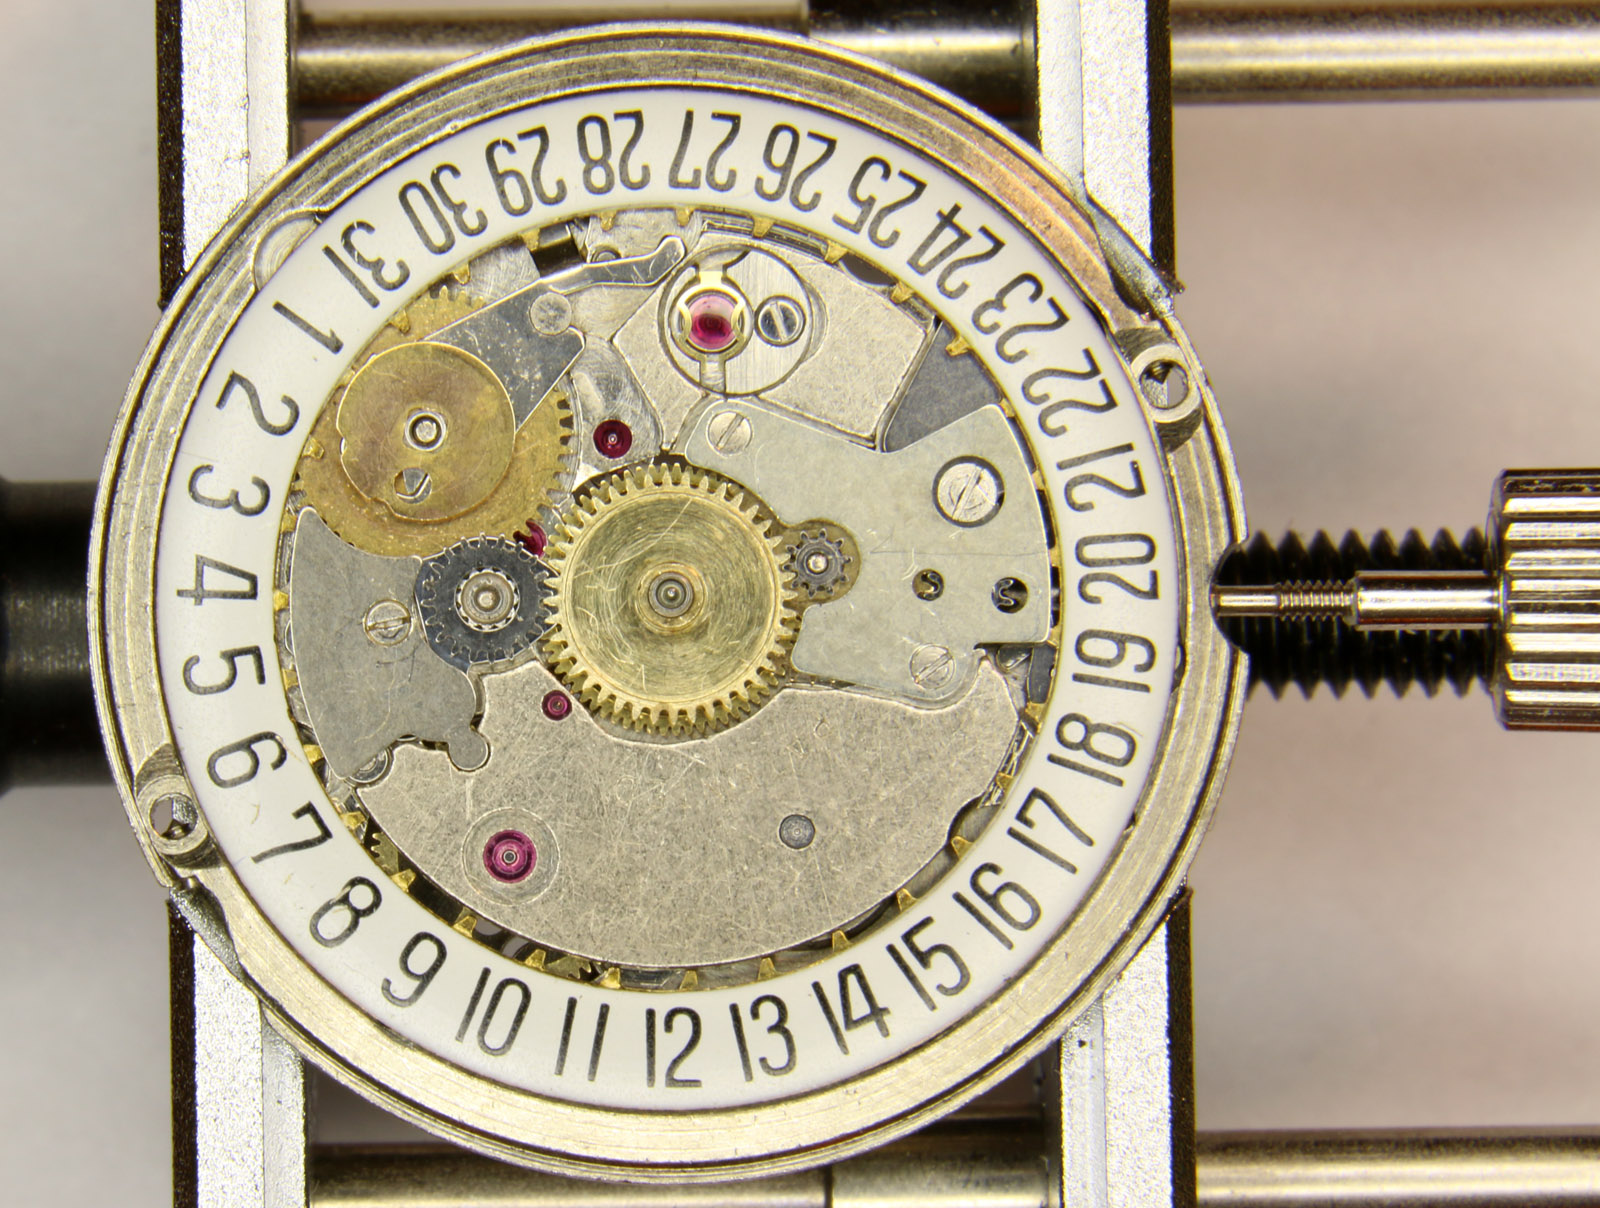
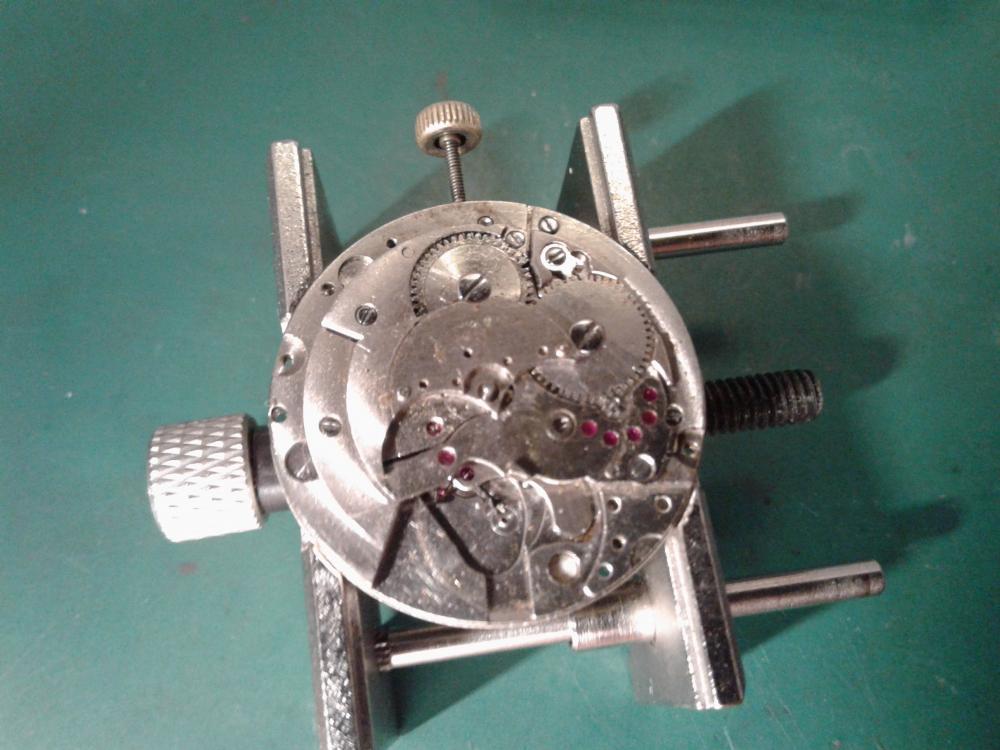
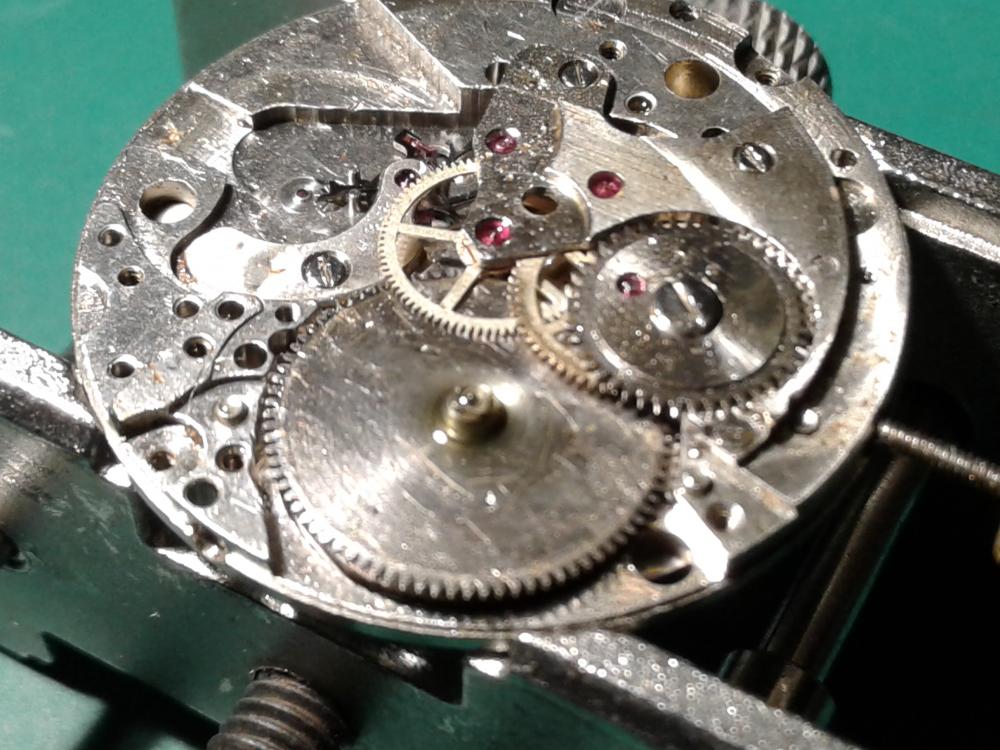
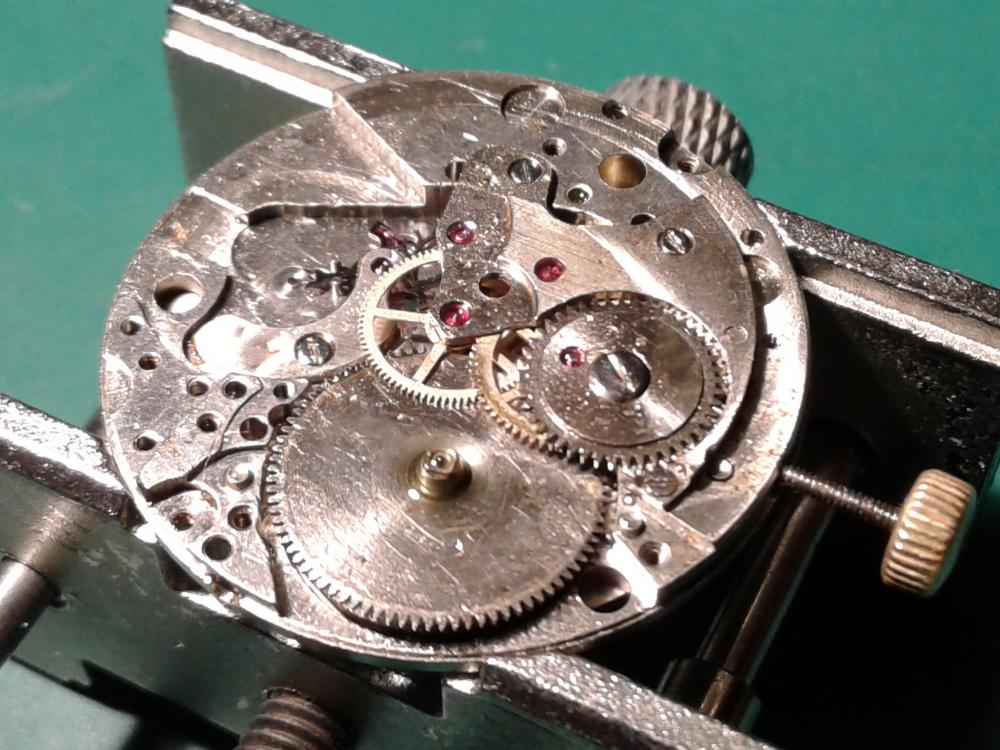
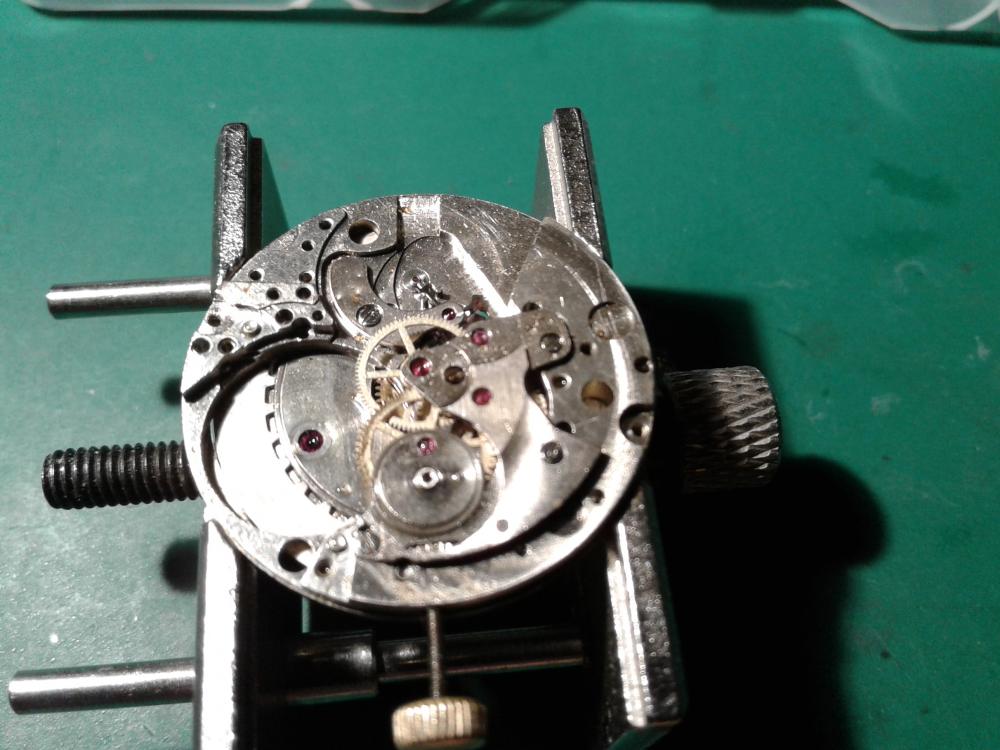
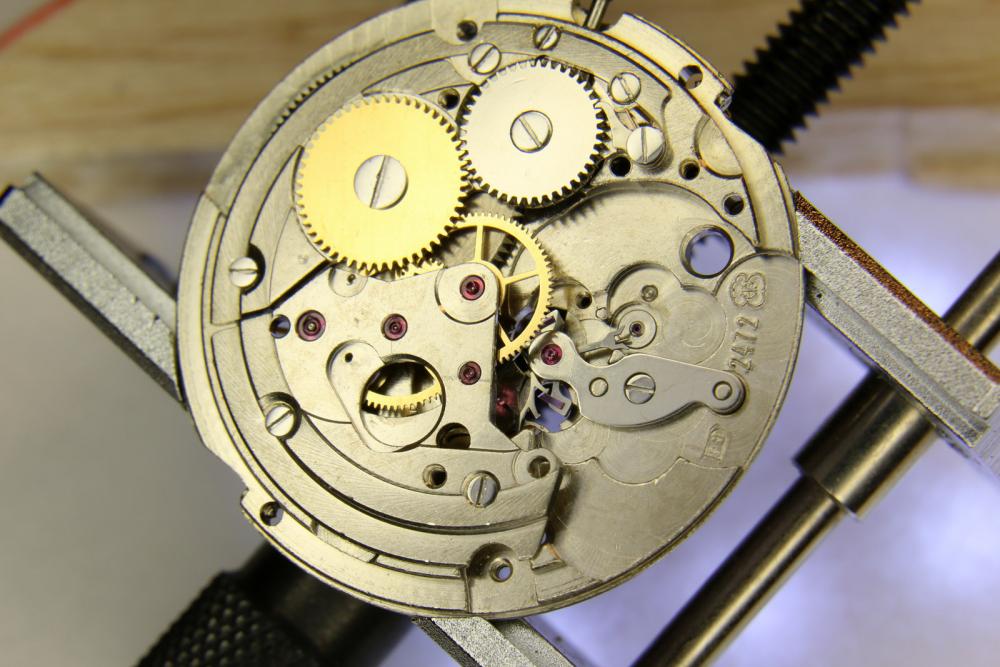
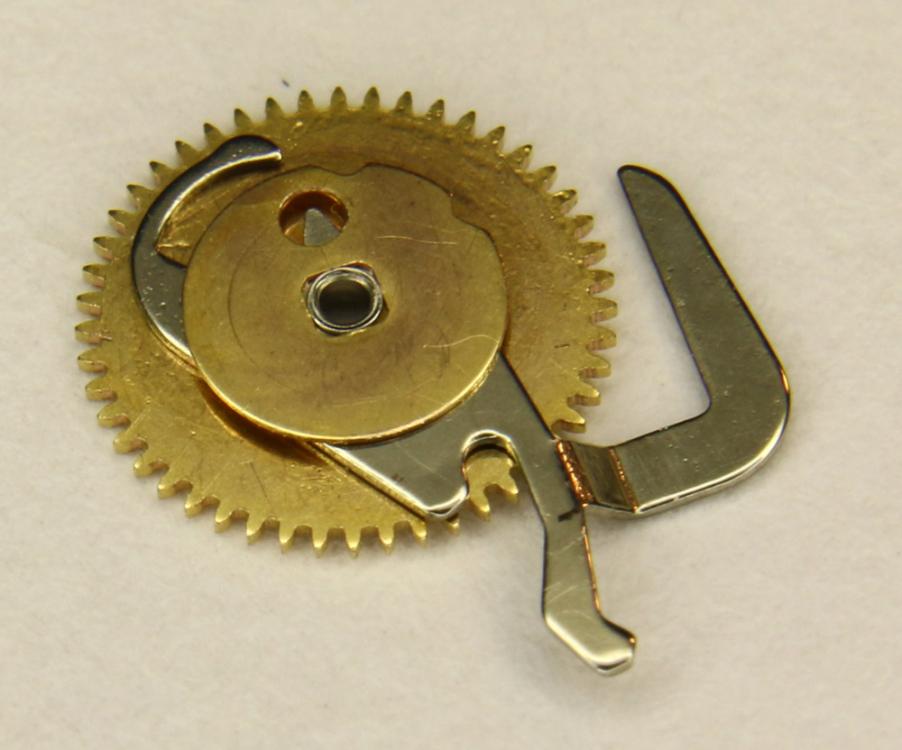
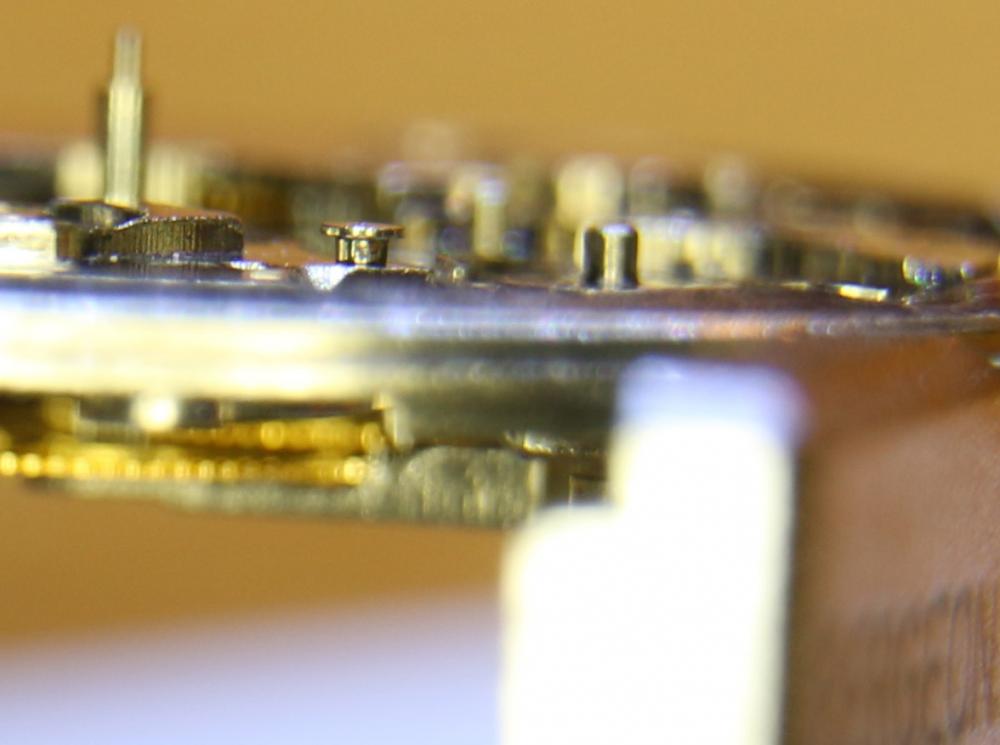
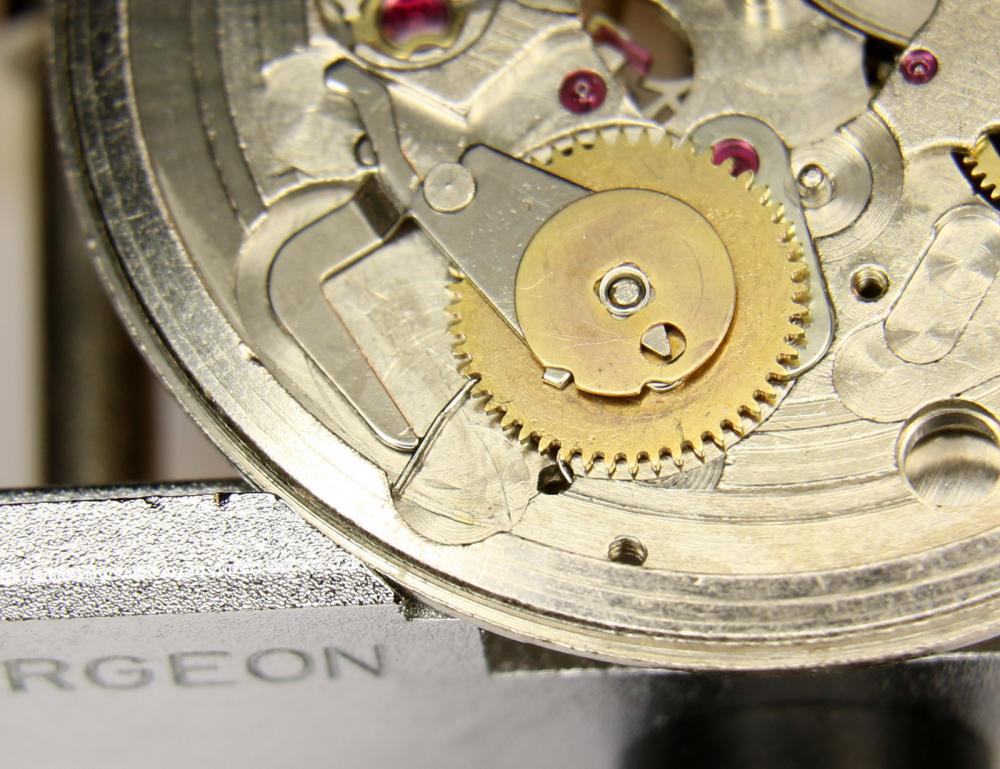
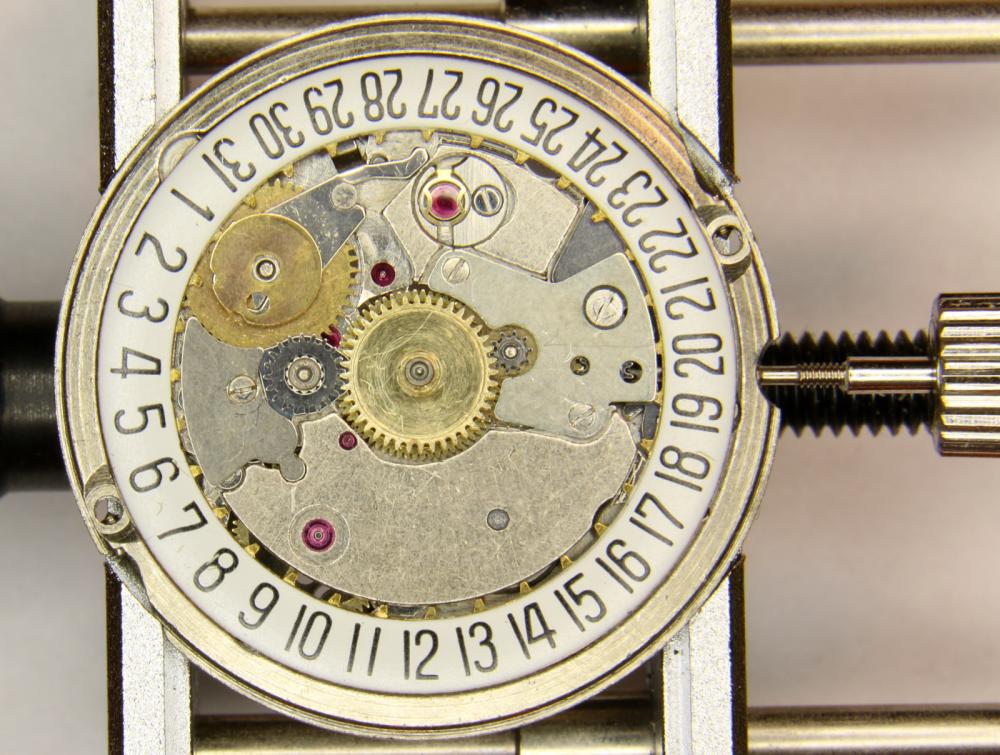
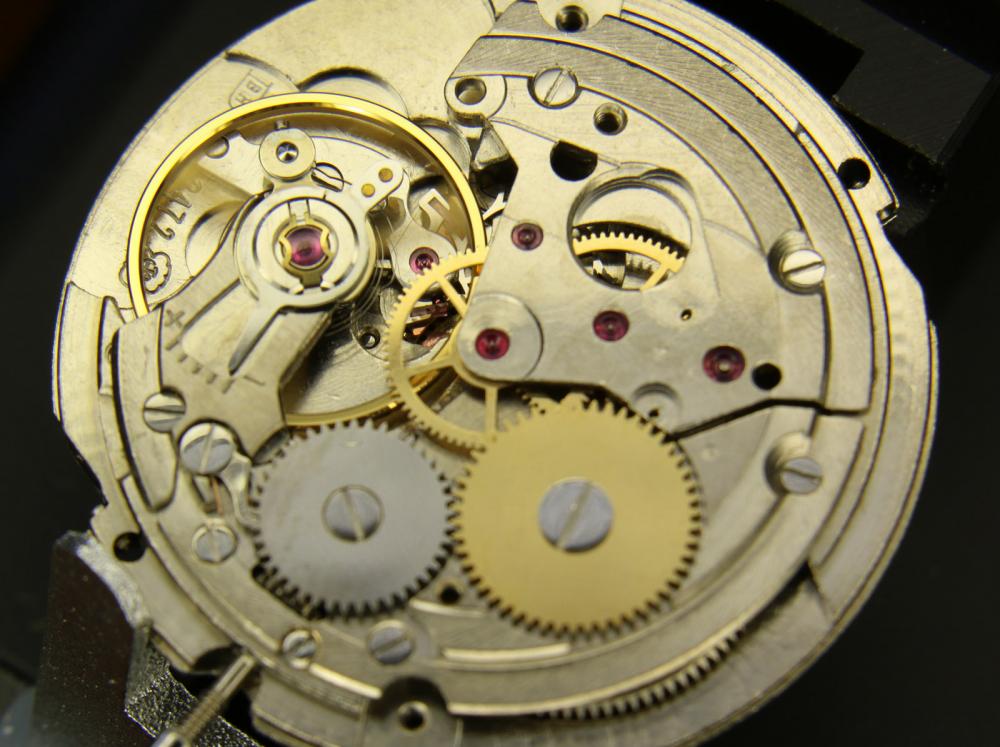
I just finished working on the 2472. Everything is in place and it's running fine. Here are a couple of pictures. Some are just for the sake of having them. Not necessary to assemble the movement but nice. Assembly of the date mechanism proved a challenge for someone inexperienced, like me. Mounting this part took me quite a while to figure out. Usually the silverish part sticks out further and cannot be inserted. This is how the part should look like prior to assembly: The spring proved to be another challenge. During assembly of the driving wheel / lever slide the spring has to be pulled back. This is the situation where the lever slide has to be slided under this guide post: After 30 minutes of trying to figure out how to assemble it, I eventually succeeded. You can see the the lever has been slid unter the guide post and that the spring is nicely in place. I first assembled the date jumper and date jumper spring but it turned out that when mounting the date indicator, I cloudn't get it done. So assemble the date jumper AFTER the date indicator is on place. The driving wheel has to be positioned so that the notches of the date indicator fit through. The date jumper is not properly in place in this picture. Done! Yet another picture of the other side with the movement in motion on the timegrapher.


 1 point