


-
Recently Browsing
- No registered users viewing this page.
-
Topics
-
-
Posts
-
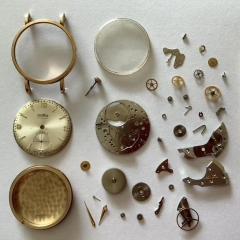
.thumb.jpg.cb17a66989f1e796fd4217db2e9ca9df.jpg) Ok, I'll admit that @JohnR725 has a point here. First and foremost, YOU decide. And YOU have to be comfortable doing it. It's also good advice to finish the automatic Seiko before going to the next watch. In defense of the "encouragement" posted above: when I serviced the Tissot 783, it was actually my second automatic watch and it was only about one year ago. So I didn't forget how it feels being in your position. Without a doubt, there is a learning curve. But I, personally (!!!), found it quite doable. It was a simpler auto system than some ETAs, Omegas and Rolexes that I worked on afterwards. But very important: this is only gentle encouragement. Nobody here is "pushing you" to try. And that said, I fully support your decision to...
Ok, I'll admit that @JohnR725 has a point here. First and foremost, YOU decide. And YOU have to be comfortable doing it. It's also good advice to finish the automatic Seiko before going to the next watch. In defense of the "encouragement" posted above: when I serviced the Tissot 783, it was actually my second automatic watch and it was only about one year ago. So I didn't forget how it feels being in your position. Without a doubt, there is a learning curve. But I, personally (!!!), found it quite doable. It was a simpler auto system than some ETAs, Omegas and Rolexes that I worked on afterwards. But very important: this is only gentle encouragement. Nobody here is "pushing you" to try. And that said, I fully support your decision to... -
So, I did an experiment. Not a fair one, I'll warn already. I compared the performance of the automatic works with: a) old (but functioning) reversing wheel, cleaned and treated with V105 b) new ETA reversing wheel, taken as-is from the blister Test 1: signs of rotor spinning when manual winding --> both performed fine, but the new wheel was better (super smooth) Test 2: With the automatic works fully assembled but not installed in the movement, held vertically, let the rotor swing from a 90° angle. --> new wheel the clear winner As I said, not a fair comparison because I'm comparing an old wheel (functioning, but potentially with slight wear) with a brand new one. But still, I think it's sufficient confirmation that the potentially-old ETA wheels sold by CousinsUK are still in perfect condition despite their age and don't need new lubrication.
-

By rjenkinsgb · Posted
My first guess would be a friction spring, something that helps hold it in place when not being driven? If I'm understanding the diagram for that movement correctly, the lower centre hand is on item 52 in the drawing, "Hour counting wheel " - and that appears to be an assembly with a spring friction clutch included, between the driving wheel and hand / reset cam? It's shown in the calendar works assembly drawing, page 22. Or is the "reset" actuator supposed to remain solidly against the cams, and there is some slight loss of pressure on that somewhere, an eccentric screw or pin that needs adjusting? I've never worked on one of that style so I'm not 100% on the chrono disengagement or reset. I'm looking at the ETA 7751 technical manual, linked via this page: https://shopb2b.eta.ch/en/mecaline.html?p=3 -
Oh boy!!! Thanks again for your post of this. I hadn't oiled there and the watch was running fine anyways (280° amplitude, fully wound, dial up). But I now added a bit of 9010 at that point of the seconds pinion and amplitude jumped to 300-310!! Wow.
-
 Evening Hector, Your are a wealth of knowledge, thank you, I did look hard but obviuosly not hard enough, my bad !! Regards CJ
-


Recommended Posts
Join the conversation
You can post now and register later. If you have an account, sign in now to post with your account.
Note: Your post will require moderator approval before it will be visible.