Jump to content

Recommended Posts

Posted

There’s no shortage of service walkthroughs for this and similar ETA quartz calibres on the Internet, and here on WRT. Nevertheless, I thought it would be good fun and educational to create my own walkthrough, and here it is now!

Only having experience of servicing mechanical and automatic movements, I truly learnt that a quartz movement is not “just a time telling battery device”, but indeed a mechanical movement, except that the power source isn’t a mainspring but a battery and that the escapement is made up of electronics (no escape wheel, pallet, and balance). So, just like a mechanical movement, a quartz movement has a train of wheels, a setting mechanism, a dial train (motion works), and in this case calendar works.

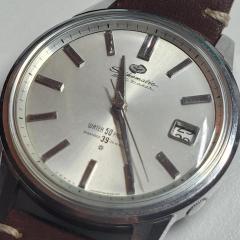
The watch belongs to my father who got it as a gift from my mother at his 40th birthday in 1979 (41 years ago!). He asked me if I could fix the crown which had come loose from the stem. So, I glued the crown back to the stem using Loctite 638. Perhaps not the ideal glue but at least the crown will never come loose again. Anyway, I thought to myself; why not try and give it a complete overhaul!? After all, it had never been serviced and I wanted to learn more about quartz watches and return a perfectly working and clean watch to my much-appreciated dad.

One of the things that surprised me while taking this movement apart was that the parts are very small. Smaller than the parts in an averagely sized mechanical movement and that was a bit of an extra challenge. So, before servicing a quartz movement I think it’s a good idea to gain some experience servicing a few averagely sized mechanical movements first.

Both the disassembly pictures and the assembly pictures basically mimic and complements @Mark's videos How to service a quartz movement. ETA 955 412. Watch repair tutorials” and How to service a quartz movement. Part 2. Assembly. ETA 955.412” which I used for guidance (Thank you!). However, my walkthrough includes lubrication suggestions according to ETA’s technical communication which are intentionally omitted in the videos to save time. For reference I also used the video Quartz Service ETA 955.112, @HSL's quartz movement walkthrough, and @Lawson's walkthrough (Thank you!). All part names I’ve taken from ETA’s technical communication.

So, without further ado.

ETA Calibre 955.112 Disassembly

IMG_3082.thumb.JPG.0353fe2826a2a11bd538de4db7b51671.JPGIMG_3083.thumb.JPG.838730984296277daf8f8c82bac9a953.JPGIMG_3084.thumb.JPG.a70d05341f88aab887bc0d354703f74c.JPGIMG_3087.thumb.JPG.f2fe2ccd728ea6ca705bea74c6852571.JPGIMG_3088A.thumb.JPG.92524ed0453907db5f4c35c09c676974.JPGIMG_3088B.thumb.JPG.9b67a9cf6cad3653218e0b95ffe8d8b5.JPGIMG_3089.thumb.JPG.eb7e8eeef5cad404eec312c049c79bac.JPGIMG_3092.thumb.JPG.f2f1a16a14248f65a4f4909ea25d2884.JPGIMG_3093.thumb.JPG.532244ab0312d9c0b8217766ab3bb41c.JPGIMG_3098.thumb.JPG.db96bb98c8e94e2617565edd0fbb4eba.JPGIMG_3101.thumb.JPG.14a66b8b109cffc7b5c943f95f19d47f.JPGIMG_3103.thumb.JPG.b5eed4c42fb4707f8c9d82313994d707.JPGIMG_3104.thumb.JPG.260e0e2f732ee79f7746778a2b1f46c3.JPGIMG_3105.thumb.JPG.877f7e262f7fb49fc4e4d3e12beea307.JPGIMG_3107.thumb.JPG.a6b6bf5eed4f7764259dd954eda00121.JPGIMG_3108.thumb.JPG.554cbb09c5f5fab8ff047b330a5752c3.JPGIMG_3109.thumb.JPG.40fe2010f61964e36c6cc1dcb5c5623d.JPGIMG_3112.thumb.JPG.c498b672b276f1fe8523a07898c70d40.JPGIMG_3114.thumb.JPG.7cf75268b311c918e42880a3c7d74926.JPGIMG_3115.thumb.JPG.58689e50987c3c4ffd1856f2a19f8e90.JPGIMG_3116.thumb.JPG.424a2b4b46001440d83e521194bc0153.JPGIMG_3117.thumb.JPG.edf2abba32238f010380684e628114e1.JPGIMG_3118.thumb.JPG.bd51a28cbf93ac2e57af27215cc3f359.JPGIMG_3119.thumb.JPG.b26ca85cc20ab13d9580e06663908803.JPGIMG_3124.thumb.JPG.8a2aaae36c8937f76d22a0e1571e4847.JPGIMG_3125.thumb.JPG.ff446534c4be5ad1c780943d454199bb.JPGIMG_3126.thumb.JPG.55a10fb632c03bcfaf42704aec1fee4b.JPGIMG_3127.thumb.JPG.cfefb27af324f26b5d01f8c9c7874b98.JPGIMG_3128.thumb.JPG.1e298939ba029ecf47fd73536a2aee73.JPGIMG_3129.thumb.JPG.be4697da41bb4ae1854ddfd5abed1acd.JPGIMG_3136.thumb.JPG.0a5c4dcc0d8ec74724028b74ddcd79e7.JPGIMG_3138.thumb.JPG.1e235a6e405b1bb60e729df64261a462.JPGIMG_3138B.thumb.jpg.3fea4221c726ec3ce49c9bc149de0e2f.jpgIMG_3138C.thumb.jpg.8d90c6dd672b4875c5d736f840b2eb97.jpgIMG_3139.thumb.JPG.e8633edf05027a56ea72562dd262f76a.JPGIMG_3140.thumb.JPG.b456c1096056e7b72b4db528c1c49490.JPGIMG_3141.thumb.JPG.0f209ef5b82c8c71d46ee1e1d69d64e4.JPGIMG_3142.thumb.JPG.c61ead638f8e2dbaeed47e0268f68025.JPGIMG_3143.thumb.JPG.33390491a37ef51beccc6d2c52a857ba.JPGIMG_3145.thumb.JPG.09e1f1029880bcc41e48123fe44beba8.JPGIMG_3148.thumb.JPG.fde5fd162f4258095663aff0bf8fa512.JPGIMG_3149.thumb.JPG.41967f528922c4fc040d7903c06baceb.JPGIMG_3150.thumb.JPG.57f438e0693ac093de86efa958fa9654.JPGIMG_3151.thumb.JPG.31258cf0bda0f06349d002c88c04358b.JPGIMG_3156.thumb.JPG.5d470cb5e2d67a51e2488236cb4cf957.JPGIMG_3157.thumb.JPG.dc7c6a56a54c0dedad6b794688acb329.JPGIMG_3158.thumb.JPG.d8b642c48c6f327c39b95eb541eb041c.JPGIMG_3160.thumb.JPG.c426f02d758a89ef3107ea93dd41ee35.JPGIMG_3161.thumb.JPG.45fff3e7a59652c49f89bcada4e19557.JPGIMG_3163.thumb.JPG.b0dc58180ded735740f4c5928e4d4c07.JPGIMG_3164.thumb.JPG.c68200dde30be18012f6a044193d5ba4.JPGIMG_3167.thumb.JPG.0c4753b1d8006be3204fbbf1c31e30c2.JPGIMG_3168.thumb.JPG.3ebd1d3d4c0bb4ef26e2474417696125.JPGIMG_3169.thumb.JPG.7abbf193bfc1c17dca9ebe2a5aaff782.JPGIMG_3170.thumb.JPG.89d6b7fc3a35c8b510fb9b3019d8b68f.JPGIMG_3171.thumb.JPG.3c3799728abdf281adaf2181d27a86a0.JPGIMG_3172.thumb.JPG.9d86b9d4f9c0354937ab6f603d189731.JPGIMG_3176.thumb.JPG.d6f03762fed4980689dd3d832bd8ee41.JPGIMG_3178.thumb.JPG.1d8c007bd0f4e915737343e3bb6fb524.JPGIMG_3180.thumb.JPG.660cf6edf10197f4574087bd751f7219.JPGIMG_3182.thumb.JPG.a5043262dac2bccb30edd16a21b8872b.JPGIMG_3185.thumb.JPG.1b68e4e0b298a444cd5f57a42e85f857.JPGIMG_3189.thumb.JPG.0db1a97155b1d1f3e4f588d06ead7dd3.JPGIMG_3190.thumb.JPG.86aa411aa70b50a83cf00af52977d339.JPGIMG_3195.thumb.JPG.22ebef01cc640588694bb3bbdcf9e6ae.JPGIMG_3198.thumb.JPG.f6a6b3817e846ae7c2940aeea683669c.JPGIMG_3199.thumb.JPG.96308be71fade224ef15df56e22edde4.JPGIMG_3201.thumb.JPG.13cc5aa3581fbb40a1ab13ceedafd86a.JPGIMG_3202.thumb.JPG.1c562b9961631f9ac4ffef792a2ffc07.JPGIMG_3203.thumb.JPG.a57aecf894887b8d0e322939a898663b.JPGIMG_3204.thumb.JPG.87012986e176cf5a30bcd4e18342bfa6.JPGIMG_3205.thumb.JPG.c41fdf4b4c1f40d10391ef5e386034f1.JPGIMG_3206.thumb.JPG.6ce92b52f50f58de1da5634d4246aa36.JPGIMG_3207.thumb.JPG.36df3bde5c2fa4639b04982380d041d4.JPGIMG_3208.thumb.JPG.43dc003f2a26af24ecdcd1083a0aea73.JPGIMG_3209.thumb.JPG.72d2c4c640b6424cd91dd22a4b3e672b.JPGIMG_3210.thumb.jpg.2056217eb454ff722369fae2f90f992c.jpg

  • Like 3
  • 3 months later...
Posted (edited)

With this superb walk-through you should be on top of the score board. Excellent job and this one is a treat for anyone ever to strip / service one of these movements !

Very well done and I'm sure your father will be happy & proud of his son !!  :Bravo::bow:

Edited by Endeavor
  • Like 1
Posted

Thanks guys, much appreciated! :thumbsu::wub:
Lawson’s walkthrough of this Calibre has a very nifty trick for reinstalling the rotor that I forgot to use in my walkthrough.

  • 2 years later...
Posted

@VWatchie, thank you so much for posting this! I just finished up servicing of a 555.415 movement, and your detailed write-up was a great help. Quality of your photos is outstanding. Much appreciation!

  • Like 1
  • 2 months later...
Posted

Thank you very much for taking the time to make this posting VWatchie, and to Mark and others who were sources for you.  I know I will be referring back to this excellent documentation when servicing quartz watches.

  • Like 1
Posted
2 minutes ago, TimeWerks said:

Thank you very much for taking the time to make this posting VWatchie, and to Mark and others who were sources for you.  I know I will be referring back to this excellent documentation when servicing quartz watches.

Thanks for your kind words @TimeWerksand good luck servicing!

  • 2 years later...
Posted

I haven't been on the forum for a while 🙃

A family member had a 955.112 watch running with an intermittent fault. Bought a NOS 955.112 movement, but to be sure, I'll give it a full service.

It has been a long time since I did the 955.112, so I went back to @VWatchie walk-through ........

Again, I'm struck by the quality of it ❣️

Superb work 👏 🫶 🙏

  • Like 2
  • Thanks 1
Posted

@Endeavor

Hey, thanks for your kind words—they're much appreciated. It's absolutely great to see you back on WRT😃 I think of you as a long-lost repairer friend with lots of knowledge and smart ideas who returned!

I know you have many other interests you explore, but I hope to see you around some more!

Welcome back! ❤️

  • Like 2
  • Thanks 1


  • Recently Browsing

    • No registered users viewing this page.
  • Topics

  • Posts

    • So it's what people call a Citizen C Mark and was the first centre second movement they produced in 1950. This lines up with the serial number which dates yours to March 1951.
    • Hello I'm trying to install the Hour Counting Wheel assembly in a Valjoux 7750. The issue I'm having is the Hour Hammer Wheel keeps fouling on the Hour Hammer and the Hour Hammer Counter Lock. I believe it's because the Hour Hammer Counter Wheel is pinned to the Calendar Bridge. The latter prevents me from installing the Hour Hammer Counter Wheel separate of the bridge and seeing how it interacts with the other Hour Hammer components. These are my questions: 1.) Should I take the pin off? The one holding the Hour Hammer Wheel to the  Calendar Bridge? 2.) Can this pin be removed? 3.) Any tips for installing the whole assembly if I'm not meant to remove the pin? I've included pictures to better illustrate what I'm writing about. Thanks in advance for any help that can be provided. 
    • The crystal seems to be exactly the same as the old one, bought from Cousins using the model number of the watch. I tried again to manipulate it into the case but still having no luck. I think I will have to reduce the size slightly but am worried that once it's in, it could be loose. Before I do that I think I will try and design a custom shaped die for my crystal press and 3D print it. 
    • What you’re saying is that if the entire coil is lifted or tilted either up or down it is due to a slight twist in the spring? Usually next to the stud?  I’ve chased this before and in one instance the spring came out of the stud and I had to reinstall it and secure it in place.  Do you find that the angle (not twist) the spring leaves the stud not only affects how it centers in the regulator pins but also the coil spacing? This could be caused by a distortion in the spring as it grabs and release the pins. I find turning the stud counter clockwise opens the coils 180 degrees away from it. So do I adjust the stud in relation to the regulator pins or to the coil spacing?  I also find that unless I remove the balance from the cock I can’t see the slight distortions in the spring. In my picture the distorted spring looked fine when installed. Do you use Alex’s technique of sliding the regulator arm up and down the curve to find distortions or can you visually see them?    Gettin back to positional variation for a moment. The angle of the regulator block is set by the factory and I’ve noticed it’s always the same. I have seen that sometimes the pins are too closed and grab or can grab the spring. If you open the pins to do the curve check what guide do you use to close them back down to the correct angle? 
    • So if anybody overrides what i say, listen to them haha. I'm not an expert but i've just been in this boat a dozen times as i used to mess up hairsprings bad, but the good part of that was that i got to learn how to fix them.  What made my life SO much easier was learning how to adjust the hairsprings with the balance installed on a disassembled mainplate, unless it's a very serious problem or on an inner coil you can't get to i would recommend trying this in part because the spring will mostly ALWAYS look flat when the balance wheel is not installed on the cock. Install the balance wheel back in the cock and the cock with the cap jewels in the mainplate, with it installed even the most imperceptible twist will be pretty obvious. Just make sure the balance jewels are also installed. In these movements, if 99% of the time any twist or problems gonna be around the terminal curve, twists often near the stud, especially if you've been removing their awfully designed studs from the balance cock. If there's a reliable way to install those things without introducing a minor twist to them i haven't found it. they're an awful design. INstall the balance on you mainplate WITH your capstones/chatones and look sideways across the balance under magnification. Look for the highest or lowest spot of the now not flat hairspring. 180 degrees from that high or low spot is where your twist will be. You have to be VERY careful with twists as the tiniest over or under twist brings it out of flat. If the area i have to untwist is near the stud i just use a pair of #5 tweezers or some very sharp fine curved tweezers and gently see which way i twist it corrects the twist, then i hold the very fine point of the tweezers on the hairspring and just gently squeeze and check it and see if it started to correct it, then i rinse and repeat. Tiny adjustments is what you want, don't close them all the way, and dont' introduce a flat spot in them. it's just a little nudge by closing the tweezers on it at an angle. .  If the twist is not near the stud, i grasp the hairspring with some very fine curved tweezers as gently as possible while still holding it then i do that same sorta tweezer squeeze with my #5's. 
×
×
  • Create New...