Leaderboard


Popular Content
Showing content with the highest reputation since 04/21/24 in all areas
-
Double Oooooo Removal tool? Dreamed of one of these. However, Kalle on Chronoglide showed everyone my system with the pegwood. Worked a treat. Felt so chuffed to be mentioned. https://www.youtube.com/watch?v=tTFrXjiyGKc 46:40 for the wheel removal. Mentions me at 50:00 and does the removal with the pegwood. Felt like my 15 minutes of fame.7 points
-
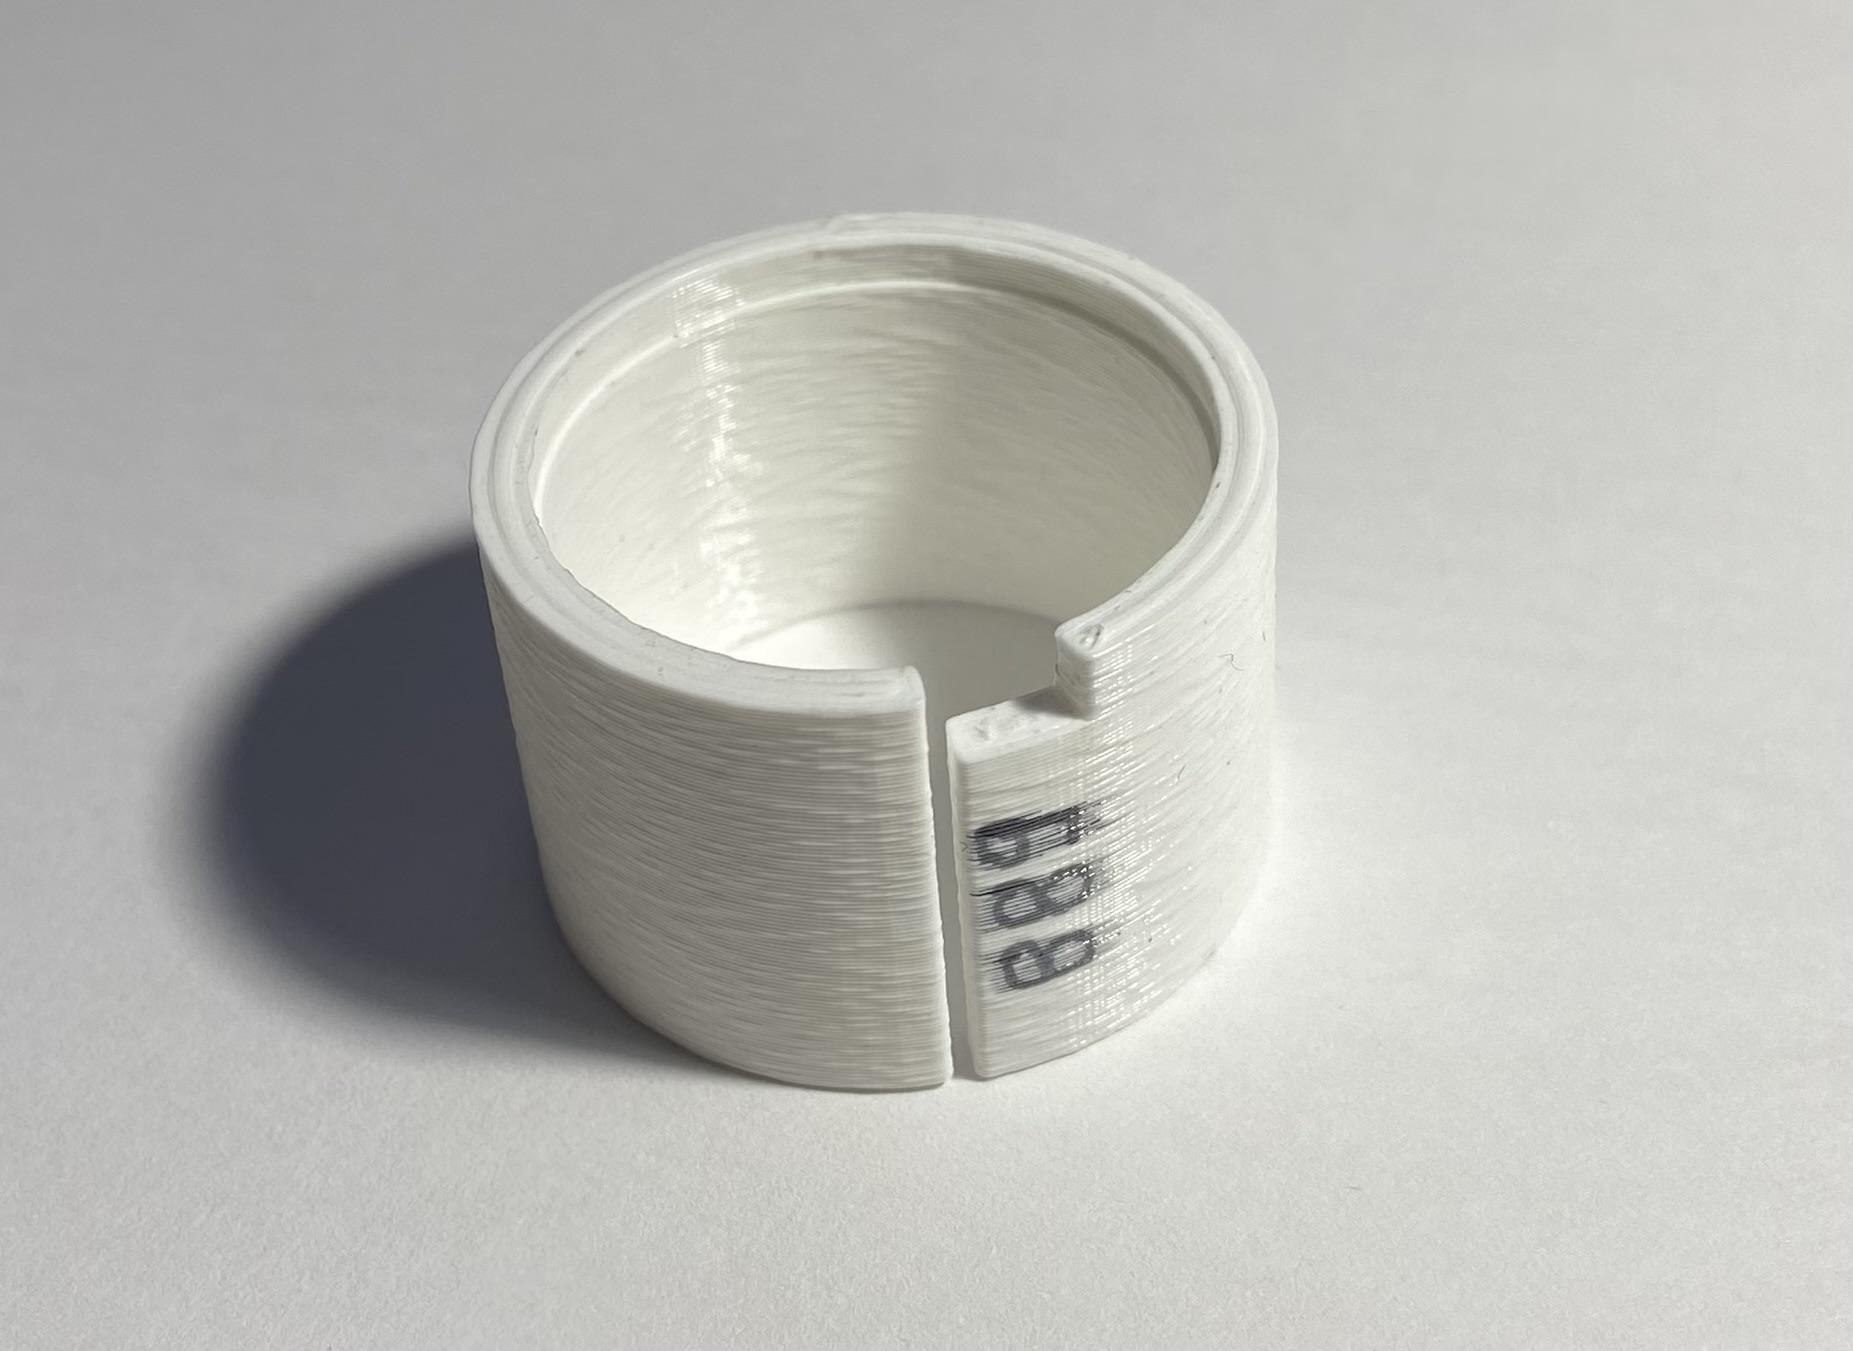
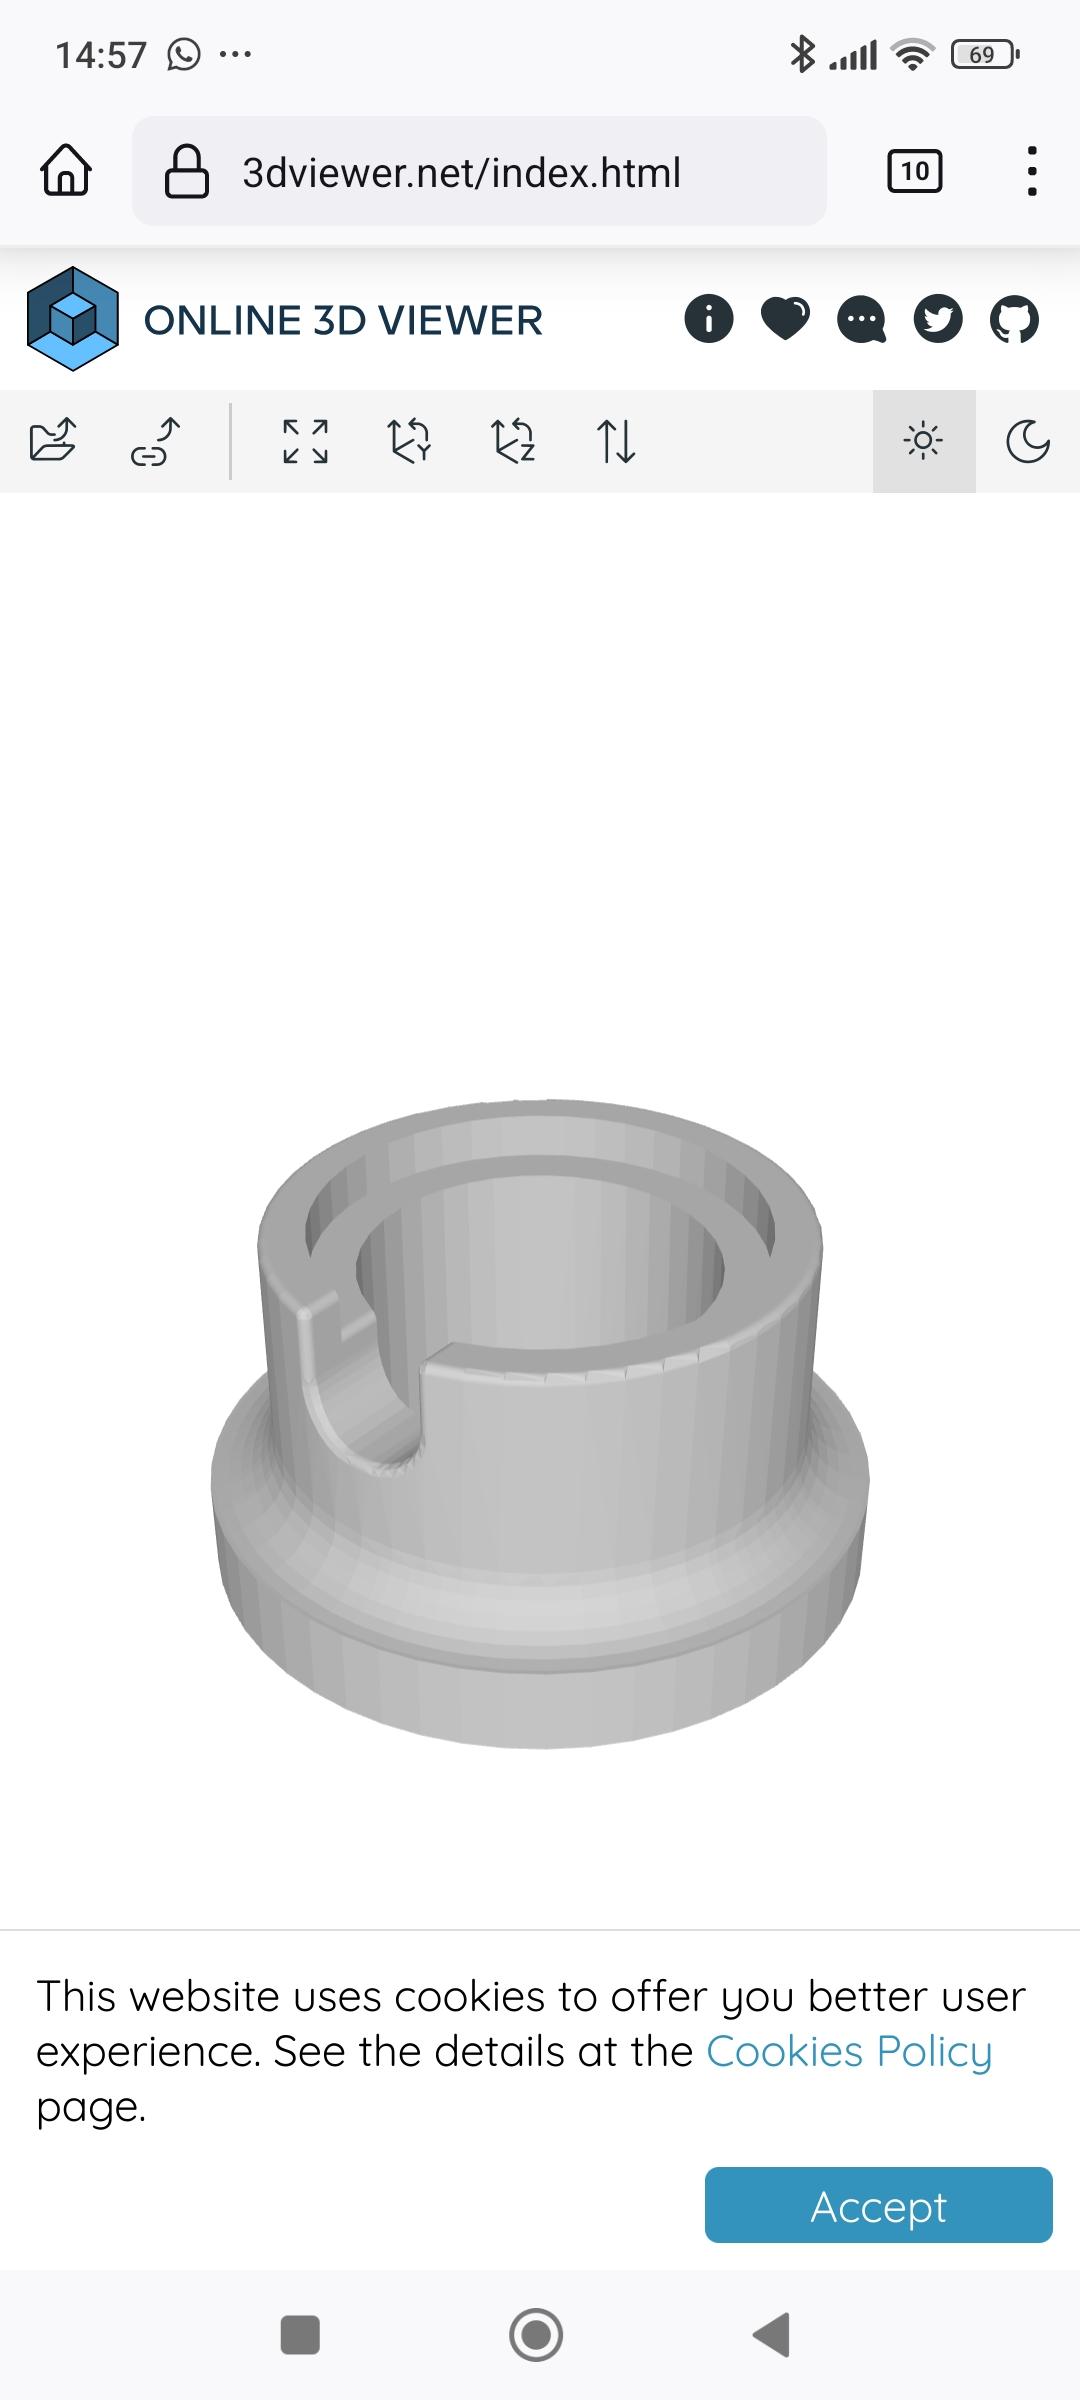
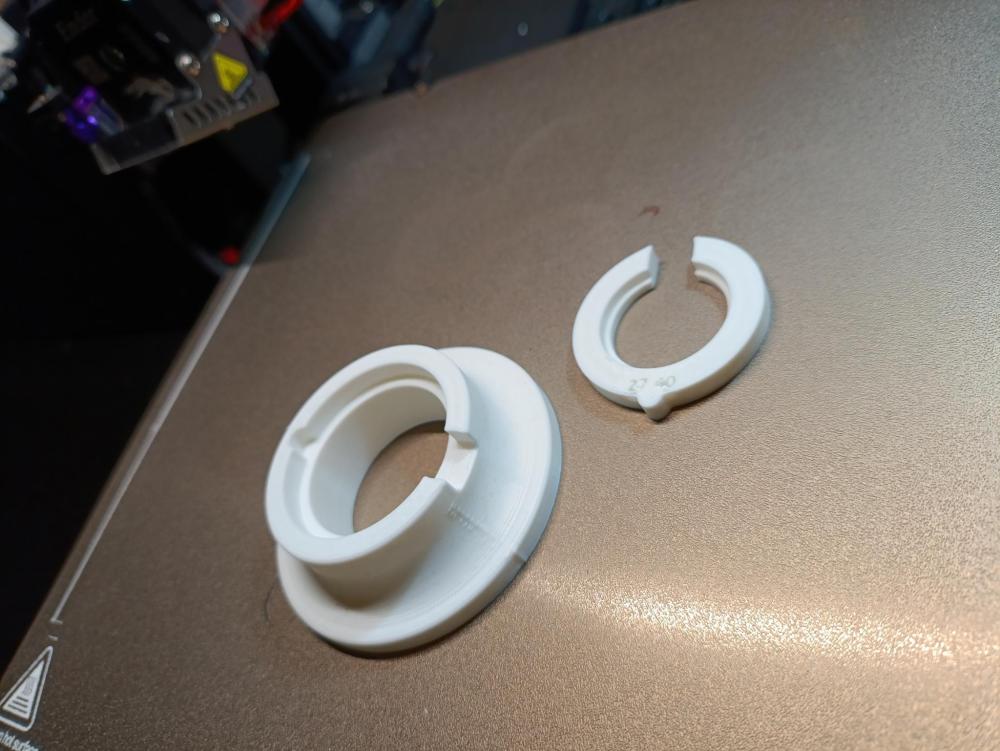
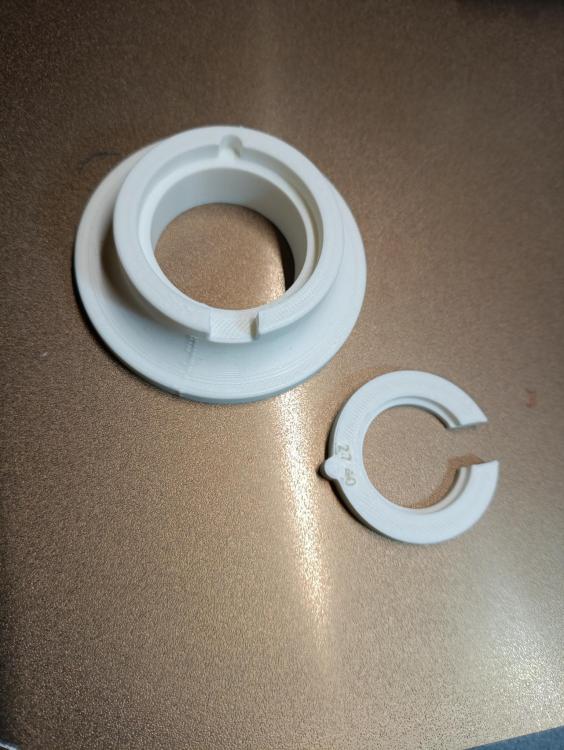
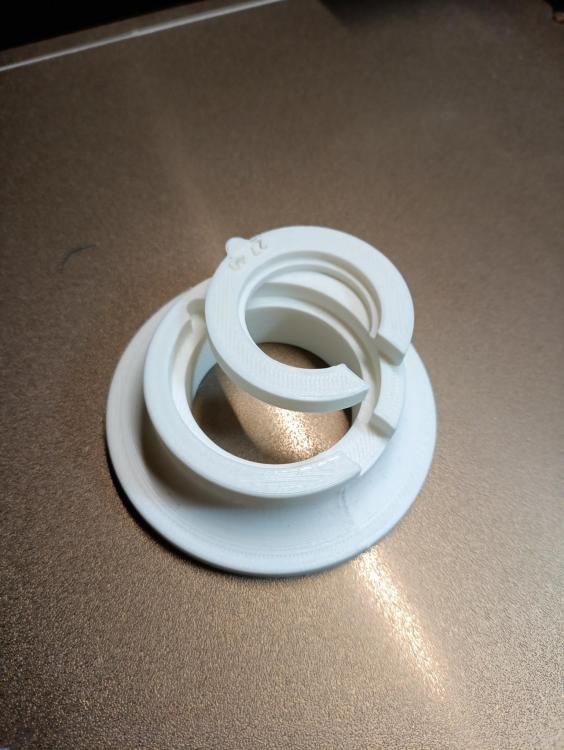
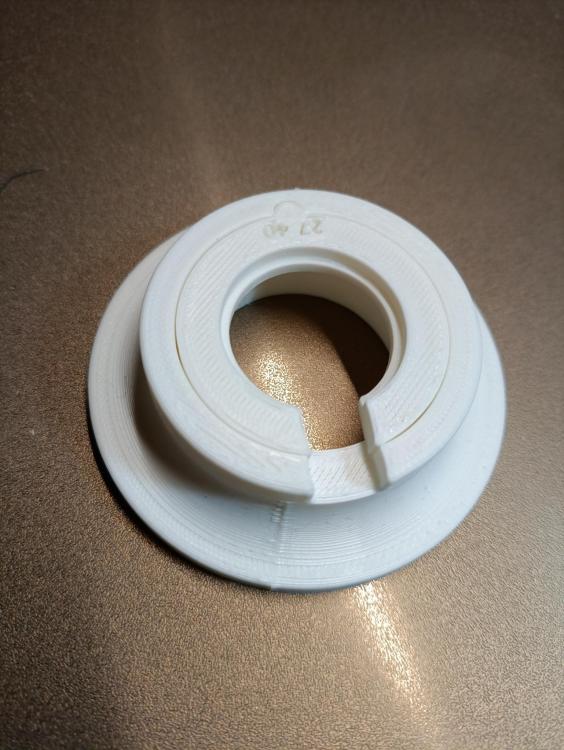
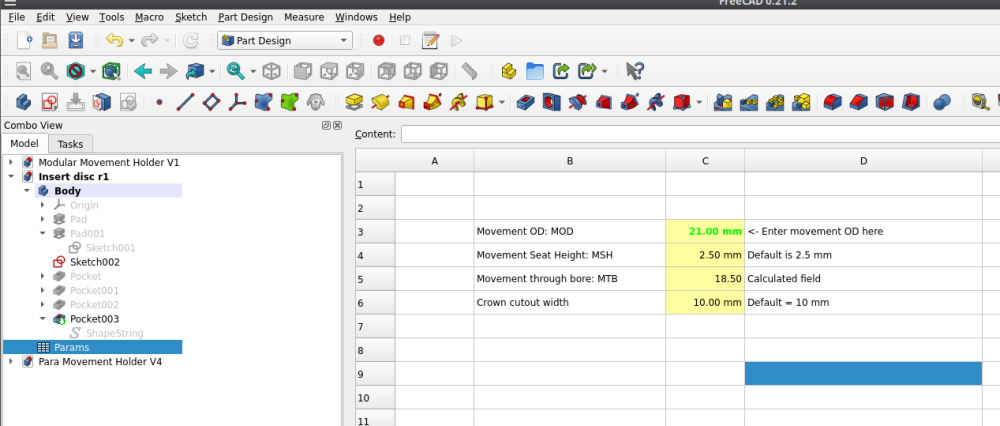
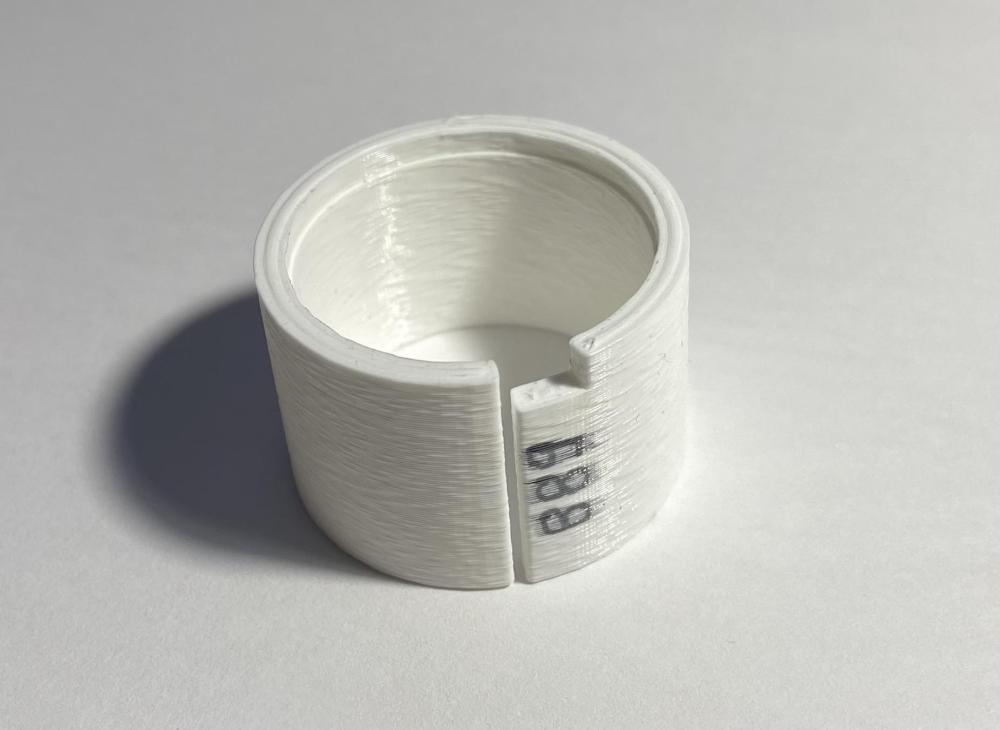
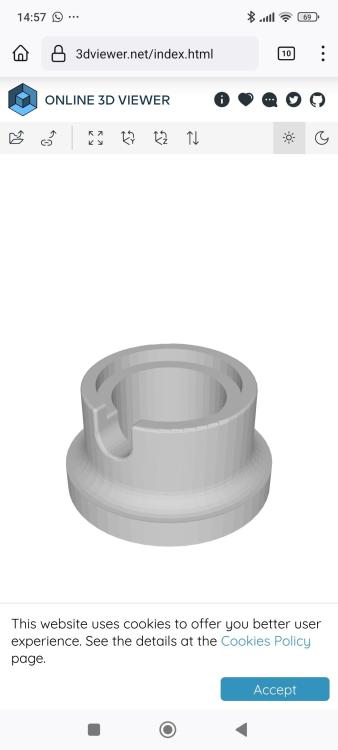
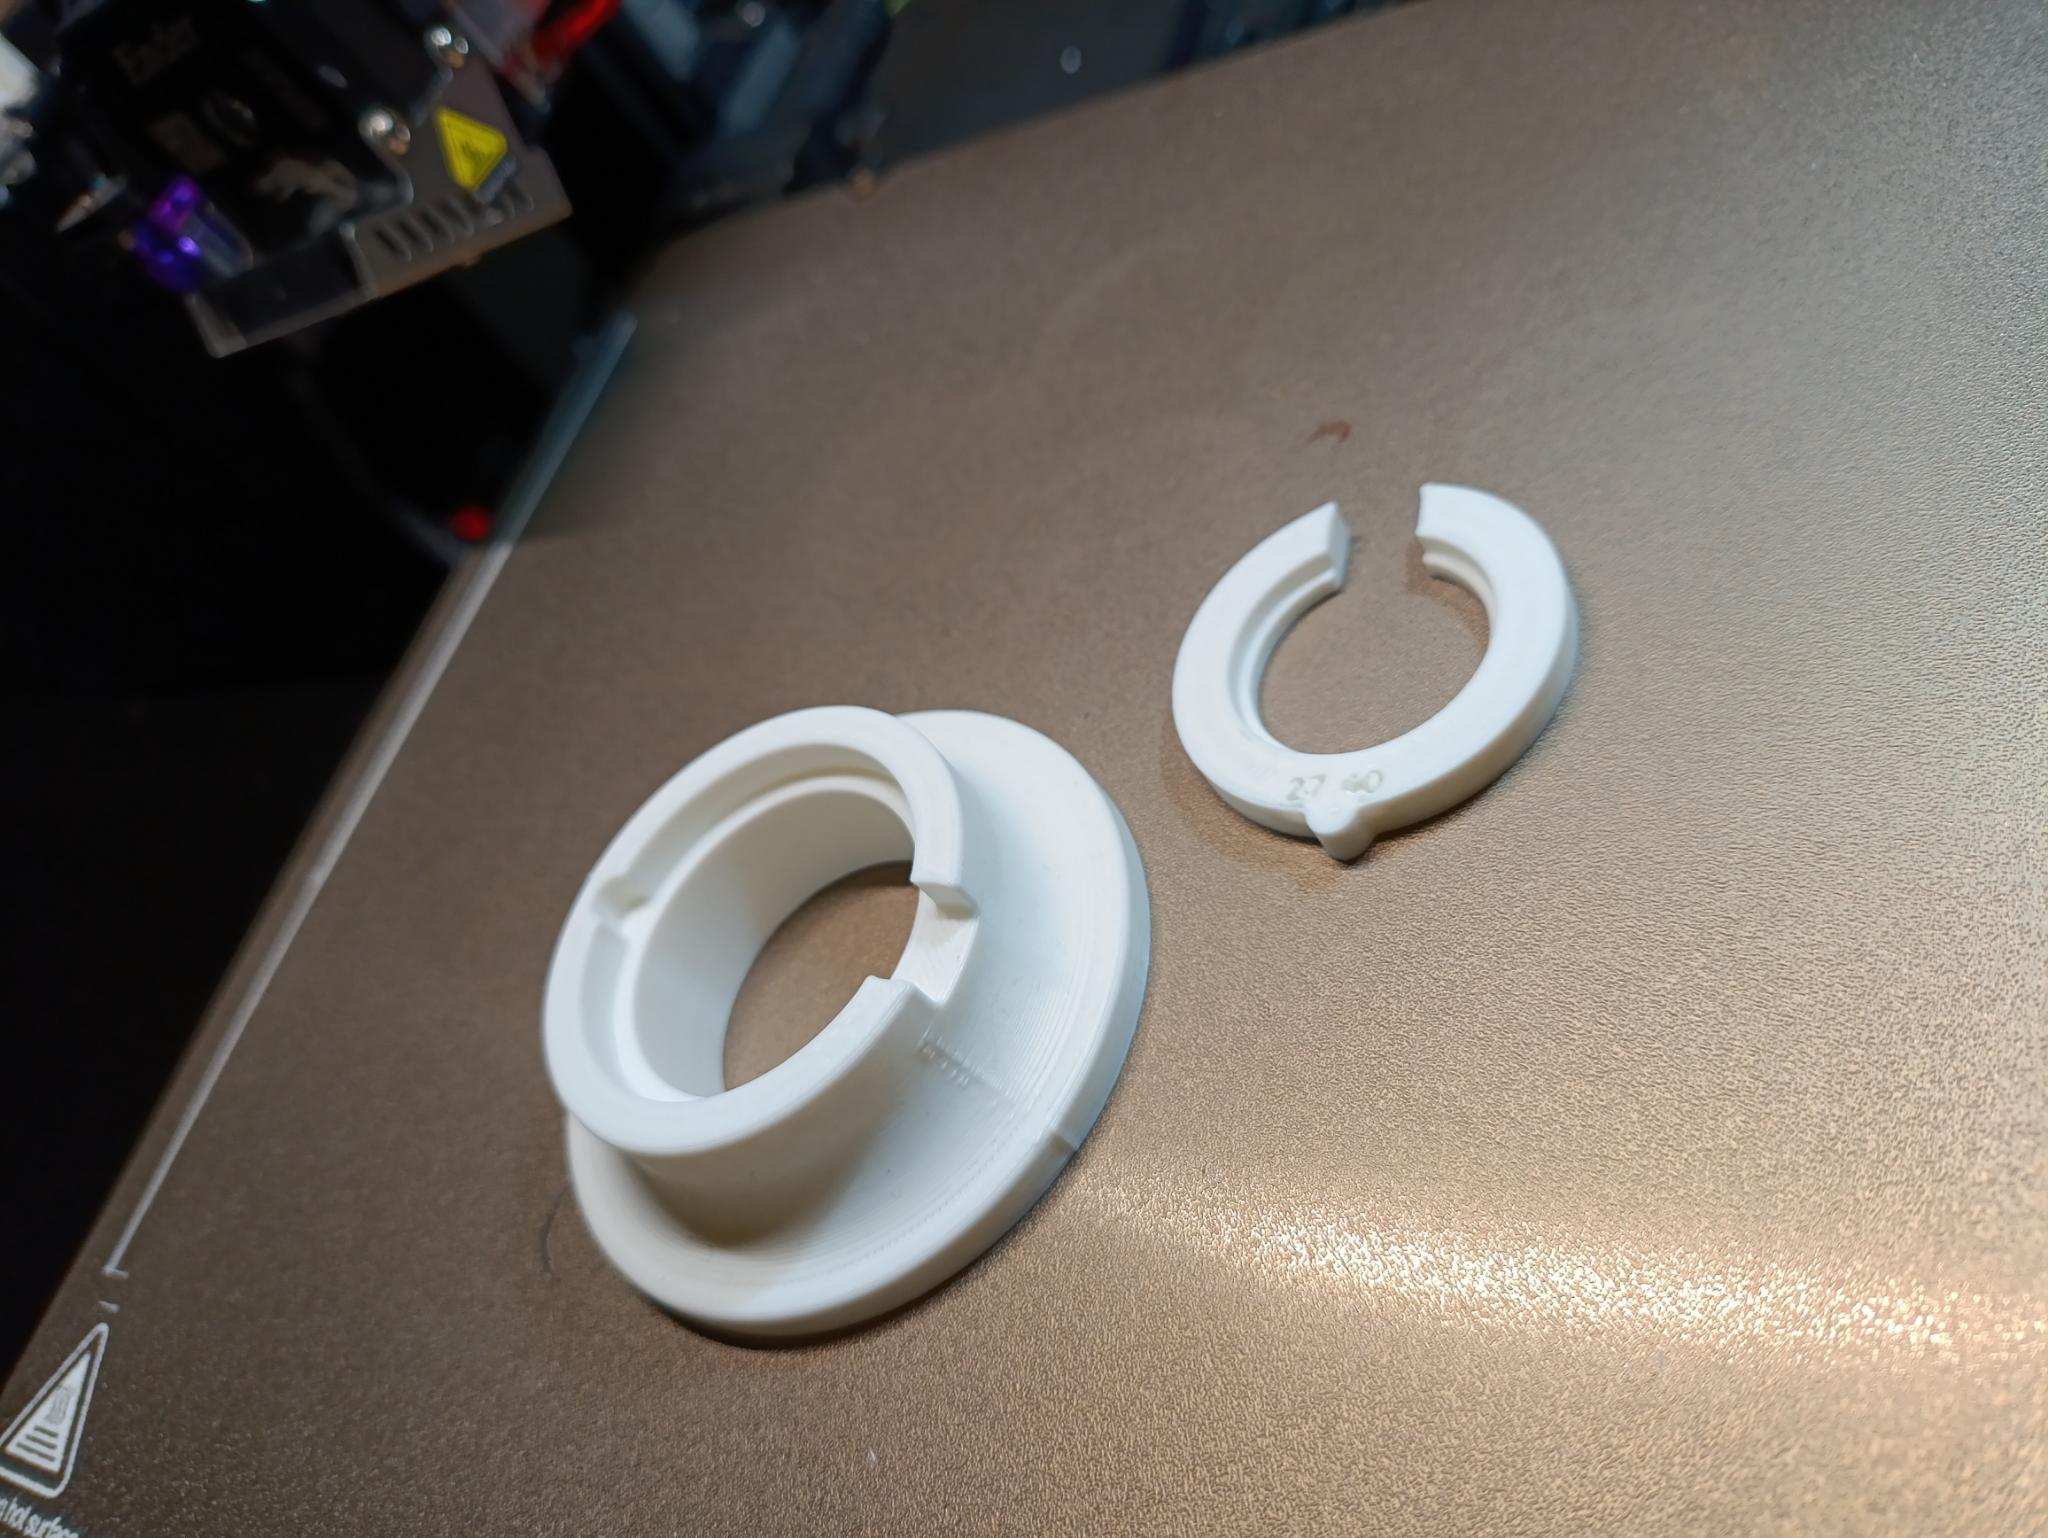
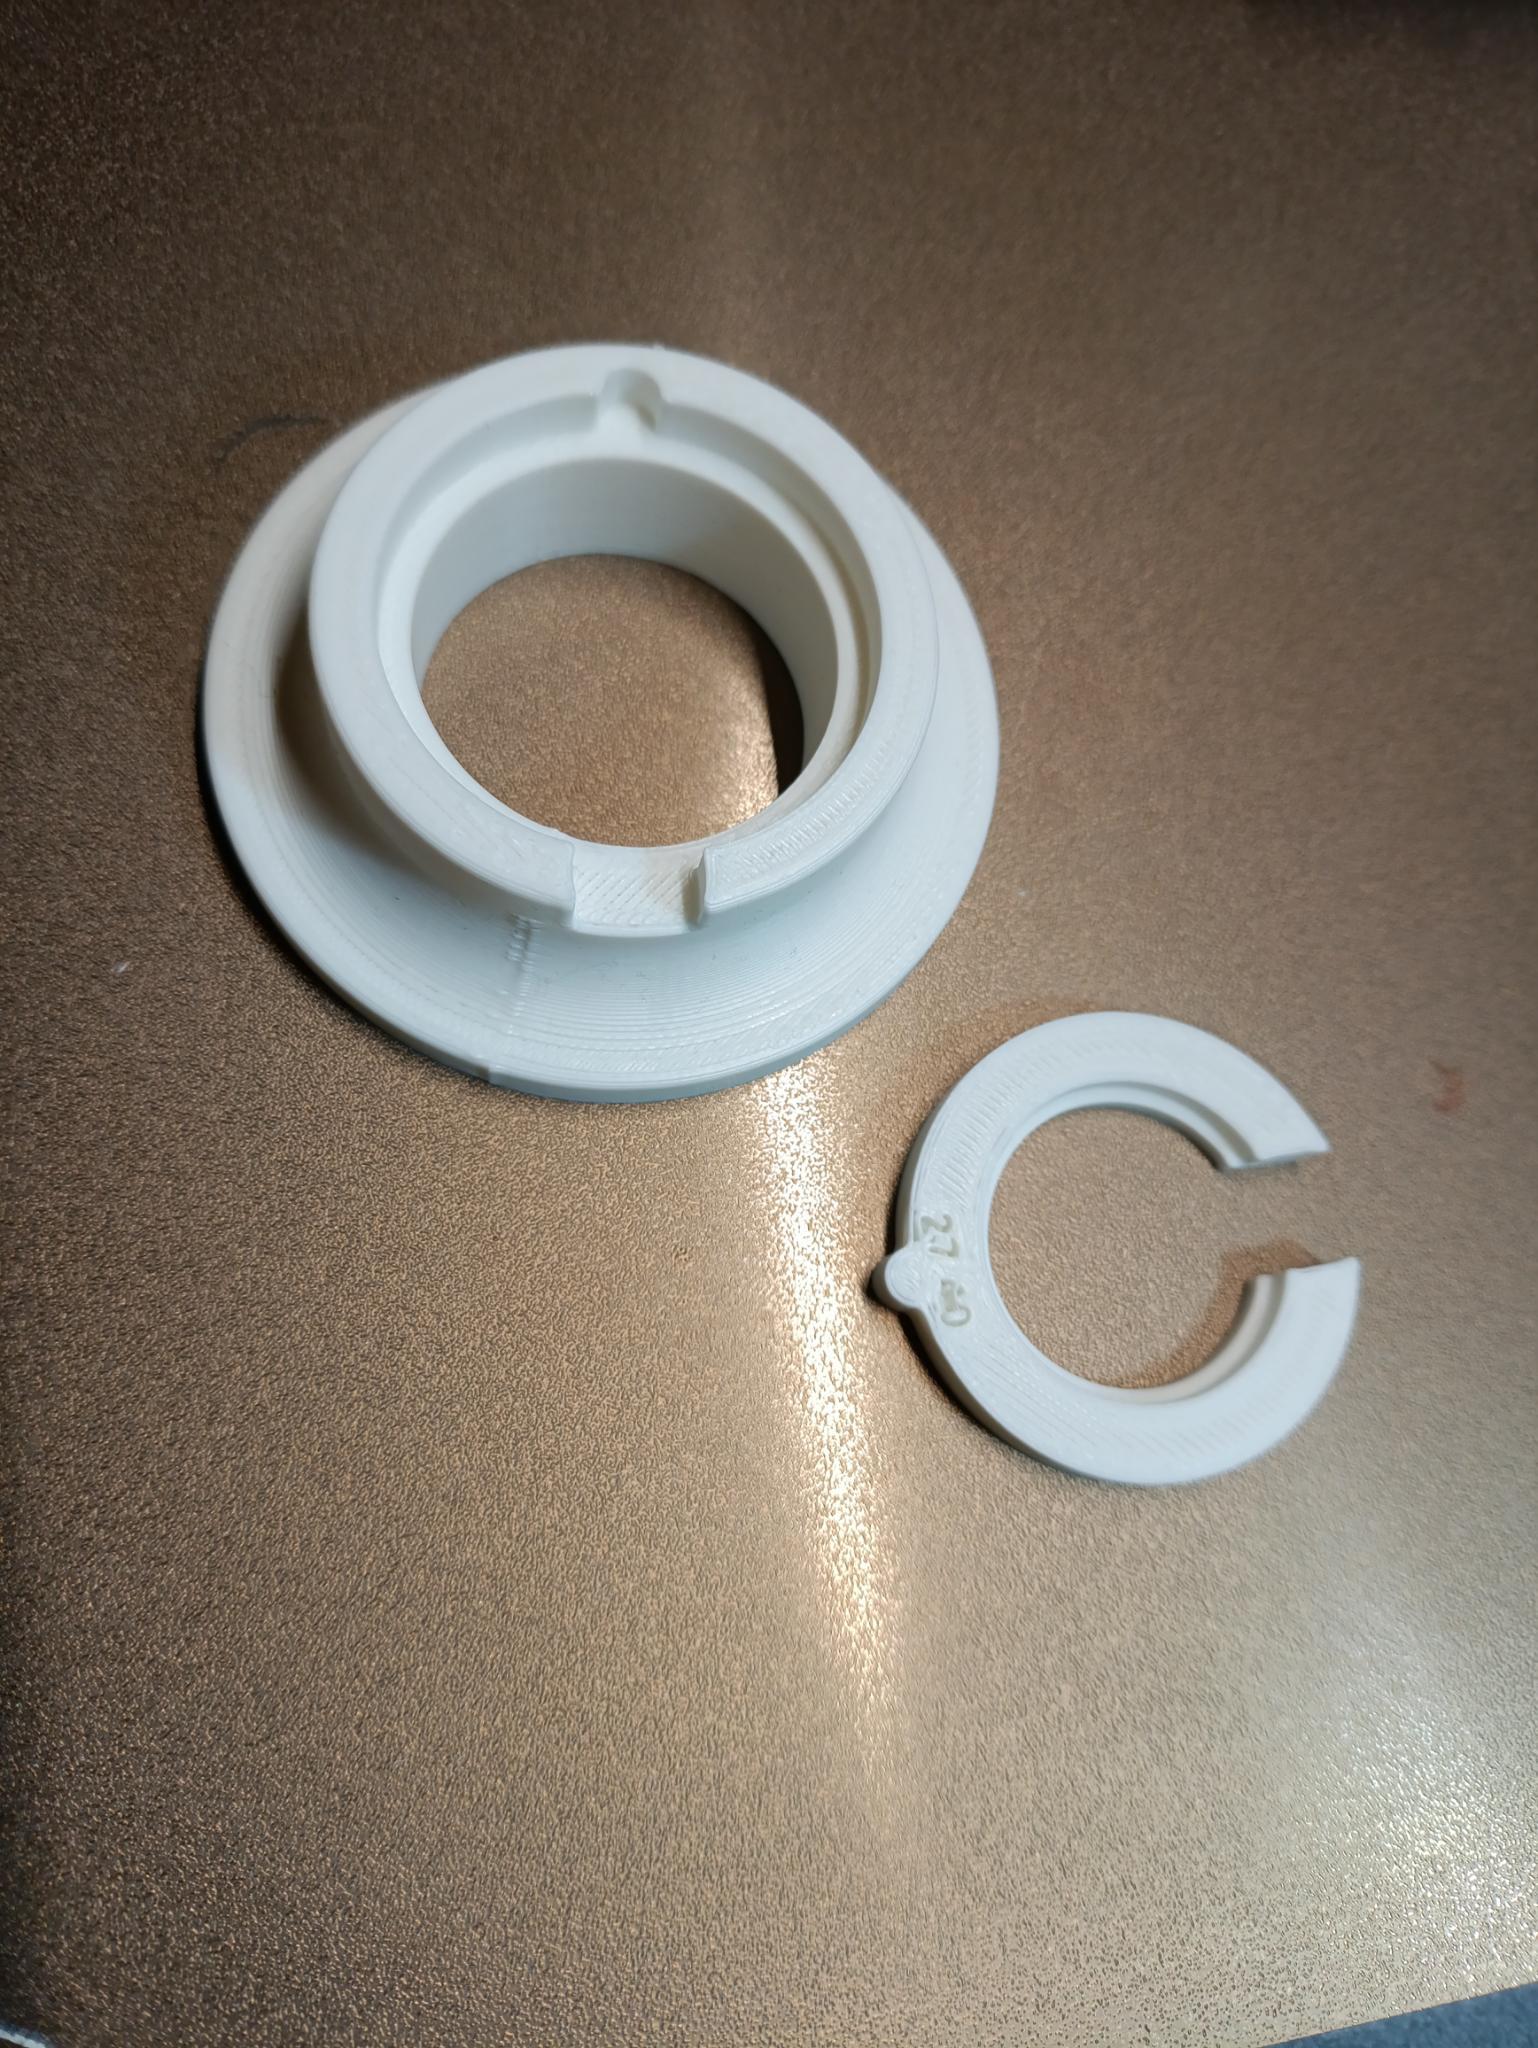
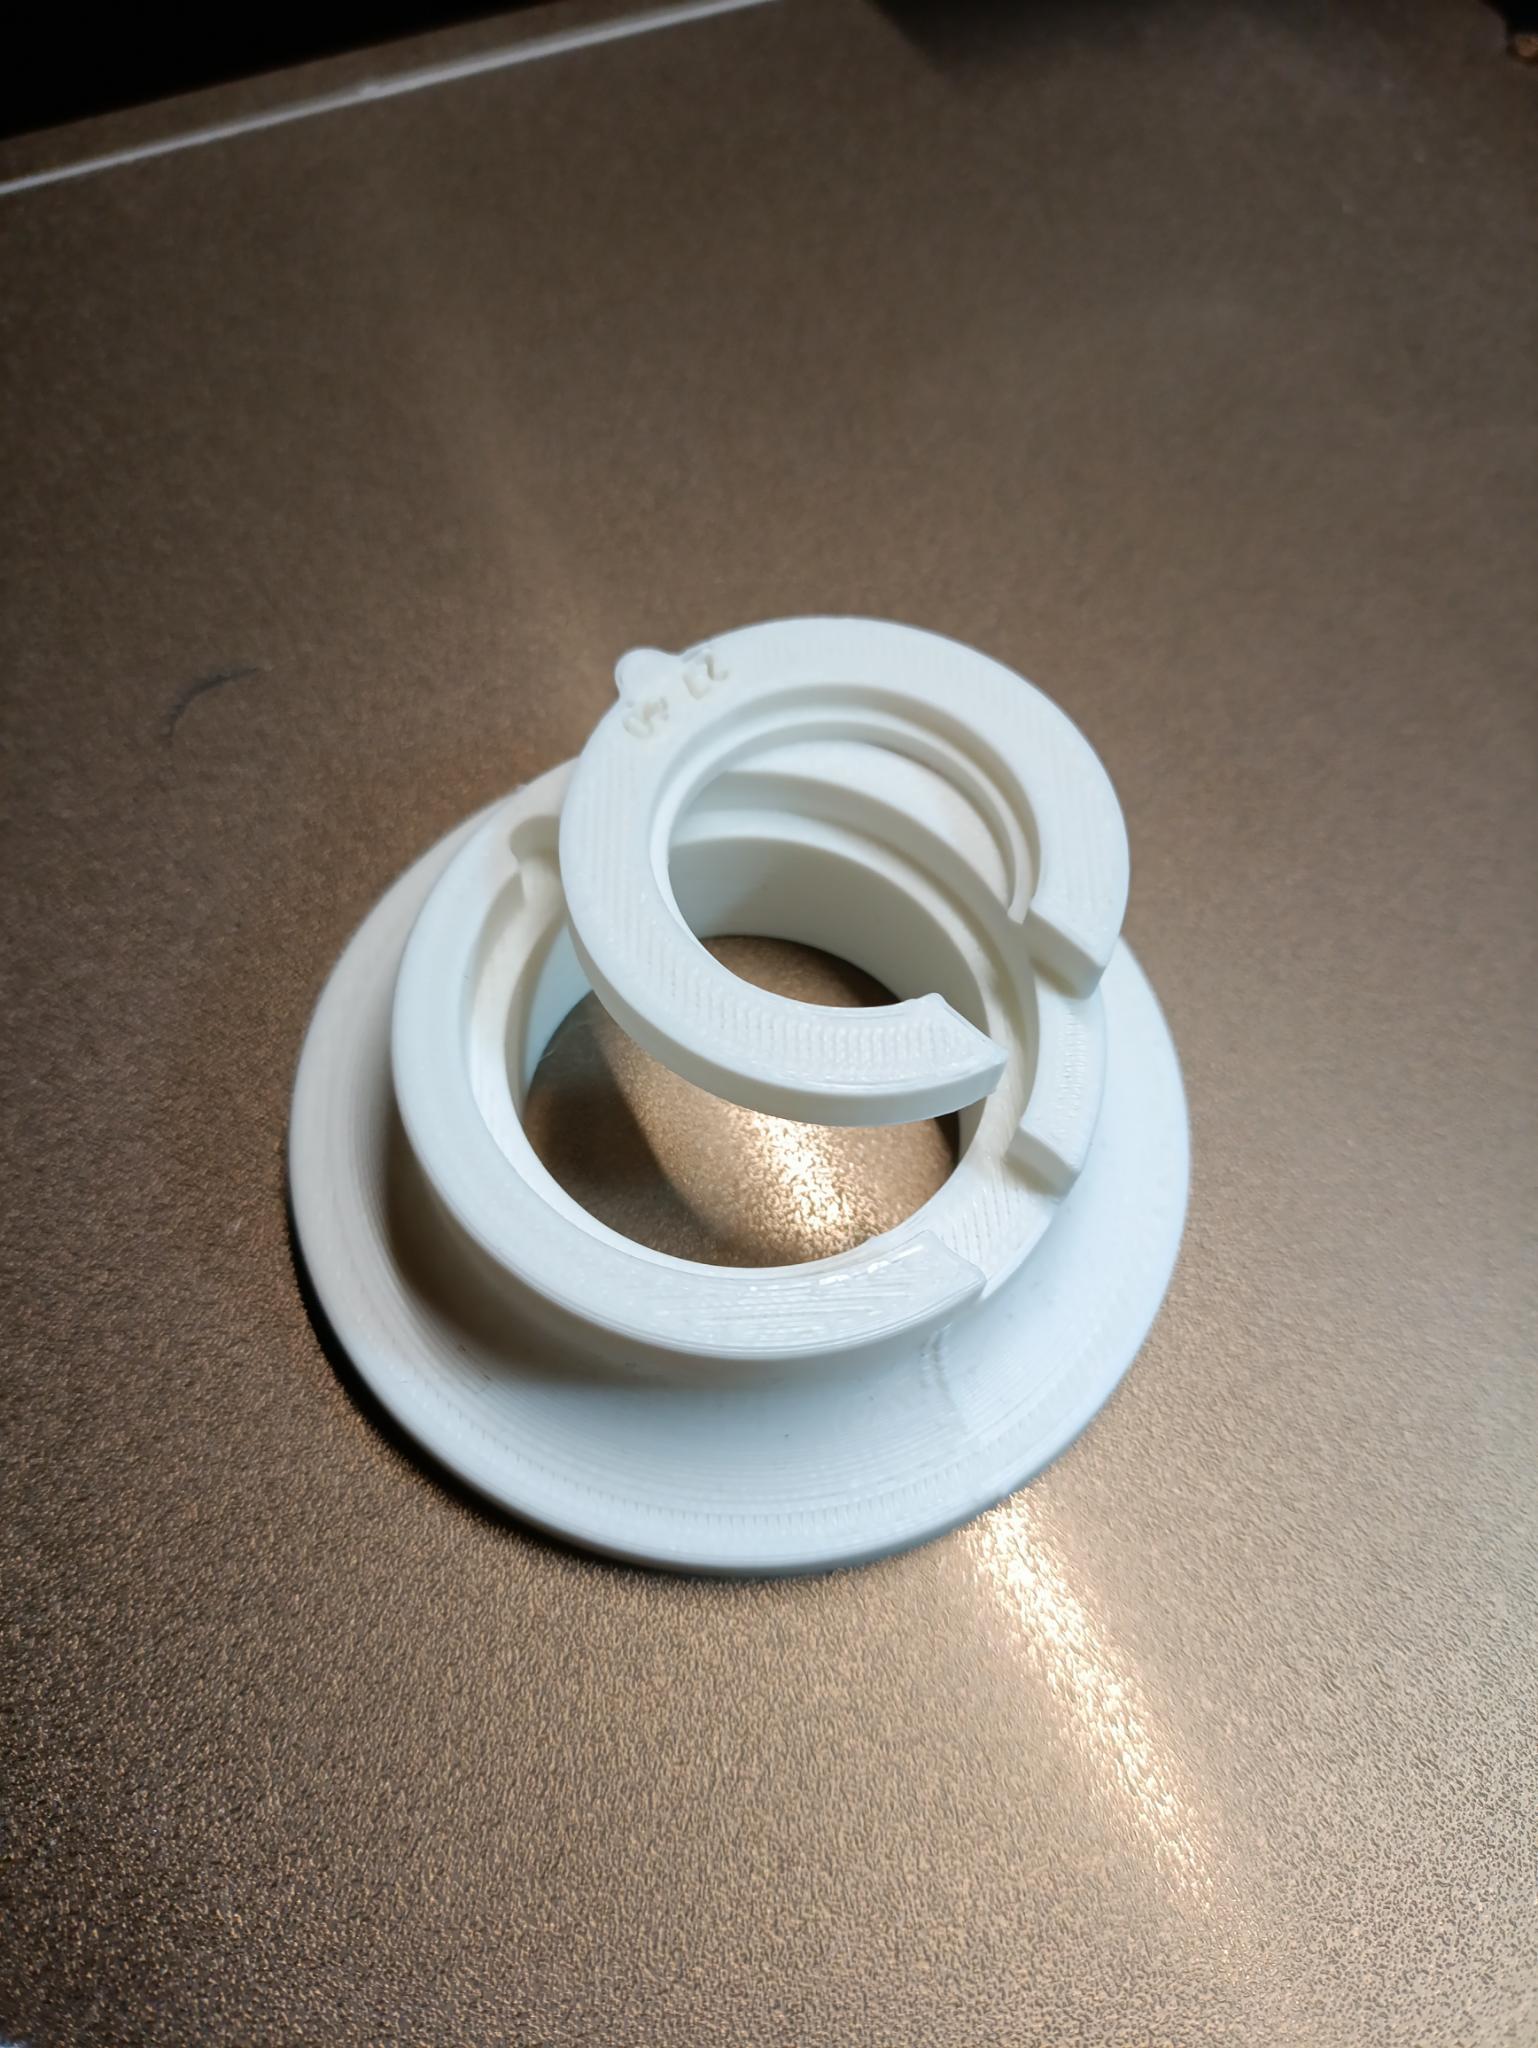
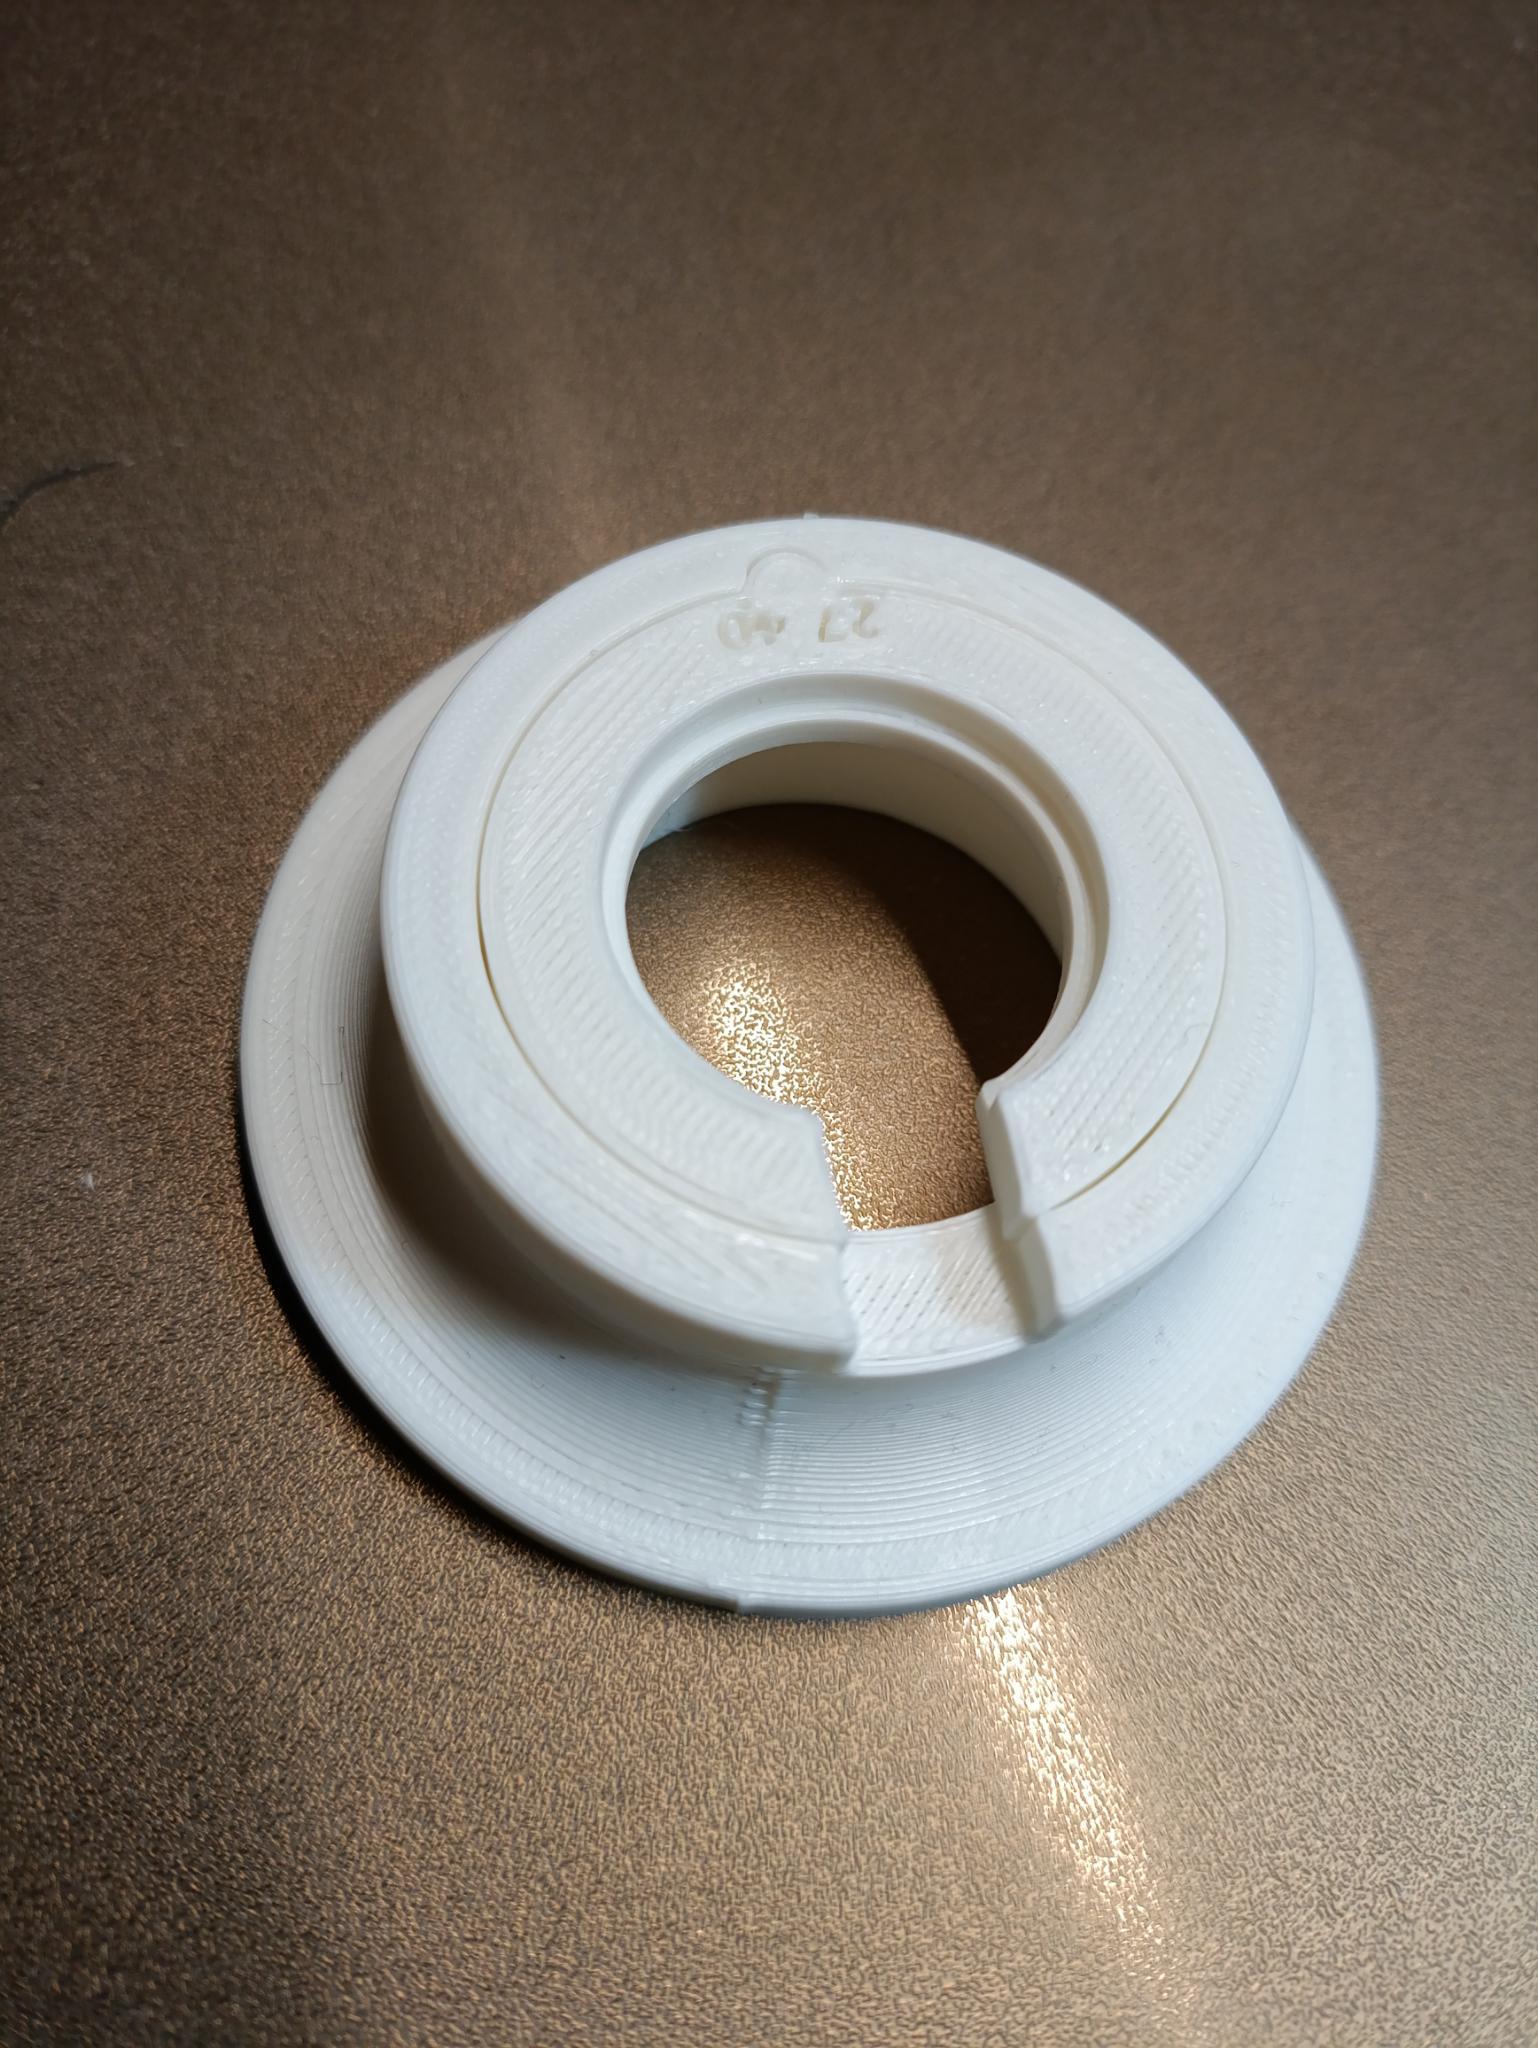
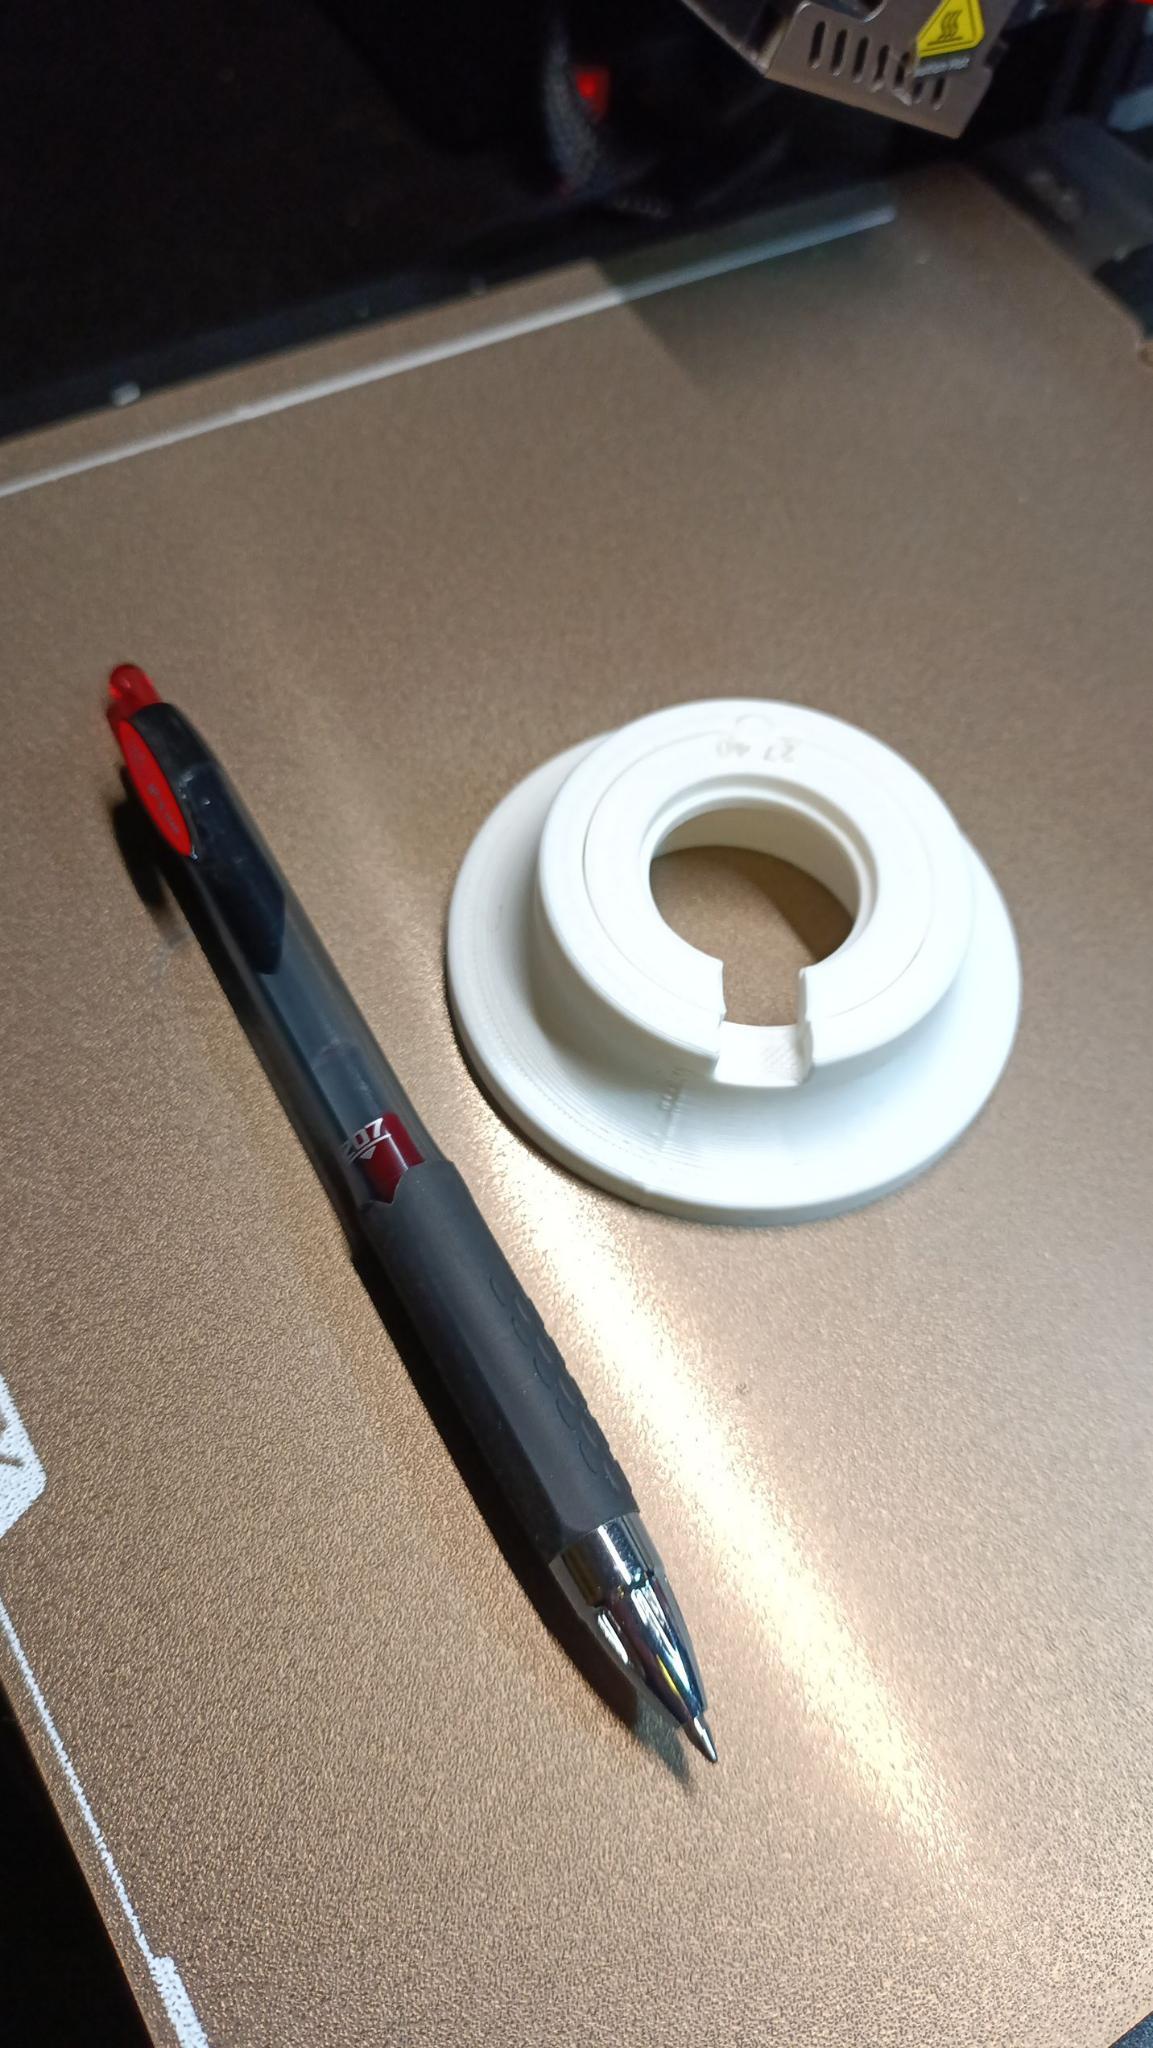
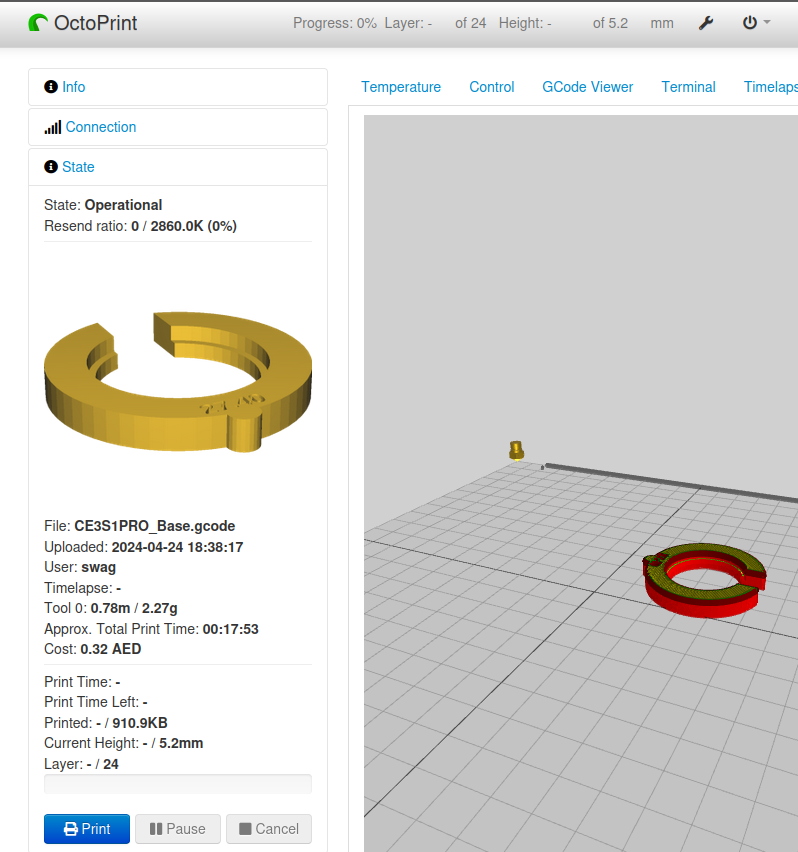
All Done, Here are the finished pictures: This one shows the generic "one-size-fits-all" base which accepts the bespoke rings - notice that the parametric movement OD (27.40 mm) automatically prints on the ring From another angle: Here is the ring about to go into the base: And finally the base and ring together: Here it is next to a pen for scale: On my system with 20% fill each ring will take about 18 mins to print, but I am sure this could be optimised: Here is the screenshot of the spreadsheet in FreeCAD, you just need to change one value to create the ring in cell C3, (the base doesn't need any changes). I just uploaded the files to printables link here, but also include here as a fake pdf, please change the .pdf to .zip to make the file work once downloaded: Modular Movement Holder.pdf Any feedback welcome! I'm also going to make a parametric ring insert for rectangular/oval movements - but I just finished a parent teacher evening so too tired now


 6 points
 -
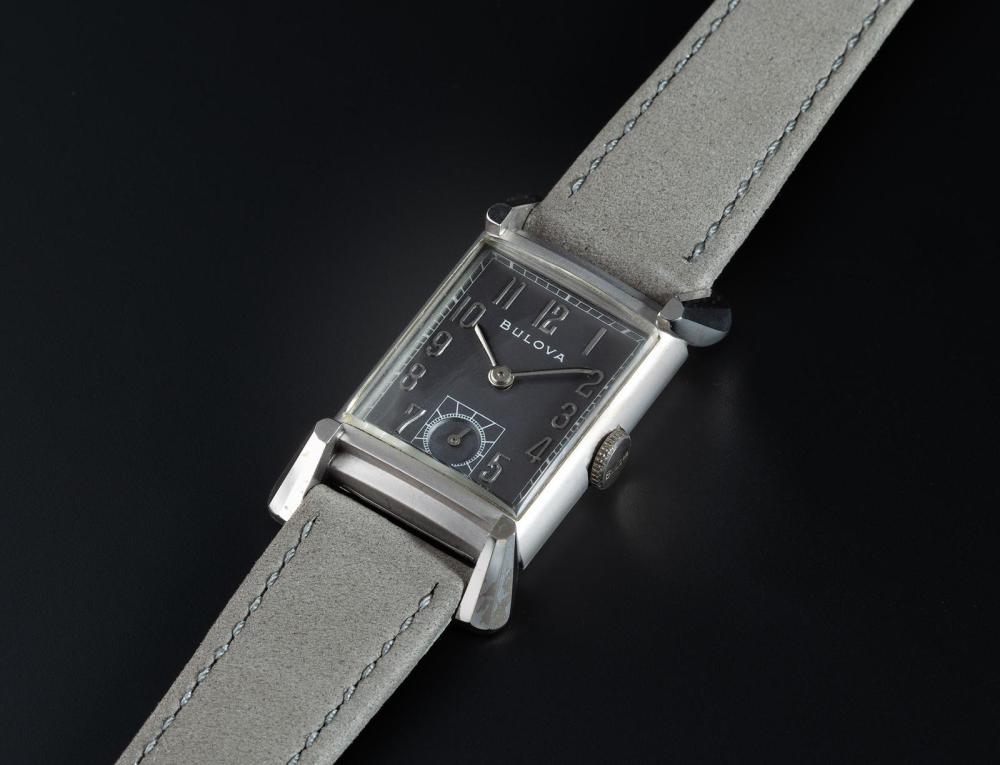
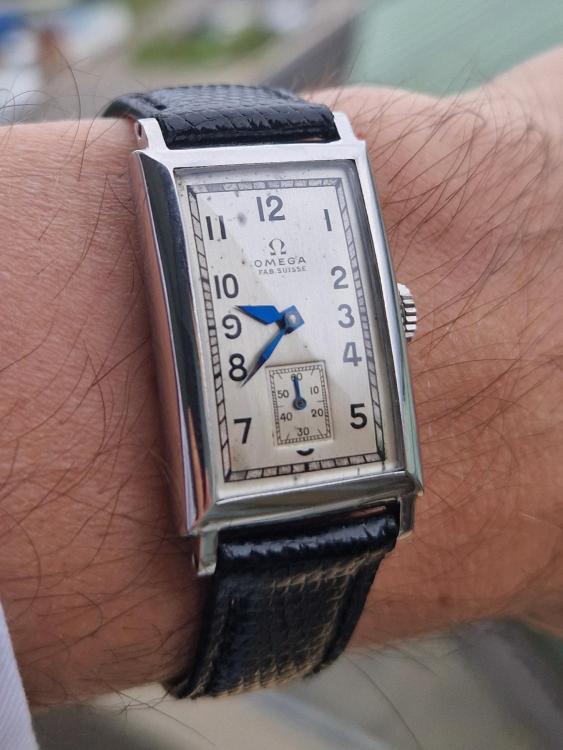
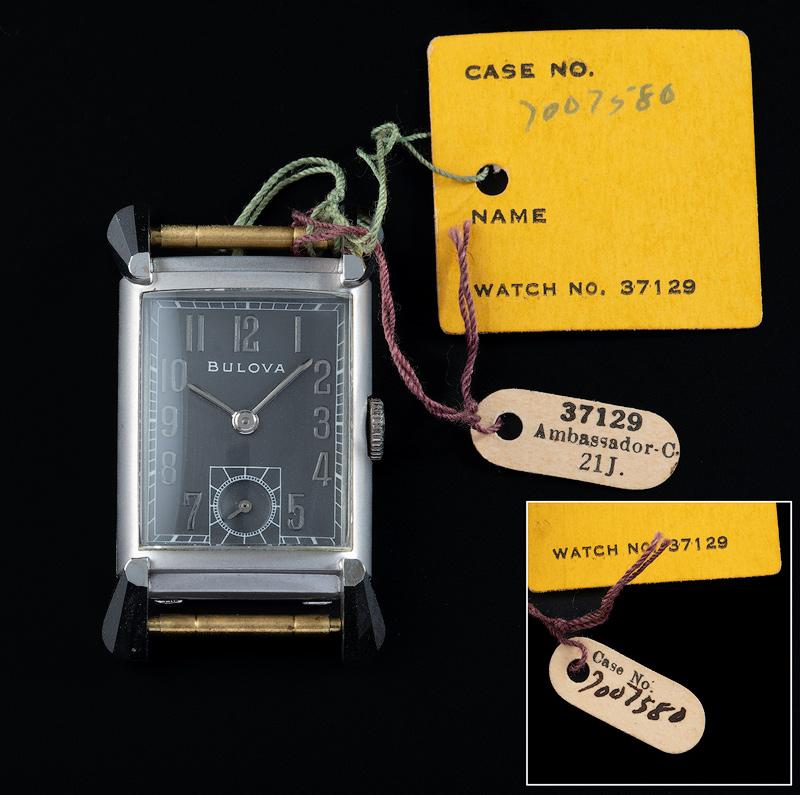
1947 NOS Ambassador 'C'. Actually, the case came without the movement so the movement isn't NOS, but she sure is pretty.
 5 points
 -
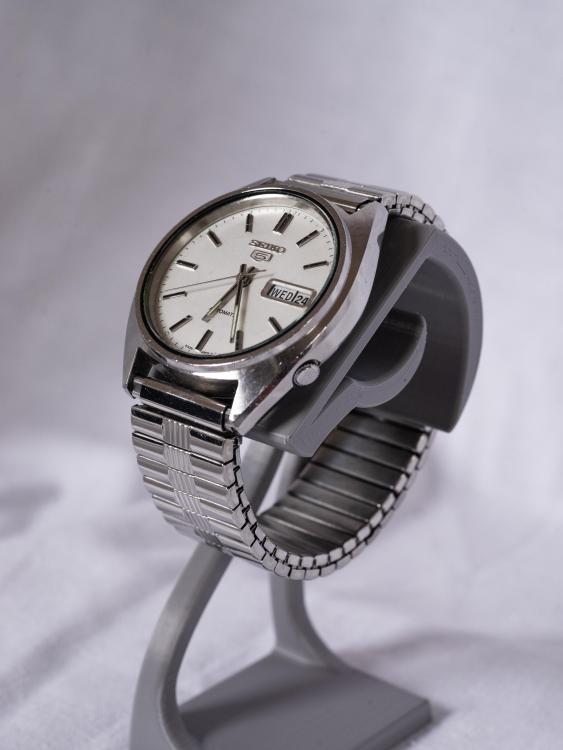
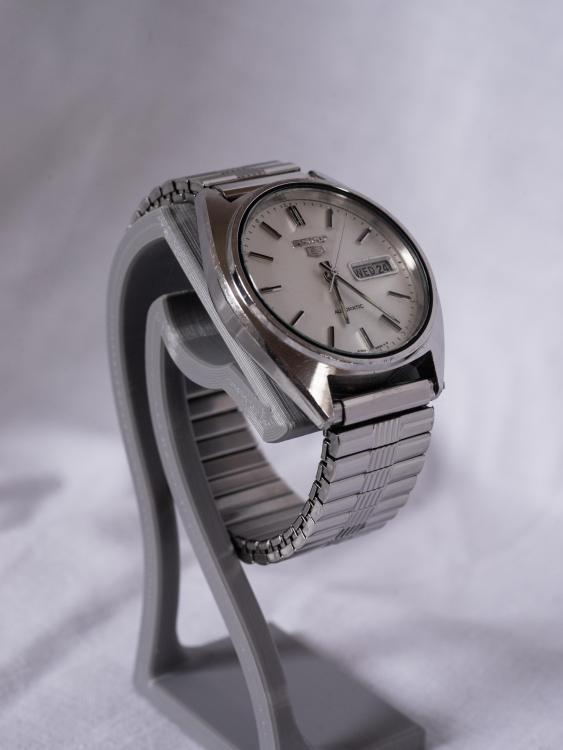
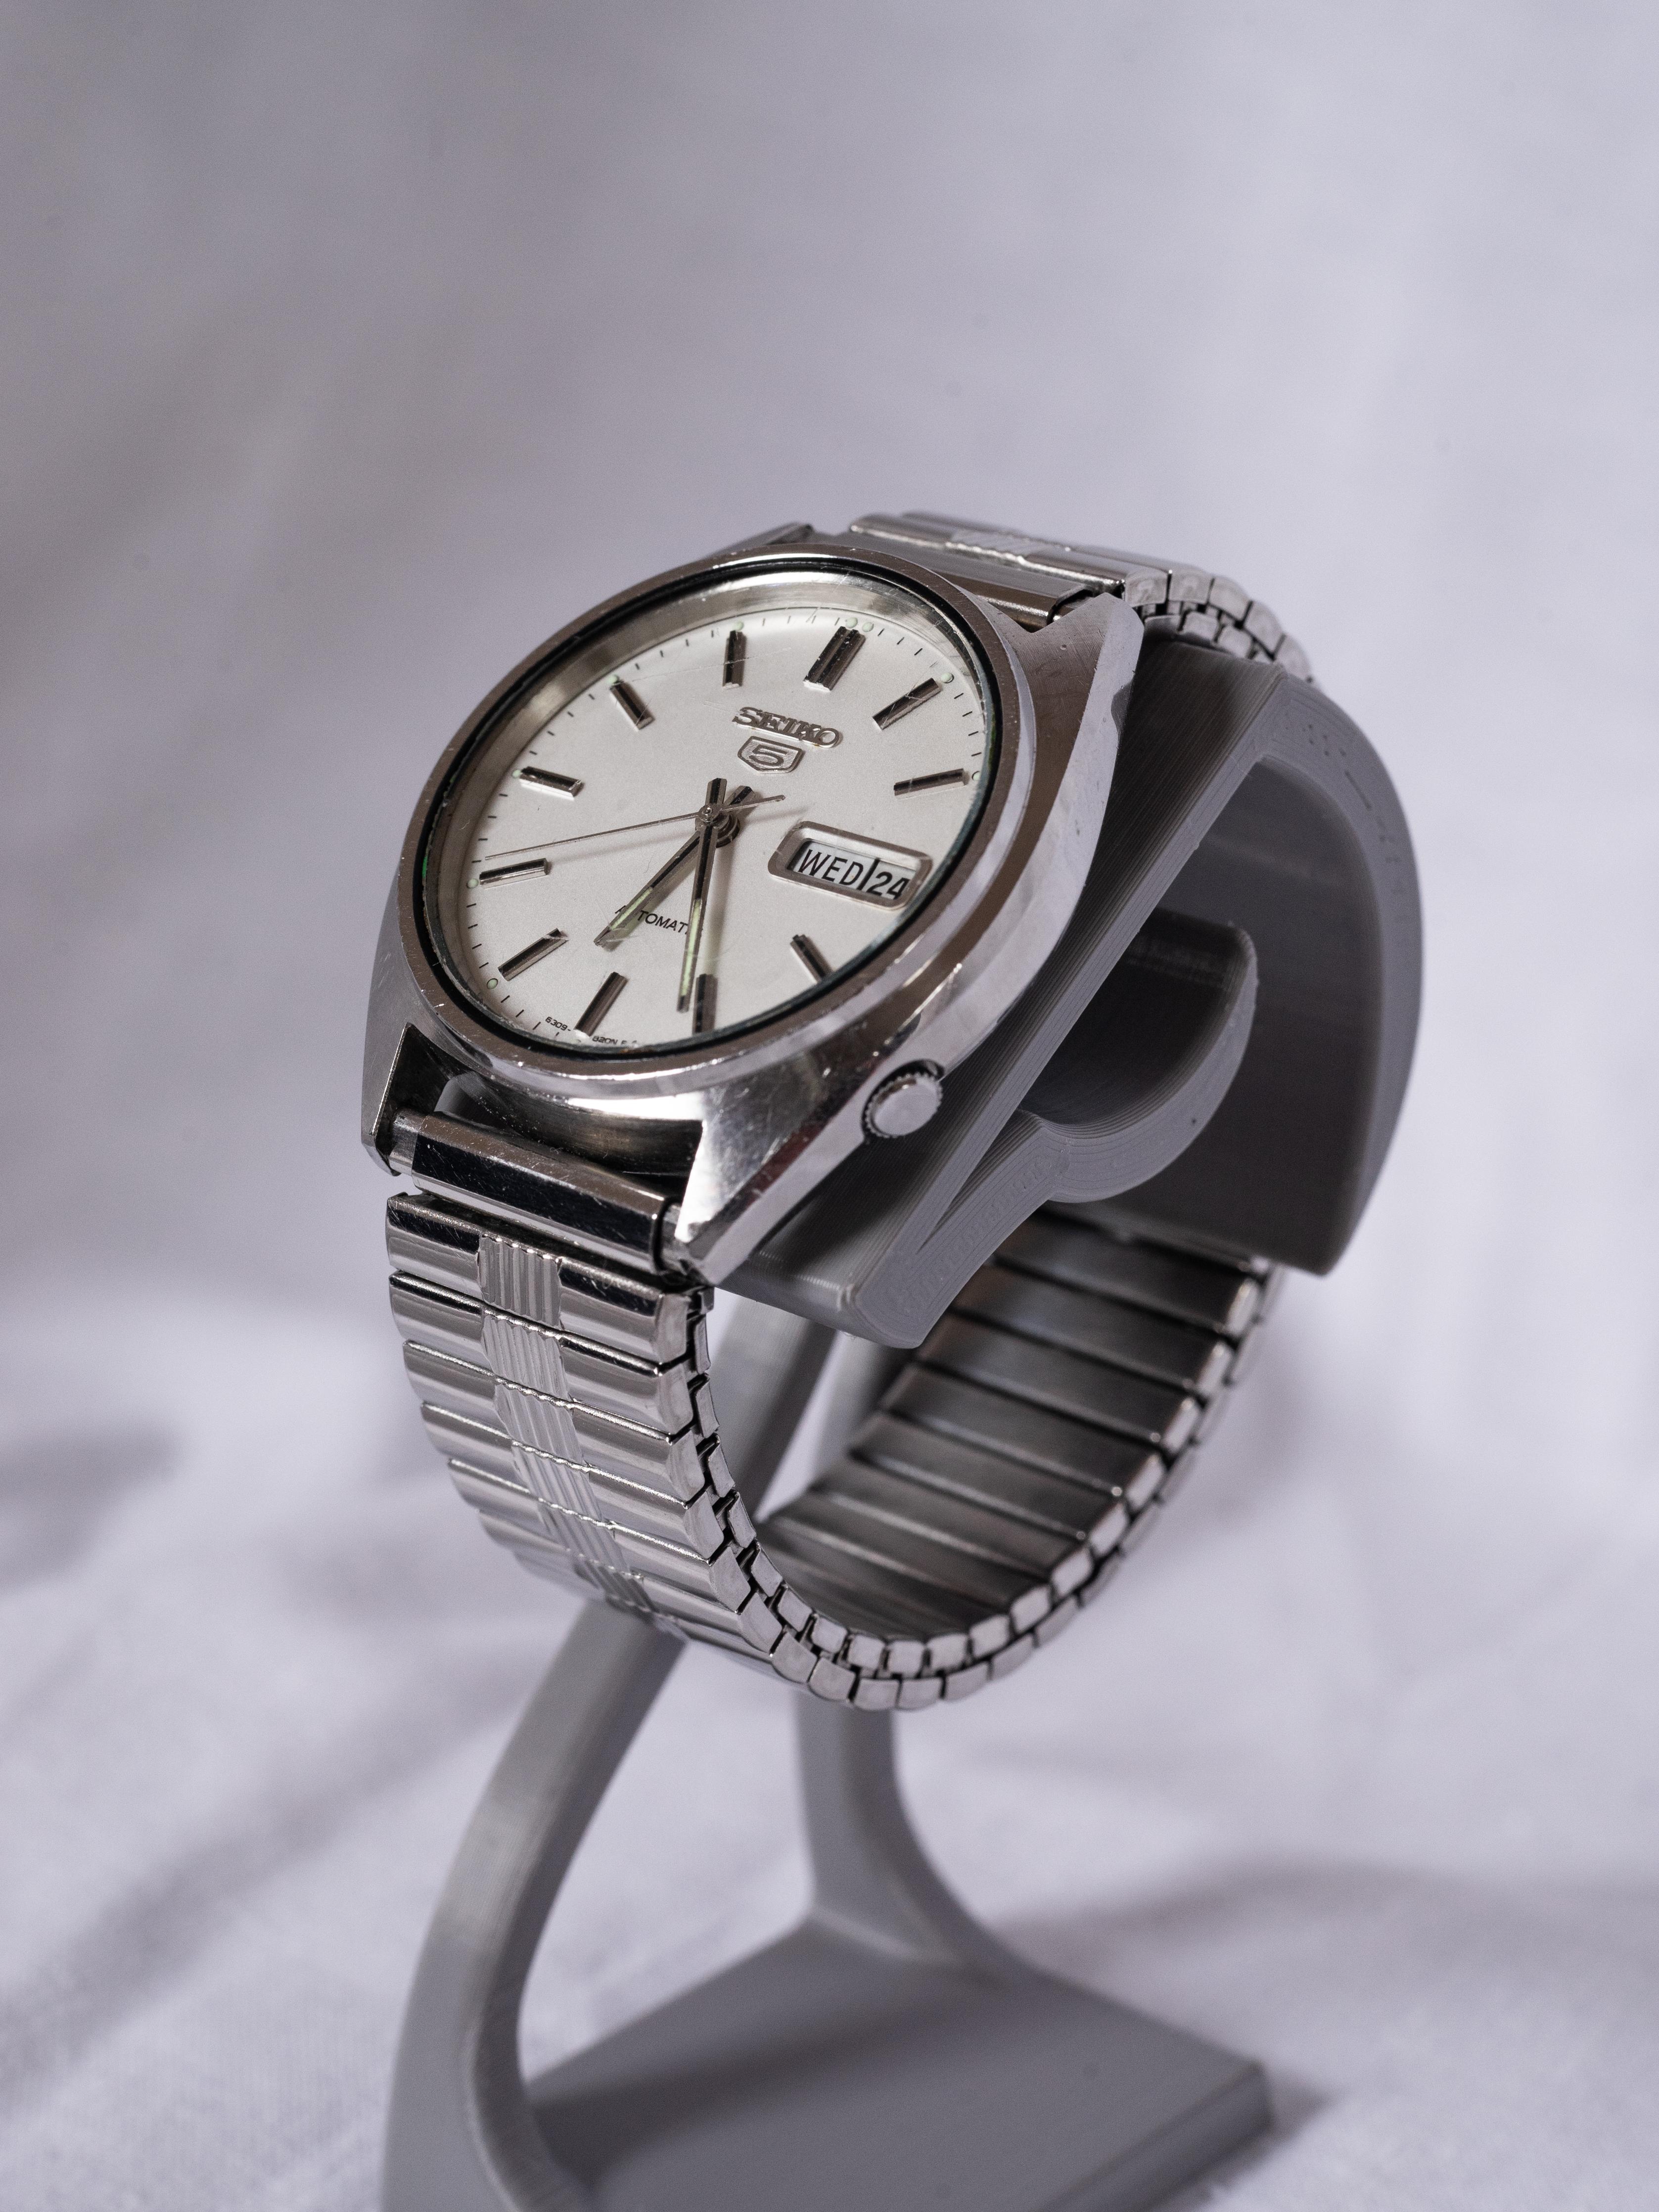
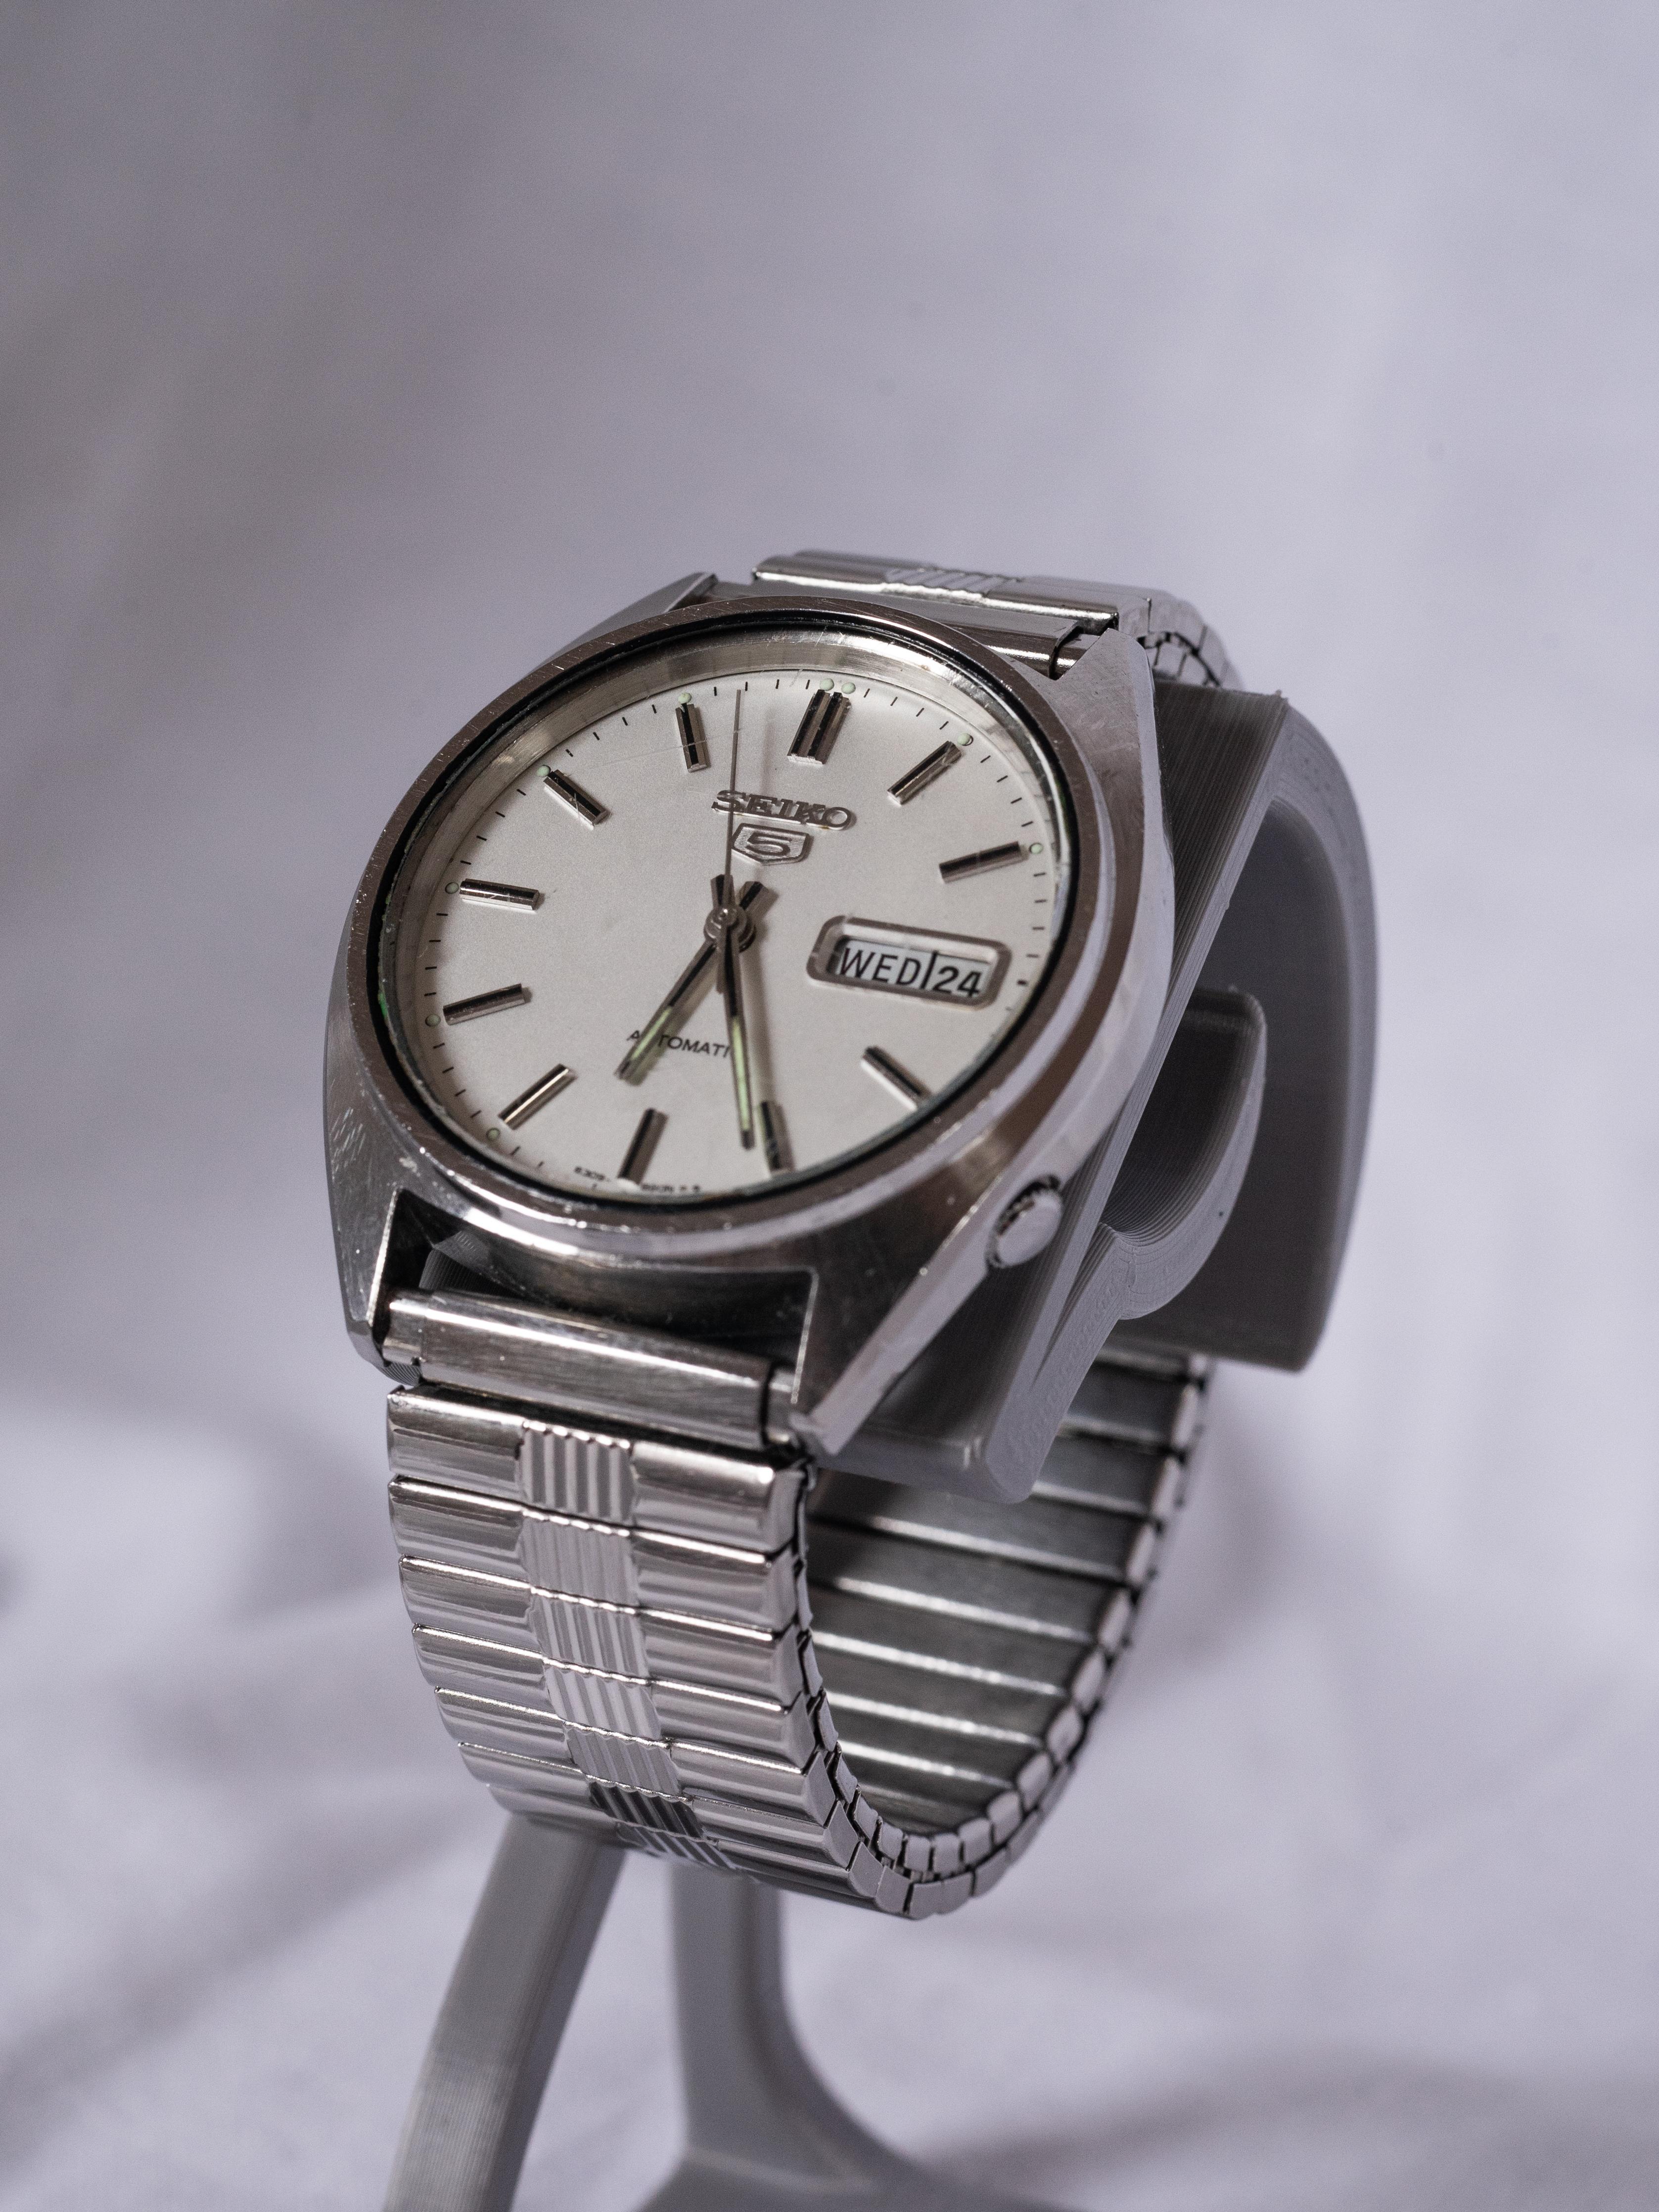
Hello everybody, sorry for the late reply. Thank you all so much for your help and your tips. I got lucky and found a replacement wheel bridge for cheap which actually ended up being in decent condition. I decided not to do anything about the mainspring barrel pivot since I didn't have the right tools and the barrel didn't have much endshake anyhow. I am happy to report that the watch now runs great, I have regulated it to about +-10/s day which is fine by my standards. The timegrapher result looks decent as well, although beat error is around 0.6ms which could be better I suppose. Amplitude reaches over 230 quite consistently which I'm happy with also. My lighter fluid has also been replaced by balance spring cleaning solution and now the springs don't stick to themselves anymore - who would have thought. I'm super happy with this watch, it might not be worth a whole lot but it's awesome that I could restore it and it makes me wear it with pride. To me it's a genuinely good lucking watch, it'll be my daily driver for a while. Thanks again to everybody for their input! I couldn't have done the repair without your help. Here are some images for those interested, the bracelet isn't original but I don't really mind:
 5 points
 -
Hi guys, I wrote a set of five lessons for my second year students regarding the Landeron 248 chronograph watch, which incidentally we are meeting tonight. They are going to be polishing pivots and pinion leaves of their 248s, before putting the movements through the cleaning machines. This is number one of five. I posted number two of five the other day HERE There are seven eccentric studs on this movement, so understanding what the studs do, how to set them, their actions and interactions with other parts of the chronograph mechanism is vitally important. I found there is very little out there on the internet to help understand the principles of these eccentric studs, especially video content to show various faults and alleviations, so I put together quite detailed walkthroughs of various complicated movements usually consisting of 15 to 18 hours of learning/servicing in the workshop per movement/module With any watchmaking, especially with complicated work, only make one adjustment and measure the results, if any. Be methodical in your approach. The lesson was originally in PowerPoint and I had to convert it to PDF to post here, so a lot of the video content won't play, but the PowerPoint version is in my cloud storage here. https://docs.google.com/presentation/d/10KJJ58P0v2BglKZSilIv9o69xBsbrQPI/edit?usp=sharing&ouid=107902587627140904870&rtpof=true&sd=true You'll need quite a newer version of Microsoft Office (PowerPoint) so the video content will play, otherwise it won't. I hope you find this lesson useful and begin to get a better understanding of how to set eccentric studs. Sometimes you'll come across a stud that is too loose, or even too tight. Usually if one is problematic it will be because it is loose. This can't be left, as the stud will turn whilst the chronograph is stopped, started and reset, throwing the chrono mechanism setting off which could lead to the movement grinding to a halt. Don't fool yourself in thinking it will hold. Either a replacement stud is fabricated to suit the enlarged hole, or the hole can be closed up. In turning and setting the eccentric studs prior to disassembly of the movement, we are able to set the chronograph mechanism, especially the minute register mechanism correctly and test for any faults, such as a bent wheel over fourth arbor, or incorrect depth of the dart tooth with the sliding gear, or a mis-set minute runner jumper spring, to name a few possible faults and mis-settings. Also in turning these eccentric studs we can gain a 'feel' for how tight they are in the mainplate or bridge. The more they are turned the more the chance of the stud becoming looser increases. So once set correctly prior to cleaning, the less chance they will need setting once the chrono mechanism is assembled, only if a stud isn't tight enough in its setting in the first place. This is for setting Landeron 248 eccentric studs, but once an understanding of their uses and actions is gained through theoretical aspects together with practical application, then this skill and knowledge can be used in most vintage chronographs to set their eccentric studs and even in modern timepieces where you'll find very few eccentric studs, such as an Omega Speedmaster or Tag Heuer Calibre 01 chronographs Enjoy! Lesson 22. Landeron 248 Chronograph.pdf5 points
-
I missed this earlier. The dial isn't going into the holder, it should sit proud of it. This is what I am currently using which I print for each different movement.
 4 points
 -
Yes, I was so chuffed when he acknowledged me. I'd heard him talk about it and I had tried it by gentle pressure under the wheel and rolling the Pegwood in my fingers. The wheel rose. His way was to rotate the whole wheel in reverse. Learn something every time from Kalle.4 points
-
Funny enough, I'm working on an Omega pocket watch which has an amplitude of over 300 and I'm planning to use 9415 to bring it down. So far, my experience with this "wonder-grease" 9415 has been rather poor, especially on older movements. When changed the oil on the pallet jewels / escape-wheel to Dr.Tillwich 1-3, which would be about the equivalent of Moebius 9010, the amplitude gain is remarkable. Try that ..... And as JohnR725 asked, what is the amplitude after 24hrs? My 50-years old Omega 861 runs 250-255 at best when fully wound, around 215-220 after 24hrs. It gains every day 1 second, day after day, week in, week out. Perhaps not an amplitude "high-flyer", but It's the best time-keeper I ever had!4 points
-
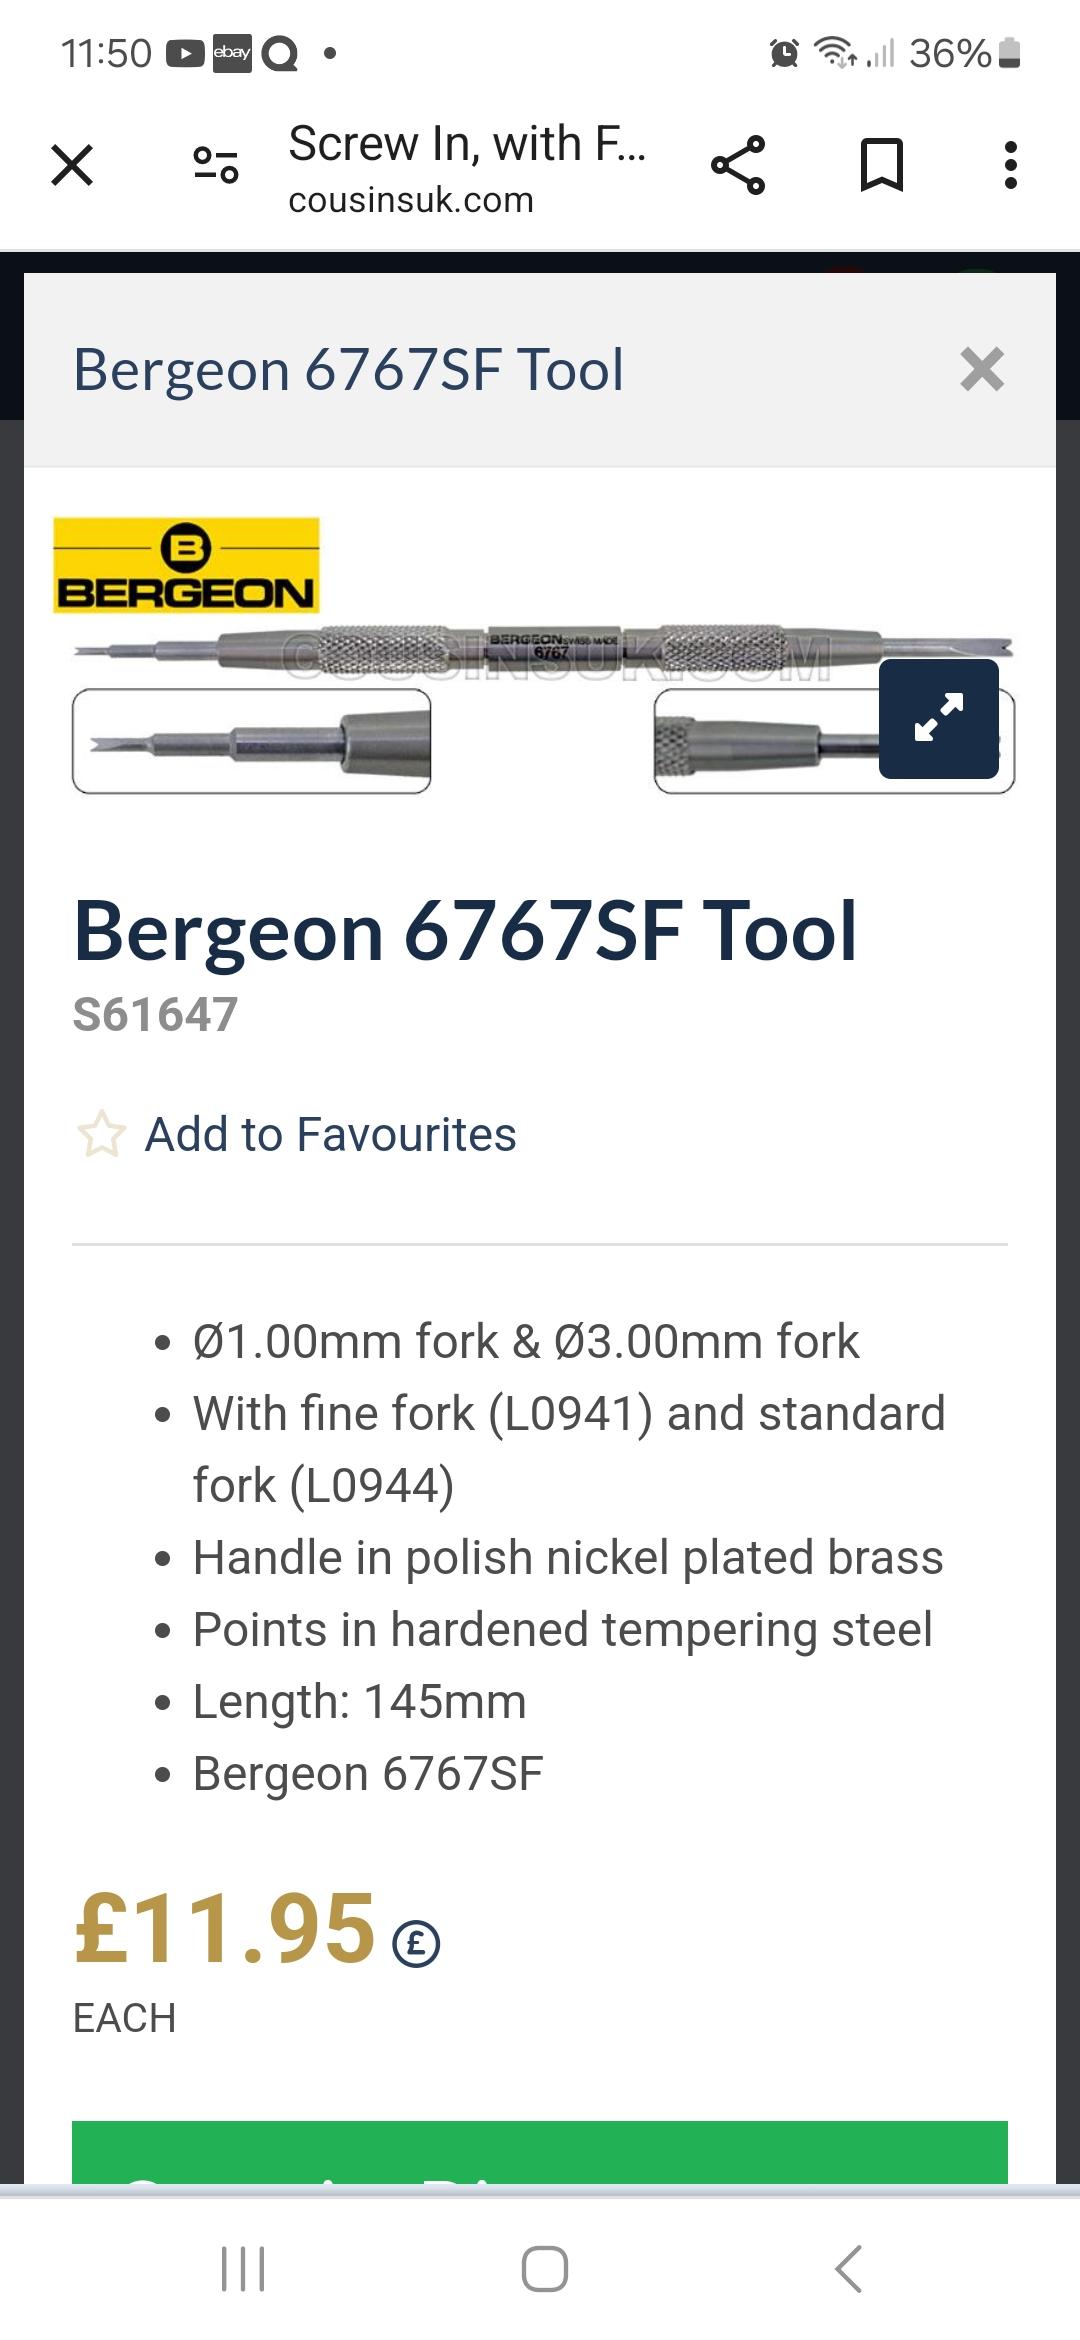
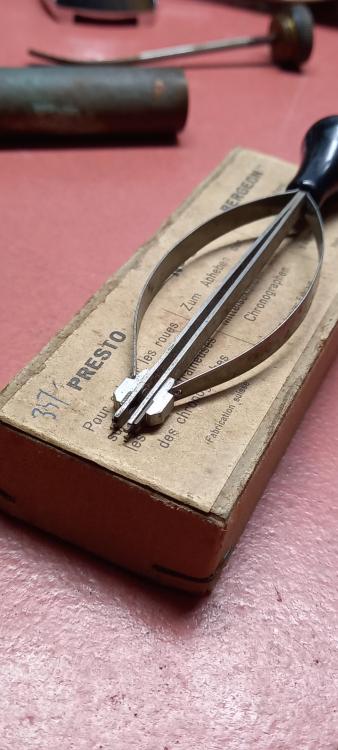
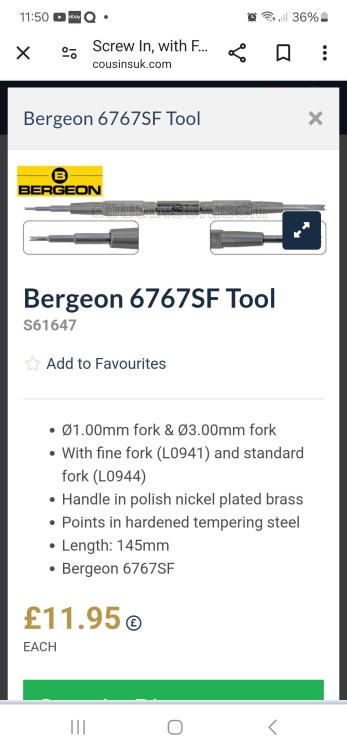
Just a heads up that the CousinsUK branded replacement forks and pins fit the Bergeon tool and look/feel exactly the same. I damaged my Bergeon one and found that the replacement Bergeon parts were almost the same price as a complete new tool, so I decided to try the cousins own brand version. Out of curiosity I tried the fork and pin in my Bergeon tool and found they were exactly the same, and to buy the CousinsUK replacement parts individually is far cheaper than the buying a whole new tool. Hopefully is will save someone some pennies!4 points
-
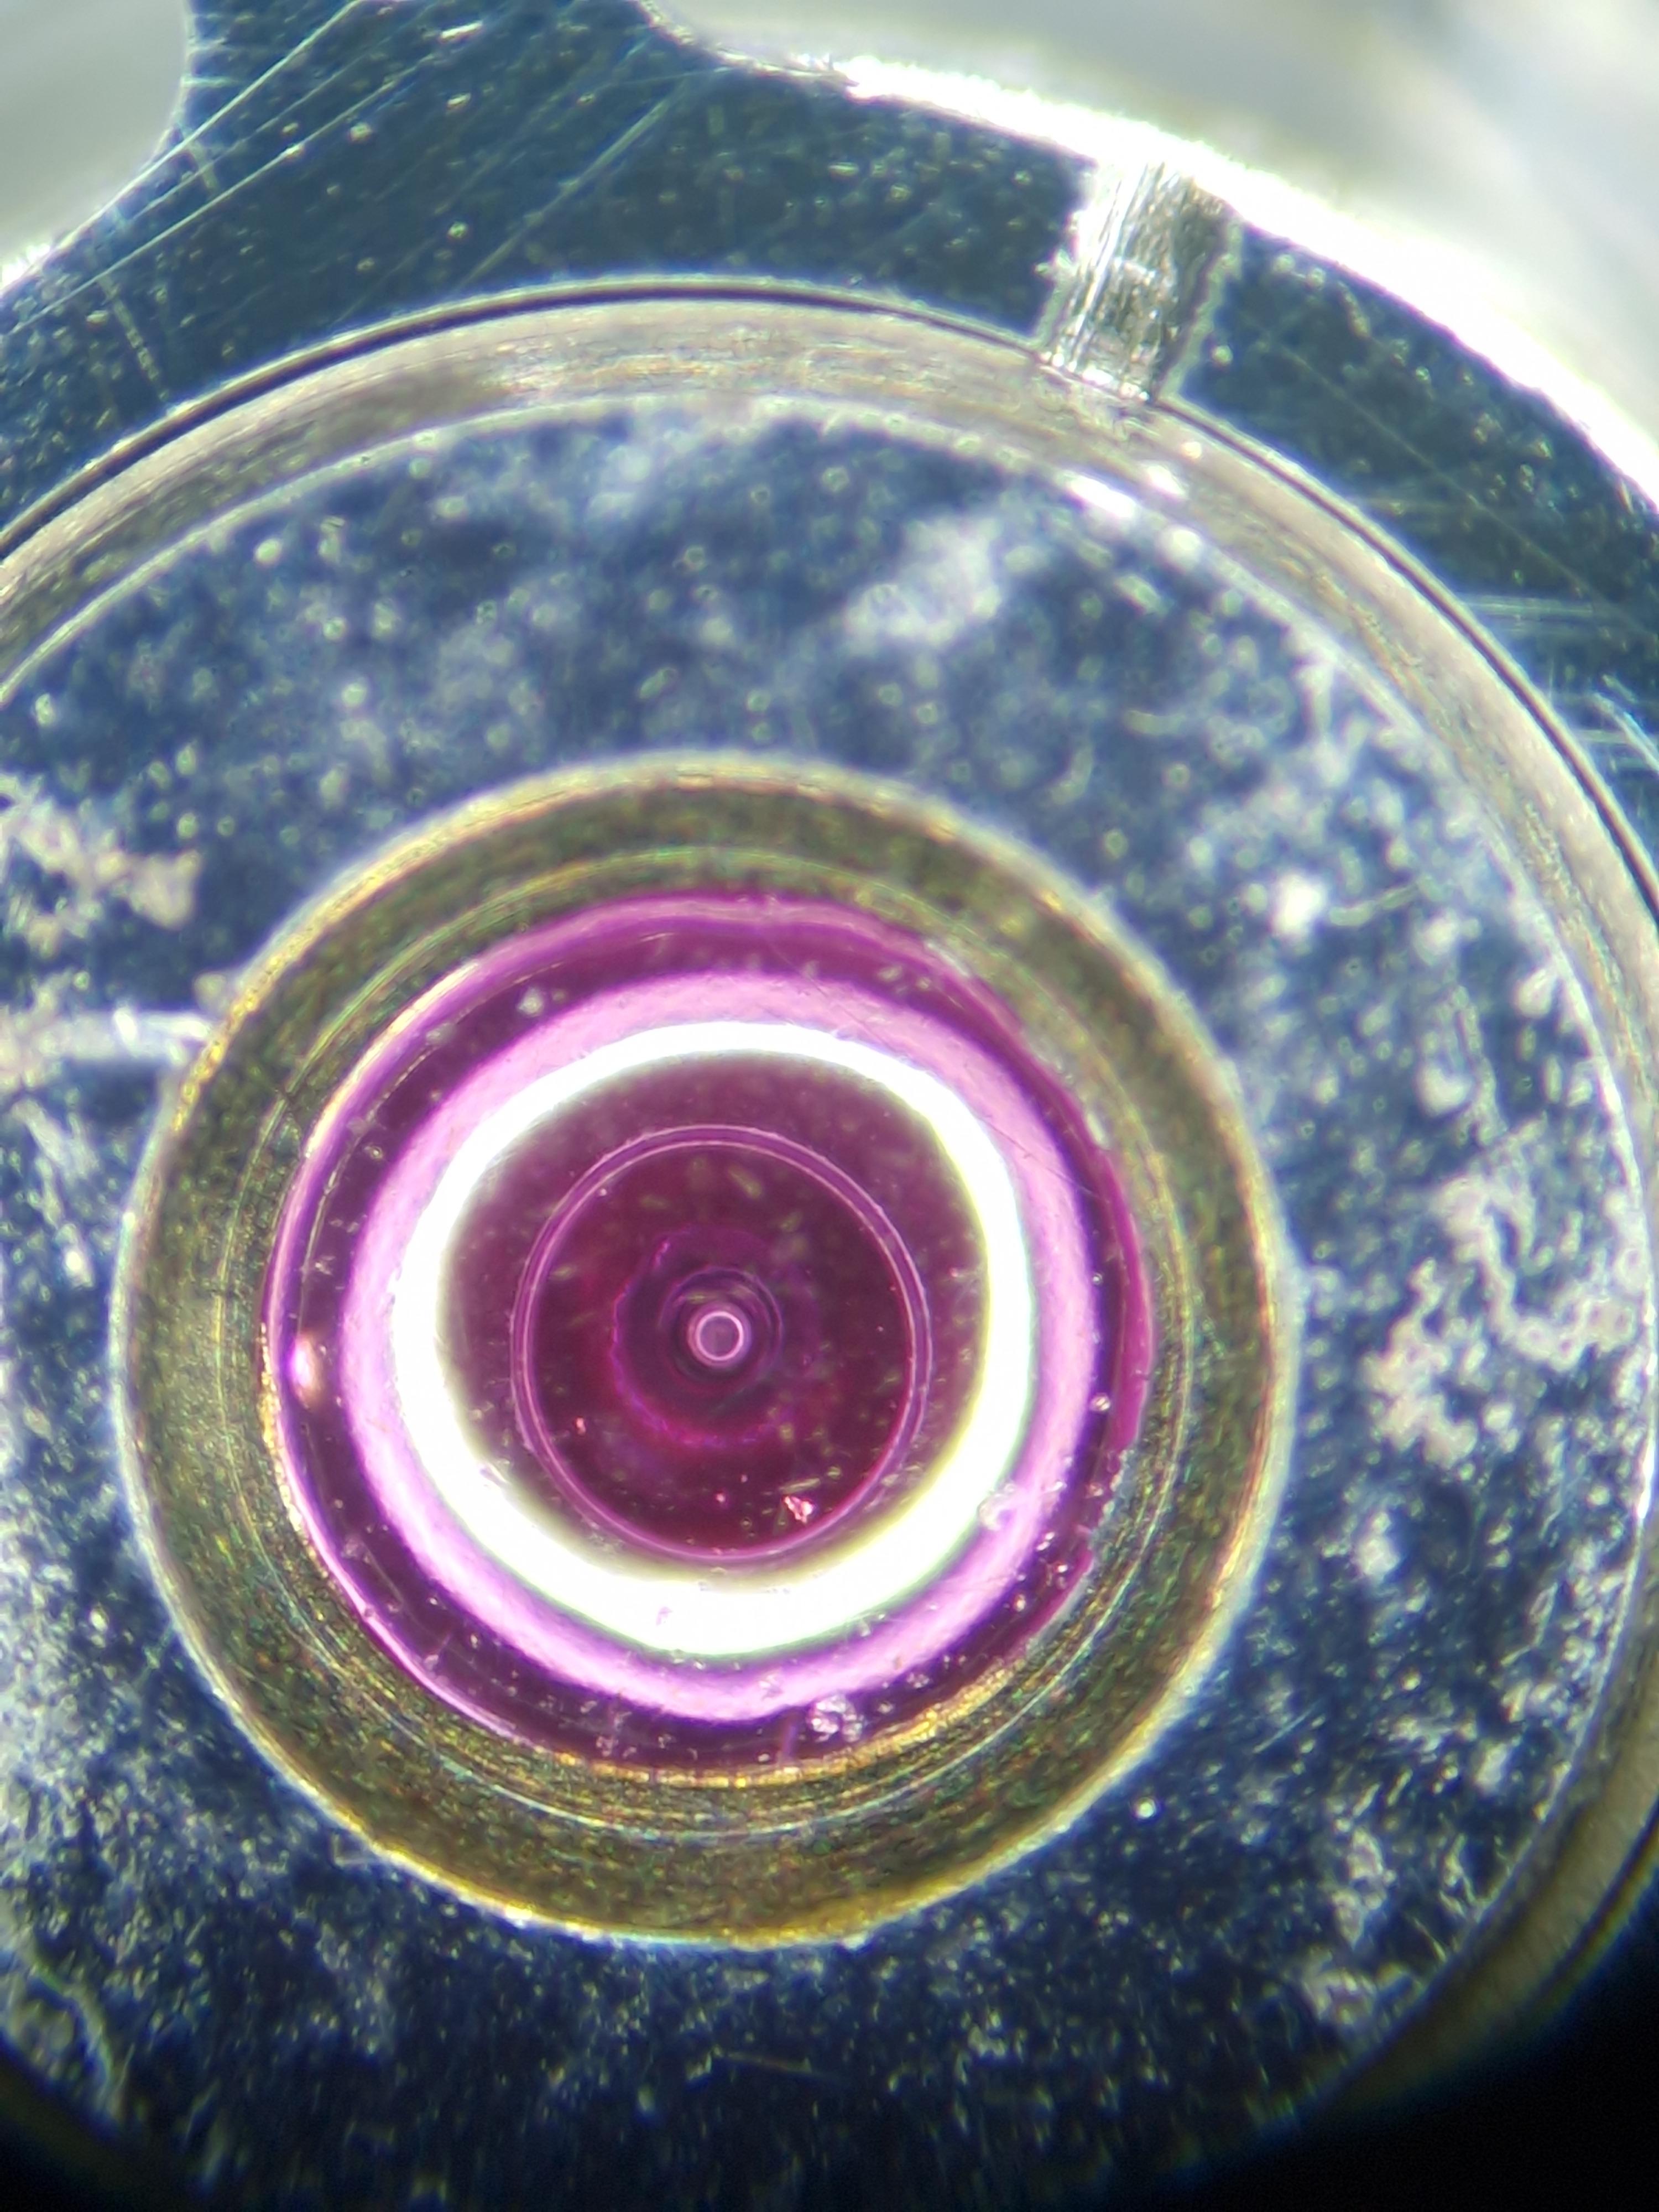
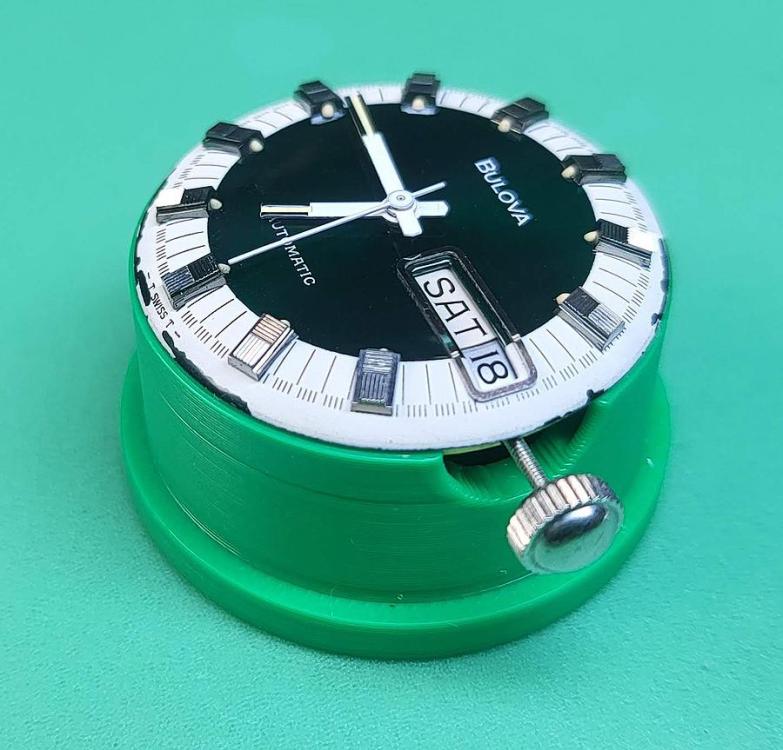
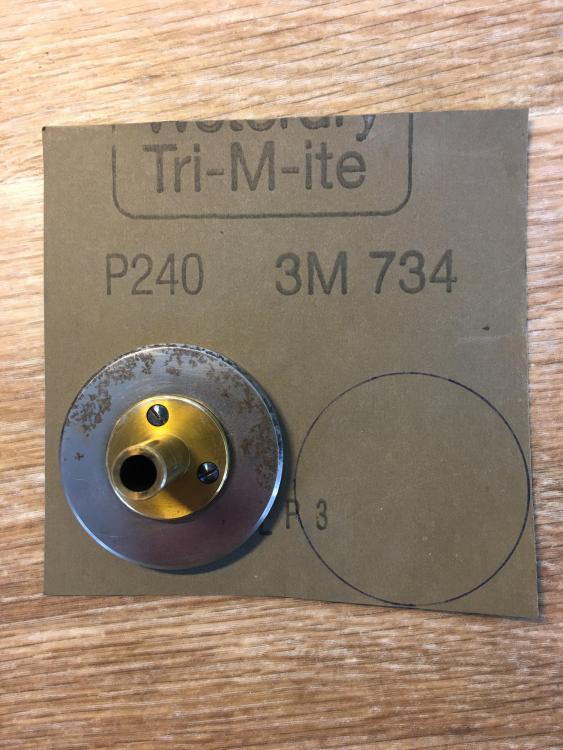
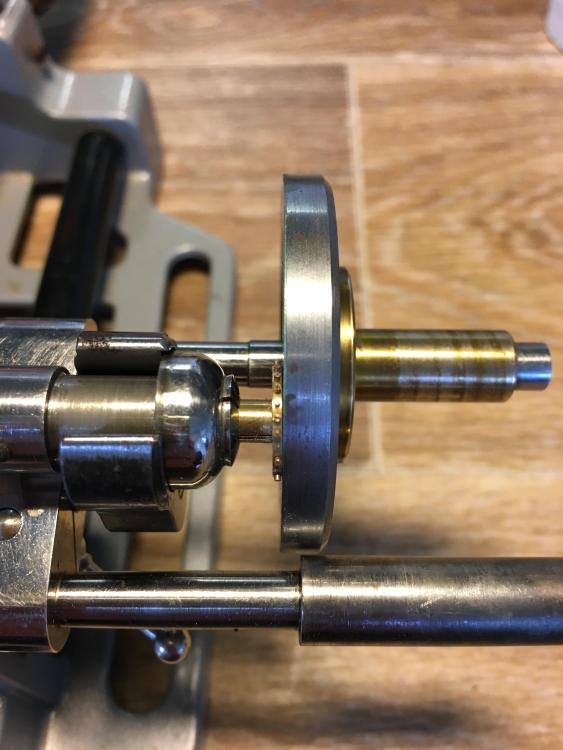
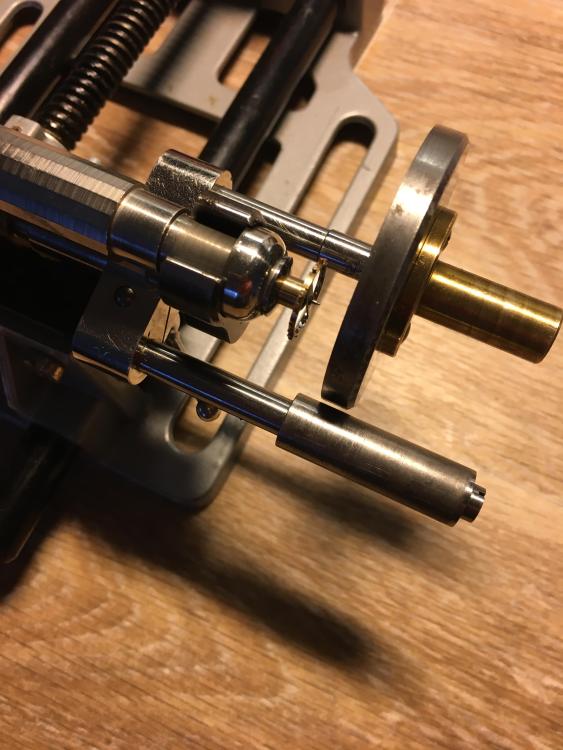
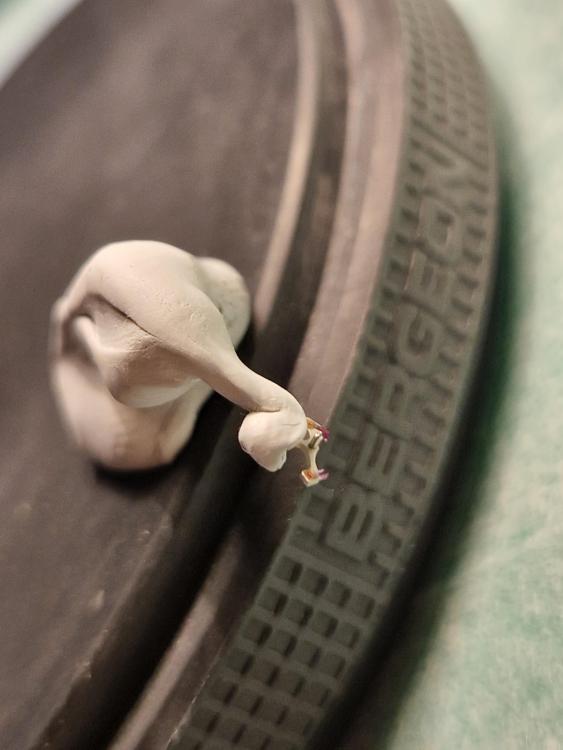
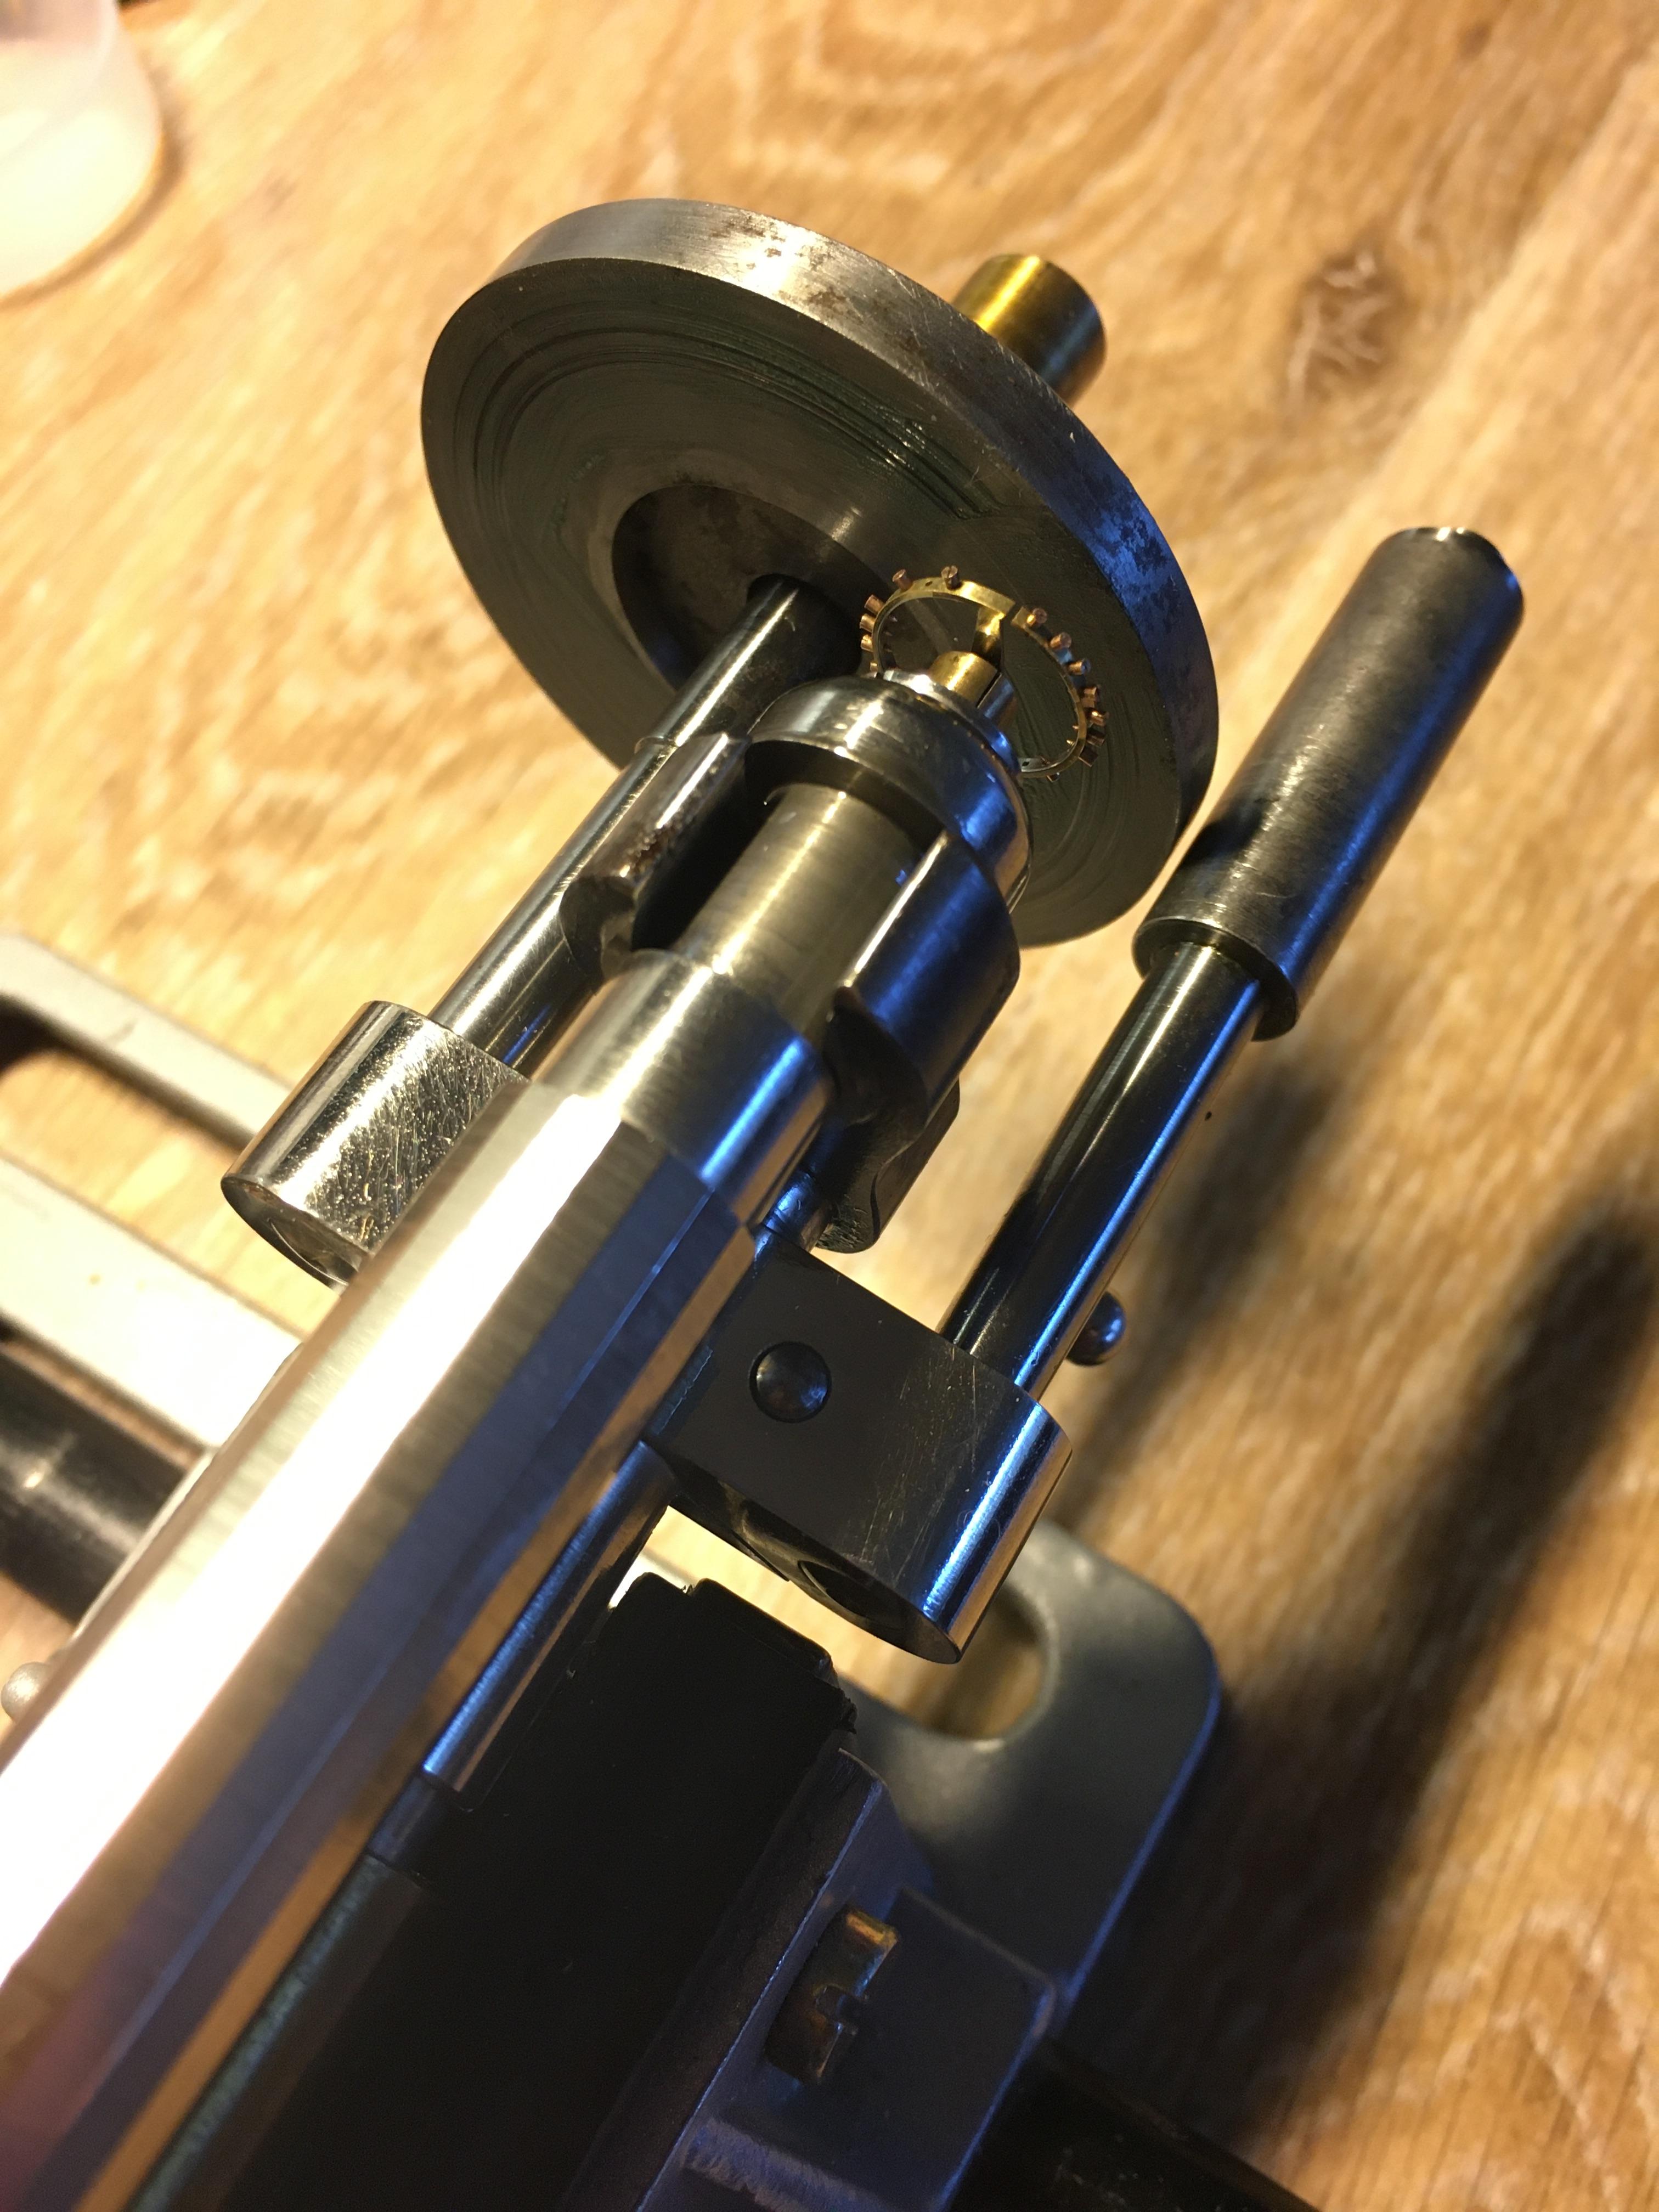
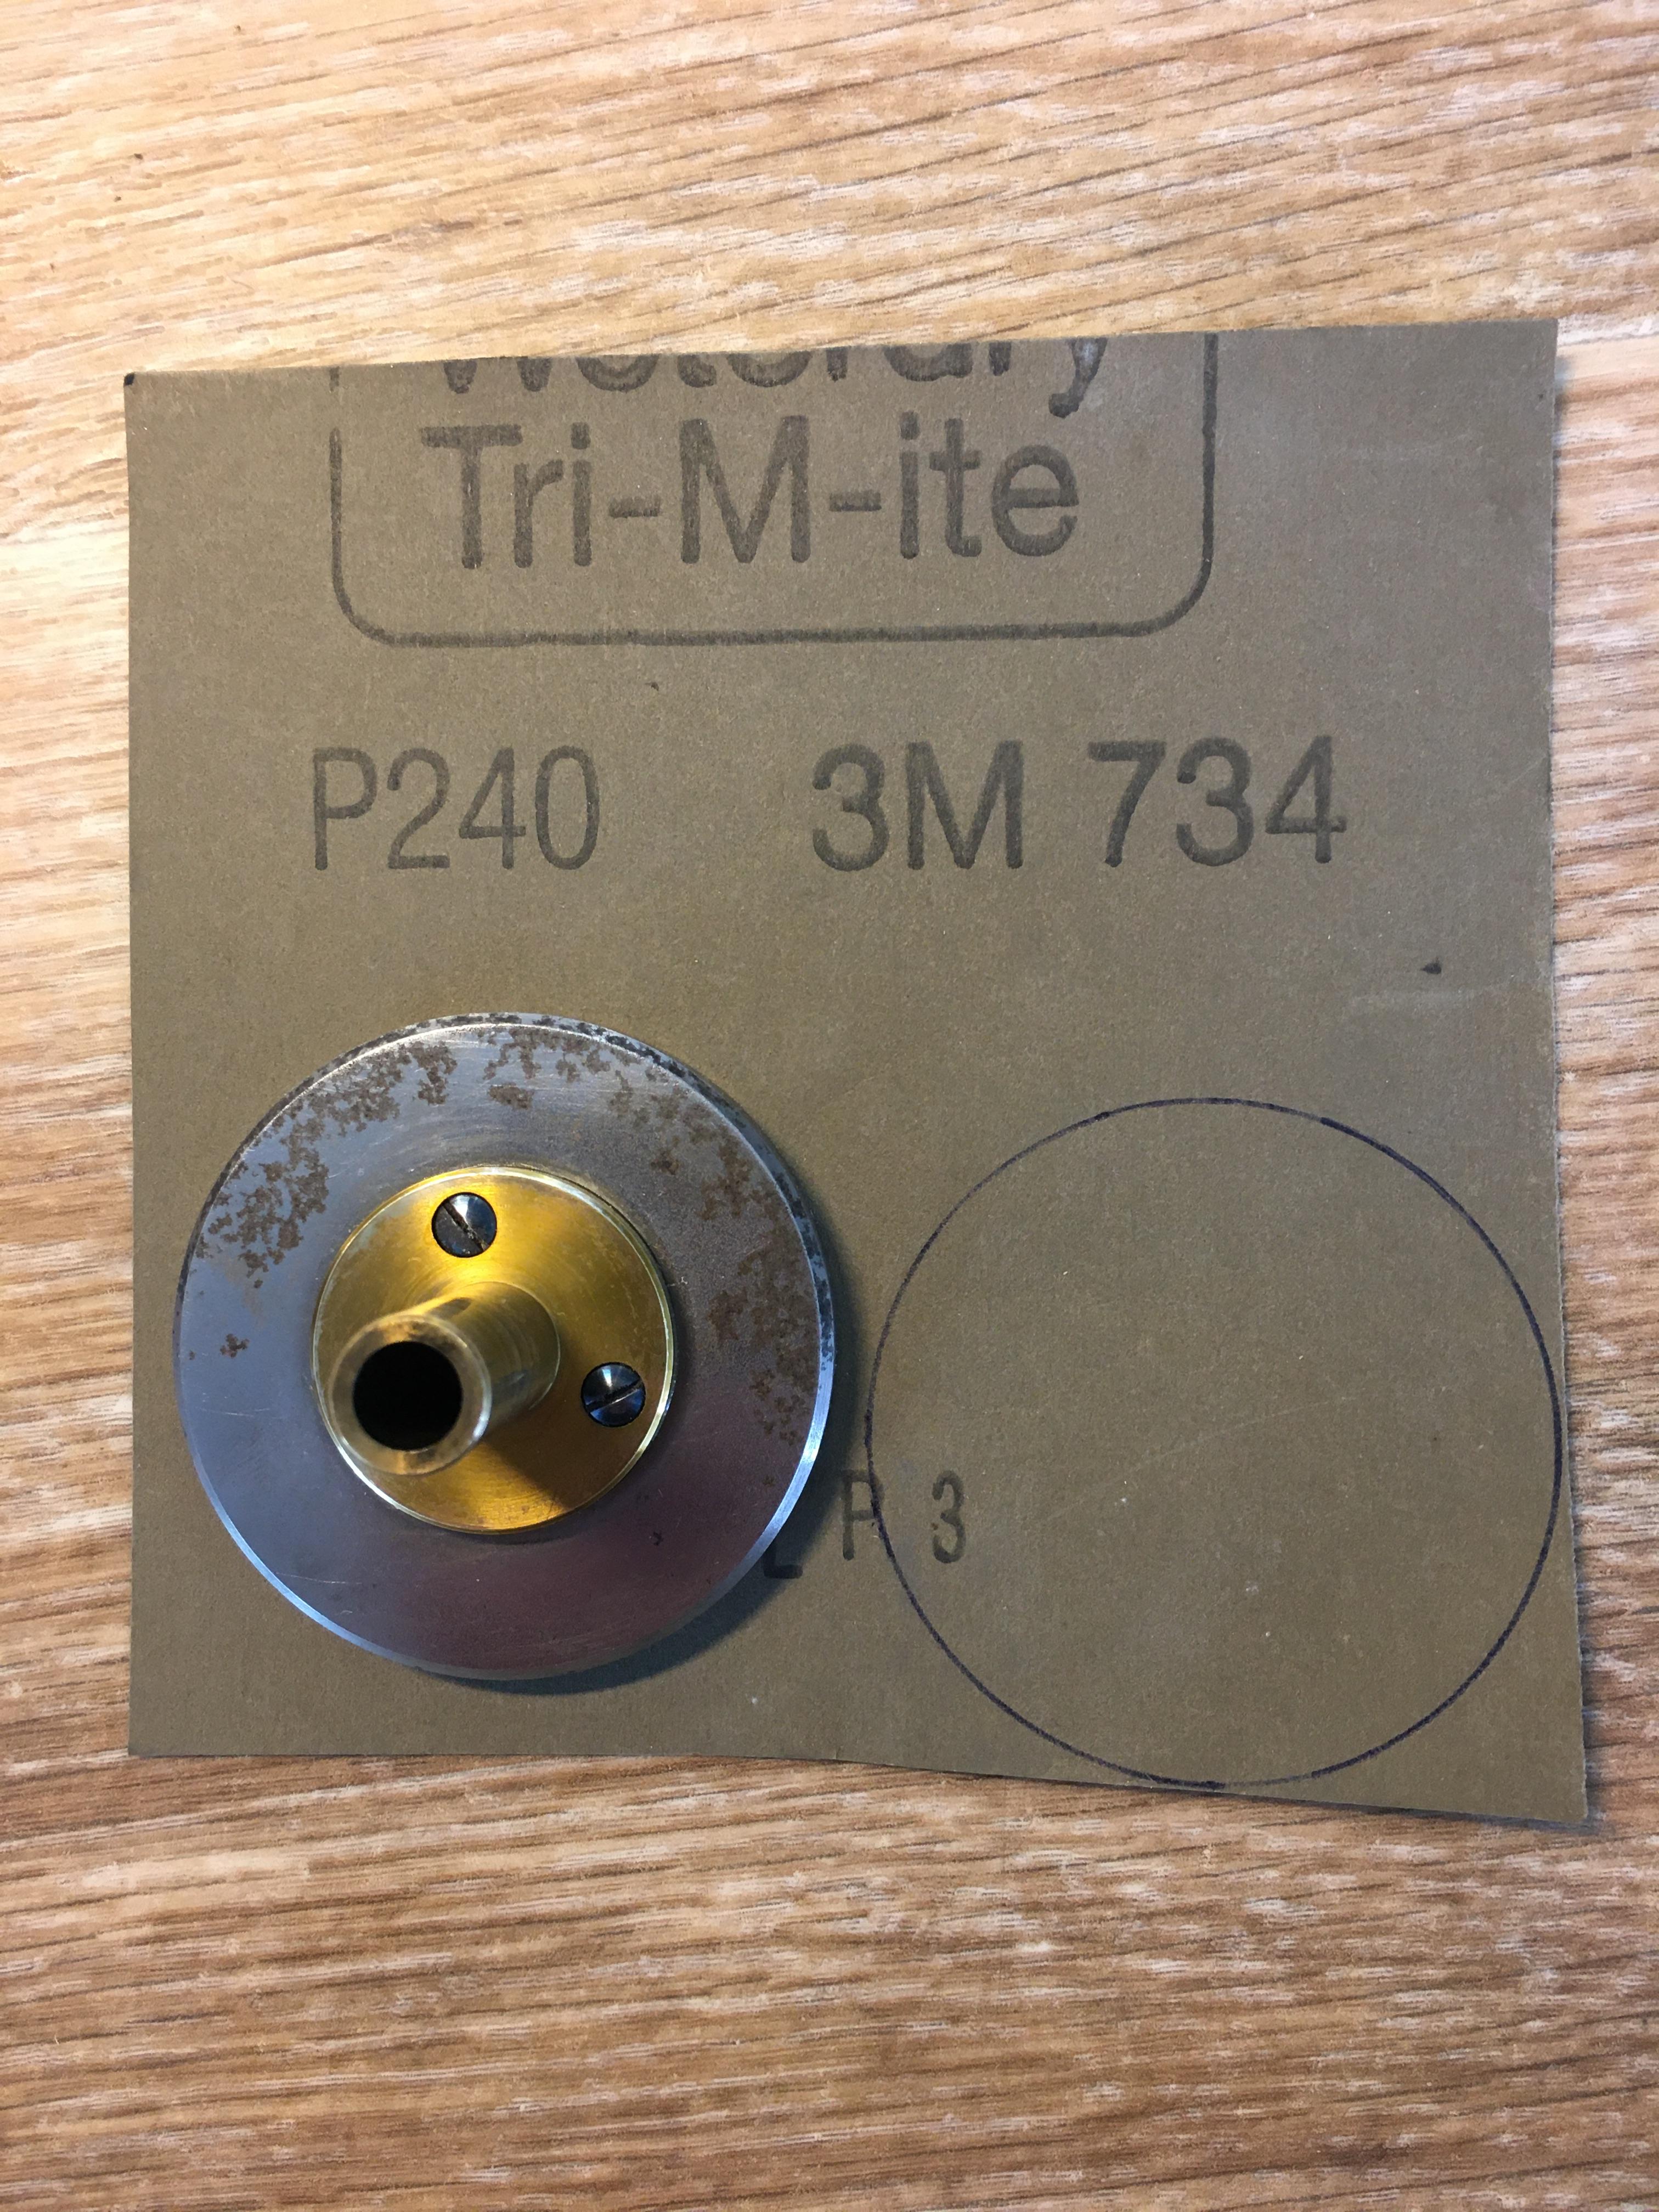
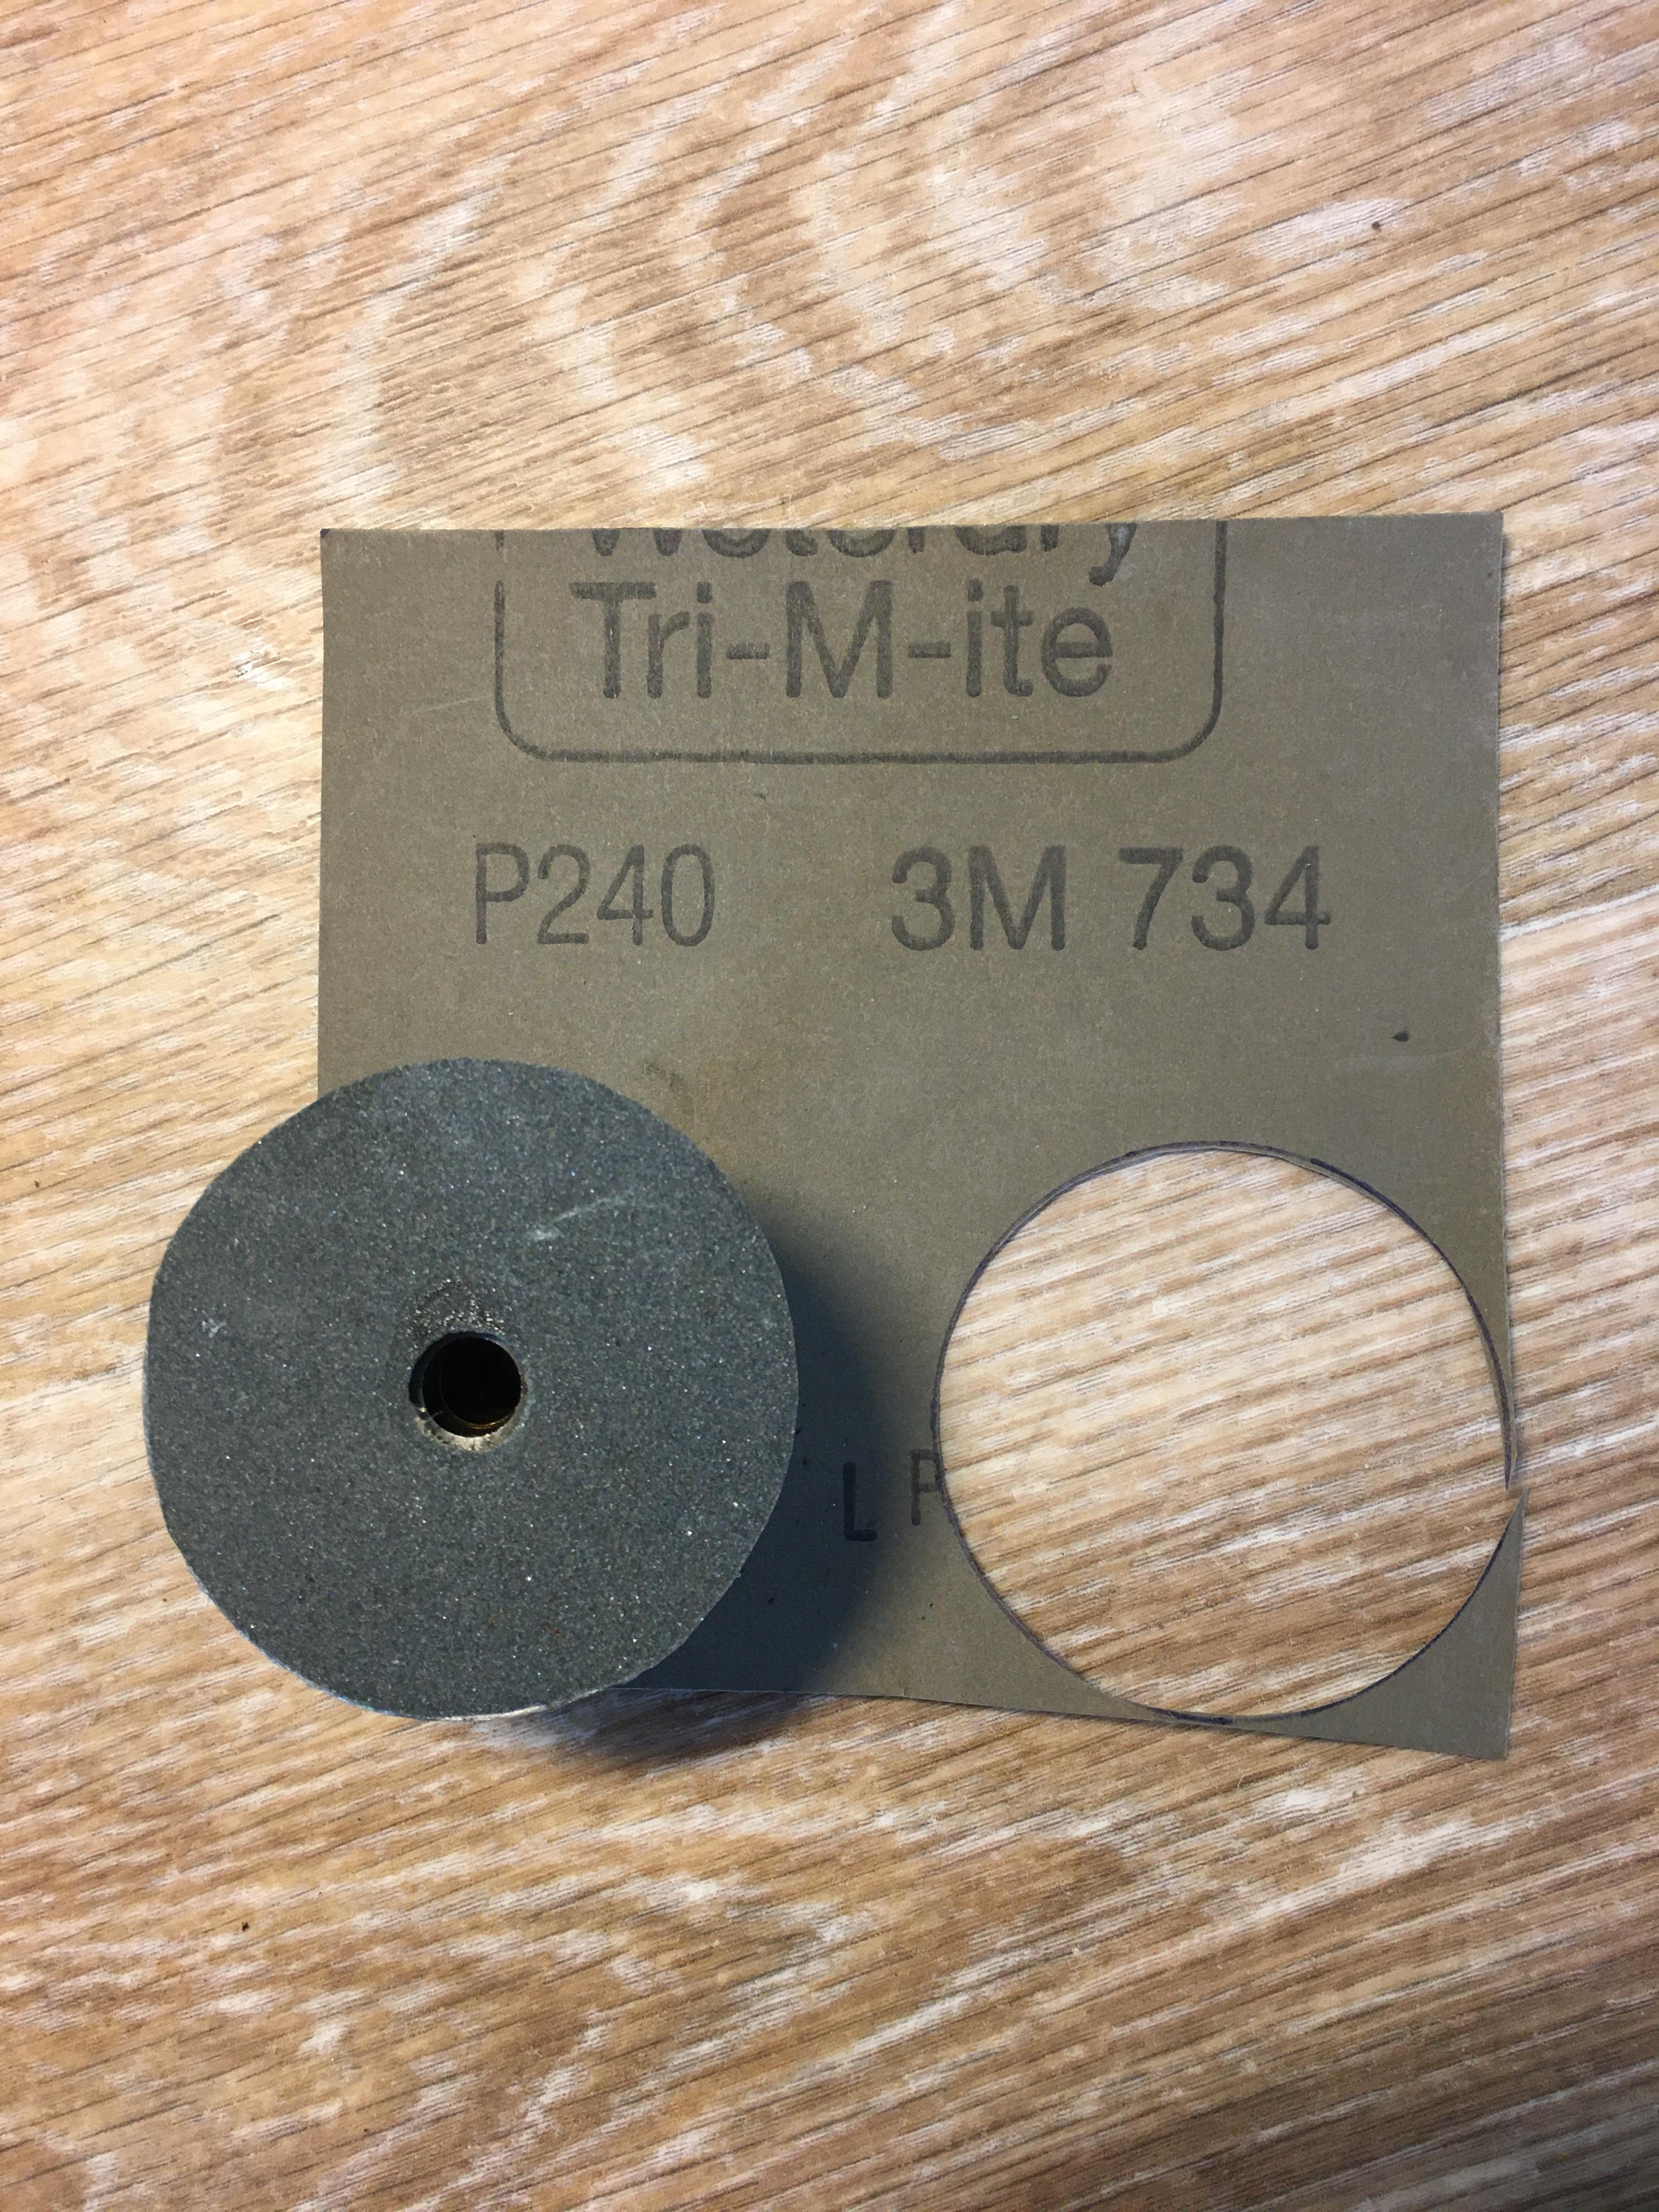
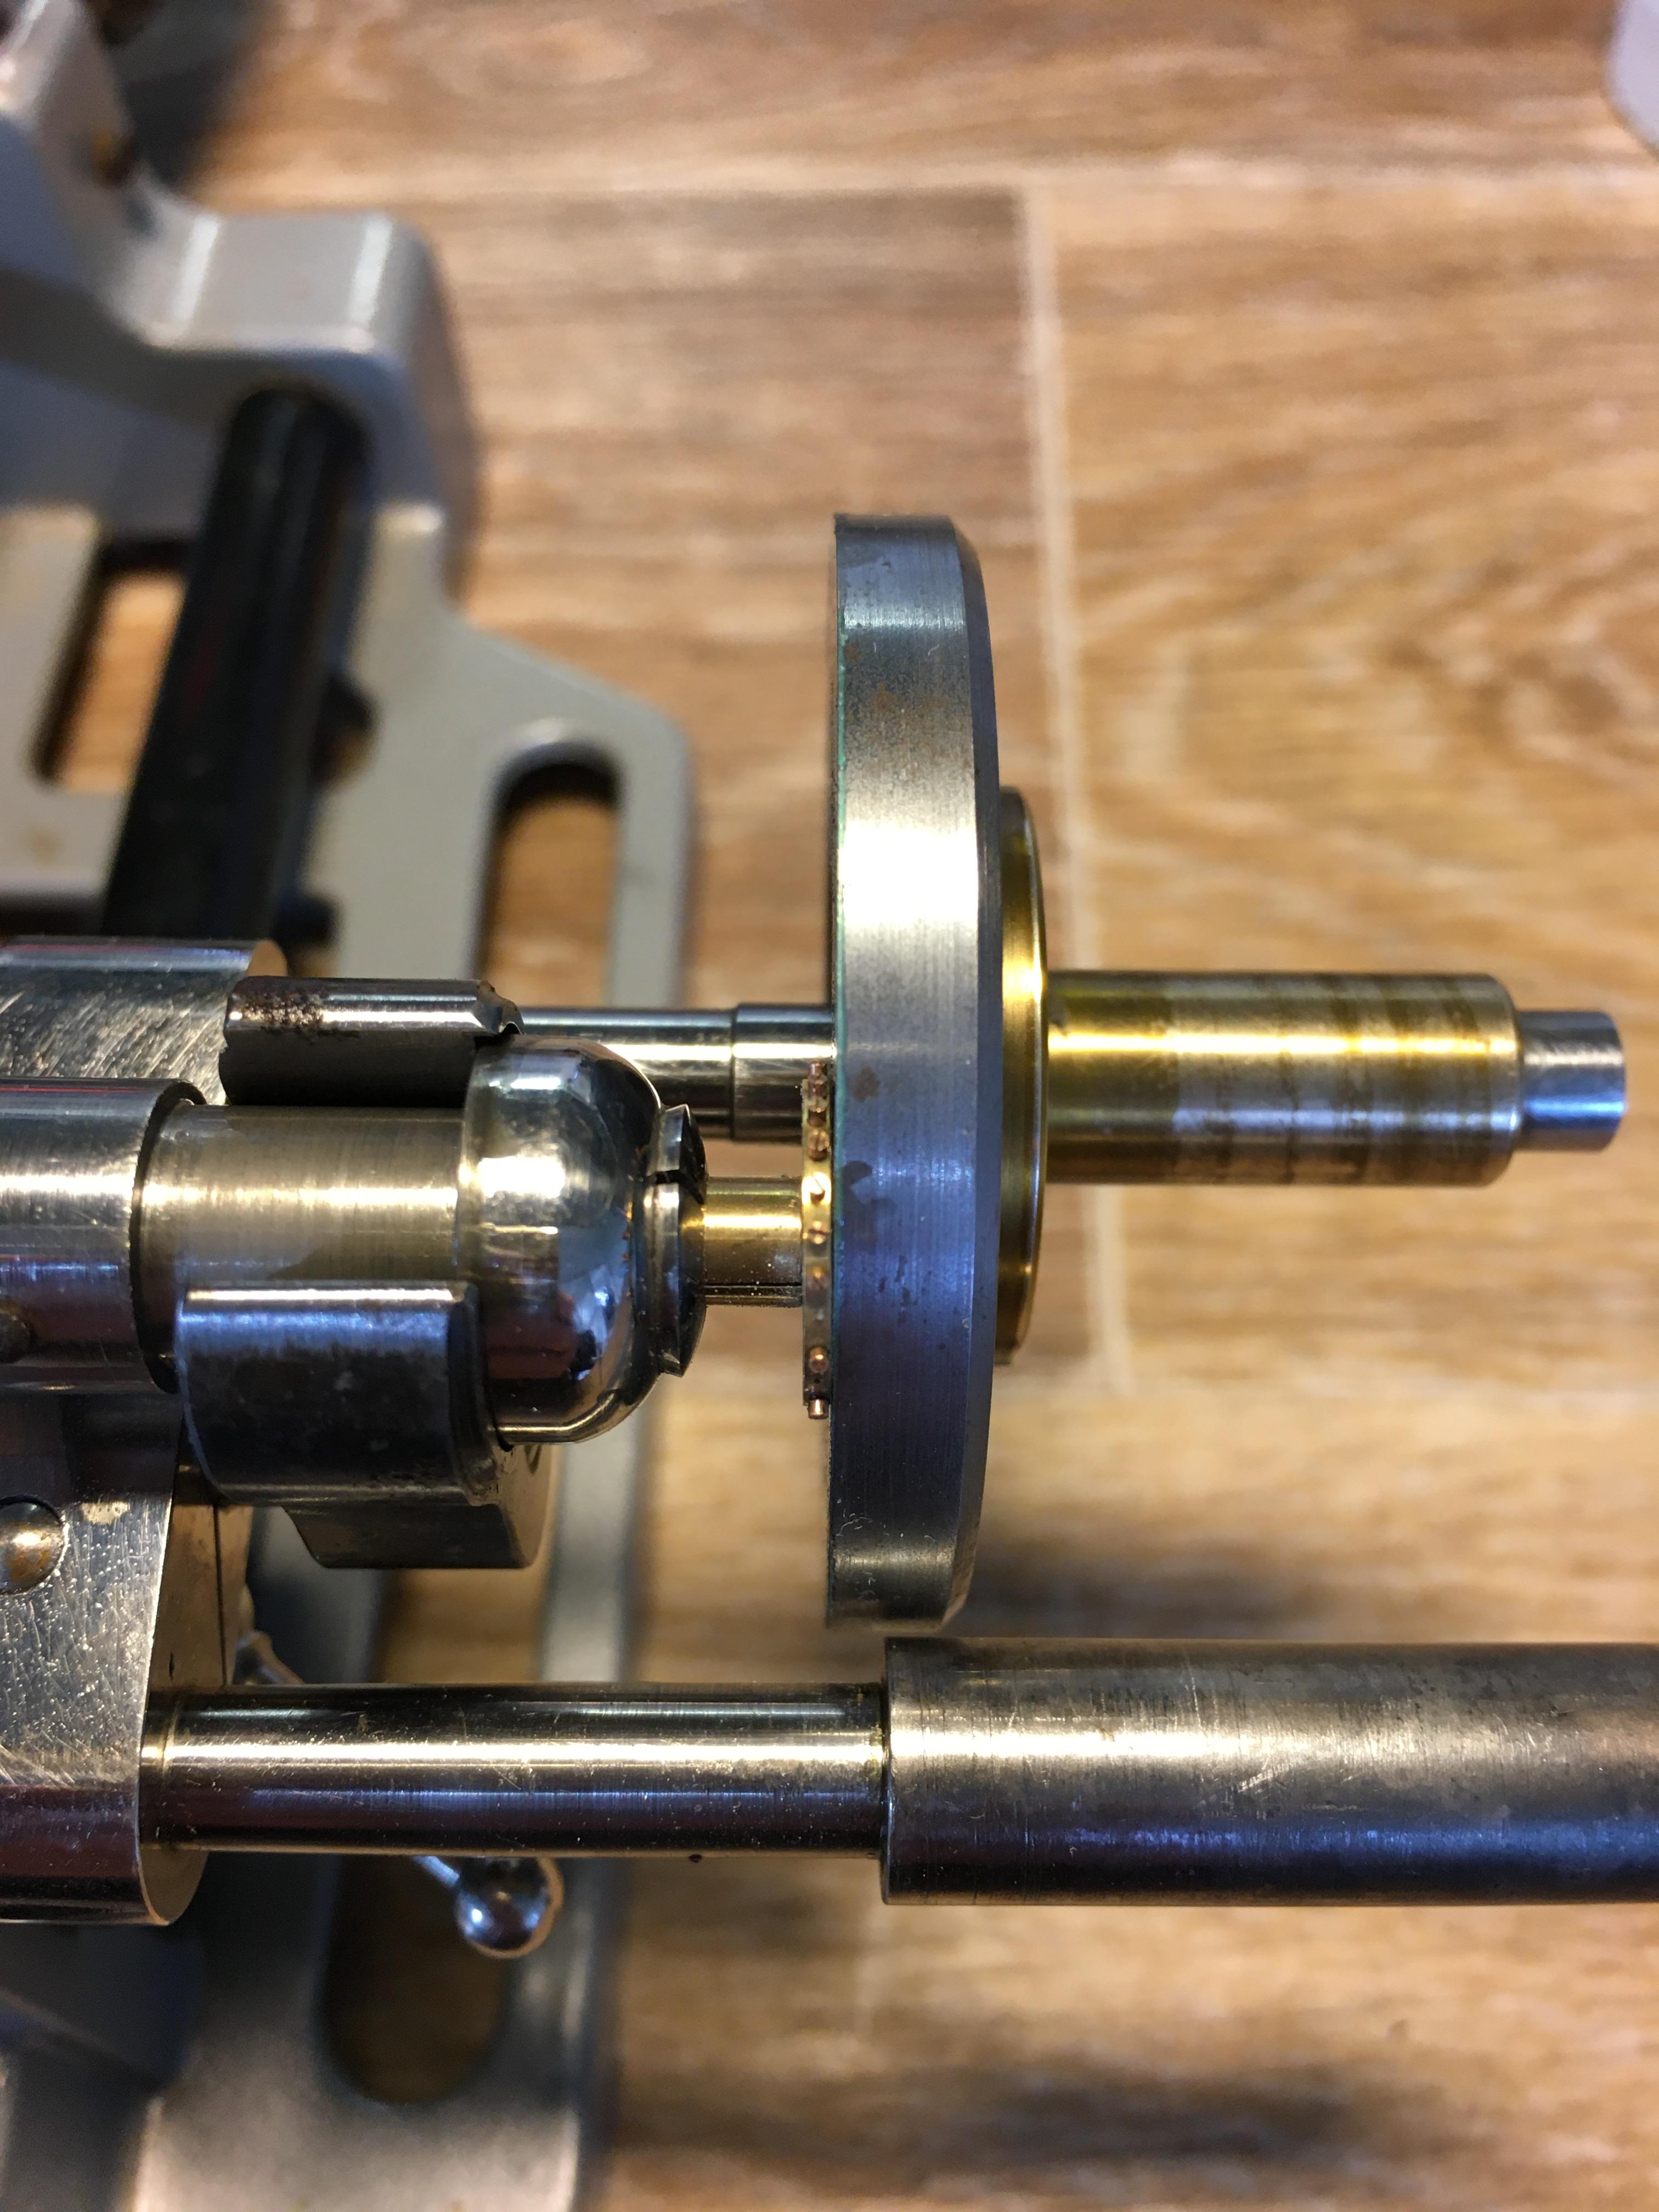
Picking up this side-tracked post again as I just removed a balance staff of a 1920's Omega (35,5L-T1) I was impressed by the way @Delgetti had his setup when he had to change out a balance-staff (https://www.watchrepairtalk.com/topic/28854-new-balance-staff-not-riveting-to-balance/page/2/#comment-244054 Not only that, but also the idea of removing the seat first before punching the staff out from the seat-side, avoiding the whole discussion of the rivet yes/no enlarging the hole. I didn't have the fancy clamps & tools Delgetti has, so I used my screw-head polishing tool. Initially I used #1500 grit diamond paste on the steel wheel, which kinda worked, but very slow. I changed to #800 grit diamond paste, which worked better, but still slow. Then I glued #240 sanding paper to the steel disk; That worked and the disk was hand-driven. Once close to the balance wheel, I took the sanding paper off and continued with #800 diamond paste. One can only do this when the balance wheel sits true on the staff and has no "wobble". I went on grinding until I saw some diamond paste on the rim of the balance wheel. This was as far as I could grind and it seemed that there wasn't much left of the seat. Carefully, with my staking set, I knocked the staff from the seat-side out. Turns out that the thickness of the seat left, now a small ring, was only 0.1mm. The balance wheel hole is in perfect shape and no damage done to the wheel at all. Of course, if the wheel has a "wobble" or isn't seated true on the balance staff, you can't get as close and there will be more left of the seat. In my case, it worked perfect I'm very happy how this method worked out !


 3 points
 -
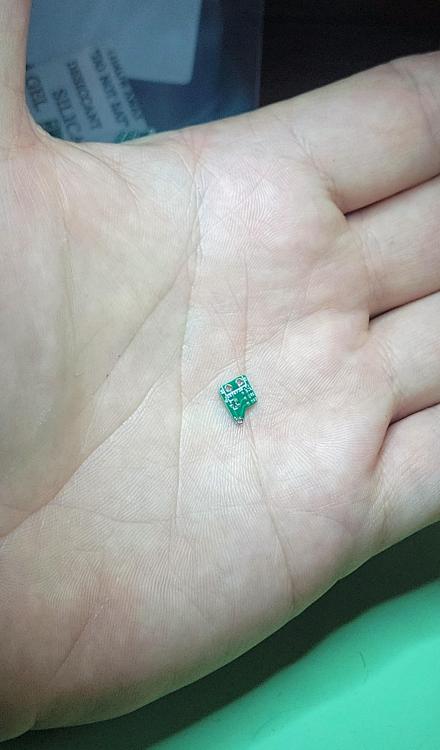
They showed up! It's a perfect fit. Can't wait to populate it and try it out.
 3 points
 -
Lubed up, back together (minus the one screw), and I'd say not a bad result! Going to give it a day or two to run in while I clean up the case and regulate it again, but off to a good start.
 3 points
 -
Glue a nut to the barrel lid, insert a bolt, pull, disolve the glue. Maybe someone will have a better answer.3 points
-
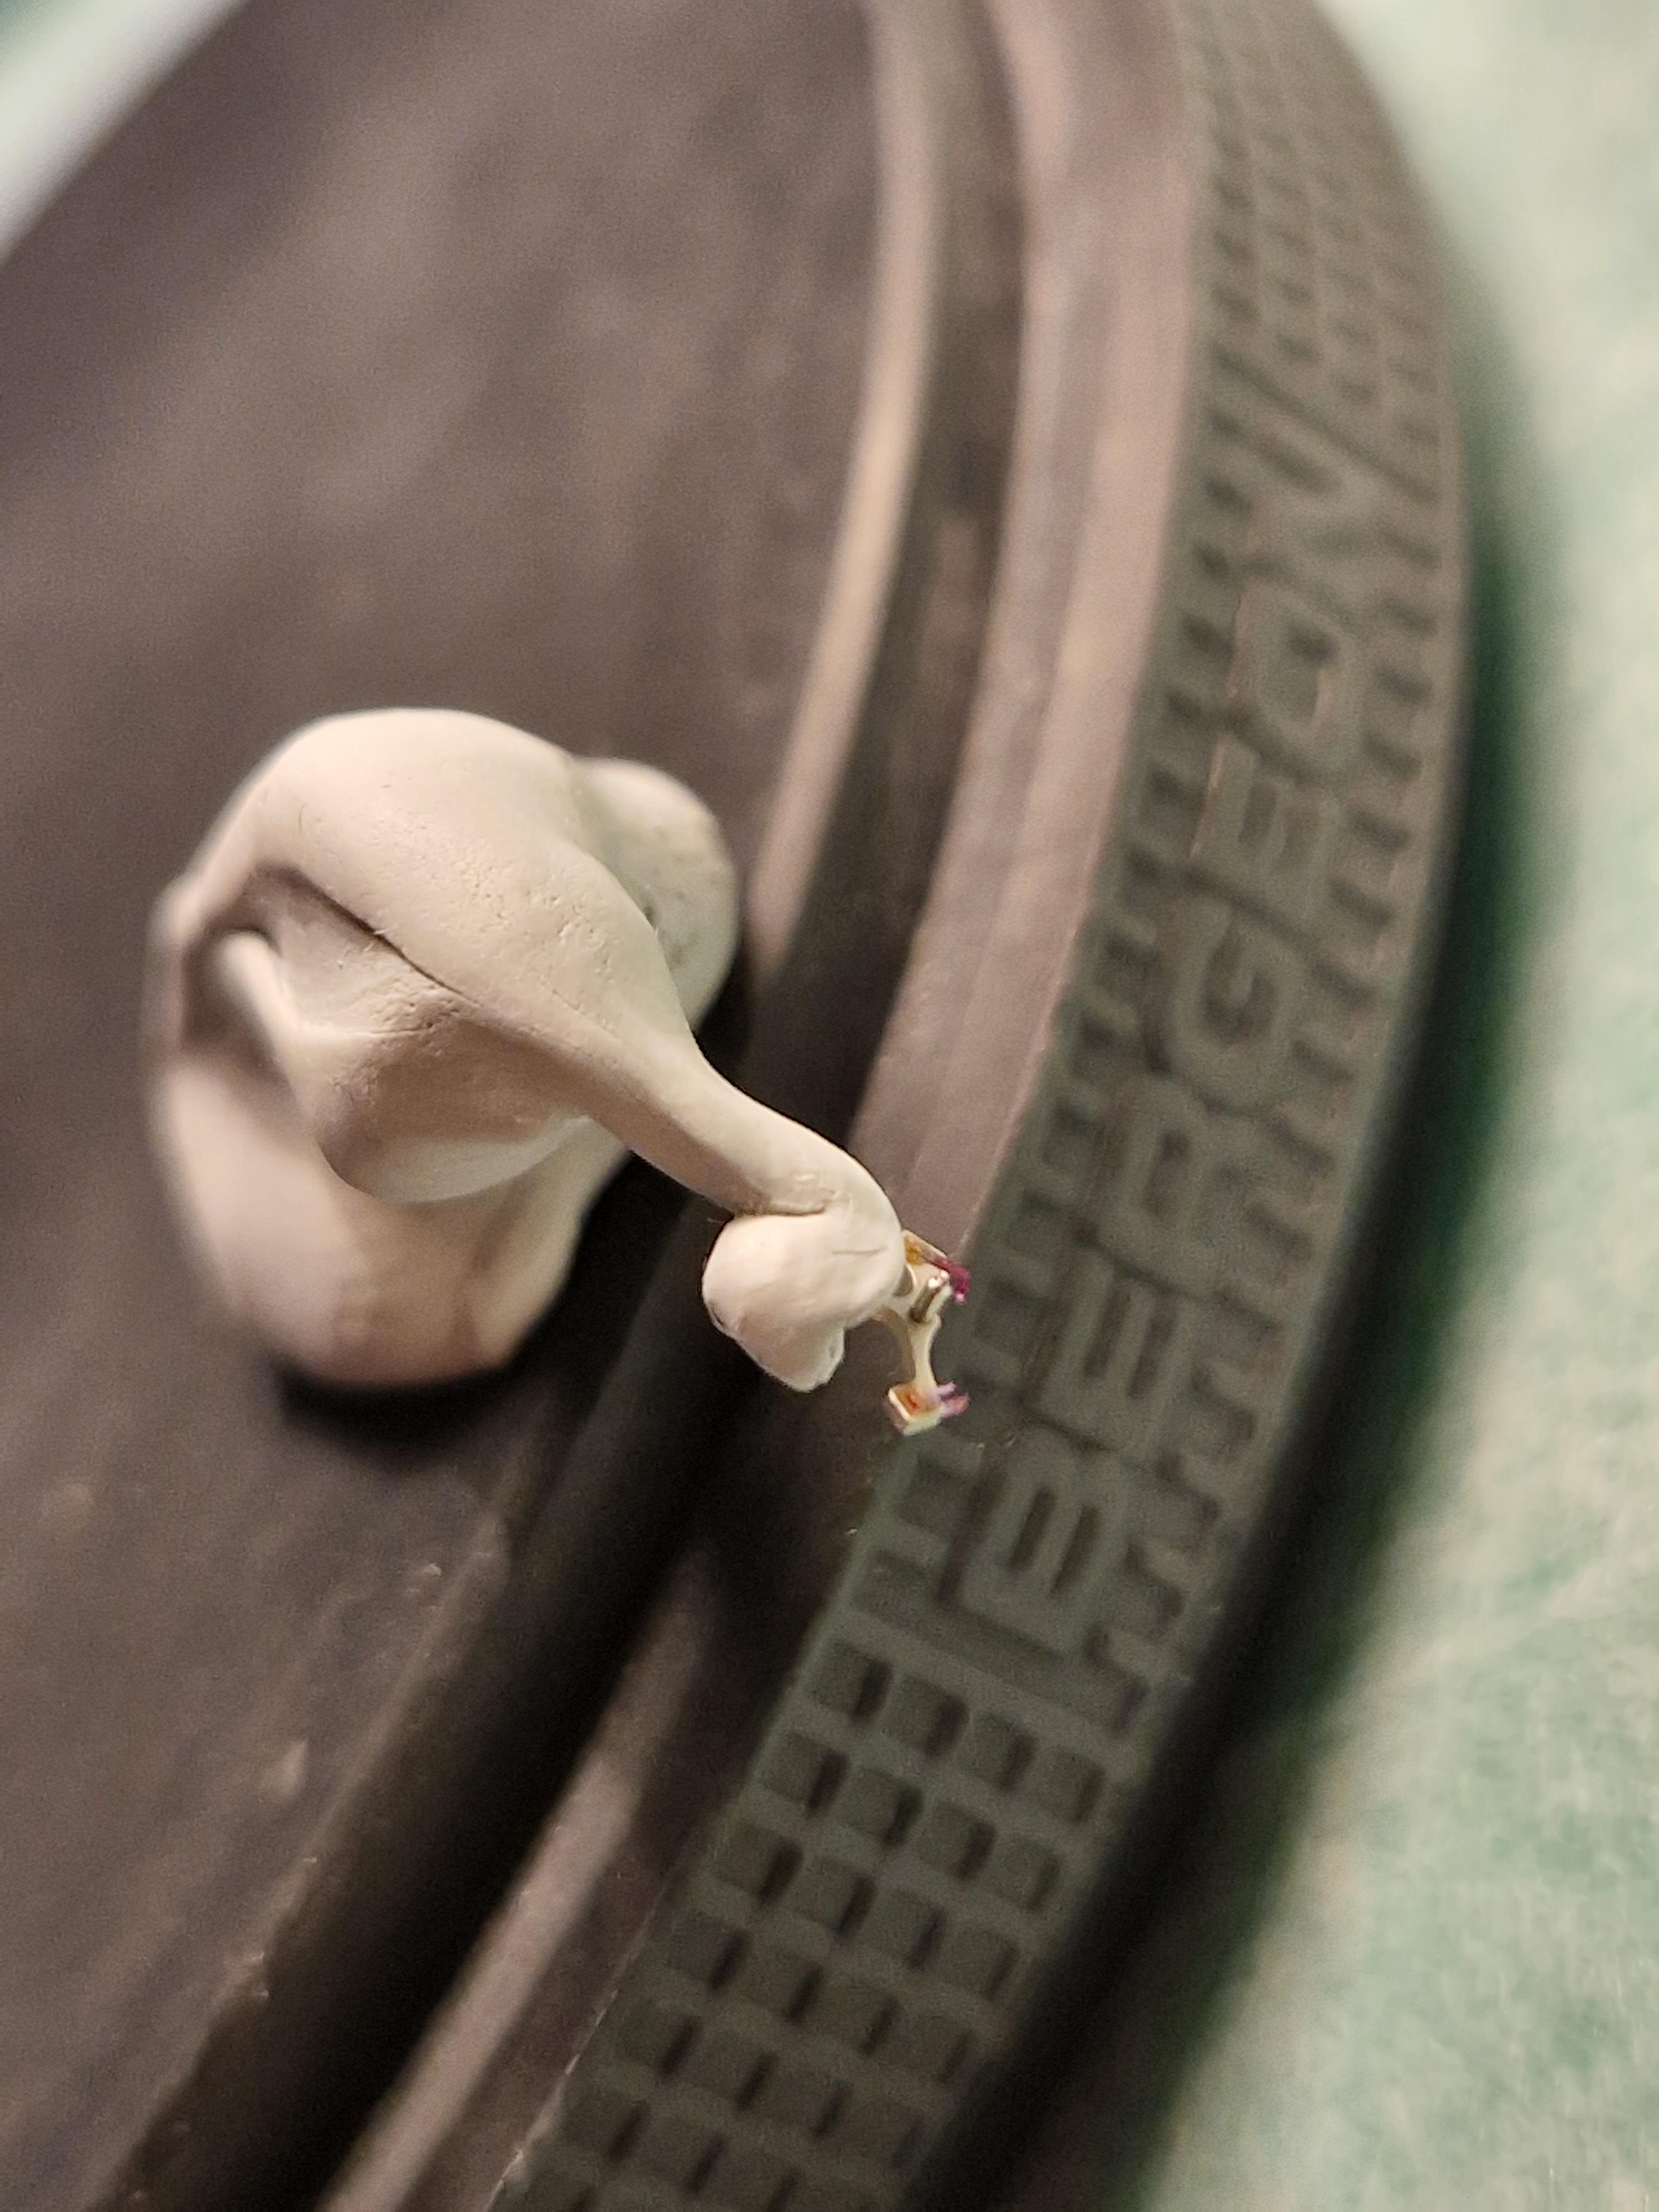
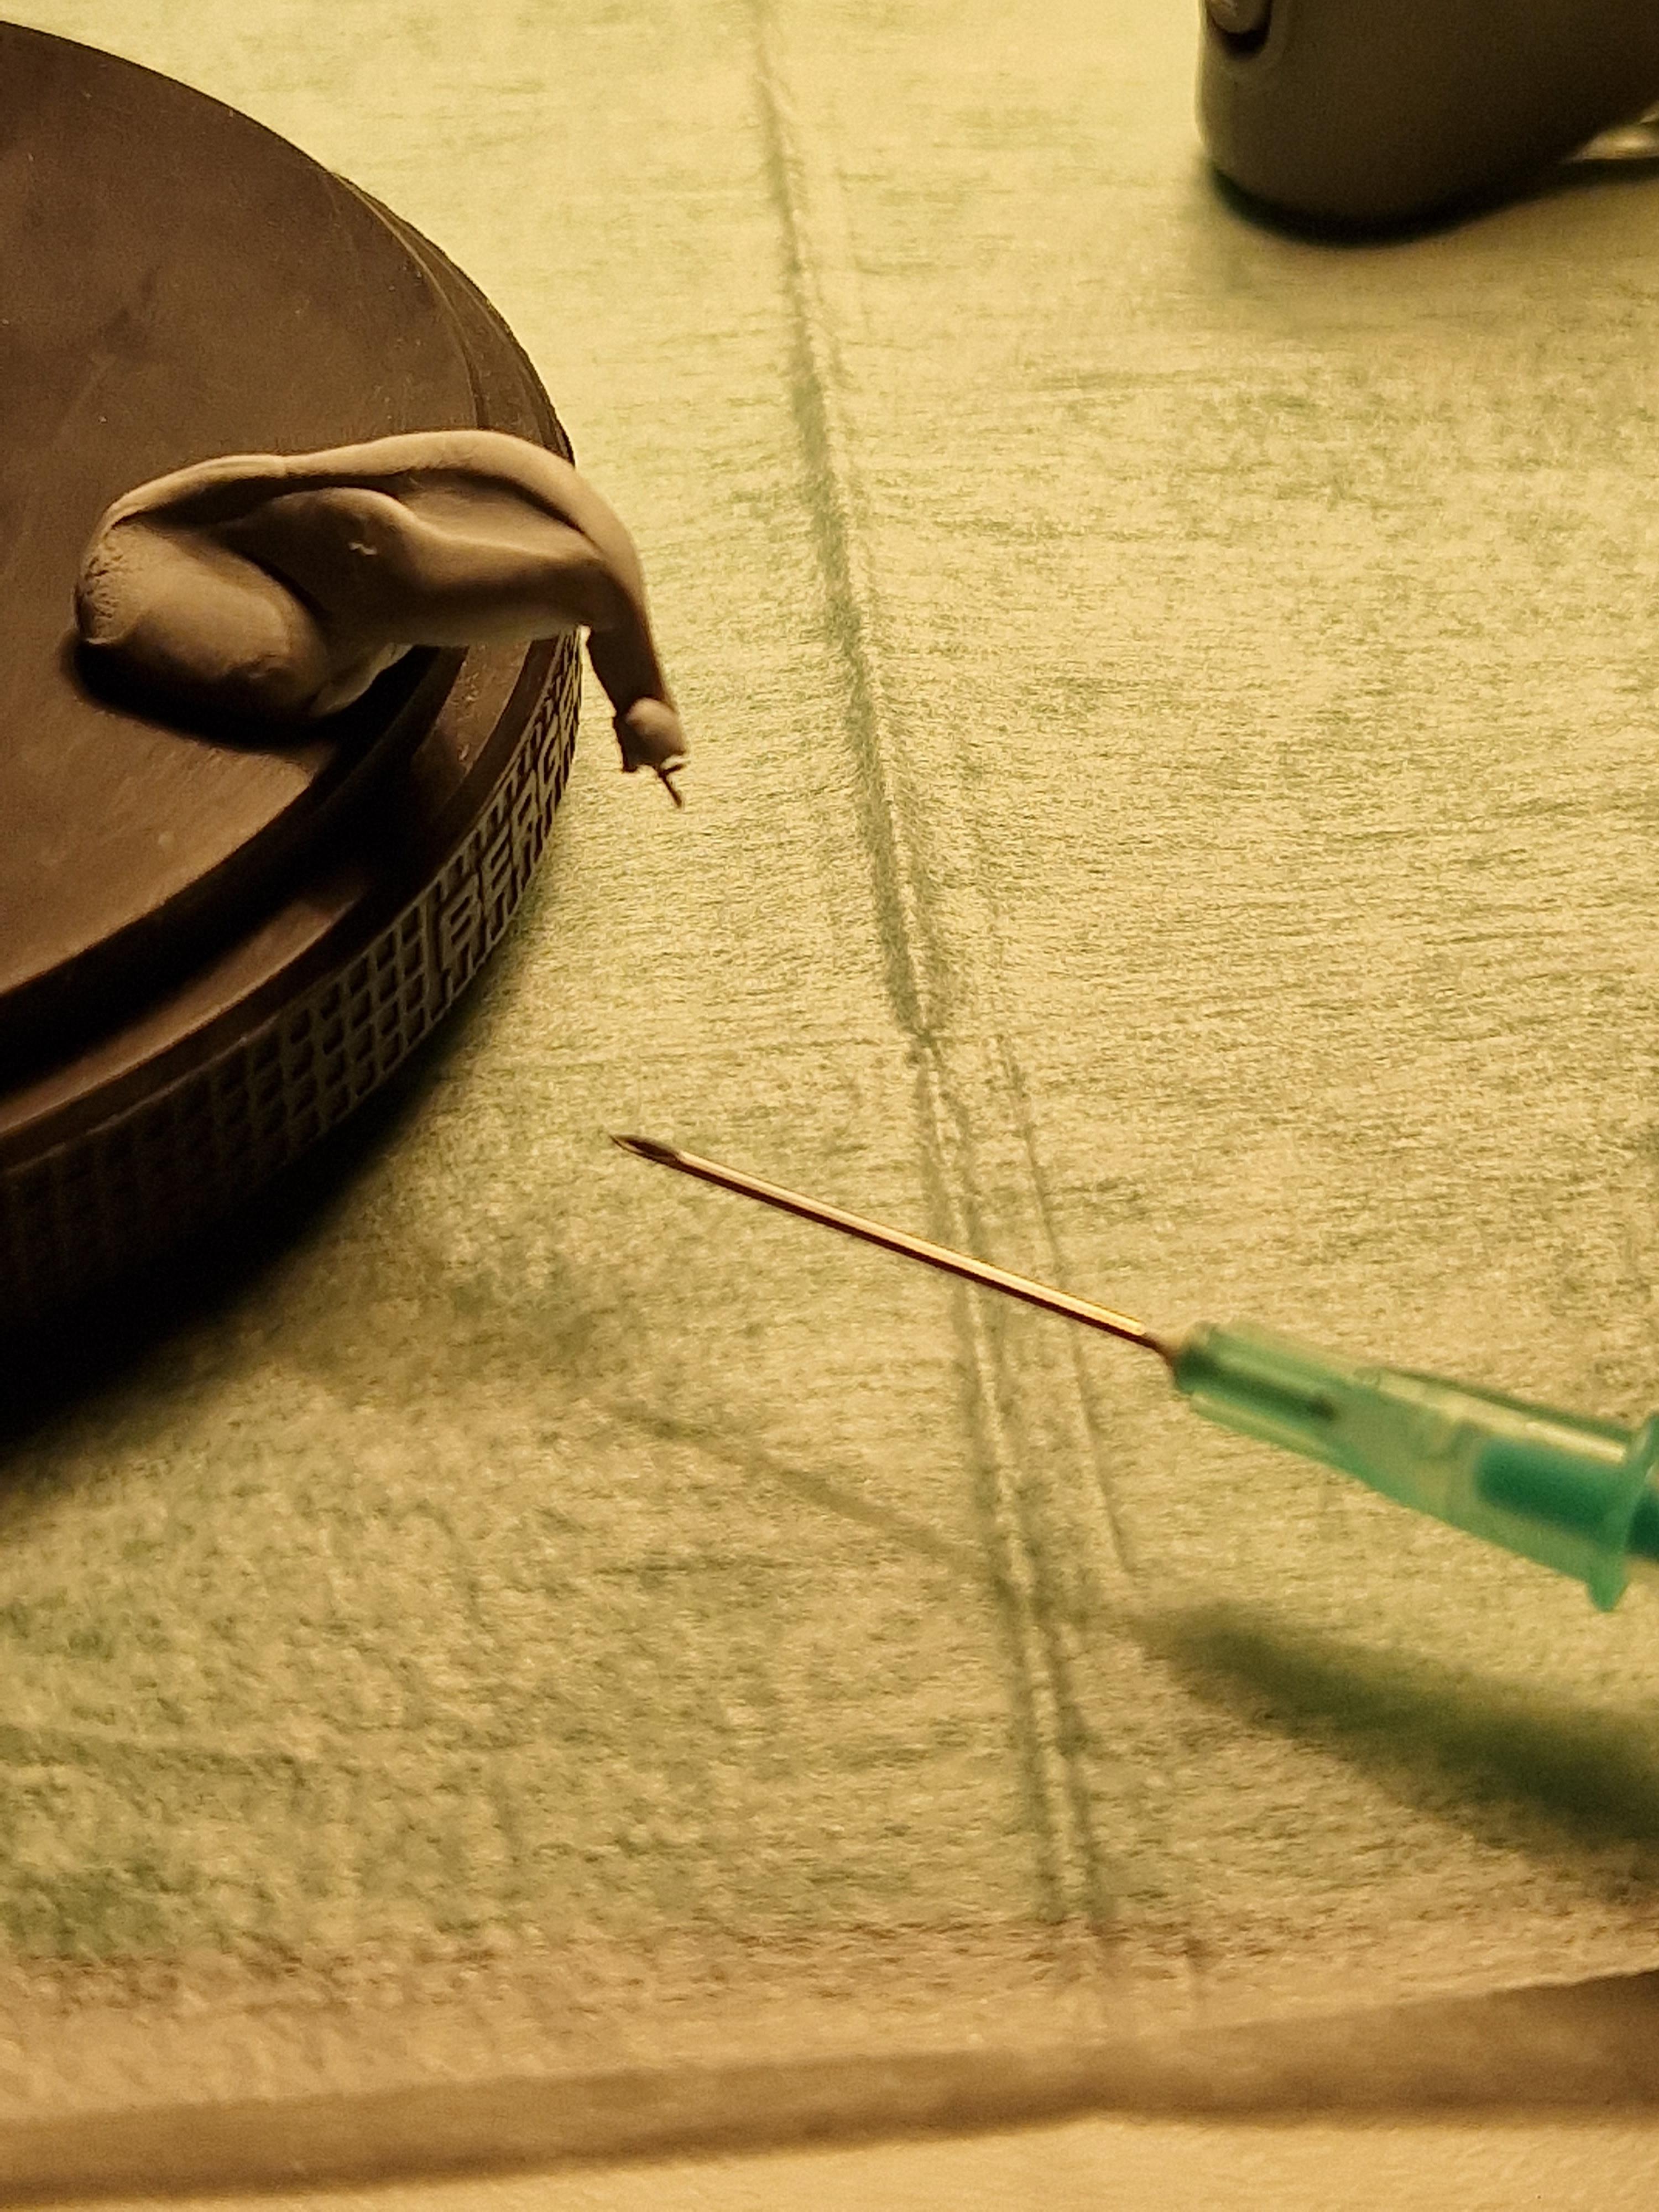
Hello everyone, for what it's worth, here is my approach: 1. Escape wheel submerged in Epilame, then dried quickly with a hairdryer. Then the final tip of the pivots are cleaned by poking into pithwood. The logic being that the Epilame is removed at the intended contact point (to avoid any residue that may mix with the oil), but remains in the areas where oil is not supposed to spread to (further down the pivot towards the wheel). The escape wheel teeth also benefit from having Epilame to keep the 9415 in place. 2. I use a syringe to treat only the pallet stones. I suspend the pallet fork with some Rodico so that the stones hang downwards. I notably use a rather thick needle where a drop WON'T form, but rather where the Epilame liquid stays in the needle tip, which I then dip into the pallet stones. It requires some practice to get the right amount of Epilame into the needle tip, but it works for me now. This way, no drop will "jump" onto the pallet fork and potentially go all the way to the pivots. 3. I let the movement run for a few minutes without lubricating the pallet stones... to scrape off the Epilame in the intended contact "channel". Then I remove the balance again and lubricate the exit pallet stone with 3-4 successive drops. See the "channel" that forms on the pallet stone in the picture -- not so easy to see, but it's visible. I am conflicted about the use of Epliame in balance jewel settings. My impression is that the two jewels sufficiently suspend the oil (even 9010). Apparently Rolex recommends NOT to use Epliame there (heard from a former Rolex service center watchmaker), as it could cause additional wear. Apart from that, I follow specific instructions where I can find them. E.g. the infamous Rolex reverser wheels or sometimes (parts of) the seconds wheel. Exception: I'm currently servicing an Eta 2824 and will probably ignore the service sheet that recommends treating the whole keyless works with Epilame and then using HP1300... I'll skip the Epilame and use 9504 grease.

.thumb.jpg.9bb1d20ca71162225b2e652ed4cfed34.jpg) 3 points
3 points -
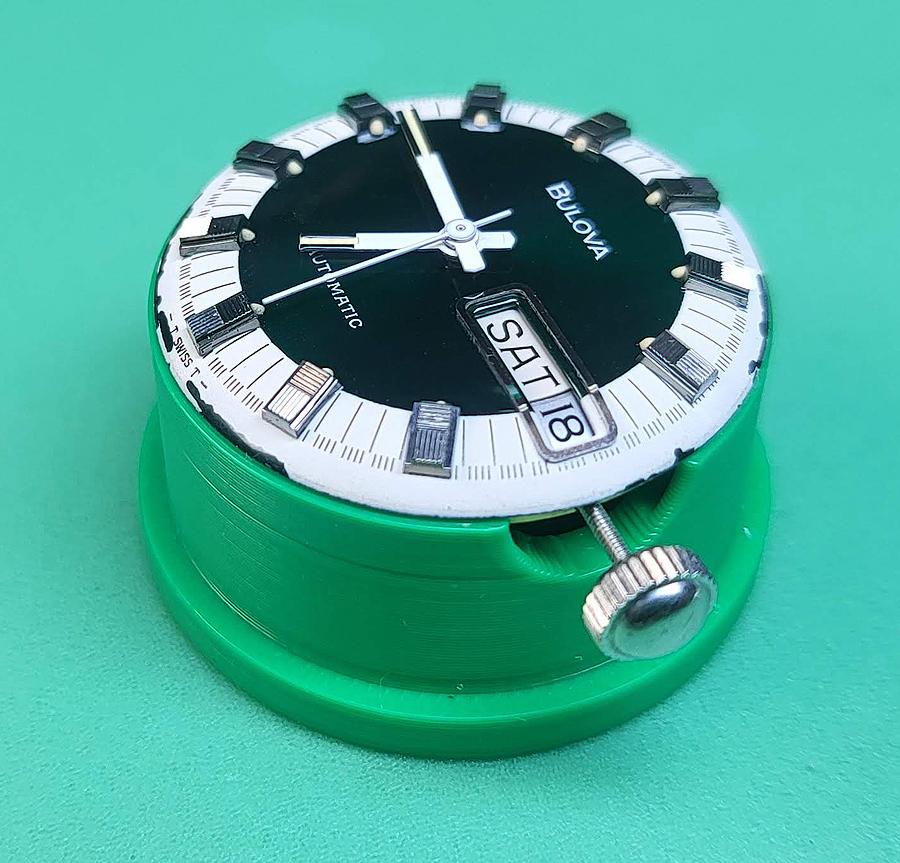
The movement is so called 'Tongji', standard chinese movement. The stem can still be used with the help of extender.3 points
-
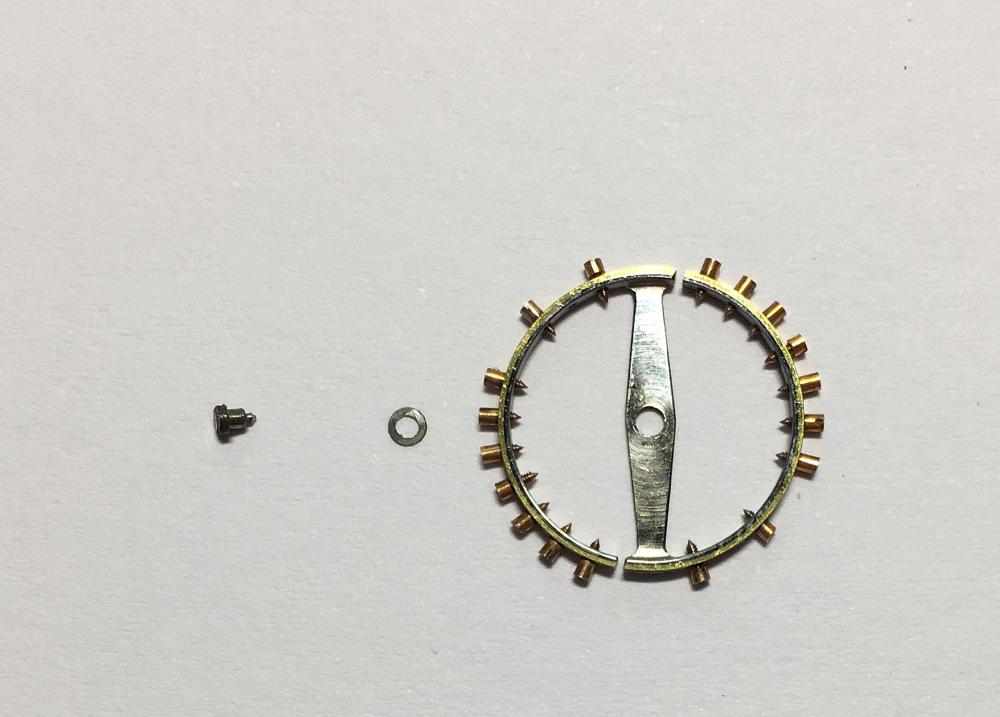
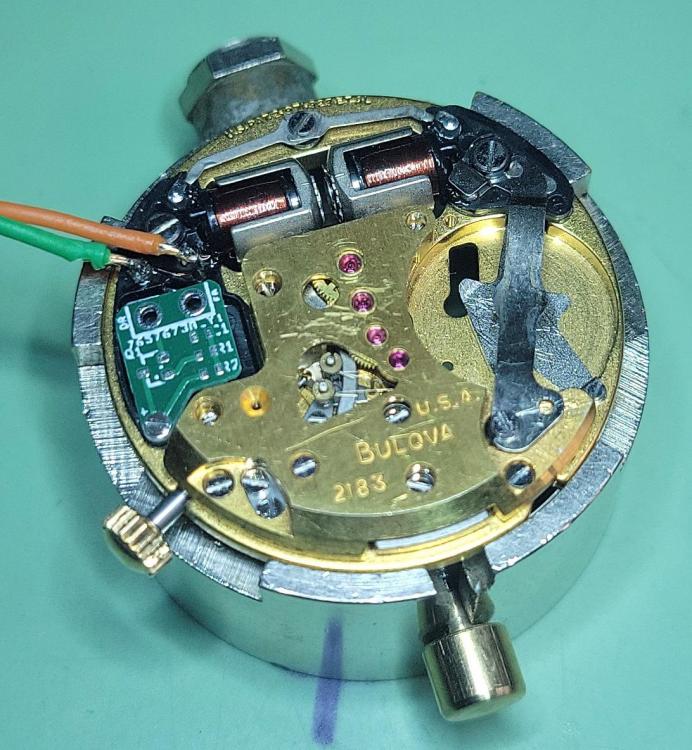
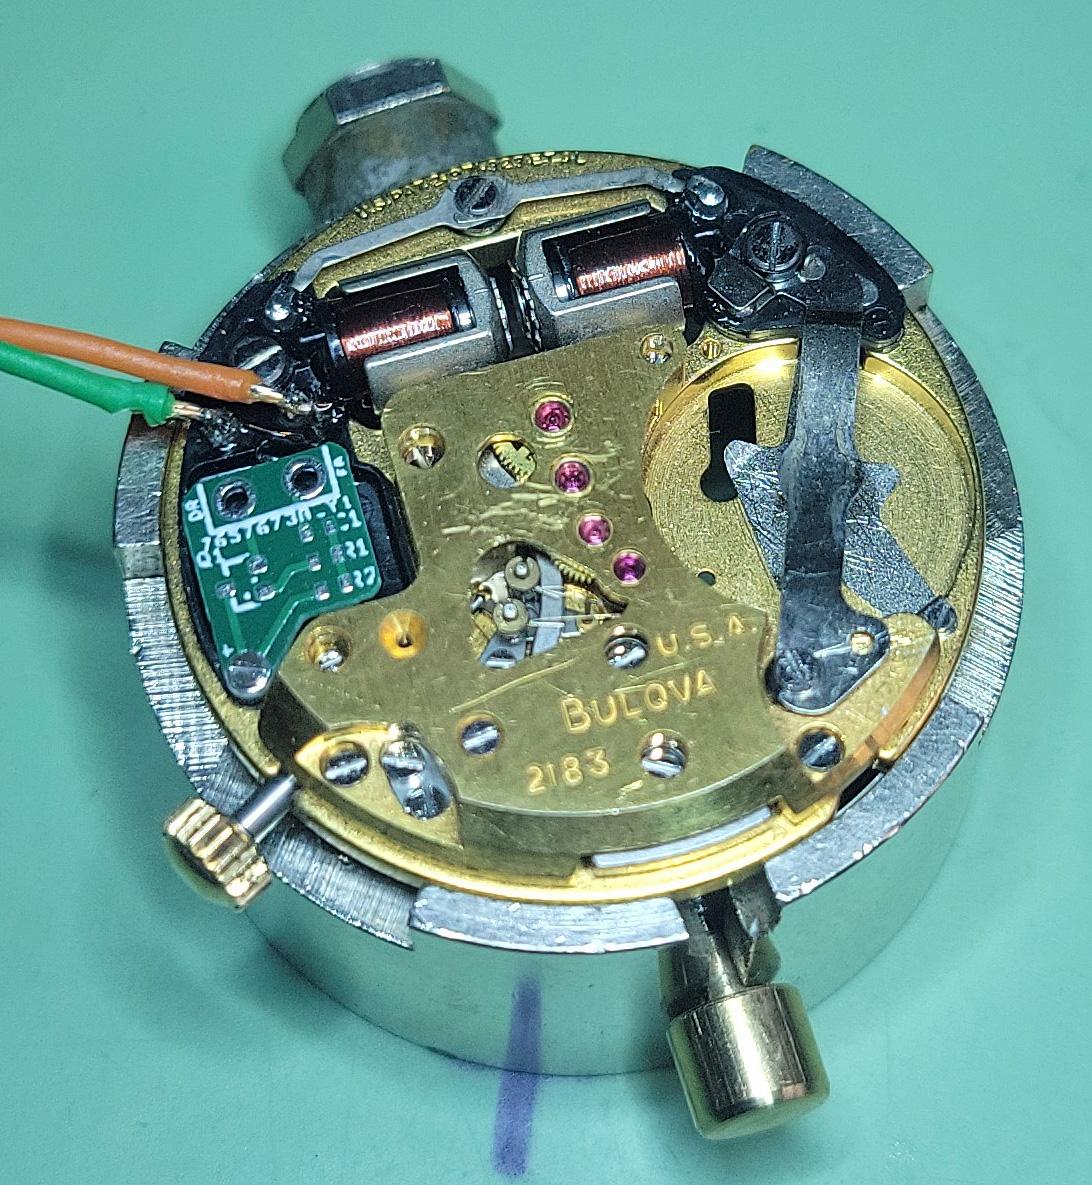
To identify movements the standard practice is the actual diameter of the movement, and a front on image of both the movement side and the dial side- minus the dial. The setting mechanism (under the dial) is considered the "fingerprint" of the movement and 9/10 leads to full identification.3 points
-
Thanks for sharing! Valuable to know! Well deserved Ross!3 points
-
Finally got one.
 3 points
 -
So for the group your watch is a failure. As the amplitude is unacceptably too low. But as far as Omega is concerned they would be very happy.
 3 points
 -
I have a cheap version of this been using it for nearly 3 years now. Works fine, i sometimes reshape the fork and when i past reworking i fit another fork insert. I try to save the pennies with cheap general tools that add up to the pounds for the real goodies. Everything takes time Michael, you take it steady. Bet you cant wait to start setting up, I have a new room planned its been on the gonna list for ages. One day . Watch the recip saw and fibreglass spells , a grinder does the job but you will get covered in fine fibreglass dust if thats what the tub is made of.3 points
-
You could use a clock key if you cant find the correct chuck key3 points
-
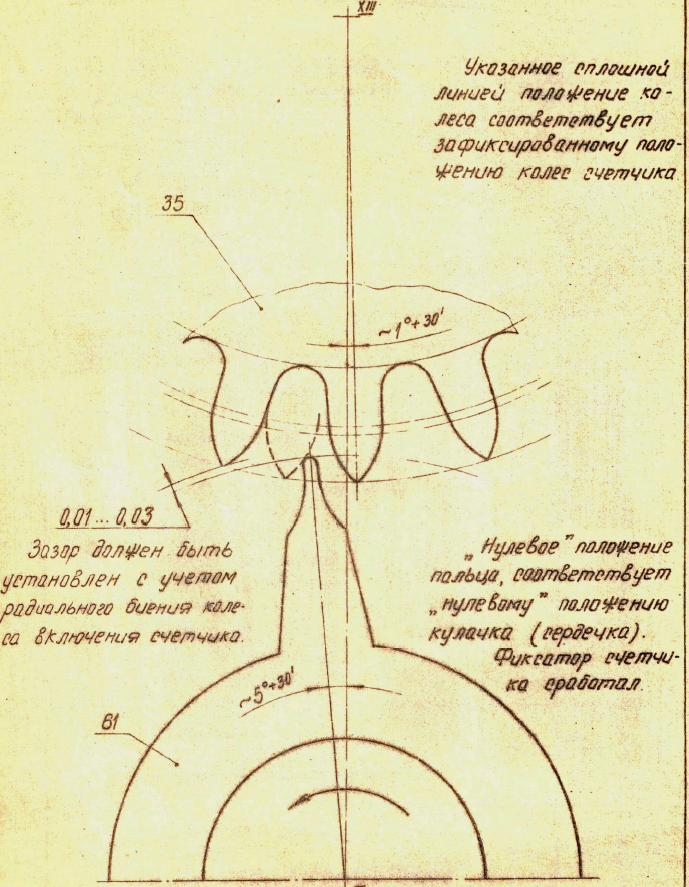
See, what has happen is a normal consequece of the reducing the hammer size and changing it's shape by the removing metal from it. But here the hammer is adjustable and just adjustment is needed to correct, and this is what You have done. There is a rule for the adjustment and it is that the hammer must lay firmly on the seconds counter heart and there should be a litle free play in the same time of the minutes counter heart/hammer which alows counter movement of about 0.5 min on the small dial hand (+/- 0.25). Of course, there is no way to make one hammer to delay from the other, as they are one single part. What has changed too is the slope of the hammer head and thus the orientation of the heart has changed, and thus the switching finger position. This led to need of the finger position correction. The rule here is that switching of the minute counter has to start when the seconds counter hand is on '59'. Of course, the seconds hand must be positioned as so the resetting is at '0' exactly. If switching is earlier than 59, there will be no problem, but it will be wrong as reading can be not correct. If the switching starts later, the problems that You described can happen.3 points
-
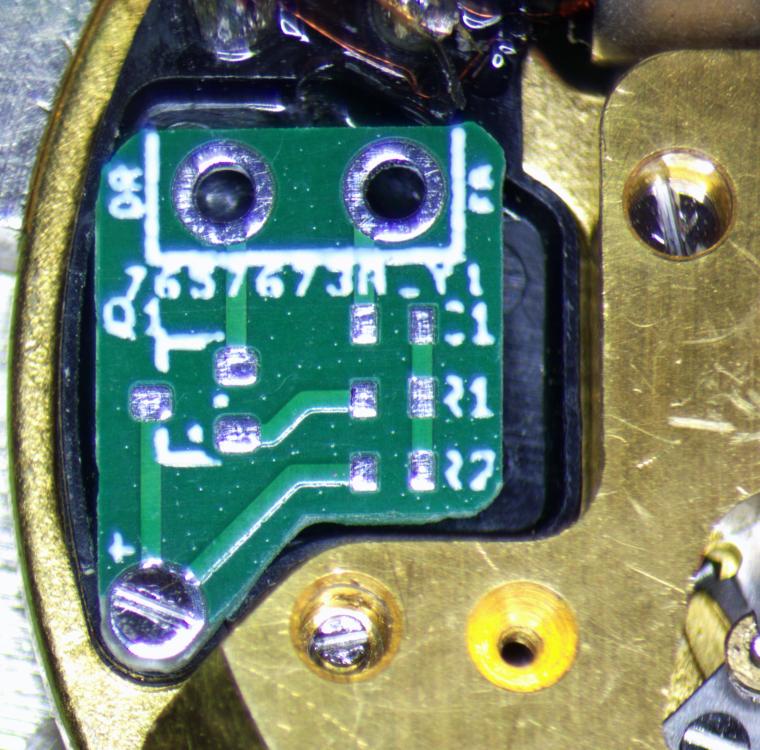
Hi. Breaks like this can br fixed with conductive paint like the paint used to repair a car rear screen heater. I have used it successfully, you don’t need much and unlike solder there is no heat 6020A-1.pdf2 points
-
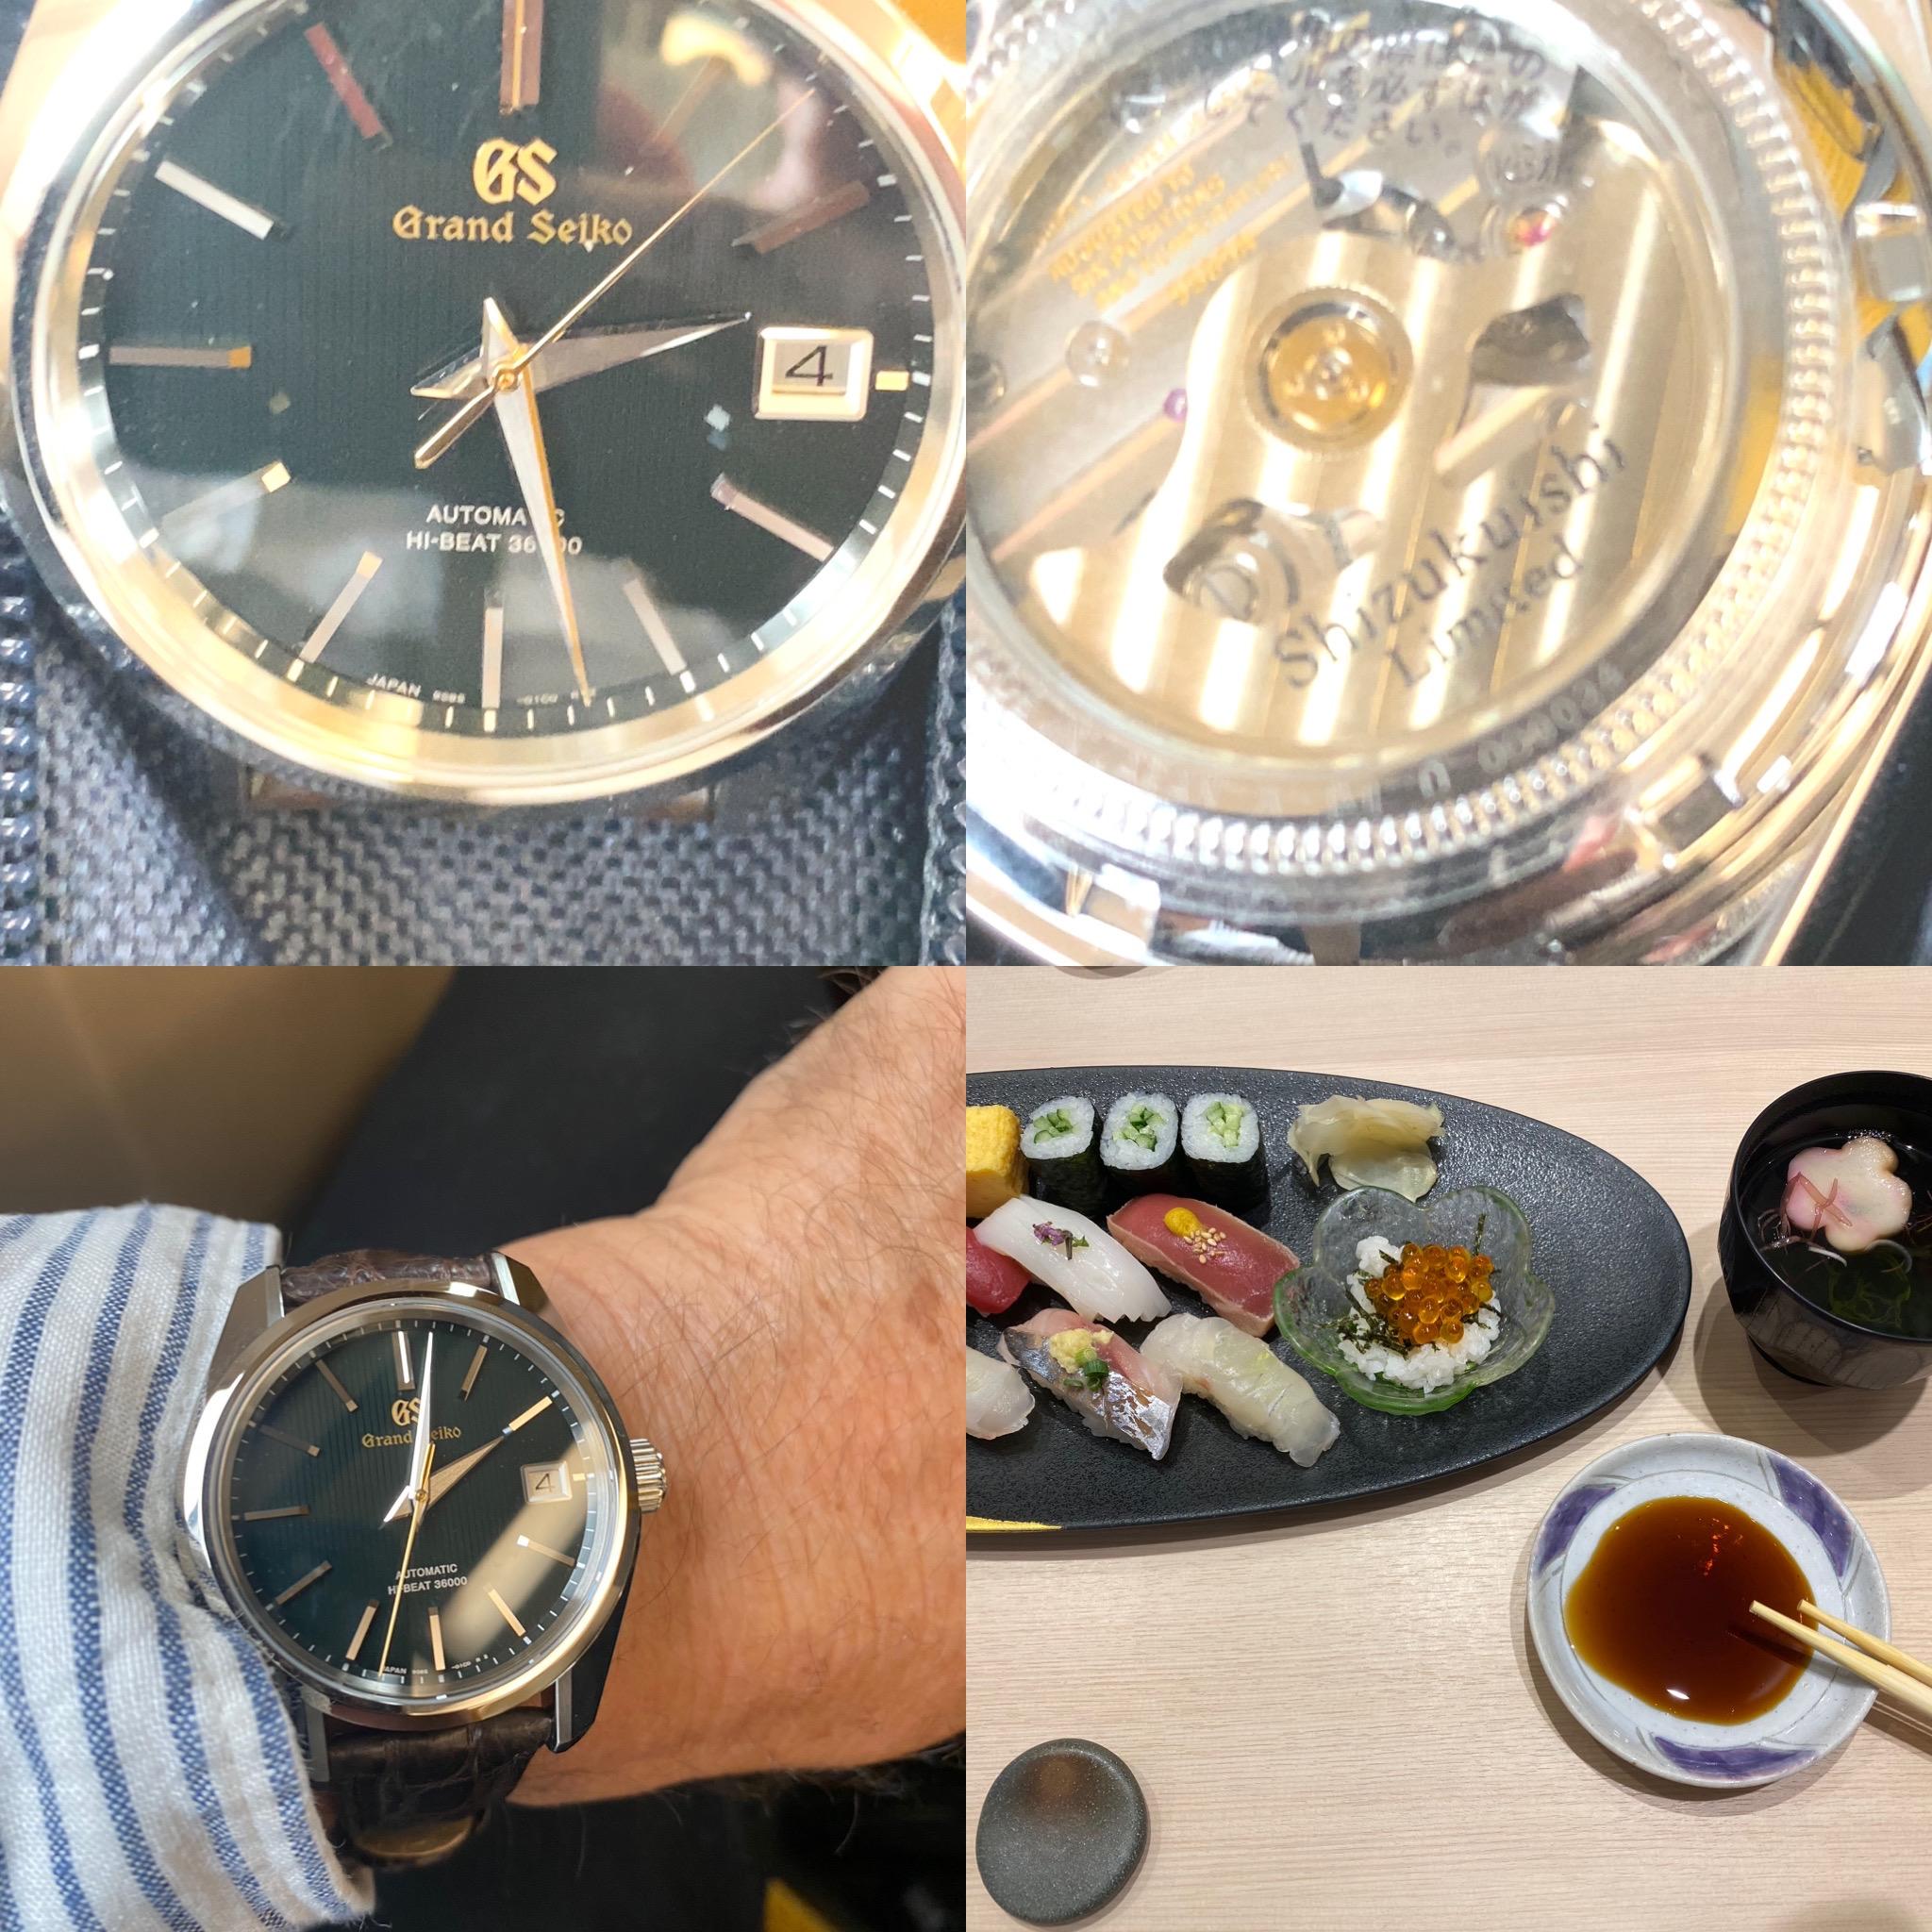
I am an Australian American living in the beautiful Gold Coast, Queensland Australia. I love Grand Seiko and Seiko watches, and recently came back from the Grand Seiko Shizukuishi Studio in northern Japan where I was blown away by the design artistry and technical excellence. More later on that (including photos, if interested!)

 2 points
 -
I have an image of what the case is supposed to look like disassembled. then an interesting website https://www.mybulova.com/vintage-bulova-catalogs there's all sorts of interesting things here for anyone in watch repair. but for the particular subject these are the two I recommend. You can see page 7 is where I got the image of the case. Then the word apartment technical manual is really a training manual of watch repair covers wristwatches and pocket watches everybody should have a copy of this.

 2 points
 -
I agree, the bezel needs removing. If there isn't a gap between the case and bezel for removal, it's probably screw on. If so you need to grip the bezel itself.2 points
-
Yes, it looks like GT Revue 30. Doctor, You can not replace escape wheel by the dimensions You listed. One needs to know much more things like number of leaves of the pinion and it's diameter, the position in high of the table and the pinion, the hight between the pivots, the exact pivots diameter... And then, even if suitable wheel is found, one will need to know how to adjust the pallets position correctly. Restoring antique movements is something different than replacing parts. In older movements parts are not interchangeable, this means spare parts do not exist. Here the case is different, but still escapement adjustment will be needed if a wheel from a donor is found. So may be it will be easier to restore the donor for You...Restoring antique movements usually means making of the parts needed and this requires knowlage and working on lathes skill. In this case repivoting of the wheel is the natural solution, but there is a long way that one must walk untill getting ready for such work.2 points
-
Well deserved indeed.2 points
-
I appreciate all of your responses and plan to take your advice. Especially, the advice to practice on inexpensive models that don’t matter before attempting something special. Over the years I have worked on cars, motorcycles and bicycles and I believe I have a feel for turning metal things lubricated with oil. But, as for really small things, this could quite a new adventure!2 points
-
This is the slotted holder for my JLC889
 2 points
 -
2 points
-
Thanks for the help guys! VWatchie I already found your thread but I'll check it again. Nice to know about acetone, I still have to get the shellac off since I made a little mess. I adjusted the jewel, put new shellac (the so called soldering technique, pallet tool too hot this time so the shellac "wire" melted in air before getting in contact with jewels or fork) rinsed the pallet fork and put it back dry. Amplitude is now in the 240-250 range that I expected in the first place. I guess there's enough oil in the escape wheel teeth already but I'll check that later. The mainspring was pretty beaten so a new one would probably boost the amplitude even further. Nice to learn new things. Now I have another thing to look for while disassembling. I wonder if the watch left the factory that way.2 points
-
These are all American movements (with the exception of the "Rubis"), and are all almost certainly "negative set" which means the stem is part of the case. So it's normal that they are all missing- they are with their cases. You will need male square bench keys to wind/disarm them. Vintagewatchstraps has a great writeup on the different systems. But basically, any American "x" size movement will fit any case for that size, possibly with some adjusting of the stem position. With Swiss movements, there is some interchangeability between calibers, usually within the same maker's range, but not really overall- there are thousands of different stems out there.2 points
-
I use the exact OD and it fits in with a little force and a pleasing 'click' so it's snug and wont rotate within the holder, but that depends on how you have set up and calibrated your printer so you may need to play with the settings/dimensions a little to allow for any discrepancies in your printer calibration. PS I just finished (2 days ago) a new revision which automatically prints the movement OD on the bottom of the holder, I'll see if I can upload it here Here is rev 4 remember to change the .pdf to .FCStd so it will open in FreeCAD - also you may need to install the LiberationSansBold font and tell FreeCAD where it lives on your PC, or change the font to something you already have on your system. Para Movement Holder V4.pdf Examples below:

 2 points
 -
Only someone on this forum would ever understand the Oooooo I just did2 points
-
One of the things that I've been bothered with lately is timekeeping? For instance a 90-year-old pocket watch what so to timekeeping was it supposed to keep? They publish railroad timekeeping but I don't know how well normal non-railroad watches were supposed to keep time. The reason why the question comes up for me is I spend a lot of time at work adjusting watches to keep really really good time because I have to please my boss where as when the watch was made I have to wonder what kind timekeeping would've been acceptable. After all they typically didn't have timing machines 100 years ago and they were timing and six positions certainly not for the non-railroad grade watch. On the other hand I do get paid by the hour so maybe I shouldn't be concerned of how much time I Spend trying to make everything keep chronometer timekeeping almost. Citing a Delta of 40 seconds for a 90-year-old watch is quite outstanding.2 points
-
I experienced that different types of shellac and their ages are affected differently by IPA. Sometimes the shellac dissolves in a few seconds and sometimes several minutes are required. Nowadays I never let shellac come into contact with IPA. It's a hotly debated topic here on WRT if you search. Like John, I don't think you need to worry about the weight of the shellac, but instead that it might start rubbing against something. When I learned how to adjust pallet stones, I tried documenting my experiences in this thread. Hopefully, it can help you. I personally don't believe in the idea of abrading the epilame before oiling so I don't think you need to think or worry about it. The only time I've heard anyone mention this is Alex on the YouTube channel Watch Repair Tutorials but actually no one else. I'm not saying it's "wrong" just that I don't think it's necessary or adds anything.2 points
-
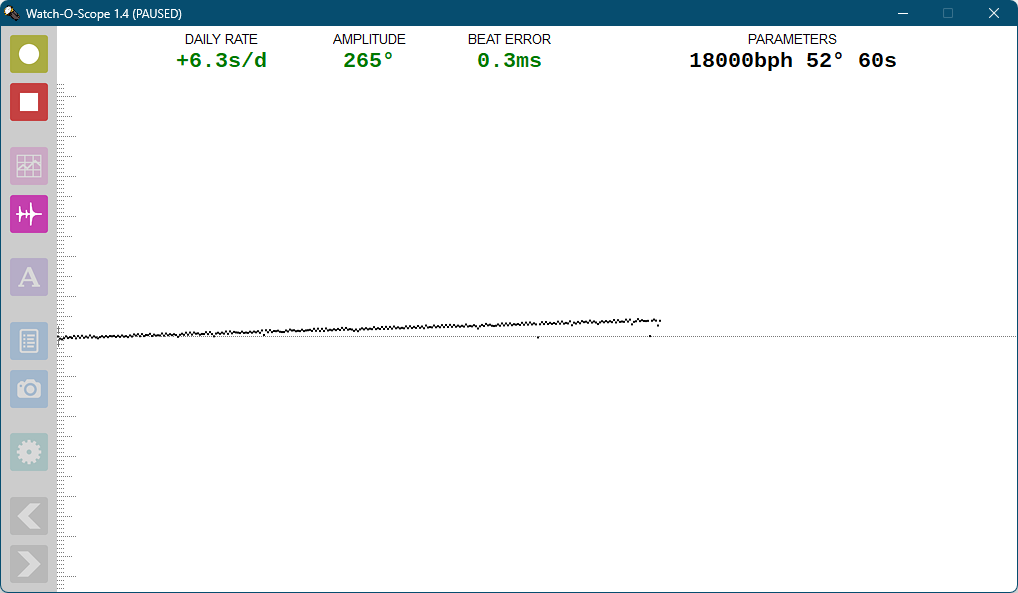
Just a quick update on my T17. I just finished the service and, boy, was this nerve-wrecking.... I bent the hairspring a few times. Stupid accidents. Once it was beyond repair and I had to get a donor movement. The replacement hairspring turned out to be a few millimeters shorter and therefore the watch was running 6min too fast even when the regulator was set to the slowest position. So I needed to get timing washers (see another post here: https://www.watchrepairtalk.com/topic/25505-30t2-adjustment-of-timing-washers/?do=findComment&comment=248100). After all, I'm now, getting a 310° amplitude (fully wound, dial up, lift angle 54°). About 250 in vertical positions. Quite a drop, but apparently not too abnormal for a 90-year-old watch with a slow beat rate (18000bph) and rather heavy balance wheel. After 24h I still get 280 (horizontal) and 220 (vertical). And now the highlight: 66h of power reserve! You may remember that I posted that I used a slightly weaker, but also slightly longer mainspring than prescribed. See my comments above. I used GR 3937 (instead of GR 3632). So I recommend this mainspring and ticker oils (9020 on escape wheel and HP1300 on the rest of the train). Some random pictures..

 2 points
 -
That endshake of the barrel arbor is huge! That needs closing up. I'm assuming the barrel cover has been bent in a convex way to create that excessive shake. Put the barrel cover on a staking block and check how flat it is then bend it to suit a better endshake2 points
-
I opened it too, and can asure that it is good and thorough. I can add something little for the minutes counter adjustment (will use the terms from this presentation) - sometimes is prefferdd that the T-line will be slightly tilted as to alow little bigger gap between the the tooth A and the dart tip, and the gap of C tooth is reduced to almost 0, as shown on the picture (from manual for 3133) Also, there is one more option, offering the same result as the changing lenght of the dart or slope of the hammer head - this is changing the position of the heart on the minutes counter wheel. Sometimes just turning hte heart upside down changes slightly the wheel position and thus one can choose the better between the two. Then, the heart position can be totally changed by making new hole for the screw that fixes the heart
 2 points
 -
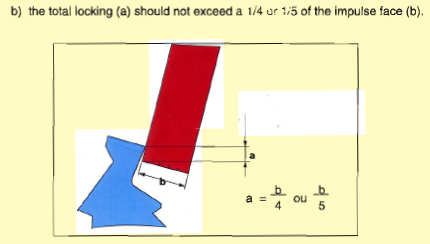
It's actually quite amazing how much amplitude you can lose if you walk is too much like yours is in the picture. Technically the pallet fork should be light as possible to move really fast. But shellac isn't overly heavy. I would be more concerned if you had too much shellac and it was rubbing on something. The problem with rules are there so many of them and it also depends upon the construction of the watch. Then we have other rules like this The problem with your image is if you measure carefully it looks like your lock is about 50% which is much greater than it's supposed to be. How does it compare to the other side? Then out of curiosity how did you lubricate the escapement?
 2 points
 -
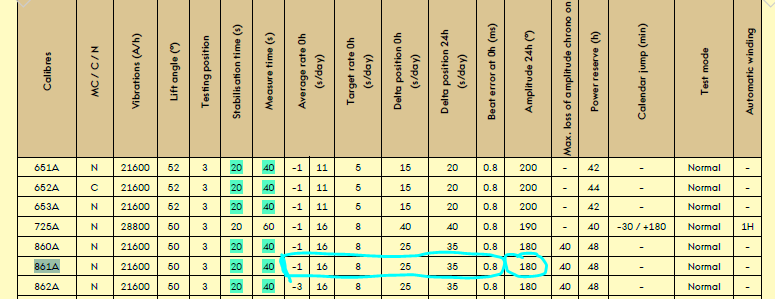
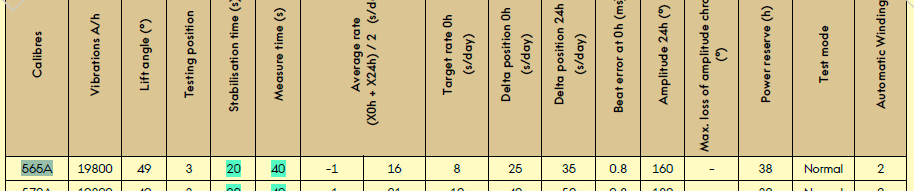
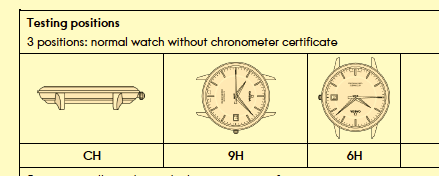
Typically for this group anything less than 300° is unacceptable. What's interesting is the Swiss Do not pay attention to this group at all. Swiss are more concerned about timekeeping than they are amplitude. Then thinking about timekeeping I don't suppose you can show us the watch in perhaps three positions on the timing machine? Like dial-up and dial down And crown down would be nice it often helps for diagnostics Oh and thinking about amplitude I see your timing machine is 52° and according to the specs you're supposed to have 49° so that will cause a minor change of the amplitude. Than very very disturbing for this group so I would suggest the old-timers run away and don't even look but amplitude at 24 hours for this watch is 160°. As I said the Swiss are only concerned about timekeeping. So at the end of 24 hours you have 160°. Then the definition of amplitude at 24 hours is Then they three position as an Omega uses for timing for three position watches like yours is found in the image below although I would still make sure you do dial-up and dial down because those should be identical and other good diagnostics do that Then thinking of lubrication what sort of lubrication's did you use and how did you lubricate the escapement?

 2 points
 -
I started 2 1/2 years ago. Watched Mike on Myretrowatches to learn about Seiko and tried Sekonda on my own. Mike and others, including Wristwatch revival who even this week, recommended Mark Lovick's course. I Obtained 1,2,and 3. Not looked back. See my posts. (6 month, 12 month, 18 month and 2 years) I still consider myself a novice but can do a basic service. Chronographs are still on my horizon. The best thing I did was join Mark. It was after a short time of doing the course that I joined this forum. I did not feel that I was good enough, or could converse well. I have dyslexia. This forum was the next best thing. Whilst I still do not feel able to to stand with the greats, they actually spend their time and speak to me, offer advise, very rarely criticise, and even then offer constructive comments without rancour. Oh! believe it or not, I am still on level 3. I have done level 2 a number of times and will do the same with level 3. I can now understand what level 3 means. Watchmaking. WatchFix. Good to go. Value for money. In my opinion. Yes. Will I do level 5? Yes, but I've given myself to the end of my self imposed apprenticeship of 5 years. Same as my engineering apprenticeship in 1964.2 points
-
Sometimes I think I need one of these:
 2 points
 -
You can buy standard 2.5mm endmills, which should fit the 2.5mm reamer holder, if that is a collet fitting? eg. https://www.cutwel.co.uk/2-5mm-4-flute-k2-coated-carbide-end-mill-g9432-series-yg-1-g9432025 Just be sure it's a type like this that has the same shank and cutting diameter - many small ones have 3mm shanks for such as Dremel tools.2 points
-
I have some spring bar removers which I showed in the Some Timelab Tools thread that I started. I will have another look at it all once I get set up in the room that I am removing the spa from. Not doing anything until next weekend to cut the spa up to get it out though. Have spent the last 6 weeks digging rocks up in our gardens, then adding soil where required and then putting all of the stones back to get them back on the surface and not buried in the soil. Hands and wrists are sore. Not the best for hanging onto a reciprocating saw for hours.2 points
-
I use one of these, the fork fits in the gap on the bracelet. Replacement forks and different sizes are available.
 2 points
 -
Many of us have one of those in our drawers. Total waste of money.2 points
-
The key is quite simply called a chuck key. As you can see above, they can be either male or female. Mostly male on larger industrial lathes.2 points
-
I've thought of this too. A photography forum that I have been a member of for 15+ years just shut down recently. They had many millions of posts, members with 80K+ posts, a huge community base with many of us donating to the cost to keep it up and running just because it was a great resource for us all. And it just went away like that; poof. I also used to run a forum that was around for about 15 years. My interests changed over the years and one day I just decided to not renew the hosting costs. I bet the hosting cost for this forum is WAY more expensive than mine ever was. It's all about the storage and bandwidth. Every time someone uploads a PDF that takes storage space, and every time someone downloads that PDF, that takes bandwidth. I try to be mindful and not upload huge files here, or point to a file that can be downloaded elsewhere instead of uploading it here, all that storage space and bandwidth adds up. If it were ever an option I would be happy to contribute to the forum as it's a resource that I highly value.2 points


.thumb.jpg.cb17a66989f1e796fd4217db2e9ca9df.jpg)
.jpg.764214994c20d13909676a28d5351a28.jpg)