Leaderboard


Popular Content
Showing content with the highest reputation on 12/27/23 in all areas
-
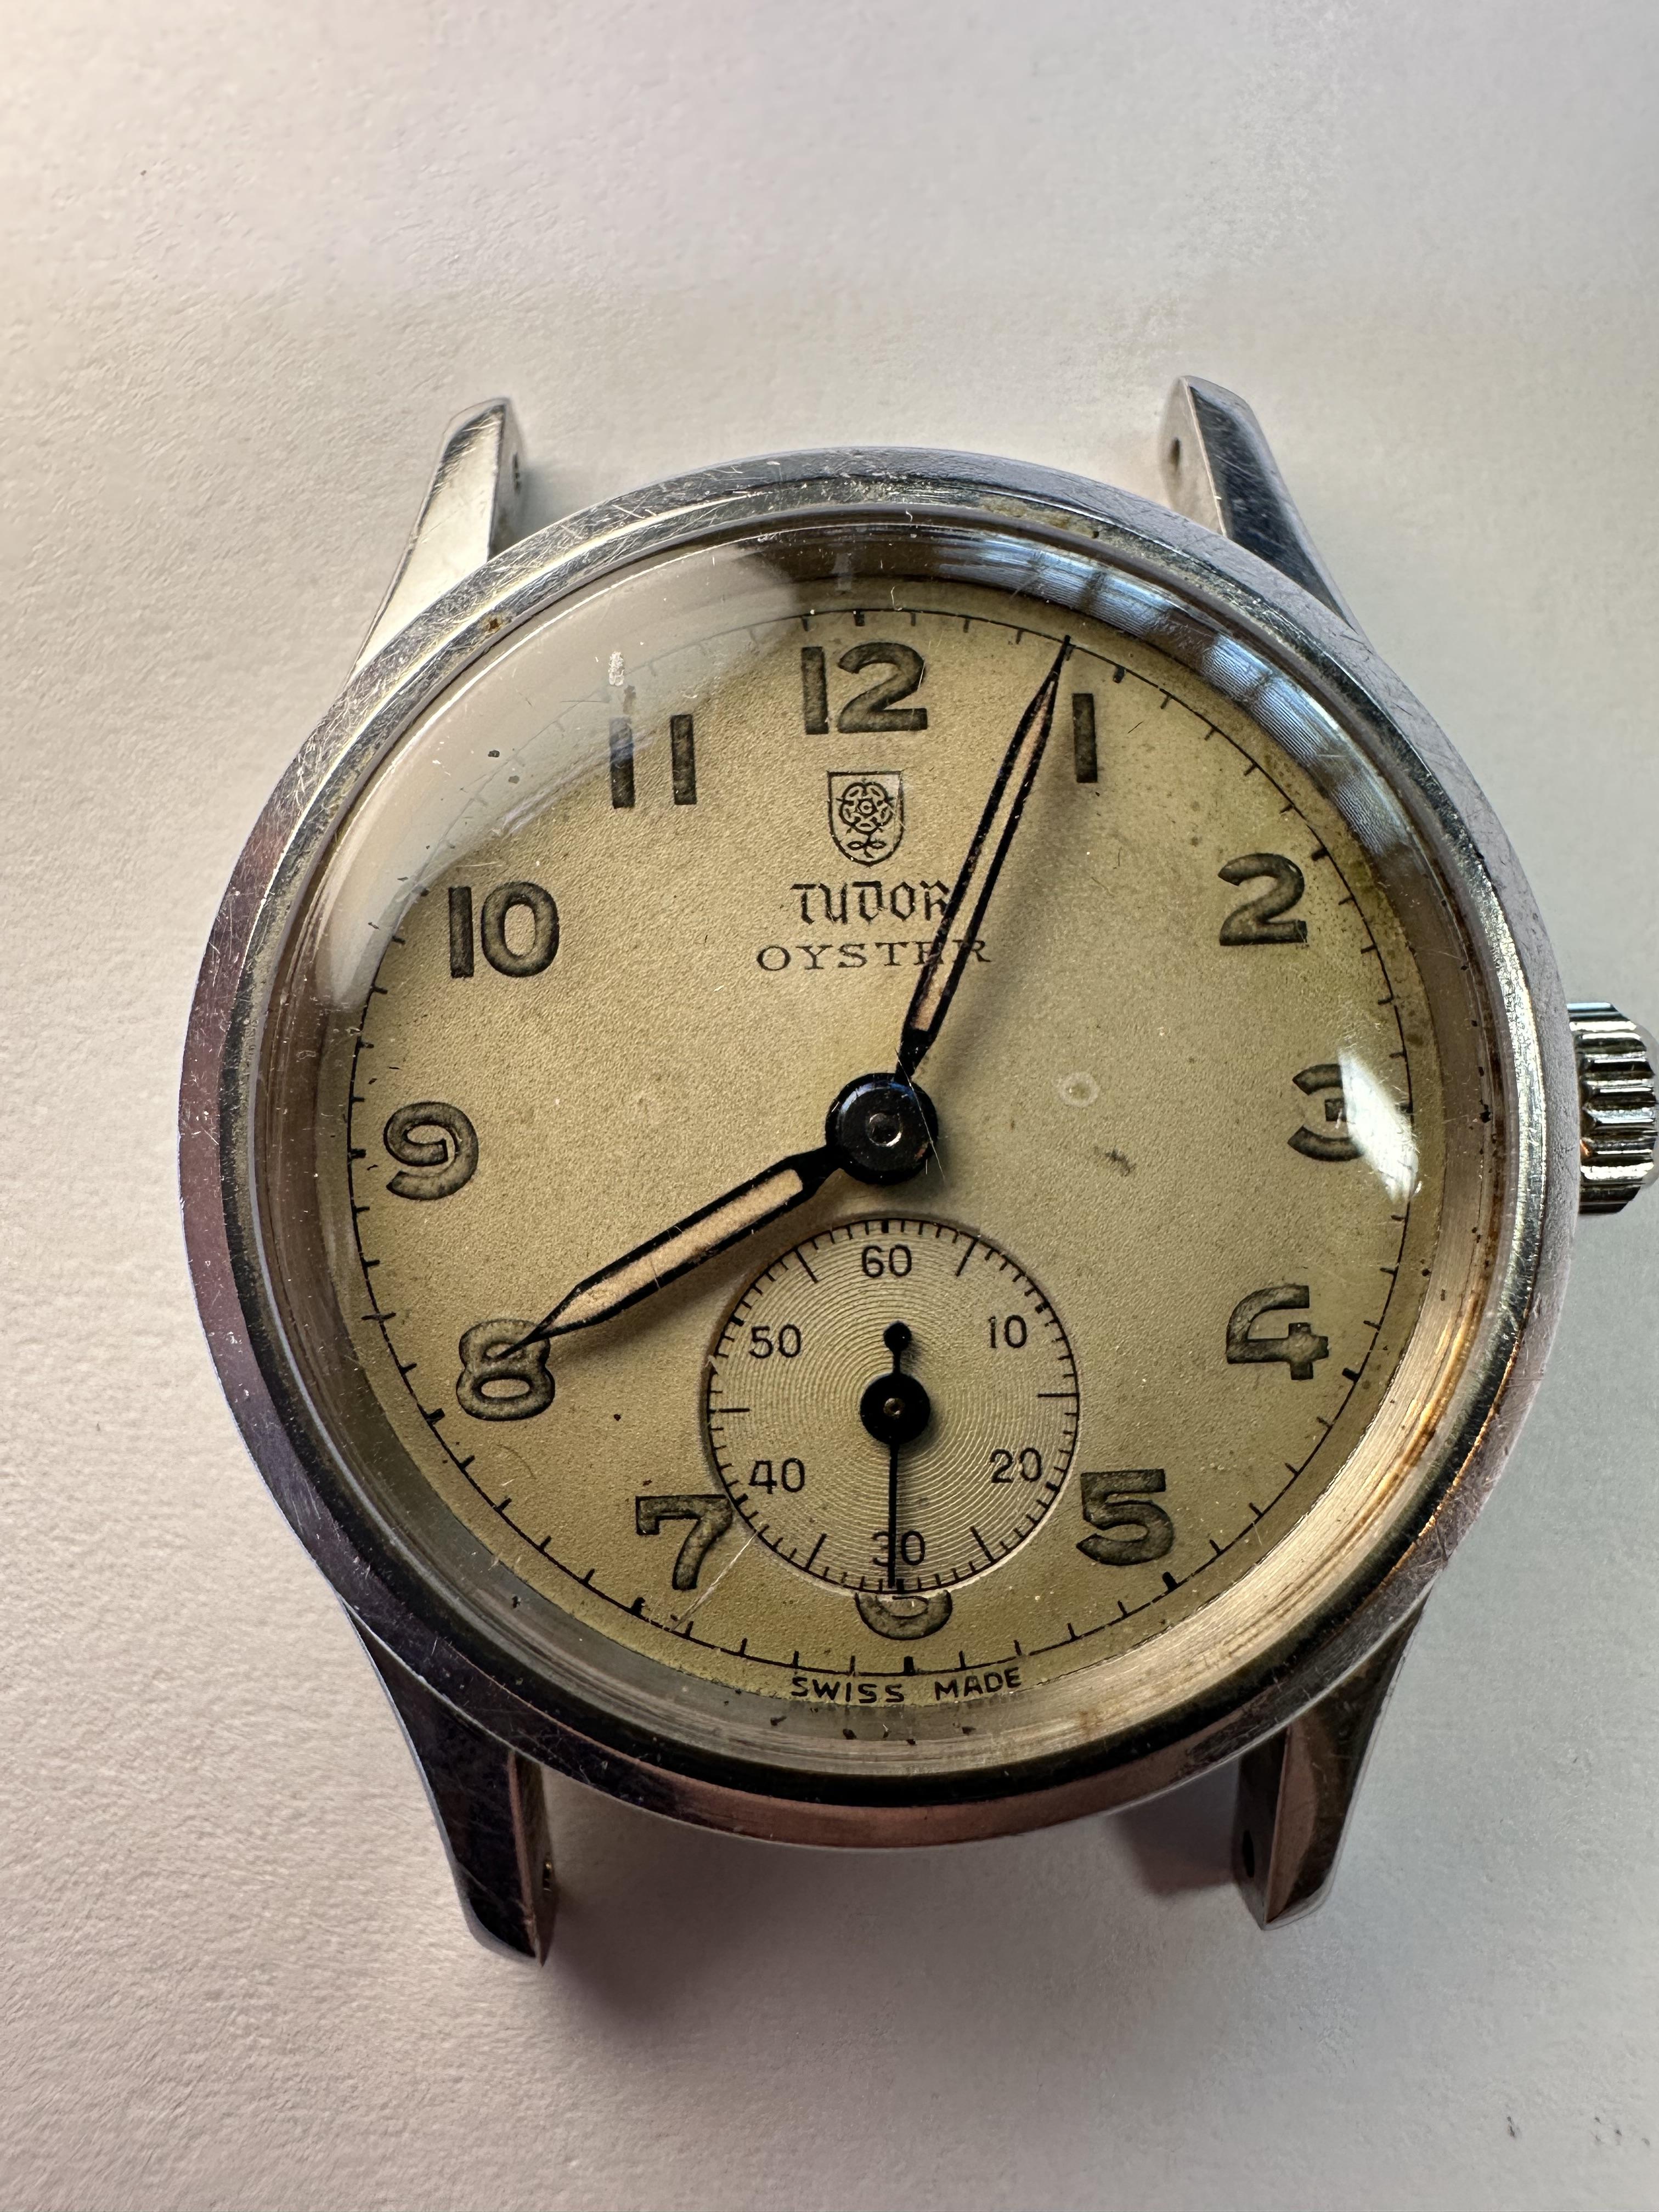
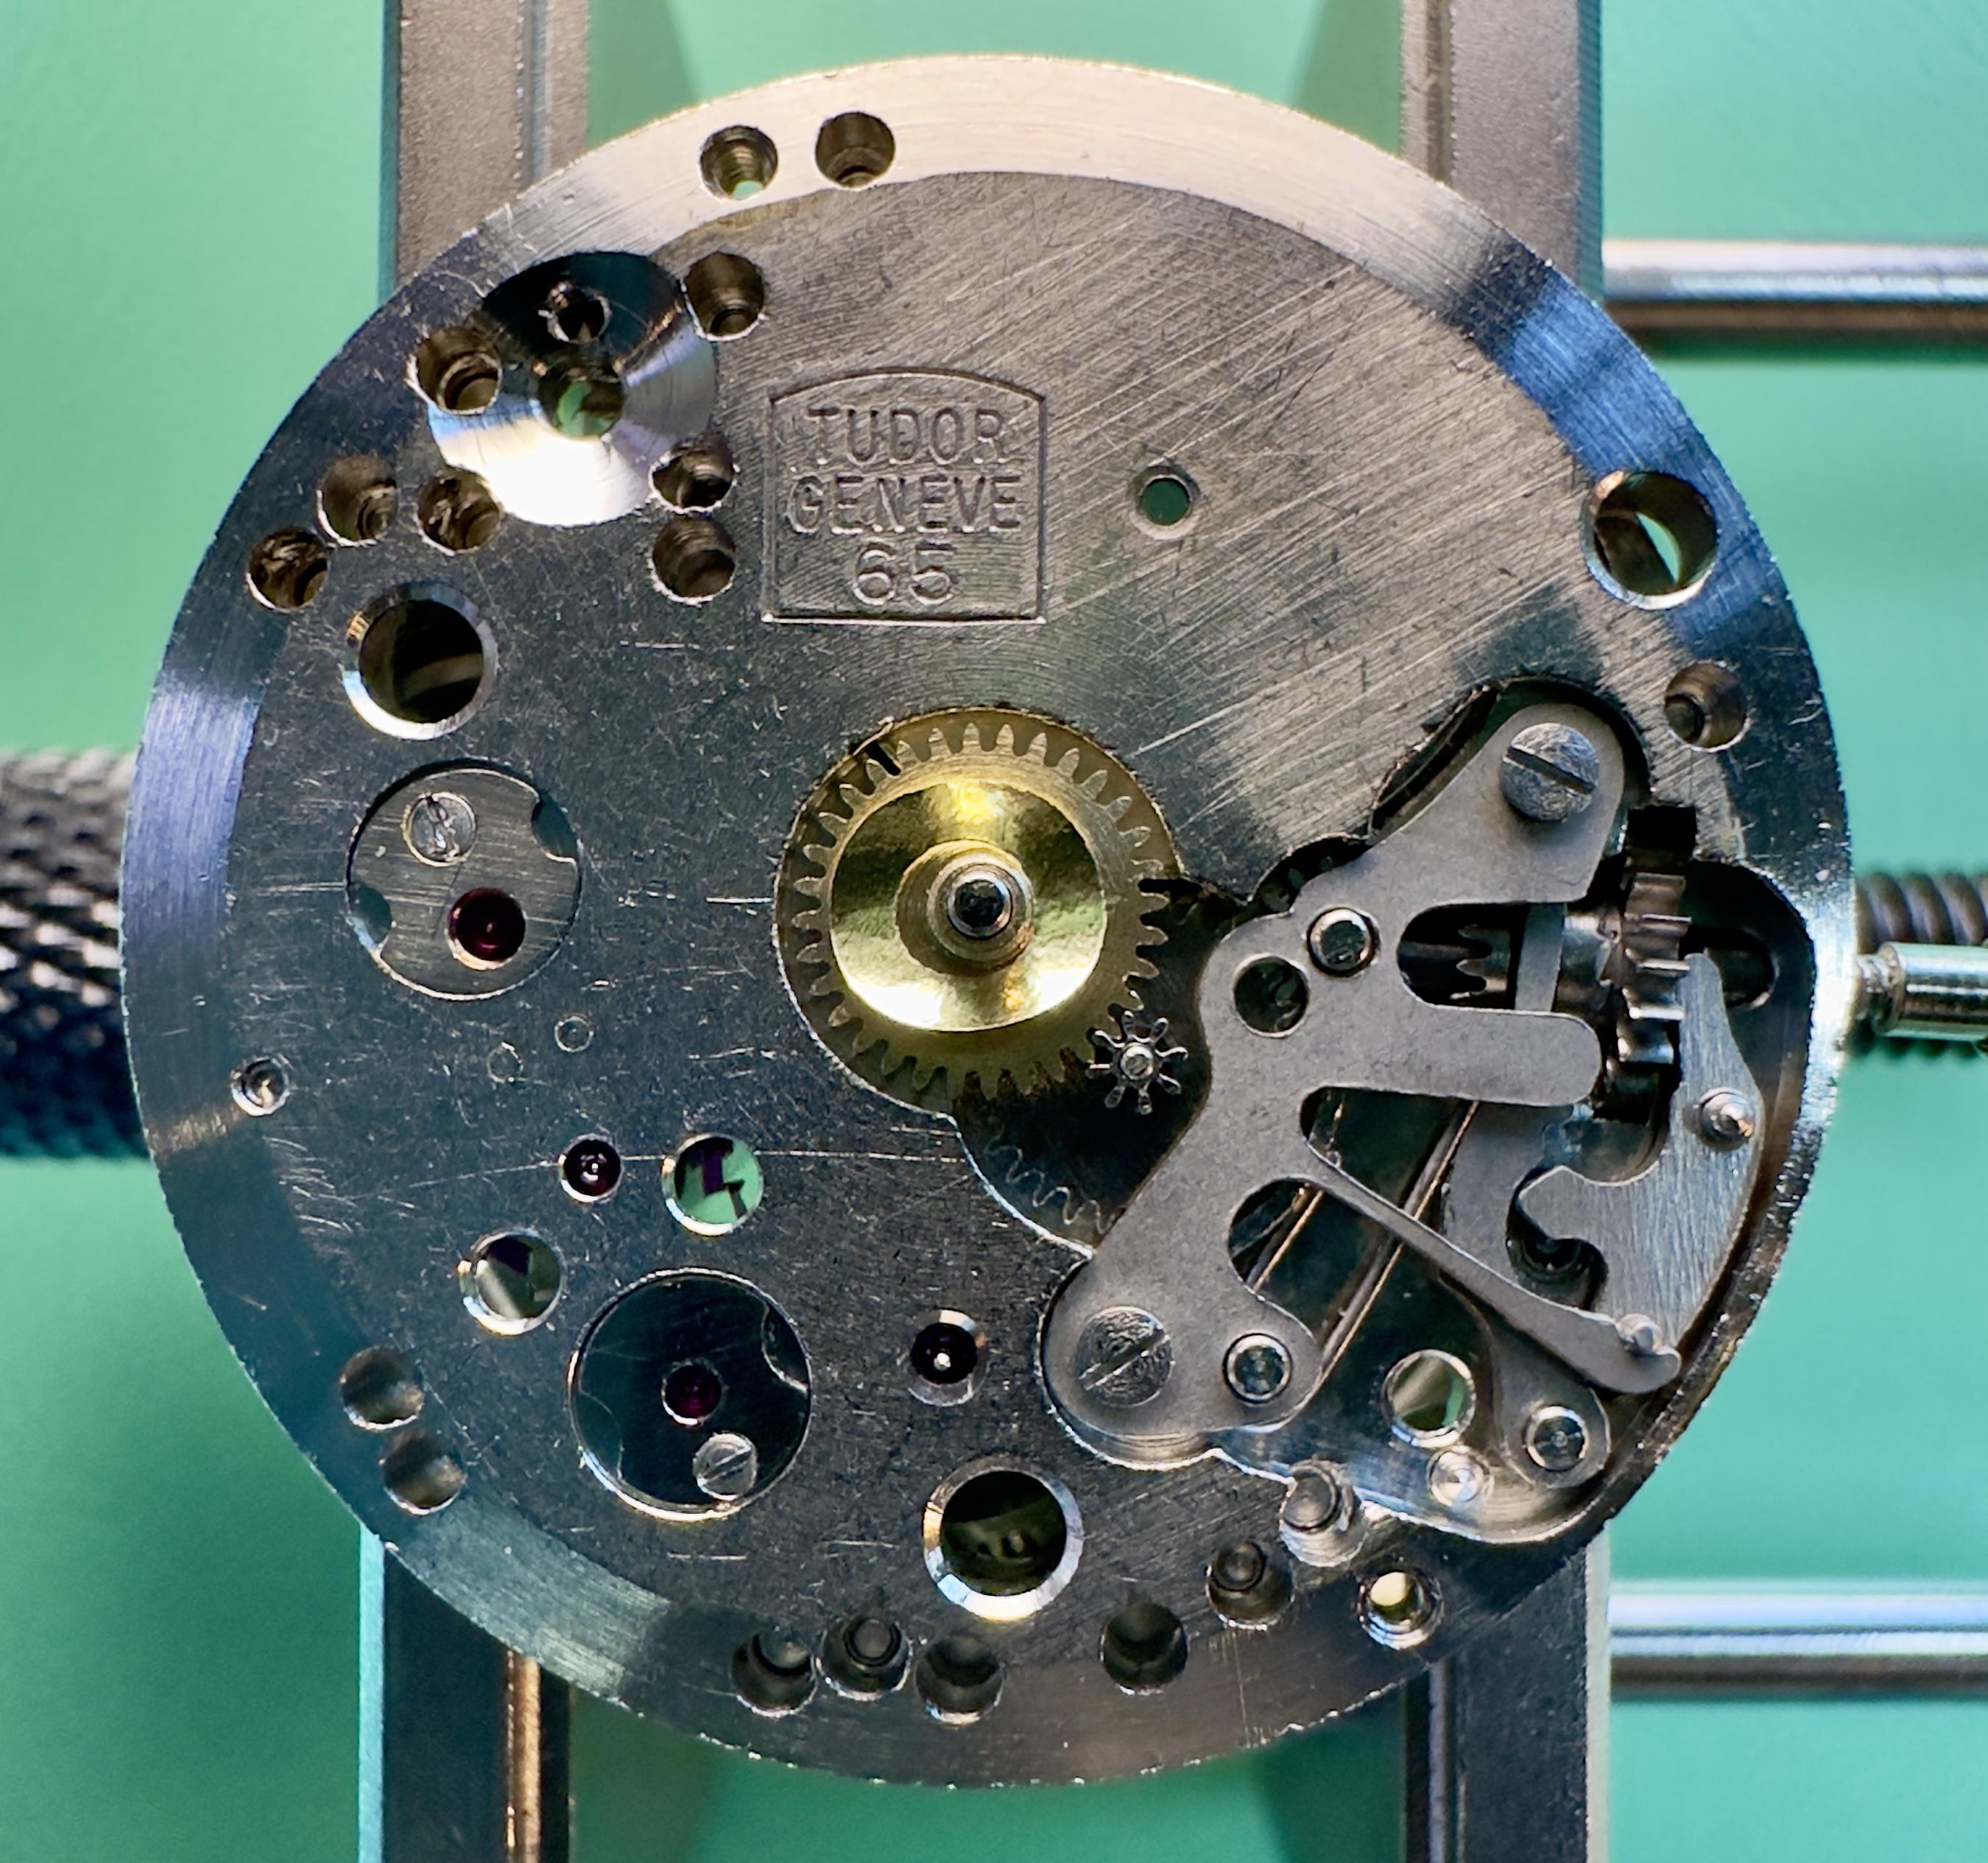
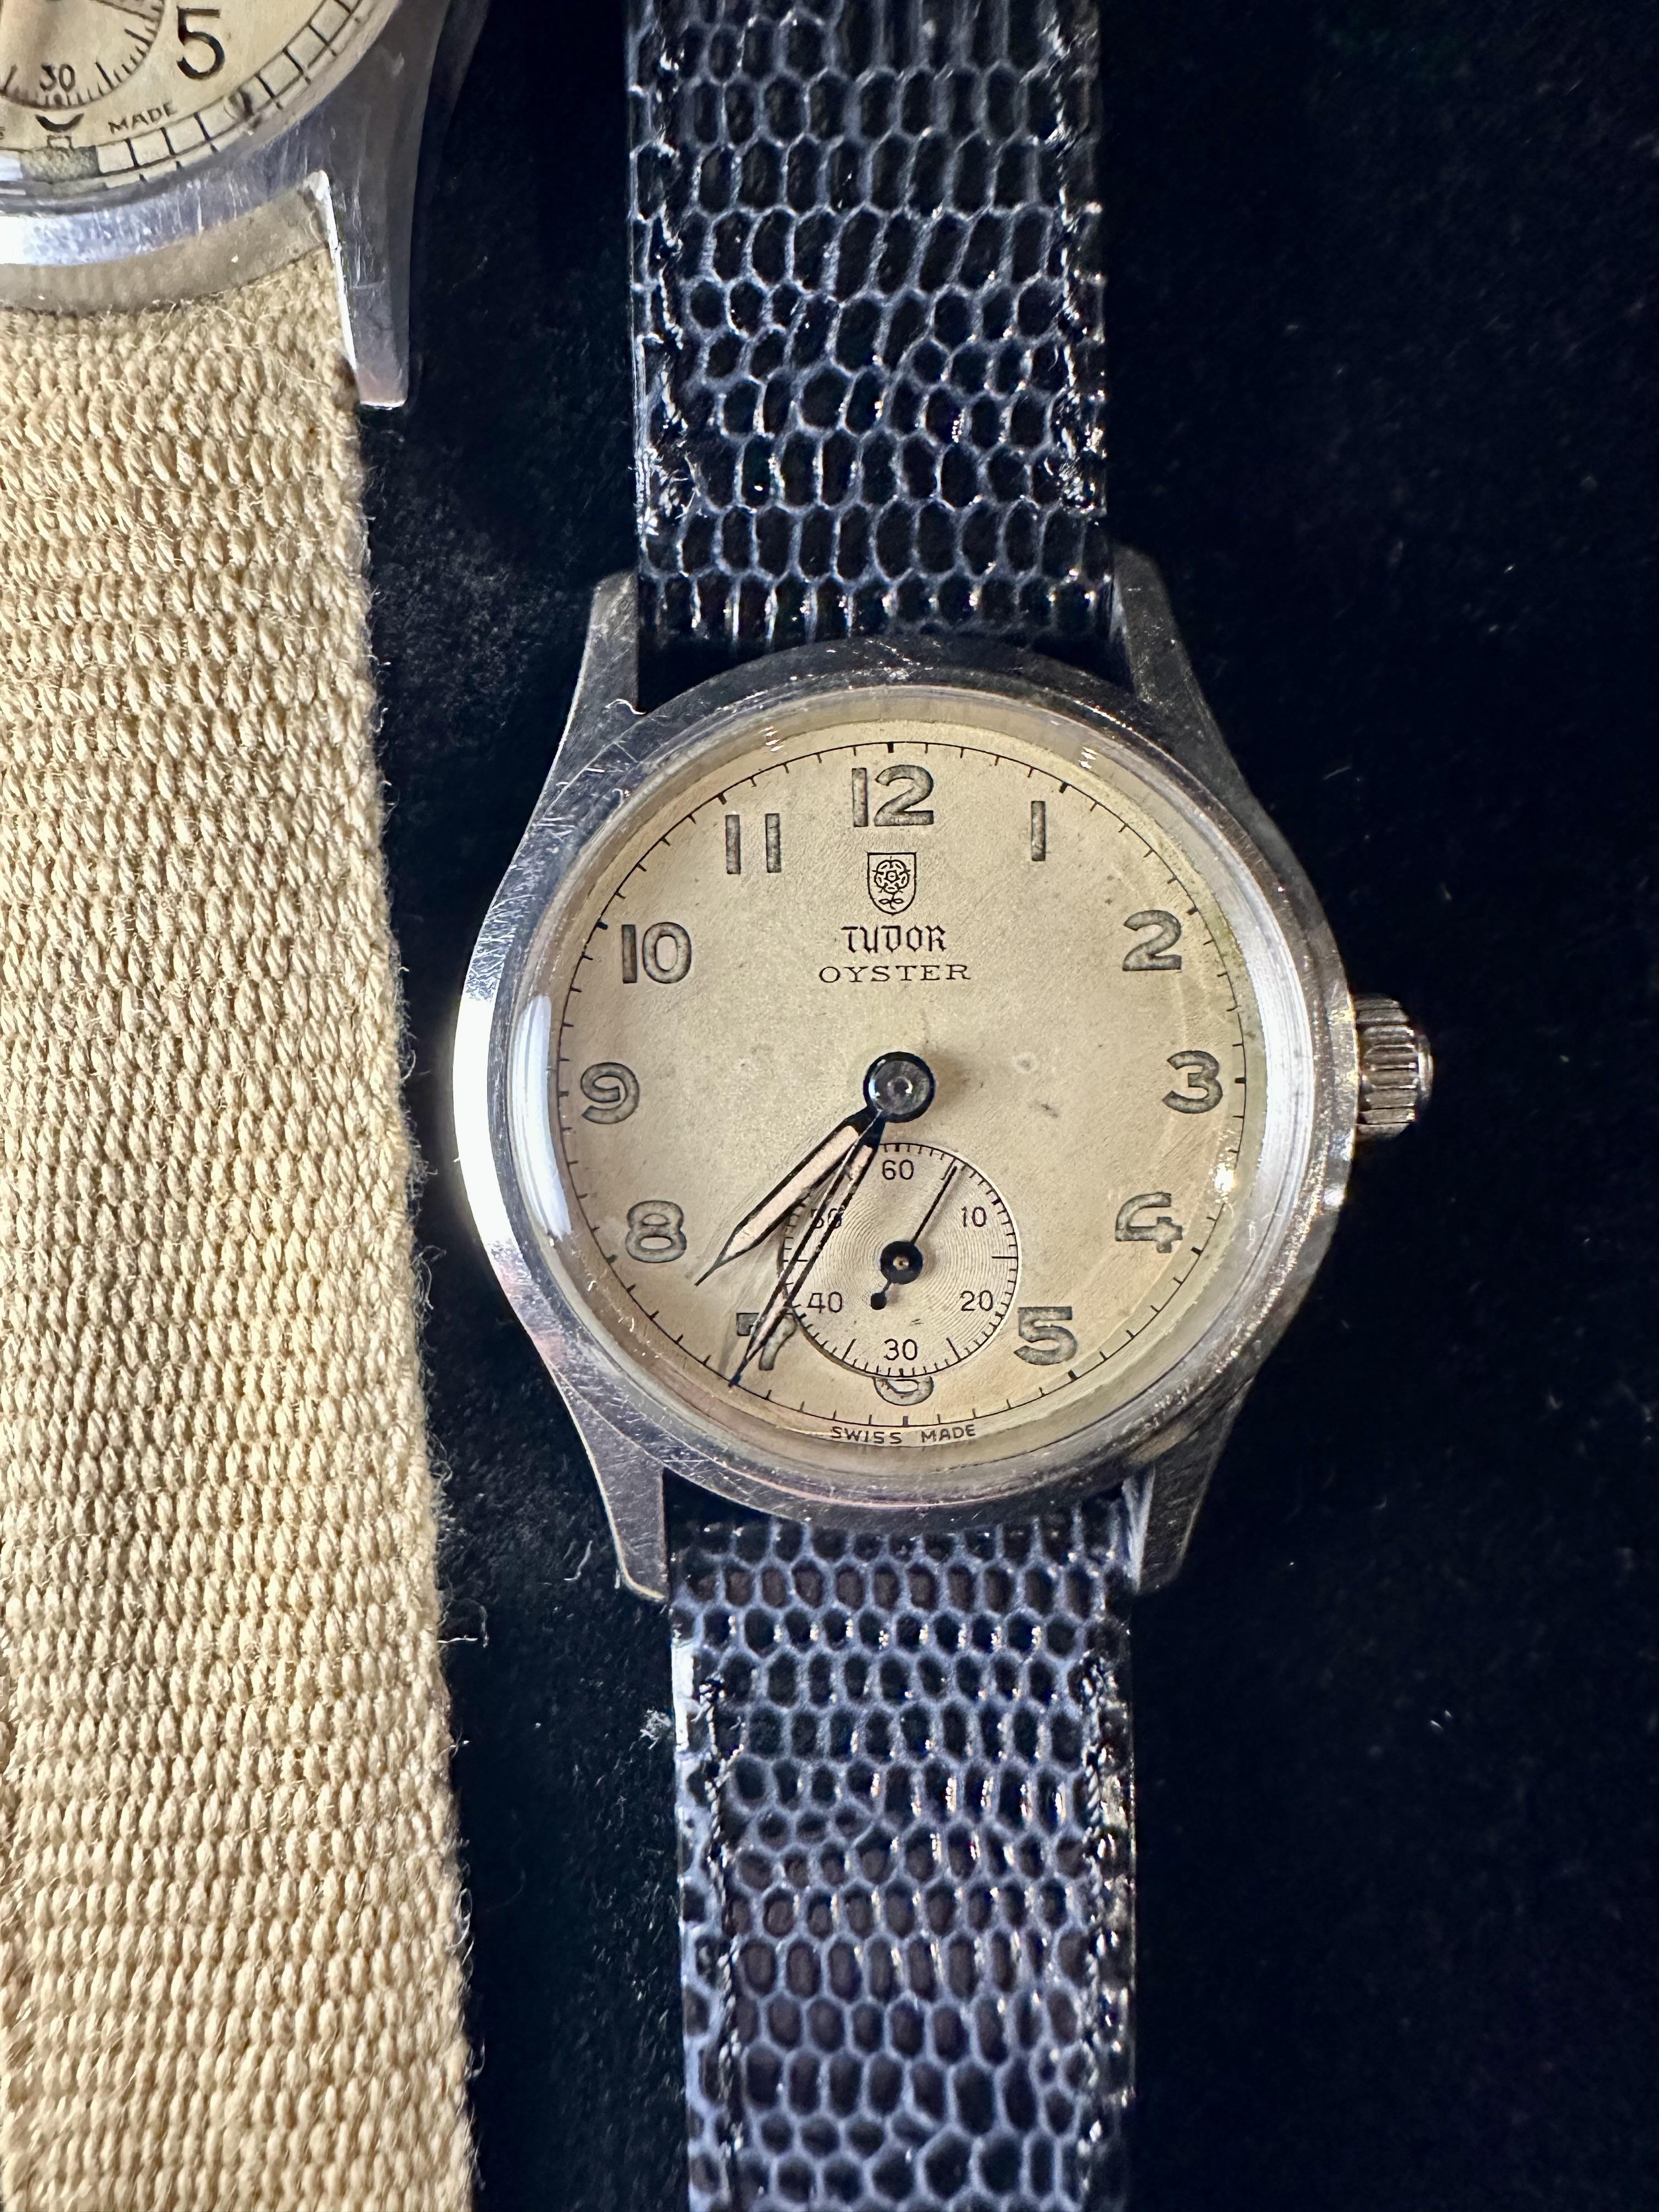
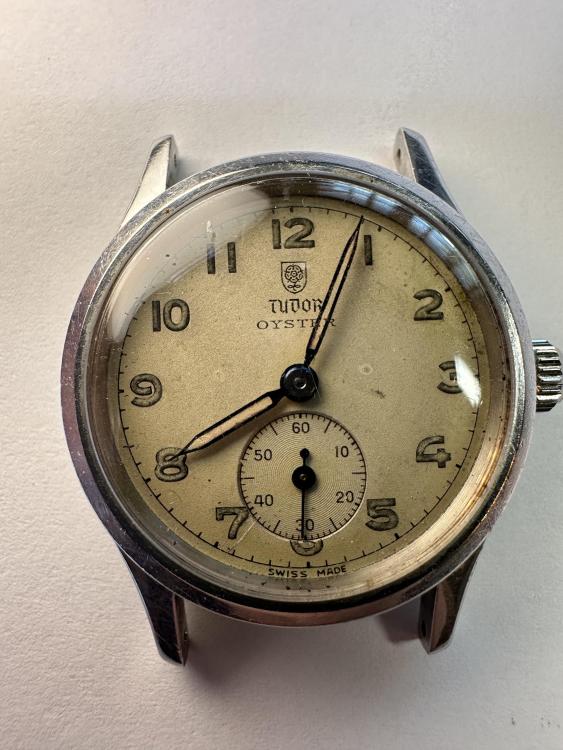
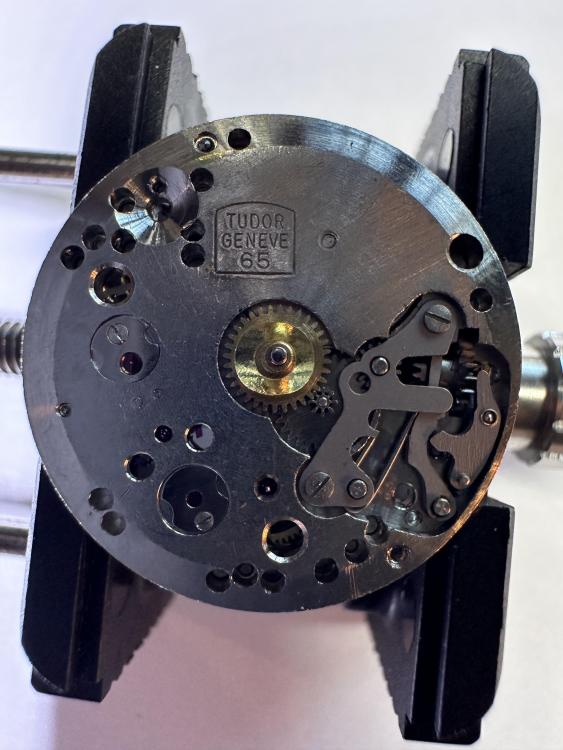
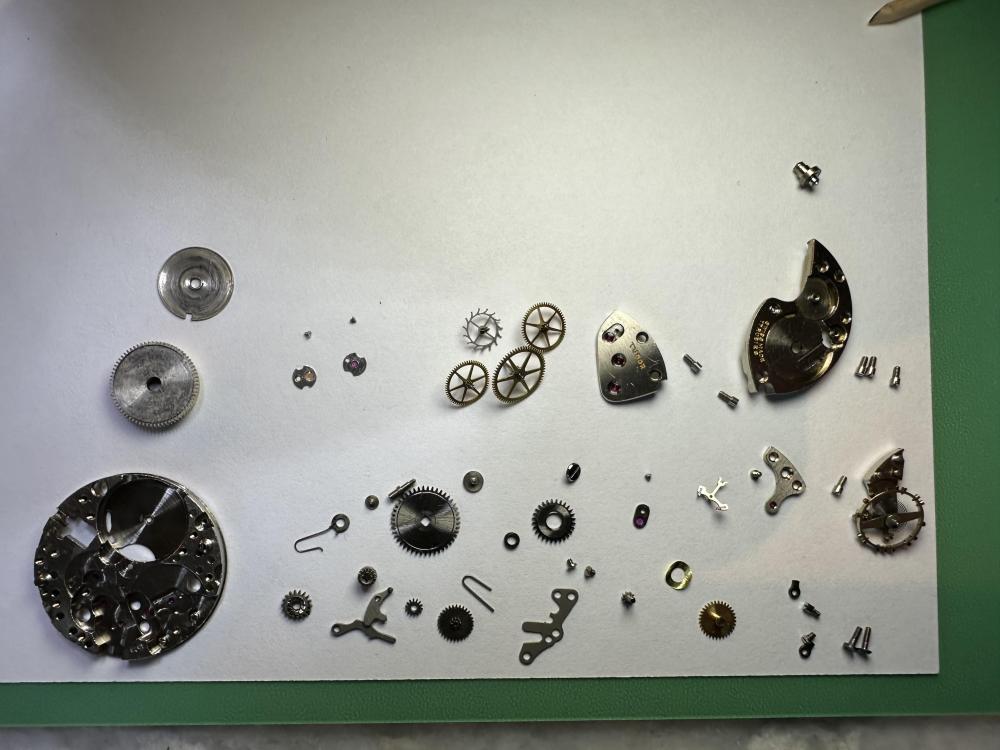
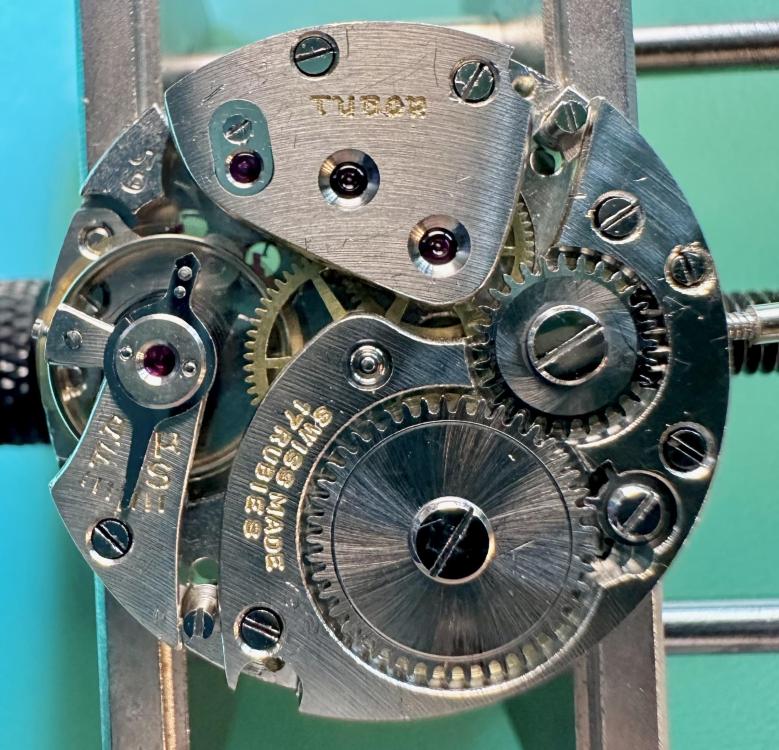
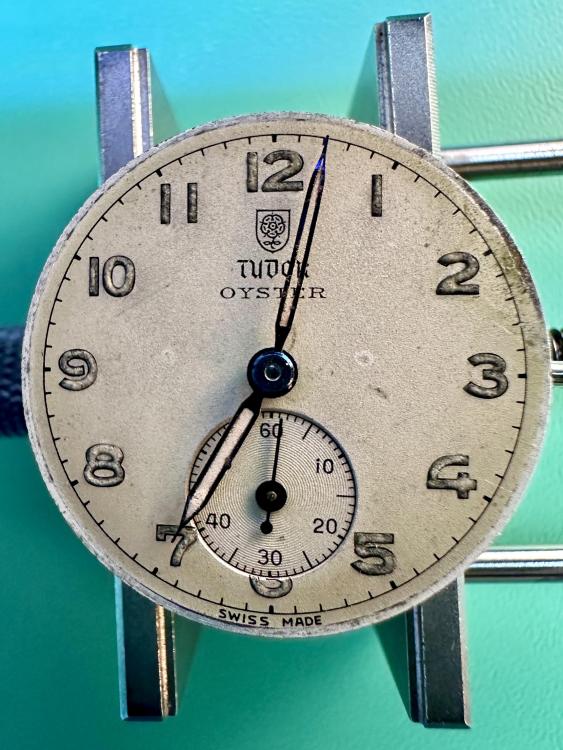
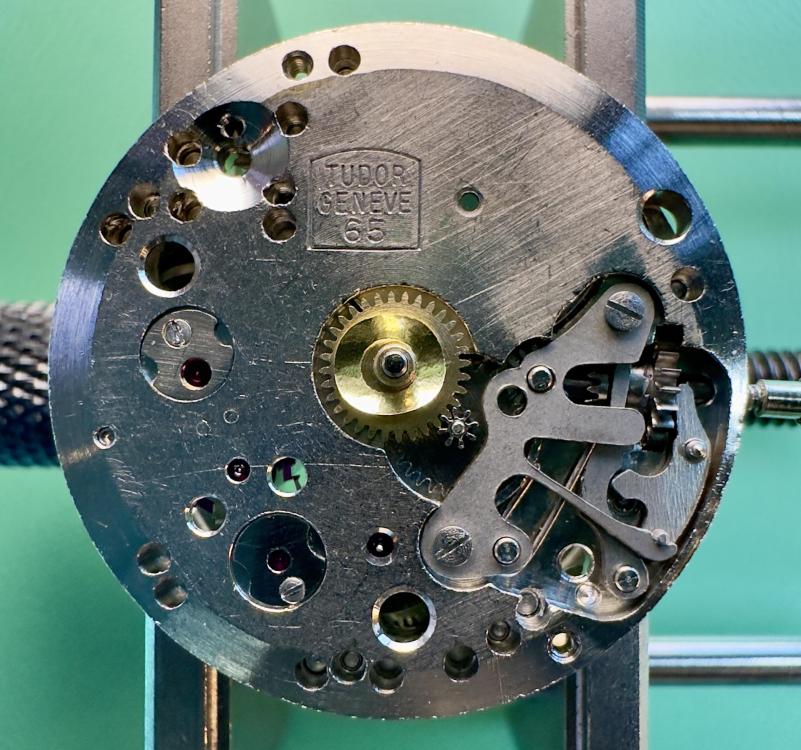
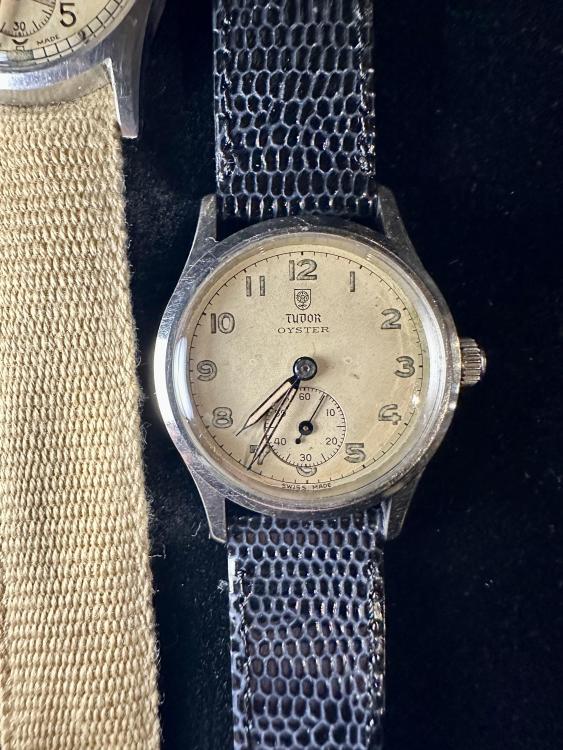
A few pictures to try and liven up the place…An abandoned Tudor I perked up a bit. …a simple service and replacement of the set bridge with the missing detent it roars back to life! ..okay, so not the most exciting watch ever but I just finished a streak of reviving the military watch of the family’s lost soldier so I was a bit weary from the tears. Boring is good… I think this is the third cal 59 for me and a plain but nice little workhorse what responds nicely to a little attention….
 3 points
 -
Hi all, Working hard to recoup some of the money I spent on watches during covid lockdowns. Got addicted to buying bulk lots of vintage fixer-uppers. Lurking your posts since 2017. No idea why I never signed up before but it became a habit to ignore the 'welcome guest' and save posts and articles in my bookmarks. I have alot of vintage watches to get through from late 19th century through to around the 1980's. It feels like I never see the same movement twice. Maybe the BF 866 and AS 1077 have popped up the most. The BF is a big gnarly fella but always runs (or merges seamlessly with another BF 866 to run). Personally I like almost any watch that isn't too heavily adorned. I mostly wear a lovely old Invicta Diver and an Orient Defender (1st version in Gray). But I usually have another watch on a Maruman Flex band ticking away on my right wrist, making sure it's wearable and the timekeeping isn't too rough (haven't got a working timer anymore). I'm taking the watch repair course at watchfix.com to make sure I haven't missed any basic watch repair and for all the wonderful tips and that smile. Previous to that I have mostly learnt through watching everyone on YouTube and through making big woopsies and then trying hard to not make them again. Also I'm 40, 3 kids, live in Newcastle Australia. Long walks on the beach and moonlight. Favourite colour blue and orange together. Rocky Road and Hip Hop. Reduce, re-use and Recycle.2 points
-
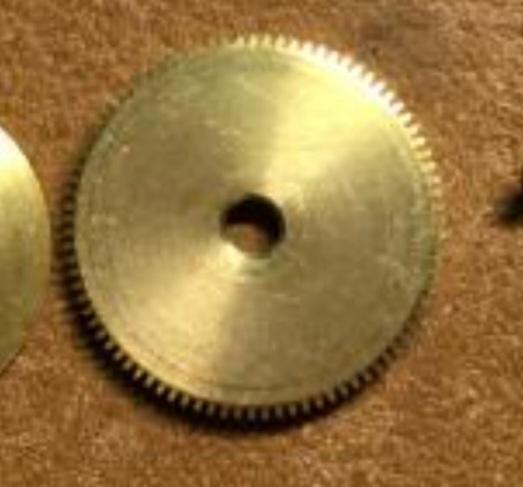
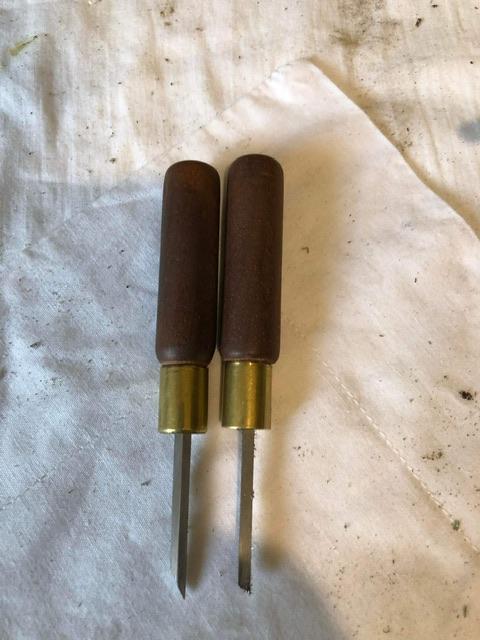
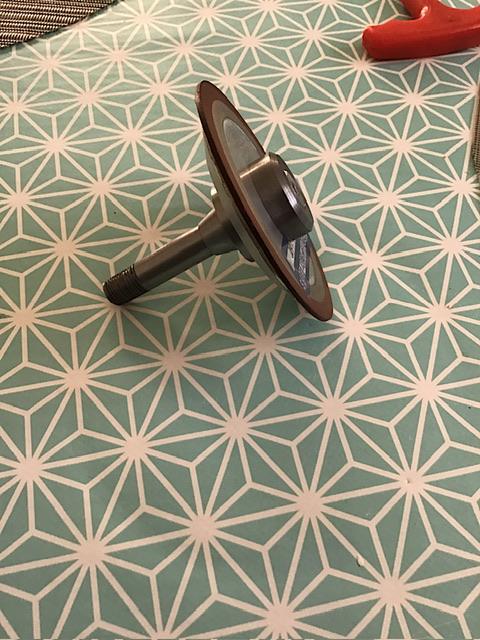
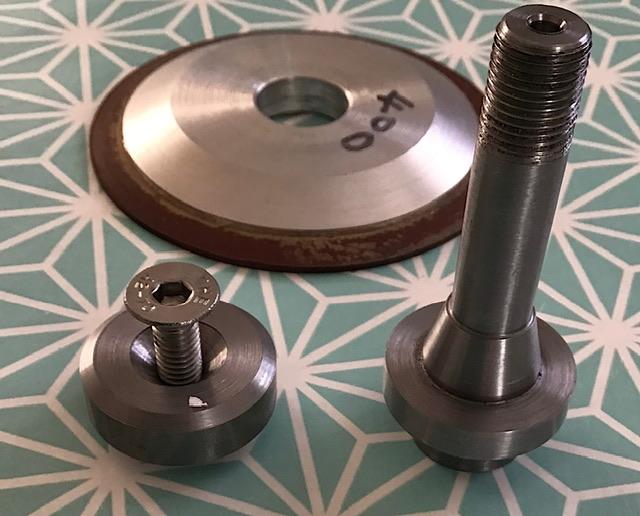
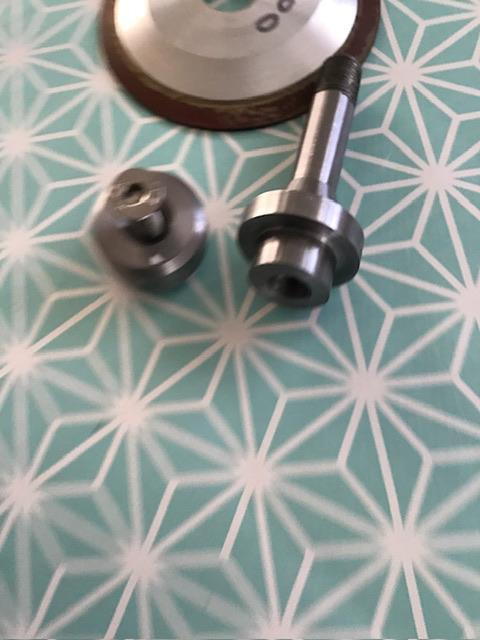
May be a picture might help. One of the problems with the punches below are typically not always of the right size for your cylinder. Plus of course the lower part has to be the exact right size as you want to support the shell and not the plug when you're trying to push it out
 2 points
 -
Been hand sharpening all my tools for nearly 40 years, using bench stones, grinding stones and disks. It takes practice to achieve what you want on the graver quickly but well worth the effort for the time saved.1 point
-
Do You think that this is so important to have angle exactly 30 degr, or 60 or whatever? What if one holds the graver by hand when sharpening it? I for example sharpen my gravers without any tool that will ensure exact angles, simply holding them with hand.1 point
-
Yes you really do have to be on top of a good balanced diet and that can take a fair amount of effort finding out what your needs are. Its a science thats constantly changing with new research, 40 years ago fat was the all evil for the last 10 years carbs have been the bad guys. Some truth in both views but its much more complicated than that and everyone reacts differently to food types. Being sensible is about the best we can do,by cutting out or at the very least reducing processed food in particular sugar and that isn't easy, its absolutely everywhere. Fasting has been a big thing for me this past couple of years, autophagy which has been strongly suggested helps to reset the body through a detoxifying process.1 point
-
Ha! Okay based on reflexive properties, from now on I am going to refer to each of my vintage Timex as a Rolex of low grade watches.1 point
-
Hi. I like it the dial says it all it has lived. Nice one. Well worth doing.1 point
-
Willkommen, Bienvenue, Welcome, Come On In!1 point
-
Hello welcome. Good to read your comments. This forum and members area will be (are) of great help. We immigrated as £10 poms in 1950. Came home in 1958. I still feel, and have never got used to the cold here. Immigrated into watches 2years ago. Regards for the festive season.1 point
-
This was a first watch? Yikes… …here’s some good news- your problem is fixable. Set this one aside in a parts tray (invest in a parts tray) and when your skills have improved and maybe have time to watch and study a proficient watchmaker work on this specific movement and you’ve saved up for a new barrel plus shipping have another go…1 point
-
I'm confused, first watch repair but you're an advanced member?1 point
-
Final update, the replacement auto module corrected the fault and the watch is now running perfectly, It would seem that oldhippy was right and the gear wheels were slipping. Thanks for all the advice and a happy new year to you all.1 point
-
Expensive mistake Endeavor, i really feel for you mate, on a positive note you wont make the same mistake again. I really think one of the best things anyone new to this hobby can do is to buy a big bunch of old parts to practice this sort of repair. It helps to outline where repairs can go wrong.1 point
-
Hard to tell but the barrel arbor hole looks deformed . I suspect that the round punches you used were too small, instead of pinching material in from the side to close up, it may have been more a case of punching a bigger hole through. With a thin piece of material like this, i personally just dome the outer of the barrel with a wide punch, sitting the barrel on the inside on a flat anvil. Just light taps and keep checking, you are usually only closing 10 -20 microns. Its always best to try out on something that doesn't matter , that way you iron out your technique.
 1 point
 -
A glass fiber brush will do the trick providing it is just surface rust.1 point
-
Years ago i used to take a lot of supplements when strength training and body building. Did it make a difference ? i honestly couldnt say. These days i hope to get everything i need from good real food, organic when possible, avoiding anything that promotes inflammation, we do need some inflammation but it is extremely easy to be harbouring excess and that is real bad for us causing so bany issues. I also haven't had any injections, have had the so called Covid twice with only mild symptoms. I believe that is mostly due to genetics and how your immune system reacts, all that starts with gut health. I also believe stress plays a huge roll in our well being, a healthy mind without a doubt contributes towards a healthy body.1 point
-
I prefer light mechanical methods such pegwood or bamboo sticks which are harder and fibreglass pens to try first, anything heavier than this can potentially damage material on already weakened parts. It all depends on what the part is and how long the rust has been attacking the steel. Steel wire brushes definitely not, brass just depends but usually not. I used to use vinegar the acetic acid does a good job of eating away at the rust, problem is it will also eat away at good steel and can etch the steel quickly. The water content in vinegar also causes flash rusting, parts soaked in vinegar should be dunked immediately in ipa afterwards. Personally i dont risk anything waterbased anymore and strong acids can end up doing more damage. Ive been thinking about giving this a try, what is the active ingredient in it Waggy ?1 point
-
I agree Jo can be a bit sloppy and clumsy at times. A new one for me to start watching is saving time. He is originally a collector, not super experienced but has learnt quickly. A very articulate and educated sort of bloke, he includes some skilled strap making. Also Richard Perrett ex military who's approach is in similar vein.1 point
-
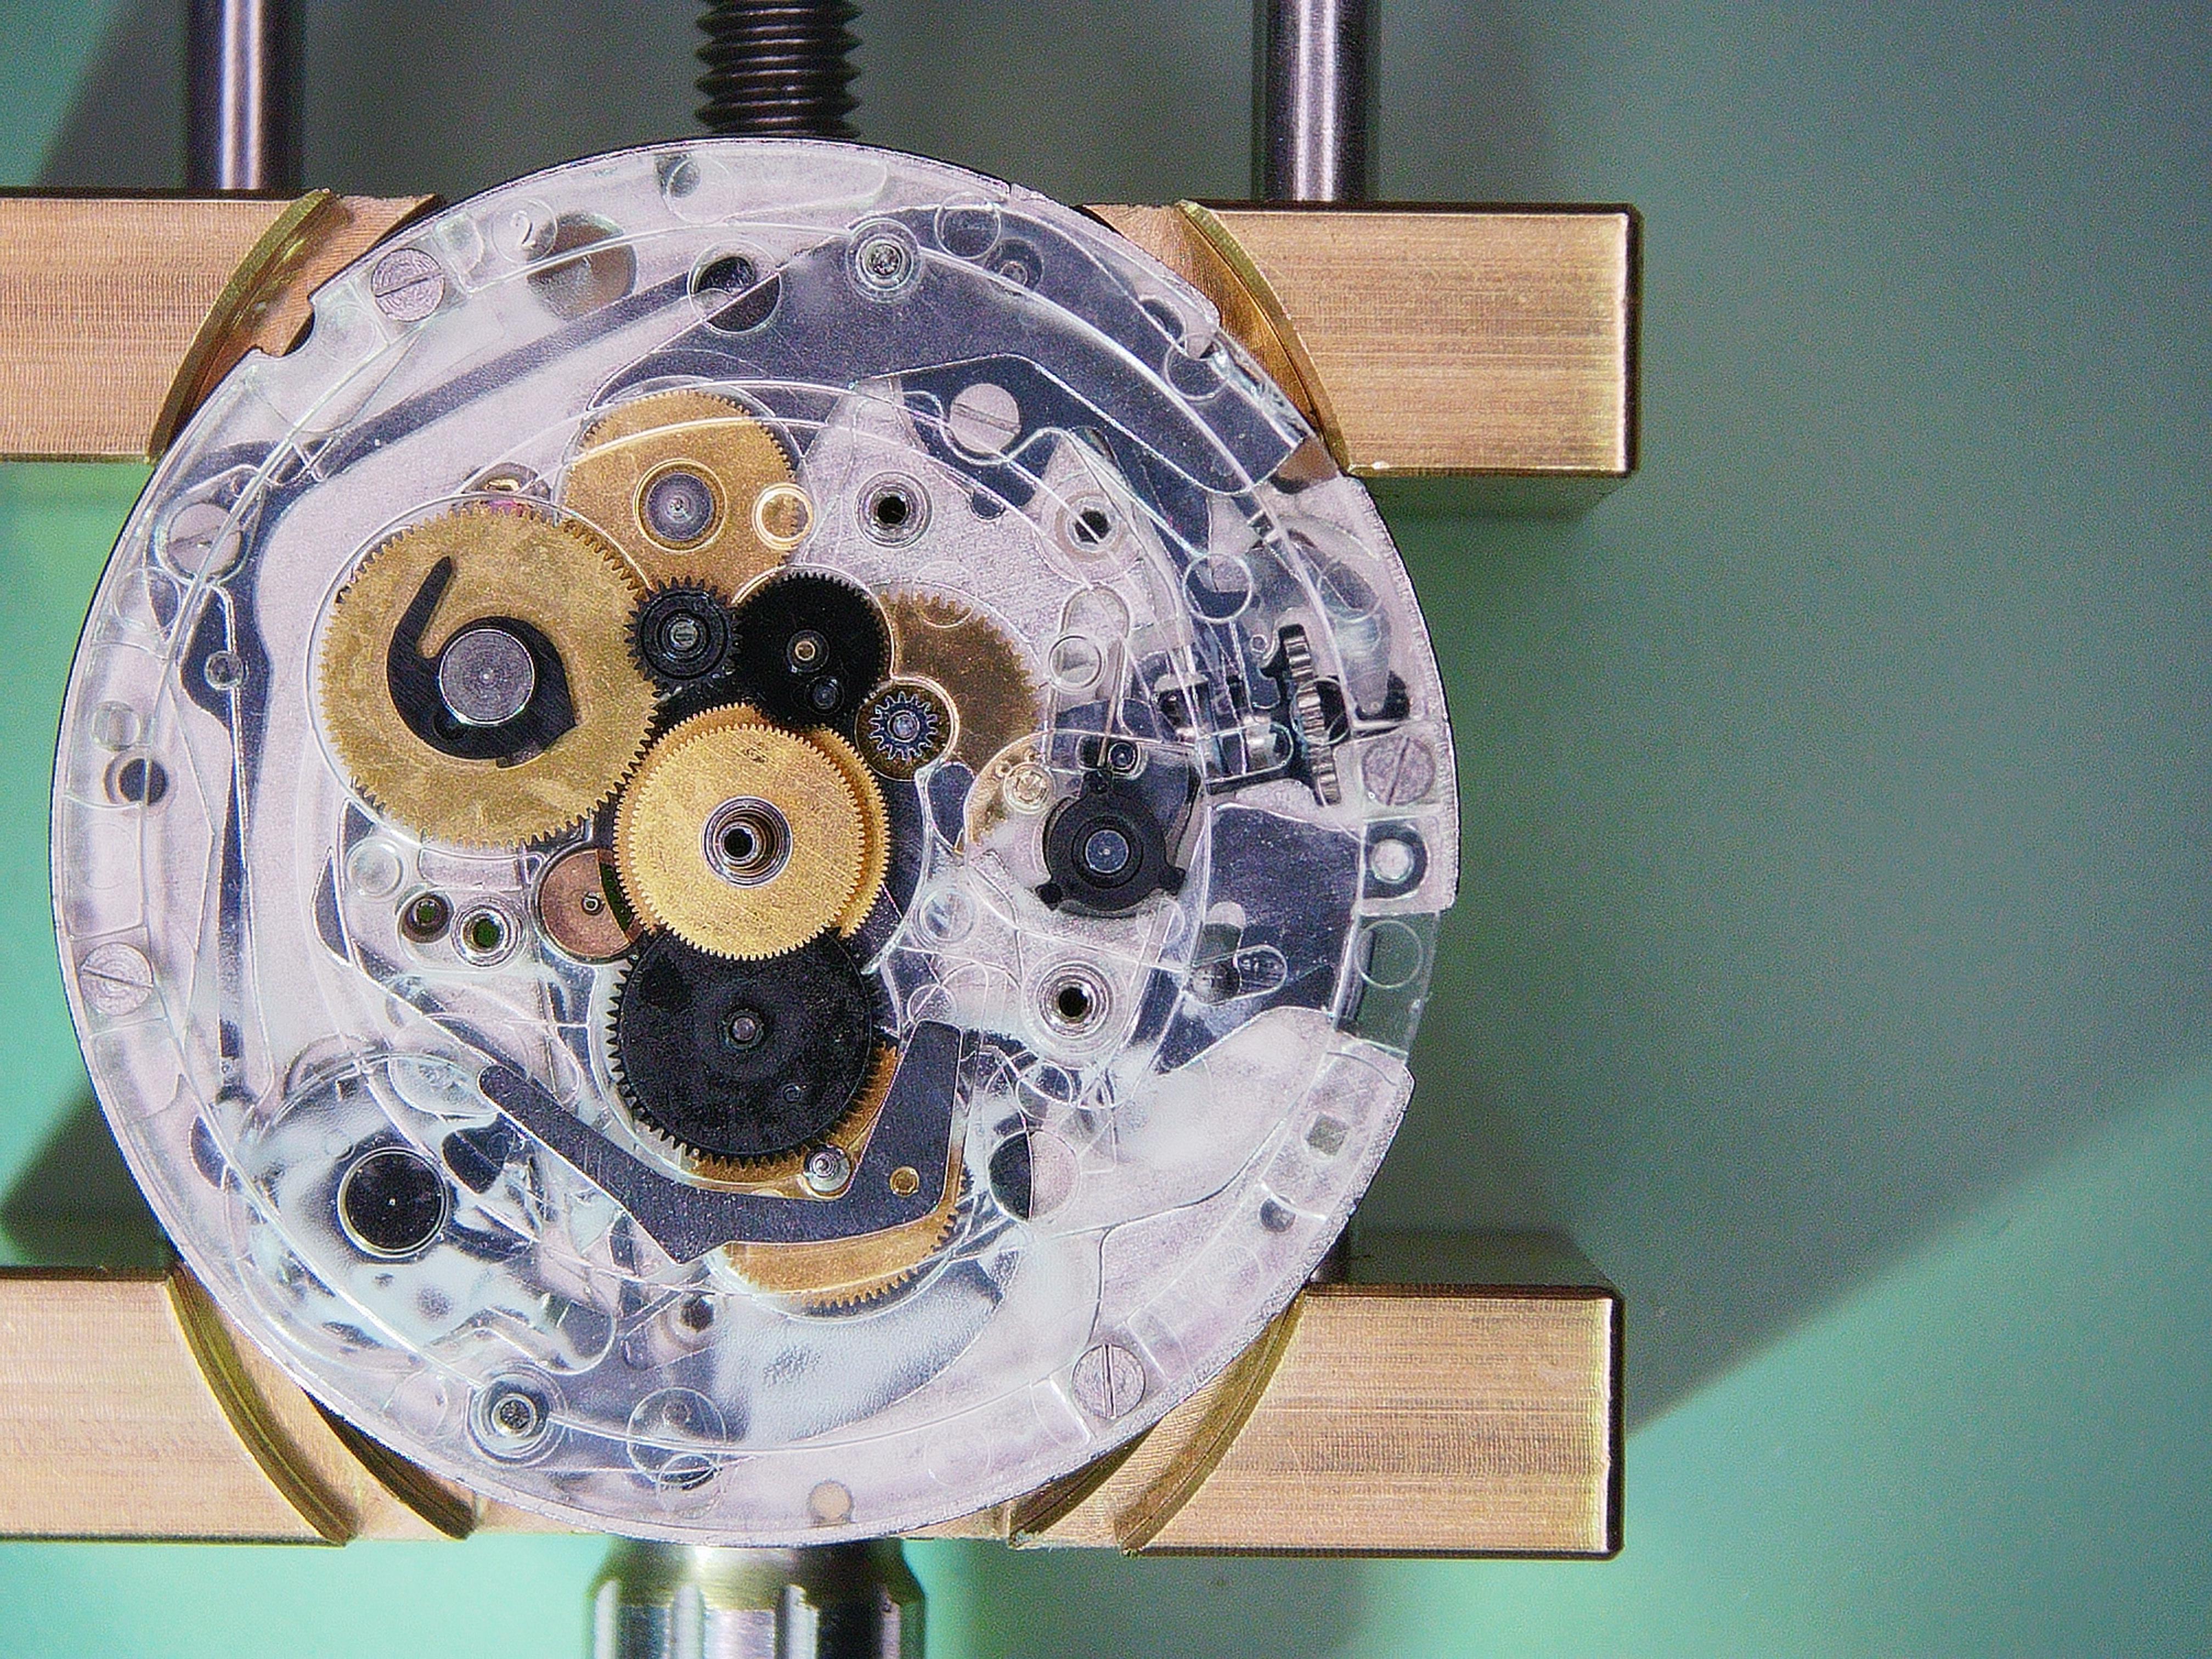
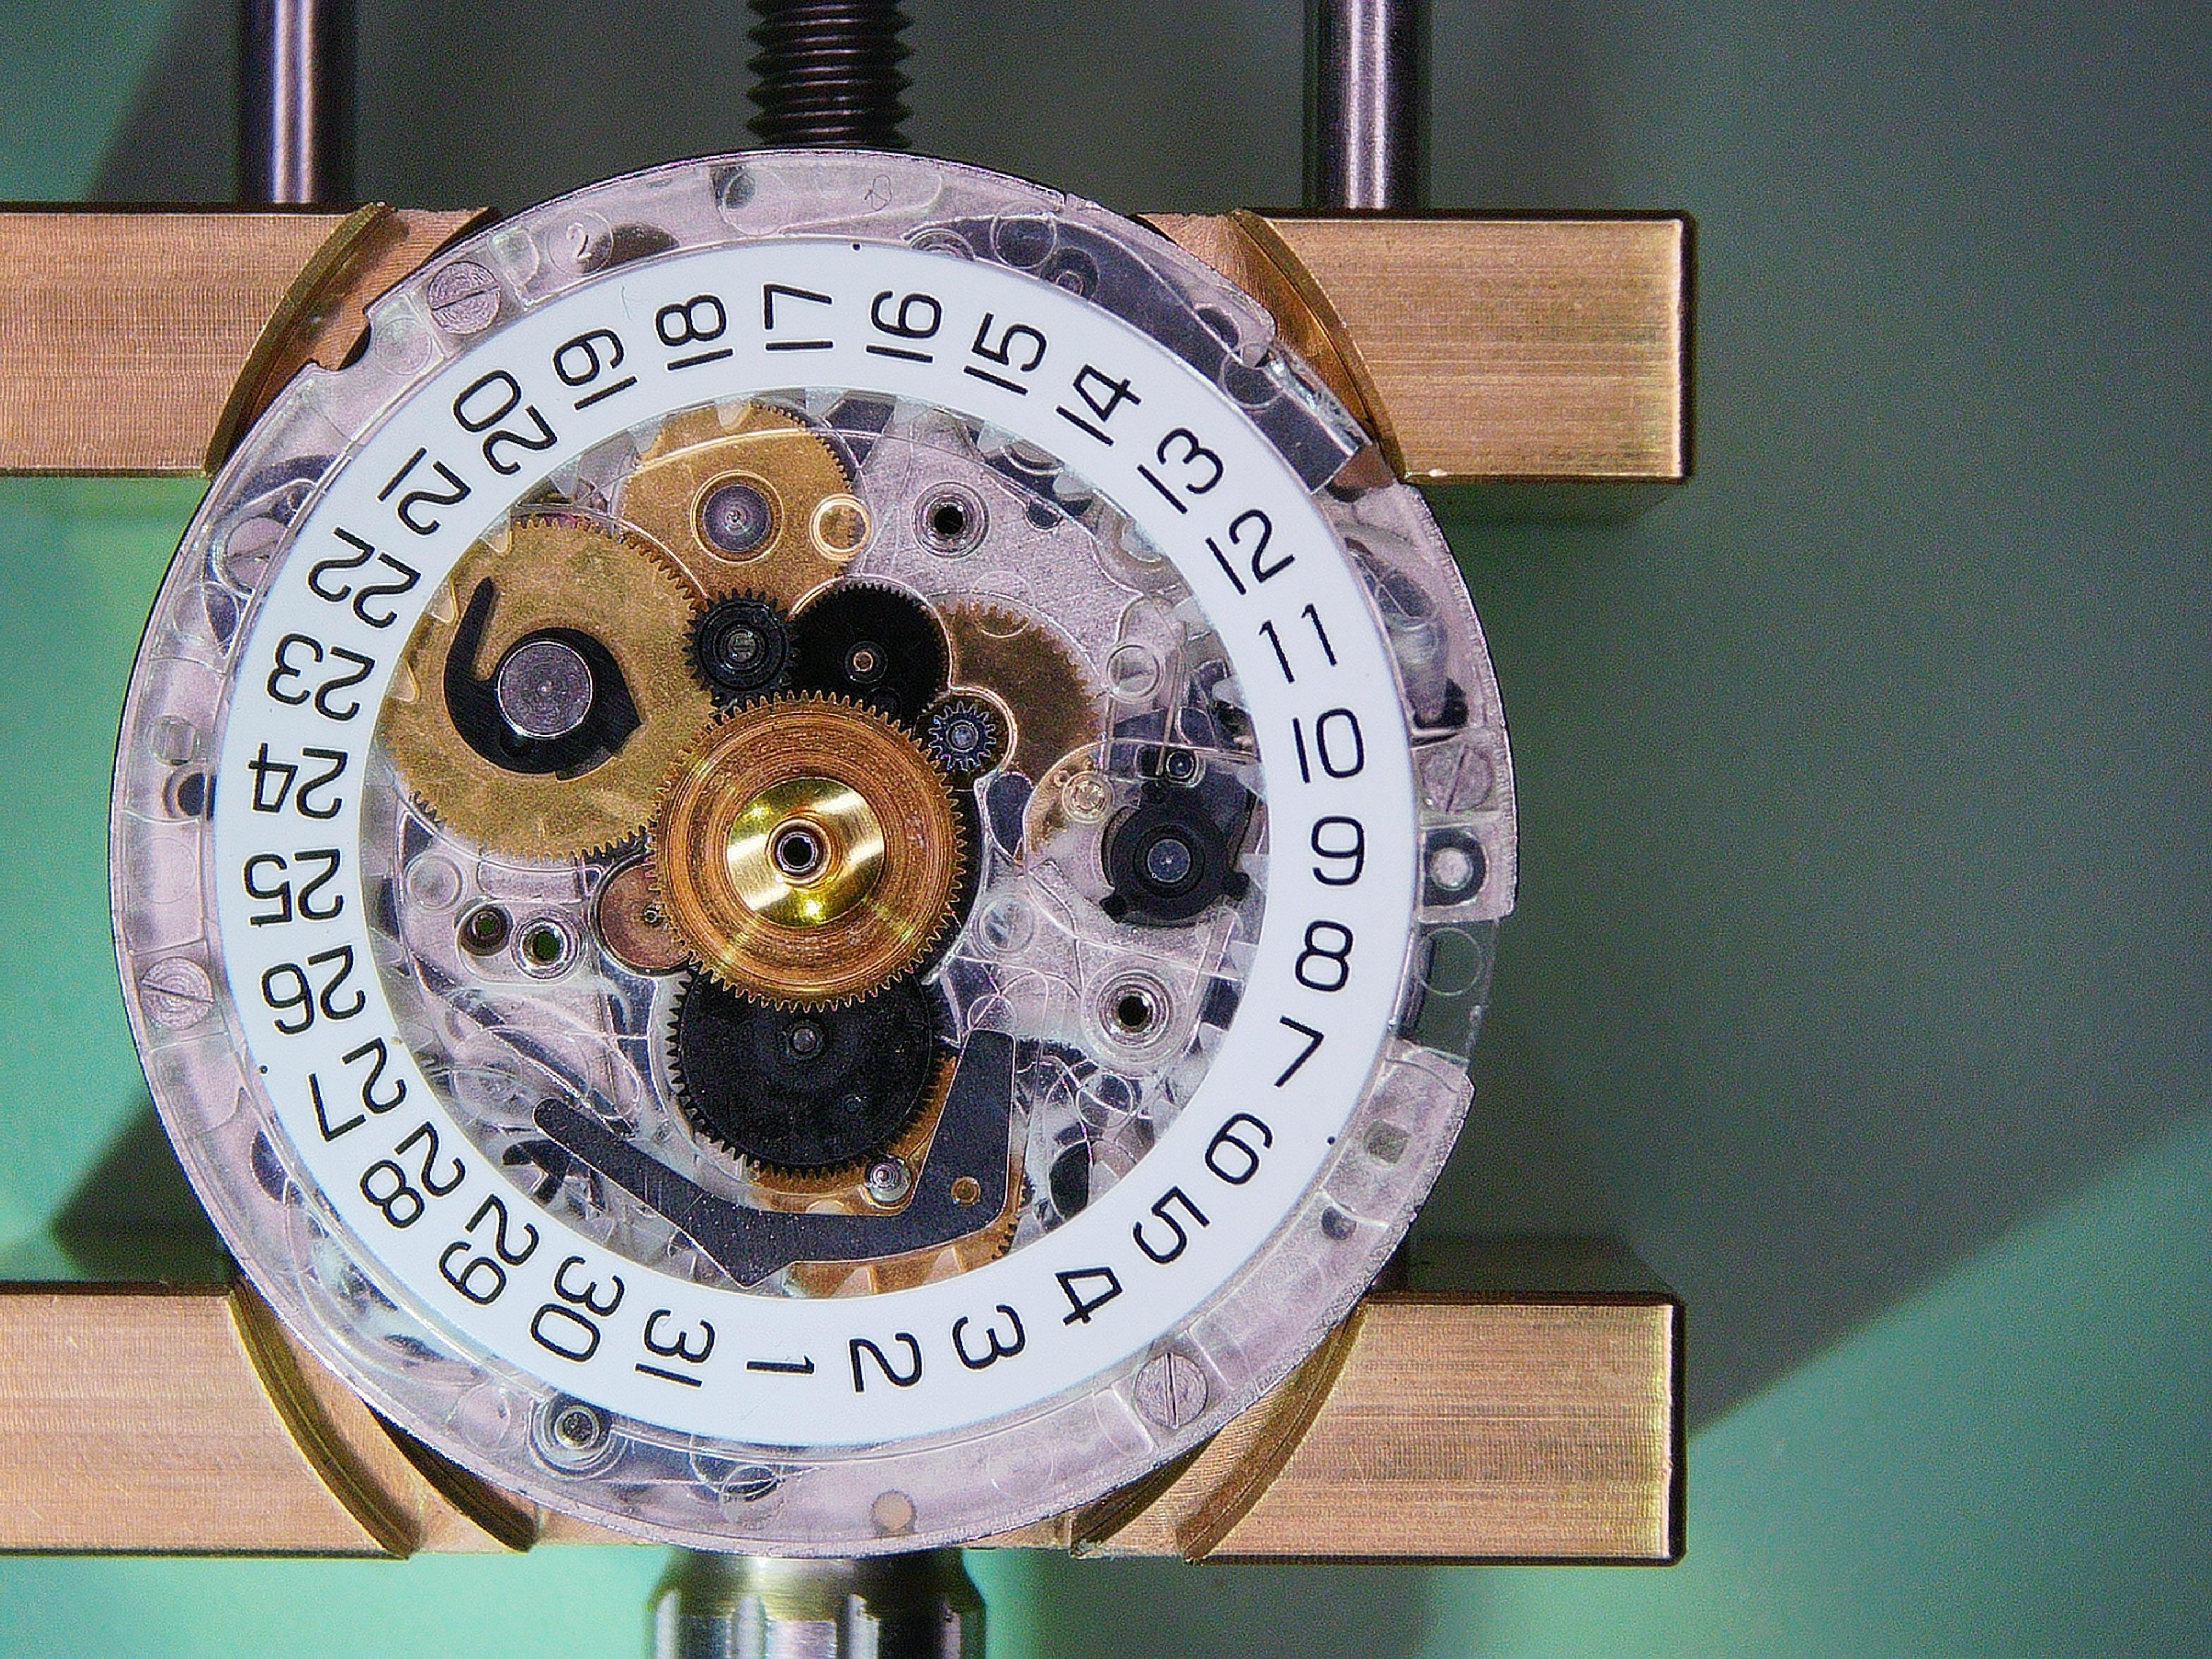
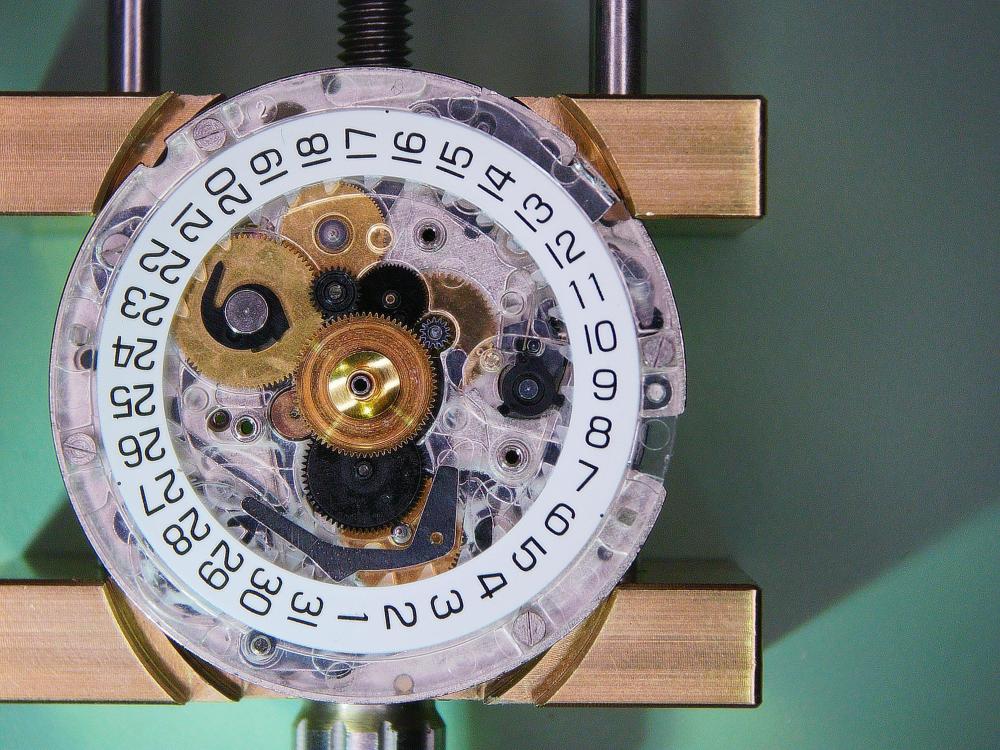
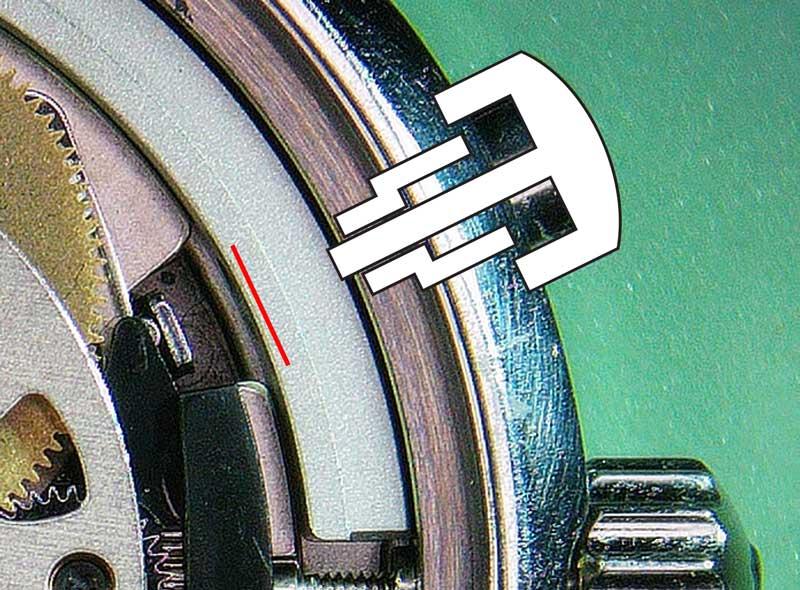
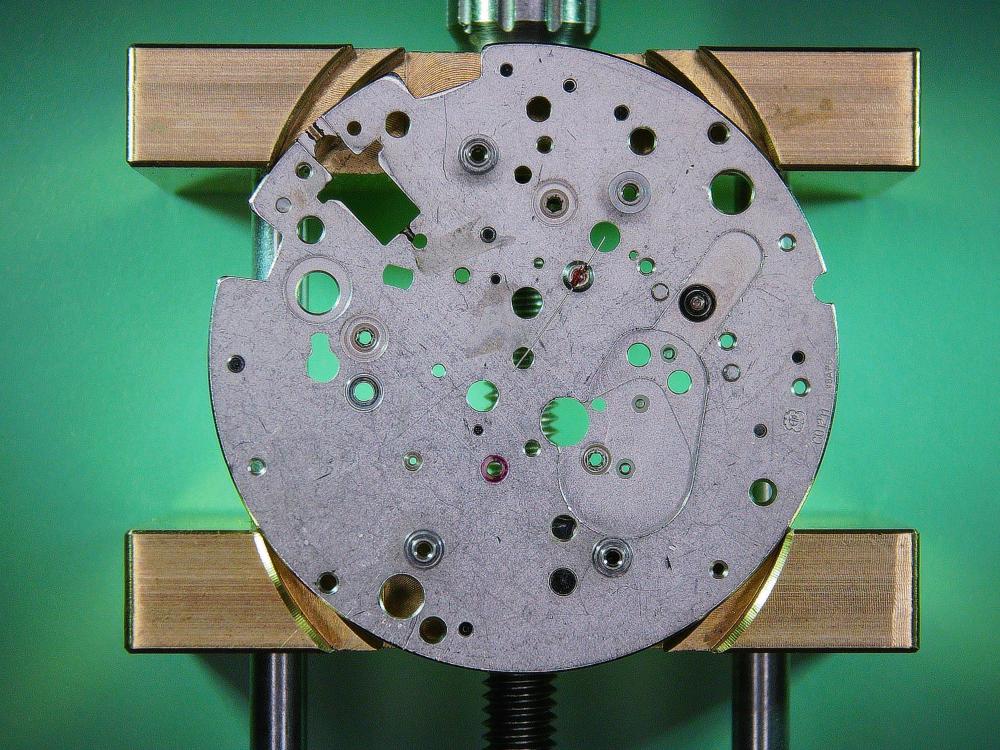
The Motion and Calendar Works. The canon pinion is trapped under the minute recorder bridge when the chrono works was assembled. Above the plastic plate are the minute wheel, minute running wheel, the hour runner and several intermediate wheels. The thing is that running wheels are driven by the minute heart, although it sets the hour runner as well. This is a two level wheel dropped over the canon pinion with the heart on the bottom and the hour runner (large black plastic wheel) in between the upper and lower wheel of the heart wheel combo. When you slide the heart cam wheel over the canon pinion, you have to hold it about halfway down to be able to slide in the hour runner or you won't be able to get the hour runner to drop on its post in under the upper wheel of the heart wheel. And you then have to retract the hammer so the heart wheel will drop all the way down or the other wheels won't mesh properly. I'm sure the engineers at the Swatch group were chuckling when they thought about someone struggling without a service manual. I should at least get a piece of cheese at the end of this labyrinth. The one (and only one) thing they did to make assembly easier is to not have to but the day jumper spring in until the cover plate was on. When you put on the hour wheel and cover plate, the spring just drops into position in the plate through the slot. Maybe that's my reward for getting this far. To wrap things up, all that's left is the dial, hands and recasing the movement ... at least you'd think that. And you'd be wrong. First, you have to put the movement ring in the movement BEFORE you put the dial and hands on (ask me how I know that, too) And then you clean the inside of the crystal, blow off the dust from the dial and ... wonder why the chronograph doesn't run. The pusher doesn't reach the operating lever. Wha? The illustration shows the watch how I received it. The pushers were in good shape and looked original but they were much too short with this movement ring. The red line illustrates the maximum depth the pushers travel. I could find nothing about this but the ring was beefy and had holes that looked like they could accommodate extensions, so I ended up buying a couple sets of varying diameters and lengths to get a proper fit. It does seem to work, but I have no idea if that's the way they watch shipped from the factory or if these are the original pushers or if I just missed something. My theory is that the original owner dropped the watch, popping out the shock jewel and spring and took it to someone to repair. When the person opened the back and saw the movement they threw their hands up and gave the watch back, unknowingly dropping two pusher extensions and one cap jewel on the floor. that's the only thing I can think of to account for the missing pieces. I got everything back together and put it on the timegrapher. After a little tweaking I have it running at +/- 15 seconds 320° amplitude and BE of 0.2 to 0.5 depending on position. At this point I'm letting it run for a week before I look at the timing again. The winding works is pretty simple. Really just a single wheel with a click and the rotor -- it only winds in one direction. And now the final peculiarity. With the the chronograph running, the minute and hour counters don't "jump" but track smoothly with the seconds hand. And THAT should be all folks, but just today I saw another one come up for auction on eBay and put in a bid ... WHAT IS WRONG WITH ME??

 1 point
 -
Every day whether you have a cold or not, take plenty of vitamin C (5 grams of pure ascorbic acid mixed in water that you drink throughout the day), vitamin D (125 ug to 250 ug), and a bit of zinc (25 mg) to help the body absorb the vitamins. Also, when not having a cold and the weather permits it, take a 20 to 30-minute walk every day (getting sweaty is not required or very desirable). I started this practice a few years ago and minimized the days of having a cold from basically three months a year to a week or two a year. I have also had Covid twice (non-vaccinated) and got through it without any major problems although really sick for about four days. Without the supplements mentioned (and walking), I am convinced I would be dead by now. Get well!1 point
-
Good suggestions! When new I would especially recommend Alex Hamilton (Watch Repair Tutorials) and Chronoglide (Chronoglide Watchmakers). Nekkid Watchmaker is great for learning about case restoration, but I'm not too impressed with his movement overhauls, mostly because he is extremely sloppy with his oiling, and learning about oiling is crucially important if you want a well-running watch over a long time (like several years). Also, if and when you're ready to put a bit of money down, I'd suggest watchfix.com. There are others like learnwatchmaking.com, but personally, I would suggest watchfix.com to be the best starting point (no, I'm not affiliated with or get kickbacks from Mark!)1 point
-
The most efficient way to remove the rust from the centre wheel would be to use a Jacot tool. However, that is certainly not a beginner's tool and it takes quite a bit of research, money, and practice to master. What you could do for now would be to cut the tip of a piece of peg wood into a square (four flat sides). Then charge the tip with some rouge (I'd suggest Dialux green). What I do is take a small glass jar, scrape some rouge into it and then mix the rouge with some oil, any old oil, until I get a gooey texture. Then place the wheel in a hole in a staking block, hold it in place with a flat piece of peg wood and polish around the pivot with the rouge-charged piece of peg wood. To inspect, brush off the wheel in some IPA and repeat if needed. This method, if you do it long enough, will also give you a very shiny and frictionless pivot. Even though I have a Jacot tool, I sometimes use this method when I don't have a suitable runner for the Jacot tool. Anyway, I hope that makes sense, or if you need some clarification just ask for it. You could try the same method with the tip of the fourth wheel, or try with some Eveflex. But be careful not to remove too much material or the second hand won't fit. I don't see any rust on the minute wheel, so I don't know what to say.1 point
-
Great title and post, indeed a wierd movement.1 point
-
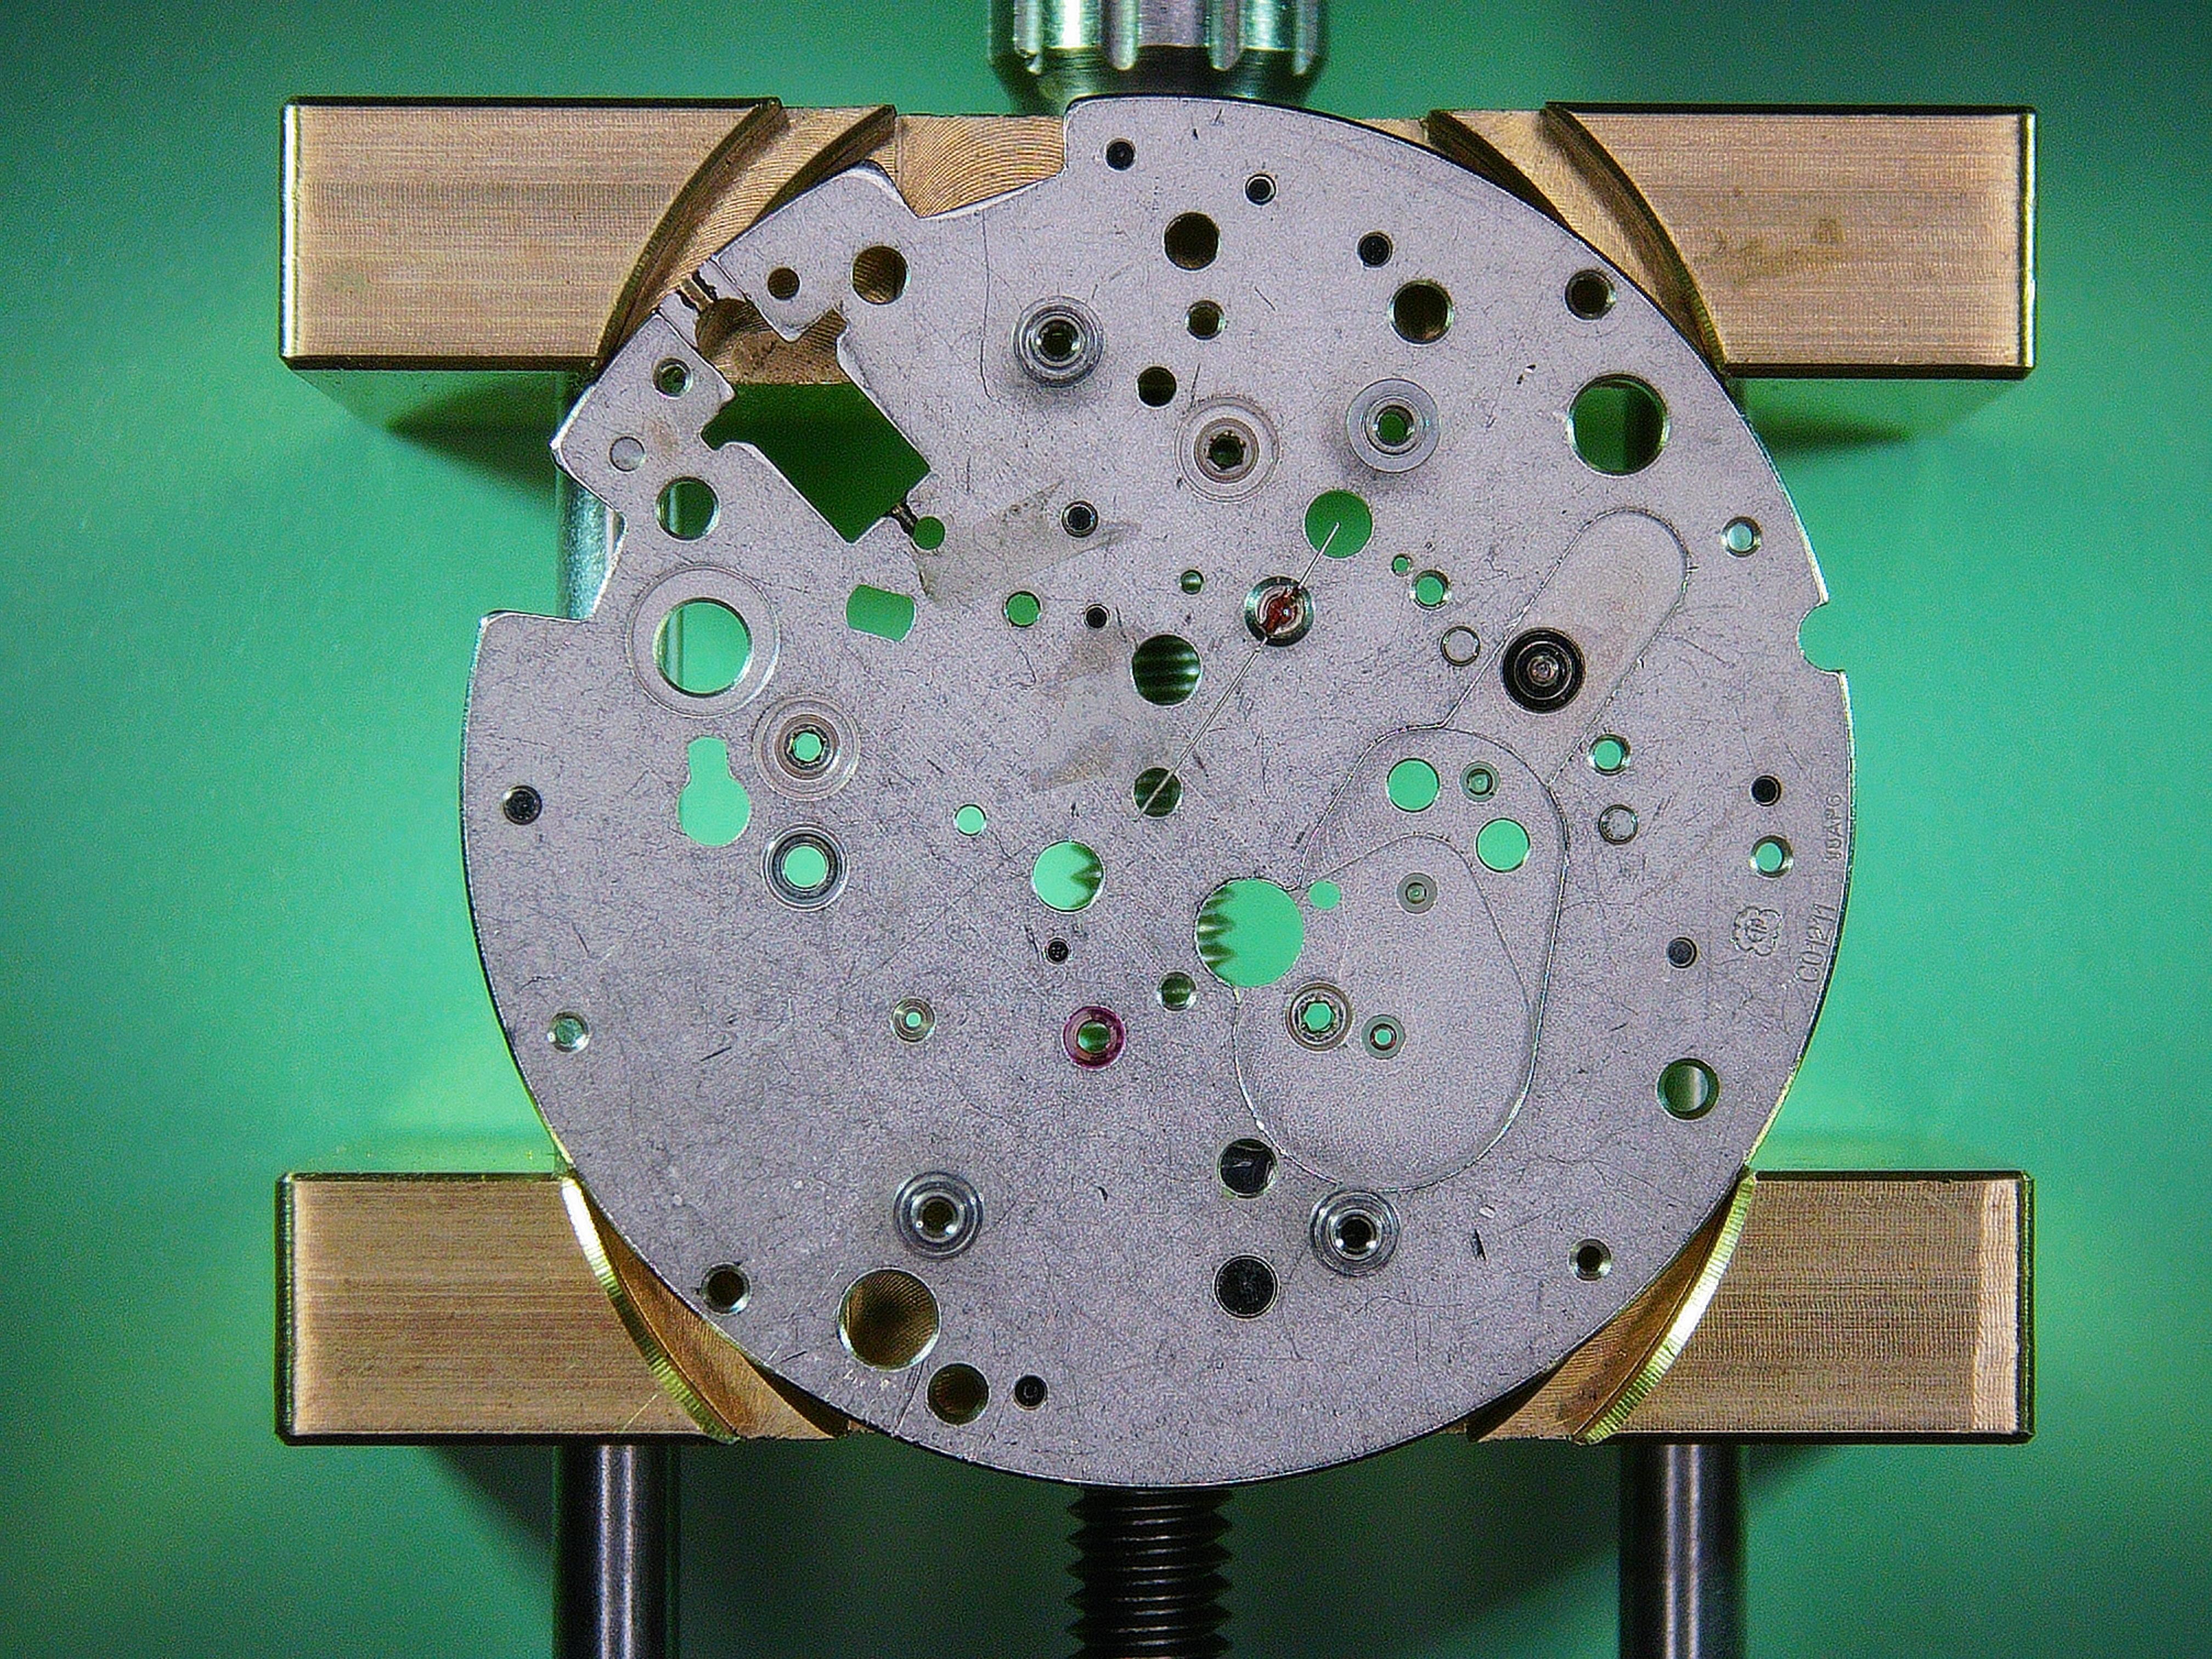
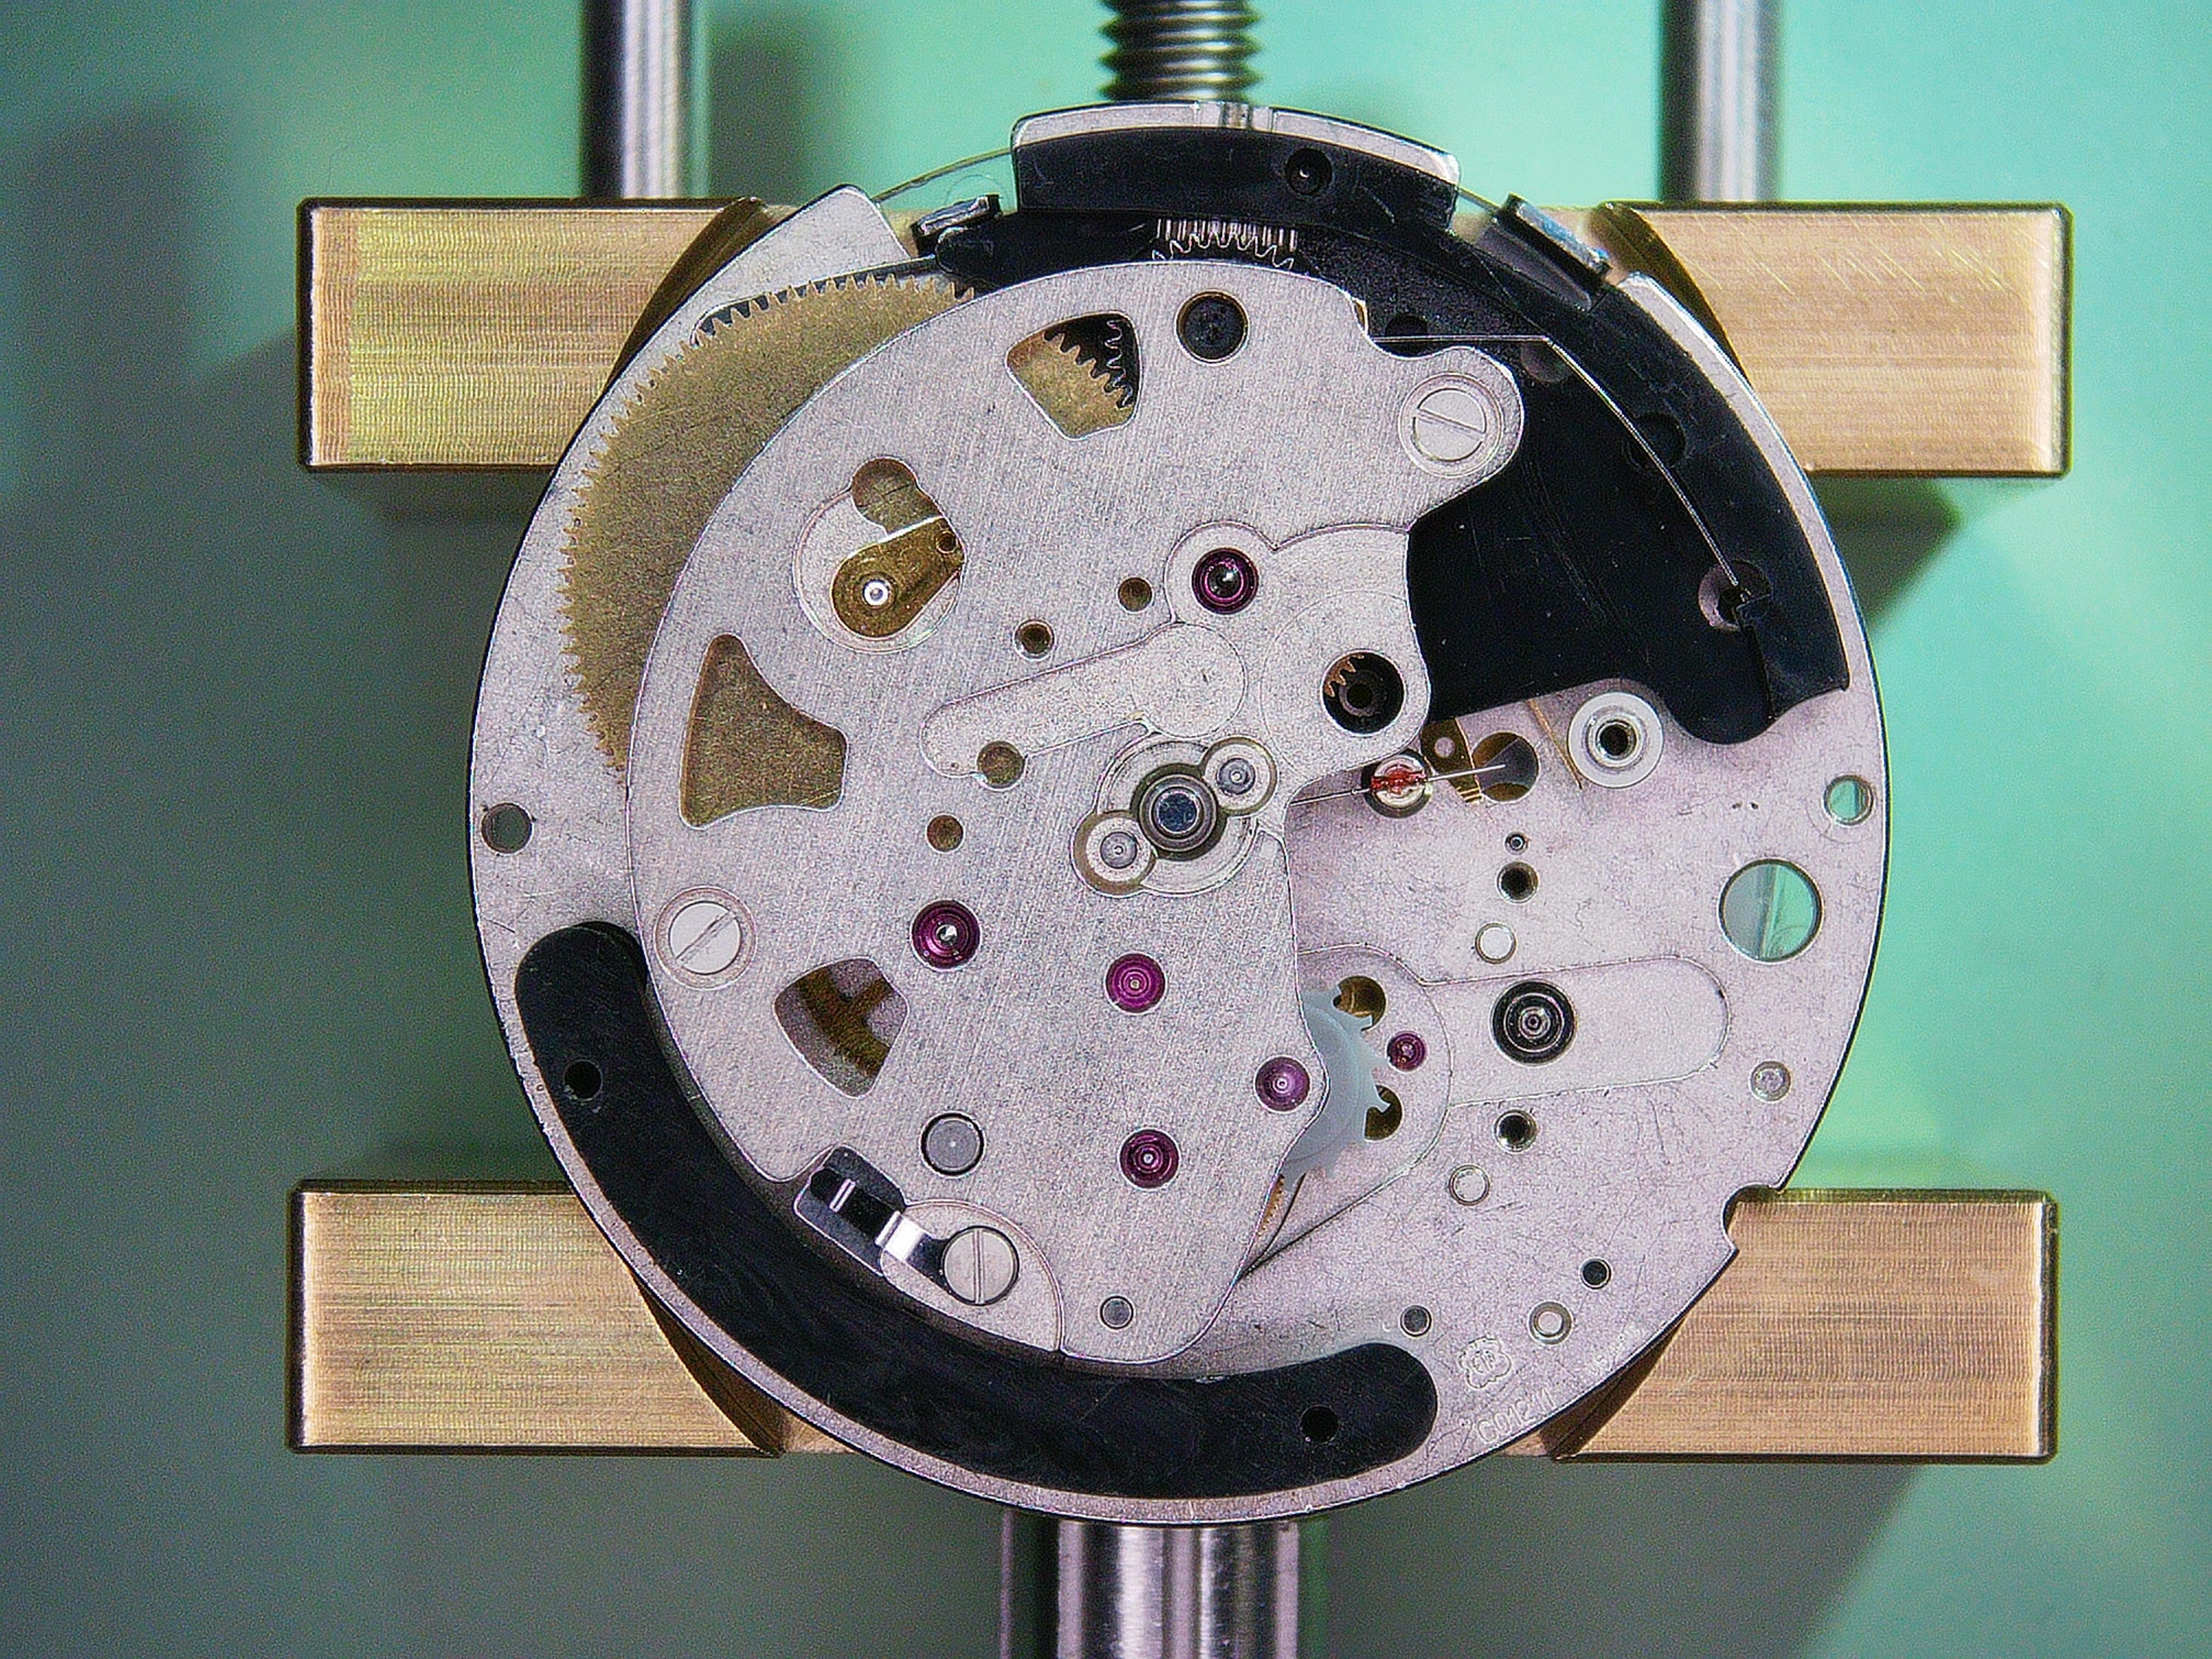
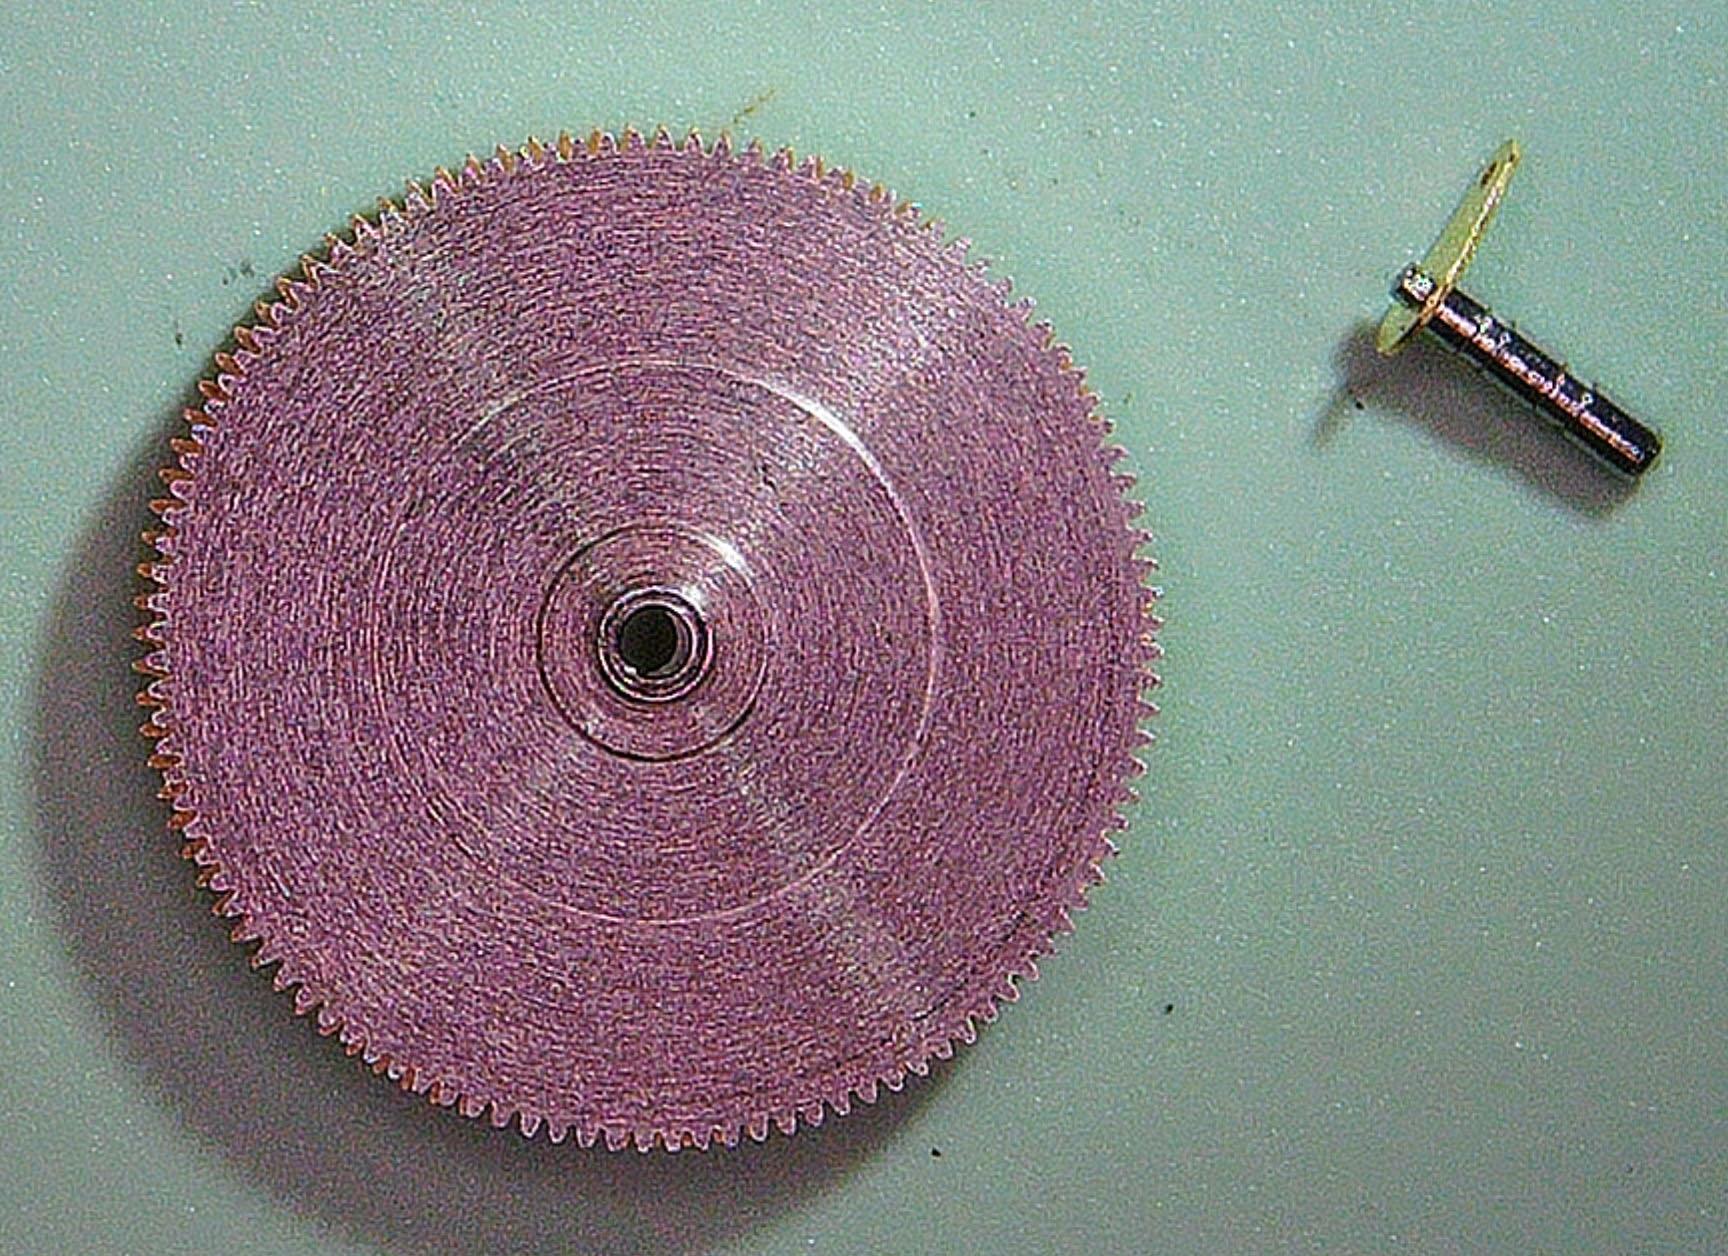
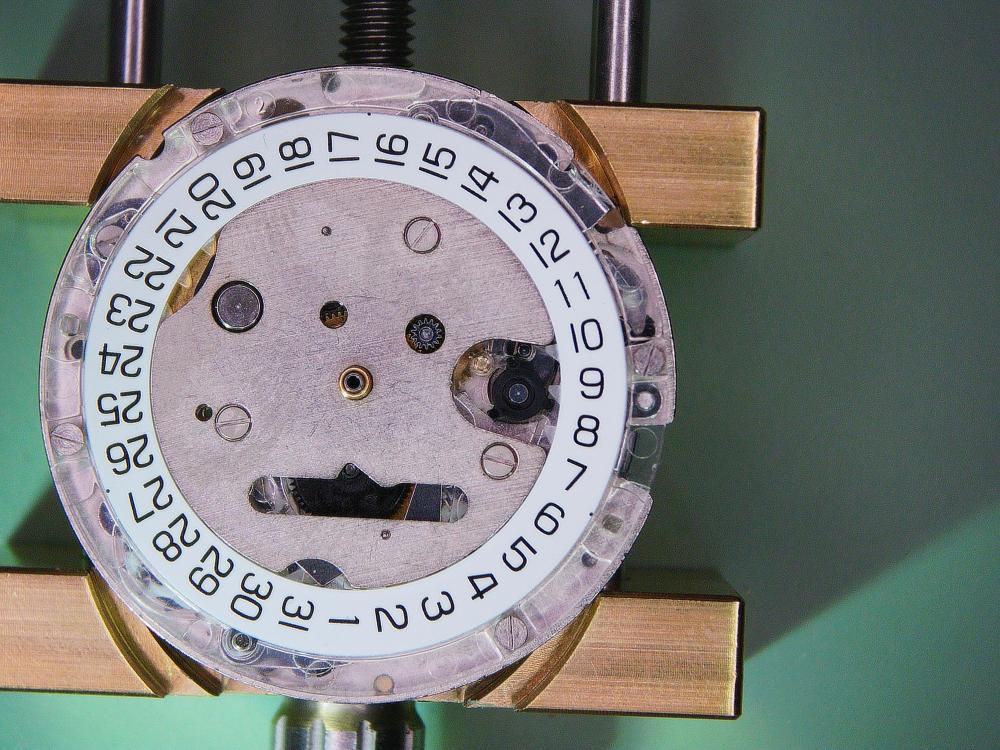
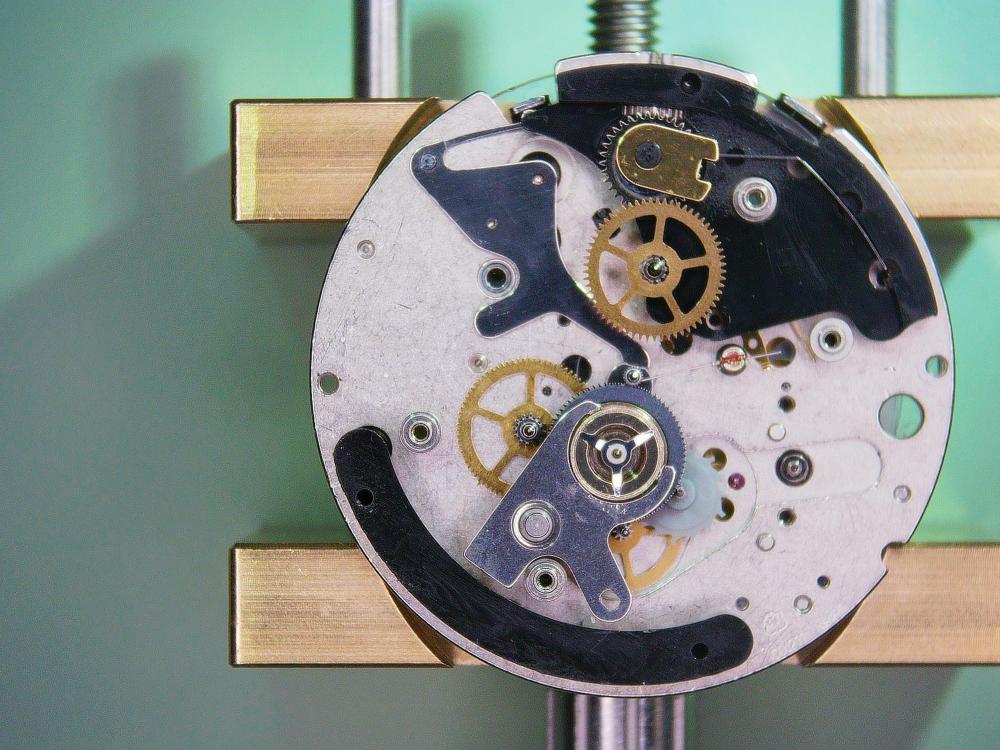
The Train of Wheels. The main difficulty here isn't assembly, but holding it in the movement holder. The plastic plate on the dial side just doesn't get along with standard movement holders and even this heavy brass holder has some problems getting a grip. I thought about 3D printing something, but for a movement I'll probably not see again, I just struggled through. There are two plastic "bridges" on the train side. The lower bridge shaped like a crescent just has two bosses that friction fit in the main plate. This is little more than a spacer. The upper plastic bridge covers the bottom of the keyless works and holds the click, the hack and parts of the automatic works. This attached with two screws from the dial side. The ballet starts with placing the chronograph seconds runner on the correct side of the retention spring. Then place the fourth wheel, the escape wheel, intermediate wheel and the crown wheel and ratchet driving wheel on the plastic bridge. Top that off with that little brass plate over the crown wheel. Finally you have that monstrosity of the coupling runner and coupling yoke (That's what the Omega manual calls these parts). The yoke has three little tabs that have to slide into a slot on the runner while you position the pivot in the hole through the main plate, engage the escape, fourth, and intermediate wheels and the seconds runner while trying to keep the yoke upright. And (yes, there's more) you have to retract the seconds hammer or it will slide under the seconds runner and raise it just high enough for the train bridge not to settle into place. Getting the train bridge to settle on all five pivots is akin to Sisyphus rolling his rock up the mountain. Everything slips out of their respective holes at least once for each pivot. Finally you get the main plate situated and screwed down and breathe a sigh of relief knowing you didn't forget to place the hack again before tightening it all up (ask me how I know.) Once the train is spinning freely, you can place the barrel. Let's talk about the barrel. This is not your ordinary barrel. No, it's a split barrel with the main spring in the lower part and the cover plate/wheel riveted to a hollow arbor. The lid is actually a wheel. The mainspring sits in the base of the barrel as usual, but the arbor and top wheel combo slide down onto the barrel until the spring engages the arbor hook. You can then slide this into place and secure it with the post. The top of the post is then slid under the plate to secure it. When you wind this movement, the top wheel rotates and the barrel base stays stationary. When the watch runs, the top wheel is held by the click and the barrel send power through the train. Basically the barrel cover is combined with the ratchet wheel. Originally I had tried to reuse the mainspring that came with the watch. It didn't look too bad and this model was introduced sometime in the mid 2000's (2006?). But once wound it would only give me an amplitude in the low 200s or upper 190s. A new mainspring got it up to 320°-ish Next I'll complete the movement with the motion and calendar works.

 1 point
 -
In case somebody stumbles on this old thread, I've managed to 3D-print a replacement. Here's the video of it in action:1 point
-
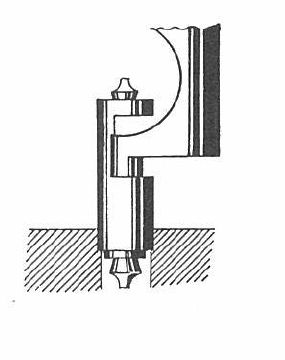
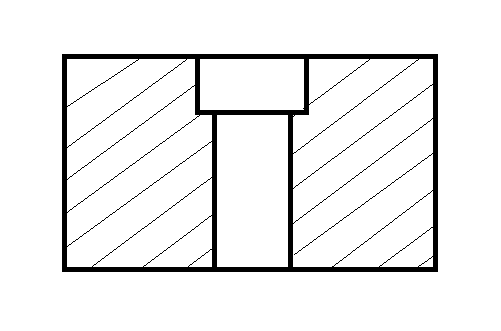
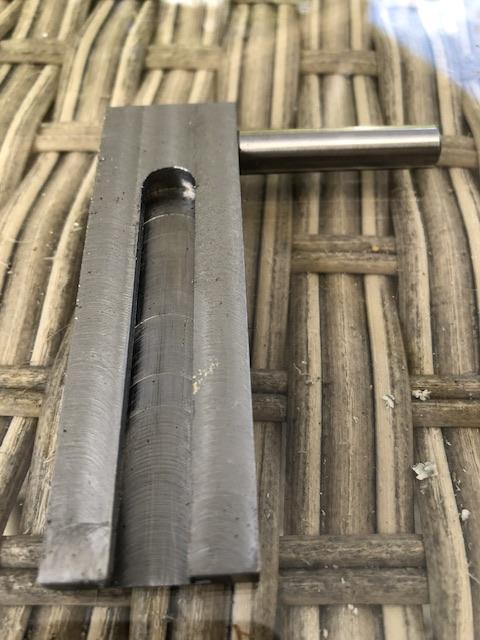
Hi Rich, and Marry Christmas to all! Sorry for the delay, I was not able to get close to the computer this days. Many questions to answer... The anvil needed for tampon removing looks like on the picture. The hole has two sizes. The bigger is to take the bare cylinder, or the brass part that is riveted to the balance with the cylinder inside. The smaller size is such as the cylinder will not go through, but the tampon will. E. g., if the cylinder diameter is 0.75, then the small size will be 0.7, and the big - 0.8. This if the cylinder is out of the balance. If the cylinder is on the balance, then the big size will be little bit bigger than the collet hole size. Yes, the hairspring side tampon can go out with cylinder on the balance. But, sometimes the tampon is very stiff and will not want to go out, then is easier to push the cylinder out and then tap the upper part of the cylinder with hammer on anvil to make tampon going out easier. No problem to use offset punch with normal staking tool, just the anvil of the tool must be turned a little. It is not so right to adjust the high of the cylinder by tampon position. The bottom part of the tampon must be ideally flat and polished and it must be positioned right where the mouth of the cylinder begins. This is to ensure correct oil retention. The cylinder itself is not riveted to the balance. It is made of steel tube and has uniform diameter everywhere on it's lenght. The cylinder is pressed in a bras bush part, which has seat for the balance and for the collet, this part is riveted to the balance and is part of it, and remains on the balance when the cylinder has to be removed. The cylinder goes out or in always in direction as the mouth will not go thru the hole. The balance on the anvil, the mouth part of the cylinder in the hole. Then a tube a little smaller than cylinder is used to push the cylinder out. If 0.75, then source 0.7mm syringe needle and cut part of it, put in a punch with 0.8 hole, then cut so it is 3mm above the head surface of the punch. This is the punch that is used to push the cylinder out. To push the cylinder in, use anvil hole that will take the hairspring part of the riveted bush. The cylinder is lead to the bush hole, then the special punch is used for pushing the cylinder in the hole. The punch must push only the upper part of the mouth.
 1 point
 -
Oh, I had no idea, thanks for enlightening me! I’m fed up with all YouTube videos and pods about Rolex watches (80 % of them?) I understand it, it draws attention, but it also makes Rolex stand out as exceptional and superior to everything else. It becomes a vicious spiral. Yes, Rolex watches are high quality watches, but the world of horology is so much more, and people in general miss out on it believing Rolex is the be-all and end-all when in reality it’s far from it.1 point
-
I make my own gravers out of HSS hardwood dowel and a bit of brass tube and have just finished making a graver sharpener to fit my lathe using the tip over tool rest with a shaft out the side. Dell
 1 point
 -
My mistake today was getting up. I have a cold, so I need lots of sympathy.1 point
-
This is the one I use https://www.aliexpress.com/item/4000004784736.html?spm=a2g0o.order_list.order_list_main.125.755e1802brNoLK You have to mount it on a wall, otherwise, it won't wind the watches in all positions as it would on the wrist. You can't go wrong for £30 including shipping!1 point
-
Has the OP responded to anyone on either making the bumpers or supplying the 3D model? I would like a set in red.1 point
-
Hi, I have been thinking of doing the same for a year now! Any chance of getting/**** the STL to test it on my machine? *** edited: no sales on this forum please.1 point
-
That's not the philosophy of this group the philosophy is to look at YouTube videos observe how simple and easy watch repair is and jump right in no skills required. In fact if you look at some of the YouTube videos actually say that they have limited skills and they don't have time to go to school etc. in their successfully make a YouTube videos and showing how to do repairs. So why practice we can just jump right in what's the worst that can happen? One of the beautiful things of jumping right in with an absolute clueless attitude is you cannot grasp at all the possibilities of what the worst could be.0 points
-
I'm not sure how this affects us because how exactly will we purchase these parts from Rolex anyway? There are ways of purchasing new Rolex parts but typically in the US it's very complicated. If you are outside of the US there are opportunities at least there were at one time my understanding is Rolex is trying to close the parts availability issue were basically there are no parts for anyone that Rolex hasn't blessed which is basically all of us.0 points