Leaderboard


Popular Content
Showing content with the highest reputation on 12/12/15 in all areas
-
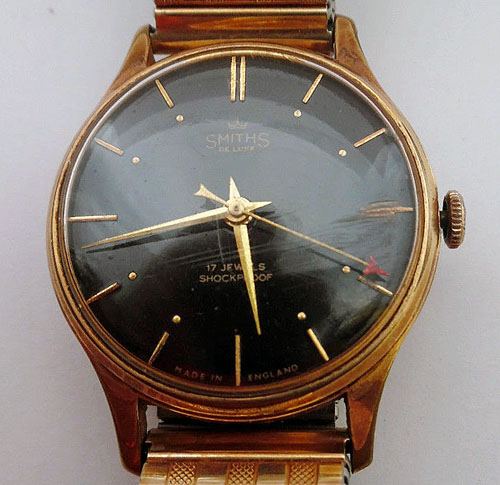
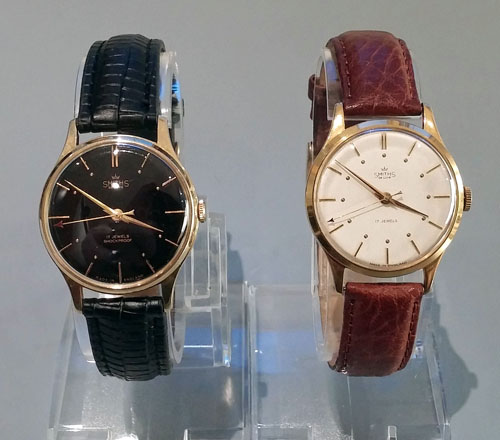
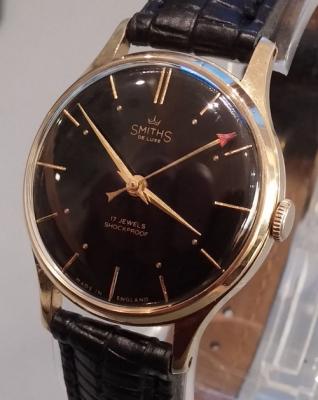
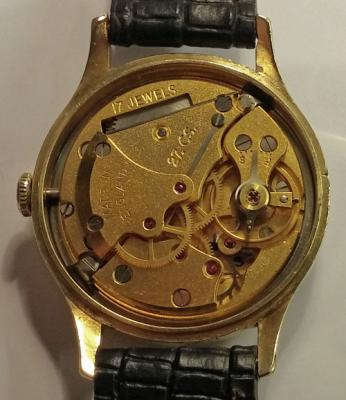
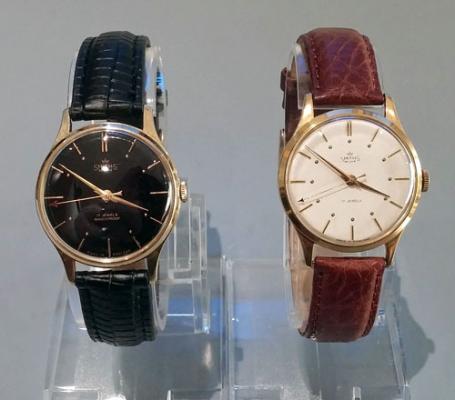
Just finished a c1959 Smiths Deluxe A358 thats been on the back burner a while now: As was: Grubby case, badly scratched crystal, sticky out crown & to top it off a vicious expander strap good for torturing the hairs on your wrist. Movement fully serviced. Second hand straightened. Cleaned case etc. New strap & crystal. Crown set correctly & it now looks like this: The movement: Easy to work on (nice big pinions) & showing a good amp of 315 well up from its original 230. Running at +/- 8 seconds a day. Shown here with its older brother an A352 from 1956:

 2 points
 -
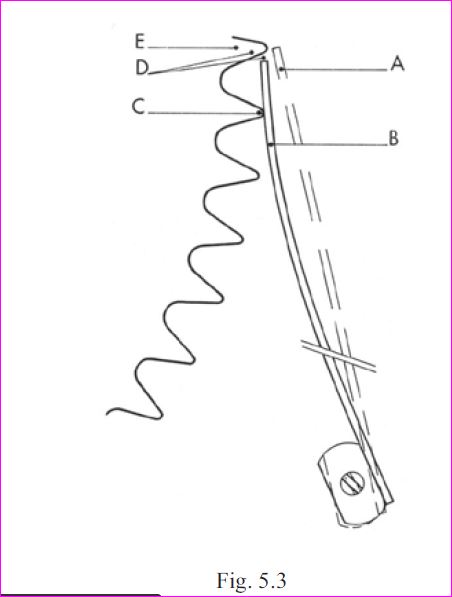
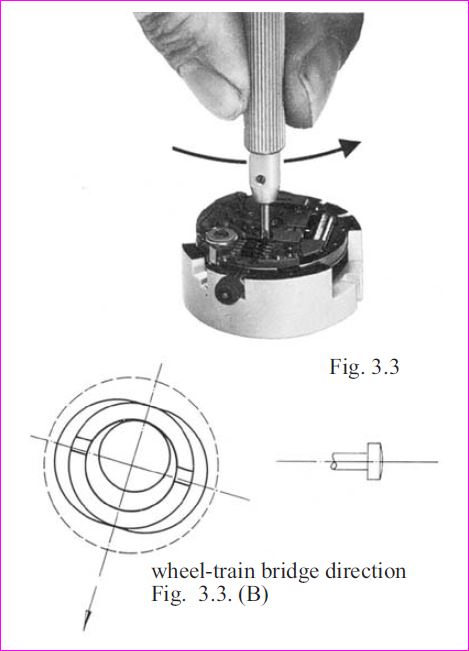
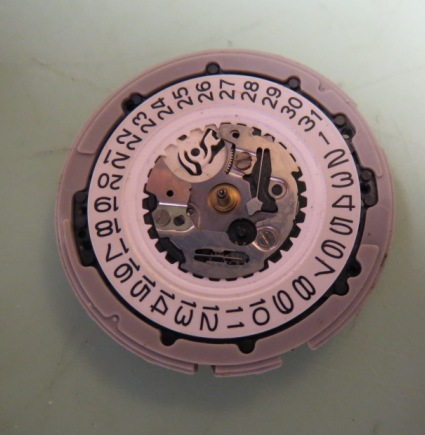
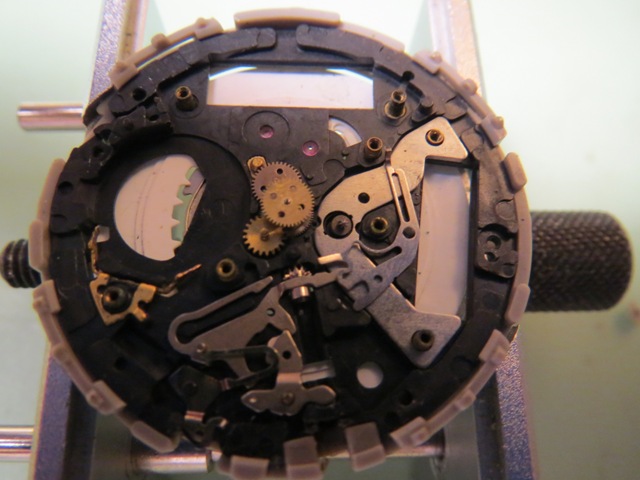
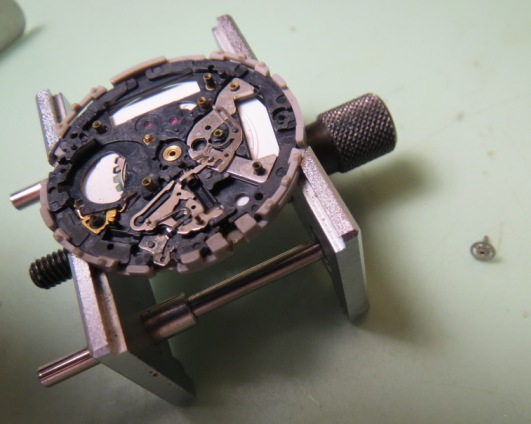
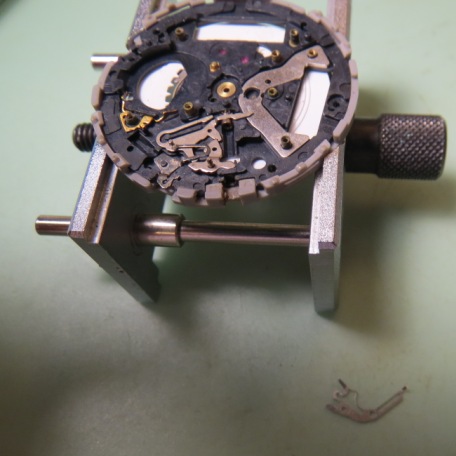
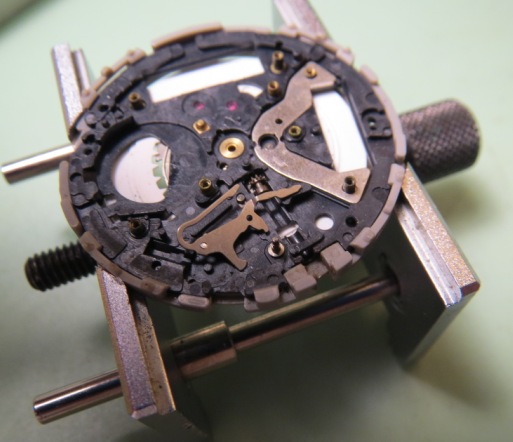
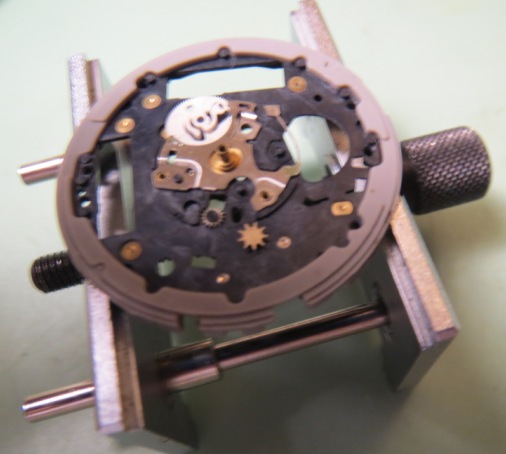
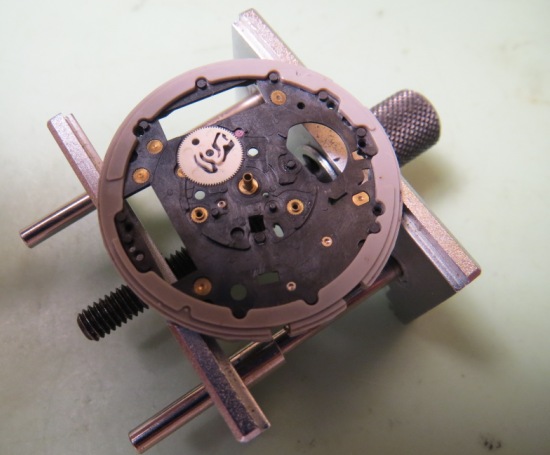
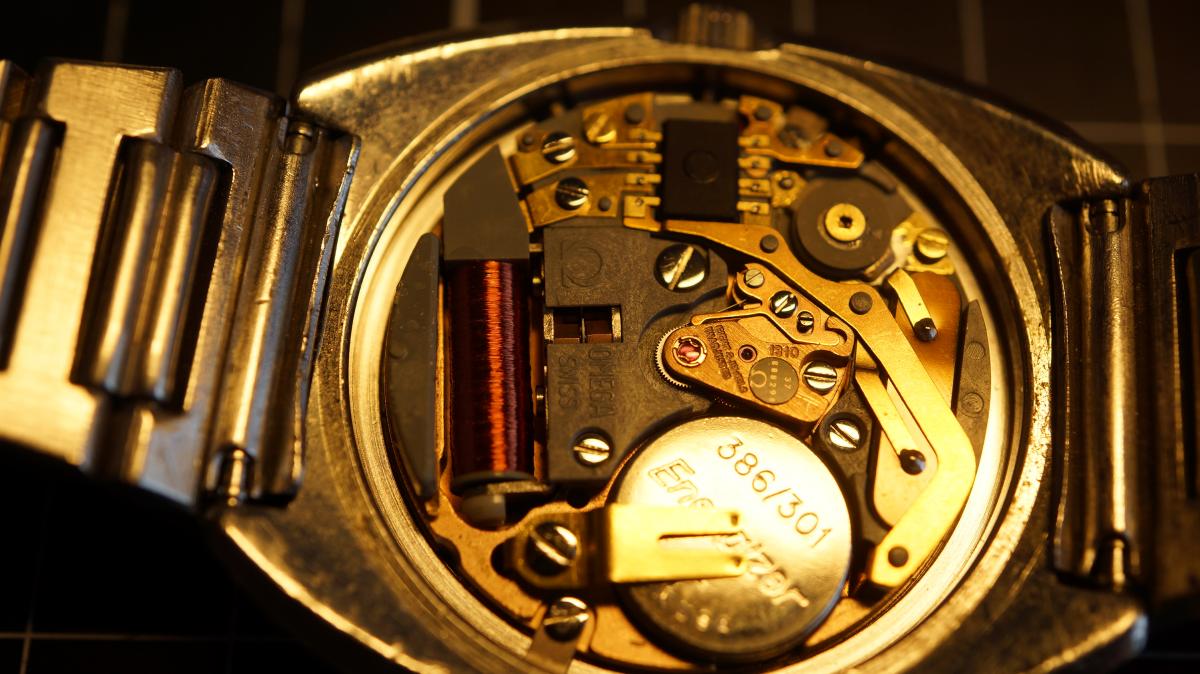
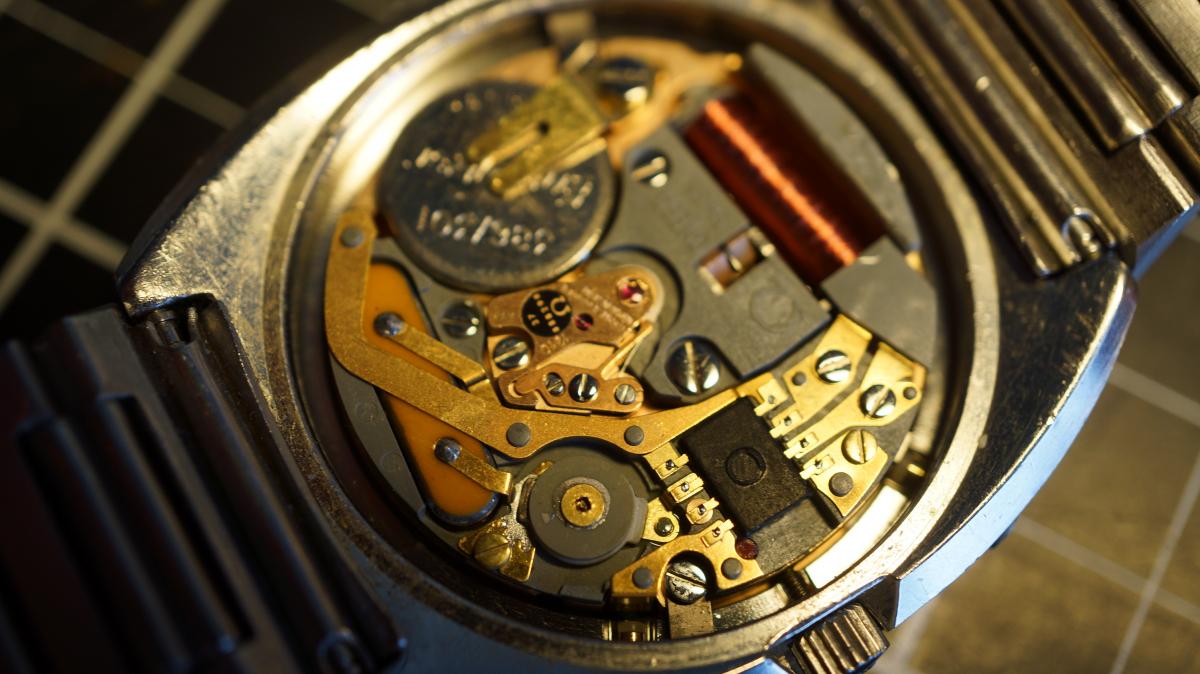
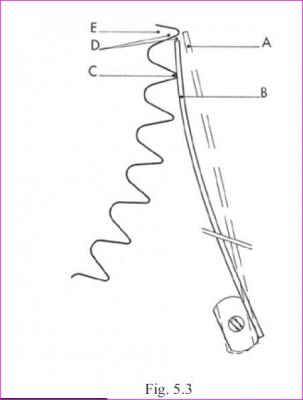
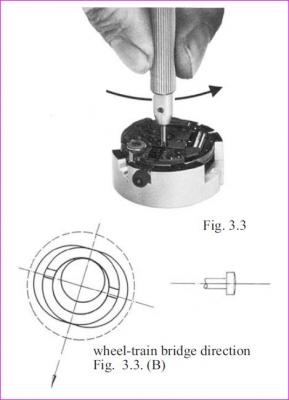
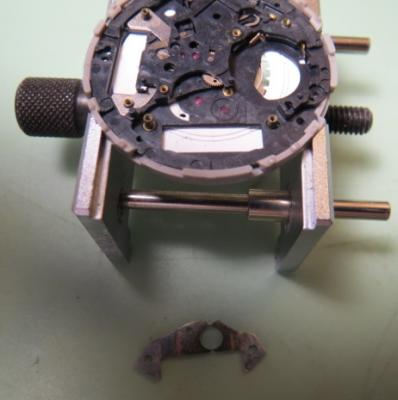
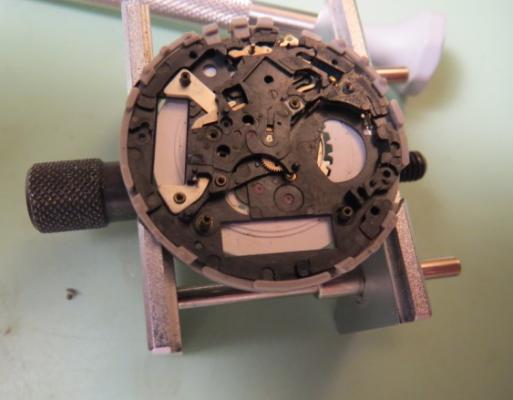
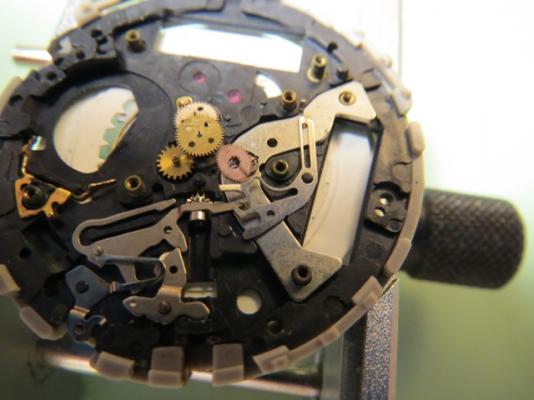
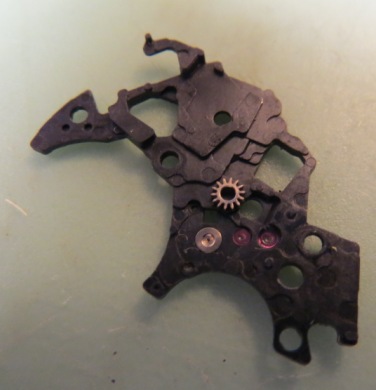
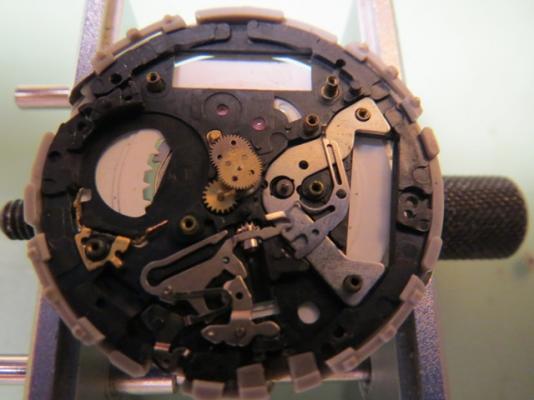
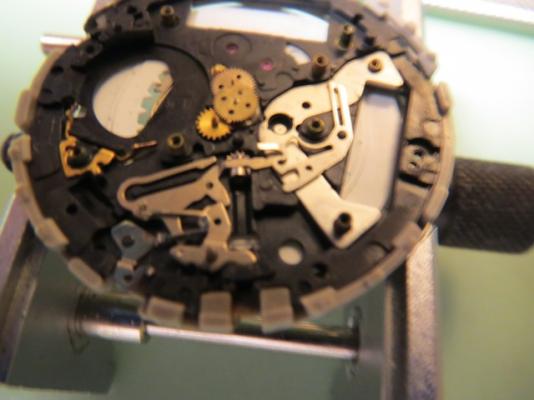
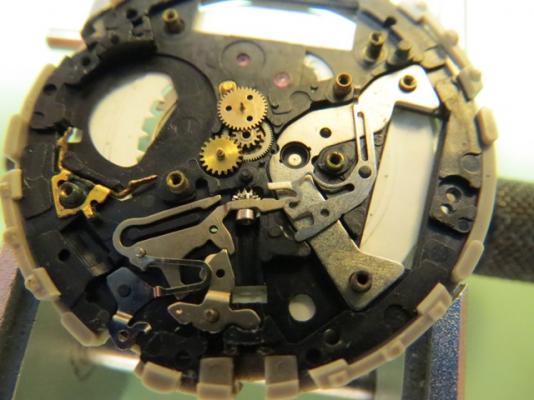
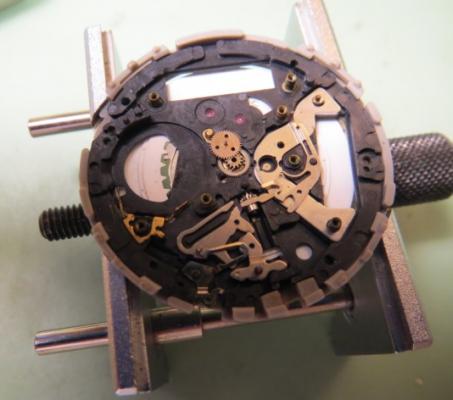
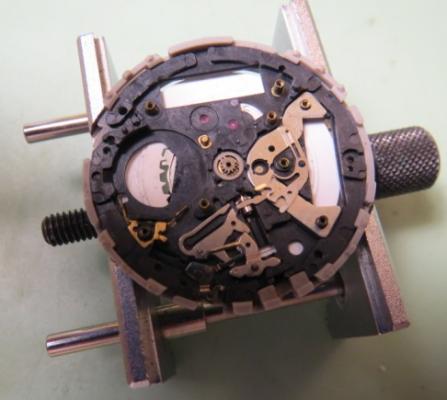
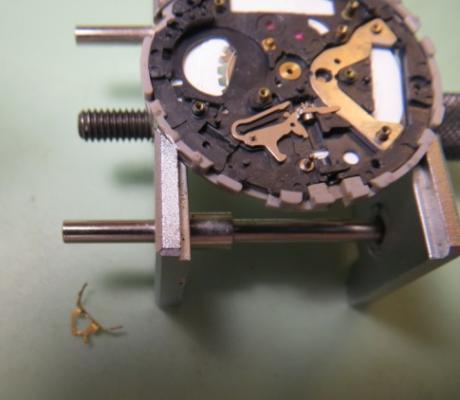
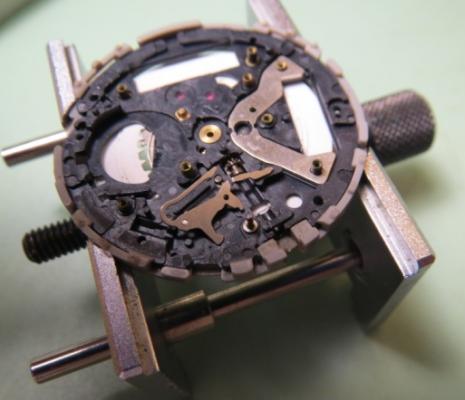
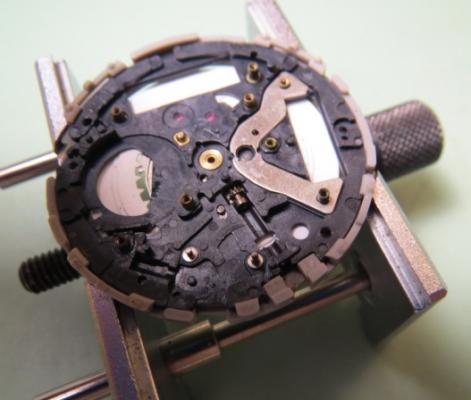
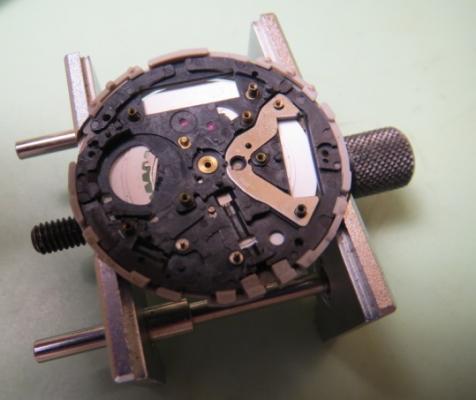
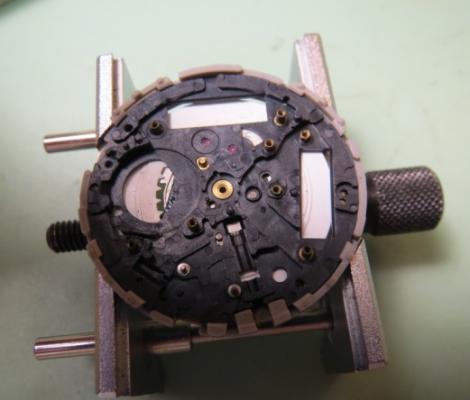
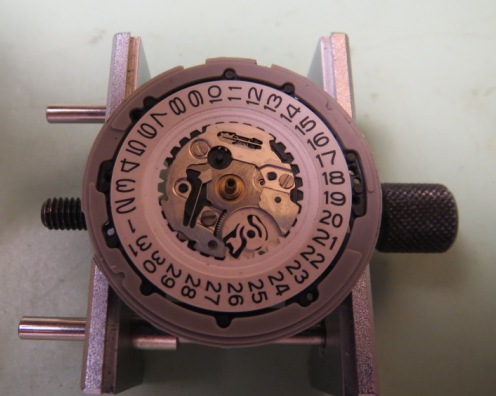
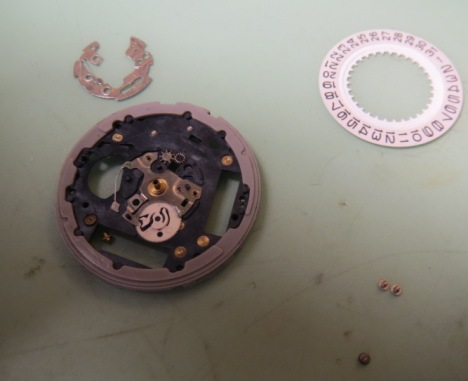
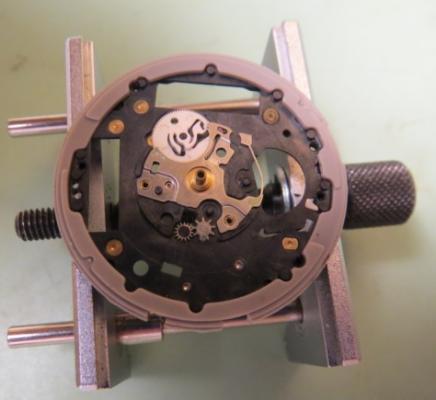
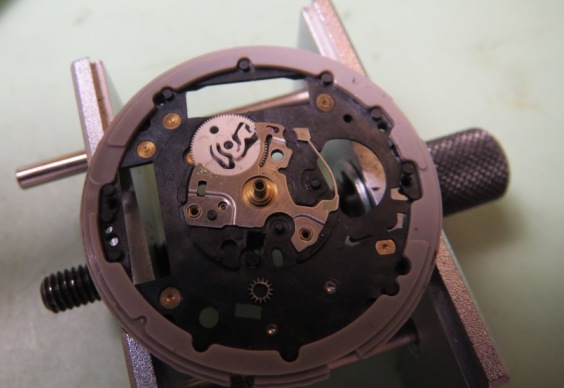
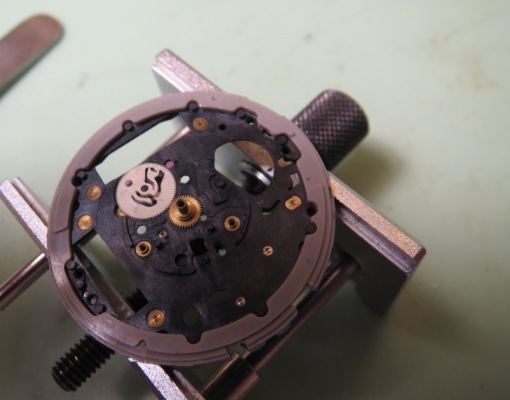
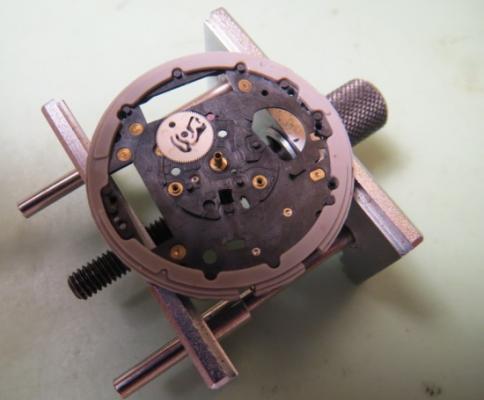
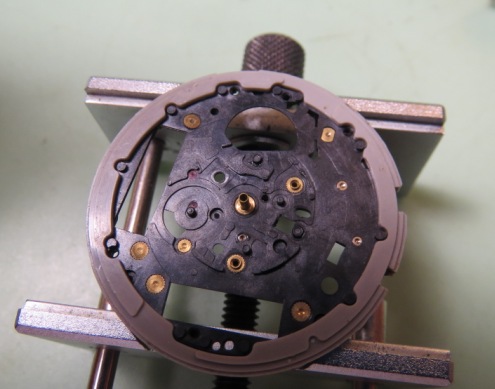
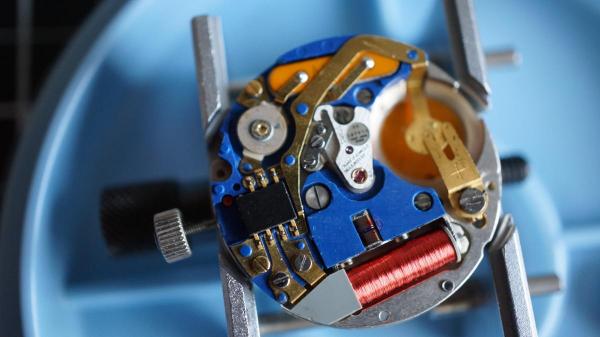
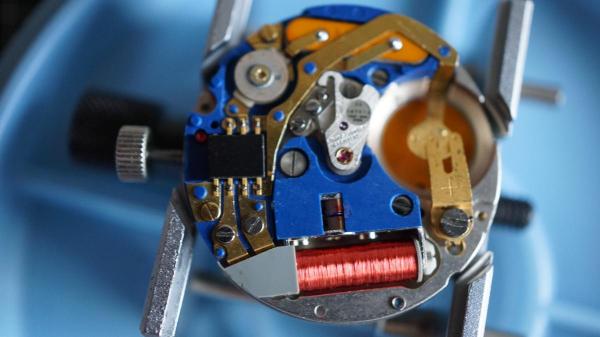
Confusing numbering that doesn't exactly explain what the differences are. So that the Tissot 2100 is equal to the Omega 1315 and 1315 is only slightly different from the 1310. I've attached a PDF that shows what the differences are unfortunately it does not explain why it's different only that it is. So the confusion you're having is there are two separate adjustments. Then the manual itself is somewhat confusing to read unless you've done one of these before. So I've attached images of both adjustments. So in figure 3.3 it shows adjusting an offset cam that changes the depth of the motor assembly with the gear train. In the text 3.36 they talk about this. So if this is not adjusted correctly the entire gear train will stop. Then starting at 3.40 this is where you're supposed to have the microscope for this adjustment. http://www.ranfft.de/cgi-bin/bidfun-db.cgi?12&archimedeshop&0&2uswk&Tissot_2100 http://www.ranfft.de/cgi-bin/bidfun-db.cgi?10&ranfft&0&2uswk&Omega_1310 http://www.ranfft.de/cgi-bin/bidfun-db.cgi?10&ranfft&0&2uswk&Omega_1315 Omega 1310 1315_1_2278.pdf
 2 points
 -
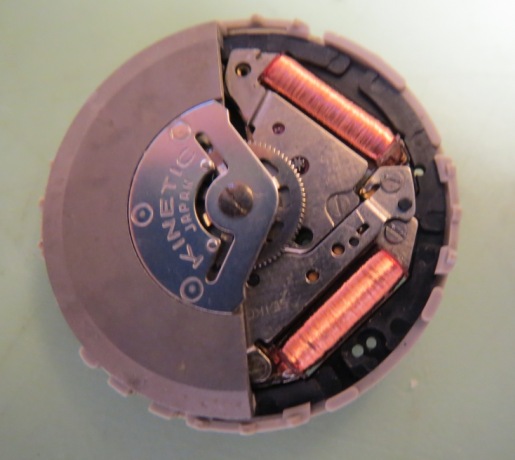
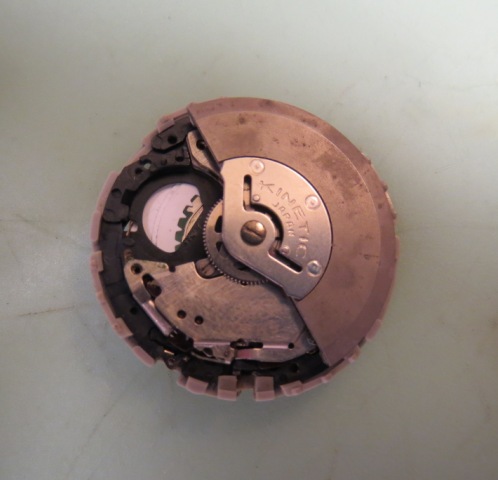
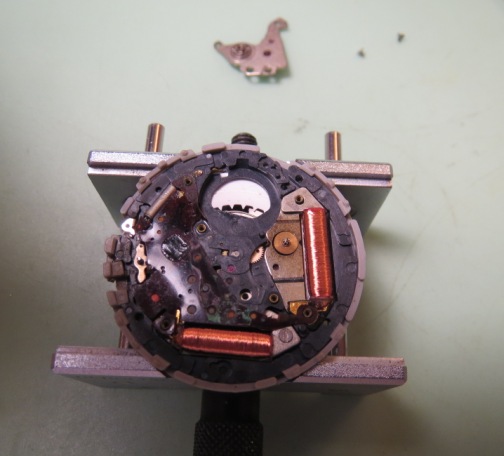
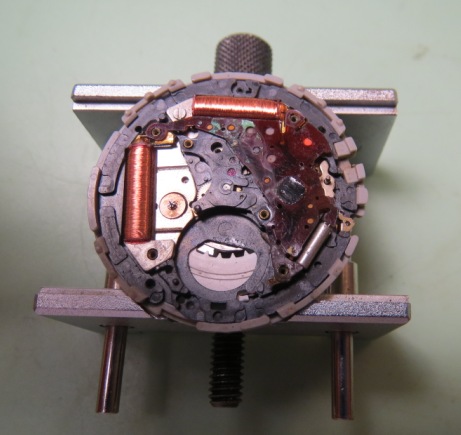
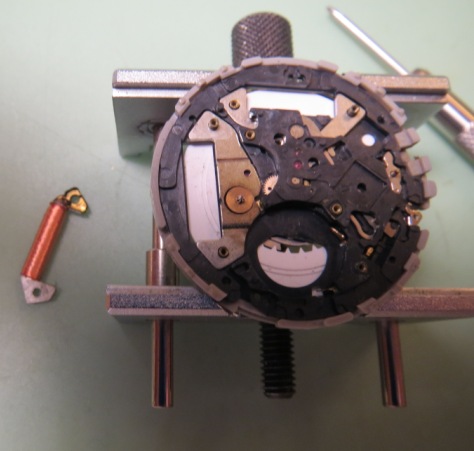
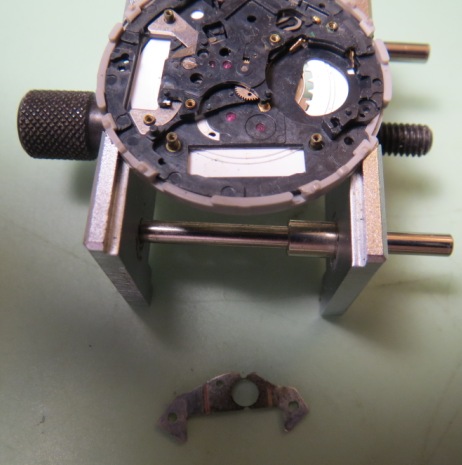
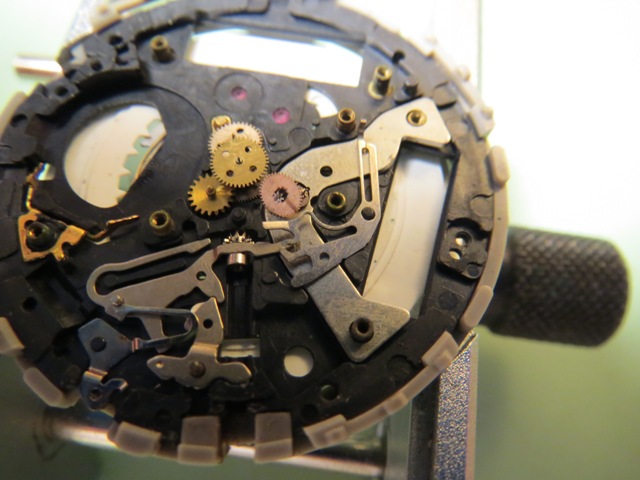
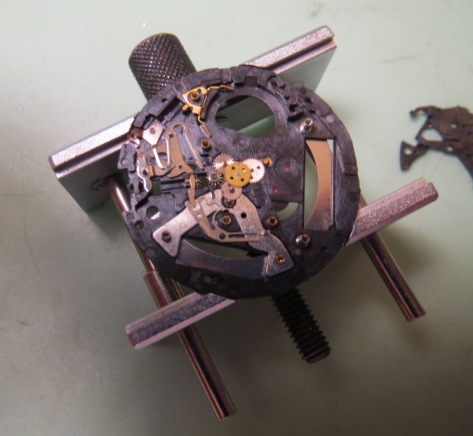
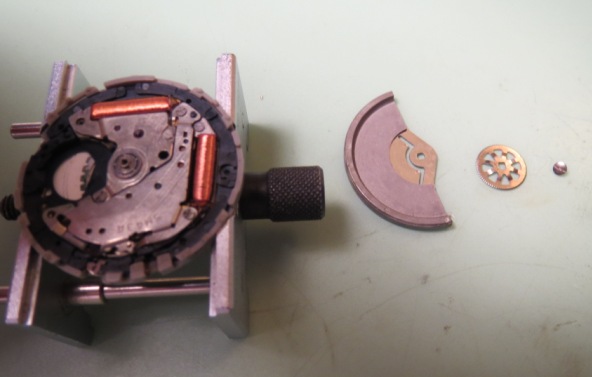
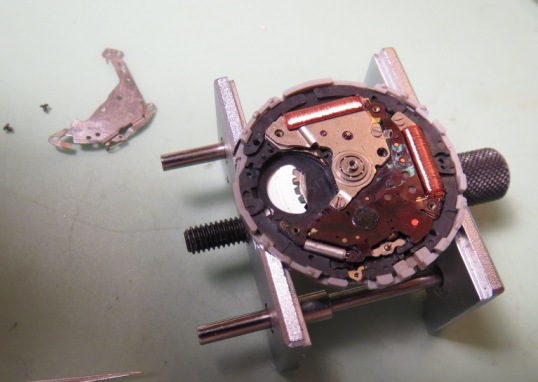
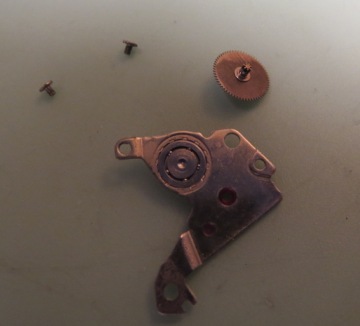
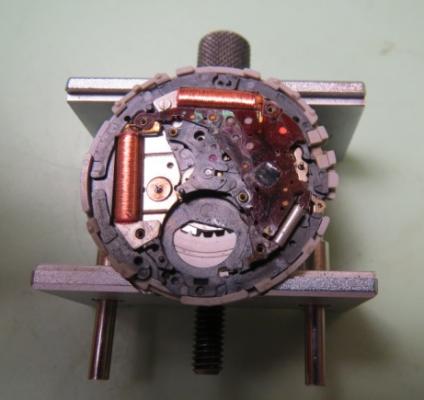
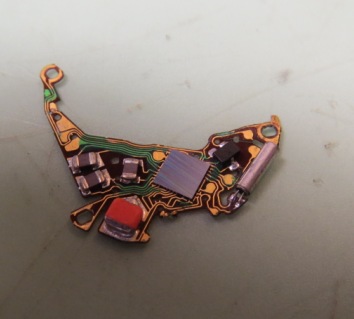
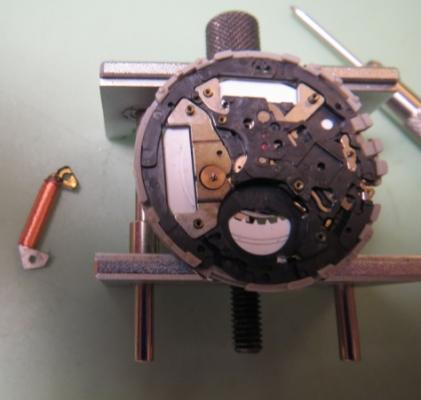
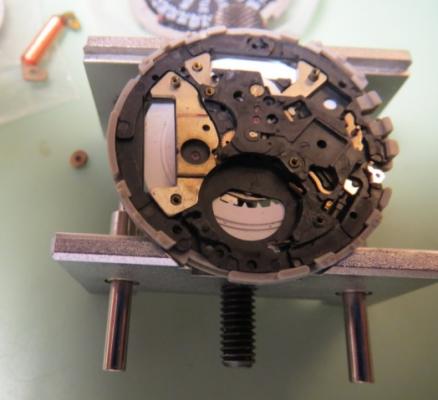
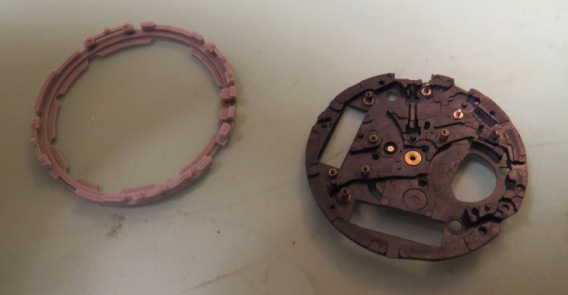
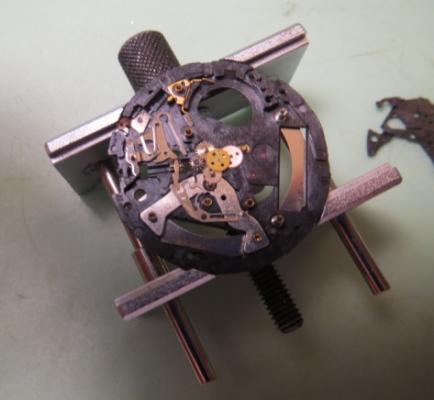
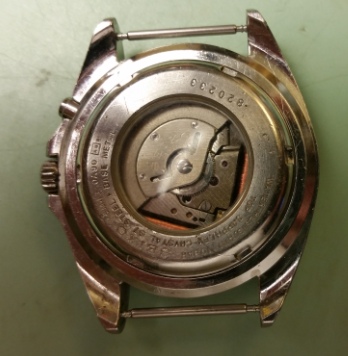
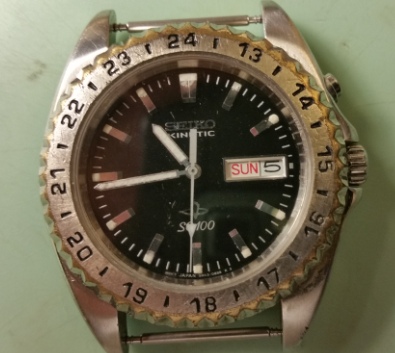
Hi all, I figure these movements were kind of popular and expensive (they are still available). So, since I just saved US$104, the price of them this side of the pond (take or leave a few dollars) I wanted to share my experiences. First off, the service data: 233_Seiko5M42A,5M43A.pdf Now for the disassembly: My order here is a little odd. The movement was in bad shape being an ebay non working watch, just for the exercise at hand. Therefore, sometimes in order not to damage a part, i.e. circuit or coil mainly, other parts are being taken out of the way first to facilitate the disassembly. In some pictures, there is another similar movement which also was used to eventually put together a working one between the 2. So, here is the 5M42, notice that the 5M43 only adds the day disc, a selector gear we'll mention later and a disc holding clip. Everything else is the same. The new capacitor kit that replaced the bugged original one is: 30235MZ which is also good for the following movements:5M62 and 5M63. There is no capacitor present in this movement... Notice that this movement can be disassembled each side without interfering with the other side. This means that we can remove all the parts from one side and then turn it and remove all the parts from the other side. Your choice which side you want to start first. I prefer to remove the rotor and keep going on that side (bottom) to ensure there is no damage to the rotor screw and bearings. As an added advantage, I'm also minding the coils and circuit. I would have removed the capacitor clamp, insulator and capacitor unit. This is only possible after the previous step and before the one being illustrated below. Removing the circuit block cover: I also removed the oscillator weight (rotor) bridge first since the circuit seemed kind of stuck and wanted more visual/elbow room to tackle it: A closer view of this bridge, notice the intermediate wheel for generating rotor: Now we have a full view of the electronics, in very delicate estate I may add. Luckily the circuit block is OK ( I used the one from the other movement which was in better shape ): Then, goes the short coil...and the long coil, the generating rotor and generating stator: We remove the only screw holding the train wheel bridge and look under the "hood": Here is the underside of the train bridge. You are seeing the setting wheel still stuck to the bridge: In the following pictures we remove the fifth wheel and pinion, fourth wheel and pinion, third wheel and pinion, step rotor, minute wheel, center wheel and pinion... Then we proceed to the keyless work et al. Removing the train wheel setting lever, switch lever (careful is under tension), setting lever, capacitor connection and yoke: We discover underneath the clutch wheel and remove it. Also the rotor stator is removed: At this point we turn over the movement...or what is left of it: As you see this one is the 5M42 version without the day disc feature. Normally for the 5M43 we pry, carefully with a small screwdriver, the snap for day star for dial disk, the day star with dial disc and the intermediate wheel for day correction. All those parts are similar in shape and location as to the 7S26 mechanical movement so there is no need to illustrate it at this point...if we had gotten it. Note that this movement uses a dial washer. So we skip the day star and start removing the date dial guard and date dial: Underneath is the familiar date jumper reminiscent of the Seiko mechanical movements, date driving wheel, intermediate wheel for calendar correction, date correction setting wheel, and hour wheel. I'm not sure about the plate present in this movement, it might have been one of those franken things, but this plate doesn't have the non-removable antimagnetic shield plate. I used the donor movement main plate since it had it. Here is a picture of the movement using the antimagnetic plate: So removing each mentioned part: And voila! The bare plate: Now we only need to remove the holding ring for dial and dunk everything in the cleaner...NOT everything! The generating rotors, both coils and circuit block DON'T go in the cleaner! Nor would go the capacitor if we had one in this case. Everything else is fair game. One note of caution, while assembling use plenty of rodico for each part since magnetism is an issue and can attract undesirable particles into the movement. Always check and recheck! From this point on and after cleaning the parts. Assembly is simply a reverse order. Follow the technical data for lubrication...I simply used moebius quartz oil and simplified everything...and maybe a little Seiko S6 here and there, mainly keyless works. One important data for those who don't have a multimeter and want to check the coils. You are measuring 2 different ranges of resistance/impedance, if your meter is not autoranging, make sure to change the range accordingly. Here is the final product in its case and with temporary hands...until I get something I really like and can refinish the case. I also forgot to say that this movement uses hands: 65/110/20...so far difficult to find in sport, luminic types...or so it seems from trawling the net! Hope all this helps! Enjoy! Cheers, Bob PS. Any insight, corrections, suggestions, etc is most appreciated!


 1 point
 -
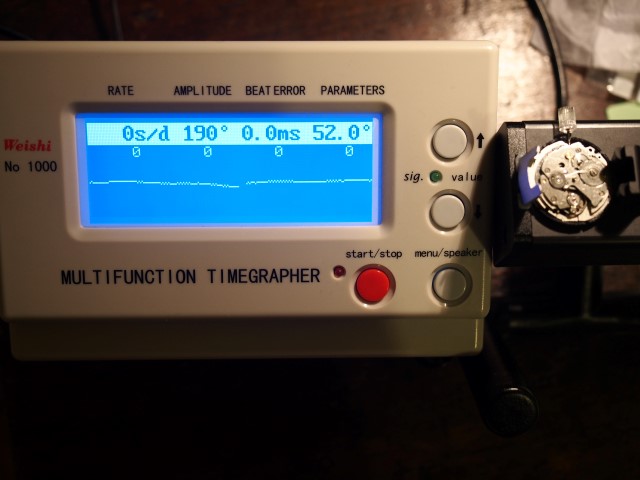
Finally some results. I have selected the balance that gives the best results and got the following. Amplitude is still not great, it's not a champion of isochronism across positions, but I'm happy with the regularity. Will finish assembly and recase to finally be able wear a watch that I've took apart and made work again :) I've learned a lot in the process and got a couple of ideas to improve these service guides, I hope to be able to post my own soon.
 1 point
 -
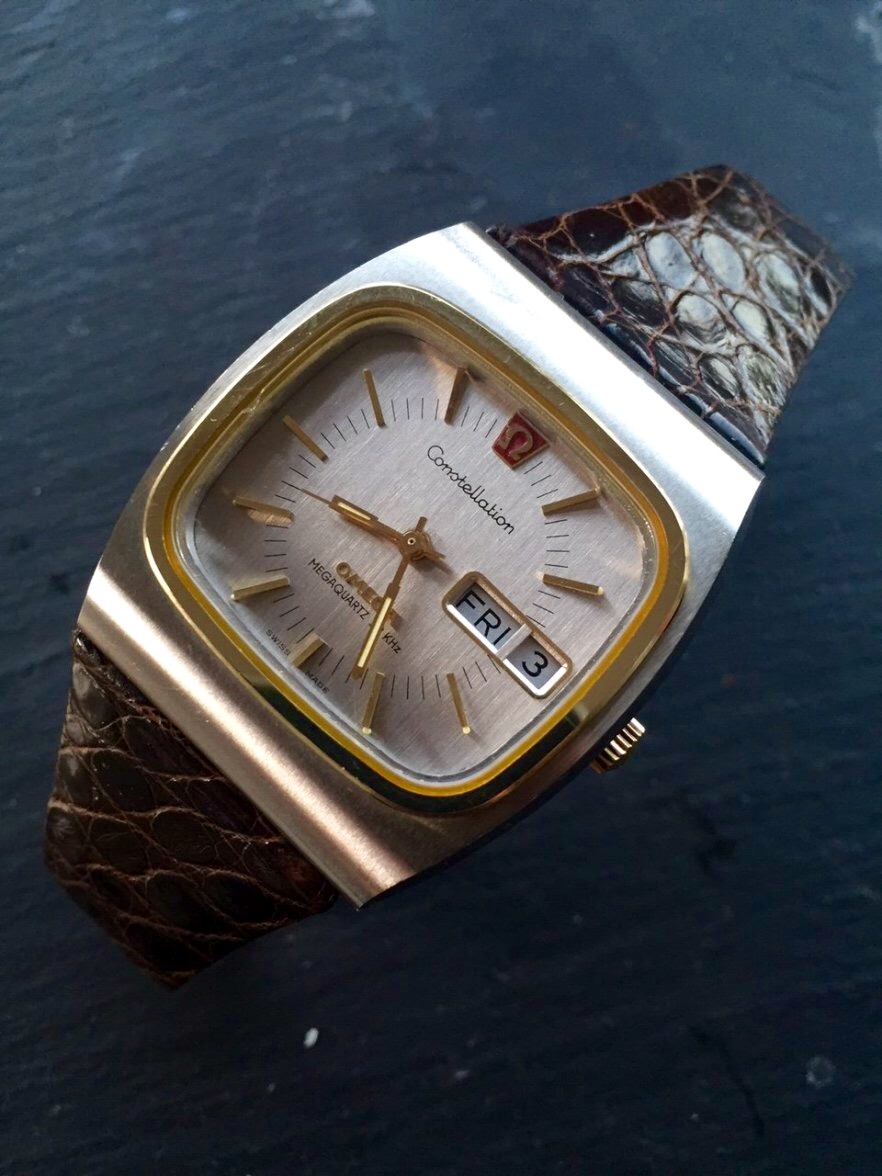
I treated myself for Christmas last week by buying a Constellation with one of these types of movement.
 1 point
 -
Have to buy some new parts. But that would not be before Christmas . But will sure try to get it up to speed again. Now that i now how it works. I am not sure i should buy the click or the click with the retaining plate already attach? Depends how difficult it is to put the click in place?1 point
-
That's a beauty of a movement...I never though I could say that of an electronic one being partial to mechanical/autos! Keep us up to date, I'd love to hear more of your progress and end result! Cheers, Bob1 point
-
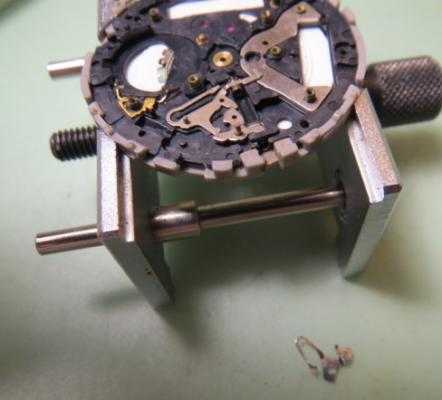
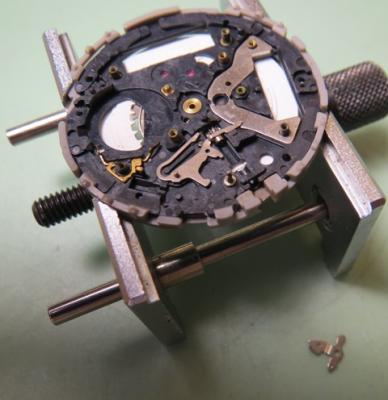
That part is missing on my movement?The click spring. I will have to get a new one from cousinsuk .Lucky as i have a 1310 movement to compare with . I will order that and see what i can do? Discovered that the click retaining plate didn't sit right either . It's jamming up the wheels . Learning more and more as i get along.


 1 point
 -
That's what I thought! Better safe than sorry1 point
-
I think you'll find this is not a fusee watch It only looks like one. We need a watch historian to get a proper answer on this one. So at one time you had fusee watches the purpose of which to get equal power from the mainspring. The mainsprings were of very poor quality.. Then the early escapement's were very sensitive to the amount of power applied as it would affect timekeeping considerably more than a modern watch. So I'm sure that there is an technical term for this type of watch. Basically they keep what they have and they just upgrade. The old escapement is gone replaced by an English lever largely keeping everything more or less the same as it was before. On these semi-handmade watches they can keep the main plates they only have to change the little stuff.Then the mainspring barrel now has teeth around the outside like a modern conventional barrel which cannot drive the center wheel due to its location.. So instead it drives a phantom fusee wheel which is usually made out of solid brass. It's one of the really fascinating things with looking at watches the evolution and so many different ways to solve a problem. So a transition watch moving from previous technology to new technology making use of what they have. Unfortunately for someone purchasing one of these unless you can see the side of the movement you have zero idea whether it actually Is a fusee watch or not. I've seen these before because when fusee movements were more affordable I would pick them up only to be surprised not to have a fusee watch.1 point
-
Thank you Don!1 point
-
Really good short video that explains a lot very clearly. Thanks for posting. Vic1 point
-
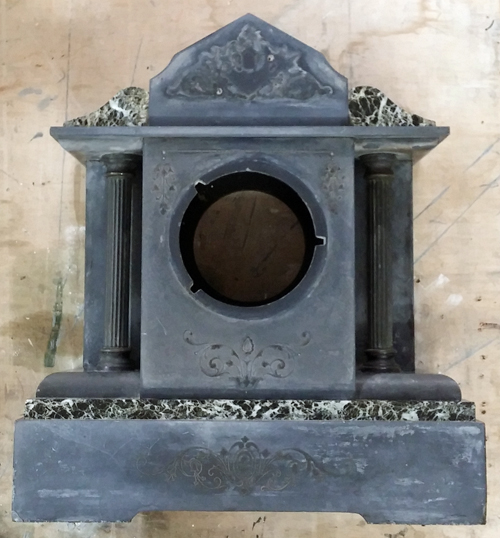
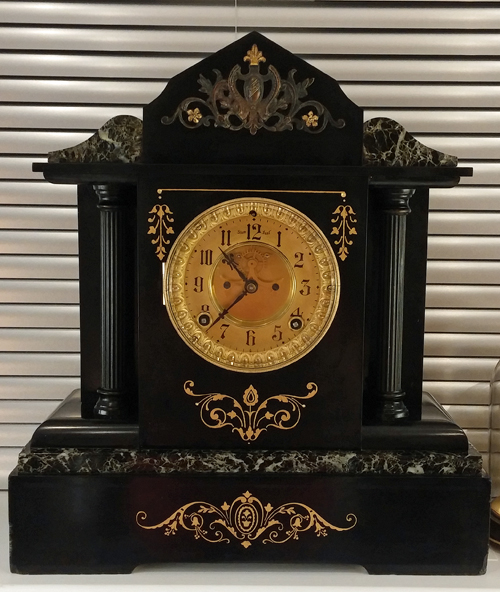
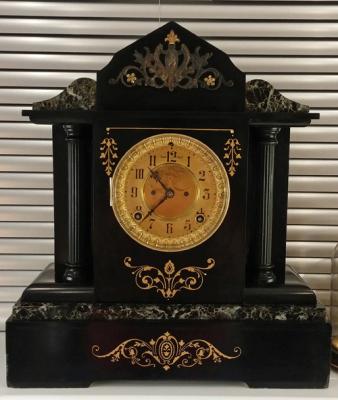
Just a quick update. The clock originally looked like this after cleaning off the years of accumulated grime: After a fair bit of trial and error I used the following: 3 coats Liberon Ebony Spirit Woodstain, 2 coats Slate Oil, 1 coat Renaissance micro-crystalline wax (thanks for the tip CB), 2 coats Painters Touch Acrylic Gold paint (from Homebase) to detail, put on liberally with brush & scraped back with razor blade between coats. a final 2 coats Renaissance micro-crystalline wax. and this is what it look like now: My initial trials with oil worked well at first but the pale patchy areas came back to haunt me after a couple of days. Tried Priorys Black Slate Renovator without success. The spirit woodstain has worked well, its not perfect but acceptable. Some surface corrosion is noticeable at certain light angles & as Oldhippy rightly states the only way to get rid of this would be to pull it apart, grind & polish. The pale patchy areas are now well masked. The Slate Oil appears to be none other than boiled linseed oil & was slower to dry than the original Floor Oil, If I did one again I would use Floor Oil.

 1 point
 -
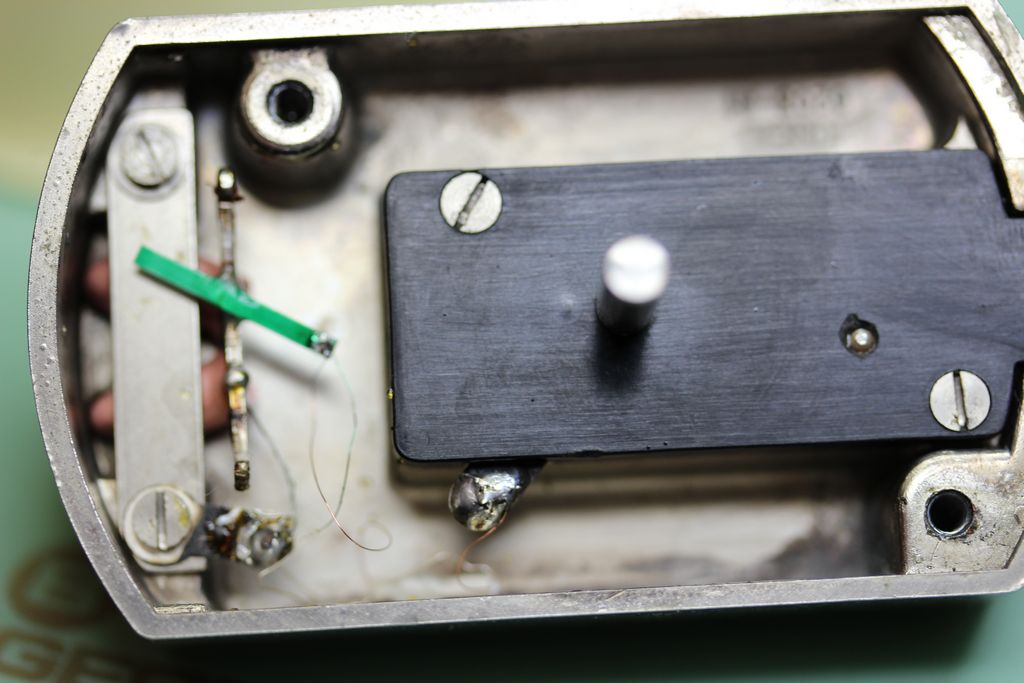
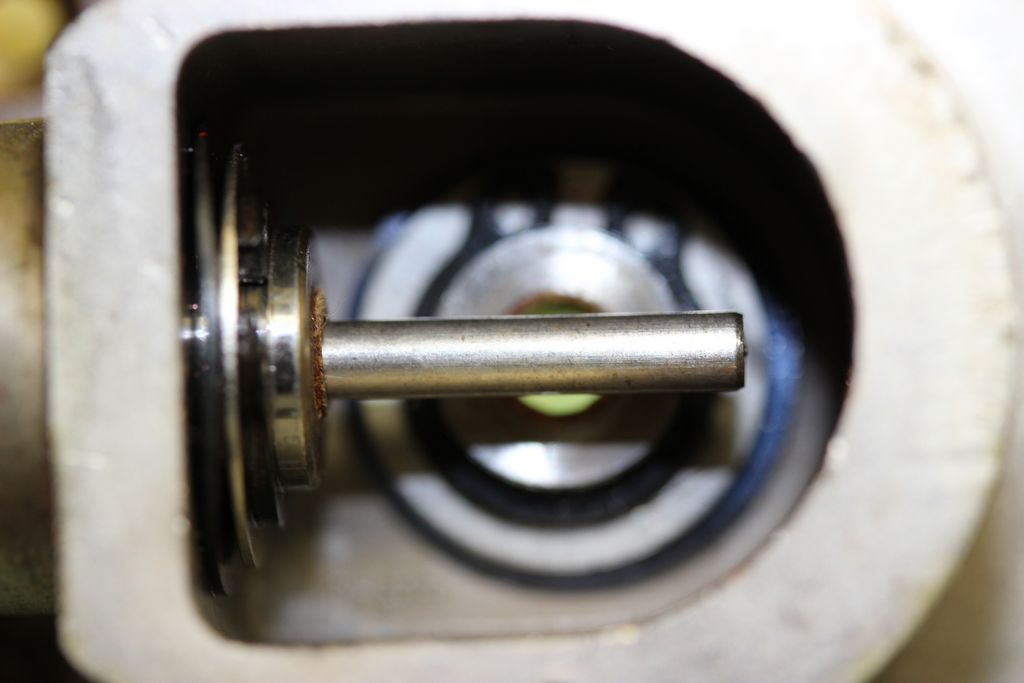
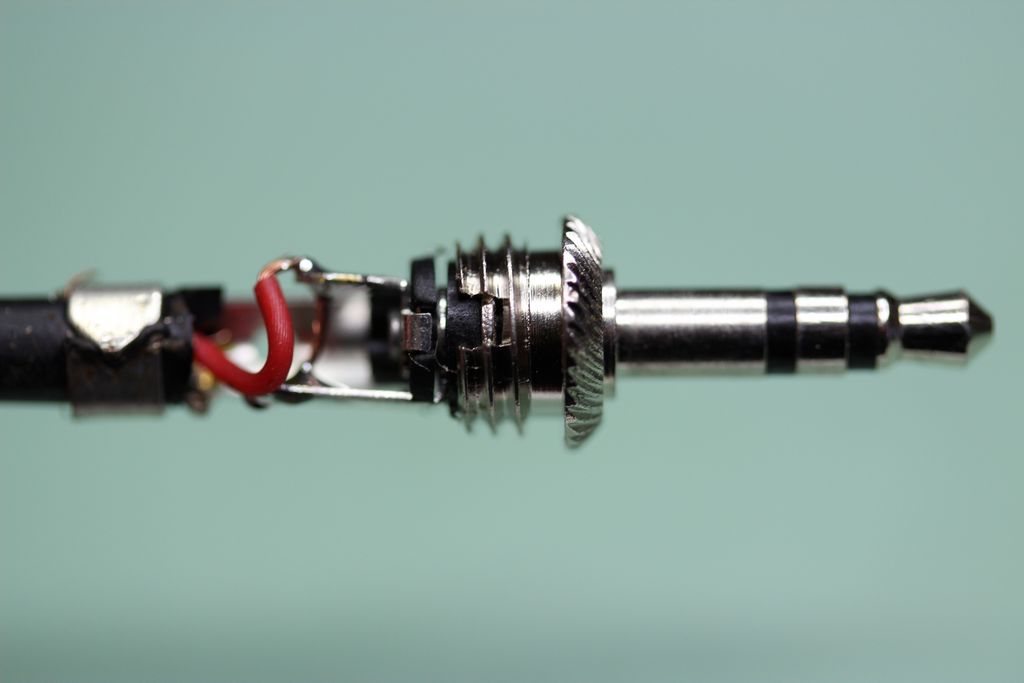
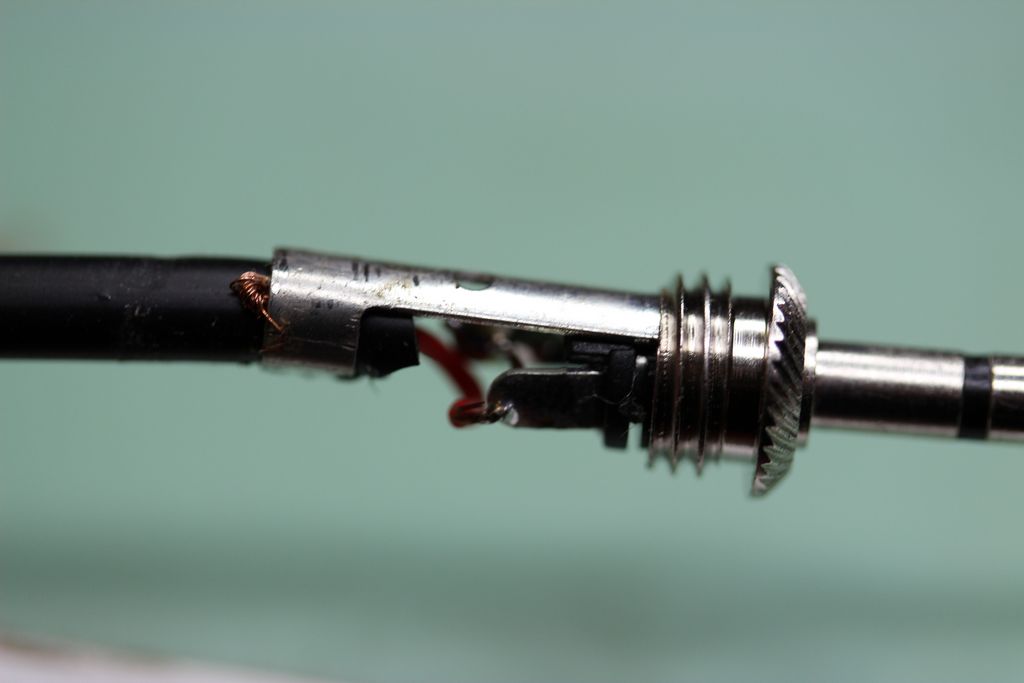
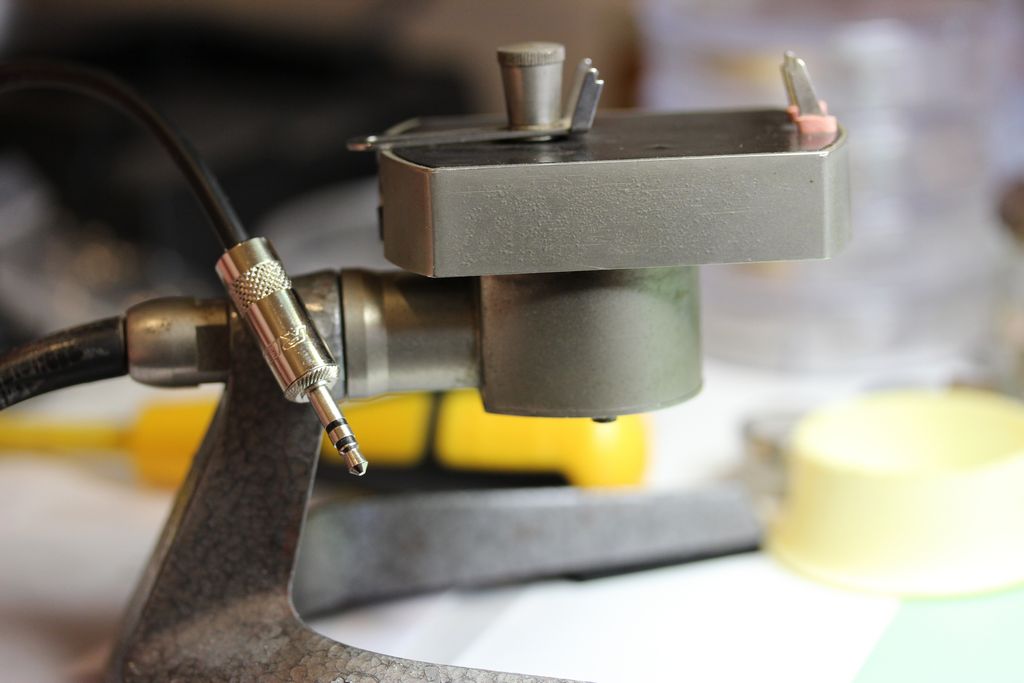
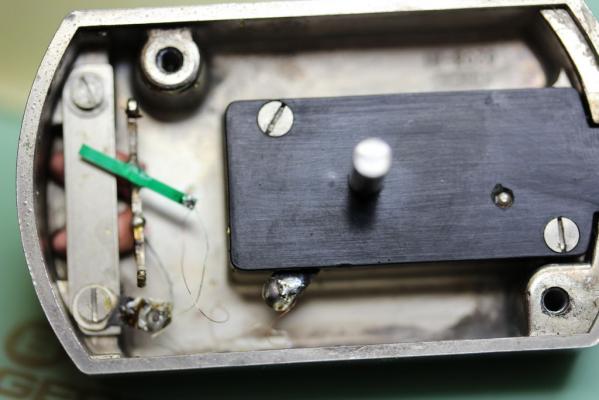
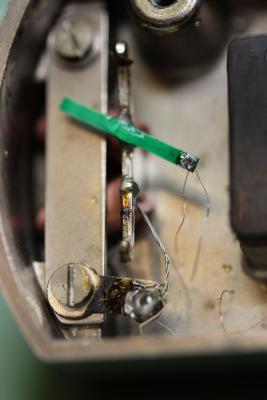
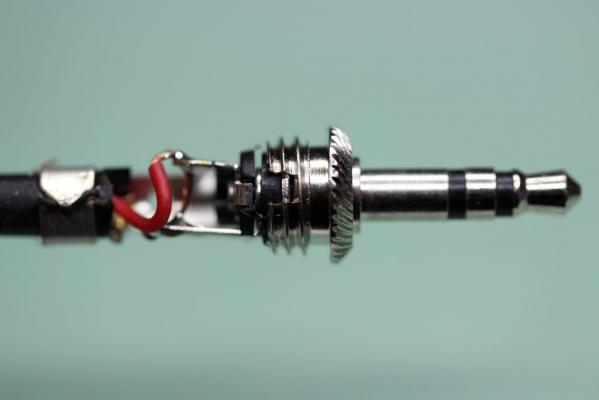
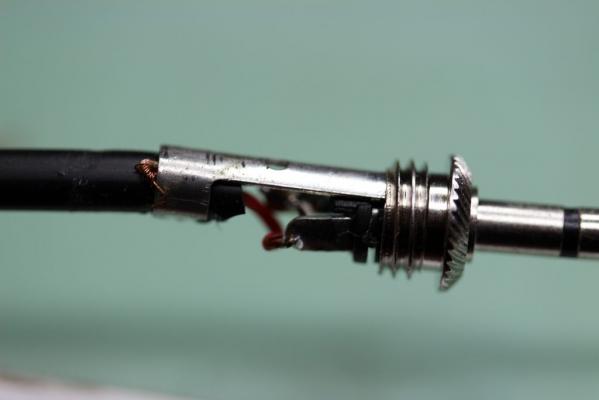
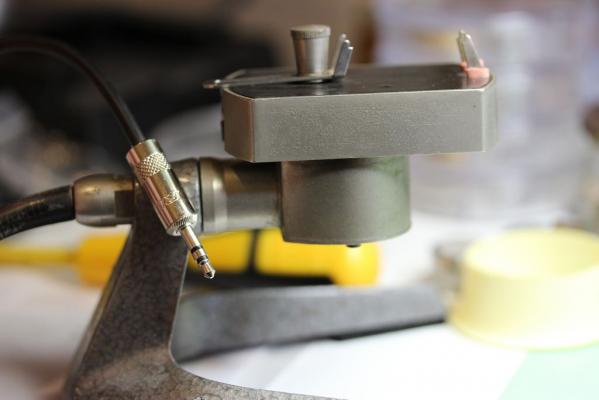
That does not sound healthy Geo! As a slightly different perspective I thought I would take some pictures of the microphone I use with the Escapement Analyzer software. This just works by plugging into the sound card on my laptop or PC. The microphone was from my old Greiner timing machine. I threw the machine away and kept the microphone to use with the software. I get an excellent amount of gain with very little noise. The microphone will pick up noises from across the room as well so I am often reducing the volume to about 1/3rd gain. Here are some pictures, I hope it helps someone. And svorkoetter, if you want me to test this with your software then fire me off a demo and I will be willing to do that. The microphone with the old socket removed and a stereo mini jack soldered in place: Pictures of how the jack is hooked up: Inside the microphone chassis: The coupling which allows this particular microphone to turn 360ºs - excellent for poising work. No pre-amp is needed, this works by just plugging into the computer sound card.


 1 point