Leaderboard


Popular Content
Showing content with the highest reputation on 07/18/15 in all areas
-
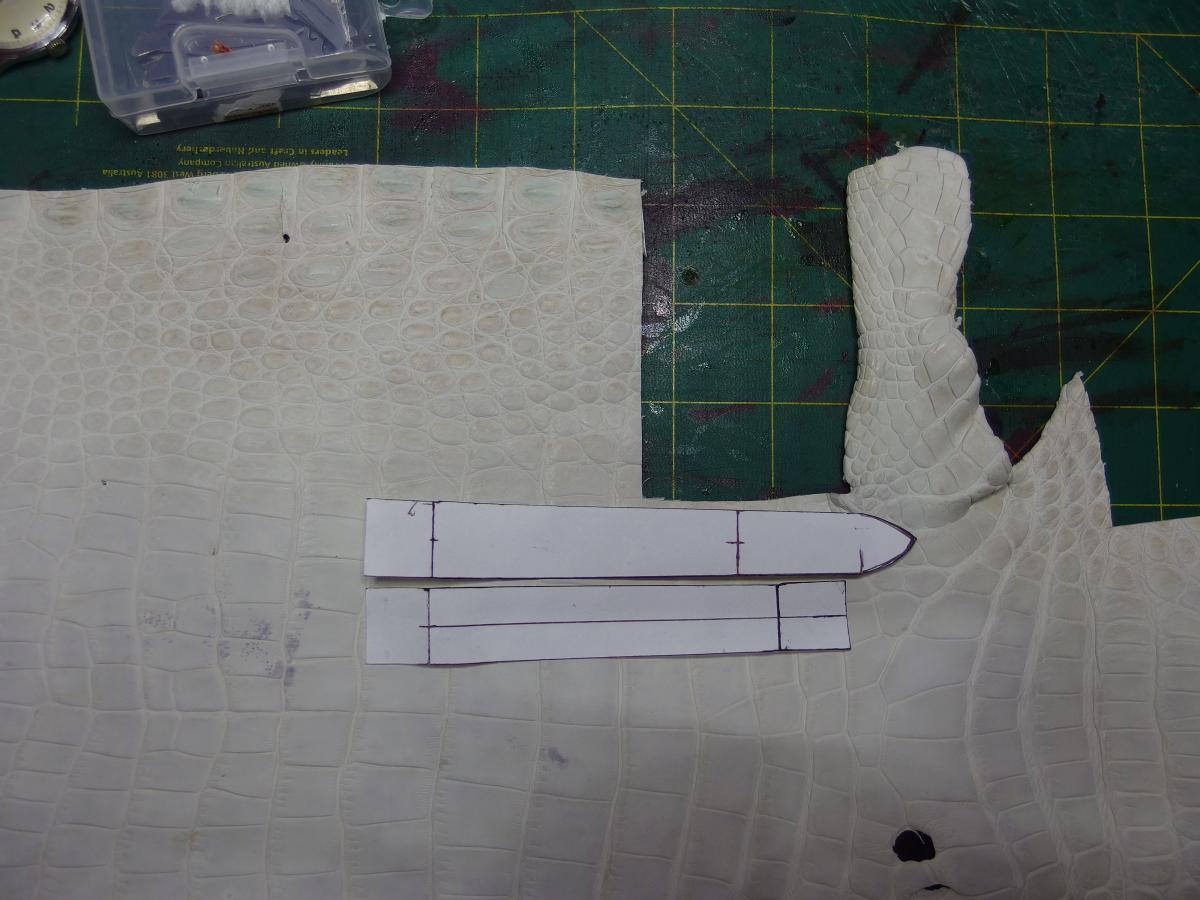
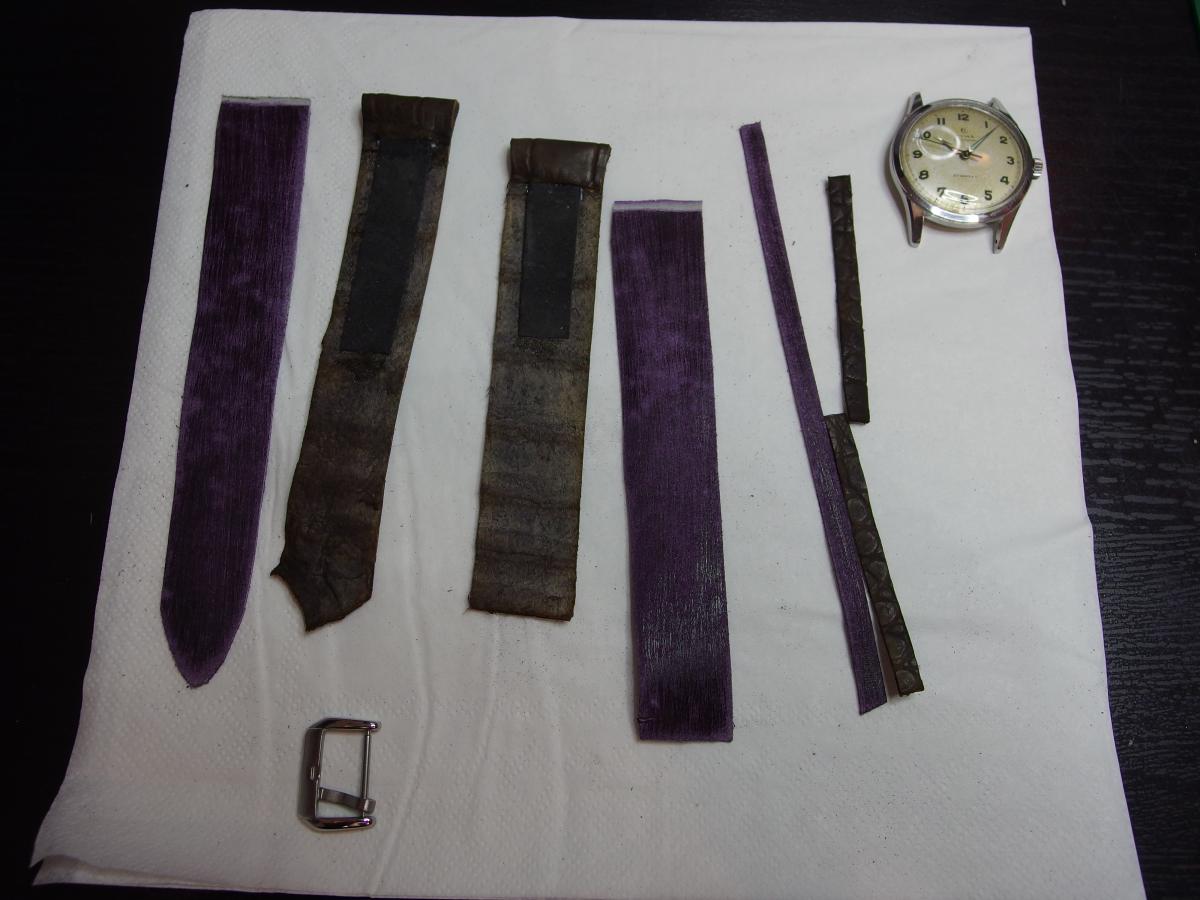
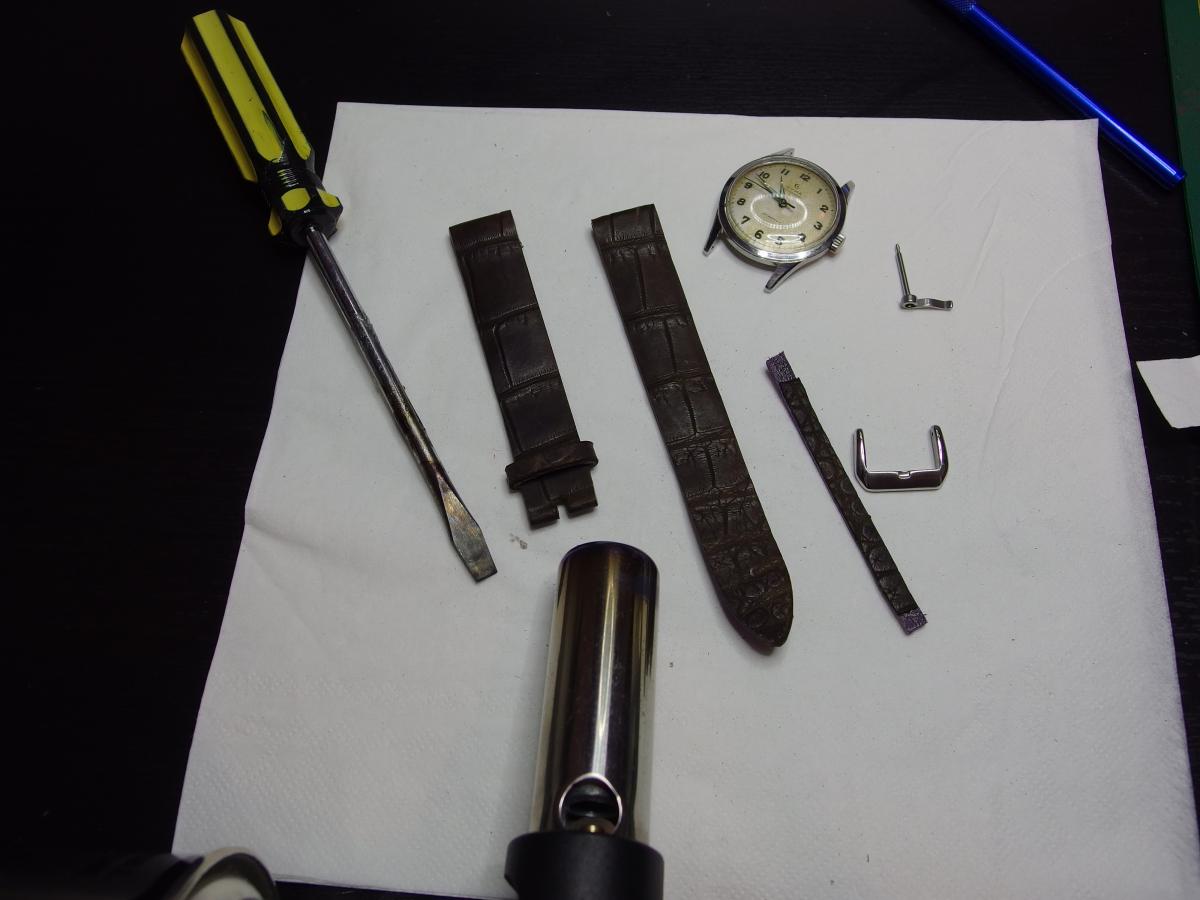
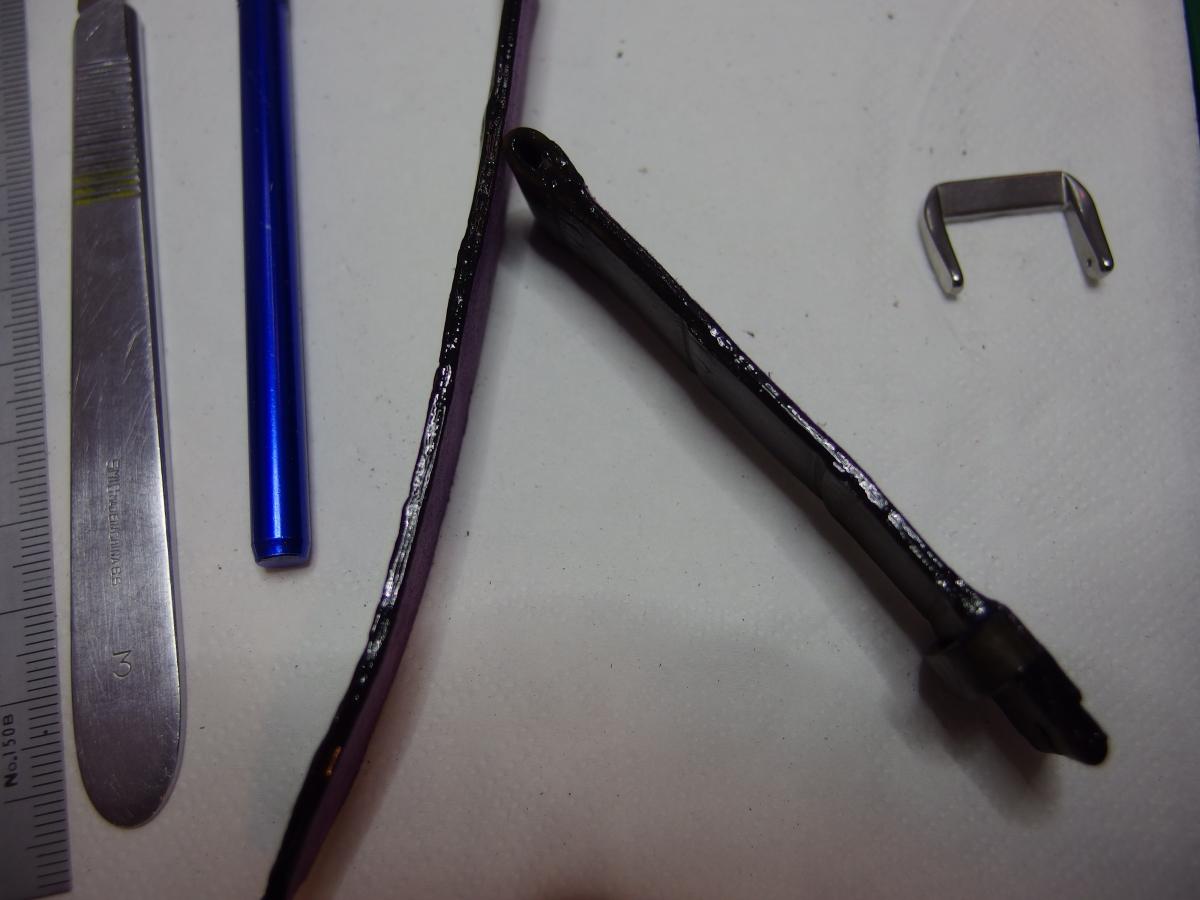
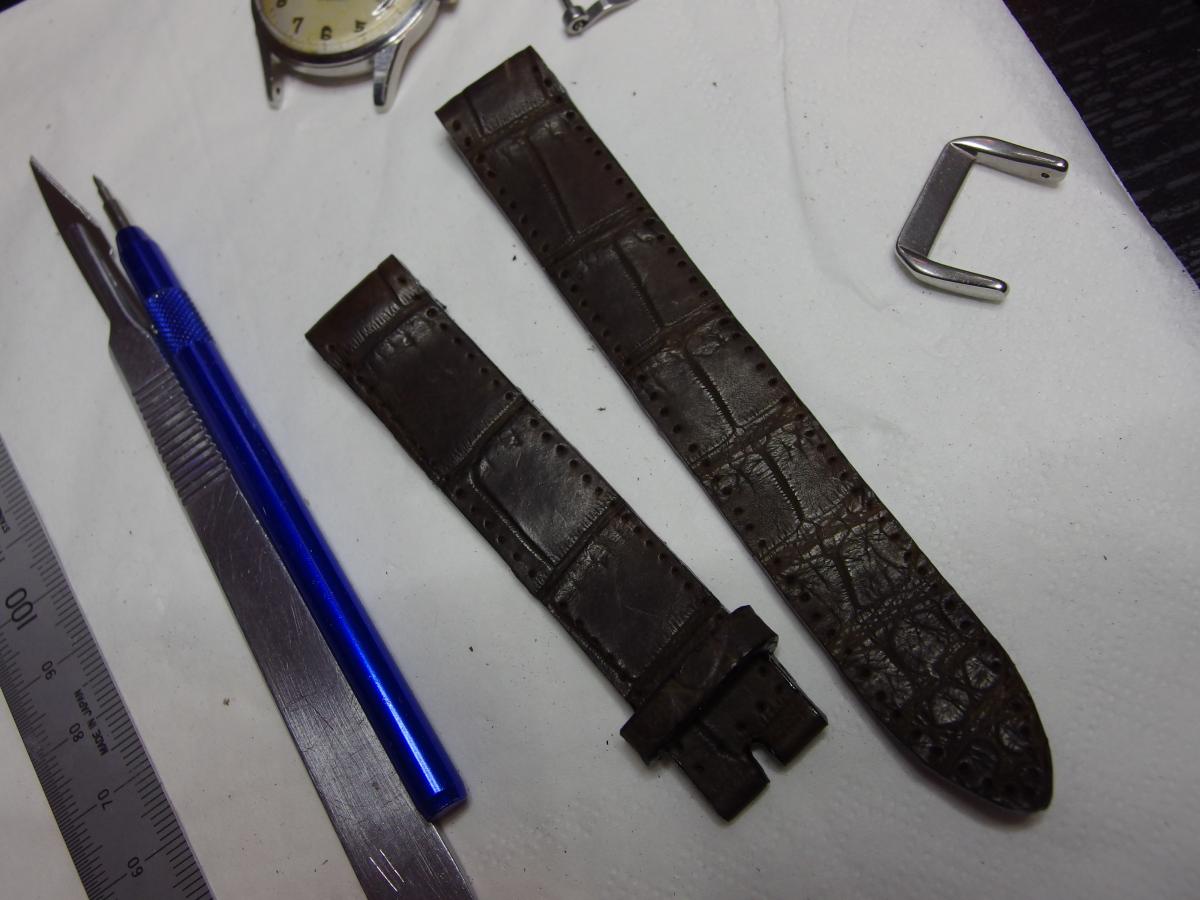
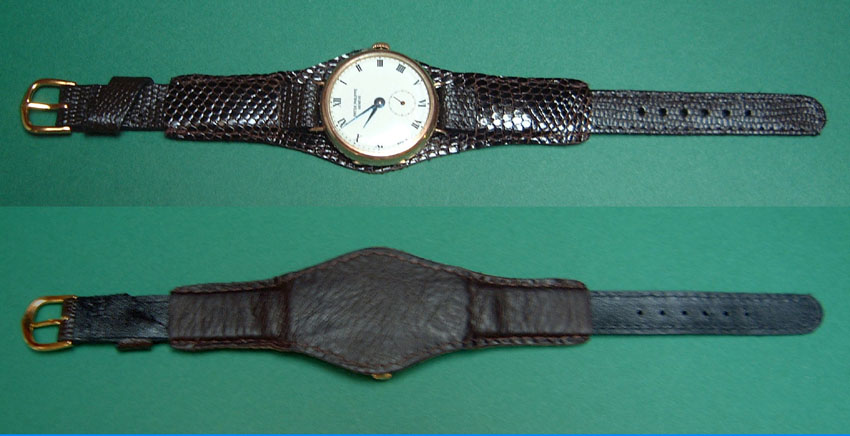
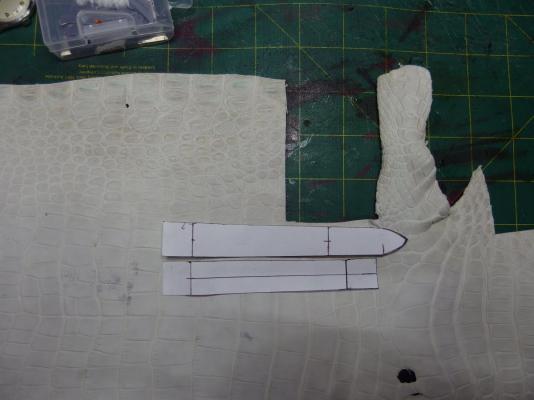
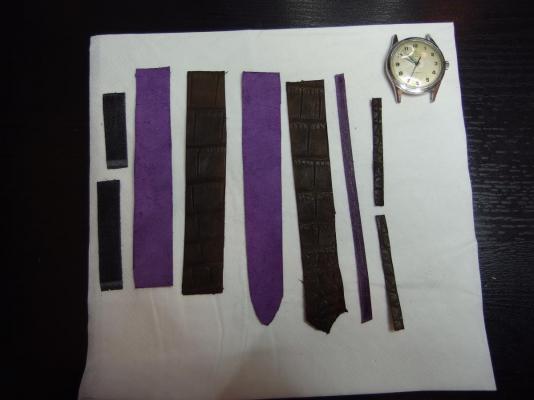
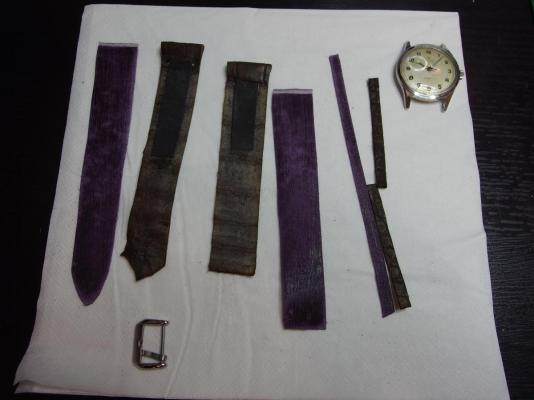
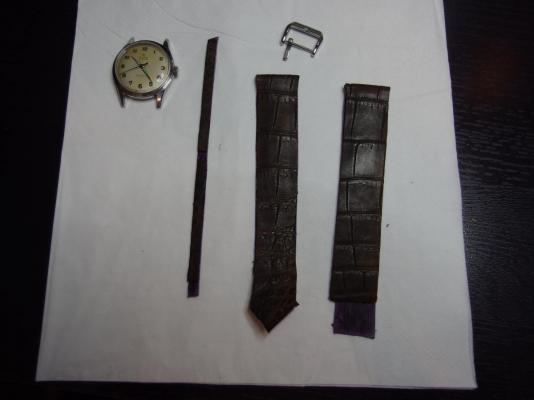
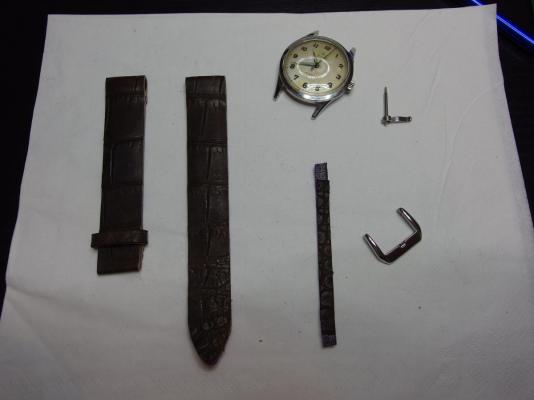
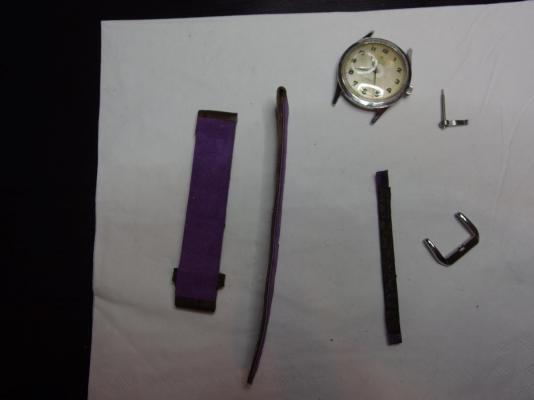
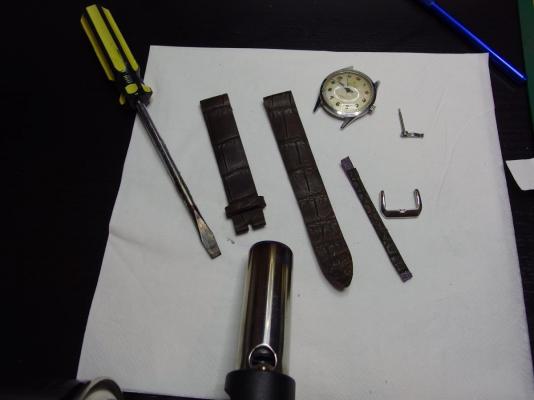
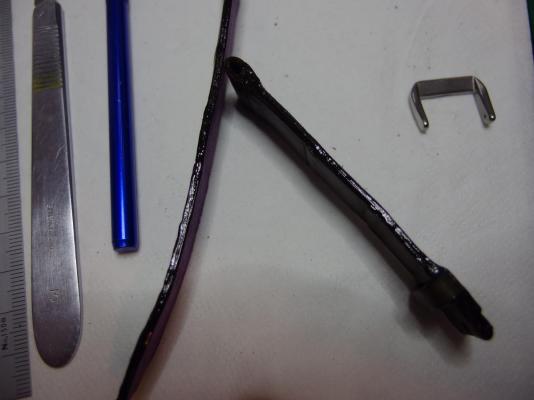
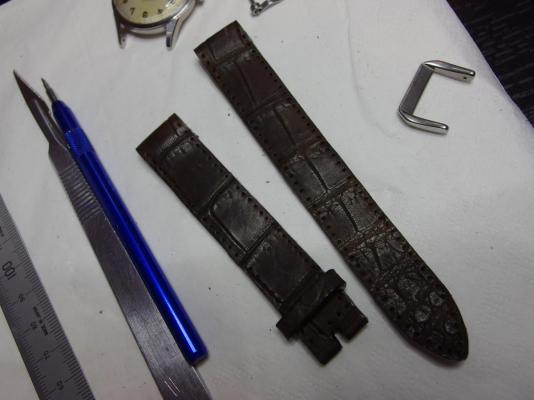
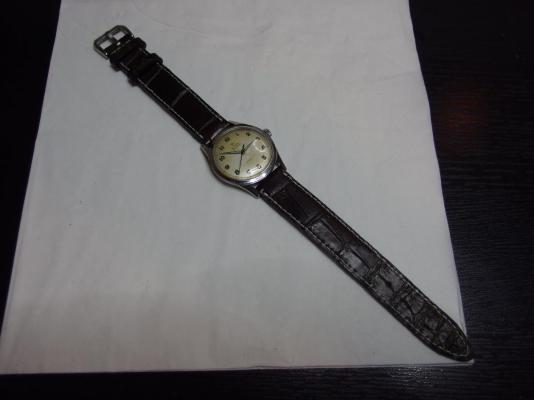
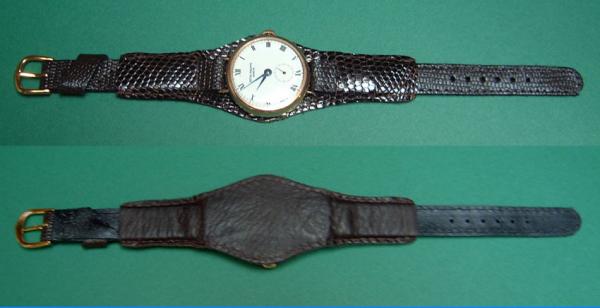
Hi, A couple of members seemed interested in how i make a watch band. They are by no means perfect, but are functional and seem to last the test of time. This one is made from farmed crocodile. The skin is cheaper to buy in a non-dyed state. This skin was bought locally in Melbourne, it was around a meter long and cost $95. The tools required are a new scalpel, awl, glue, hole punches, a gas torch and mid size screwdriver, needle and good quality waxed thread, sealer and dye for the sides and coffee leather dye. The other materials are kid leather strips (suede side out, very comfortable, but up to you) and some scrap leather for filler. (Above) I have made up some templates. These are paper, but clear hard plastic seems best as you can see the grain underneath. I look for matching patterns. From this hide I rough cut the band and the keepers. (Above) The slide shows the croc and the kid liner. The keepers will be lined also. The croc has been dyed. The two strips to the left are the band pad scraps. On some bands I like a lot of padding, sometimes three layers so it appears curved, but on these watches just one layer is best and only part of the way down the band. This stiffens up the band well. It is important to have the band not too stiff or too supple and also tapering in thickness towards the buckle ends. (Above) This pic shows the reverse sides of the croc with the padding in place. I use water based glue. I find drying time varies with the amount applied which gives you good control and it is super-flexible. The spring bar ends have been folded over. They will be double stitched later. (Above) Liner glued to croc. Keepers/liners glued. (Above) Shaping complete. One fixed keeper attached under liner. Buckle end is folded over under liner. Wait for glue to dry. (Above) Reverse side. You might be able to pick up how I have done the spring bar end. Should be strong with double stitching later. (Above) I use a heated screw driver flat to smarten up the leather edges. Not for too long though. Really helps to get a nice curve on the end of the band. (Above) I use inks to dye the side sealer. This one is black and after mixing I apply it with a cotton bud - seems to work for me ok. The fiddly parts can be applied with a small flat brush. Take care not to get the sealer on either the leather or the liner as it is impossible to get off, once dry. I have never seen this stuff peel or flake. (Above) I use a sharp awl and just eyeball the holes. Make sure you hold the awl vertically and not at an angle. The band is ready for stitching. I use good quality waxed thread. Better to have the thread a bit too long that short. I sometimes dye the thread, but these days tend to use white a bit...all depends on personal preference I guess. Anyway now you can sit back for around two hours and stitch away. (Above) The finished product. I have tried many products to finish the croc, but have found simple neutral shoe polish great. Put some on with a cloth and just brush off when dry. (Watch is a 'Cymaflex' watersport with dial patina...fairly common watch I think). Happy to provide further detail if you would like also more than happy if you see ways I can improve. Hamish.
 3 points
 -
Congratulations - I am impressed by your method. I have been using some skins bought at a flea market: lizard and another scaly unidentified animal. I have been able to sew the edges with a domestic sewing machine by turning the handle slowly and applying a little power from its electric motor. The needle is one for sewing leather. The thread is unwaxed - I wax in afterwards. Here is an example of a band made for a trench watch. The backing is glove leather.
 2 points
 -
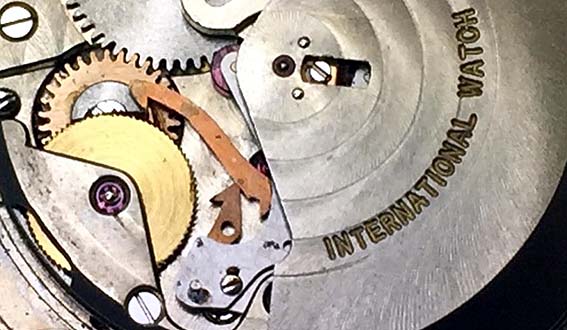
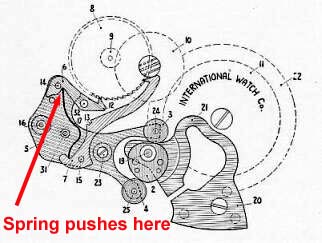
After a thorough clean this IWC 8541S movement was working well except for the Pellaton automatic winding system. You can see in the photo (taken before the clean and oil) that the two hooks are not engaging the winding wheel. To remedy this fault I tried several different cleaning methods including ultrasonic in a bath of penetrating oil. This freed-up the long hook, but the short one although it could be pushed around would not spring out into the winding position. You will see in this picture of the Pellaton system (Michael Friedberg, IWC forum) that there is very little effort exerted by the spring onto the short hook. The two plates of the Pellaton system are screwed together, but nothing would budge these small screws. About to bin the piece and search for a replacemet; in desperation I inserted a 0.5 mm screwdriver blade between the plates and gave it a twist. Out popped the short hook. Then with more cleaning and another screwdriver twist for good measure, after re-assembly, I had a working automatic movement once more.
 1 point
 -
I rather like the ana/digi look of my Wingman. Only paid ~£25 for it. Have you tried entering the details on Boley site to get part numbers?1 point
-
I have also used the JBWeld type of metal filled epoxy. I tried several standard epoxies but all seemed to set somewhat soft and flexible whereas the JBWeld sets really hard and it can be carefully filed or sanded to remove any excess. I have a cheapo Seiko which I use for experimenting and trying skills on, and which I had to re-affix the dial feet. The dial has been removed several times and the feet are still intact. I found that careful preparation and cleaning of dial back and feet are a must. The biggest problem was getting them in the correct place. To do this I very lightly scribed lines through the feet centre on the dial back, long enough to still be visible outside the expoxy 'pad'. The JB sets fairly quickly so just keeping an eye on things remaining upright and square in the early stages is best. I then leave at least 24hrs before fitting. I also tried making a plastic template matching the dial feet and hands centre positions, then using a piece of pegwod for the centre and fixing the dial feet in small holes in the template, then pop a tiny bit of epoxy on the dial at the feet position and lower the template in place. It worked but was very fiddly and found my other method easier.1 point
-
I do like a challenge Stephen, but rather you than me with this one. I did some research regarding the calendar module and it is absolutely mind boggling. The calculations and design work that have gone into producing it is amazing. It is a truly wonderful looking timepiece, and I look forward to reading about your progress. :)1 point
-
Thought of sharing some pictures, smartphone quality though. The complaint is the chronograph seconds hand not able to reset back to zero position. Checking on the Timegrapher showed an amplitude of 200. So it badly needs a cleaning and oil. The seconds hand dropped off when the movement was taken out from the case. A loose hand but cleaning is needed. Googled to check how the perpetual calendar works. Very little information available online, so it's better leave the calendar system alone for now. Hopefully will get to watch a video from Mark on setting the perpetual calendar. [emoji6] Today managed to remove all the hands as the month and day hands were very close to the face of the dial. Loosen two tiny screws at the side which hold the dial feet and the dial is off. Found three screws holding the calendar block to the movement. After putting aside the calendar block, proceeded to dissemble the 3750 movement for a good cleaning in the machine. Hope this will provide a little information on this movement. Thanks and comments are welcome. Hopefully one day will be able to learn how to set the calendar system. Cheers1 point
-
No, have none. Brewing today a Belgium Tripel and a Belgium Wit while the wifey is working. Just not looking forward to 96 degrees Fahrenheit today- I brew outside [emoji30]1 point
-
Hello George, Breaking boundaries as usual I see but I am not sure of the legality of such horological rapine :startle: will the time ever be right. :D Cheers, Vic1 point
-
Well done, it's a great feeling when it all comes together and works. :)1 point
-
Finally i assembled them . But dial feet i am unable fix since i don't know. I used cum. One of my friend said ..since i used bare hand it my lead to rust accumulation .. so before fix hands i used a muslin to clean.
 1 point
 -
Well done Dan, I hope you treated yourself to a well earned beer afterwards? :) PS Nice watch!1 point
-
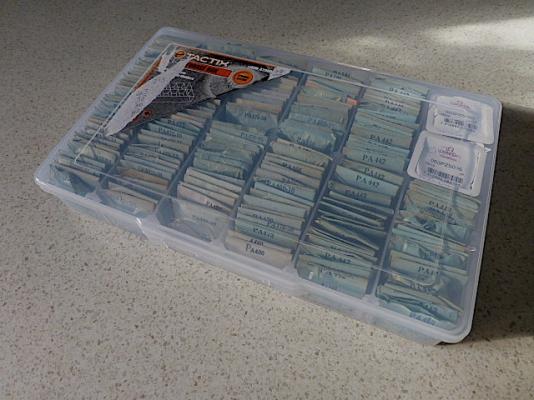
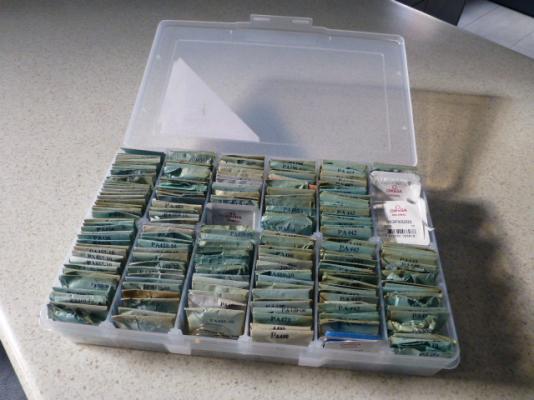
From my local hardware store, you should be able to find something similar in Canada. Cheers Jim

 1 point
 -
Something made for holding tea would probably work. Search "tea box" in images to get an idea.1 point
-
Beautiful. I love vintage Hamiltons.1 point
-
Ditto!1 point