Leaderboard


Popular Content
Showing content with the highest reputation on 01/30/15 in all areas
-
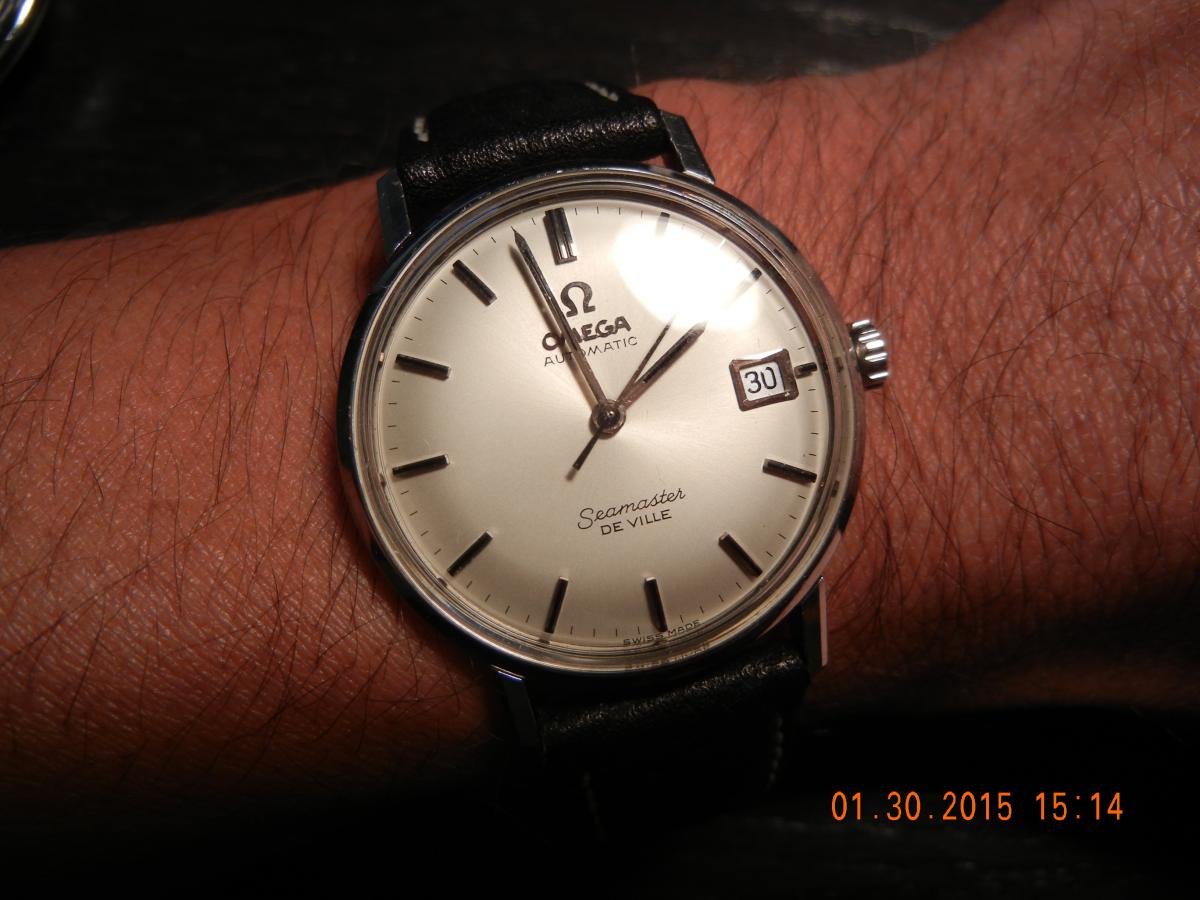
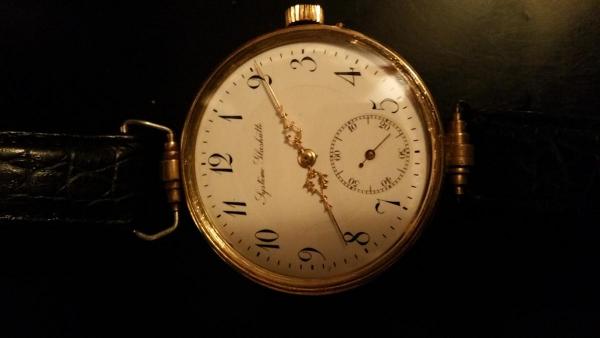
My oldest watch that I wear. Not daily of course but I use it. Some people store their vintage and exotic cars , I could never do that. I have to drive them.
 2 points
 -
You need to now the high from the dial to the center of the stem . This is called the T . You could measure it if you measure from the point where the dial rest to the center of crown tube . Takes of the dial thickness . Then look if the movement has the same T at http://www.ranfft.de/cgi-bin/bidfun-db.cgi?10&ranfft&0&2uswk.Lot of work i now but there is a help in the advanced to the right .2 points
-
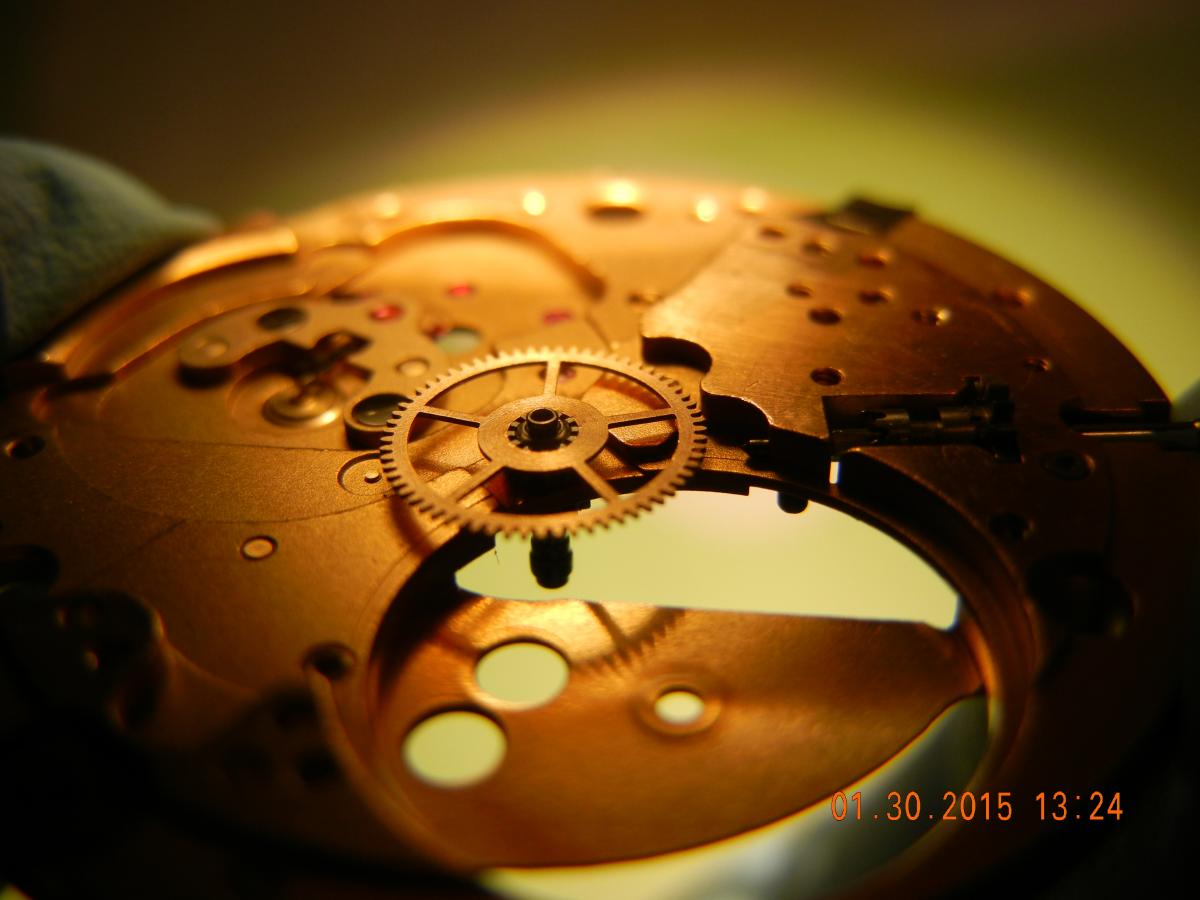
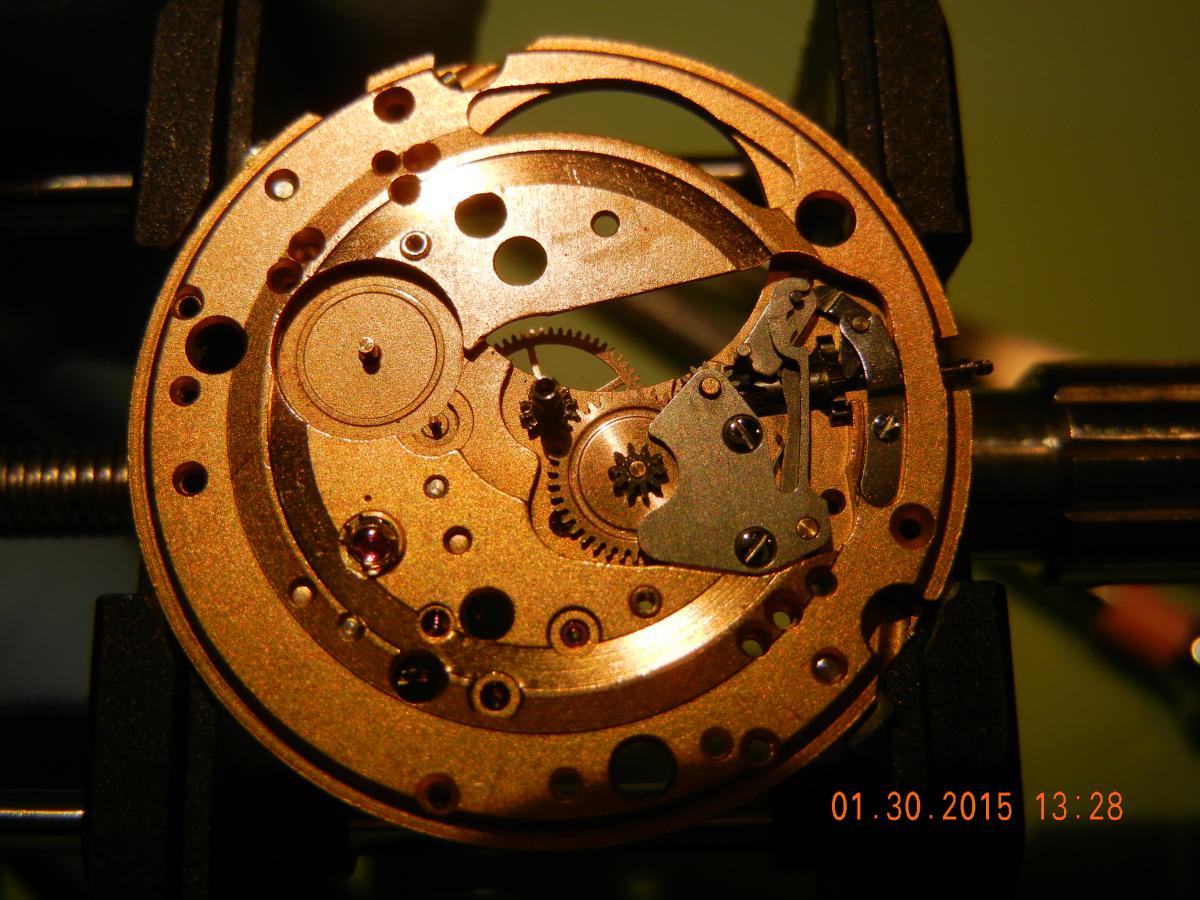
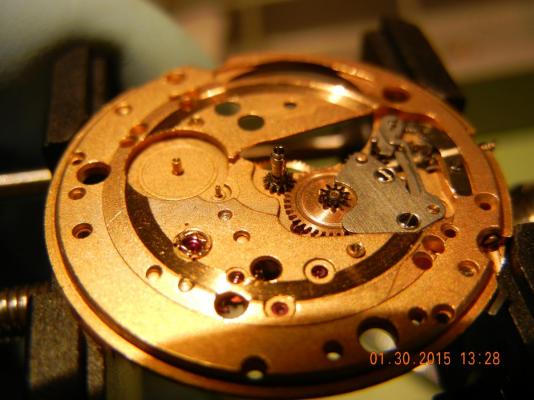
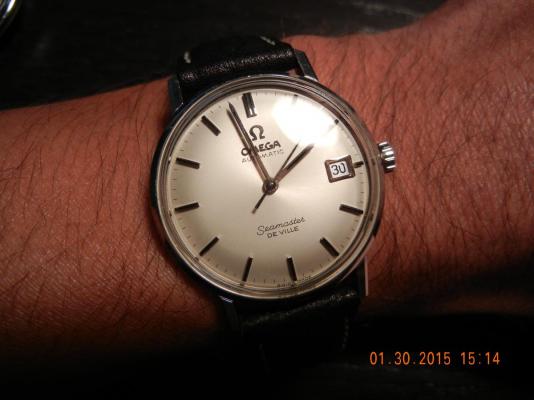
Thank you everbody for the suggestions. Anil you did a great job diagnosing the problem-- Been there done that? Oh yes, experience is the best teacher! I took the watch apart and this time I secured the cannon pinion/center wheel before putting the intermediate wheel in and it worked. The winding is smoother and I can set the time without needing latex for uhm.....protection. I am always afraid that redoing a watch will result in something going terribly wrong that will overshadow the original problem, but things went smoothly. I hope this experience helps someone else from doing the same thing! Hopefully doing it right the 2nd time Looks better than before And now on the wrist Regards, JC


 2 points
 -
Hi folks. A member of another watch forum is selling 2 large books of ESA worksheets dating roughly from 1980 to 1990 - some quartz, some electric/electronic and some auto - which I've agreed to buy. He lives in Brighton so I'm going to meet up with him next week and do the deal. I'm proposing to make them available on this forum for download. My first project, when I've received them and checked them, will be to list them and post the list here, prior to any conversion to PDF. Should any member need a particular sheet, I'll be happy to create a PDF of it and upload it here. Eventually it would be good to get each worksheet uploaded, but I can't say when that might be until I've got a better idea of quantity, etc. I hope this will be a useful resource for the forum. Cheers, Will2 points
-
Quick report back. My jewel picker uppers arrived, and the little red one worked perfectly. Picked up the jewel I needed out of the little triangular white tray, lifted it over to the spot I needed it for, and just touched it with the tips of the forceps and it plinked straight into the hole. Perfect. No more jewels flying through the air into the black hole of the space-time continuum! ;)2 points
-
Nice thing about those movements is they can be had in two different heights!1 point
-
My machine arrived from Germany today and everything is working perfectly. All I'm going to do is give it a light clean and polish and start using it. The only thing that had me puzzled was the colour of the old continental mains cable, Red is earth, Black is live and Grey is neutral. I did a lot of double checking before wiring the plug. The cable and electrical controls are all in excellent condition. :)1 point
-
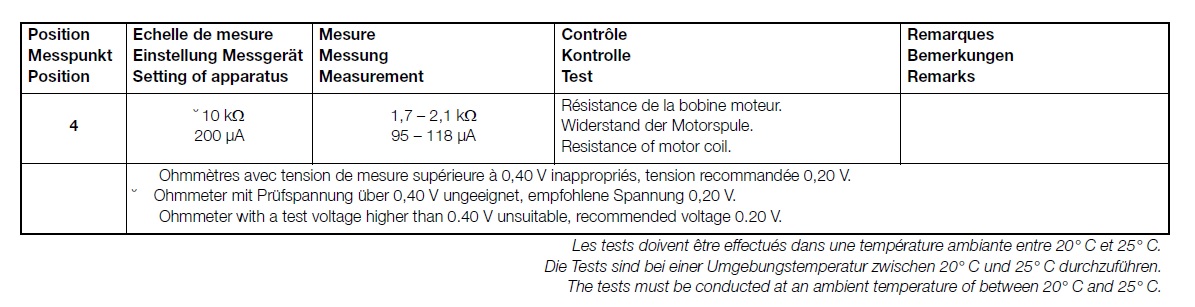
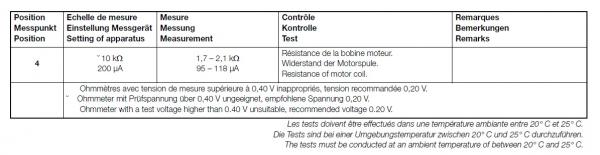
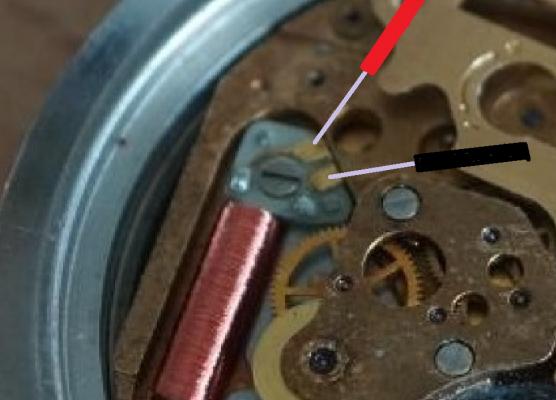
Ohms is an electrical unit of resistance. George Ohm named it after himself ... the sanctimonious scallywag! :P Anyhoo, what you are trying to find here, is how much resistance has been created by the windings in that coil of wire. Normally it will either be on spec, give no reading at all (an open circuit), or to low (a short in the wiring). Each an every coil of wire, whether it be in a quartz watch, or the electric motor in a vibrator, will have a specific Ohm reading: depending on how the factory wound the coil. Every coil is different, so you have to have the factory spec sheet to know what resistance it should have. As an example: here is the spec sheet for the coil on an ETA 955.412 Movement. You will have something similar for your caliber. To test the coil, place the probes of the meter on the two copper pads connecting to the wire making up the coil (as shown below), and note the reading. BE CAREFUL! That wire is VERY fine and delicate. Hope this helps mate ... and I wish you well on restoring this little gem :)
 1 point
 -
I've serviced a 203 moonphase triple date which is pretty much the same. Unfortunately I can't help you with a worksheet, take plenty of pictures during disassembly you shouldn't have too much difficulty if you have worked on watches before. It's certainly a lot easier than working on chronographs.1 point
-
This is an excellent thread! And one that all newbees to watch repair, like me, should read until they understand what went wrong here. I applaud you for sharing this with us JC, and never feel silly or ashamed for exposing your mistakes, as we can all learn very important lessons from them, and thus you become our teacher. The way I have been instructed to assemble is in the following order: Gear Train and Mainspring Canon Pinion Keyless Work Motion Work Is this how everyone else is doing it?1 point
-
Nice. There are few greater pleasures than finding the right tool for the job...1 point
-
The kink that Will has pointed out would be enough for me to want to replace the spring as it is a potential breaking point; however, I don't think that he spring is "set". The main coils look well spaced and it has a healthy reverse coil on it, so I would be surprised if it's not providing enough power. Also, I believe that a lack of braking grease is likely to result in the mainspring failing to slip rather than slipping too early. The way that braking grease works is that is holds against the shearing force between the bridle and the barrel wall, allowing the spring to be wound up, until the shear force reaches a certain strength, and then it allows the spring to slip. As it slips the shear force reduces to below the braking limit and the bridle once again grabs the barrel wall. I could be completely wrong on that though :-) Try winding the mainspring by hand (use a screw driver in the ratchet wheel screw on your Seiko as I don't think it has manual winding) and see if you can feel when it slips. If you can get just a couple of turns on it then that should be enough power to run for considerably more that just a few minutes. When you reassembled the movement after cleaning it did you test the free running of the train without the pallet in place? A puff of air on the escape wheel should be enough to spin the whole train easily, and a couple of clicks of power on the mainspring (again use a screw driver to turn the ratchet wheel) should spin the train first of all the right way, cause the train to overshoot the springs fully unwound position, and then recoil in the opposite direction for a couple of turns of the escape wheel (or more). If the train won't spin with a puff of air or there is no recoil then you need to strip the train back and reassemble one wheel at a time, each time testing the freedom of the train for power loss until you find the problem, which could be anything from a bent pivot, broken jewel, incorrect end or side shake, damaged wheel or pinion teeth, etc, so it is important to always thoroughly inspect every part after cleaning and before installing it. If everything in the train is free enough to see recoil from a couple of clicks on the ratchet wheel then reinstall the pallets and put about half a turn of power on the ratchet wheel. Now by just very gently nudging the pallet fork from side to side with the tip of a clean oiler you should see the pallet fork snap smartly across to the opposite banking pin. Also, if you stop nudging the pallet fork just before it snaps across and take the oiler away, the pallet should return to the banking pin you were nudging it away from (this is called draw). If it doesn't snap across or draw back then carefully inspect the pallet stones for any chipping or damage, and the pallet arbor pivots and jewels. If it does snap across nicely and draw back properly, then the issue is likely in the balance assembly. I hope this helps.1 point