Jump to content

ETA 2804-2 Service Walkthrough


Recommended Posts

ETA 2804-2 Disassembly pictures

ETA 2804-2 Assembly pictures

IMG_7531.JPG.f42da04df960a3acfa47b66af3f06e91.JPG

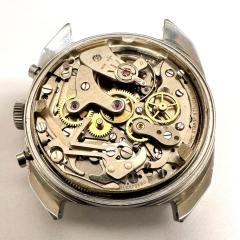
I always wanted a mechanical (wind-up) hi-beat watch for myself. Eventually I found a black dial military style Hamilton Khaki Mechanical on eBay housing an ETA 2804-2 for a reasonable price as it was in need of a service and some repair.

The ETA 2824-2 contains nothing surprising or difficult to handle. It’s an easy movement to service and doesn’t contain any tiny springs that can ping, not even the click spring. Overall, the ETA 2804-2 is a very solid and precise horologe.

This walkthrough isn’t a tutorial but is primarily meant to be a help for determining what parts goes where. That said, I have included ETA’s oiling suggestions and a few of my own suggestions and tips here and there. ETA’s technical communication for the 2804-2 contains a few contradictions and oversights (such as omitting oiling of the pallets), but hopefully not so this walkthrough. However, if you do see something funny or have any questions please get in touch.

So, without further ado, here goes and I hope you’ll find it usable and/or enjoyable!

Edited by VWatchie
  • Like 1
Link to comment
Share on other sites

That’s a great guide! I would only add that you should be very careful with the incabloc on the main plate, and place a small piece of rodico in the gap indicated by the arrow, when moving the shock spring. The incabloc shock spring can fly out of that gap when you move the shock spring.

8999CF6F-000E-4E73-B3F0-21EA92FFA7AA.jpeg

Edited by ifibrin
  • Like 3
Link to comment
Share on other sites

Excellent walkthrough as usual.

 I got in the habbit of checking shakes specially staff's before disassemby, if any adjustment is needed, I move the housing of the jewel setting in the mainplate.  Your thought? 

Also, I hear thicker endstones were/are manufactured for endshake reduction, I wonder if its true.

Regs

  • Thanks 1
Link to comment
Share on other sites

4 hours ago, ifibrin said:

That’s a great guide! I would only add that you should be very careful with the incabloc on the main plate, and place a small piece of rodico in the gap indicated by the arrow

Thanks! That's good advice and would make a nice contribution in a tutorial. Personally I support the anti-shock spring with a piece of peg wood.

Link to comment
Share on other sites

4 hours ago, Nucejoe said:

if any adjustment is needed, I move the housing of the jewel setting in the mainplate.  Your thought?

I don't get it!? As far as I know the jewel housing can only be fitted in one way so I don't see how that can be used as a method for adjusting end-shake.

4 hours ago, Nucejoe said:

Also, I hear thicker endstones were/are manufactured for endshake reduction, I wonder if its true.

I never heard of that, and I fail to see how a thicker end-stone could affect end-shake!?

Link to comment
Share on other sites

2 hours ago, dadistic said:

Extremely well formatted walkthrough, thanks. If I try to do one, I think I'll use your posts as a template. Really appreciated.

Wow, thanks for your very kind words! Heartwarming! 😊

"David S - who needs to spend less time in front of a computer and more time actually working on watches."

I like your signature. Spending more time on reading and writing about repairing instead of actually doing it doesn't make you more skilled, but there's risk one might think so.

Edited by VWatchie
Link to comment
Share on other sites

On 10/5/2021 at 5:14 PM, Nucejoe said:

Also, I hear thicker endstones were/are manufactured for endshake reduction, I wonder if its true.

On second thought, perhaps a thicker end-stone wound assert more pressure on the staff pivot end and thereby reduce end-shake. Hopefully someone with more experience can chime in and spread some light!?

Link to comment
Share on other sites

1 hour ago, VWatchie said:

On second thought, perhaps a thicker end-stone wound assert more pressure on the staff pivot end and thereby reduce end-shake. Hopefully someone with more experience can chime in and spread some light!?

A beveled edge of some sort so end stones sits futher down inside the chaton reducing staff's end play. Its to compensate for pivot wear.

Anyhow, end paly reduction reduces positional variation and best be adjusted.

Link to comment
Share on other sites

A thicker stone won't affect shake, it sits on a lip so that's what limits. Some settings can be moved in the plate to adjust, but not all.


The thicker stone on the cock, as was explained to us in school, is because studies showed that that stone received more and more violent shocks than the plate side in use, so a thicker stone is less likely to crack. You don't see the thicker stones on more modern stuff and don't see cracked cap jewels either, so I guess they discarded the idea.

  • Like 1
Link to comment
Share on other sites

1 hour ago, watchweasol said:

Another great walk through VW always very informative .  You should put all your wak thoughs in to a file for down load there are many who would appreciate the information all in one place..

Thanks for your very kind words! Much appreciated! That's an interesting idea which I'll consider!

Link to comment
Share on other sites

3 hours ago, Nucejoe said:

Its to compensate for pivot wear.

Moving the setting in the mainplate is good when we are merely adjusting for end shake . In case pivot is worn and is short enough to let pivot shoulder rub on the mainplate side  , I flip the end stone over so its domed side faces the pivot, the staff then in  effect stands proud and often is enough to get another life out of the worn pivot. I don't expect this approach to recieve COSC's approval, but it works. I see replacing the staff is recommended in books and surely in watch schools, nice when one has a staking set and tools to rebuild a balance complete.

I did recommend this to number of newbies on WRT and it worked for them, but that was before you joined the forum.  This approach didn't receive approval from OH either " put everything back right"  he said.

Regs

Link to comment
Share on other sites

@VWatchie   The third image of the setting in the link below, shows the pivot protruding out from the hole of jewel, then EXTENDS further ( proud of the jewel)  to come to contact with the end stone. a pivot that is worn and is short should  be burnished back to the orignial length. 

In case one isn't set up to burnish or replace the staff, one can flip the end stone instead , the dome of the end stone facing the pivot, would compensate for the wear of the pivot, this keeps the pivot end of the other side from jumping out of jewel hole. 

A simple trick specially useful to those who don't have burnishing tool or burnishing skil.


https://www.pinterest.com/pin/137570963592676129/


Regs

Link to comment
Share on other sites


×
×
  • Create New...