Jump to content

Recommended Posts

Posted (edited)

Hi all. I recently purchased a Leonidas Bidynator automatic watch to restore. I have repaired and serviced the movement and polished the case but I am not sure what to do with the dial. 
 

It was in very poor condition but a light clean in water revealed small amounts of what looks like silver but the rest has worn off leaving just base brass. 
 

my question is, is this silver the same as a clock dial and could be resilvered using resilvering powder or would I be better off painting it. 
 

I have attached a picture of what I believe to be the same watch in good condition. 
 

as usual many thanks in advance. 

E21C5002-3F12-43C2-98B0-76427EA44BDC.png

Edited by Specializedjim
Added photo
Posted

The dial is in a bad way. You can't re-silver that dial, looks like the numbers are fixed, you could have it restored but that will be expensive. Your best bet is to look for a replacement dial. You could look on the various suppliers sites or try ebay.  I also note the hour wheel is missing. 

Posted

Thanks for your help. Yes your right it is bad and from what I can see it’s also quite rare.  Can you answers the following for me please. 

You said the numbers are fixed and I already noted they are not pinned through the dial. So are they glued?

If I could get the numerals off and polish the dial to a good state could I resilver (do you think that’s what it was originally) or would paint be better. 
 
well spotted on the hour wheel I already have a spare. 
 

many thanks for your help. 

Posted

You say it is quite rare. I would have it restored by professionals. I'm not sure how the numbers are fixed. I have only re-silvered Long Case Clock dials which is fairly easy with the right materials.  

Posted

Hi again

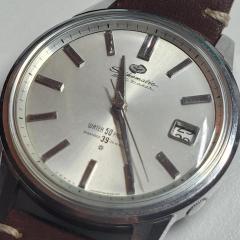
I have had ago at restoring the dial using spray paint and a ink jet printed numerals etc. I think I will have another go at it now that I have a better idea of what I’m doing but I think it looks ok for a first attempt. Also the completely knackered movement I repaired seems to be going well so overall I’m happy with my efforts for a £20 punt. Let me know what you think. Many thanks for all the help received. 
 

image.jpg

  • Like 2
  • Thanks 1
Posted

Now, redo it, but take lots of photos/video and repost as a how-to. I feel like dial refinishing is one of those semi-lost arts. They were cheap/unloved, and so were either parted or tossed, and anything with any value was done professionally. Dial refinishing needs to stage a serious comeback in the DIYverse.

  • Like 1
Posted
Hi again
I have had ago at restoring the dial using spray paint and a ink jet printed numerals etc. I think I will have another go at it now that I have a better idea of what I’m doing but I think it looks ok for a first attempt. Also the completely knackered movement I repaired seems to be going well so overall I’m happy with my efforts for a £20 punt. Let me know what you think. Many thanks for all the help received. 
 
image.thumb.jpg.67af186f24fee63e64dc63bb0e48f377.jpg
WOW !!! great job ...
I've been "playing with dials" for some years now and I'm amazed how quickly you did that ... congrats !!!
Now your oldie looks like a 4925 ...
8cf1f7644db8e71d9bd7d9f1bc67418a.jpg

Envoyé de mon moto g(7) power en utilisant Tapatalk

  • Thanks 1
  • 1 month later...
Posted
On 5/21/2020 at 6:18 PM, spectre6000 said:

Now, redo it, but take lots of photos/video and repost as a how-to. I feel like dial refinishing is one of those semi-lost arts. They were cheap/unloved, and so were either parted or tossed, and anything with any value was done professionally. Dial refinishing needs to stage a serious comeback in the DIYverse.

Very true! And this is the reason why I am here on the board to find ways to fix my dial of Omega 155.006, but haven't found a solution yet

  • 1 year later...
Posted

How the bloody hell did you do that? That looks incredible!

How did you use an inkjet to print the face detail? Onto decal paper and then transferred to the dial? I can 't think of how else you would do it.

That is a REALLY great job.


  • Recently Browsing

    • No registered users viewing this page.
  • Topics

  • Posts

    • What you’re saying is that if the entire coil is lifted or tilted either up or down it is due to a slight twist in the spring? Usually next to the stud?  I’ve chased this before and in one instance the spring came out of the stud and I had to reinstall it and secure it in place.  Do you find that the angle (not twist) the spring leaves the stud not only affects how it centers in the regulator pins but also the coil spacing? This could be caused by a distortion in the spring as it grabs and release the pins. I find turning the stud counter clockwise opens the coils 180 degrees away from it. So do I adjust the stud in relation to the regulator pins or to the coil spacing?  I also find that unless I remove the balance from the cock I can’t see the slight distortions in the spring. In my picture the distorted spring looked fine when installed. Do you use Alex’s technique of sliding the regulator arm up and down the curve to find distortions or can you visually see them?   
    • So if anybody overrides what i say, listen to them haha. I'm not an expert but i've just been in this boat a dozen times as i used to mess up hairsprings bad, but the good part of that was that i got to learn how to fix them.  What made my life SO much easier was learning how to adjust the hairsprings with the balance installed on a disassembled mainplate, unless it's a very serious problem or on an inner coil you can't get to i would recommend trying this in part because the spring will mostly ALWAYS look flat when the balance wheel is not installed on the cock. Install the balance wheel back in the cock and the cock with the cap jewels in the mainplate, with it installed even the most imperceptible twist will be pretty obvious. Just make sure the balance jewels are also installed. In these movements, if 99% of the time any twist or problems gonna be around the terminal curve, twists often near the stud, especially if you've been removing their awfully designed studs from the balance cock. If there's a reliable way to install those things without introducing a minor twist to them i haven't found it. they're an awful design. INstall the balance on you mainplate WITH your capstones/chatones and look sideways across the balance under magnification. Look for the highest or lowest spot of the now not flat hairspring. 180 degrees from that high or low spot is where your twist will be. You have to be VERY careful with twists as the tiniest over or under twist brings it out of flat. If the area i have to untwist is near the stud i just use a pair of #5 tweezers or some very sharp fine curved tweezers and gently see which way i twist it corrects the twist, then i hold the very fine point of the tweezers on the hairspring and just gently squeeze and check it and see if it started to correct it, then i rinse and repeat. Tiny adjustments is what you want, don't close them all the way, and dont' introduce a flat spot in them. it's just a little nudge by closing the tweezers on it at an angle. .  If the twist is not near the stud, i grasp the hairspring with some very fine curved tweezers as gently as possible while still holding it then i do that same sorta tweezer squeeze with my #5's. 
    • Has it got the logo on the crown. I think you're best option is going to be to remove the damaged stem and measure it. Edit Do you have the case reference number.
    • Movement is Omega 1012. I bought this from Cousins: 
    • Welcome to the WRT forum.
×
×
  • Create New...