Leaderboard


Popular Content
Showing content with the highest reputation on 04/06/24 in all areas
-
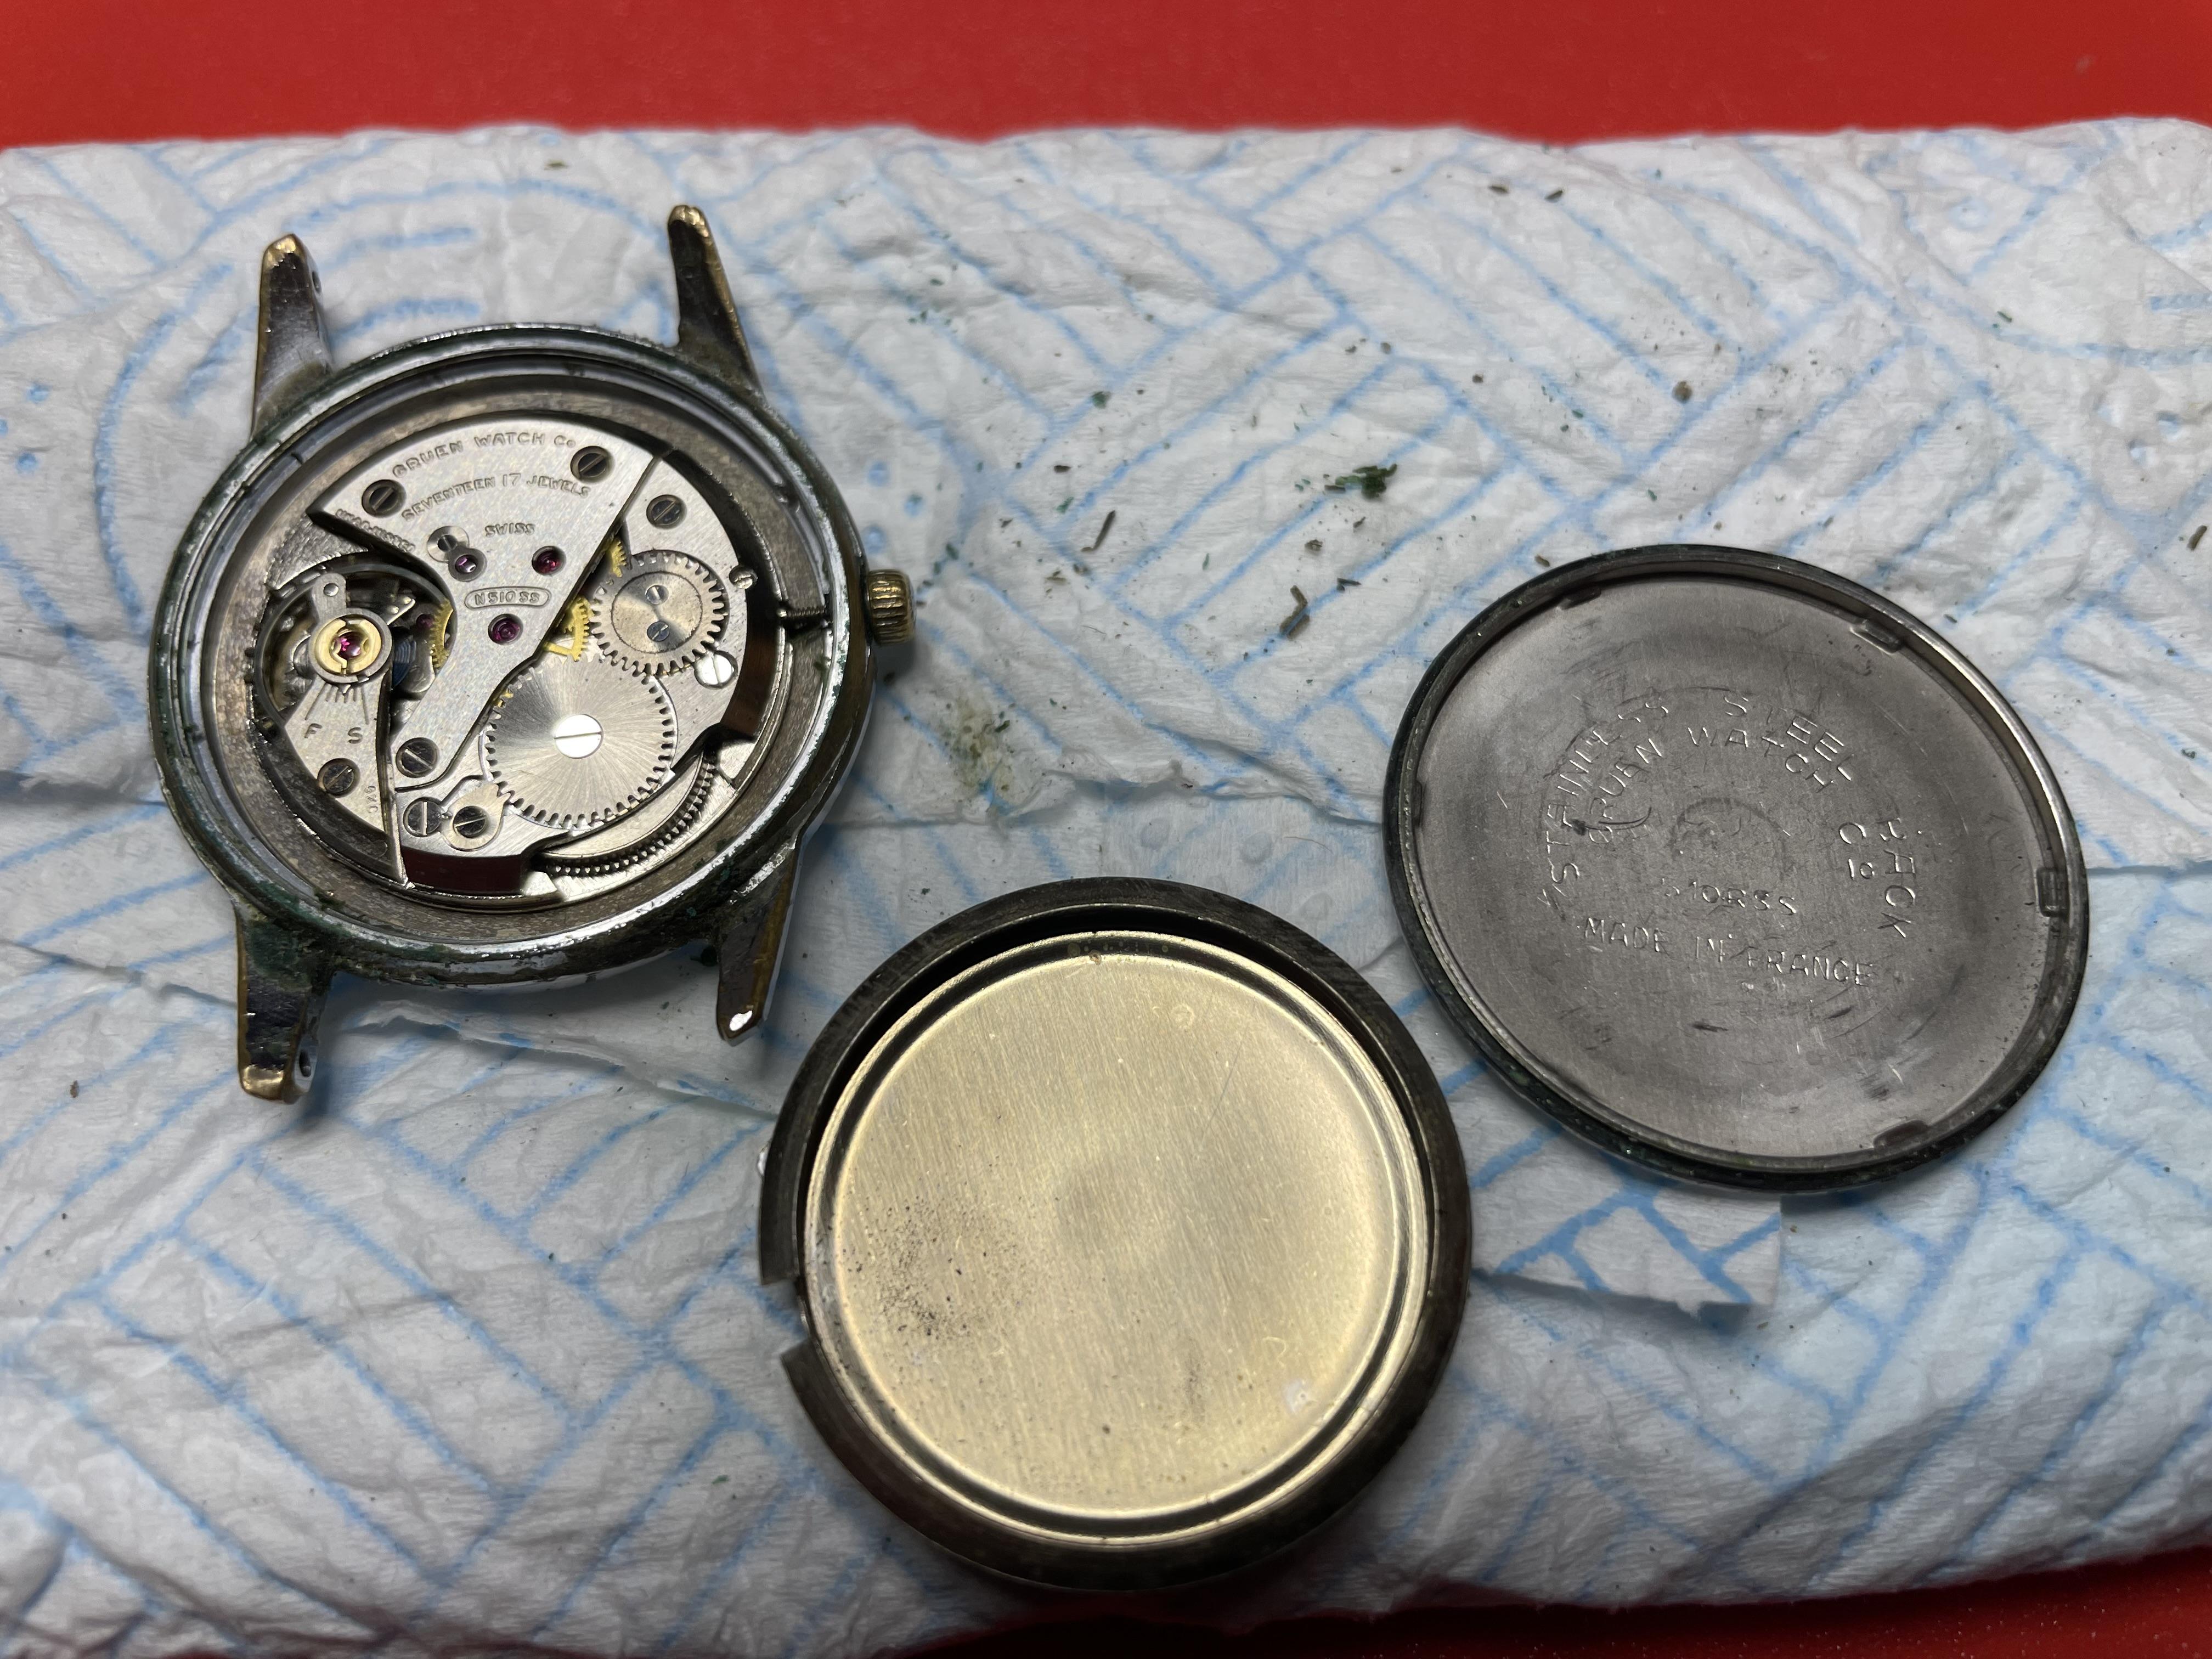
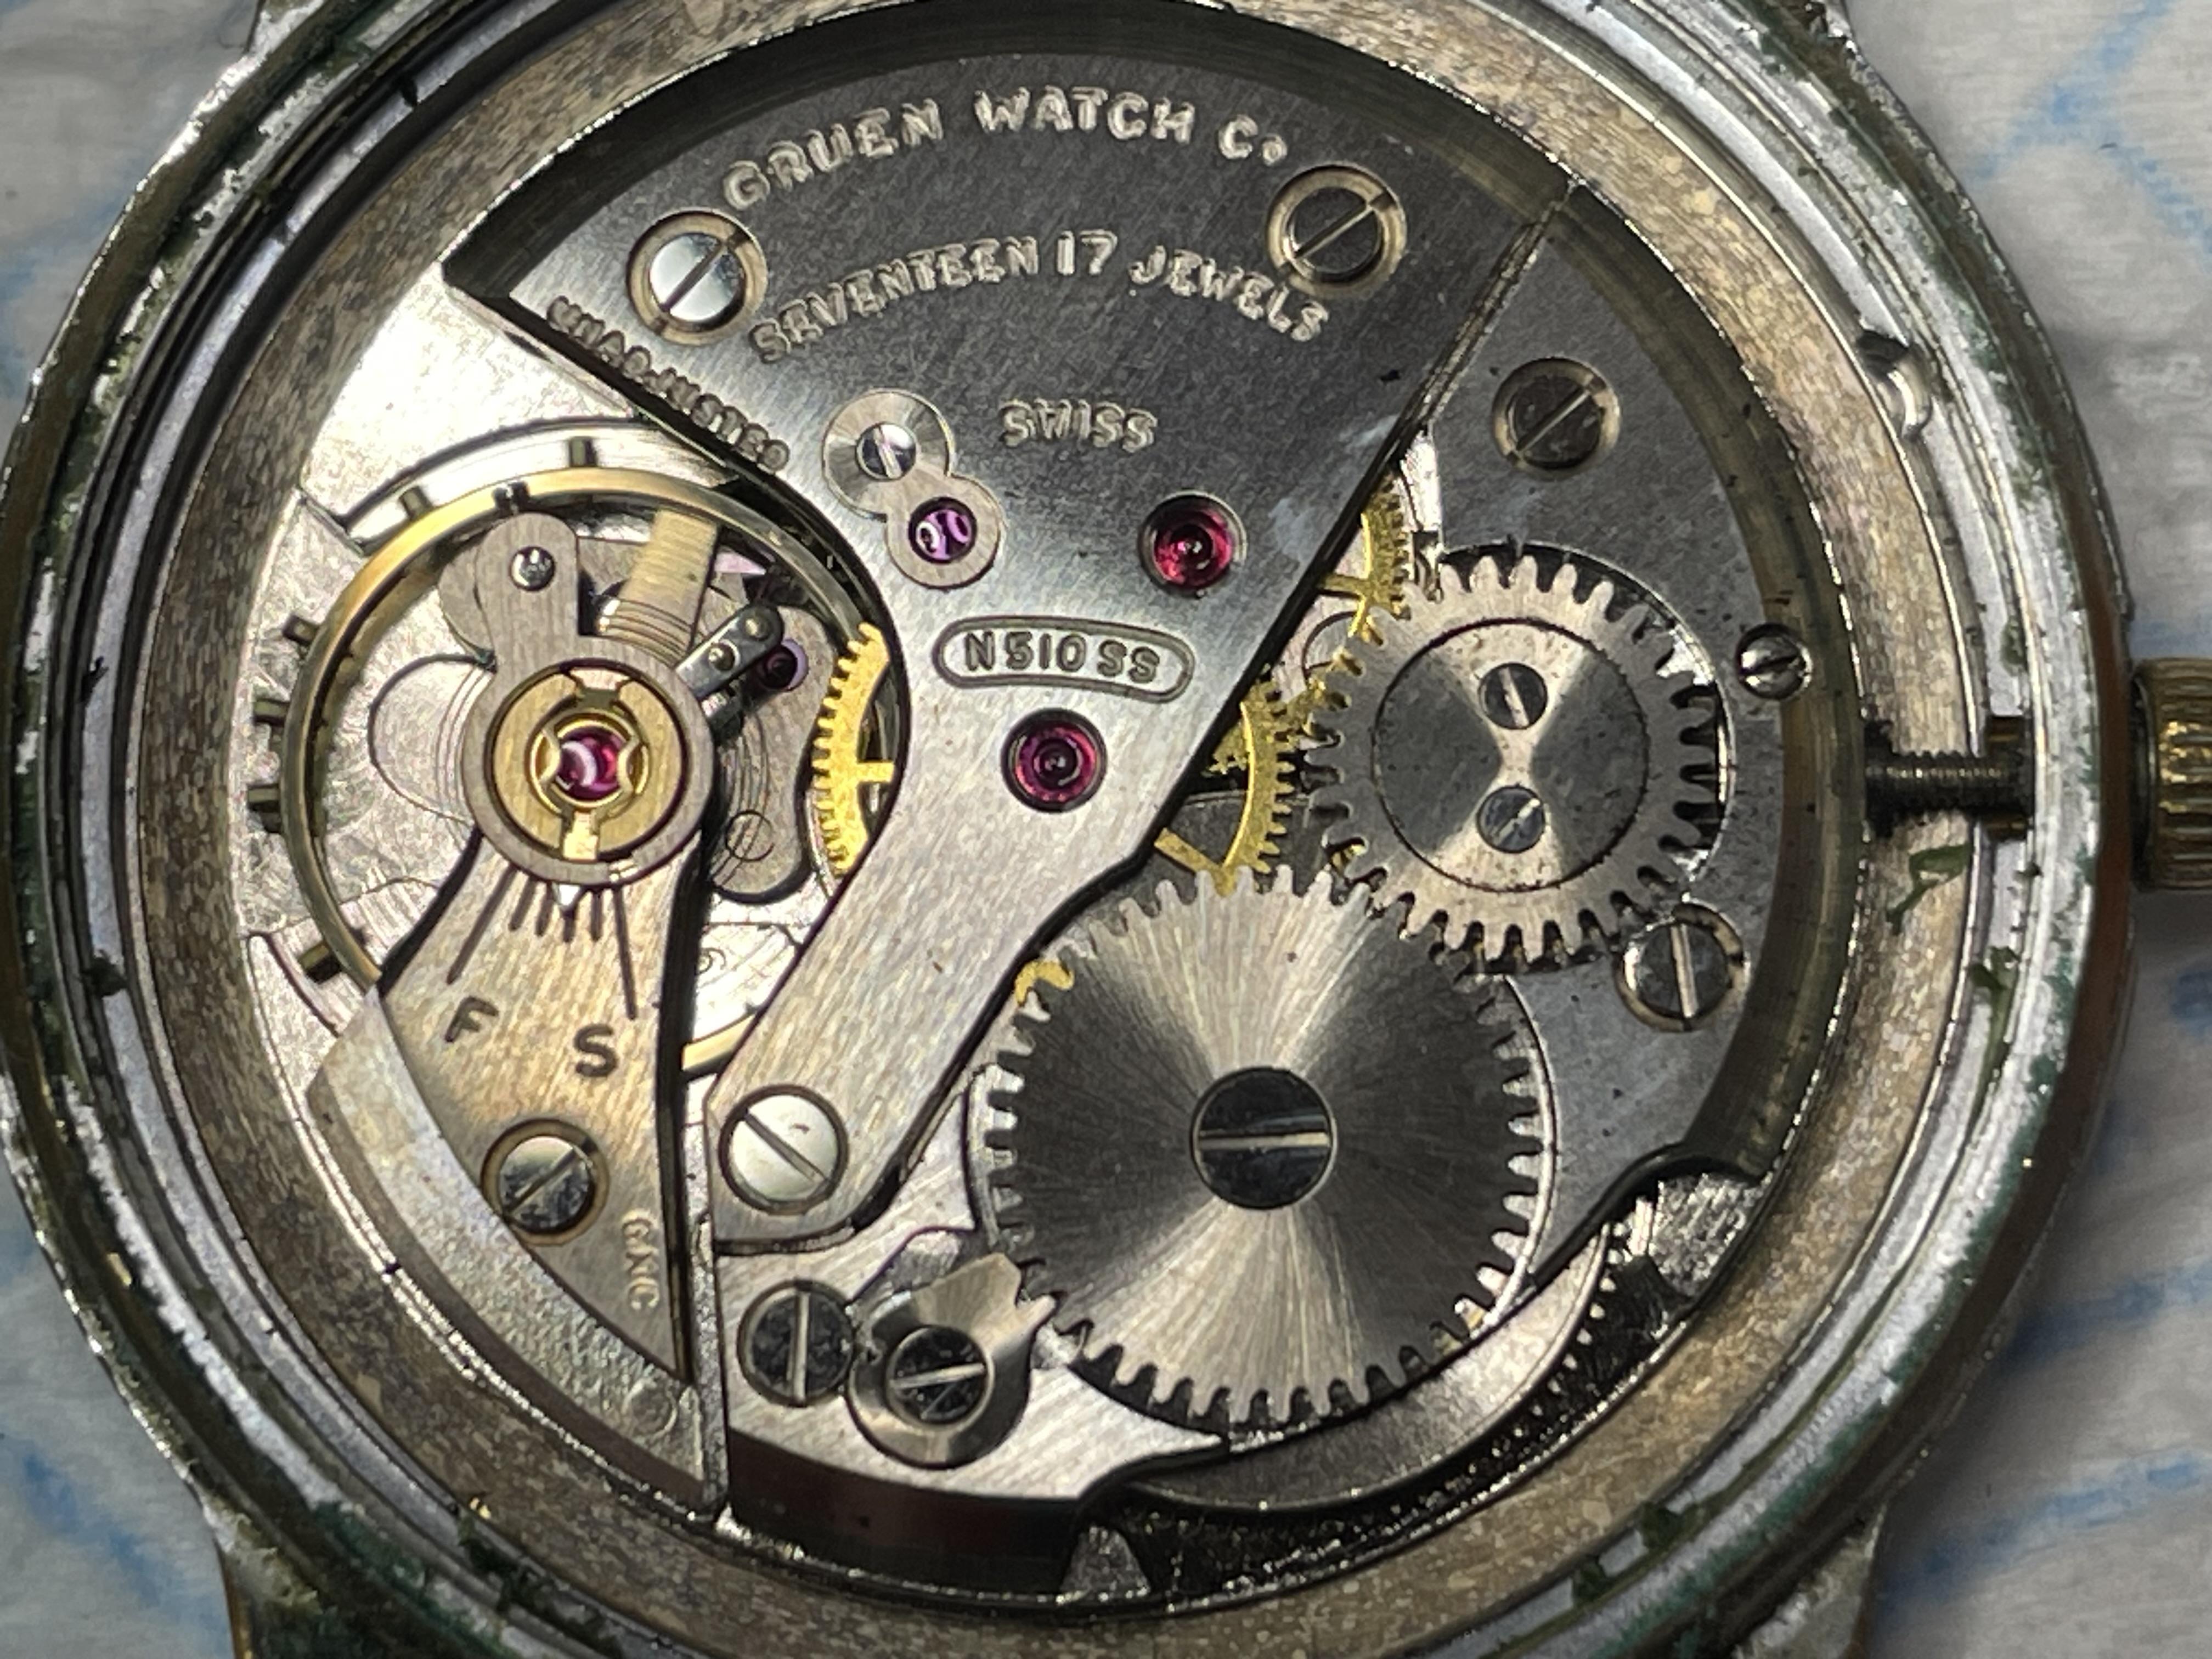
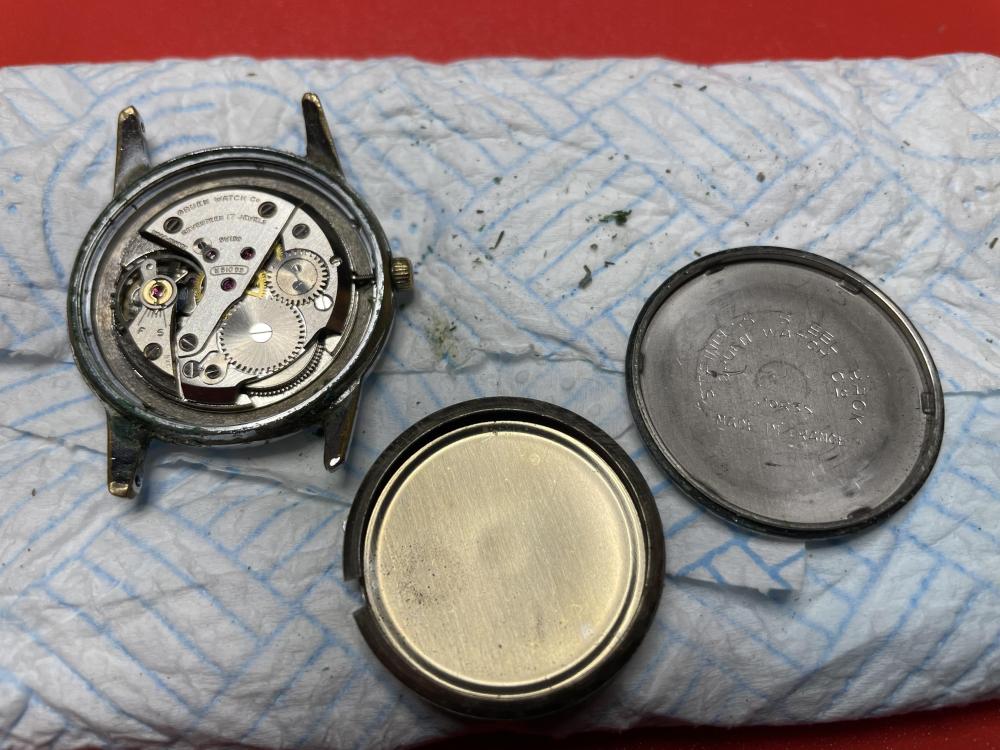
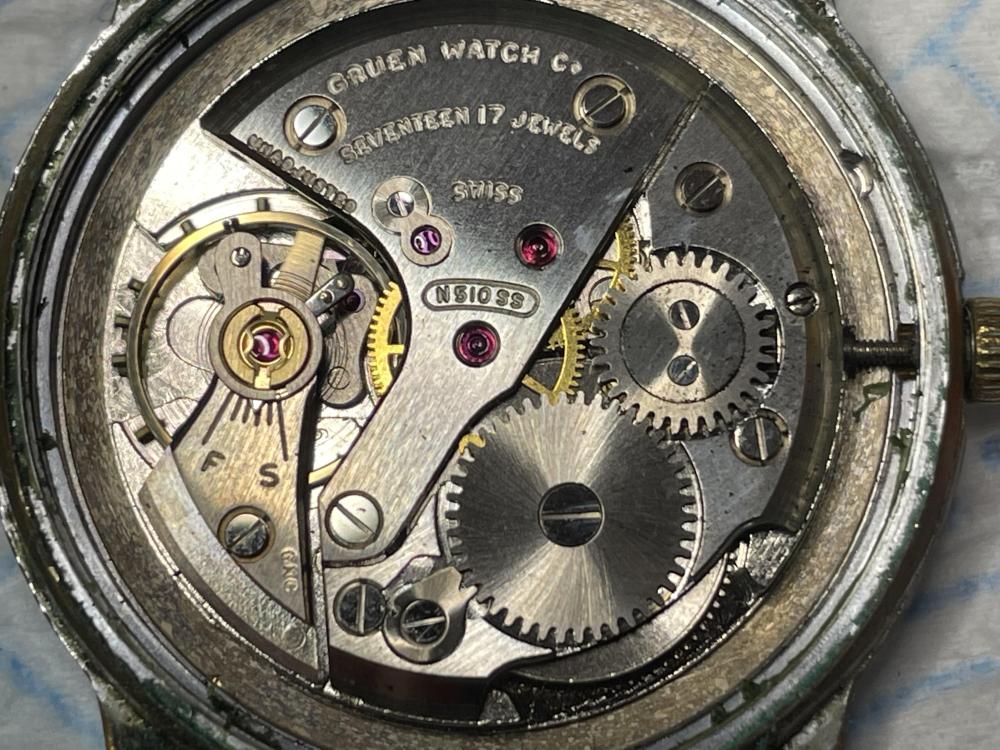
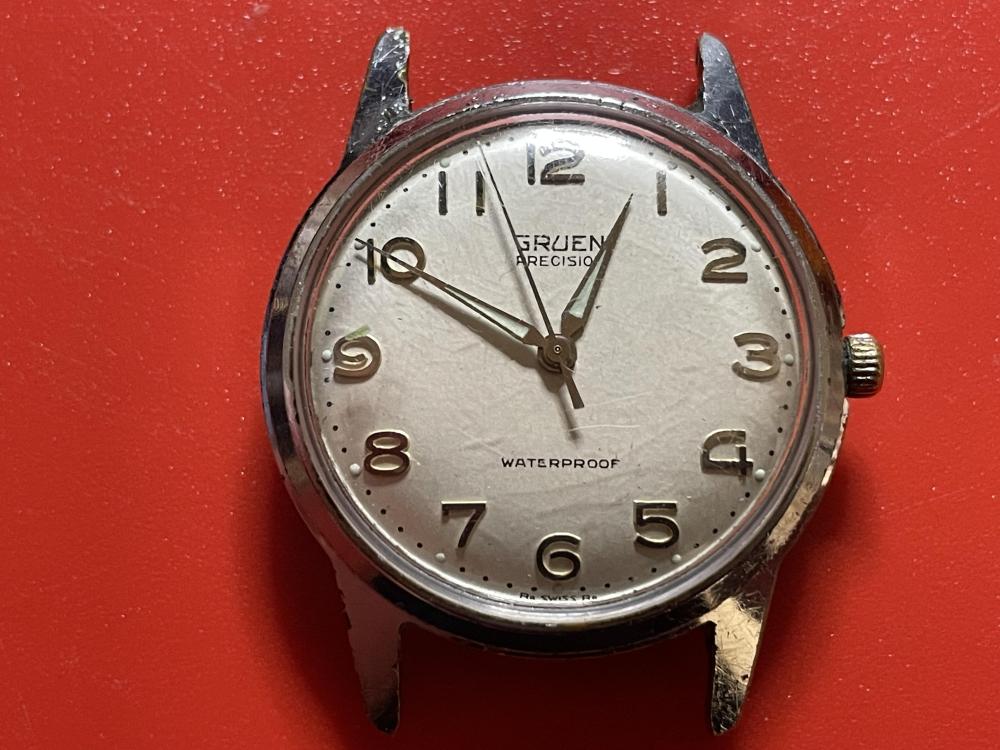
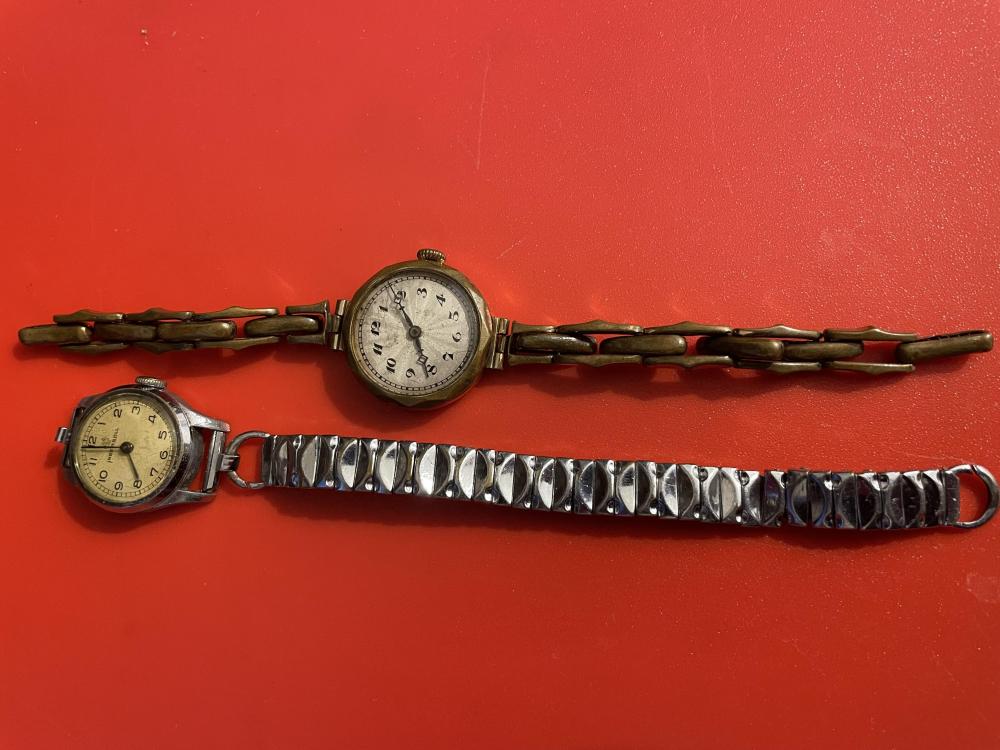
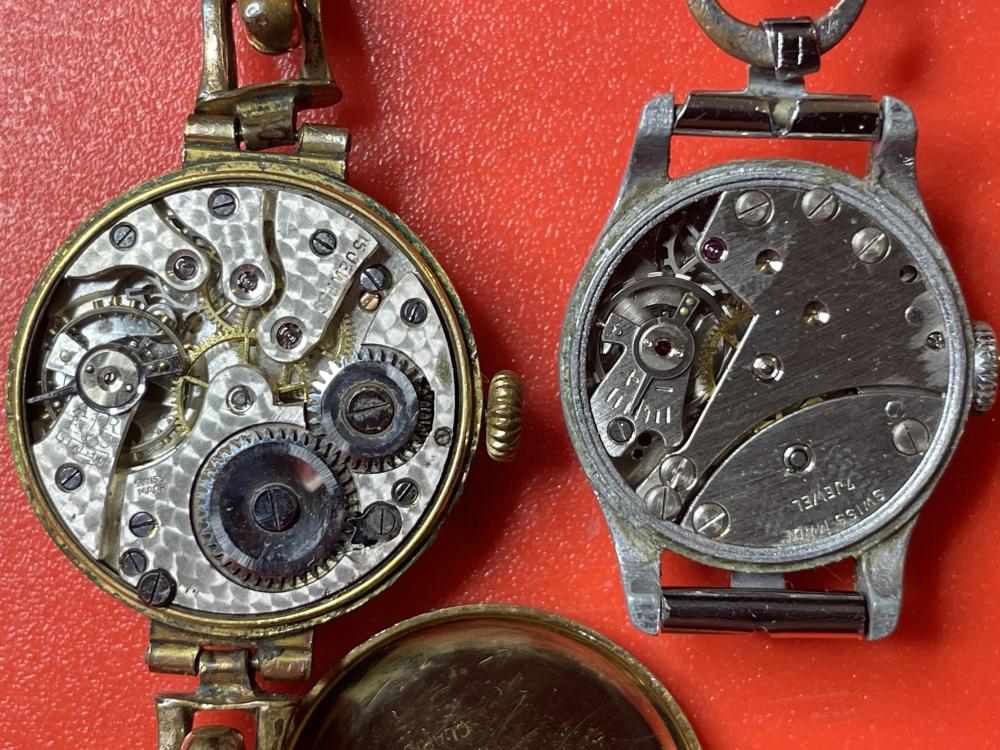
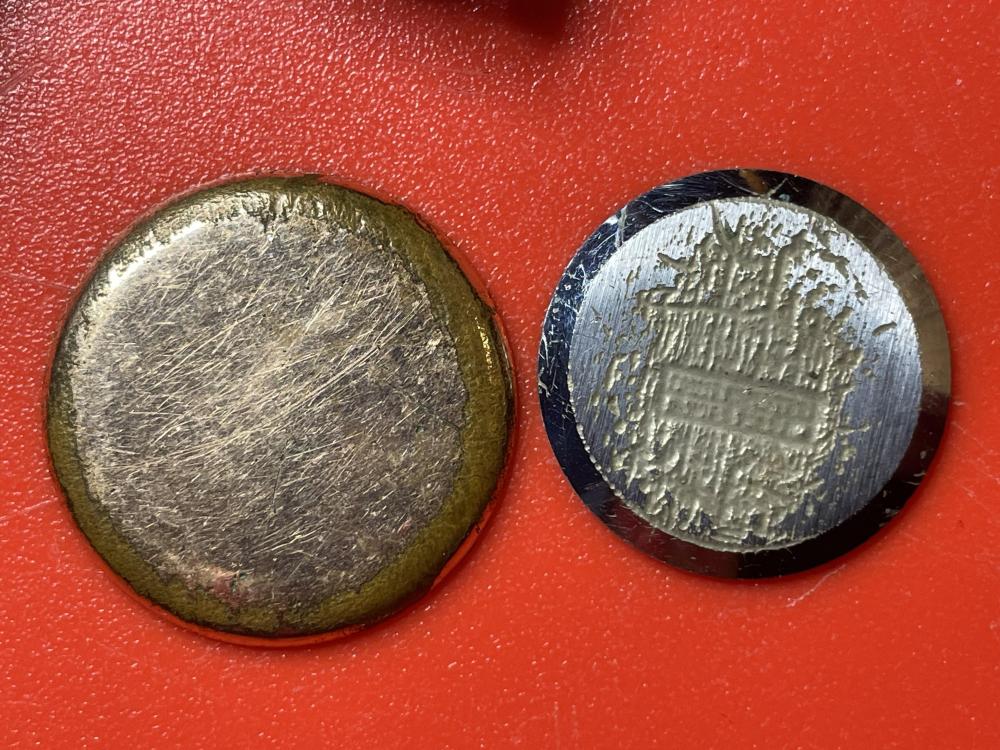
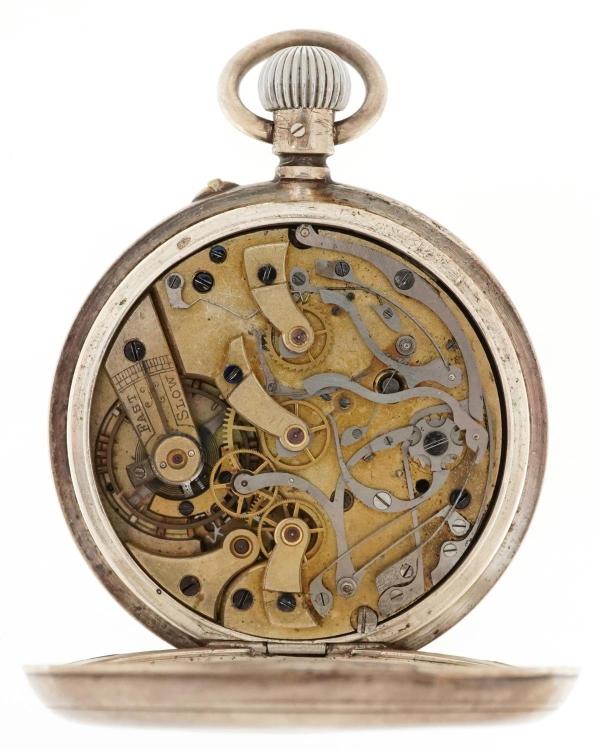
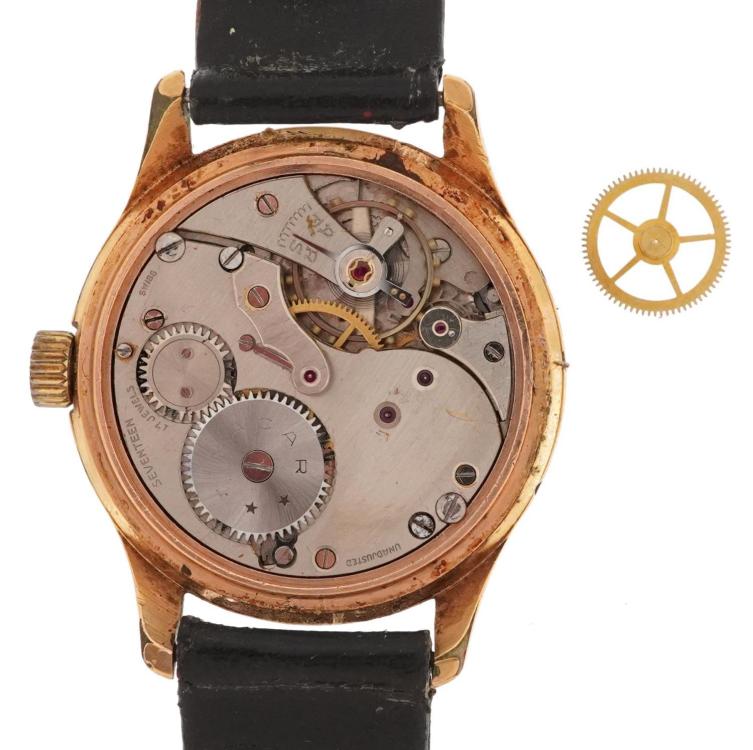
What I consider ebay "Paydirt" - taking the back off a watch and finding years worth of accumulation of crud around the edges, so it is as previously worn rather than someone else's failure or Frankenstein attempt they are getting shut of. And even better when you also find an immaculate movement with no sign of rust or chewed up screws! Another couple I think are fantastic old ones, from an ebay job lot (under £2 each). They both look like they have been worn to death, with little plating left. The "Claridge" one (upper) has the date 1922 (or 23) scratched in the back, and the Ingersoll has 2/48/FW in the back. (Is that when it was sold, or serviced)? The movement in the Claridge looks like it was a reasonably high end one at the time, from the finish? It's also got quite a fancy dial. That one tries to run, but is very sticky. The Ingersoll is only a pin escapement type, but it's still going strong with good amplitude!
 3 points
 -
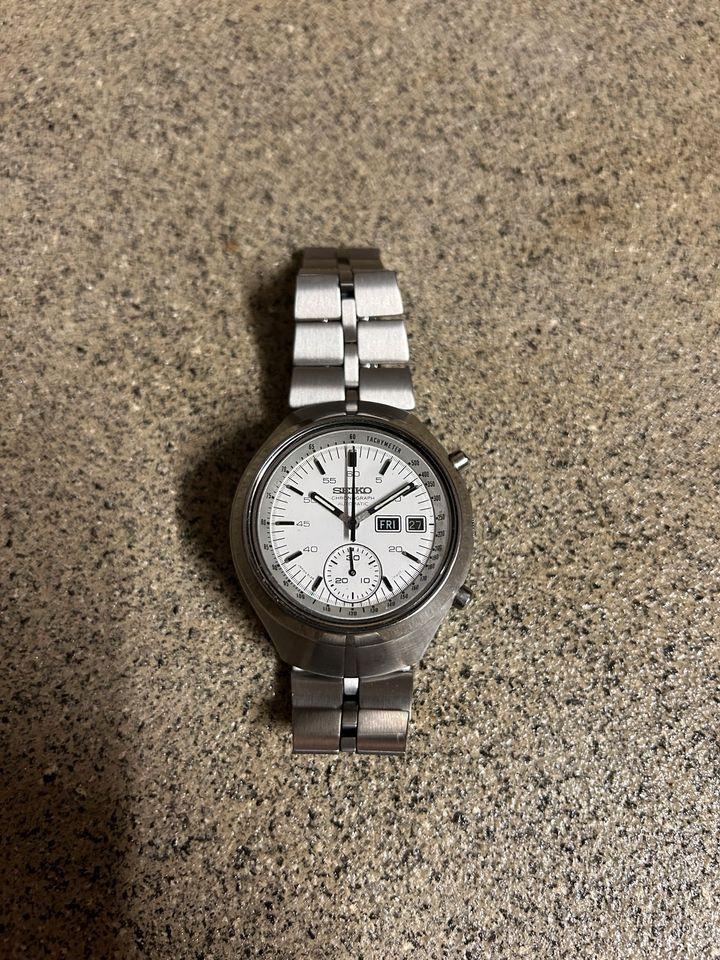
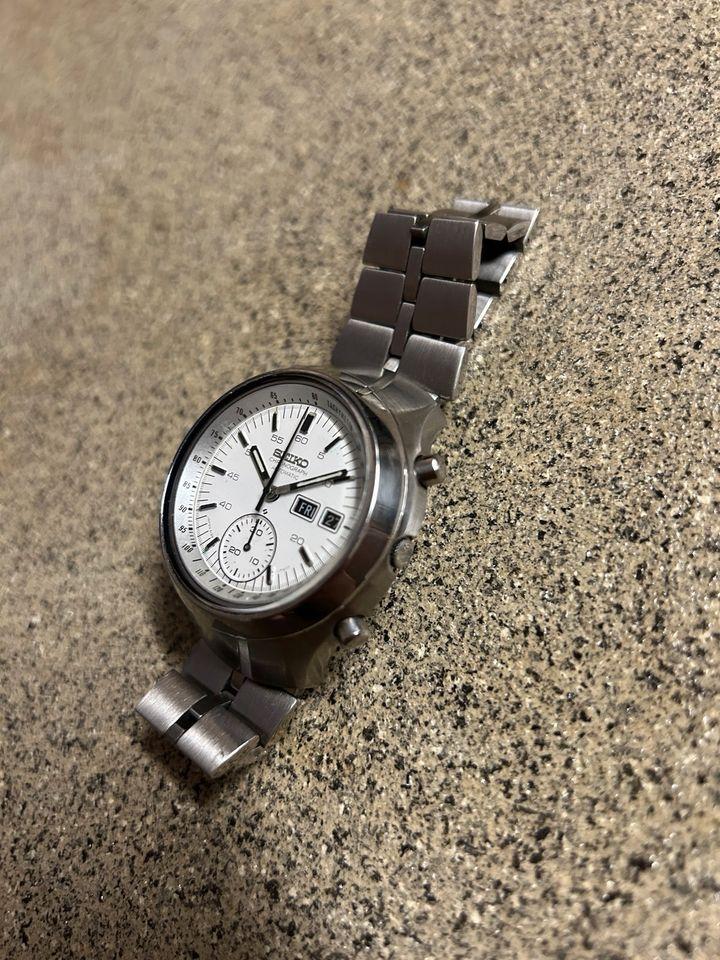
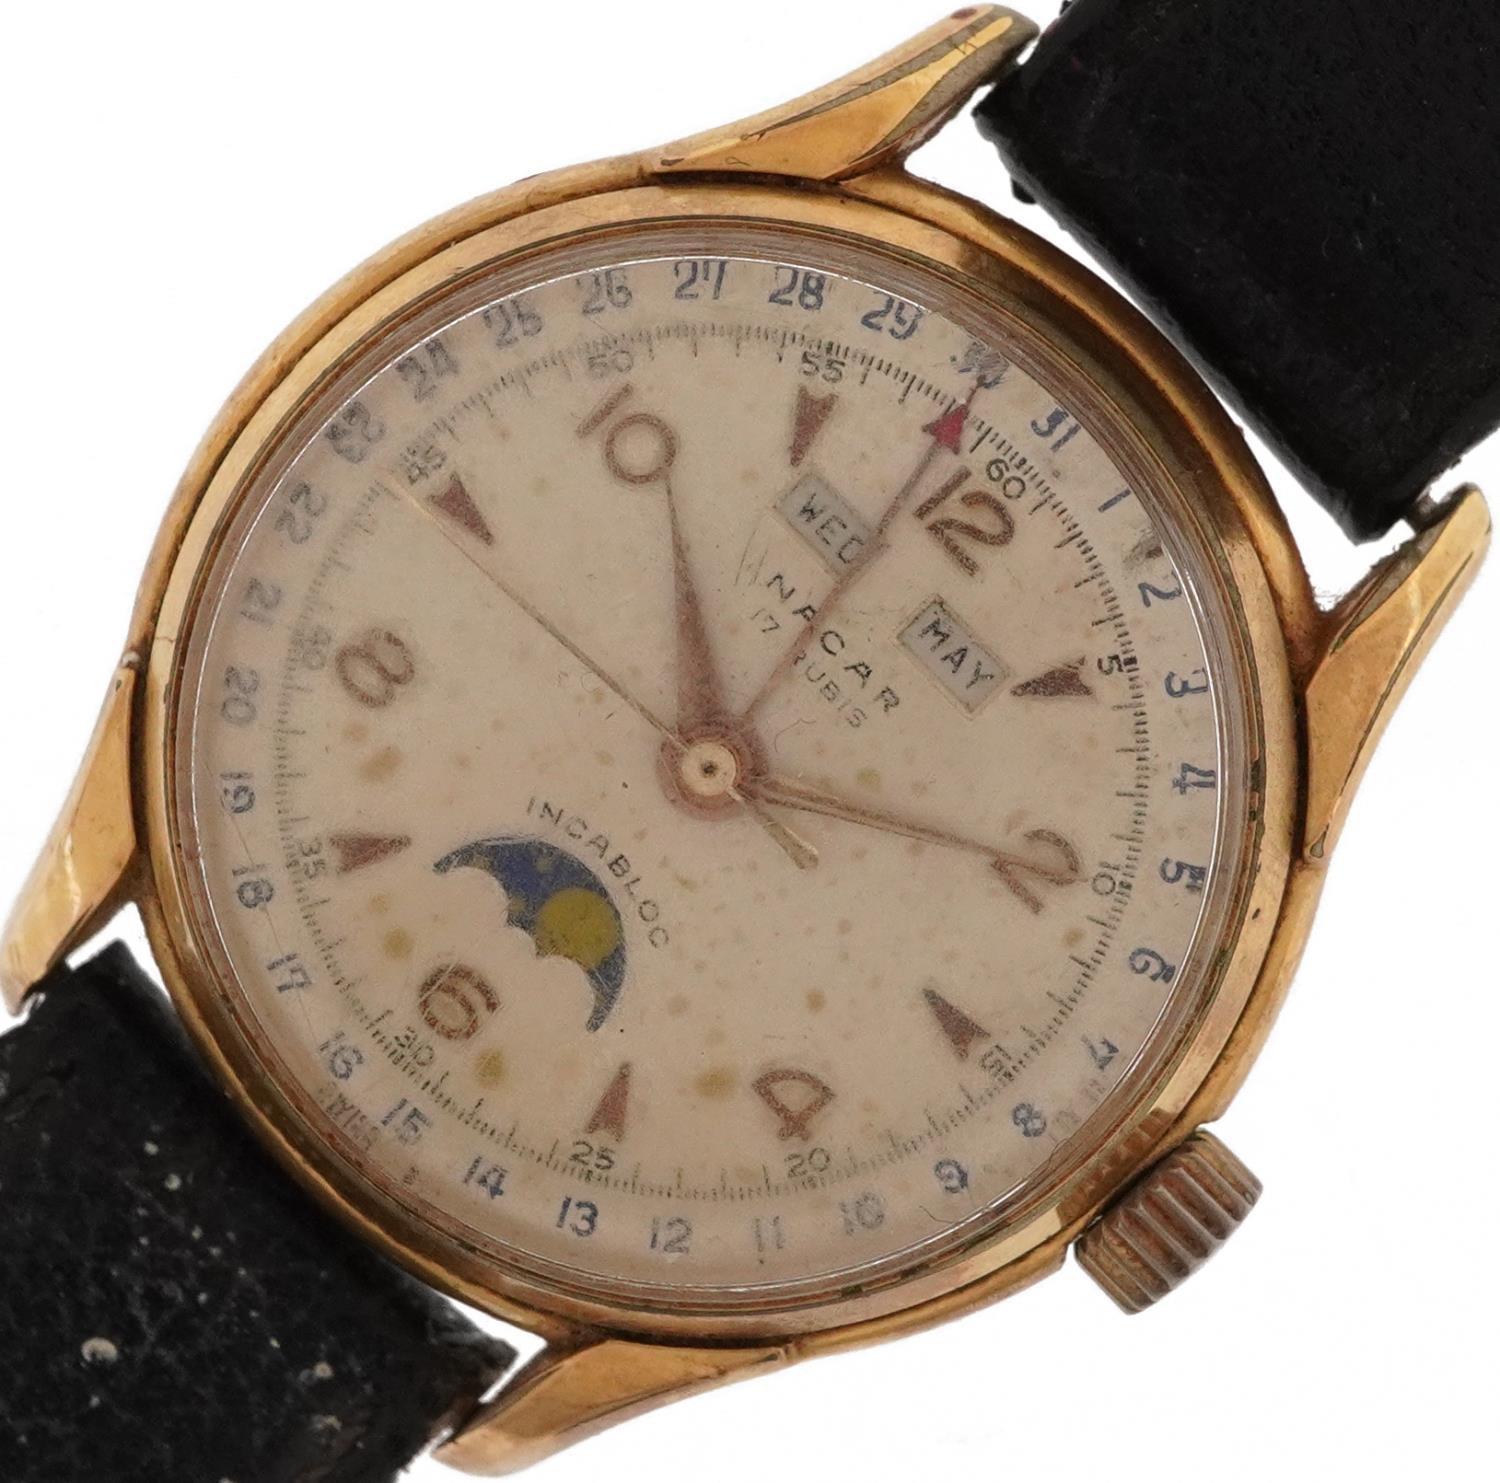
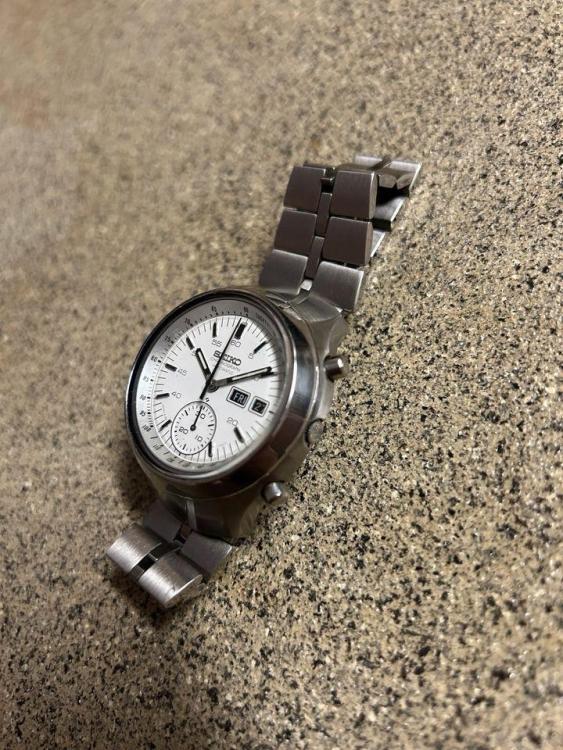
I order to boycott the Swiss (not really ) I like to try a Seiko (6139-7100). Bit of an iconic 1970's model, nick named "the Helmet". Below sellers pictures and it seems to kinda run ...... according to the sellers watchmaker; ceased due to dried up oil and the seller didn't wanted it serviced, hence sold as defect. Case, glass & original bracelet should be in "super" condition ......... Curious what's under the hood !?

 3 points
 -
I don't see why in classical watch repair , disassembly is not practiced as A process of elimination. Remove the seconds hand, once sure it ain,t the bad guy !! Remove the minute hand , continue ... Find the bad guy, call the police. repair or replace the sucker. A good clean and lube wont hurt. Enjoy your watch in goood health. Rgds2 points
-
No need for a new bezel, it just needs removing and a good clean, clean the case under the bezel too.2 points
-
looking at this brings up memories? At one time these newfangled LED watches were newfangled and there was way more of information. Tech sheets soldering stuff. There is even a kit with super tiny gold wire to reattach the wires to the LEDs because some of them were not covered with epoxy. Then yes it did come with the conductive glue you definitely need a microscope for this one. So you've missed out on all the fun stuff from the old days and now have to reinvent the wheel. Usually the variable thing is the variable capacitor to regulate the frequency of the watch. Oh and yes there were available separately in case you broke yours or something one to replace its. as you like playing with your soldering iron vintage at the first link modern or something similar at the second link http://rk.nvg.ntnu.no/sinclair/other/blackwatch.htm https://www.makershed.com/products/solder-time-watch-kit2 points
-
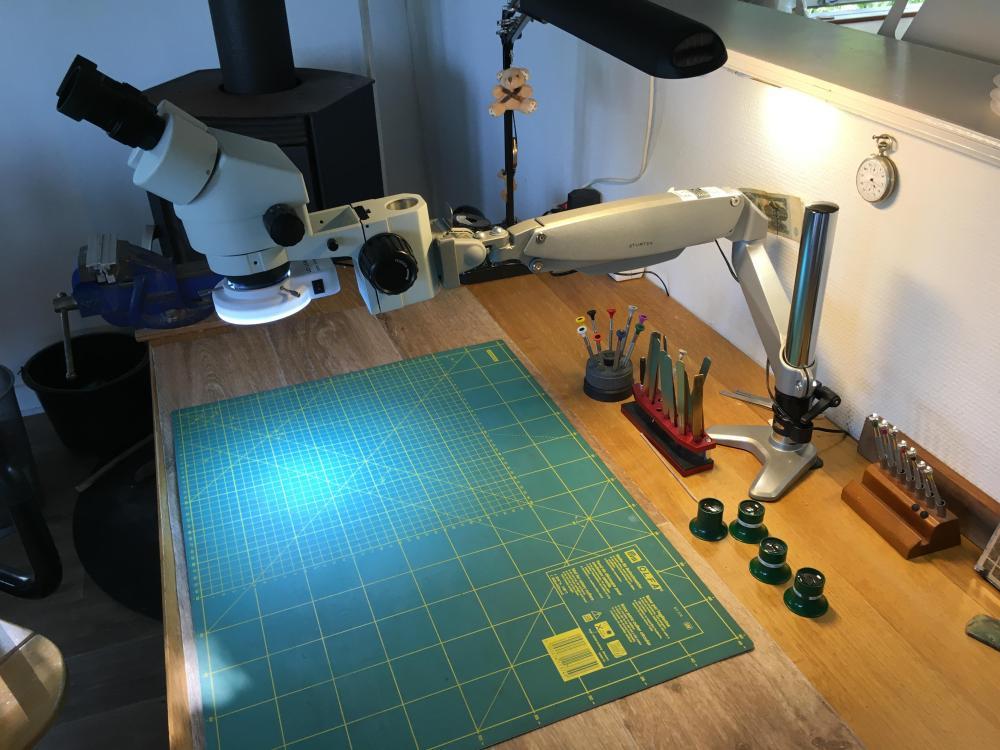
It seems that most of these models are from the same (Chinese) factory, just differently branded & priced. Mine Chinese scope is branded as a "Swift", but there is also Euromex, Besser, Bewinner etc etc. All suspiciously similar looking. I think Amscope stands for America scope, a catchy brand name for in the US and mostly sold in ...... you guessed it; the US. The same scope for in the EU is branded; Euromex. My 7x - 45x Swift has a LED-light in the base, ideal for inspecting jewels. The upper-LED is replaced/modified with a LED-ring light. If I need more work-space, for that I've a computer monitor arm with a 0.5x Barlow lens;

 2 points
 -
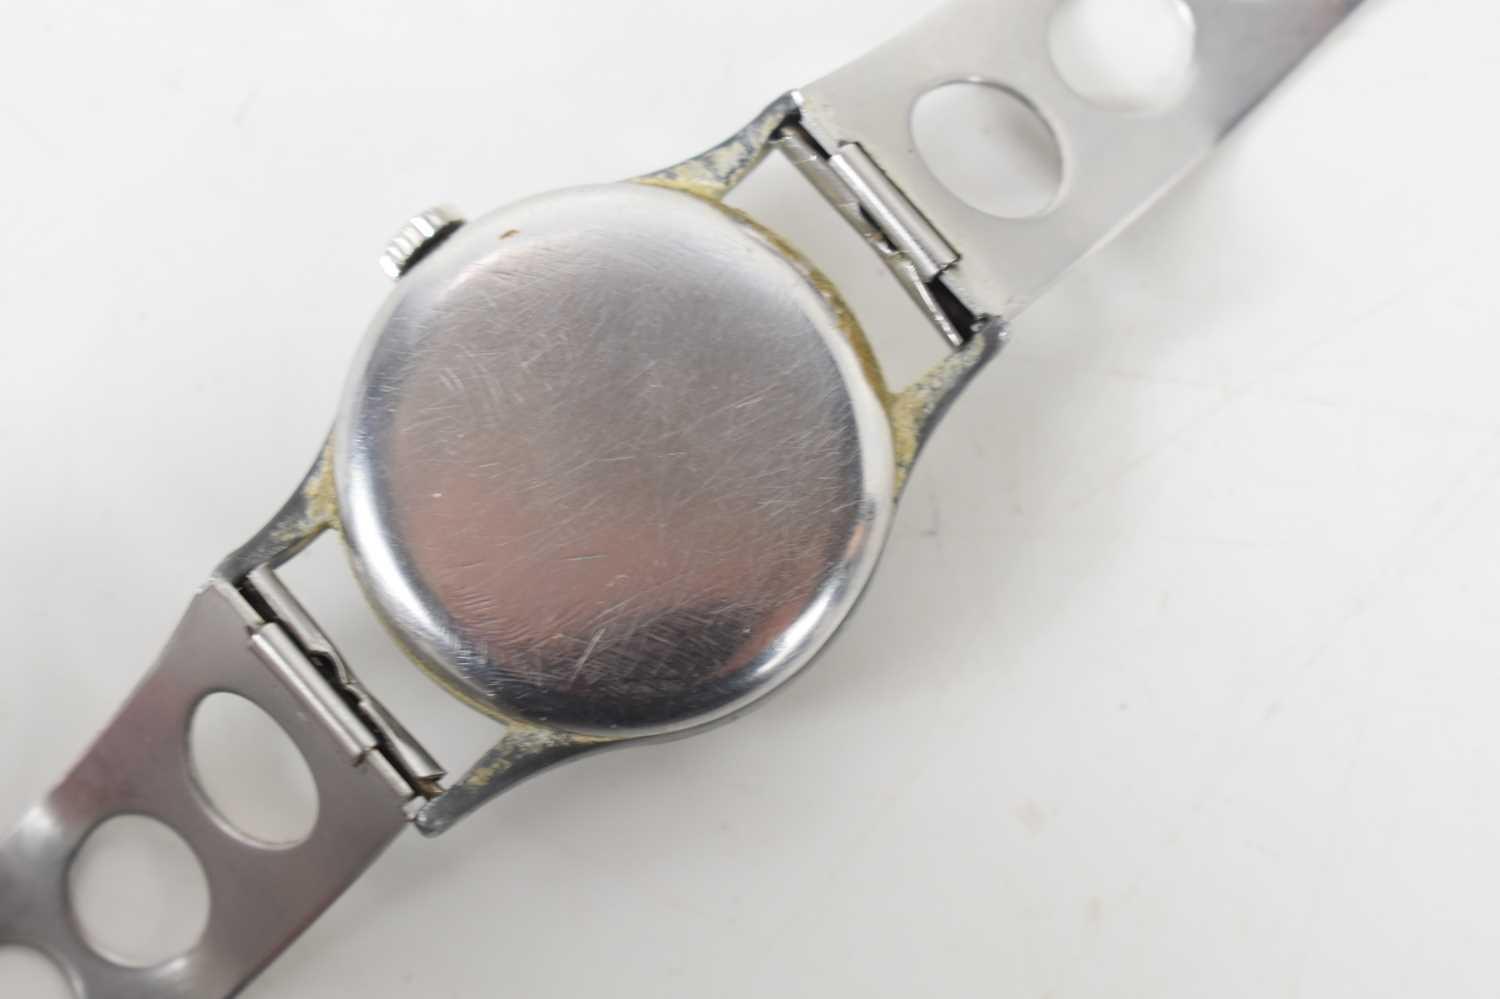
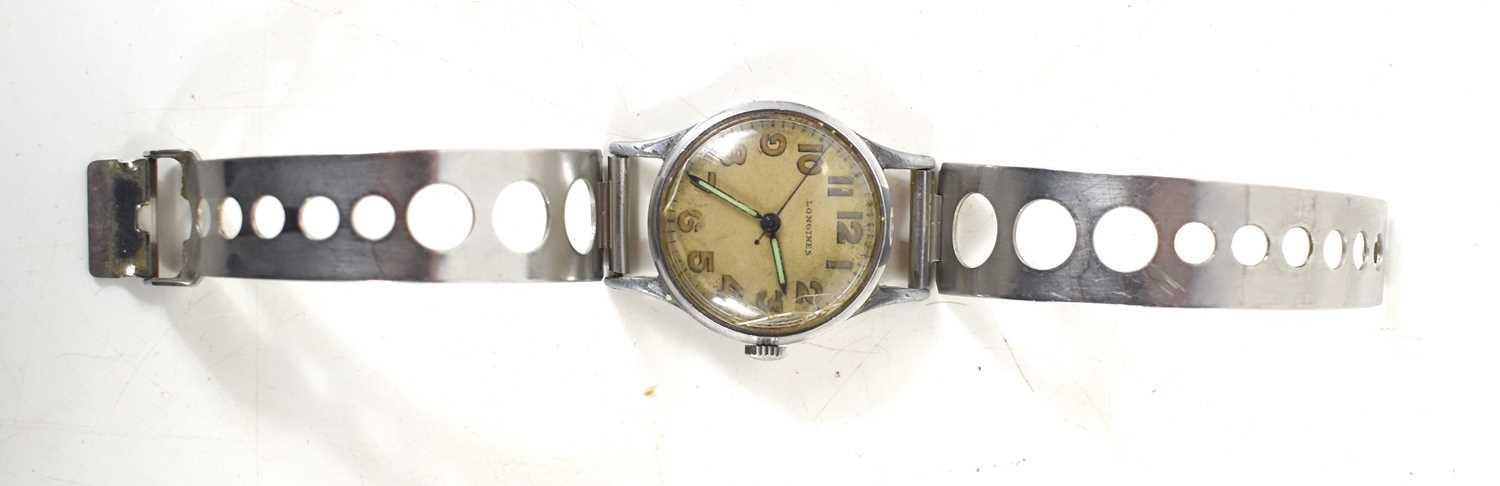
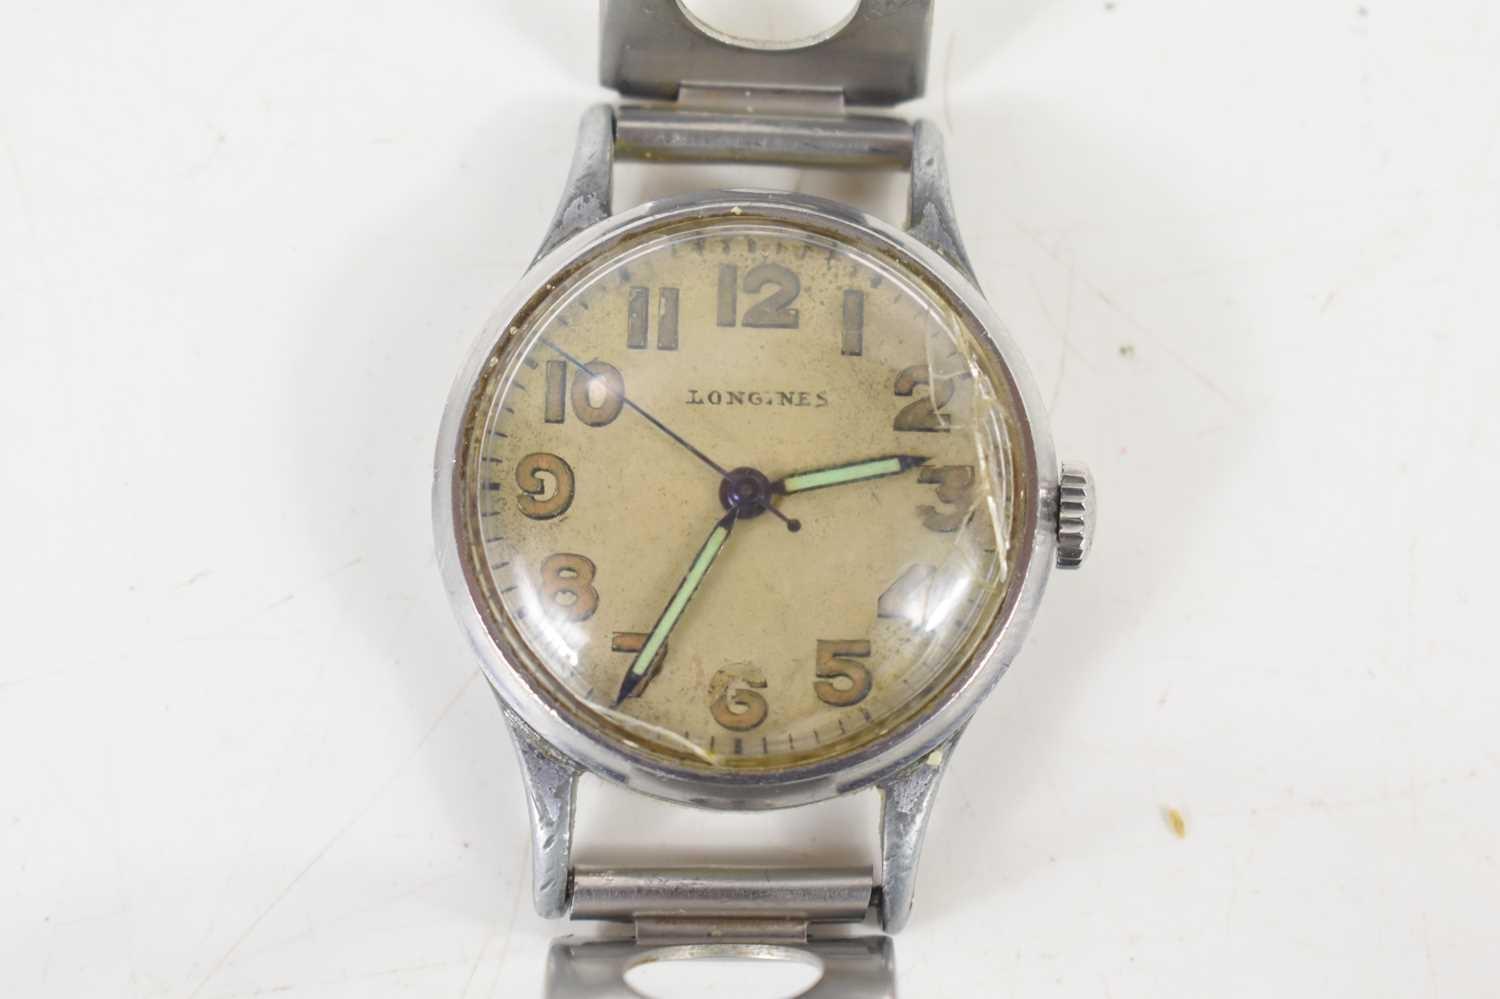
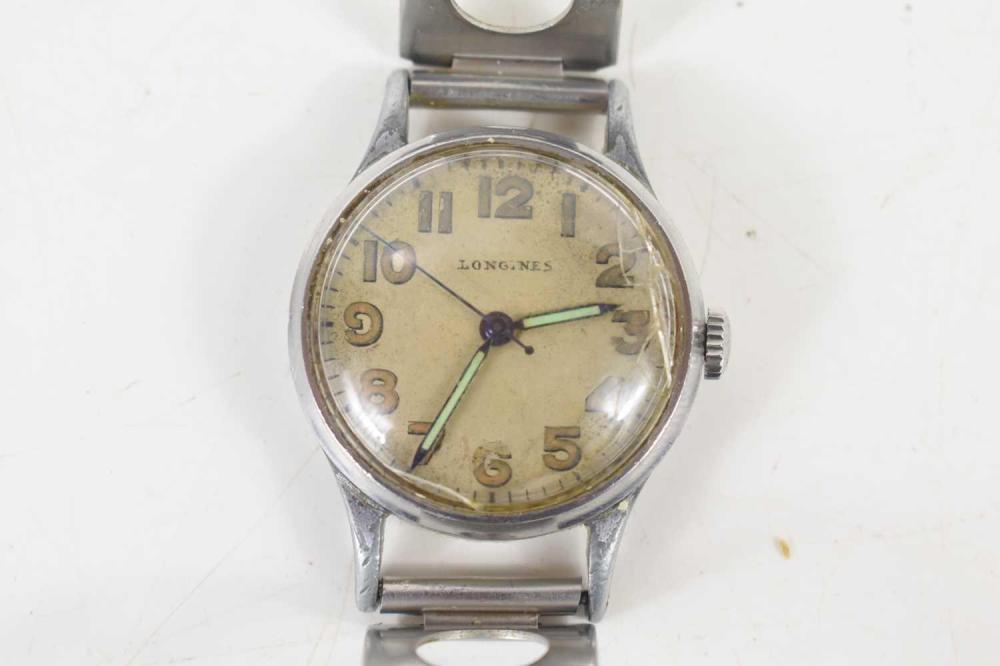
For £30 + fees, ~ £37. (only the longines, system merged all my pictures into one post)


 2 points
 -
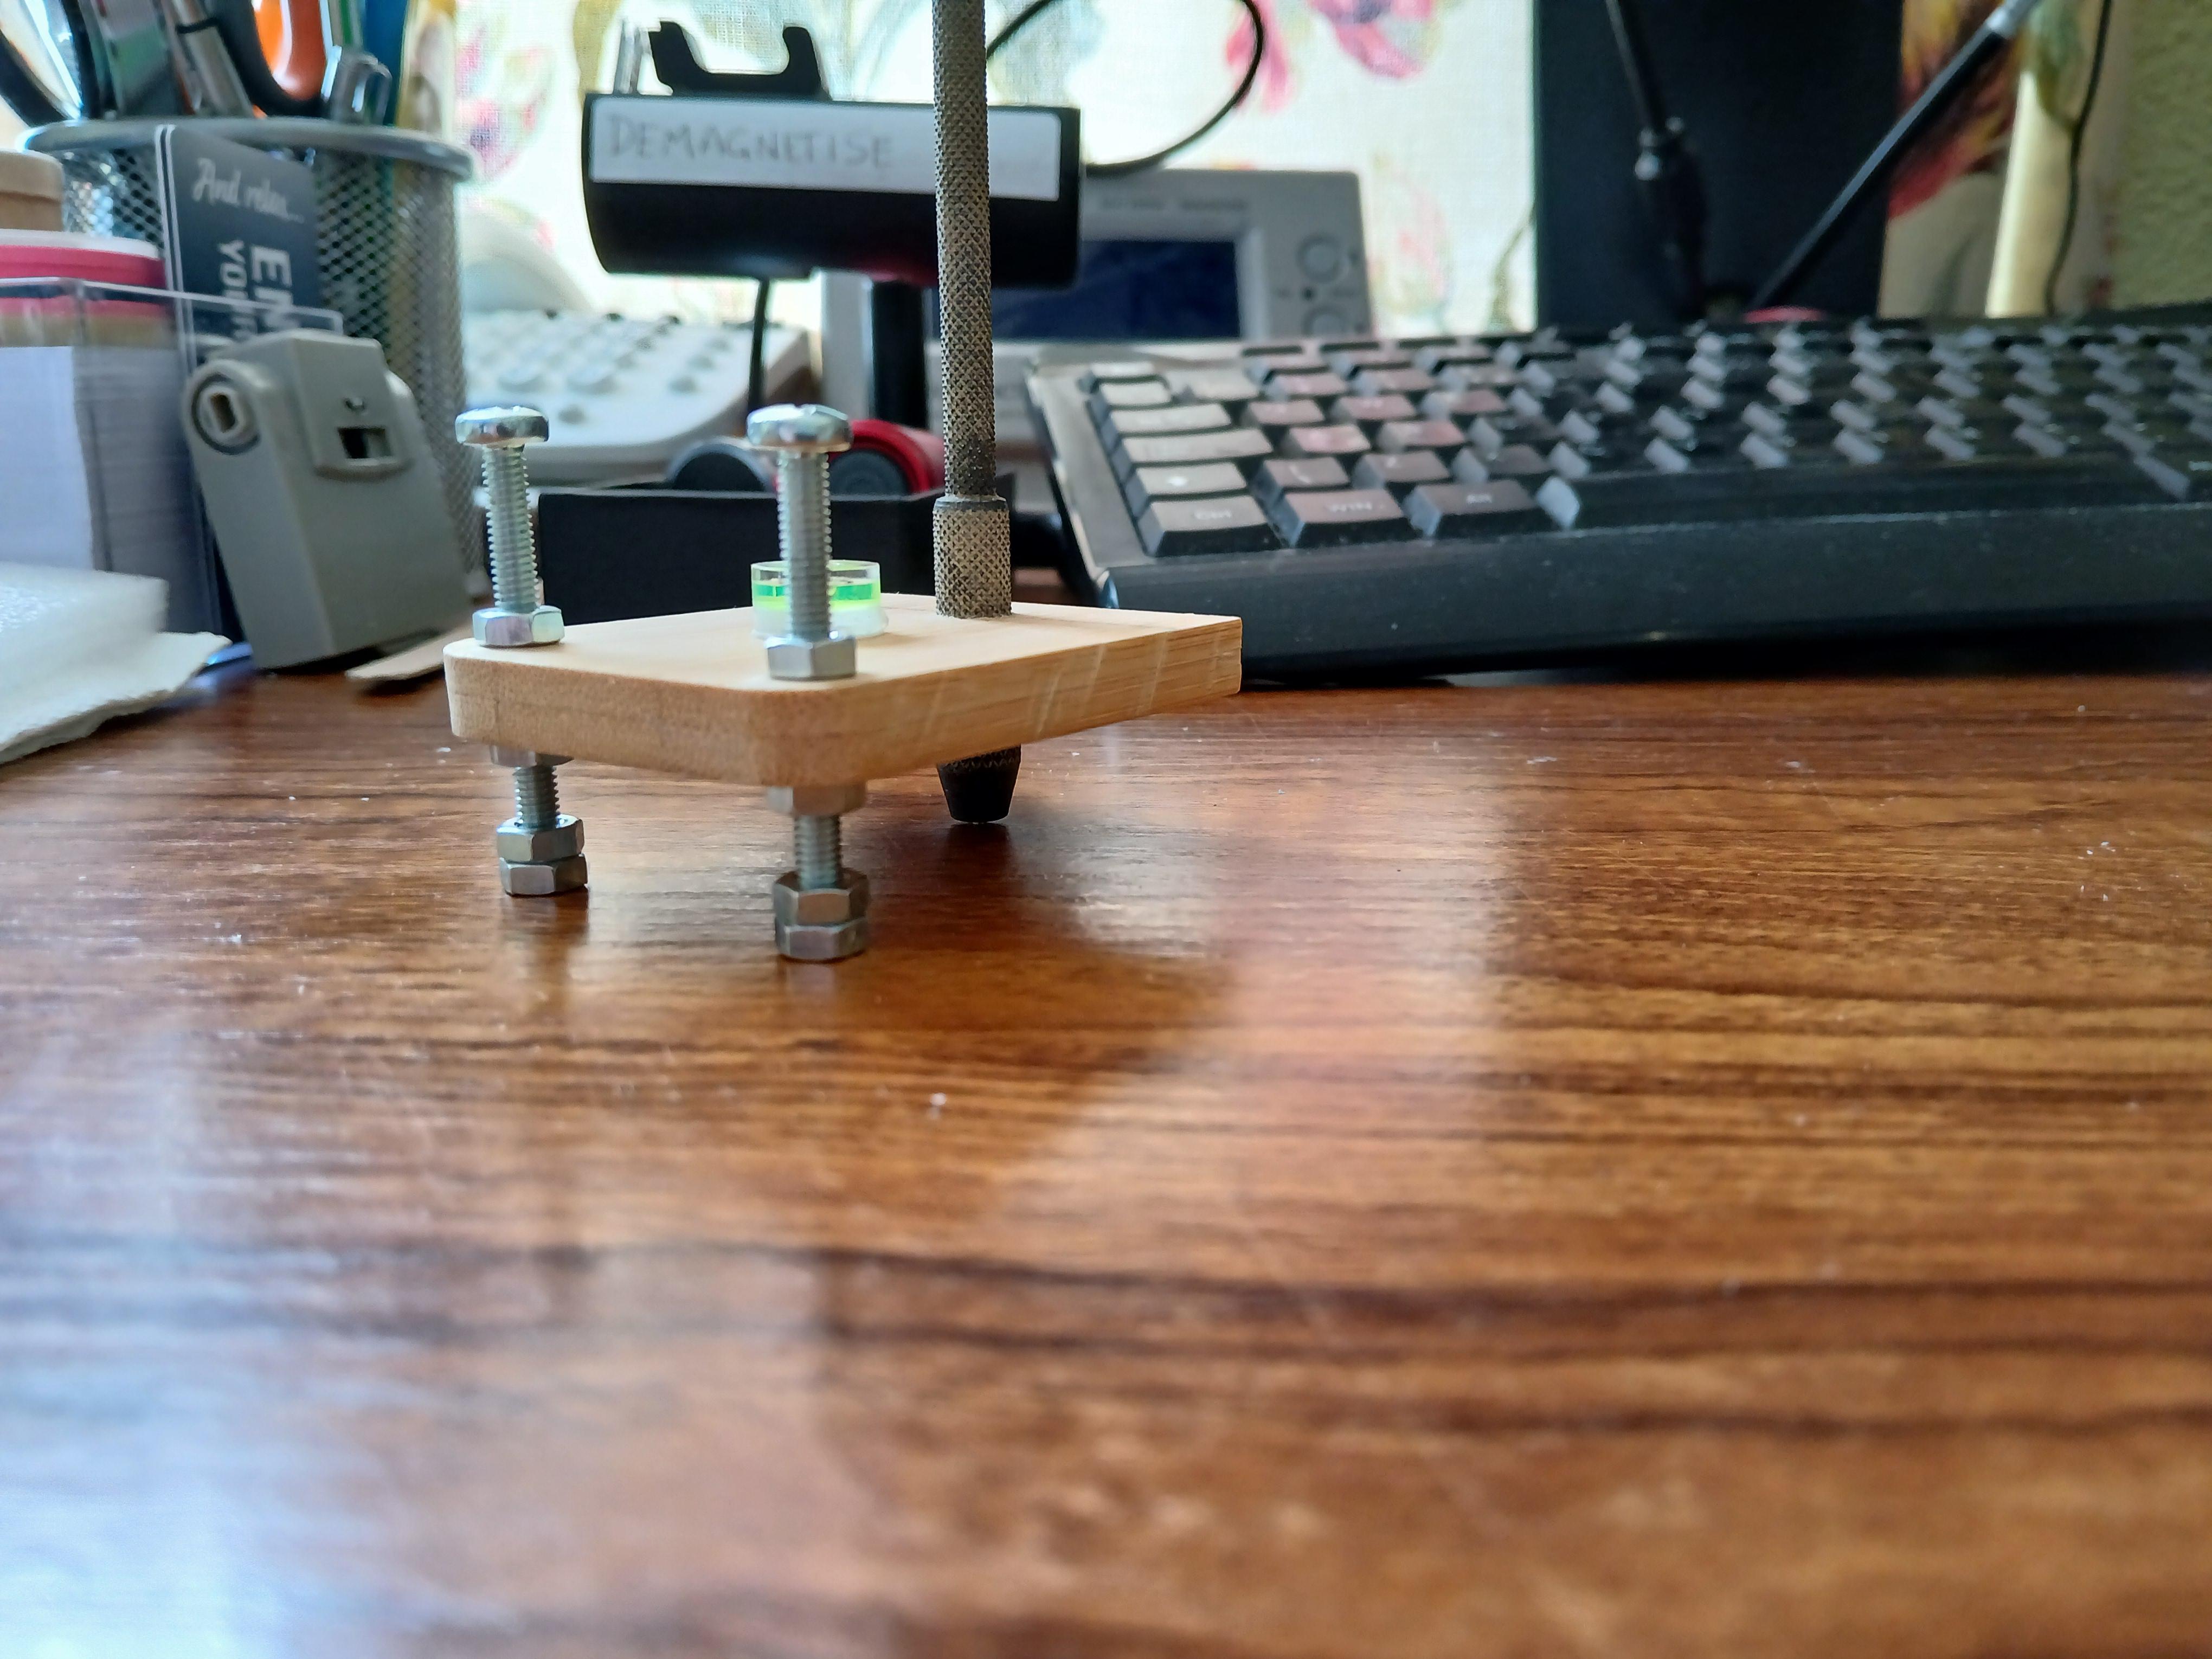
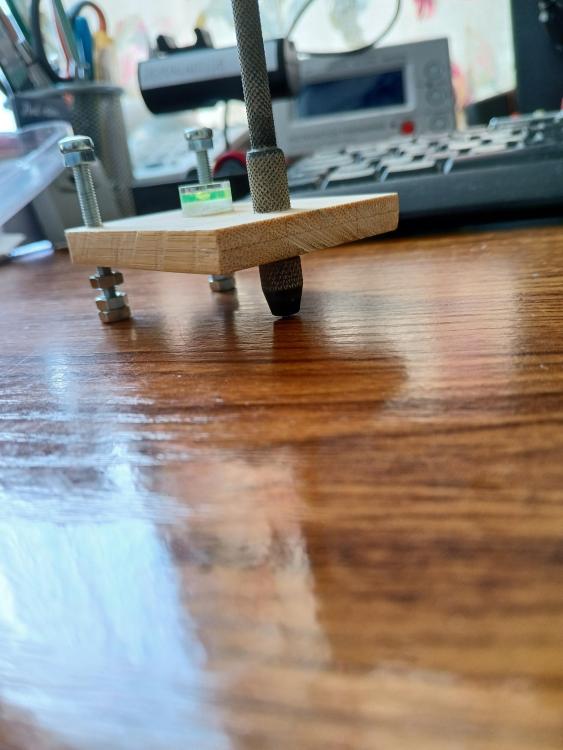
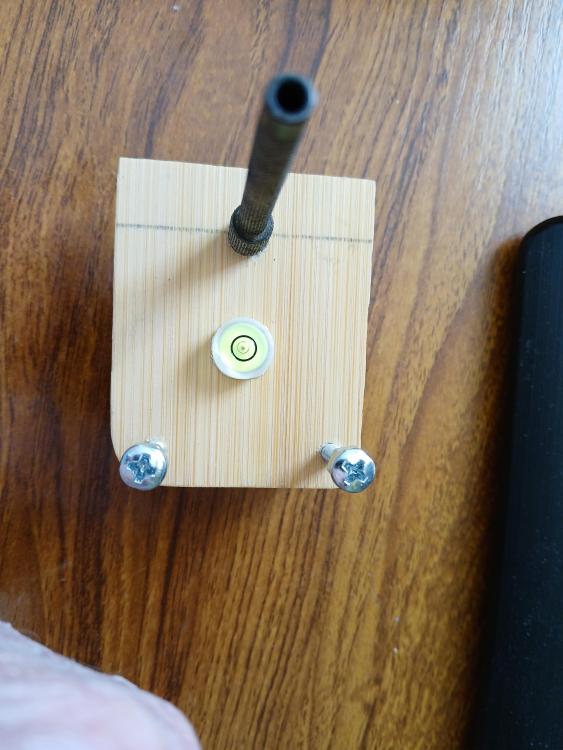
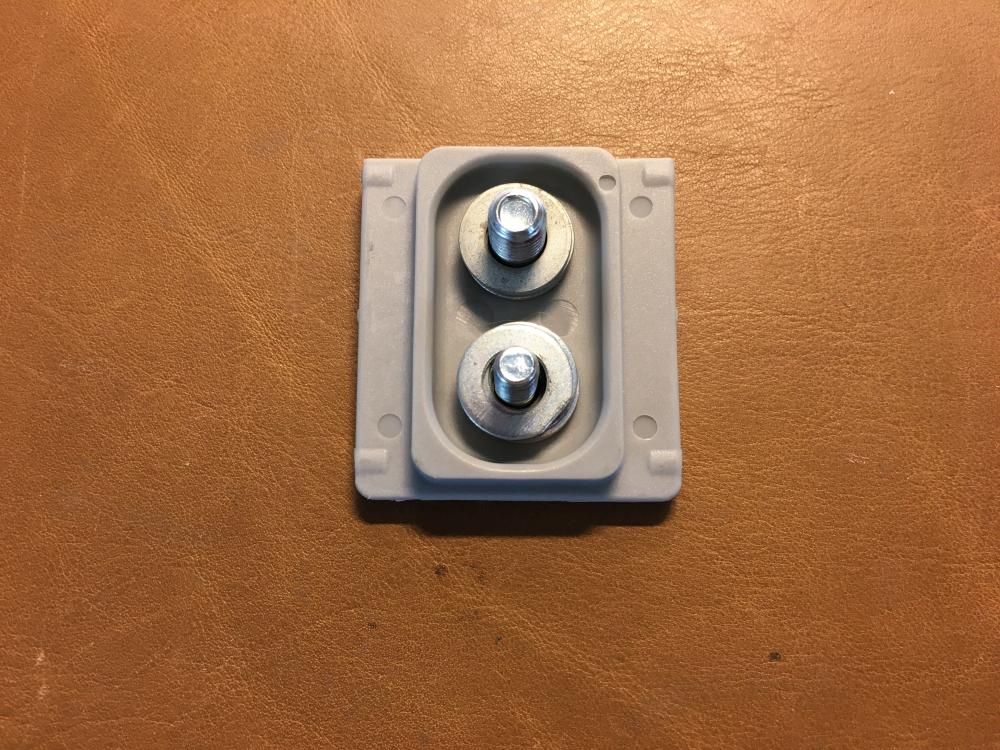
DIY Screw polisher. Inspired by Alex Hamilton, I have made my own screw head polisher. Less than £4 in parts. I hour to make. Chuffed. Additional photograph information Bottom nuts are tightened to make a solid base. Nuts below and above wood are to make the level set when using the polishing base. I will get a small picture frame with glass to insert the polishing paper. The screws can be altered to accommodate. I can now polish to 1 micron. I piece of wood 2" x 2 1/4". 2 x M4-30mm bolts. 6 nuts. 1 pin vice from set of 4.

 1 point
 -
Haha, looked like AS but I had it upside-down.1 point
-
Hi no easy way out . Possibly damaged or worn tooth or teeth, dirt who knows. Dismantling cleaning and a good lubricate on re assembly. Inspect each wheel whilst re assembling for possible problems.1 point
-
You are not the first to be done over. And I doubt you will be the last.1 point
-
for power supply this thing draws a lot of current why do you try a car battery will give you lots of power make sure you fill it for us please. Now joking aside you want to pay attention because typically the two batteries are in series student need 3 V. Then when all the LEDs are on it does draw a little more power than a regular quartz watch. Then yes this is bringing up memories of the old days as yes they had power supplies for the use. What is interesting is is just how fast knowledge of this period of watches seemed still disappeared were the knowledge of how to work on them etc. although let's see what searching the Internet brings up for you. One of things this article handset is yes all the semi conductor companies got into integrated circuits for digital watches plus a lot of the US integrated circuit manufacturers even got in the manufacturing digital watches. Then as nice as the article is it doesn't cover all the watch repair test equipment etc. Then by the way this was the years of crisis for the watchmakers as these newfangled watches don't seem to have any gears in them and where's the balance wheel? Yes the watchmakers panicked again like they like to do with new tech which is some point in time fades away in mechanical watches are popular again. https://www.hodinkee.com/articles/four-revolutions-led-watches looks like the digital watch isn't gone after all? https://www.hamiltonwatch.com/psr then yes I know it's not your watch but you might find the reading interesting especially when you get towards the bottom as to how he fix the pesky watch doesn't work problem. Then yes a heck of a lot of these watches failed and in the old days people didn't like failed digital electric watches and rather than throwing them away which a lot of dead a lot of them were given away? http://pulsarledtime.com/Blog-Article-on-PLT-1-Module.html1 point
-
Greetings Colonel. Like your sense of humor. Best wishes1 point
-
It looks pretty good - though the top one has some corrosion on the battery contact, it does need a proper cleaning before use. I think it be a direct fit, if you use the original crown & stem from the MG one.1 point
-
I am afraid so. They sent out another set and let me keep the fork, which was very kind of them. But unsurprisingly the pry tools are far too thick to be used on watches without damaging them. I would be better of using the fork tbh. Oh well lesson learnt.1 point
-
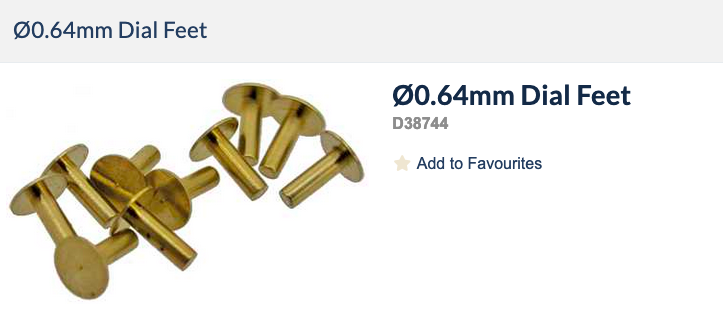
Ross, I have had the idea of getting some dial feet replacements, the ones for the milling tool and supergluing them to small flat parts and fitting them to the tripod for polishing. Then drop them in some acetone (nail varnish remover) to get them apart once the part is polished. Tom1 point
-
I hope this will explain what I've done1 point
-
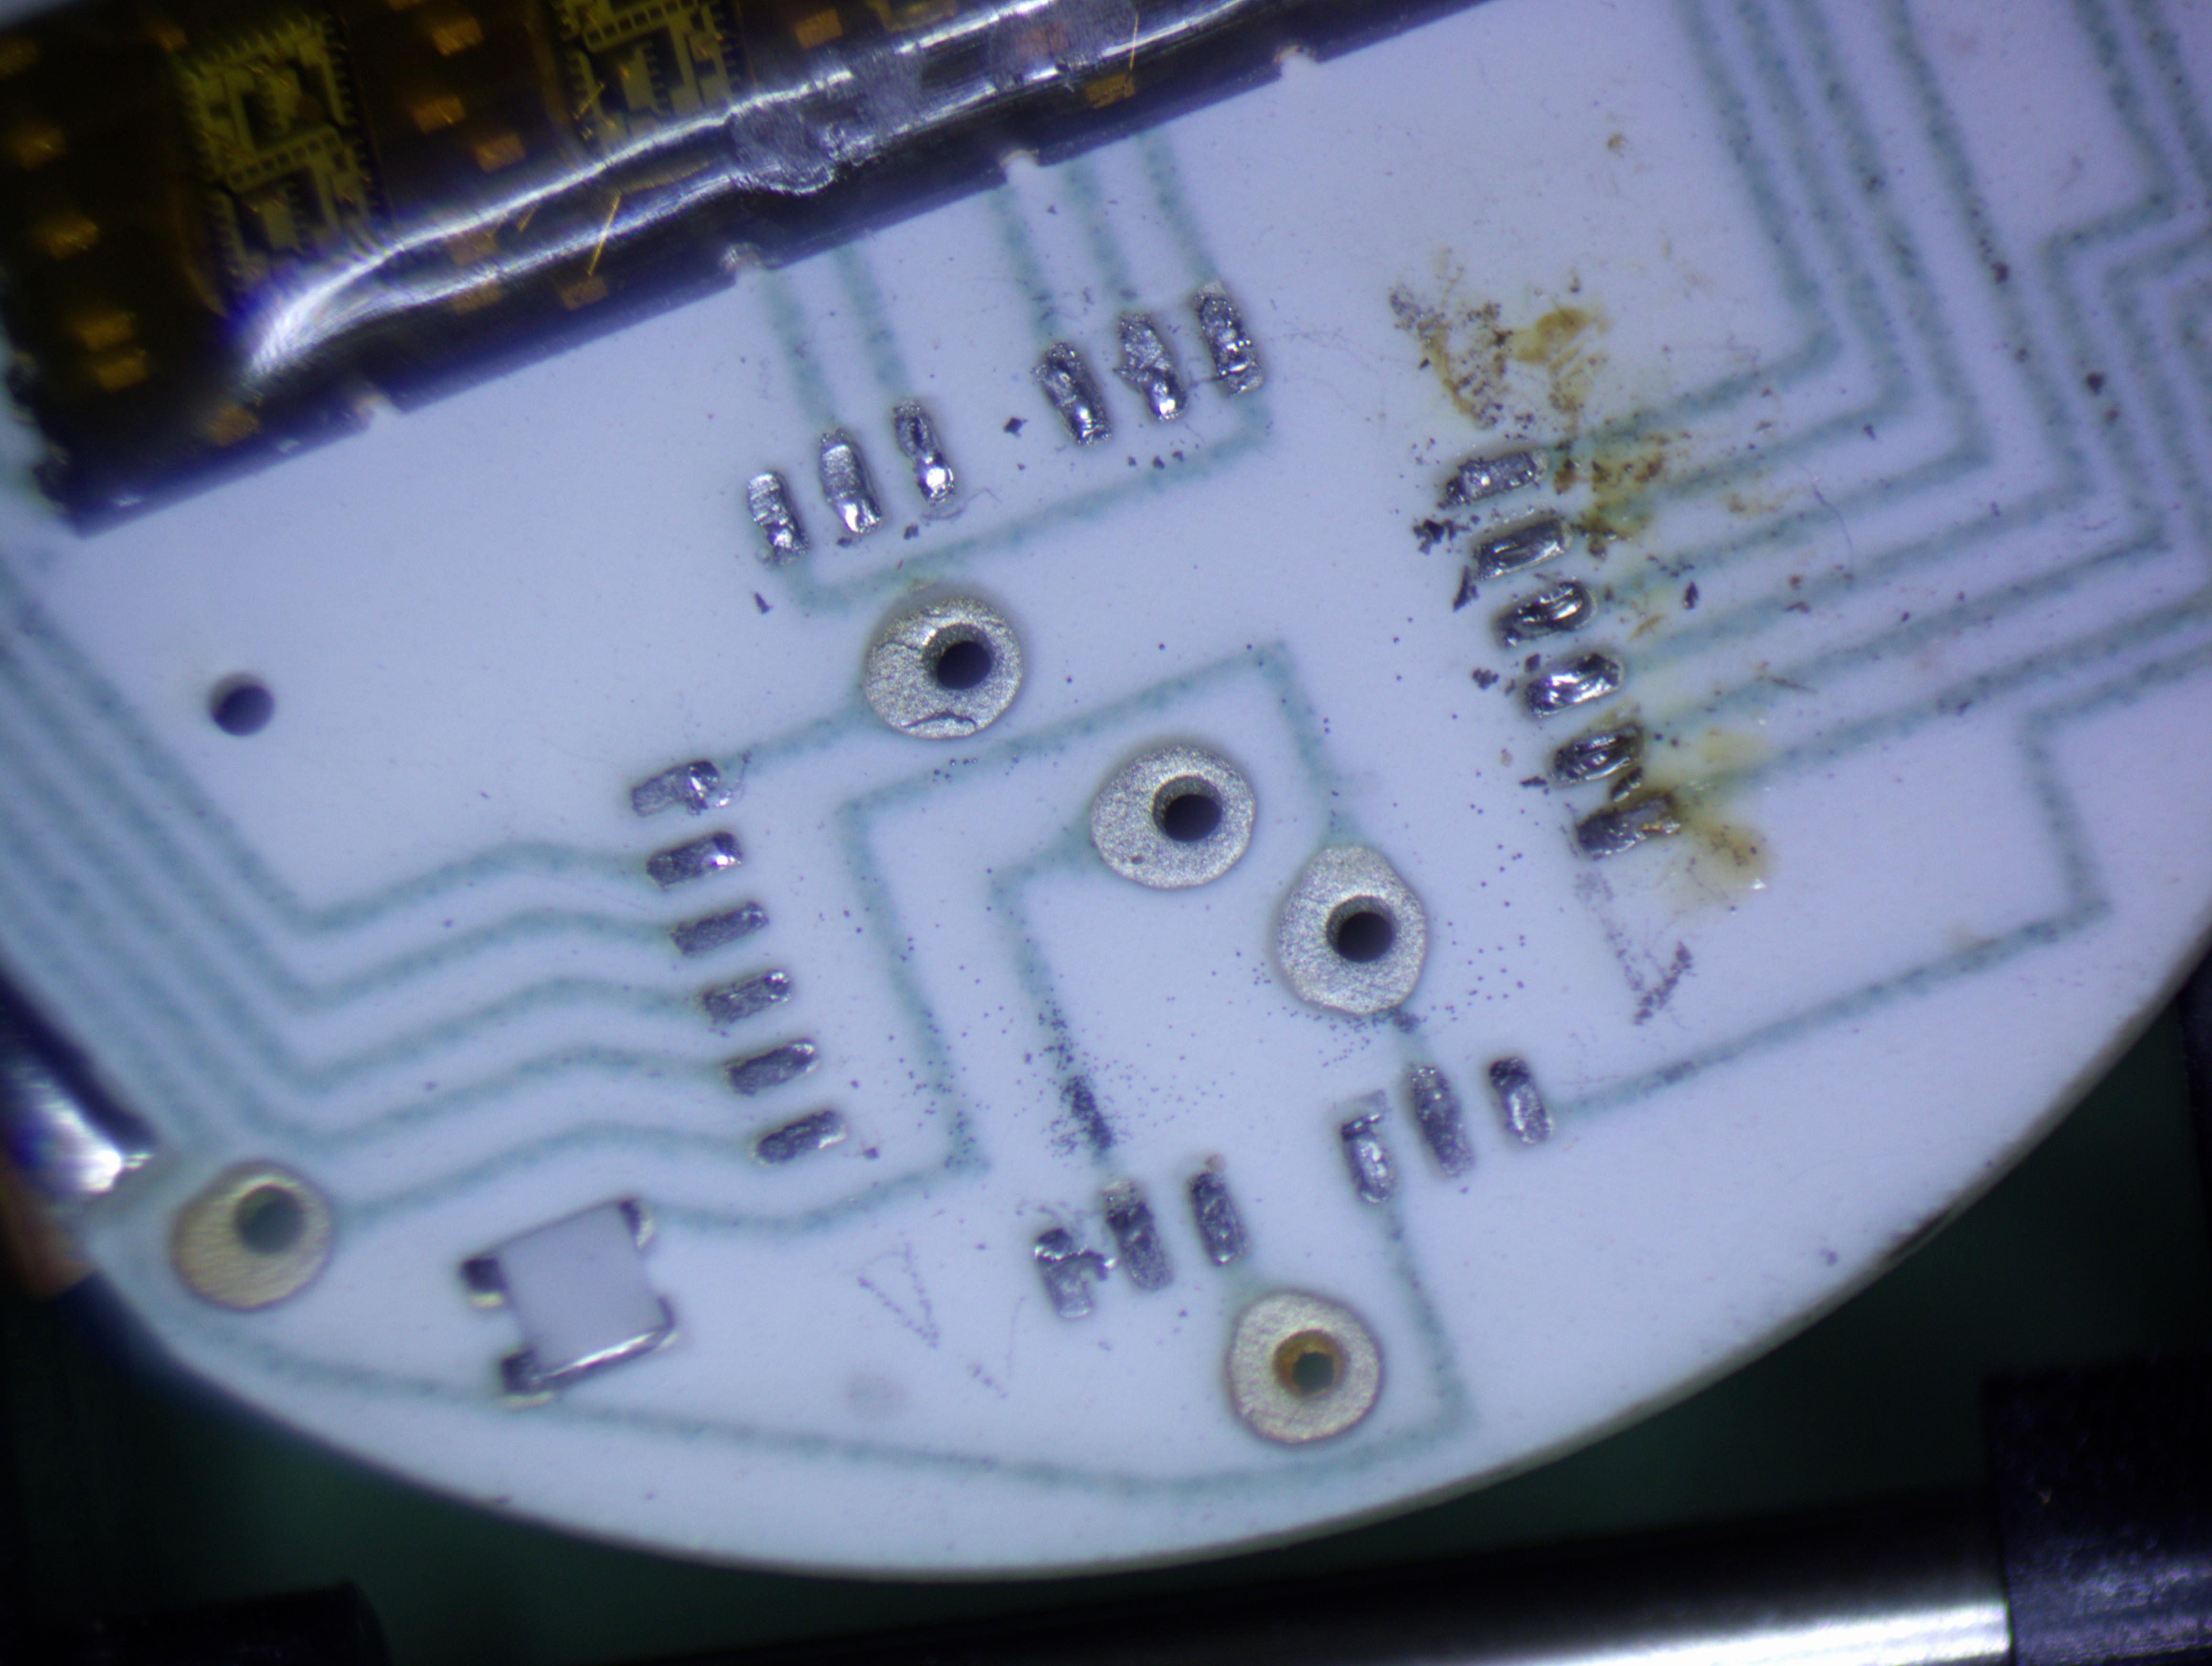
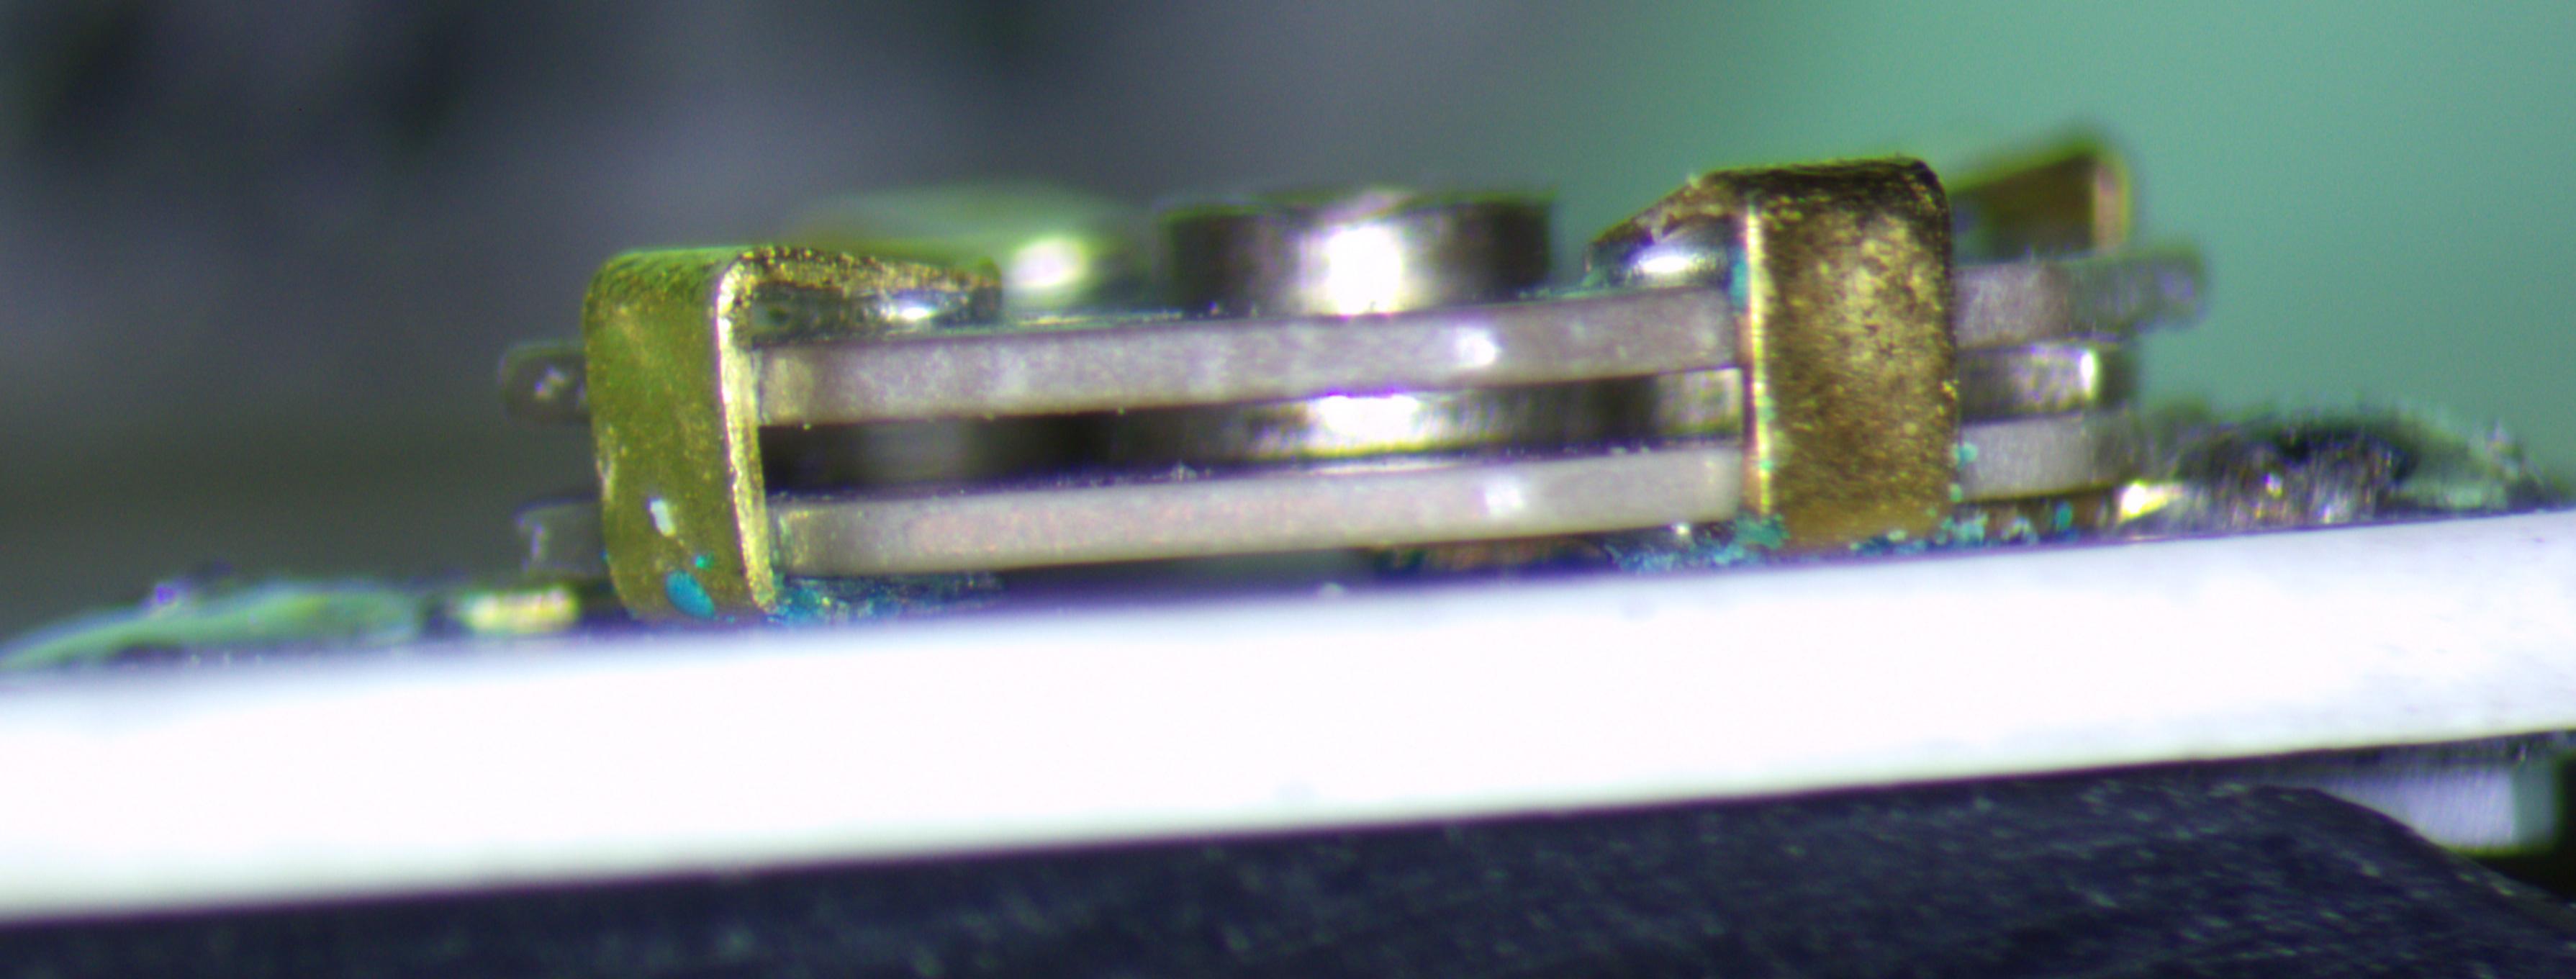
Testing continues. I de-soldered the main chip from the broken board to find out where the vias underneath it go: And then I took a closeup picture of what I assumed is a trim pot, but when I measure the resistance across it the value slowly rises as if it were capacitive. So I'm hoping someone here can tell me what we're working with. Then I figured I should test out the LED display, so I applied voltage to it, with kind of weird results. I had the ground attached to the battery -, and +3.1v attached to my tweezers. It was pretty neat to see it light up! Edit to note I think the weird results are because the inputs of the transistors are floating, although I'd expect no result at all in that case. Also edit to include the schematic I put together.
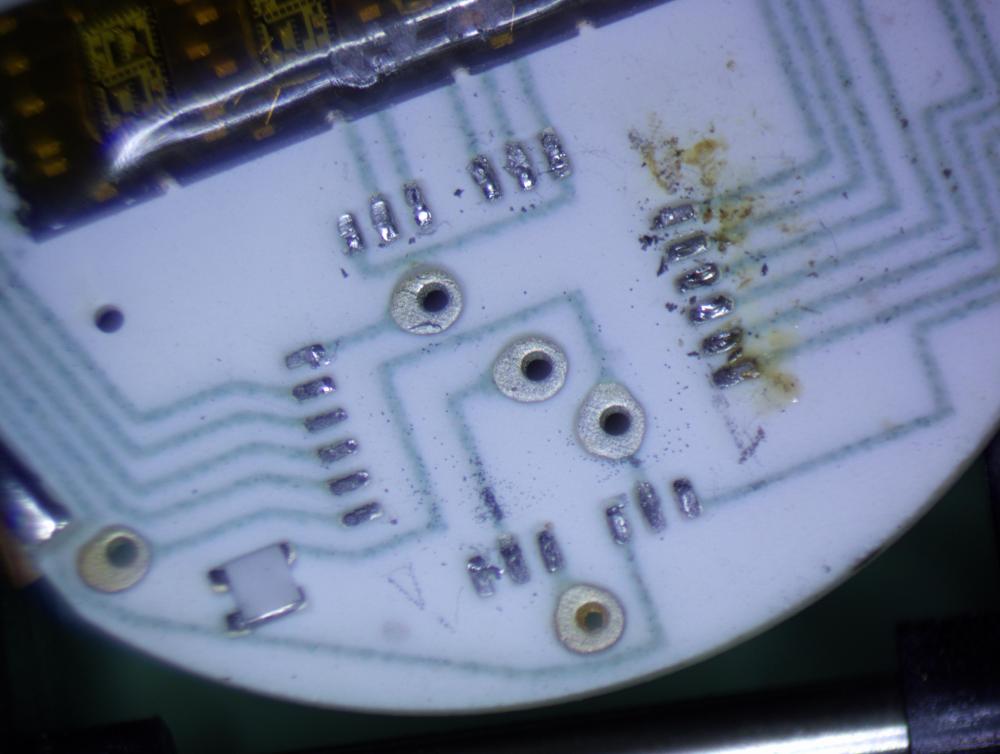
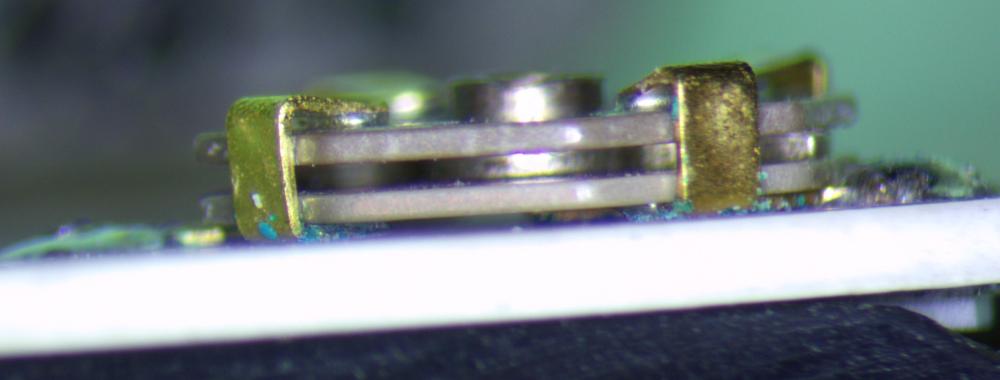
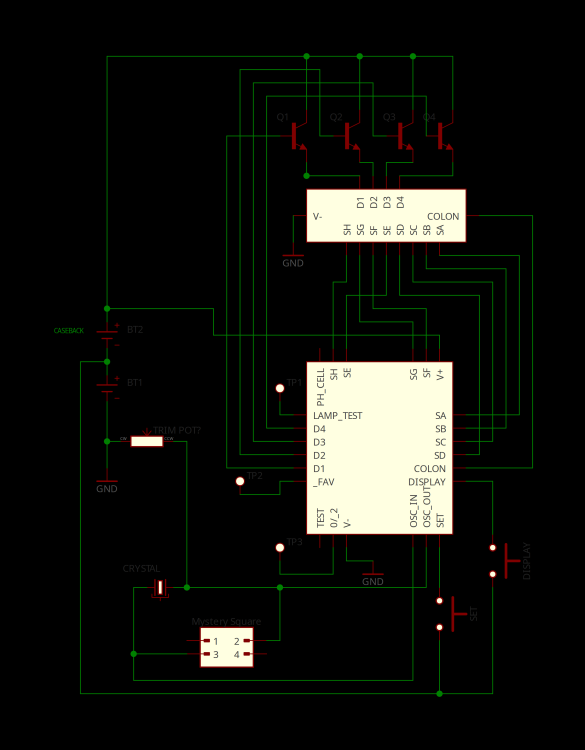 1 point
 -
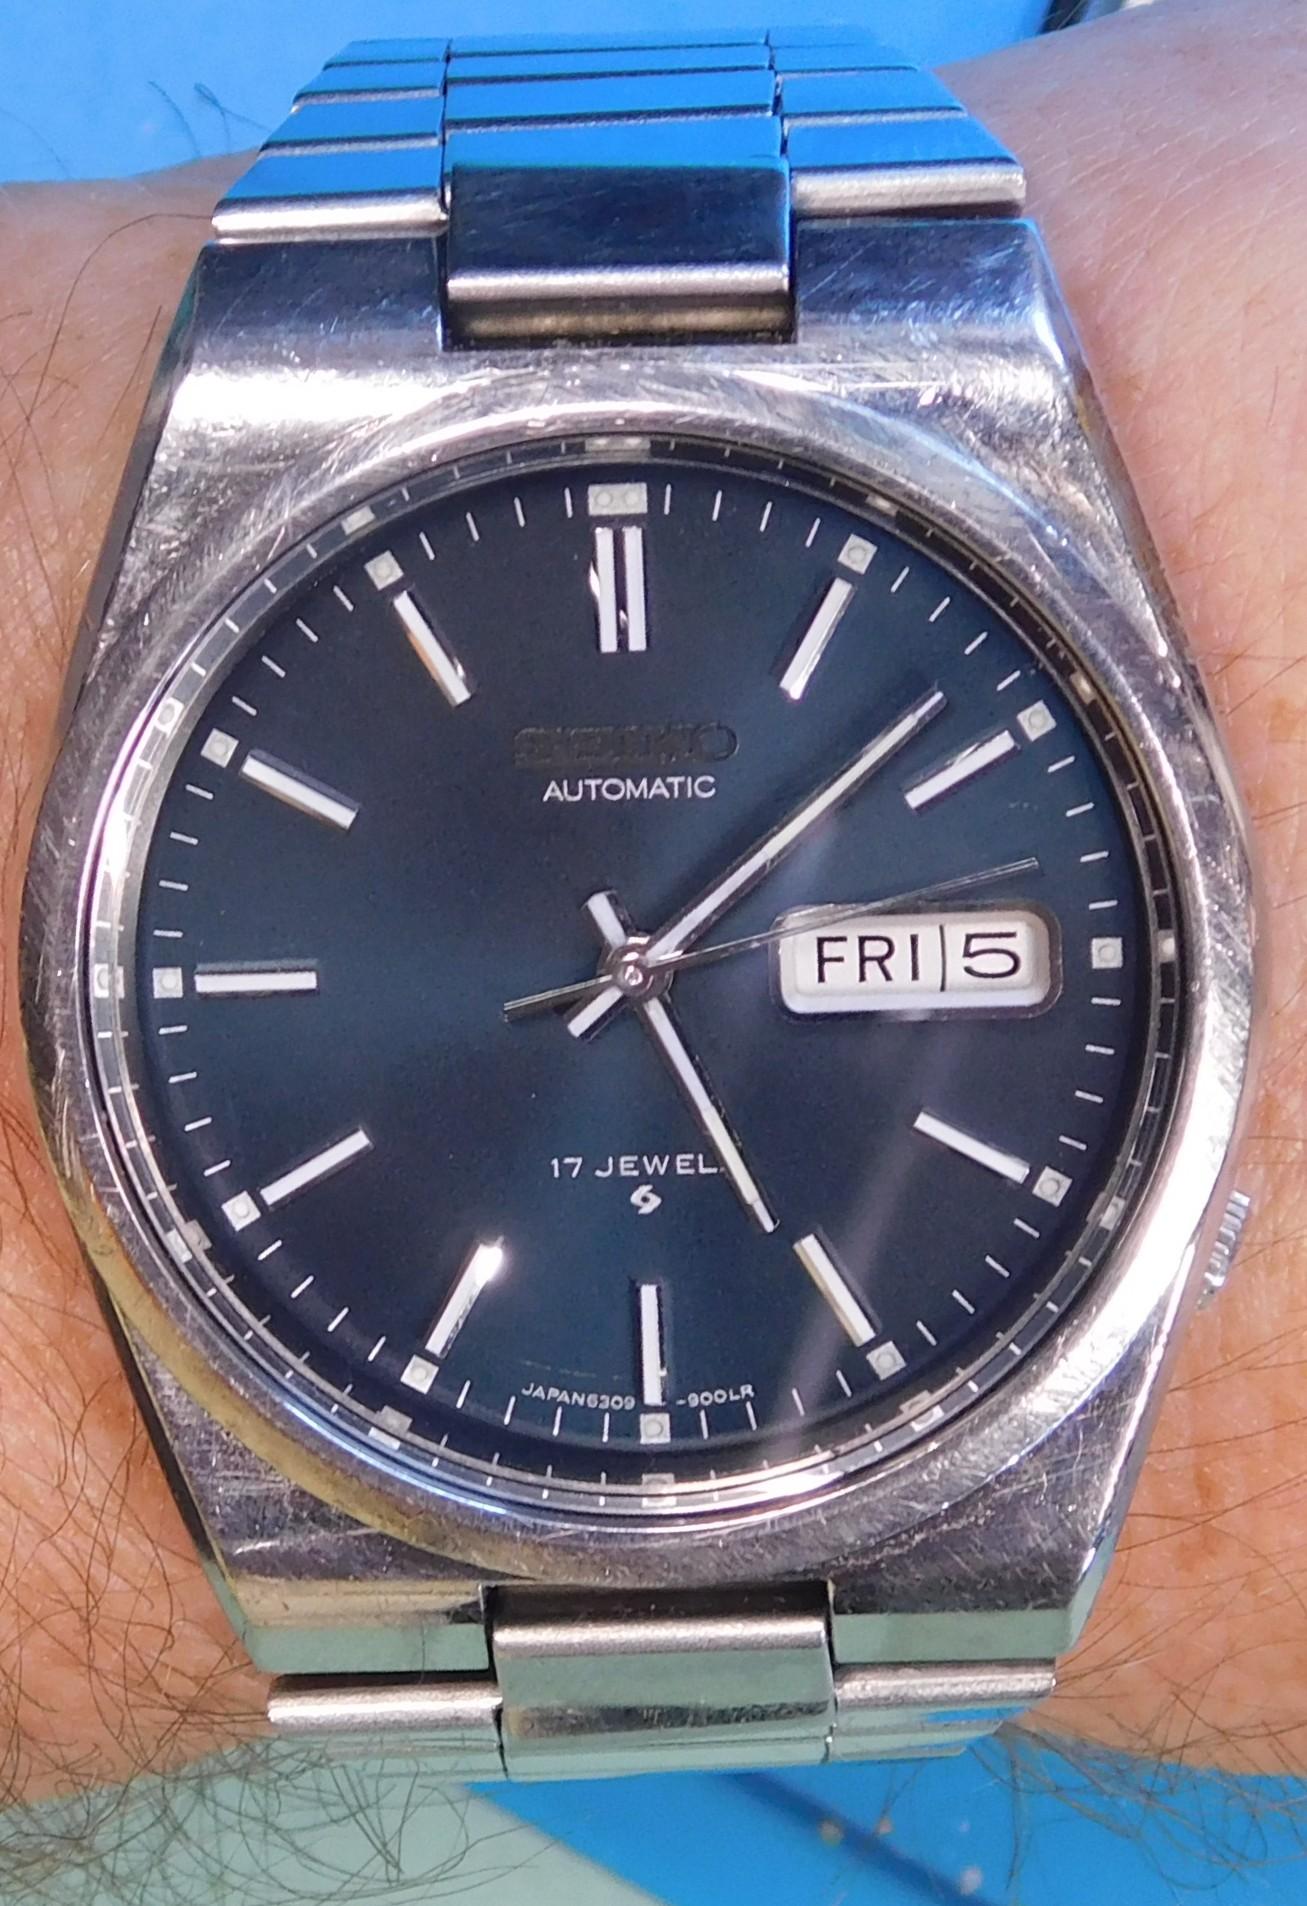
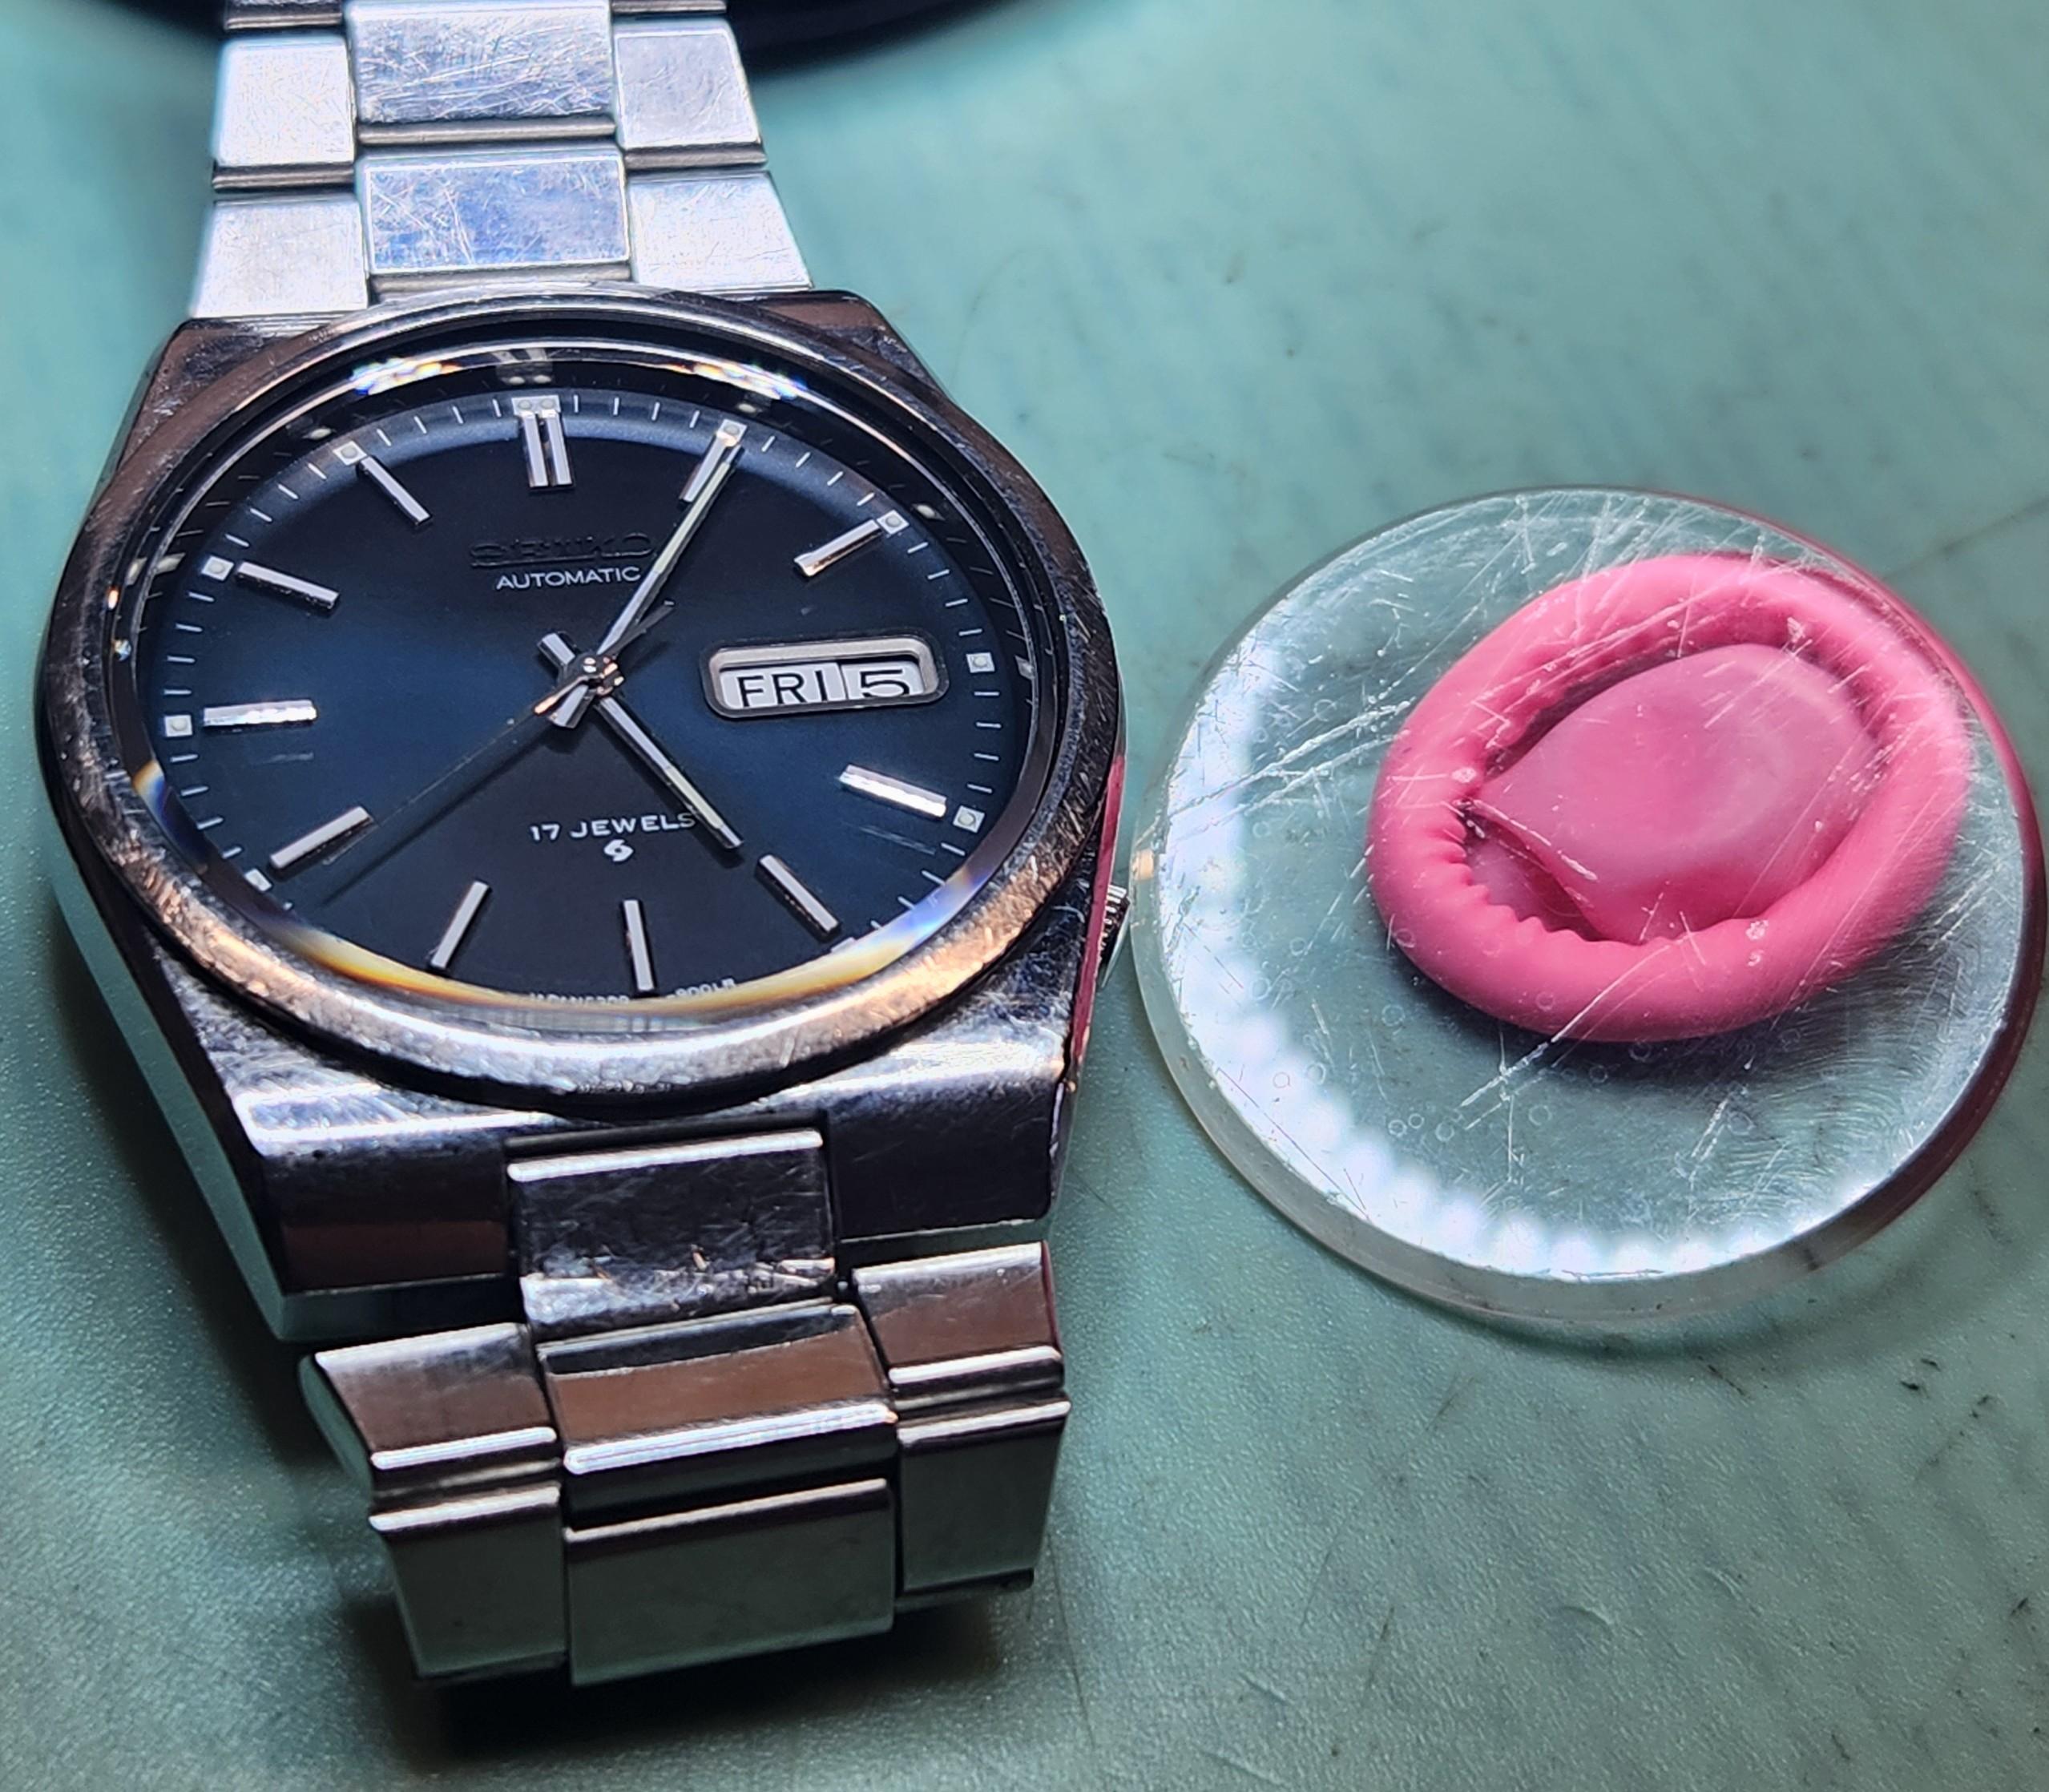
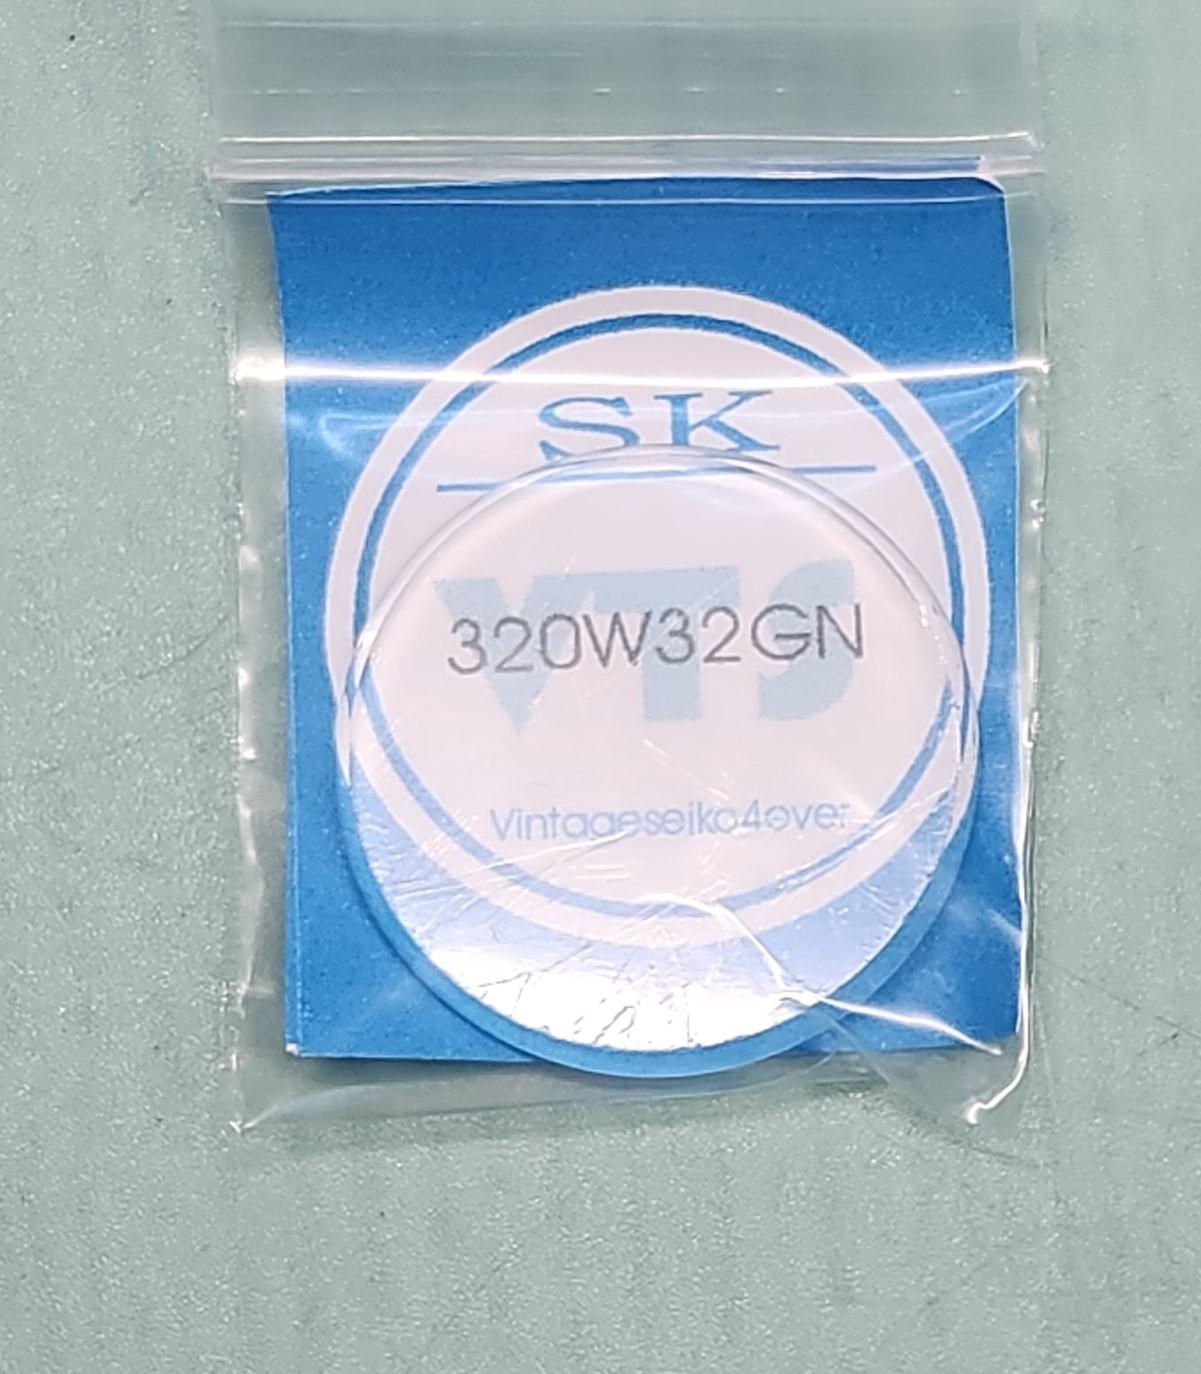
The hardest thing about changing this mineral crystal was forking over $38US and waiting 10 days for it to arrive from Thailand. Fits perfect and really looks great. Now it is obvious the bezel, case and bracelet needs polishing. This crystal has been discontinued.


 1 point
 -
Thanks to your advice Dell I've got the clock running, apparently reliably (time will tell!) and it's back for sale in the Charity Shop (they've put a £40 ticket on it). I'm still in the process of regulating it in situ - initially fast by ~5 mins a day & waiting to see what effect one complete turn of the '+-' wheel has. Looking back over the experience I can see I hadn't appreciated just how delicate these torsion springs are and have been lucky not to break this one although I have manged to kink it at both top & bottom when fitting/removing it from the 'blocks'. On this basis, it seems that one answer to my earlier question about what causes the need for the top block housing to be turned left or right to get it 'in beat' is how 'true' the spring is & the angle at which it emerges from the blocks if not exactly 90 degrees. I also found that I needed to shim one of the movements supporting pillars. I'm very grateful for the interest you & others have shown in my little project. That seems a good idea Nev. Unfortunately I didn't have such a device to hand but will look out for one for future use - time-consuming (not to say frustrating) though working on this 400-day example was, I haven't been put off addressing another one should the occasion arise....1 point
-
Soldering / welding dial feet isn't that easy, provided you have the correct equipment ..... which doesn't come cheap. Chances are, that if you were to use a regular soldering iron, that the dial becomes too hot causing the paint on the dial side to discolor at best, or worse to blister. This will ruin the dial. Unless others have some better methods; if none of the current dial feet do fit, break/cut them both off. Buy some dial-feet of the correct size (to be glued onto the dial) or use, to secure the dial to the movement, dial stickers or double sided sticky tape. The picture shows dial-feet of a random size, obviously you need the size / diameter of your existing dial-feet, if they are of the correct size the movement needs? Suc6
 1 point
 -
Well done, there is more to changing a movement than a beginner might think. Careful placing of hands, synchronisation of the date change over with the correct time of day, did you remember that first time . Fitting the dial to the movement, precise fitting of the movement ring, releasing and installing the stem. All daunting tasks to a first timer so well done, onto to the next one1 point
-
Hi VWatchie, not being as active in the repair side as i was due to the recent covid episode I spend quite some time searching the various forums and sites to gather information to store as in this case it turns up useful. I use the WRT site questions as a direction and then research. this particular manual has been on the system for some time where I picked it up I cant remember. You are free to ask ant time in case I have somthing you need.1 point
-
The broken PCB is not a problem, but this is if the display is not broken too. The usage of the word 'digital' for the traces is making me smile, this is just traces and they do not have idea what kind of signals will they conduct... You can use thinn enameled wires to reconnect the leads of the parts. I am a little frightened when read that You intend to use regulated power supply. This is the normal way, but one has to know what He is doeing.1 point
-
I think you were "forked" over.1 point
-
Thank you for your introduction and welcome to this friendly forum. We all look forward to your contributions and continued involvement. Did you order Chinese tools, because if you did you are not the only one that is sent total crap.1 point
-
The fact is, there is no way to overwind a clock. Specifically, if a clock is wound fully, eventually the winding key will no longer turn.1 point
-
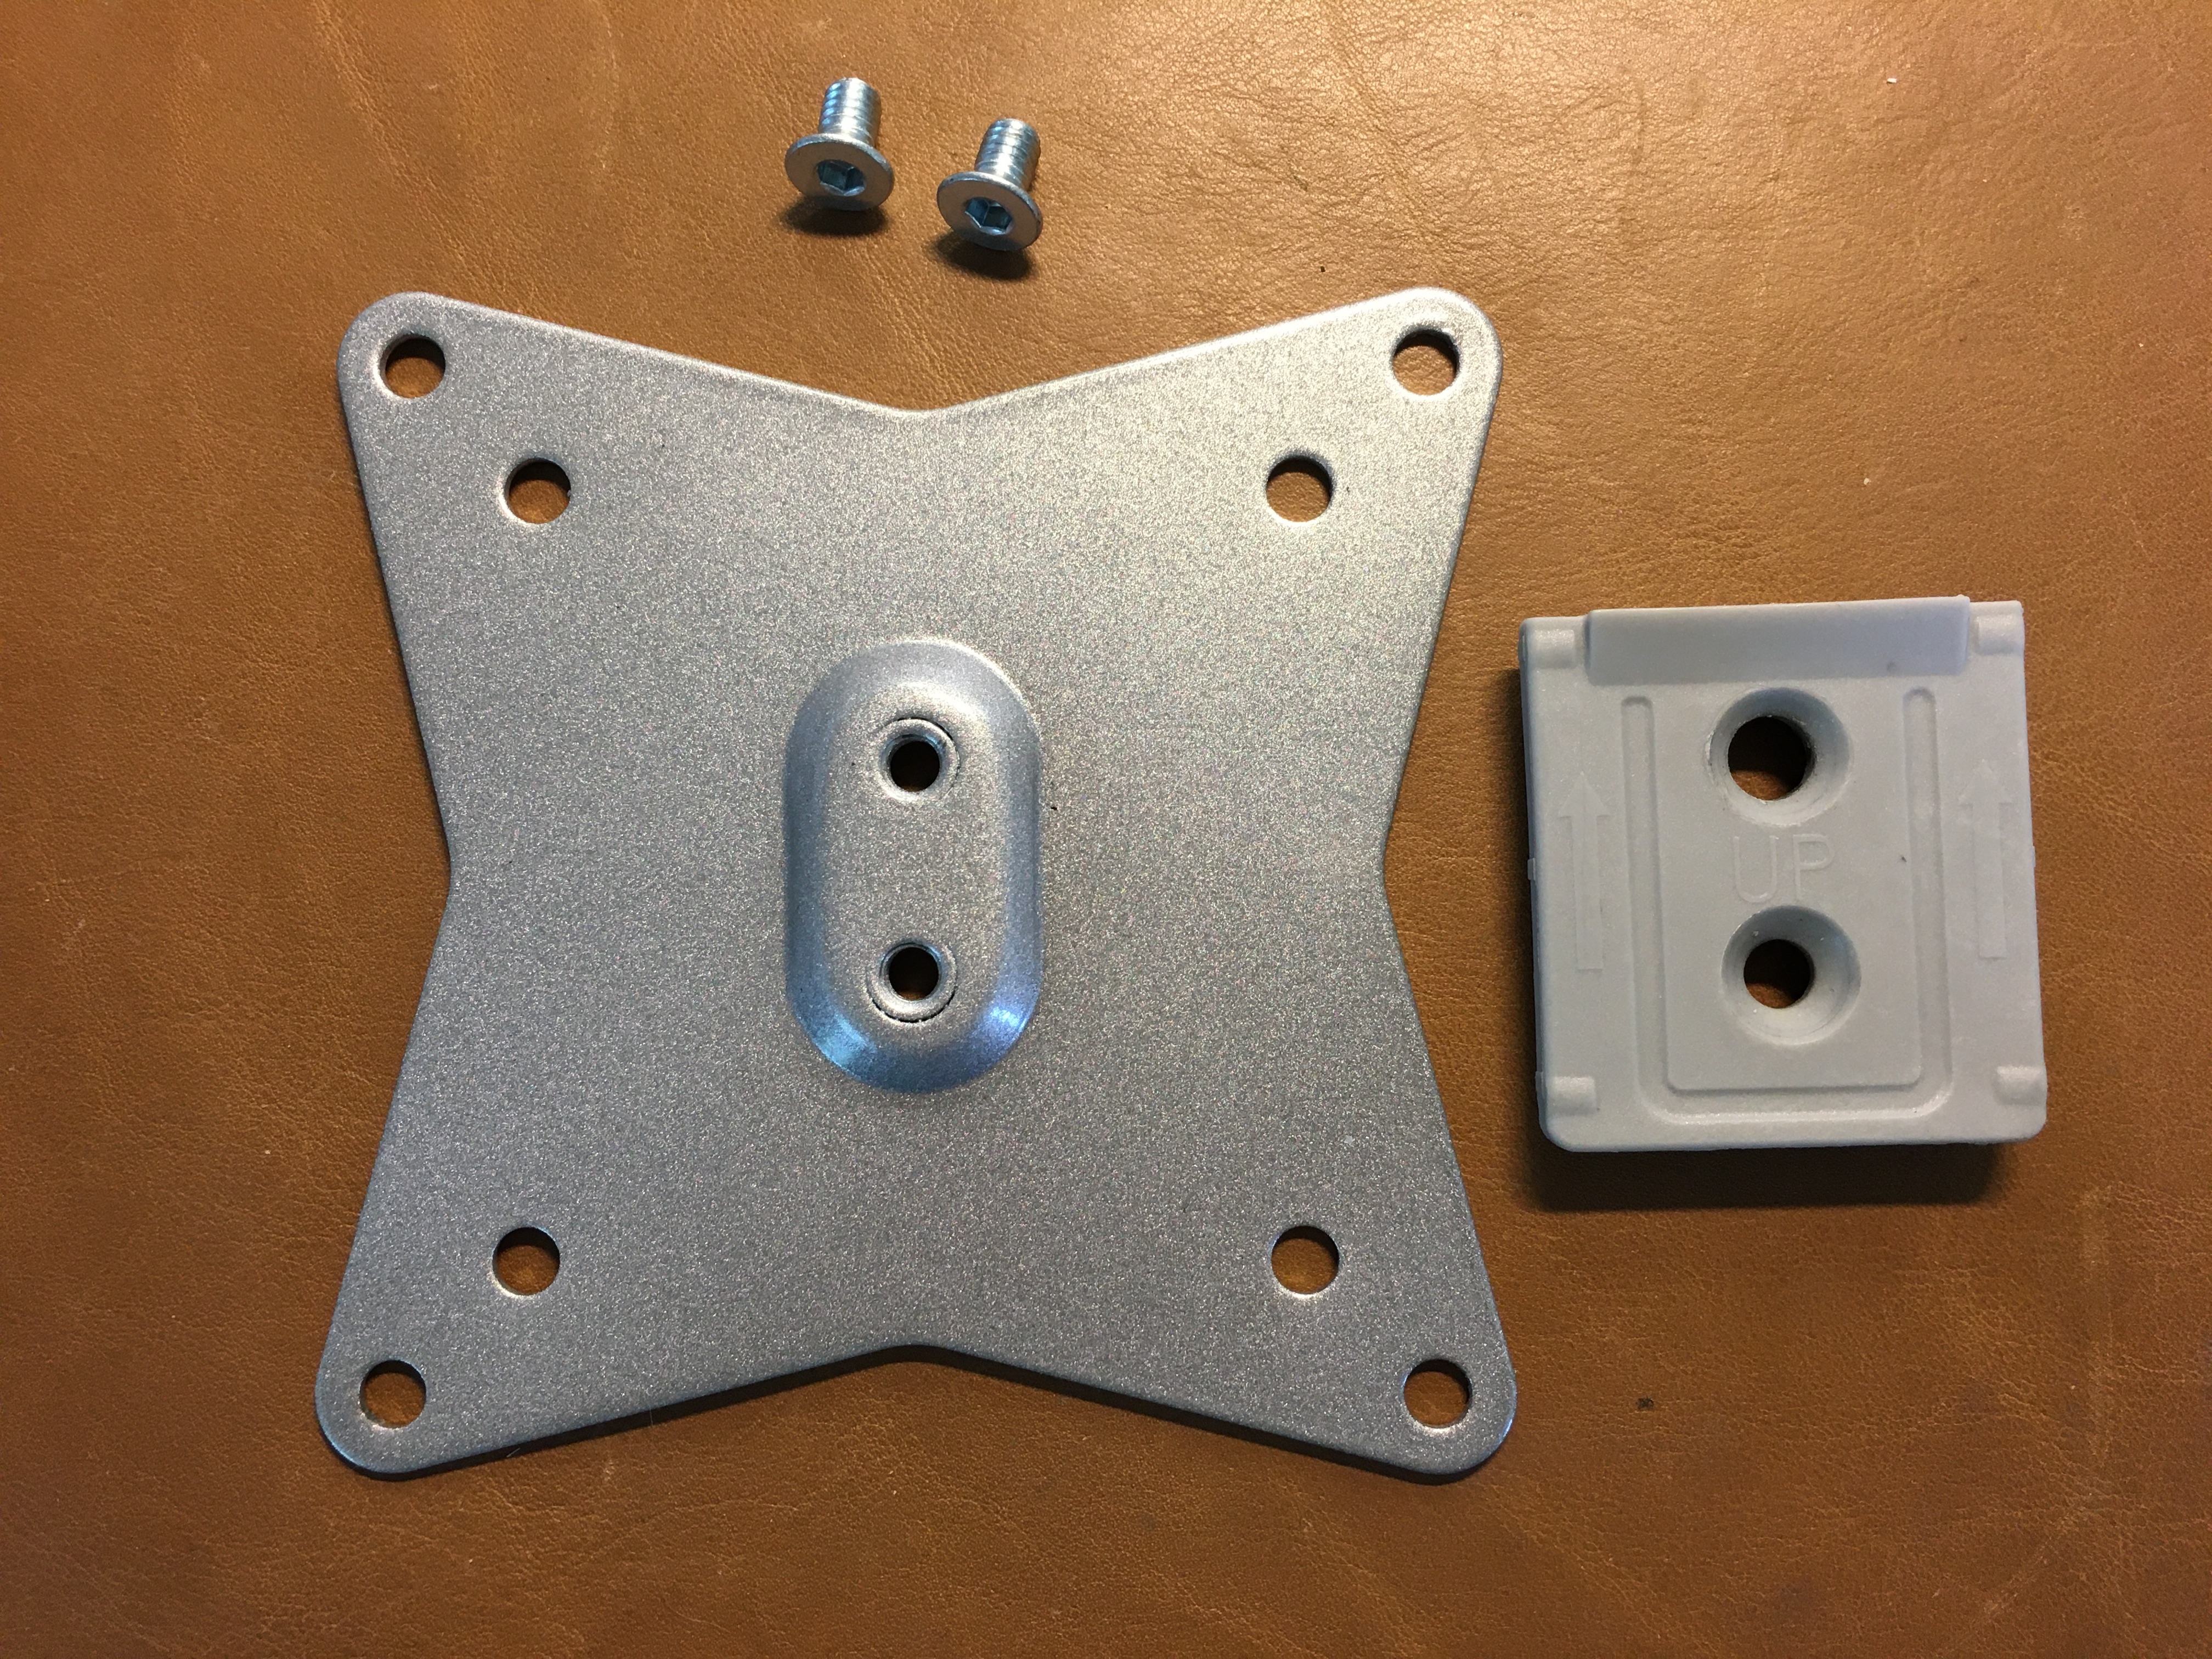
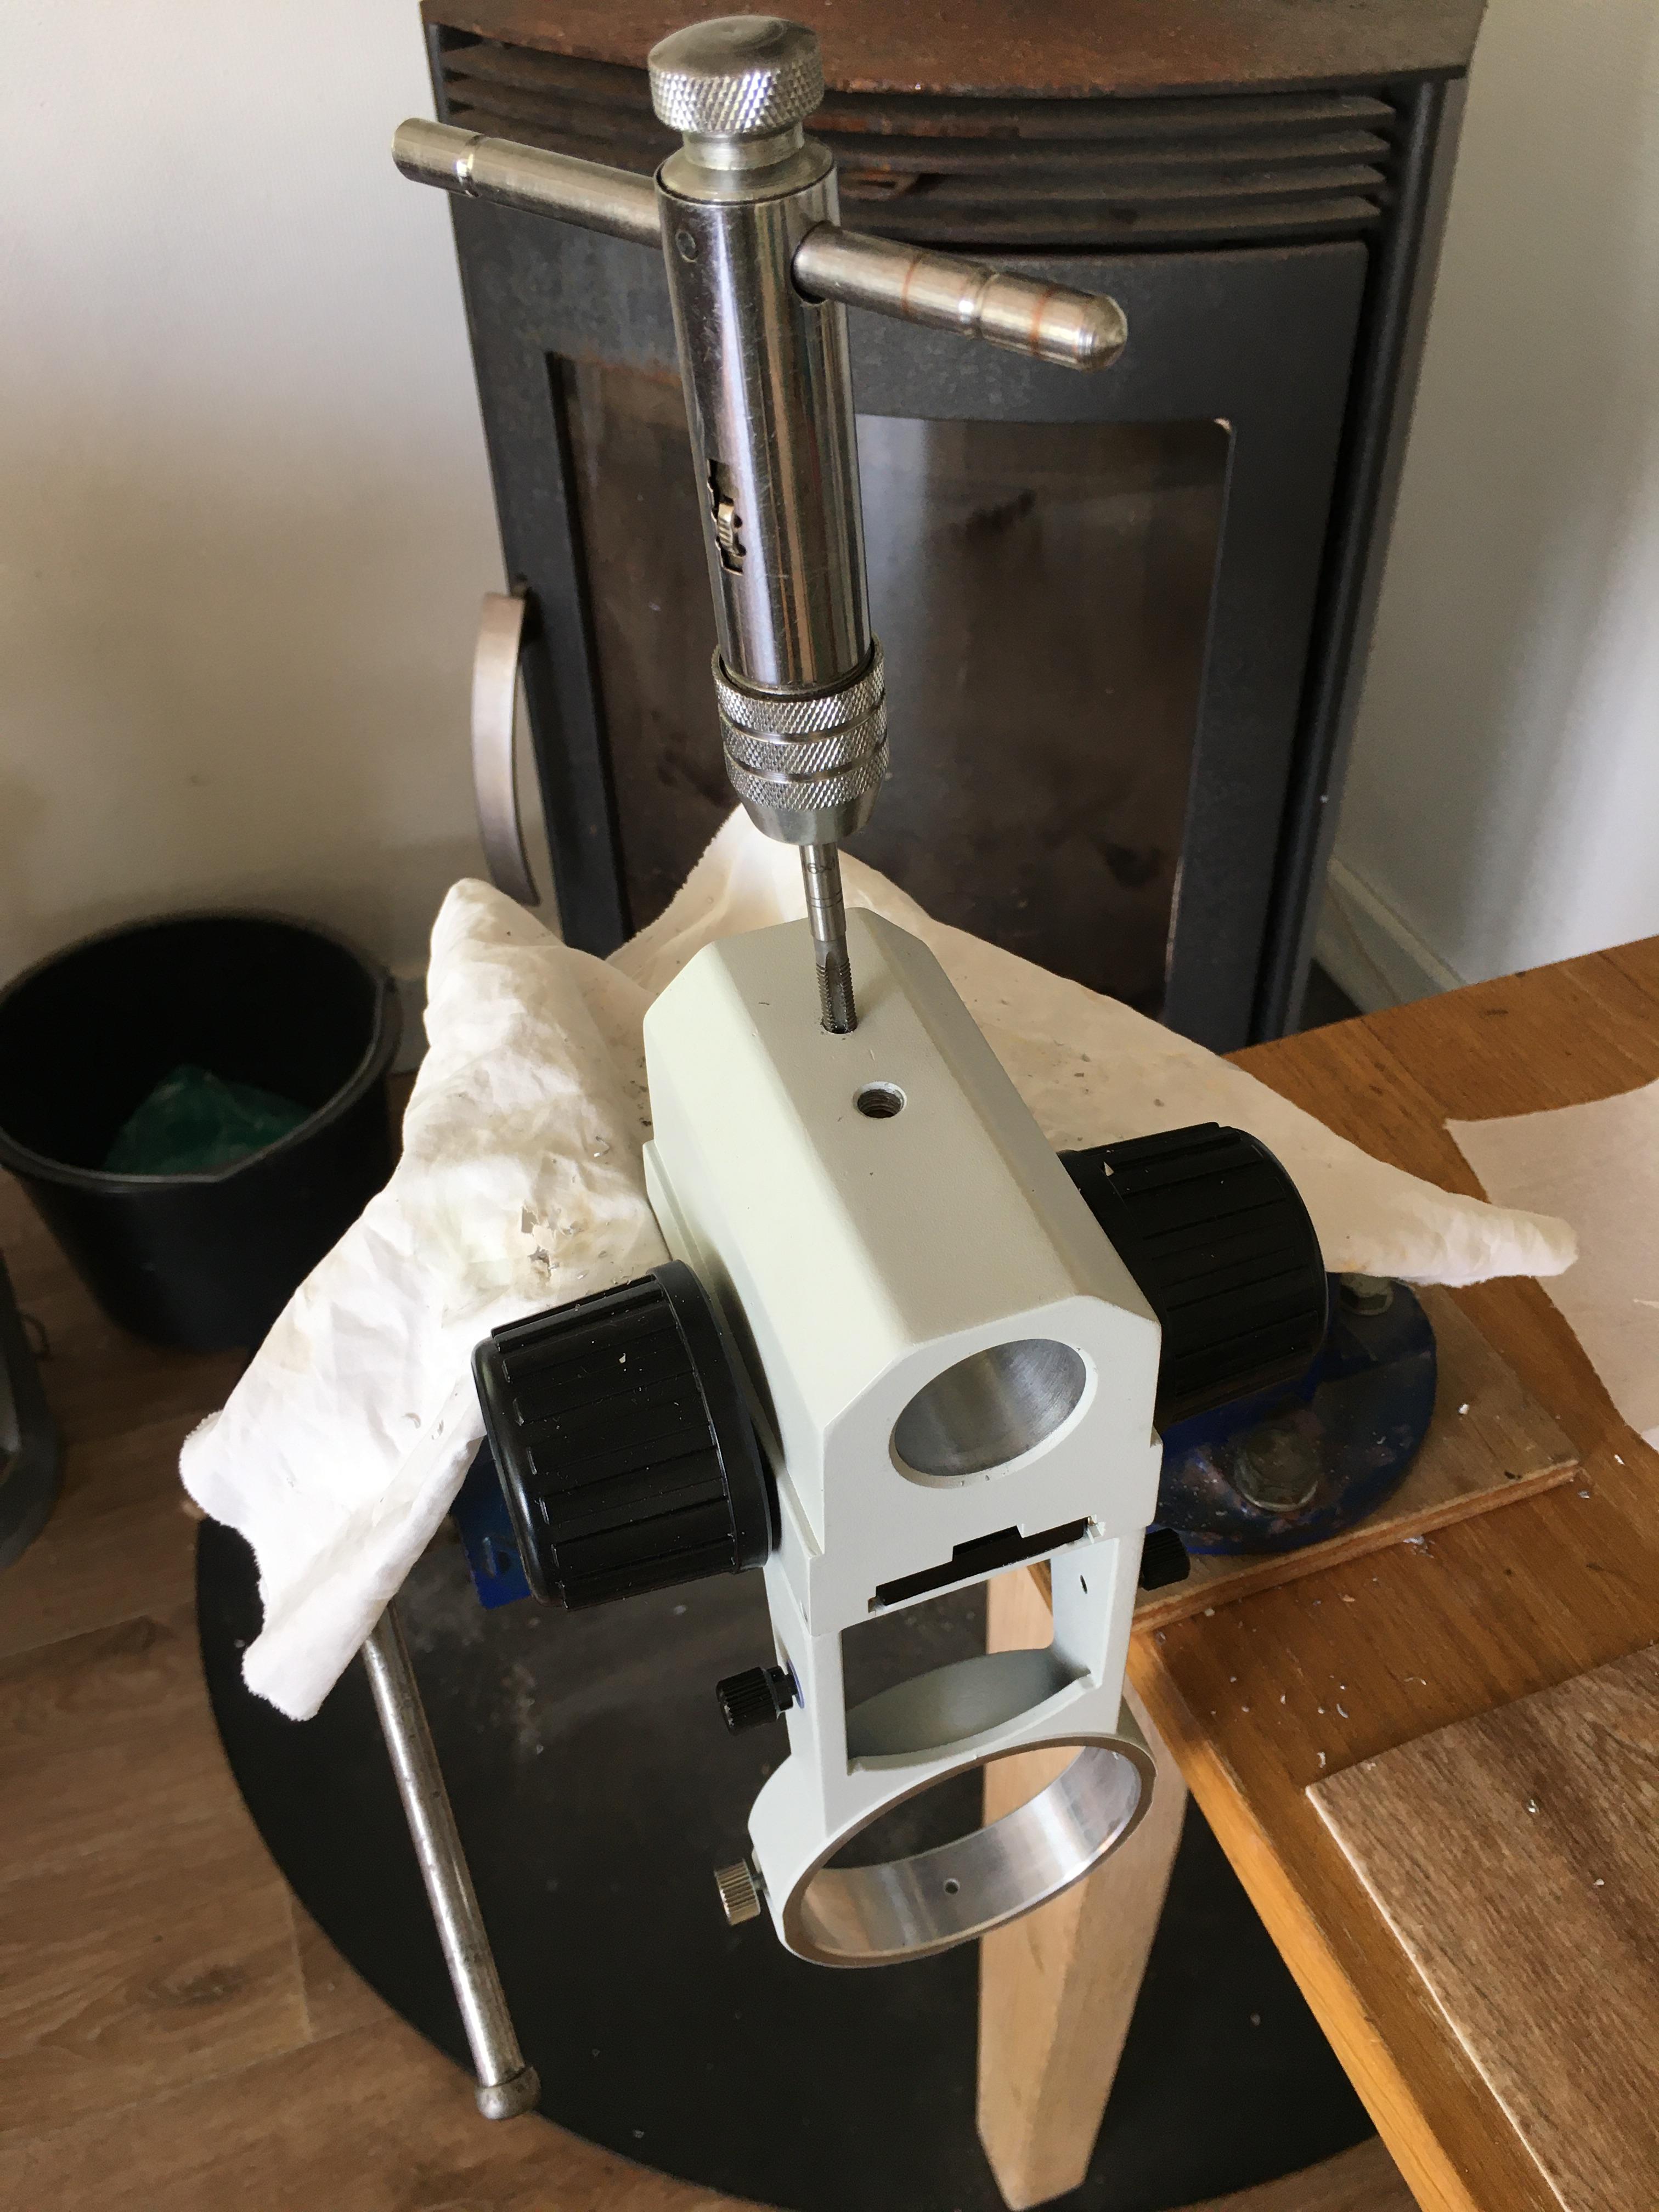
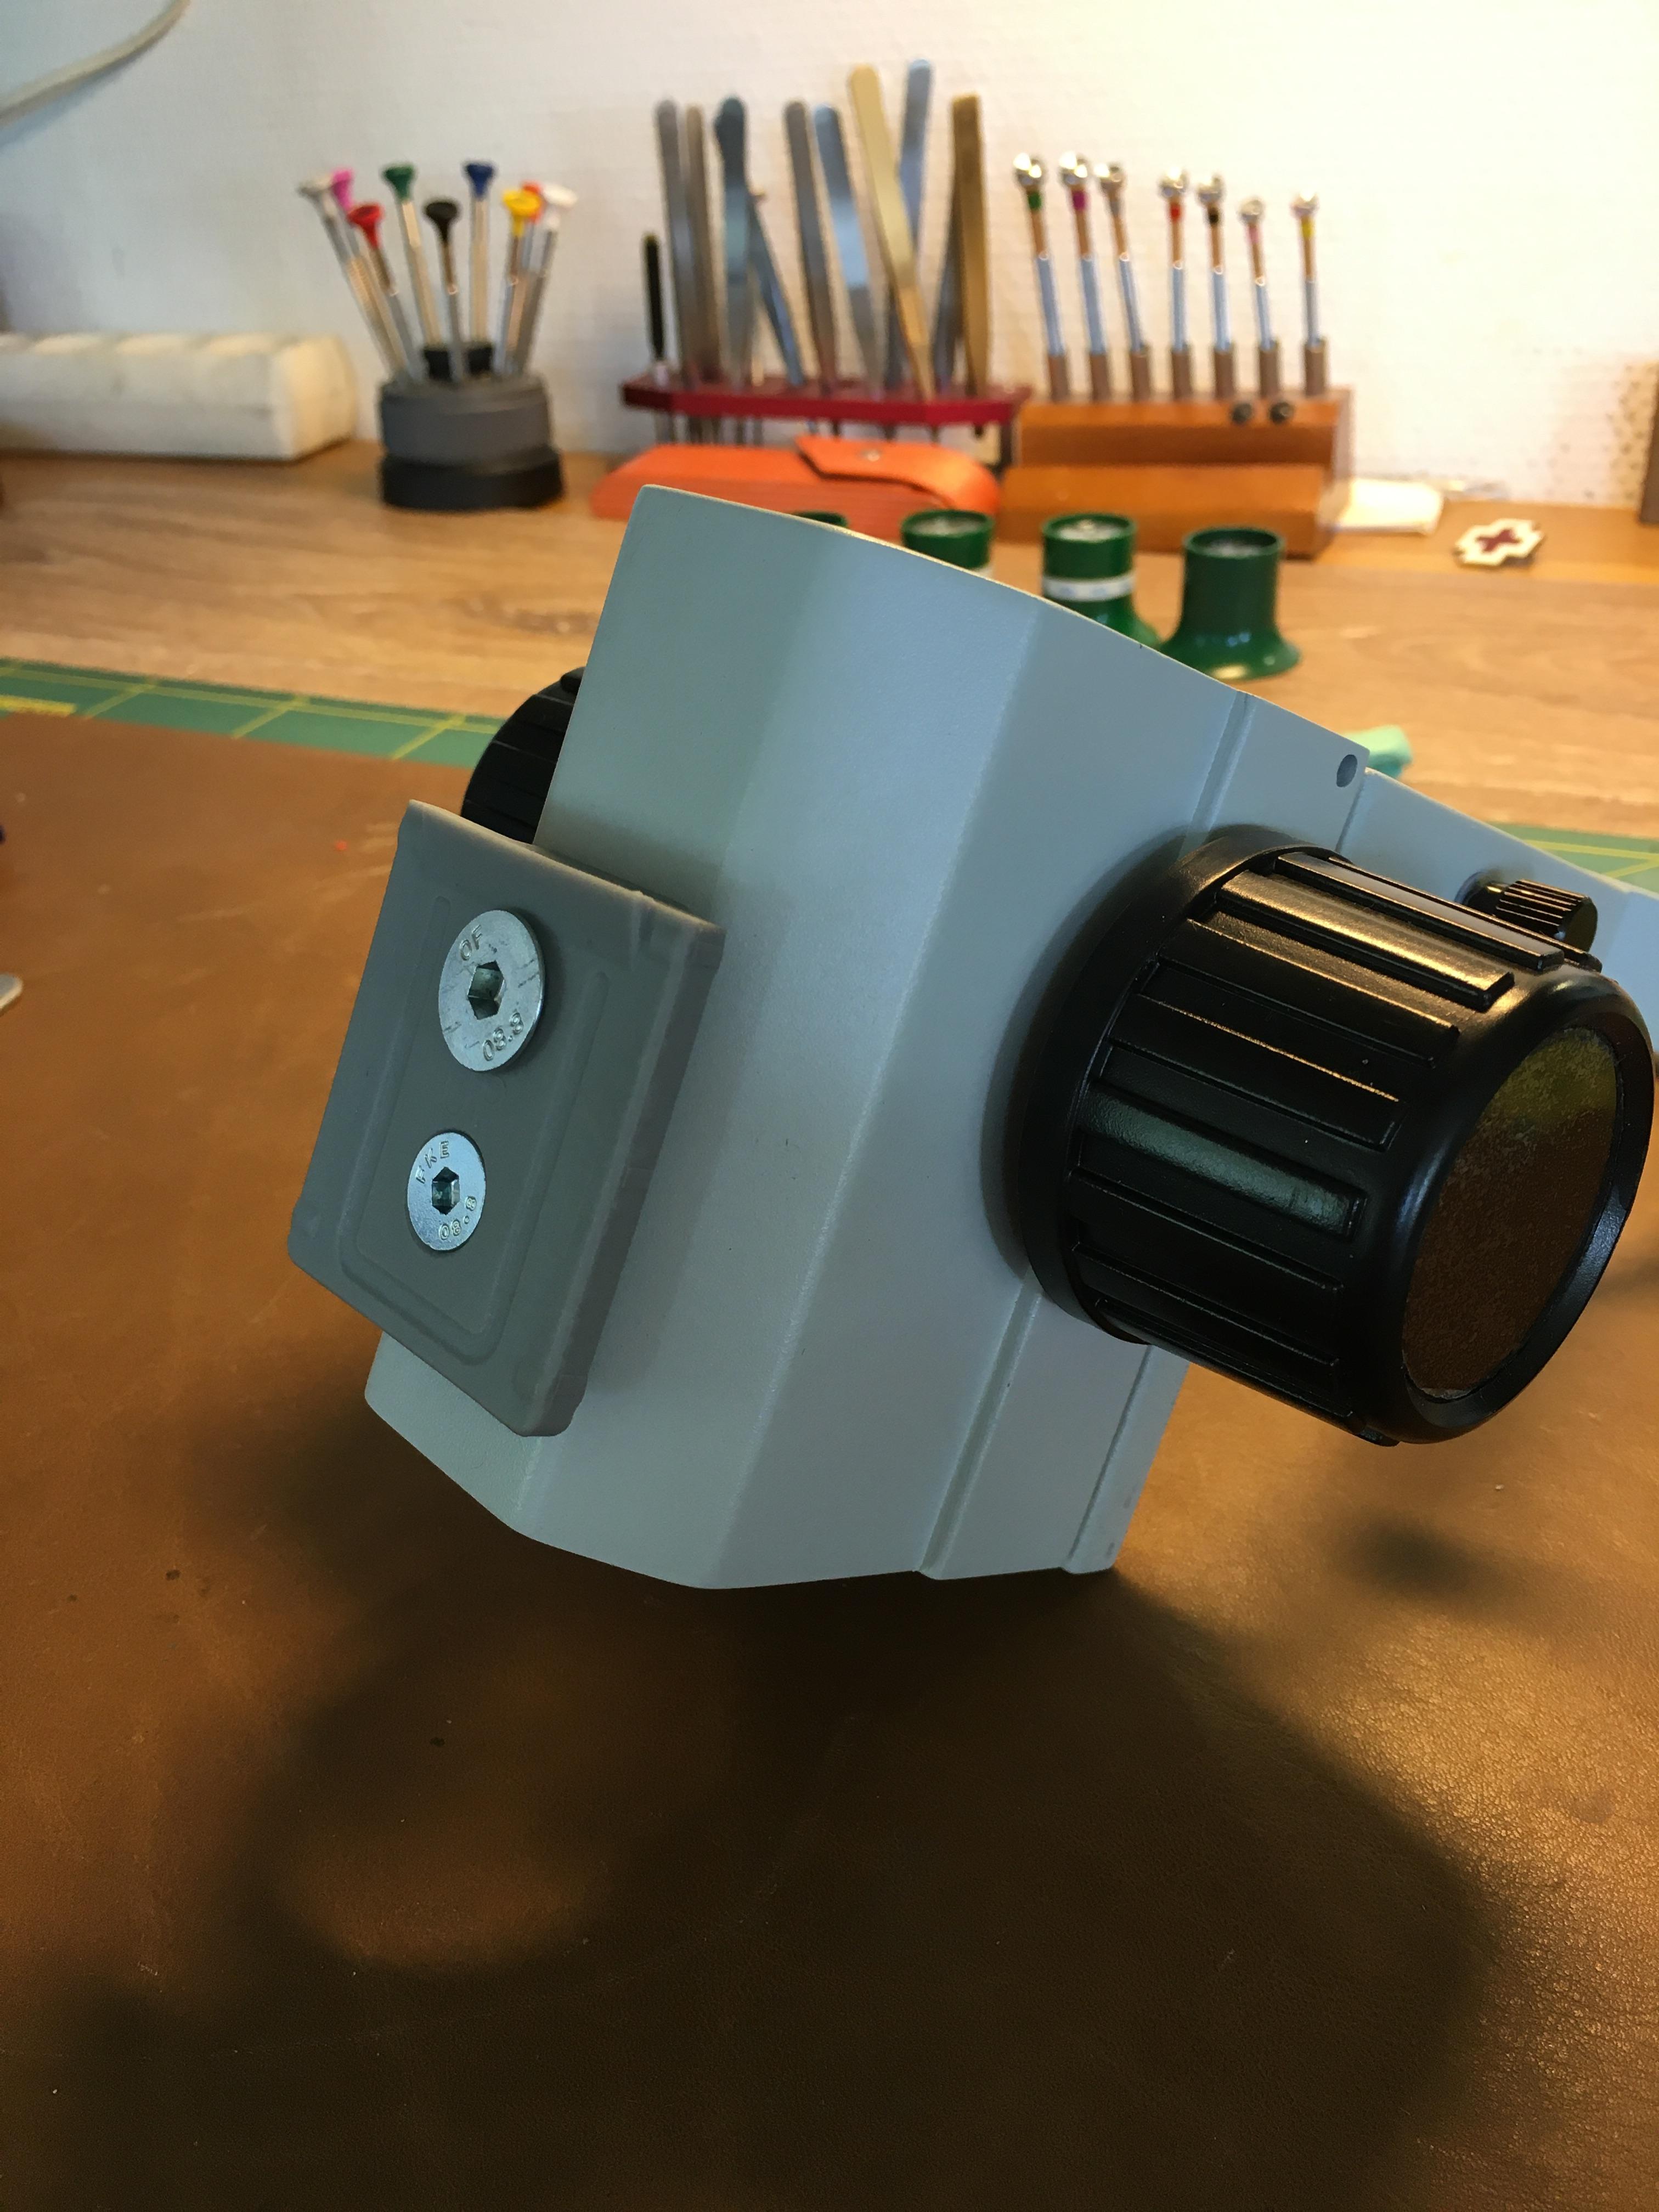
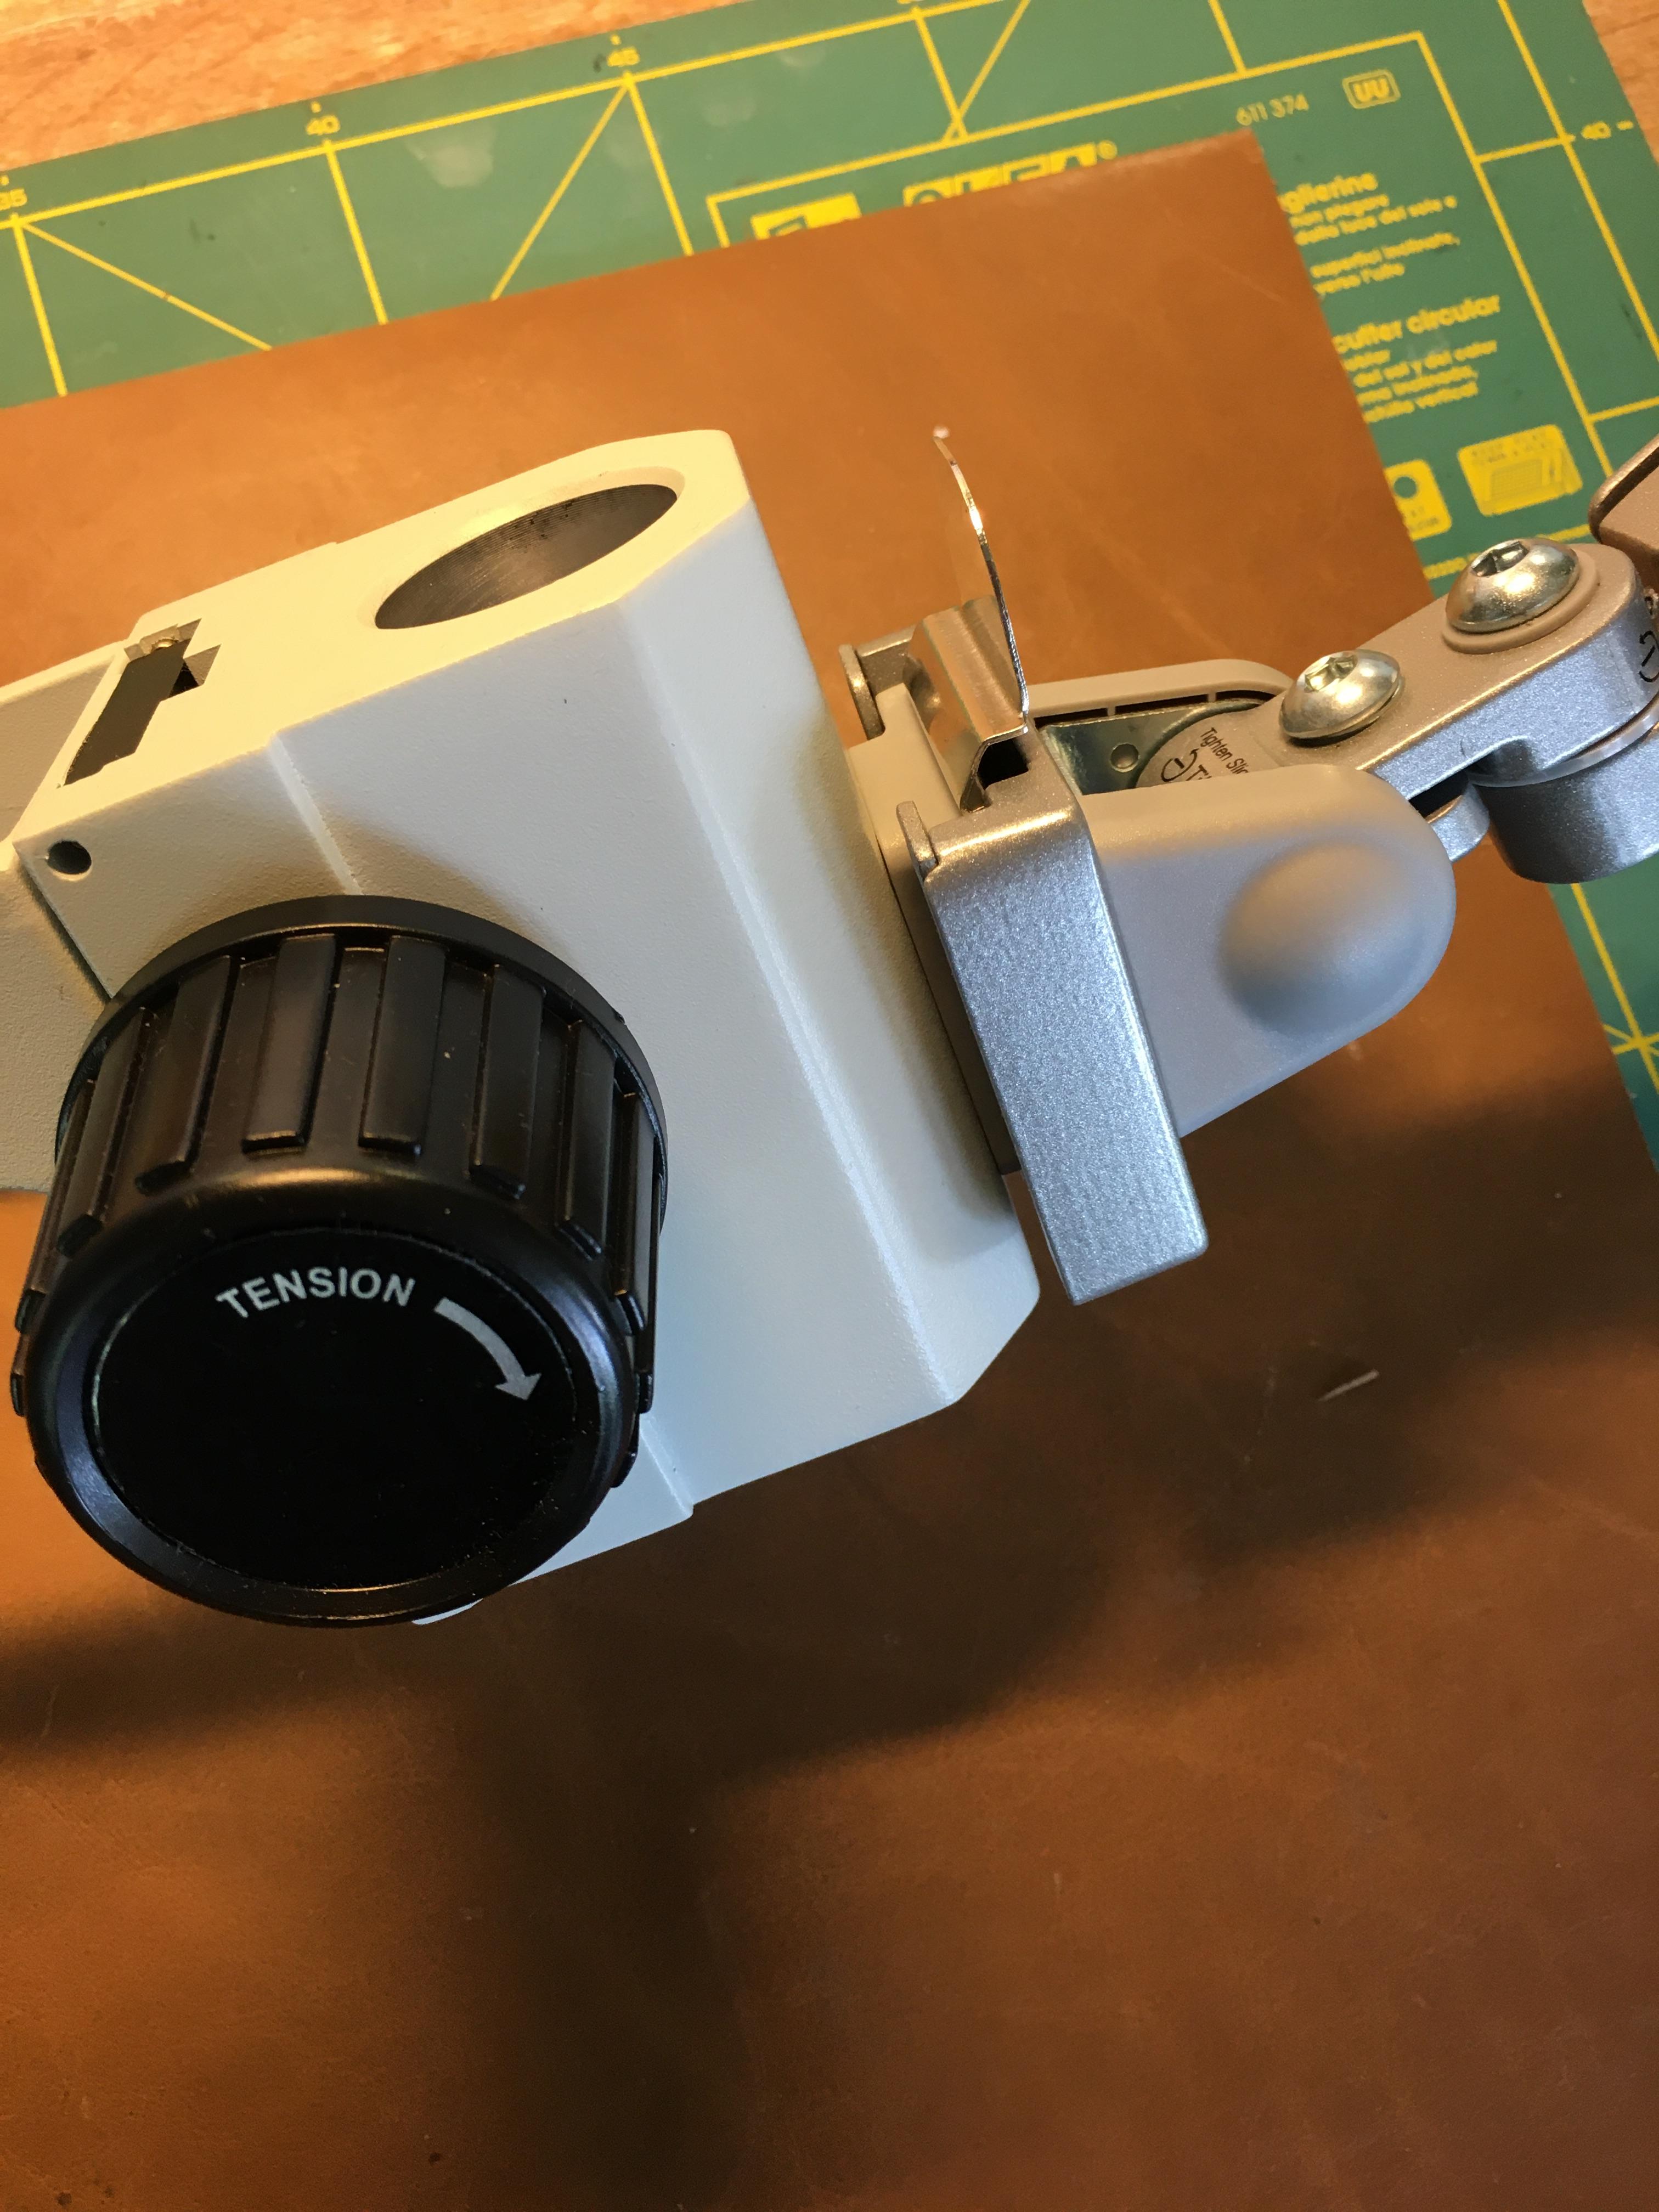
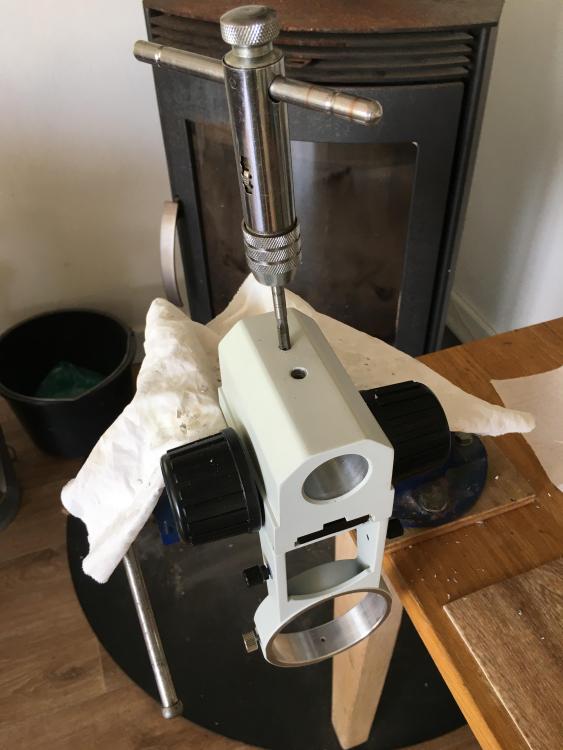
For the people interested, I like follow up and conclude my monitor-arm experiment. The new gas-spring monitor arm (Atumtec ATMS032) was purchased of eBay for the grand sum of €47.50, including shipping. The back of the Vesa plate had a plastic bracket which allows the screen to be uncoupled from the monitor arm. Instead of following the idea in the video given earlier in this thread, I saw opportunities with this plastic bracket. That plastic bracket (with two M6 holes) fitted nicely to the back of the microscope bracket. The microscope bracket had already one M8 hole in it, so it required drilling one more hole and to cut M6 thread in it. The other hole in the plastic bracket was enlarged to allow a M8. To make sure that the plastic bracket wouldn't crack, due to its hollow inside, washers were used to fill the gap. This all worked according to plan; Combined a nice tight fit with the monitor arm; Installed the monitor-stand to the table, electricity for the ring light, mounted the microscope and adjusted the gas-spring tension. With the monitor-stand positioned roughly in the middle of my work-desk, a large area can be covered, and the microscope can be swung out of the way when not needed. Now the big question: Does it work !? For me, YES it does !! Is the arm rock-solid? No, the arm is not rock solid. But with the 0.5x Barlow lens it works quite well. Much better than I had anticipated. When adjusting the height of the microscope with the big knob or adjusting the magnification, yes the arm "wobbles" a bit, but one can still see clear and adjust clear. Having no reference to an expensive microscope arm, I doubt whether my setup "wobbles" a whole lot more than such an arm. I would love to hear from people, who have such an expensive arm, whether these are rock solid when adjusting the knobs? Once you've adjusted the height and magnification, the monitor arm comes quickly to a rest and the view is crystal clear. The picture will start to shake if you bang the desk with a hammer, but by which arm it wouldn't? If I need the microscope on its "original" base, all I need to do it to uncouple the microscope from the monitor-arm, remove the plastic bracket (2x screws) and it's ready to be installed on the original base. The only alteration done to the original setup was adding one M6 hole. Perhaps the official arms are better (?), but you have to grab much deeper into your pocket. For me, I don't see any reason for purchasing anything else, as it works very well. Off to my next Endeavor


 1 point