
Leaderboard


Popular Content
Showing content with the highest reputation on 10/30/22 in Posts
-
The local chapter of NAWCC jointly with CAWCG (affiliate of AWCI) held a class on staking and jeweling today...just 30 minutes away! It was great. I had never used my Seitz jeweling tool for anything other than tightening a cannon pinion. It was fun...and a new vista!! Great bunch of guys too.9 points
-
Ok, I got this thing totally figured out so I'll post how i did it easily finally for other people if their 1a auto oiler isn't calibrating right and you don't own a microscope. Screw trying to dial it in perfectly if that's not working like it wasn't for me. Put the offset screw to the lowest setting. On amazon you can buy cheap USB backlights for tracing. I got one for about 8 dollars, this makes it quite easy to see your oil bubble while you're oiling the already set capstone. Place the bridge on the backlight, keep the needle out, insert the needle into the jewel hole from the back and flick the trigger, it will probably deposit too little but you can CLEARLY see the bubble slowly grow as it's filling with a 10x loupe. After the first flick remove the oiler and check the bubble, it will likely be too small. Reinsert the the needle into the jewel hole and through capillary action it will draw oil slowly from the oiler, if it doesn't give it another flick. Either way it's slow enough that it's easy to get the perfect size and shape bubble. Just rinse and repeat till your oil bubble is correct. There is definitely some technique to this tool not very many people talk about. This had confounded me for awhile. I'm thrilled i can continue now with my service!4 points
-
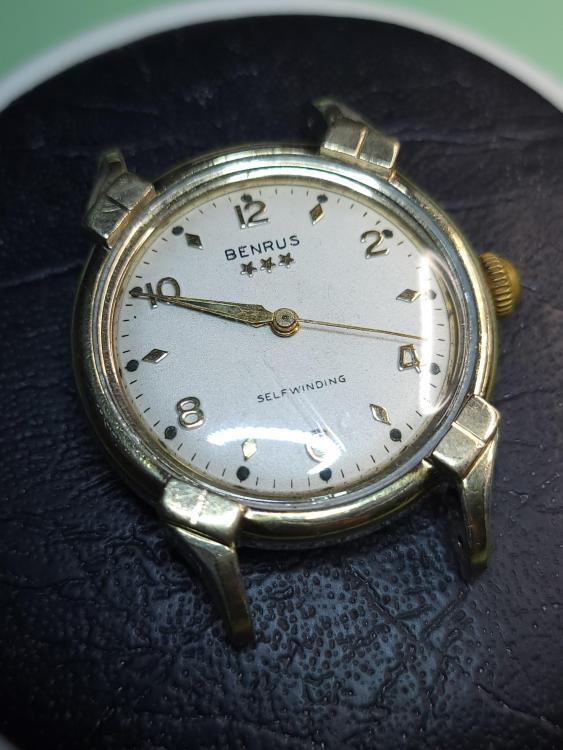
After installing the movement into the case I could wind it but not set it. Hmmmm. Much analysis indicated that the spring used to keep the winding pinion and sliding pinion together was too long--meaning, when compressed, it was too long. As a result, I could never get the setting wheel engaged. This was an ebay purchase and I could tell that it had been hacked in other ways, so I figured that this was not the original spring...it was the only thing that made sense. So, I made a new spring that, when compressed, was shorter. IT WORKED.3 points
-
I know what you mean about the way the wire band can fit. I bought one over 15 years ago and another about 10 years back. The newer one looks identical to the first, but doesn't fit as well. Visually I can't tell any difference between the two. If you wear glasses of any type, you might consider the loupes that clip on the front of the temple. If you can get them to stay put on the temple, they're as comfortable as wearing your glasses, with the right amount of "boost". Good luck.2 points
-
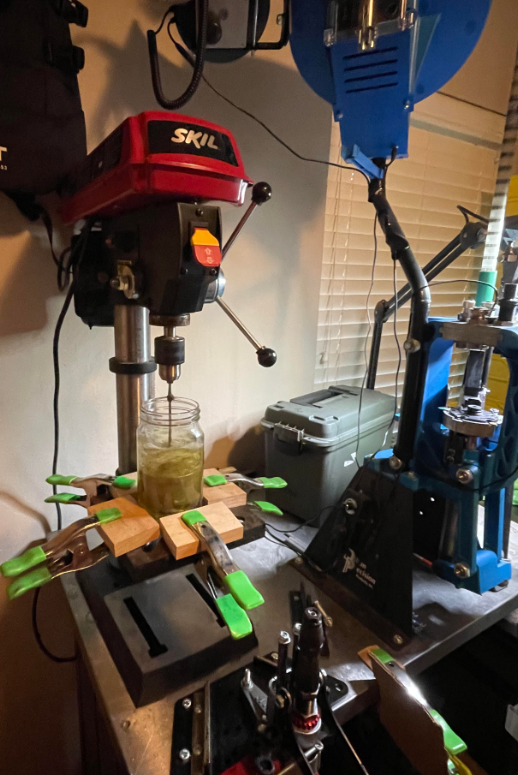
Well, this isn't really elegant, but I decided to just rig up something quick to attach to my drill press to see if it is a viable option as a cleaning method. I fully intend on purchasing a proper machine in the future, but I just wanted to give this a shot. Please forgive the mess in the background. I currently have my drill press mounted up on my reloading bench (another hobby of mine). I just cut up a piece of 1x4 and made a quick holder for the cleaning jar by clamping the wood to the drill press base, holding the jar in place. I lowered the RPM on the motor to it's lowest setting (300 rpm), and am just giving it a shot. I've a Reverie Sea Spirit with a Miyota 8218 movement that needs to be serviced. If this doesn't work well, I'll still clean it the traditional way, but I thought I'd give this a shot. I've sold a few watches on eBay last week, and unfortunately my funds are currently being held for 2 weeks (apparently because I am not a regular seller). Once they are released, hopefully I'll be able to pick up a dedicated machine soon. I just thought I'd share my little contraption!
 2 points
 -
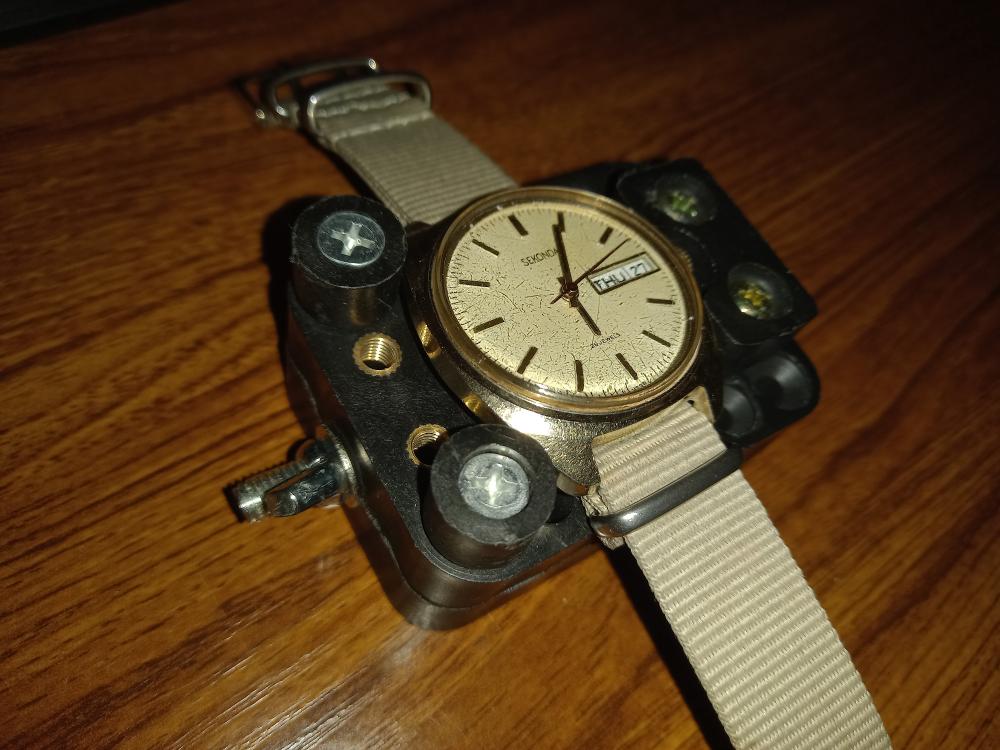
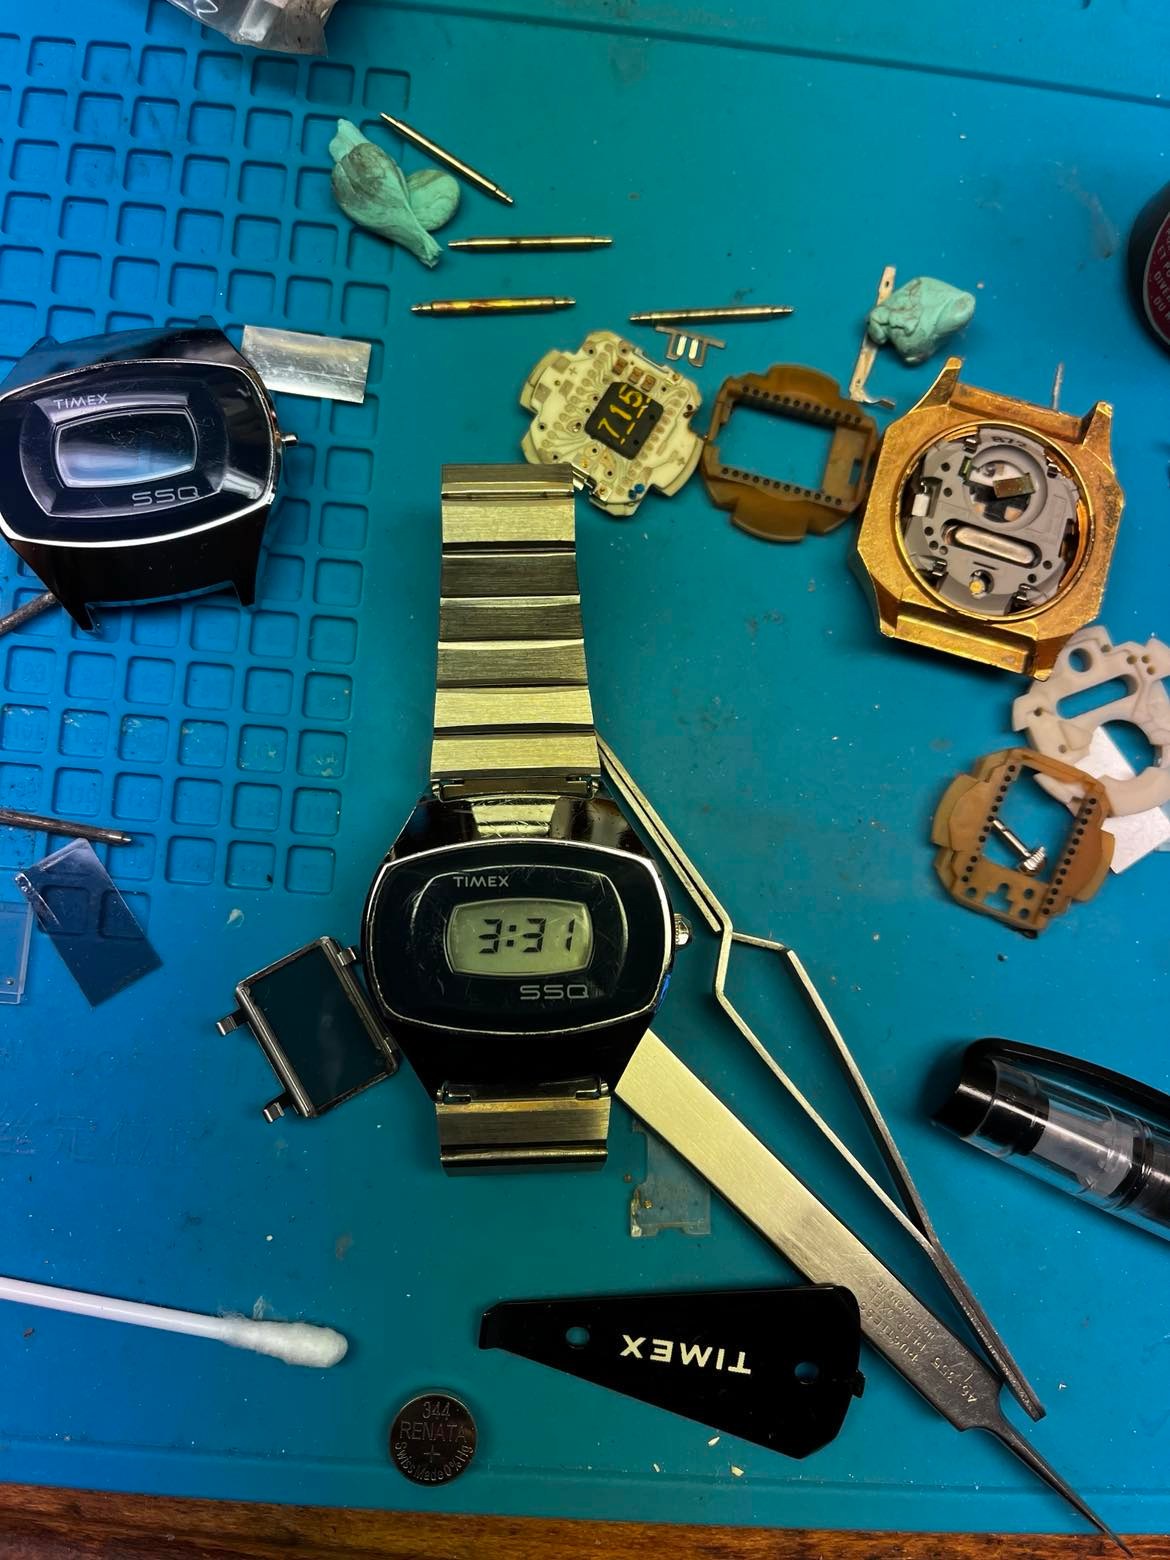
I have had one of these SSQ models from a huge lot won well over 10 years ago. Problem was that as I wore it on my wrist the heat build up would cause the display to go all black. Several times I took the module apart and carefully cleaned all contacts with alcohol and other various electronic cleaners. No luck! Than I would let it sit for a few more years. A few times I tried to swap in a display glass from other modules. Again no luck. Finally the other week I got lucky and swapped in a new glass and it worked. But.... I noticed that some segments were not appearing on the second digit. Was my fault because on of the contacts between the circuit board and the glass was damaged when I lifted it off. What to ? Lets go search eBay and find one right? And sure enough I found one listed as "Parts or Repairs" BIN make offer and for just about 10 bucks one was on its way. Yes, I know what your thinking...the one coming it was going to have issue too and now instead of one broken SSQ I'd have two. Well, I guess I got lucky because here she is... So why did I go through all the fuss? Easy, 1975 was the first year Timex introduced an LCD watch and it has a unique feature. Which is that unlike most LCD modules that require two or more push buttons, this one only has what looks like a typical crown. You turn it and the minutes count up, turn it back and turn it again and the hours count up. Plus 1975 was the year I graduated HS. Won't it be cool to wear this to the 50th reunion that is only 3 years away.
 2 points
 -
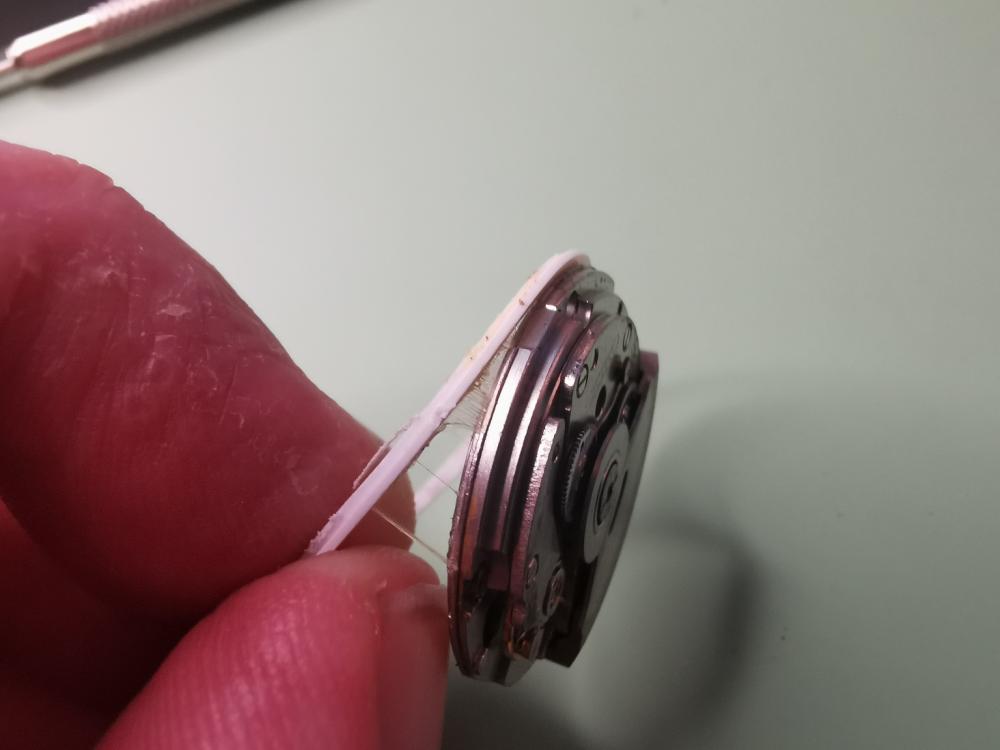
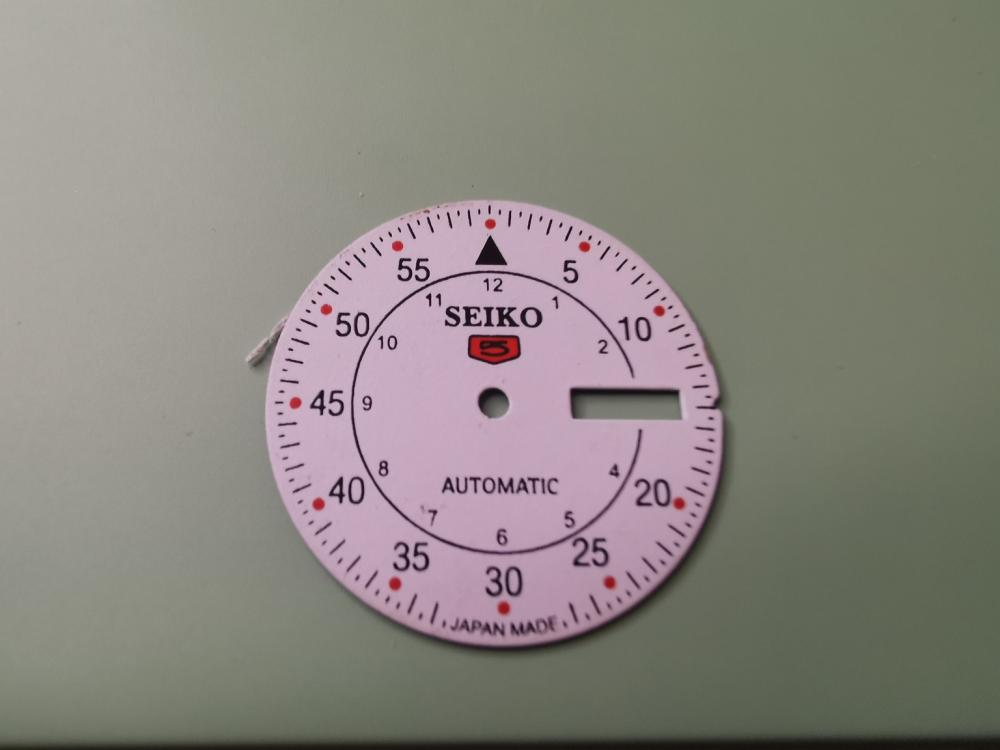
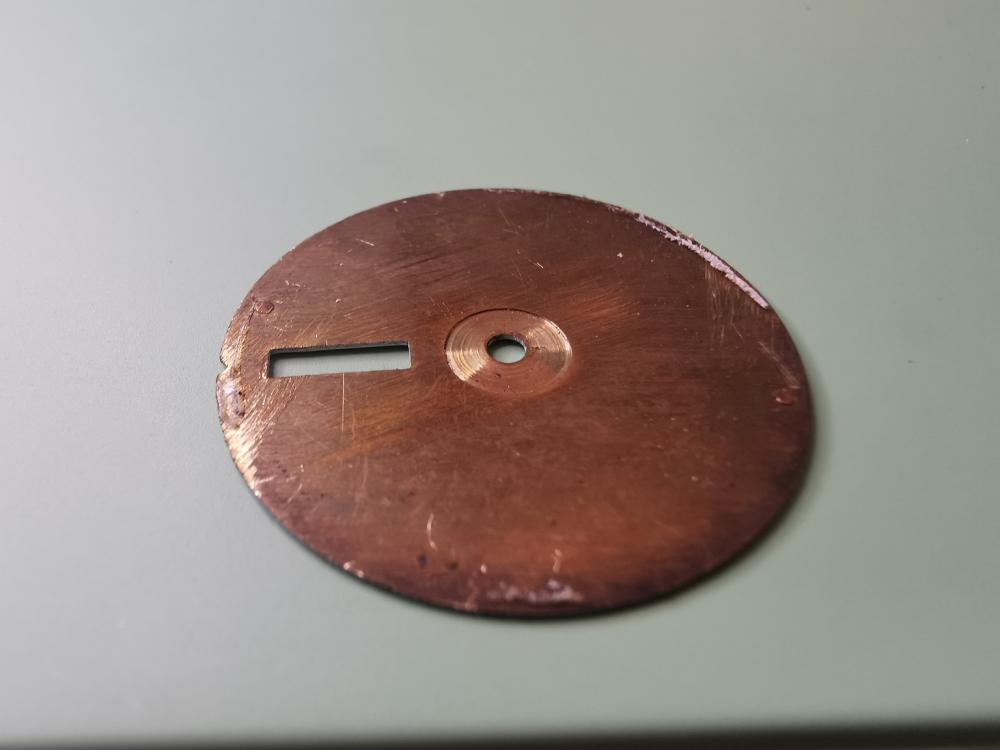
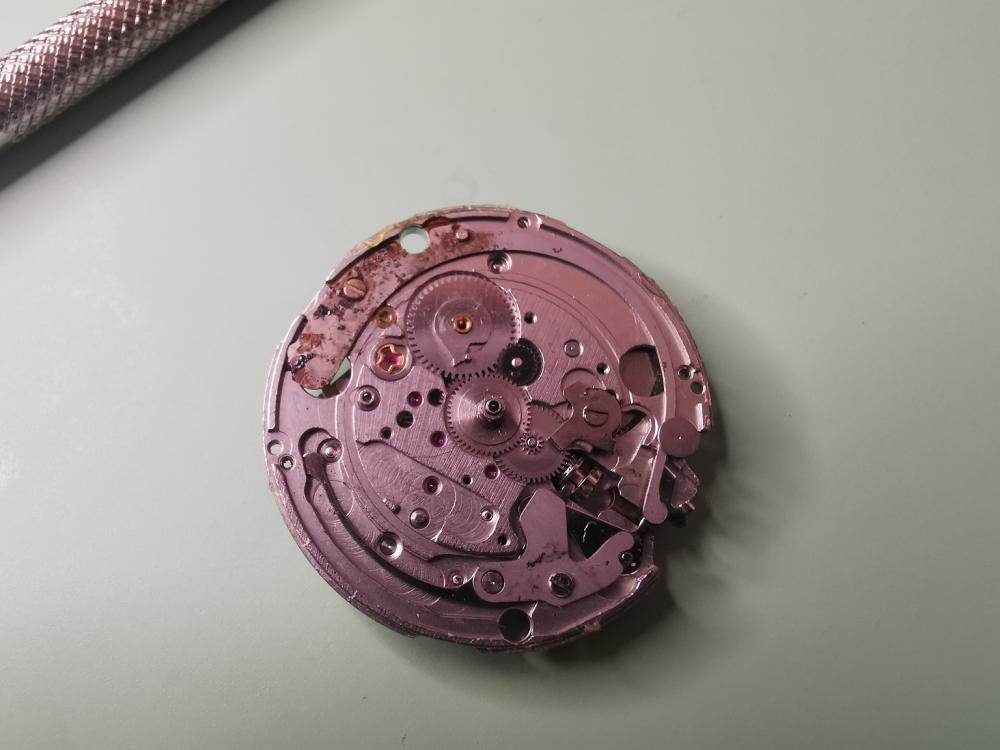
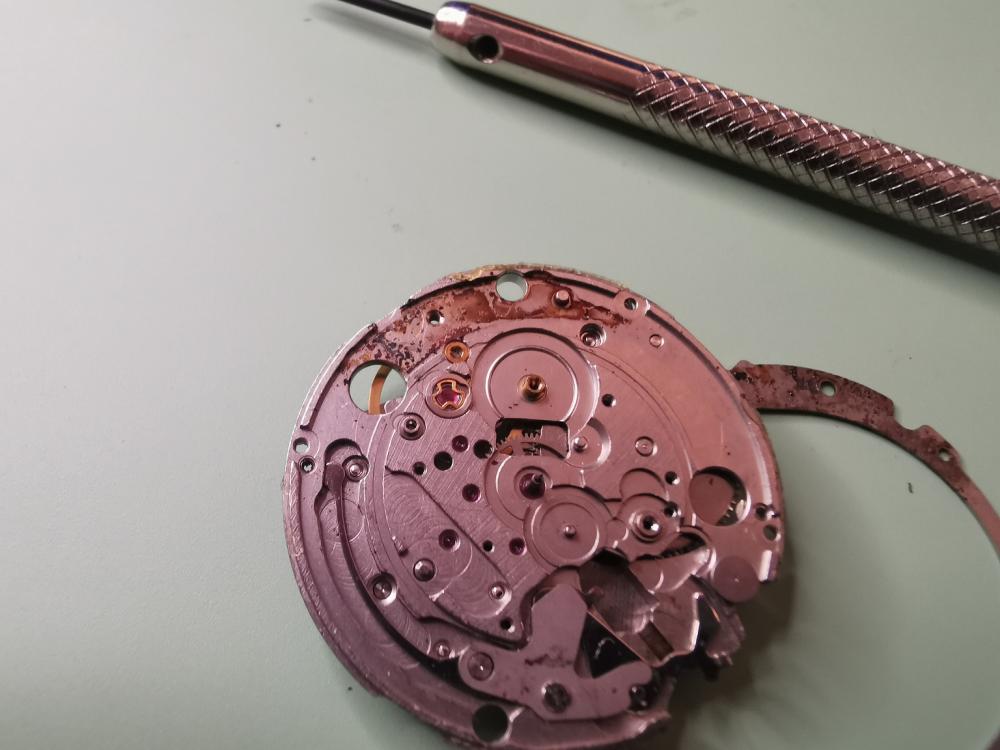
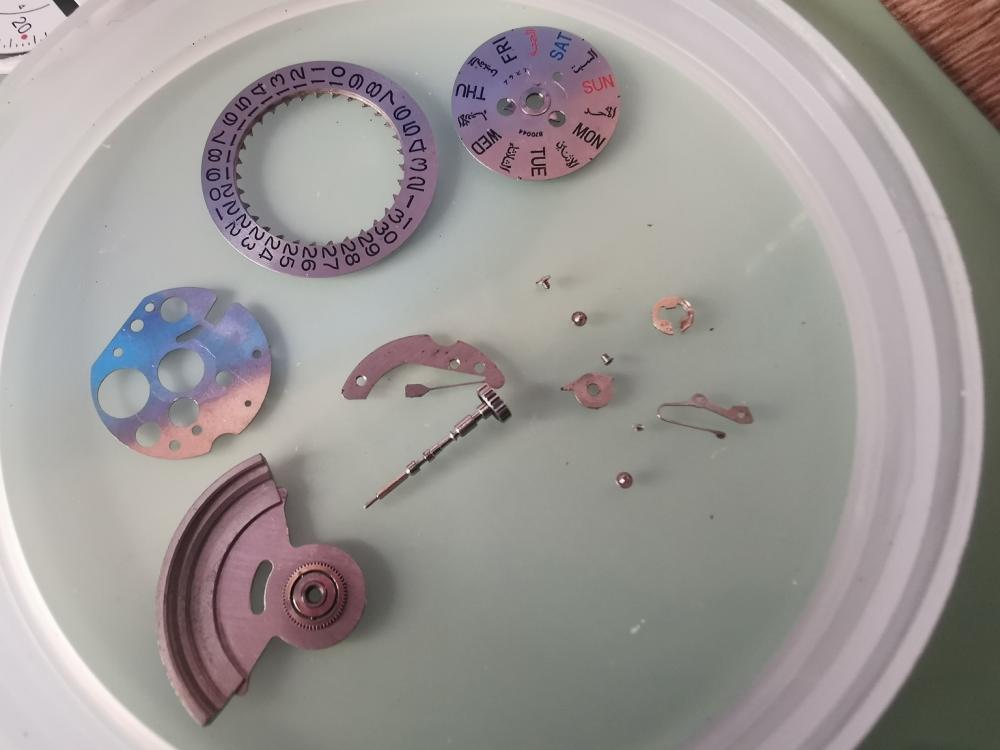
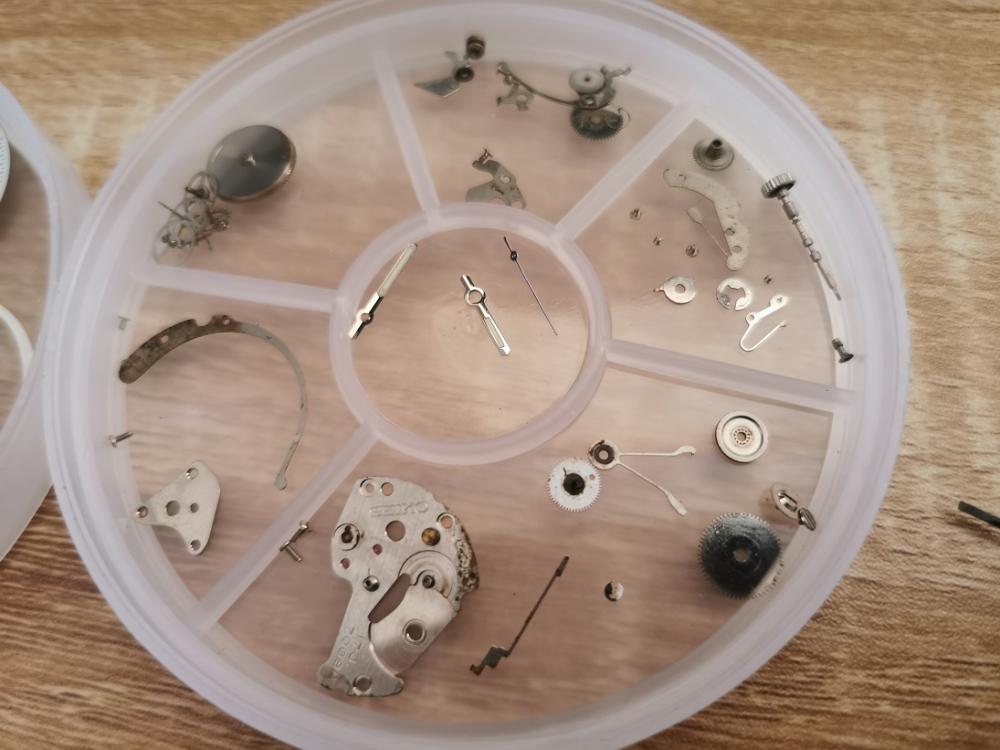
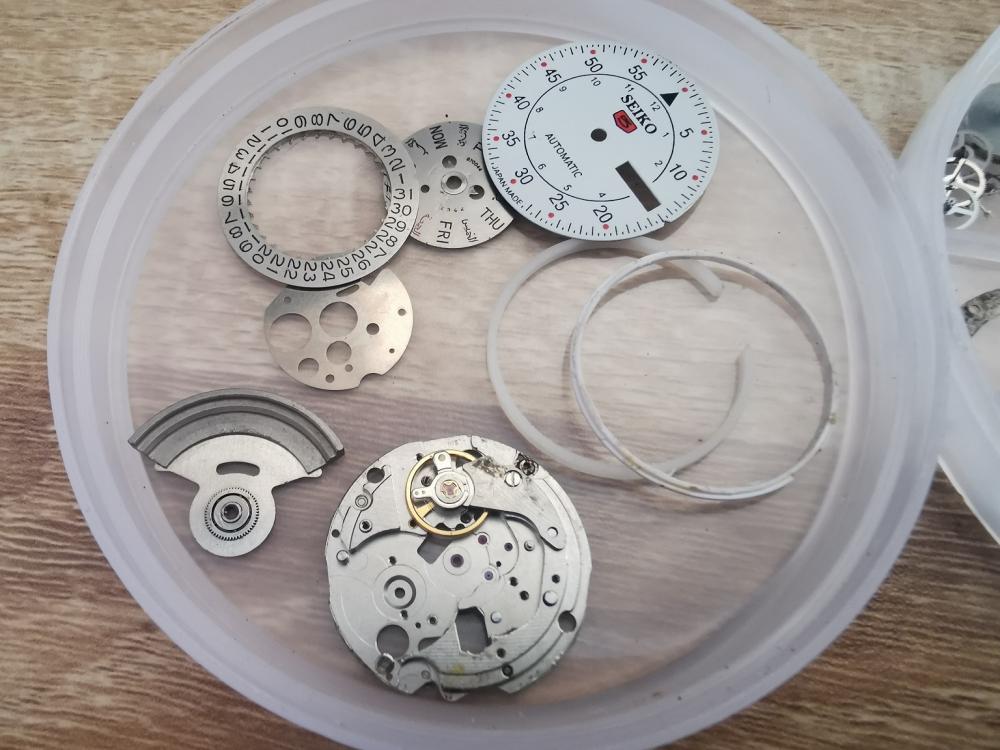
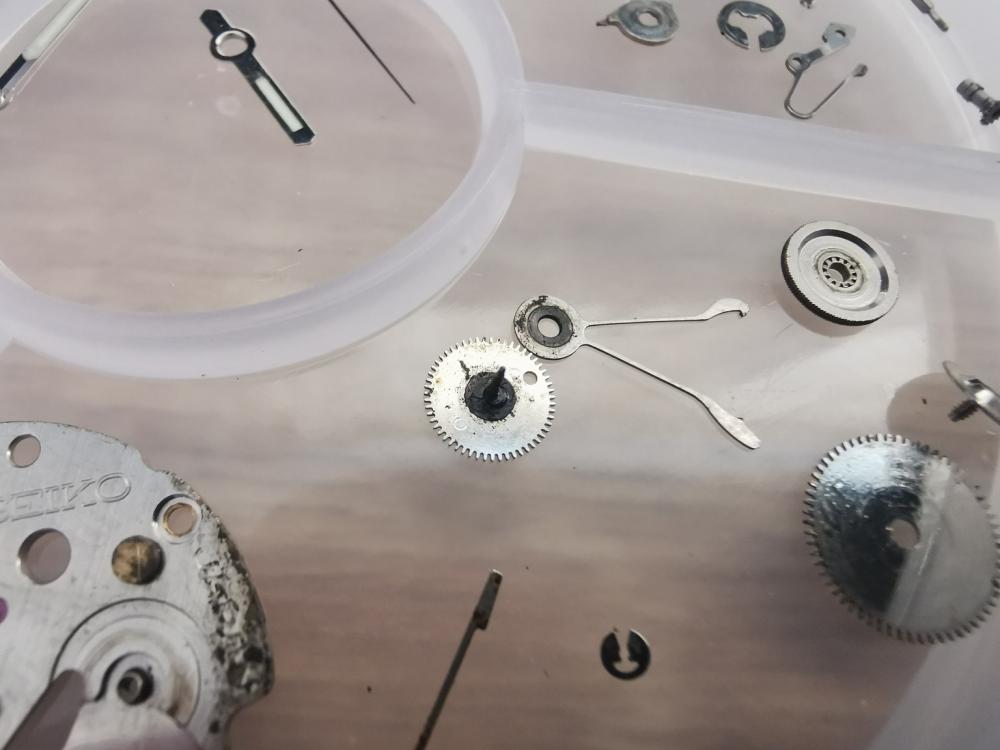
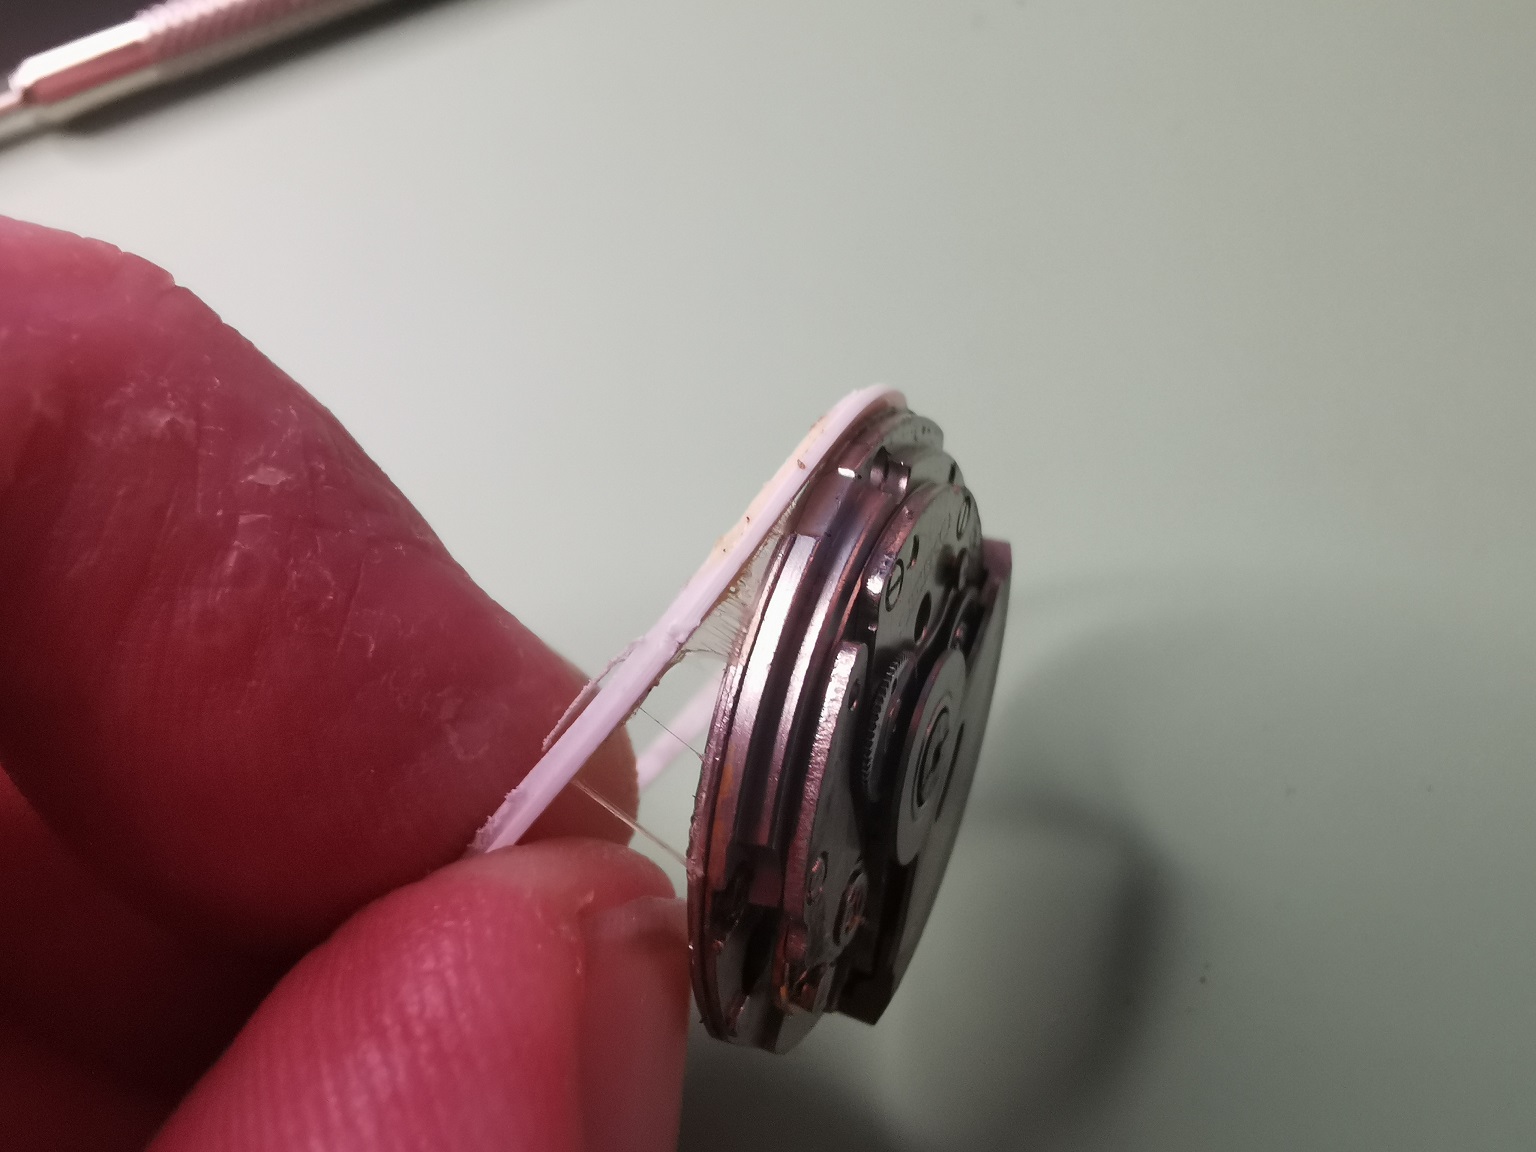
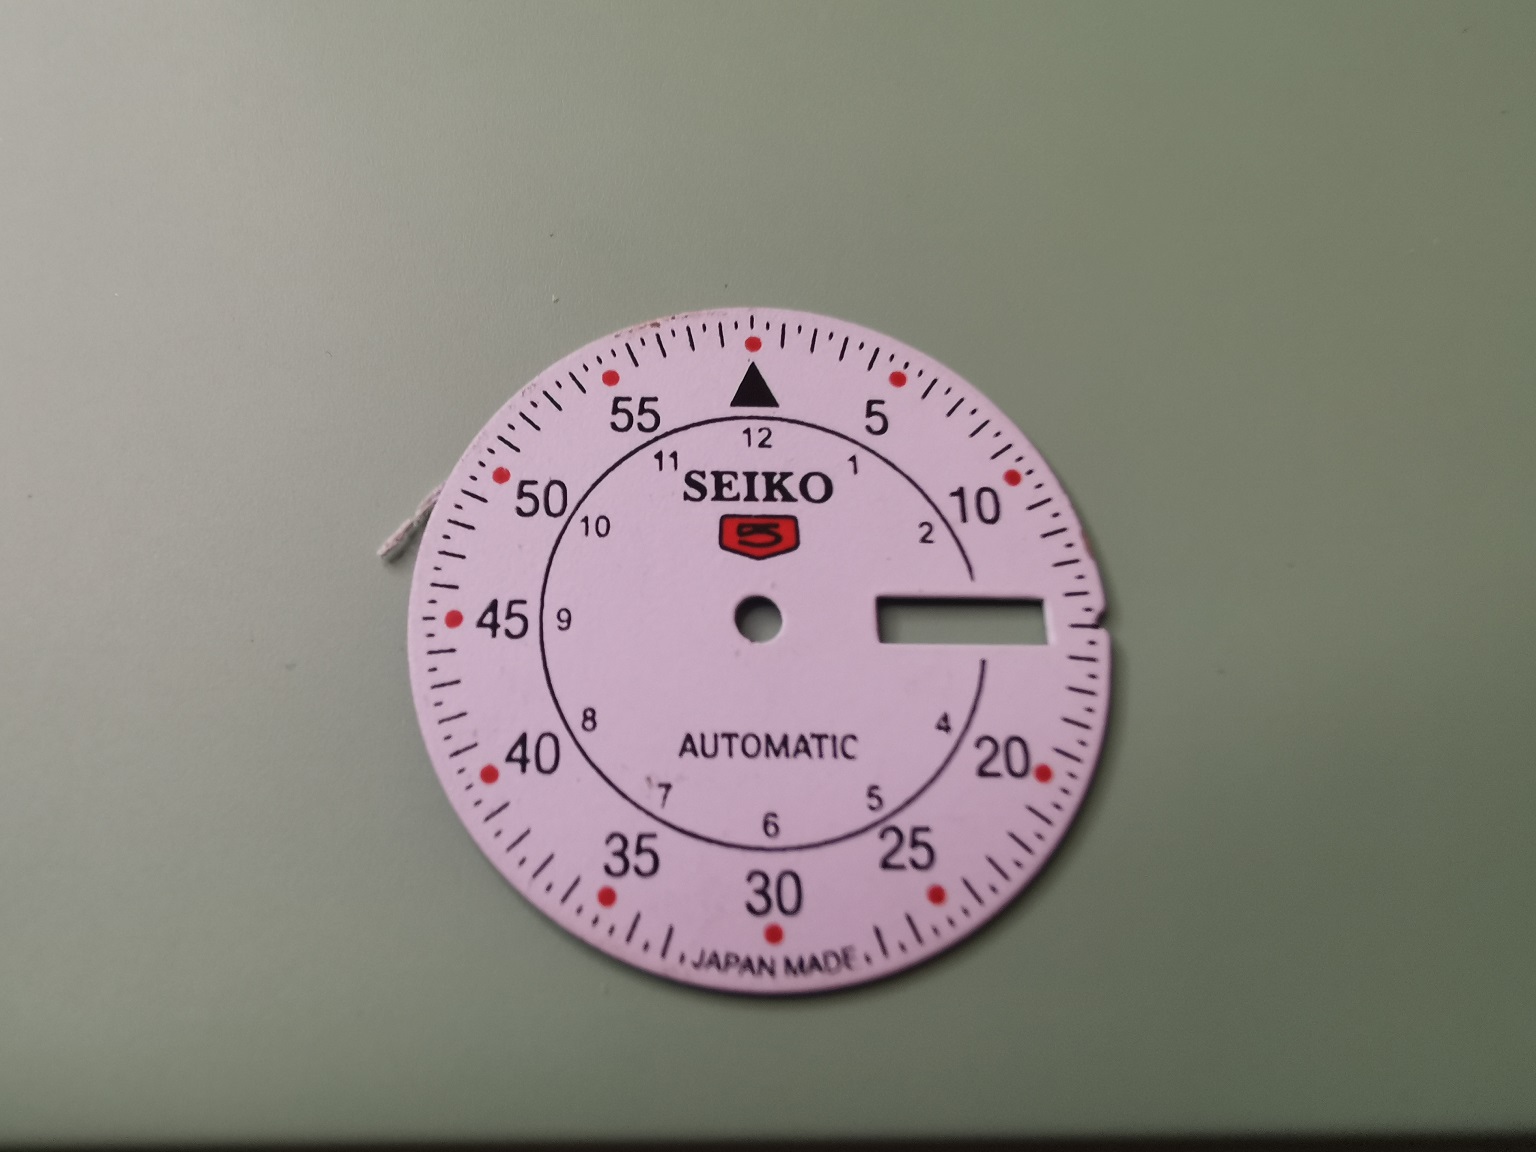
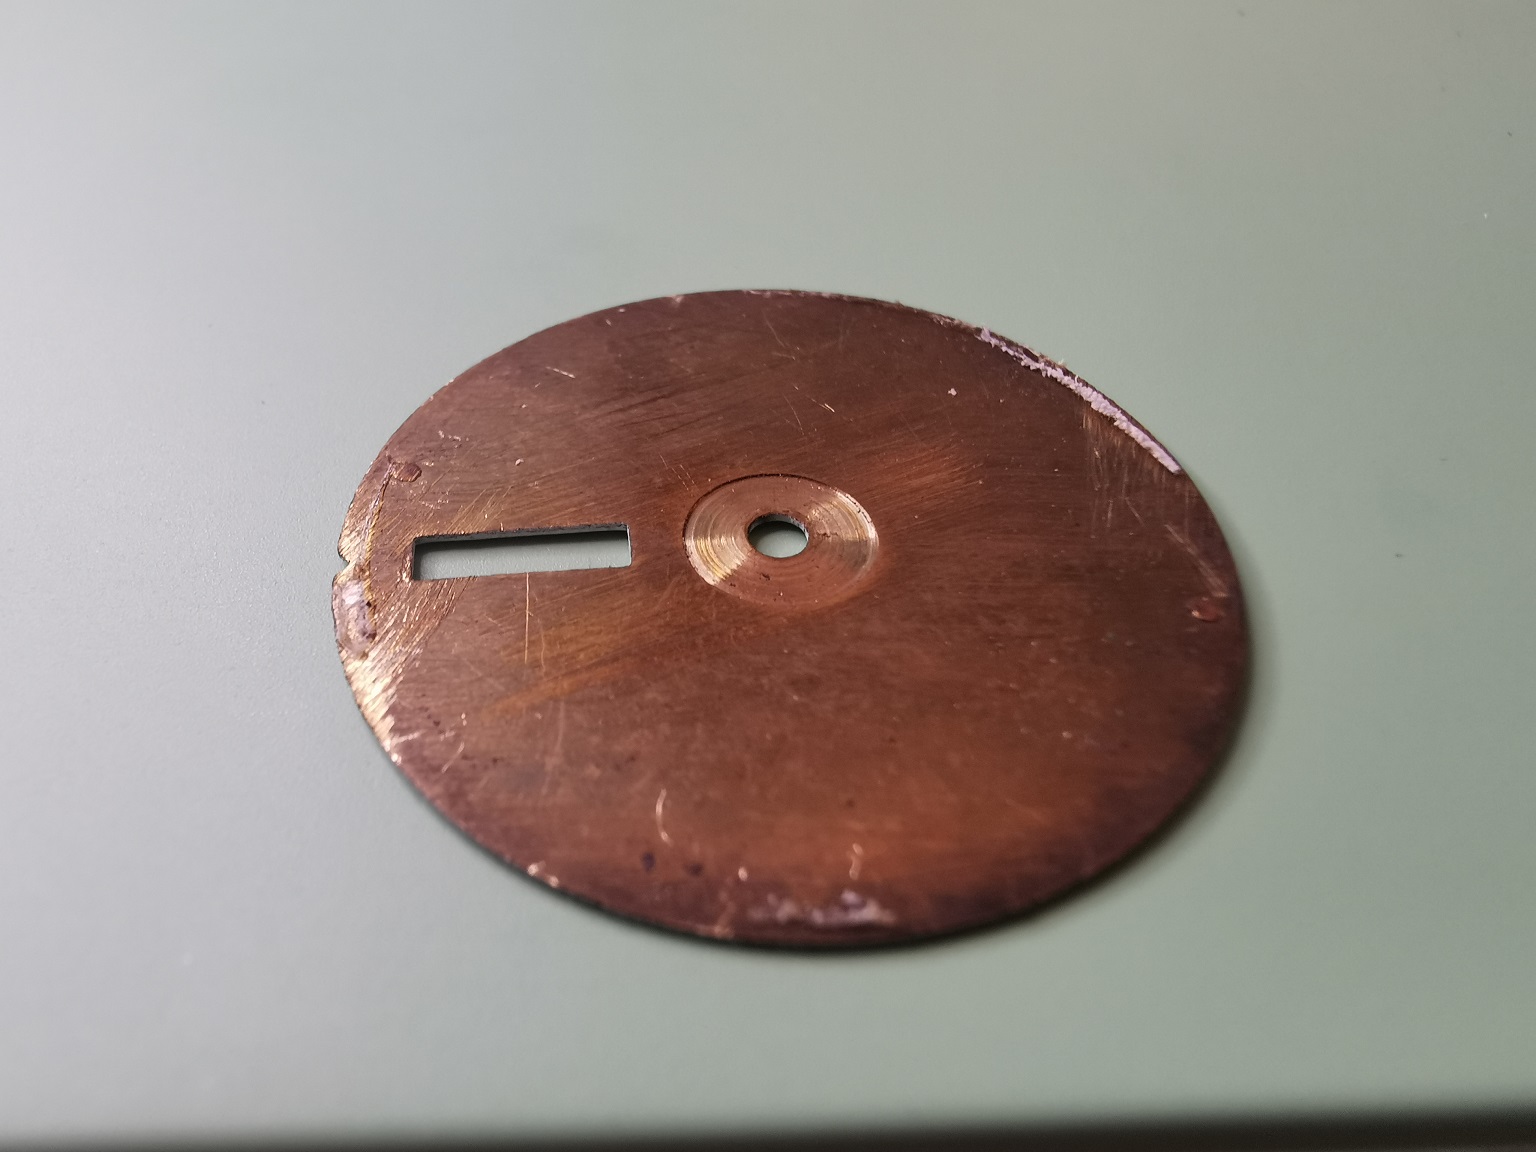
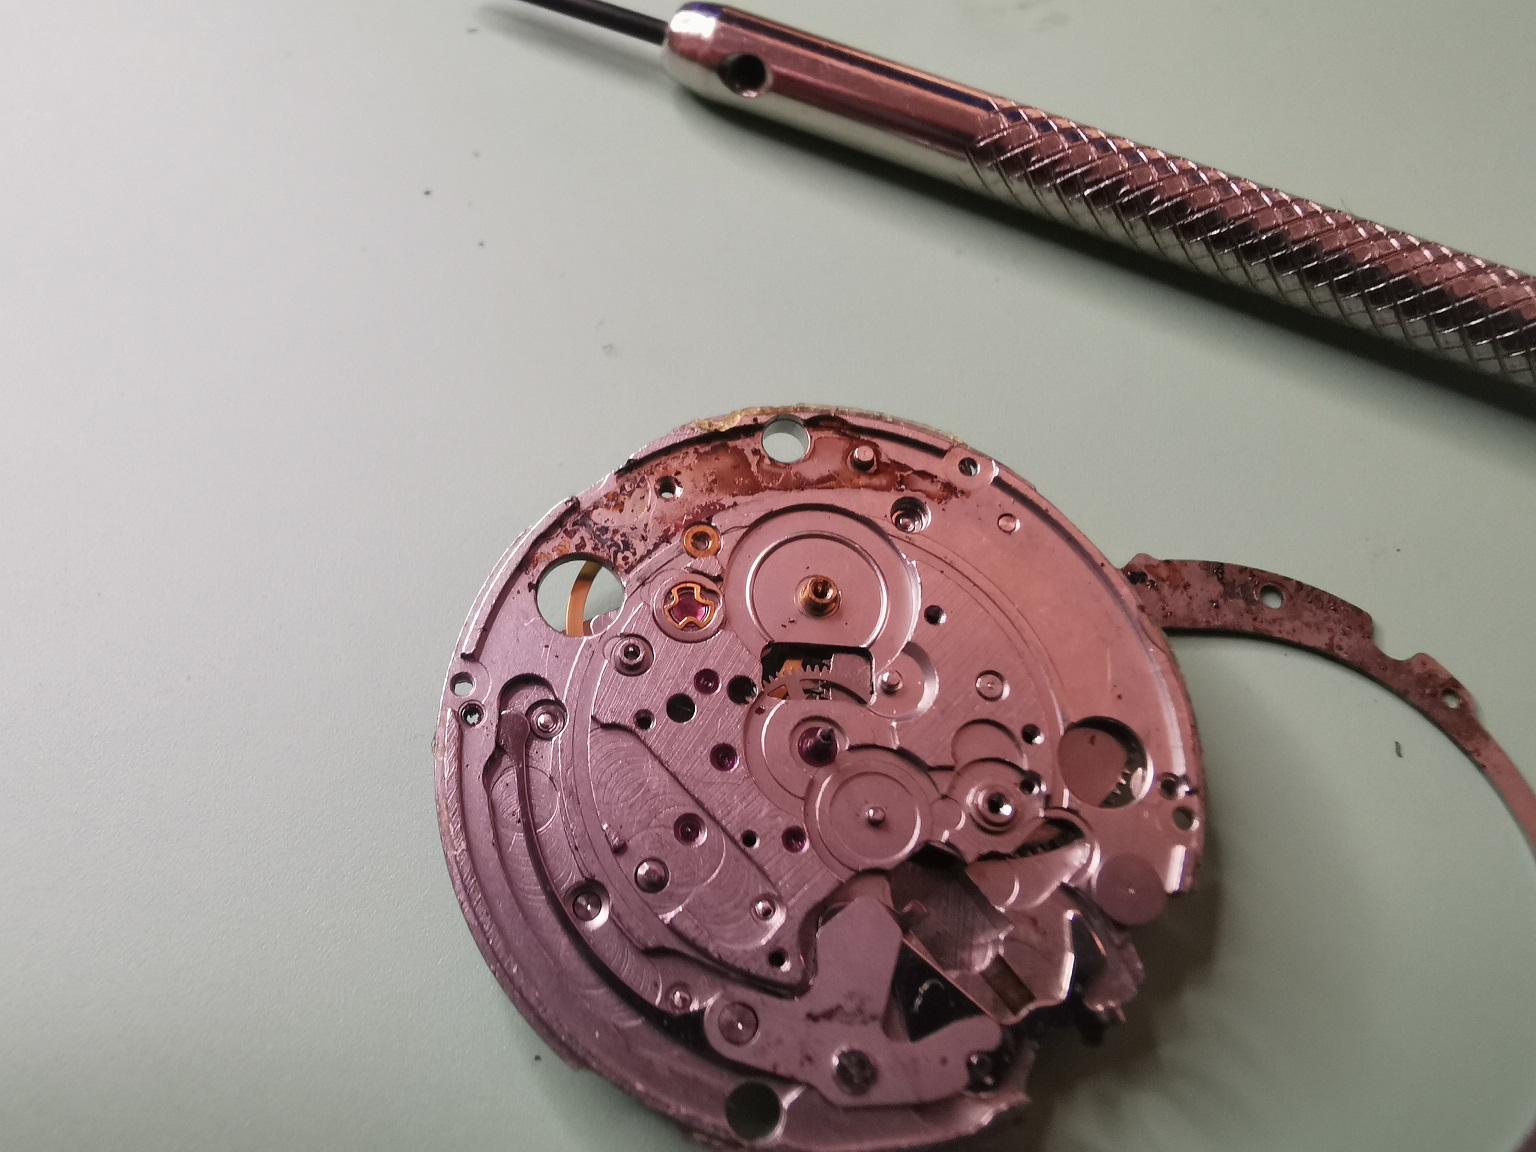
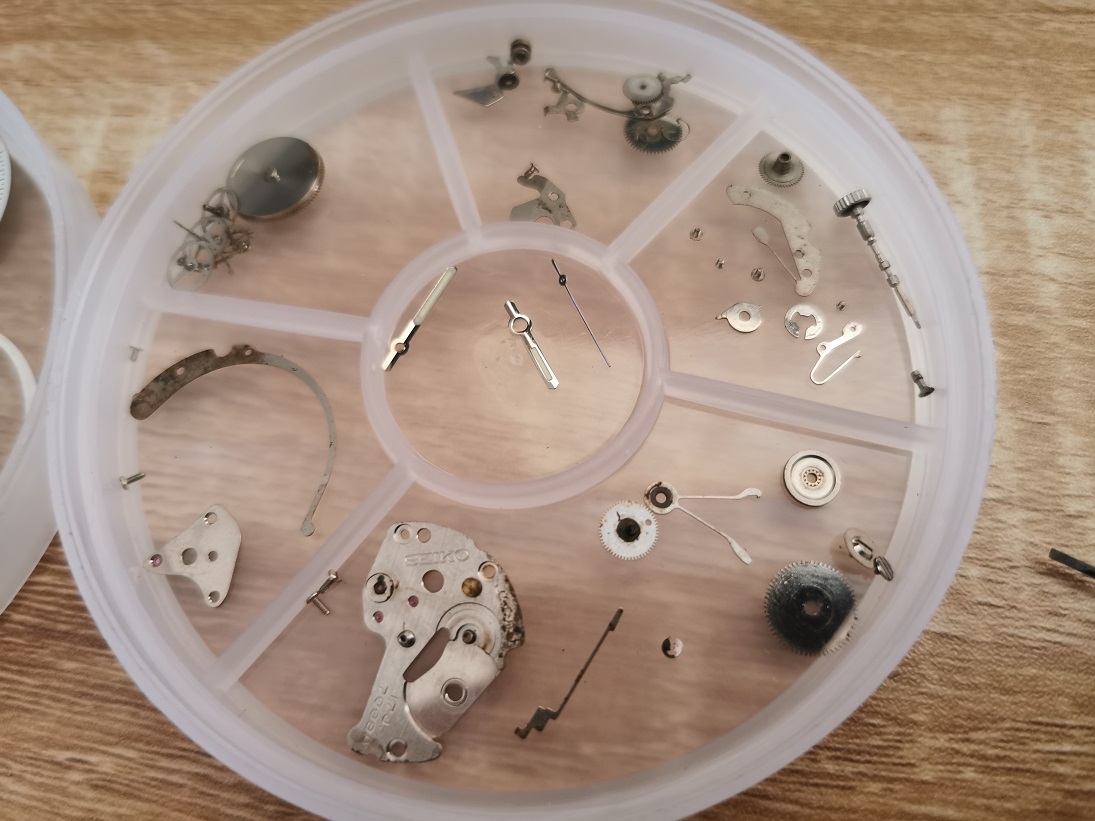
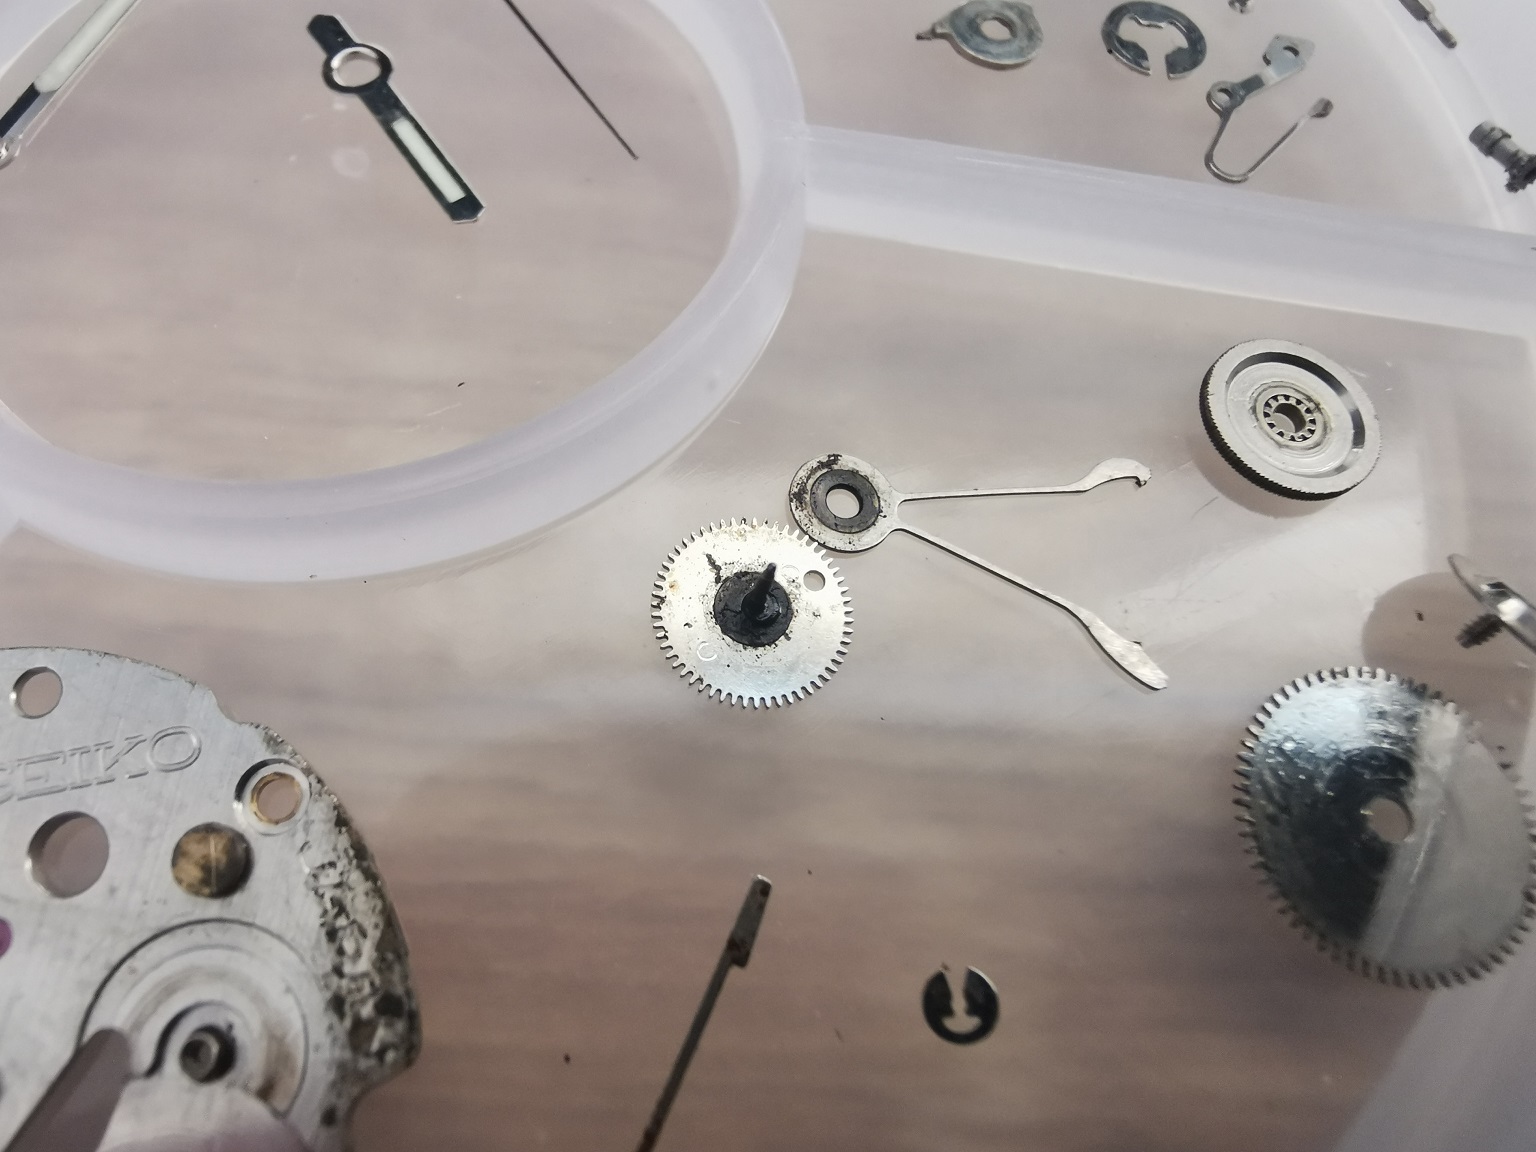
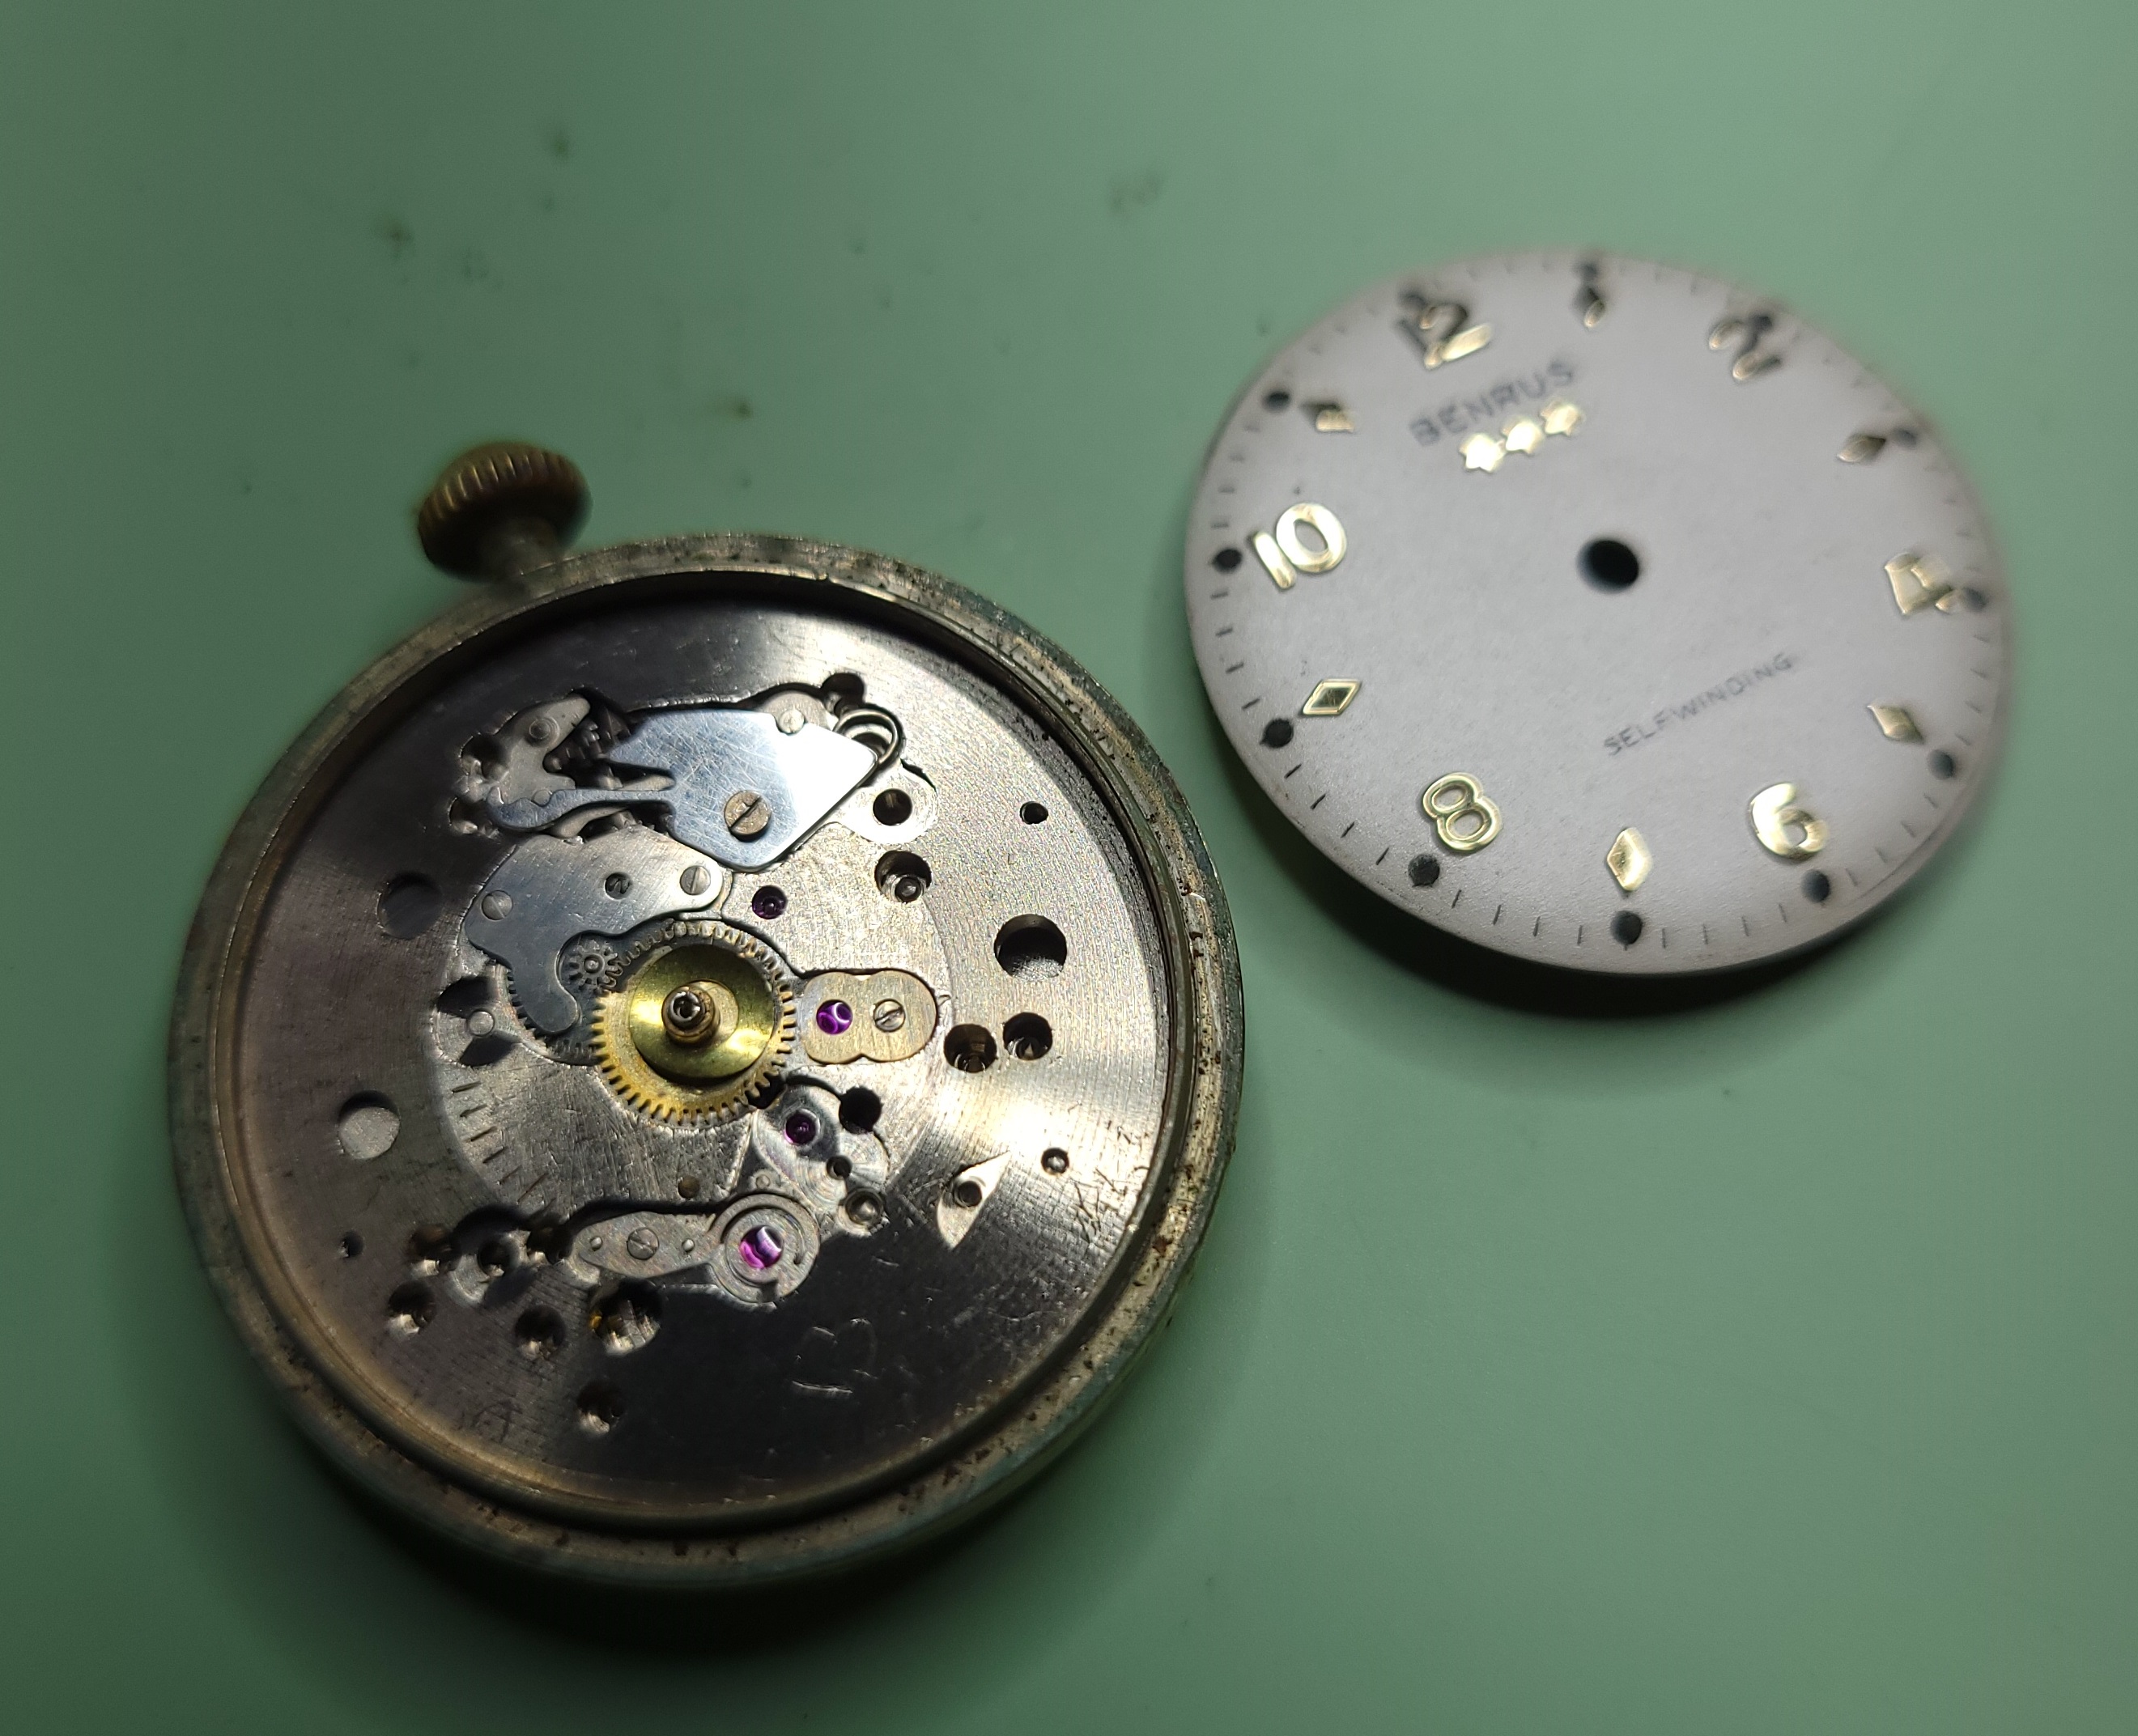
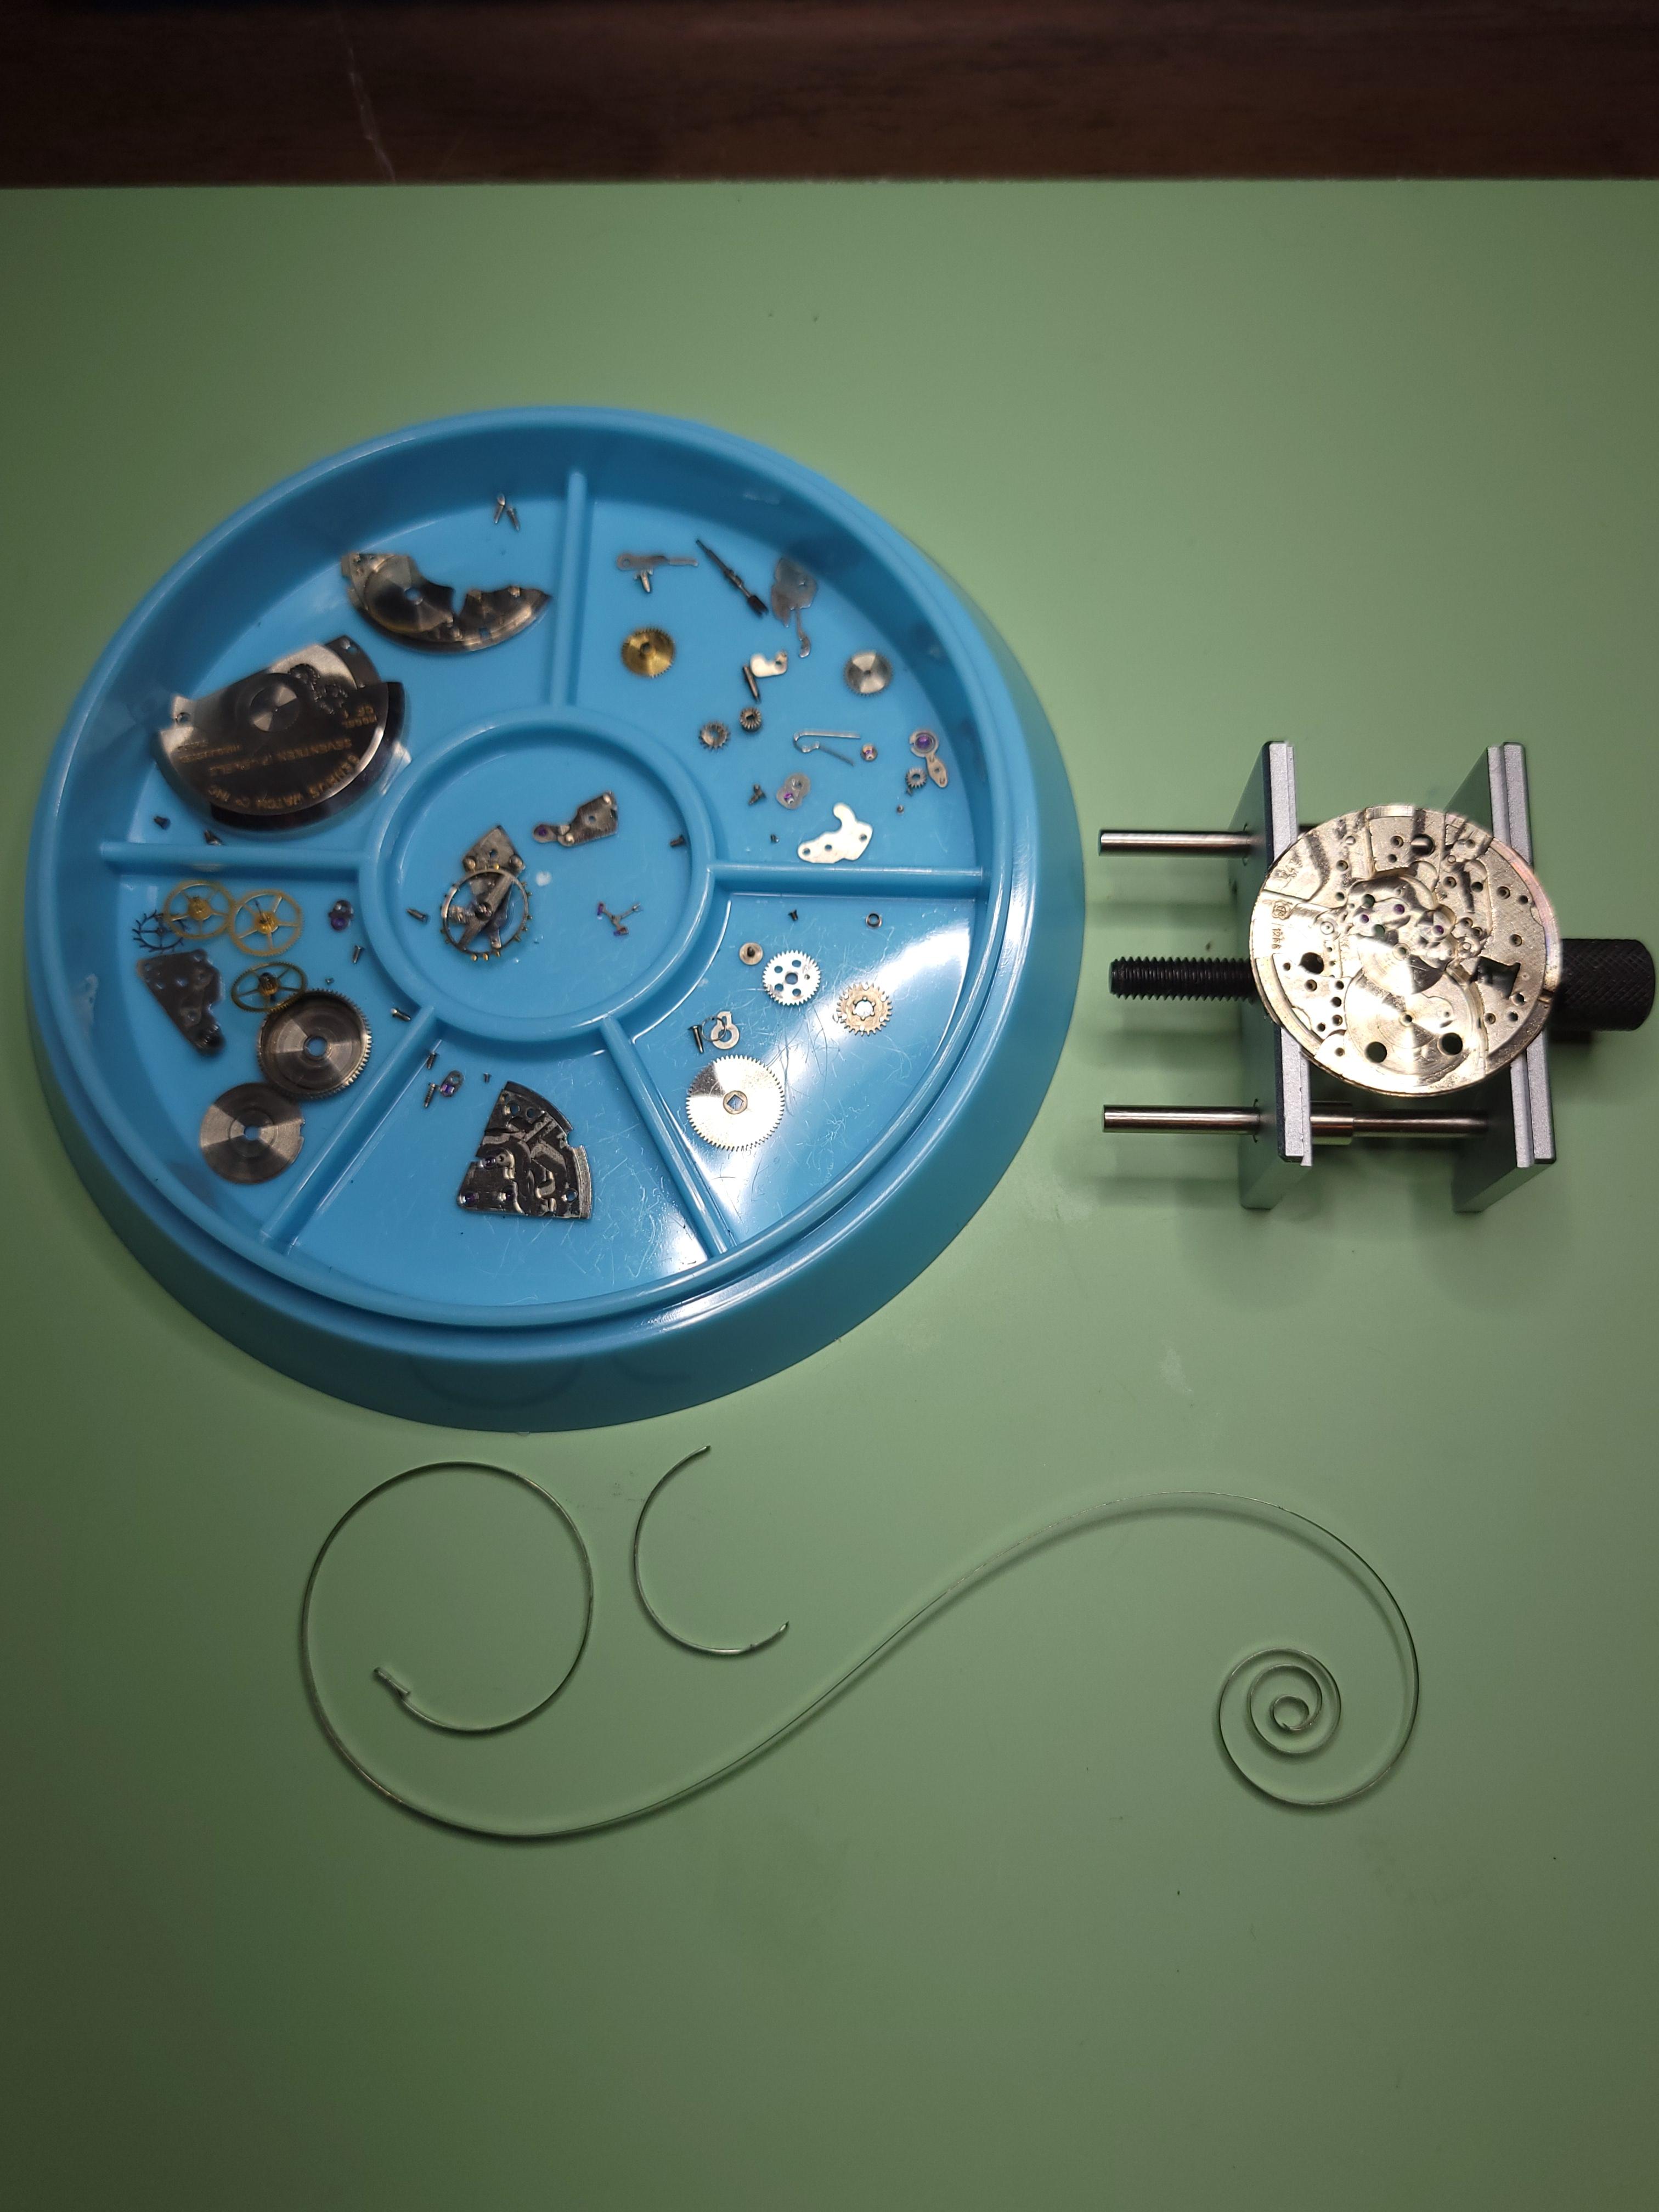
I'm a complete beginner, but dead keen to get stuck in. I'm still waiting on some tools, holders, dial cushions etc to turn up, but I've decided I can still get to work disassembing my first movement. This is a 17 jewel Seiko 7009a. I bought this as a cheap practise movement (to be honest, nowhere near cheap enough), so I'm not super invested in this timepiece or keeping it authentic etc. At worst I see this as being used for parts in the future, but if I can disassemble, clean it up, reassemble and get it to tick I'll feel like that's achievement enough. Straight off the bat, it looks like a clean enough watch, but if you know even a small amount about these movements you'll have already picked up on a few things. No Seiko will have "Japan Made" on the dial, it's obvious the dial is not sitting correctly in the case, the crown extends too far out (and is entirely the wrong type), there's no surround on the date window, there's no loom, no indices, the logo and badge are printed.. An obvious dial repaint, but that's fine, I don't want to risk ruining a nice watch on my first time out. When you pull the crown out to set the time, the movement shakes around inside the case like a pinball, so obviously there's something up with the movement ring. Also, I cannot got the strap off for the life of me. Timegrapher results are as expected, absolute chaos. Seriously low amplitude, terrible rate and beat error. Removing the movement was pretty standard, pull crown, push pin, remove stem, movement falls out. Removed the hands, and then here's where it gets fun! First thing I notice is that this thing is full of corrosion, especially on the side opposite the crown. One of the dial feet screws is especially rusted, but it turns out it doesn't matter! Stay tuned to find out why. No gloves because this thing is going to get a thorough clean and I don't believe it's possible to make it worse than it is right now. Turned the dial feet screws but the dial just did not want to let go. Figured it was just being a bit stubborn, so started prying it with a screwdriver. Oh, it was being stubborn alright. Both the dial and the movement ring had been glued to the movement. Here's the front and back of the dial in all it's glory, complete with glue and no dial feet. Removed the oscillating weight and then started removing everything onthe dial side. The day corrector spring is absolutely covered in rust, as well as the plate underneath. A little while later and I've got a couple of trays full of parts waiting for a clean (once I'm set up for it). To be honest, I don't think I'll be able to clean these to any high degree of standard, but I'll try and do my best. When I next get time I'll be inspecting parts and jewels to see what kind of condition we're looking at, and to see if my cheap digital microscope is any good. I've got to get something to use for cleaning jars and baskets this week, then I'll be using dish soap for a degrease, then shellite (naptha) for clean and rinse in sealed jars in an ultrasonic. Pictures on the internet really don't do any justice for how absolutely ridiculously tiny these parts are, especially some of the screws. I've got everything sorted into what I hope is a logical grouping of screws and parts, hopefully not too much of a drama when it comes time to reassemble.


 1 point
 -
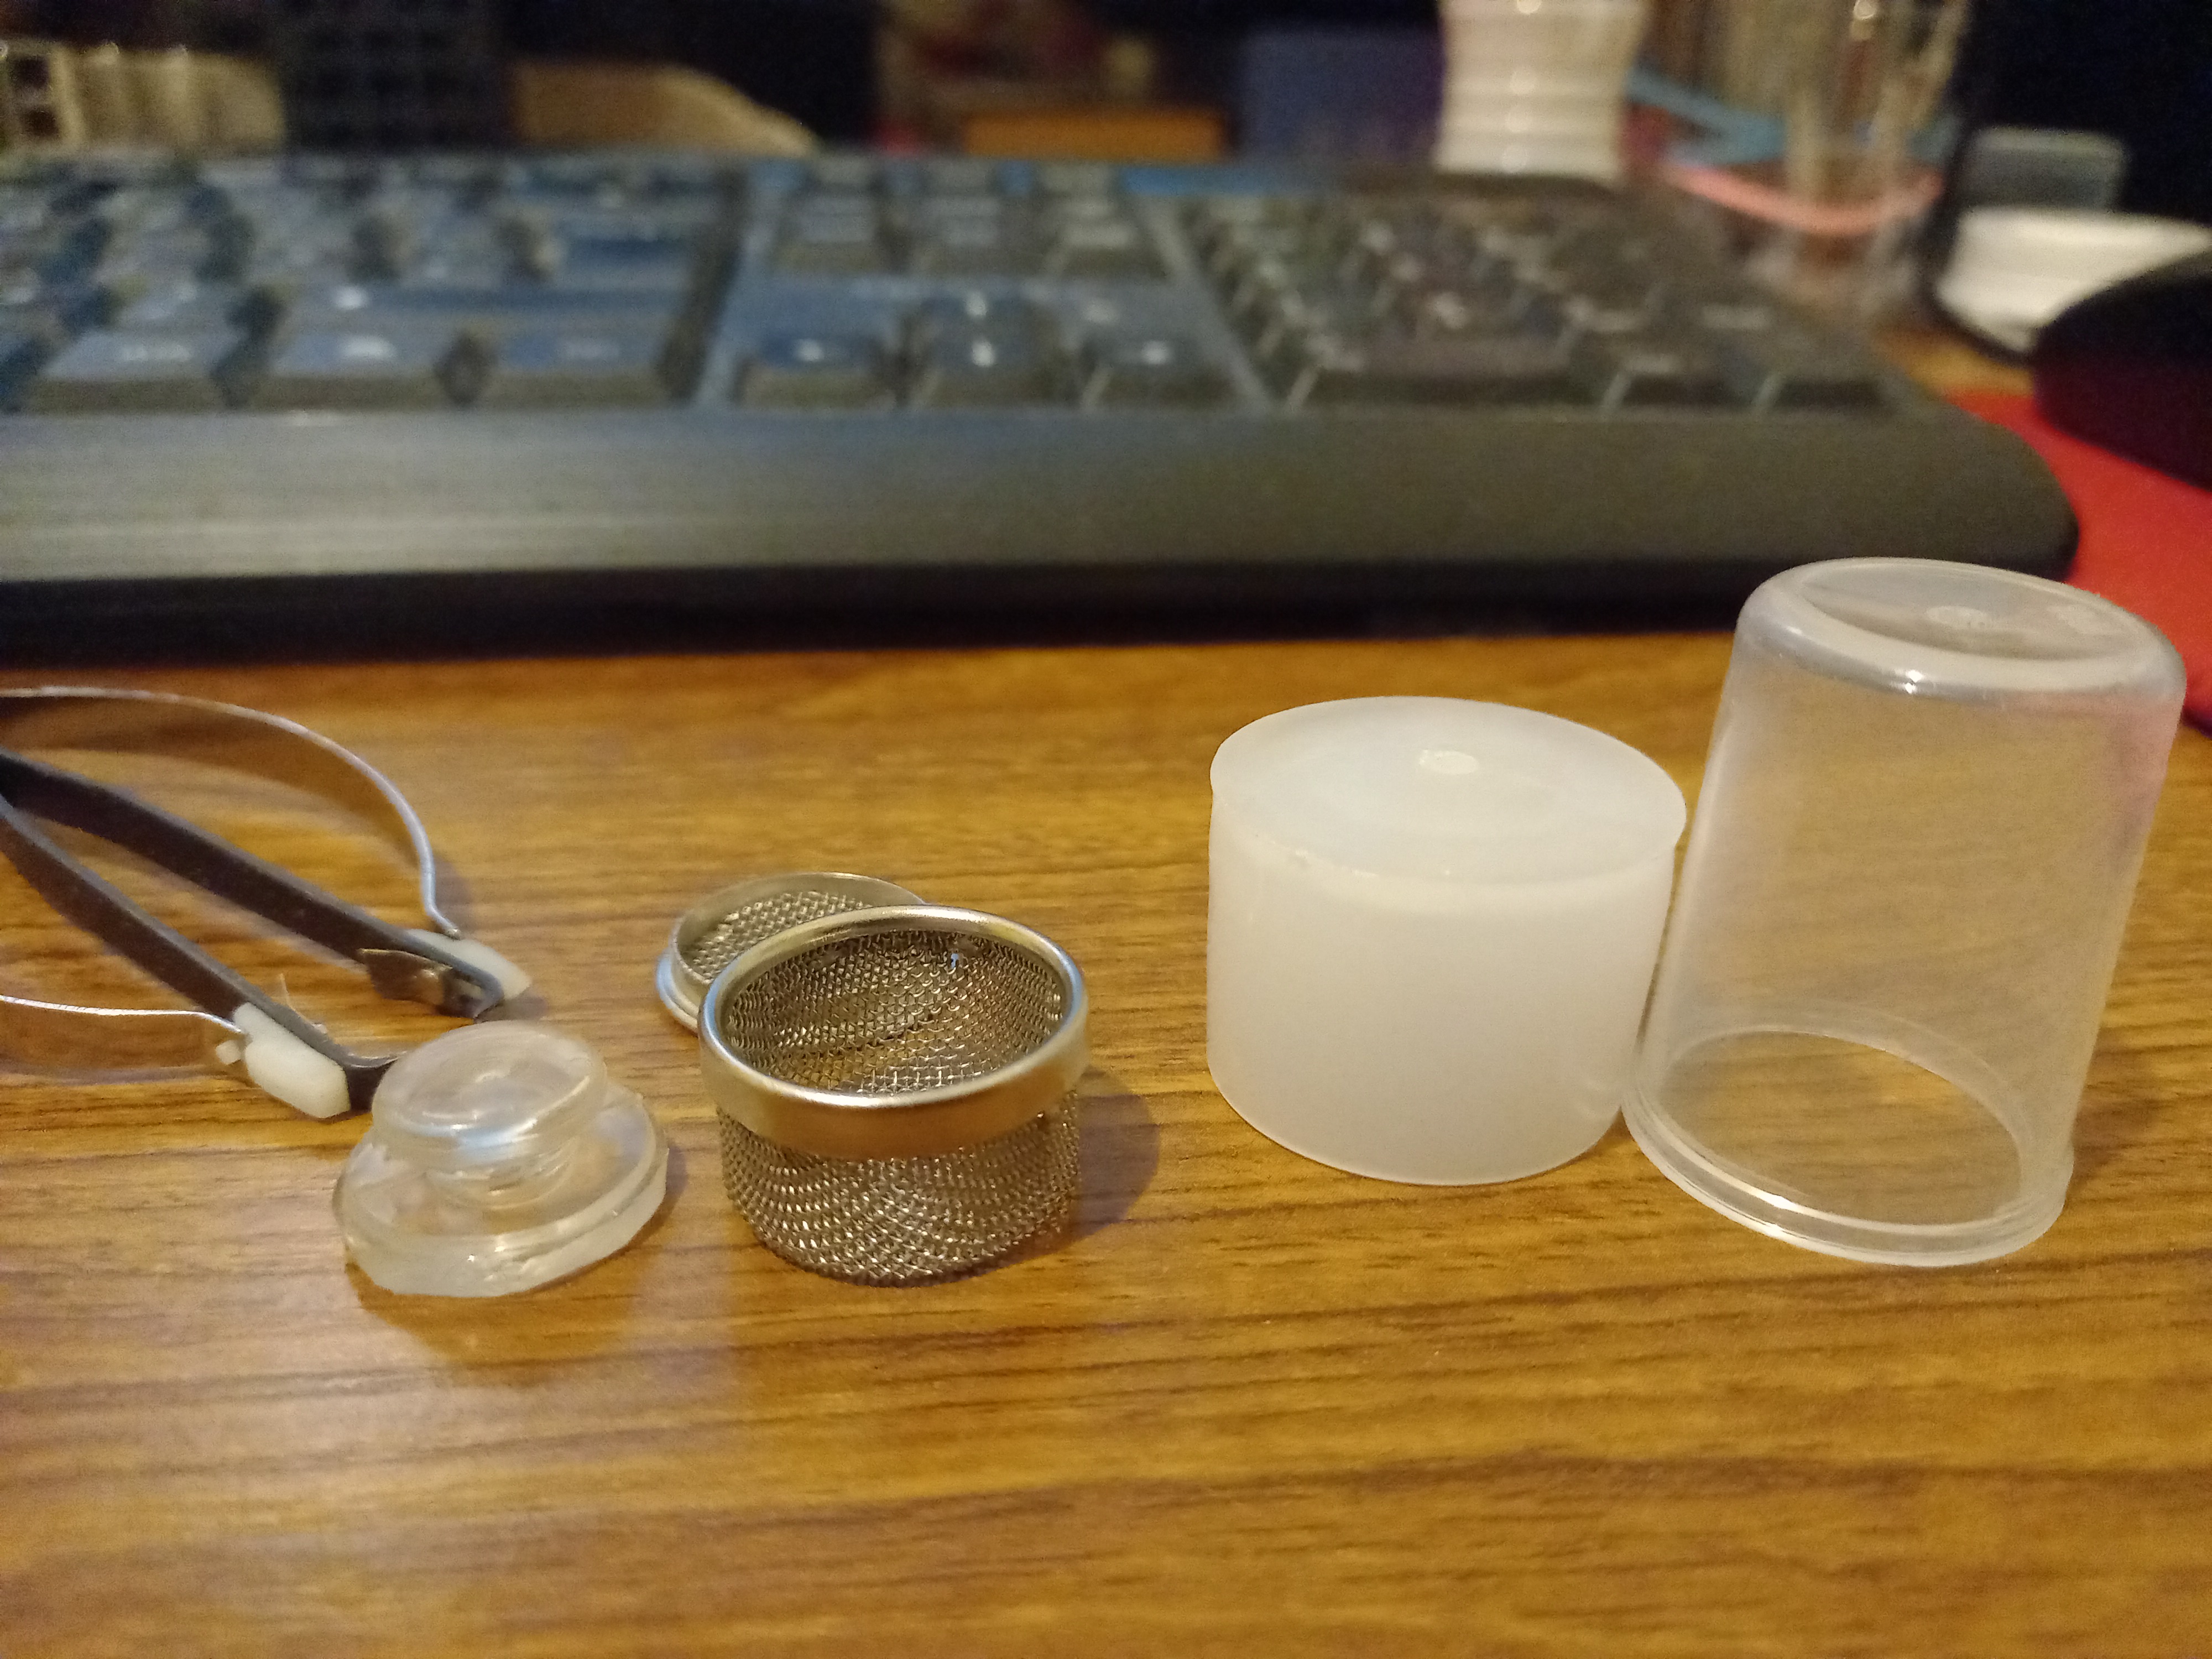
I recently gave information about Timegrapher. I thought someone might be interested in my approach to homemade tools. I made a mainspring Barrel press from two different sized shampoo tops. A small hole in the centre of each makes a gap for the arbour. A £4.99 presto tool. Cutting a groove with a dremel makes it useable for 5 spoke wheel removal. Spring saver whilst washing. Centre of a suction cap. Outer edge cut away. Inserted into the mesh basket, placed on top of springs means they do not get caught in the mesh. Just loving the hobby. Ross
 1 point
 -
http://digitaleditions.telegraph.co.uk/data/1139/reader/reader.html?social#!preferred/0/package/1139/pub/1139/page/15/article/NaN1 point
-
Thank you for the great information. I guessed that may be the case but it's good to know. I'll leave it as it is as I cannot see the letters without glasses. Again thank you. Mart.1 point
-
@LittleWatchShoptried other watches, timegrapher seem to work fine.1 point
-
I would carefully observe the escape wheel and pallet fork and see if it is mis locking or skipping a tooth now and then. I would also test a known good watch to be sure your timer is operating properly.1 point
-
Yep, looks fine to me. It doesn't make sense that adjusting the beat error 1ms makes such a difference in rate - 1ms is only an angular movement of 2°. And the amplitude jumping around so much is odd. I've had similar odd behaviour, and it turned out to be either a loose hairspring collet, or loose roller or jewel. Unlikely as your balance looks to be in original and excellent condition. But worth a check !1 point
-
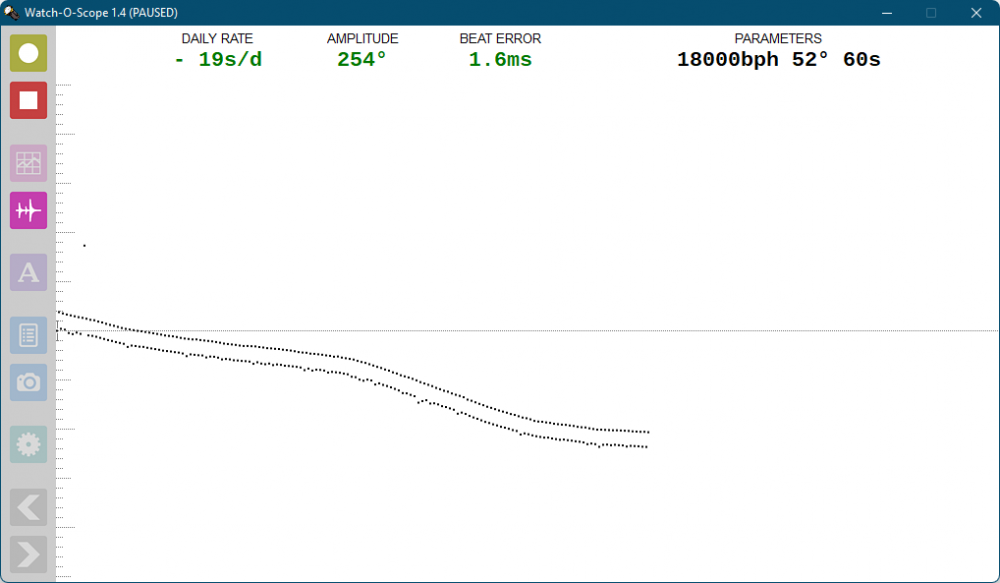
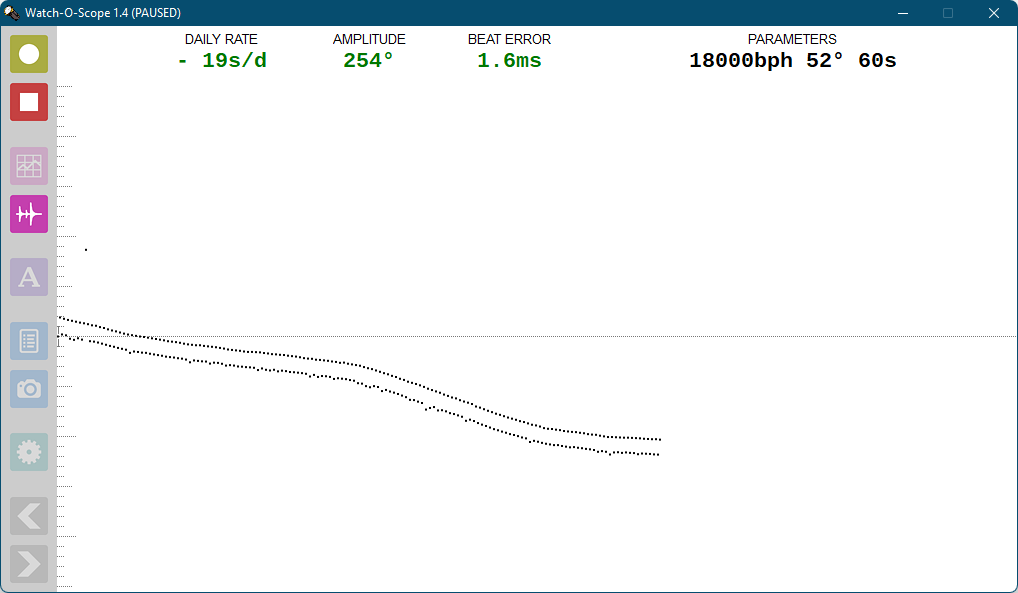
I've been looking at ways to check my watches, and a timegraph seems to be the way to go. The cost at this time is inordinately expensive. May be later. however, I made a startling discovery. I can have a very good system for free. My watch holder can hold a watch and be turned in many directions. Placed against the microphone of a spare webcam Timegrapher 0.5.0 for PC. Works a treat. See the results Saved over £130
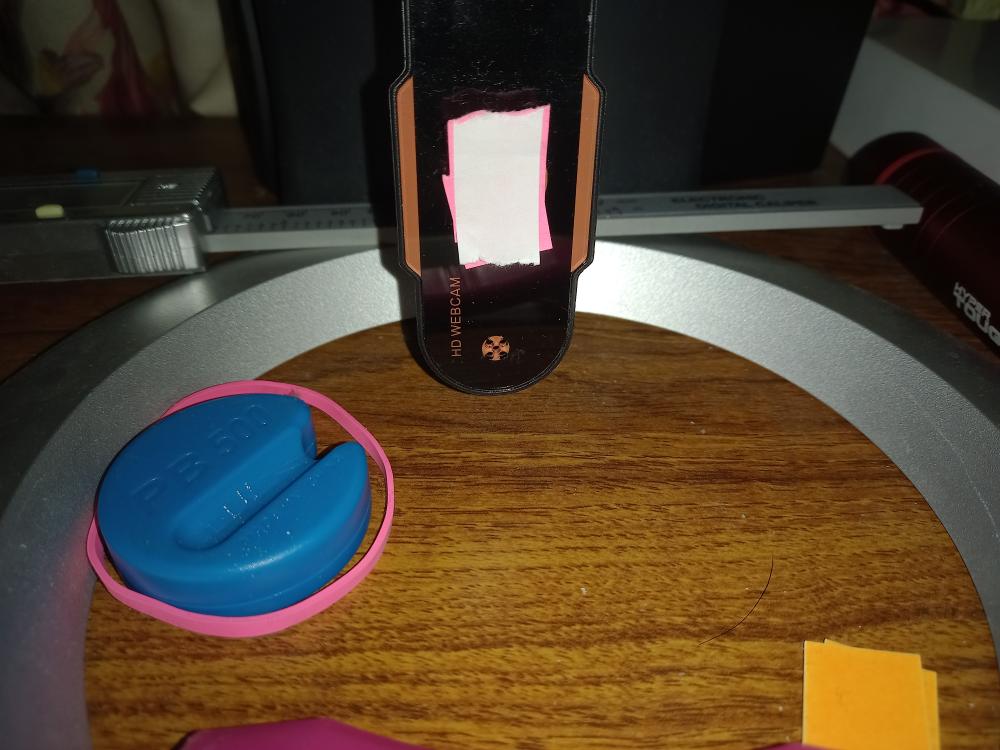

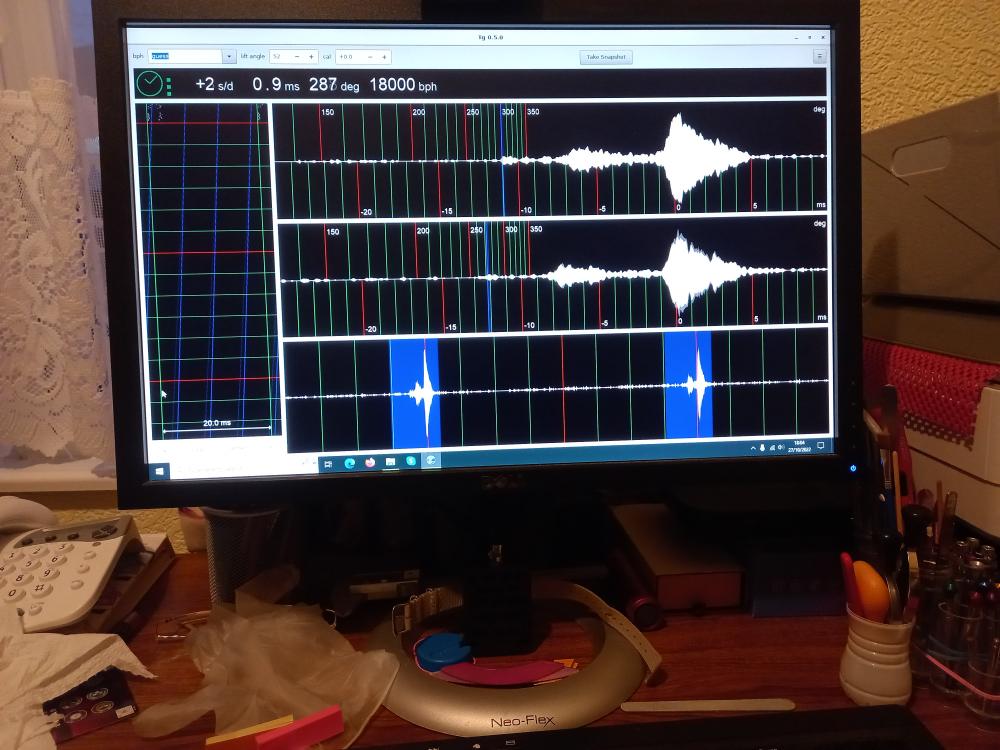 1 point
 -
Kalanag did not think my work was good enough, neither did I. photo shows third attempt at installing the banking pins. Turned down a stepped pin on my Sherline lathe. 0.040" stepped down to 0.022" x 0.050 overall length. Hope he likes it. On the the reassembly.
 1 point
 -
Ok mate just checking you were ok.1 point
-
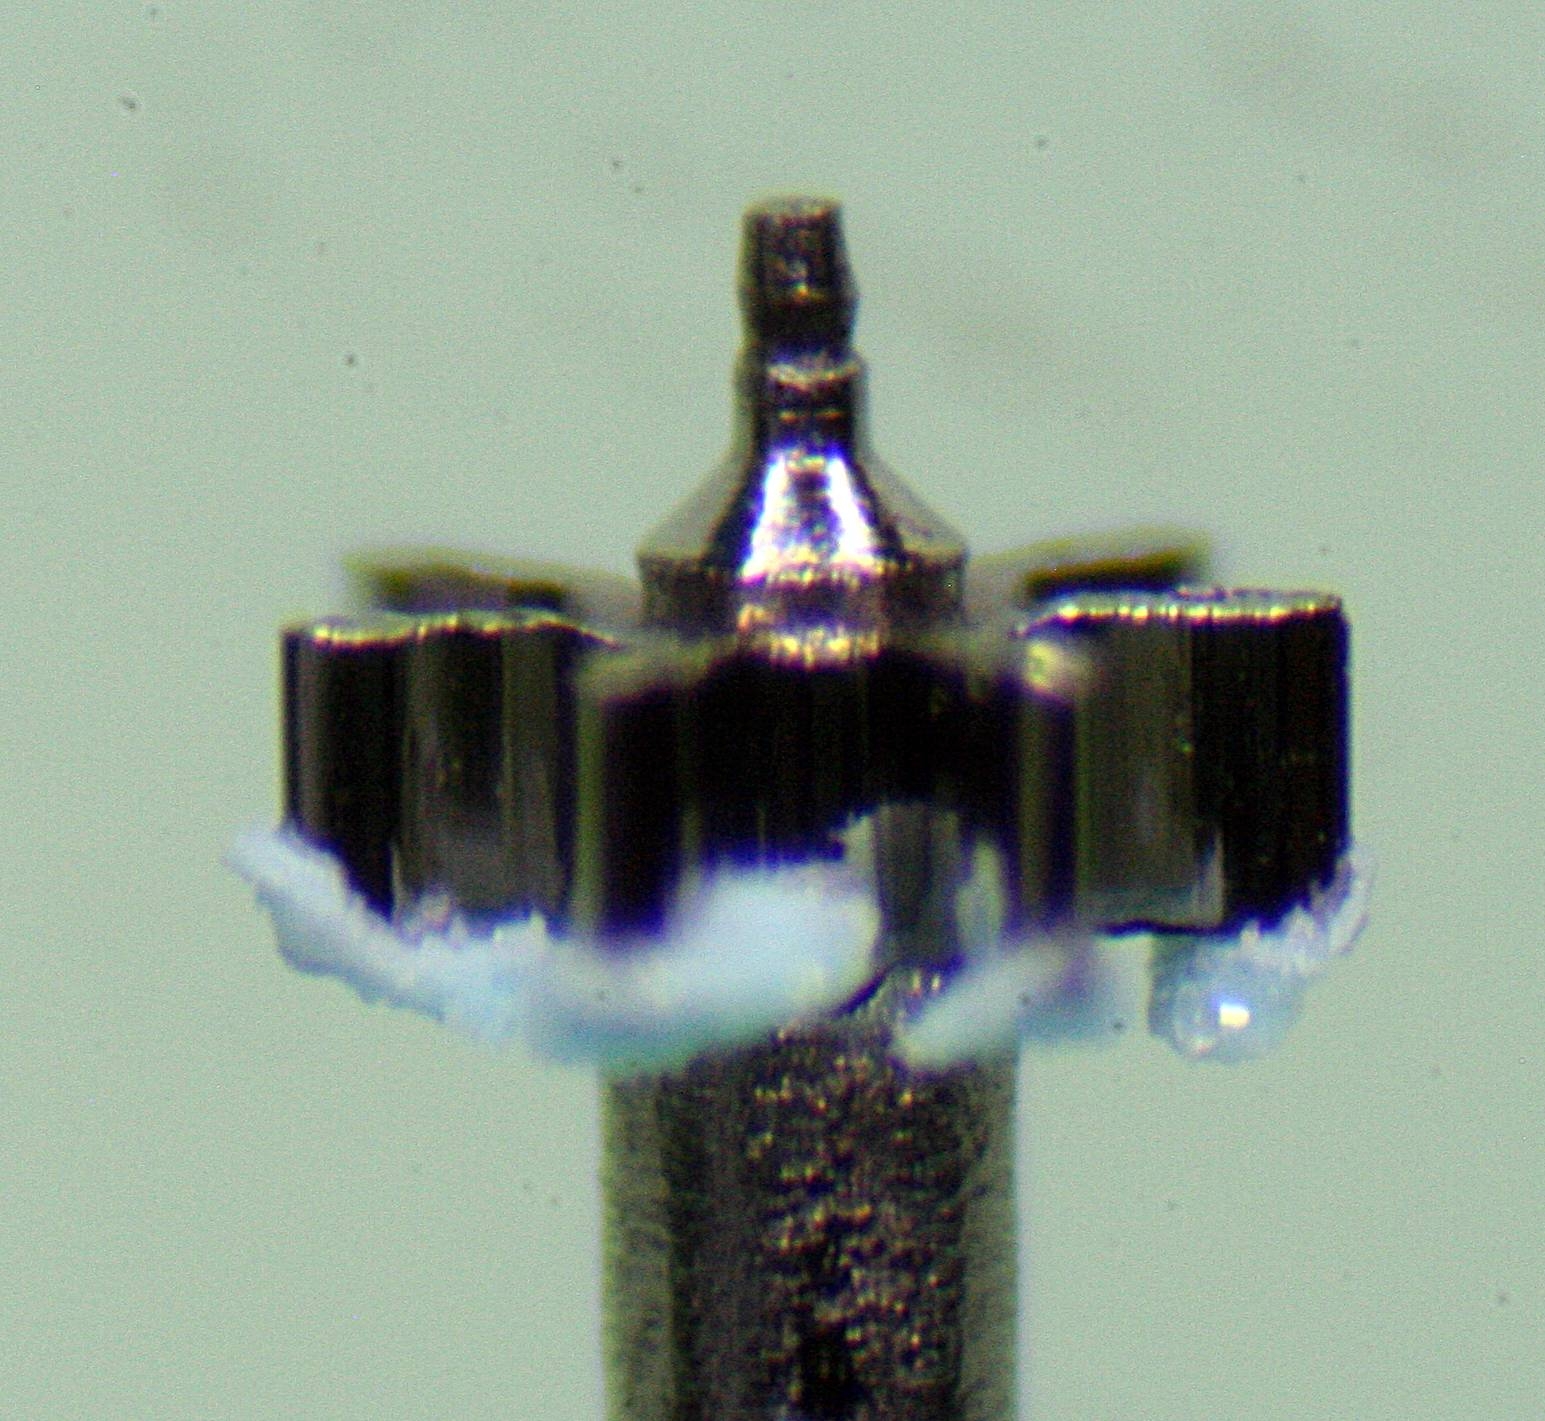
Hi the point is that when you turn the crown the wheel doesn't rotate round the post but climbs up it with continued winding (yes). does it do this with out or with the hour wheel fitted or both. You say you tried the dial washer, have you tried a little lubrication on the post. Is the post polished or under the scope a rough surface, is the post moving (a little loose) because when turning its finding something to drive against that causing it to lift.1 point
-
Doesn't look bad, a 48 hr soak in Coca-Cola and a used tooth brush cleans it to your surprise. I can wish you luck with everything except that cheap digital microscope they are just kids toy. Rgds1 point
-
The headband can be bent to better fit the individual. There 2 ways of wearing the headband. The first way is to have the band exit on the same side of the eye and go around the back of the head and the come around to the the front, ending up on the forehead. This method requires more adjustments to get the loupe to fit properly. The second method is to wind around the head in the other direction. i.e. run across the forehead first, around the back of the head and end up on the temple. This method seems to fit me better. Try out both methods and see which suits you better.1 point
-
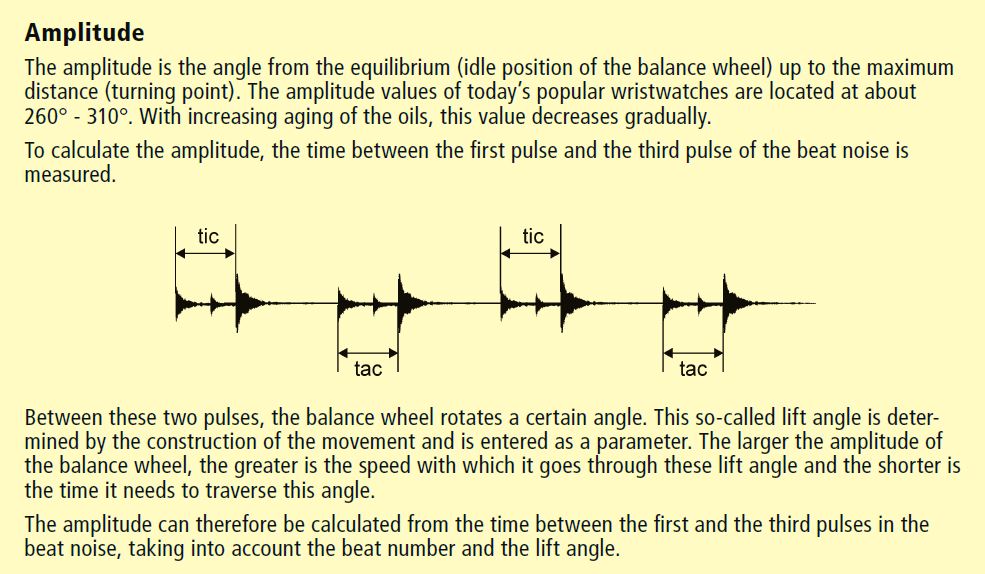
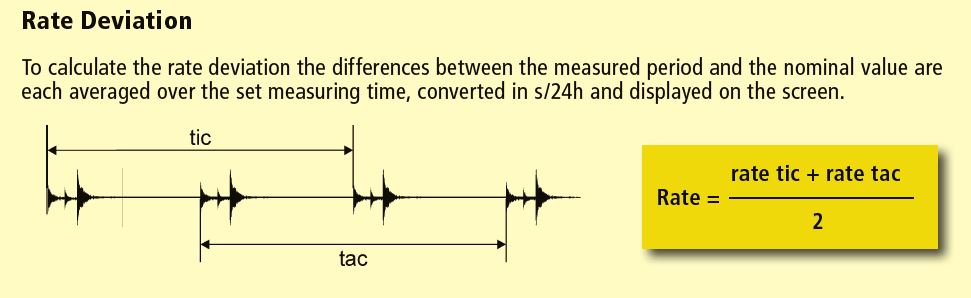
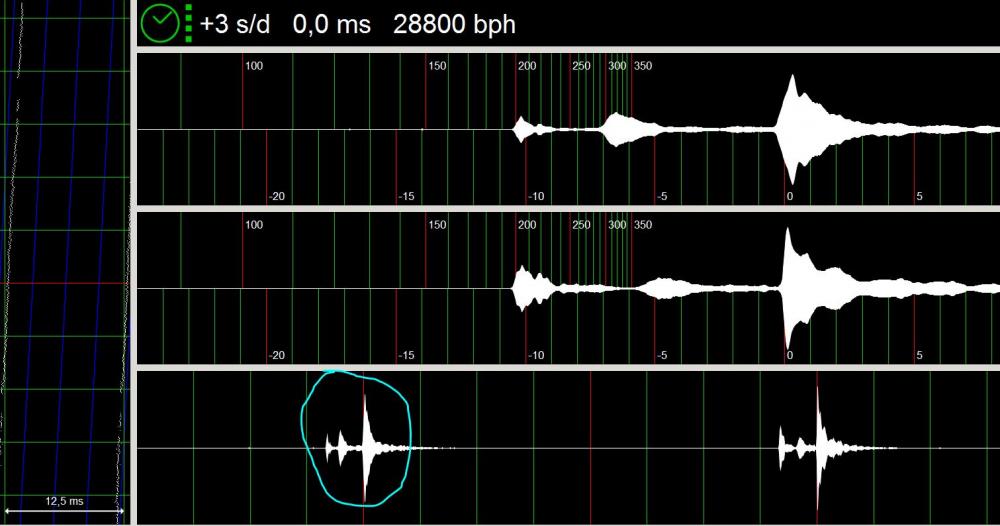
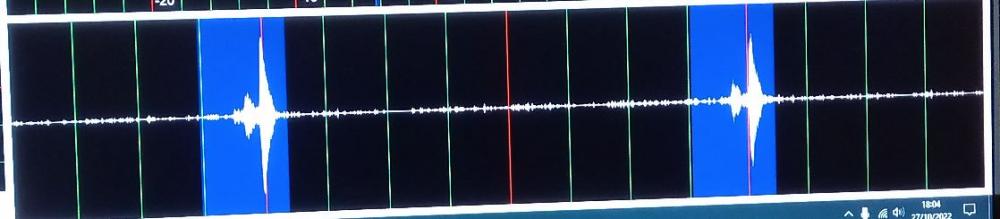
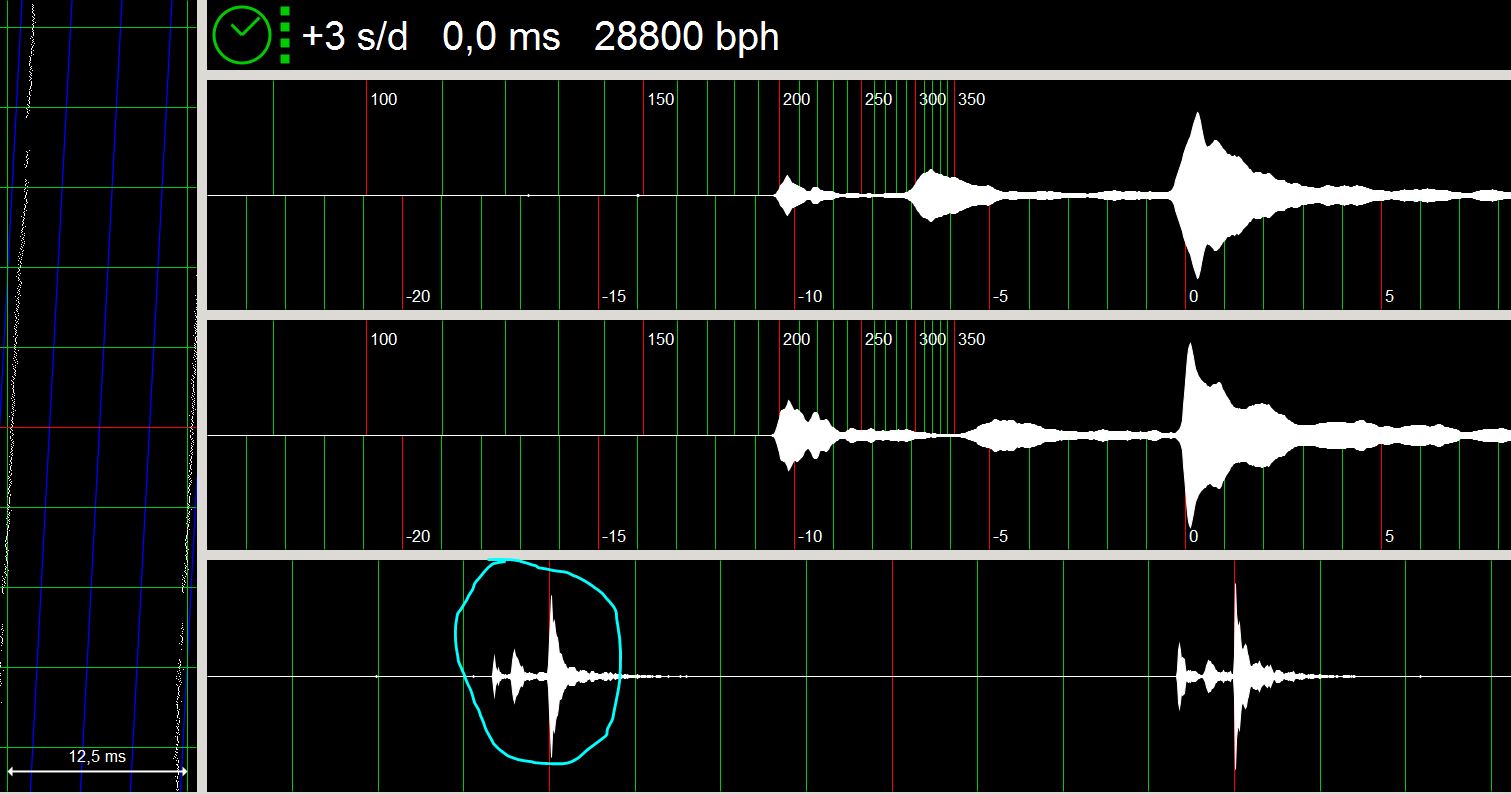
first step in timing machine interpretation troubleshooting is to troubleshoot the timing machine. The most important aspect of whatever you using whether it's an actual timing machine like the Chinese 1000 or the 1900 or in this case a software for the PC or a phone App the absolute most important thing is that you get a good clean signal. While the ticking sound of a watch is an audio frequency range the timing machines themselves the pickup is actually picking up the vibration of the ticking not the audio. Most things that are not timing machines have microphones that pick up audio sounds that are not actually designed for timing machine use. So whatever you use has to pick up the signal correctly or we will have a problem. then yes you really do have to understand all of this if you would like to interpret the results of your timing whatever. Because until we get a timing machine with artificial intelligence that will just tell you what the problem is you do have to understand. Otherwise as I said you will have a problem and I will explain farther down what the problem is. then we have a really nice video wasn't specifically designed for the purpose that I like the use it for it was designed this show us how wonderful their new escapement is but in order to show you how wonderful it is they have to show you the lever escapement which works beautiful for us. then the video shows everything is being absolutely perfect which works well for learning point of view unfortunately a real life the waveform isn't always as perfect as this but it is really nice for training purposes. So skip ahead to about one minute and two seconds we get to the lever escapement . You can see is the balance wheel is rotating the roller jewel is crashing into the fork and generates sound number one. the absolutely most quiet sound of the ticking and its key to everything if your timing whatever is going to work. then for the middle signals number two and three no notice they overlap to certain degree. Then in most drawings of the escapement oscilloscope they will overlap these to one signal so typically LC three signals one reality we notice five because the overlap. now we get to the next most important to locking sound which is number four finally crashing into the banking pin. These two of course overlap to certain degree. ideally should watch the video more than once there might be a test later on. https://youtu.be/g5c5RK4WFV8 then I've attached a whole bunch a images and a PDF while we continue our education into interpreting timing machine results. from the witschi PDF two separate images where of course the waveforms are consolidated to three each rather than five and they show the importance of two of them. The roller jewel sound is number one key to everything. Then if you want have amplitude you need the fourth sound and you can measure amplitude looks pretty simple. the notice in all of this so far we've been using the oscilloscope to look at things and unfortunately on most timing machines you don't get around oscilloscope. Although on most timing machines you don't typically need on oscilloscope because typically they pick up the signals correctly and typically will show you the correct results. Fortunately on our application for the PC in this discussion it has an oscilloscope and let's see what we can learn from that first I went online and found another image somebody else's and notice on the oscilloscope I circled it looks pretty darn perfect. We see three clear signals and nothing in between absolute quietness. This is ideally what were looking for. now we can see aware having our oscilloscope for your timing machine is really important let's snipped out an image for up above and compare with everything we've learned. We know that ideally background noise should be nonexistent and we see a lot of background noise if that is of high enough level the timing software might think it's a valid signal or? In other words it might interpret it as a problem in the watch something making noise that shouldn't be making noise and of course it could show up as random dots on the screen. Then the number one key signal doesn't appear to be super clear to me if it's not clear to software then your rate is going to be all over the place especially if it varies a little each time in other words you can't consistently trigger off something that it has to trigger off of. Of course if the rate is wrong because it doesn't get a nice signal amplitude will be wrong and basically everything will be wrong all because of a signal that's not quite correct then mentioned there was a problem of what if we do not get a clean signal? It may be we don't get a clean signal because the watch is having issues and running really poorly or we may not get a good clean signal if you're just not picking up the ticking sound correctly. The problem becomes where is the problem is if the inability to pick up the signal correctly or is the watch itself having a problem. We've done this a couple of times with people with phone apps where the problem was really in the app and the microphone that wasn't designed to pick up ticking of watch sounds. As the image I found online shows the software can work it just has to have a proper pickup that gets the correct signals otherwise we can end up with a situation like this of is that the watch having a problem or is it the software having a problem? Witschi Training Course.pdf
 1 point
 -
Hi was there as washer on the hour wheel when you first started . When the dial is on the dial washer curves upward and is pushed down with the dial therefore holding down the hour wheel and canon. before you start bashing things try a dial washer and see how it goes with the dial on. One assumes its the right hour wheel and canon pinion, have a look at Ranfft site for the omega 711.1 point
-
That doesn't sound right ! How does the hairspring look at the regulator pins? Are the pins correctly spaced, is the spring pushing against one of the pins, is the hairspring vertical (not twisted) at the pins?1 point
-
Hi Somewhere in the dark recesses of my mind I seem to remember our Seiko expert jdm mentioning some of these watches (orient) were only for the japanese market, I may be wrong and maybe jdm will respond. I had a look for the techsheets but there are none at all around for the 76XX series so far. For the wheel to rotate properly it needs a bearing point, and having no decernable pivot I find odd to say the least.1 point
-
Can you post a readout from the timer?1 point
-
No, I was not sarcastic...truly questioning. Vulcain appears to be in somewhat of a revival state. I have a sneaking suspicion that they are still using the Cal 120 platform. Next question...will they sell parts to anyone?? It would be great if they did. If I may inquire...what did they charge for the spring. I bought one in 2021 for 20 Euro.1 point
-
Yes, but you would have to source a "day" wheel. Just a quick look on eBay suggests that you're going to have a difficult time finding an affordable "donor" movement. Good luck!1 point
-
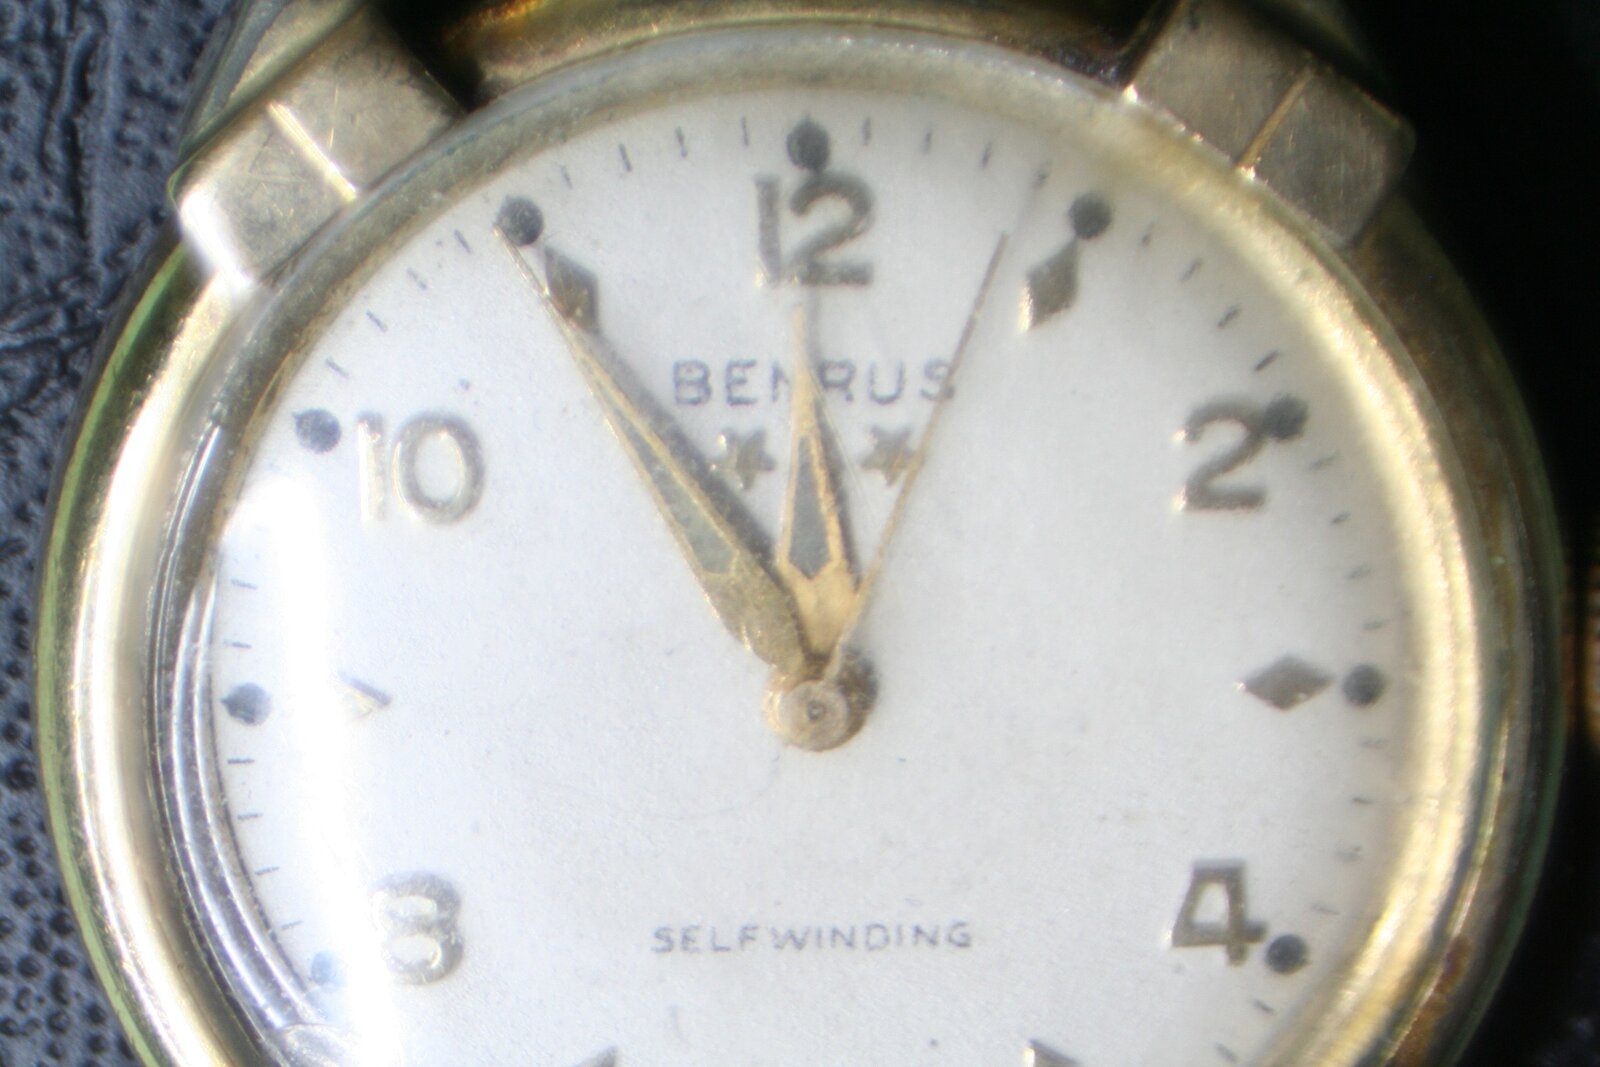
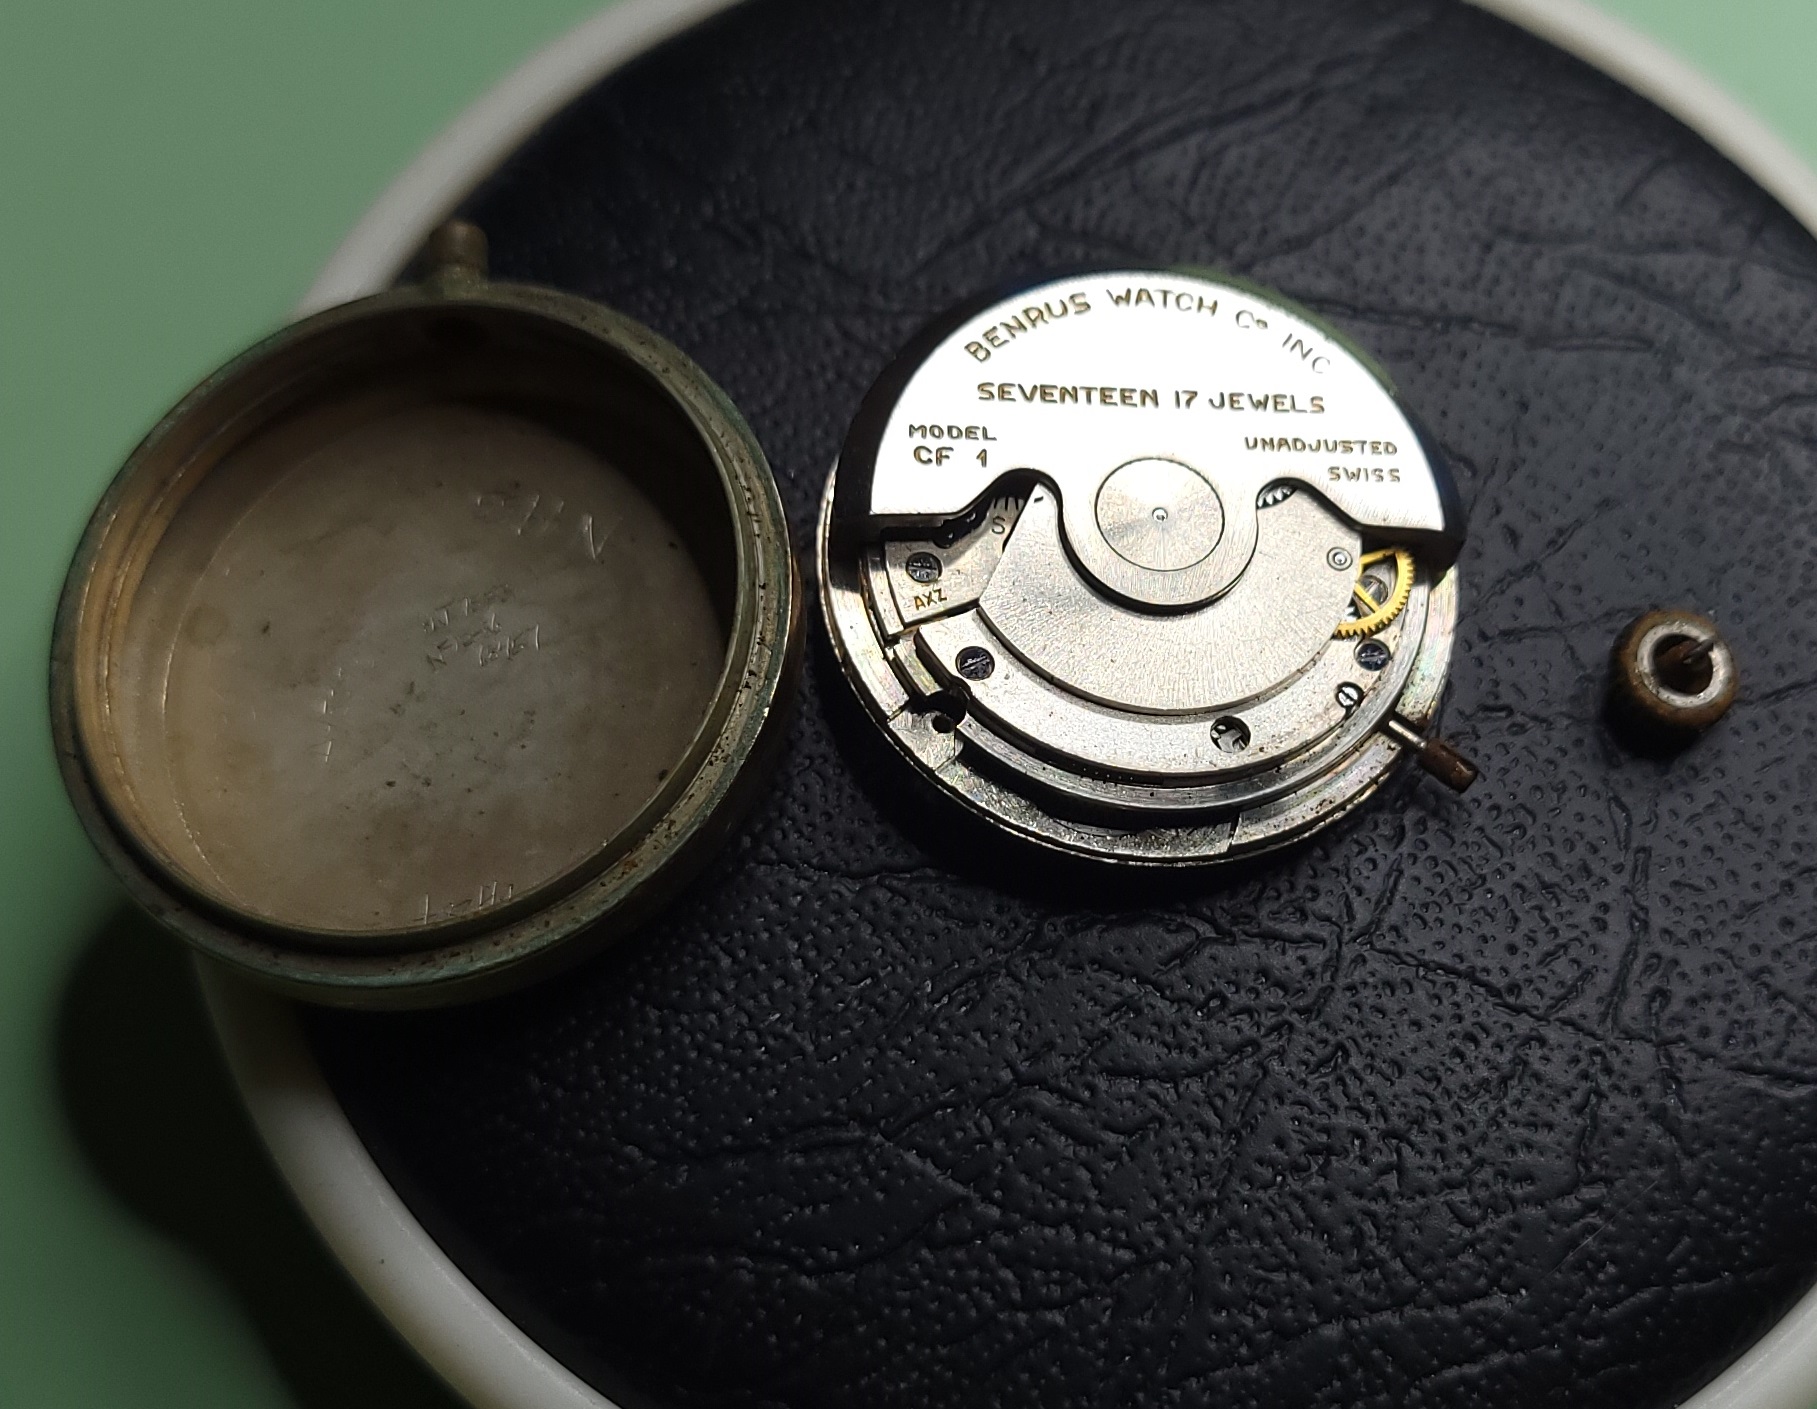
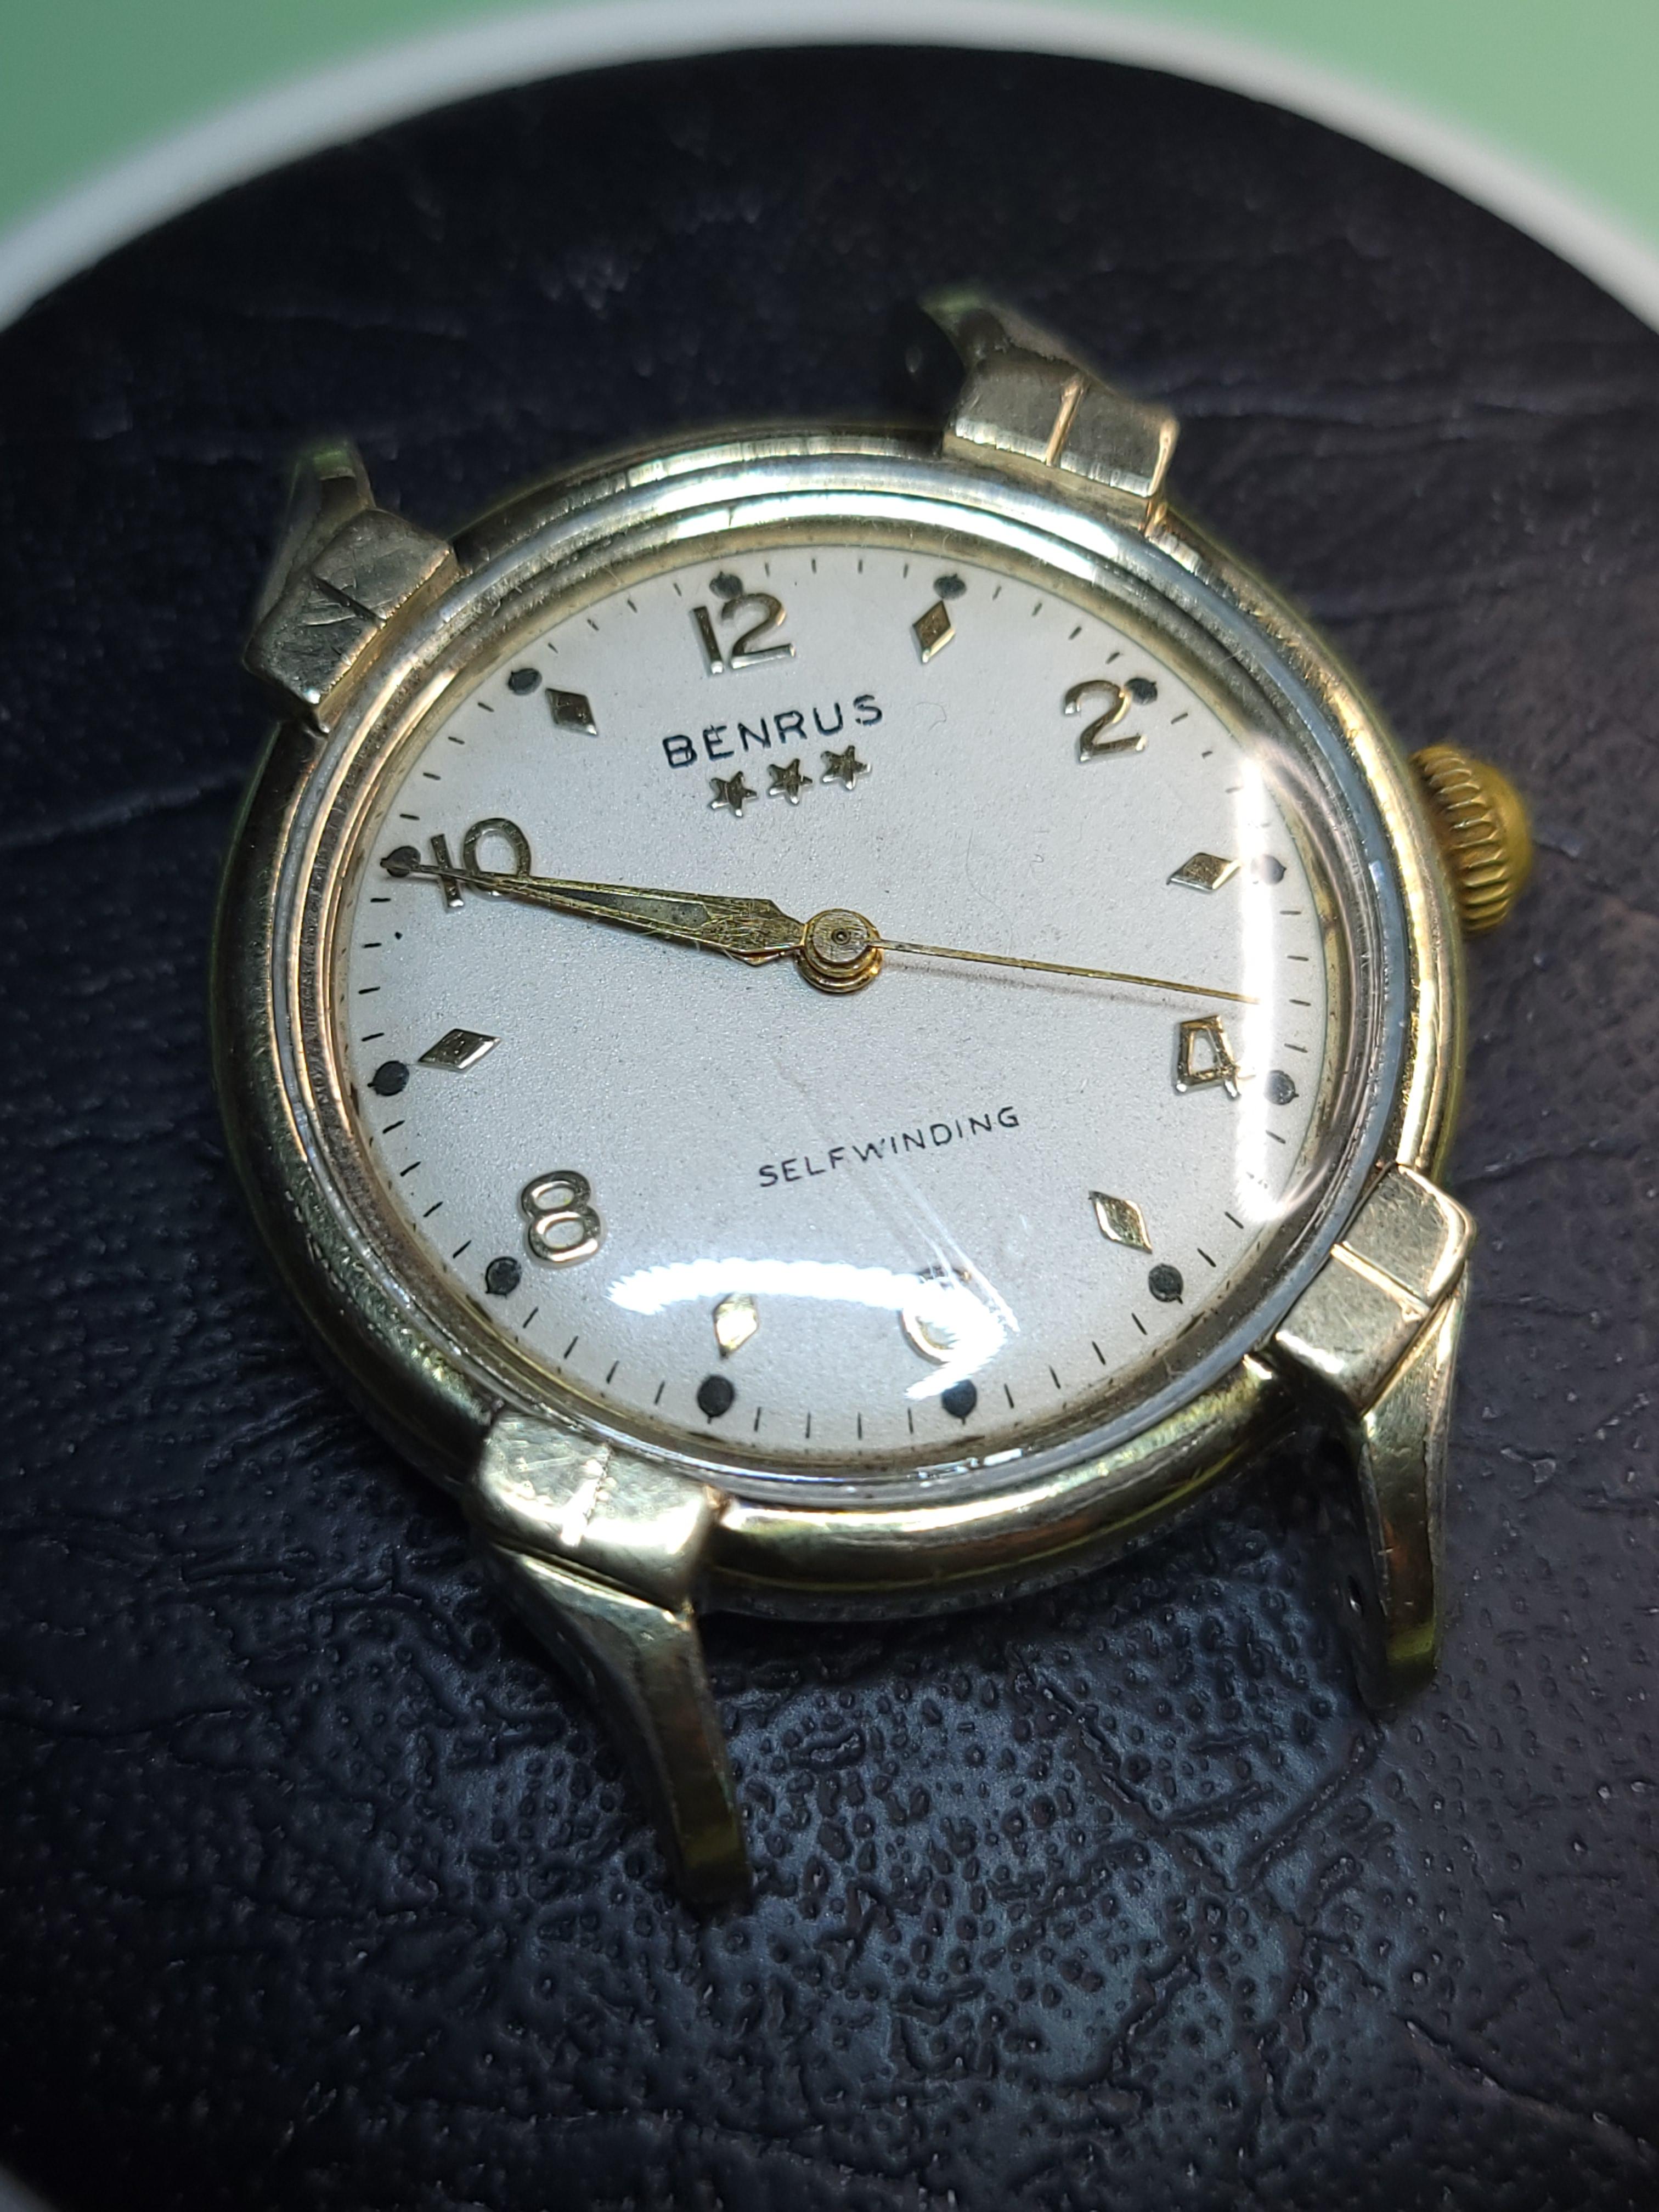
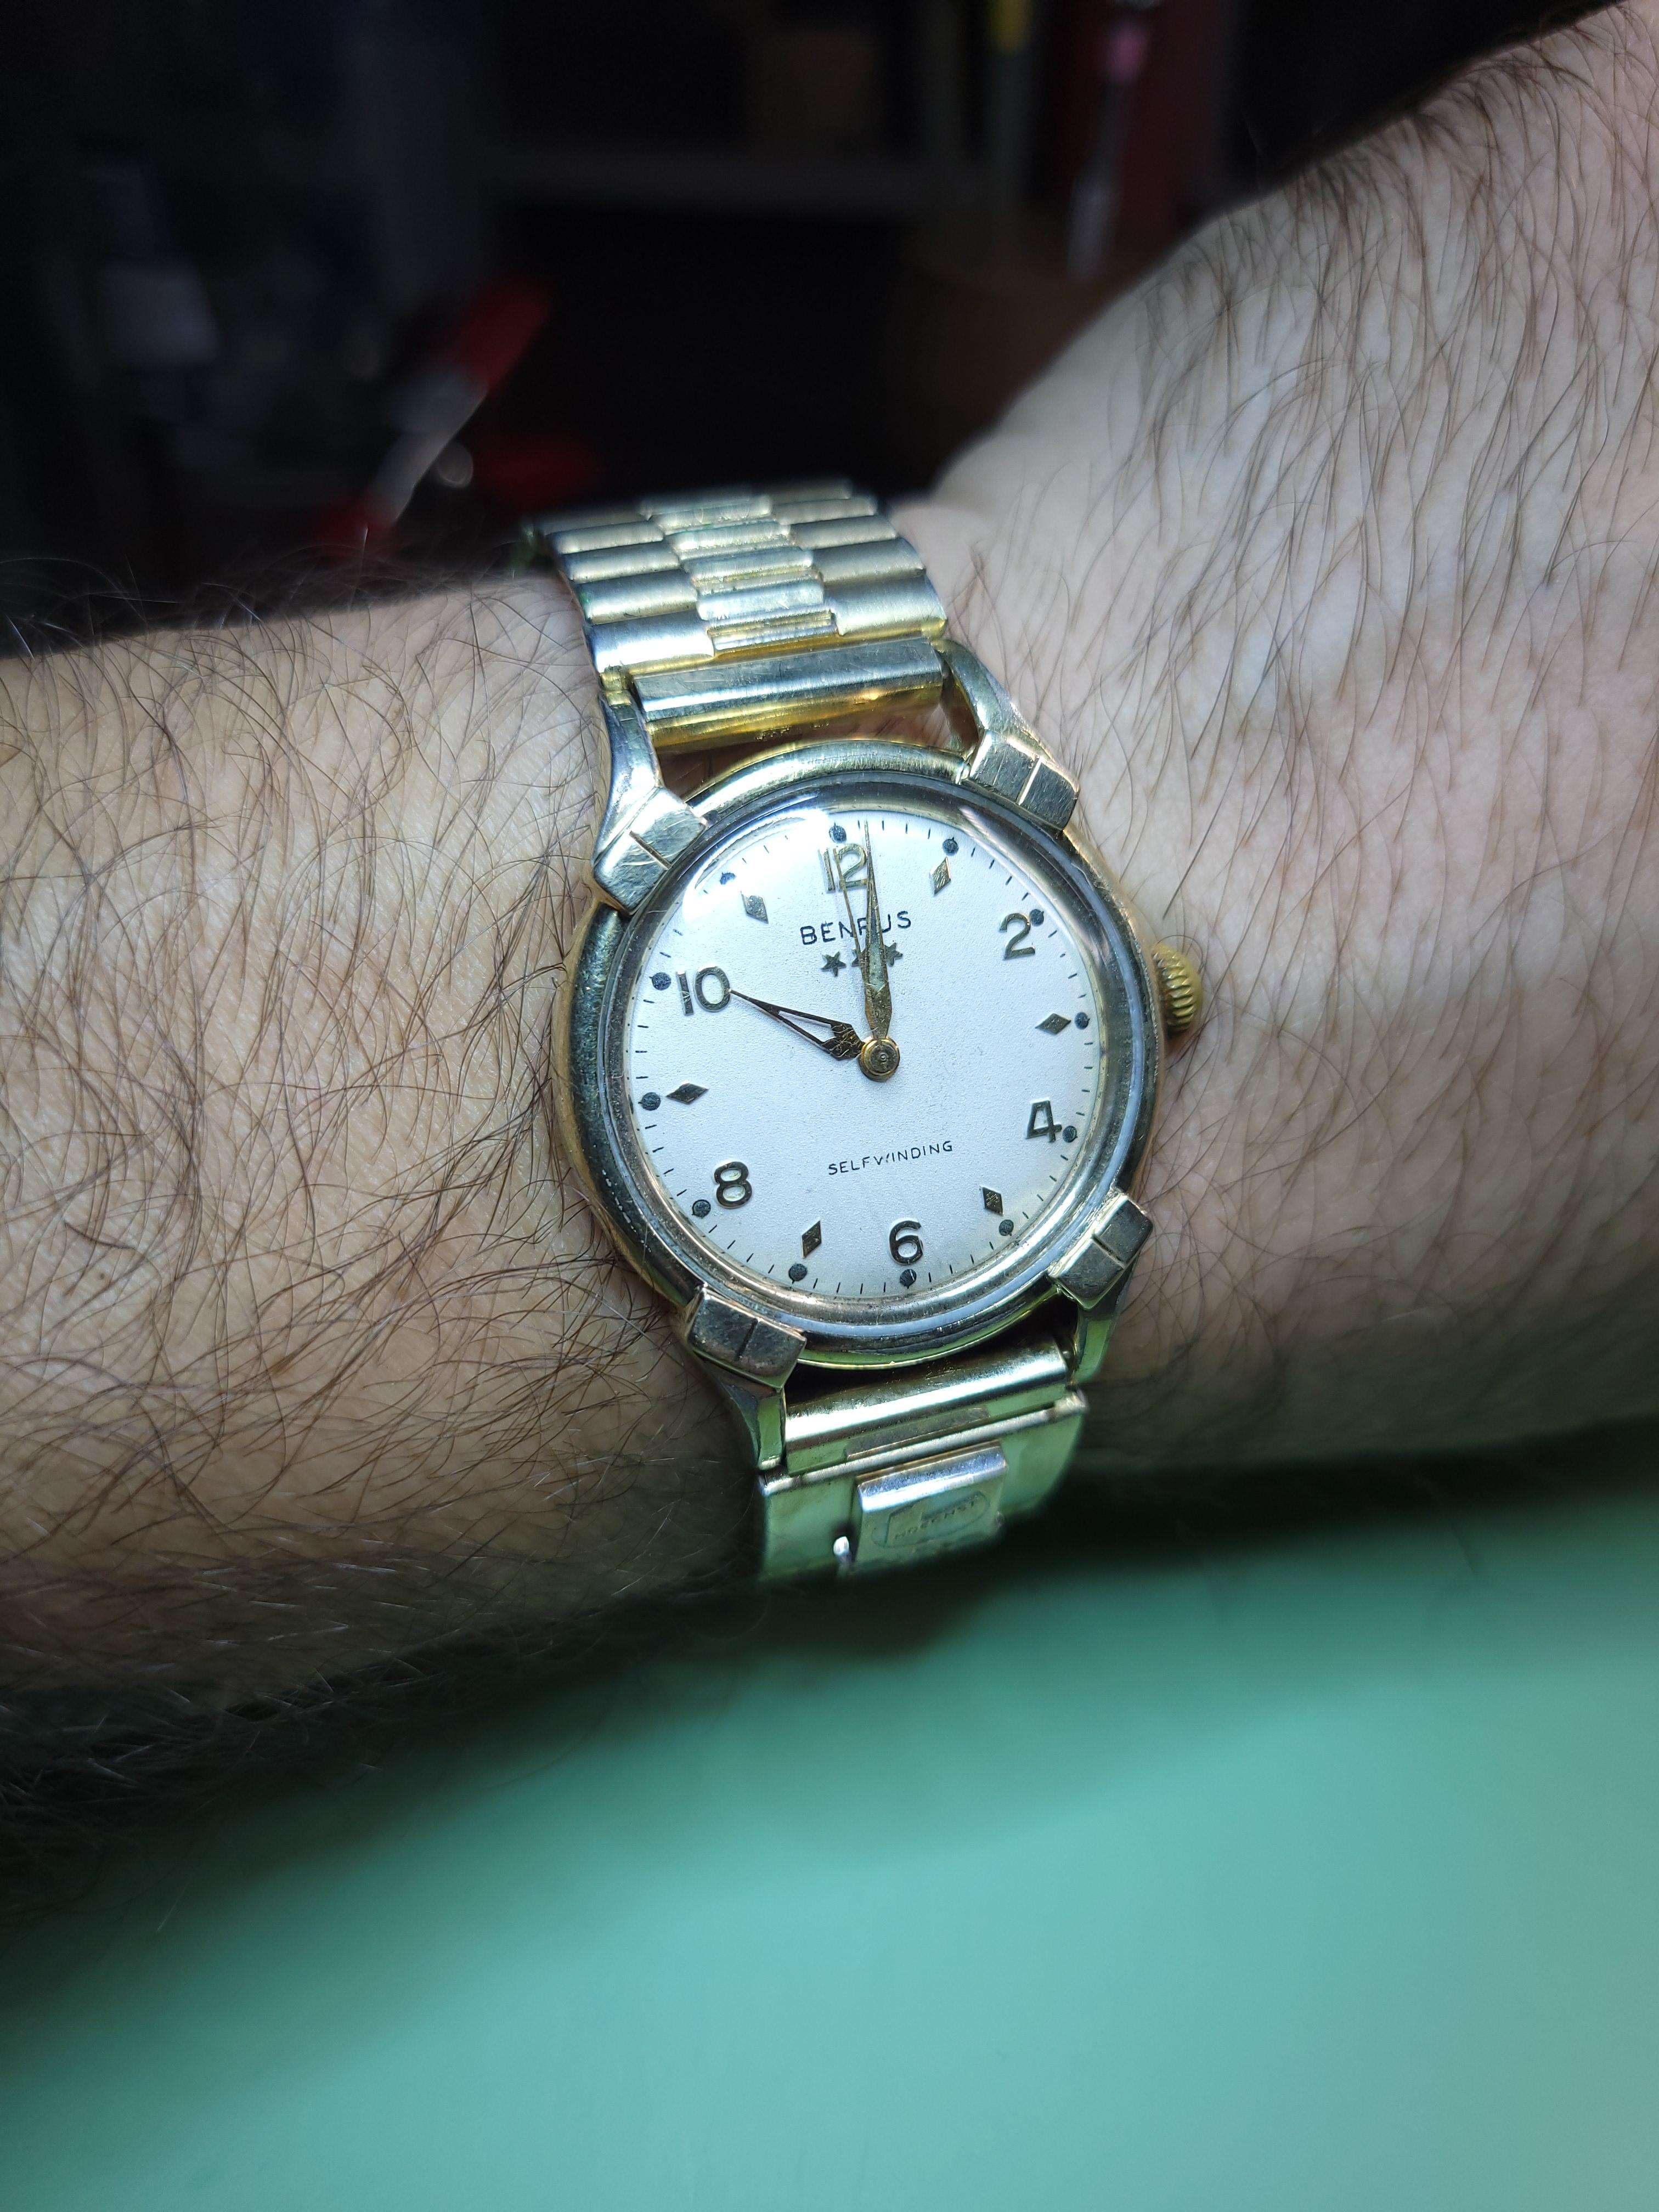
Picked this guy up from a local jeweler who said he didn't deal in used watches, but had this lying around. For $30, I had to take it home. Non-runner, turns out the upper escape wheel hole jewel was badly cracked and destroyed the pivot. New escape wheel, mainspring, jewel. I also bought the mainspring sliding attachement, not realizing it came with the mainspring. As well as the ratchet wheel, when I meant to buy the crown wheel. It's a learning process Getting the new jewel in the right place was quite the test of patience, but in the end I think I won. The timegrapher reading is right after I got it back together, just to get an idea of where I'm at. I know the amplitude is a little low, but I'm hoping an overnight run to let everything settle in will help. I'm also waiting on an Elma antimag from Cousins to demagnetize the movement. But overall I'm really pleased with the results and kinda proud of myself, and thought I'd share, maybe to inspire other newbies like myself. I'll post up once I get the case cleaned and all back together!


 1 point
 -
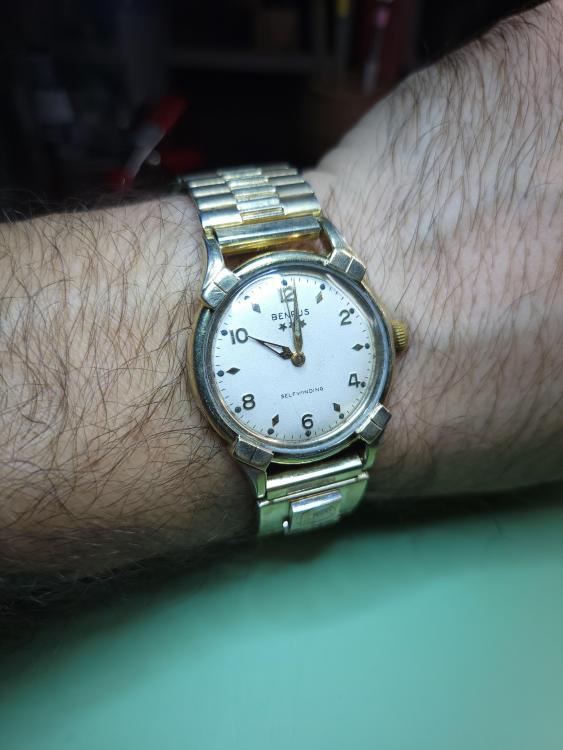
Well this sure cleaned up nice! I need to tighten up or replace the split stem, and definitely regulate it better, but for now it'll be a nice daily wear for a little while.
 1 point
 -
10 month in Hello again to all. Just an update on progress of a beginner. And a few observations. I began in December 2021. My wife has 3 old pocket watches. That are dead. “I know!” I said to myself. “I’ll fix them”. I’ll look up on the Internet, and it will show me what do do. I’ll buy one of those watch sets and Bob’s your uncle (English saying). All will be well. The set arrived. I pulled the watches apart. What am I looking at? Don’t know. What do I do? Don’t know. How do I do it? Don’t know. Some Internet sites are doing repairs. I’ll buy a cheap watch that I can repair. Did so. I was not running. Now I have 12 watches and movement. None working. What goes where.? My weekly spends of £10 was going every week and nothing to show. Nothing was ever fixed. What am I looking at? Don’t know. What do I do? Don’t know. How do I do it? Don’t know. Looking on the Internet I found YouTube. There is a plethora of sites where people show you what do. Not! In actual fact there a very few who are into showing their skills at the teaching level. Less that 2 dozen. That’s not many. All bar two are amateurs. There are many who show off. “I started last week, and this is how I have worked on a Chronograph, and it is now pristine”. Wow! I can learn from him. Not. But as you begin to understand you realise why you can’t. Their skill level they portray is way beyond even my level after 10 months. The ability to use tweezers correctly to remove and turn jewels over for cleaning for example. What did I do right. Well, I can say in my favour, I typed the words ‘watch forums’. I found ‘Watch Repair Talk’, and information about Mark Lovick. Wow! Cant afford that. Look elsewhere, Buy a cheap course. Did so. The video was made in 1987 and was converted from a 16mm Cine camera and it was about pocket watches. They did give me a refund. It took me over 3 months to save and buy Marks course. Should have done it in the first week. What he offered me was information and guidance. Learn the principles. Practice. Repeat, repeat, repeat. It won’t work first time. Redo. Practice. Where am I now. What would I do differently. In actual fact. Not much. Working my way forward has given me hours of pleasure. I subscribe to 22 YouTubers and eagerly open each. They are great to learn from. I spend almost the same time practising. Can I disassemble safely? Yes. Very rarely screwdriver slip or ‘ping’. Can I clean? Yes. Hand clean then Ultrasonic to degrease and wash twice. Can I assemble? Oh yes. Do they work? Yes.. ish. Need to practice to overcome low amplitude. Am I getting there. Oh yes. One of the things that I have been told by a number of people is quite correct, but as beginner it is totally impracticable to practice. Don’t start on movements, or dead watches. Trying to find the parts for movements means that you have to buy another movement, or more than one because the donor is just as bad. The dead watch is just as bad. Why is is bad? Because it is broken and needs a part. Buy a movement for the part. Back to square one. In hind site, it is the correct thing to do. But where would I now be? Most running watches are in excess of my months saving. I would never have started. But I have. And I have to say it is great fun. What information would I have helped me? None really, as this is voyage of discovery and you can only discover by error – practice. The best thing I have learned is, system. Have every tool in its place. Put everything away each time. Have a label on each box that contains the watches and note on it details what you have done or need. Where will I go from here? Deeper into the hobby. I’ve given myself two years to learn enough to service my own very expensive watch. I bought it in 1968 for my 18th birthday. Regards to all. Ross1 point
-
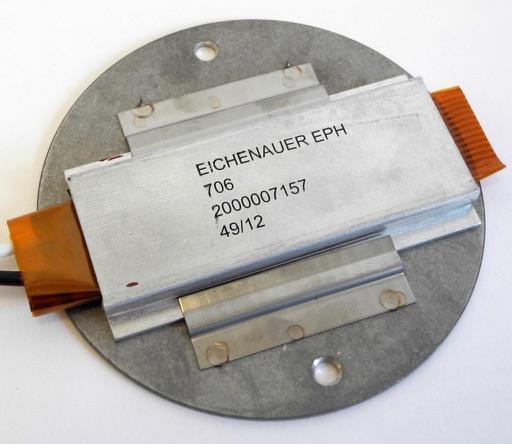
With the PTC Heating Element arrived, it was time for some metal bashing. Actually, it briefly got a bit more "high tech" that that. I needed to try and replicate the Elma Heater, based upon what the Elma spare part heater looks like from catalogue pictures. A quick estimation on my part seemed to indicate a mounting plate size of around 90mm diameter (the element being 75mm on it's long side). Where to sort it from? A quick conversation with an old work-mate turned up the opportunity for a catch-up and a bit of "metal bashing" for the cost of a light lunch. A bit of mild steel around 1.5mm think was run through his laser/plasma cutter in no time and I had my mounting plate. Once back home, it was drilled to attach the heating element. So that job done, now to mount it in the machine. In my opinion, it's not a bad replication of the original Elma spare part and I cannot imagine that it would be any less efficient. SO - if you cannot get hold of the Elma Heating element, all you need is a relatively cheap PTC Heating element, and a good mate with around £35,000's worth of plasma cutter!
.thumb.jpg.f706ad06f89a2f338f71a3d0a9822d69.jpg)
 1 point


.jpg.99680653f0cc3da5f2cf452efdf7b0cd.jpg)