Leaderboard


Popular Content
Showing content with the highest reputation on 03/30/15 in all areas
-
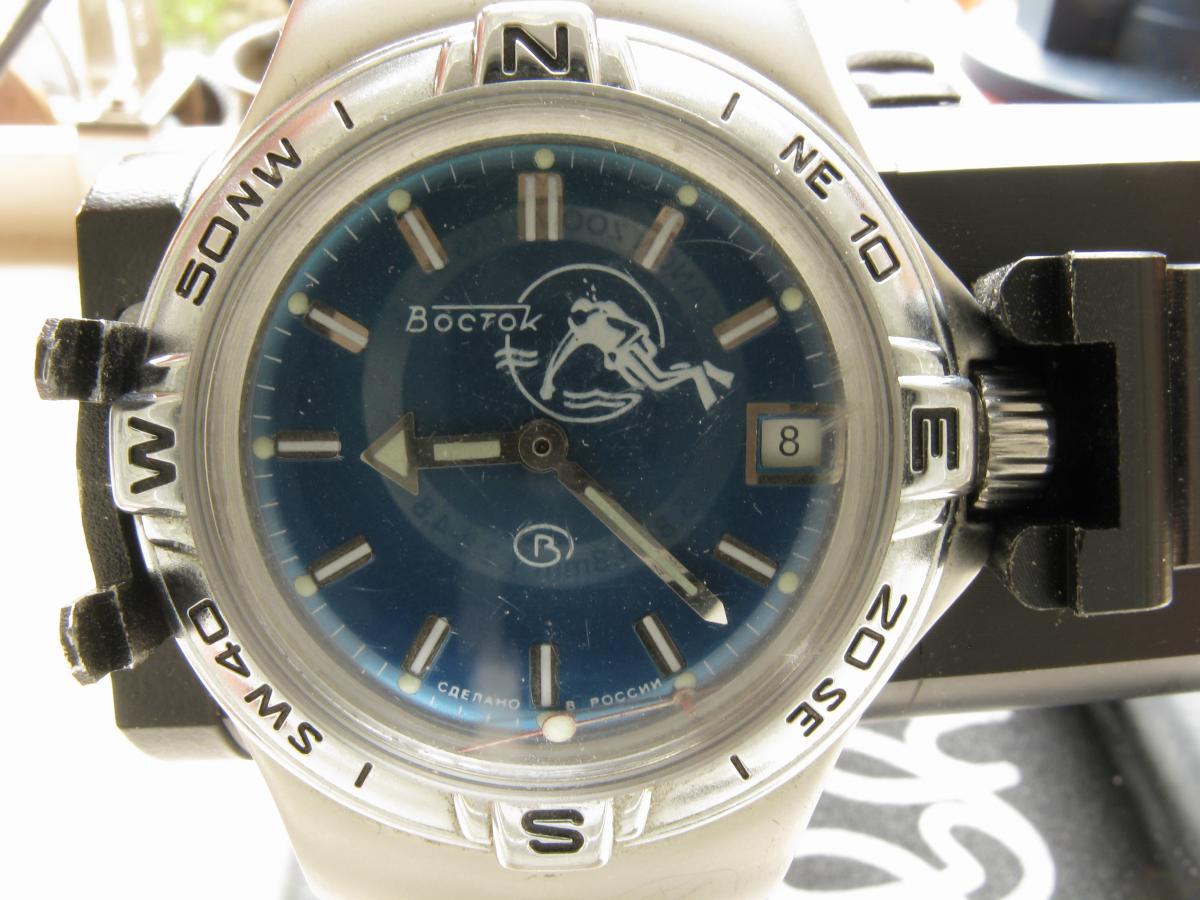
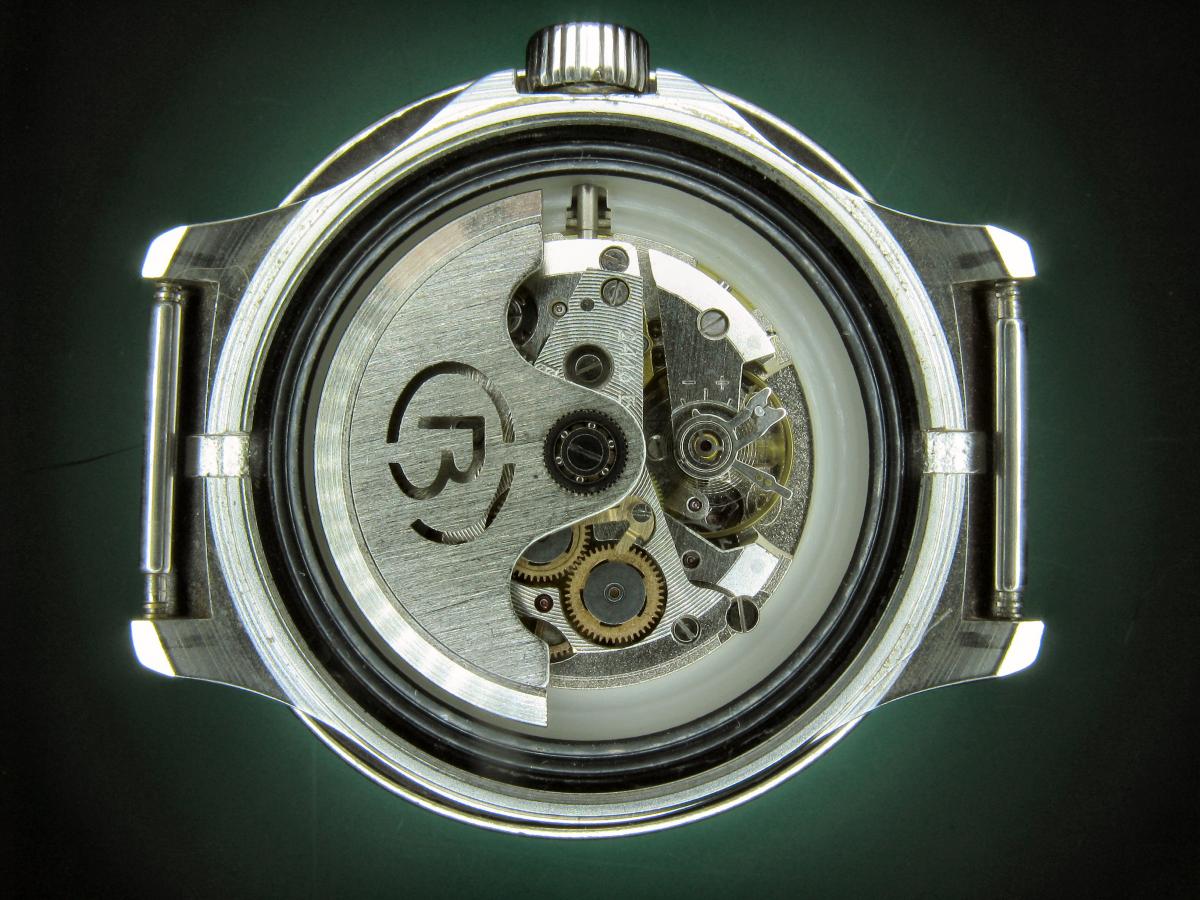
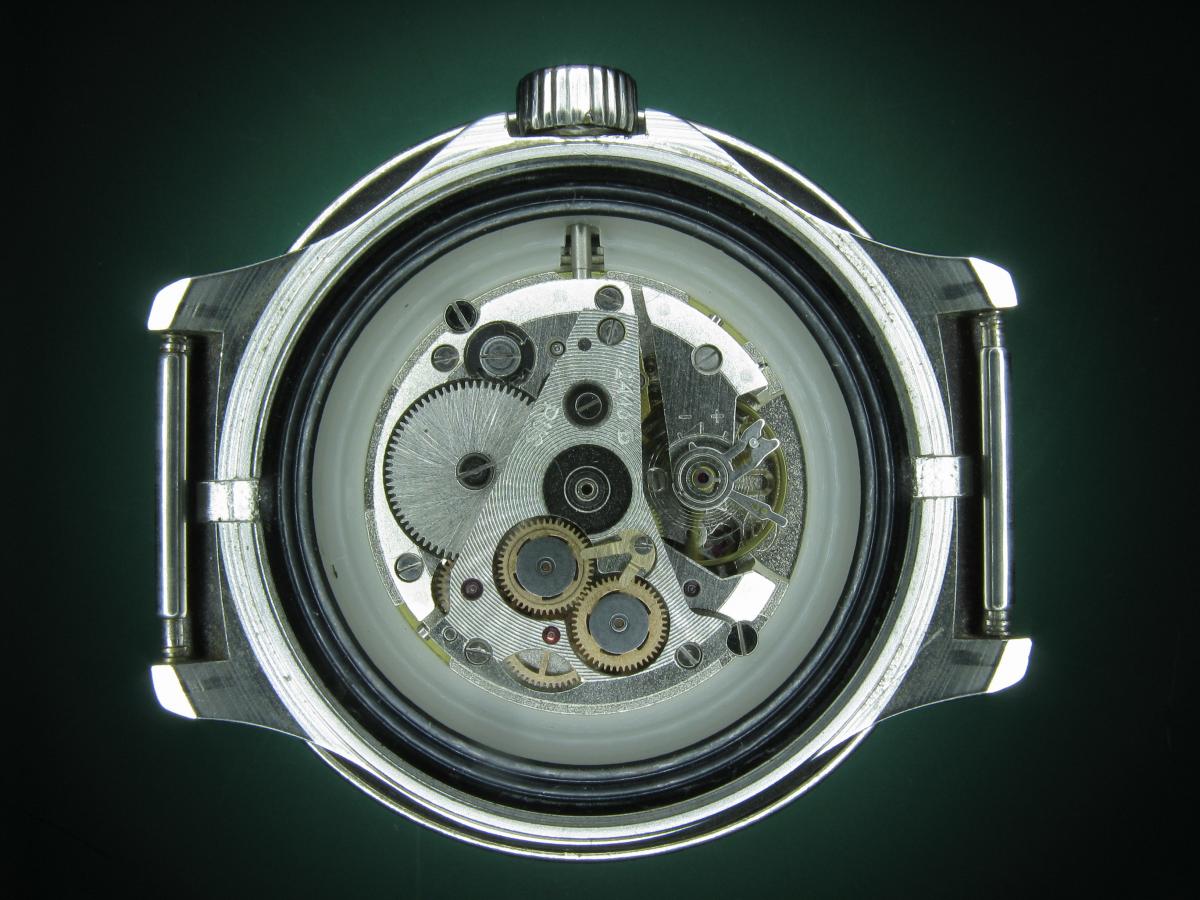
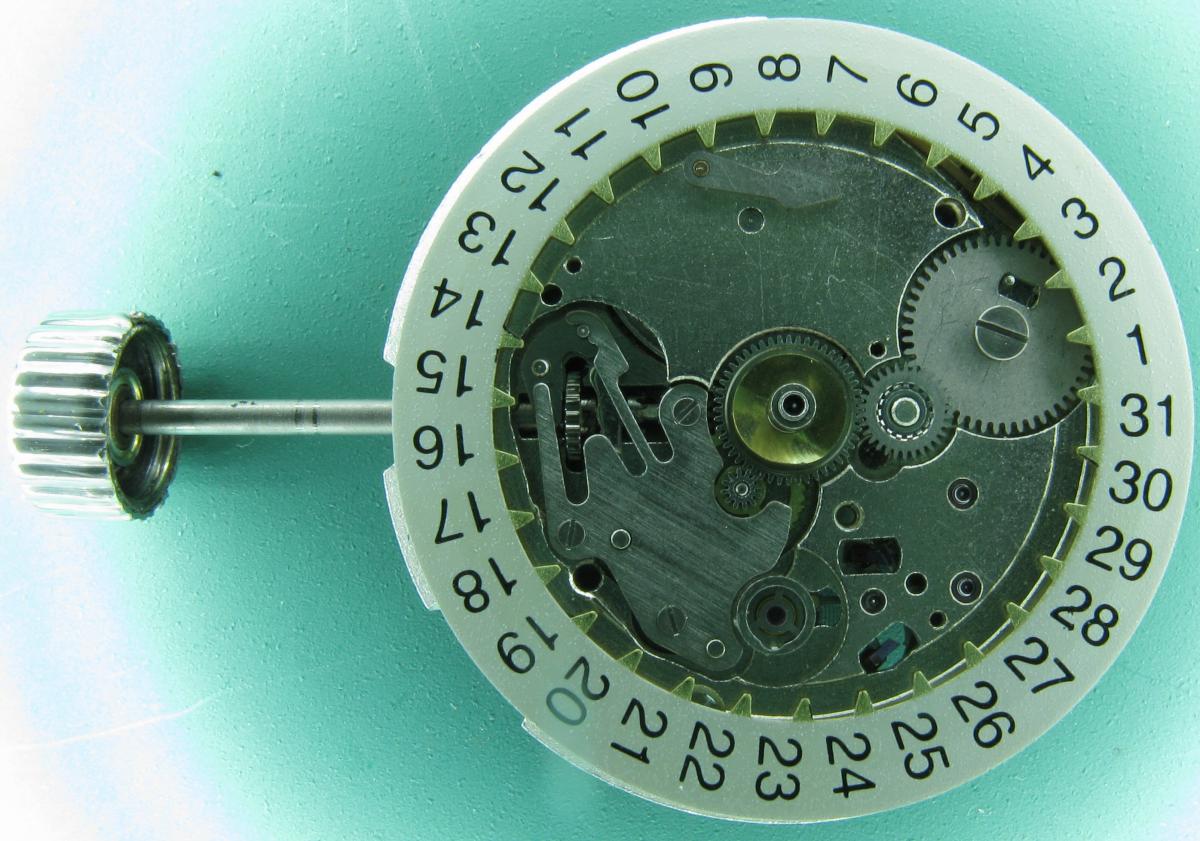
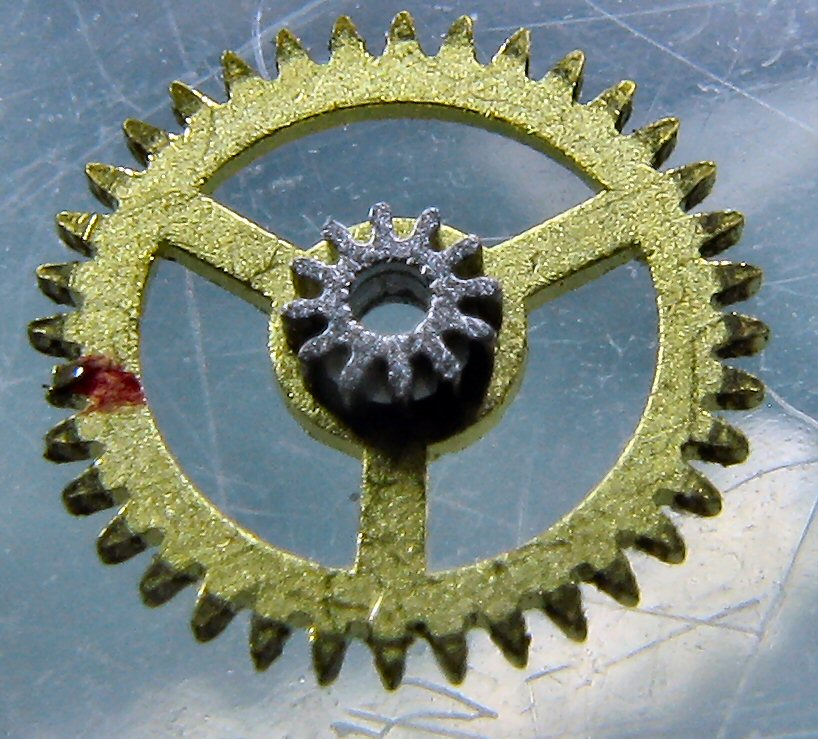
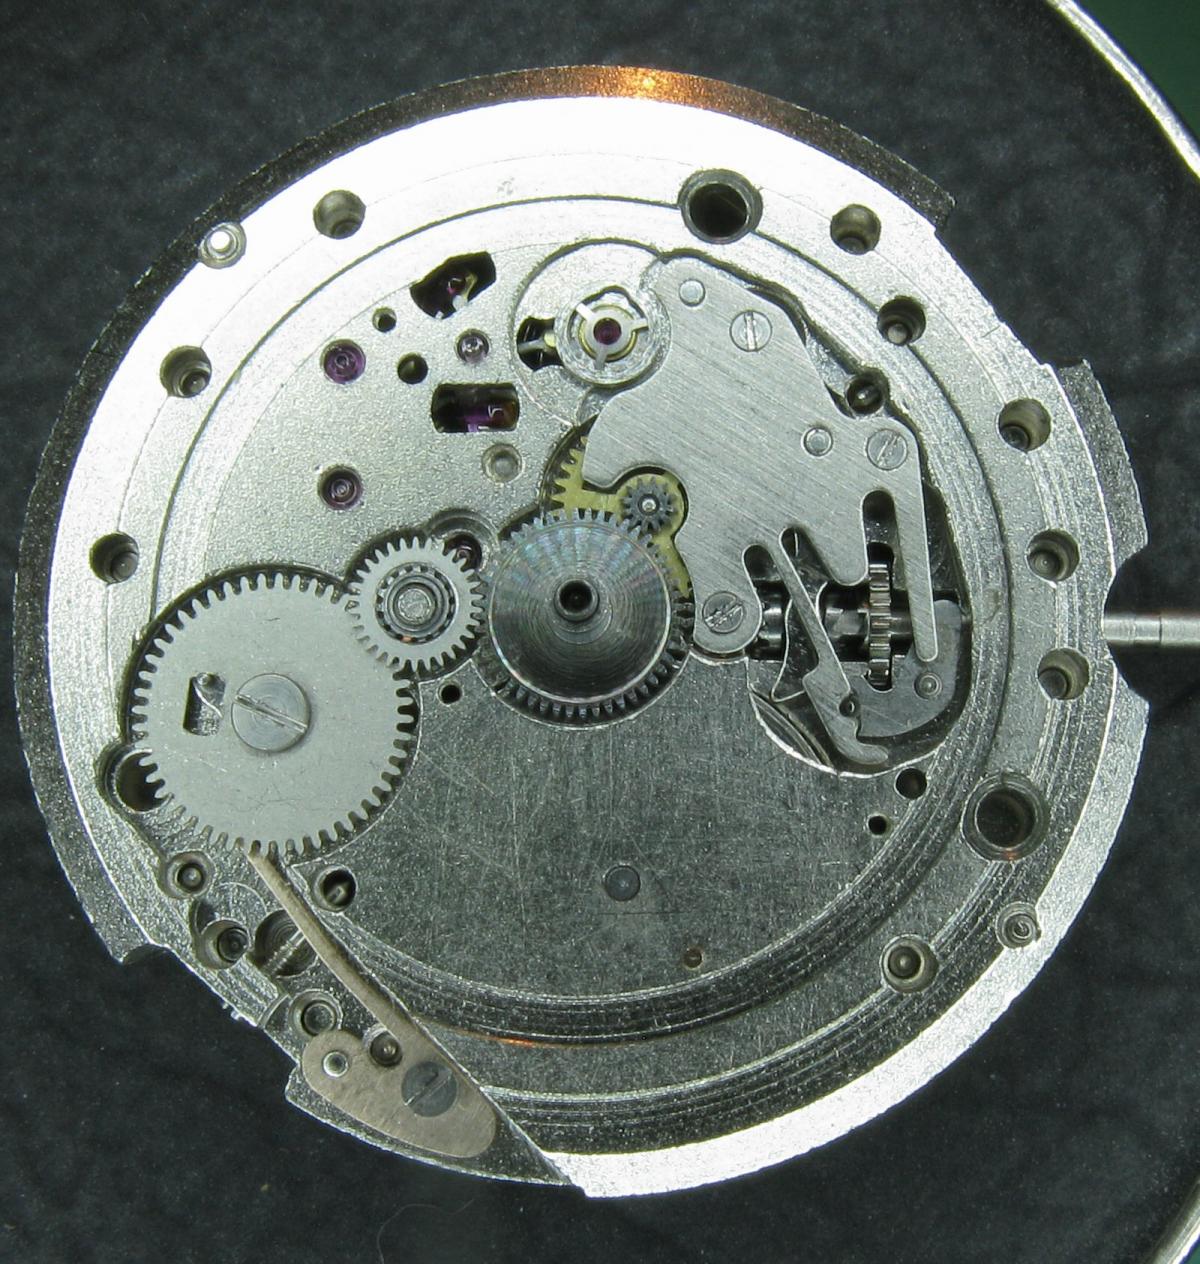
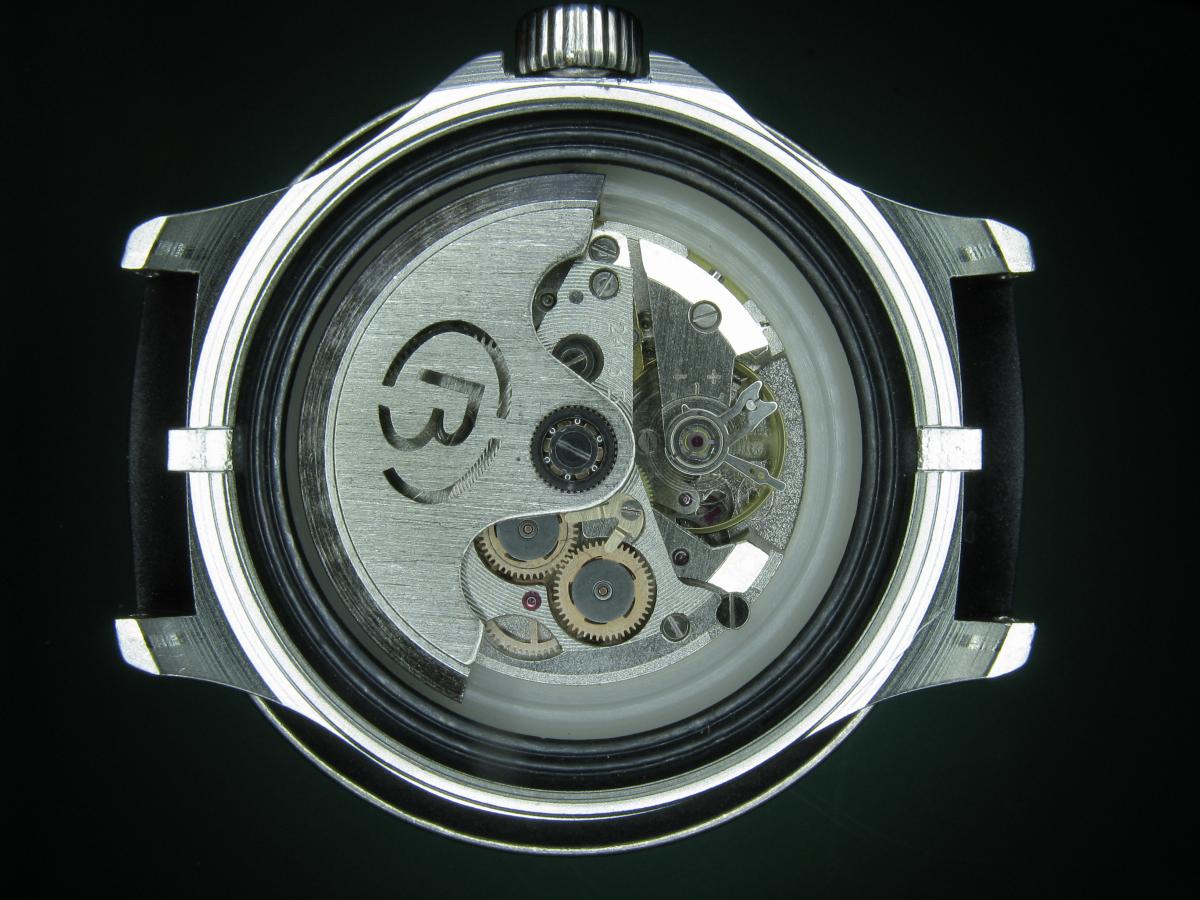
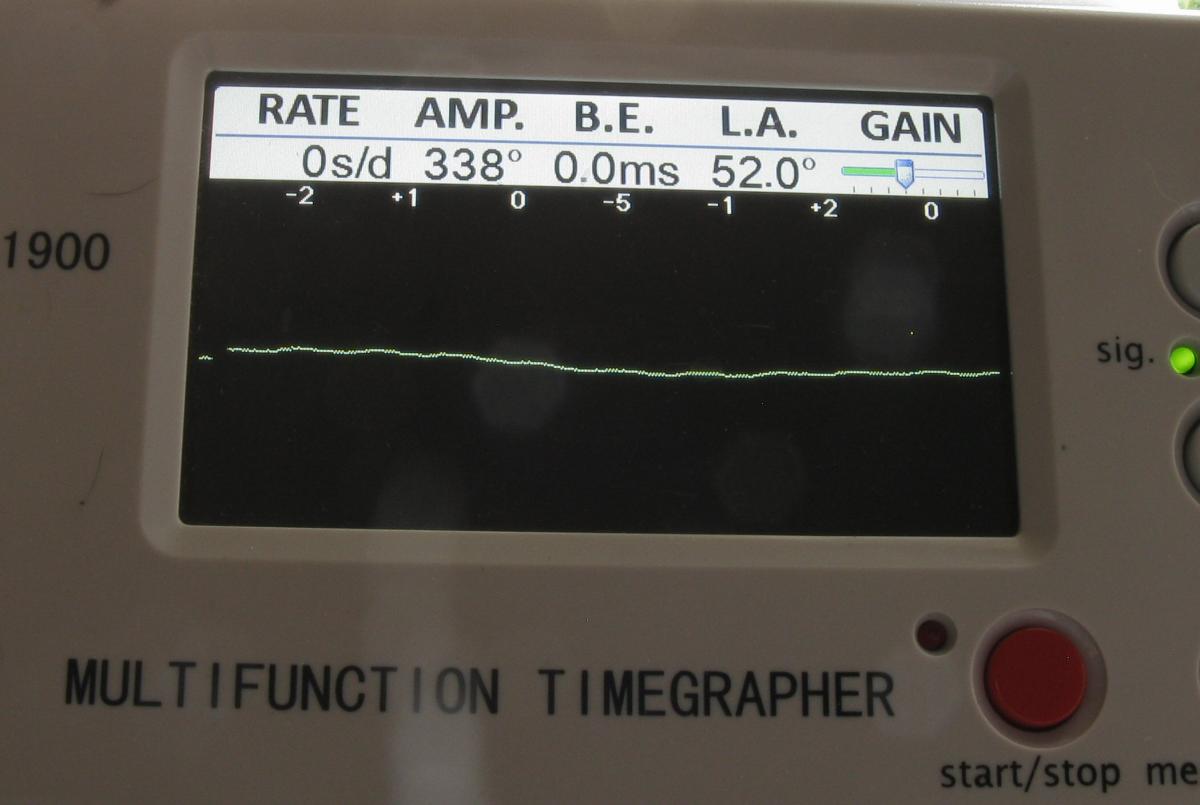
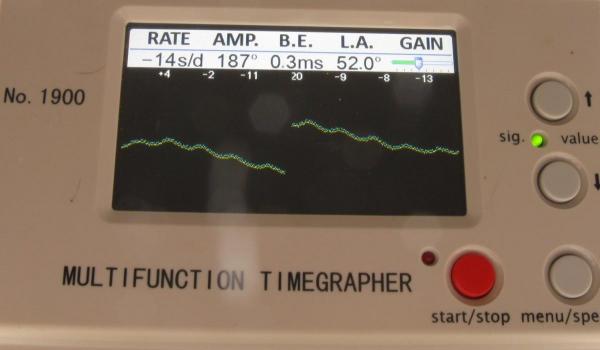
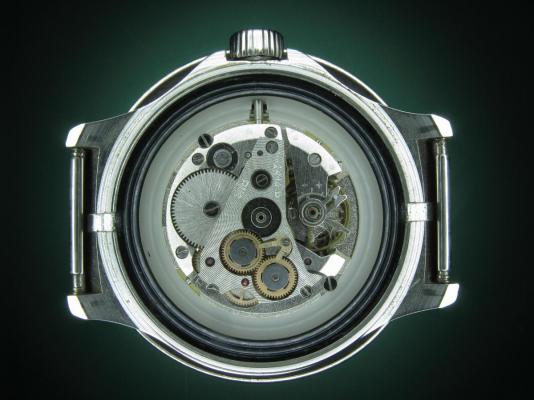
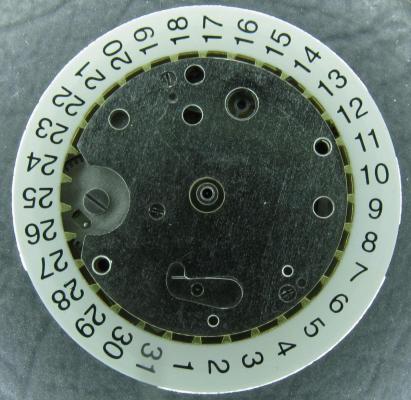
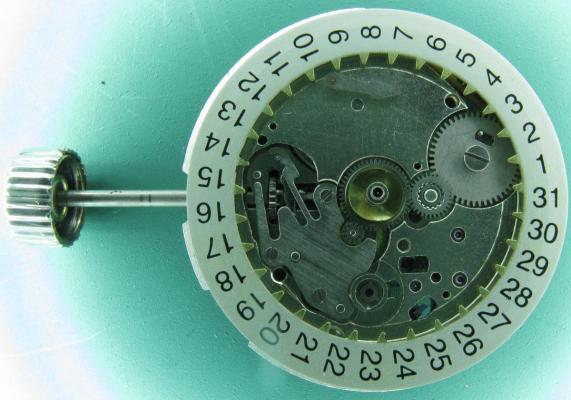
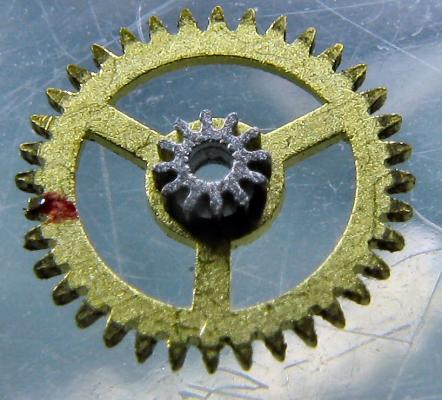
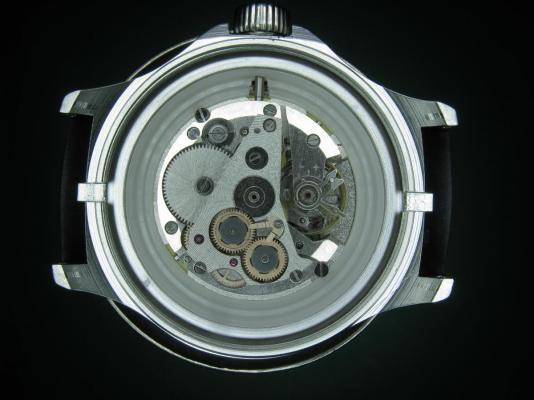
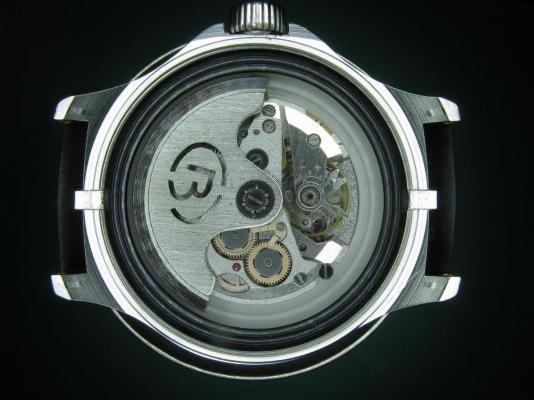
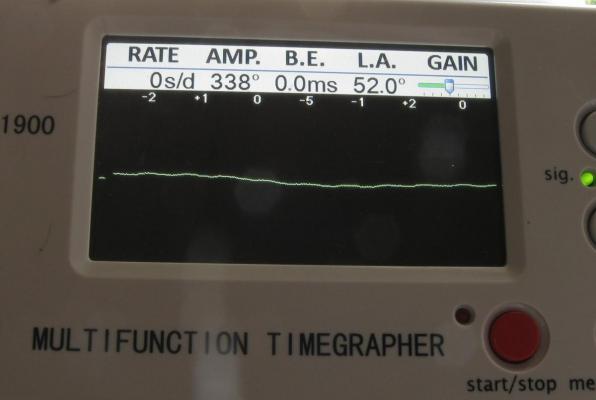
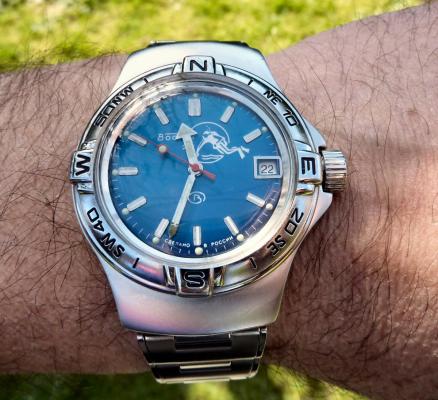
This is a bit of a departure for me as I usually like to play with stuff a little more vintage and a little more Swiss. That being said I have done a few vintage Russians in the past and this is a watch that I had been curious about for some time. I picked this one up at a car boot sale last summer for just £3 in a less than wonderful state. As you can see, the seconds hand was off and it was described a not running. It turned out that it did run, just not too well and the hour and minute hands didn't move. Canon pinion anyone? First impression with the back off is pretty encouraging. Still looking good with the rotor off. This is a 31 jewel movement, 10 of the jewels are inside those reverser wheels. Somewhat minimalist under the dial. With the calendar wheel retaining plate off you can access the motion works, the calendar works, and the keyless works. Flipped back over and with the auto-wind bridge out of the way. This is an indirect driven centre seconds hand which has a tension spring to hold the seconds hand pinion in place. This has to be supported when installing the seconds hand otherwise the hand simply pushes the pinion against the spring and won't install. Balance cock removed with the shim that the soviets are so fond of for adjusting end shake. Hair spring is in good shape. With the train and barrel bridges out of the way the going train is revealed in all its glory. Flipped over again to strip out the bottom plate and a problem comes to light. There is some damage to the minute wheel (marked in red ink). Maybe the canon pinion isn't the problem after all? In close up you can see the damaged minute wheel tooth. This I didn't think would be a problem, just replace it..... I thought. Not so easy as it turned out as I couldn't find anyone that could supply a new wheel, and a donor movement proved elusive unless I wanted to spend a fortune on a complete, working watch, which I didn't, so I had to wait for eBay to come up with a spares or repair victim at the right price, which it eventually did. The stripped out main plate with the balance and cock, minus jewels, ready for the cleaning machine. The bottom plate back together again after a good wash cycle in the Elma. At this point I did check the canon pinion anyway and it was as well that I did. There was virtually no transfer of power through to the hands at all so a suitable adjustment was made and a tighter fit achieved. Back in the case and ticking like a champ. The rotor and massive case back gasket back in place. And a much improved trace on the timer. This is with the original mainspring which turned out to be in very good shape requiring just a clean and relube. The trace isn't perfect by any means, but compared with other Russian watches that I have played with (and with it's starting trace), it's pretty good. There is still a hint of a periodic variation that I may investigate at some point but for now I shall just wear it and enjoy it. And here it is on the wrist after a bit of a cosmetic brush up. These are available with many different dial designs, apparently this one is referred to as a "SCUBA Dude". I have worn it for two days now and it has gained about 5 seconds a day so there is a little fine tuning to do to get it right "on the wrist". All in all I'm very pleased with this one. I had been curious about the Amphibia for some time having read a couple of articles detailing its history and design. It also has quite a large following of avid enthusiasts who rate it for both value and robustness. On the value front I can't complain with this one as the total cost to me was just £11 (including the donor). As for ruggedness only time will tell, but the performance so far is very impressive.


 1 point
 -
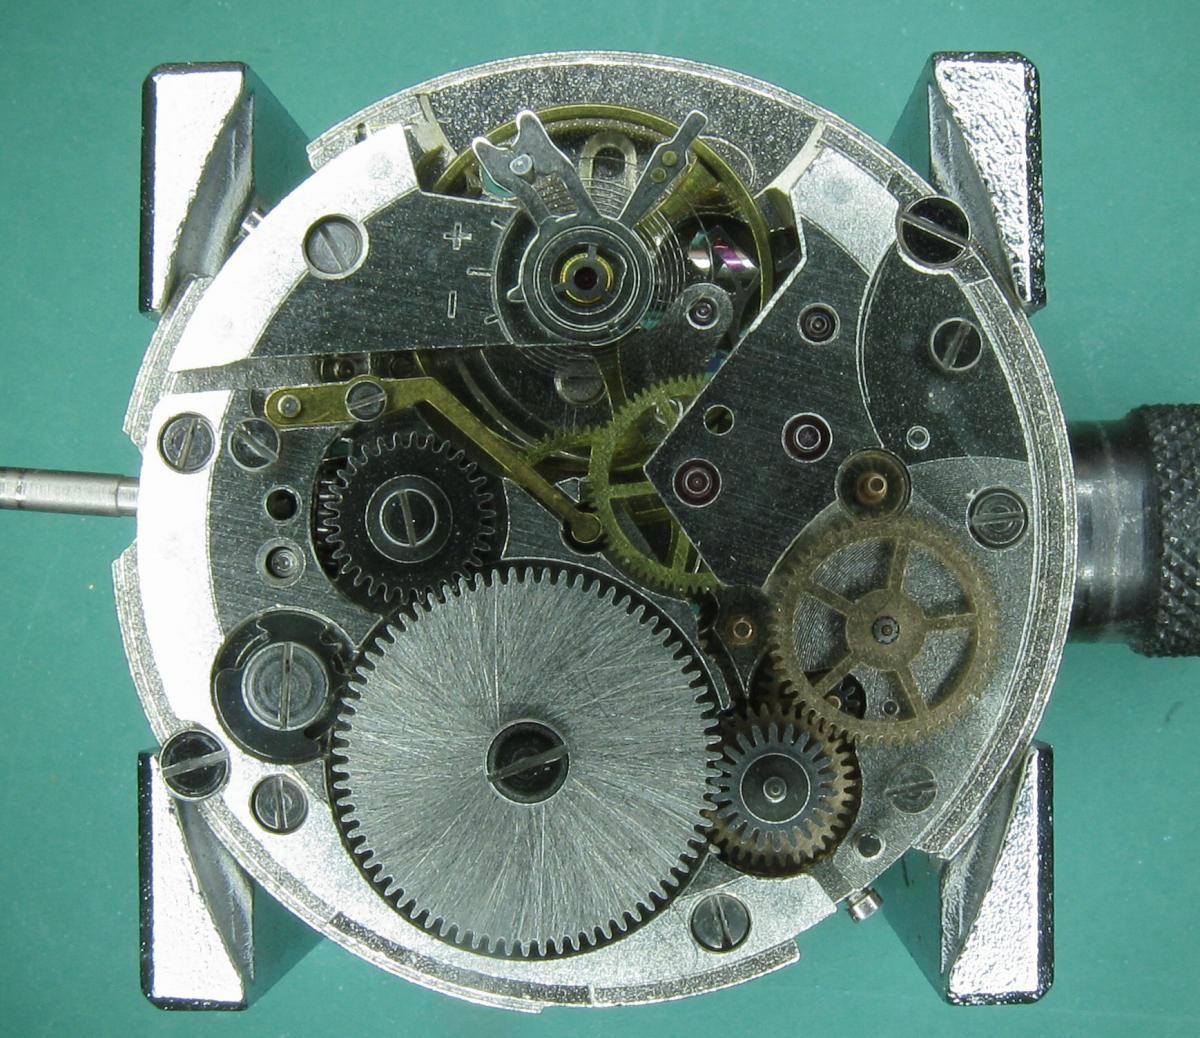
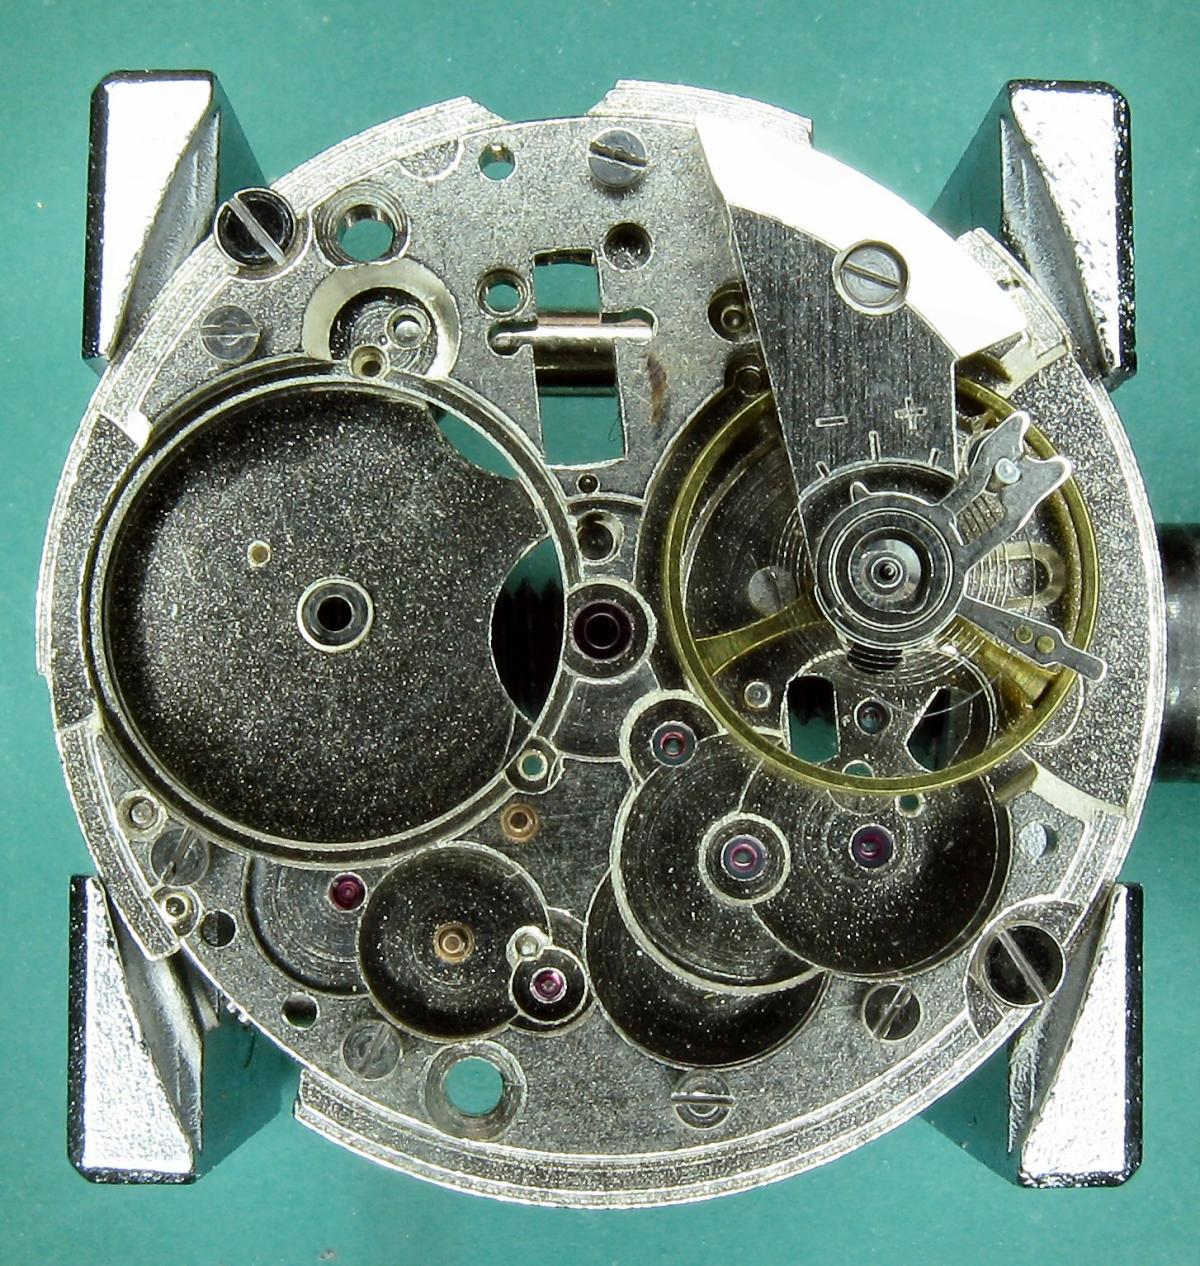
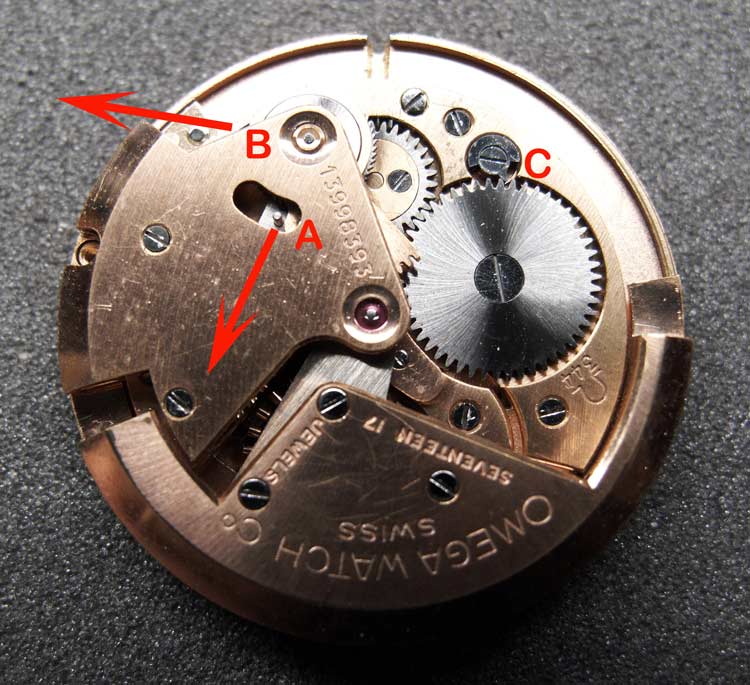
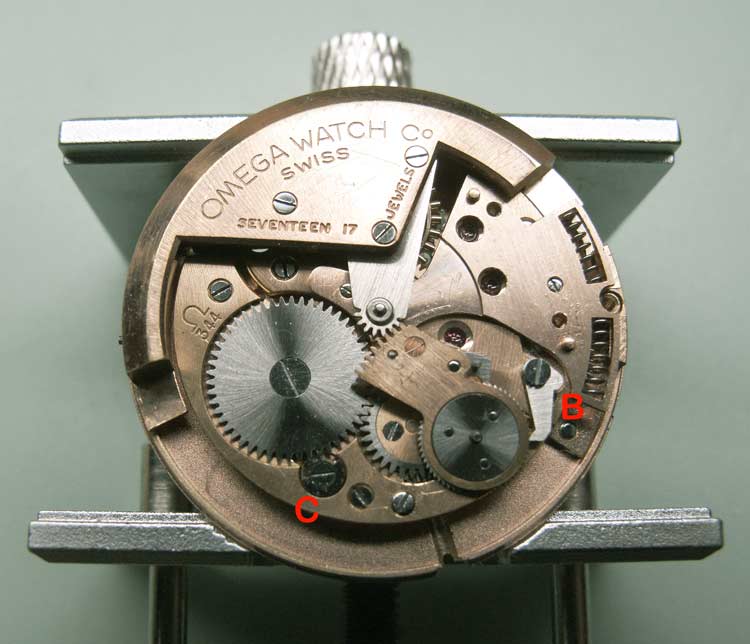
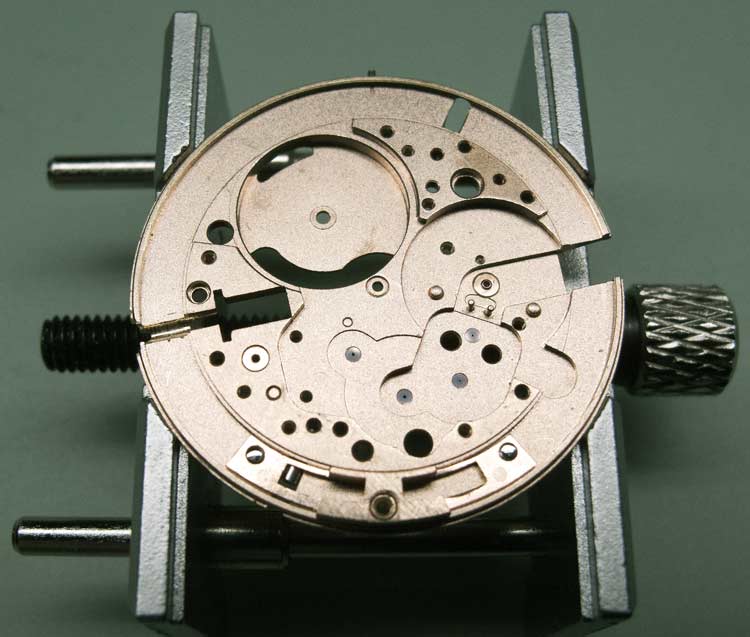
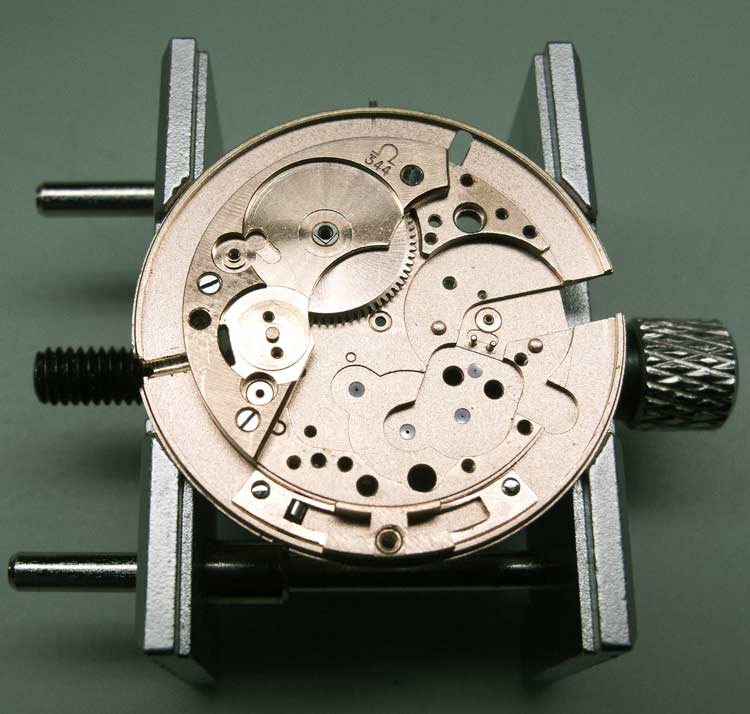
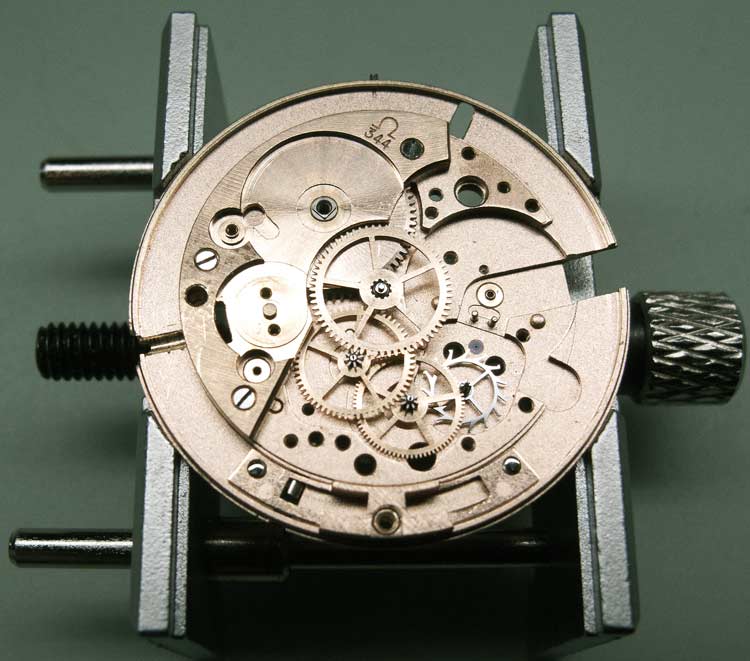
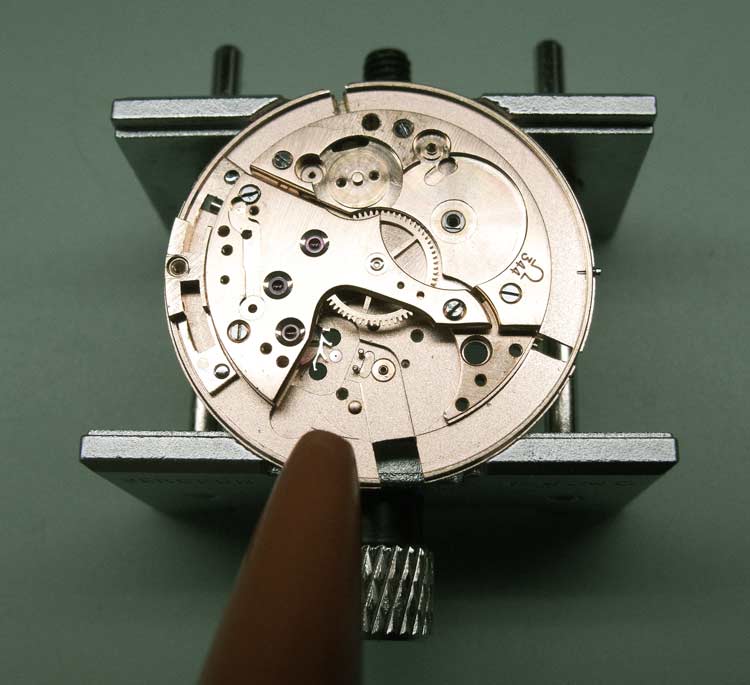
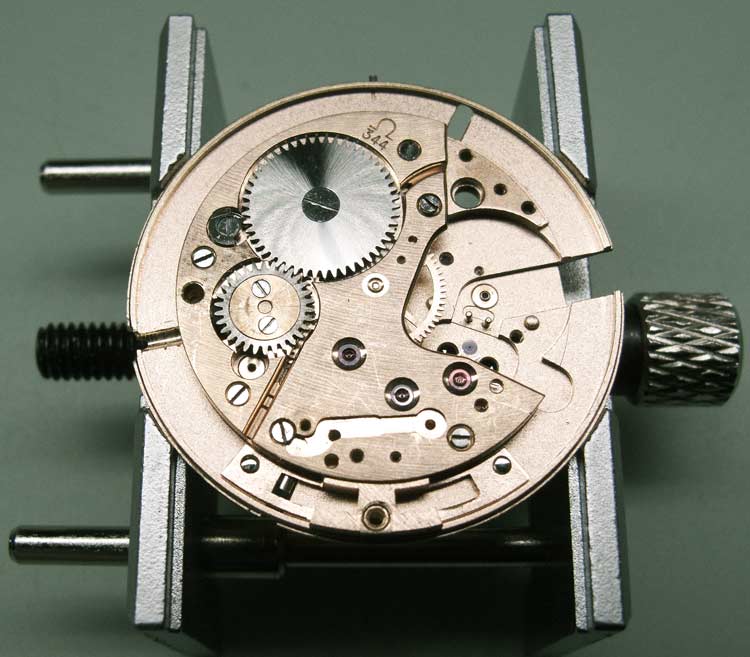
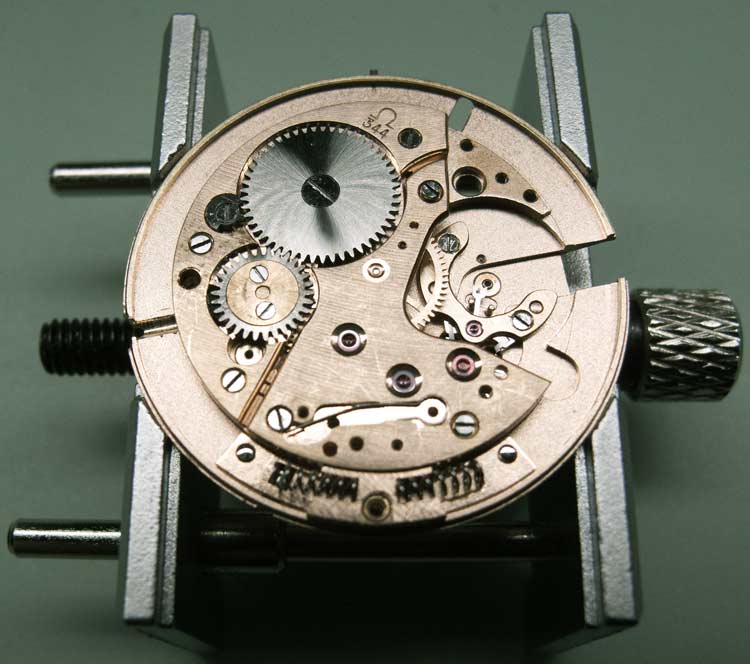
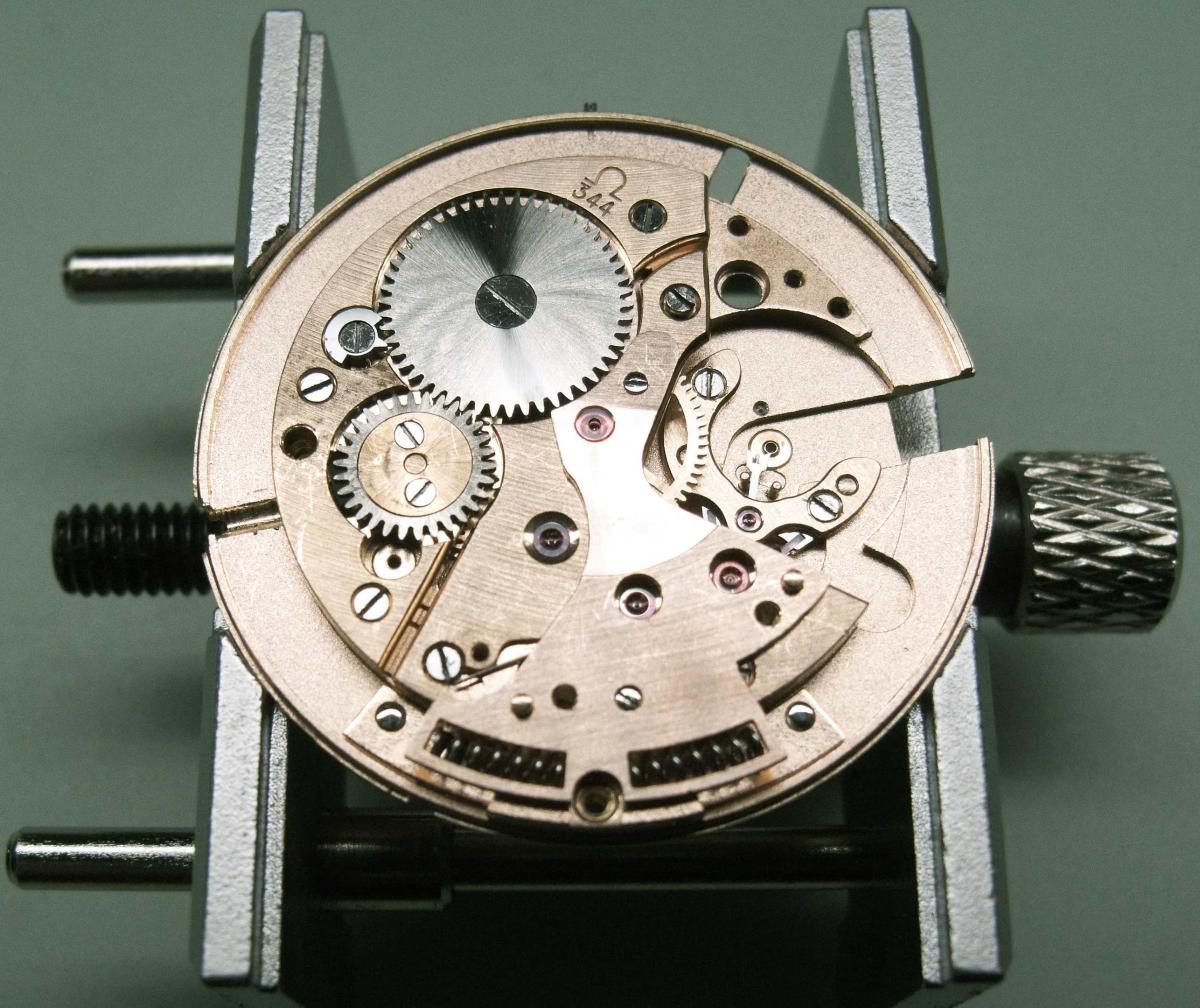
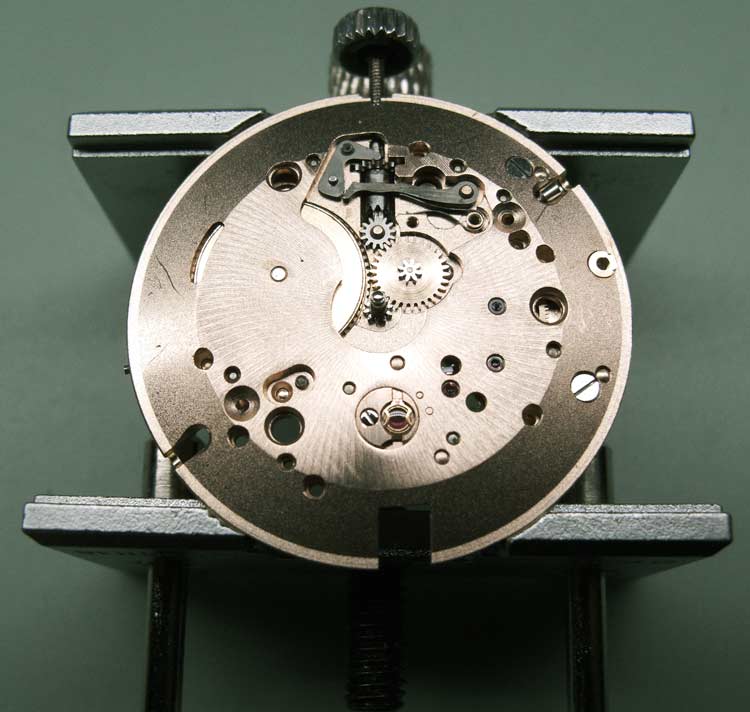
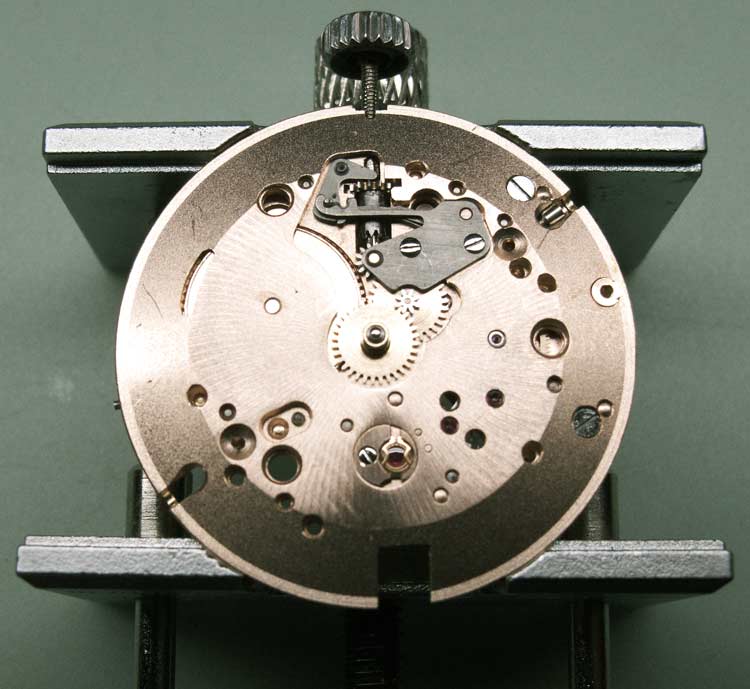
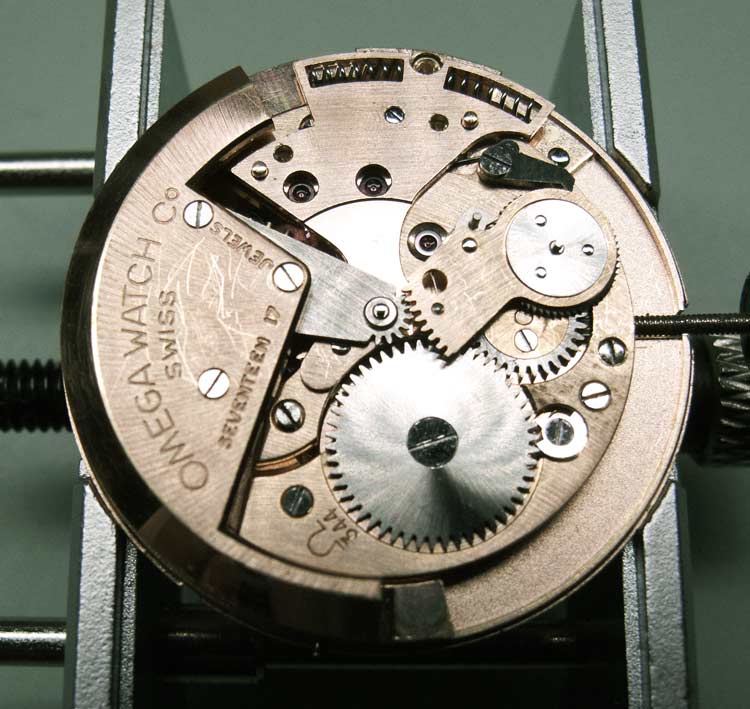
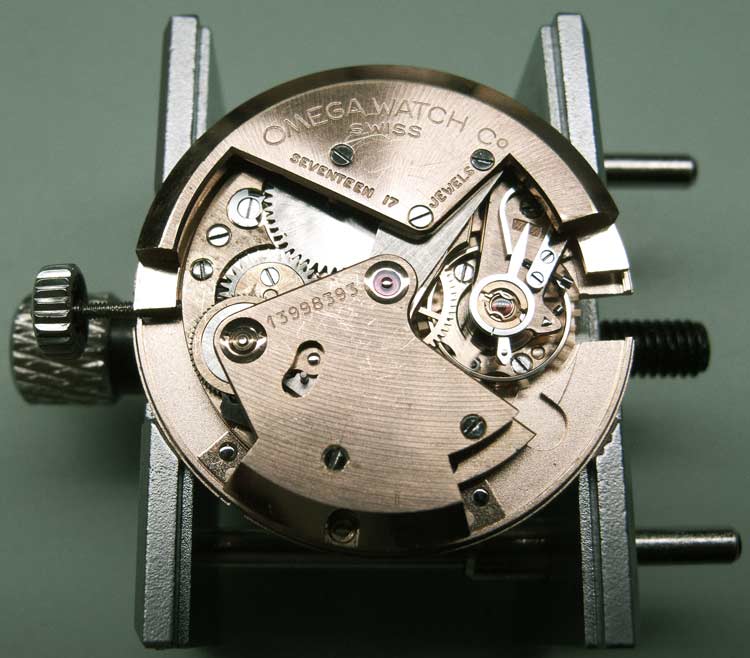
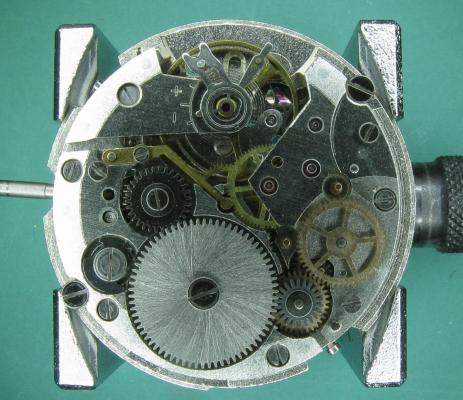
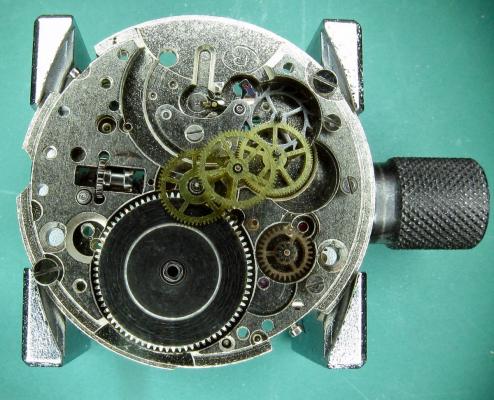
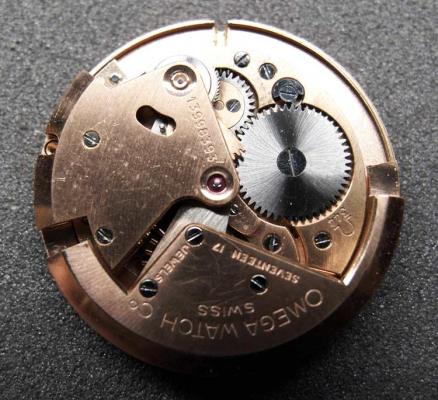
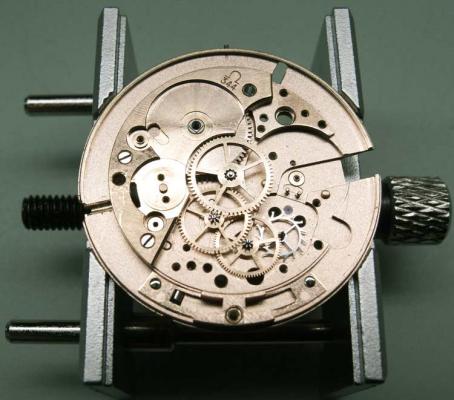
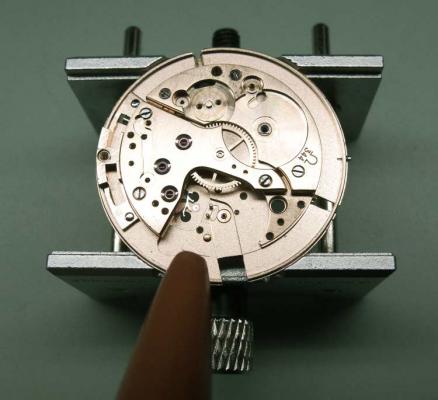
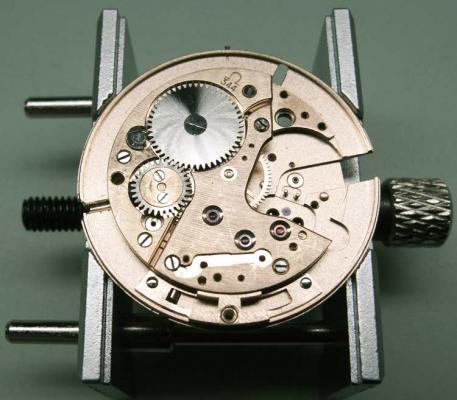
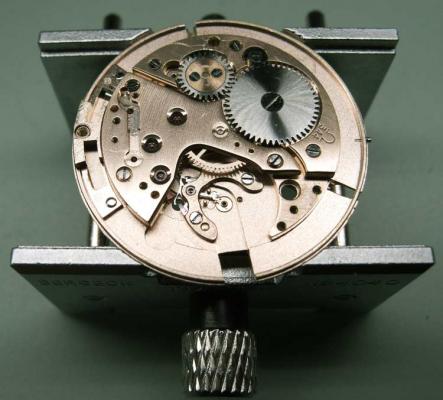
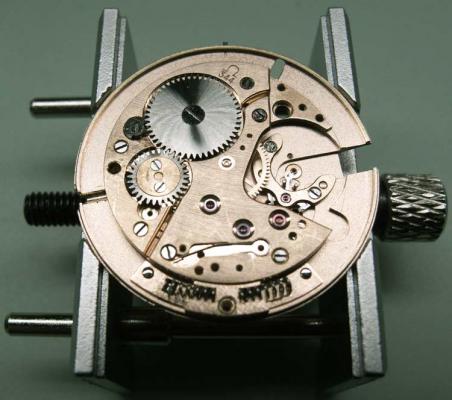
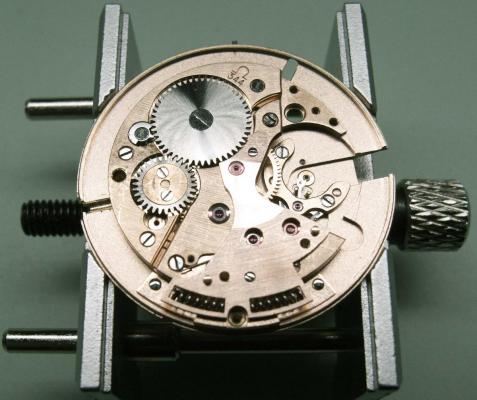
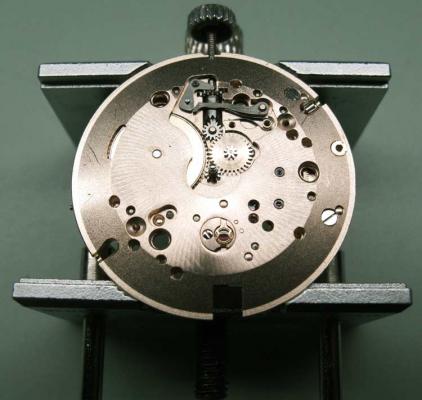
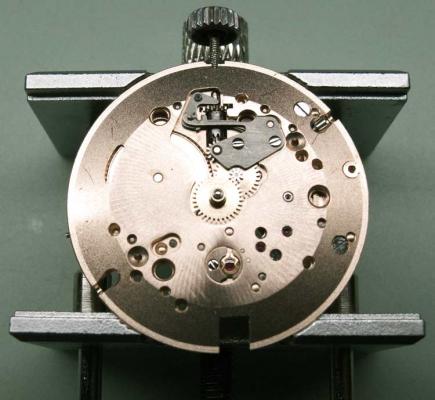
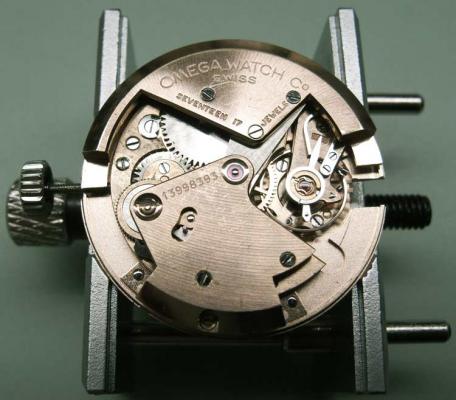
Here is an insight into the rebuilding of an Omega Seamaster bumper automatic 344 calibre movement from 1952. I am not going to give a step by step dismantling procedure. Apart from the auto-wind mechanism, the dismantling is fairly standard. I will however give a couple of tips on how to safely remove the auto-wind mechanism, before showing assembly of the cleaned movement. The Omega bumper mechanism has three clicks A, B & C. The first A is mounted on the ratchet lever and transmits force to the ratchet gear during winding. It also allows the ratchet gear it to index in one direction only. The driving force is produced by the oscillating weight and transmits force to the lever via a curved rack on the end of the lever. The second B is mounted on the Train Bridge and ensures the ratchet gear is held stationary when the ratchet lever moves anti-clockwise to the starting position of its clockwise winding stroke. Click B is holding the force of the mainspring during normal use. The third C is the barrel ratchet click. This is only really required to hold mainspring pressure when the auto mechanism is removed during disassembly. Disassembly Procedure When dismantling the watch movement the mainspring pressure must first be removed from the auto mechanism. Once this is done the auto bridge can be safely removed. To do this release both click A and click B to remove all mainspring force from the auto mechanism. This is done by pulling the clicks clear of engagement in the direction of the red arrows. The mainspring pressure will now be held by click C. Once this has been done the auto-wind bridge can safely be removed. This reveals the lever and ratchet assembly that can now be lifted from the movement. At this stage the mainspring pressure can now be completely released in the normal way. Use a screwdriver to control the rate of barrel rotation while holding click C clear of the ratchet wheel. Dismantling from here on is much the same as any other manual wind watch. Reassembly Attach the Bumper Spring Retaining Plate (at bottom of picture). Fit barrel and Barrel Bridge. Fit the Gear Train and Bridge. Blow the perifery of the escape wheel toensure free running of gear train. Fit the Crown Wheel & Ratchet Wheel. Fit the Escapement lever and Bridge Fit Bumper Springs and Retaining Bridge. Fit Keyless Work. Fit Auto-wind Mechanism. Ensure that the automatic lever is engaged to allow full travel of the rotor. The rotor should bounce of each spring at the end of its travel. If it doesn't, damage will result. Finally fit Auto-wind Bridge and Balance Assembly That’s all folks! PS. The new LED light from Cousins has greatly improved my pictures. Now shooing at handheld at 200ASA instead of 800ASA.


 1 point
 -
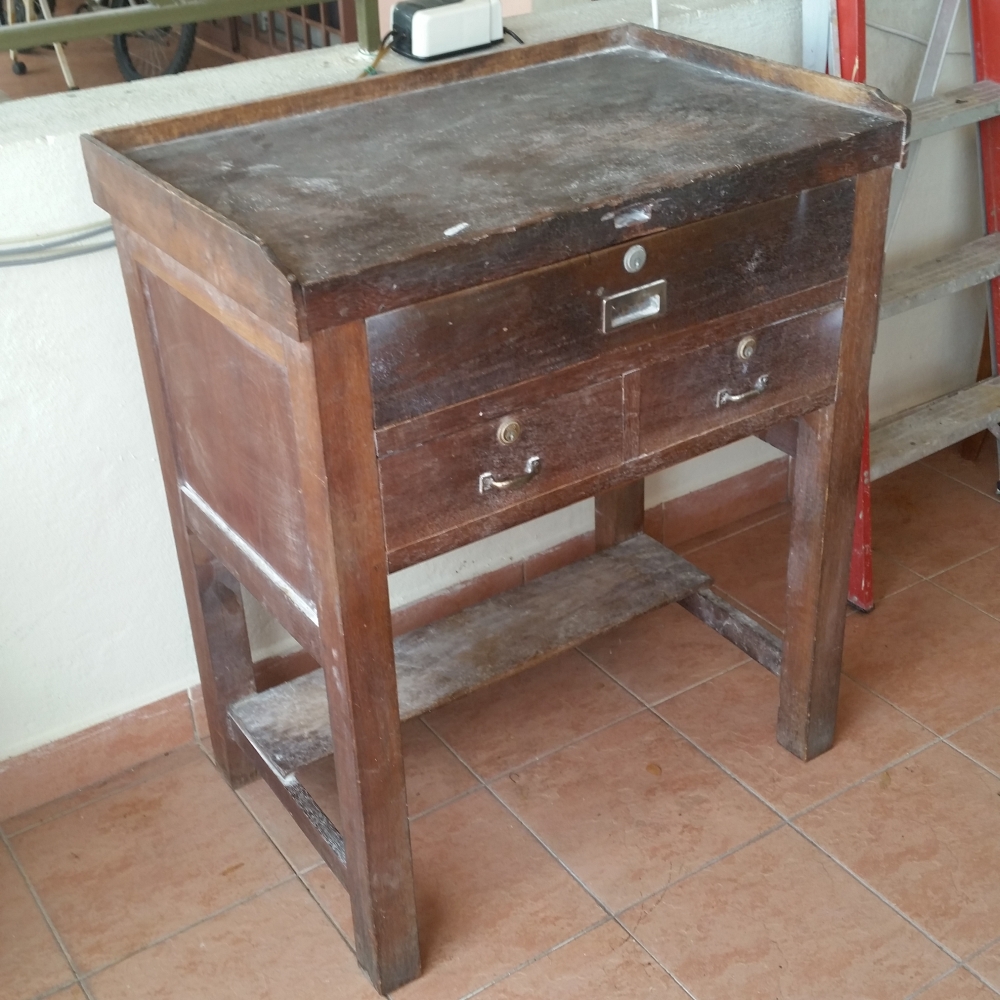
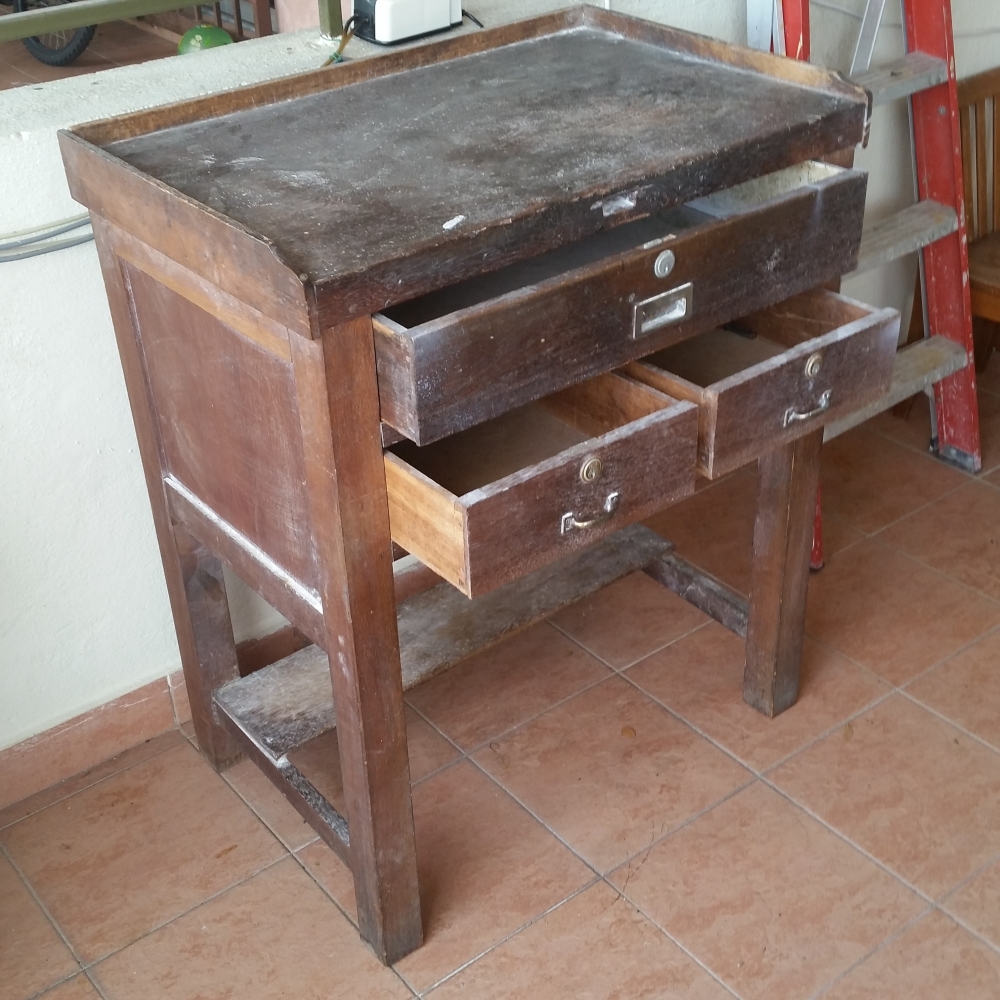
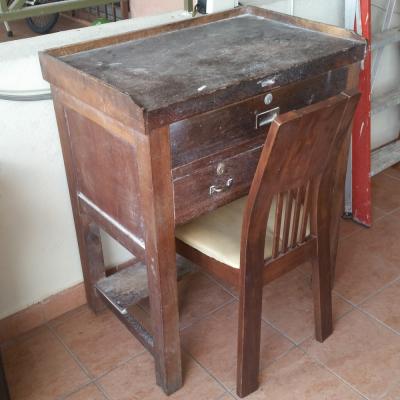
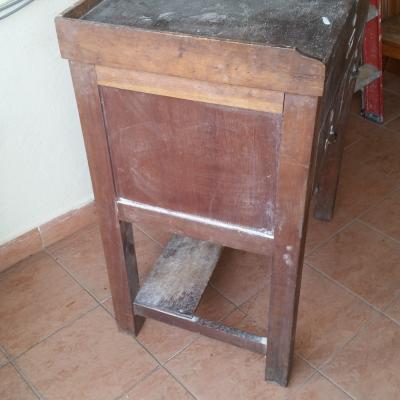
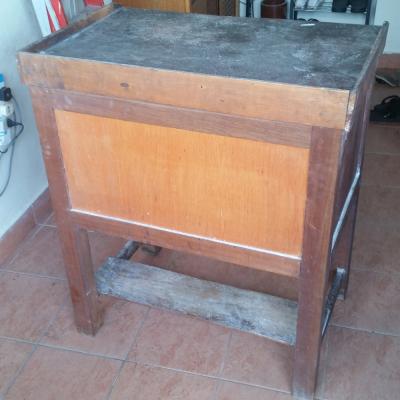
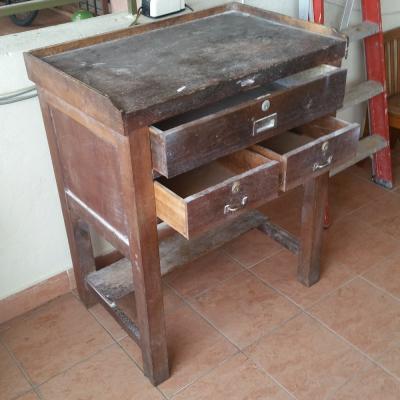
I had been using a study desk as my work bench, due to the height it's giving me pain in the neck and making it difficult to concentrate and work for longer that few minutes at a time. I need a proper desk to work on the watches. I am contemplating on getting a new workbench made, however it expensive and there are no ready made unit available, since it's not many people looking for it over here where I am at. Few days ago, stumble upon an ad in the local used market on the internet for an old Jewellers desk and it's going for RM 100.00 that about USD 30.00. Here it is below, it's 36 inches tall and 31 inches wide with about 20 inches depth, just nice for me and it doesn't cost a bomb. It's heavily used by the old Chinese gentleman that quit jewelry making and just decide to get rid of it. It's made of hard wood and must be around 30 years old, about that. I will need to clean it and probably give it a much needed rub down and stain it back to seal the wood. Very heavy and made to last. All looks ok, except the skirting on the right. The wood crack and I will need to remove all the skirting and redo them. It has three drawers, the top most is the widest. I can use it as a catchment and the keys are still there :) Okay, I am excited today and will need to do lots of work on it. Slowly I'm getting my work area done.. :) Affnan


 1 point
 -
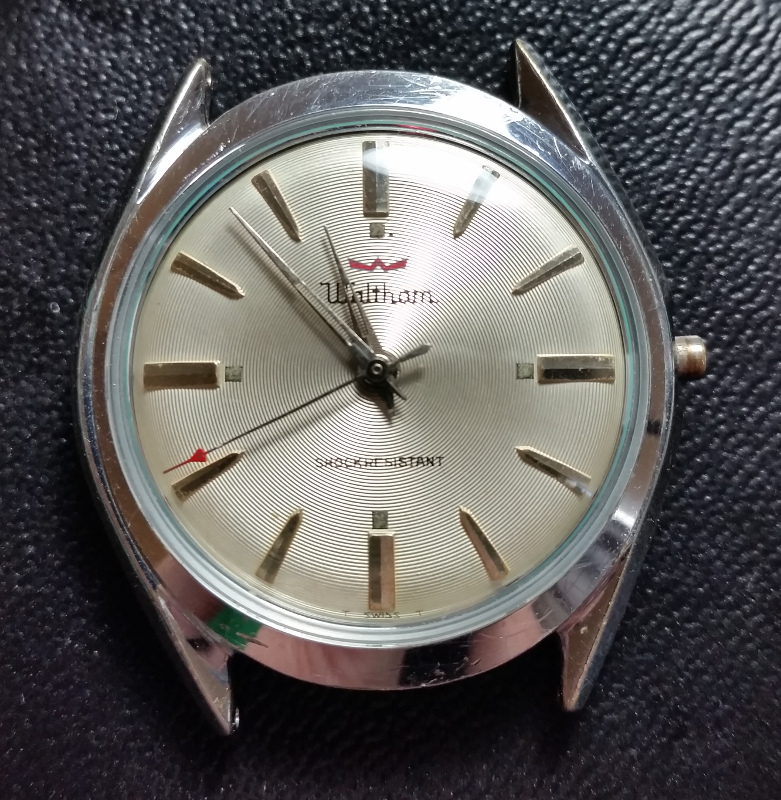
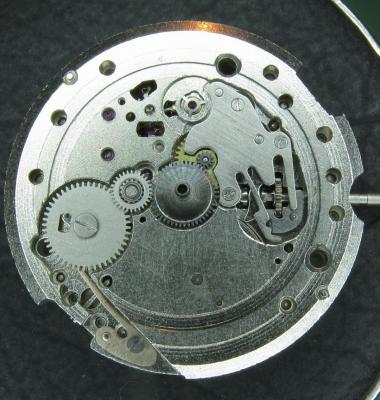
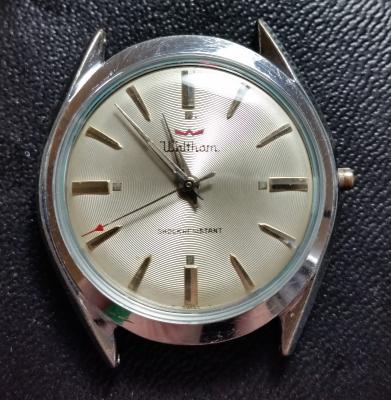
Today was a milestone. I finally took a watch that I bought off of fleabay as "Parts or Repair" and brought it fully back to life. Disassembly, cleaning, troubleshooting, replacement parts, lubrication, the whole 9 yards. So much learning, so many mistakes. I held this precious thing in my hand that I knew inside and out and watched it merrily tick away. I reveled in the results of the timegrapher that told me it wasn't just working, it was accurate too. Magical. So in order to celebrate this momentous occasion, what did I choose to do next? I dropped the movement and broke off the stem flush with the crown....... I'm not sure I've ever truly "wept" before, but if there was an occasion to, this might have been it. Here is a picture of the poor thing. It is still merrily ticking away, at least until it needs wound again. As I dust myself off and prepare to find a replacement stem and crown, only one consoling thought keeps running through my head... At least I know how to fix it :)
 1 point
 -
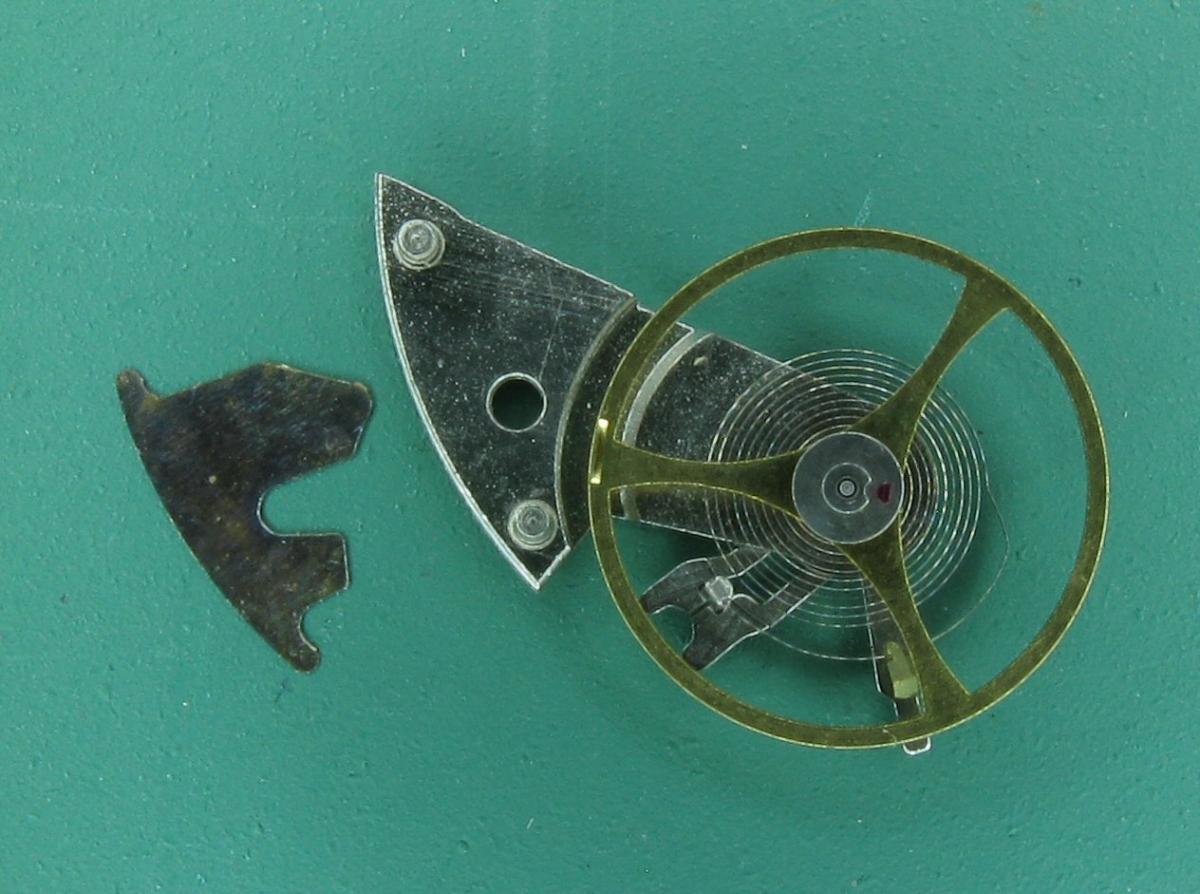
You dissasemble the whole movement,put the balance complete in its place,set the bridge above it and screw it in on the mainplate.move the regulating pins and fork which holds the stud as far as posible. using fine tweezers put the hairspring between regulating pins, put the stud in place "between the fork" as you say press it towards the jewel center using brass tweezers Voala! br emso p.s: sent from my s****y phone so sorry for typing mistakes1 point
-
I've not worked on one myself, but unless I'm mistaken you need the correct tools for the job. https://www.cousinsuk.com/product/eta-special-tools Have a read of this thread:- http://www.watchrepairtalk.com/topic/997-stud-removal-techniques-for-the-eta-chron-system-eg-2824-2/1 point
-
Here: https://www.cousinsuk.com/category/seiko-case-parts just type in the full number - 7009-3140 lookup select & then search for items or here: http://cgi.julesborel.com follow the instructions & it takes you here: http://cgi.julesborel.com/cgi-bin/matcgi2?ref=sek+cs%237009-3140&submit=Search1 point
-
Ooops! apologies Geo, missed your post. I really must pay attention in class (I think they used to say that too me a school a lot, but I wasn't really paying attention at the time).1 point
-
Oh no you're not, just keep taking the pills! :)1 point
-
Looks to be in good condition with a good selection of stakes and stumps. Well done.1 point
-
Well done Don. :) I just love the description of the die plate! "made of THE TOUGHEST ALLOY STEEL KNOWN TO SCIENCE" .................Brilliant! B)1 point
-
Congratulations on a very clean staking tool! I believe Bergeon stakes will fit too.1 point
-
Mine was only $75 but defiantly had some rust and I was never able to clean the stakes up as much as I would have liked. Yours seems pristine.1 point
-
Looks like a good set to me!1 point
-
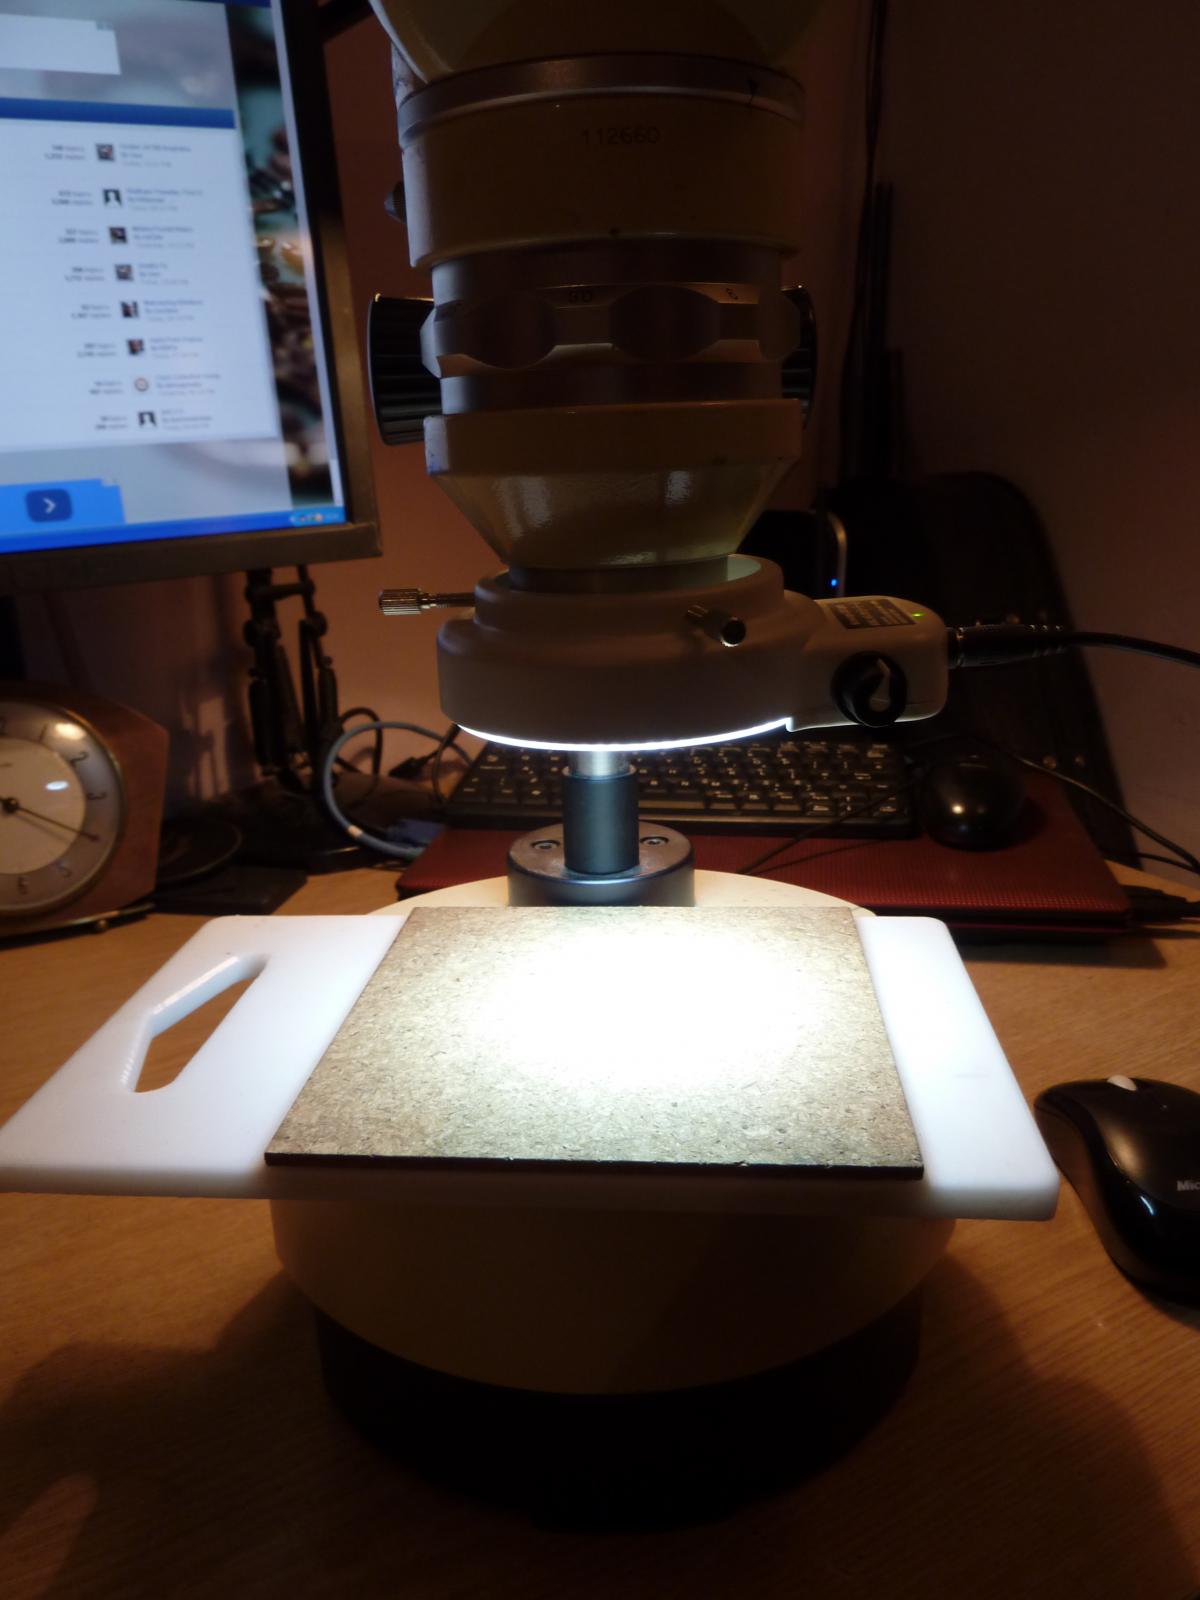
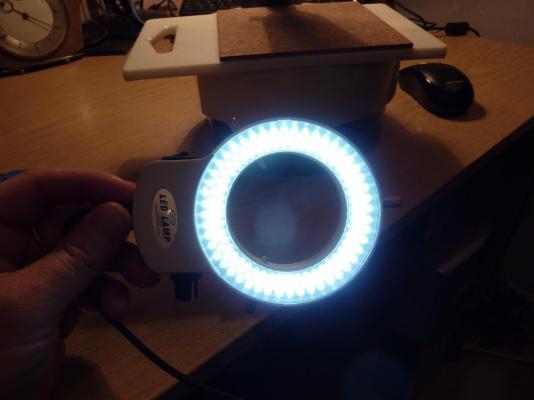
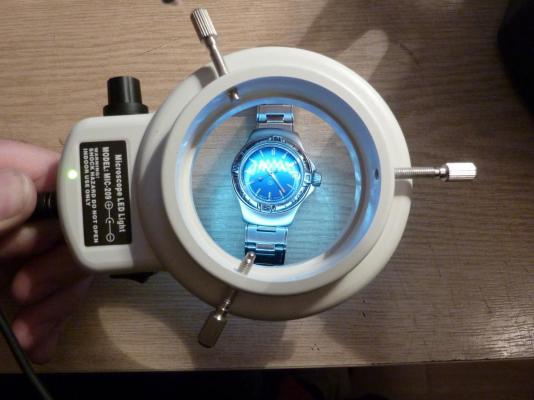
Thanks Geo, here is the secret to my lighting; eBay item #121337832210 It was a birthday present to myself at the beginning of March to use on my microscope. However a quick cobbling together of a suitable adapter and it now also fits my camera, providing enough light to permit hand held macro shots, so no more tripod on the bench. The wifey bought me cycling gear as she says that I spend far too much time sat on my fat backside fiddling with watches and I ought to do something to keep my circulation going!! I will spare you the photos of high vis lycra :thumbsd:

 1 point