Leaderboard


Popular Content
Showing content with the highest reputation on 11/22/15 in all areas
-
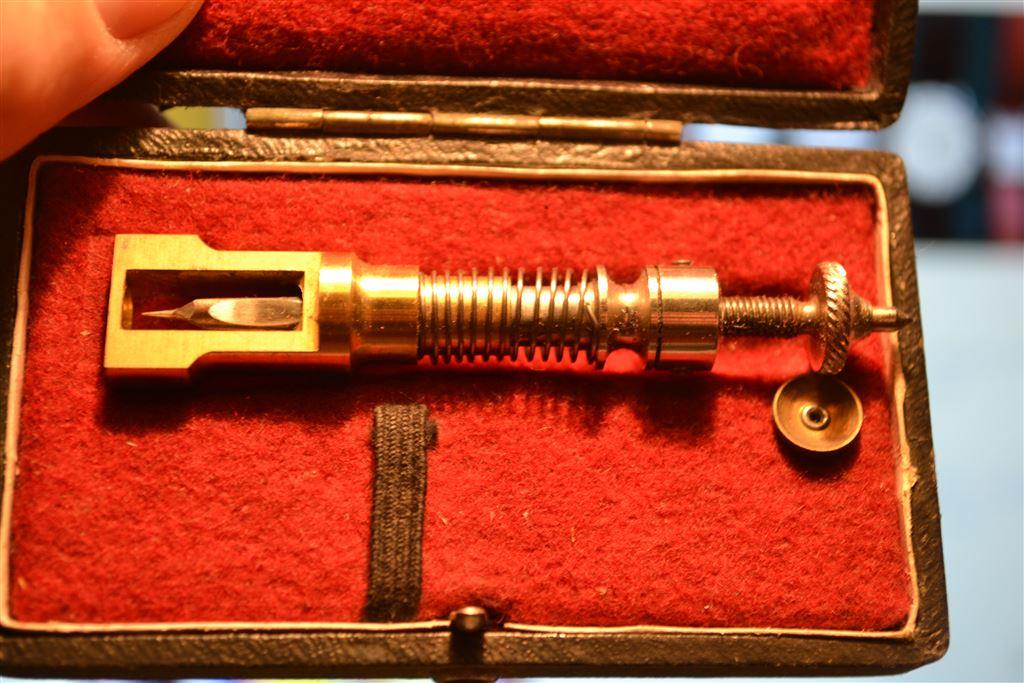
I finally got the time this week to make a couple of tools I've been needing. A tool for removing pendant tubed when refinishing cases. A oiler that can be held like a pen for ultimate control. Made from 6mm anodized aluminium rod and a reshaped sewing needle. Handremovers made from 5mm stainless rod5 points
-
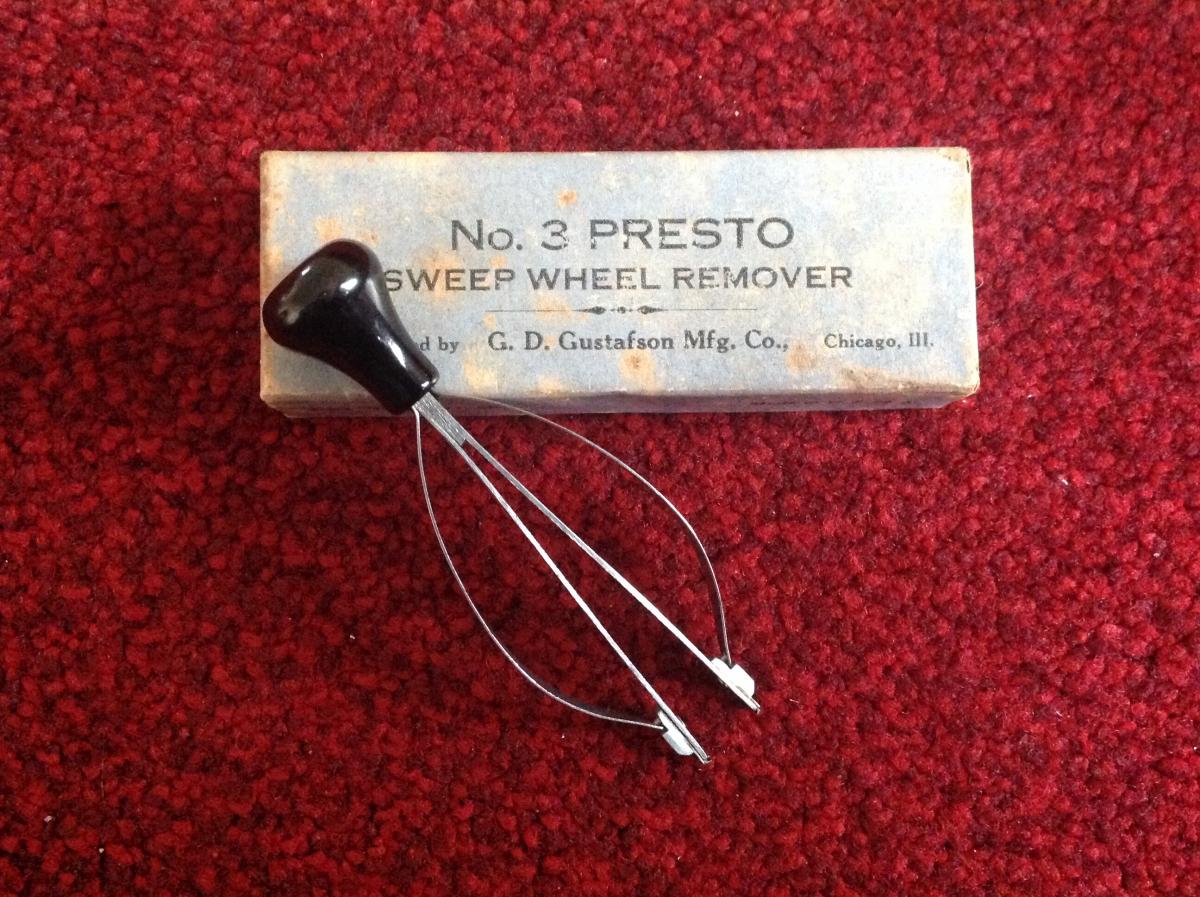
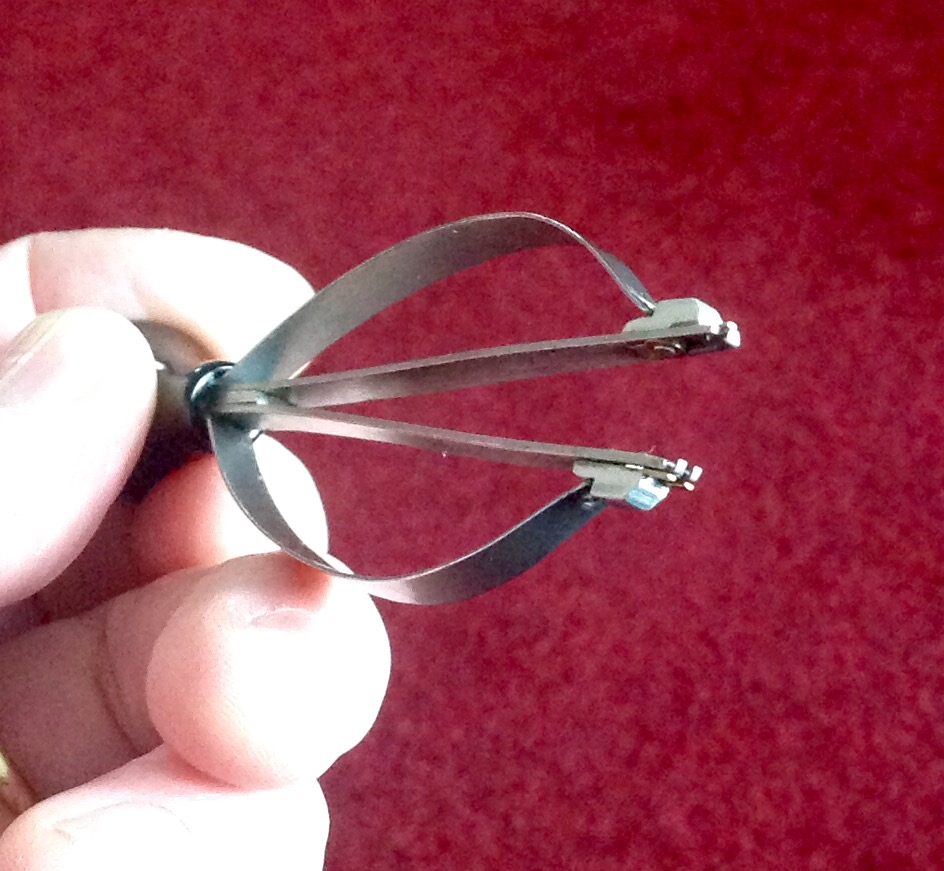
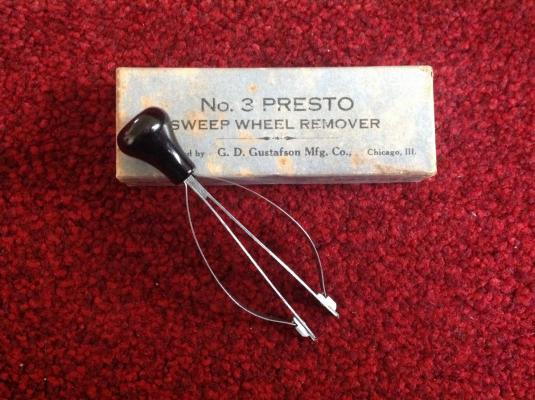
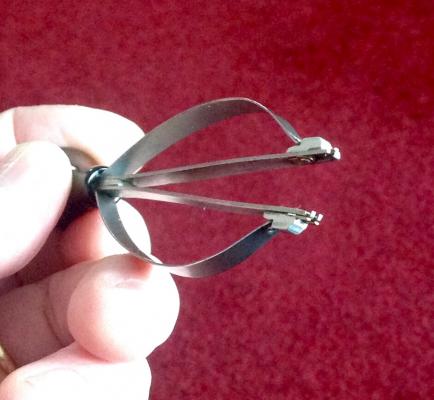
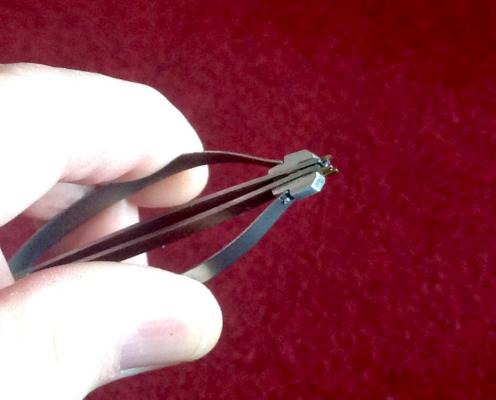
You will have to remove the centre wheel stabilising bridge first as Bob says. To remove the five spoked wheel you ideally need a "sweep wheel puller". This loos like any normal Presto type of puller, but when examined closely, you will see it has one hook on one side and two hooks on the other to allow it to grip in between the five spokes. If you do not have the proper tool, be very careful if you try to lever it off, as the extended shaft will snap way too easily. Here's what the tool looks like. Sorry it's not the bast image as it was taken with my iPad camera.
 4 points
 -
Use fine wire wool with some WD40 on it. Bearing in mind they are precision gauges and will be made to very high tolerances, I would keep away from abrasives as it would be easy to reduce the size of the pivots slightly.3 points
-
I wouldn't say i was a tool maker but when i have some scrap material around i make some use of it :) Pictured below, a couple of staff hammers ( for choice of better word ) i use these when replacing staffs and knocking out old ones, the smaller hammer for wrist and larger for pocket watches. The hammers have other uses too of course, both have stainless steel handles and brass heads which give just the right amount of weight, they ain't pretty but they work a charm. There's a very rough looking aluminium lug pin removal tool made from a short scrap of stock, bang some holes and threads in the end and add some hardened steel tips tada. A small screw driver i used for general stuff, i made this again out of scrap bits i bought in a joblot. Last picture is a small stand i made from scrap aluminium, just messing around with scrap and turned into a tweezer stand for now ha ha. The stand is quite sturdy and weighted despite being alu. I do make higher quality tools when i have time but these are all i have that were all made purely from scrap. :) When i do next make a set of screwdrivers i will be sure to share here :)2 points
-
....or the missing part of the DeLorean car! :) Sorry but I have no idea what that is and couldn't resist! Cheers, Bob2 points
-
Guys, I managed to do take the movement out. It wasn't that hard, I was just being thick. Movement looks lovely and I think you are right, I think it is a 30T2 Thanks again for replying. Much appreciated. Nick
 2 points
 -
The wheel in question is the centre seconds drive wheel which is a push fit on to an extended third wheel arbor which protrudes through the train bridge, and drives the centre seconds pinion. As I said, it is a push fit so should simply pull off, however, the extended third wheel arbor is very delicate and if you try to lever it of from just one side you will snap it. You can get "presto" style pullers for this (or modify a set of hand pullers) but in the past I have successfully used fine hand levers, working diametrically opposite sides of the hub at the same time, between the spokes. Levering at the rim runs the risk of damaging teeth, distorting the wheel, and again, breaking the arbor. If you can't lever at the hub one approach is to use two thin blades (single edged razor blades are good) and slide then in between the bridge and the wheel to wedge the wheel gently upwards, however, this runs the risk of scratching the bridge. Reinstallation is done with a staking set. Good luck.2 points
-
Hi, If you fancy some Junghans pocket watch information have a look at my website: http://dirkfassbender.de/movements-1.html On the other hand I would be grateful if you have some informations which are maybe missing. Junghans is not so well represented on the internet which I would like to change. Best regards Dirk1 point
-
I do like that, and yes, you are a "Jammy Sod" ! :D1 point
-
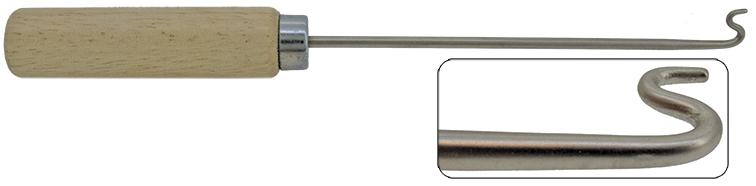
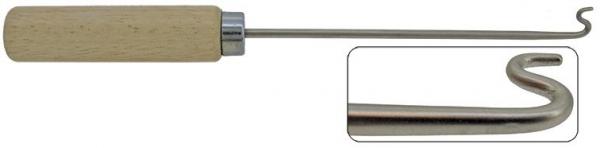
Make a miniature version of a clock pivot aligning tool by heating the tip of an old oiler and bending it to look like this. This will allow you to push and pull pivots while very gently applying downward pressure to the plate.
 1 point
 -
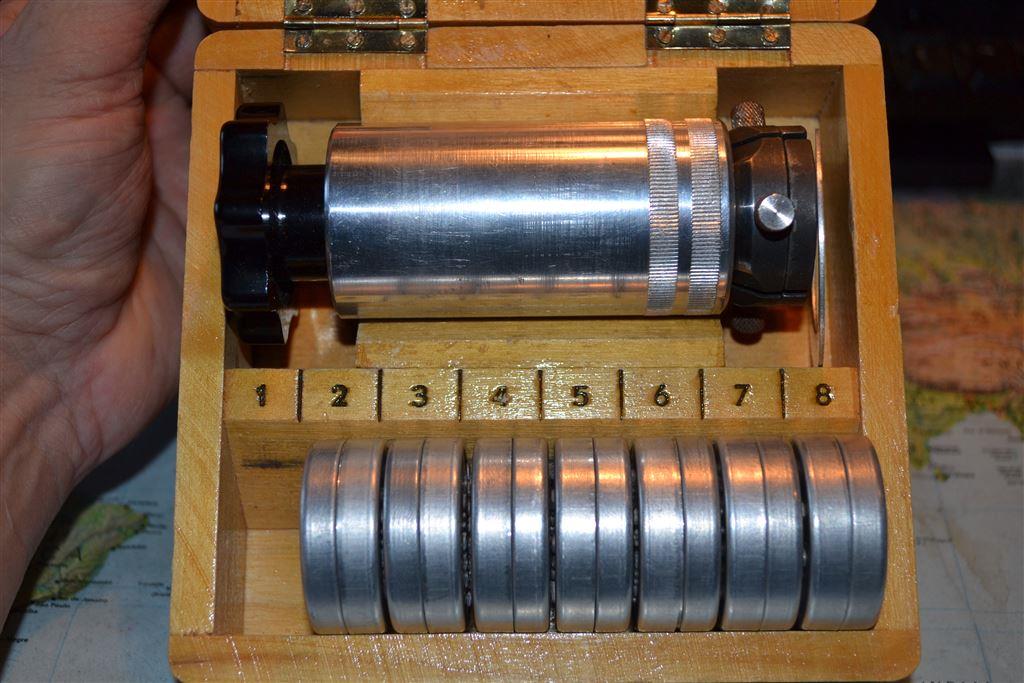
Found this tool on a auction site . Anyone now what it is? Costing £20 This is a crystal tool i think but is it worth £24? Looks like every size is there except number 1. But could be in the main tool?
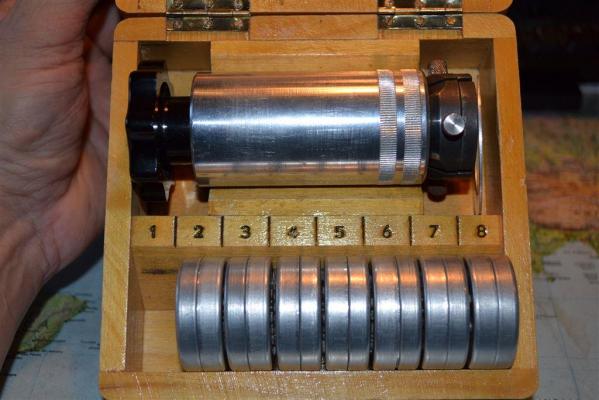
 1 point
 -
Absolutely correct unless your stacking tool has the jeweling add on...like some K&D models.1 point
-
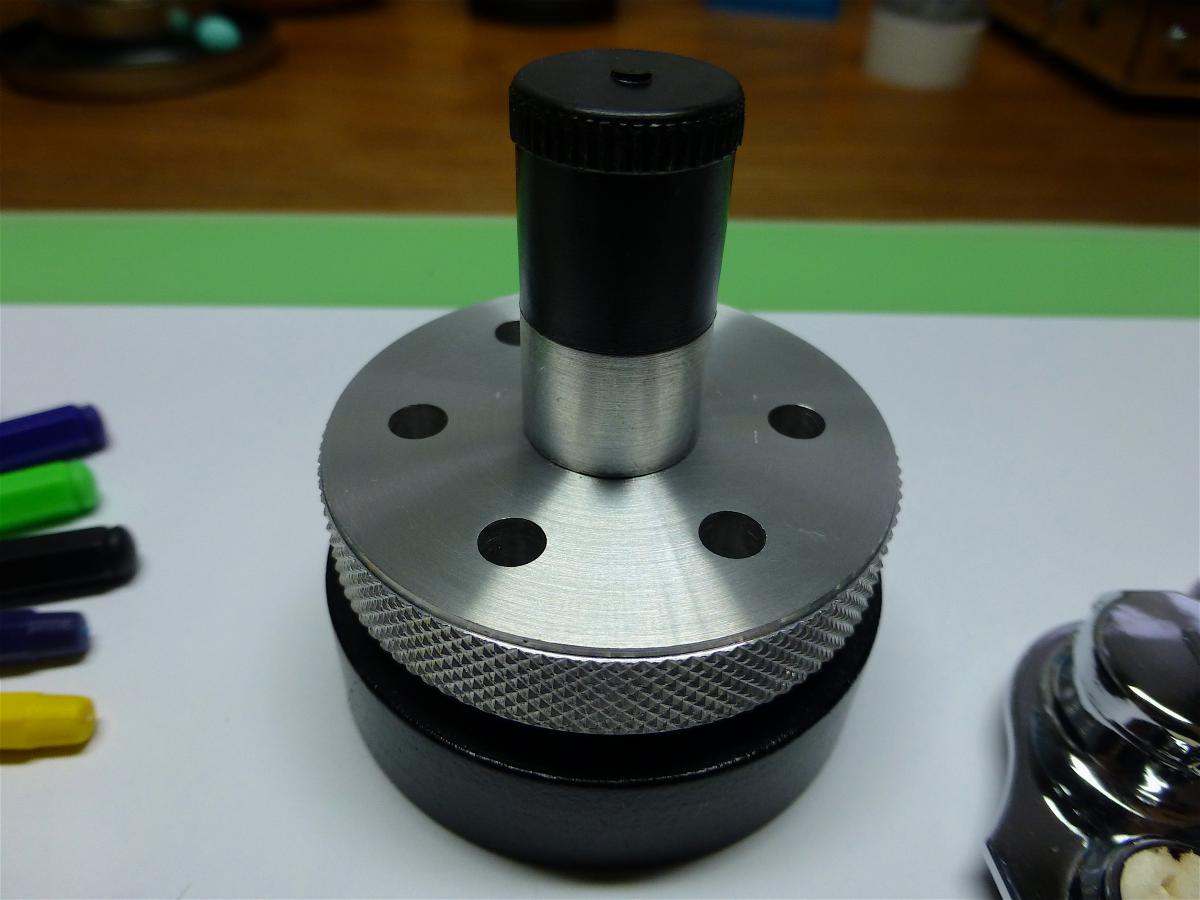
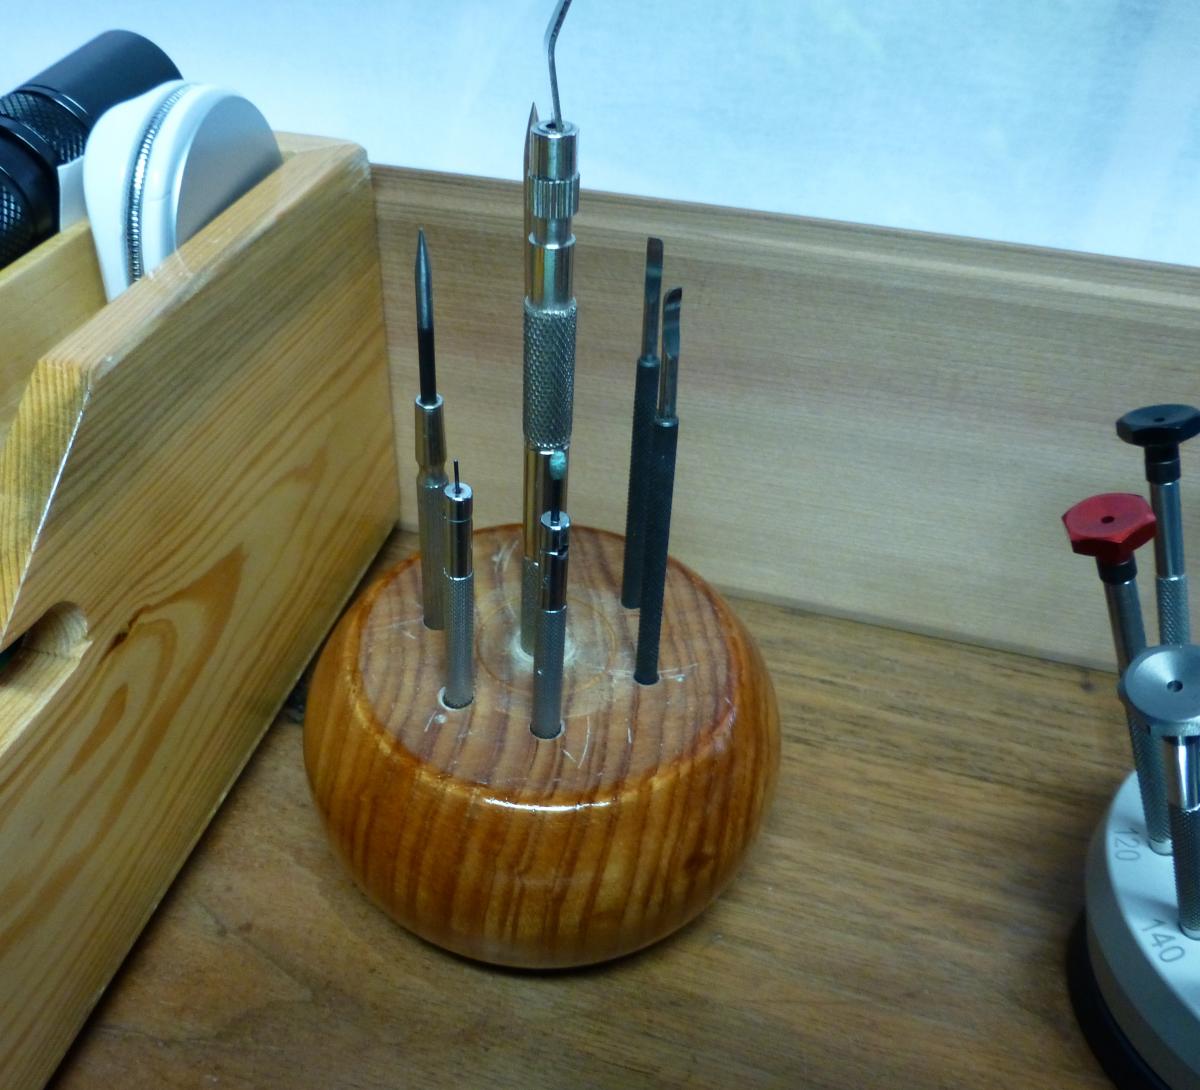
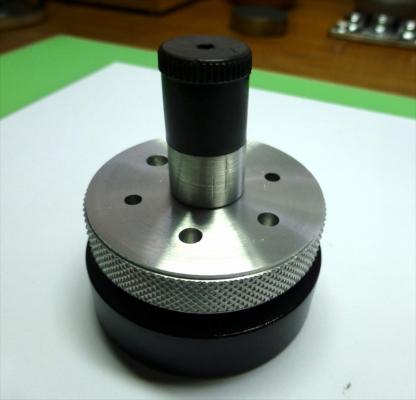
Having my oilers constantly in the pithwood holder annoyed me so I thought I'd make a little swivel stand for them. I had an old screwdriver holder from a very cheap set I got ages ago. A bit of modifying and presto! And with my oilers safely stowed in a re-purposed item that had no further use.

 1 point
 -
Here is a howto from the NAWCC forum. You do need a staking tool. To replace incabloc springs--push the setting out of the cock or plate. Place spring in channel, (self explanatory when you get this far) put jewel in place and lock down the spring. reinsert the setting. Easier than it sounds. You will need a jeweling tool or at least a good staking tool to do this properly. Under 'Watch parts branded' Cousins lists the springs for ETA 2892-A2 at £2.95 per pack of 5. You need to be registered (no hassle).1 point
-
You just beat me to it Geo.1 point
-
No, Bob, it would even support your torrid heat of 'way down yonder'. Cheers, Colin.1 point
-
Hi frenchie, Good to talk to you again. As for the Buren, I haven't worked on those yet but in my mind I believe you need to first remove the "bar" on top...there is a screw there. Maybe it is a bigger disassembly until you get to it. I would go this way: first make sure the main spring doesn't have any more tension by "unwinding" it (by holding the click open). Then I would go for the balance wheel to avoid damaging it (just in case). Then the "bar" and finally other wheels. Of course, I'm thinking the movement will be already out of the watch. In any case, take plenty of pictures! Cheers, Bob1 point
-
Excellent find GuiBer, Thank you! One more piece of information for my modest watch "info" folder. I usually wing it trying different sizes. This takes the guess work out of the equation! @George: George, maybe I'm not understanding well but for the spring I believe you don't need a staking tool. They just "attach" hopefully by inserting on end with your tweezers. Then, the two lyre ends are moved into position with the same tweezers. The first move is tricky but no staking. In my mind, and with a lot of imagination, it is the same principle as those battery lids we see in remote controls for tv: you have to attach one end so the other end can latch...and it comes with -- usually -- to plastic guides (or ears If you would). Well, in this case, the back of the lyre has this particular shape that will fit the frame where it belongs. Usually you kind of push it at a steep angle and once it clicks in place it will act like a hinge, allowing you to close it over the cap jewel and eventually securing both ends of the lyre in their respective "grooves". I can't explain it right, words are not enough but hopefully you get the idea. Or maybe I'm confused and it is different to other ETA's.... Maybe you can try first and if it doesn't work you can send it to your friend the watchmaker...but where is the fun if you don't try first! :) Cheers, Bob1 point
-
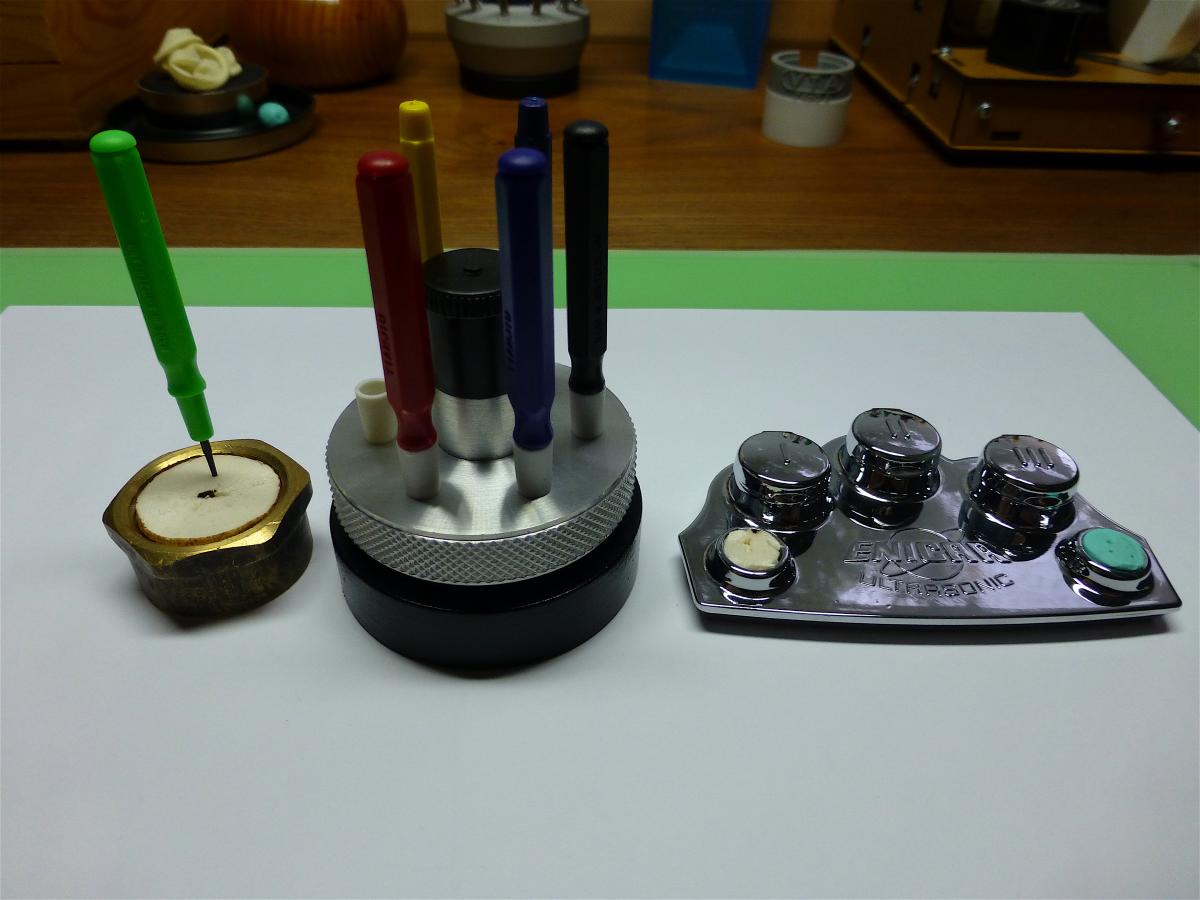
Well, a few more folks are like me, a cold wet afternoon and a lump of teflon and Colin has a new oiler holder. Just one of the many little things that plant the seed for others to follow. Encouraged by the success of re-purposing my old Indian screwdriver stand to an oiler holder (http://www.watchrepairtalk.com/topic/3138-i-needed-a-stand-for-my-oilers/) and knowing I had another one in the junk box somewhere, I decided to see what I could use it for so I rustled it up. I had made a quick and dirty holder for some bench tools from the foot of an old sofa that had gone to the charity shop, wasn't pretty but did the job. Using the same method, I popped the stand apart, chucked it in the lathe and marked the diameter and index marks using the index wheel on the lathe to produce six points. Then to the drill press for pilot holes and final holes to suit the tools. Back together and I'm happy with it. And with the tools. They are a pair of hand lifters, a brass stabby thing I made from a clock chime, a steel stabby thing I made from a cheap screwdriver, and at the back, two Indian screwdrivers modified by removing the swivel heads and shaping the bladed into little flats, one with a blob of Rodico which was my go to jewel lifter until I got a proper one. This forum and the posts of the members is great for galvanising one into motion isn't it :-)

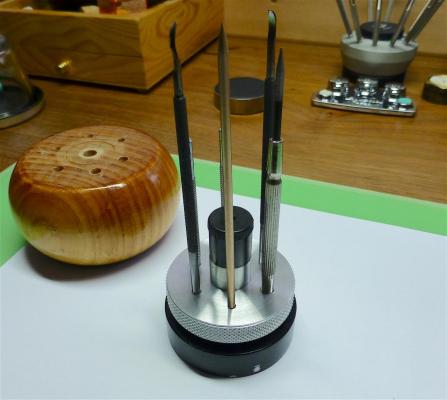 1 point
 -
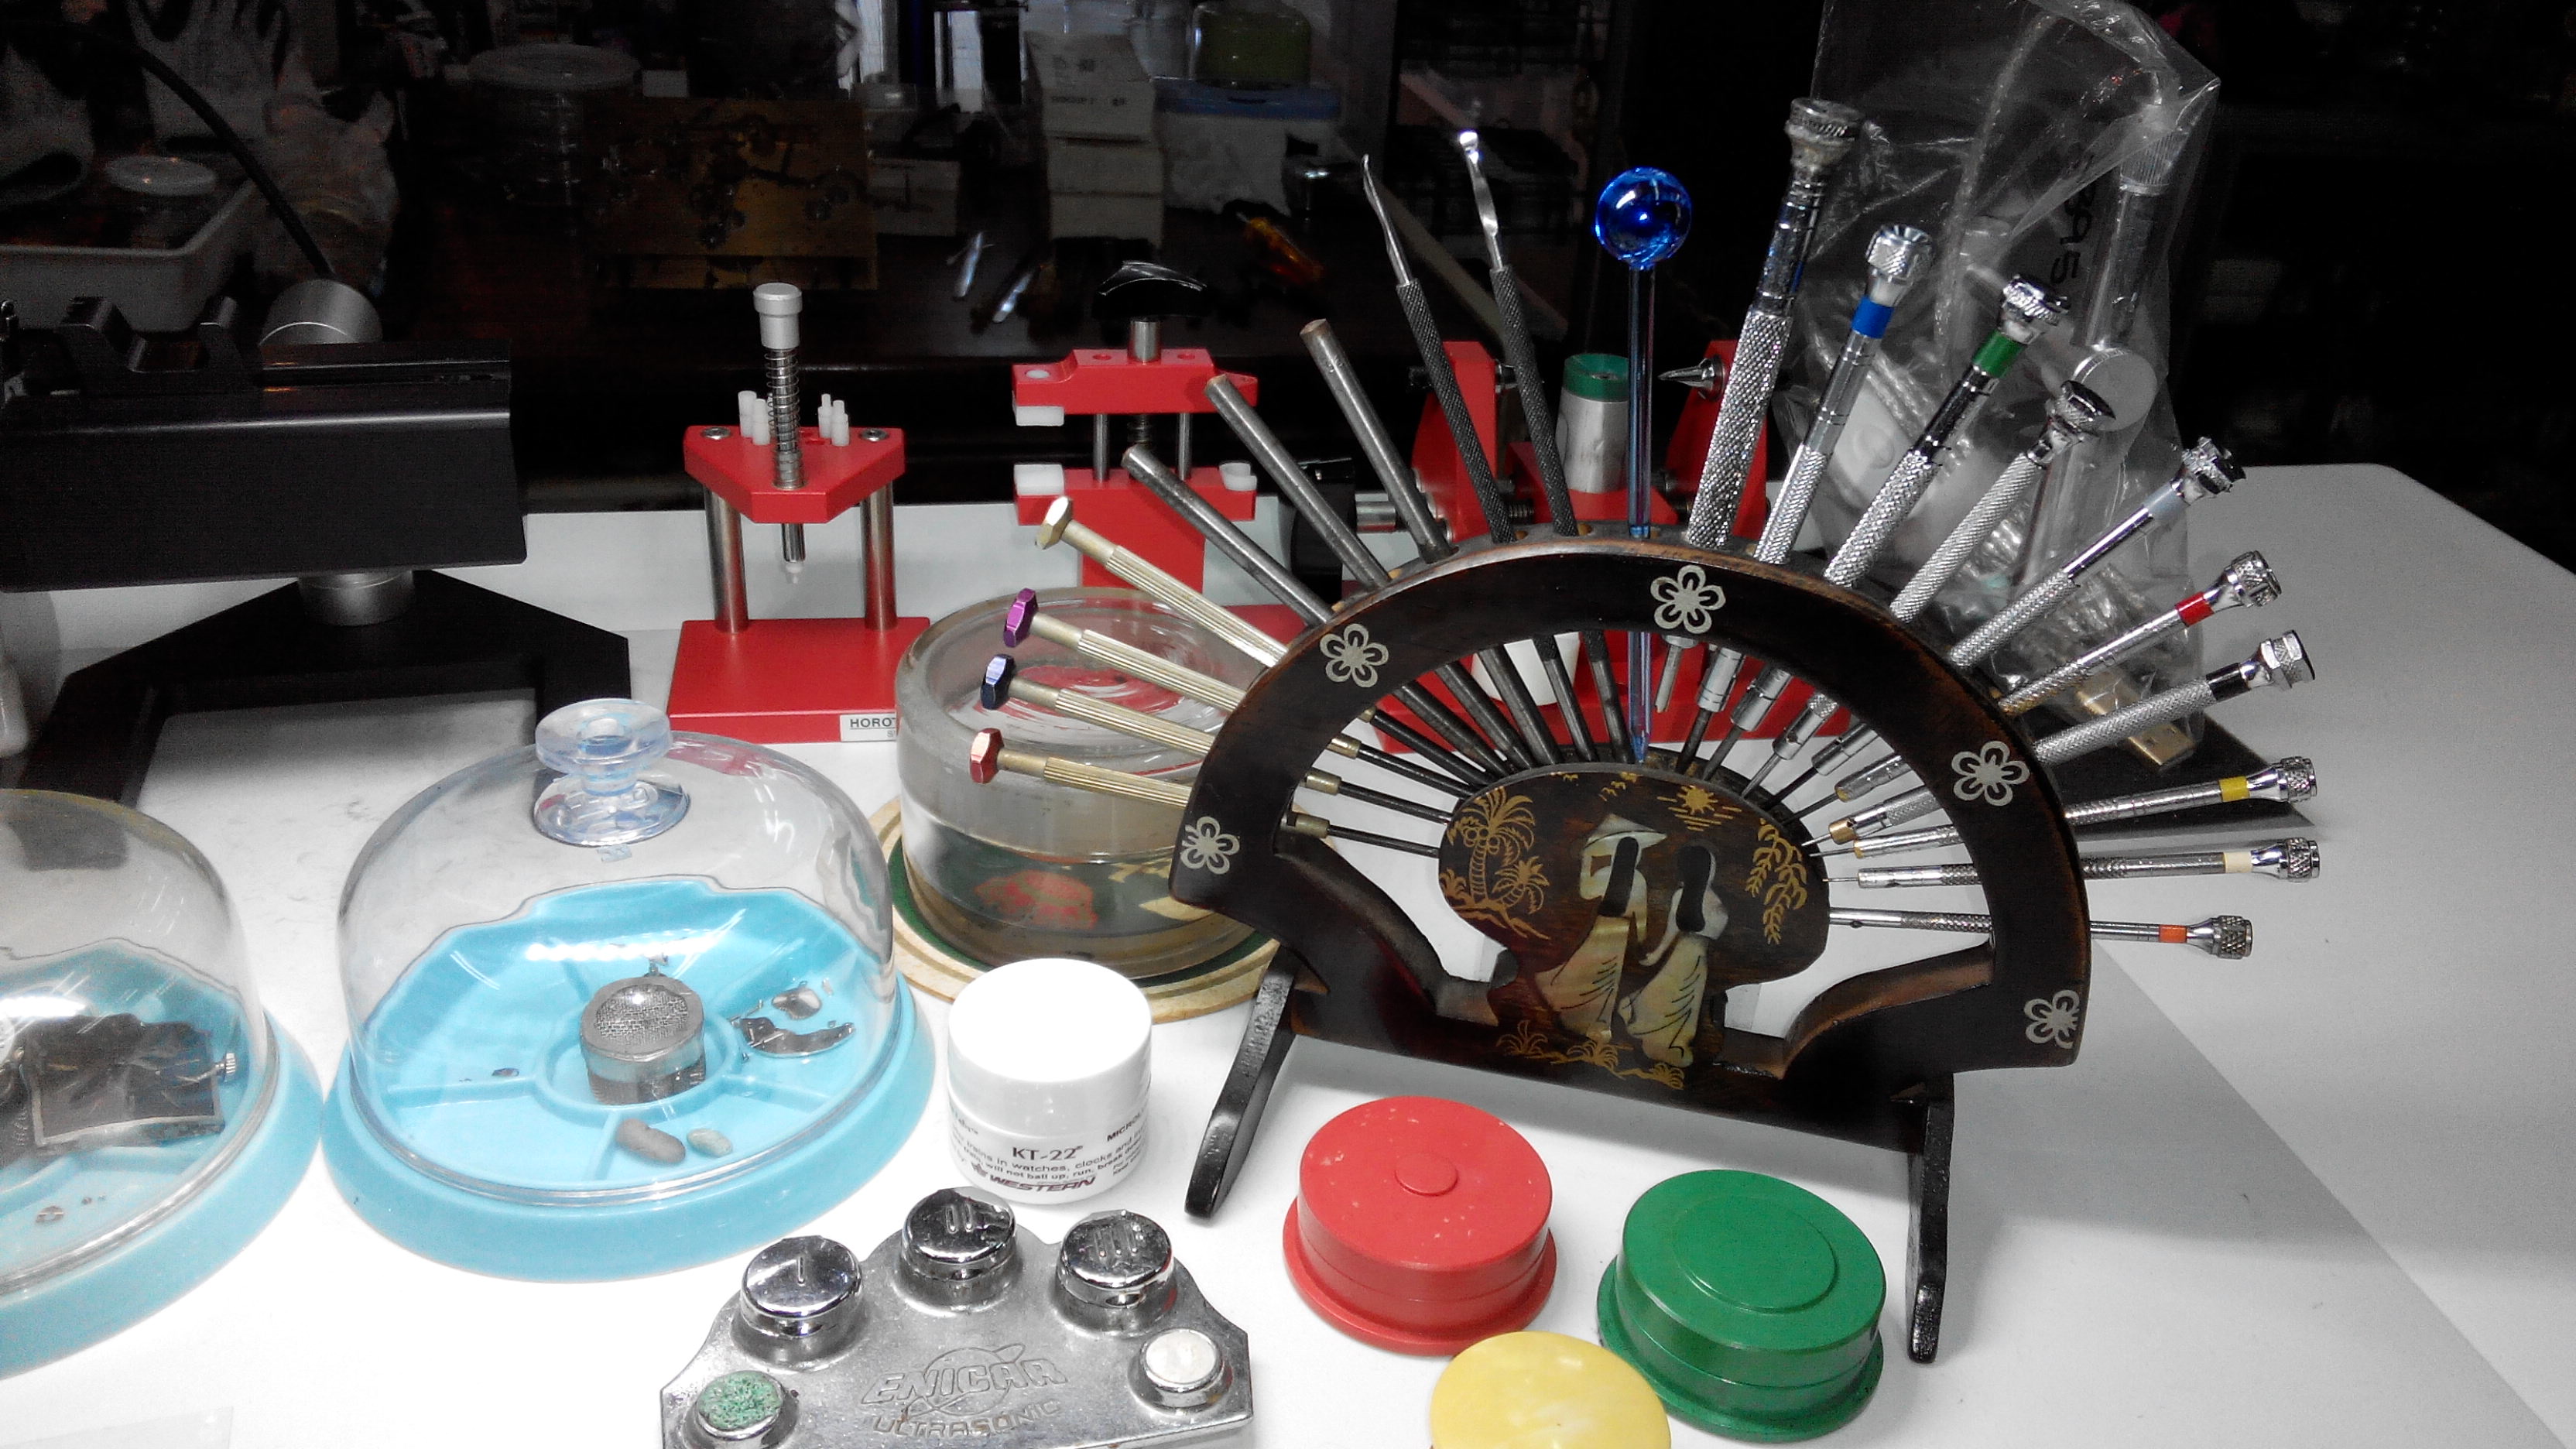
The machine arrived today. Overall it is in decent condition for a machine from the 1940's. The glass canisters are in very good shape, without cracks or anything of that order. There are a couple items that need attention before I can put this machine to use. 1. The basket holder is in terrible shape. It is badly corroded and will need to source a new one which may not be easy to find. This is by far my biggest concern. 2. The reverse switch is just ugly looking. It is a momentary push-button switch which I would guess is illegal to use under current standards. I think a modern three position switch will work better. 3. The rheostat does not look too bad, but I will feel better once I get it replaced. Most of the wiring was replaced with a high quality (not really) extension cord and electrical tape. That needs to be fixed. Refinishing this will be fairly easy. The paint comes off just by rubbing my nails against the machine. I think a nice acetone bath and the paint will be completely off, similar to what SSTEEL did with his machine. The heating element works as designed. It even has the correct bulb installed. Taking everything into consideration, this was not a bad deal at all. Here are some pictures. What a fantastic and professional re-wiring. Speechless. The basket holder is pretty much done. I don’t know if this is a single assembly, or if corrosion joined the shaft with the fan. This may be a bit more difficult to repair, but I am staying positive. The heating element does not look too bad. Notice the white insulation beginning to show signs of burn? That wiring needs to be fixed. The rheostat is not too bad. There is rust on the terminals, but it seems to work. I had the machine running for a few minutes and I still have all my fingers. This is the most interesting part: I am assuming the star-shaped piece is to keep sediment at the bottom of the jar while the machine is running. I just cannot figure out what the other piece is or what it is for. I am guessing this belongs to another model. Any ideas? Not too bad for a machine this old. The motor is in very good shape and runs strong. This will make for a nice project and I am hoping I can put it to use.1 point
-
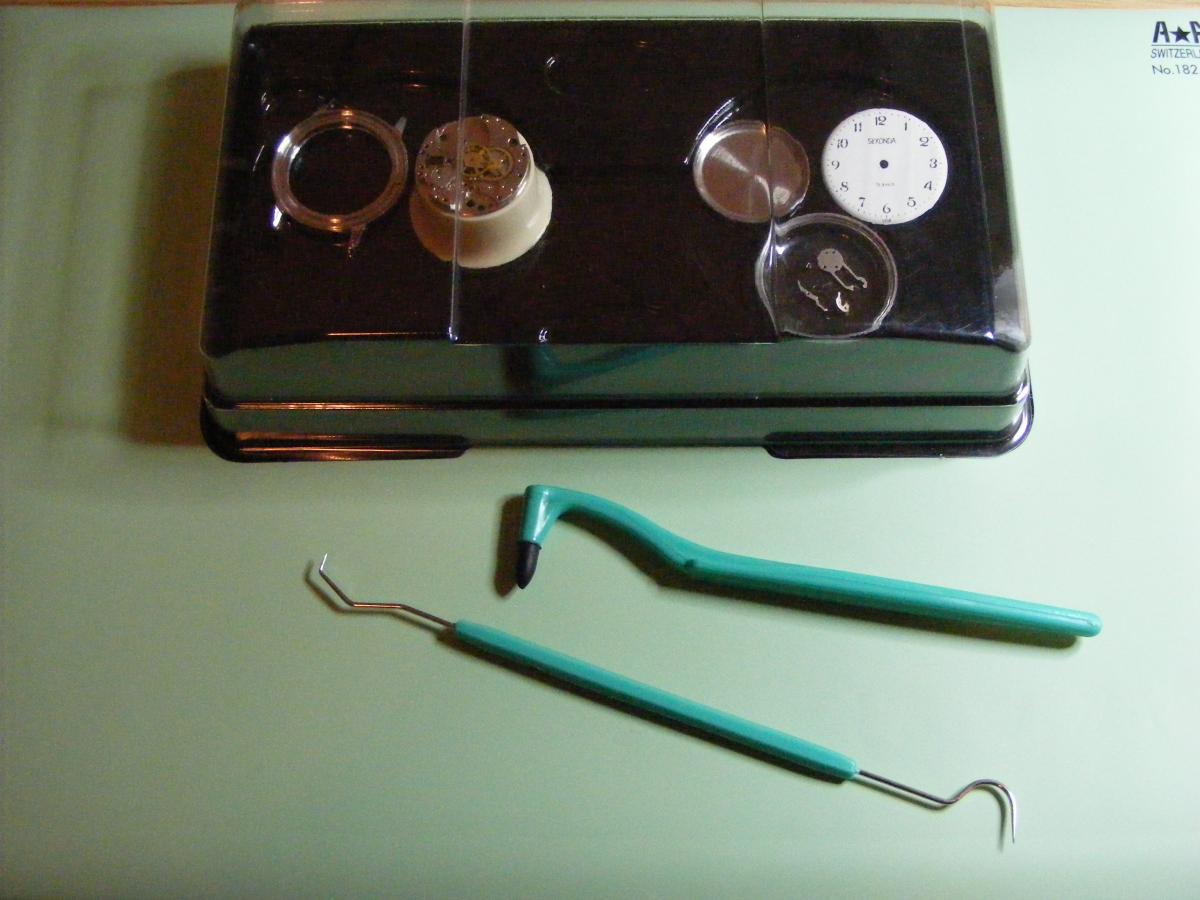
Not in the same league but I find these useful , tools from a dental kit , 99p stores, & plastic dust cover Marks & Spencer's smoked salmon roulade ! ;)
 1 point
 -
A splendid solution to the oiler holder. On an awful wet afternoon, not having the nice screwdriver stand, I resorted to using a block of Teflon that has been in the cupboard for many years. Drilled and chamfered to 4.5mm it takes the oilers without those plastic covers and being a dense material it stands firmly on the bench. Thanks, Jim, for providing this useful tip and a means to forget the weather.
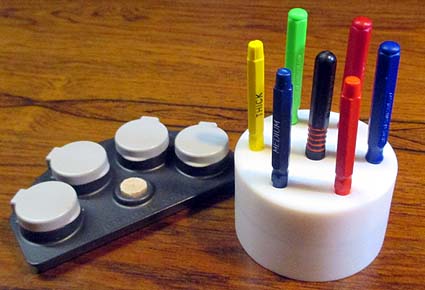 1 point
 -
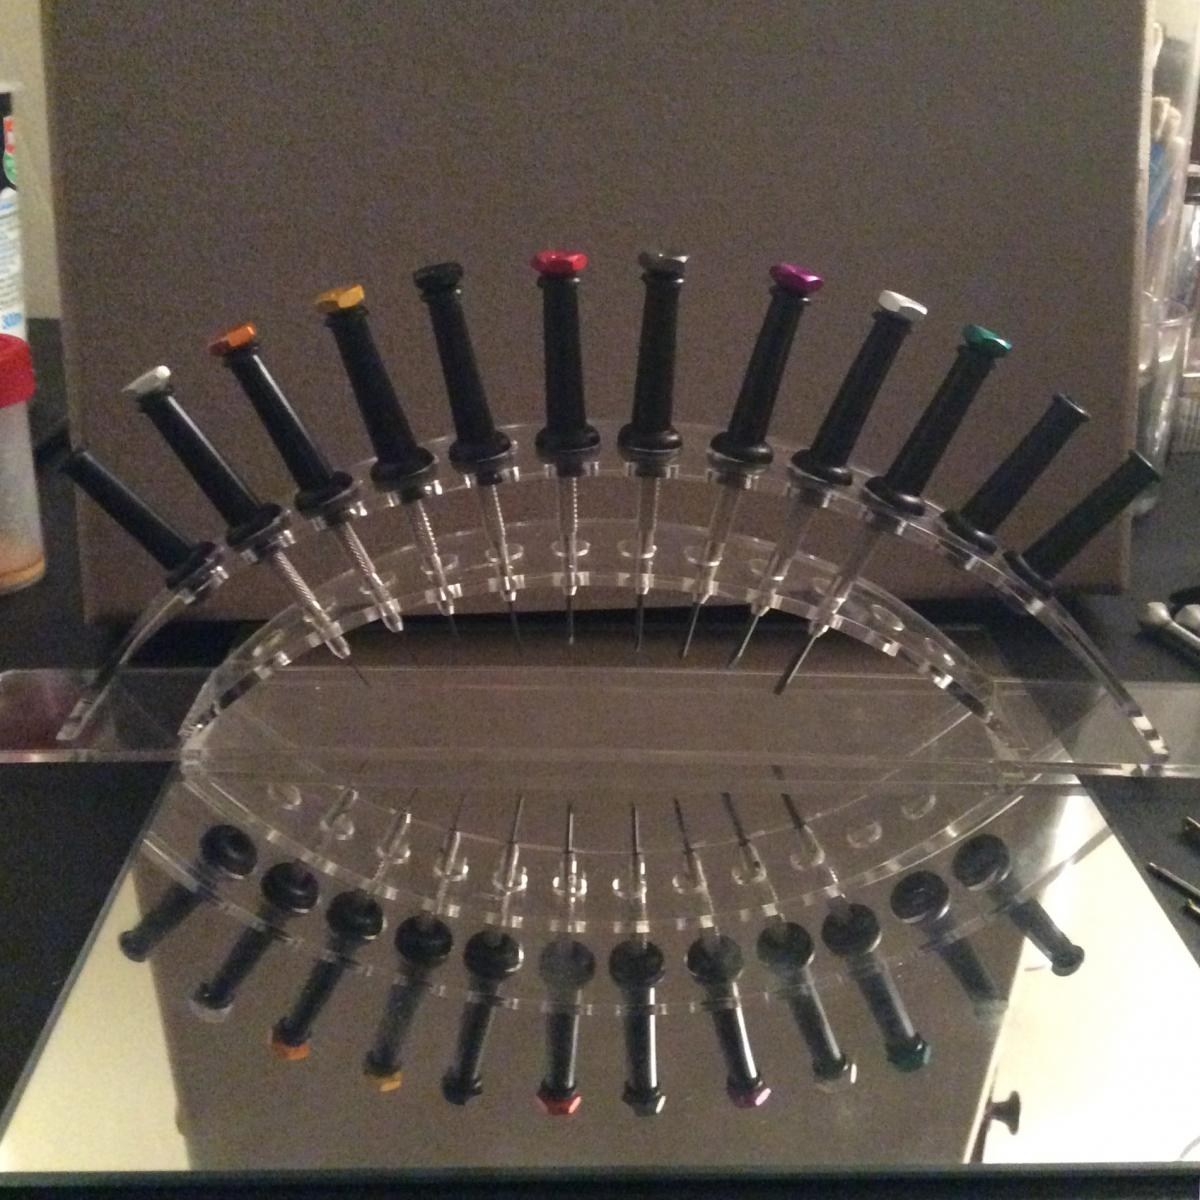
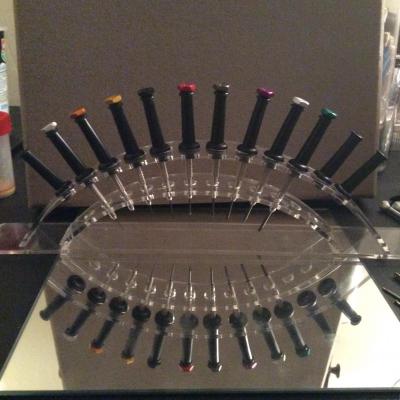
That's my screwdrivers stand which I've been using. It's actually a chopsticks gift set from Vietnam. I've just ordered an acrylic stand for my tweezers. Never thought of it before, thanks to you guys. [emoji2] Sent from my Lenovo S650 using Tapatalk
 1 point
 -
this cost me £6.20
 1 point
 -
Hi Marc, it's a "TANGLEWOOD NASHVILLE IV TND ACOUSTIC GUITAR" and the top is solid spruce. It's an economy guitar, but the sound is absolutely brilliant for the money.Oops I forgot it's watch of the day, so it's the old Harwood today.
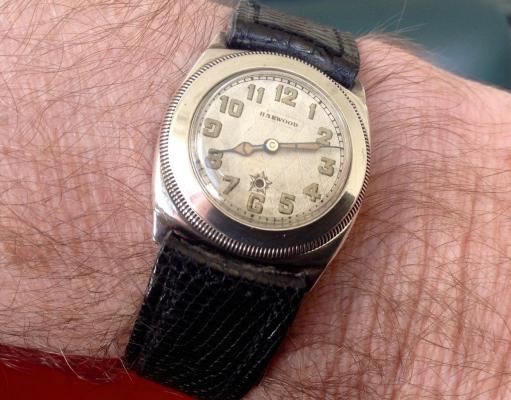 1 point