Jump to content

Hampden 12s #603 "quickie"


Recommended Posts

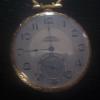
Okay here is my first, (virginal) walkthrough, I got this 17j Hampden for less than $30,  it's not uber rare scarce or anything uncommon, anyway upon arrival, I immediately noticed some rusty hands and lack of winding (AAAARRRGGH), fortunately it was just from cheap crystal, (I think) the seconds hand is almost gone!)

DSCF0383.JPG

Next off they came and things still looked pretty good.

DSCF0384.JPG

I don't like dust shields and read somewhere they are not recommended/necessary on Hampdens anyway.

DSCF0385.JPG

when I got under dial, the cannon pinion and hour wheel were pretty toasty, otherwise it was pretty clean.

DSCF0386.JPG

Next, off comes balance assm and out comes pallet bridge and fork. Just in case, I did try to let down mainspring, but that appeared to be part of problem.

DSCF0387.JPG

Then comes main barrel bridge, winding wheel, third and fourth wheels and bridge, note steel escape wheel and white/clear jewels on pallet fork.DSCF0388.JPG

Out comes barrel and arborDSCF0389.JPG

And just as suspected, mainspring is a goner! Note the serial number inside barrel, matches the rest of watchDSCF0390.JPG

Dial cleaned up pretty nice, lot's of hairline dirt removed. Still has some nibbles between the 10 and 11, that's what I call character!  

DSCF0391.JPG

New spring

DSCF0393.JPG

In goes the new spring, I did this by hand, (too cheap to invest in winder!) Just a pinch more to tighten up arbor and greased.

DSCF0394.JPG

Patiently awaiting their return after cleaning. The cannon and hour wheel were replaced, I got lots of parts, so no issues there.

DSCF0392.JPG

Now with everything tidy, back goes barrel and bridge

DSCF0395.JPG

Third and fourth wheel bridge, plus touching up pivots/jewels with oil as we go. This last part can be a bugger if you don't line everything up, I give it a "soft screw", pardon the expression, but I'd rather check everything before it gets tightened, (learned the hard way on that one)

DSCF0396.JPG

New Cannon Pinion, hour wheel and  dial washer on and dial ready for replacement. A few more touches of oil on dial side pivots. ( a bit heavy handed on the barrel, did clean that up a bit)

DSCF0397.JPG

I picked out new hands, pretty fancy scmancy and had to replace second hand too.

DSCF0400.JPG

Now I know I  didn't show all that boring stuff with the keyless works, set springs and winding wheels and mainplate cleaning, but it all had to be done, I just wanted to show how relatively simple these movements and others like them are to work on and hopefully get some others to try their hand. One quick vid,

she's running like a scalded cat!

DSCF0401.AVI


  • Like 4
Link to comment
Share on other sites

2 hours ago, oldhippy said:

Nice work. What was the problem with the cannon pinion and hour wheel?

Thanks, there was a touch of rust on main wheel and cannon pinion, was able to get apart and clean up with some gentle persuasion. Once I looked closely at hour wheel it was worn and 'crimped' to that point where there wasn't any free travel between the two. So if I had gotten the hands back on straight, chances are it would have run slowly.

Link to comment
Share on other sites

7 hours ago, WileyDave said:

Thanks, there was a touch of rust on main wheel and cannon pinion, was able to get apart and clean up with some gentle persuasion. Once I looked closely at hour wheel it was worn and 'crimped' to that point where there wasn't any free travel between the two. So if I had gotten the hands back on straight, chances are it would have run slowly.

Lucky for you that you had parts, it could have caused the watch to stop.

Link to comment
Share on other sites

Great walk through and I think you found an amazing watch for the price! 

That is a beautiful movement too BTW.  The form of a high end American made pocket watch is hard to beat.  Look at that dameskeening and perlage.  Beautiful.  :thumbsu:

Link to comment
Share on other sites


  • Recently Browsing

    • No registered users viewing this page.
  • Topics

  • Posts

    • Moved in. Now working out the best place to have things so moving around the room makes sense. The wooden movement testing rig may end up being suspended from the roof with some pulleys and ropes that I salvaged from some alfresco blinds that we replaced. I always seem to salvage things from things we scrap thinking, "I have an idea what I can use these for." I hope I'm not the only one that does that. My wife hates me for it. "What are you going to do with all this crap?" Anyway, here you go. If anyone has suggestions for workflow around a room, speak up. All Ideas are appreciated. The bench on wheels will carry either a laptop or my Samsung table for using with the little camera that is on the tripod for photos while dismantling etc. The small bar fridge in the corners going to have water etc in it and I might move the coffee maker from the kitchen out there as I am the only one that uses it. I want to get an ultrasonic cleaner so I may set up some sort of cleaning rig in front of the glass of the sliding door. Where the grandmother clock is currently standing. I'm hoping that I will be able to transition my working area, which is the table that the stool is sitting in front of, fairly easily between clocks and watches. I'll be doing my best to make sure that tools for each are separatedwhen stored. Logistics. I'll have a bit of wall space for being able to hang clocks if I find some that I wish to keep or hopefully at some time to be able to hang customer clocks for monitoring after servicing/repairs. The clock on the left in the blue pillow slip and the grandmother clock are earmarked for  Jarryd and his wife, Sara. He helped me move the benches in today. And then went on to tell me that ticking clocks drive him nuts. Who doesn't like the rhythmic ticking of a clock? I have a green pad for adding to the bench for a working surface. It is not a cutting mat or one of the Bergeon mats. It is actually a green desk writing mat. Was really cheap and will do exactly what I want, I think. I also have to get the sparkies back that put our new stove in to put some power points on the walls behind the benches. Hopefully this is all going to go well. I'm excited about it. It'll beat having to live out in the garage doing it. The other thing I have to do is cut a circle or square of plastic to go over the bouncing watch or clock part black hole in the middle of the floor. I would pretty much guarantee that anything that sproings off the bench would end up going straight down that drain. 😄     
    • So leave off the seconds. Stand the movement on its edge, its the dial edge that rests on the pad ( either rubber or cork , something that wont slip ). Use a finger of your left hand to hold the movement upright,  right hand presses the release and flicks out the stem. I do it this way so i can see what I'm under a microscope. But you could hold the movement between two fingers of your left hand, its the right that has to manipulate the stem out by pushing the release and flicking out the stem with  right ring finger nail. Sounds more complicated than it actually is. I guess you could fix a push pin to something solid, then all you need to do is push the release against the pin, leaving your right hand completely free to pull the stem out.
    • Try putting everything back together and closing the back cover. I think one of the two springs has to contact the metal casing to ground the casing. So when you press the button, it will touch the contact on circuit board and close the circuit.
    • Yes, the seconds hand is the longest and goes almost to the edge of the dial. I can’t quite picture it how you do it on the rubber pad
    • A don't think so it leaked or damaged it because the watch itself works it just the buttons ain't working not connecting with the circuit board have taken more pictures of where the buttons makes contact with the circuit board.
×
×
  • Create New...