
Straightening pivots.


-
Recently Browsing
- No registered users viewing this page.
-
Topics
-
-
Posts
-
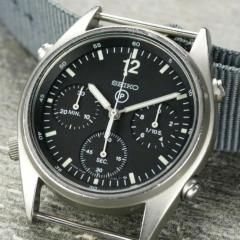
 A couple of pictures of the front… Sorry, I’m months away from this one, but…there is an edge to the bezel but I see no obvious signs of previous bezel removal and it is quite thick so it would be difficult to grab an edge on the crystal with a crystal lift. It does look like in/out thru the back…good luck…
 -
-

-
 Personally I would salvage the missing screws from some donor movement. I also bought a random selection of screws "Assortment of Stainless Steel Watch Screws" for next to nothing. As for using an Alum solution - I had great success with that removing a rusted stem from a stainless steel crown. The best piece of advice I read on doing that was to keep the solution warm so that the reaction didn't take weeks! I did it in a couple of hours with the solution in jam jar and the jam jar in a saucepan full of water which I left on an induction hob maintaining about 60C in the Alum solution.
 -
 I decided that it was time to tackle the piece that I'd set aside as my first project. The subject in question is a Gruen Veri-Thin pocket watch. It winds and "runs". On the time grapher, it has reasonable amplitude (240 or so depending on the position), but was loosing close to a minute a day. The stem also has the annoying tendency to just come out when pulled, which makes it super hard to set the thing. As with many things this one started sideways and just got more so. I was able to overcome the mangled "tab" on the back case cover (a well placed, very sharp knife enabled me to get in when I couldn't get a purchase on the mangled tab with a case knife.) I was then sort of shocked to find that one side of the dial was held down with some sort off tape or adhesive material as someone had broken the dial foot screw on that side and left the broken screw in the mail plate. The loose stem does in fact seem to have been a poorly tightened setting lever screw, but I'm afraid there may still be gremlins in the keyless works. While I was able to get the stem to stay in by putting everything in the right place and tightening the setting lever screw (before I took it all apart for cleaning and inspection), it just didn't seem to all sit right. The final gremlin showed up when I was taking off the lower cap stones for the balance and escape wheel (yes the Gruen 380 seems to have a cape jewel on the escape wheel). The balance stone came off fine (but that in fact is the smallest screw I've ever seen. When I turned the movement around to get the one off the escape wheel setting, I found that the screw head had been mostly sheared off. After some reading and looking at what I had, I decided to try and tease what was left of the screw out of the hole by nudging what was left with the corner of my smallest screwdriver. After 20 minutes or so, I was able to get the remains of that screw out. The picture I'm including of the disassembled movement was taken before I got the second cap stone off, so in the picture, it's still attached to the main plate (for those looking carefully, you'll only see the one cap setting in the pic.) Now I'm left with: A broken dial screw inside the main plate that needs to come out A broken cap stone retention screw that I have in my parts tray, but that is strictly useless and needs to be replaced. The need to get another dial foot screw I'm contemplating solving the first problem by soaking the main plate in an alum solution. I think the main plate is brass and shouldn't be affected, but I have not been able to confirm. This seems like the easiest option as I can't really access both sides of the screw to use the pricey Bergeon tool (which I don't fancy buying unless I have to.) I have located a couple of donor movements and have questions out about whether or not the include the dial foot screw and prompting for pictures of the dial side so evaluate the cap stone settings. I've also found that a supplier in this country does have the cap stone settings, but isn't overly clear about whether the screws are included. Are these the types of things that one can scavenge out of assortments or is it best to just grab one of the donors assuming that they look like they have what I need?
-


Recommended Posts
Join the conversation
You can post now and register later. If you have an account, sign in now to post with your account.
Note: Your post will require moderator approval before it will be visible.