Jump to content

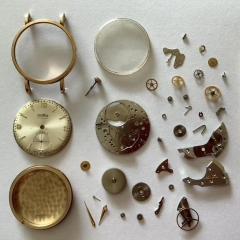
Making a stem for a watch, I don't understand the tap sizes


Recommended Posts

I recently purchased a brand-spanking new Sherline lathe, which has the ability to cut threads.  However, I am still unsure of how the stem tap measurements work.  Some websites say that the tap is proportional to the thread diameter (larger diameter = larger tap).  Some websites say that the tap is inversely proportional to the thread diameter (larger diameter = smaller tap).

Then there is the issue of what the actual thread pitch of the stem is.  Assuming the simple approach of tap being proportional to diameter, what is the thread pitch or TPI of these tap numbers?  I've read that it closely resembles the Bourgeaux thread series.  But I can't get a straightforward answer of what exactly the Bourgeaux thread series is.  Different websites report different numbers.  I can't find an authoritative source to get the actual numbers.

Link to comment
Share on other sites

1 hour ago, Neverenoughwatches said:

That defo warrants a photo Greg, what on earth were you thinking ? That you could get away without one 🤨

Because I purchased it so recently that it hasn't even shipped from Sherline yet. 🙂

Link to comment
Share on other sites

Hi John, that was one of the websites I found before making this post.  I bought the inch version of the lathe, but you can still cut metrics threads.  The instruction manual for the thread cutting attachment includes the gear setup for cutting metric threads on an inch lathe and vice versa.

Link to comment
Share on other sites

9 minutes ago, oldhippy said:

Here is the table for  Bourgeaux thread series.

https://www.sizes.com/tools/thread_bourgeaux.htm


Thanks hippy.  That was one of the websites I was referring to when I mentioned that different websites report different numbers. 

Mainly

https://www.sizes.com/tools/thread_bourgeaux.htm

and 

https://www.chiark.greenend.org.uk/~alanb/martin.html

The sizes.com also has a page on the Latard series, and gives a reference to a nearly 100 year old German book.  So at least it's something to go by.  But there are no such references for the Bourgeaux thread.

Then there's also this book (p69 and p70) which reports that Bourgeaux had a pitch of 0.94^n or 0.9^n, neither of which conform to those two websites.

https://www.researchgate.net/profile/Randall-Brooks/publication/233455494_Standard_Screw_Threads_For_Scientific_Instruments_Part_I_Production_Techniques_And_The_Filiere_Suisse/links/568c0ec708ae153299b63b04/Standard-Screw-Threads-For-Scientific-Instruments-Part-I-Production-Techniques-And-The-Filiere-Suisse.pdf

However, this whole point is moot if there is a place that can give the exact dimensions of current stem threads.

Link to comment
Share on other sites

13 hours ago, GregG said:

this whole point is moot if there is a place that can give the exact dimensions of current stem threads

The problem with looking for certain specifications is the specifications only exist if someone is trying to make that item typically. The problem becomes finding the specifications become problematic if nobody's actually making stems and him.

Then at one time they used to make a set for re-tapping the crown. The that a holder for the crown a drill and a tap and it was made by star and that's all the information you get the sizes are intent's of a millimeter. But it doesn't say give the guy information you're looking for as I didn't assume you be using it to try to make a stem.

There is a couple links you might have missed perhaps

https://mb.nawcc.org/threads/watch-stem-threads-made-on-sherline.157058/

I think this one covers the same stuff you have but to put it here anyway

https://mb.nawcc.org/threads/watch-stem-tap-sizes.124651/

I think probably what you're going to have to do is get stems of the size you like to make and imitate the threads that you find on them.


Link to comment
Share on other sites

  • 3 weeks later...

I went with the CNC-ready package, so I had to supply my own motors. I've written a rudimentary "CNC" program in Python that takes an SVG outline of a balance staff that I create and moves the motors to cut accordingly.  But I haven't stitched all the pieces together yet.

They are also closed loop stepper motors, meaning they have an internal feedback mechanism to accurately control the position.

Edited by GregG
  • Like 3
Link to comment
Share on other sites

5 hours ago, oldhippy said:

Are you sure its big enough to make a watch stem. 🤣

On a somewhat related note, I found a video about the American Precision Museum, and they had one of the machines used to make watch screws (at 48 seconds if it doesn't automatically jump to that point).


  • Like 1
Link to comment
Share on other sites

1 hour ago, GregG said:

and they had one of the machines used to make watch screws

here's a book that talks about things like this unfortunately not the kind of detail I would like but still interesting.

The Evolution of Automatic Machinery: As Applied to the Manufacture of Watches at Waltham, Mass

https://archive.org/details/evolutionautoma00marsgoog


  • Like 1
Link to comment
Share on other sites

1 hour ago, GregG said:

On a somewhat related note, I found a video about the American Precision Museum, and they had one of the machines used to make watch screws (at 48 seconds if it doesn't automatically jump to that point).


I believe this is an identical machine in action, amazing for 1870s!


  • Like 2
Link to comment
Share on other sites

1 hour ago, nickelsilver said:


I believe this is an identical machine in action, amazing for 1870s!


I think the video you linked to is the video that is playing on the iPad in the museum video. XD

Edited by GregG
Link to comment
Share on other sites

Join the conversation

You can post now and register later. If you have an account, sign in now to post with your account.
Note: Your post will require moderator approval before it will be visible.

Guest
Reply to this topic...

×   Pasted as rich text.   Restore formatting

  Only 75 emoji are allowed.

×   Your link has been automatically embedded.   Display as a link instead

×   Your previous content has been restored.   Clear editor

×   You cannot paste images directly. Upload or insert images from URL.


  • Recently Browsing

    • No registered users viewing this page.
  • Topics

  • Posts

    • I was given a 1920s? Limit pocket watch in very poor condition a few days ago. The case back was very badly rusted with deep pitting. Someone on here advised me that the case was originally blued gunmetal, so I thought I'd see what was possible with it, to make it not quite so bad at least! Heat bluing seemed out, as the hinge looks to be brazed in place & I did not want to risk it falling apart!   I got a bottle of "Jenolite gun blue" to try. First, I sanded the back to remove all visible rust, working from 1000 down to 7000 grade. There was no visible brown at that but still remains of deep pitting, that I though would take too much metal off to fully remove. An ultrasonic clean in weak Ajax floor cleaner solution for a degrease, as I usually do with case parts, rinses in the ultrasonic then a wash with deionised water followed by IPA to ty and ensure no parts would be "un-wet" in the chemicals. The gun blue mixes 1:3 with deionised water, then soak the parts for 15 minutes; I used a glass jar just big enough to completely submerse the case, and moved it around every couple of minutes to try and ensure an even effect. I did the bezel with a cotton bud, flat in a jar lid, glass in, and the solution applied around the outside with a cotton bud every few minutes, so it did not get on the inner silvered surface.   Everything had a good rinse under the tap once done, then a brief deionised water rinse & dried. The finish it totally matt black as it comes out the solution, with the black sediment rubbing off on anything it touches! There were some traces or brown rust after it dried, so I tried boiling it for half an hour, as apparently that should convert brown rust to black??   Once everything had cooled and been dried out, I tried burnishing the surface with thick kitchen towel dry. That seems to work quite well, removing the loose particles and gradually brining it to a dull shine - but it's quite sensitive to pressure and a crease or fingernail pressure leaves a different level of shine to a smooth pad, until that wears through and creases.... It's not finished, my fingers are aching so giving it a break. I'm hoping the finish will even out with further burnishing, though the residual pits in the back are probably there for good & I'm not sure what to do about the traces of brown that have re-appeared. The instructions for the chemical blue say it should be oiled as soon as dry, then left to cure for 24 hours - but I'm not sure about soaking a watch case in oil? I did leave it overnight before boiling & burnishing.   It still need more work and detailing! But the effect looks promising.   Before:   After, still needing further burnishing. All the streaks are pressure marks, where the burnishing has smoother or removed more of the surface material. I'm hoping that a fine brush will clean the details and edges, where a cloth cannot do anything.            
    • This way removes the process of any material changing heat treatments . I assume the heat from spot welding is so localised it doesn't change any properties of the spring. 
    • Maybe because I have a spot welder, my prefered method has always been to spot weld another piece cut off from an old mainspring.
    • Hi, I've serviced a Tissot 2481 movement which had a broken mainspring, I used the following from Cousins a GR 2973X mainspring which fitted with no issues. Your issue is a common problem that is often mentioned on this site, that you source a mainspring that matches your original mainspring dimensions but on arrival the mainspring eyelet doesn't match your arbor, generally too open. Regards CJ
    • Two ways in which i tighten up the inner coil. 1st which has always worked up to now when the spring is new or very good shape, a brass/wooden rod inside the coil to press against, i just use small pliers to manipulate the spring. The wooden rod has that extra give so you can overcompensate with your bend to allow for the steel's elasticity. If you want less breakage risk then anneal just the arbor coil, then reharden and temper when you have the shape you want. 
×
×
  • Create New...