Jump to content

Replacing Shock Spring On Bulova


Recommended Posts

Hello,


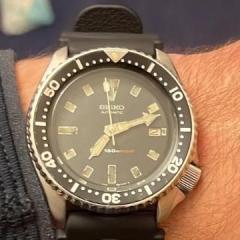
Hope everyone had a great holiday. I was working on a Bulova Oceanographer auto-winding day/date (11ANACB) watch and lost the setting lever. That was only the beginning because after I continued with the overhaul I broke one of the shock spring legs from the dial-side. when I went to replace the jewel the spring jumped out and is lost. I have a Bulova  11 BLC that I took the shock spring out of but I cannot get it to stay in the oceanographer movement. Does anyone have experience with this? I was thinking I'll probably have to get a whole new working Bulova 11 ANACB just to get the setting lever and just as importantly the shock spring for the lower plate. Dashto watchparts has the setting lever and its also on Ebay, but I can't find the shock spring anywhere. So...I wanted to get some feed back before I go ahead and buy a not-so-cheap Bulova Oceanographer just to harvest it for twio parts--especially if the skill set for replacing a shock spring surpasses that of a neurosurgeon. Maybe I'm better off just replacing the whiole bottom plate shock system and all? Please weight in on this one!


Here is the watch itself:


post-328-0-18266700-1420490543_thumb.jpg


And the problem:


post-328-0-35153500-1420490626_thumb.jpg


post-328-0-19106800-1420490631_thumb.jpg


Link to comment
Share on other sites

Put one side of the hinge into it's locating groove. Cover movement with clingfilm.

Then get a piece of sharpened pegwood to hold it in place while you press the other side into it's locating groove with another piece of sharpened pegwood.


Or step 1 above then place a small amount of rodico over the spring leaving the hinge exposed while you press it in with your pegwood.


Good luck.

Link to comment
Share on other sites

I haven't worked on them enough to hate them, but in my limited experience, I find Bulova's difficult to work on. This particular model also has the "lifetime mainspring" that  even has written on it "DO NOT OPEN". I think that the spring I was trying to use is not the right size because I managed to put it back into the donor watch with no problem--Looks like I'll have to buy a donor watch (not that cheap)....Now THAT I hate.


JC

Edited by noirrac1j
Link to comment
Share on other sites

PM sent, new shock spring forthcoming. 


For those who may have found this thread by searching for a similar problem, here is a very basic KIF primer, they are actually quite sensible and logical:

KIF shock springs come in several incarnations, first thing is to determine which style you need.


Trior:

post-456-0-04687000-1420555700.jpeg


Elastor:

post-456-0-42250300-1420555745.jpeg


Satellor:

post-456-0-30676400-1420555763.jpeg


Ultraflex:

post-456-0-22145000-1420555793.jpeg


They can look a bit similar if you haven't dealt with them a lot (and if you are reading this, that is likely the case), so try to find a reference for your specific movement if possible. If not, you will need to measure the old spring. 

Replacements are ordered with the style prefix, (1=Trior, 3=Elastor, 4=Satellor, 6=Ultraflex); followed by a size reference (1=1.30, 2=1.60, 3=1.90, 4=2.10, 6=2.30) My observation is that sizes 1 to 3 increase by increments of 0.3, and 4+ increase by 0.2

The complete part number will be style-size e.g.: 3-2 will be a 1.60mm Elastor


Which is the part we need in this case. 

The Bulova-KIF reference material I was able to find did not include either the OP's 11ANACB or the 11AOACB that I was seeking originally. By checking Bulova service manuals, I was able to determine that these two used the same lower setting (112) as the 11ANACD which is listed in this reference, and uses the 3-2 KIF spring.


KIF_Bulova.pdf


  • Like 1
Link to comment
Share on other sites


  • Recently Browsing

    • No registered users viewing this page.
  • Topics

  • Posts

    • Why cut the paper, cut a square around the image and grind to it. 
    • I did try that last time Rich , i traced the image from the Bestfit book which is the actual size. But its more difficut to cut the shape from paper than it is to grind the steel to shape. This way is pretty easy and the final shaping is done when fitting the part. There are a couple of things i will do differently next time, clamping the 2 pieces together with a drill press will help to hold while scribing the shape in. This was a bit tricky having only one hole, if using the pins and cork the drill size needs to match the pin diameter so there is no movement at all from the template. This movement hasn't finished frying me yet, damaged thread in the plate crown wheel hole and two rubbed in cracked jewels, thats gonna be much more fun.
    • 👍 Whats not to follow OH ?  You're every inch a pro and a true gent, i always enjoy reading your answers even some of the clock stuff that i dont have a clue about. 
    • Could you print the image either enlarged or reduced to the same size as the actual part and then glue it to the steel. 
    • Next is to drill the screwhole this then provides an anchor point so the bridge doesnt slip around while scribing the shape. A cork lid, a pin and a piece of gaffer tape ( 😅 ) keeps it all in place. The hole is measured from the broken part using a hand measuring gauge. Mark the hole, punch it and drill it off to size. The awkward bit is working out where the jumper should be and the detent positions.  I remember watching a youtuber a while back do this with dividers, so i dug out my old school compasses and improvised a little. This bridge only has one hole and to find the detent positions you need two points of reference, so i just worked the second point from one of the corners, hopefully its near enough. Then scribe in the jumper using the two detent positions ( wind and time set ) that were marked and a big picture of the complete spring to look at that helps to give you a feel of where the jumper should be.   
×
×
  • Create New...