Leaderboard


Popular Content
Showing content with the highest reputation on 01/24/24 in all areas
-
Got there in the end, with some lessons learnt : 1. Copper plating is a great base layer to fill defects. It requires a lower temperature than nickel, and is easy to do (but you must use the proper PDO copper anodes). 2. Don't be too vigorous with polishing the nickel ! I put on about 20 microns, but still managed to go through on an edge when trying to polish out a defect. I ended up re-plating the nickel which I wasn't sure would stick, but if you activate it with acid correctly, there's no problem. I'm happy with the results. To the naked eye it looks good, with defects only really visible under magnification. I'm still getting a few micro holes, I'm not sure why. Before After (it's really hard to take pics of curved shiny surfaces) Now to fix a VERY embarrassing and expensive error I made when servicing my Breitling Aerospace
 5 points
 -
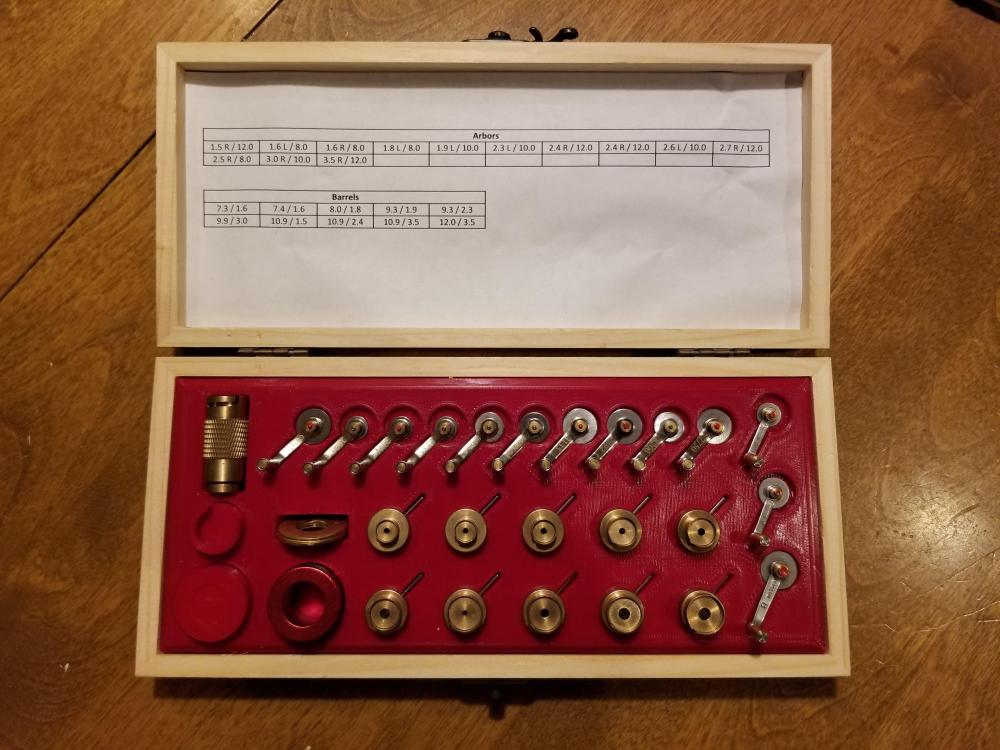
You can modify the cheap Chinese set to make it more of a generic set. I did that with several of the winders from my set, by drilling out the arbor hole to a larger size. I chucked the pusher part of the winder in a vise and slowly drilled out the arbor hole. If the winder comes apart in doing so, just push it back together. With my modified set, it is easier to find the combination of arbor and winder that I need for a particular mainspring. I went a bit further by buying the Bergeon #6 and #8 arbors (arbors only, not with the winders), which gives me arbors of 3.0mm and 3.5mm diameter, respectively. The largest arbor from the cheap set was 2.7mm and that was too small for some of the vintage mainsprings that I was working with. Well, I also bought the #4, which turns out that I didn't really need. If you need a left hand wind but only have a right hand arbor (or vice versa), You can do one of two things. Wind up the mainspring into a winder, preferably a bit smaller than you would normally grab, push it into the winder that is a bit bigger than the first, then push it into the watch barrel. Or you can make up a series of brass washers, drilled out to different diameters, grab one of those to push the mainspring into, flip it over and then push it into the watch barrel. Attached is a photo of my modified set and a chart that shows winder sizes. Mainspring-Winder-Size-Charts.pdf
 4 points
 -
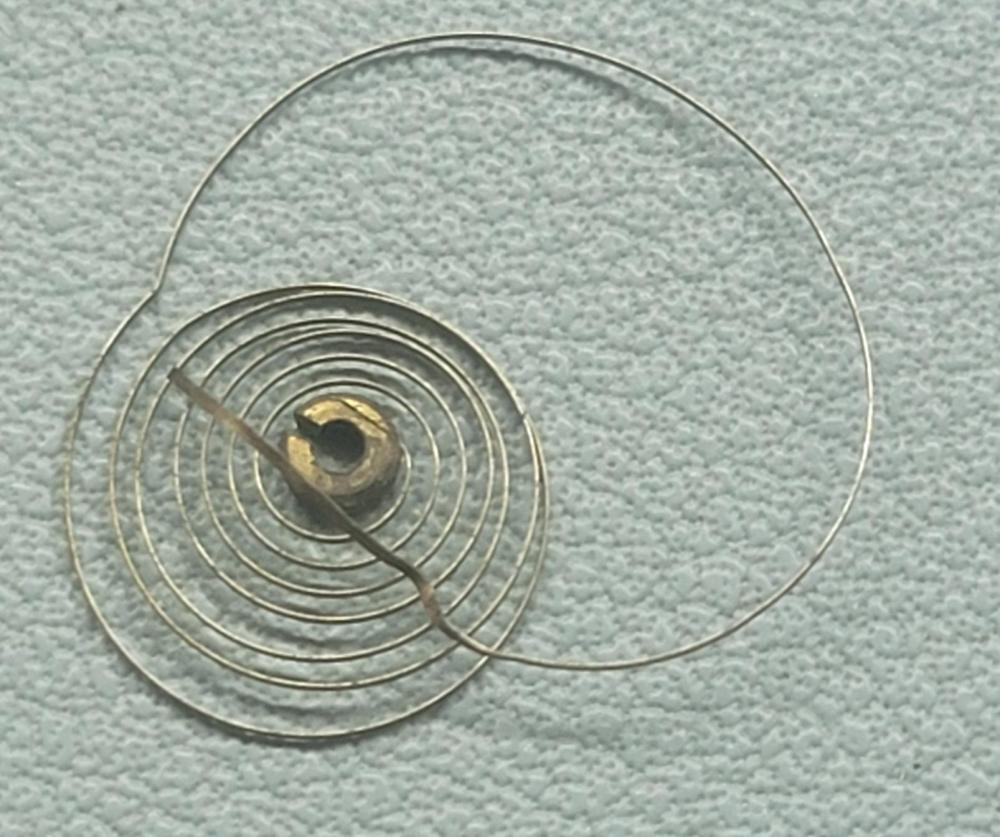
Found this among my pile-o-parts. Why not give it a spin. Had to do some cleanup first. Running now...will see how it goes ______________ I also ordered an assortment of hairsprings anyway.
 3 points
 -
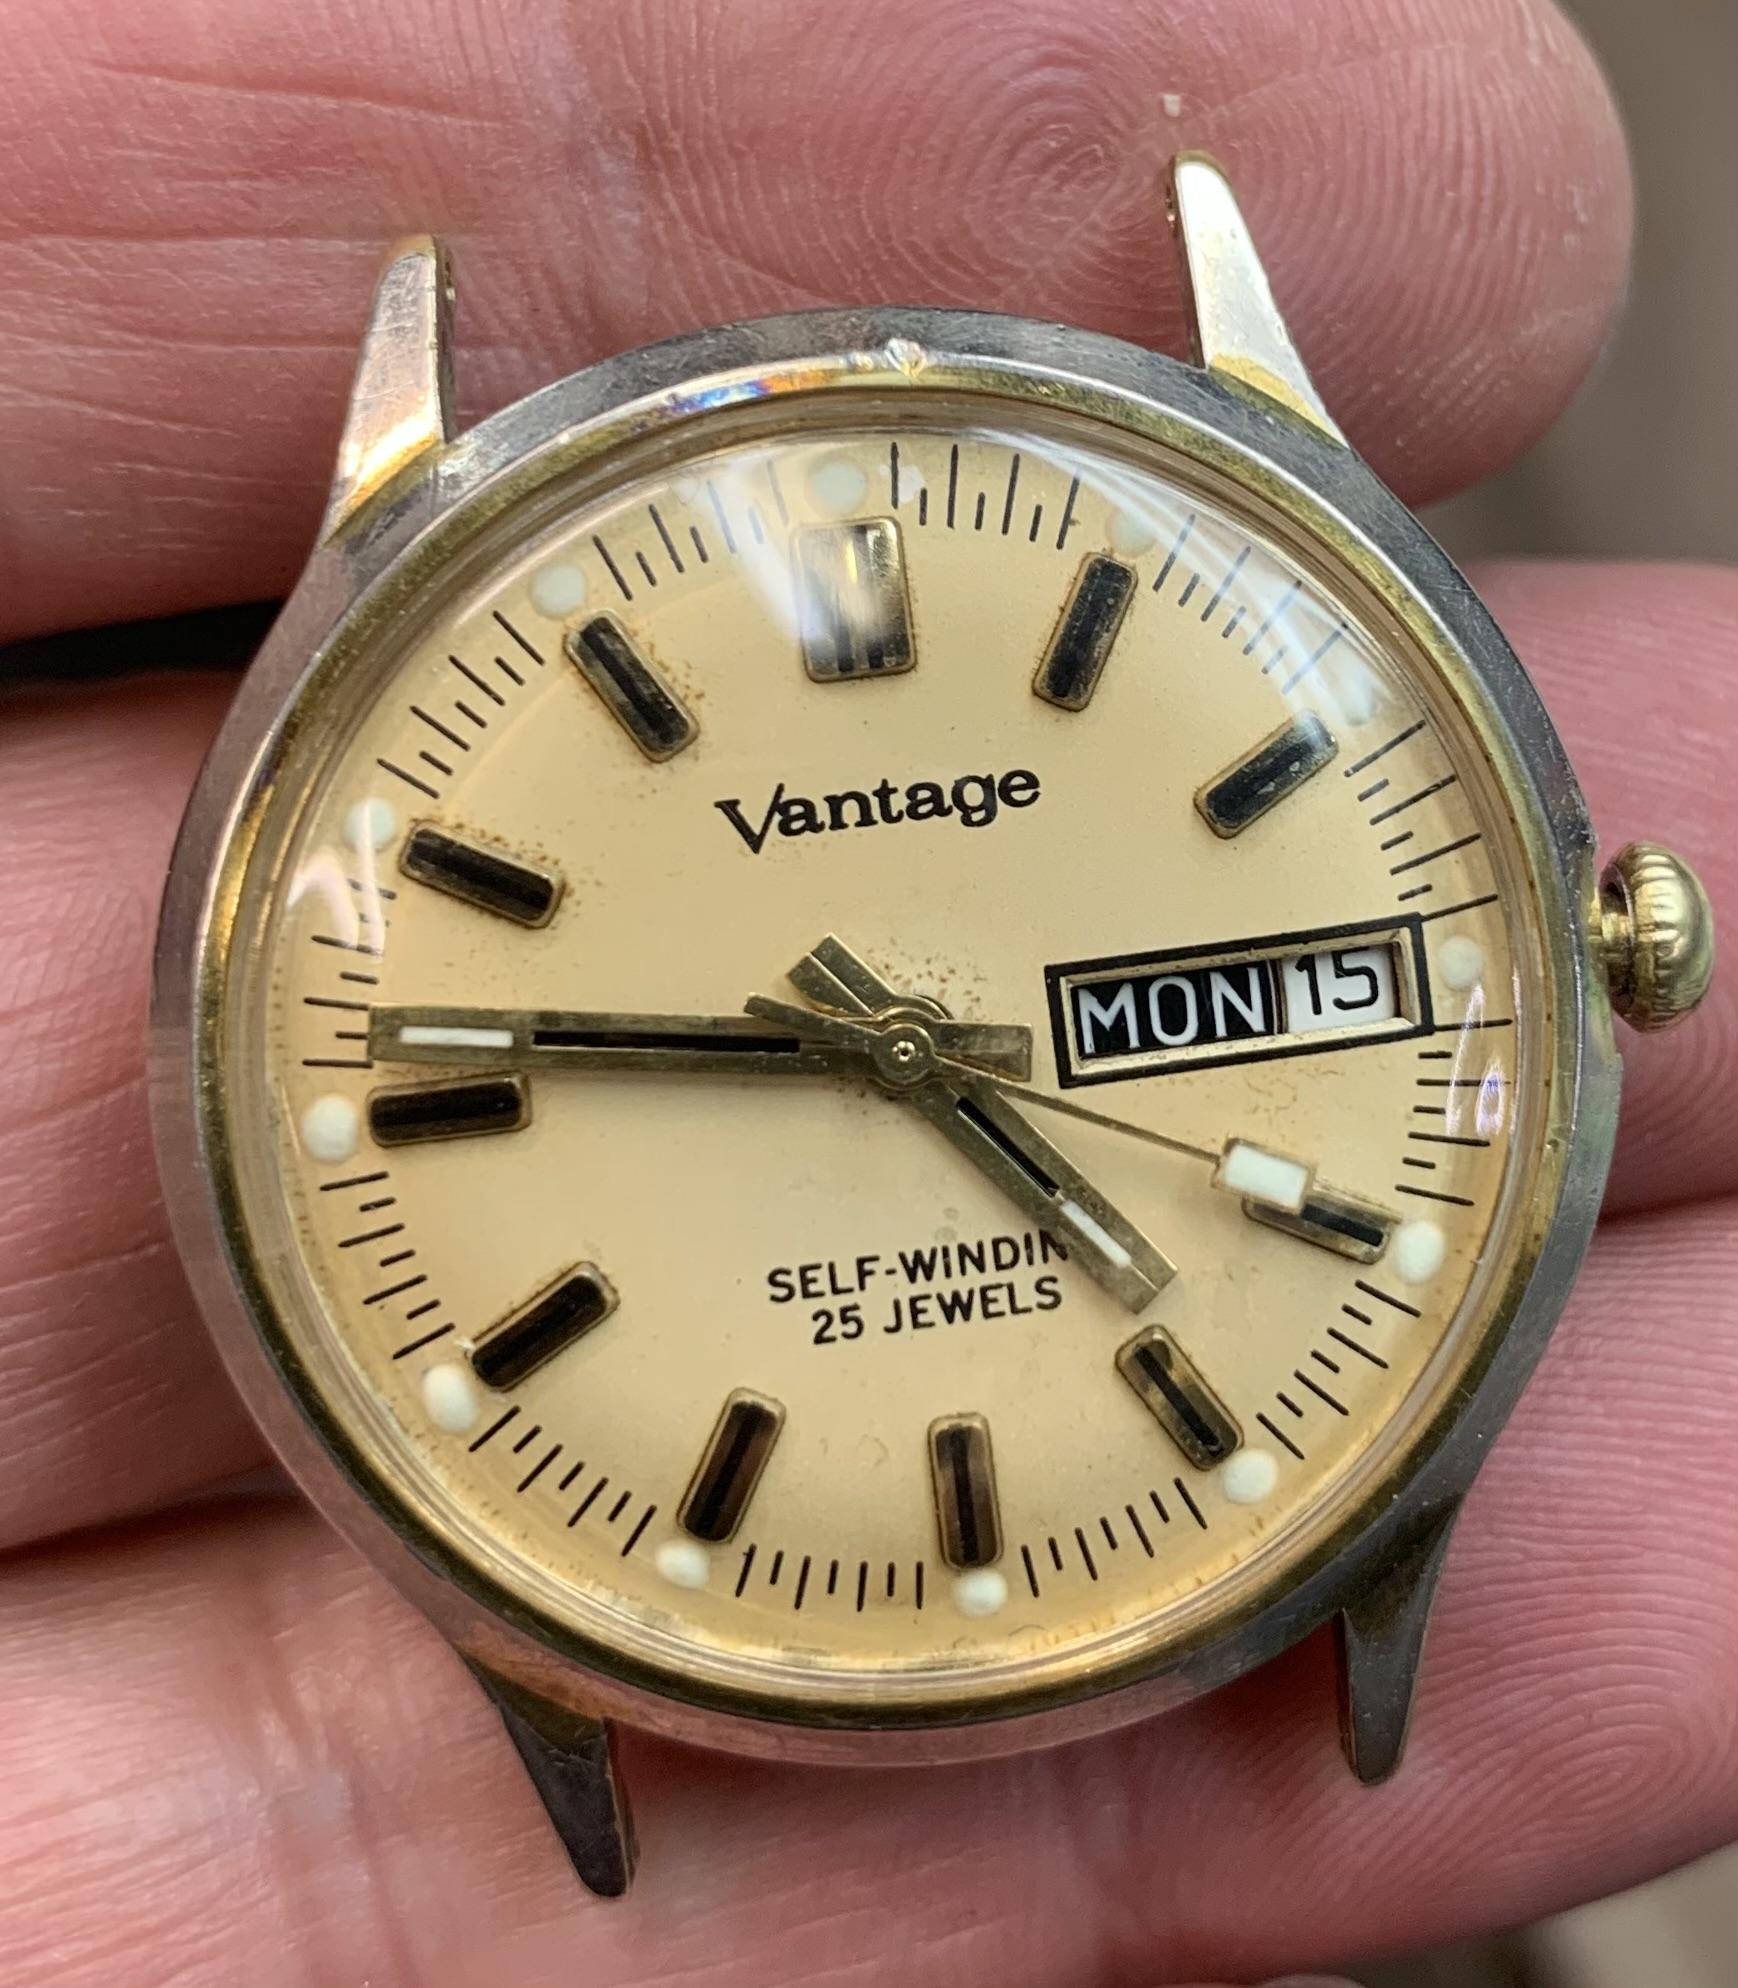
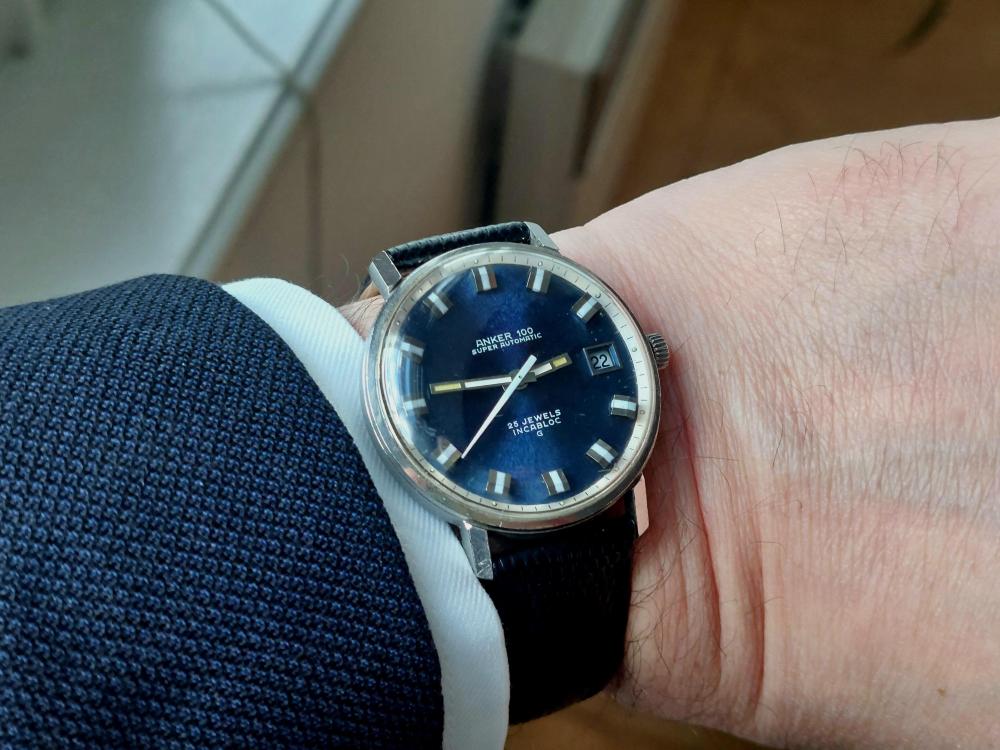
Wearing today: Anker 100 sporting German automatic 25J movement from Pforzheimer Uhrenrohwerke (PUW)
 3 points
 -
If we enjoy it thats the main thing now. But it will get more difficult to get parts i feel sure. I bet this hobby has grown massively in the last few years, you only have to look at the price increases of new and old watches to work that out. I remember Frank saying a while back." Gone are the good old days of being able to just swap the complete balance " or words to that effect. This is why there are guys like Kalle Slapp that are desperate to become totally self dependent for watch parts. The repair industry just needs someone with a yard full of cash to step up and start manufacturing obsolete parts.2 points
-
As long as we have sheer **BLEEP** mindedness to never be beaten we still have a chance Tom2 points
-
Correct Tom, i may never see one but i have a complete balance for it . That calibre is used in a few watches really not just the WWW grana. These lots are great if you can repair stuff, thats why I'm so keen on me and everyone else starting out learning the old skills like fixing hairsprings. Parts are running out they must be, in 10 years time this hobby the way its going will be much more repair than replace unless something changes. You know as well as me Tom, that we are 30 years too late to the game for it to be any more than just a game. I've made myself sad now2 points
-
I'm ever so pleased you didn't ask me how i know Tom . No actually it wasn't so bad, it was a big job lot with 120 balance comps many with naffed springs and broken balance pivots, the ones you see on ebay are all like this, they have been swapped out from the container, new for the replaced ones from the watch. A few are new but not many. You have to ask yourself, why would a watchmaker buy a load of random caliber new bal comps ? He wouldn't, they were for repairs and you end up with the naffed ones out of the watch. Some obviously hated replacing staffs or couldn't straighten out a hairspring, so on the positive side i have plenty of staff replacement practice to get in and Ross has around 30 hairsprings coming his way to fix for me . The lot was fine it had so much other material in it as well screws , springs crowns stems staffs brass tube blue steel rod setting levers there was even a few grams of wierd looking scrap gold in there that i almost threw away until i thought to look for a hallmark, that almost pays for the lot. Some of the completes will be an easy fix and there is some military among them, one in particular stood out a KF320, have a guess what movement that fits into. So yes it could have been better but it was still good and kept me quiet for a day sorting it all out.2 points
-
Got this set of carb jet broaches (0,4 - 1,6mm) for just €9,- (shipping included). They worked well for the cutting. After finishing with a smoothing broach the result is fine
 2 points
 -
I think the low amplitude comments about seiko movements are from the people that have unrealistic amplitude expectations. I love the seiko movements, not been servicing them yet but from the factory I have generally seen from 240-270 amplitude and running them for a few days I have seen this climb a bit. I find that I can get them regulated to less than a handful of seconds a day at worst. As @JohnR725 points out over and over, don’t become a slave to the timegrapher and don’t worship amplitude, not all watches are made the same and look at the overall timekeeping of the movement, simulating a week of normal use or actually using the watch is much more useful as long as the timegrapher doesn’t show any egregious problems. Tom2 points
-
one of the basic things when servicing a watch is separating the balance from the watch. But all of these watches seem to have the balance bridge still attached weird? if this was a newer watch with the etachron system I could see why you keep it attached but to remove it from the bridge is so simple and no you don't need a microscope.2 points
-
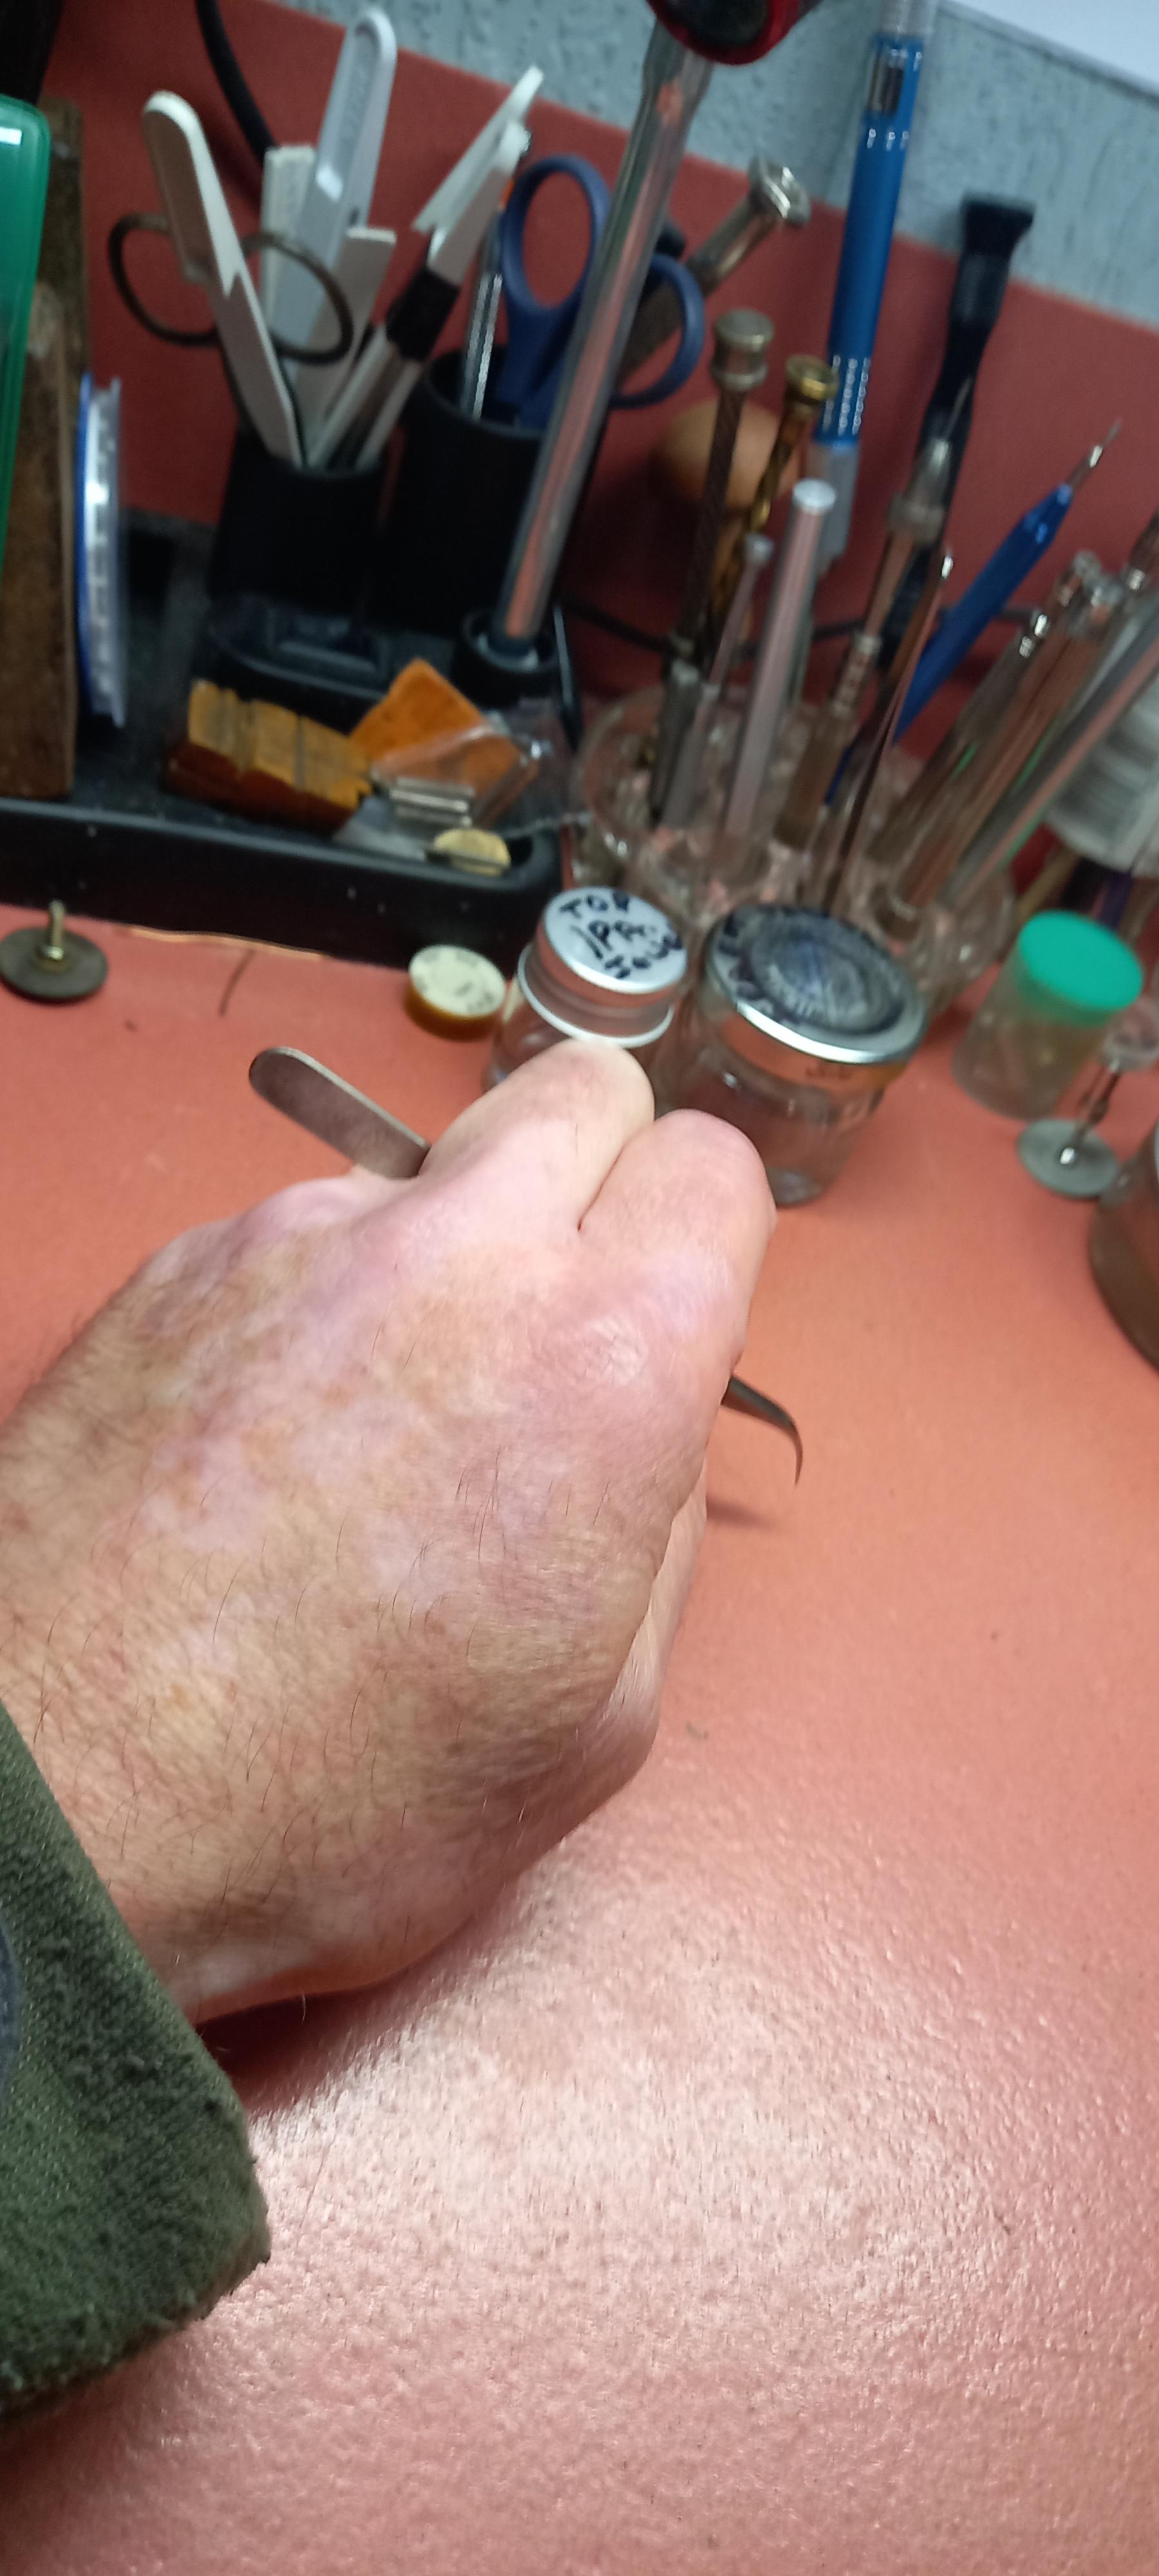
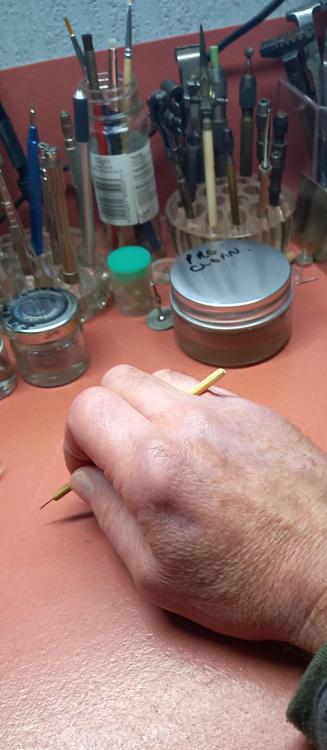
Unless you have the eyesight of a 10 year old Ross you will need a microscope to fully see what you are doing. Personally i would have a go midafternoon by which time your blood sugar will be steady a couple of hours after dinner and well past any morning coffee you might have had. But play with the time you start as we are all made and react differently to food. But yes you must practise a lot on old springs. With me the anchor tweezers fit to my left hand, the grip i have shown gives me really good control between thumb and index finger ( correction on the grip in previous post the tweezers are held between middle finger and wedding ring finger ) . The anchoring tweezer is the one that holds the hairspring, holding it this way gives me great stability, good approach angle and i can concentrate without having to worry about the tweezers slipping out of my grip. The right hand holds the manipulating pick, i haven't shown that yet but its basically an acupuncture needle with a small 90° bend at the tip. This is used to gently tease or stroke the bends out or in to improve and equalise the coil shapes. Nev shows great ability Ross, after all the corrections and the hairspring is back to shape, it can end up being quite battered and bruised with visible dings and dents along its length from all the corrections especially with something that started this bad. The important thing is how it performs in the watch, if it still has it's length, doesn't catch on anything through all watch positions and is concentric while oscillating so that the coils dont toucheach other, fits and works well between the regulator pins then thats all you can ask from a badly mangled spring.2 points
-
I will try again, for the last time. To restore the bearing, You first have to dismantle it, like this. Then, one must grind this surface a little, in order to allow two cones of the internal ring to come closer to each other The grinding is done this way, pressing the ring by finger and moving it on grinding surface - in this case a diamond file Then assembling the bearing and test of the free play, if needed - repeat untill free play gets minimal. No adjustment only by pressing is possible, this is a silly thought.

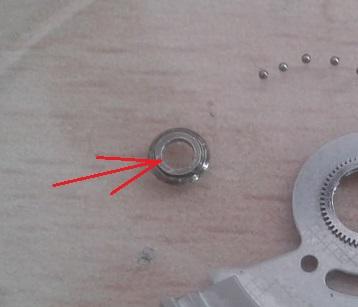
 2 points
 -
What do you think as a replacement for The bergeon 5 spoke wheel lift tool? I'm into making my own tools and have made many. Also, in my 2 years I have purchased many cheaper version of high end tools. These have served me well. I'm almost at the end of my tools purchasing. However I have always thought about a tool for removing 5 spoke wheels. I use pegwood and use them as described by Kalle of Chronoglide. Gentle pressure and rotate. Always worked. Never had a problem after breaking the first one. But I have seen one of these on ebay What do the members think? https://www.ebay.co.uk/itm/1858979664981 point
-
Stop it. Now I'm thinking about it.1 point
-
Important to grip just the hub of the wheel, if this can do that and fit between the spokes then why not1 point
-
Correct! You cannot build a business making parts. You can build a business making movements generating revenue and profit...the parts are a byproduct. All of the capx is for the machines making the movements and you (kinda) get extra parts for free.1 point
-
Nice work H.1 point
-
Some fault causing the mainspring to not slip soon enough causing continuous winding of the mainspring ?1 point
-
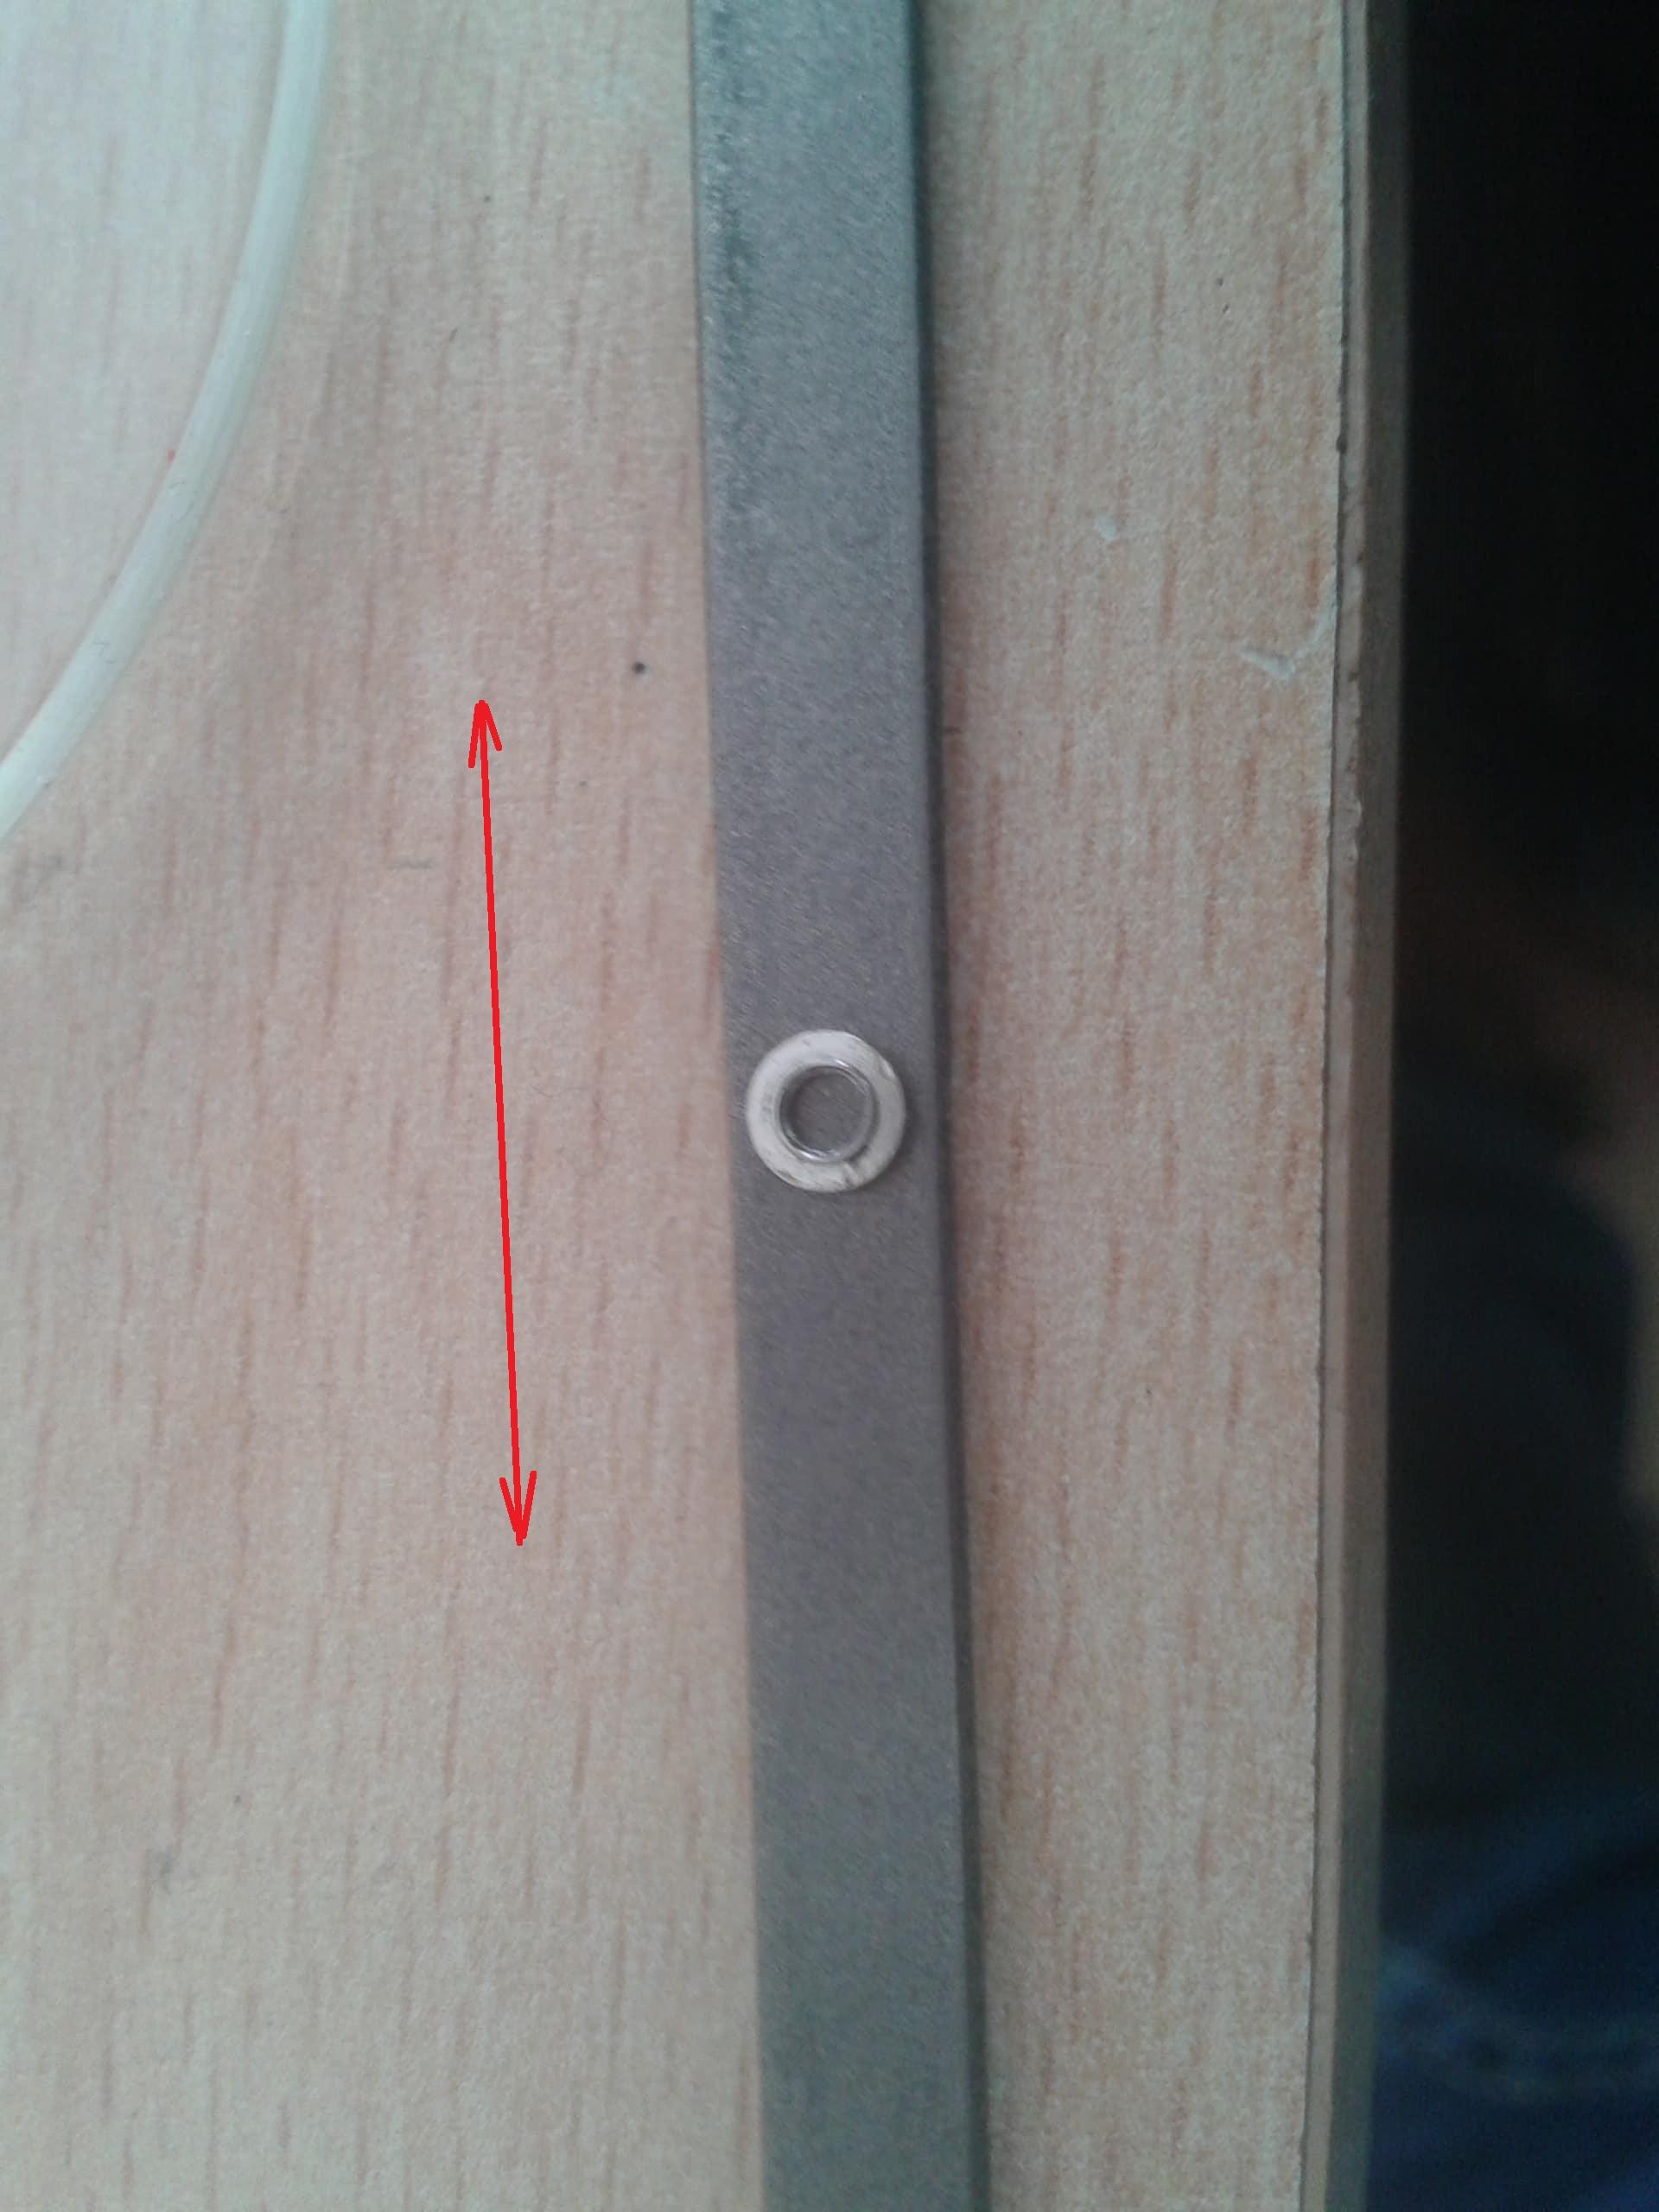
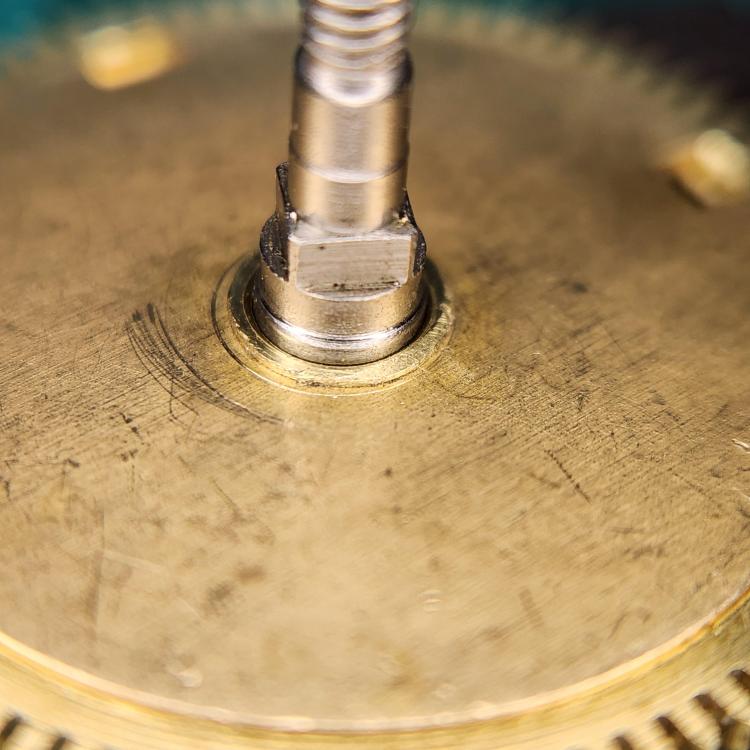
Here's a photo with the arbor in place. There is a little chamfer on this side. I also left the bush a little proud of the cap surface, in case I need to solder it.
 1 point
 -
I might agree with you Ross, but how difficult could it be ? Cnc machines these days can knock up just about anything. 3D scanning, profile imaging , technology has advanced so much now. The Tornos micro production machines are amazing. Why is it that swiss manufacturing monopolise this industry ? Surely Cousins have the finance to reproduce at least some of their own basic stock instead of labeling half their items as OBSOLETE. If i won the lottery i would definitely have some plan down that path.1 point
-
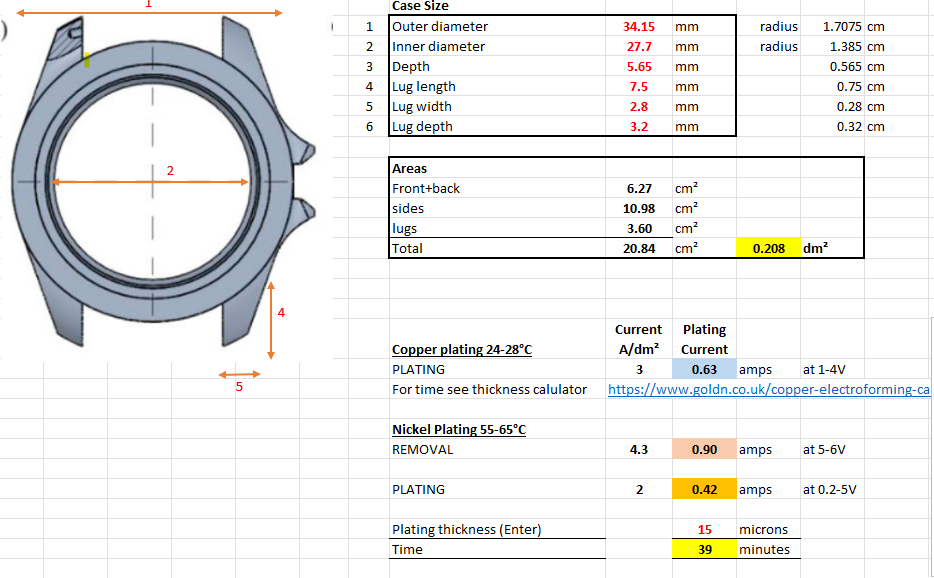
I just work out the area of a cylinder for the centre, and add on a bit for the lug. I can't attach the spreadsheet, but the calculations are, Front+back area = (outer radius-inner radius)* Pi² Sides (inner & outer) = 2 * Pi * depth * (inner radius + outer radius) Lugs = No. of Lugs * ( length * width *2 + length * depth * 2) (width and length I use average values) Add them up to give an area in cm². divide by 100 to get it in dm², as plating currents are often in these units. I use Watts Nickel plating solution. Current density are often given as 2-10 A/dm². Lower values give better finish. I use 3 A/dm². So just multiply your surface area by 3 to get the current. You can see below the values I use for nickel removal (4.3), and copper plating (2). You set the current, and the voltage takes care of itself. There's a nickel plating calculator : https://www.goldn.co.uk/nickel-tank-plating-calculator/ and copper : https://www.goldn.co.uk/copper-electroforming-calculator/
 1 point
 -
I decided to design and build my own model, link here, made sure it could handle the slimmer types of barrels that the existing one struggles with. I printed mine in PETG, but no reason PLA/PLA+ wouldn't work as well. The FreeCAD parametric files and .stl files are attached below in a zip archive, change the .pdf to .zip after you download to access. or you can take the .stl files from printables web site Barrel_Tool_R2.pdf
 1 point
 -
I forgot to close this out, so thanks to GuyMontag, who graciously sent me the correct shock spring, the watch is up and running again. I still need to go back and fix a few things; needs a new stem and the date jumper isn’t quite working right yet. Thanks Guy, and thanks for all the help with this watch everyone. Bill Here’s a before and after photo of the watch:

 1 point
 -
Is that looking at the inside? If so a little counter sink on the out side would be good for a little oil. That is just a suggestion. It looks a nice job.1 point
-
I just rebushed the barrel cap. I'll put the movement back together tomorrow and let it run for a week to see if it will hold.
 1 point
 -
Hey Ross, if you have a method that works then use it, for us hobbyists the time isn’t really a concern, for the pro’s who’ve time constraints that is a different matter and may need some investment. I suspect they would just go for the bergeon one. Tom1 point
-
Not going to happen. But you are so right.1 point
-
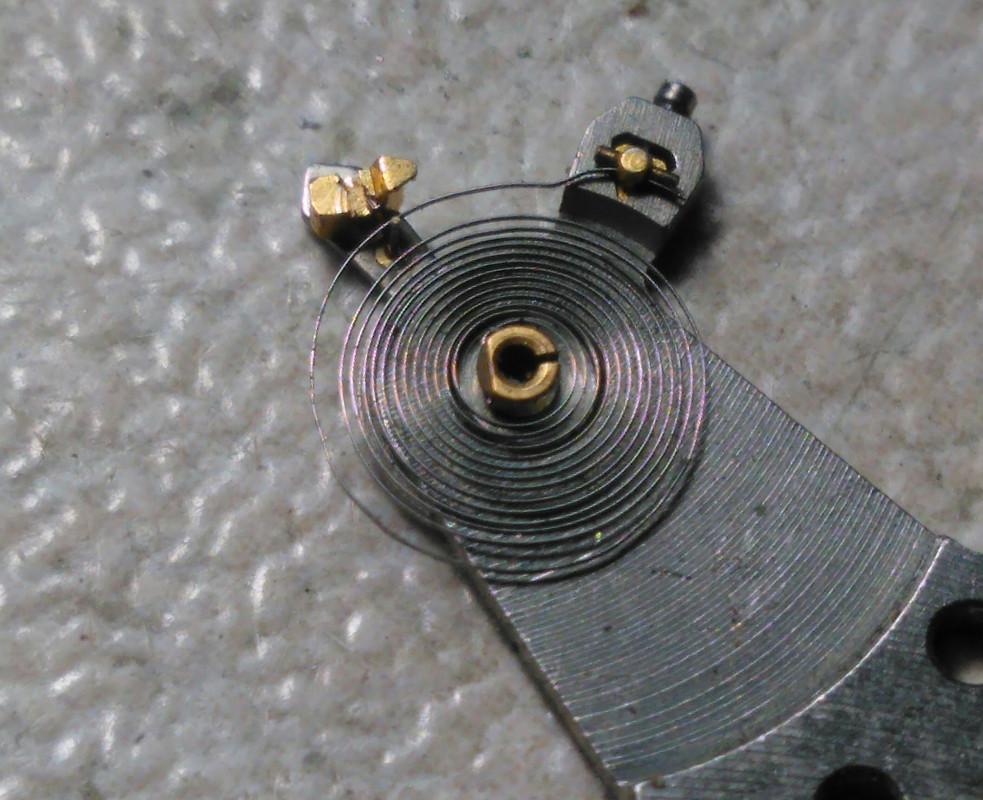
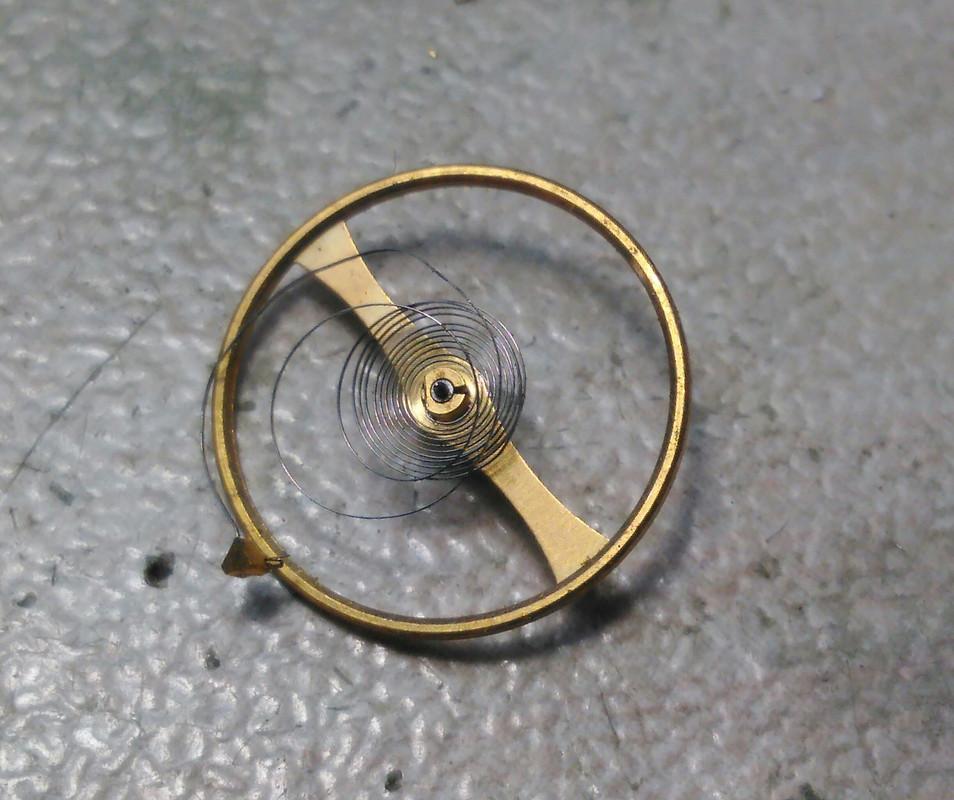
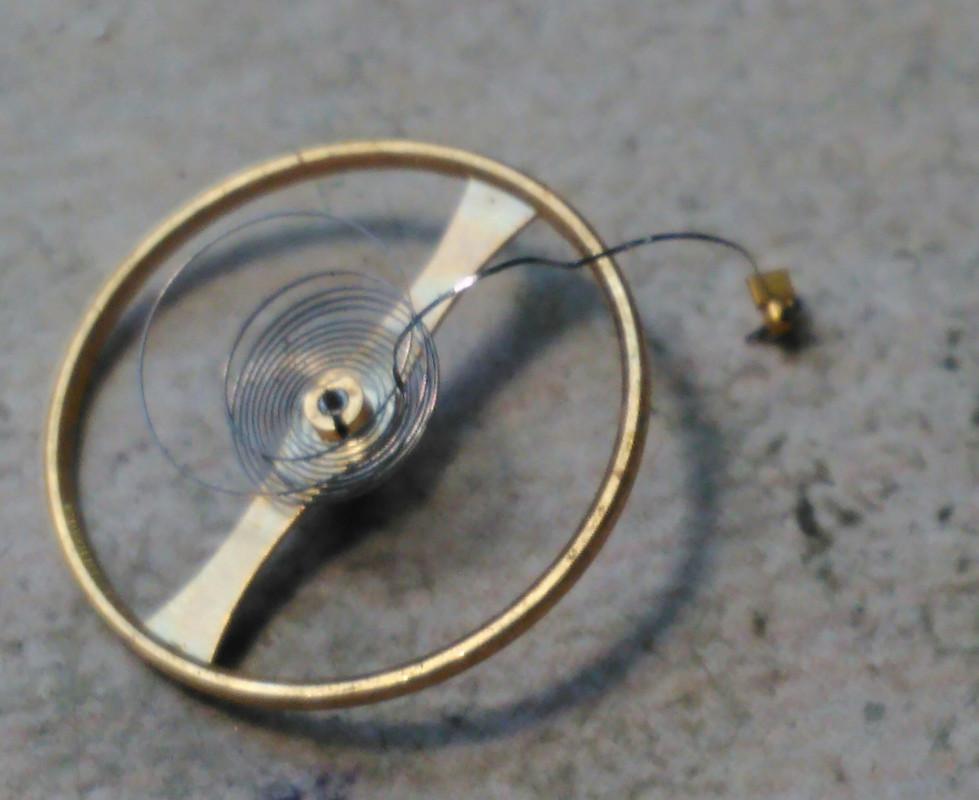
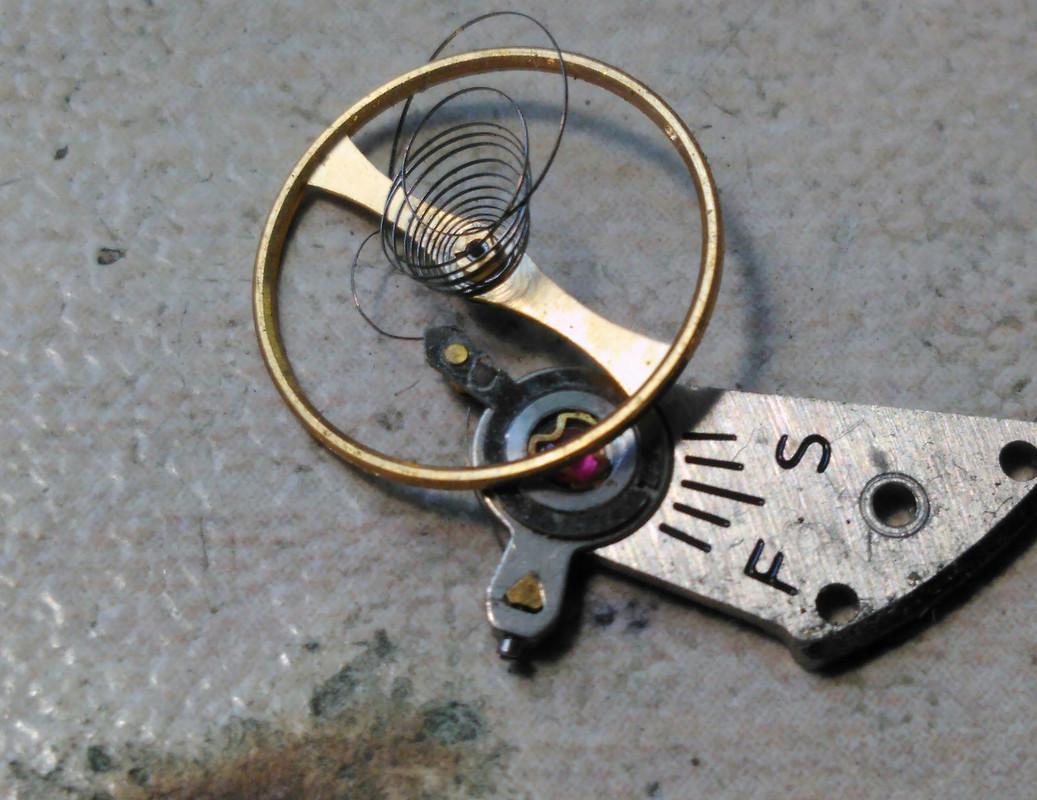
Hi tom, i know what you are thinking, the burr cutouts found under the balance wheel to remove weight. No these were punch marks in line with the stud very similar to the gouging marks under a cock. A big bunch of balance completes i bought had these marks. Coincidentally dont buy job lots of balance completes, they will be all fluked, dont ask me how i know1 point
-
That wasn't you Ross , it was me giving you an example of quote selecting instead of you having to physically write out someone's quote. Not as accurate Ross and you would need to get under the hairspring to do that, so not a very safe option. But there might be instances when you could do that if you wanted to.
 1 point
 -
Oh believe me i'm not. But if i have a movement in front of me in great condition that i know can easily get 270+, i'm gonna make sure i get there. Anything above that is just a bonus. If i don't get to 270, and there's nothing mechanically wrong with it, I know my service needs a second look because I probably forgot a pivot or something.1 point
-
I got the same set with my pearl watch cleaning machine, I soldered along the bottom seam/interface myself to prevent the parts moving around. Also the dividers were not folded over at the top, so the steel mesh started to fray and pokey bits of steel wire stabbed me when using the baskets. Slowly swapping them out with higher quality ones. Link here1 point
-
So this is sorta my question as to the quality of my service. I keep hearing seikos are "low amplitude". In fact when i first finished this service i was disappointed to see 220 amplitude and i got about a dozen responses elsewhere of basically "Typical seiko amplitude, they suck, they run at low amplitude. I figured since i took a 2 months break in the middle of lubricating this watch the thing probably just had to run and get the lubrication in the right places. Sure enough i woke up the next morning to an amplitude of almost 280. I've now serviced technically 10 of these movements and one that's even older and my amplitude runs from 275 to 290...meanwhile i got a bunch of professional watchmakers (elsewhere, not here) telling me they struggle to squeeze 240 out of these movements. They tell me they're not accurate but the last service i did on this one before it dropped and broke over a year and a half it never deviated more than one second a day with it's average deviation being about a half a second over the half dozen times I would do a week or two of timings. It's obviously too early to tell as i'm only on day 2 of my final on the wrist timing and day one it lost 1 second, day two it lost 2 seconds so i'm probably gonna get similar results. These results make me think i'm doing some very solid services probably. I get REALLY good results, better than anybody i know who ever works on these in both accuracy and amplitude. After a week's up i'll post my daily deviation timings. I will be really interested to see how this one comes out after my hairspring job.1 point
-
Yes, the old like 7009 are just pressed and and only pushing of the downside part thru the hole of top part, untill the rotor is supported above proper hole is needed. The newer are riveted, so first some drilling of the riveted part is needed. No riveting is needed after all is done, as the screw holds the both parts together well pressed1 point
-
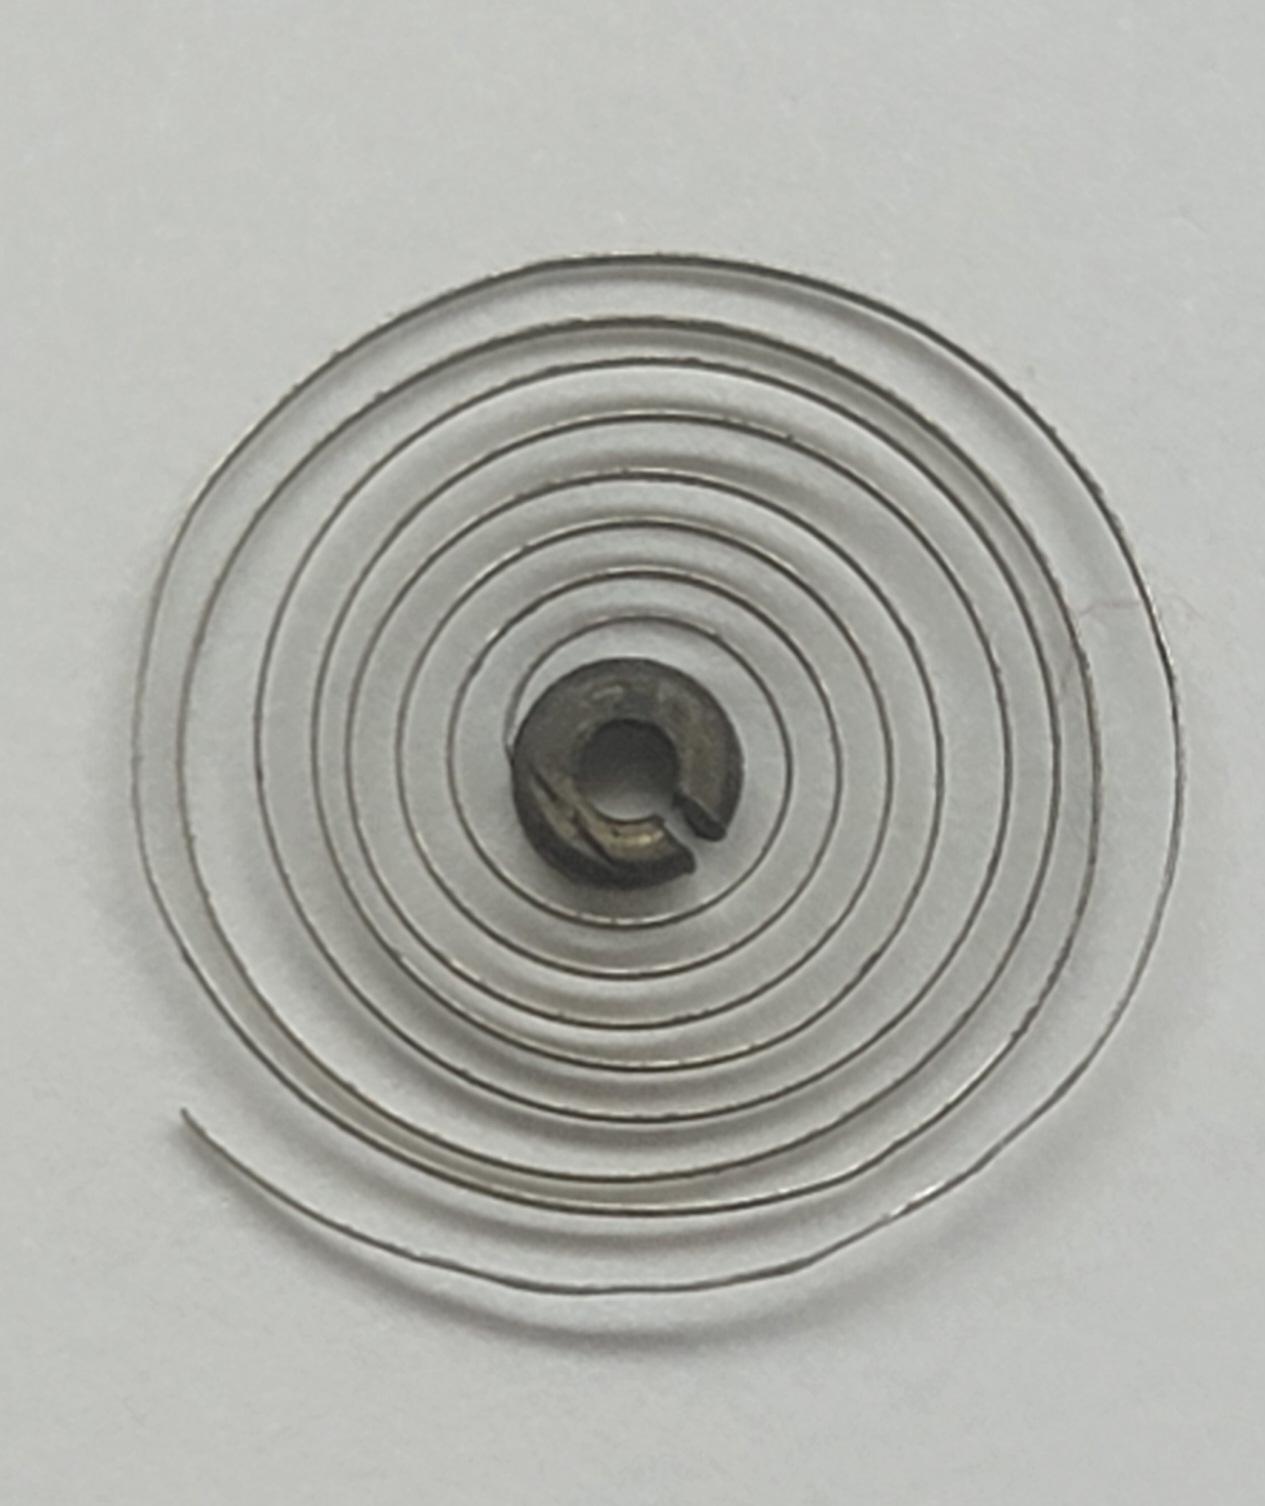
Good advice from you all. I have a broken spring from one of the first watches I obtained. The spring had snapped at the stud, and it had wound around the cock. I will spend some time and try to straighten it for practice. Looking forward to it ...ish. I will try viewing with my head magnifier and loupe. Failing that, I will use the microscope. I think I will be ok. It's the putting back together bit that I am most worried about. Using Mark's maxim. Practice, practice , practice and more practice.1 point
-
As has been mentioned, dial on hands on, set, check fully for fouling through 24 hours and correct them, check calender and date functions correctly before placing the case and crystal over the dial and press down to close up some of the gap between the dial and inner case dial lip then spin over. For front loaders, drop in carefully from above. As a side note some case mounting rings can be a total steward to get in afterwards, I've had a few that needed the ring on the movement first and then both placed together in the case.1 point
-
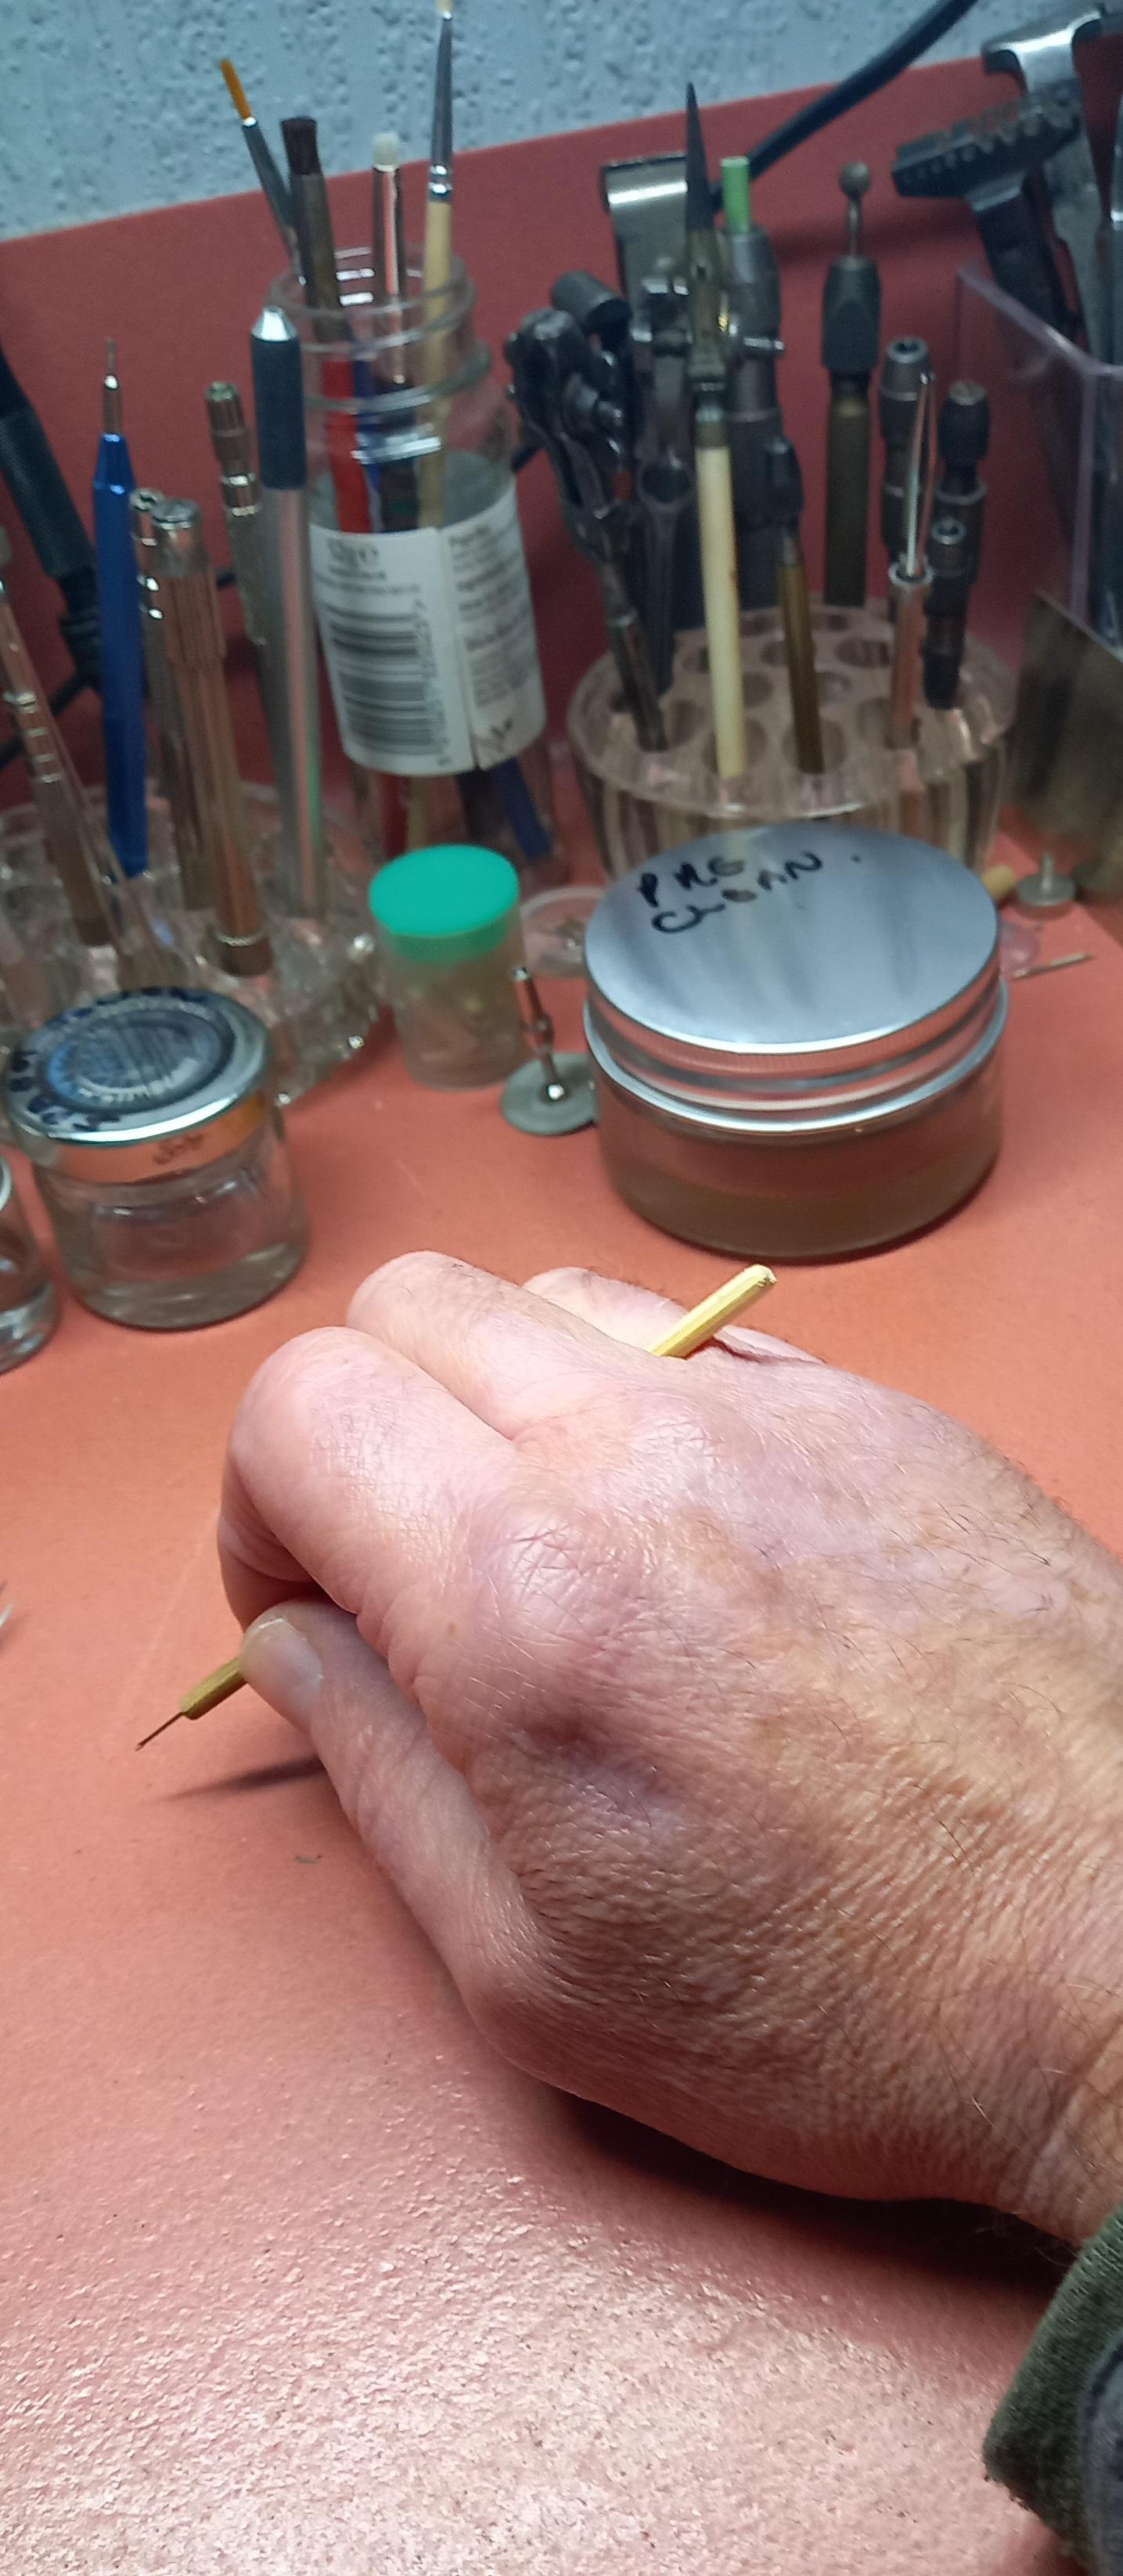
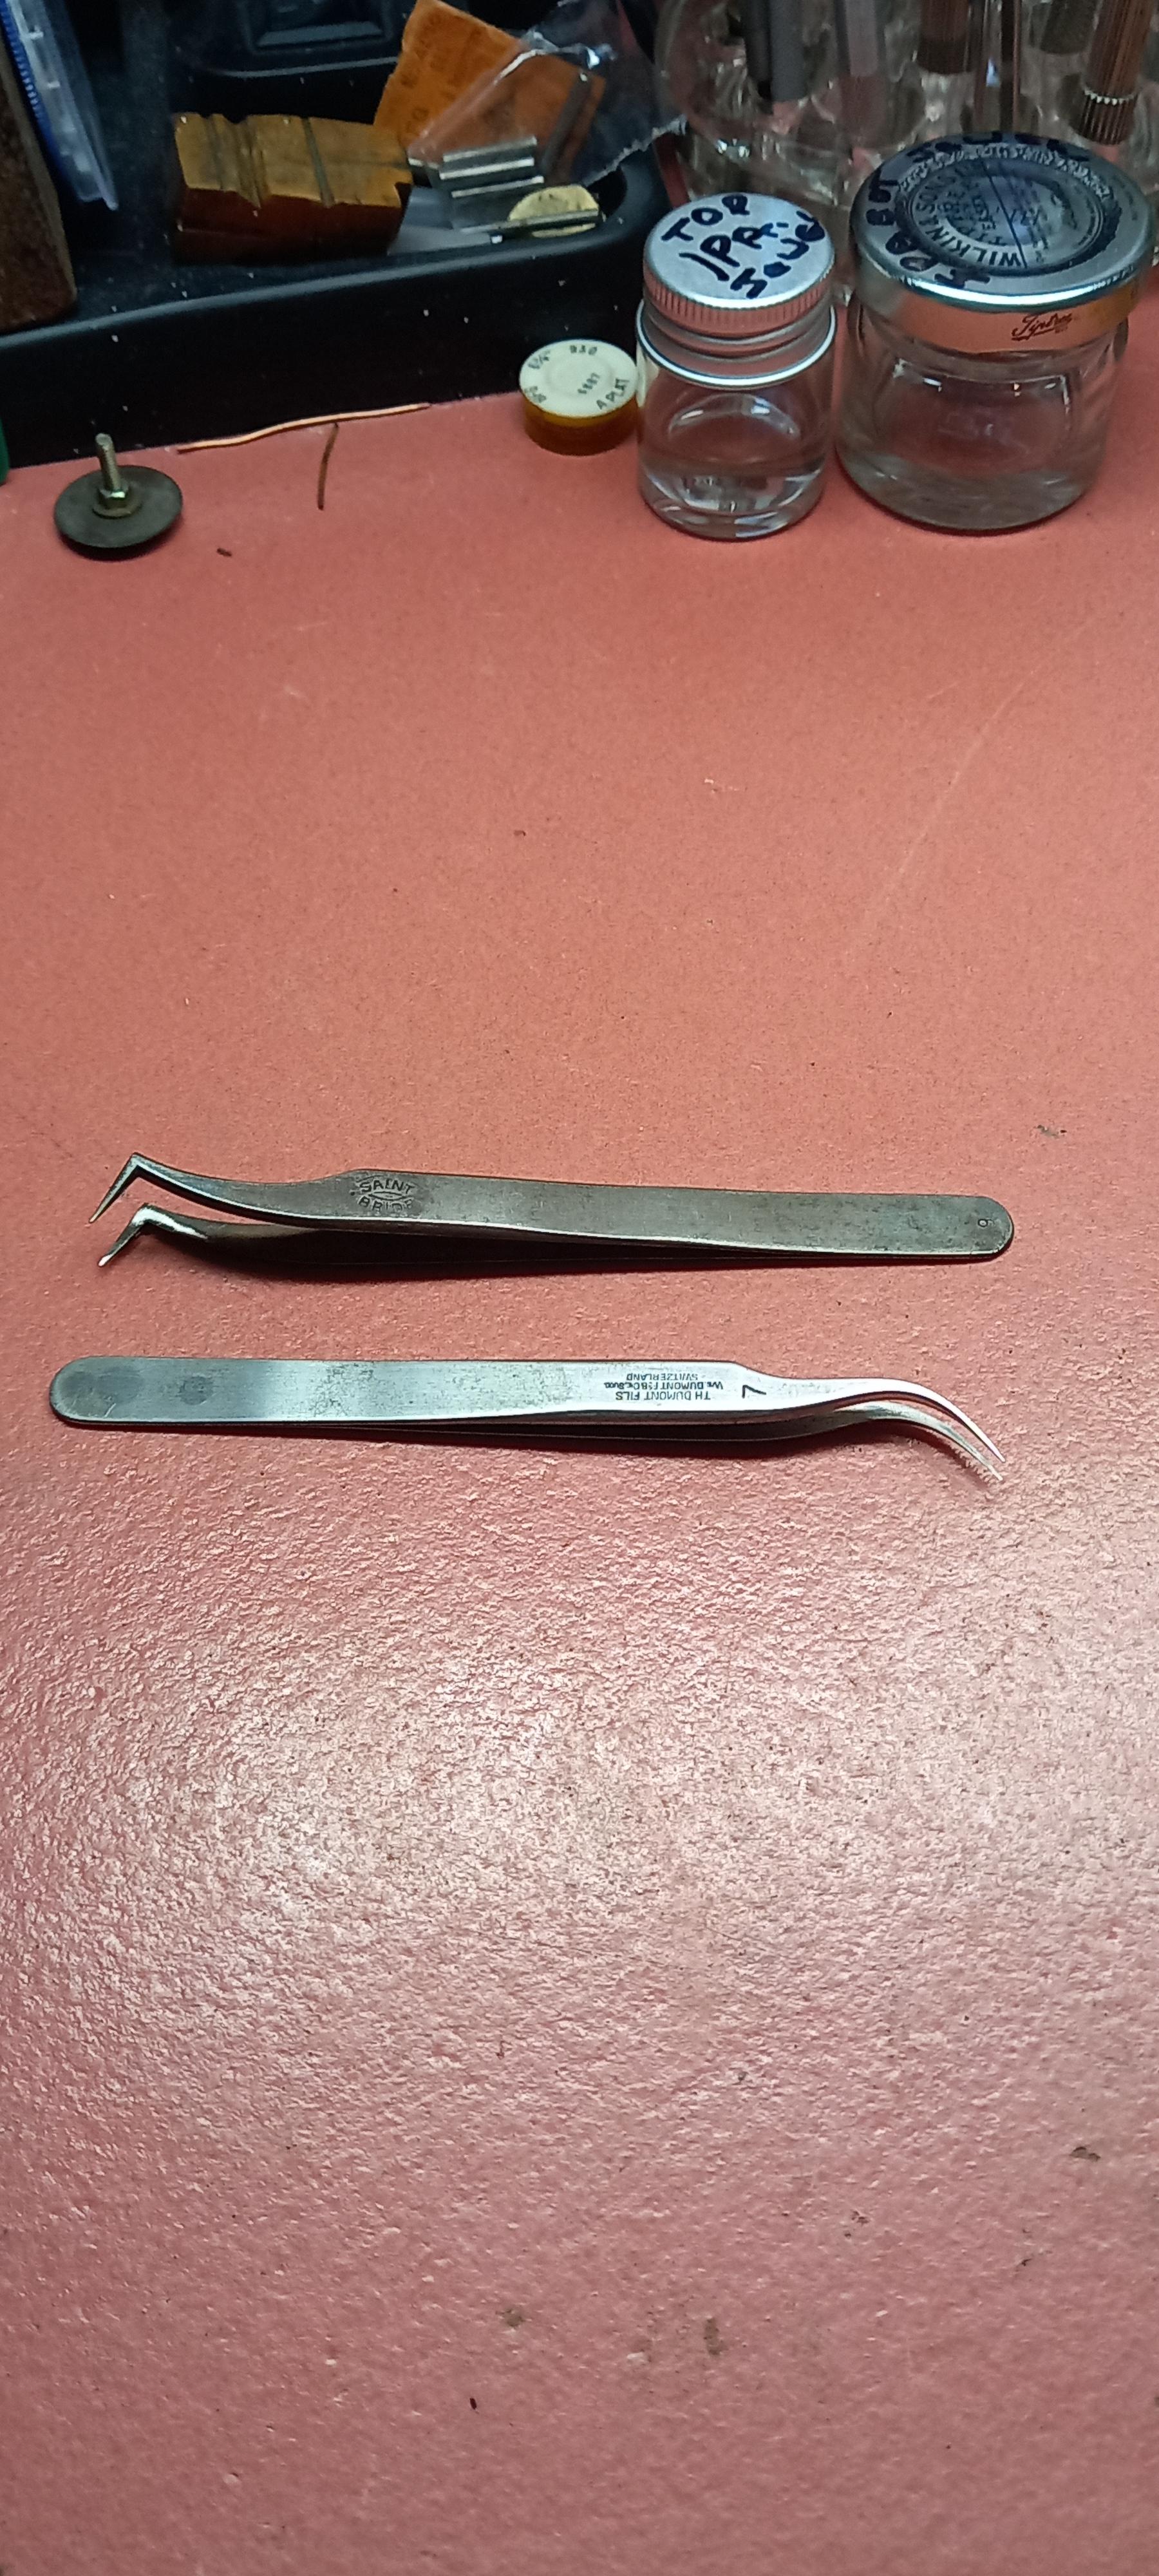
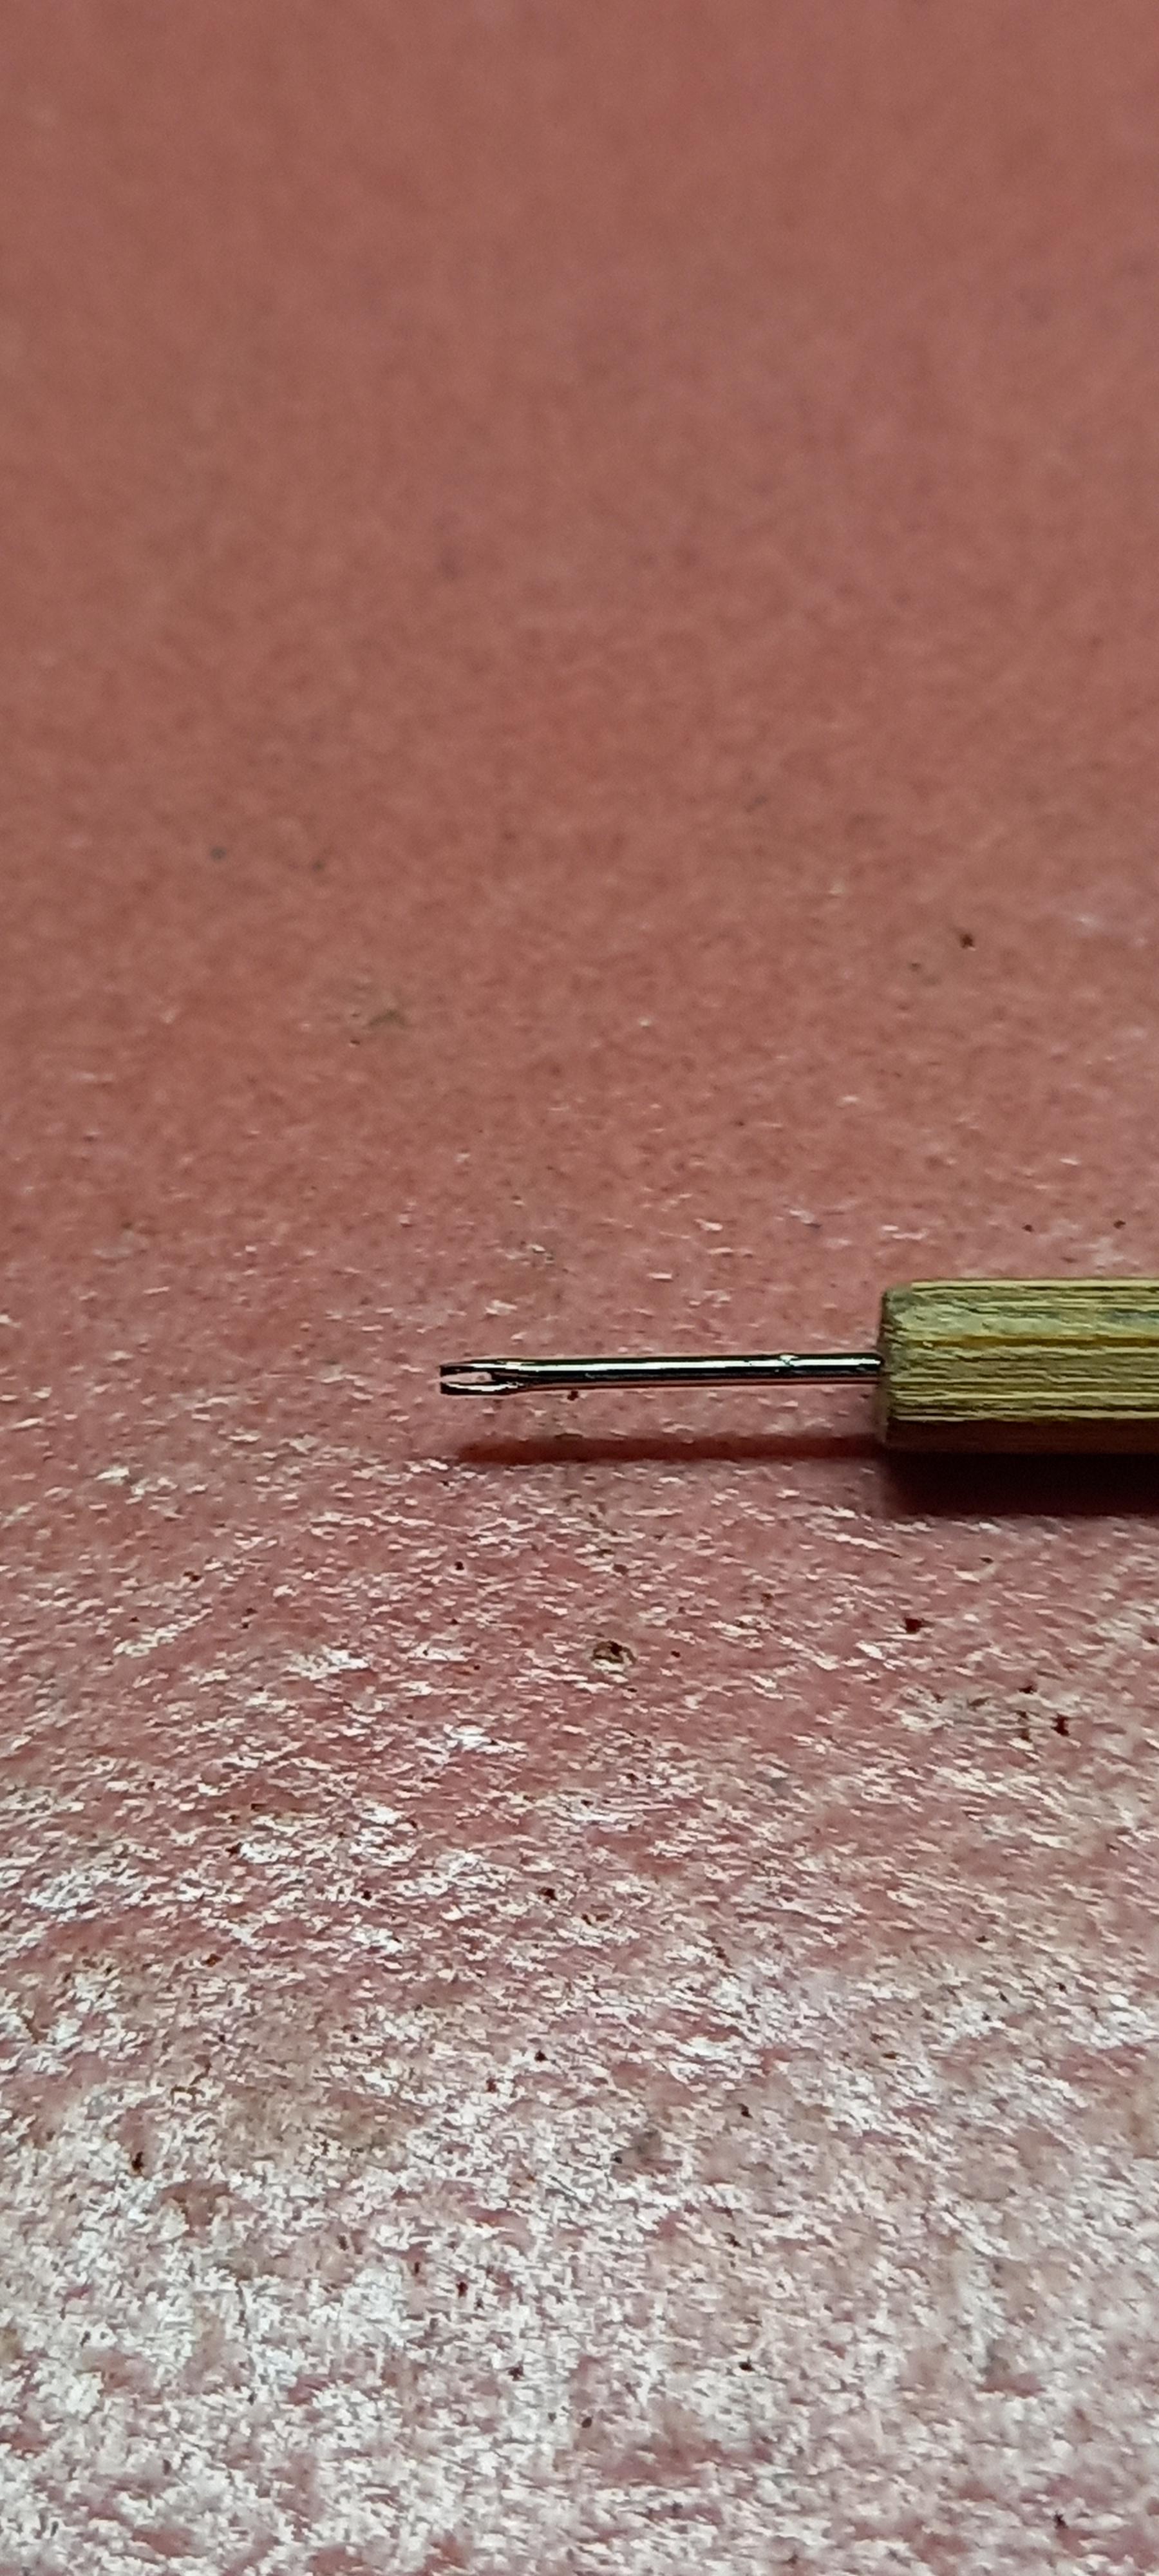
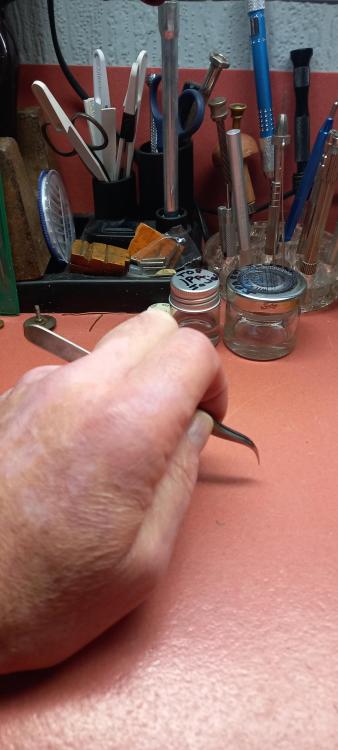
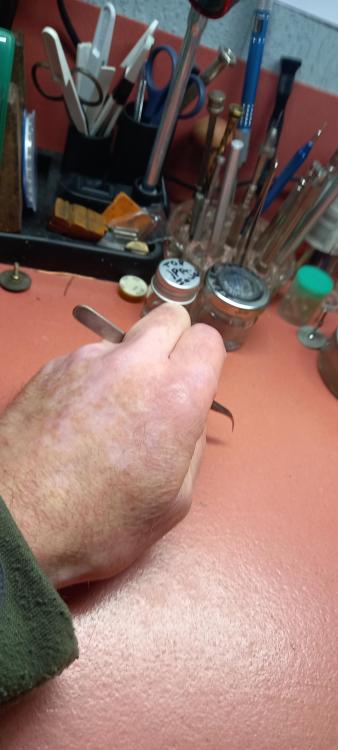
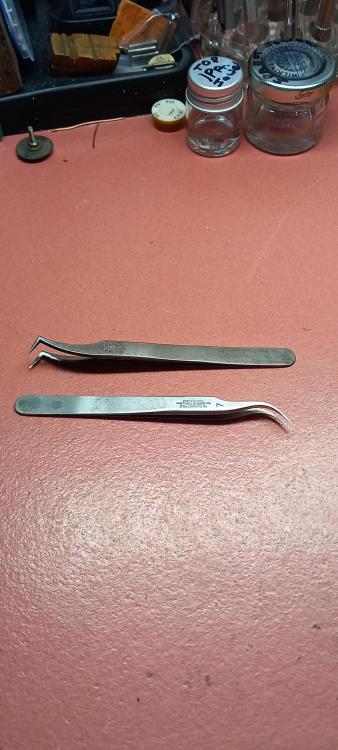
You can do it Ross. You understand learning technique i know you do. Yes that was the worst i ever managed to bring back to some form, i have a picture somewhere as it was coming to a finished state. It wasn't perfect by all means and easy to see that it had had some distress, i think there was one slight shallow verical bend that i just couldn't remove but that watch ran quite well with it. Been doing them almost from week one out of necessity and insanity, wierdly i enjoy it which really helps. I use a pair of no 7 tweezers, thats the curved tipped ones and a bent acupuncture needle set into a piece of pegwood or a narrow fitting pinvice ( i call that a pick , the one in the picture i use to twist the hairspring to raise or lower out of flat springs ) mostly. I hold the tweezers very differently to standard practice to get the correct working angle. The bent tweezers help with coming in on top the hairspring to straighten the out of round bends ( these are the bends that make the coils touch together when looking down on the hairspring) Stability is key here, you will noticed massively hand and finger shake without very good grounding of the wrists or palms of the hands. To further the angle of the tweezers and pick they are slid between my ring fingers and index fingers this helps to keep your hands stabilised while manipulating. Start from the inside of the hairspring and work out . With out of round bends find the largest gap ( coil running outwards ) or smallest gap ( coil running inwards ) and work back 90° into the hairspring, this is where the bend begins, this the manipulating point. I always remove the inward bends first otherwise the hairspring coils will come in on themselves and get tangled up. The out of flat bends and twists are another game altogether, these are the ones that raise the hairspring up or down when looking at it from the side. The twists are quite easy but the bends along the height profile of the hairspring are a real pain to fix. But i wouldn't worry about the out of flat for now, there may not even be any. Some of the correcting you might be able to do with it is on the balance and maybe even with it in the watch. A really common issue of the hairspring bunching up can be just one little correction at the stud. Do some research and make a start see where you get with them i have faith in you Ross, learning to fix them can save you a fortune in replacement balances.
 1 point
 -
Not sure of a 'smart' method' but use the cushion, place the case over the movement and press the case into the cushion it a bit before you turn it over...1 point
-
Put the movement dial up on a watch cushion, place the case over the movement and then turn the cushion over.1 point
-
Ross, taking balance out of the bridge and putting it back is something simple. Why microscope? Just a small screwdriver needed to open the regulator and untighten the screw of stud carrier. Then the balance gets out, piece of cake.1 point
-
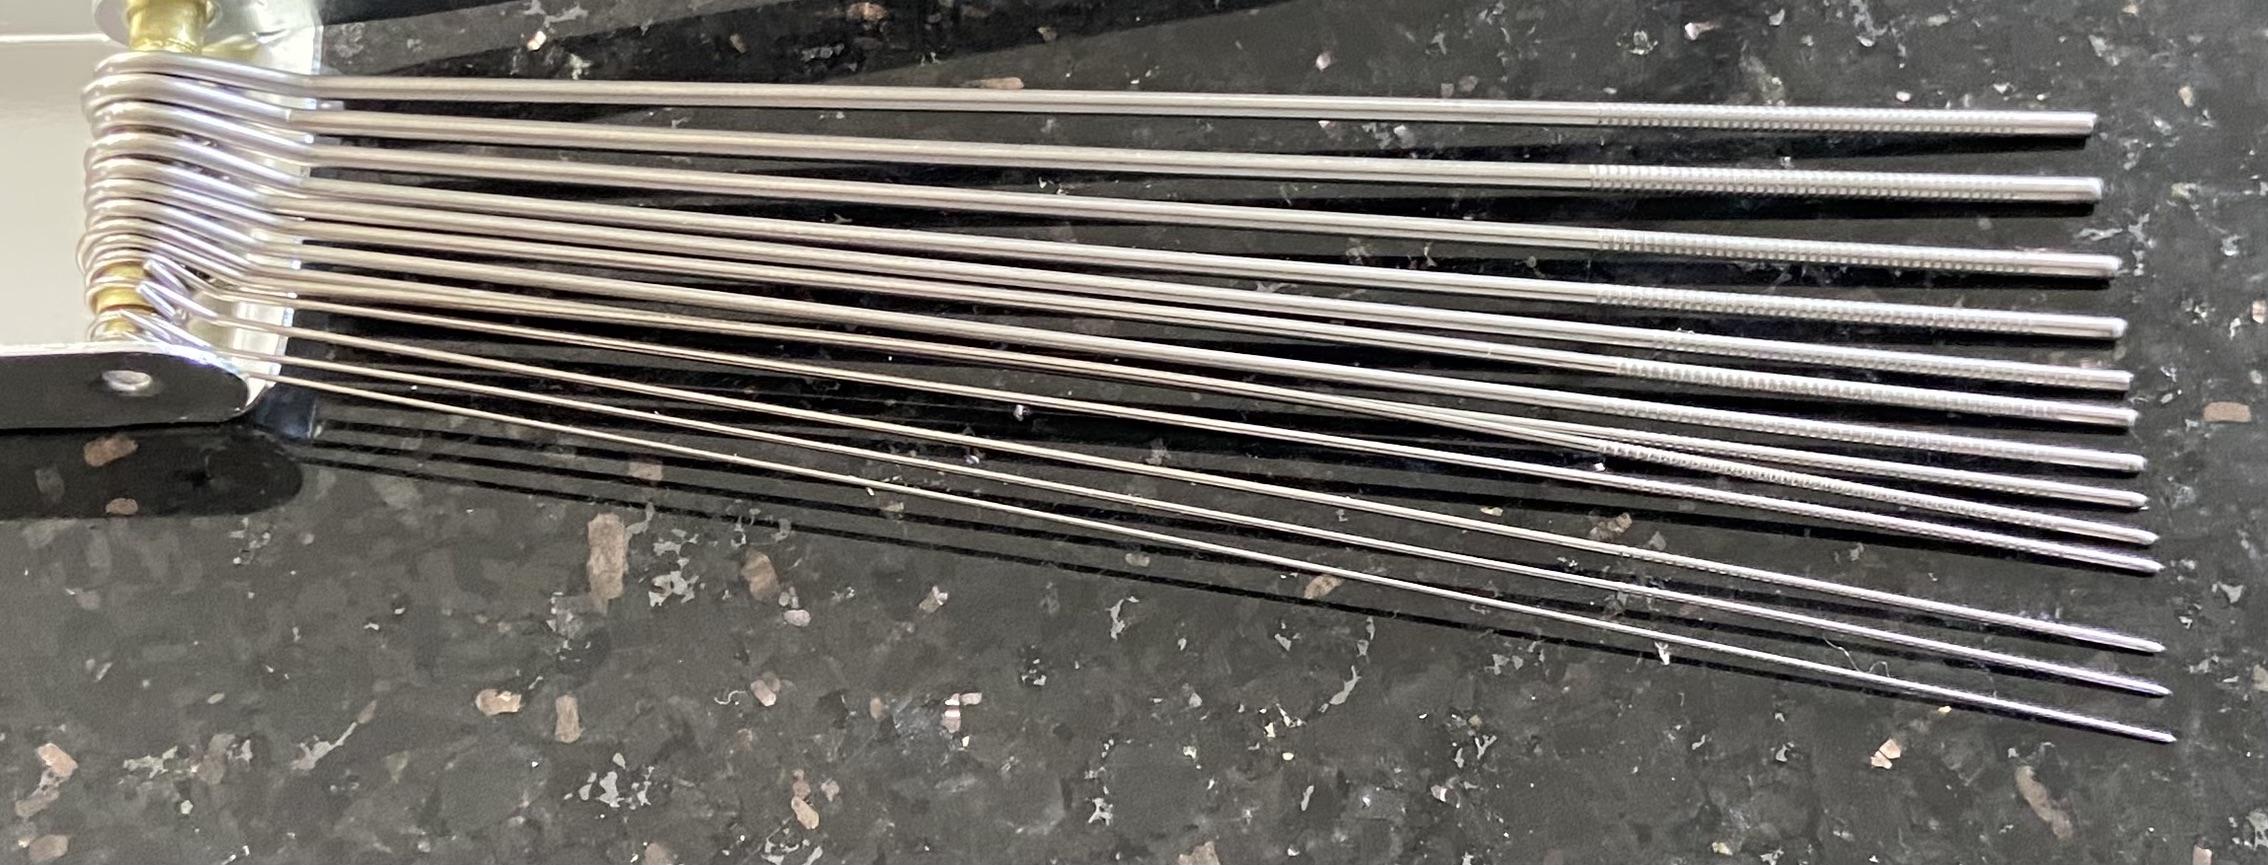
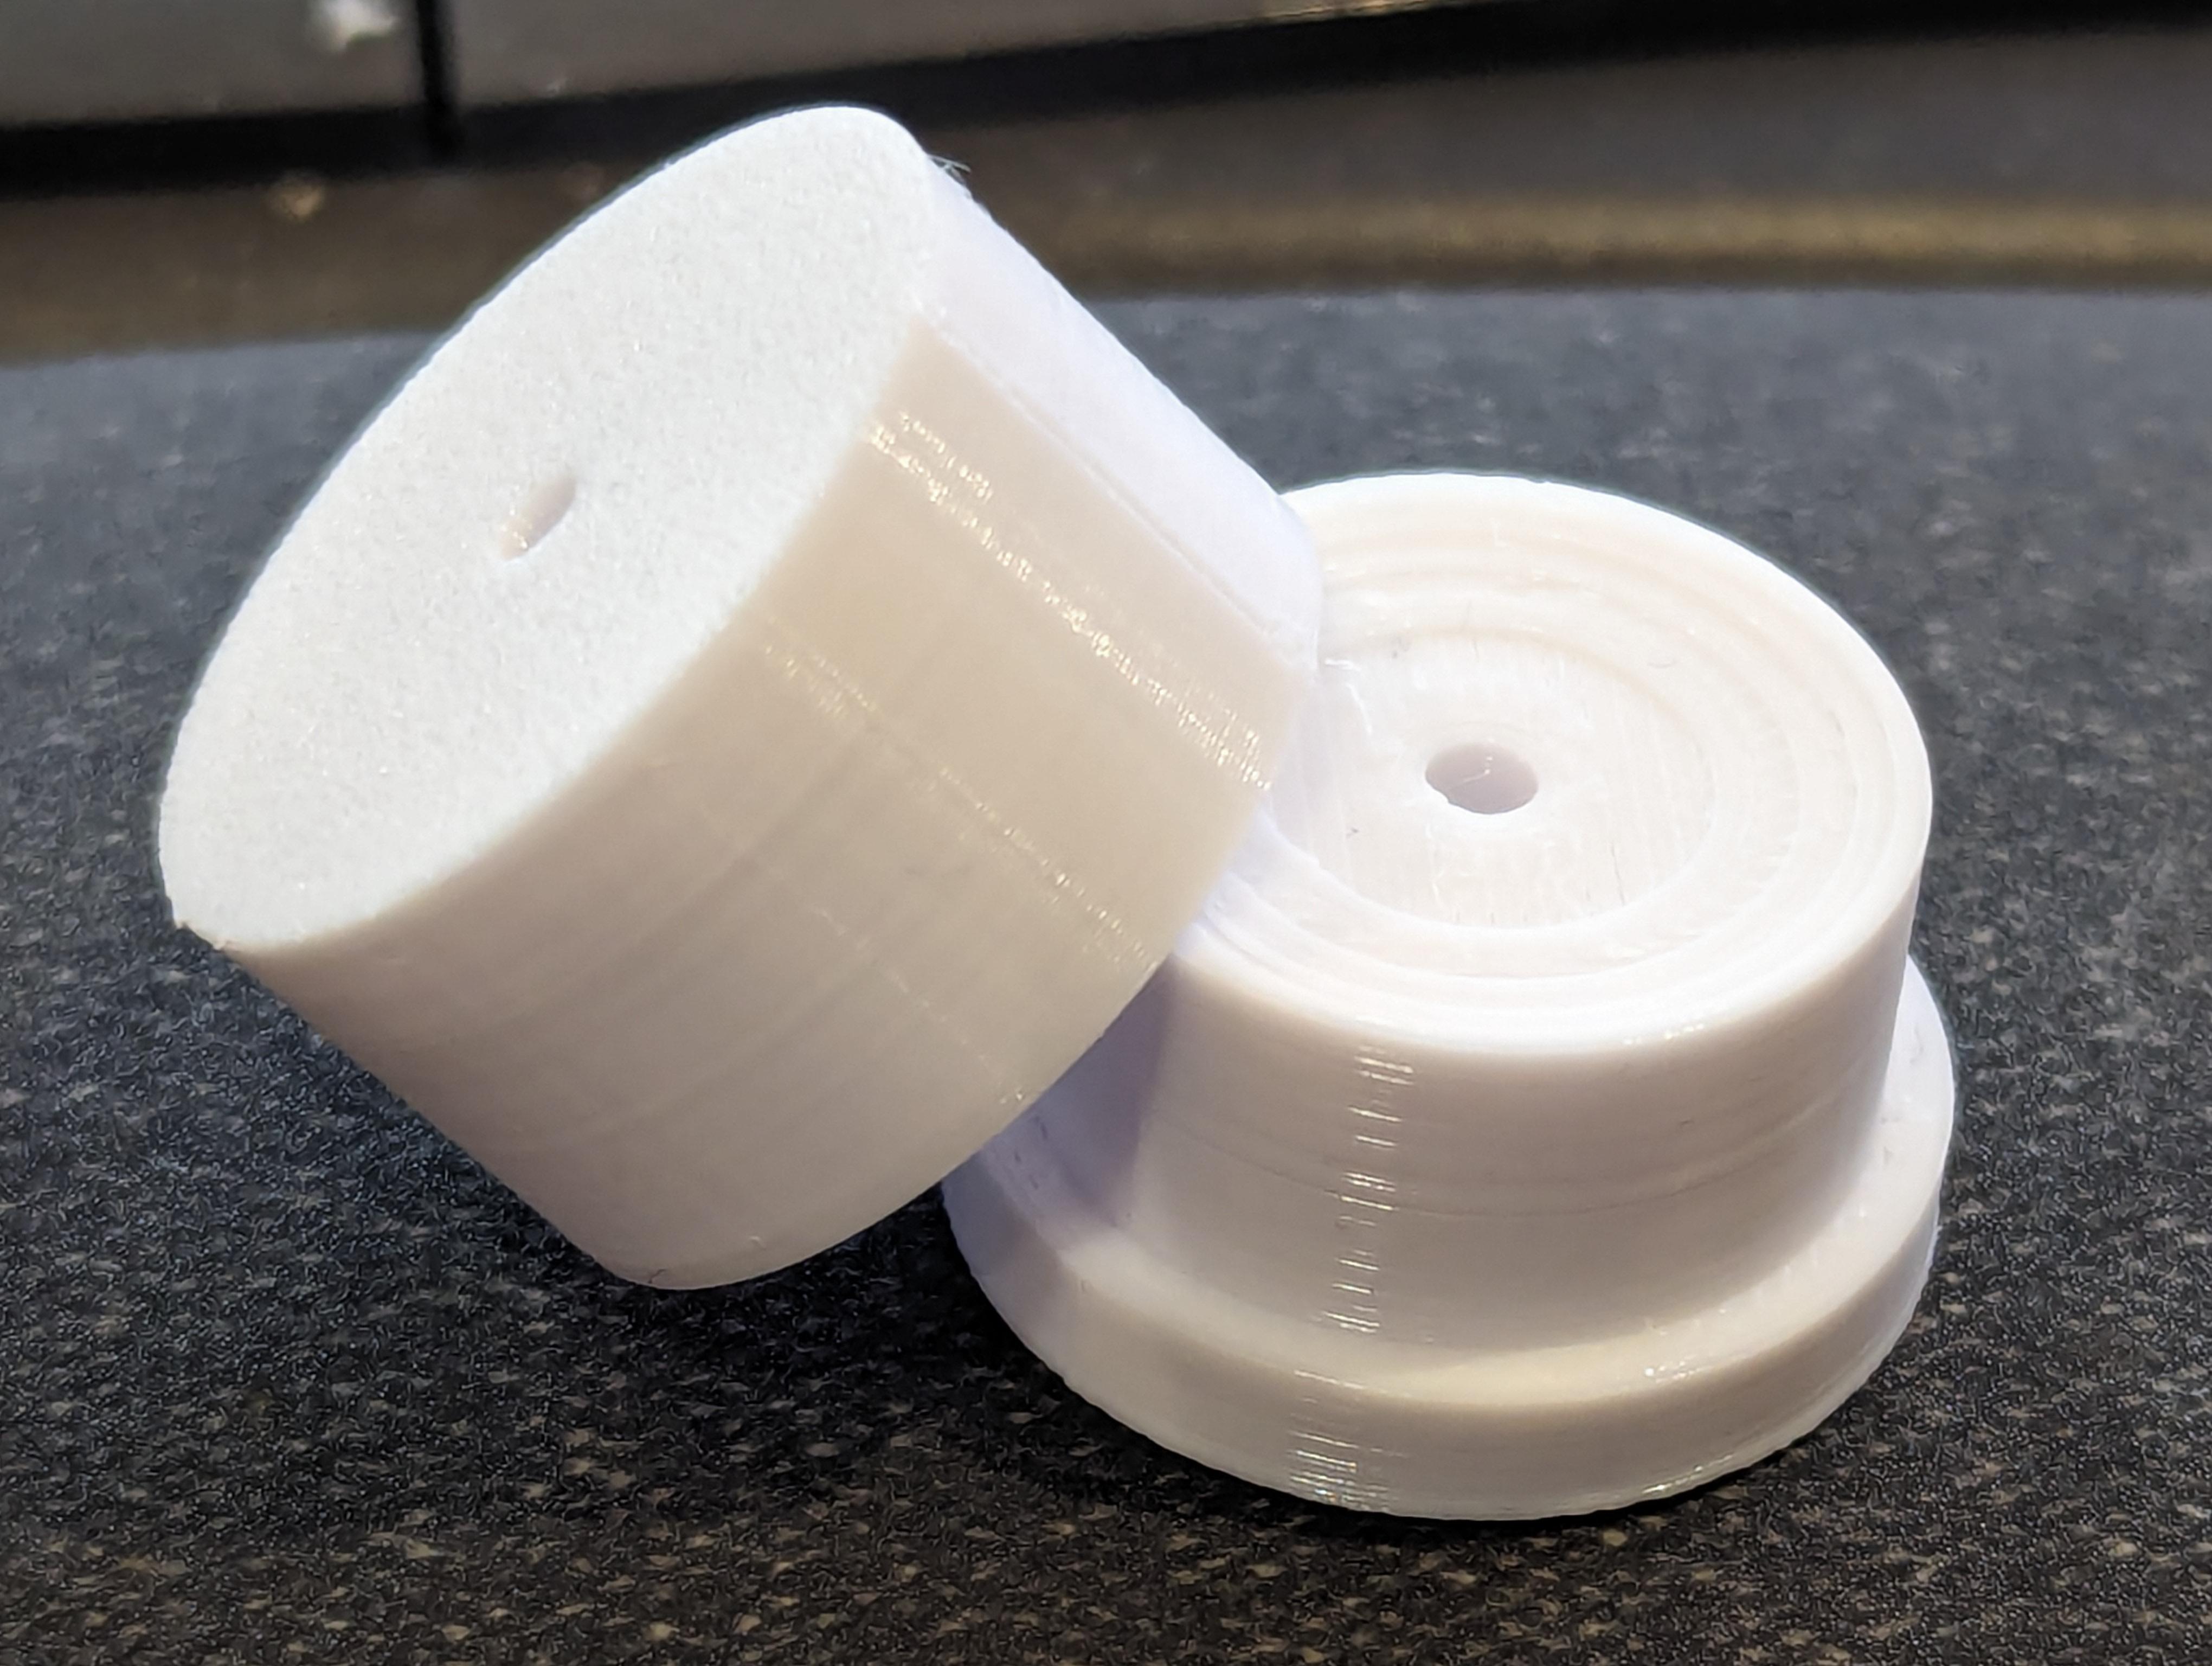
I would say they're ready to go. Get the files from the Releases section on github, the top entry will always be the latest version of the files. I don't own any Bergeon winders, but I have to believe you get what you pay for. Getting the arbor hooked up on these is a little fussy, and you're holding the whole thing together with your hands while you're winding. They work fine, and they are about 1% of the cost of the Bergeons. If you have a printer, there's also the advantage that you can have any size winder you might need in an hour or two. As I'm a learner practicing on a box of old pocket watches, this is a huge win. If I were in your shoes, I think I'd apply the same heuristic that I do with Harbor Freight tools for working on cars: If I need something once, go the cheap route. If I'm going to be doing it a lot (or I've worn out/broken the cheap tool), get the good stuff. If you're going to be working on a lot of watches that are the same size barrel, get the Bergeon, If you need something weird for a one-off, print it. To the designers: Now that there are two arbor sizes for each winder size, it would be great if you could emboss the arbor size on the winder base. I've printed all four bases and am printing barrel/plunger sets as I go, and it would be nice to have the arbor size labeled. Thanks again, these are excellent.1 point
-
Theres a lot more to a low amplitude than a poor service can cause. The timegrapher is not dismissed as such ( with me anyway ) . Just used in a different way compared to when i first got it. I just dont rely on it completely and wont become an amplitude slave to it.1 point
-
I found that out too. 1 ltr solution contains 1 oz gold and has the price of 1 oz 99.99 gold I can see that you are quite far in the process, so my old March 2016 thread (coincident with when you joined WRT?) may not be much use to you, but perhaps others could still pick up a few learning's? https://www.watchrepairtalk.com/topic/3831-design-watch-plating-project/1 point
-
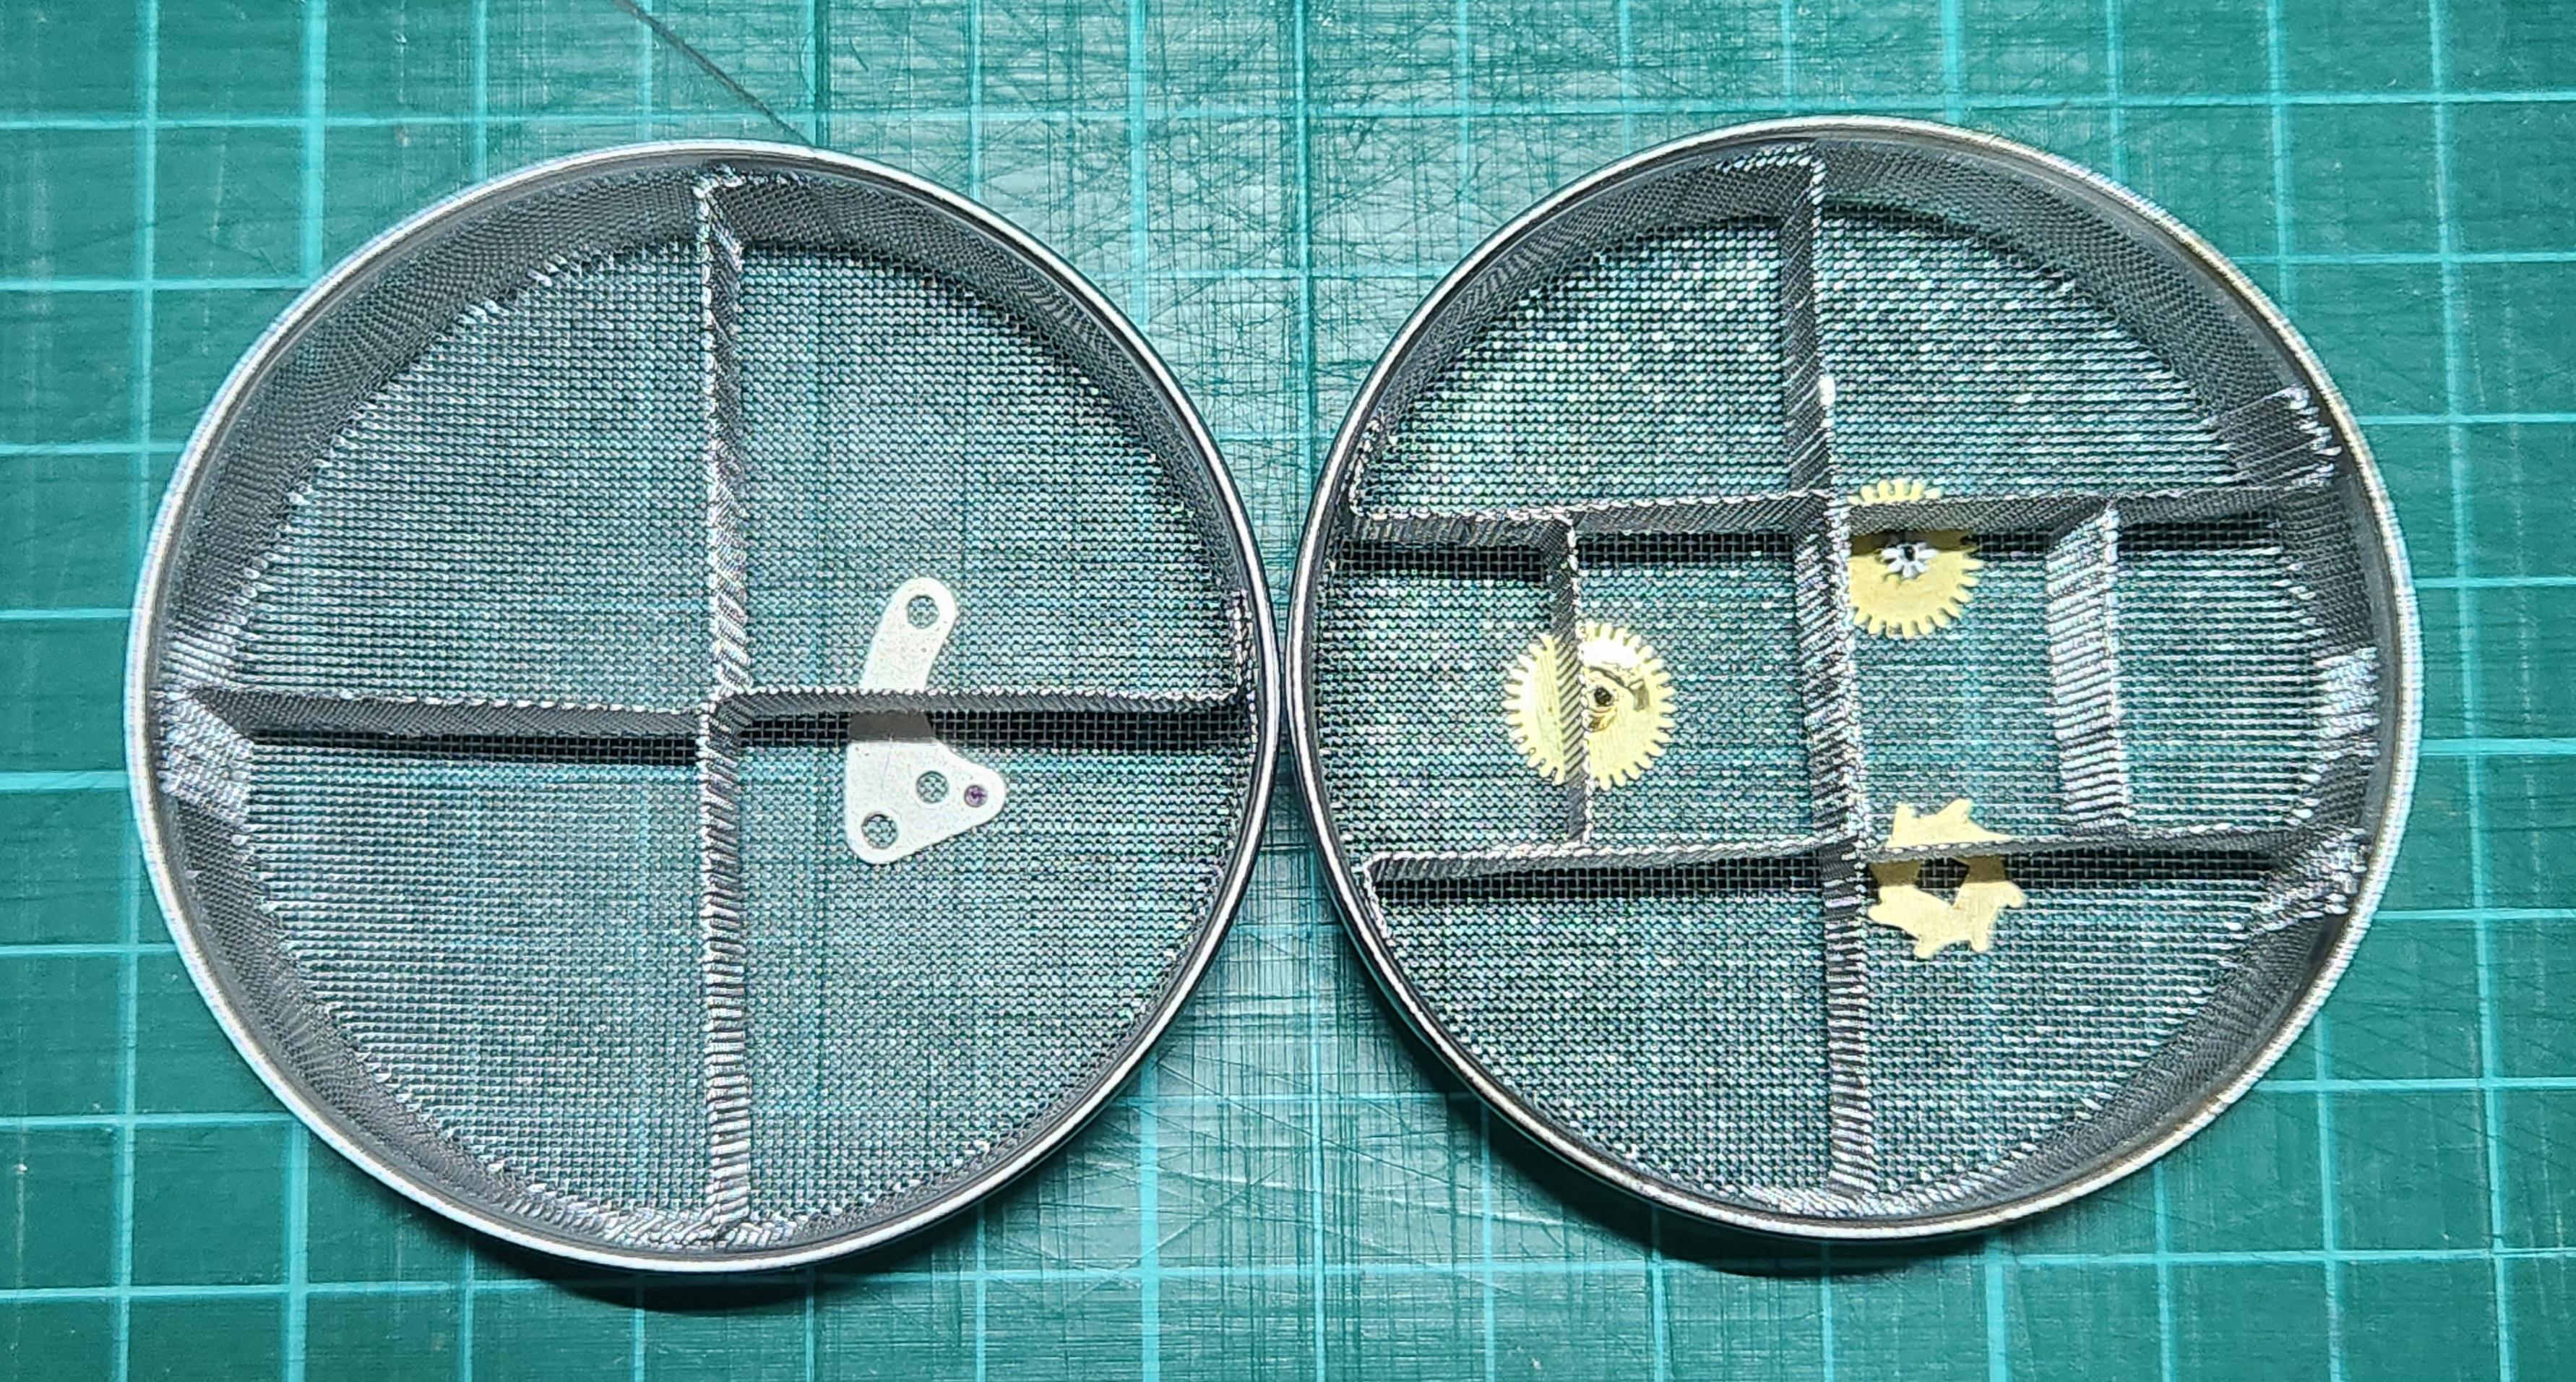
Another new discovery after using this basket for awhile. The wire netting dividers are not welded or soldered to the bottom netting. So small parts can slip under the divider and end up in another compartment.
 1 point
 -
unfortunately Gramham hasn’t been back on the site for some time so at the moment this project is unlikely to come to fruition. I have seen a lot of people these days going for raising and lowering desks so there is flexibility, normal height for microscope use, higher for when you need to get up close and personal with a movement. I wish I had gone down this route as I can see the advantages now. Oh, you can get adjustable arm rests from Amazon, made for computer use but as watch fiddlers we adapt and modify all sorts of stuff. Tom1 point
-
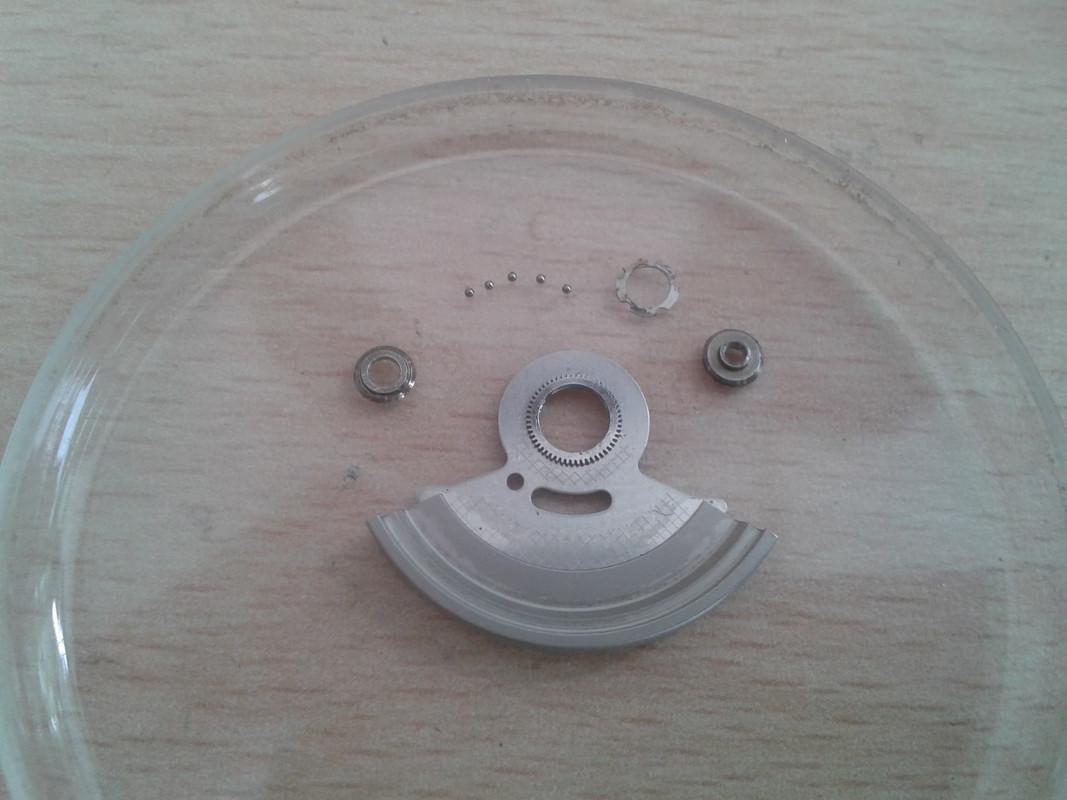
I recently got these jewel counting trays from AliExpress for sorting out the different types of jewels from a bag of assorted jewels from India. But I found another use for them. When I disassemble a watch, I usually place them together as a group in my parts organizer tray. Transfering the parts one by one over to the organizer is sometimes a adventure as many a slip can happen along the way. Now I just place this beside the movement, on the microscope table and put the parts durectly in them. When all the parts from the group are in the tray, I just bring it over to my organizer and tip the parts in. And if you need to photograph the parts from an unfamiliar movement, it offers a nice white background for the shot. (Can anyone recognize where this balance comes from?) But if you drop the whole tray along the way, then....
 1 point
 -
Nice work Leon, and thanks for sharing your experience. I think your idea of using a pin vice to hold the staple is an excellent idea. Although I said I use tweezers, that was a lazy description, I actually use locking forceps such as used in medical procedures which securely grip the shank much like a pin vice. As you have discovered, you can control the manipulation of the staple much more precisely with something that has a locking grip. The fact that you prefer to place the spring on the arbor instead of placing in the drum illustrates how versatile these winders are, you can modify the order of things easily to suit your style or sequence of work. I honestly feel these winders are an excellent option for both hobbyists and more serious horologists alike, and they offer some significant advantages over traditional winders.1 point
-
Just wanted to give anyone who is having difficulty using the winder that it's absolutely worth persevering. Like a number of people, I'd had some issues trying to get the staple engaging with the hole in the mainspring, but using a combination of the guidance from the GitHub wiki and the step by step instructions from @Yxoc I have a very repeatable and easy method and I've been able to wind springs of any size. It takes a little practice, but not really any more than a Bergeon set of winders, which has a learning curve of its own. Similar to Yxoc, I am inserting the staple into the hole in the mainspring first, on the outside of the inner coil, as per the guidance: https://github.com/vishnu350/rs-mainspring-winder/wiki/Using-the-RS-winder Rather than try and hold the staple in tweezers to do this, I've had more success holding the staple with a pin-vise, which gives me more control and leverage. Unlike Yxoc, I place the spring directly onto the arbor/shaft of the winding base. I find that this allows me to very easily locate the staple hook into the hole on the face of winding base. The staple just drops into place - in fact, for me one of the main benefits of attaching directly to the spring first is that you don't need to be concerned with the staple hook left in respect to the width of the mainspring. The hook will find is correct height. I then place the barrel on top of the base, ensuring that the spring is located correctly and exiting the correct gap in the winding barrel housing. The winding process is then as described. The set that I have was purchased directly from @AndyShap and the print quality definitely helps, but having done plenty of 3D printing myself I'm sure that you could achieve a perfectly usable set of winders from home. I just preferred to buy from Andy because I'm lazy! Finally, I would just say this - practice, practice, practice! I almost gave up, but when I saw the success that @Yxoc was having I tried again and it just clicked for me.1 point
-
Actually, my question was a retorical one. I knew the answer, that's why I asked. But, If You read my post, the one that You quoted, to the end, You will find that I gave there link to a discussion in another forum (Bulgarian), where I have shown solution for the problem with restoringing this bearings. There are photos there, that show the real process of restoring the bearing.1 point