Leaderboard


Popular Content
Showing content with the highest reputation on 11/15/15 in all areas
-
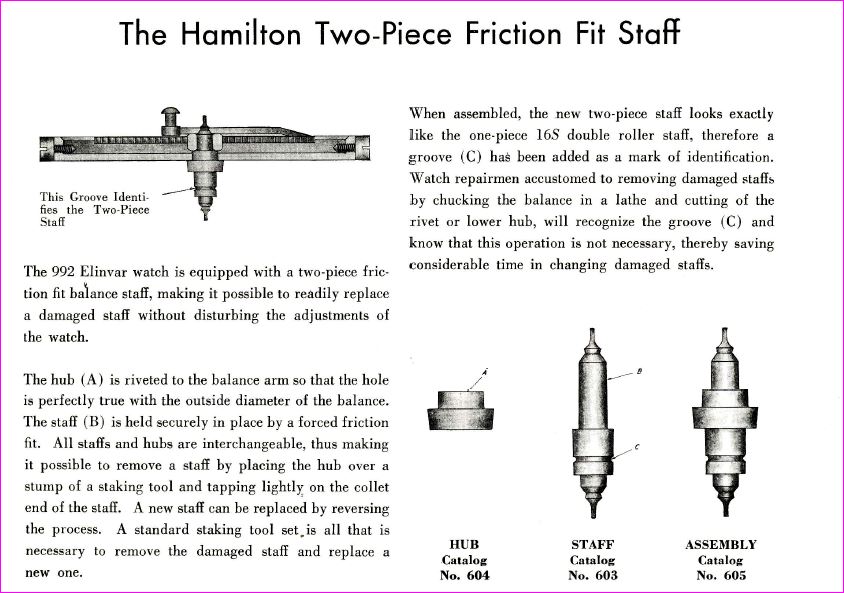
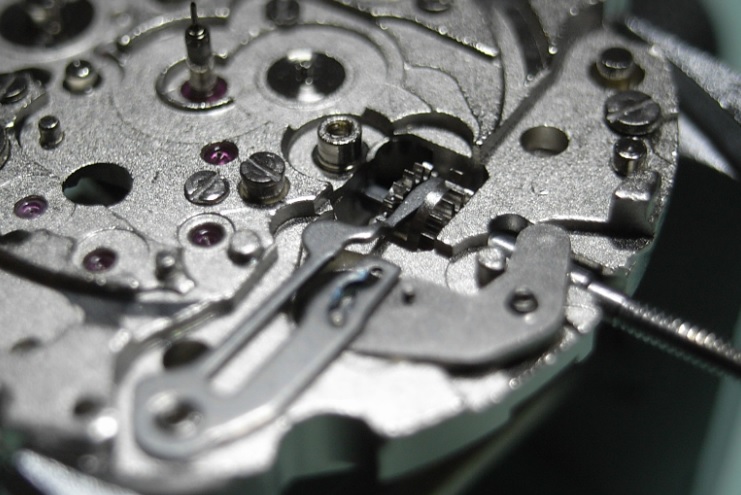
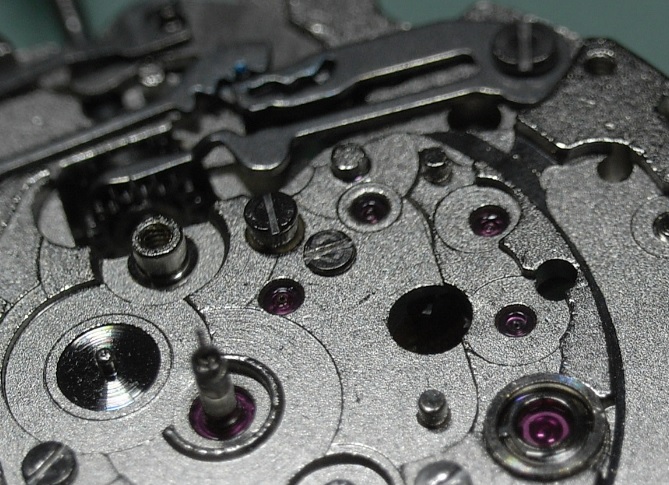
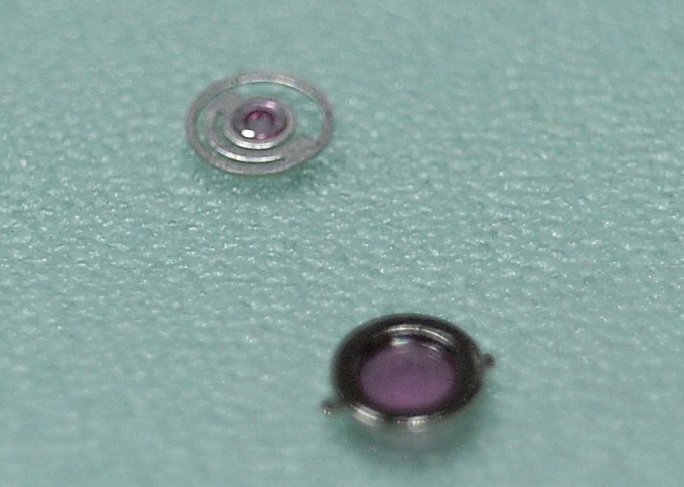
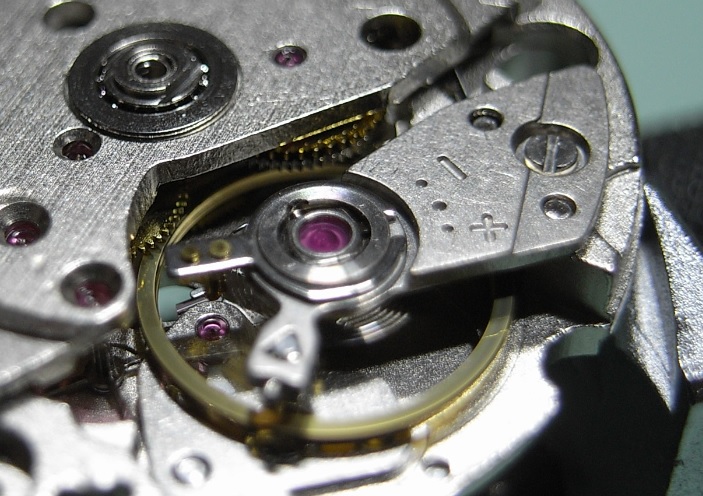
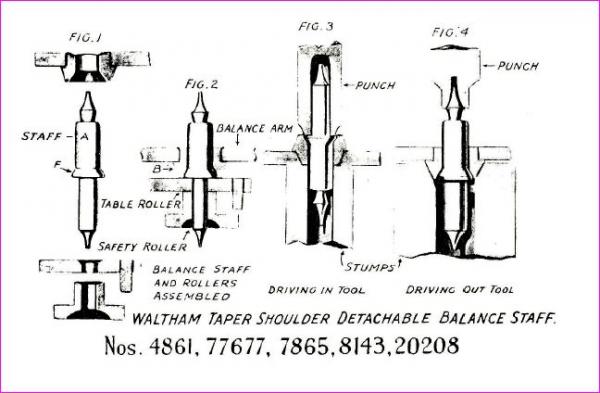
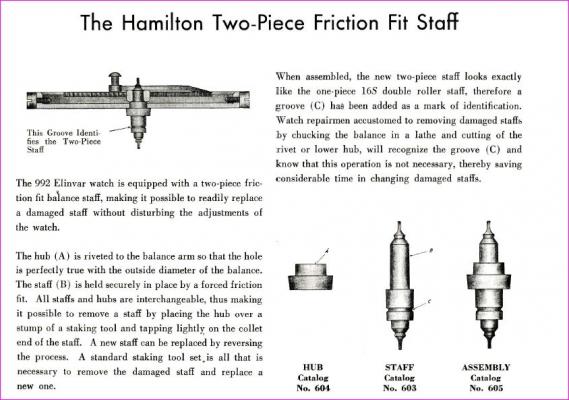
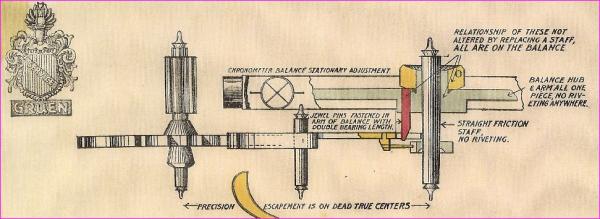
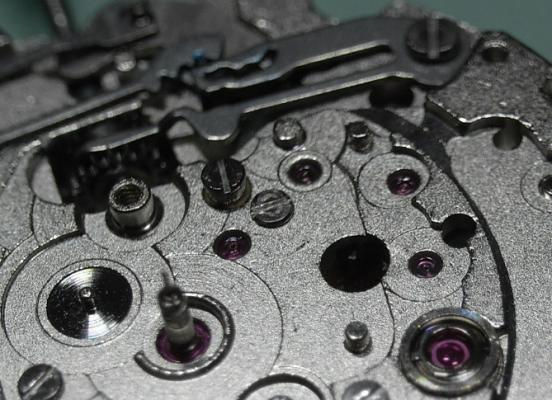
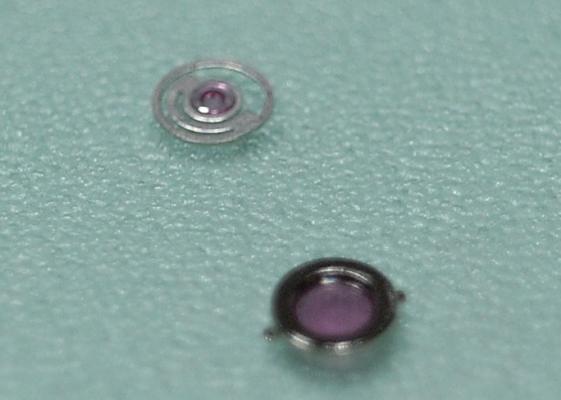
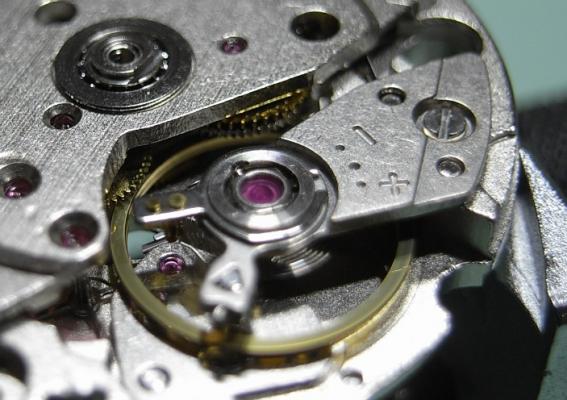
Interesting short questions you have that don't have short answers. To properly explain how to replace a balance staff requires several paragraphs with pictures and/or drawings. Or perhaps a video like the link below. But even with the video it's not that simple there's lots and lots of variations. http://www.watchrepairtalk.com/page/watch_repair_videos.html/_/balance-escapement-videos/fitting-a-new-balance-staff-to-a-vintage-1940s-cyma-www-military-watch-r19 So for friction staff's I've attached some images. Replacing friction staffs are easy for the most part. Sometimes trying to figure out how the waltham staff goes in and out the roller table etc. can be a interesting process. The hairspring especially for beginners is a challenging thing to remove. Just because the staff looks easy to change the entire operation is not necessarily easy a lot of places where things can go wrong. The balance wheel really isn't something you want to mess up. Then notice what Hamilton has written with there's they put a groove in the staff So you can recognize it's a friction staff. Which is interesting because most of the time the hubs are blue but occasionally there are not. So you have to look for other clues. Then Gruen had an interesting idea. The hairspring is attached to the balance wheel not the staff. Means replacing the staff is easier to do providing you can get a replacement staff. Then next link it's a sample issue so most of the PDF is missing but they did keep the section on replacing balance staffs. Then there's a whole bunch of steps missing like removing the hairspring safety roller etc. http://www.awci.com/wp-content/uploads/2011/09/HT-teaser.pdf
 2 points
 -
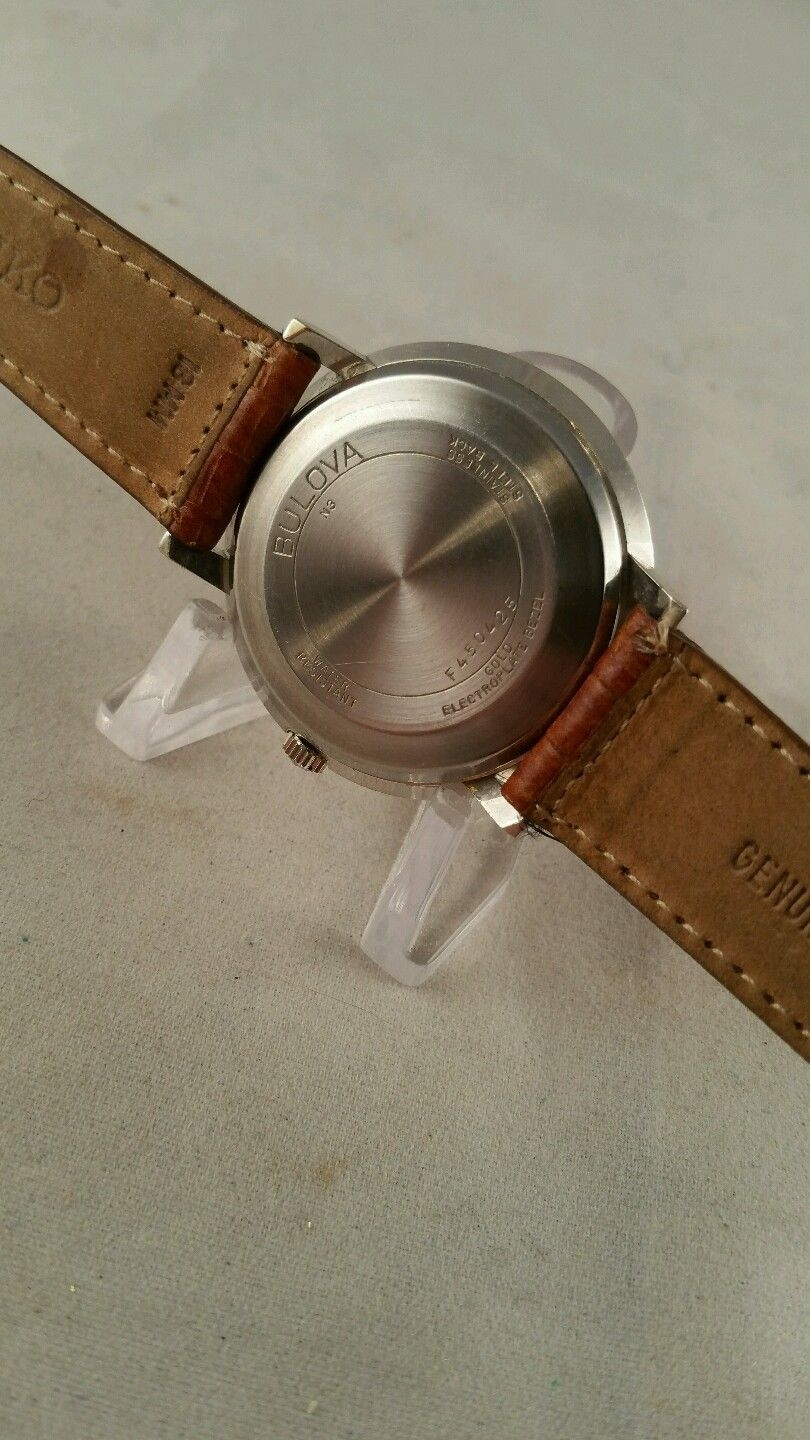
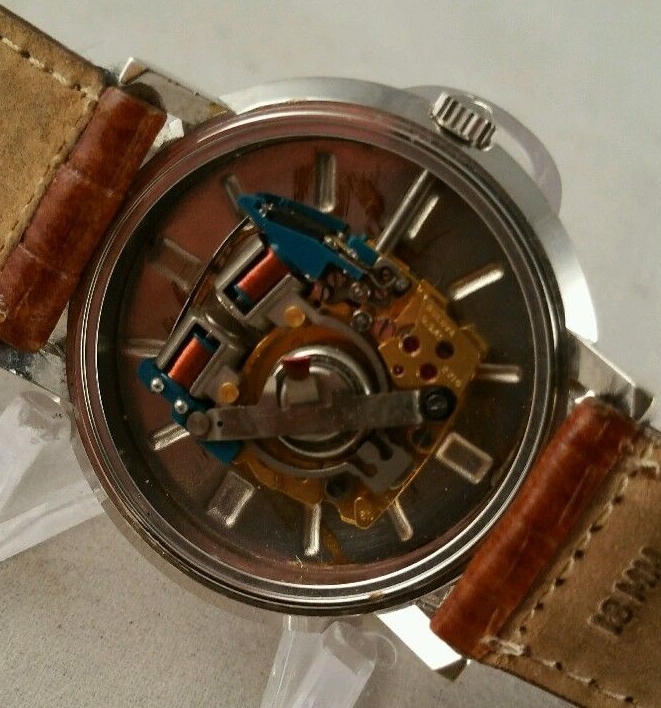
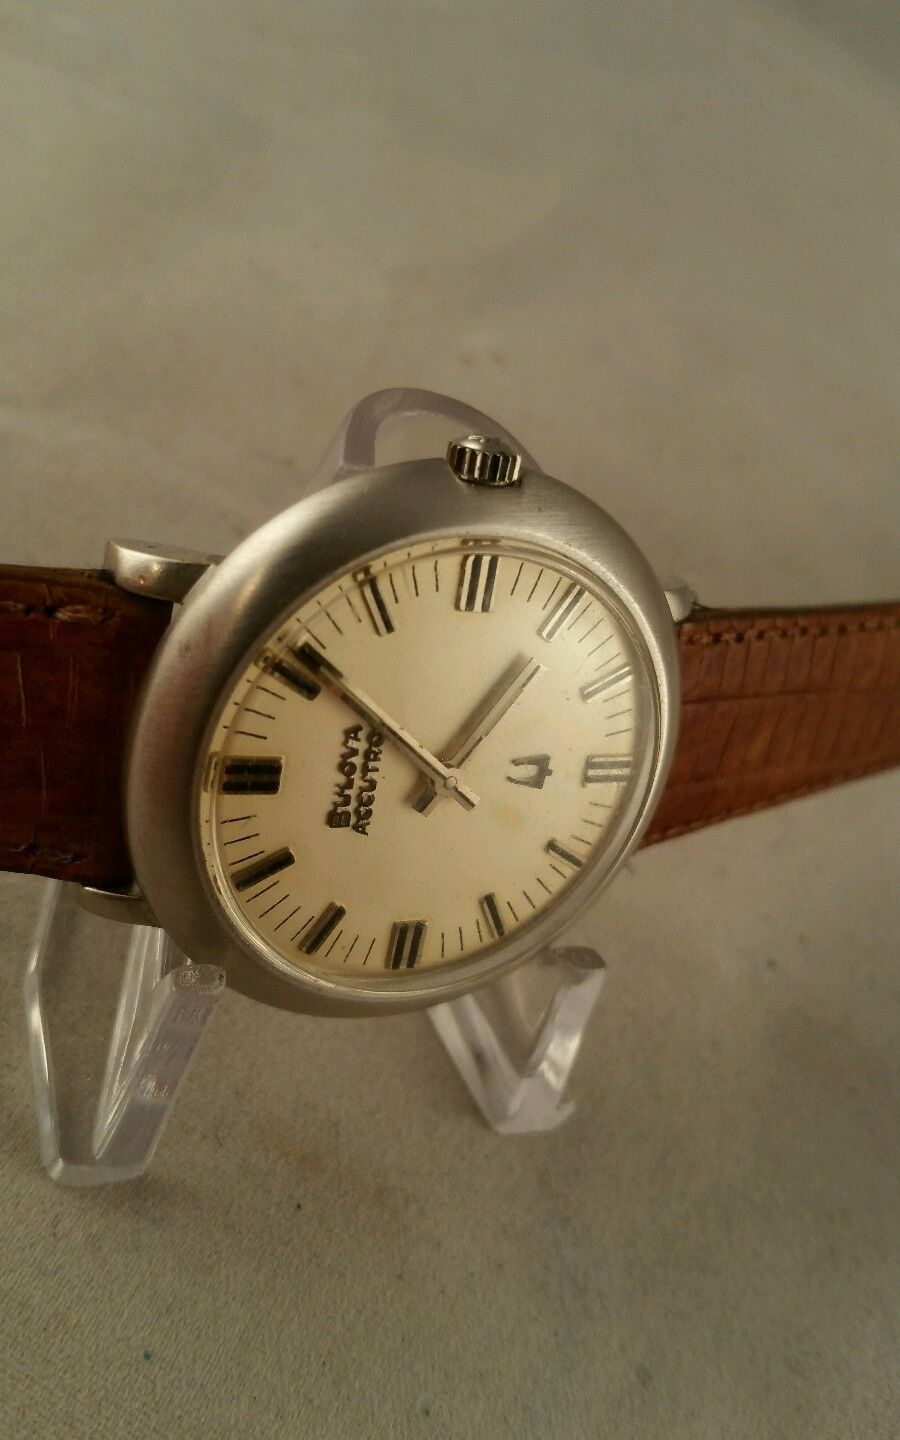
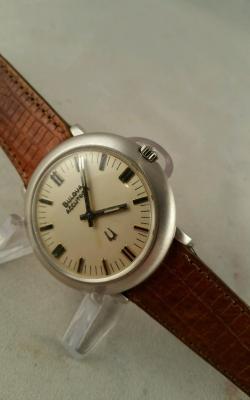
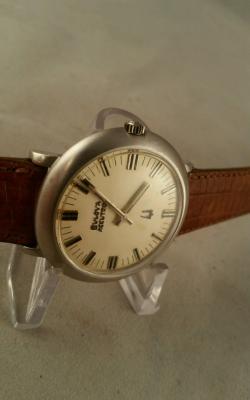
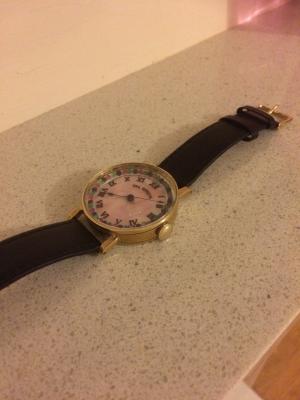
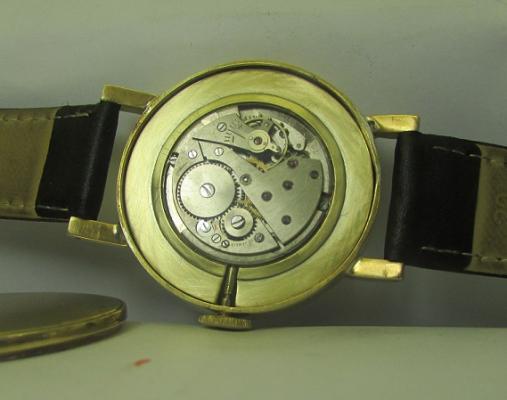
Although I was trying to be good and not purchase anything till I had sorted out the multitude of watches I have in the queue, I saw this Accutron on the bay and bought it for £32.49 plus about $5 postage to my sons place in LA. I had not got an Accutron 2210 up to this point in time, and to be honest the movement does not have a particularly good rep for reliability. However, the parts are comparitively cheap compared to the 214 and 218 and through a quirk of fate I have quite a few NOS 2210 parts that were amongst a job lot of 214 and 218 bits I bought some time ago. It is a 1973 movement and coincidentally that is when these were first produced and the movement is quite small, being used in lots of ladies watches which do not command the same prices as the mens accutrons - good for getting parts. I queried with the vendor the size and was advised it is 34mm excluding the crown so it is in a mans case. Condition was described as "Awesome" but I will settle for reasonably good seeing it is over 40 years old, there are some scratches on the glass and I deduce from the back that the case is gold plated which is difficult to tell from the photos, but I will take what comes. It will be a while until it is sent over to me along with some 218 coils I took a punt on but I look forward to seeing it. Was not going to buy any more repair jobs but I weakened, however, I am definitely back on the wagon for a while. Cheers, Vic


 1 point
 -
Have a look here. http://www.beco-technic.com/index.php?language=en&cat=c6272_VOH-Schraubendreher.html&page=11 point
-
Hi There are cases and dials available all over eBay at varying prices. I think the dial was from there and the case was definitely from http://shop.sk-watchparts.com/ Regards, Chris Sent from my XT1039 using Tapatalk1 point
-
NIce to meet you Sendilkumar, Okay. If I get to the stage of servicing I will take pictures and post them here as a walkthrough. The pictures might help me too no doubt! Thanks!1 point
-
The long thing is actually quite useful. It's used for removing the punches when there in the case and you can't get at them with your fingers. Then I've attached a link to the PDF manual for K in D staking set give you an idea of what some of the things are for. Plus a whole bunch of stuff you've probably never seen possibly. The round things shows up on page 15. http://cholla.mmto.org/watches/repair/manuals/KD_staking_tools.pdf Then stumble across a website with more K&d staking set stuff http://kanddinverto.weebly.com/1 point
-
New wiring is most likely the very first thing I will do to it. Last thing I need is for it to go up in flames. I've seen several baskets on the 'bay but I am not certain about the size, so I will have to wait until I get it to make sure I order the right one.1 point
-
incorrect these are in packs of 50 1 bought one pack of each1 point
-
http://www.ebay.co.uk/itm/391288111482?_trksid=p2057872.m2749.l2649&ssPageName=STRK%3AMEBIDX%3AIT http://www.ebay.co.uk/itm/391288111482?_trksid=p2060353.m2749.l2649&ssPageName=STRK%3AMEBIDX%3AIT other sizes available1 point
-
Crown made and dial markings put on. Glad to be getting close to the finish line!!
 1 point
 -
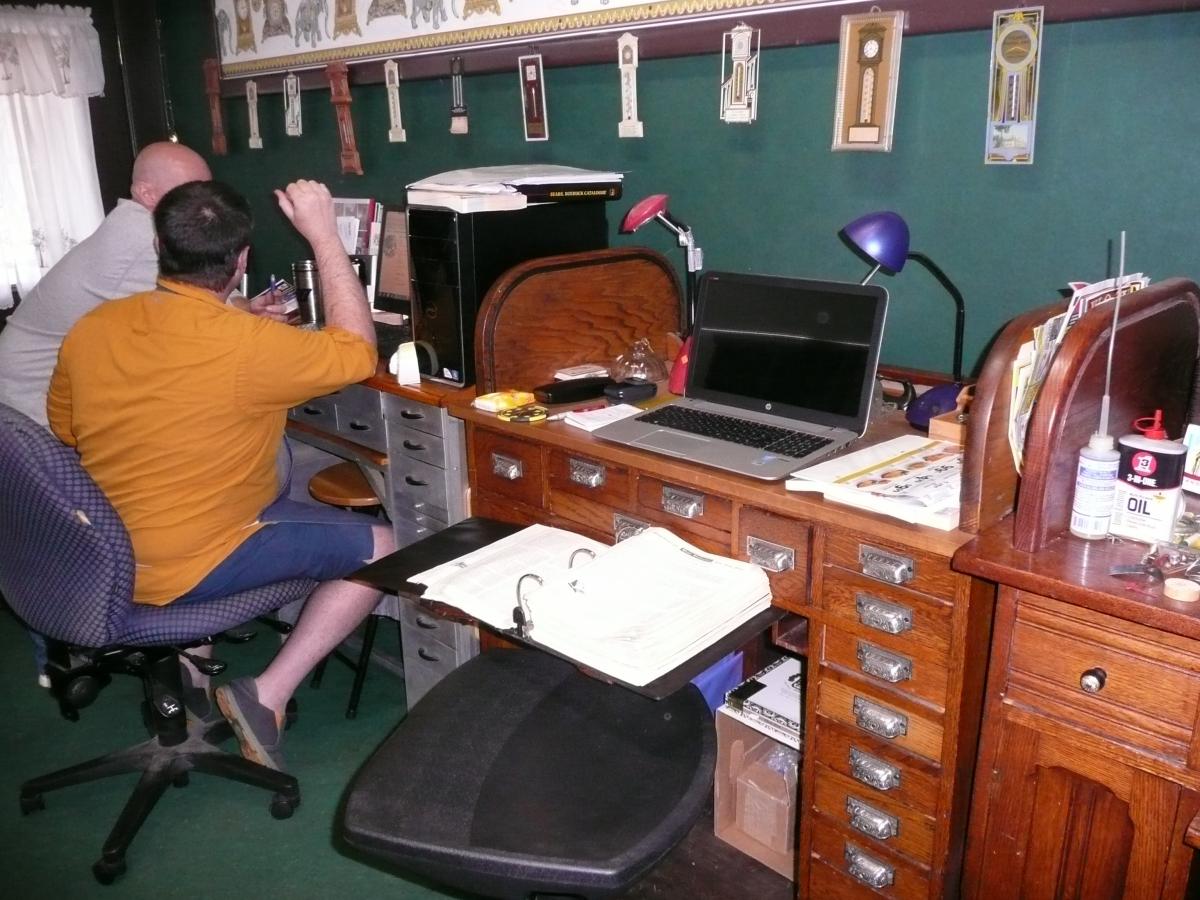
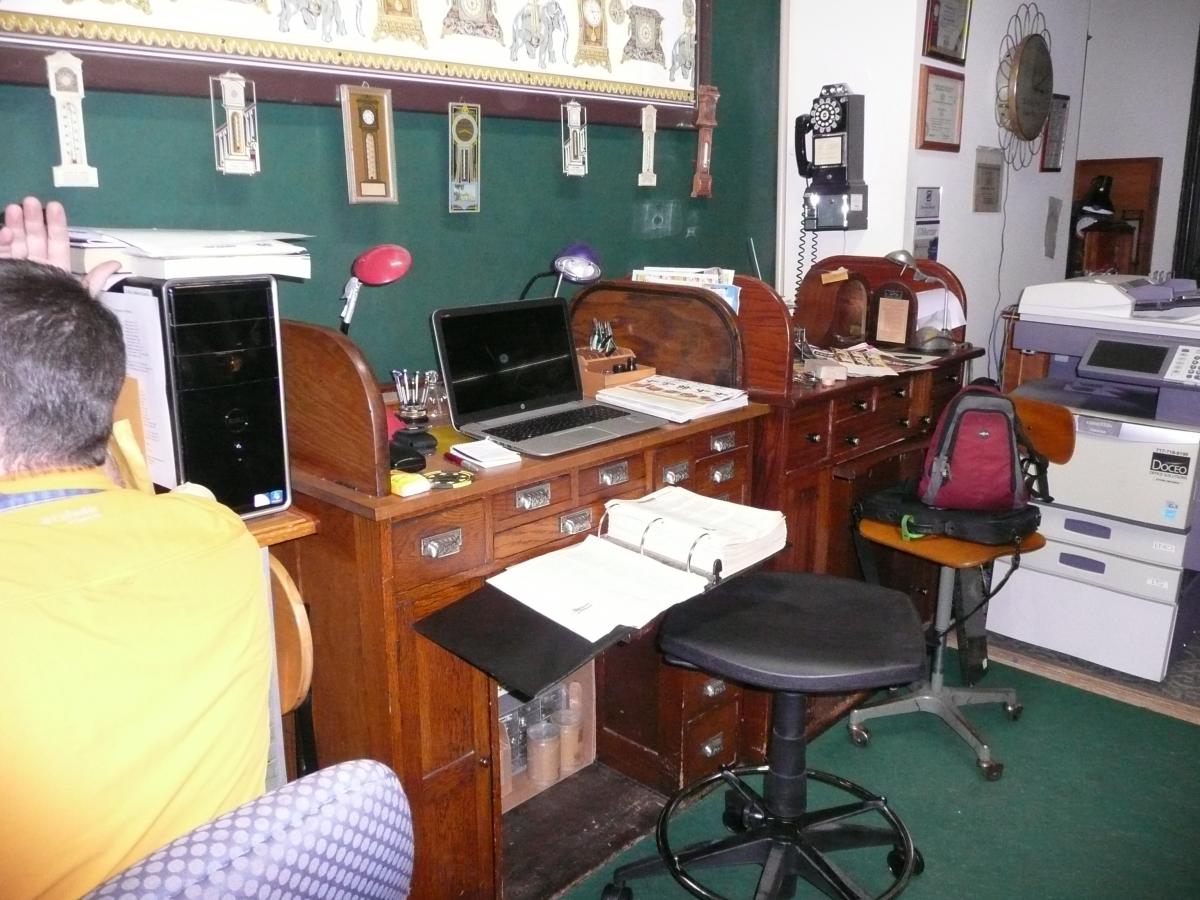
This is the first installment of what I hope will be a series of updates on my experience at the York Time Institute. In Lesson 1 of the Chicago School of Watchmaking's Master Watchmaking Shop Training and Job Guides, Thomas B. Sweazey says, The second sentence of this quote spells out the ethos of the York Time Institute as expressed by its director Daniel Neid. "Dan" is firmly committed to the idea that his students will not only be able to make repairs from stock parts but also, if necessary, be able to make parts when necessary. Not only that he will also be able to understand all the different mechanisms that go to make up the complete watch--including but not restricted to casemaking. My experience so far is that Mr. Neid not only has the knowledge but the tools to put paid to this claim--we shall see. I hope to be able to provide vignettes of how much I will be able to learn and put to practice. For now I am totally amazed--one might say overwhelmed--by not only Dans knowledge of current practices but his avid knowledge of the history of the techniques and tool of this honorable and difficult craft. He has an absolutely amazing array of tools, many of them very rare and practically unattainable. I spent the better part of yesterday afternoon inspecting a multitude of watchmakers lathes; ranging from small bow-driven lathes to modern motor driven ones. Add in a huge number of examples of all the tools mentioned in the Chicago School's manual. He not only has examples of modern tools but their predecessors that date back well into the 19th century. I am looking forward to the chance to try them--especially the bow and treadle-driven lathes. We spent several hours today examining measuring devices, many of them factory pieces once used at places like Hamilton, Waltham and Bulova factories. It is amazing how many kinds of devices have been developed to perform the many types of measurements required for watchmaking. Again, I was overwhelmed and am looking forward to trying some of them. Dan has a good rationale for spending a good amount of time inspecting the tools of the trade: he says it will be invaluable for being able to identify tools at various kinds of sales such as estate sales, yard sales (yes many of his tools have come from such sources). The student (like me) will be able to sometimes get great bargains by being to identify a tool that perhaps its owner doesn't recognize. The other students confirm that they have, in fact, put their knowledge to acquiring lots of interesting pieces themselves. We work in close quarters in a shop chock-a-block full of watchmaking tools and a huge inventory of parts. I once spent some time at sea on a nuclear submarine every facet of which serves some importance towards its mission. It was like living inside a machine. I get this same feeling at the institute. The close quarters serves to create an espirit de corps that I hope I will be able to share someday. The students are inculcate with sense of being a "breed apart" from the ordinary person and take pride in their work. It's also informal but serious and sometimes not so serious. Dan seems to be a good psychologist recognizing emotional ups and downs that can accompany success and defeat. The former receives praise but a gentle reminder to keep focused and not to let them swell the head. The latter is met with the reassurance that our foulups and fumbles are a necessary part of the learning experience; the even experienced students and masters loose parts and break things--underscoring the need to be able to make what one does not have or has lost or destoryed. When we get into a dudgeon over repeated failures Dan says, "Go take a break and don't let it get under your skin." Because it is through failures and even catastrophes that one really learns. One must develop patience and take the time to get the task right. He pays attention to how our tools are organized by task and frequency of use. He helps his students acquire their tools from the least expensive sources--though considerable expanses will be incurred event the. Though students are encouraged try out his many tools and devices to further direct acquisitions by the student. I just bought a nice lathe with complete sets collets. I will spend some of my time restoring it to mint condition. And its not jjust Dan, the other students are willing pitch in by selling the beginner some ot their surplus tool at very reasonable prices. I too donated to the Institute several of my supplies to the general pool can be of help to all students. We are constantly being giving spot tests to see what we've learned. For now my tests are ones of recognition. I'm getting tired to I'll cut this short by showing you a couple pictures of my bench. It's an old bench as you can see with a place for a treadle on the left. I love the feeling that I am working where generations of watchmakers worked before me. My I do them honor and justice. My bench is the one in the middle with my laptop on it. Today they are indispensable for research.

 1 point
 -
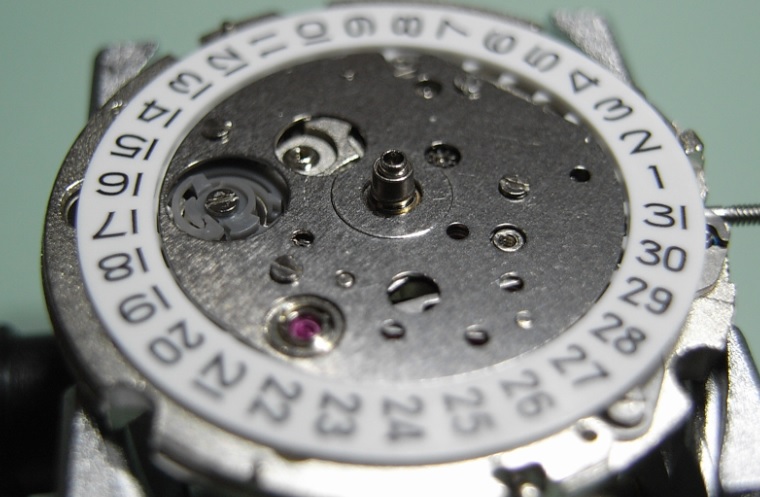
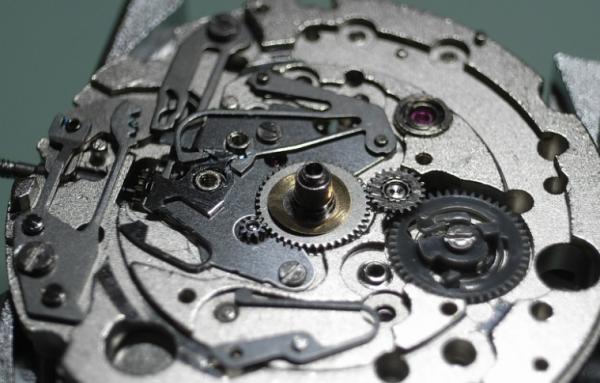
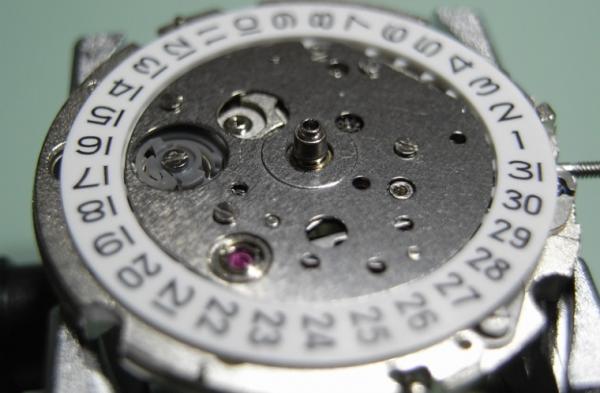
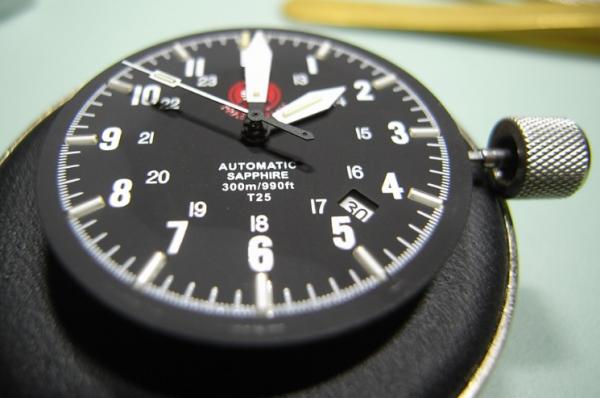
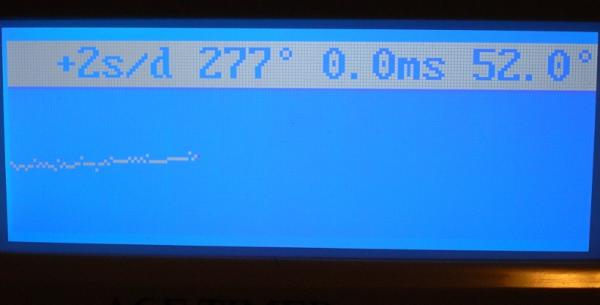
Assembly The rust that was on the Centre Wheel and Pinion cleaned up real nice, So the first step was putting all the Gear Train, Mainspring, Winding Gears, and the Automatic Work onto the Main Plate, and then locate all those pivots once the Bridge was placed on top ... this movement is a good test of your patience and skill :) As it's not possible to wind up the Mainspring for testing the Pallet Fork, I decided to install the Keyless Work so I could wind it up While I was on this side I also removed the shock system and oiled it. It's a very interesting system, and extremely easy to clean and re-oil ... perhaps the easiest I've come across. Flipped the movement and installed the Pallet Fork and Balance ... then cleaned and oiled the shock system on the Balance Cock. Started ticking straight away with very nice amplitude. Next was the rest of the Motion Work and Calendar Work Date Ring and Cover Plate back in place Lastly the Dial and Hands replaced. Again this movement used H3 tubes on the Dial and Hands, so very little clearance when fitting the hands. Back on the Timegrapher ... and she's purring like a kitten :) I thank the Lord Jesus Christ for the wonderful gift he has given me, I really enjoy this work, and every movement is an adventure. I hope you've enjoyed it as well, and it helps those who come across this movement to service or repair.
 1 point