Leaderboard


Popular Content
Showing content with the highest reputation on 10/05/15 in all areas
-
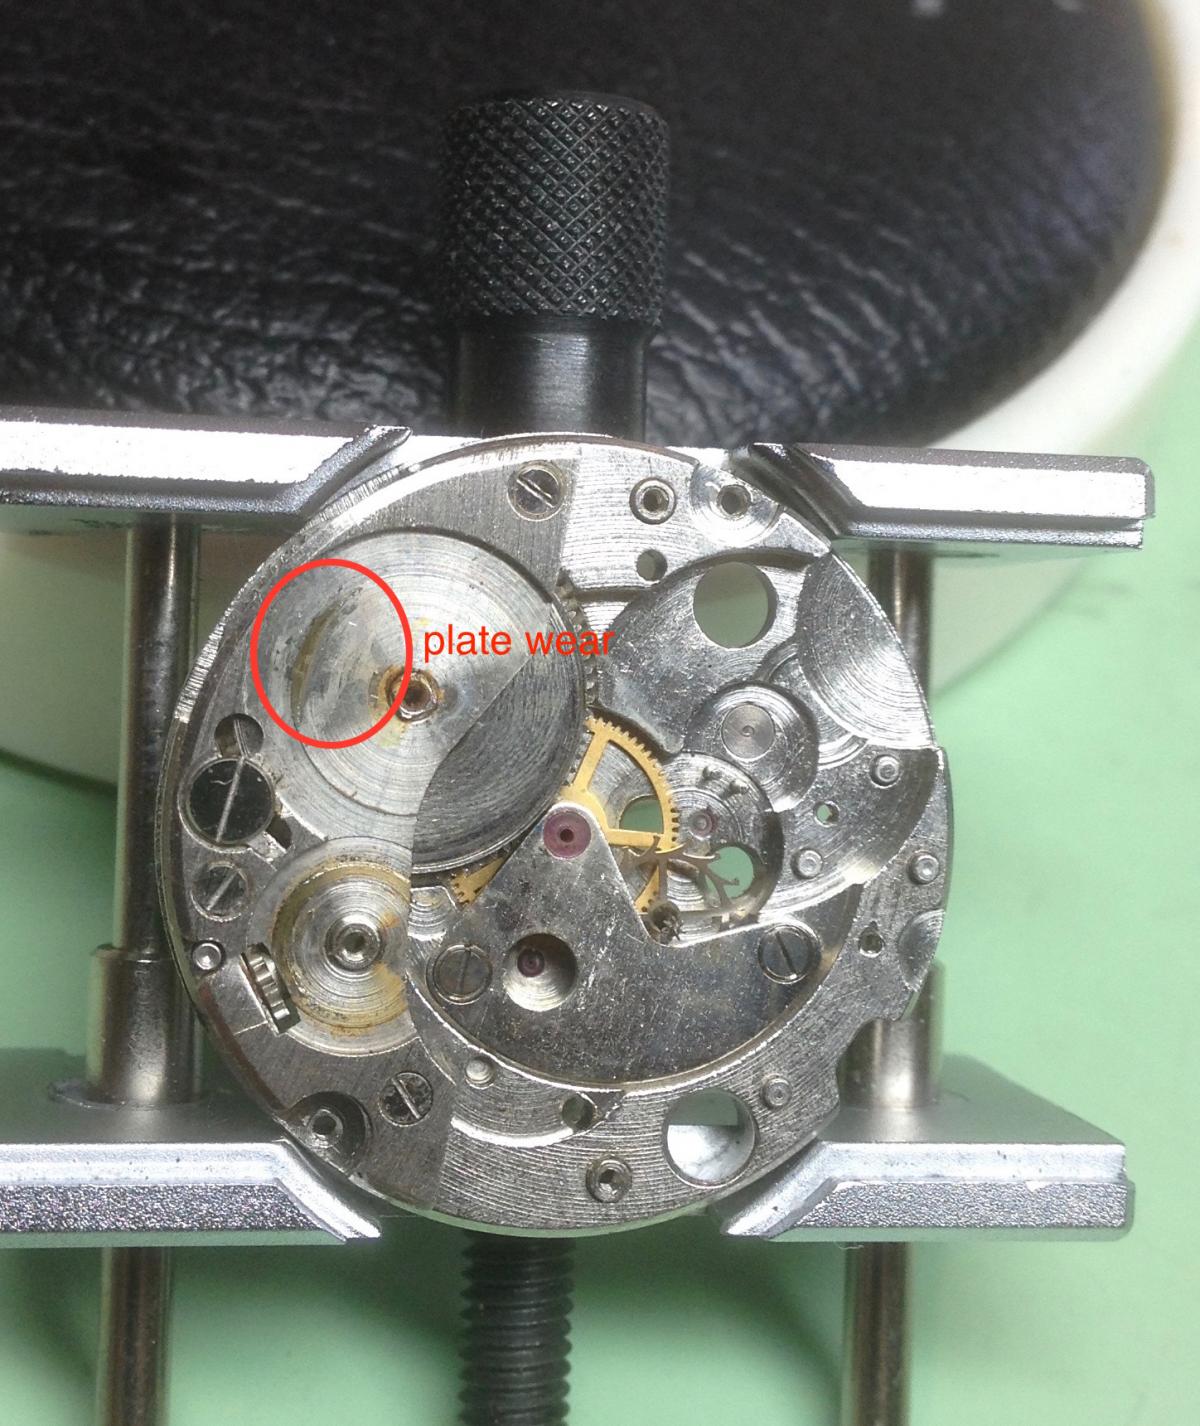
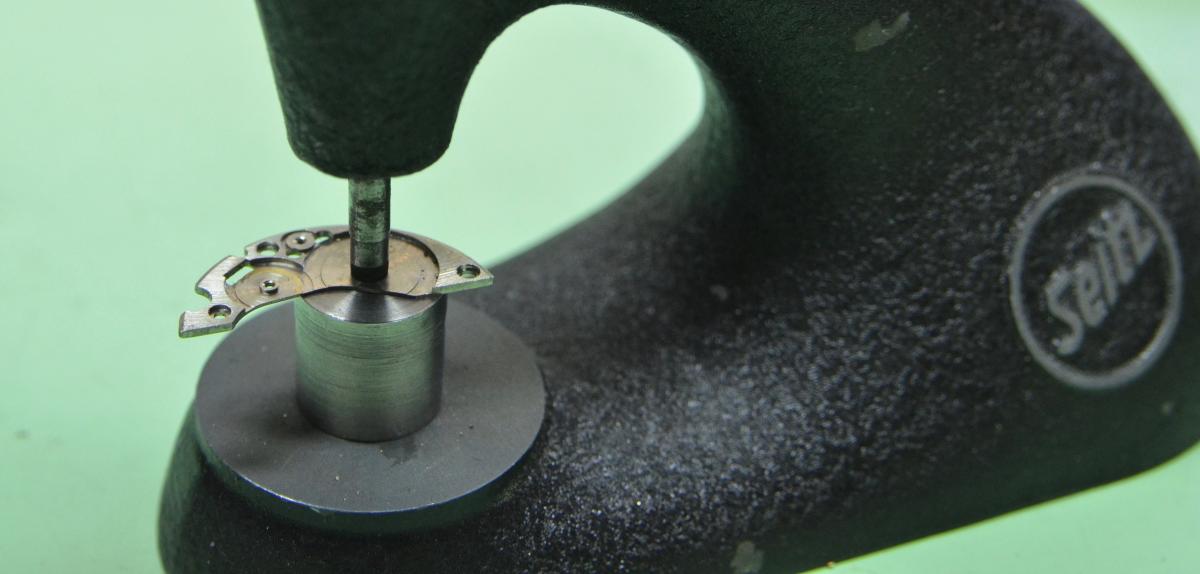
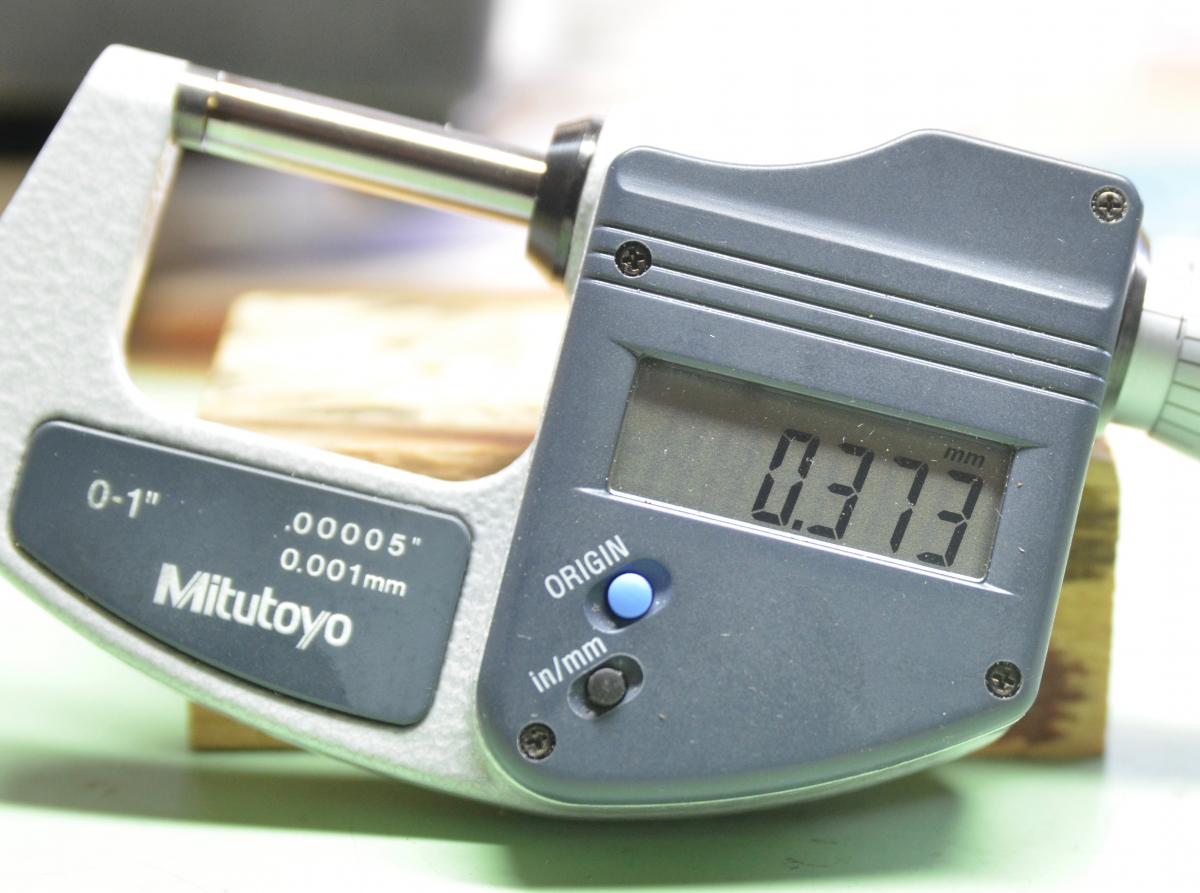
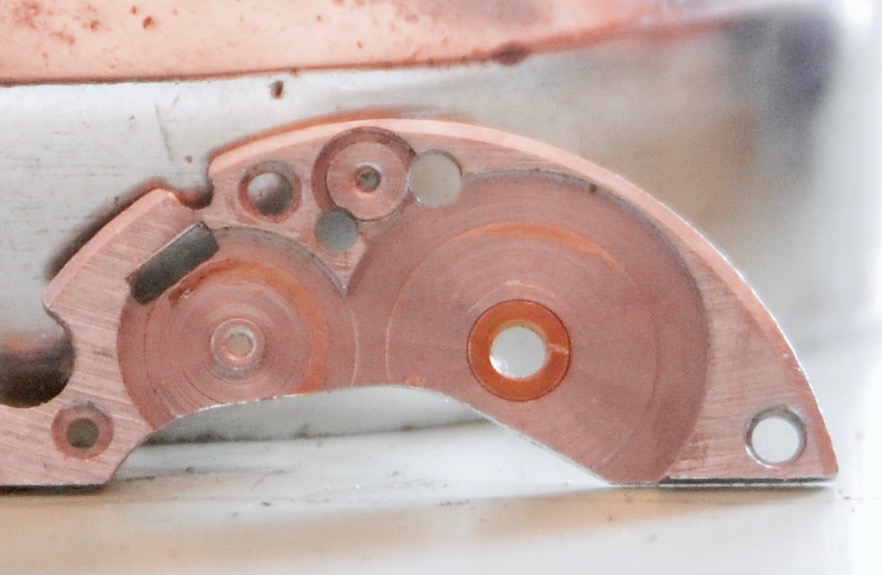
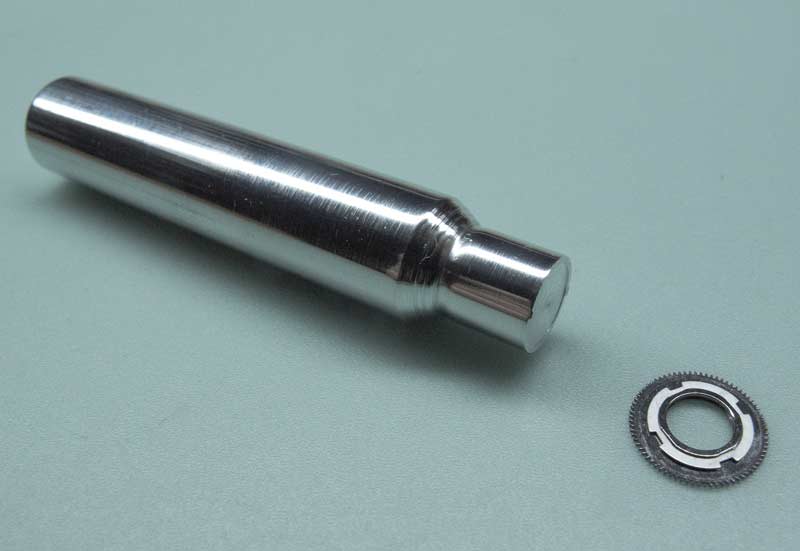
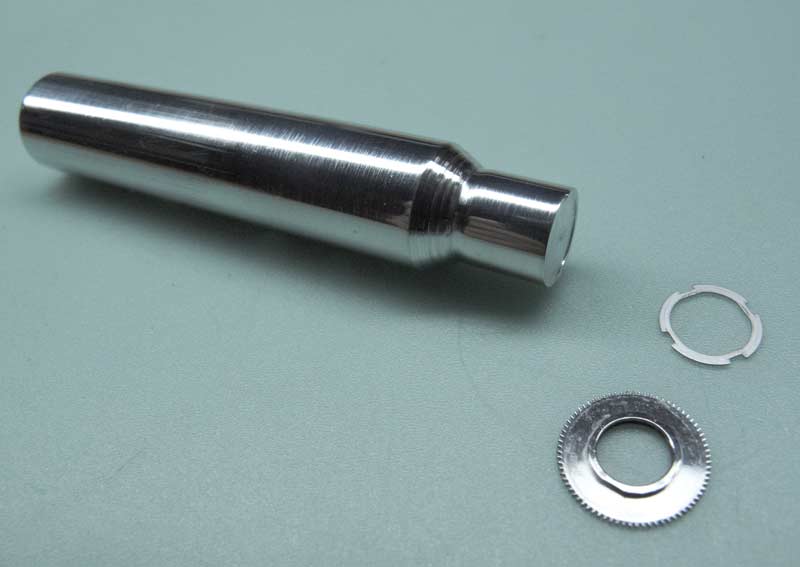
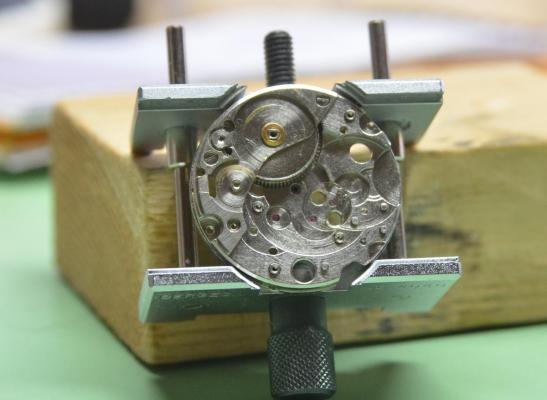
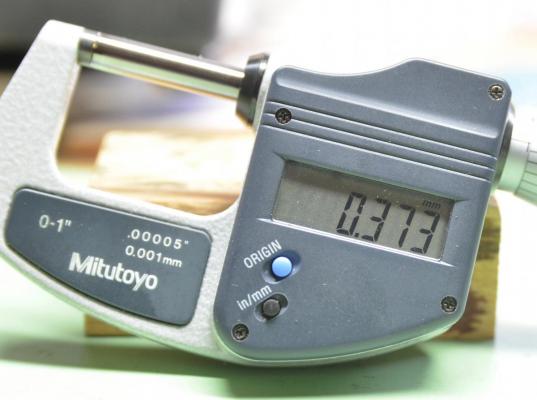
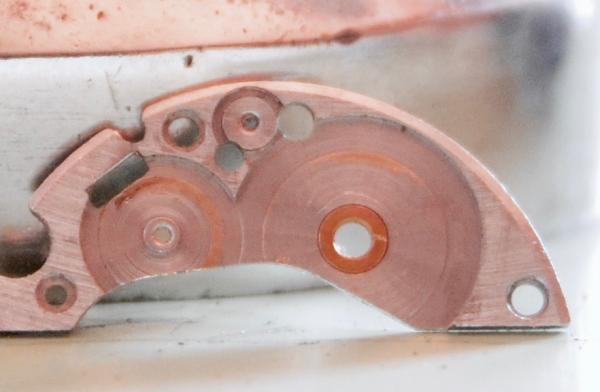
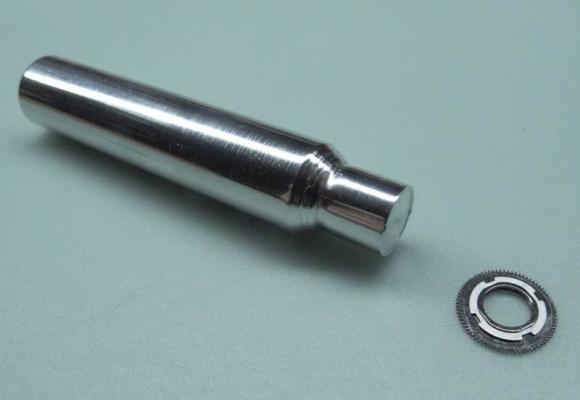
I was asked to look at a Sekonda that was running for approx. 8/9 hours & then stopping but would run with again with encouragement. When I opened the watch it was extremely dirty But I noticed that under the mainspring barrel there was wear on the plate. After reassembling the barrel & bridge it was apparent that the barrel bridge hole for the barrel was very badly worn. The answer was to re-bush the hole. I had some clock bushes & luckily had a bushing that had the correct size hole. The problem was however the plate was only 0.373mm thick so effectively I had to make a bushing that was not much more than a washer. I turned the bush down on my lathe to a reasonable working thickness & then reamed out the hole for the new bushing (3.00mm). Then I fitted the bushing using my staking set & tested the hole was correct. After a lot of broaching using a smoothing broach achieved a good fit. I then removed the new bushing & using a soft piece of wood as a base filled & burnished the bush to the correct thickness. Then I finally pushed the new bushing in with my staking tool but added for safety some lock tight to it,s edge as it is a very thin bushing. Job done just the watch to re-assemble.


 4 points
 -
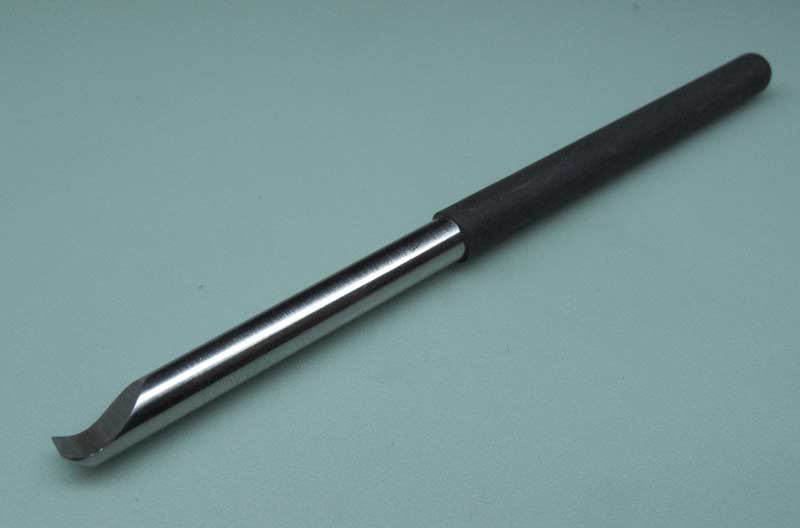
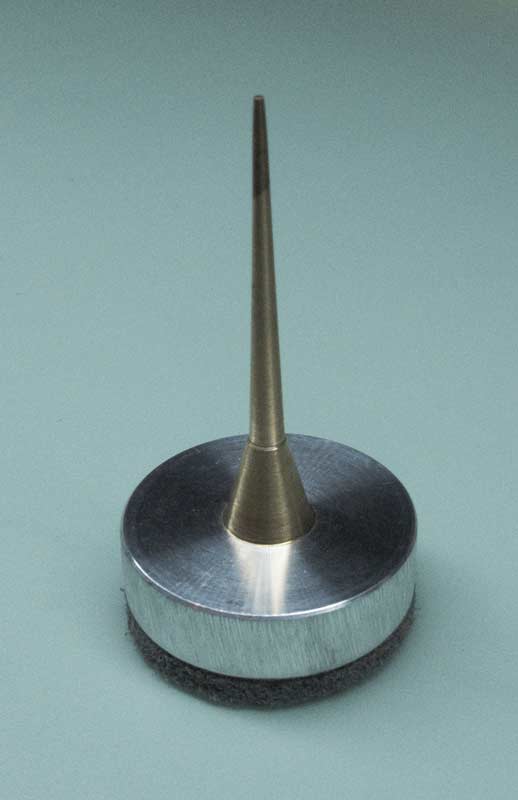
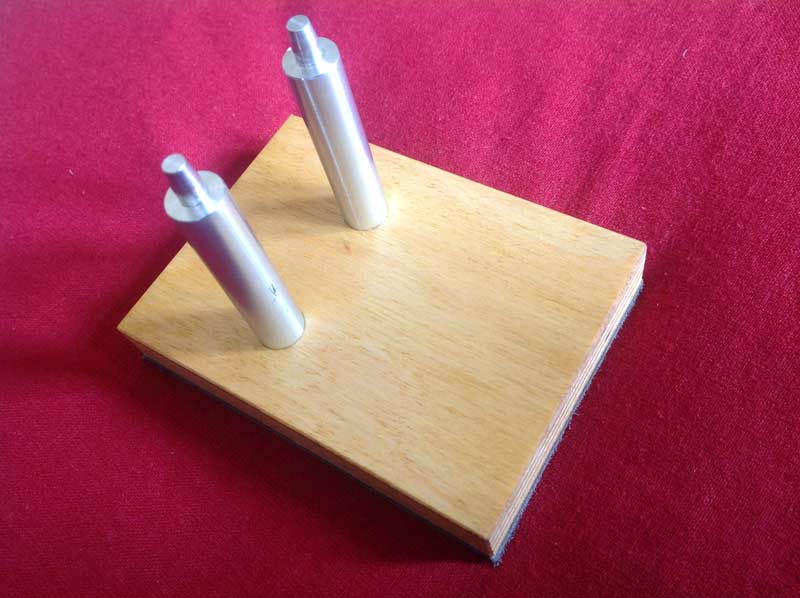
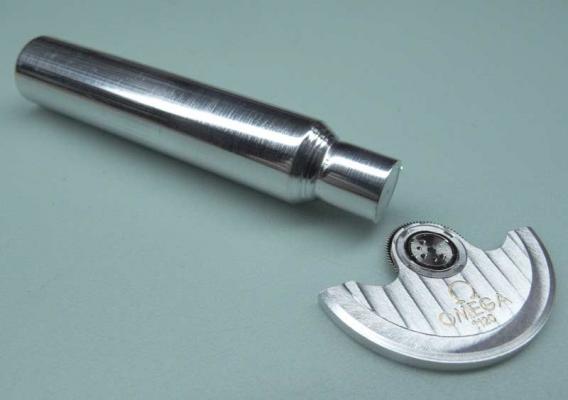
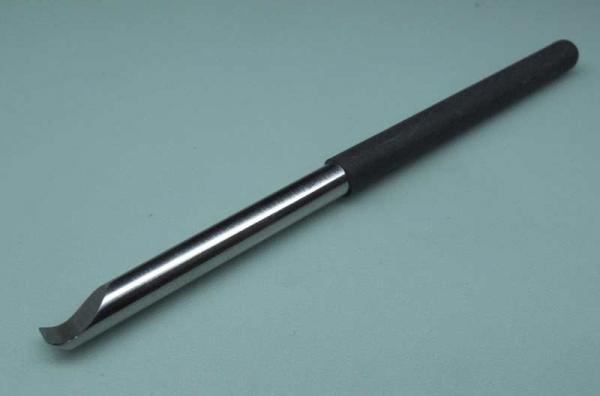
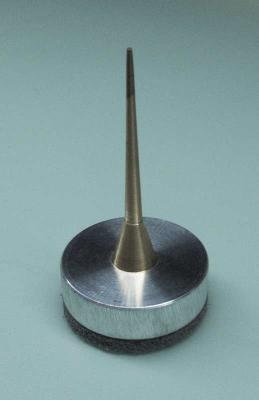
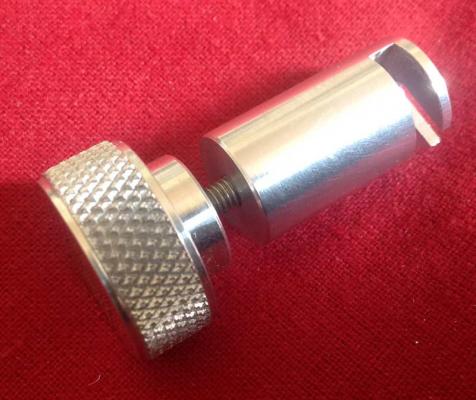
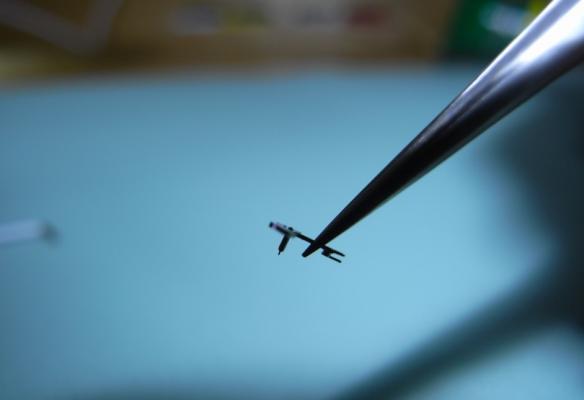
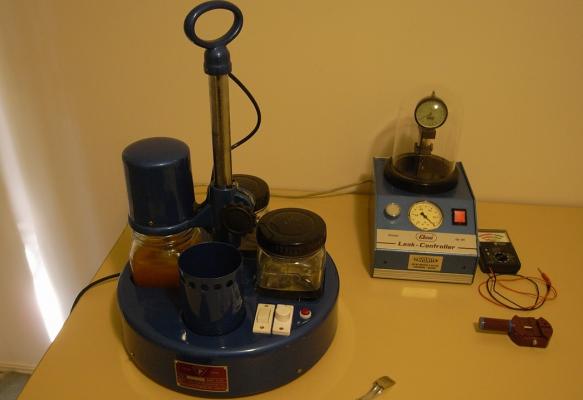
Here's a few. I made this today for tightening the nut when replaing a rotor bearing on an Omega 1120. Pair of levers (only one shown) great for hands and especialy snap case backs. Balance tack. Minute hand puller for an Atmos clock. Movement holder for Atmos clock.

 3 points
 -
I use a ribbed mat for my tweezers, hand levers, and hand fitting tools. Untitled by Micky Aldridge, on Flickr2 points
-
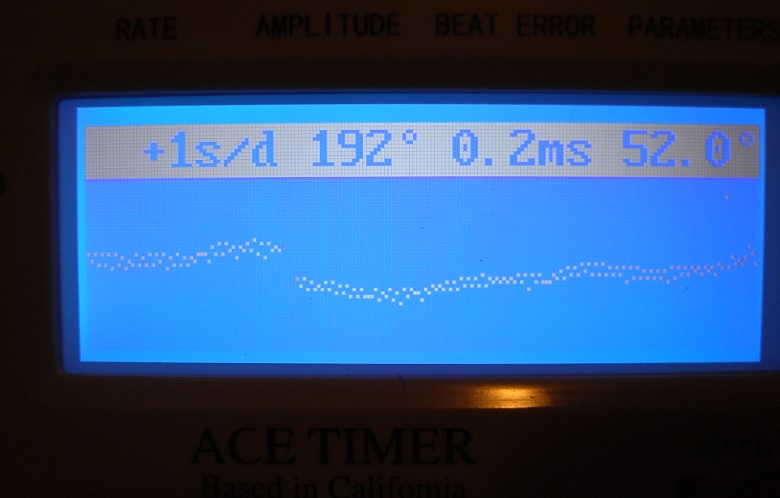
One of the problems with diagnosing watches is it's really helpful if we could see the watch. It be nice to see a close-up picture of the balance assembly where the regulator is? Usually Omega watches have a floating regulator which will move independent of the indicating arm. Then there's usually a floating stud holder for putting the watch in beat also. Sometimes on the Omega watches it's hard to tell as it all looks like it's one piece. So 235° for serviced watch is a bit low if the watches fully wound up but the watch should still keep time. You can see at the link below has service the watch and they have 270°. Several things are possible with timing machines especially the Chinese if the amplitude is way below 200 the timing machine will have a hard time picking up what it's supposed to pick up and pickup the wrong part of the waveform. Then it will give you a much higher amplitude than it really is. Usually you get a indication of this if the numeric numbers take a long time to come up because the timing machine is having a hard time figuring out what it's supposed to be doing. This is one of the reasons I asked what the beat error of the watch is because if things are really bad some of the numbers may not come up at all. Then an extreme one this is a 19,800bph watch and if the timing machine is set to 18,000 interesting things will happen. Then is not the change the amplitude much but the lift angles 49°. http://watchguy.co.uk/service-omega-seamaster-600-135-011-calibre-601/ http://www.ranfft.de/cgi-bin/bidfun-db.cgi?10&ranfft&0&2uswk&Omega_6012 points
-
Well, it turned into "next year while I'm traveling", but the article is finally done: Making Custom Watch Dials2 points
-
Hi guys. Thanks for all the nice comments! The article is finally done, after close to a year of doing instead of writing: Making Custom Watch Dials If I've omitted anything or something is unclear, please let me know, either here or in the comments of the article. azwatchman, of course you can use my process. If I didn't want anyone to use it, I would have kept it a closely guarded secret, and changed my name to Rolex. :) ;)2 points
-
check out 14:202 points
-
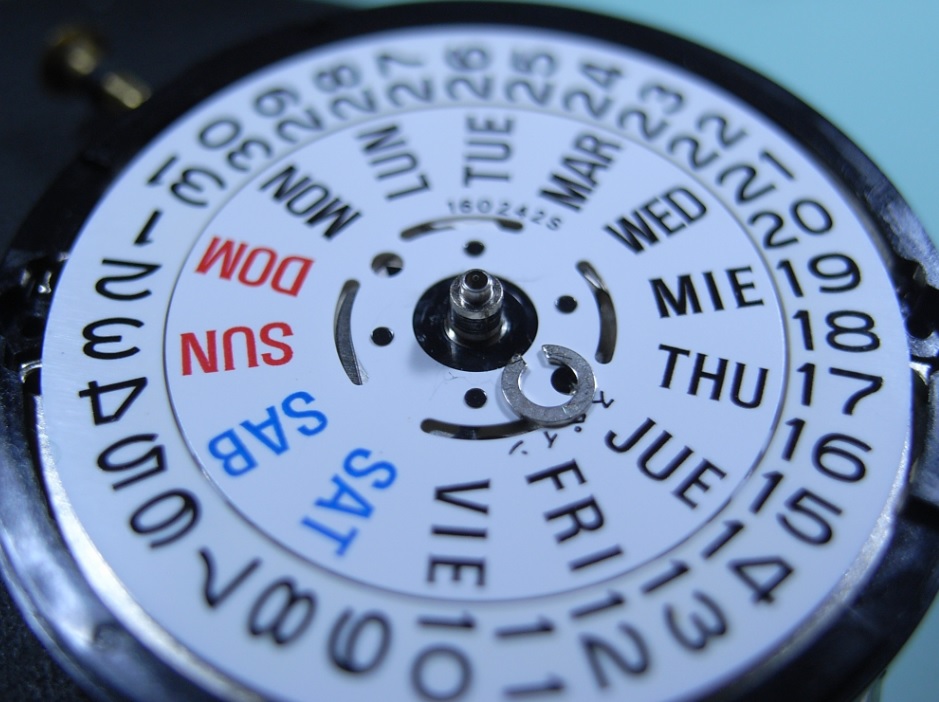
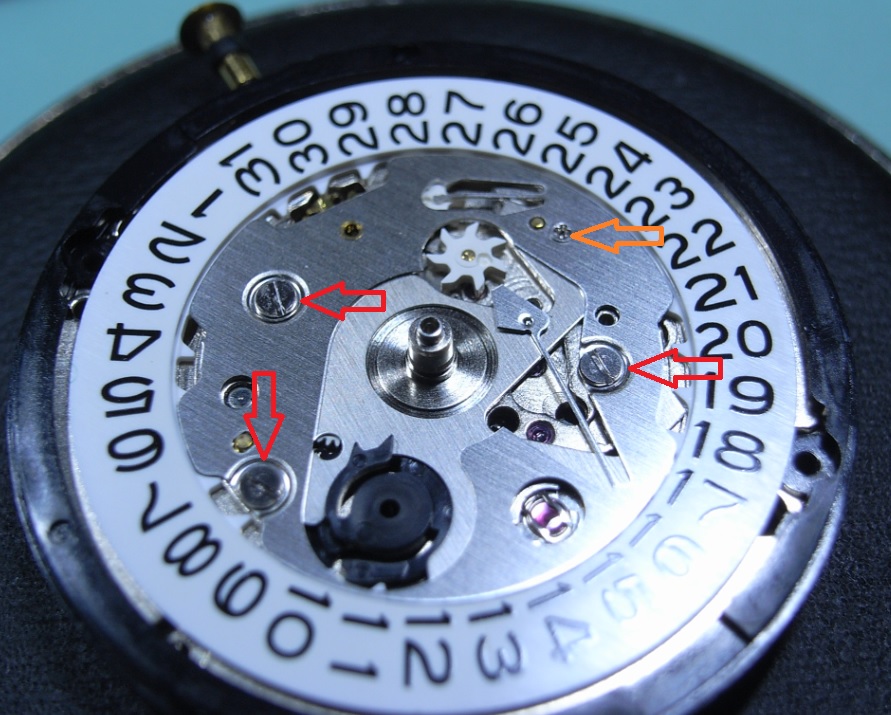
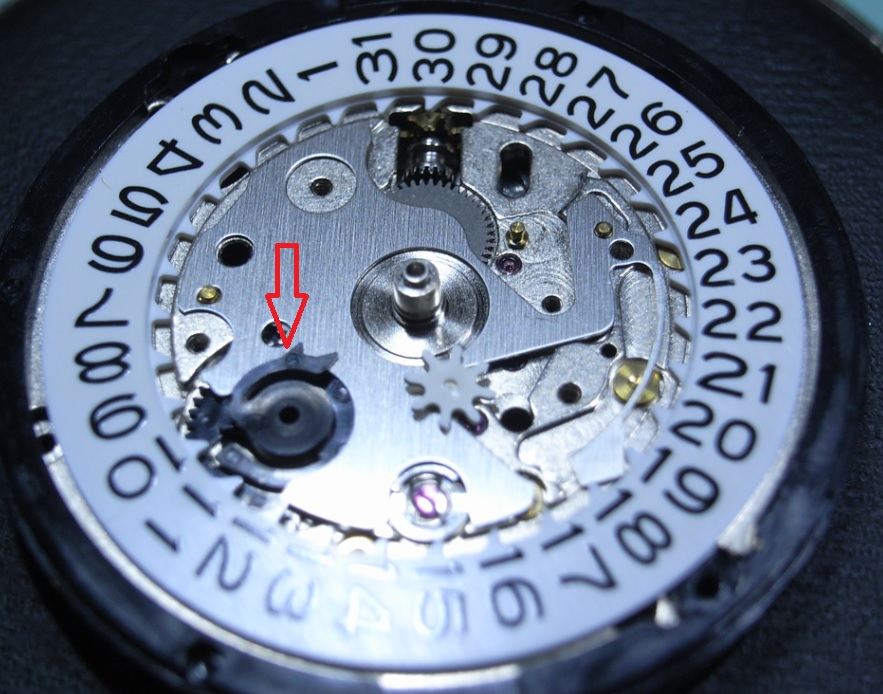
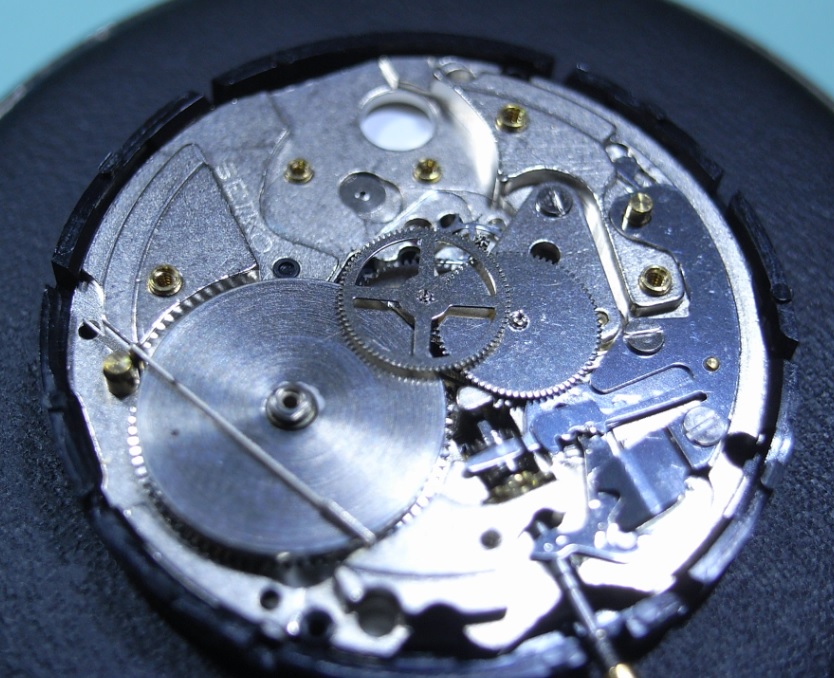
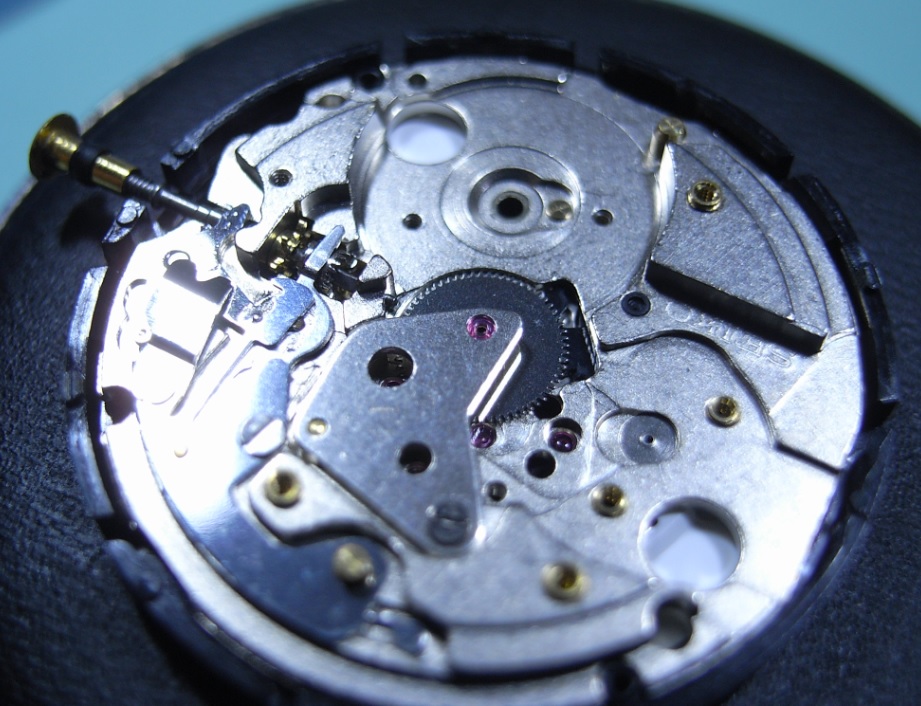
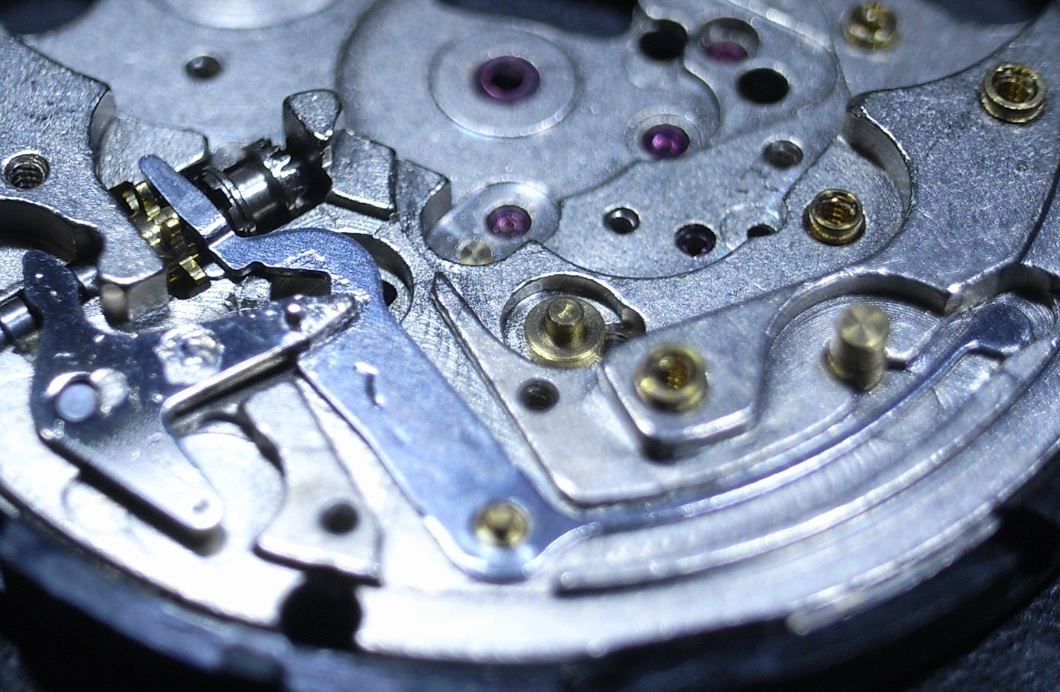
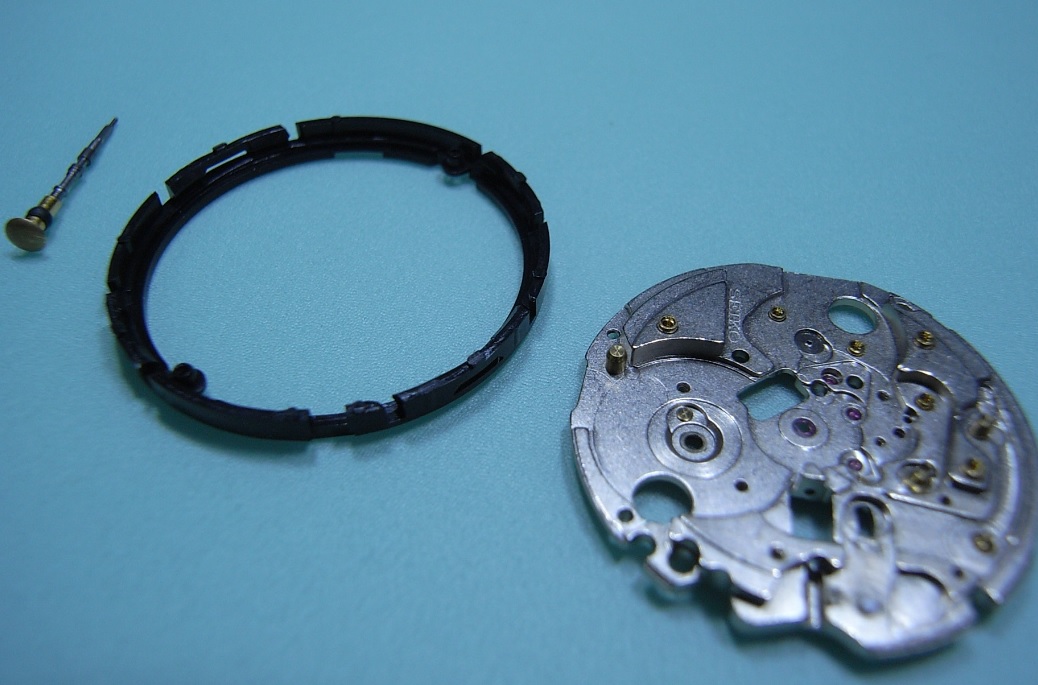
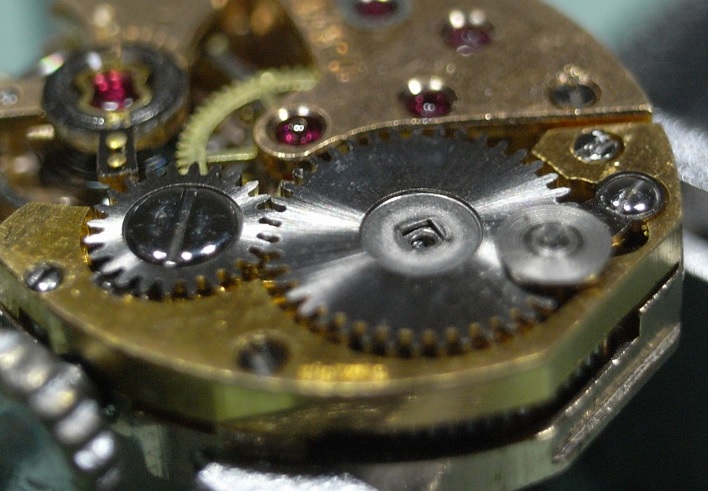
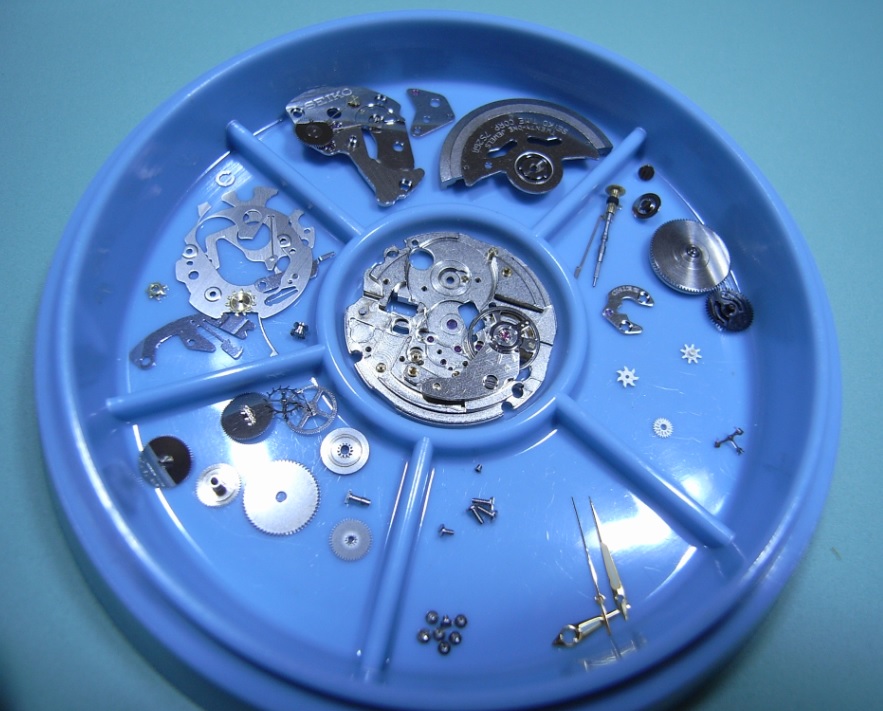
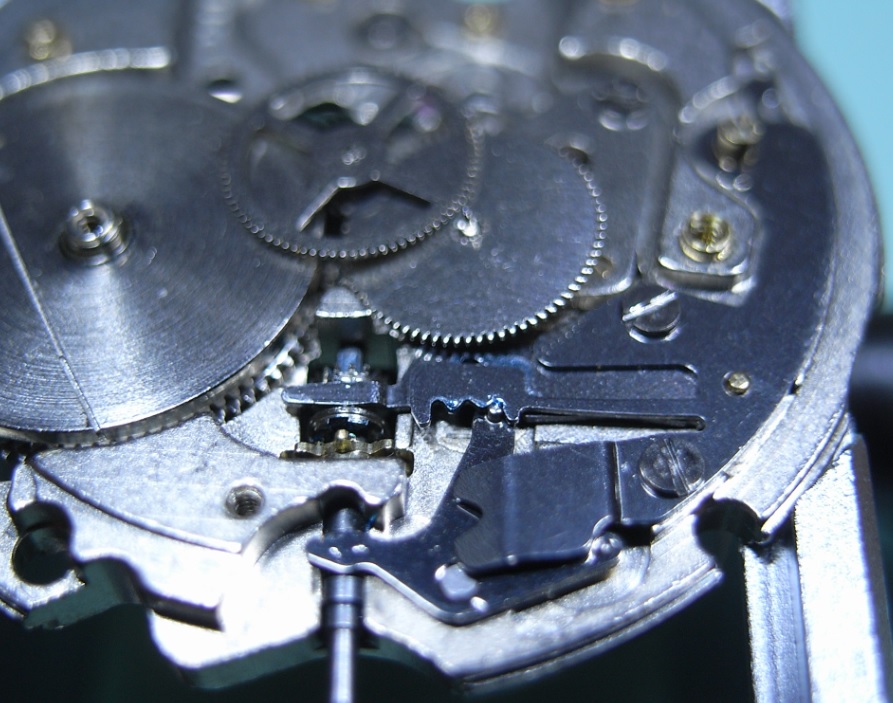
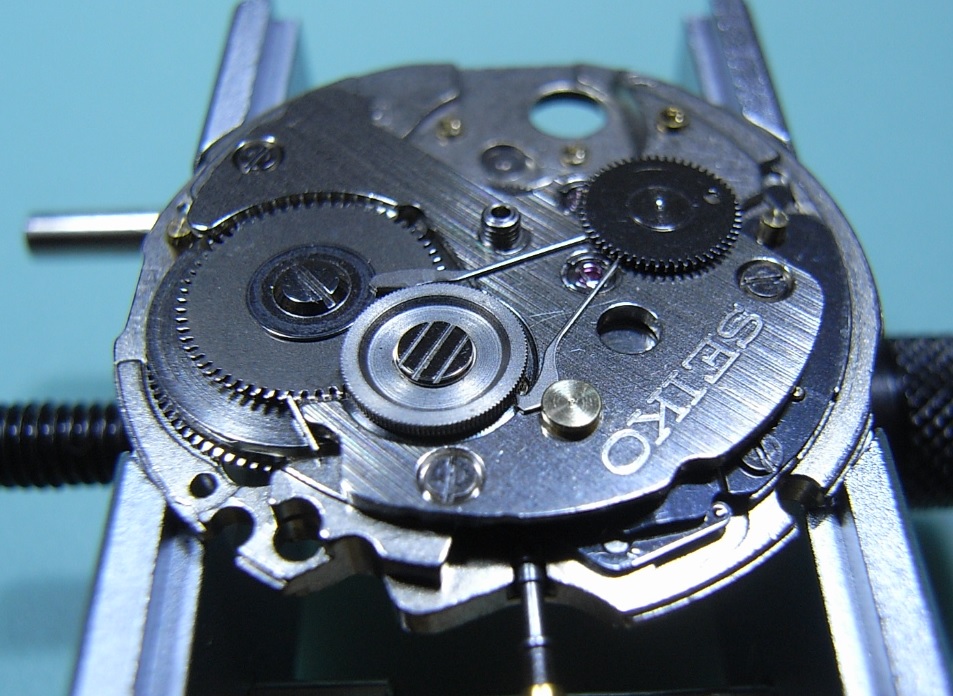
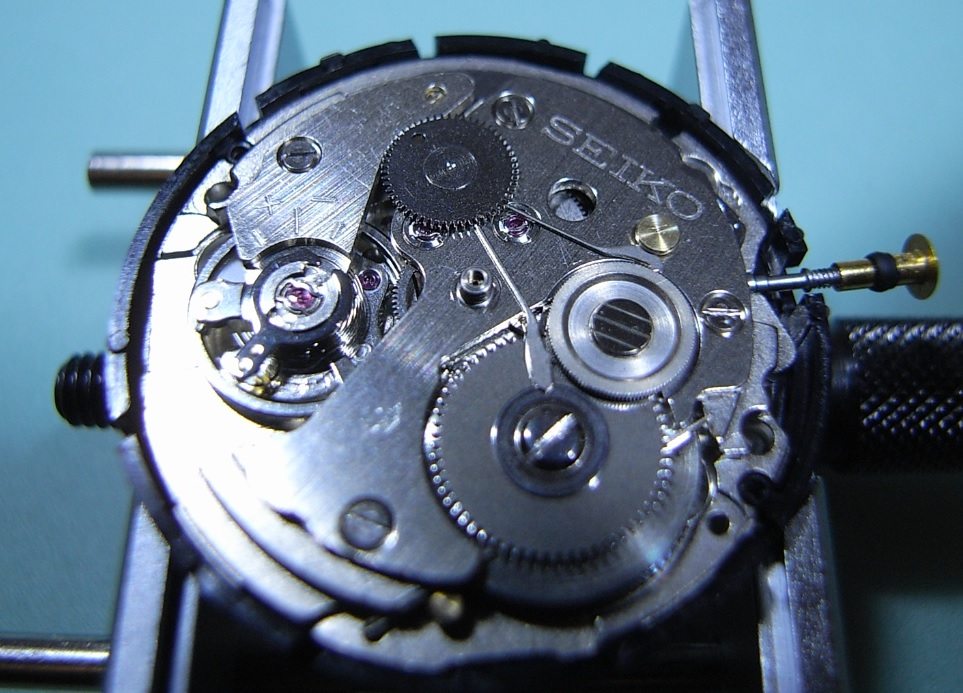
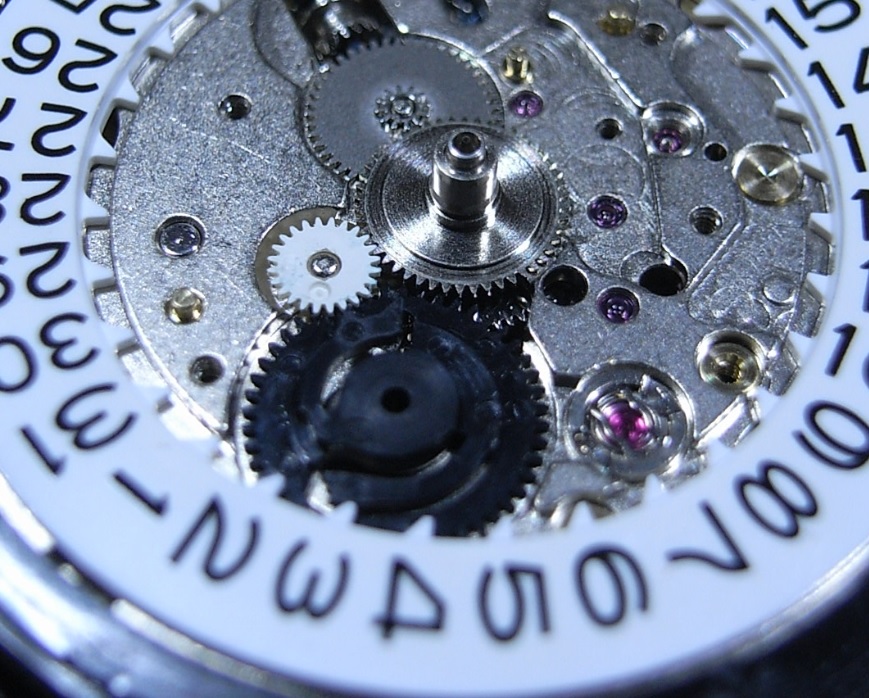
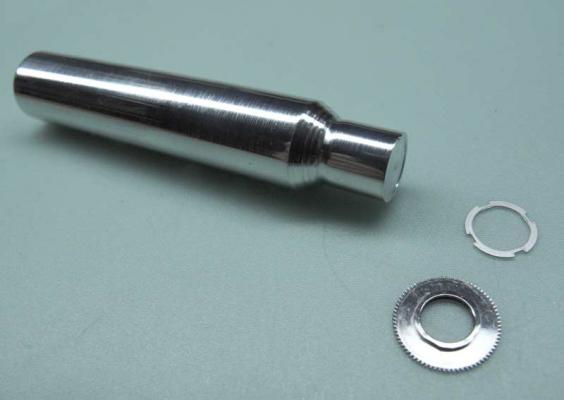
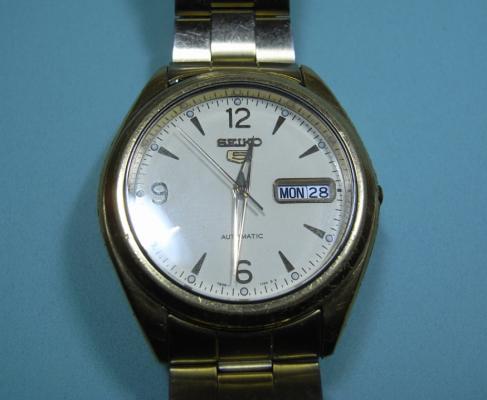
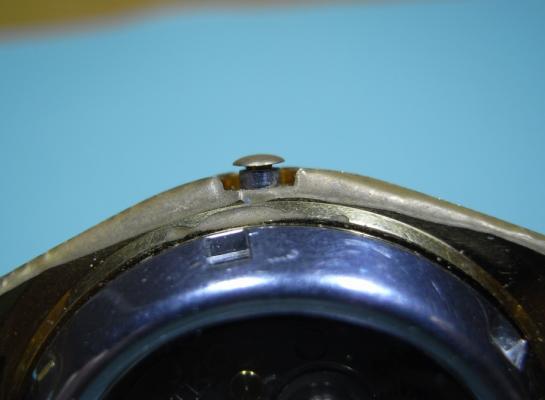
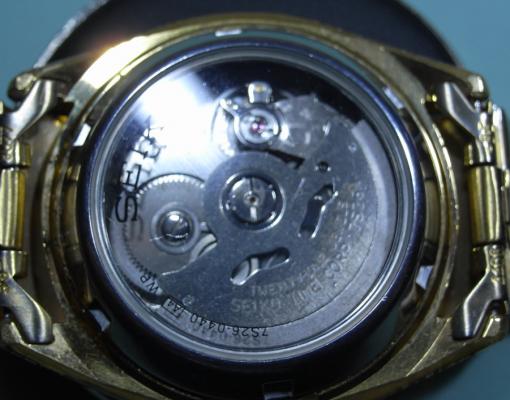
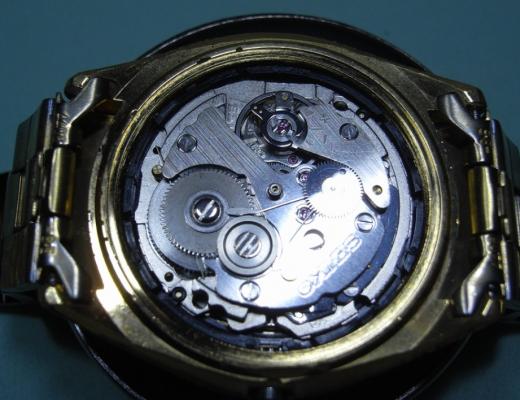
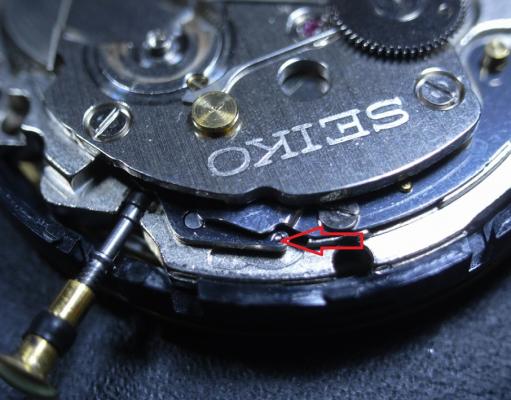
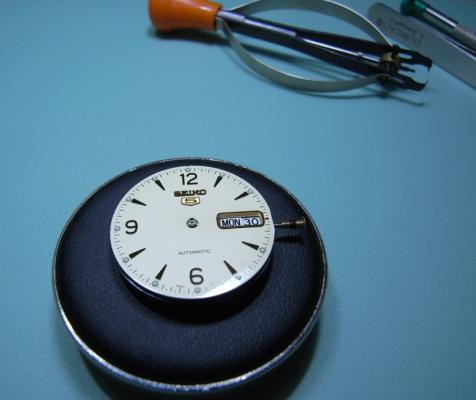
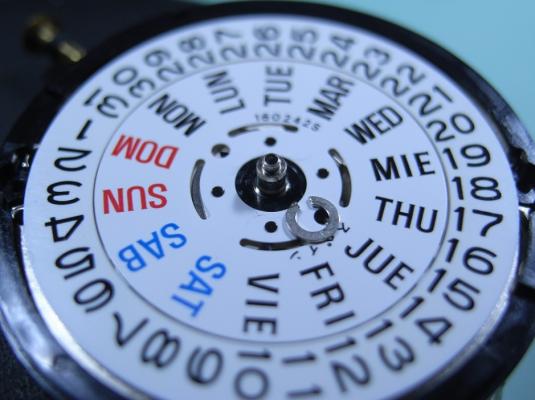
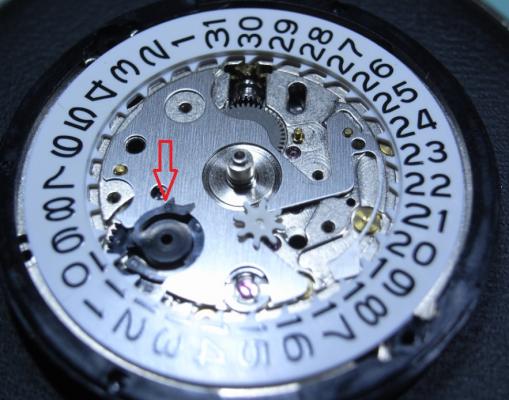
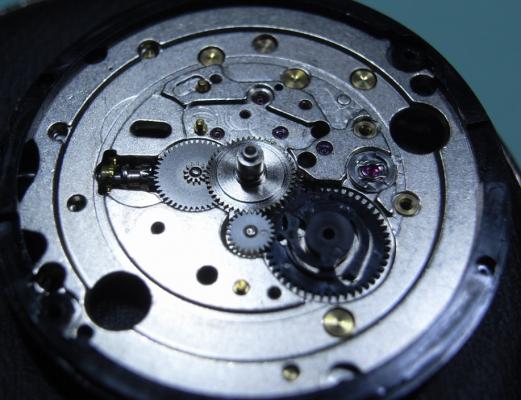
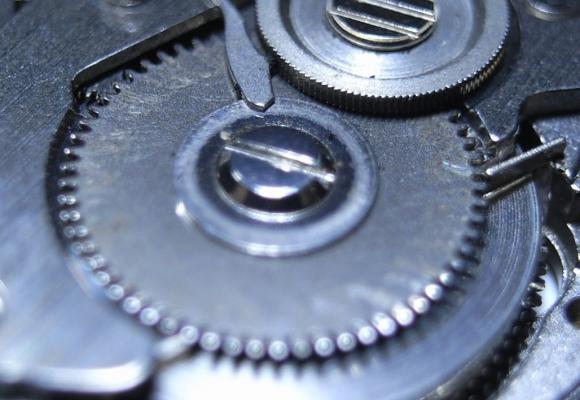
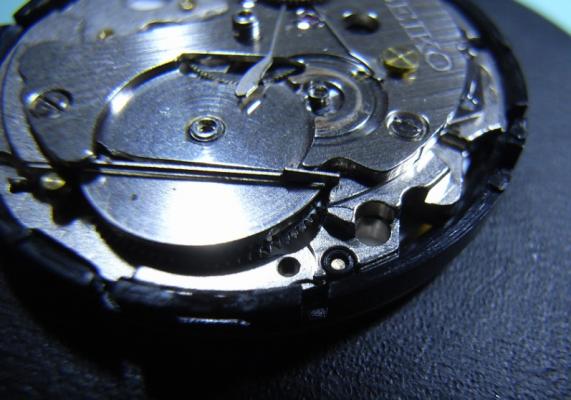
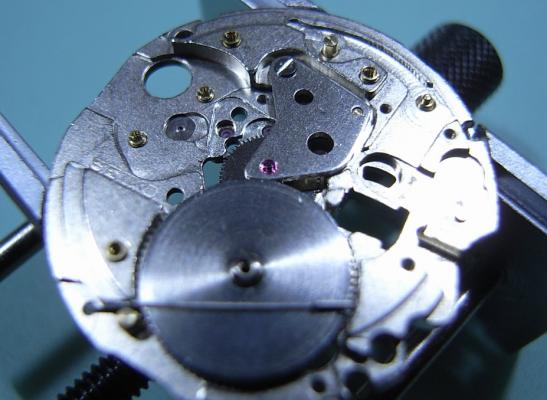
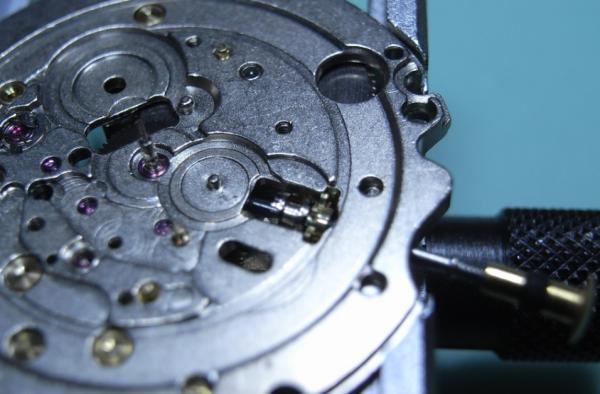
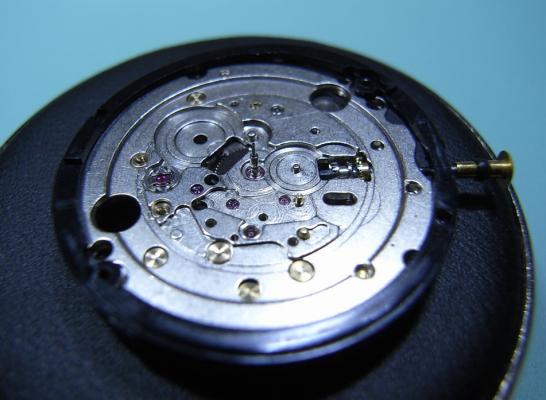
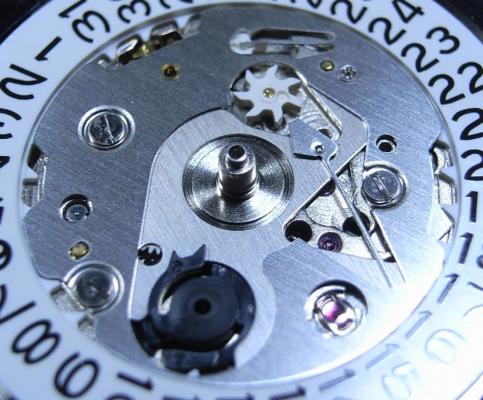
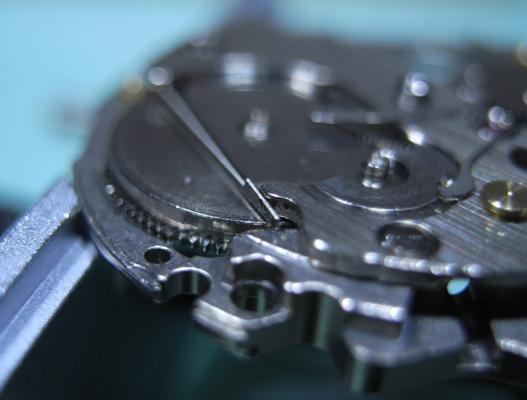
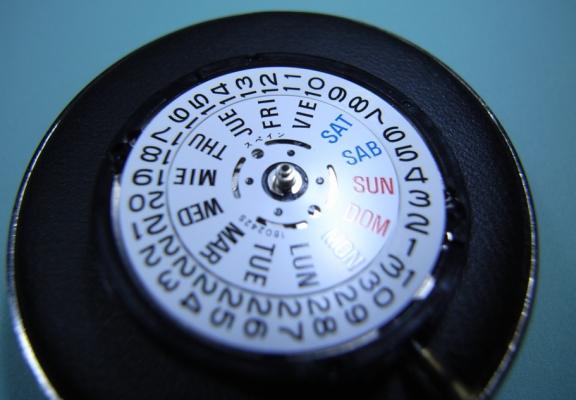
Seiko 7S26A Complete Service Background I have a good friend, a brother in Christ Jesus, who I've known for many years. He knows I've embarked on retraining myself for a new career in Watchmaking, and seen my first two restored watches. He told me that his old faithful Seiko 5, which he's worn everyday for 12 years, has recently had issues. Occasionally it will advance rapidly in time (up to an hour in a few seconds) and then just keep ticking away normally. I told him I'd be happy to take a look at it, and put it on my ACEtimer Timegrapher. The pattern on the screen looked like a B-52 drop in Nam (stupid me forgot to take a photo), and I told him that his watch definitely needed an inspection and service. So started my research on what the problem might be. After reading a "Practical Watchmaking", and the many forums that I've read, I was pretty sure it was the Pallet Fork ... either very dirty or damaged stones, or a broken/damaged fork pivot. So onward to the service... Disassembly One unusual aspect of this watch is the crown ... or lack there of, more to the point. I suppose since this is an automatic watch, they thought it didn't need to be wound. This watch also has a display back, so extra special care not to mark any of the plates, or damage screw heads! The first issue you'll face when working on a 7S26A Movement, is how to get the stem out! It isn't obvious at all, and there is a little trick. The crown needs to be pushed all the way in to expose the push plate (it is hidden in the other crown positions). I took this photo once the movement was out to best illustrate where to push. Remove the Hands, Dial and Oscillating Weight (2.0mm Screwdriver). Gently lever up one end of the circlip and carefully work your way around. You then should be able to raise the circlip up the length of the shaft without it pinging off. Remove the Day Wheel and the four screws holding the Date Dial Guard. (Use a 1.40mm Screwdriver, and this driver is good of all the screws from now on; bar one.) NOTE ORANGE ARROW: Seiko Special Tool needed for the 0.98mm Philipshead Screw (Part Number: S-921) I had to journey down to my nearest Seiko Distributor and grab one ... cost was AU$24.00 Here's a closer look at the troublesome screw. Remove Date Jumper, and note that the Date Drivewheel lips over the top of the plate. Remove all the motion work, and pull the Cannon Pinion Remove the tension from the Mainspring. Remove the Ratchet Wheel and the Second Reduction Wheel and Pinion. (remember the Reduction Wheel has a reverse thread) Unscrew the Balance Cock and remove the Balance. Also unscrew the Pellet Cock and remove the Pellet Fork. BINGO! Found the problem with my friends watch. The top pivot on the fork is broken. Easy fix with a replacement fork :) Remove the Barrel/Train Wheel Bridge Remove the Click, then the Barrel. Remove the Fourth Wheel, Third Wheel and Escapement. Unscrew the Centre Wheel Bridge and remove the Centre Wheel Now to the Keyless Work. Remove the Setting Lever Spring Remove the Yoke and the Setting Lever Pull the Stem out, and the Clutch and Intermediate Wheel will fall away. Lastly, pull the black plastic location ring off. ... and now it's bath time!!! I hope this has been of help to you guys. I'll post the Assembly steps in this thread tomorrow morning.


 1 point
 -
Providing it runs for 30hrs without a re-wind Job Jobbed PS before service & repairs DU - 29 S/D B.E 1.9
 1 point
 -
Here's a list of things I stole from a site years ago: Watch not cleaned and oiled properly. Rusty hairspring. Hands rubbing together, hitting on face, or on the crystal. Stem not staying in or the watch was left in set mode. Loose cannon pinion pinion. Regulator set wrong. Bent wheel. Bent or dirty teeth on wheel or pinion. Damaged jewel. Worn bushings. Bent pivot. Out of beat. Hairspring not in regulator. Regulator pins to far apart. Balance arms bent out. Loose timing screws. Mainspring sticking. I would put my money on the mainspring, but then again when I put my money on anything I normally loose it. What is it by the way?1 point
-
Good News Everybody! The watch is adjusted and running happily. It's not going to be a certified chronometer; but that's not the point of this watch, it's purely a fashion item. Only one problem though ... I can't wind it!! :( My **BLEEP** fingers are too big!! I had to wind the Ratchet Wheel with my screwdriver to power her up :P

 1 point
 -
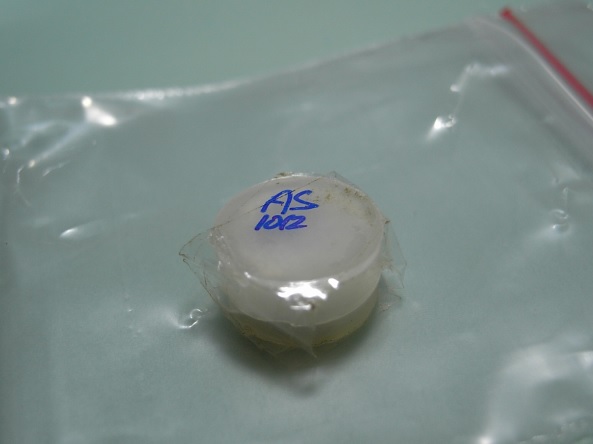
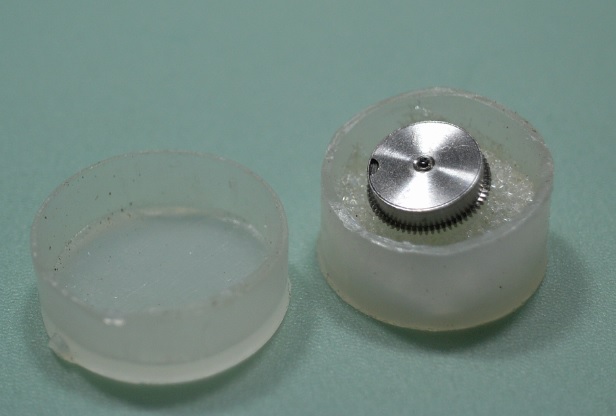
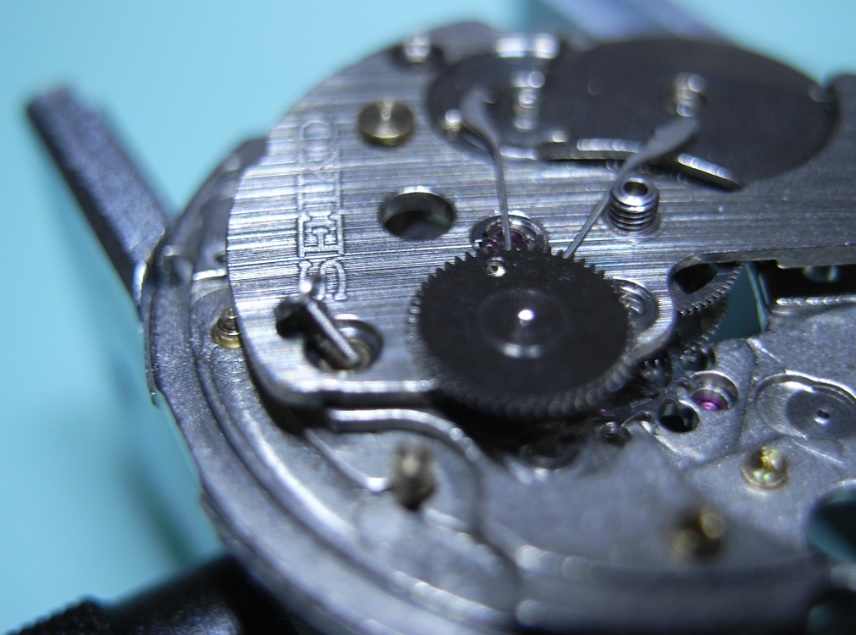
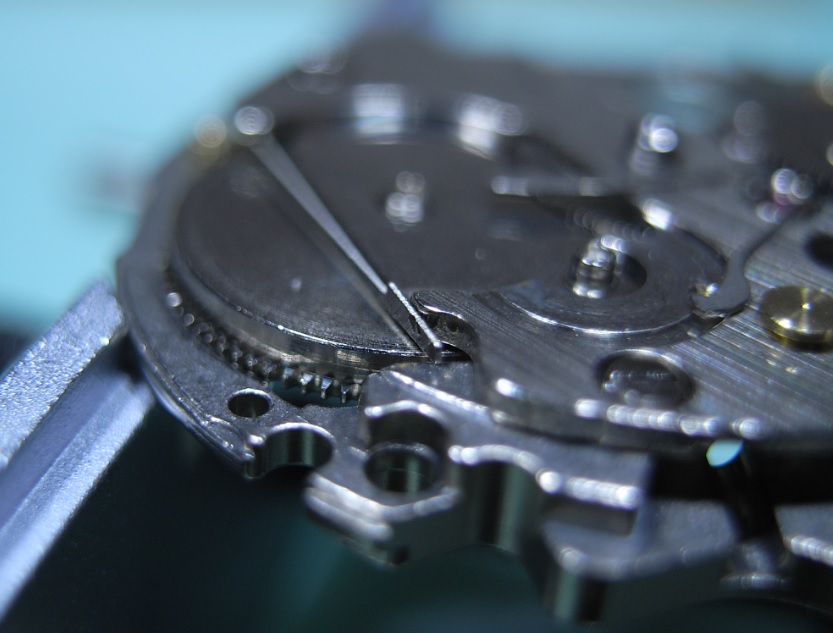
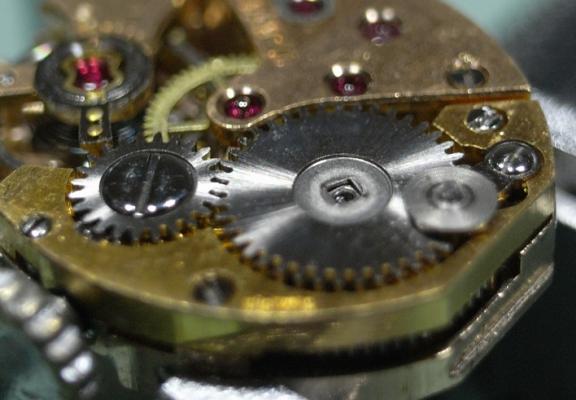
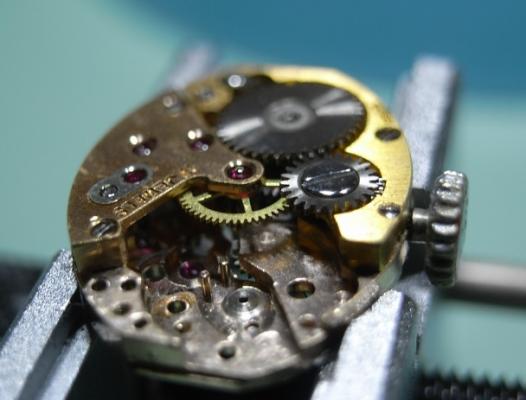
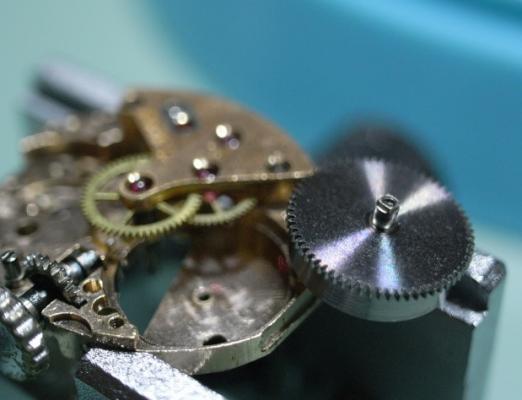
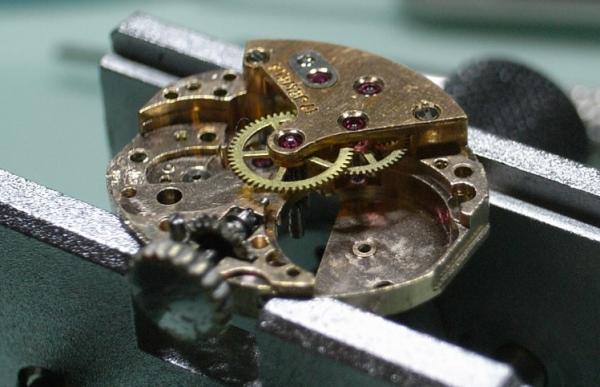
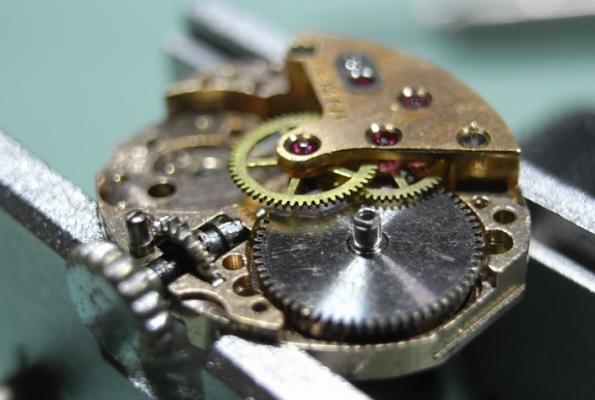
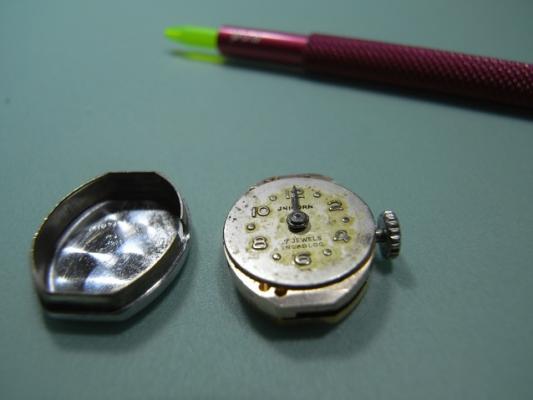
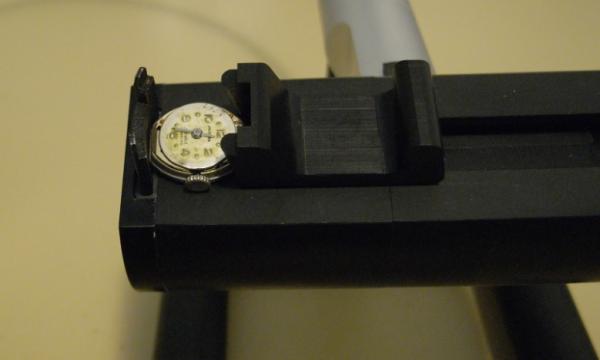
Thanks for all the kind words guys :) This movement has been a fun project. So, today I received the replacement parts from Sudarson at Old Swiss Watches, and as normal his service is outstanding! Right parts, right price every time! And they always come neatly packaged in a water resistant envelope, and in tiny plastic parts containers ... soooo cute! So to recap, the Ratchet Screw snapped off in the arbor, and needed to be replaced. NOTICE: On the AS1012 both the Ratchet Wheel and the Crown Wheel are LEFT HANDED THREADS!! I have never seen this before, and the screw top is not marked with any indication it's left-hand threaded ... BE WARNED. So the damage was caused by silly old me :P Even though it was broken I put the movement back together before ordering any parts to make sure everything else was working well ... so things needed to be disassembled again. After making sure there was no tension left in the Mainspring, I removed the Balance and Fork. This is an important step, because you could easily damage the Pallet Stones when removing/refitting the Mainspring. Off with the Ratchet Wheel and Crown Wheel. Off with the Mainspring Bridge, and out with the Old Mainspring. Ready for rebuild As a complete Mainspring was purchased, I inspected both of them and replaced the one that looked the best ... with the new Arbor. Then it was just a simple matter of putting everything else back in place :) All back together, and functioning wonderfully ... ticking away nicely for the first time in many decades. On with the Dial and Hands, ready to be fitting back in it's movement holder. NOW comes the issue :notfair: How on earth do I adjust this thing?!?! It's too small for the timegrapher .. even when you put it in sideways!! This photo may look like it's being held by the clamp; but it's not, this movement is just shy of the minimum clamping length. So the timegrapher can't get a good reading Can I just put a wedge in there, and still be sure of getting an accurate reading? Advise from one and all would be most welcome.


 1 point
 -
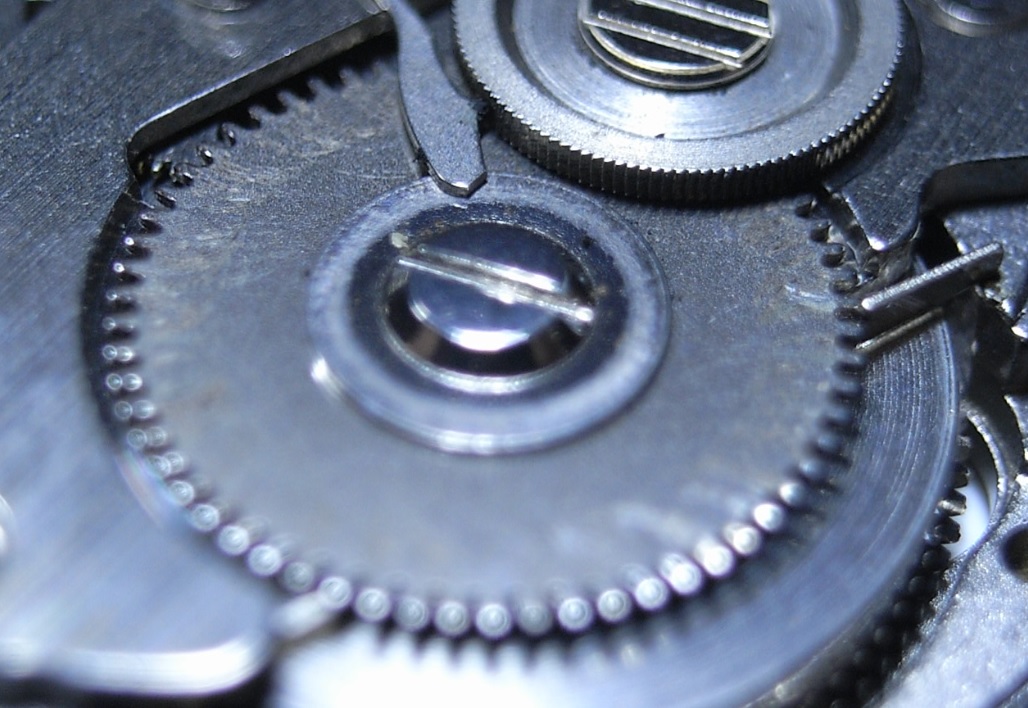
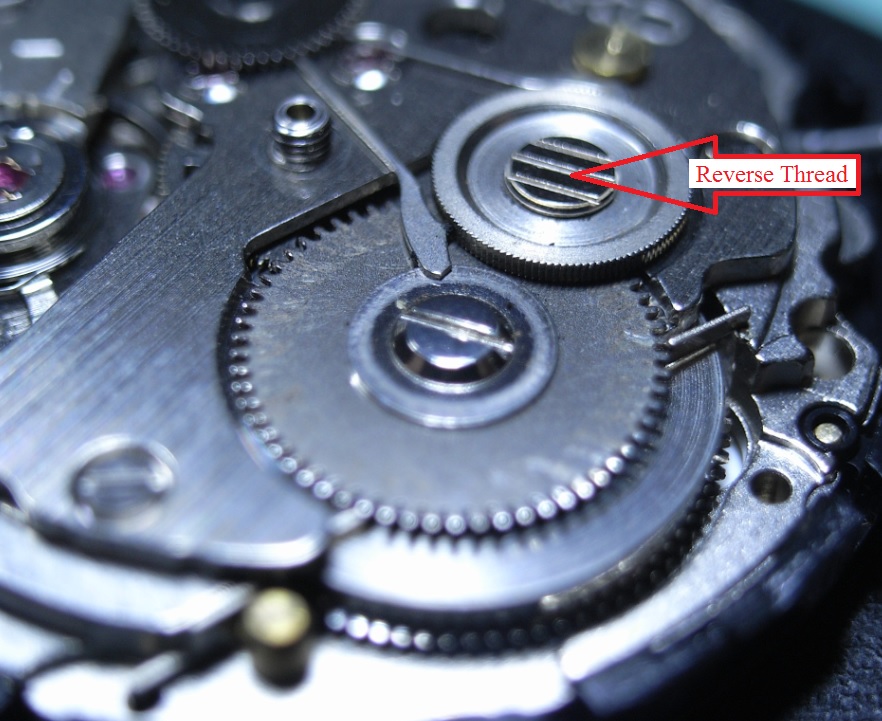
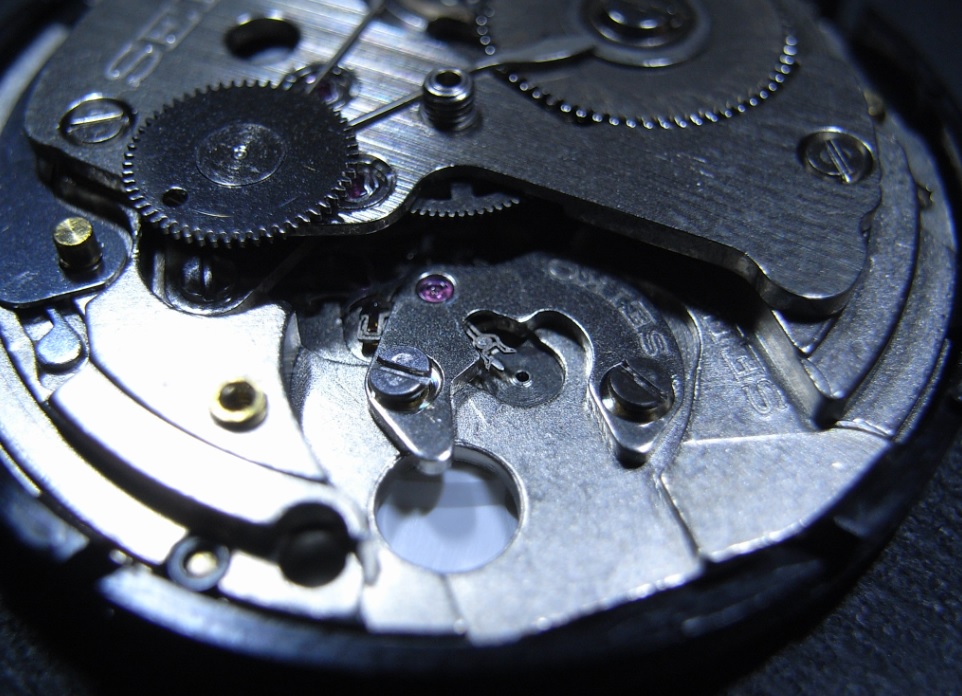
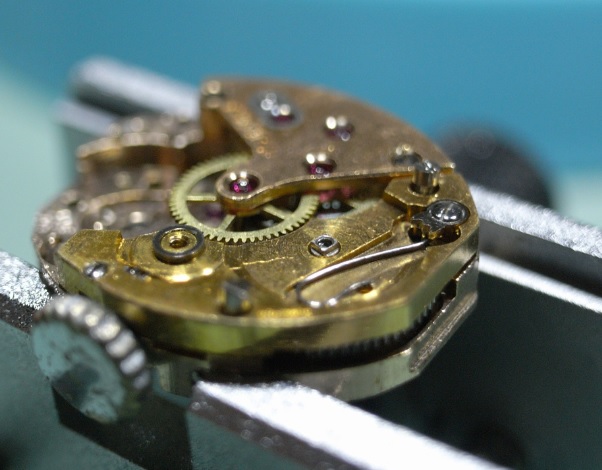
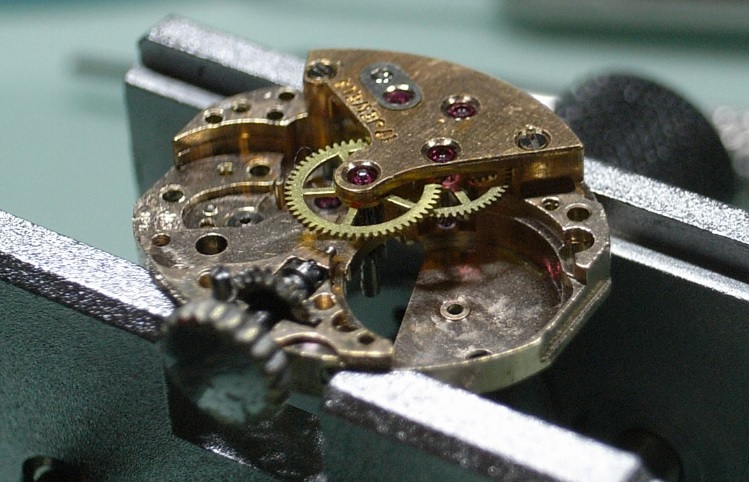
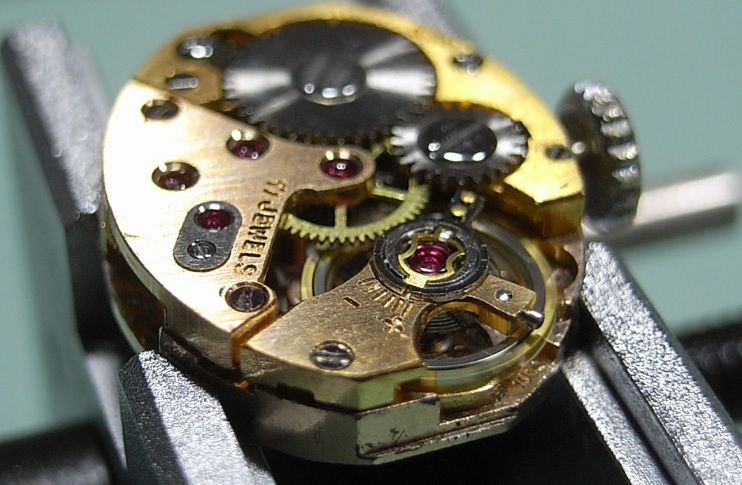
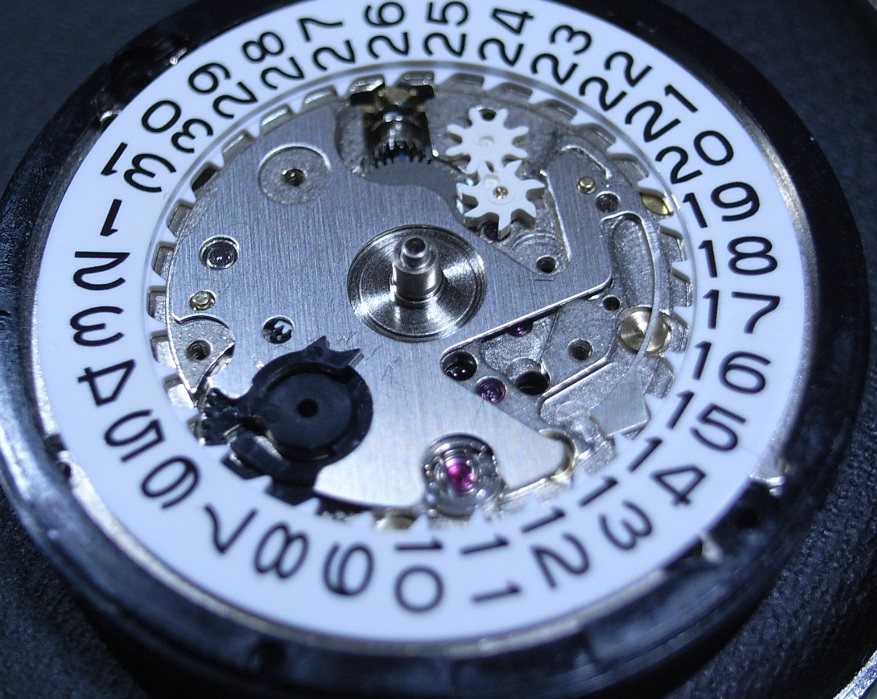
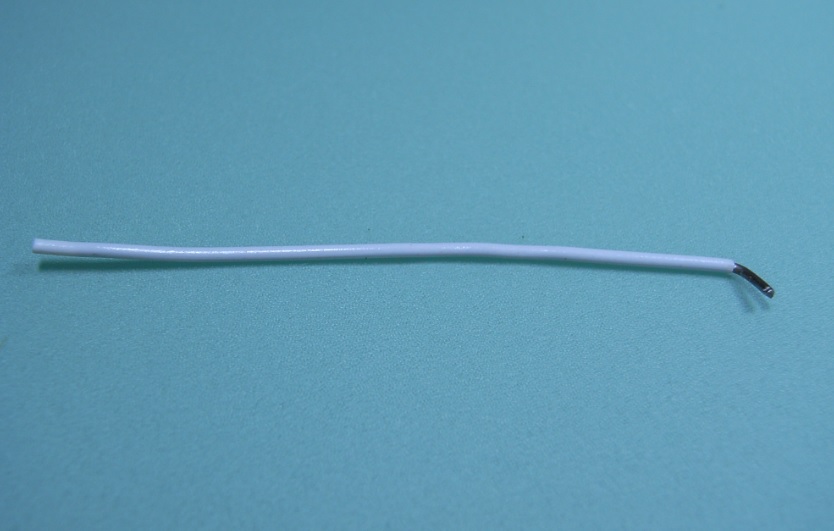
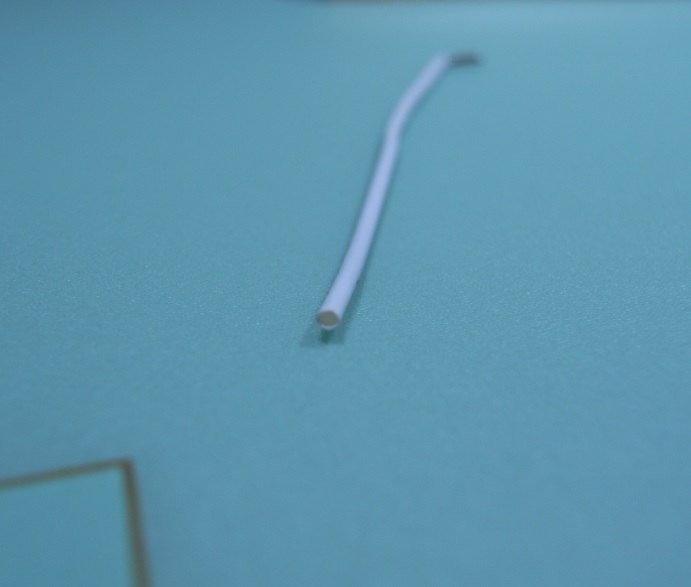
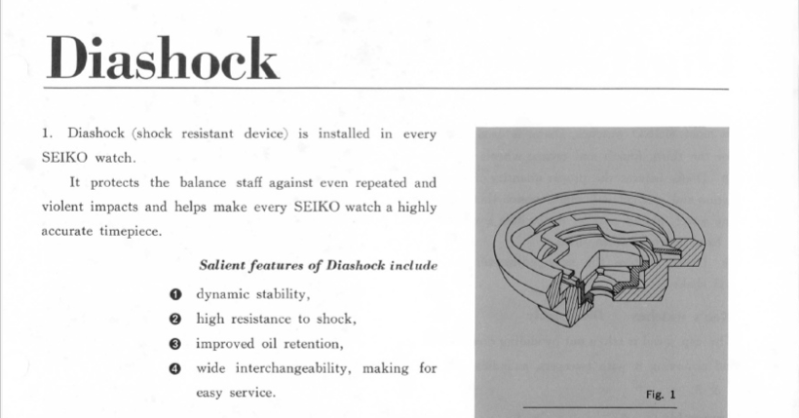
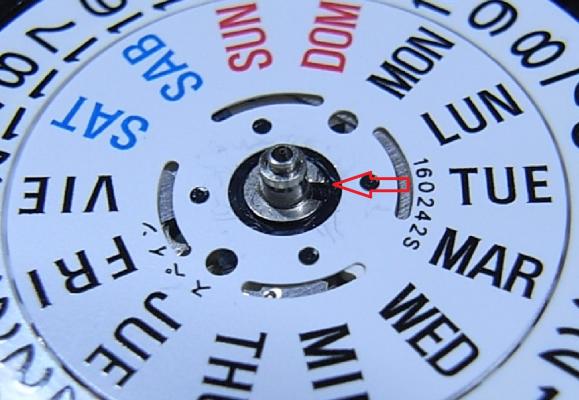
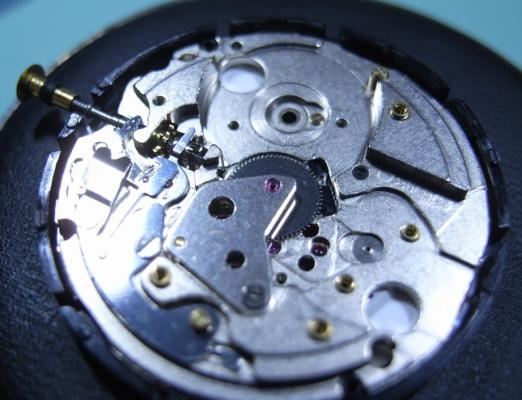
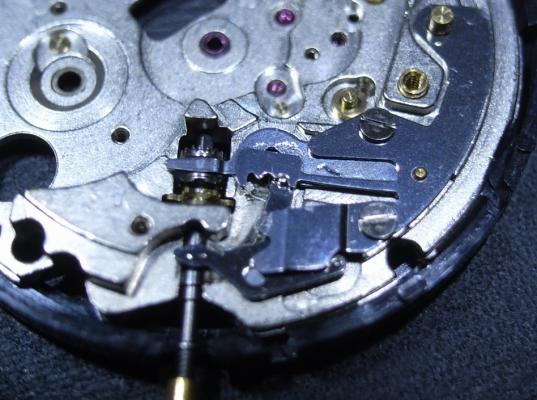
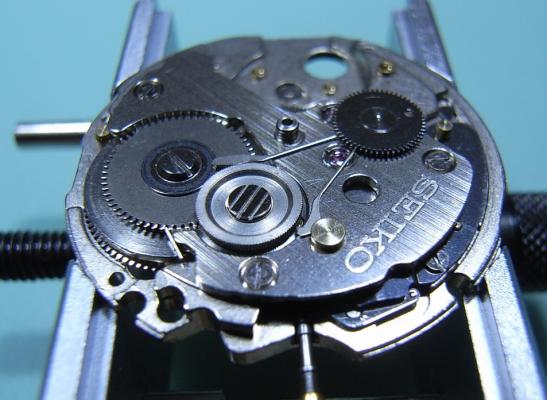
Assembly This is a very easy watch to re-assemble. In fact I'd recommend the 7S26A to be the first Japanese Movement to practice on, because it's so beautifully and logically laid out. The only downside to this watch is that you have to buy one special tool from Seiko, the S-921 Philipshead Screwdriver; but it's not very expensive and once you've got it, you have it for life. For oiling information and a parts list for your movement, please download the copy of the Tech Guide below: 7S26A_7S36A.pdf Drop in the Clutch and Intermediate Wheel. Then push the Stem into the shaft. Fit the Centre Wheel, and attach the Bridge. Then drop in the Mainspring Barrel, and refit the Click. Refit the Keyless Work, and I have to say the Seiko design is a HUGE improvement over the AS and ST Keyless Work design ... no fiddly Setting Lever screw to worry about ... Love it!! Once the Keyless Work is installed, install the Third Wheel, then the Fourth Wheel, and lastly the Escape Wheel. Next, fit the Barrel/Train Wheel Bridge. PLEASE NOTE: Be careful to check that you have pulled the Click out from underneath the bridge BEFORE you begin locating the pivots of the train. Once all the pivots on the train are in place, and you're happy it's all moving freely, use the three longest screws to secure it down. Install the Ratchet Wheel, and the Second Reduction Wheel. Two things to note here: Firstly, when screwing down the Ratchet Wheel, make sure to clear the leg of the Pawl Lever, as it has a nasty habit of wanting to slip under the screw. Secondly, as you screw down the Second Reduction Wheel (Reverse thread remember!), keep adjusting the Pawl Lever arms so they rest on either side of the wheel. Next, fit the Pallet and Pallet Cock, and then the Balance. This particular movement has the DiaShock system for the IncaBloc. To remove and refit these for oiling I suggest you make a simple tool from a plastic covered Paperclip. Straighten out the Paperclip and cut it to a comfortable length to work with in your fingers. Then pull the plastic cover down about 4-5mm ... as pictured below: Use this like you would Pegwood, over the top of the DiaShock Spring, as you use your tweezers to turn the spring and remove/refit it. The plastic cover will conform to the shape of the spring and hold it securely without damaging it ... It's works a treat! PS. Sorry I couldn't get a photo of me removing/refitting the spring with this little tool; but I don't have someone here to do the camera work, and only have two arms. Next, flip the movement over, and reinstall the plastic Location Ring. Install the Cannon Pinion, the black plastic Date Driving Wheel, then the Motion Work, and lastly the Calendar Ring. Install the Date Jumper Plate Install the white plastic Date-date Corrector Wheel and it's Intermediate Wheel Note: Remember from disassembly that the black plastic Date Driving Wheel needs to lip over this plate. Install the Date Dial Guard Place the Day Disk on the shaft and push the Circlip down the shaft after that and push down until it locates in the Circlip Groove. Lastly, reinstall the Oscillating Weight, Dial, and Hands. Case back up and your done! I really enjoyed working on this movement, and I thank my Heavenly Father for the skills and ability to be able to do this type of work ... amen!


 1 point