Leaderboard


Popular Content
Showing content with the highest reputation on 07/19/15 in all areas
-
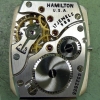
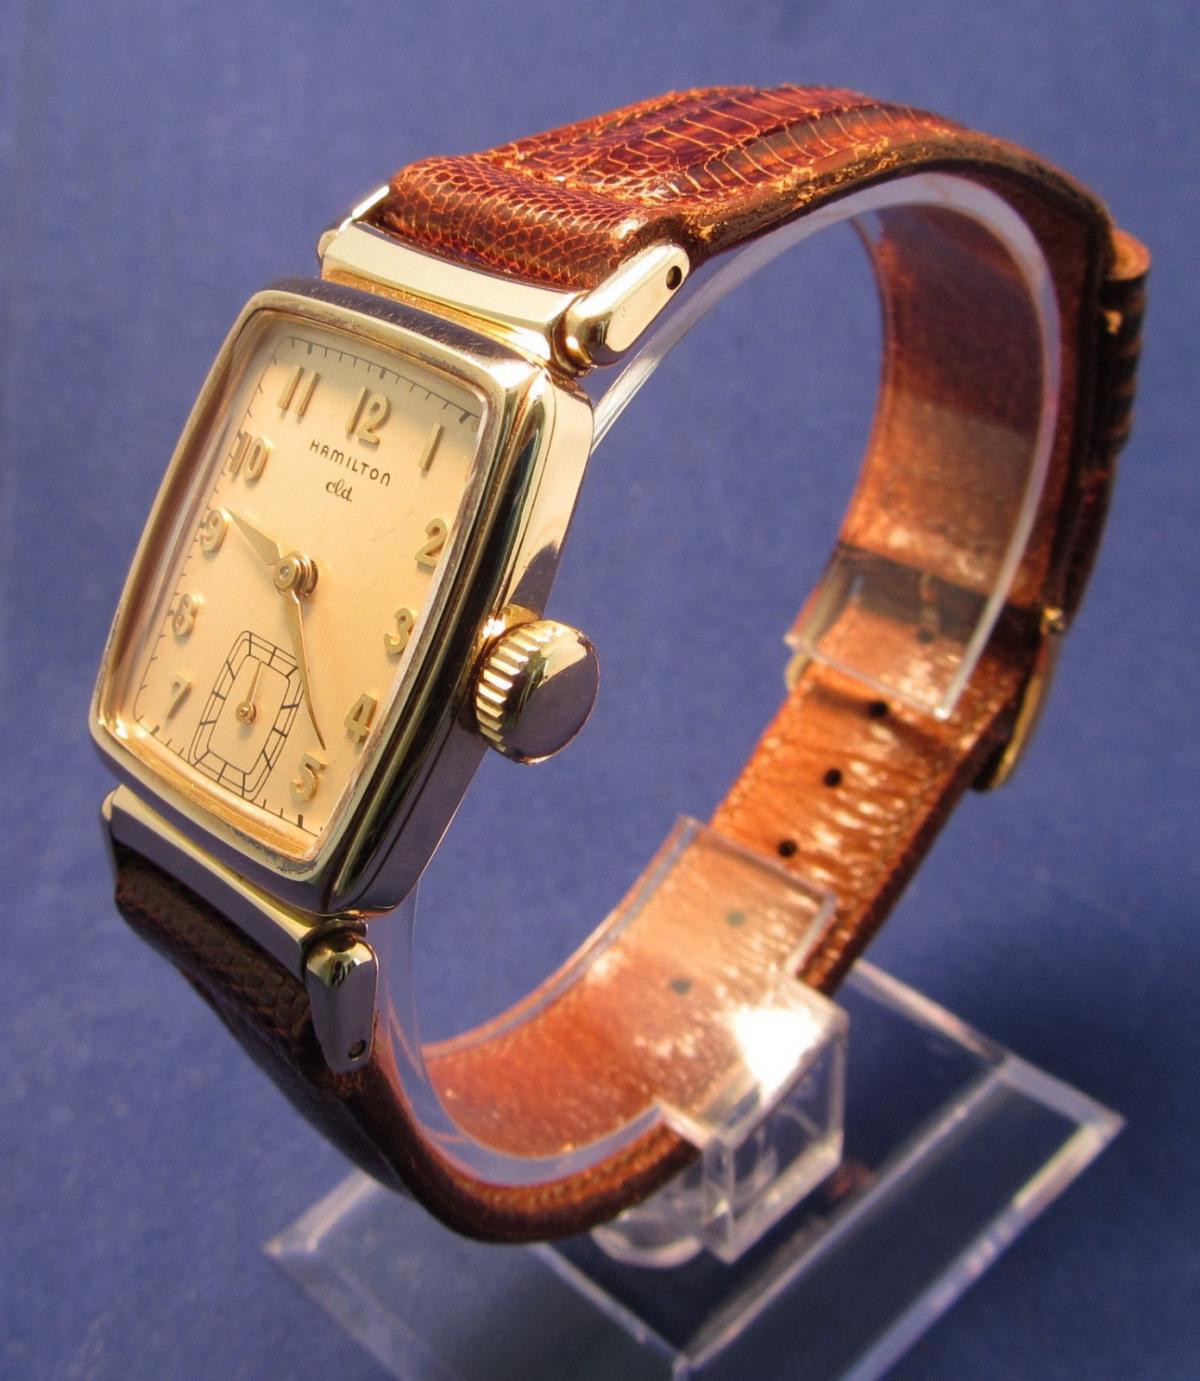
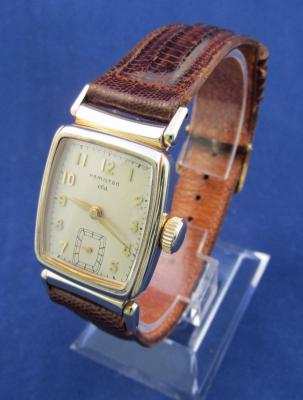
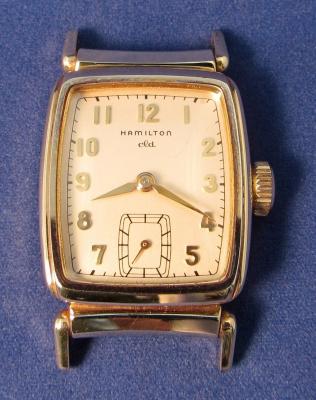
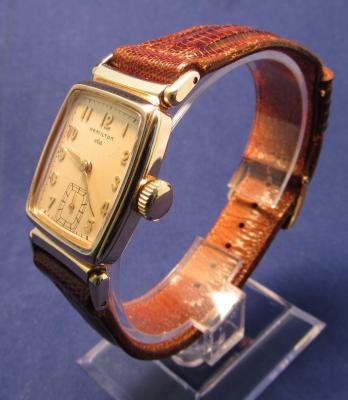
Here is an excellent prime example of a Hamilton Brandon model wristwatch. These watches were made from 1948-1951 and are 10KGF with 18K solid-gold numerals on a silverdial. This particular watch is a wonderful, very clean example with an original dial. Note from my pics how crisp and clear the dial is - especially the "cld" and the seconds sub-dial. Dial restorations do not replicate the "cld" as well as this original dial from 65 years ago. This Brandon has the original gold hands which are in perfect condition. There is no pitting anywhere on this watch. Of particular note is that this watch was completely serviced (disassembled, cleaned, rebuilt and timed) by Rene Rondeau, the world's foremost expert on vintage Hamilton watches, who has recently retired. The last 2 pics were sent to me by Rene as he was working on this watch. He noted how nice the dial was (he also concluded it is original) and that the cal 980 17 jewel movement was also very clean. Indeed, this watch runs strong and accurate as a wind-up vintage wristwatch! This is a fixed-lug version and I can find only a very few issues - it is almost perfect with virtually no wear! If you look closely at the pics, there is a fine hairline scratch on the dial (between the 1 and 2) that is very hard to see in-person. The back still has the original brushed gold finish and has only 1 faint small scratch that I can see. I cannot find any scratches on the crystal. You will be hard-pressed to find another Brandon CLD in this fine condition; especially one that has also been serviced by Rene Rondeau!

 1 point
 -
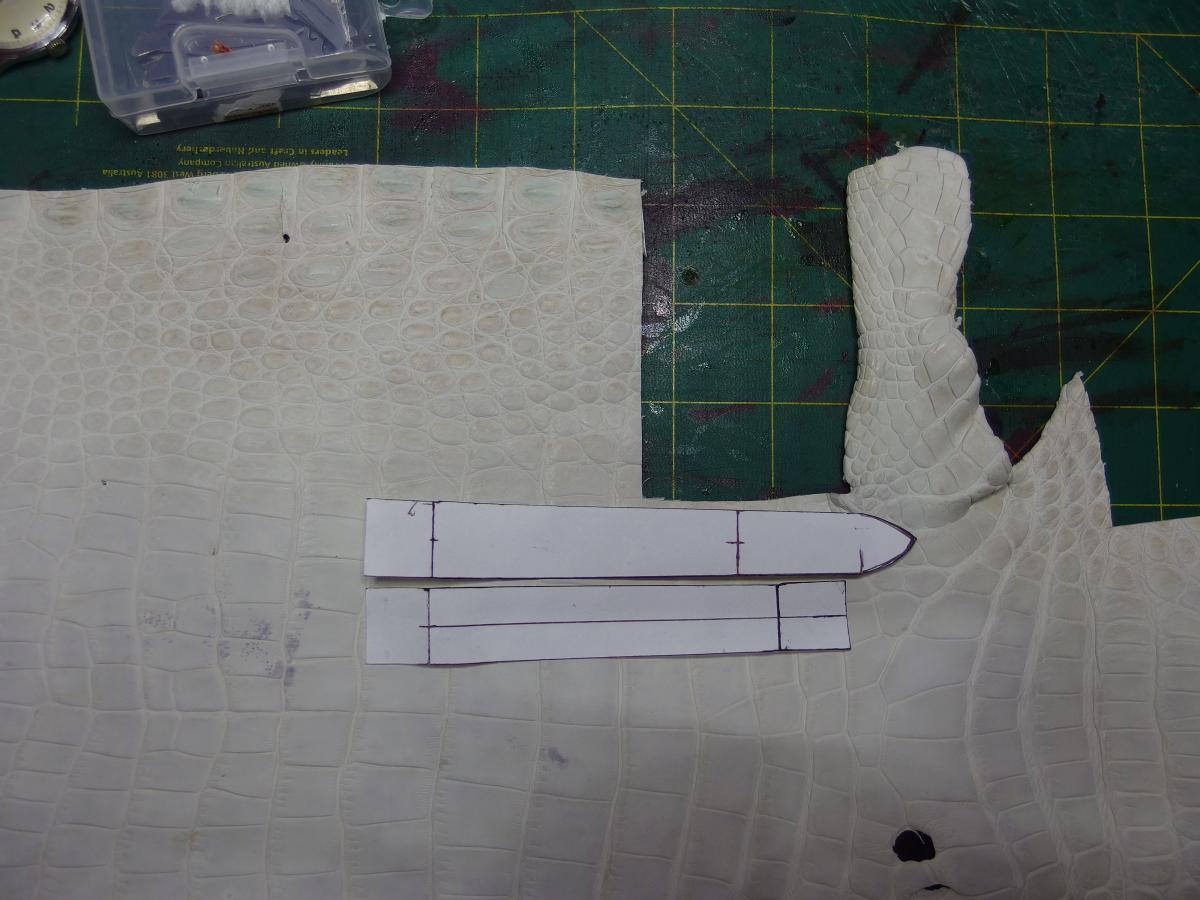
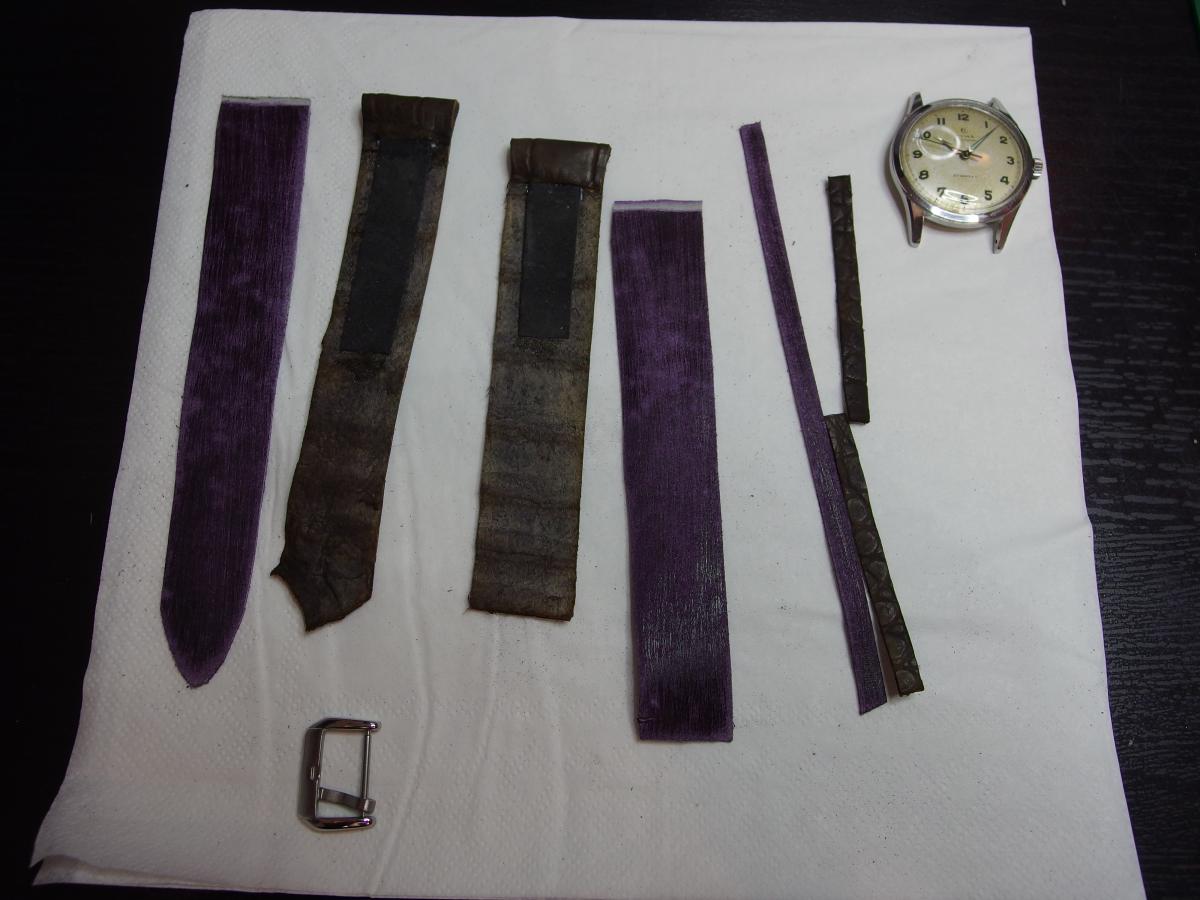
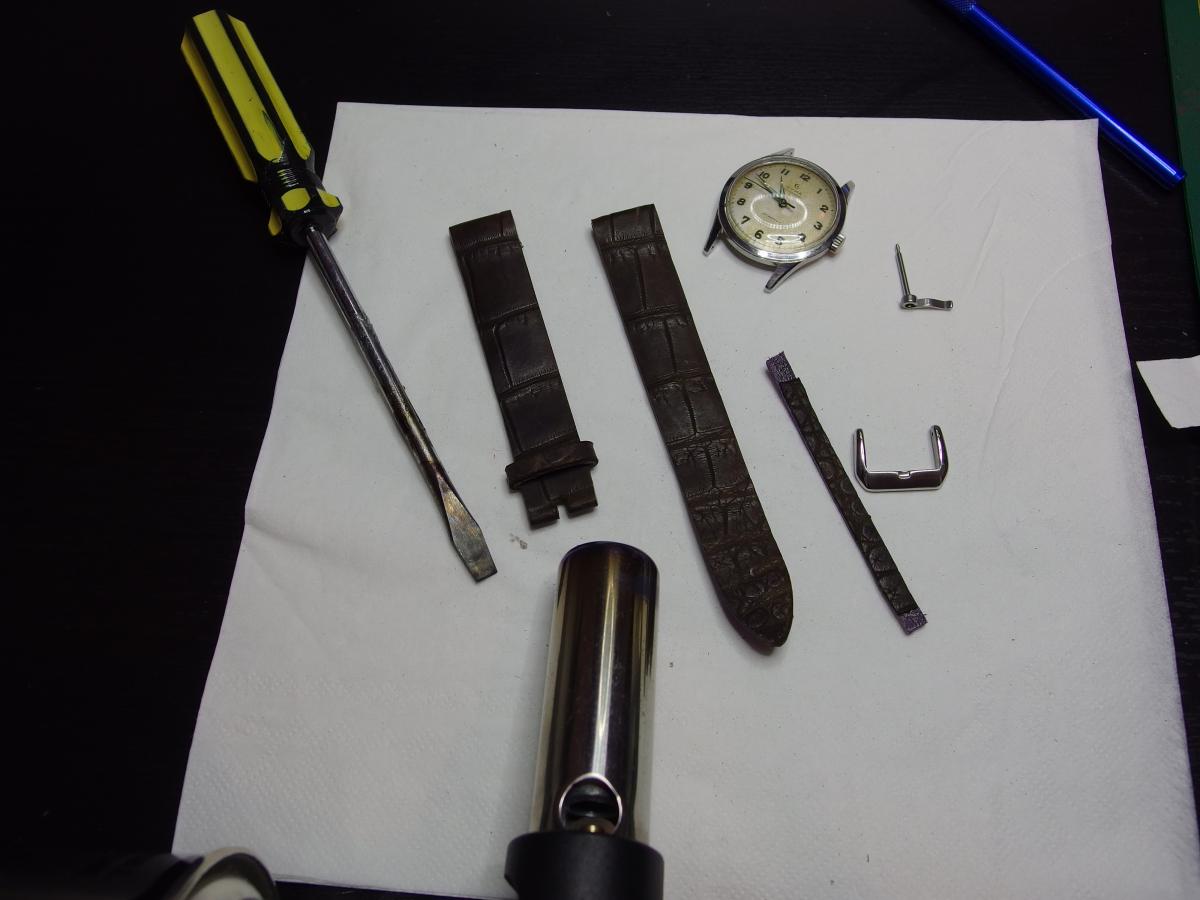
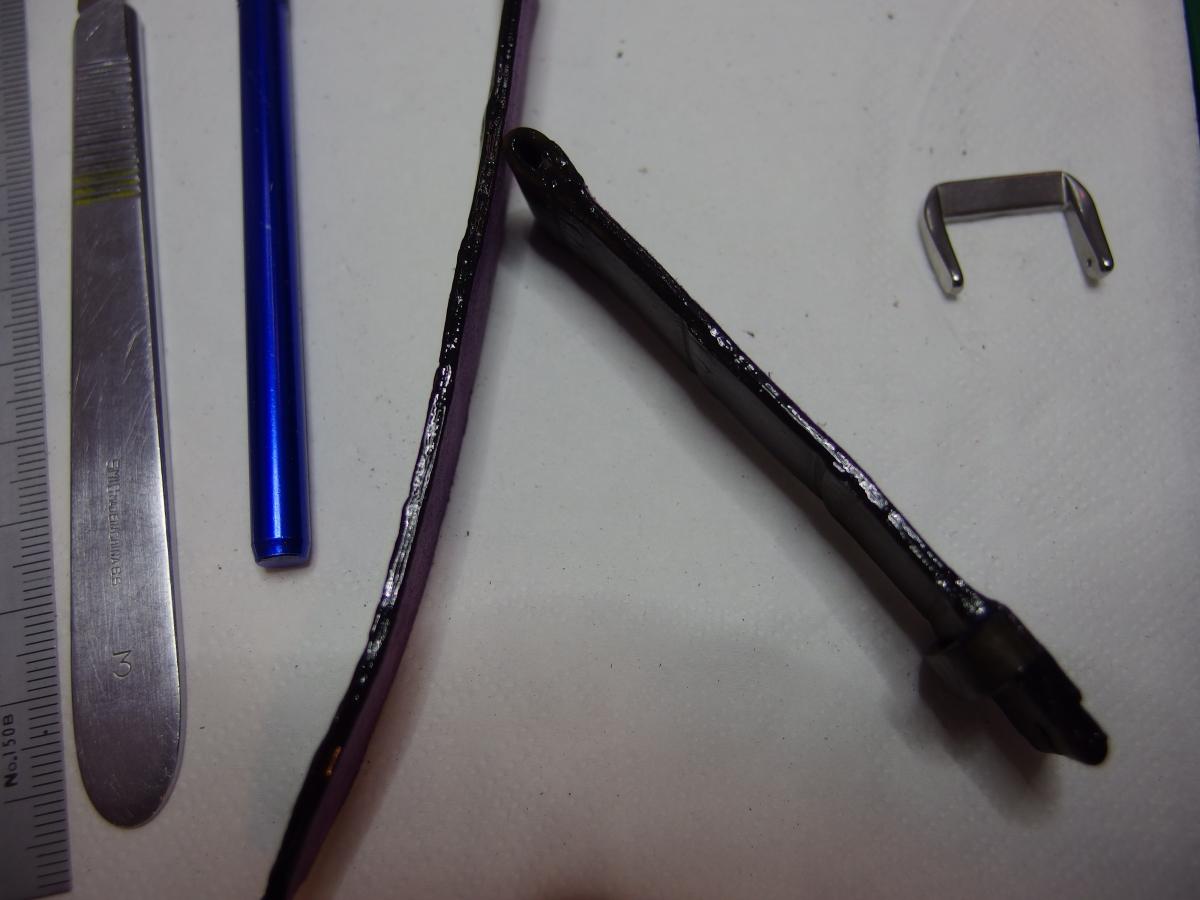
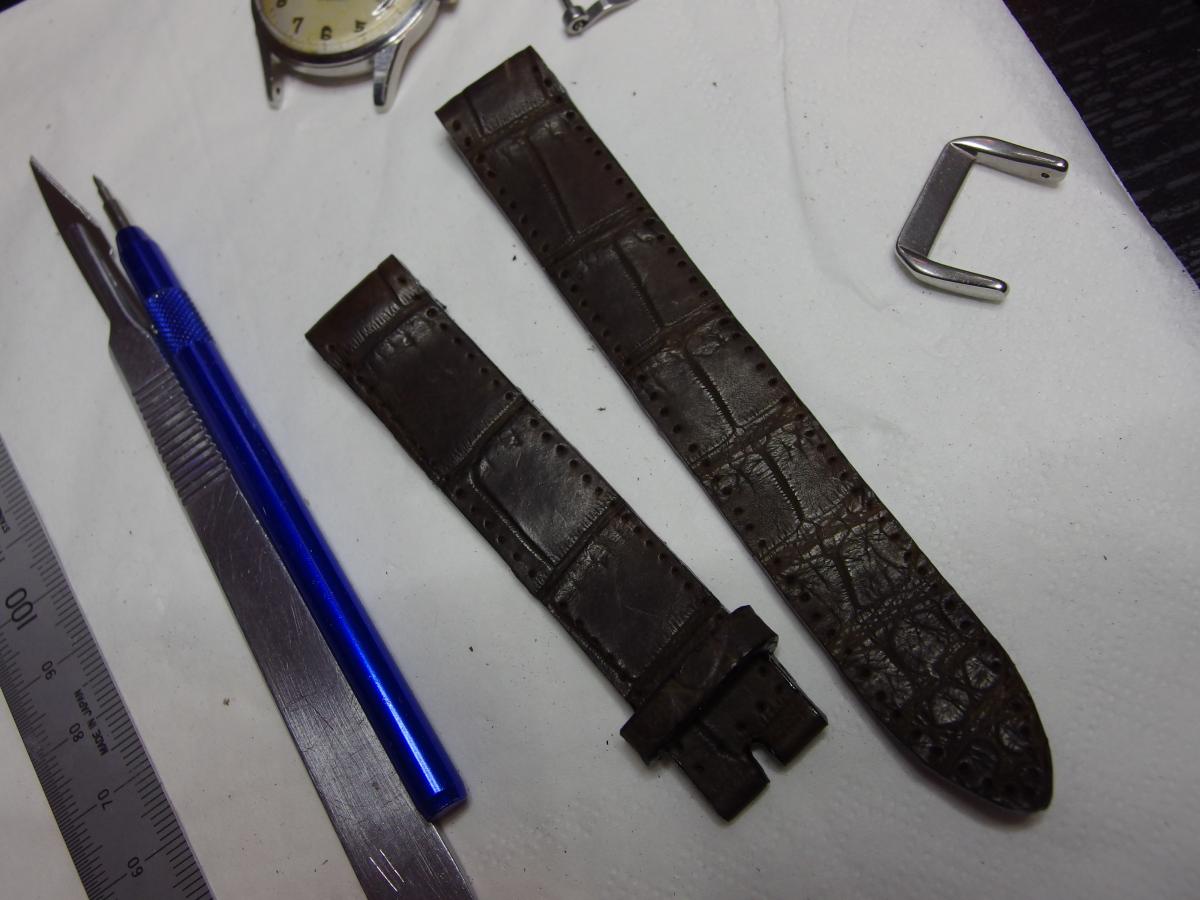
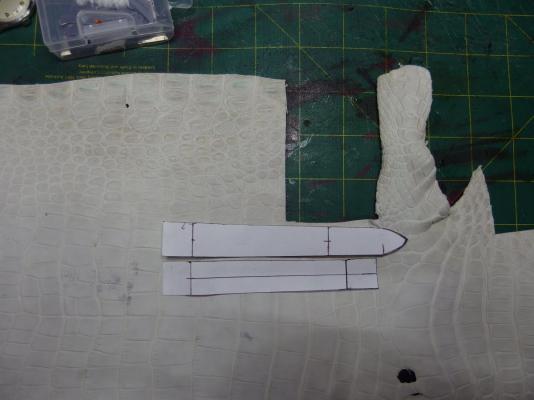
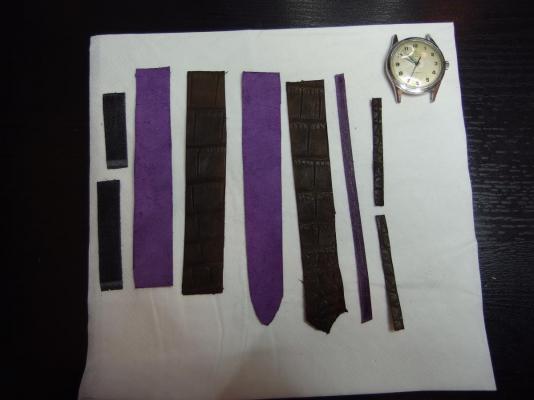
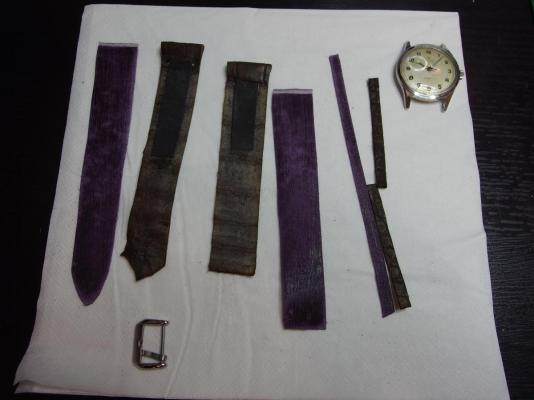
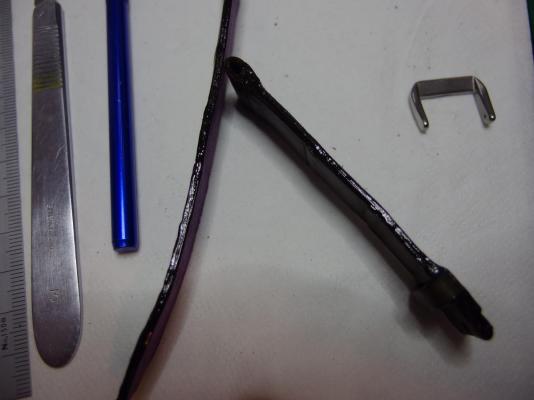
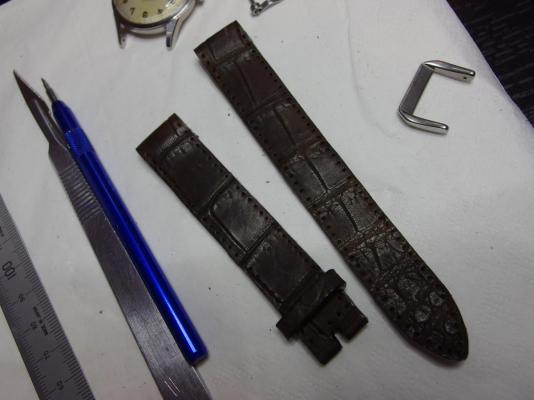
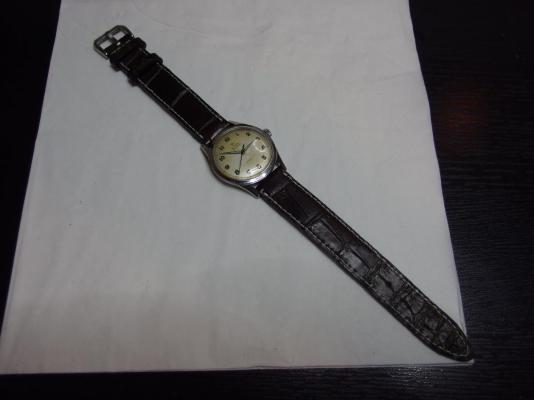
Hi, A couple of members seemed interested in how i make a watch band. They are by no means perfect, but are functional and seem to last the test of time. This one is made from farmed crocodile. The skin is cheaper to buy in a non-dyed state. This skin was bought locally in Melbourne, it was around a meter long and cost $95. The tools required are a new scalpel, awl, glue, hole punches, a gas torch and mid size screwdriver, needle and good quality waxed thread, sealer and dye for the sides and coffee leather dye. The other materials are kid leather strips (suede side out, very comfortable, but up to you) and some scrap leather for filler. (Above) I have made up some templates. These are paper, but clear hard plastic seems best as you can see the grain underneath. I look for matching patterns. From this hide I rough cut the band and the keepers. (Above) The slide shows the croc and the kid liner. The keepers will be lined also. The croc has been dyed. The two strips to the left are the band pad scraps. On some bands I like a lot of padding, sometimes three layers so it appears curved, but on these watches just one layer is best and only part of the way down the band. This stiffens up the band well. It is important to have the band not too stiff or too supple and also tapering in thickness towards the buckle ends. (Above) This pic shows the reverse sides of the croc with the padding in place. I use water based glue. I find drying time varies with the amount applied which gives you good control and it is super-flexible. The spring bar ends have been folded over. They will be double stitched later. (Above) Liner glued to croc. Keepers/liners glued. (Above) Shaping complete. One fixed keeper attached under liner. Buckle end is folded over under liner. Wait for glue to dry. (Above) Reverse side. You might be able to pick up how I have done the spring bar end. Should be strong with double stitching later. (Above) I use a heated screw driver flat to smarten up the leather edges. Not for too long though. Really helps to get a nice curve on the end of the band. (Above) I use inks to dye the side sealer. This one is black and after mixing I apply it with a cotton bud - seems to work for me ok. The fiddly parts can be applied with a small flat brush. Take care not to get the sealer on either the leather or the liner as it is impossible to get off, once dry. I have never seen this stuff peel or flake. (Above) I use a sharp awl and just eyeball the holes. Make sure you hold the awl vertically and not at an angle. The band is ready for stitching. I use good quality waxed thread. Better to have the thread a bit too long that short. I sometimes dye the thread, but these days tend to use white a bit...all depends on personal preference I guess. Anyway now you can sit back for around two hours and stitch away. (Above) The finished product. I have tried many products to finish the croc, but have found simple neutral shoe polish great. Put some on with a cloth and just brush off when dry. (Watch is a 'Cymaflex' watersport with dial patina...fairly common watch I think). Happy to provide further detail if you would like also more than happy if you see ways I can improve. Hamish.
 1 point
 -
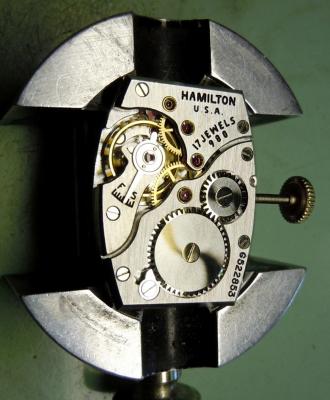
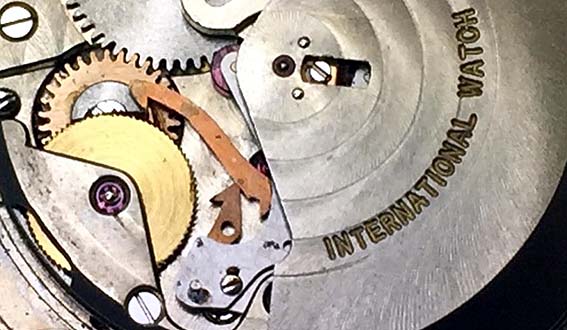
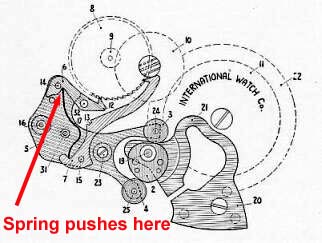
After a thorough clean this IWC 8541S movement was working well except for the Pellaton automatic winding system. You can see in the photo (taken before the clean and oil) that the two hooks are not engaging the winding wheel. To remedy this fault I tried several different cleaning methods including ultrasonic in a bath of penetrating oil. This freed-up the long hook, but the short one although it could be pushed around would not spring out into the winding position. You will see in this picture of the Pellaton system (Michael Friedberg, IWC forum) that there is very little effort exerted by the spring onto the short hook. The two plates of the Pellaton system are screwed together, but nothing would budge these small screws. About to bin the piece and search for a replacemet; in desperation I inserted a 0.5 mm screwdriver blade between the plates and gave it a twist. Out popped the short hook. Then with more cleaning and another screwdriver twist for good measure, after re-assembly, I had a working automatic movement once more.
 1 point
 -
Just wanted to take a moment and Say Hi, as the title says I'm new around here and to watch making in general, Been reading the forums for a few months and been taking a deep dive in repairing and overhauling watches. Spent a good bit of time watching Marks videos to give me more of an idea of what I was getting myself into. Just wanted to say thank you for all the great videos and all the insight that i have gotten for these forums. I would like to be active on these forums helping out as I can and also get some insight on projects that I'll be working on in the future. So I'll start by sharing a little background, I started training as a goldsmith when i was 15, doing polishing, simple repairs such as soldering chains and ring sizing then moved on to Casting and refinishing and designing. My goldsmith training was from my parents they been in the industry for over 30 years. I've been doing goldsmithing for nearly 15 years now. during this time I also study to become a gemologist at GIA. So my focus ended up more in the gemologist field doing jewellery appraisal, grading gemstones and diamonds. We open up a store in 2007 and I've been focus on managing and running the retail front of that ever since. So the reason I started to dive into watch making was due to the fact that not many watch makers are around in my local area any more. In the past 8 years we had 3 watch makers retried. We been looking for new watch makers on and off for many years now so finally I said I had to learn or this will become and endless cycle. So ya this is why here to get insight, learn, have a place to ask questions and hoping to answer some to. I will post my workshop project and a few other thigns i've been working on soon . :) Thank you for your time and hope to get to know more people in watch community.1 point
-
Fine strapping lizard that ! :sword: Cheers, Vic1 point
-
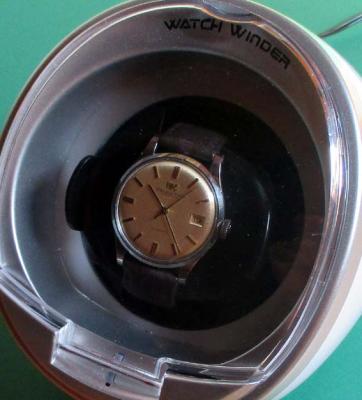
Proof of the pudding: Here is the Cal 8541 in the winder keeping excellent time and running on automatic.
 1 point
 -
A good question, Geo, you must be correct in assuming that it is an anti-shock feature. I suppose that it is mentioned in the patent application, but I have not looked for that. Here is an article describing the history of the Pellaton system: http://people.timezone.com/library/itsabouttime/itsabout0002 And this one on its application to the Cal 85xx series by Michael Friedberg: http://www.iwcforum.com/Articles/Calibre85Family/Text.html1 point
-
Their is a document to download on Cousinsuk . Search for Tissot 2780 and download .1 point
-
Excellent introduction and insight into what you are up to Mkay. I'm looking forward to your future contributions. PS don't mix up your maple syrup with four Moebius! ;)1 point
-
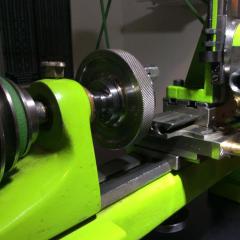
Okay so about 3 months ago i decided I wanted to become a watch maker and handle all the repairs that were coming into the our store. My uncle who is also a watch maker who is now retried has been teaching me for the past 4 months. But the first project that i had to do was get a work station prepared. Here are some photos of the workshop reno. This room use to be a full goldsmith workshop for over 20 years. The carpet needed to be replaced due to it being old and floods that we had over the years due to this being a basment workshop. We had to add a sum pit and repair a crack fondation that was done last summer. this is the design of the new goldsmithing/watch making work bench that i was going to make. New room layout New clean carpet installed Ikea Cabnets installed with raisers made out of 2by4 and 4x4 to get it the work bench to the right height. Table tops put in. with a little more triming of the table needing to be done with a jiggsaw. Table all cut added a little wall up so if watch parts go flying it will hopefully stay on the work bench. Goldsmith work bench, will also be use to refinsh watch cases and bands. Using 4blub natura light for each work bench for a lot of lighting. Watch work bench basic supply and tools, I'll add an updated photo when i get a chance to take a pic this was from about 3 months ago. A quick look at the work area lots of place to put tools, still wanting to add a lot more shelfing and a bunch of other things will update with new photos later.1 point