Leaderboard


Popular Content
Showing content with the highest reputation on 03/29/15 in all areas
-
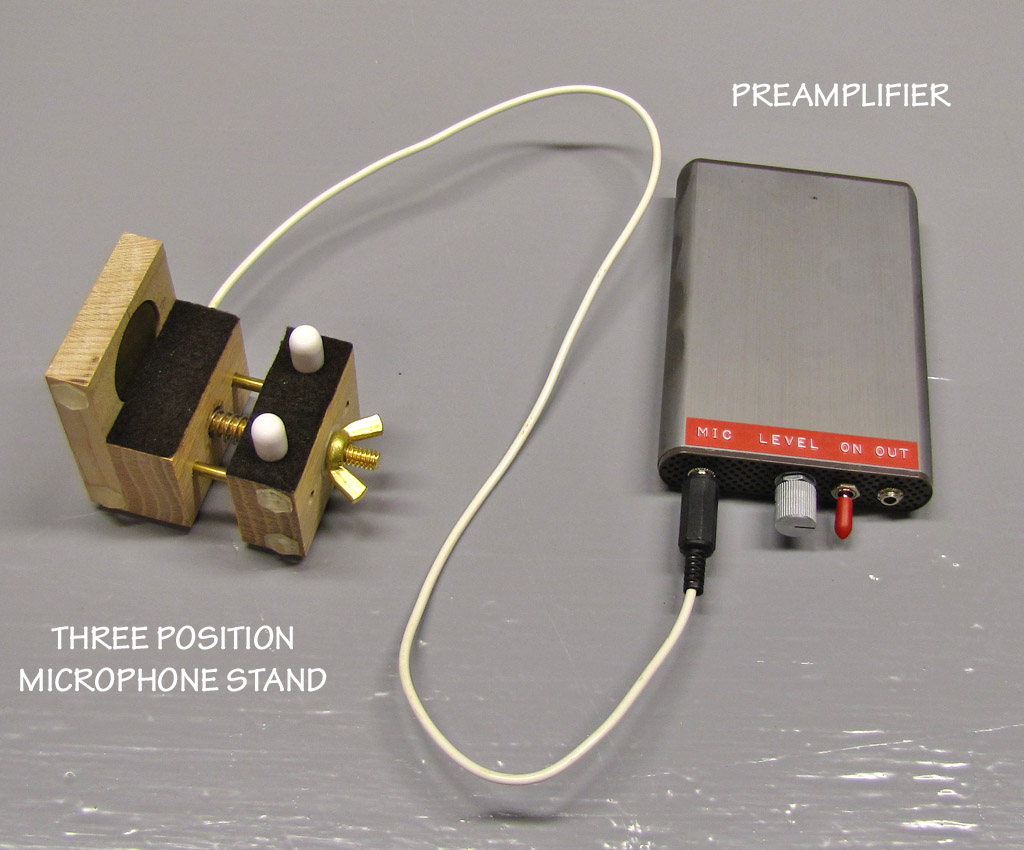
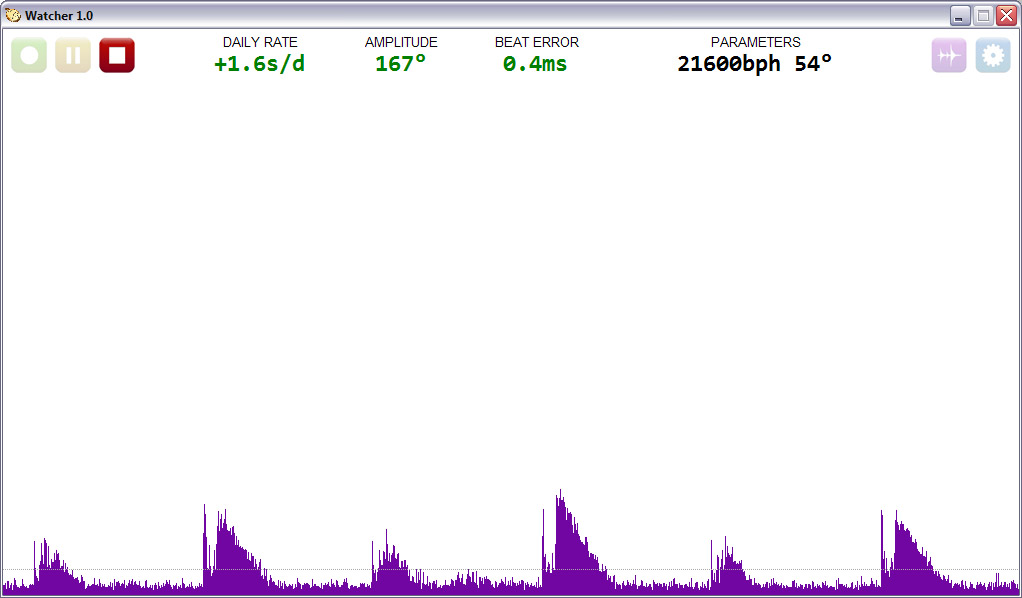
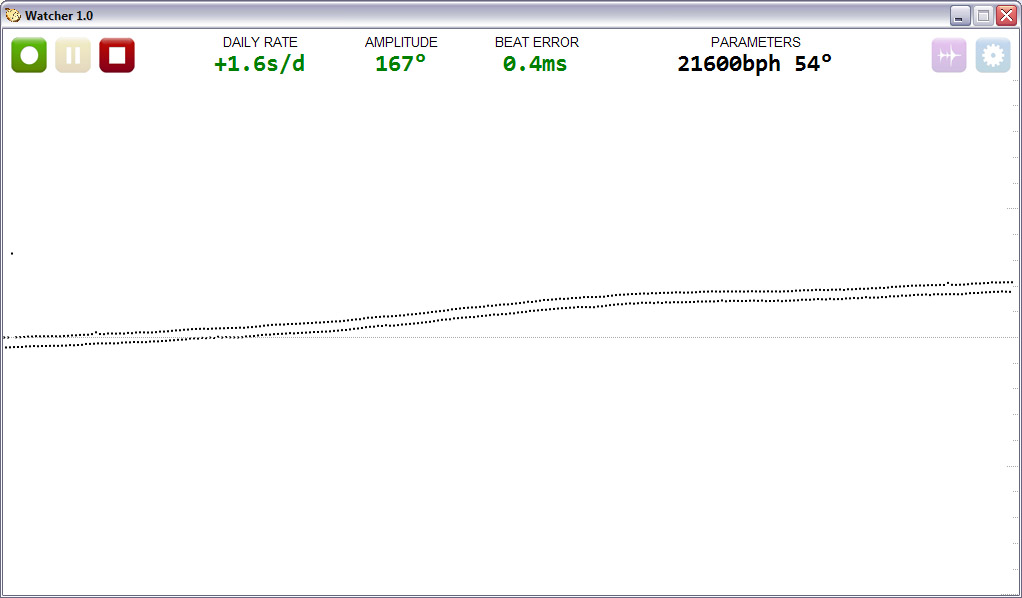
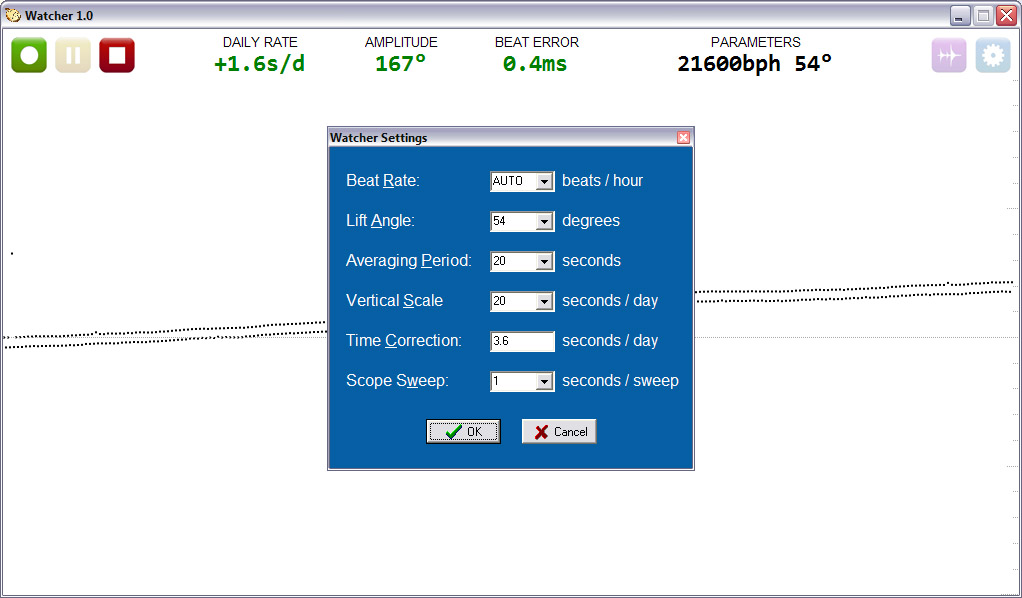
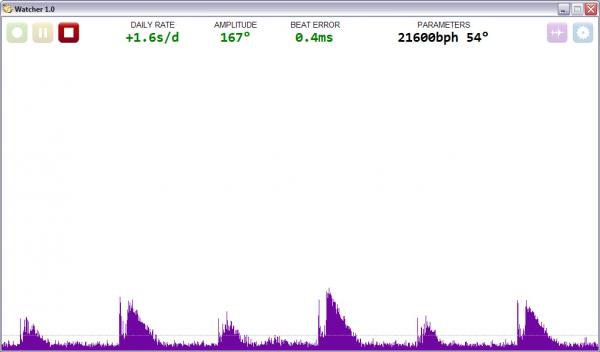
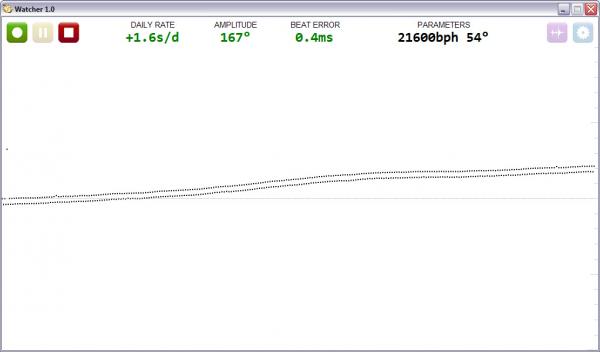
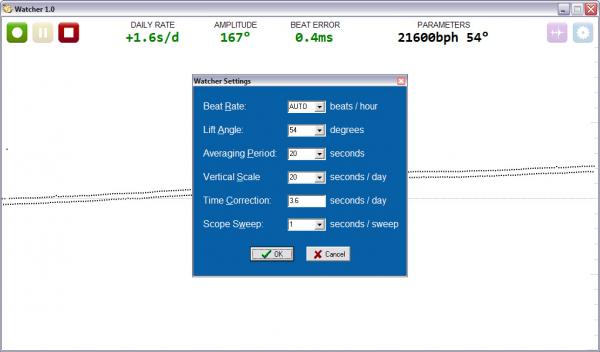
I'm a watch DIYer, having serviced two watches myself, partially using tools of my own making. One thing I've been working on over the last few months is my own PC based timing machine. I've finally got something working reliably, and thought I'd preview it here. My plan is to eventually write up a detailed article on my web site describing how to build the hardware, and providing a download for the software. I may also produce a "pro" version of the software with more features, to be sold for a reasonable fee. Here's the hardware, all home made of course: The next picture shows the timing trace from my "Black Lagoon", a modified Invicta 8926OB with a Seiko NH35A movement (yes, the amplitude is quite low and tends to fluctuate, topping out around 220 degrees - apparently this is par for the course for Seiko movements): In this picture, the software is in scope mode, showing directly the ticks and tocks. Notice how with this movement, they alternate in loudness. Since the scope mode was run after the timing mode, the scope also shows the threshold that was used by the timing mode to detect the start of each tick. And this is the settings window: Here's a brief list of features so far (I have to resist creeping featuritis): Numerical display of daily rate error, balance amplitude, and beat error. Horizontal "paper tape" mode with sub-pixel vertical resolution that can show fluctuations that are too small to see on a typical stand-alone timing machine. User selectable averaging period. Rate determination using linear least squares, which gives a more meaningful reading than just naively averaging the rate. Automatic signal and noise level determination. There's nothing to adjust. Aggressive noise filtering in the software to keep the hardware simple. Automatic rate detection for common rates. Simple, uncluttered, fixed-size display (1024x600). Scope mode to aid in diagnosis of various watch faults.

 1 point
 -
Very rampant 12 o'clock marker! Fnar!1 point
-
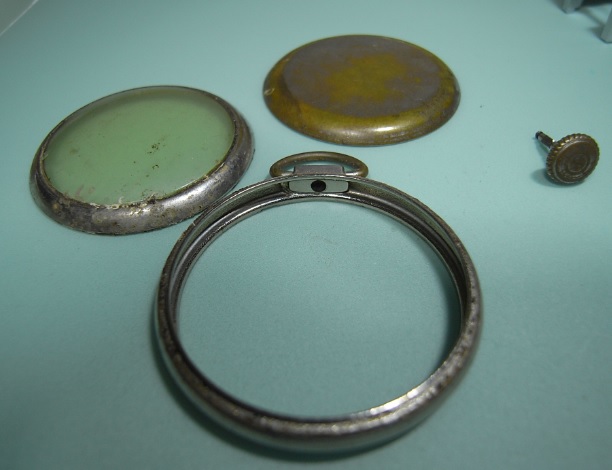
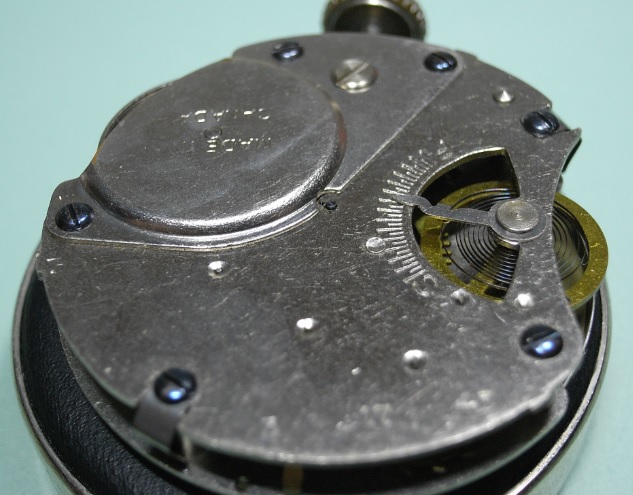
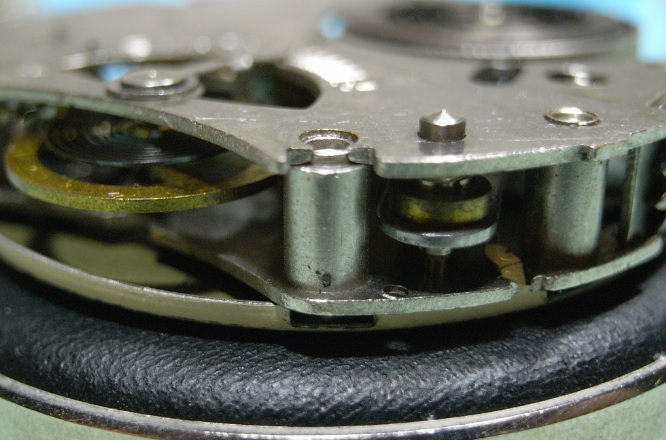
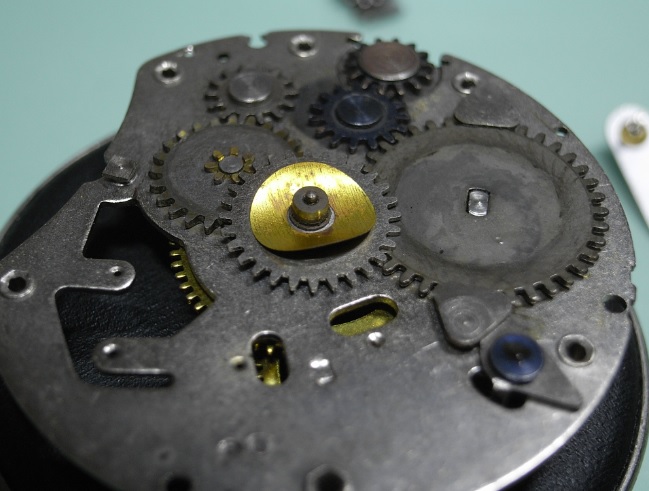
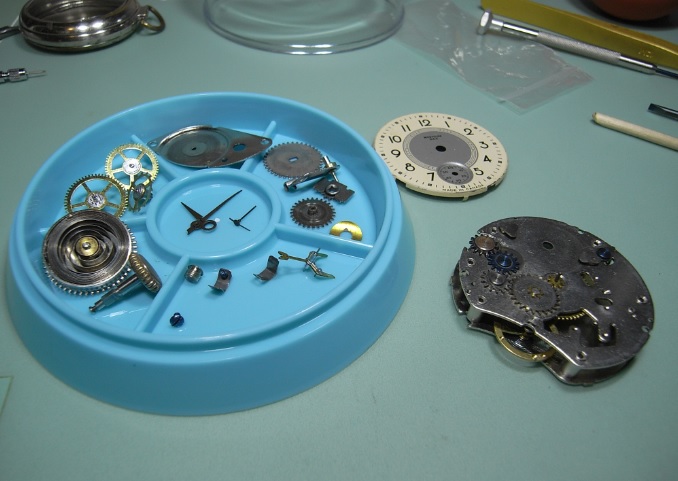
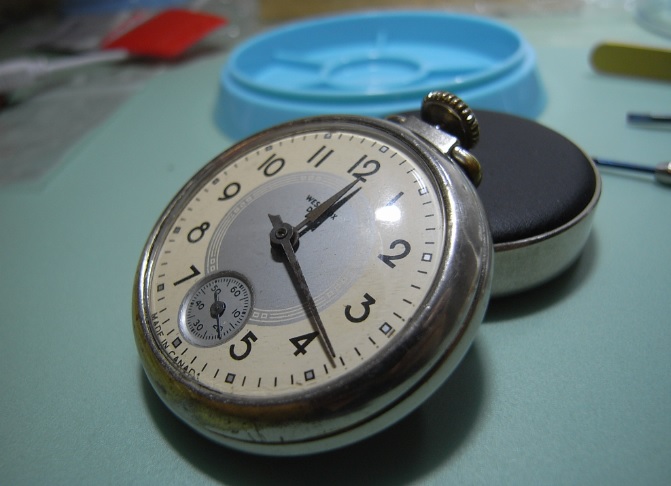
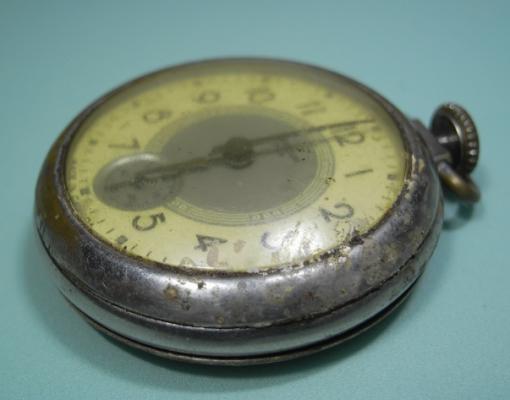
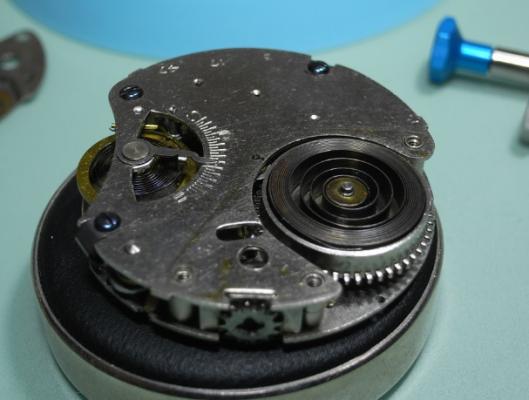
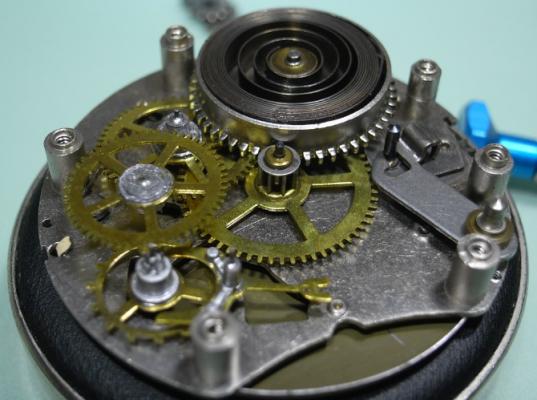
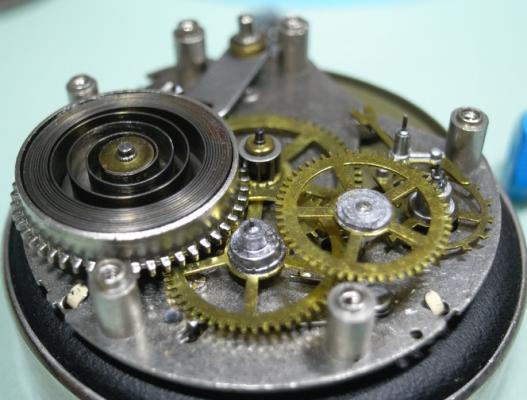
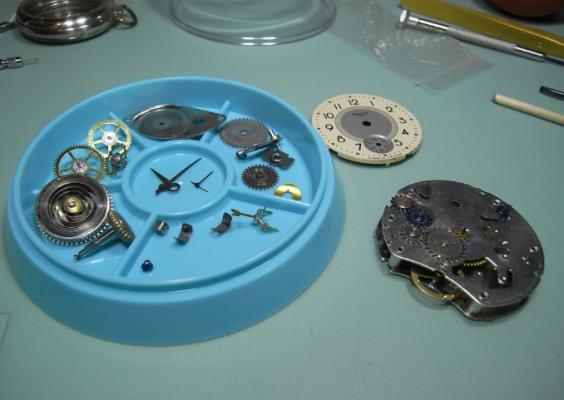
Hey fellow watch nutters. Sorry I haven't finished the F05-111 assembly, but here's why.... One of my Mum's friends dropped off an "Heirloom" pocket watch to her, which wasn't running, for me to fix and clean up ... and I can't say no to Mum :) It's nothing flash, that's for sure. I'd say it's was probably purchased in the depression and is all they could afford at the time. I'm not doing a walkthrough on this one ... I know, I know, very slack of me, but I wanted to get this one done and dusted, and get back to walkthrough's that will help others. BUT, I know you all luv da pics ... so for your enjoyment: here are the reference photos I took along the way :) My goodness! What a mess :o Time for some case cleaning, and glass polishing!! No jewels, Pin Lever Movement. Made in Canada! Mainspring cover off. Having a peekeboo between the plates before I undo the case screws and it springs out in ten directions all over my desk ^_^ Bridge off, and here's the movement in all it's glory. BTW, the Hairspring is attached to the Bridge :unsure: Lots of fun to put back together Another reference angle of the movement Motion Work under the Dial ... Dial was held on my bend tabs All the parts ready for cleaning. Note I screwed the Bridge back on, due to the fact the Hairspring is attached to it. All back together, clicking away nicely, and cleaned up like a new penny .... well sorta :rolleyes:


 1 point
 -
I'm with Geo on this one - enamel dials are very prone to cracking. An alternative to superglue (apart from a perfectly fitting replacement) is to use sticky pads. It's not a solution I care for, but they do work and they won't cause any damage. There's also the question of grinding down the existing feet...1 point
-
Hi Bruce. You've definitely got a a tricky one here. I might be wrong, but I'm sure pins can be soft soldered onto the dial. Being ceramic, the heat required should not effect the finish. The ceramic residue on the rear of the dial would first have to be carefully ground off; not easy when you consider how hard the stuff is. You would then require some sort of fixture to hold the pins in correct alignment and the whole dial would have to be gently brought up to temperature to prevent cracks before actually doing the soldering. I sure wouldn't want to attempt it. You can buy replacement dial pins/feet with solder pads here:- http://www.daveswatchparts.com/MaterialAssortments.html I would suggest purchasing the feet and fixing them with superglue. It would be a lot safer.1 point
-
Hi Noirac, When you said you pressed the seconds hand on firmly.. did you support the backside of the pinion? If you did not do this it would not be possible to get the seconds hand on correctly. Also the spring pressing on the back of the seconds hand could be out of adjustment.. it needs to apply some pressure on the back of the pinion. Anil1 point
-
Found this:
 1 point
 -
The Watch-O-Scope software is now available for general downloading. This is version 1.0 Beta 2. All features are available for a period of 60 days from first use or from release of the final version, whichever is later. After the evaluation period, it reverts to a "Lite" mode where some of the more advanced features useful to professional watchmakers are disabled. http://www.watchoscope.com1 point
-
10 cleaning cycles or 1week,afterwards you need to exchange them If the movements are very dirty even before that br emso p.s: sent from my s****y phone so sorry for typing mistakes1 point
-
I have a counter unit next to my L&R that I took off an old printing M/C. I was told approx. 25 washes. As Mark states it depends also how dirty the movements are. I made a mistake a while ago I put some very dirty clock parts that had been sprayed with WD40 through the L&R and it ruined the cleaning solution.1 point
-
You can clean many times but it depends on what you are putting in - how dirty the items are. I don't count, you just get a feel for when the solution is no longer effective. And when the rinse is no longer effective you will notice immediately.1 point
-
I purchased a cheap ETA 6497 pocket watch a while back with a view to making a big wristwatch, However when it arrived the balance was in bits and on assembly the hairspring decide to get itself all out of shape! This was shelved as I had no confidence in correcting the self destructing beast. Until 2 nights ago armed with my new Dumont no4 tweezers and having watched Marks excellent videos over and over, operation Do or die commenced! After a couple of hours of bending ,stroking, cursing and manipulating the little bugger the watch was running...Badly! By 4am the whiskey i had been sipping to stay relaxed had over relaxed me so I went to bed! Last night phase 2 began. A little more caressing and back together, still bad! spring looked ok but no amplitude and the loudest knocking I ever heard from a watch. Further investigation showed the balance wheel spokes were hitting the index pin, the arm had a slight bend which was finely adjusted with a set of pliers! Much better! On to the timing machine and I saw what looked like a blizzard so then decision was made to strip the movement down ready for cleaning today! I ended up cleaning reassembling and oiling and having got to bed at 4am again I left the watch running. It now shows good amplitude. 0.3 m/s beat error and around -10 to +6 secs a day. Happy Bunny. If there's a moral to this it must be never give up and all credit to Mark without whose brilliant videos this movement would most likely have never ticked again. The End....or just the beginning?1 point