Leaderboard


Popular Content
Showing content with the highest reputation on 01/28/15 in all areas
-
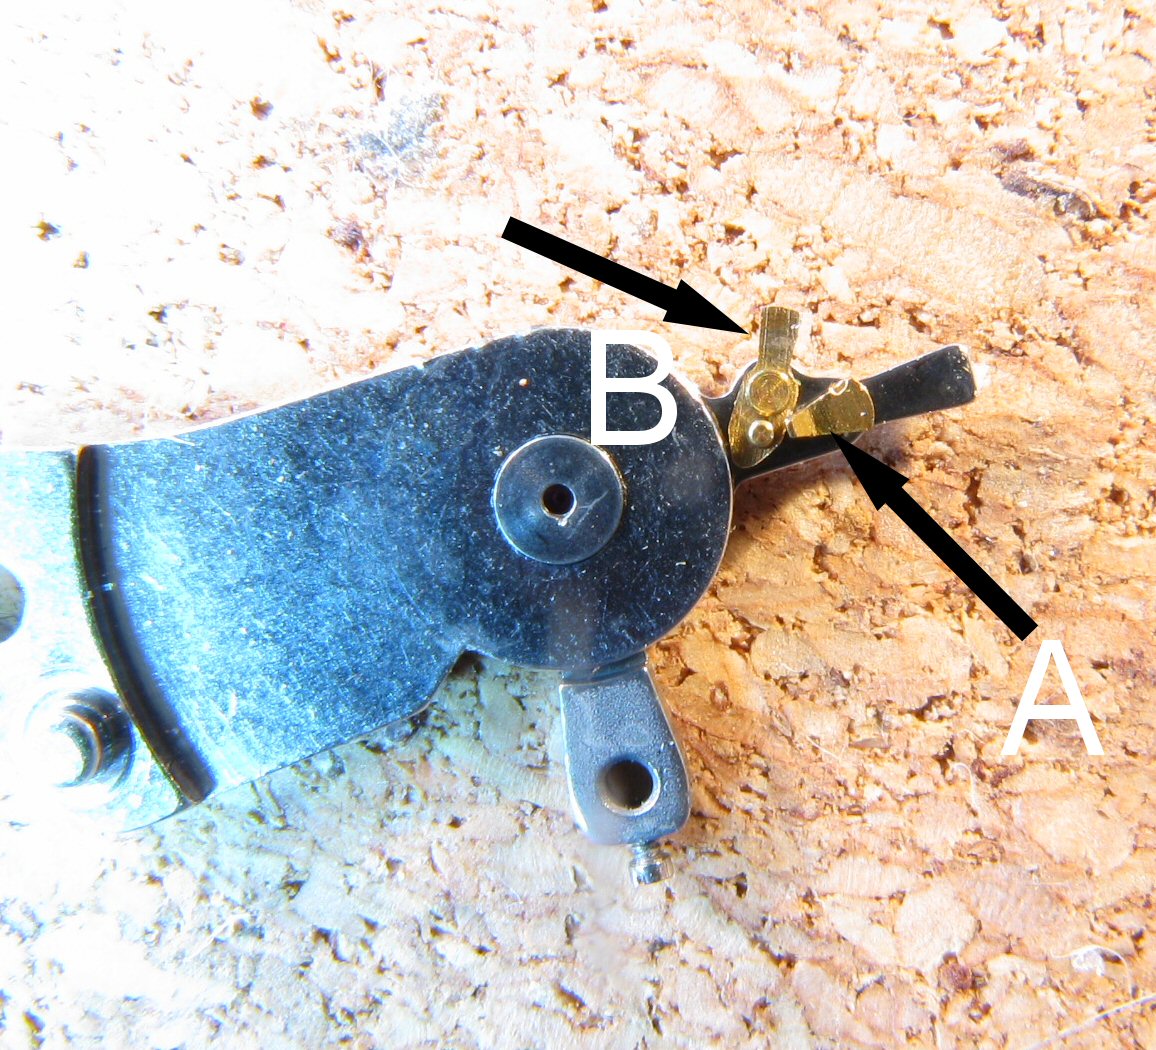
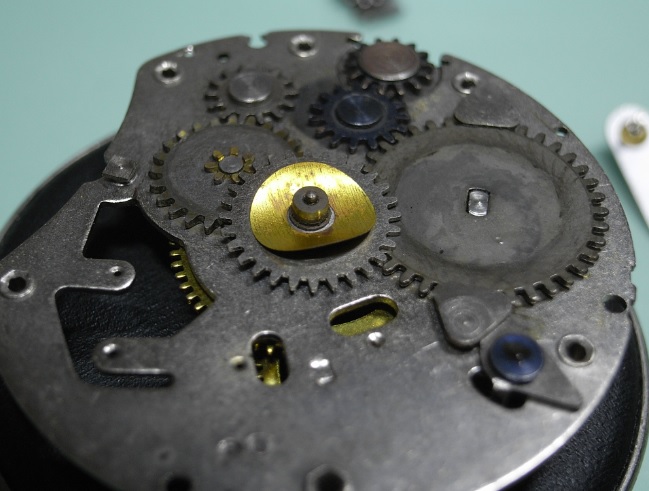
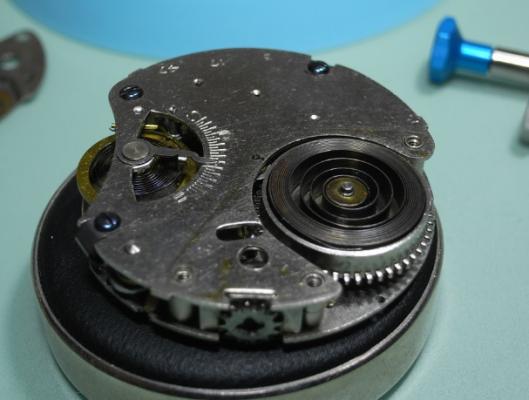
Hi Roger, I hope I'm not too late to the party with this but I wanted to dig out a FHF(ST)96 from my projects bin to check before posting. The photograph that Anilv posted shows the most common set up for the regulator, where the outer boot (labelled "A" in my pic below) pivots around its own rivet to free the hairspring by inserting a screw driver in the slot and rotating it. The FHF(ST)96 is different in that the outer boot is fixed and has no slot. Instead the inner pin is attached to plate which in turn is riveted to the regulator arm and forms a little lever ("B" in my pic). You need to gently rotate the plate clockwise around its rivet by pushing on the end of the lever, swinging the inner pin away from the boot and freeing the hairspring. When reinstalling the hair spring you close the gap between the pin and the boot until the top of the pin just touches the tip of the boot. You can see in my second pic that the the face of the boot is flat, and the pin is machined such that when the top of the pin touches the top of the boot there is just enough clearance for the hairspring. I hope this helps.

 2 points
 -
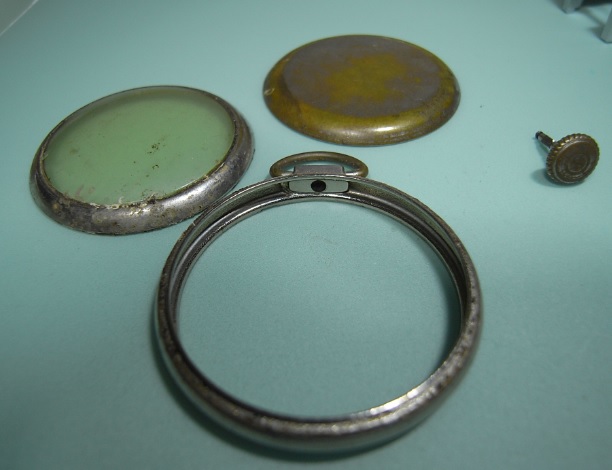
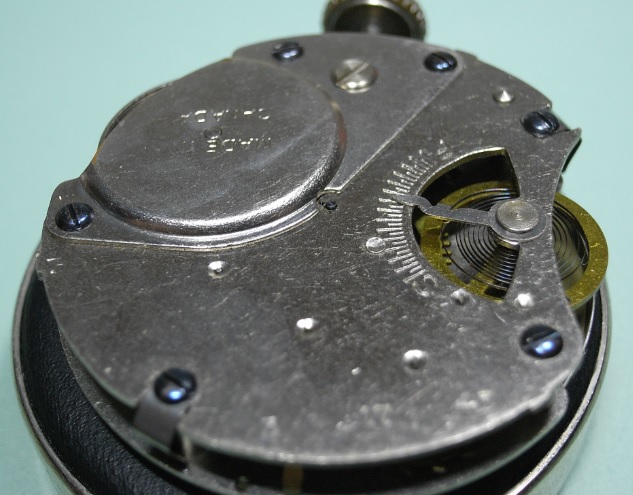
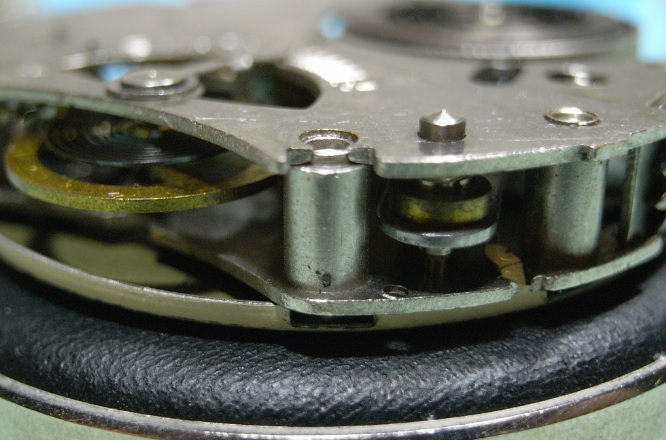
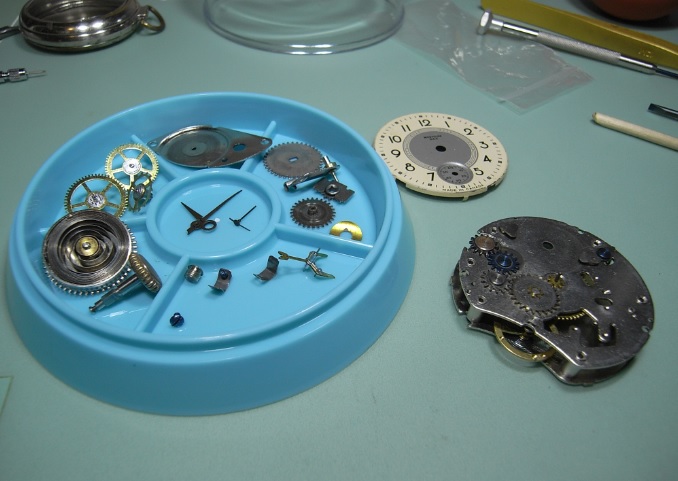
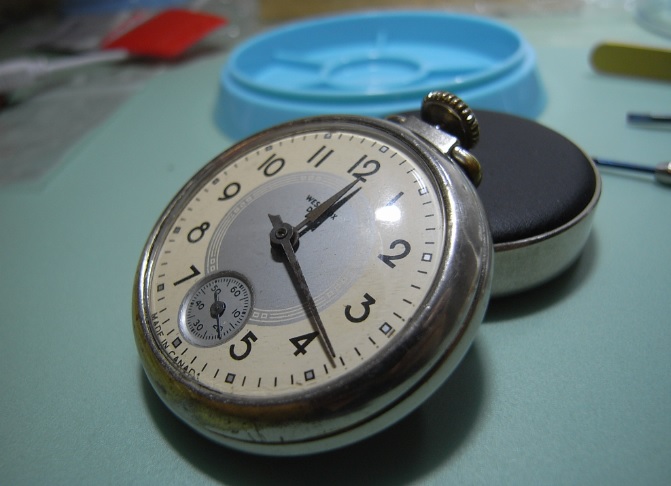
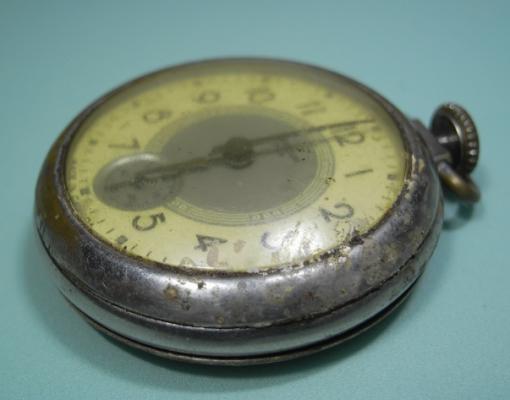
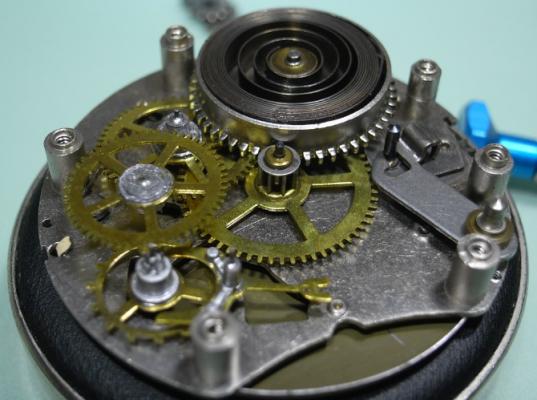
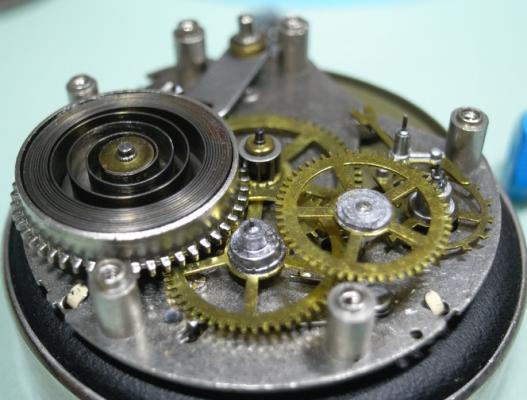
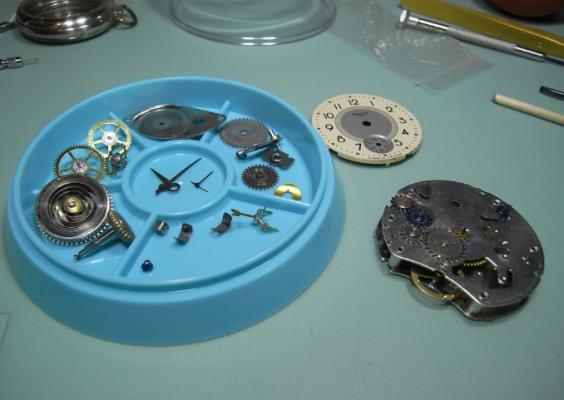
Hey fellow watch nutters. Sorry I haven't finished the F05-111 assembly, but here's why.... One of my Mum's friends dropped off an "Heirloom" pocket watch to her, which wasn't running, for me to fix and clean up ... and I can't say no to Mum :) It's nothing flash, that's for sure. I'd say it's was probably purchased in the depression and is all they could afford at the time. I'm not doing a walkthrough on this one ... I know, I know, very slack of me, but I wanted to get this one done and dusted, and get back to walkthrough's that will help others. BUT, I know you all luv da pics ... so for your enjoyment: here are the reference photos I took along the way :) My goodness! What a mess :o Time for some case cleaning, and glass polishing!! No jewels, Pin Lever Movement. Made in Canada! Mainspring cover off. Having a peekeboo between the plates before I undo the case screws and it springs out in ten directions all over my desk ^_^ Bridge off, and here's the movement in all it's glory. BTW, the Hairspring is attached to the Bridge :unsure: Lots of fun to put back together Another reference angle of the movement Motion Work under the Dial ... Dial was held on my bend tabs All the parts ready for cleaning. Note I screwed the Bridge back on, due to the fact the Hairspring is attached to it. All back together, clicking away nicely, and cleaned up like a new penny .... well sorta :rolleyes:


 1 point
 -
As the title says, for a day out in London. Saatchi museum, Kings Road, 27May to 7June. Visit www.patek.com for details1 point
-
That's good that you've found the problem and sorted it. If it's been going for over two hours I'm sure you've cracked it. :)1 point
-
I disassembled the watch and discovered I hadn't quite pushed the canon pinion all the way on, pleased I realised that before removing the mainspring from the barrel (the photo above was took during disassembly before I cleaned everything). It's been running now for over two hours so hopefully that's it. I'm going to leave it overnight before finishing assembly, maybe I'll let it fully run down to test the power reserve on the spring.1 point
-
As far as my wife is concerned. Off the record, I've only begun to spend the money. [emoji355] [emoji383] [emoji386] [emoji387] [emoji389]1 point
-
Hi Pete, thanks for the enthusiastic suggestion, but I'll stick horological dabbling and helping folk where I can along the road where I can. :)1 point
-
I believe Geo that you being an apprentice would also enrich the teacher knowledge...it would be a collaboration mostly!1 point
-
Hi Don, I see you finished NOT reading the thread...did you NOT finish spending the money? :) Cheers, Bob1 point
-
I believe that's a Seiko mainspring (7S26 et al) and the kink you see is the place where it touches the tail as it is winded on the barrel. I'd say it is good to go. I usually clean it with lighter fluid, then lightly rub/film with moebius barrel oil and smear the actual barrel with the Seiko S4 oil. That's all it take. Just be careful not to break it when inserting it back in the barrel. Cheers, Bob1 point
-
I'm just beginning to learn proper lubrication. Although I bought a pretty good selection of lubricants for my practice, one book I read stated that a beginner can get by with just three types - mainspring grease (i.e. Moebius 8300), Moebius 9010, and Moebius D5. The general principle is high load, low speed parts require lubricants with more viscosity. While high speed, low load parts require less viscous lubricants. Too high viscosity (and also too much) lubricant on the high speed parts can cause drag. So maybe these three lubricants will suffice for the time being. FWIW, I opted for HP 1300 over D5. It's more expensive per ml, but I was able to buy a smaller quantity and thus spend less.1 point
-
That only means you would bring more life experience to the table ;) . Roger1 point
-
Excellent Job, it just proves that you can polish a turd! :)1 point
-
The kink that Will has pointed out would be enough for me to want to replace the spring as it is a potential breaking point; however, I don't think that he spring is "set". The main coils look well spaced and it has a healthy reverse coil on it, so I would be surprised if it's not providing enough power. Also, I believe that a lack of braking grease is likely to result in the mainspring failing to slip rather than slipping too early. The way that braking grease works is that is holds against the shearing force between the bridle and the barrel wall, allowing the spring to be wound up, until the shear force reaches a certain strength, and then it allows the spring to slip. As it slips the shear force reduces to below the braking limit and the bridle once again grabs the barrel wall. I could be completely wrong on that though :-) Try winding the mainspring by hand (use a screw driver in the ratchet wheel screw on your Seiko as I don't think it has manual winding) and see if you can feel when it slips. If you can get just a couple of turns on it then that should be enough power to run for considerably more that just a few minutes. When you reassembled the movement after cleaning it did you test the free running of the train without the pallet in place? A puff of air on the escape wheel should be enough to spin the whole train easily, and a couple of clicks of power on the mainspring (again use a screw driver to turn the ratchet wheel) should spin the train first of all the right way, cause the train to overshoot the springs fully unwound position, and then recoil in the opposite direction for a couple of turns of the escape wheel (or more). If the train won't spin with a puff of air or there is no recoil then you need to strip the train back and reassemble one wheel at a time, each time testing the freedom of the train for power loss until you find the problem, which could be anything from a bent pivot, broken jewel, incorrect end or side shake, damaged wheel or pinion teeth, etc, so it is important to always thoroughly inspect every part after cleaning and before installing it. If everything in the train is free enough to see recoil from a couple of clicks on the ratchet wheel then reinstall the pallets and put about half a turn of power on the ratchet wheel. Now by just very gently nudging the pallet fork from side to side with the tip of a clean oiler you should see the pallet fork snap smartly across to the opposite banking pin. Also, if you stop nudging the pallet fork just before it snaps across and take the oiler away, the pallet should return to the banking pin you were nudging it away from (this is called draw). If it doesn't snap across or draw back then carefully inspect the pallet stones for any chipping or damage, and the pallet arbor pivots and jewels. If it does snap across nicely and draw back properly, then the issue is likely in the balance assembly. I hope this helps.1 point
-
I totally agree Marc. The case opener I use for screw casebacks is the "T" shaped one from Horotec. It adjusts quickly and is worth every penny. Also as Mark suggested, a case vise is absolutely necessary not only to protect your hands; but to ensure the least possibility of slipping and damaging the caseback.
 1 point