Leaderboard


Popular Content
Showing content with the highest reputation on 01/24/15 in all areas
-
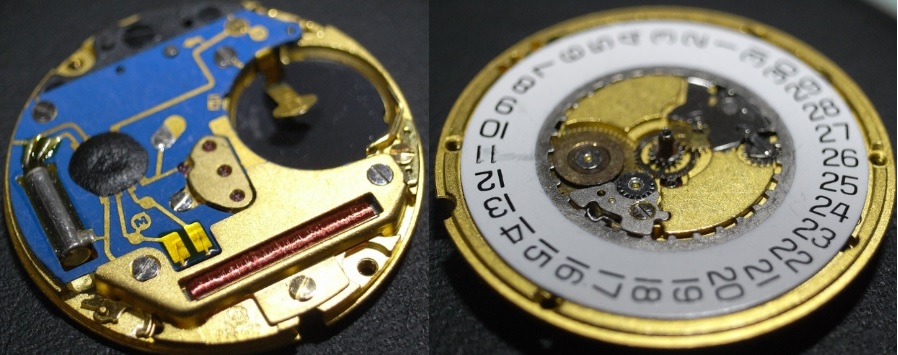
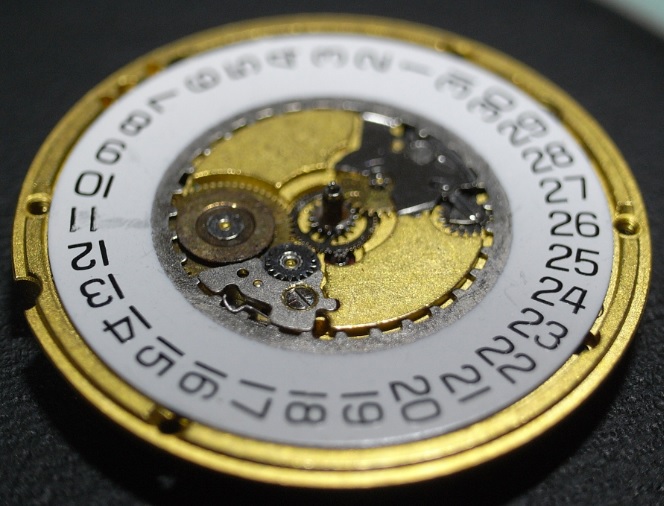
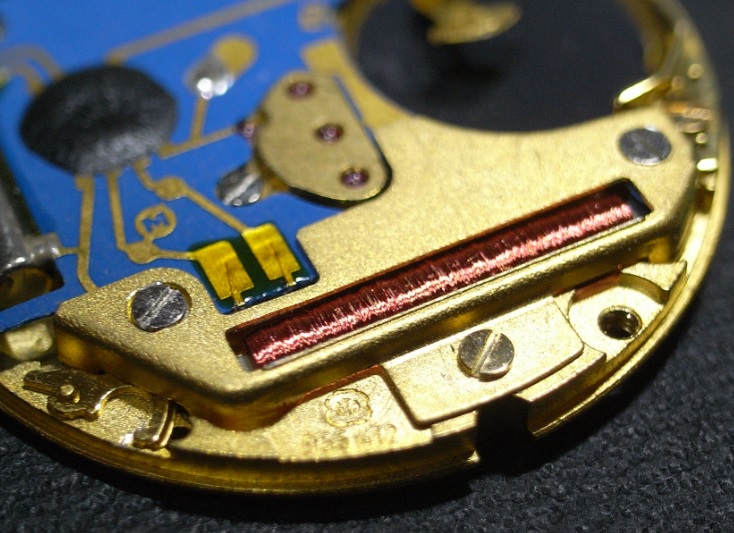
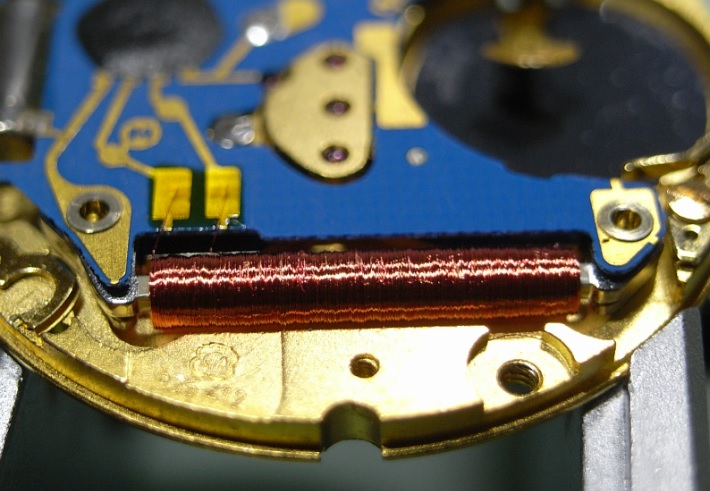
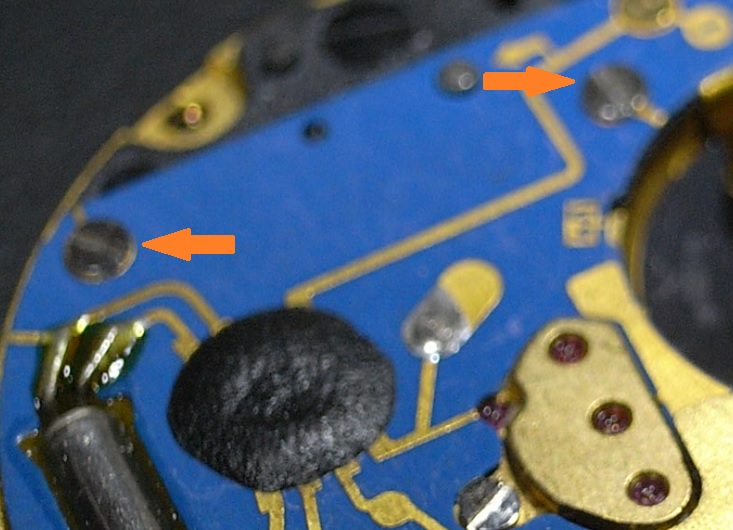
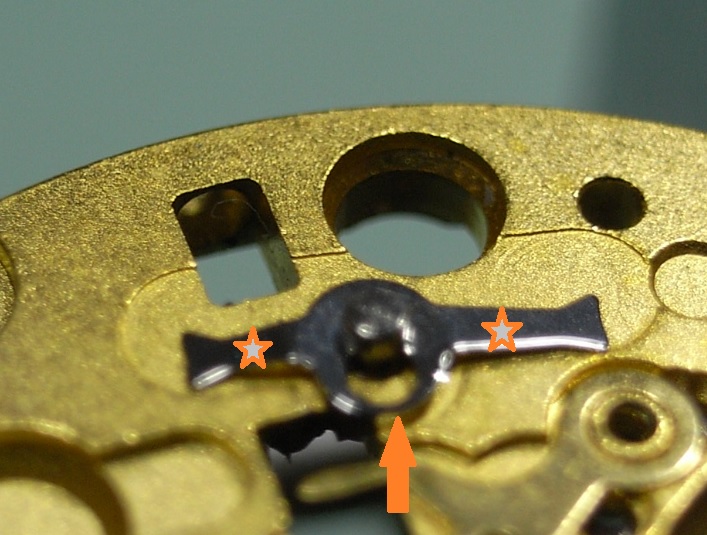
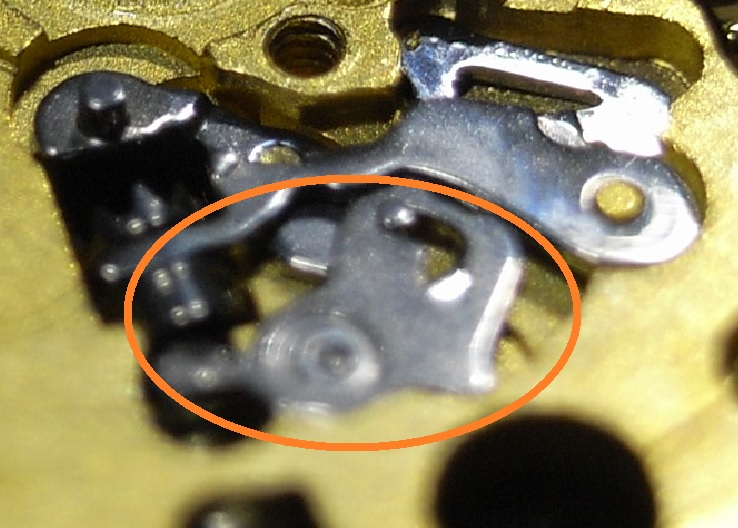
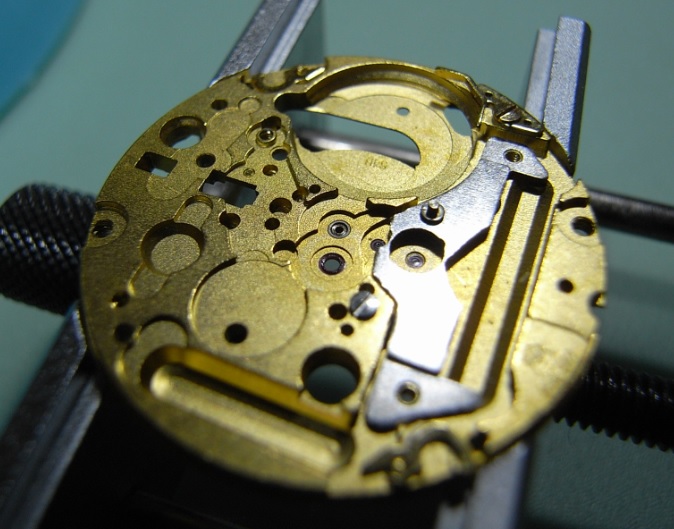
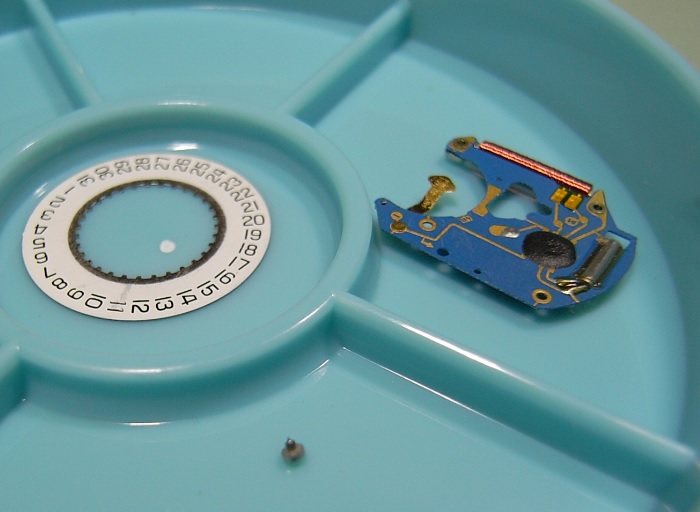
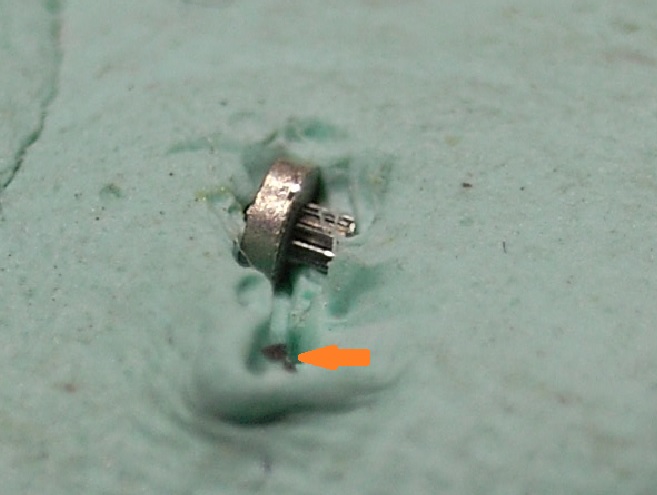
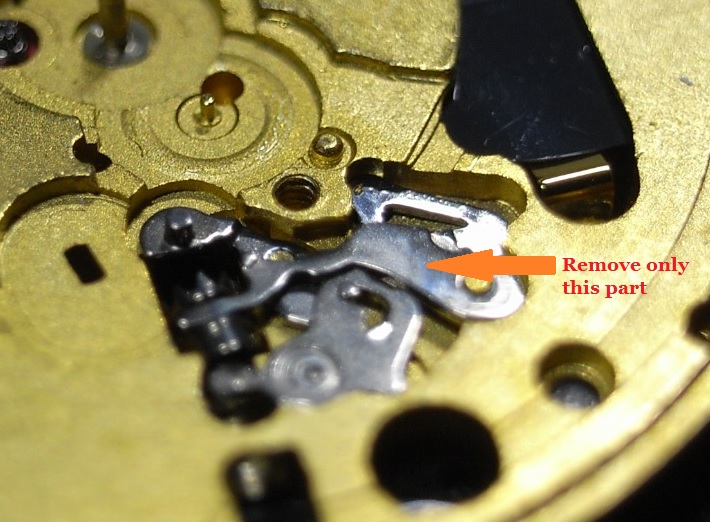
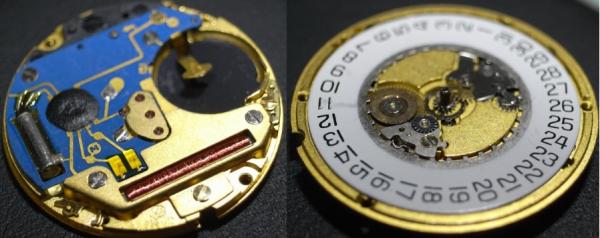
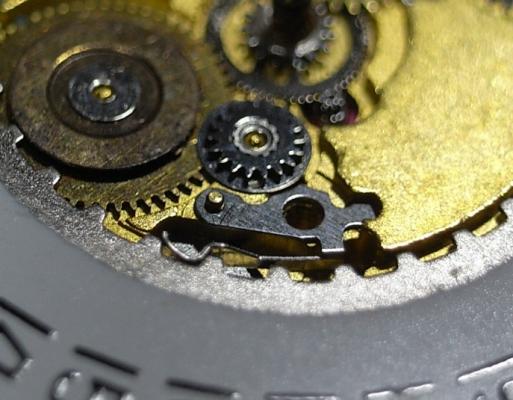
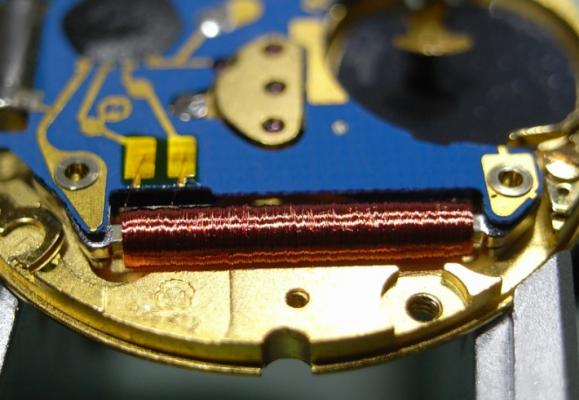
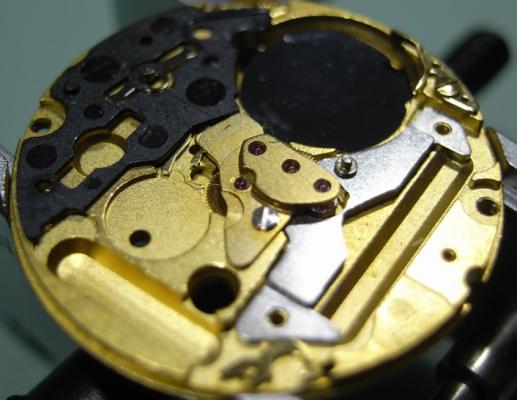
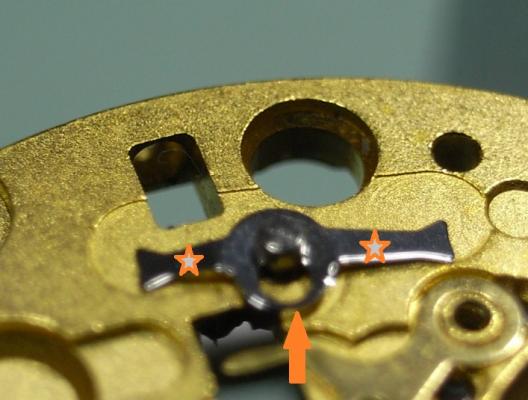
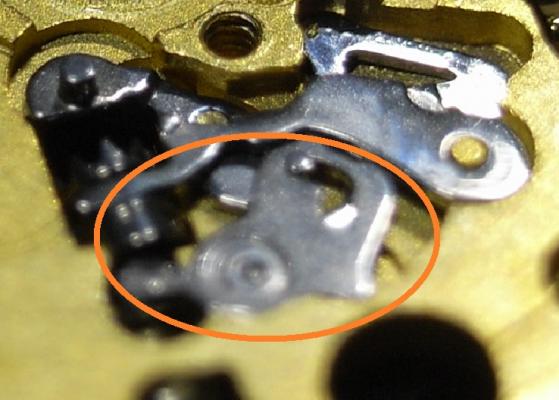
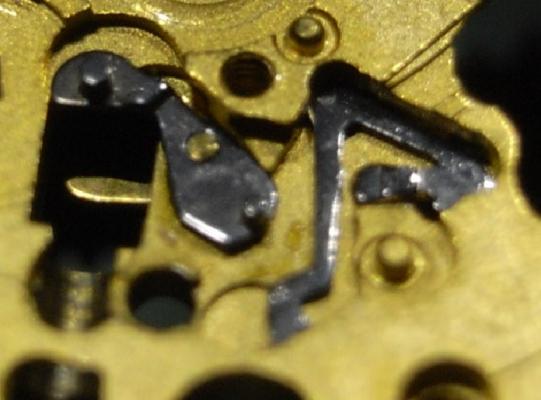
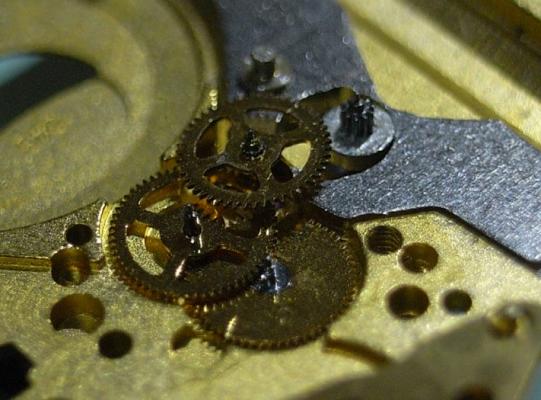
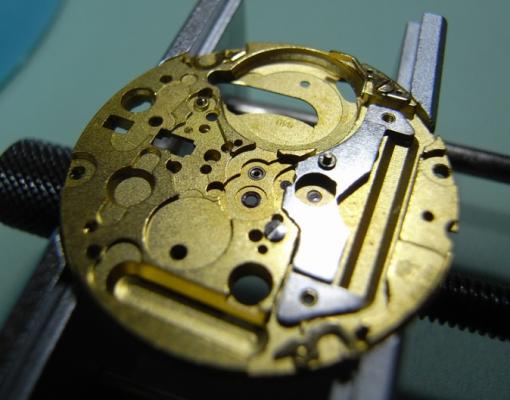
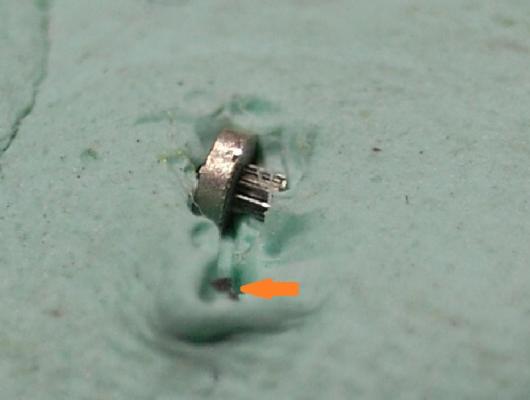
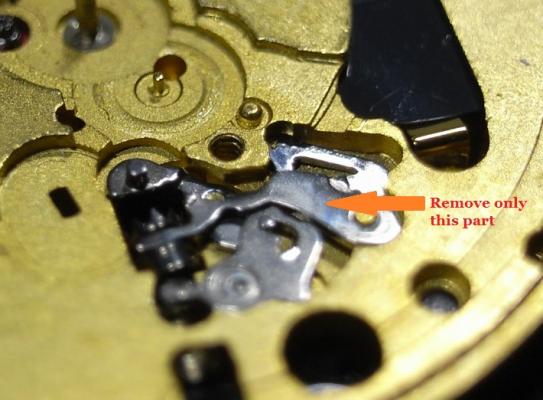
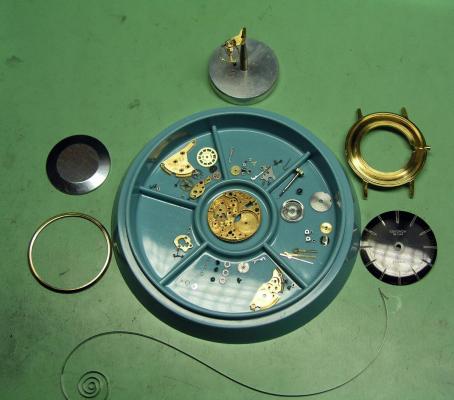
ETA 955 Service Walkthrough "The Workhorse of Highend Quartz" The ETA 955 and 956 Quartz Movements are the most commonly found movement in high-end quartz watches with three hands and a date feature. You will find them in Omega, Tag, and many other brands on the market. For this walkthrough I will be using an 955.412 Movement as my example; but the 956 is so similar to the 955, that this walkthrough will suffice for both. Please note that the numbers after the decimal place only relates to the factory in which the movement was made, so yours could read 955.112, or another factory number ... regardless, the parts are identical and interchangeable. As with all movements, quartz or mechanical, they have a service interval that should be adhered to for longevity of the movement. With quartz movements when the lubrication becomes dried out, or the movement becomes dirty, they will draw more and more current from the battery in order to maintain accurate time keeping. The ETA 955/6, when in optimum condition should draw around 800nA ~ 1.5uA, if the movement is drawing more power than this, a service is required. If a service is not performed, the battery life with decrease markedly, and can go as far as drawing more power from the battery than it was designed for, and damage the battery and cause it to leak and corrode your valuable time piece. Service Manual for the 955/6 Movement CT_956412_FDE_493024_06.pdf.PDF Disassembly Remove the two Date Wheel Keepers. I always start with the one holding the Date Jumper Spring in place. Sometimes the Date Jumper Spring can ping out of place, so be careful when removing the keeper plate above it. Here is a reference photo in case it moves before you see how it's properly seated. Next remove the Keepers and Date Wheel. Then remove the Date Jumper Spring, Motion and Calendar Work. This will leave only the Keyless Work; remove the Yoke and the Sliding Pinion only. We need to flip the movement over, and disassemble the IC Board before we can remove the rest of the Keyless Work. With the movement flipped over, remove the 3 screws holding the Coil Protector. Note for re-assembly the Gold Screw in the centre. Now that the Coil Protector is removed, GREAT care must be taken not to damage the exposed fine windings of the Coil. Then to remove the IC Board, simply remove the 2 remaining screws that hold it. Do this slowly and carefully, as you do not want to slip off the screw and damage this delicate circuit. The same level of care needs to be taken when removing the IC Board from the Main Plate. Take your time and carefully lift it off and store it immediately out of harms way. Next remove the black Insulator Block, and Battery Insulator. This will expose the Setting Lever Spring Clip, which will enable you to remove the rest of the Keyless Work. To remove the Setting Lever Spring Clip, place both points of your tweezers on the locations where I've placed the stars and gently push down on the spring. Then with a piece of Pegwood, push the spring in the direction of the arrow until it moves to the larger opening slot. This will now allow the Setting Lever to be removed, along with the rest of the Keyless Work. Next remove the Stop Lever and Switch, and remove the one screw holding the Train Bridge in place. Then carefully remove the Gear Train and the Rotor. The movement is now completely stripped and ready for inspection and cleaning. There are some parts that you do not place in the parts cleaner, they are as follows: Date Ring Rotor IC Board The rest should be demagnetized prior to cleaning to avoid any metal particles in your cleaning solution from sticking to your parts. When cleaning I also including the Insulator Block, and Battery Insulator in the basket, normal watch cleaning solutions do not harm these items and it is essential they are completely clean to provide the best insulation possible. The Rotor should be cleaned by use of Rodico. As you can see from the picture below, it's surprising the dirt and old oil this will remove ... and it is sufficient cleaning for the Rotor. I hope this has been a help to you, and I will post the assembly procedure later today, if time permits.


 5 points
 -
As for the cost its because they are Swiss. Just like their watches (particularly the mediocre ones) and tools they are ridiculously overpriced.2 points
-
It's a method devised by Greiner in the late 50's or early 60's which allows the use of the timing machine to find the heavy spot when you have an amount of positional error. I understand that their method rendered the 'static poising' method to be obsolete (their words, not mine). In the most basic form the method is to test in 8 positions (0 to 7) in the vertical, and find the position where the watch is gaining the most. The starting position is to draw an imaginary line from the escape wheel centre to the balance centre and set the movement on the microphone with the line vertical, the balance being above the escape wheel. This is position '0' Each test you turn the movement clockwise by 45º, the first = point 1 second = point 2 and so on. When you find your heavy spot (where the watch is gaining the most) take the balance off the watch and flip it over so the impulse pin is facing up. Draw an imaginary line from the staff through the impulse pin to the balance wheel rim. This is point 0. At 45º from this point is point '1' and 90º is point 2. Point 4 is at 180º on the balance rim and hopefully you get the idea. So whatever position is gaining the most on the timing machine, you would either reduce weight at that point or add weight (timing washer) on the opposite side of the heavy spot. And this depends on the rate when the watch is in the horizontal. If the watch is slower in the horizontal then you will lighten the screw at the point found. If the watch is faster in the horizontal then you will lighten the screw opposite the point found. If the watch is running at zero rate in the horizontal then you would lighten the screw nearest the point found and add weight to the opposite of that point in equal measure to the lightening. If the balance has no screws then the only choice to be had would be to remove material at the heavy spot, it's not possible to add weight. Two things to note is that, when testing on the timing machine, the watch should be wound down enough so that the amplitude is between 150º and 180º And secondly the watch must be cleaned and properly lubricated first. I hope my overview is clear, it's late and I have enjoyed a few fingers this evening :)1 point
-
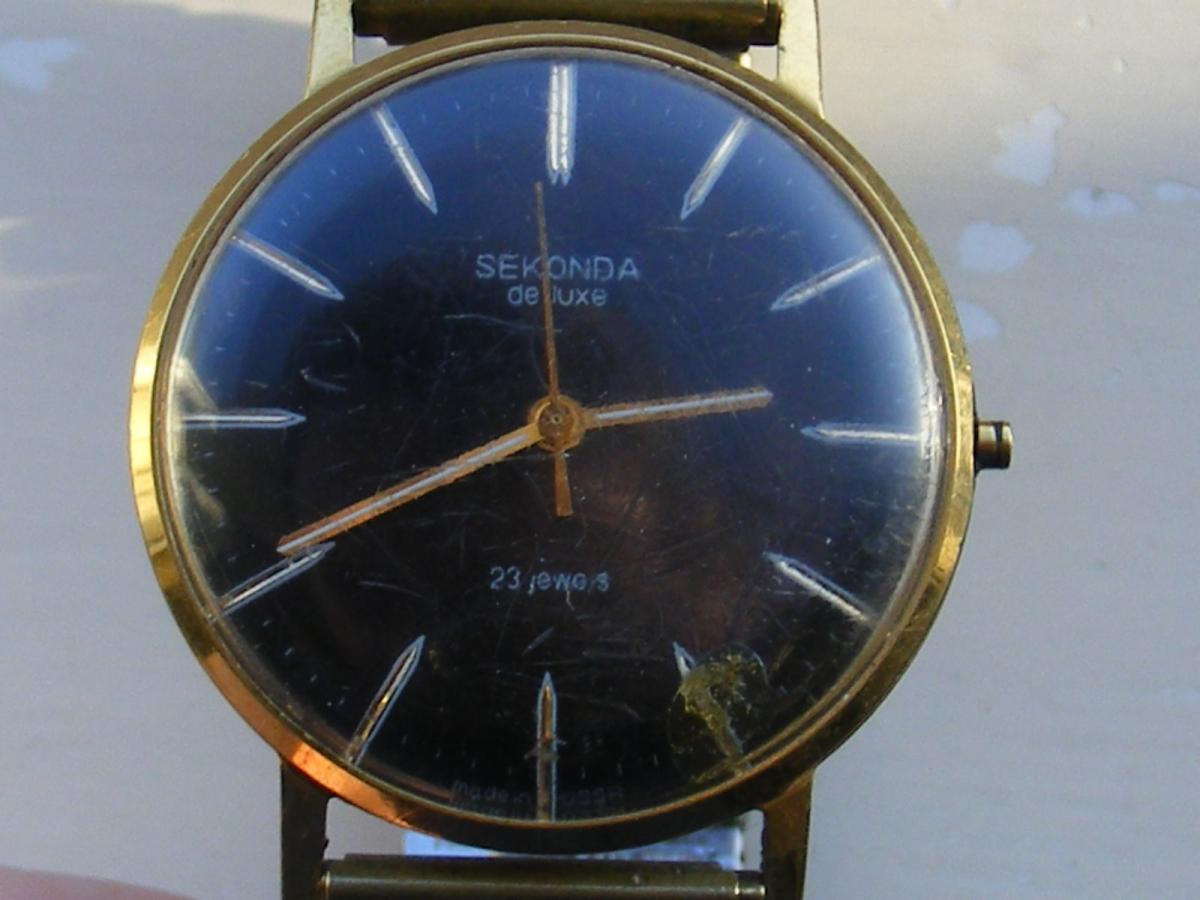
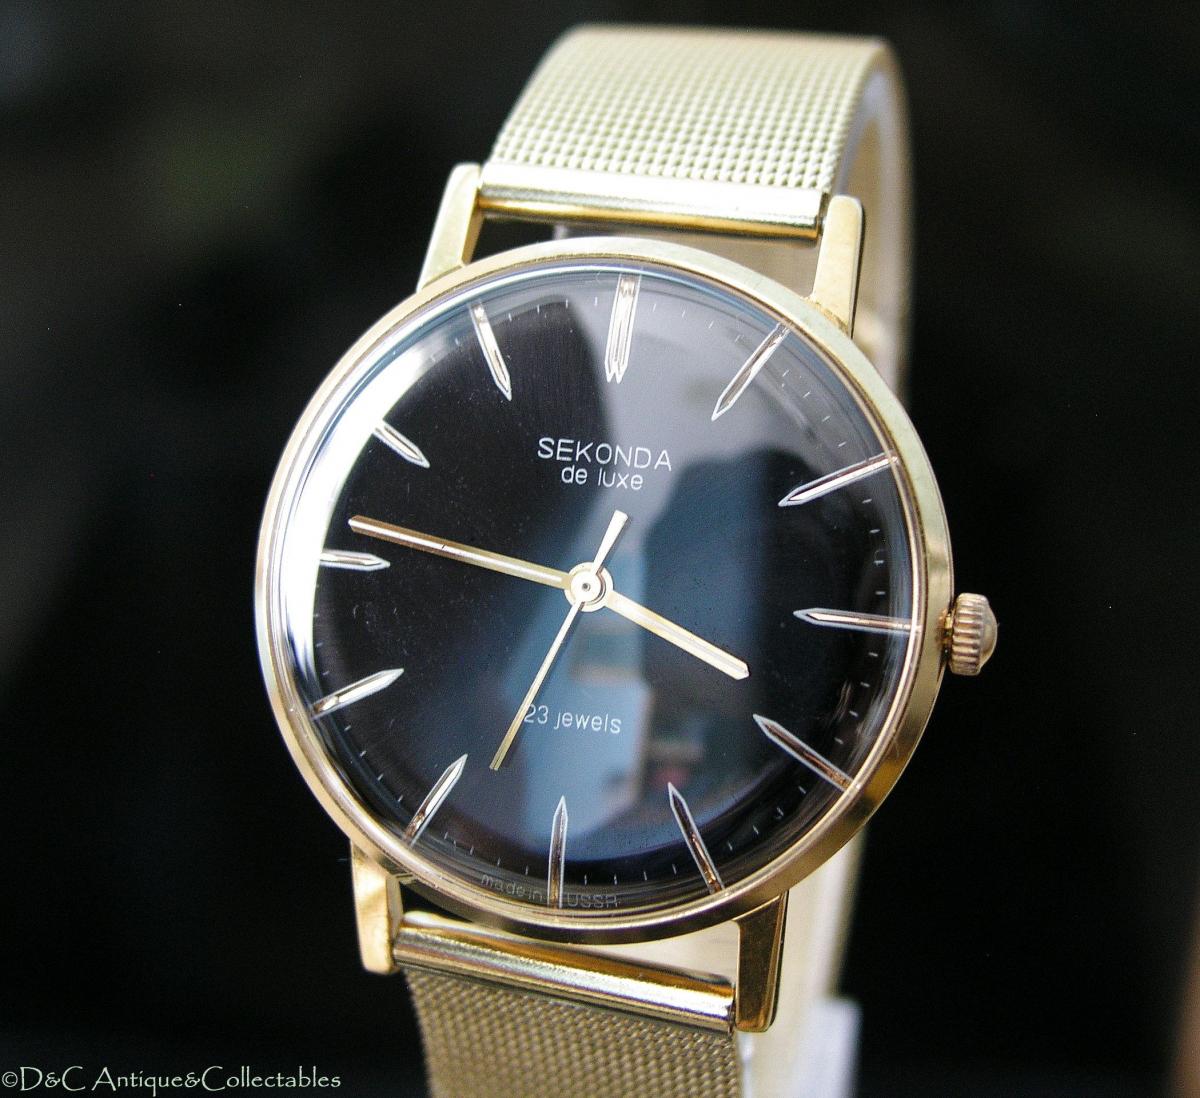
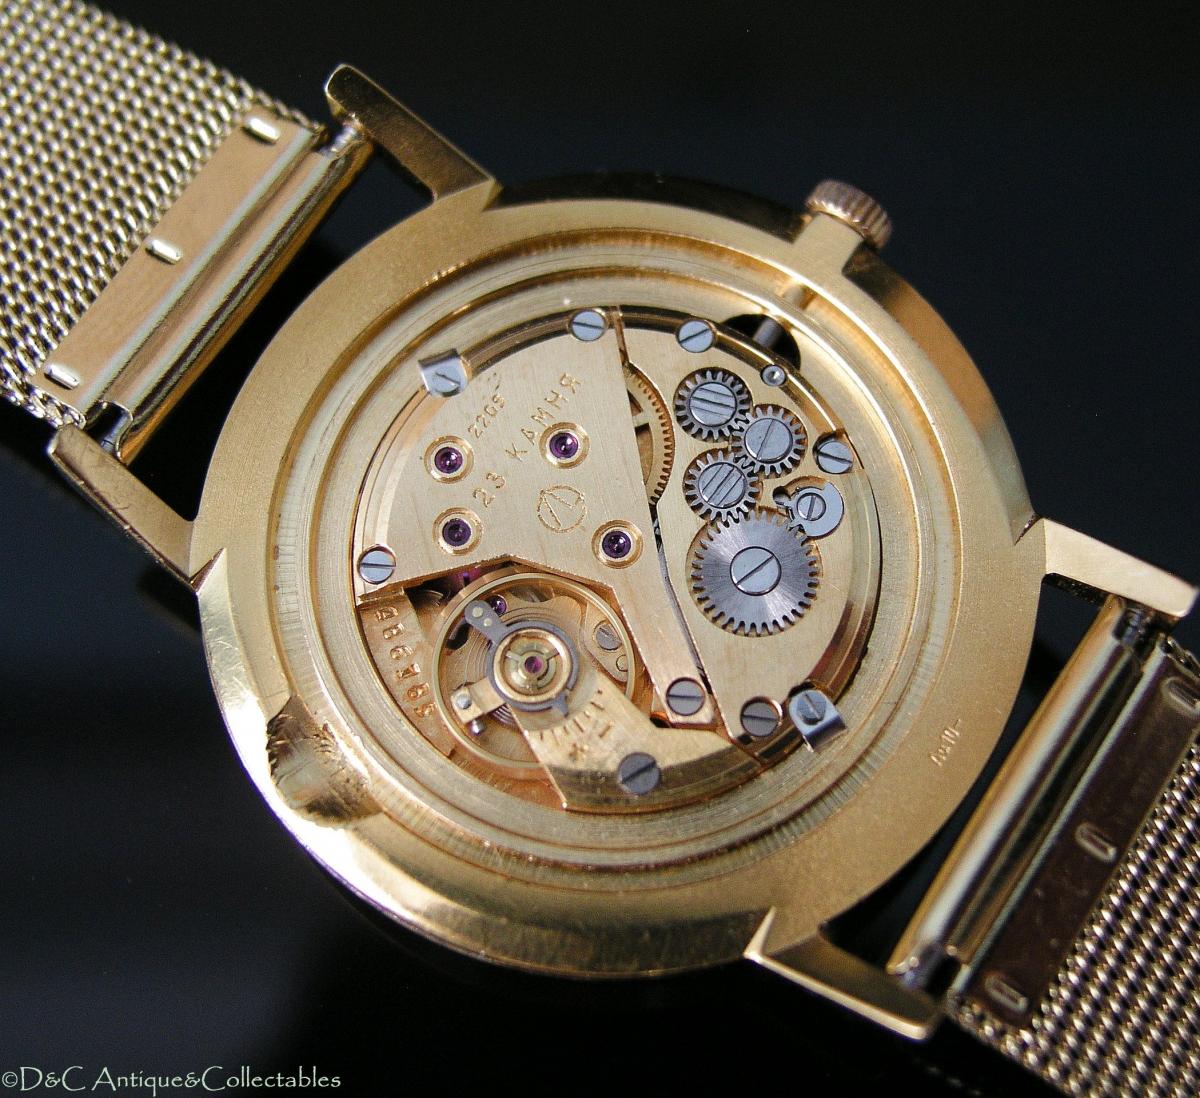
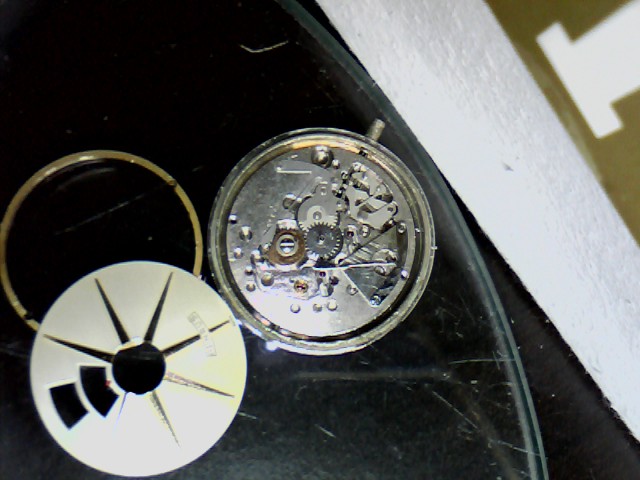
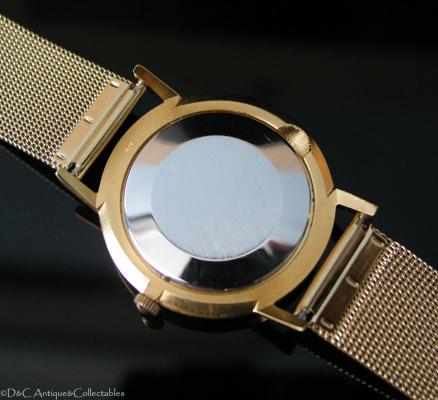
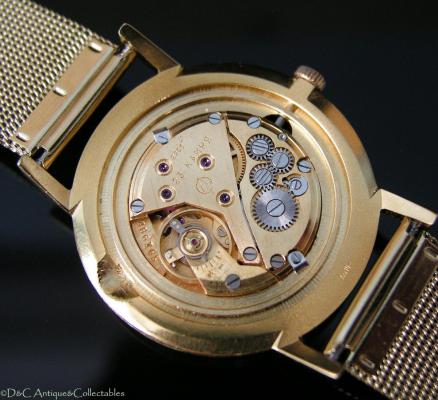
Hi all, I took a punt at the last minute on this 23 Jewel Russian Luch Sekonda last week on the Bay, I took a chance on it because I thought it was one of the scarcer Blue Dials that had been put in a gold plated case, but did not have enough time to read the listing until after :biggrin: when the listing stated a Black Dial I was slightly disapointed. Anyway after reminding myself to always read a listing before bidding, I looked forward to receiving the watch, so I could get to work on it. I thought I would share some photos of the process with you all.. It did not turn out too bad at all Best Wishes to you all Darren


 1 point
 -
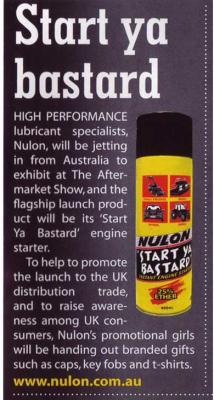
That is a pure Aussie invention with an appropriate name ... all our very best inventions have "**BLEEP**" in their product name :p That stuff is good for everything: from a lawn mower that won't start up, to a hang-over cure, and breath freshener for the morning after :wub: ... Honestly! I wouldn't lie about such things! :rolleyes:1 point
-
What about this Bob, do you think it would work? :)
 1 point
 -
Hi Pete, In my experience which is almost none, I can tell that lubricating a movement is like an art form. Normally, in the beginning of our watchmaker life, we over lubricate and therefore add another "malfunctioning" variable to what already exist in the movement. Then we start putting our act together until it becomes perfect. The choice of oils and greases (note the difference) is based on the function of the parts they lubricate. I believe you may find an explanation to the aforementioned "function" in the forum. In a pinch, sometimes 1 or 2 oils/grease is all you need for most of your work...it may not be 100% what is recommended but done right it may be "equivalent"....somehow. Also, some cheaper oils made somewhere else than Switzerland may work the same and/or better. You will be getting all this with experience and experimenting...also other watchmaker's input is a wealth of knowledge in this matter. Bottom line, don't worry about this subject too much at the beginning. When in doubt, try to get the service data of the movement you are servicing and go by their recommendations...this is not always the best for that movement since movements are modified and service data take a long time, if ever, to be updated. In any case, you will be safe by following them. Just MHO. Hope this helps, Cheers, Bob1 point
-
I finally got the movement out. It appears the dial is a interference fit between the retaining ring and movement. I couldn't see any other way to remove it and continue without the dial being removed. It took a little prying and a lot of nerve but the dial popped off. the retaining ring was in tight due to dirt and corrosion. I used heat as suggested by Marc and the retaining ring came out. After a cleaning I hope the parts go back together more easily. Thank you all for the helpful suggestions. Tony
 1 point
 -
Had similar problem when selling a paper 'knife', just changed description to letter opener! Maybe describe it differently and try again.1 point
-
Sums it up nicely Pete, a fair bit of science, and a large dose of snake oil....... <sorry.. couldn't resist :D >1 point
-
I agree with Clockboy and Marc. Another possibility could be that oil in the base of the balance jewels has turned into a a hard varnish over time and has not been cleaned out properly at the last service. The varnish can swell with both the cleaner and fresh oil, resulting in lack of clearance and a tight balance shaft. I have had this problem with a couple of old watches with fixed balance jewels in the past.1 point
-
Hi Pete, I reckon that your first port of call should be here; http://www.watchrepairtalk.com/topic/638-lubricants-basics/?hl=%2Blubrication+%2Bbasics Coming from the lubricants industry as he does Canthus provides an excellent overview of the world of oils. As far as the numbers are concerned I'm not aware of any standardised nomenclature used in the manufacturers reference numbers although there are some indicators within some product ranges (eg. Meobius HP series synthetic oils get more viscous as he number gets higher). Then I would have a look at this; http://www.bhi.co.uk/Documents/certificate/Tech/PractLub.pdf This is an excellent standard approach to oiling where specific manufacturers instructions or tech sheets for a given movement aren't available. However, you will find that manufacturers specs, personal experience, cost, availability, brand loyalty, and habit all influence what any watchmaker may consider to be the best approach to lubrication, which means that there are as many opinions as to what is best as there are watchmakers. As far as the oil in the oil pots is concerned, if you keep the lid on the pot when not in use it should have the same shelf life as it would in the bottle, which for Meobius is 6 years from manufacture. However hard I try to keep things clean though I inevitably end with small amounts of contamination in the oil pot over time so I tend to decant the smallest amount from the bottle as I can get away with and change it every 1 to 2 weeks depending on how many watches I work on. I will still probably not get to the end of the bottles before the use by date. You really don't need a different oiler for each oil. Just make sure that you always clean the oiler in pith wood every time before dipping the oil, even if you're using the same oil, as it keeps everything scrupulously clean. As for cost I suspect that there are 2 main factors at play; economy of scale for oils that are made only for horological applications, and marketing for those that are much more widely used but under different names. I'm pretty sure that there are manufacturers out there that bottle the same oil under different names and price it according to what the target market is prepared to pay. Find the mass market equivalents of the Meobius range and you will be a happy horologist. Better still, let us in on the secret and we will all be happy :-) I quote Meobius as examples simply as they are the easiest for me to get hold of here. If I could find a supplier of alternatives I would happily experiment with cheaper options which I'm sure are just as good at the job.1 point
-
You will be amazed by the 12000 grit. It literally creates a mirror finish! But obviously you need to work down to it through the grades - what also surprises me is how quick you can achieve the result.1 point