Leaderboard


Popular Content
Showing content with the highest reputation on 10/07/24 in Posts
-
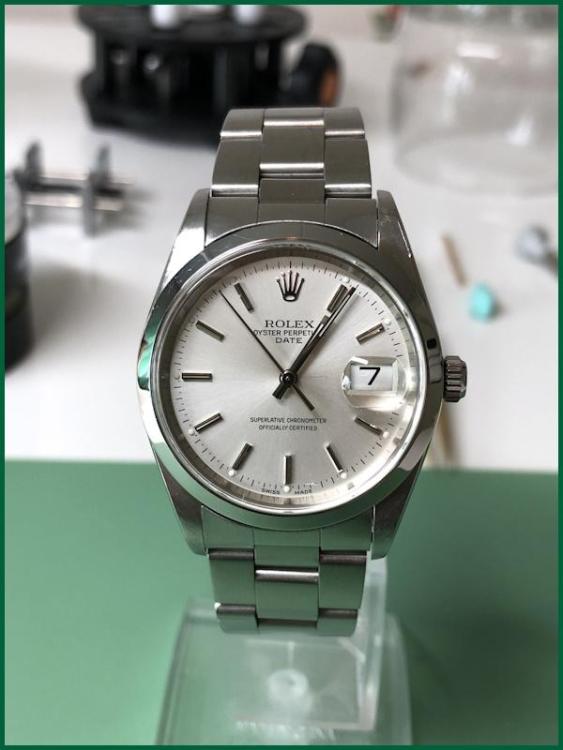
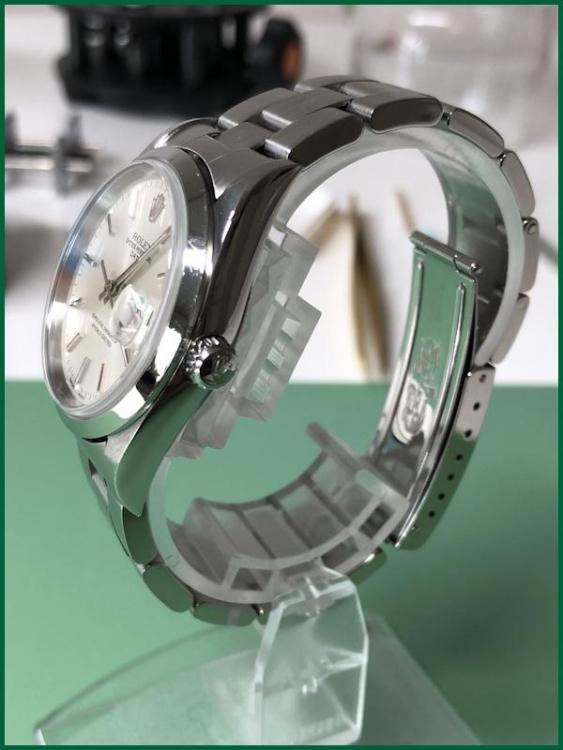
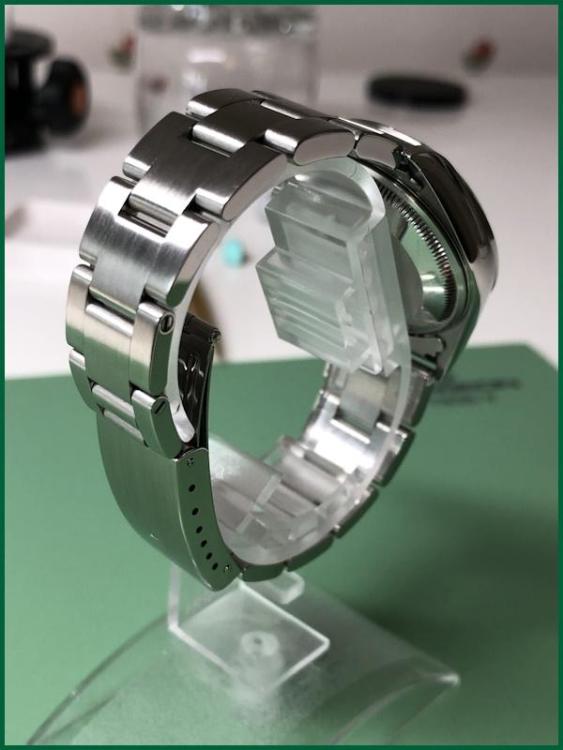
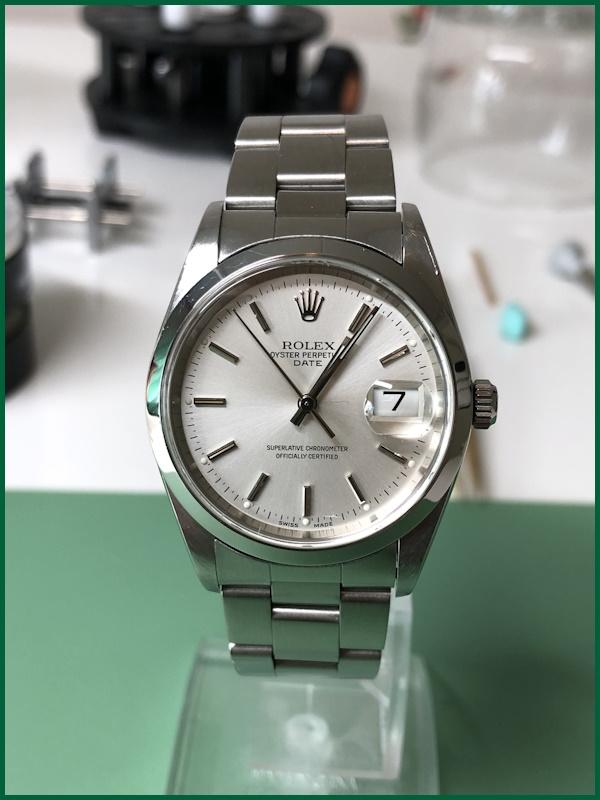
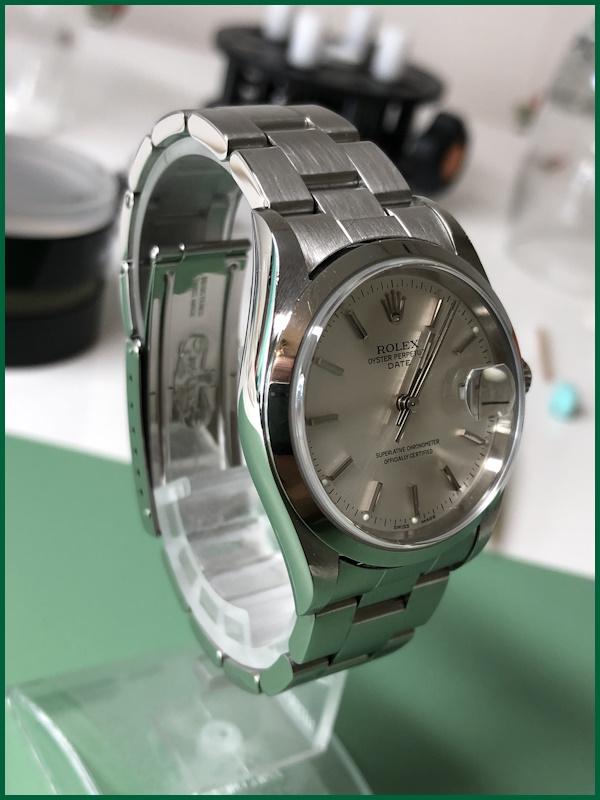
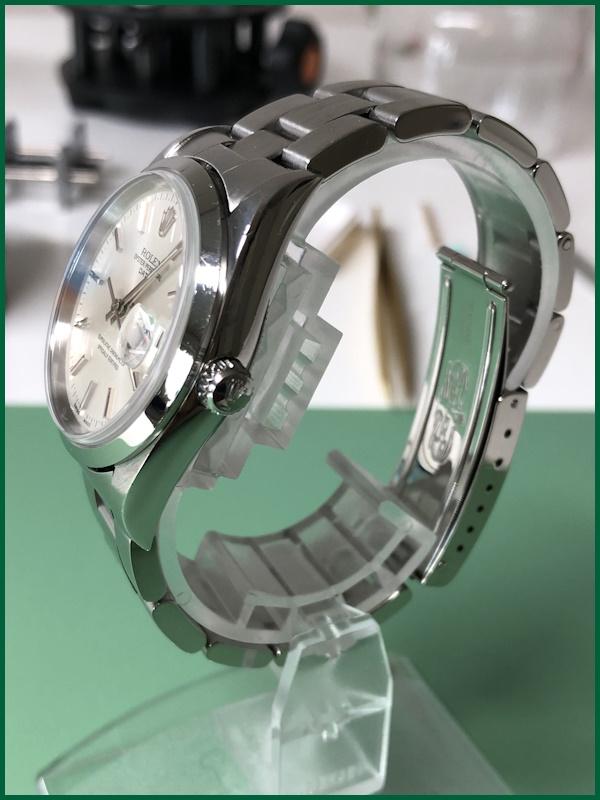
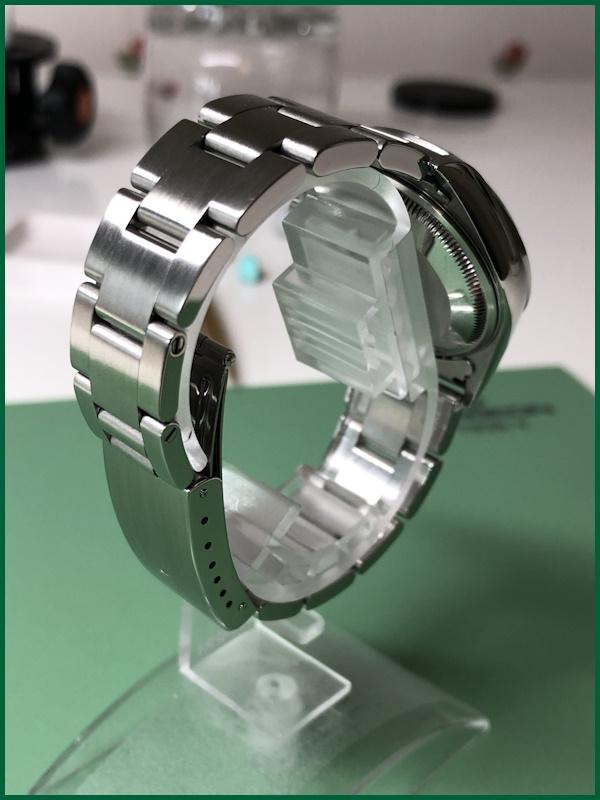
So finally, mission accomplished! Preliminarily everything looks very good and I am particularly pleased with the repair of the rotor. It was undeniably a bit nerve-wracking to rivet the axle to the rotor but it now seems to work as well as when the watch was new. Who would have thought that you could repair a Rolex by hitting it really hard with a hammer? Although the owner did not ask me to do so, I polished the case and the bracelet. I was cautious with the case so as not to jeopardise its shape. All I did was polish with Polinoxx polishing compound on a Felpato mop to bring back the lustre. The bracelet I fully polished and brushed as it was very scratched and dull and lost most of its lustre. I got the impression that Rolex stainless steel is extremely hard compared to other watches I polished. It now remains to test the watch properly for a few days. It is currently spinning on my cyclomat. Preliminarily, the precision seems to be according to specification. I have adjusted the beat error but lack the Rolex special tool to adjust the rate. We will see if it is needed. In many ways, servicing and repairing my first Rolex has been educational and a lot of fun, if a little nerve-wracking at times, and all the help I've received in this thread has been invaluable. So once again a big warm thank you!

 5 points
 -
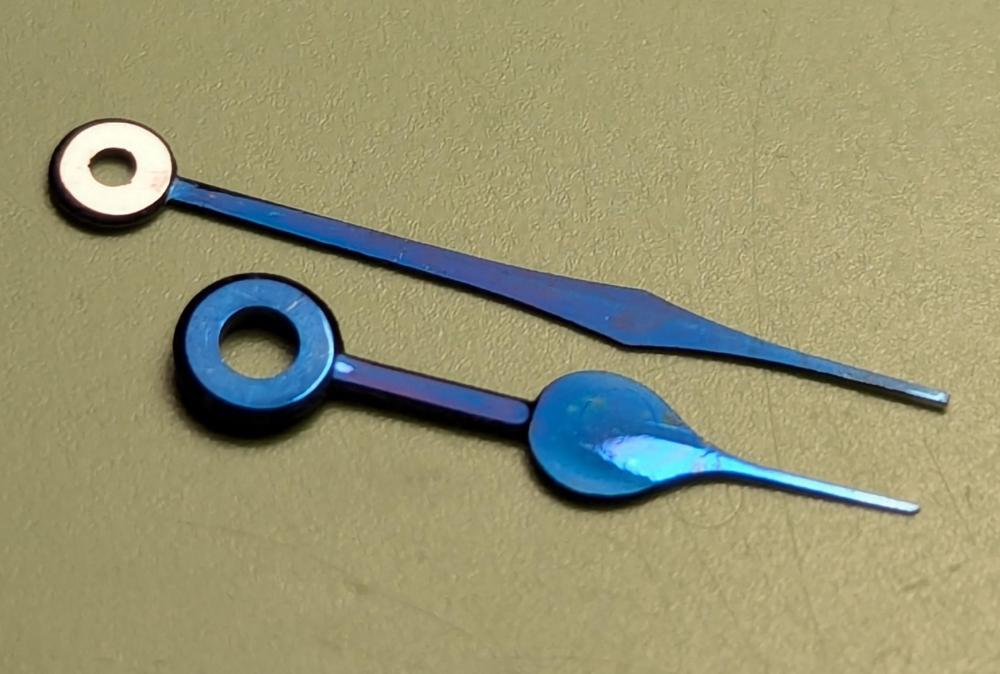
A pair of Hamilton 16 size pocket watch hands restored for a long term project watch, not my first bluing, but my first really meticulous polishing job. Through 12 grits of diamond paste, repeated cleaning, bluing, then attempting a black polish on the minute hand boss. I can't say I achieved a true black polish because it isn't a perfectly flat surface. But I got it very close. I tried to use a technique as demonstrated by Roger Smith but didn't get a good polish when running it face down against either a smooth steel block or glass. The steel was probably a little too hard and abrasive and the glass didn't keep the paste in place well. Maybe lapping film on glass would have worked better and I will get some soon. But ultimately I just taped the hand to a steel block so the blued area was masked and worked the finest 6 grits of diamond paste over the boss with pegwood. The polish is very nice and consistent now but it could be flatter. And a special shout to Macro Restorations (Leo Vidal) on YouTube from whom I lifted a lot of the hand polish technique. The small seconds needs to be blued once more as I am not happy with it, but otherwise I am very pleased with the results of about 4 hours work.
 5 points
 -
This popped up in my FB feed this morning. An auction of stuff from a clock centre in South Australia. Knowing how hard it it to find stuff in Oz I thought I should put it up here. https://bid.adeyauctions.com/?fbclid=IwZXh0bgNhZW0CMTEAAR3tABfnRCdRvM5eTgDi2_qGkaLhHZn952RTOU7mJhsfg7dbzQ7k3KS5-tw_aem_mVgnAG0UY-nTfX4bE3DN6w no affiliation or any connection to this Tom2 points
-
No idea, I wasn‘t there for decades. What drove me out was a terribly thin „coffee“.2 points
-
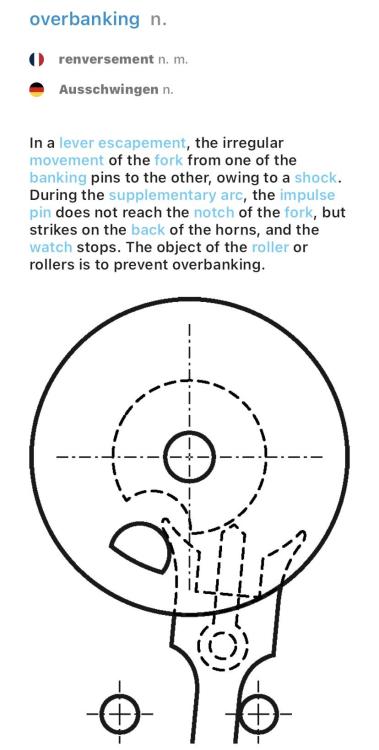
Seems even native English speaking guys are confused by the …banking issue . Berner‘s lexicon says: Rebanking he calls „knocking“ which avoids all confusion and was already proposed by Klassiker. I found only one big fault in Daniels‘ book and that is the claim of 1/3 barrel diameter for the correct mainspring. This is wrong. The arbor uses 1/3, the remaining 2/3 make a free area in which a correct mainspring takes 1/2 (area). Of course then the relaxed mainspring will use less then 1/3 diameter, the wound mainspring more than 1/3. Frank
 2 points
 -
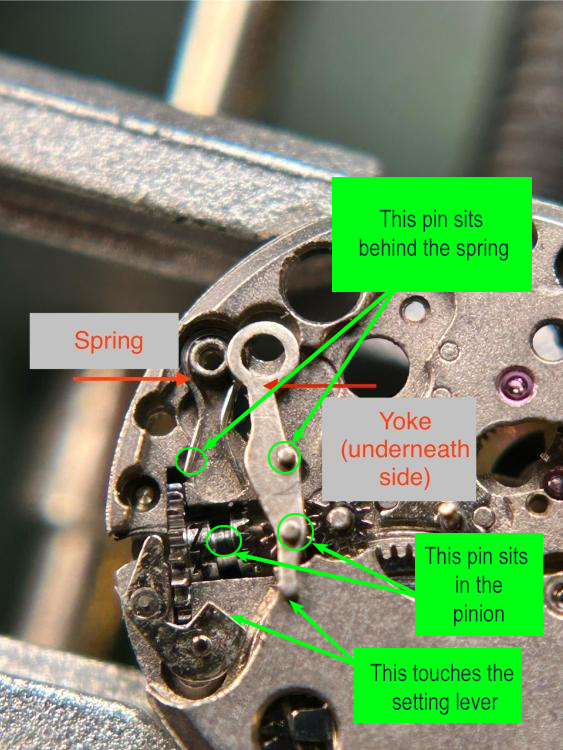
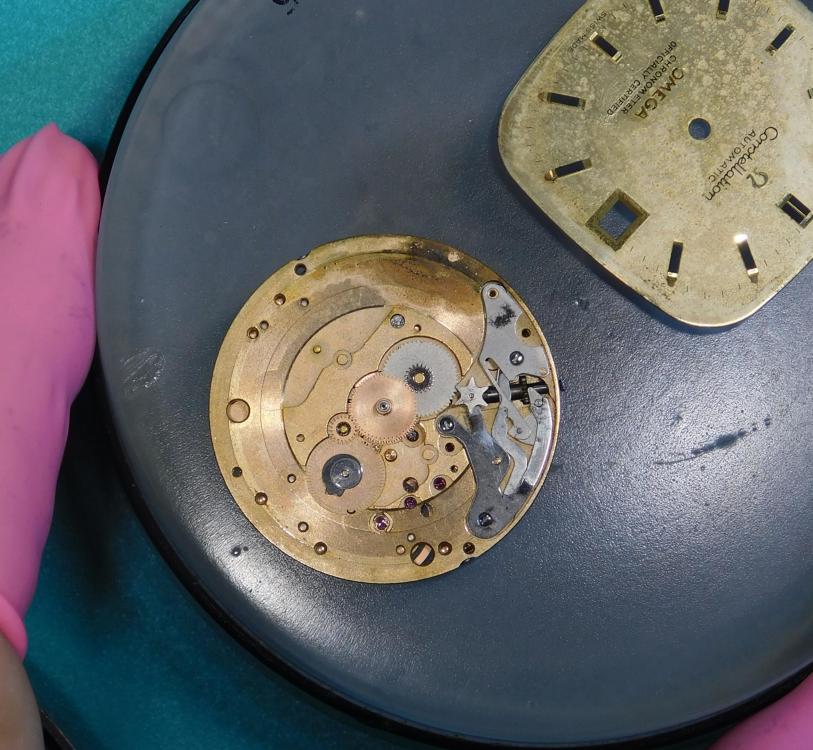
This is a tiny little movement (the grandmother thing gave that away ) so to conserve space they stacked the spring and the yoke under the setting lever spring. @Neverenoughwatches is correct about the first pin on the yoke, it does sit behind the spring to apply tension to the winding pinion. The second one sits in the winding pinion with the tip of the yoke being moved by the setting lever. This is all held in place by the setting lever spring. This is the whole thing assembled.
 2 points
 -
I've dealt with this before, and I have overcome it by placing the movement holder in my small bench vise. The problem with that being, that the bench surface is no longer under the movement, making a dropped part a guaranteed floor praying situation.2 points
-
I found that the clock runs fast when I plug it into the socket that has a built in surge protector. I took apart the surge protector and found that it only has 2 components inside, a gas discharge tube and a metal oxide varistor wired in series across the L and N line. Something must have failed and clamped the voltage above a certain value and affected the motor. The clock runs fine when plugged directly to the wall socket.2 points
-
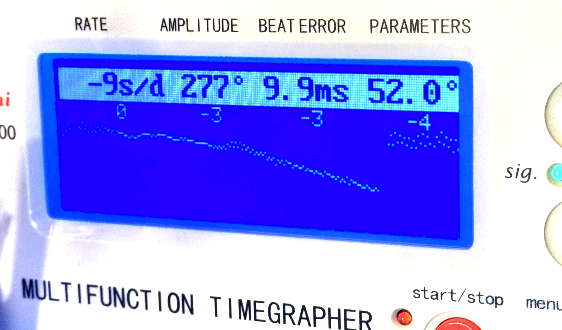
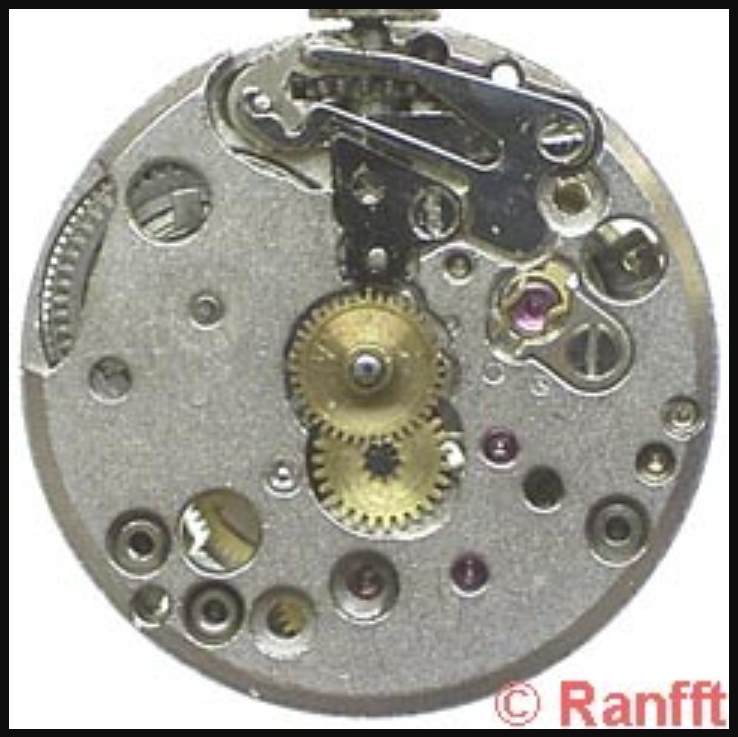
interpreting timing machine results does require that a photograph be taken in such a way that we can actually see the image without having to rotate it and do photo enhancement to see the details. does appear you later images that you grasp the concept as they are much easier to see than this one which is a rather interesting image once we can see it. then from the quote above this would be the second image which you indicate doesn't have a beat error. We need to improve your timing machine interpretation skills which is why we always ask for pictures for this situation exactly. first thing to remember is something that I believe @Neverenoughwatches calls the snow globe effect. In other words some of your pictures appear to have random dots even though we see numbers on the screen. If the timing machine is having a hard time producing a proper graphical display then the numbers will not be right either timing machine needs to get a reasonably clear signal to give you an idea of what's going on. So basically snow globe effect is the timing machine telling you you have a serious problem you need to fix that with the numbers being wrong. then this timing machine has a minor technical problem which is the graphical display is not big enough. I don't remember where the exact problem occurs but as the beat error increases somewhere past 4 ms the graphical display will roll over. This means that the topline will become the bottom line the bottom line will become the topline and as the beat error increases the lines will actually come together and conceivably will look quite nice. This is where the graphical display has to agree with the numeric display. so in this particular example the number that really jumps out is 9.9 followed by the amplitude. Because 9.9 is the maximum number the timing machine can show. So basically you have an extremely bad number and a graphical display that does not look good at all either. So this is definitely not a watch in beat. Then I think others have hinted this I would be very suspicious if your amplitude was really 277° with a graphical display looking like this. So visually when you're looking at the watch how did the amplitude look? Yes I know you got a timing machine so you wouldn't have to look at the balance wheel but you ideally still have to look at the balance wheel and see the visually looks like it's running spectacular which it would be 277° versus probably not. https://ranfft.org/caliber/2063-Cortebert-677
 2 points
 -
I looked at a drawing I made for an old Patek fork, and measured 325 or so rebanking. Newer stuff might hit a bit higher due to less ornate fork horns, but not a lot. Once you're over 300 for me that's a bit risky. Especially with an automatic watch.1 point
-
What spring did you fit? Do you know the GR number or the dimensions of the spring? Did you use breaking grease on the barrel wall? Was just the mainspring replaced or a full service done on the movement? I have found that if the amplitude is low, the timegrapher can double it up, or if it doesn't hear the first impulse and makes stuff up. If it does have a low amplitude, you should be able to see it pretty clearly, or put a mark with pen on the balance and you'll know if it really is that high an amplitude, which it isn't. No watch movement would show 348 degrees and not be knocking (rebanking). In fact, no watch movement could spin 348 degrees, as it is impossible. I've just serviced a Rolex 1200 from 1950's and used a mainspring a strength too much, which was 0.11 mm thickness instead of 0.1 mm and it started to knock at 332 degrees. With the correct spring the movement now achieves 285 degrees. I find that if the amplitude goes beyond 330, it will knock.1 point
-
@Neverenoughwatches You're welcome.1 point
-
No comment …1 point
-
I would suspect geography less than just repeating whatever term mentors used. I did see something somewhere blaming "Americans" (e.g. me) for mixing up the two. There are plenty of things you can blame us for besides that.1 point
-
Not surprising to me1 point
-
That is true. You have to read the text and the picture should be a video1 point
-
Yes, it is a detecting issue. Cause: the machine misses the 1st (too) small impulse of the tic noise. It uses the next pulse in the noise as start. Because amplitude is calculated from the time interval 1st to last pulse of the noise, this is too short and so amplitude too high (as explained several times before ) Frank1 point
-
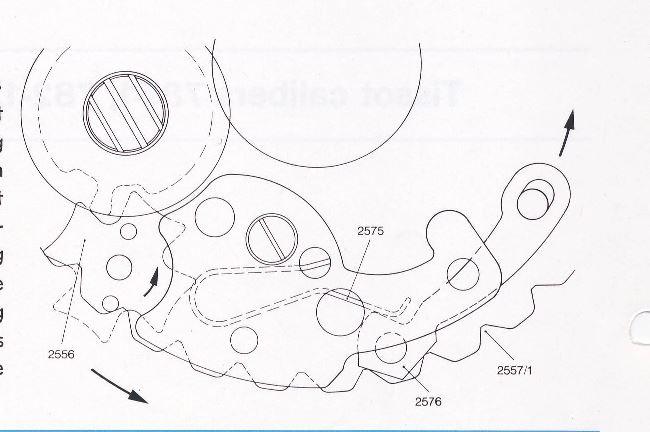
I see the diagram visually represents both a rebanking and overbanking situation with the directional pull of the hairspring unidentified .1 point
-
Looks great!1 point
-
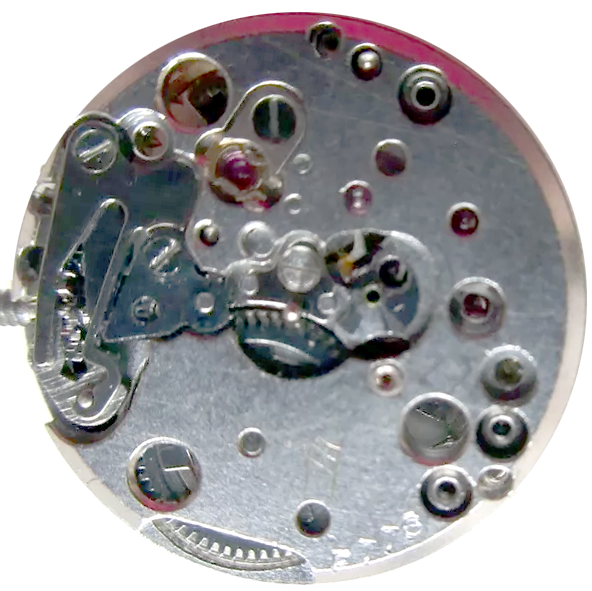
Based on the photo from Ranfft below I don't think it's an Ebel 59.
 1 point
 -
I know my eyesight isn't what it should be, to me the hairspring doesn't look correct, looking at the top of the balance cock it doesn't look right behind the hairspring stud. The center wheel isn't jeweled, have you checked for wear pivots must be smooth.1 point
-
Those movements should run like chronometer beasts; the wavy funky line isn't very chronometer-y. In some cases the machine will pick up a bad/dirty signal and double the amplitude. This is how you can end up with 350+ and it not be rebanking. I would be curious to see how it does if you clean the fork, balance, and balance jewels, oil it carefully, and recheck. 348 degrees shouldn't be possible, there just isn't room for the impulse jewel to swing that far without bumping the fork horns.1 point
-
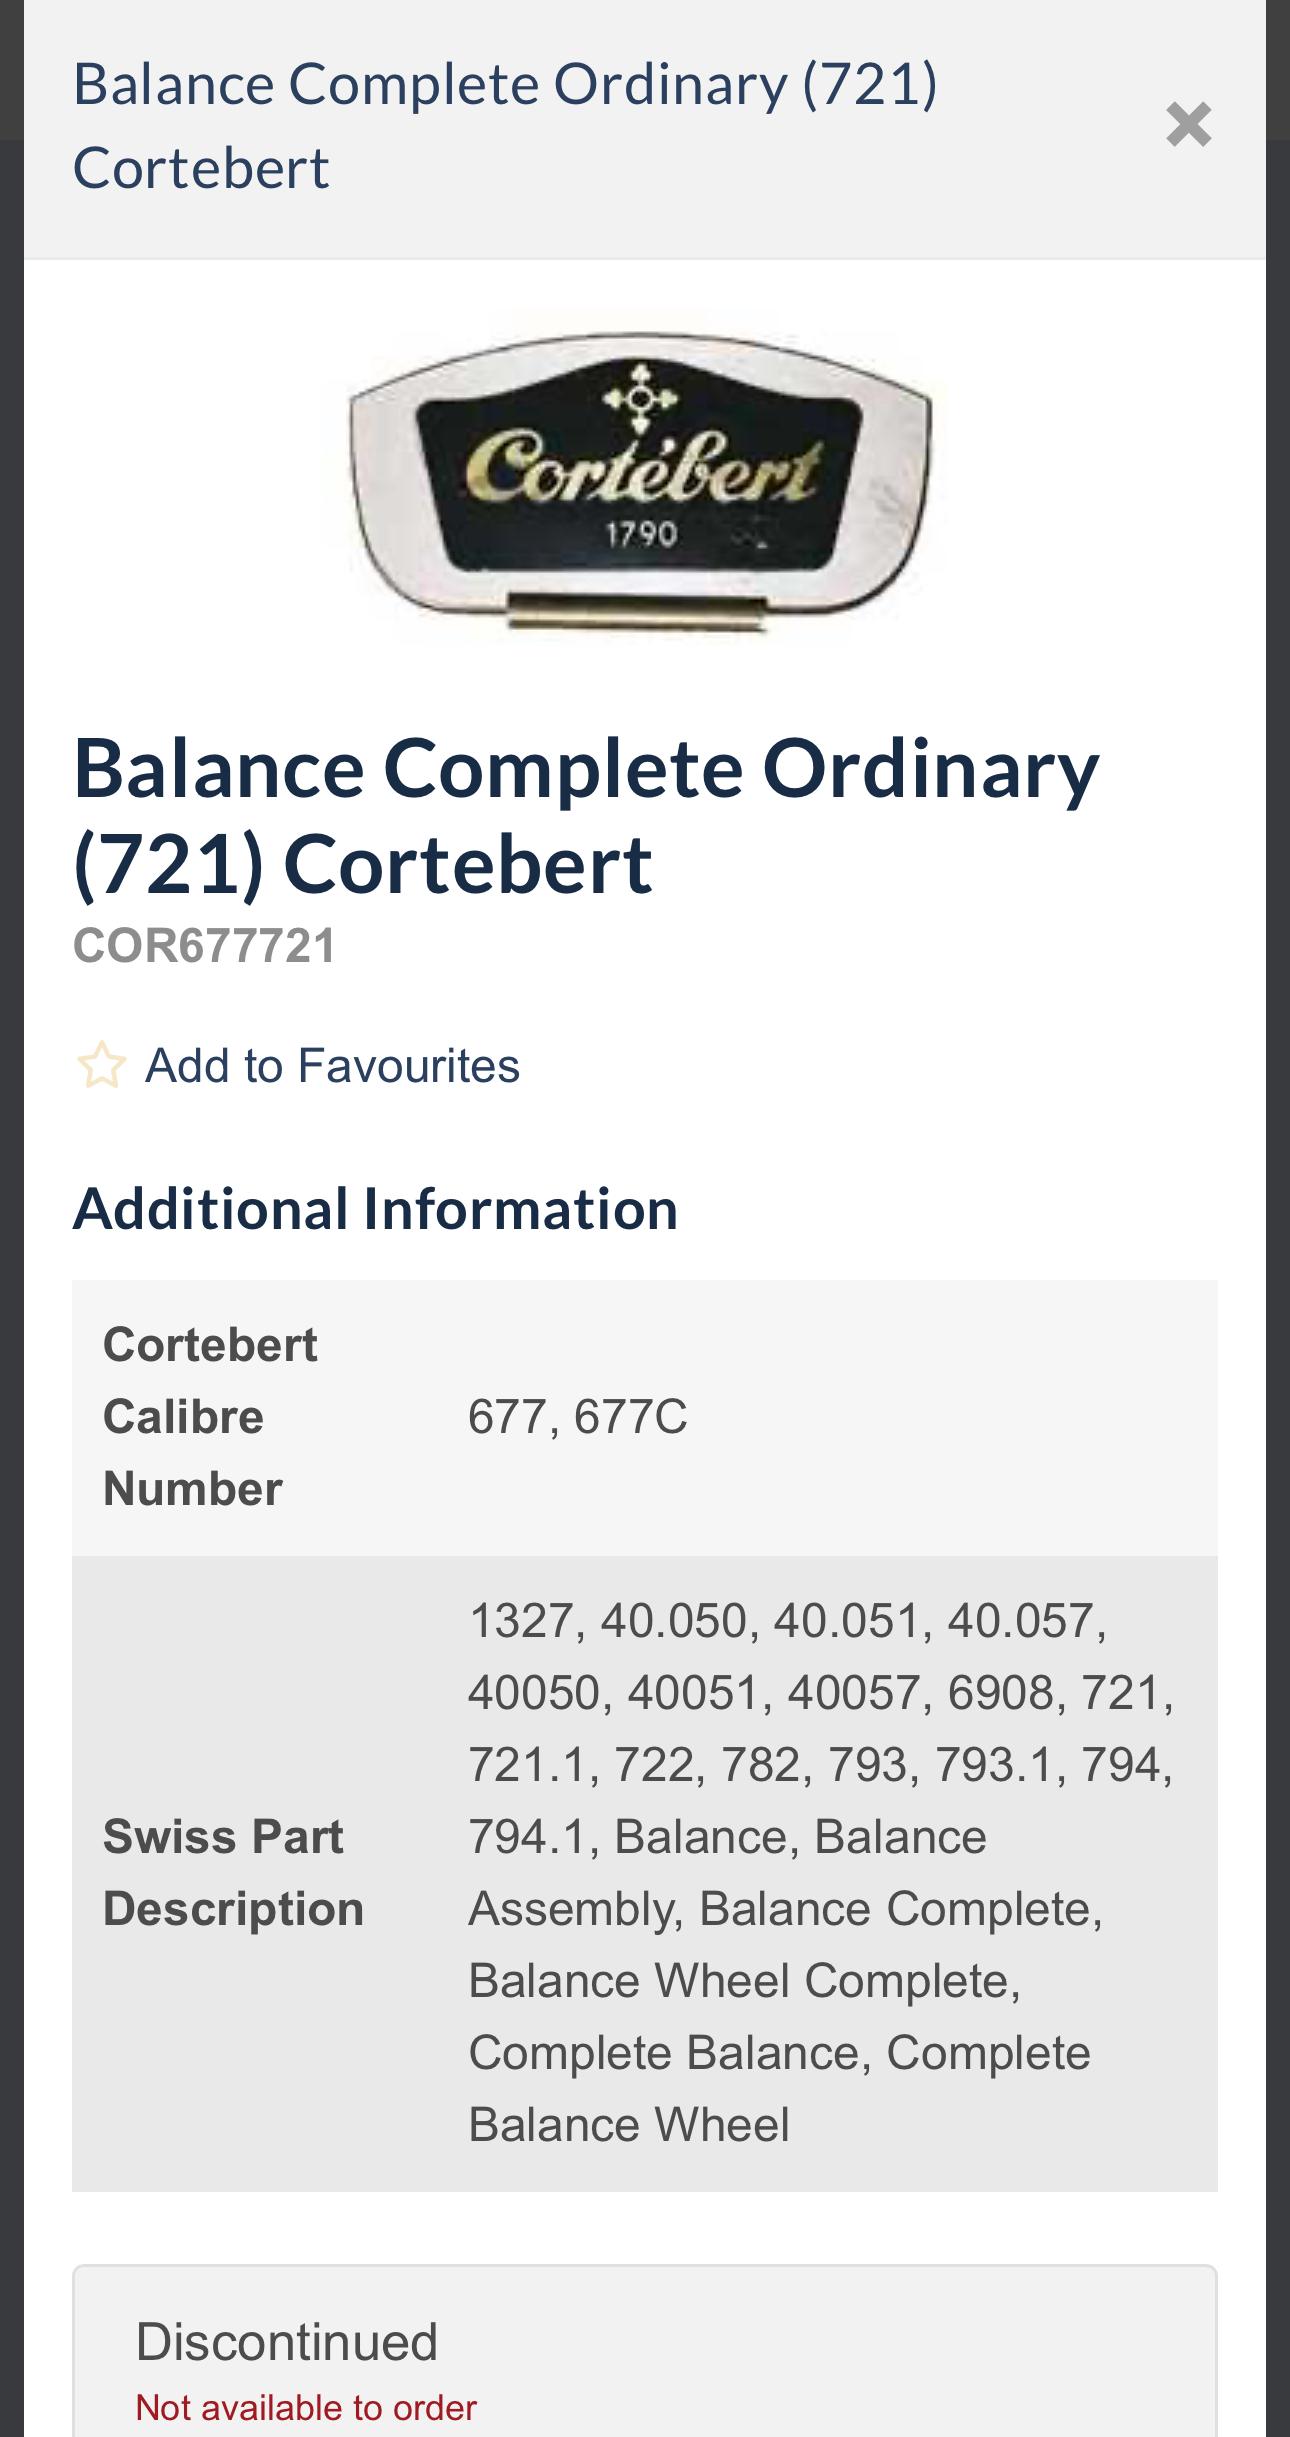
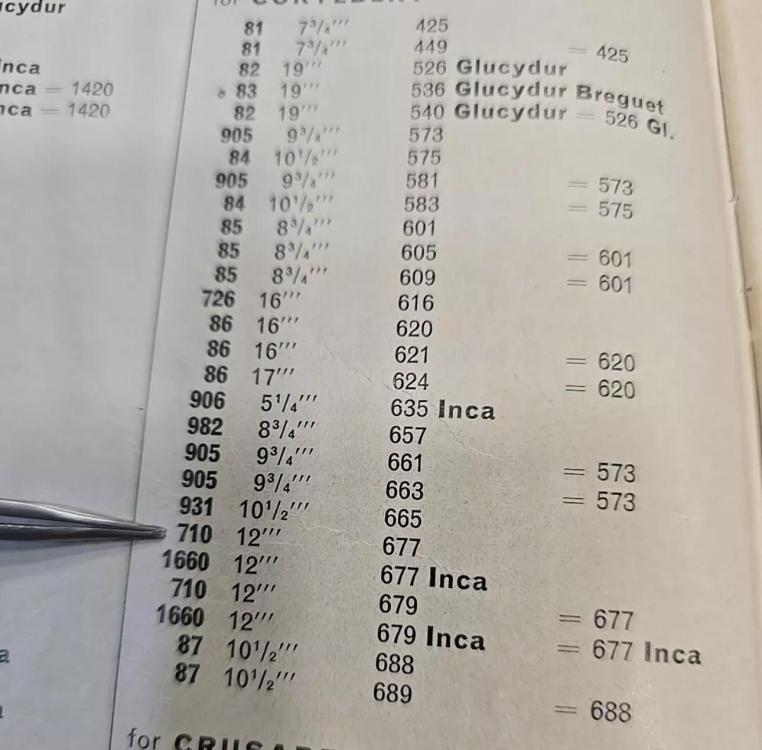
That's a Renata Generic one but the number is correct so should be OK as a None INCA Balance.1 point
-
Yes, really depends on your phone. Mine does lovely videos. I take them even if I know the lift angle. I can't argue with the fun of watching glow-in-the-dark dots, though1 point
-
I will check into calculating the lift angle, when I get the new balance. The beat error adjustment, is done by turning the collet, unfortunately it doesn’t have the other type. I checked and compared the original and the new balance staff to each other, and the visual looks the same. But to be sure, before I order a new one. I found it this way. Cousin didn’t have one in stock, so I found one on eBay. But the cousin number doesn’t match up with the one from eBay (the one I’ve got) but the seller shows me this, therefore I bought it. And they looks to be the same. I’m pretty confident that it’s the right one I’ve got, but just wanna be sure, so I maybe/maybe not order another wrong part.

 1 point
 -
@apandersP Working so much on pin pallet movements it's become almost routine for me to visually verify amplitude. My proceedure if I'm really wanting to know the lift angle - first make sure the pallet fork is centered ( midway) to the banking pins and the impulse pin is also positioned in the center of the fork ( not touching either horn ) the balance is now "on beat". Adjustment of the beat arm or collet adjustment may be needed to do this ( hopefully if you are new the balance cock has the facility to adjust the beat via a beat adjustment arm. Next grab yourself an ink pen refill ( grow in the dark ink is great for this ) clip the tube off close to the ink surface so you can dip a small oiler in to draw up some ink. In many cases the balance wheel will have two arms which makes the next step easy, now you have the balance on beat...mark with your inked oiler.. the rim edge of the wheel directly below the center of one of the balance arms. We now need another ink dot placed at the opposite arm, not on the wheel rim but on the surface below it....be that the plate or a bridge. We now have our two ink references... so last up is to slowly wind up the watch until it starts to run and gradually increase the amplitude one click wind at a time...while keeping a close eye on the two ink dots. We are looking for them approaching each other until they reach side by side.....at this point stop adding power as the movement is now running at 180° amplitude. Place the movement on the timegrapher and adjust the lift angle until the amplitude matches our 180° visually verified amplitude. Job done lift angle aquired. As above....................... this was something i used to do in my teens with a fit filly . Let me swap out grow for GLOW1 point
-
I think in this instance you'll have to work it out.1 point
-
List of calibs lift angle, https://watchmakingtools.com/watchmaking-resources/watch-movement-lift-angles/1 point
-
You have gremlins in your home.1 point
-
@Bonefixer, I'm working on an AS574 at the moment. Let me know if anything.1 point
-
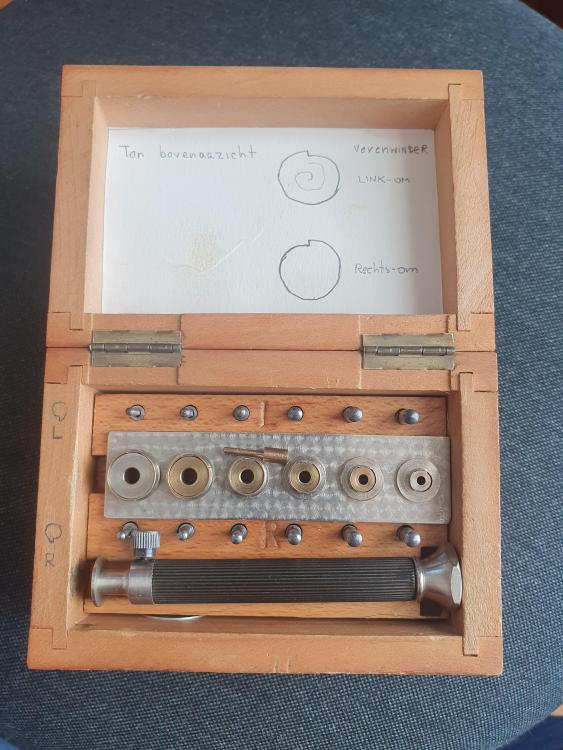
I have one of the cheap chinese sets, and have had the arbour-too-small <> barrel-too-large problem a few times. I just drill the barrel out to take the required arbour. They still work fine with the original smaller arbours, a bit of a sloppy fit makes no difference. I also hand wind non-automatic springs if making a winder fit is impractical or just too much hassle.1 point
-
I found that these work on pretty much anything apart from pocketwatches which are to big. It is easy to make a custom arbor if you need one, for a very small ladies watch for instance. They come up for sale regurarly and are usually way cheaper then the Bergeon winders. A plus is that, after winding the spring in, you can remove the handle, leaving the "winding-in arbor" in place. That makes it much easier to get that out. No poking with tweezers like with the Bergeon type of winders.
 1 point
 -
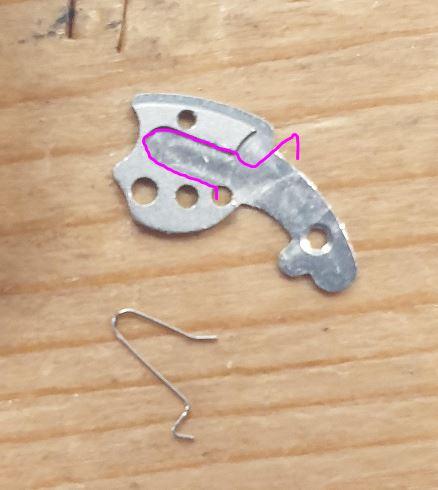
The lever you could make that will give you one half of the repair needed. Make the hole smaller and re-thread the screw Super little pin pallet movement, i was wearing one yesterday, there is a fairly large calibre family for this. You could pick up a donor for pretty cheap , not forced to not have the same issue but honestly just have an attempt at making the lever. Or buy the pieces whatever, in Yorkshire we make what we dont want to pay for . If you want to work on pin pallet movements then choose Oris, in my opinion they made the best for the money....because they had no choice but to. Keep this thread open if you dont mind as I'd like to see your progress with it and also ask something of you that I'd like varifying.1 point
-
You might be able to make some money off of that.1 point
-
Could be the reason, i brought this up earlier today, the rate can step....but a regular wavy trace can also indicate an out of axis wheel rotation. But the amplitude is about at its limit before rebanking occurs. Excessive amplitude is certainly due to a overstrong mainspring pushing too much torque through the train. Pull the mainspring and verify it's dimensions against recommended1 point
-
If lift angle is correct then amplitude is way too high.1 point
-
How difficult was it to put together? Have you published any of the construction details like 3d printing files? Thanks.1 point
-
Guys, if we talk about the situation when the watch has stopped with the impulse jewel outside the fork notch in zero position and it is needed to take the balance out and put it back correctly for making the watch work again, then it has nothing to do with the mainspring. The strong mainspring may be provoking the fault more frequently, but if it is able to happen, then it will happen again and again, until the real reason is rectified. And, the real reason is that the guard mechanism of the balance, which consists of the guard roller and the guard pin, for some reason and in some situation, doesn't work.1 point
-
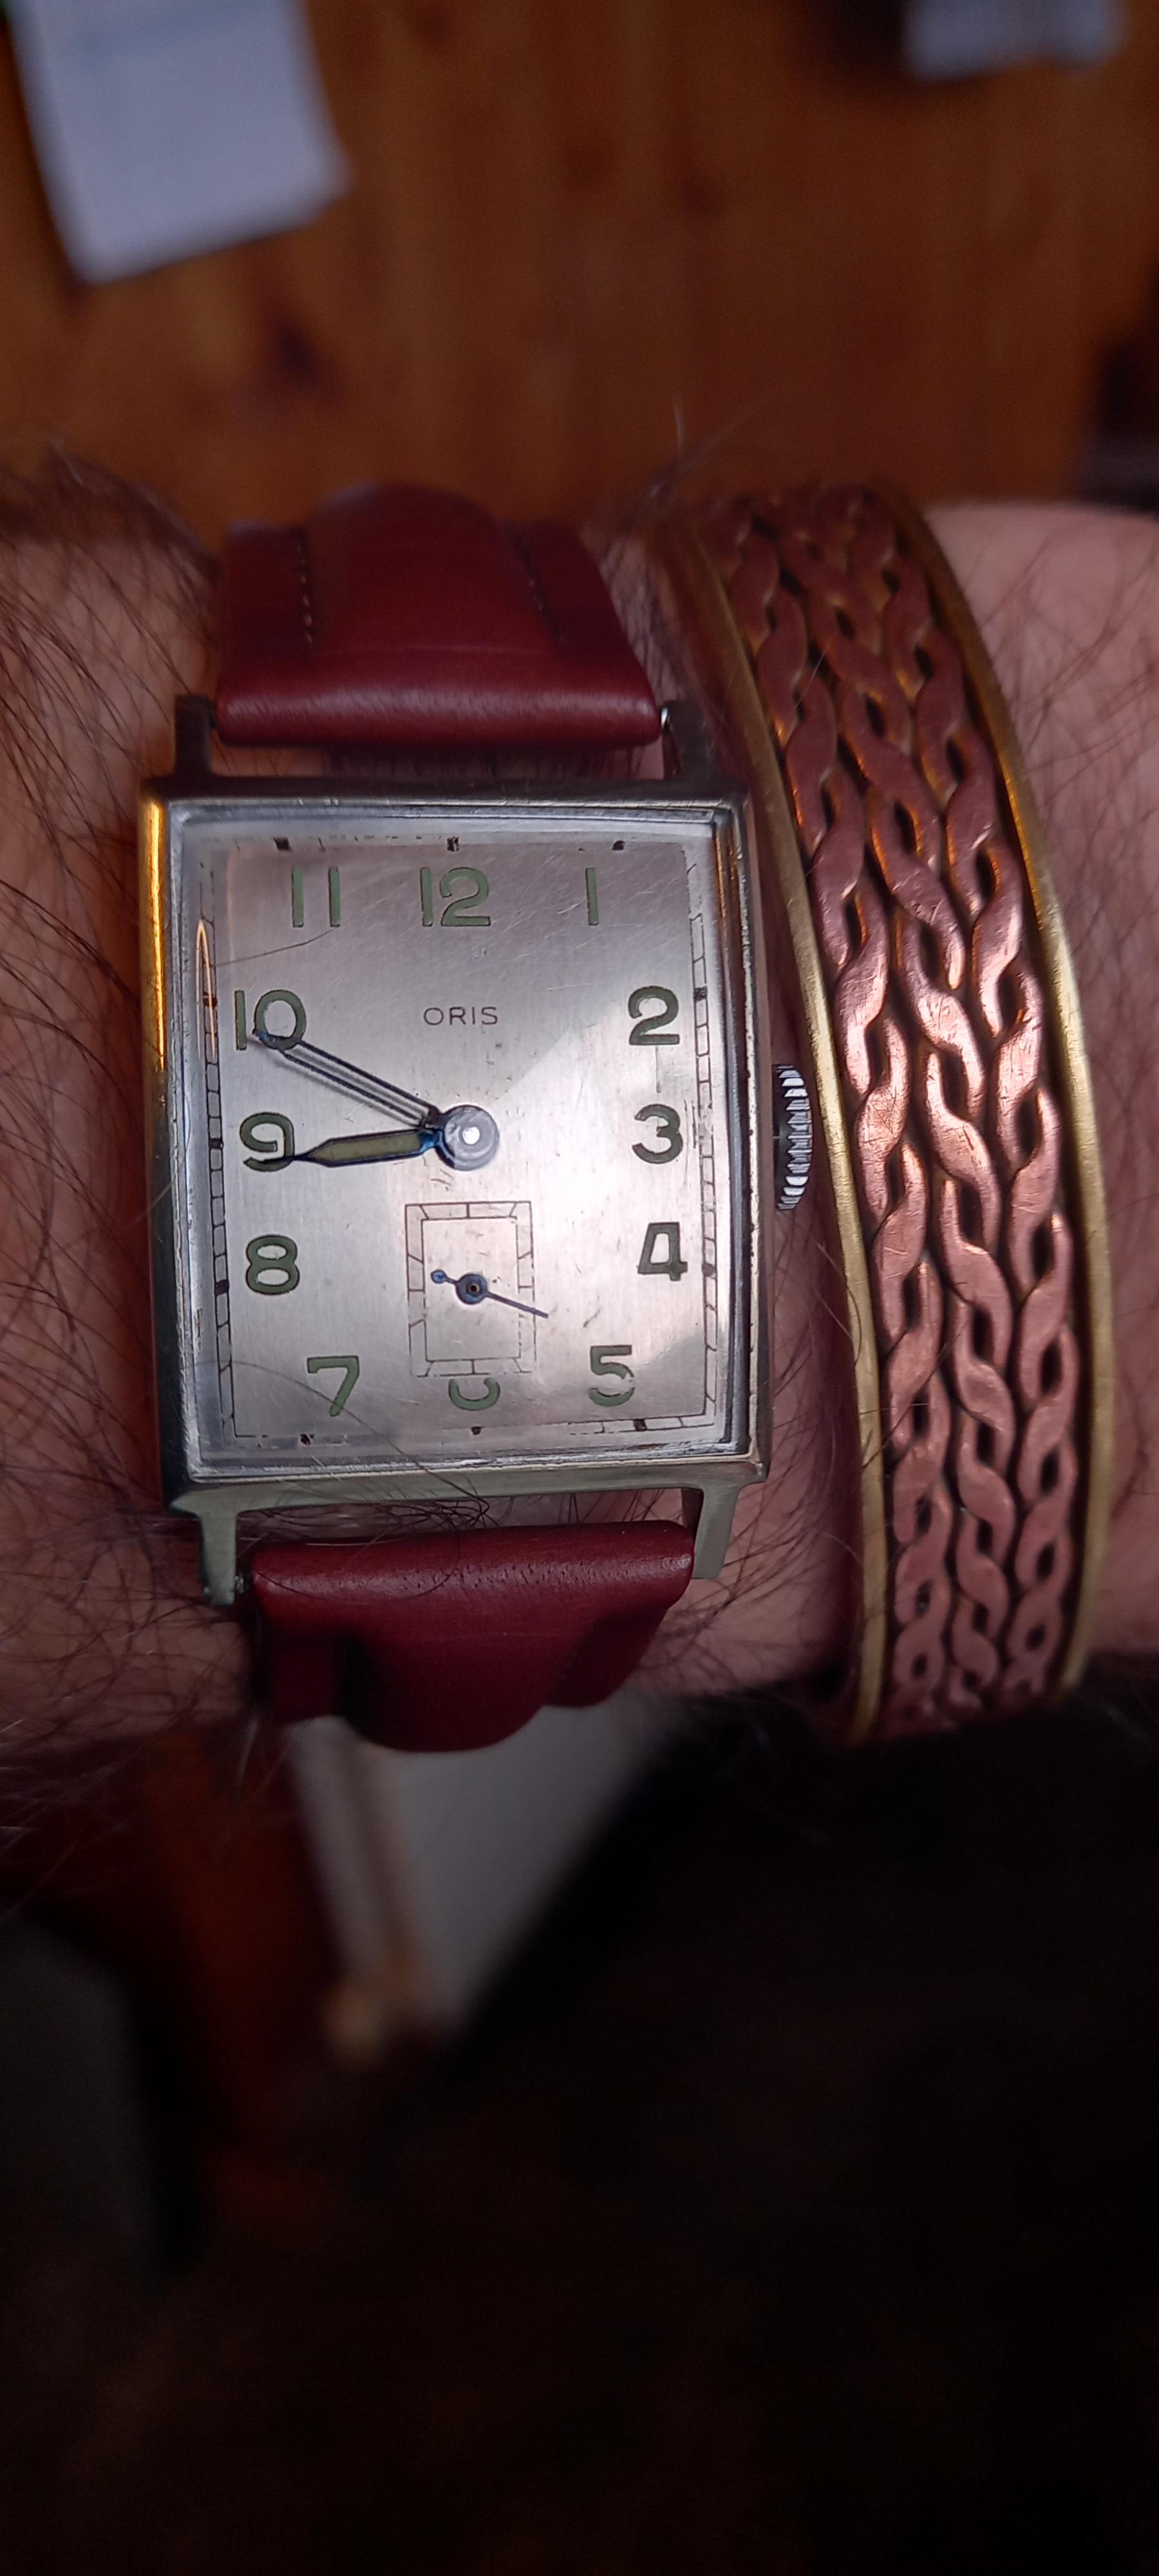
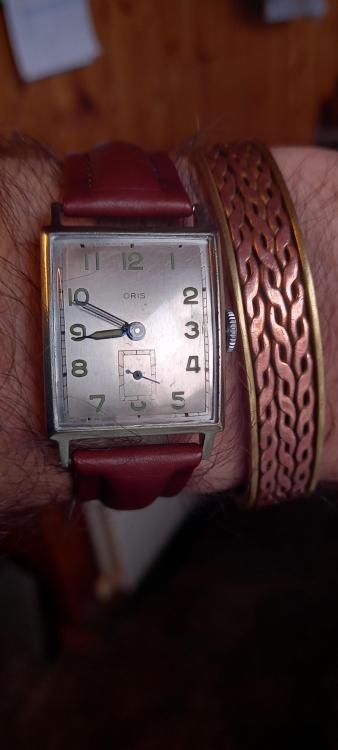
Finally got this little Oris tank back on my wrist ( after fiddling with the Westclox) with a half decent strap. I went with Frank's ( praezis ) idea of drilling a hole in the top of the cannon pinion so i could then tap the broken cw arbor out from the top end, thanks for the suggestion Frank it seemed like the safest option. And Nev's idea of gluing an iron tapered pin to fill the hole, in fact it was a stainless steel panel pin that i shaved down with a mini sanding disk on a low powered rotary type tool. Filed down and polished up, the join is visible but only under good light and magnification . Running solid up to now , 28 hours and it doesn't appear to have lost any time. This watch goes back around 2 years to my initial attempts at restoring it,this cannon pinion with jammed cw arbor inside it, broken hairsprings a balance staff , a dodgy overpowered mainspring, a new crystal that i put off buying then aquired a big stock of fancy crystals that was just over the cost of the one i nearly bought for it. And last night closing the minute hand hole, it still needs the hands restoring , bluing and luming but I'm happy to wear it for a while as it is, luming is something i haven't even tried yet, mostly because i enjoy originality, a watch's history, it's age , its life and its deterioration unless something is needed to protect and prolong it. Just as we should embrace growing old gracefully , the aching back, the dodgy knees, hair loss, hair growth in the wrong places , stiff hands, failing vision, I'll stop now before we all get depressed about the inevitable . Time can be short ,so make the most of what we have, grab any opportunities that come our way to make life more enjoyable. Signing out people, have a great day and make the most of it. Rich X
 1 point
 -
If it's not the Canon pinion it could be something with the minute wheel pinion for why the minute hand is not moving but the hour hand does. Here is a dial side shot without the calendar works on my dirty 1001 (later cleaned up) if that helps.
 1 point
 -
initially I made a nifty drawing for you but something was bothering me so I found the tech guide. So the spring does go where I say it does and then you need the jumper in the right place. One of the things that helps when putting these together is to put the jumper under the disc. This way can get thing in place and then push the jumper back against the spring and then slowly pushed the plate in place. Because trying to put it together and then put the plate on top seldom works and parts fly all over the room.
 1 point


.thumb.jpg.cb17a66989f1e796fd4217db2e9ca9df.jpg)