Leaderboard


Popular Content
Showing content with the highest reputation on 08/07/22 in Posts
-
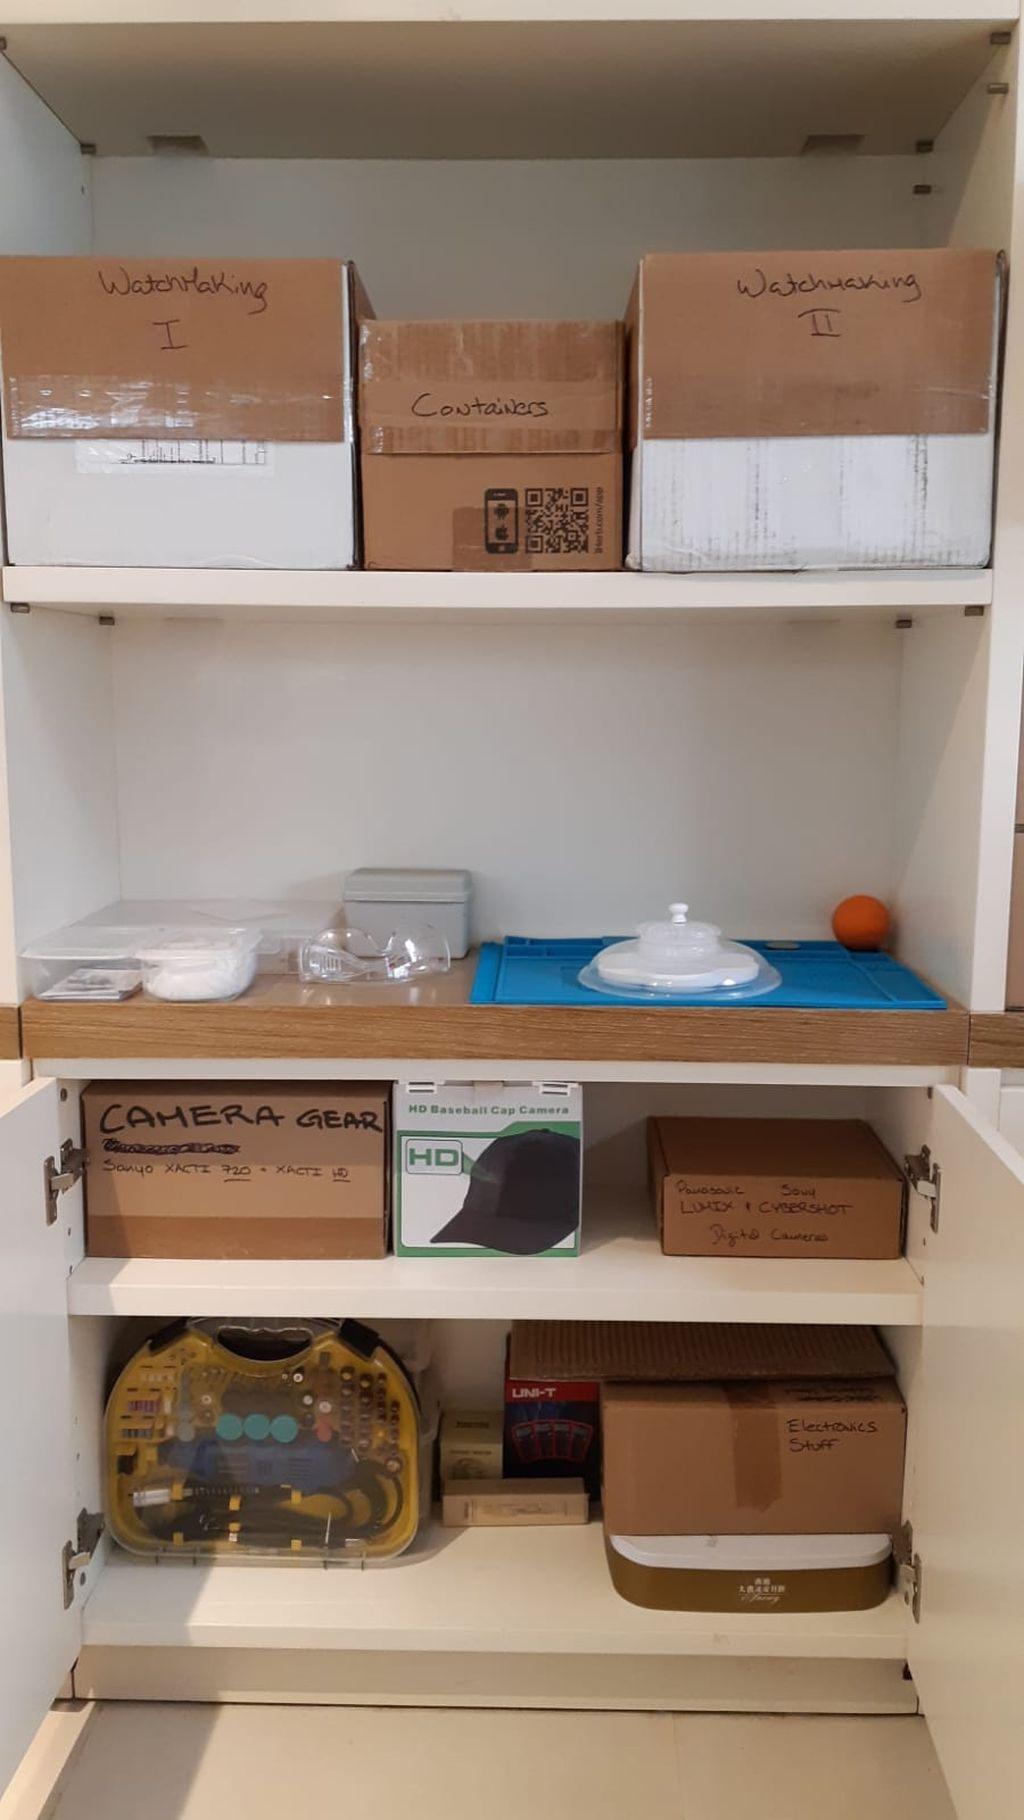
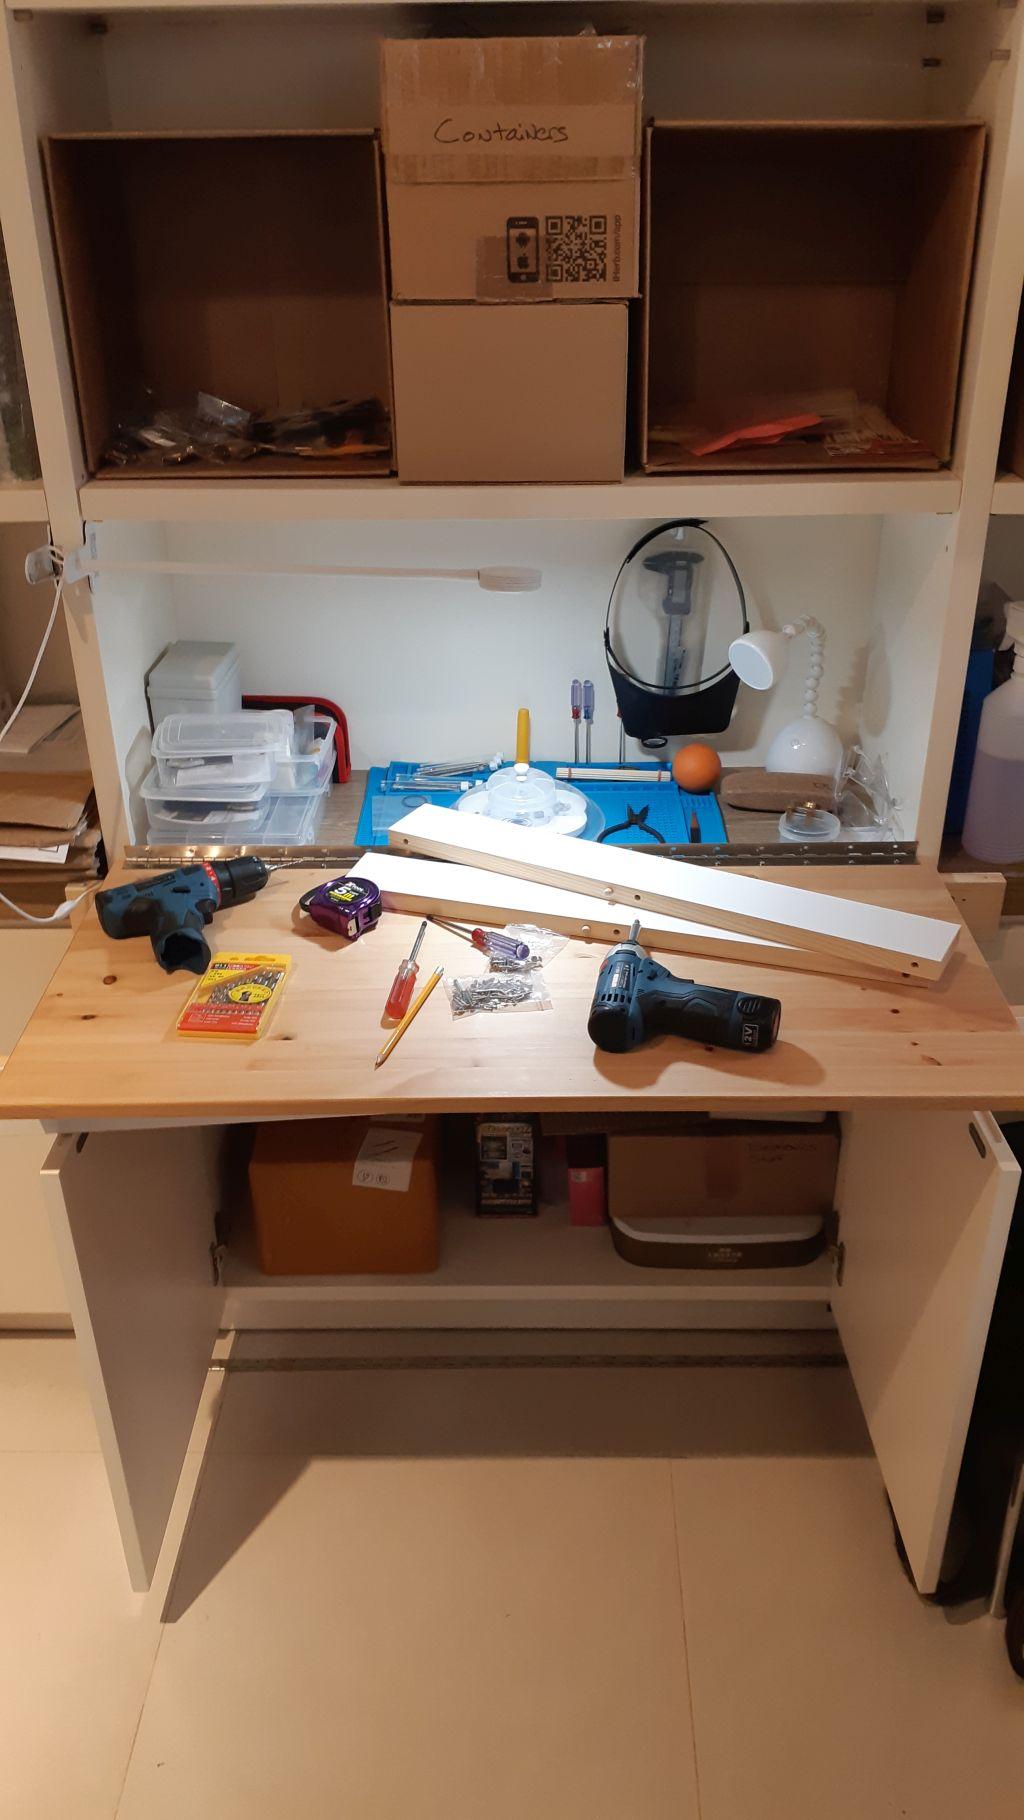
Now starting my 9 month. Where am I up to? Beginning to understand a little about watch construction. Using Youtube videos as instruction, I am able to disassemble most of the watches I have purchased for the hobby. My problem was rushing into reassemble and not realising that at each stage of the build, that it needed to be tested. Full rebuild, then it does not work. Start again. My other problem was not realising how important it is to have the tools to do the job. Where am I now? Having a rest on a Sunday. It is an engrossing hobby. So enjoyable. 3 to 4 hours a day fly by. Limiting myself to specific watch projects. Seiko 6309, 6319, 7009 and 7S26. I have one of each for repair and two movements of each to build from. I am capable of the rebuilds, but still have the problem that they stop after a short time. Balance wheel care is my problem. I have a 'Watches of Switzerland Seafarer' that I purchased for my initial project. I broke 3 escape wheel pivots and damage 2 balance wheels in the first month. I left them alone for 6 month. It had an ETA 2789-1 movement. Spares are from 2789-1 and 2789 movements. Trains of wheels are the same, but he calendar works are different. One one of the 2789-1 the Centre wheel pivot hole does not have a guiding pipe. I spent hours not being able to get a mesh. Another caused a problem? When I turned the plate over to work on the train of wheel side, the jewel from the base of the balance wheel fell out. I did not realise until I had completed the build and no amount of regulation would have any effect. The jewel hole would not retain the spring. Another movement needed. What can I do well? I am able to clean a watch now. Degrease and wash. Every watch is now in designated containers, each marked and the corresponding spares in their respective containers also marked. As can be seen from above, I have a working box that contains my 'pings'. Where is it going? Don't care. I'm enjoying my life, My bride accepts the hobby. Keeps me away from Covid contact. Retired and learning. What more can I say? Regards to all Ross4 points
-
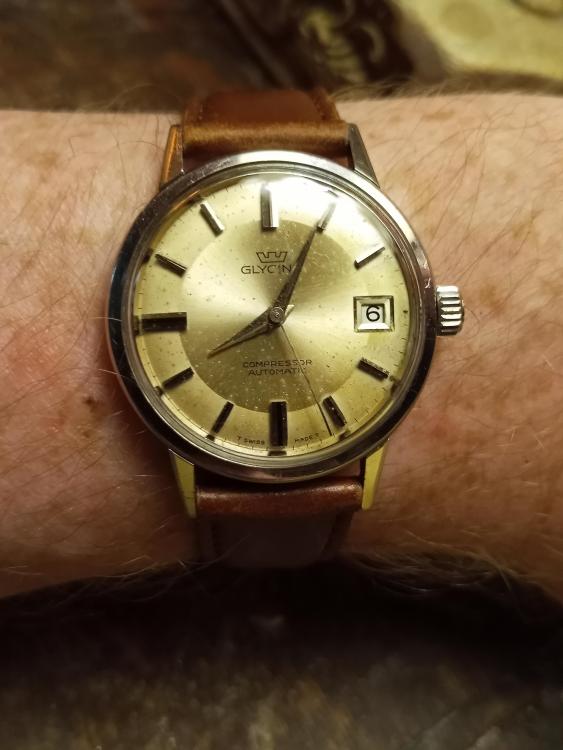
I snuck another nice one out of the $1 watch bins at the local flea market. A Glycine Compressor Automatic. It needed full cleaning and service. And a new crystal. Just opening the case was daunting and memorable. Getting the old crystal out was (not) fun. Getting the new one in had me swearing in German (due to the tension ring having its own ideas). I ensured it was well regulated before sealing it all back in tight. Man, they don't call it a "Compressor" for nothing; I'm glad it'll be five years before I have to open it again. The bracelet with which I bought it was clearly taken off a cheap old LCD quartz watch. The style of it was ever so wrong for this. But I had a nice comfy leather strap, so I put that one on it. I did not do more than a light cleaning on the dial, for fear of ruining it. But I think it turned out well.
 4 points
 -
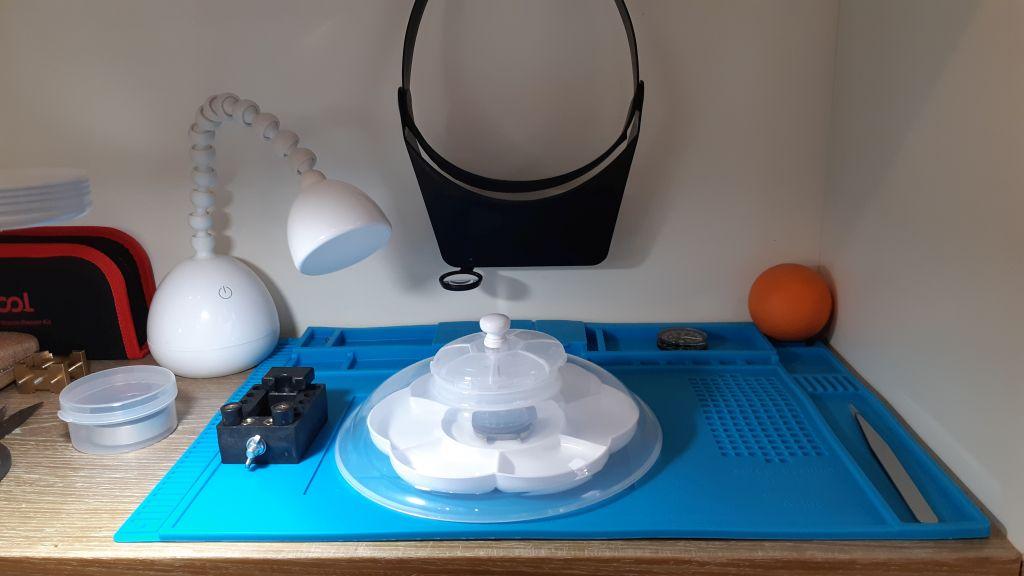
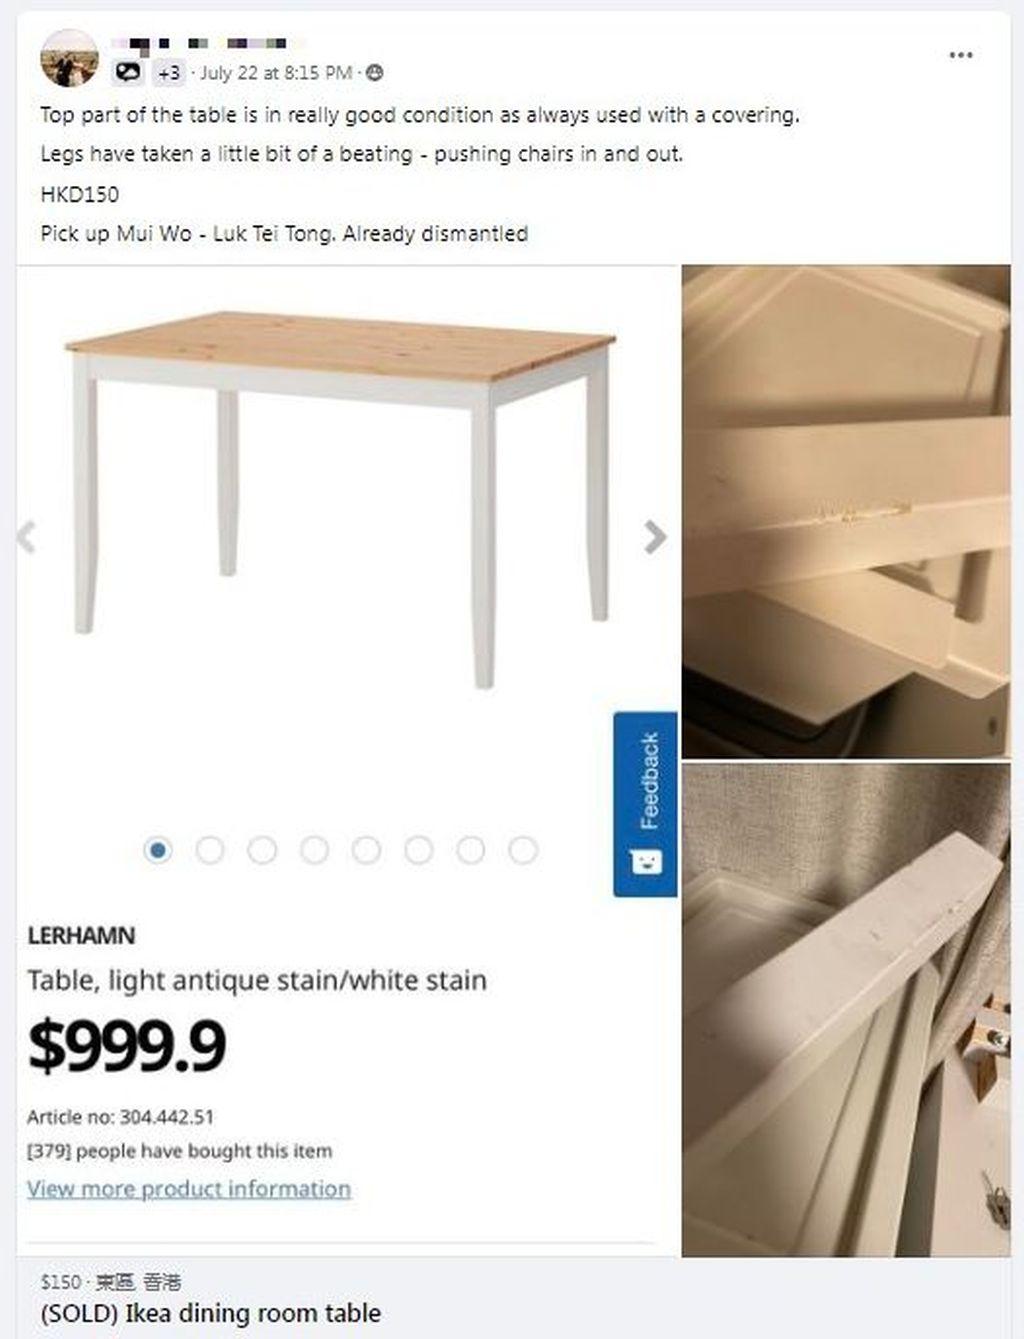
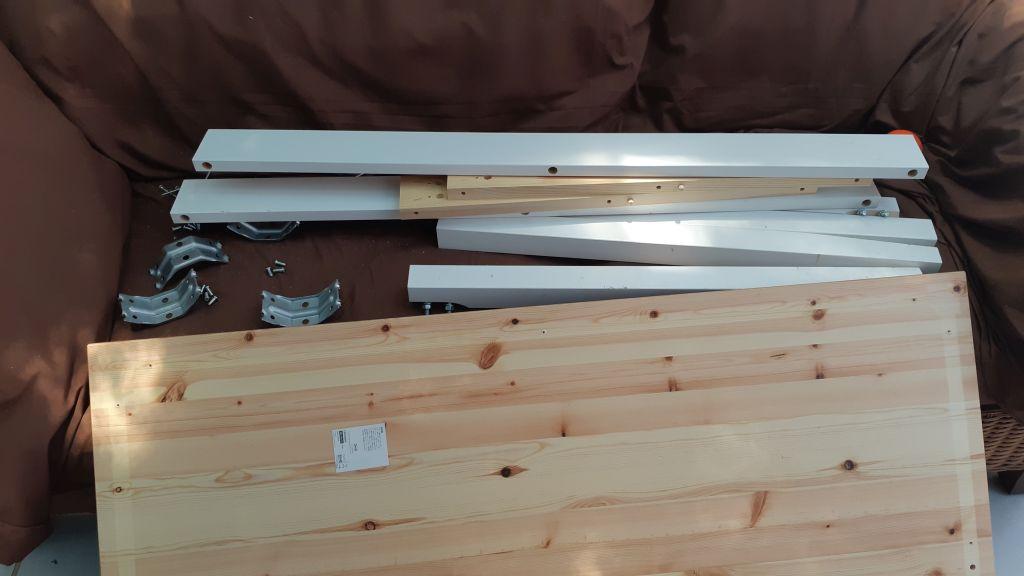
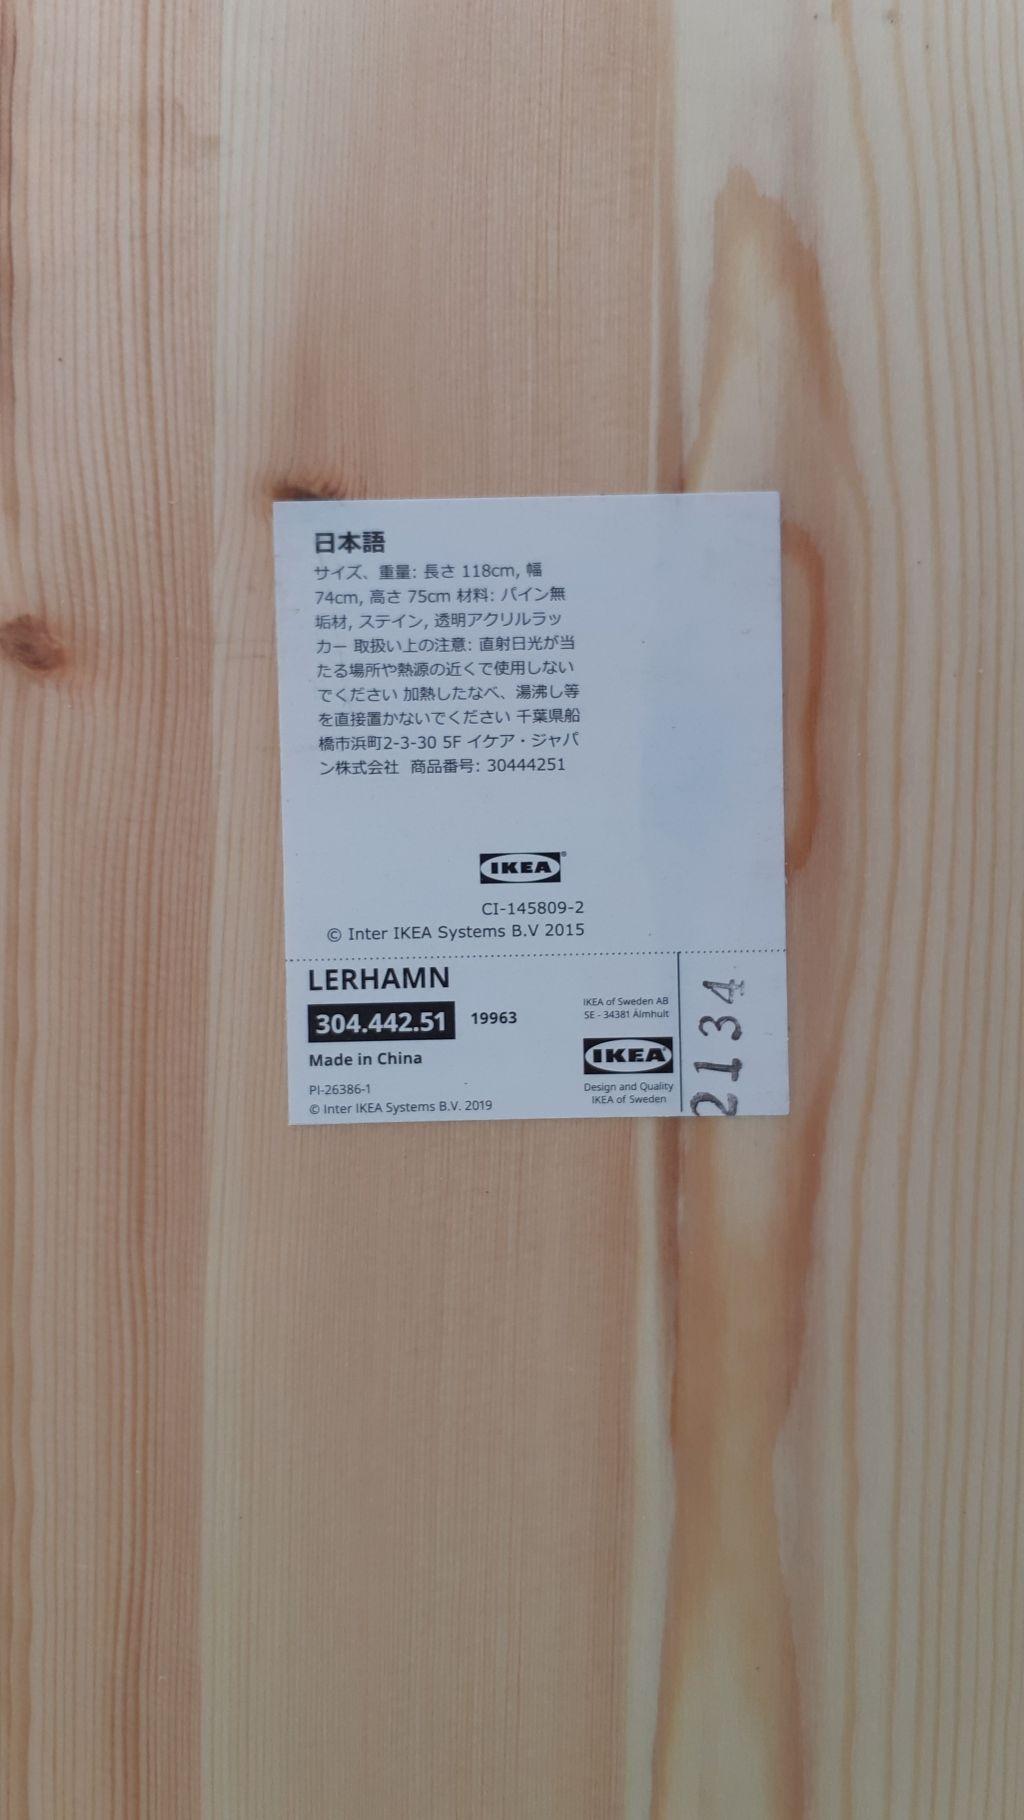
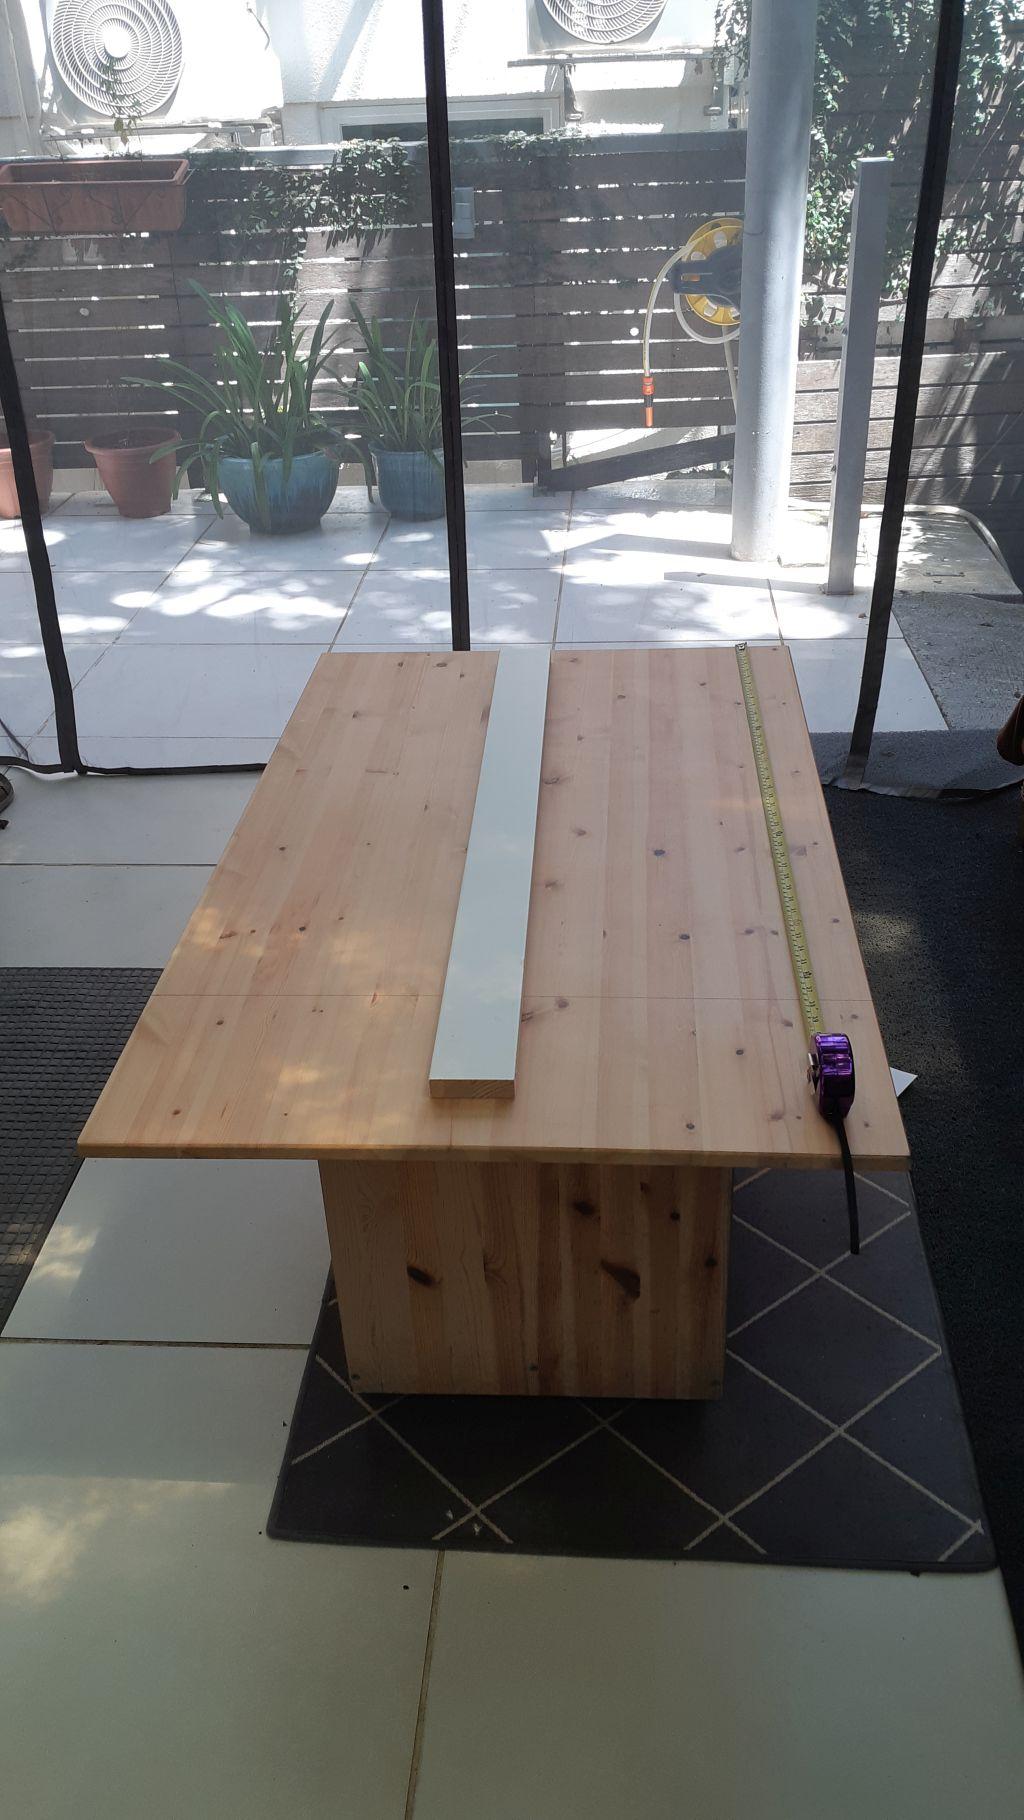
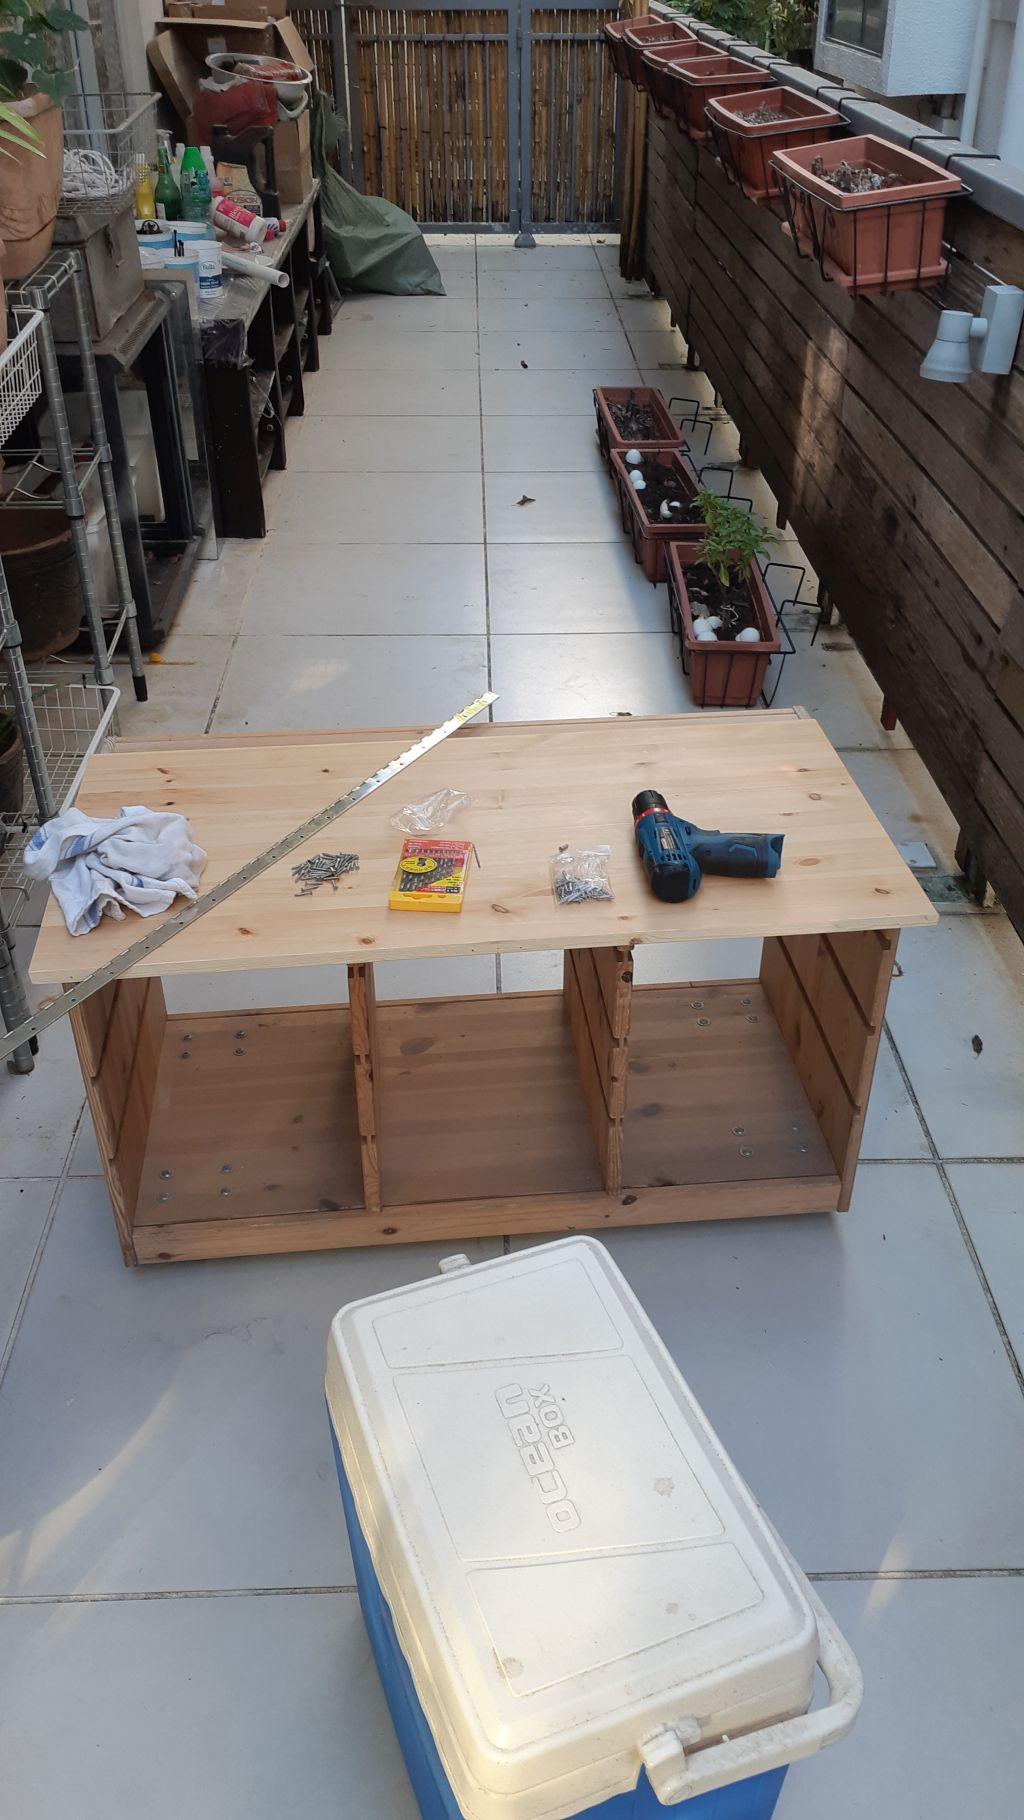
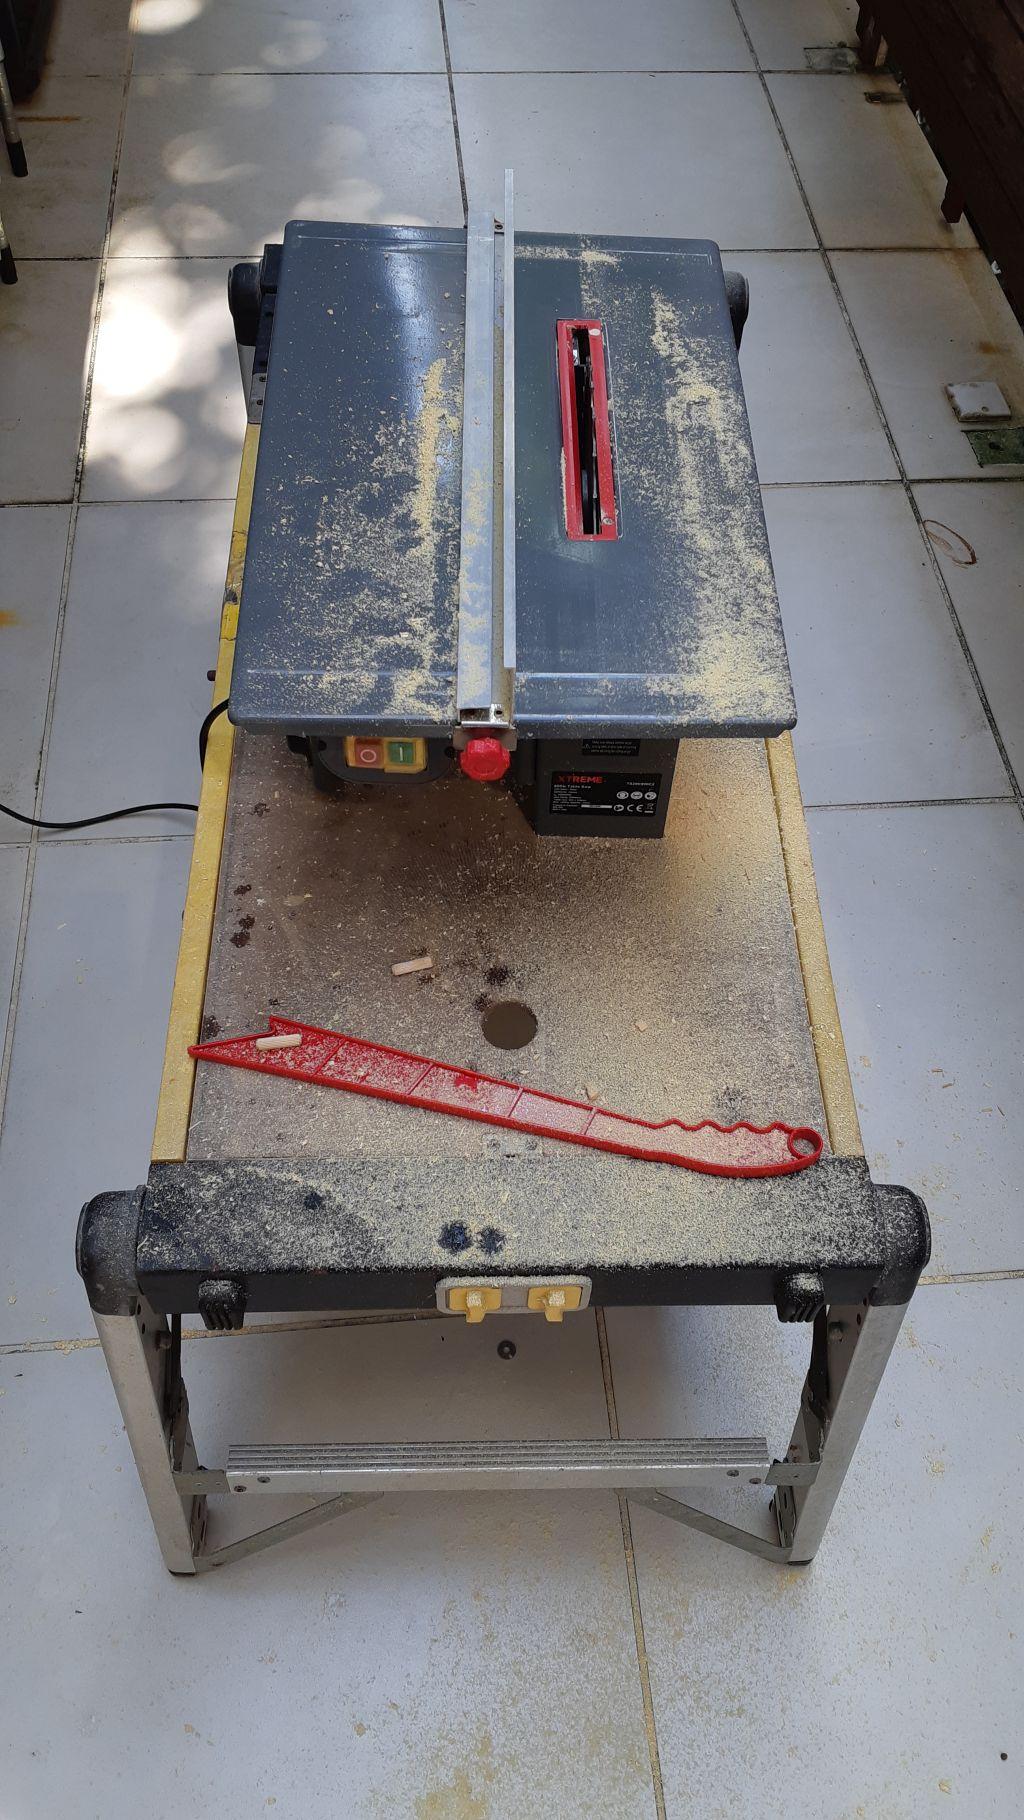
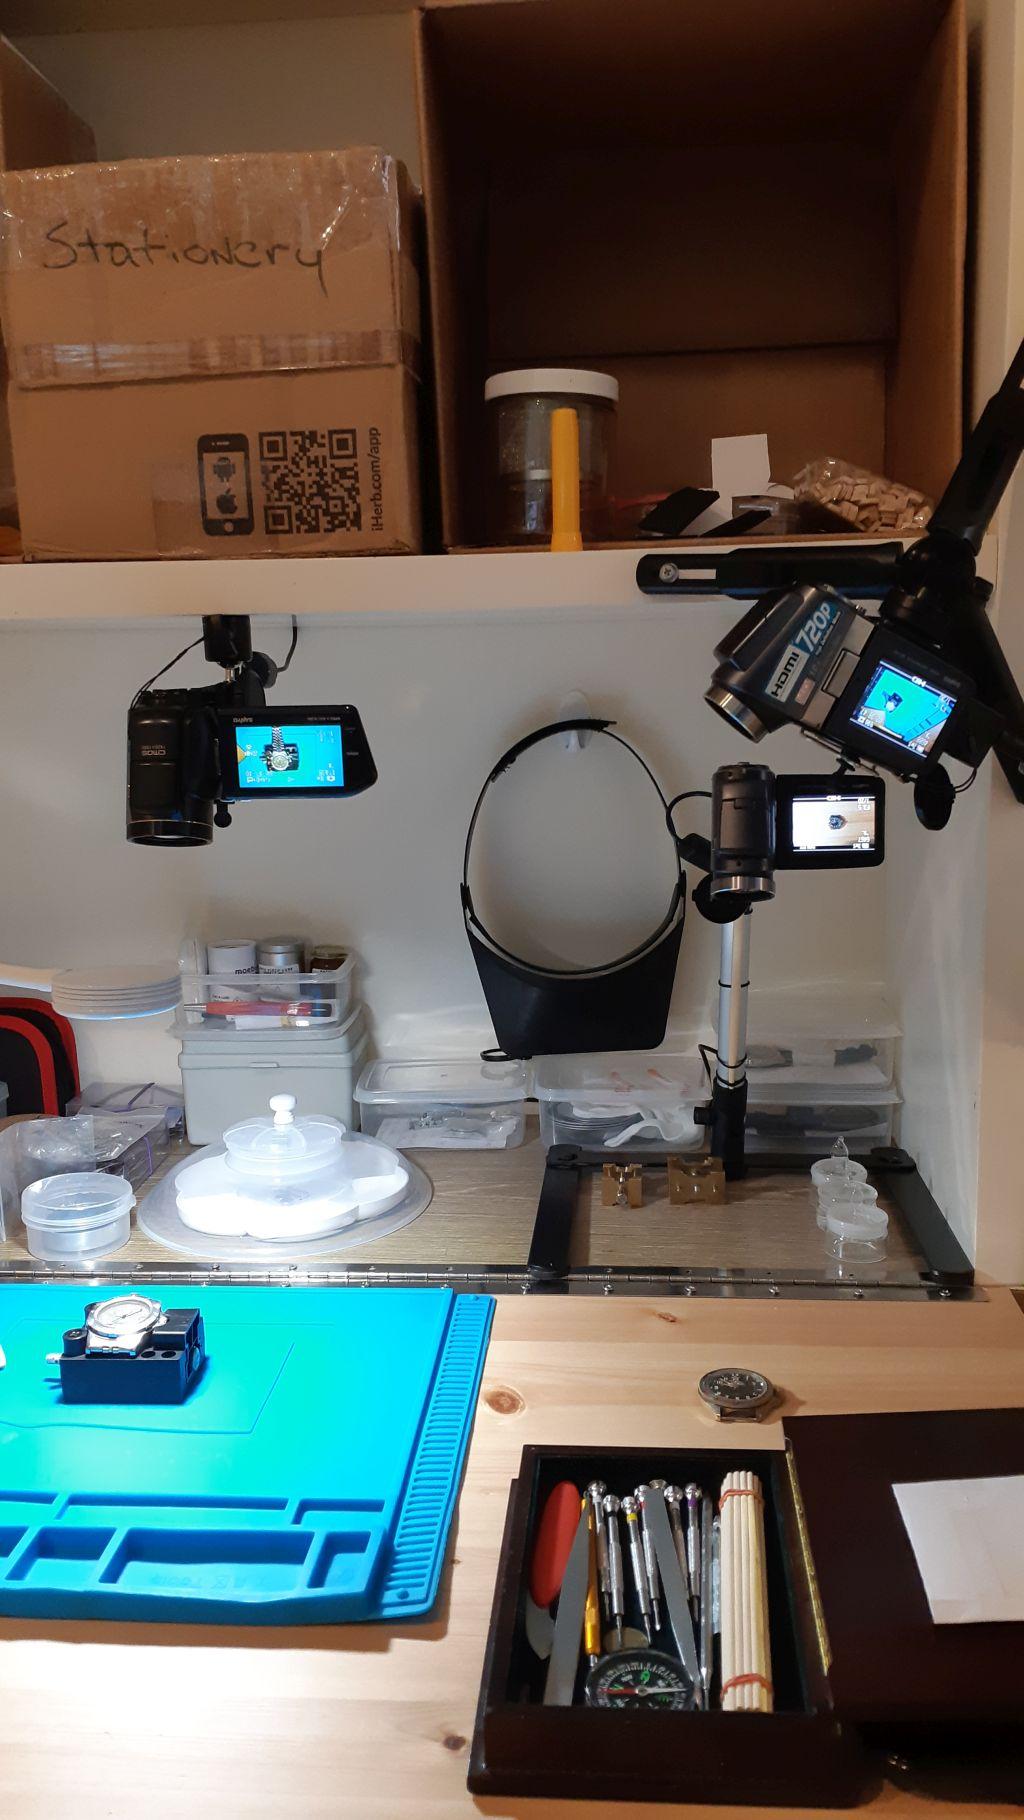
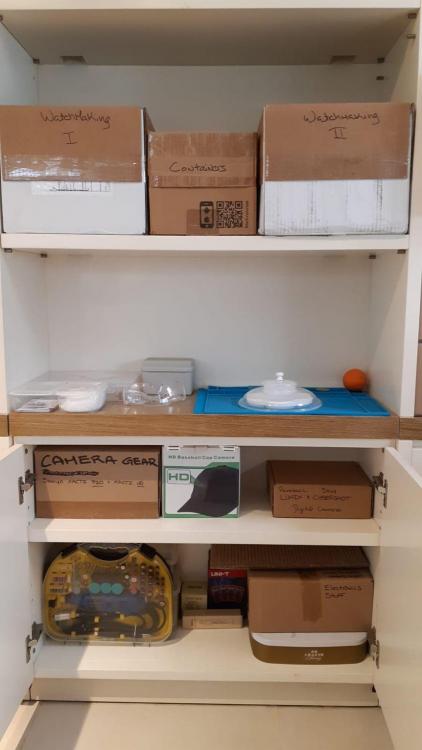
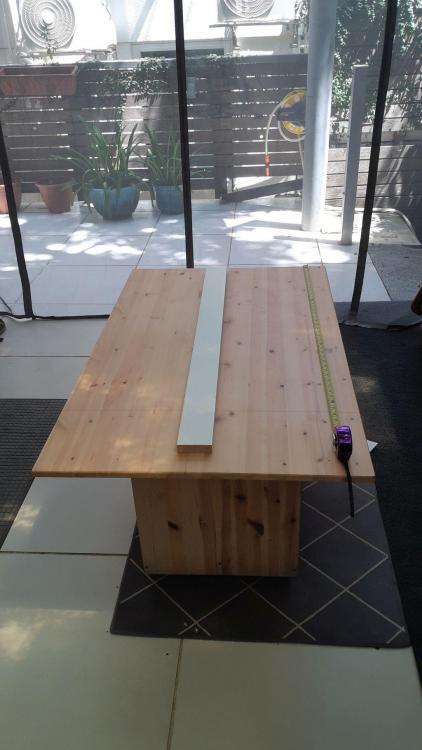
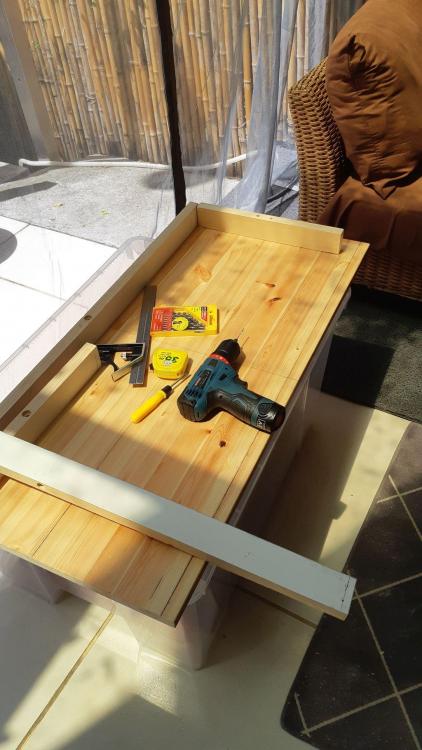
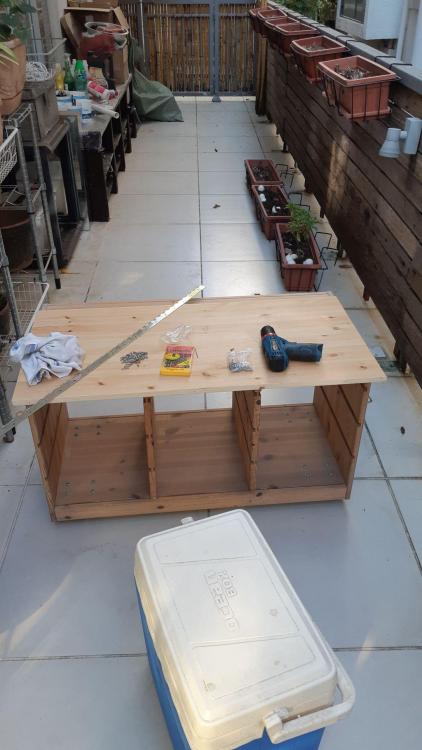
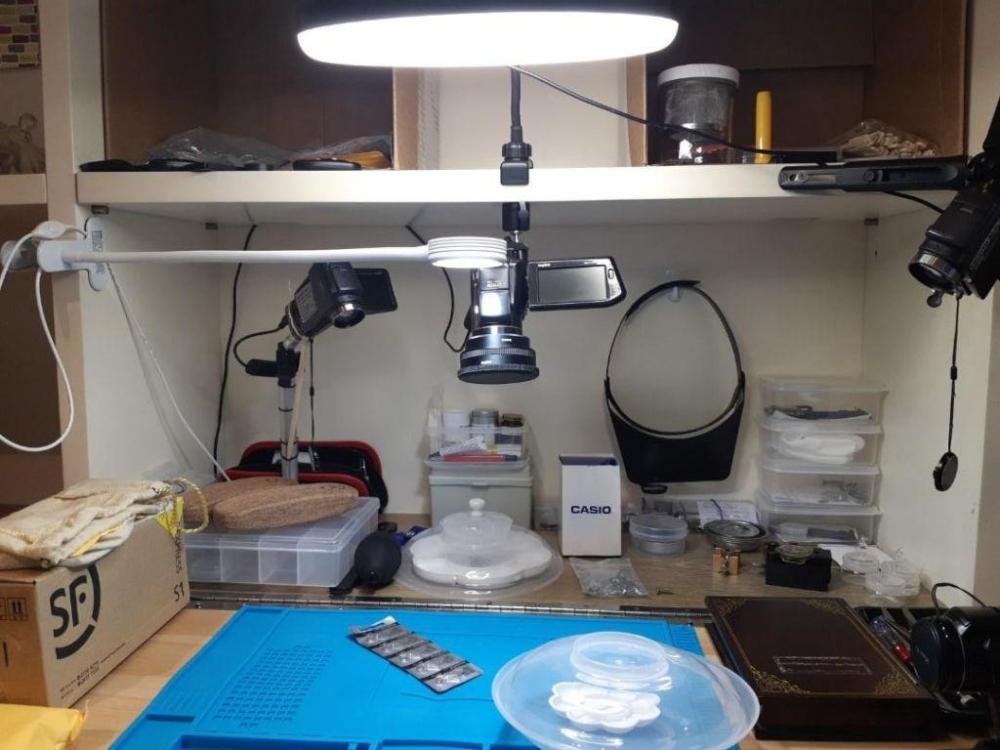
Hello Everyone, For the past couple of weeks, I've been putting together a little watchmaking area in my office. I cut down a 2nd hand IKEA table and fit it onto a large built-in bookcase in my office. Since then, I have been assembling various bits & pieces on and around it. It's far from complete, but I did want to share what I have accomplished so far with people more expert than me to see what they think...and get some feedback? Have I missed anything? It's still very much a work in progress, but hey...why not share early, see what people think and perhaps avoid a tragic error of some kind g. ----


 2 points
 -
Yes! I'm semi-pro I guess, I flip watches that I've restored, and I do some work for collectors. Most of the work I do for other people has been barter, for parts Now that I'm free of my previous career, I'm urgently trying to up my game. We'll see There are three of four places on Route 53 that are within minutes of our townhouse, other than that I'd suggest Lutsen Resort, but that's a couple of hours away. We are at Stebner and Maple Grove. Happy to have people over to the townhouse to meet and have a drink and snacks. With enough advance notice I might be able to reserve the clubhouse, which is a nice place to hang out in.2 points
-
Some snap backs can be fitted with watch crystal, so you have an exhibition back and if your lucky it might even look good. Regds1 point
-
I assume you are talking about their tuning fork models. I would say not more difficult, once you understand their unique process but much more tricky. There are a few strip down videos on YouTube, watch those so you know what you are getting into Here is a good one, watch it and then the following 2 assembly ones, he goes into quite a bit of detail. Don't think I would touch one yet though1 point
-
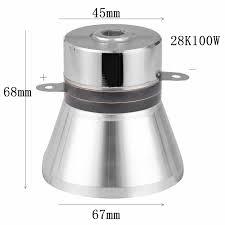
That is where the transducer is attached on the bottom of the tank.
 1 point
 -
If you are enjoying it Ross then you dont need to say much more. I used to play the guitar years ago, tbh i was pretty crap at it, did i care , no. Did i care if anyone moaned about my practicing, absolutely not, they usually got a basic reply of lol. So as long as your enjoyment is still there Ross how you progress doesnt matter. I have a few watches that i will be revising later in my learning. For instance one of my first repair attempts,i was completely stuck with it with really low amplitude and stopping. I've recently spent a couple of evenings now 9 months later and breezed through its repair fault finding along the way. It now runs consistently for 36 hours. You will find your learning and skill clicks into place in stages. Problem after problem for weeks then suddenly a skill jump and then a good run of fixing follows. My usual approach on a working watch begins with an initial case and crystal inspection, a hand setting and winding check then straight on the timegrapher and record the results. Demagnetise then timegrapher again with some regulation and more recording of results. The movement is then removed and i will spend a good twenty minutes watching it run from every angle before i disassemble and inspect every part making notes if i need to. This is mostly to rule out my own mistakes. I also developed the habit of replacing parts immediately after removal to help remember how they fit with each other. This way I'm assembling the same watch a few times rather than jumping in and doing a full strip down in one go, this way any faults that are present are picked up sooner rather than later. Sooo pleased you are still enjoying it Ross1 point
-
1 point
-
The machines are relatively cheap. Some jewellers offer a repair service for any sort of metal work. The case I had repaired with cracked lugs, it was so good that couldn't see where the repair was. The heating is very localised with lasers and doesn't discolour or distort surrounding metal.1 point
-
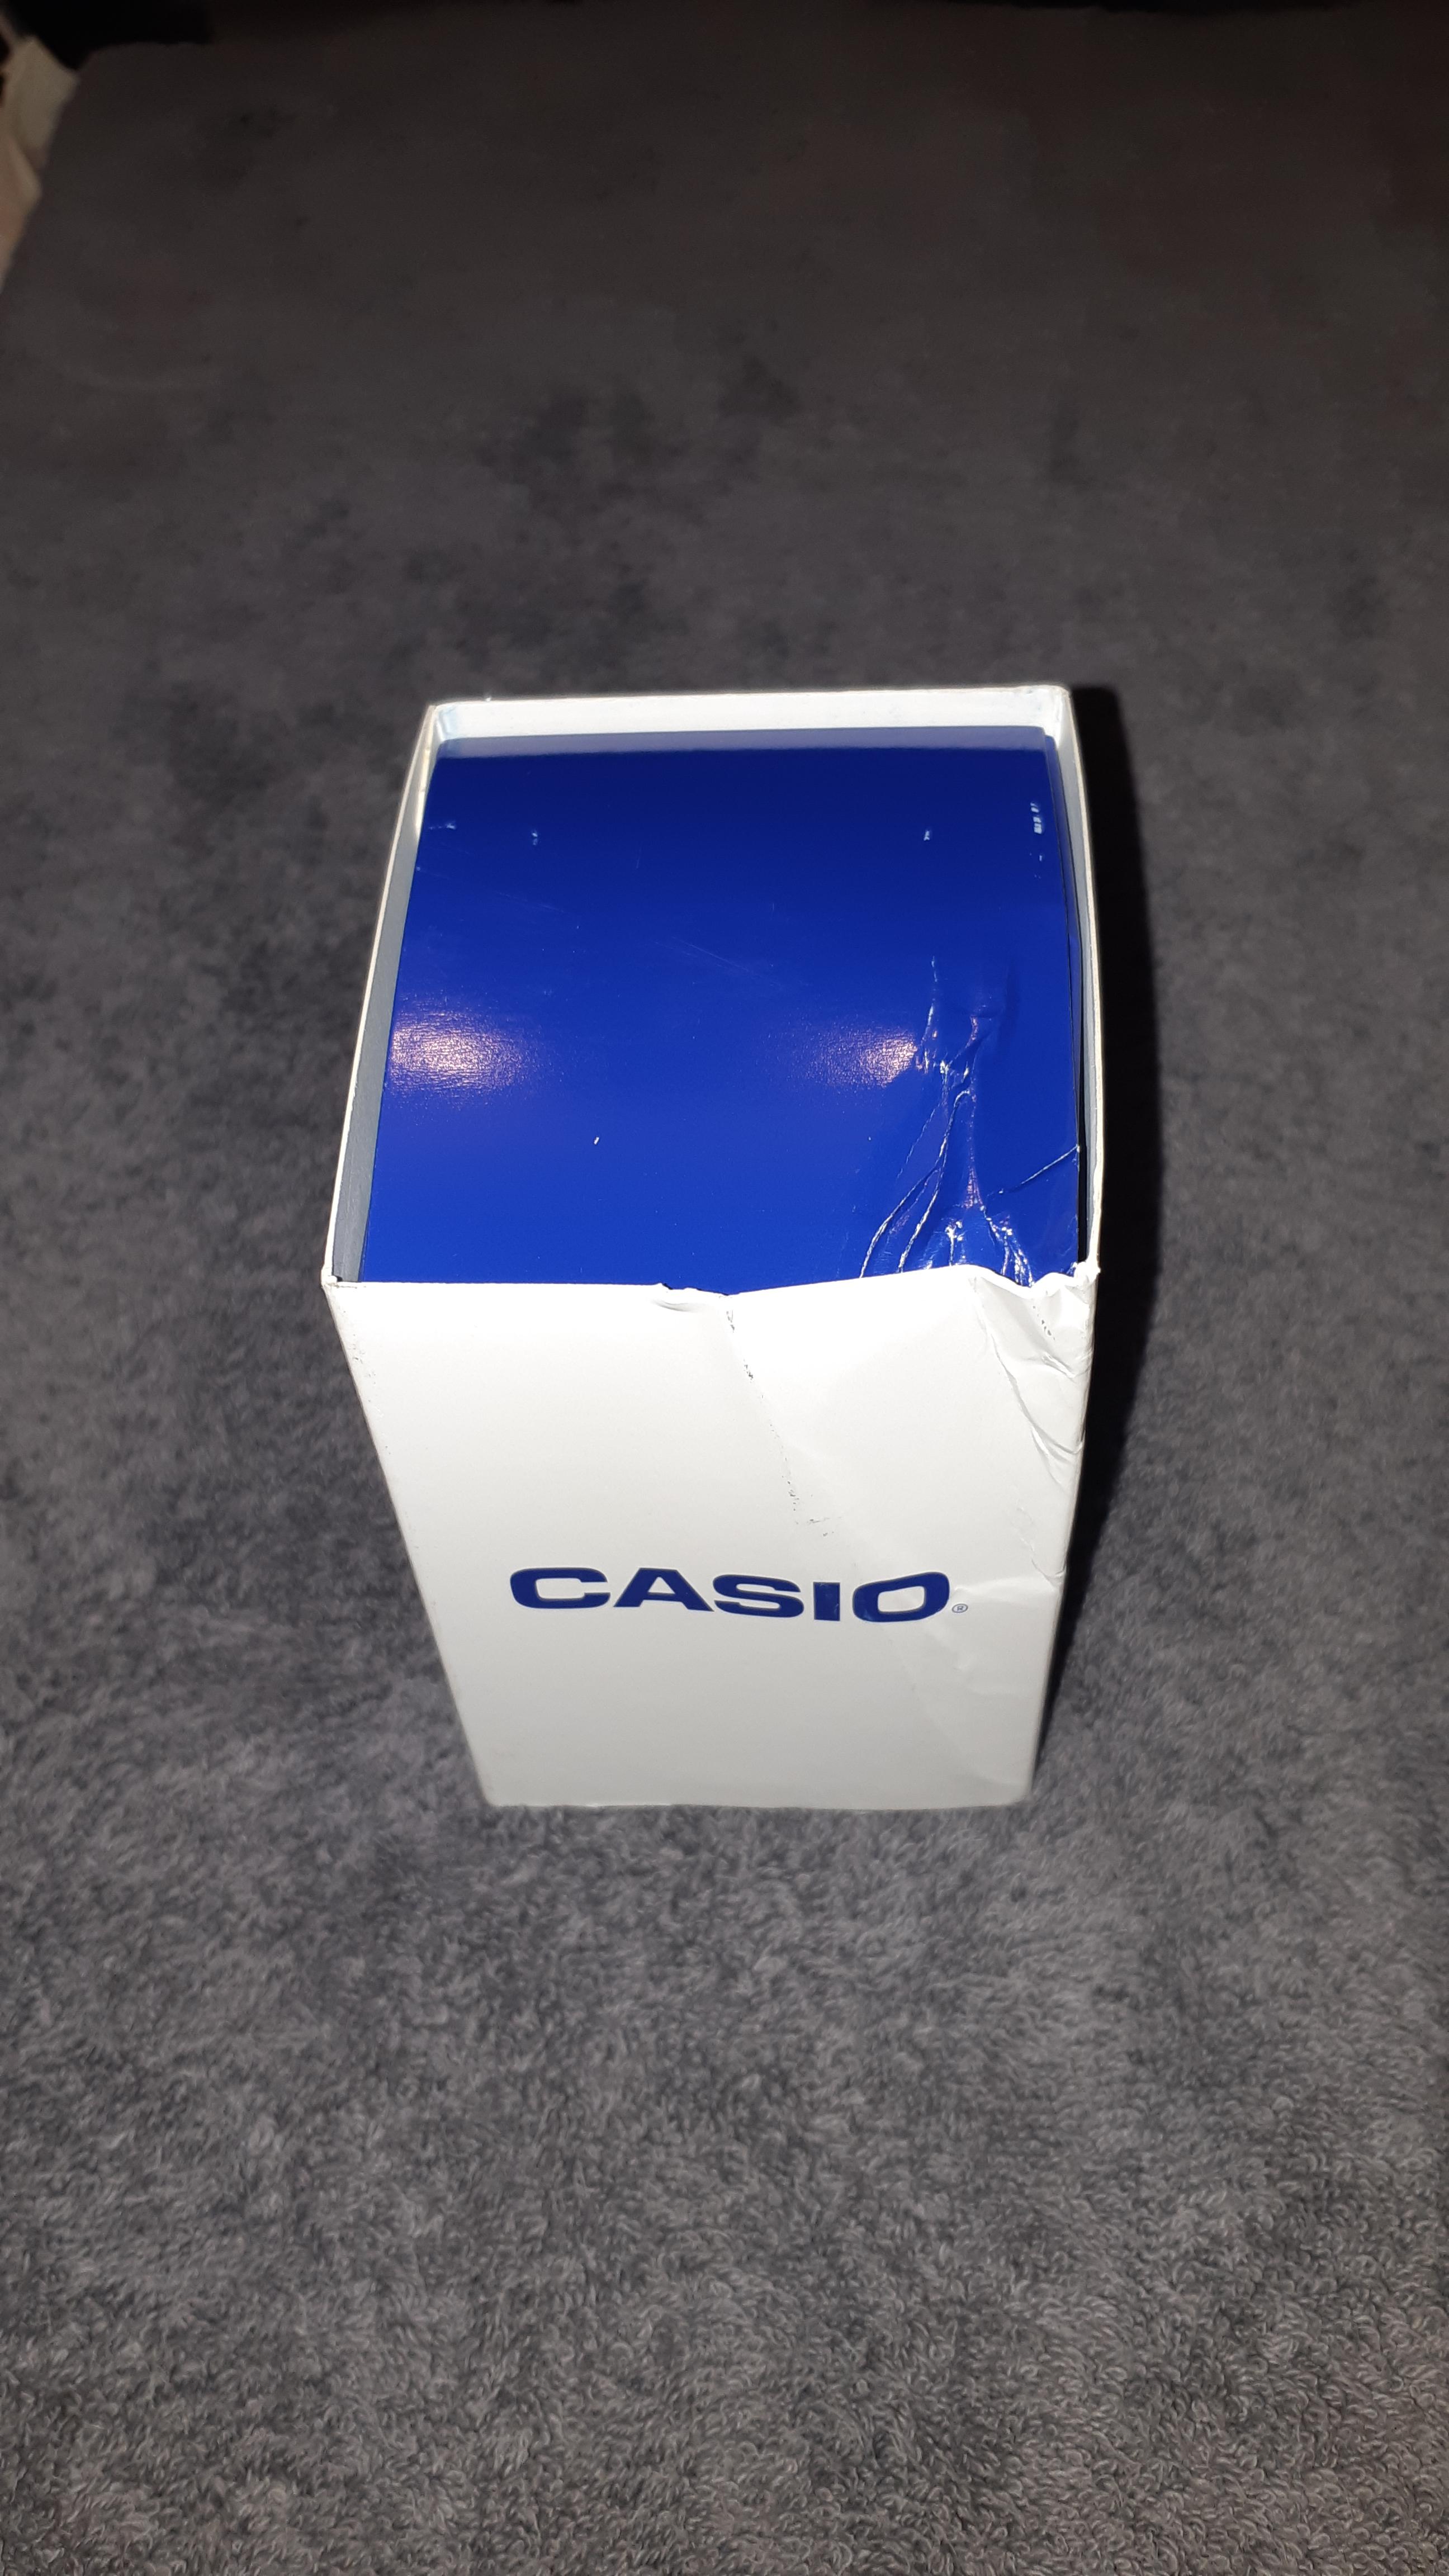
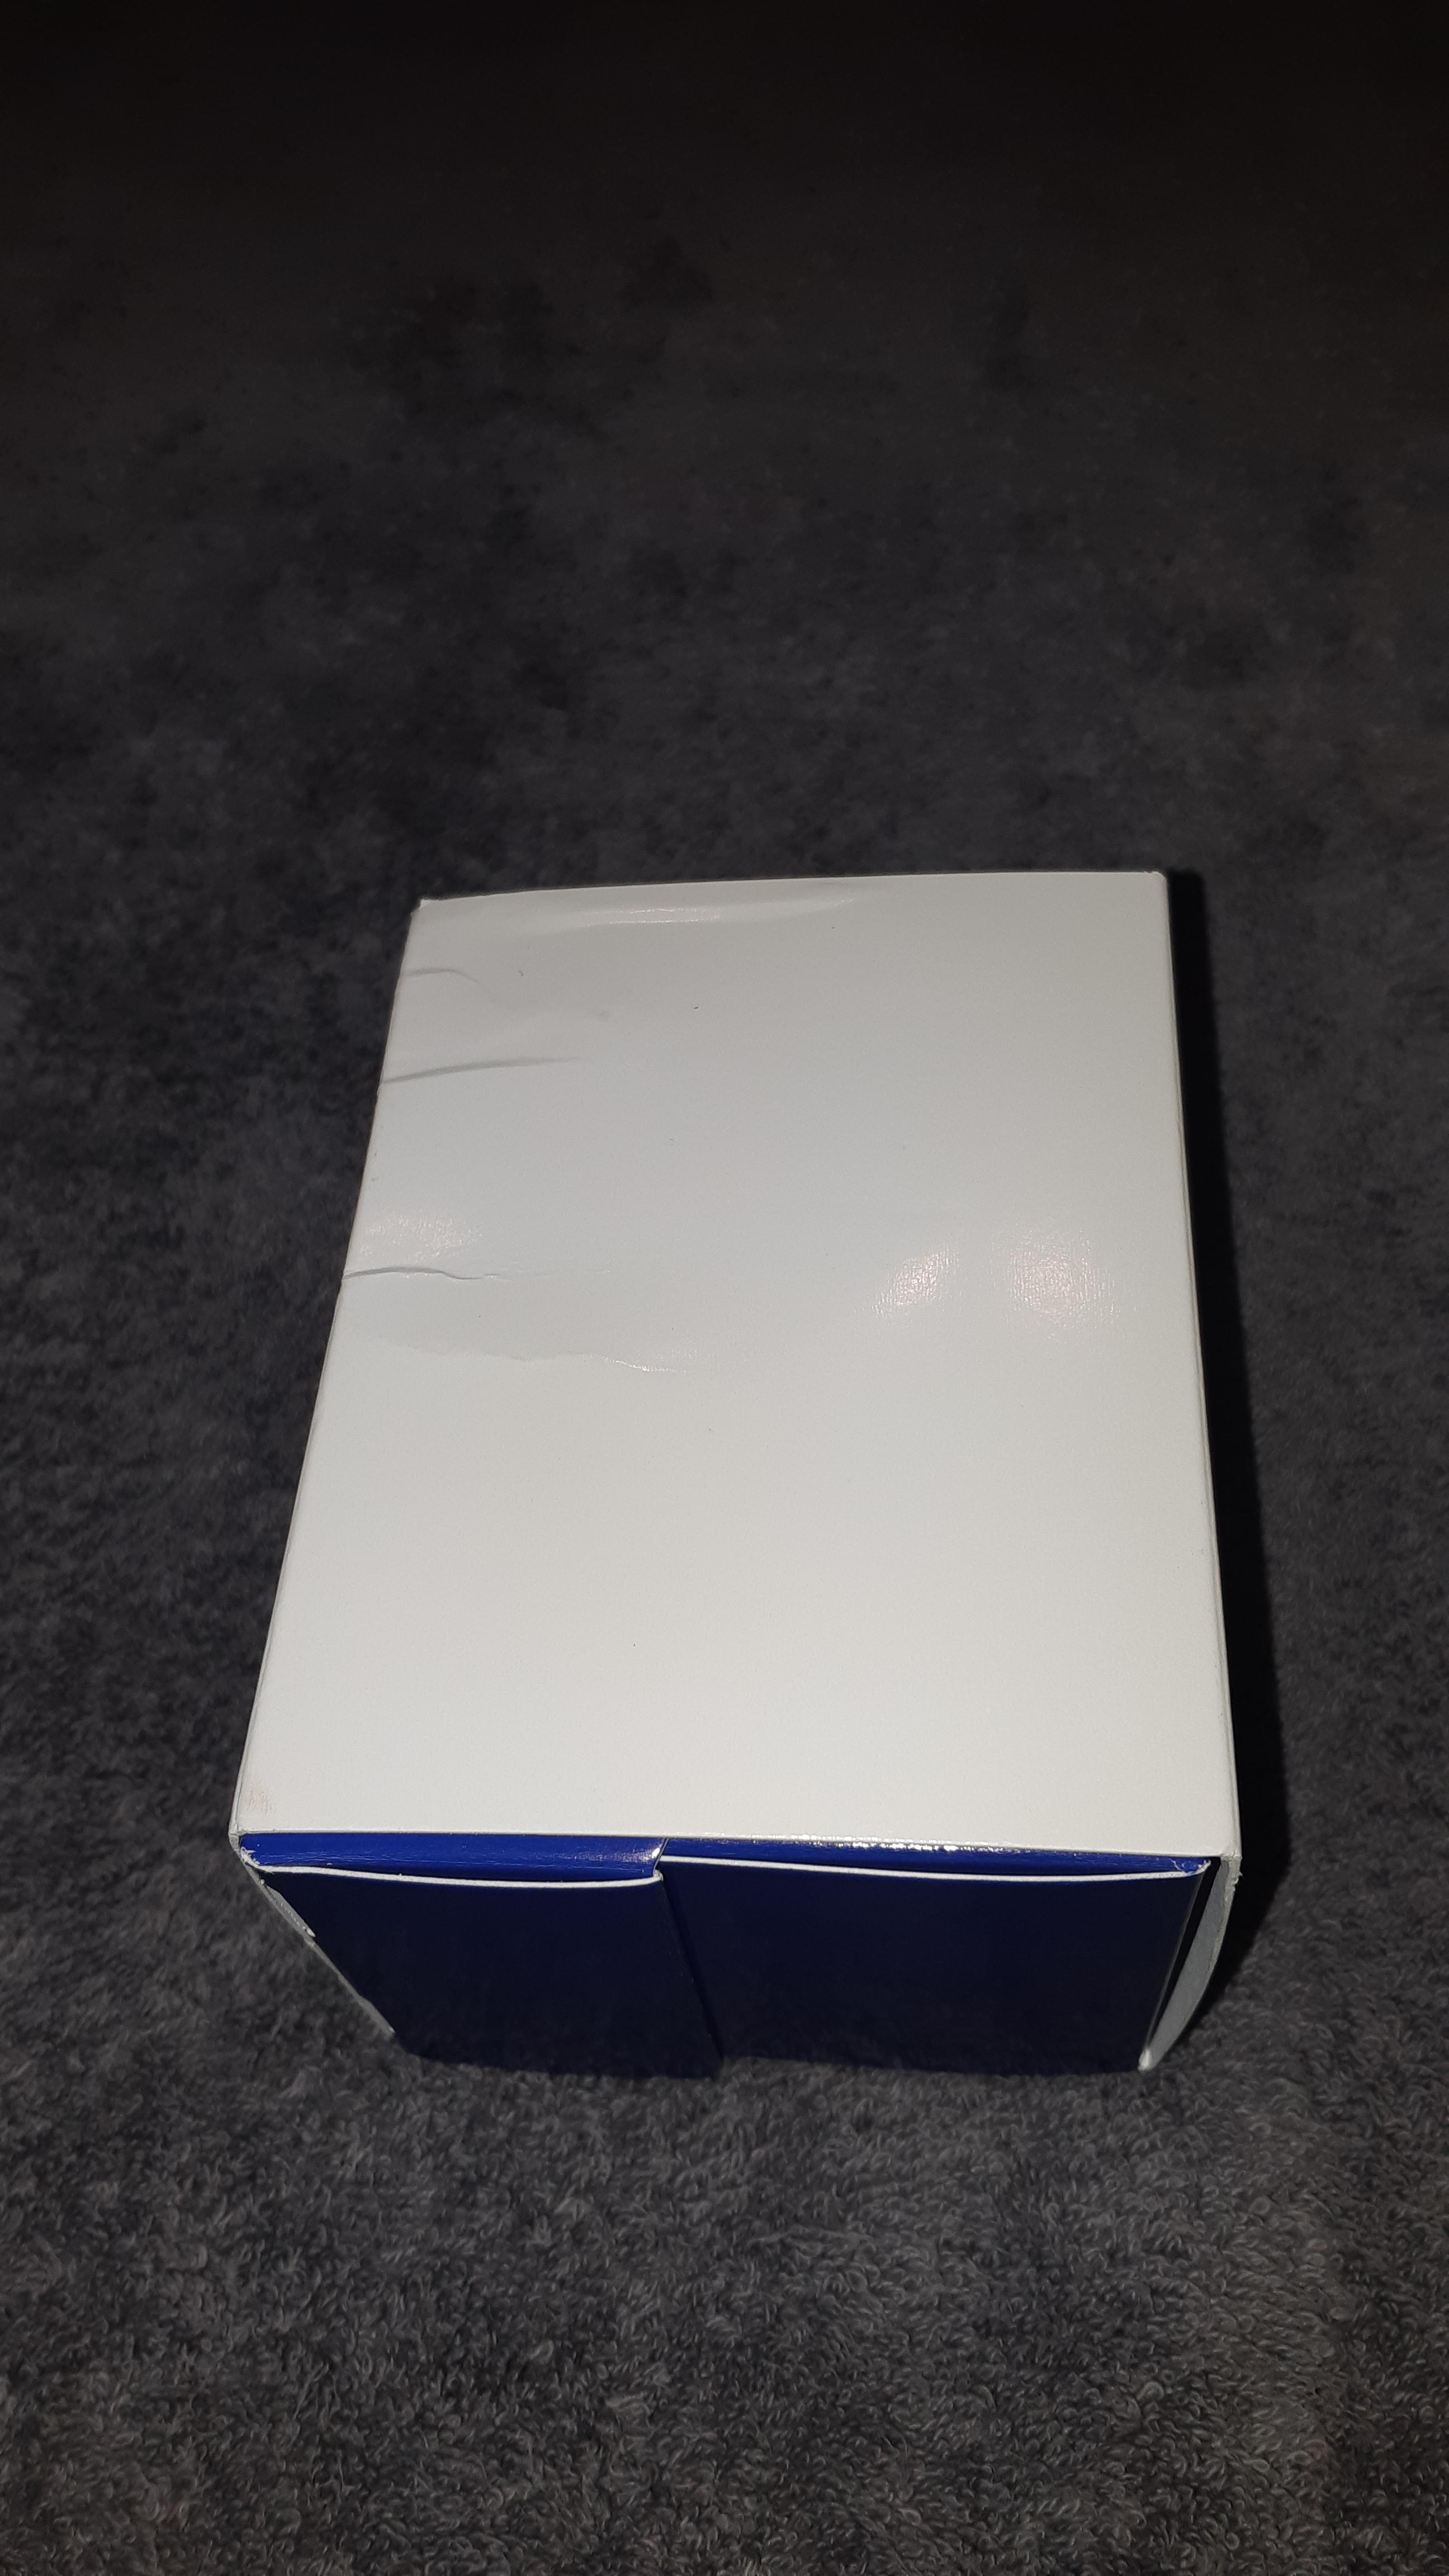
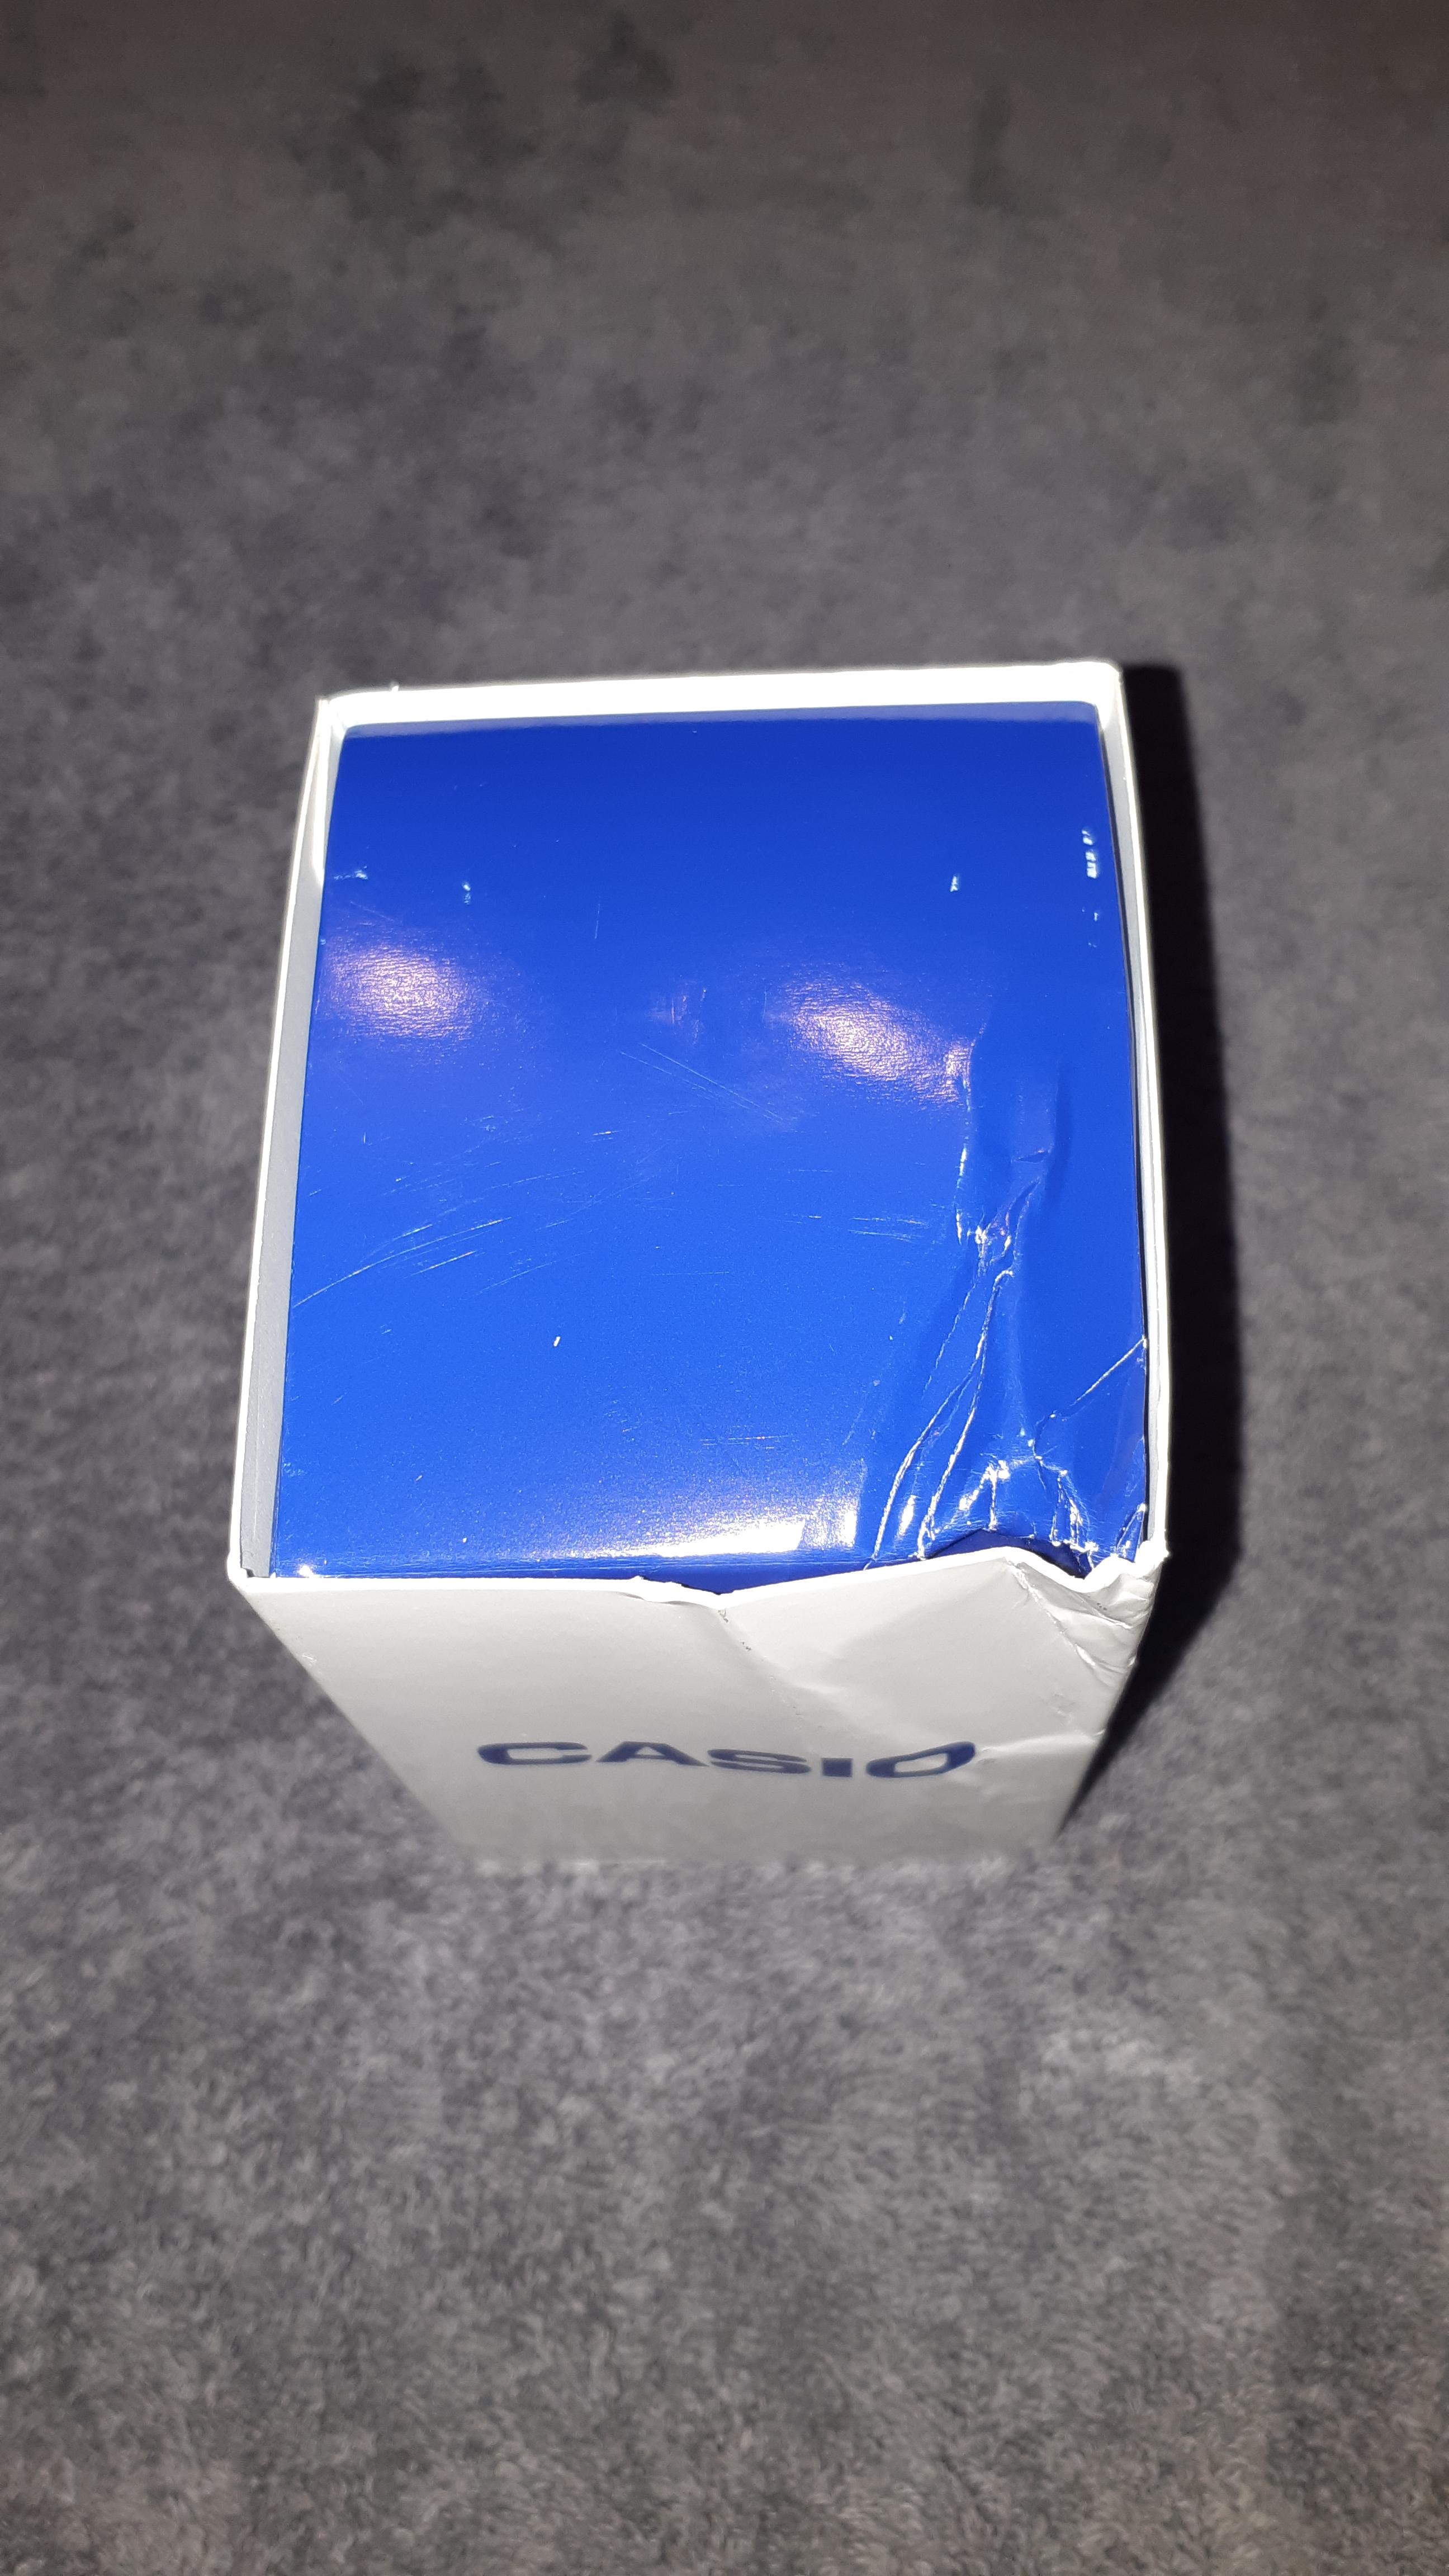
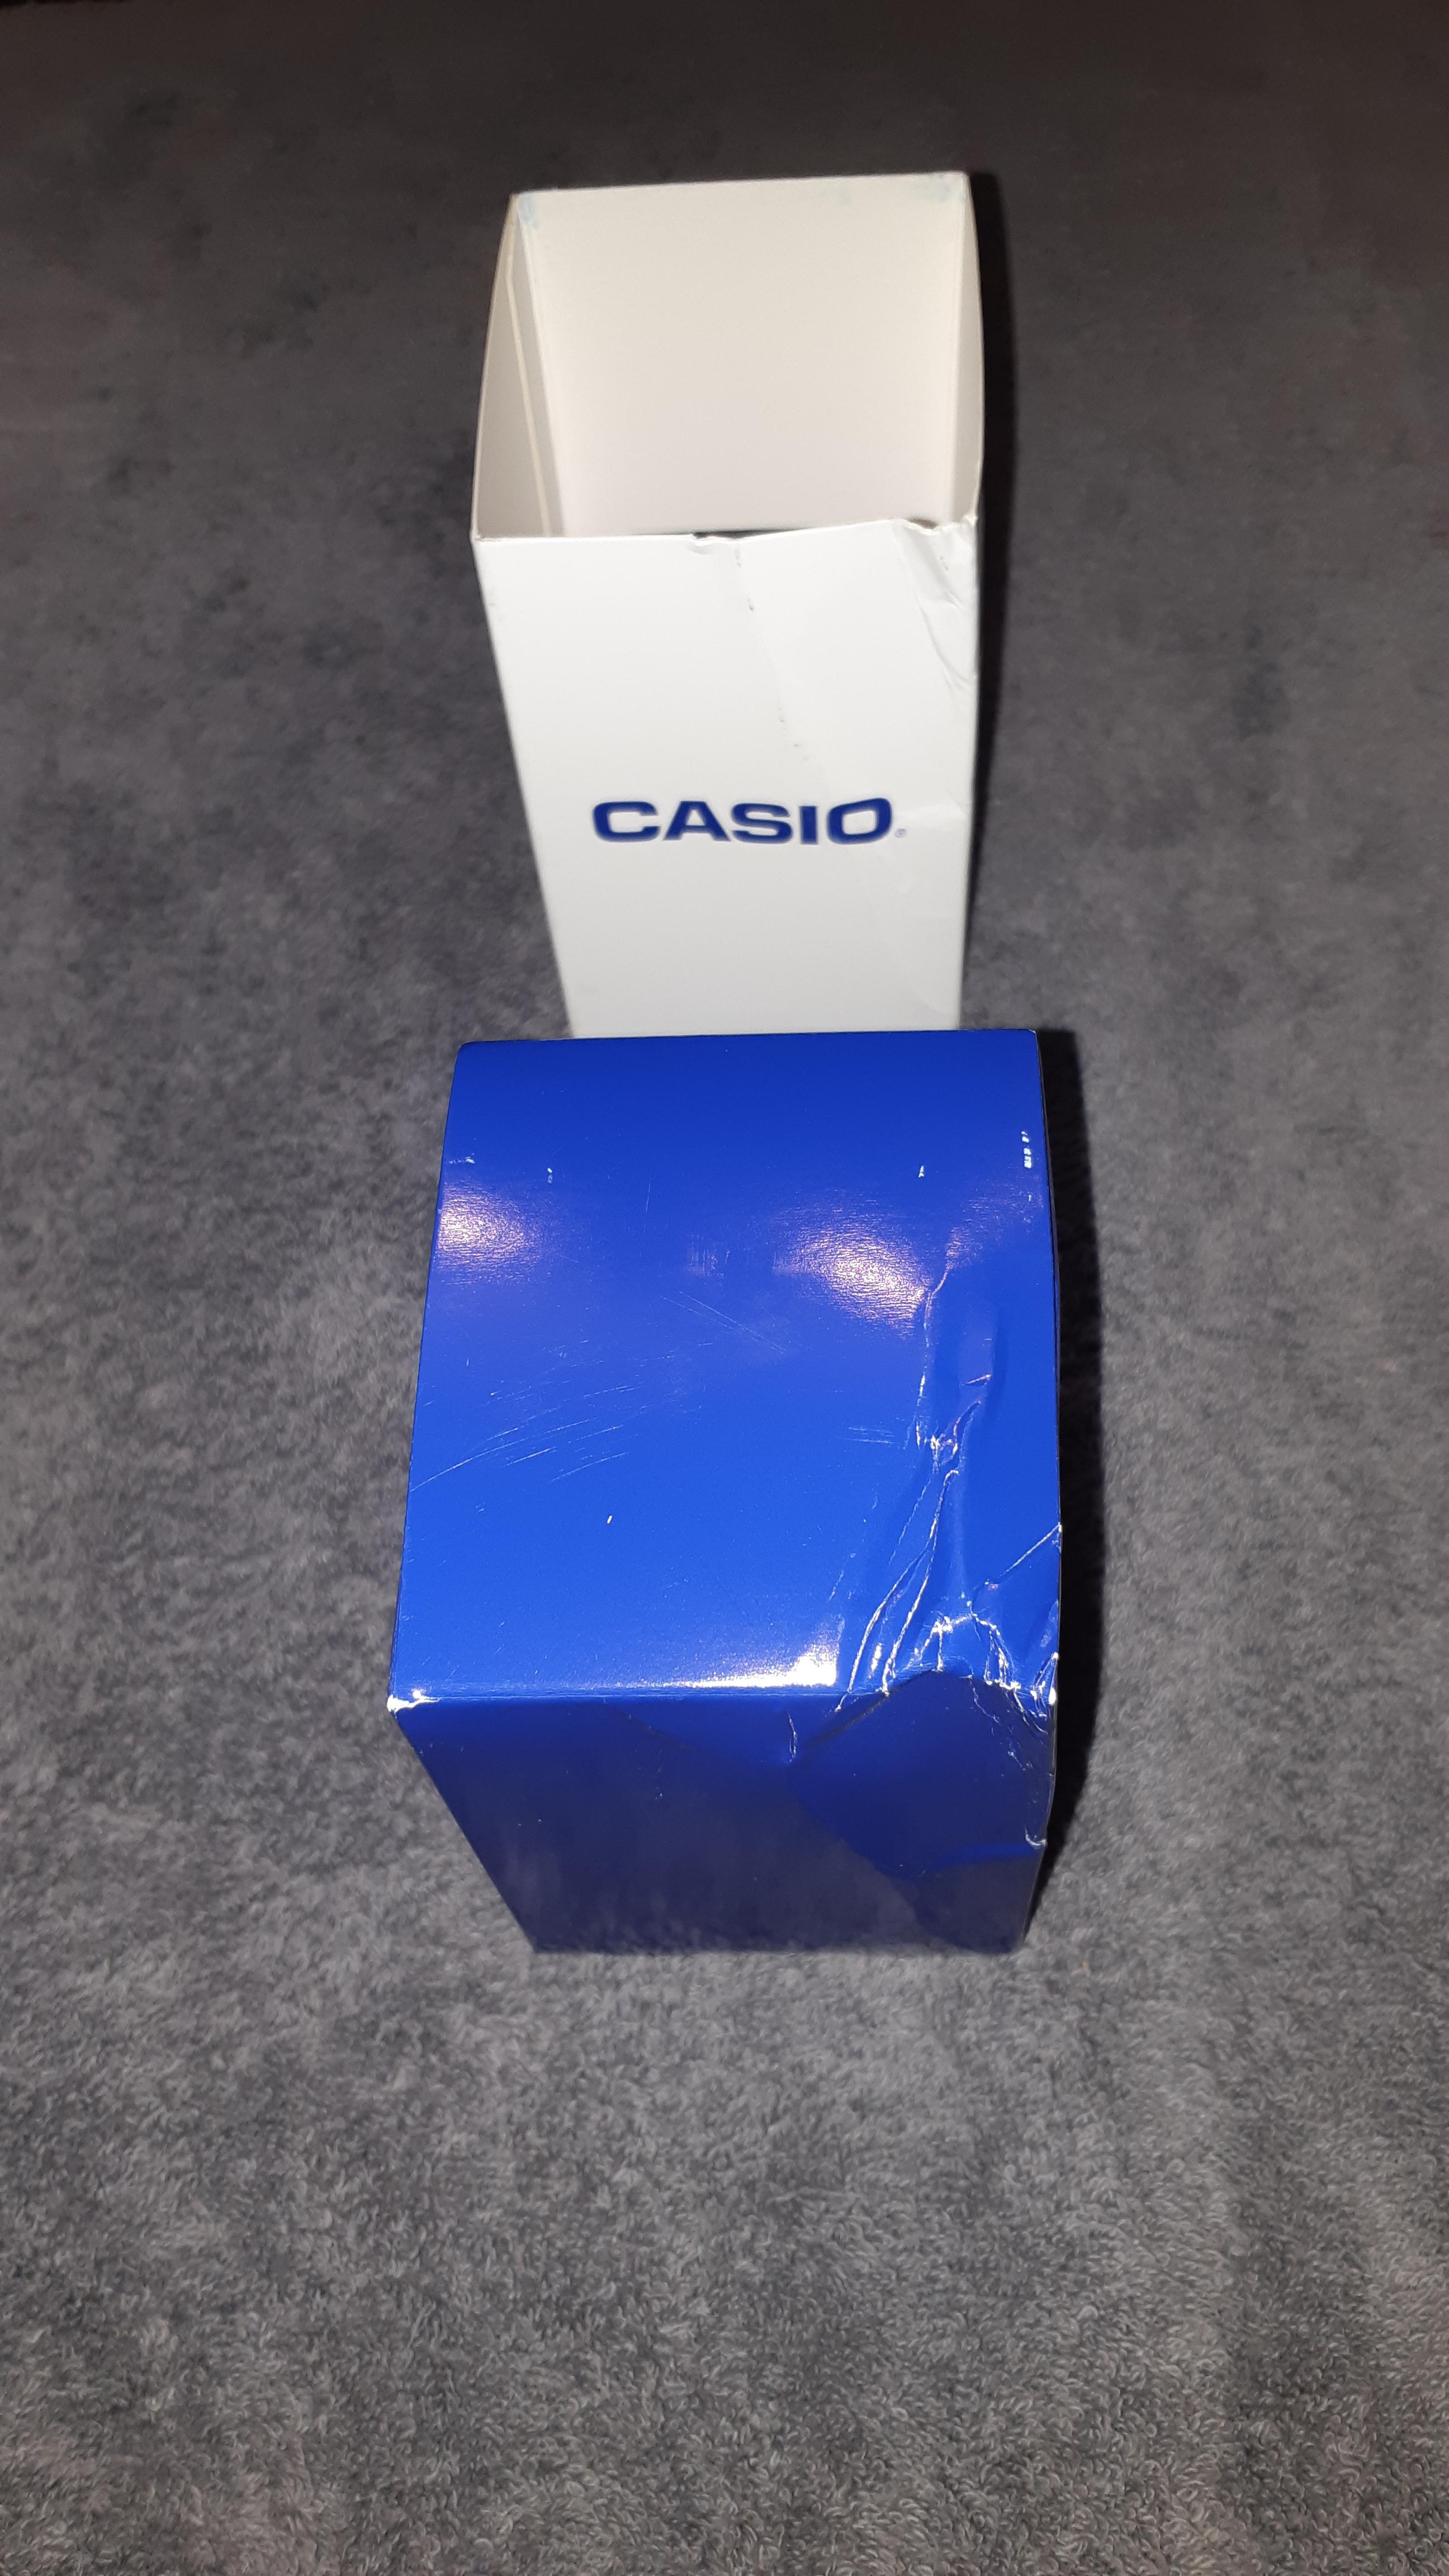
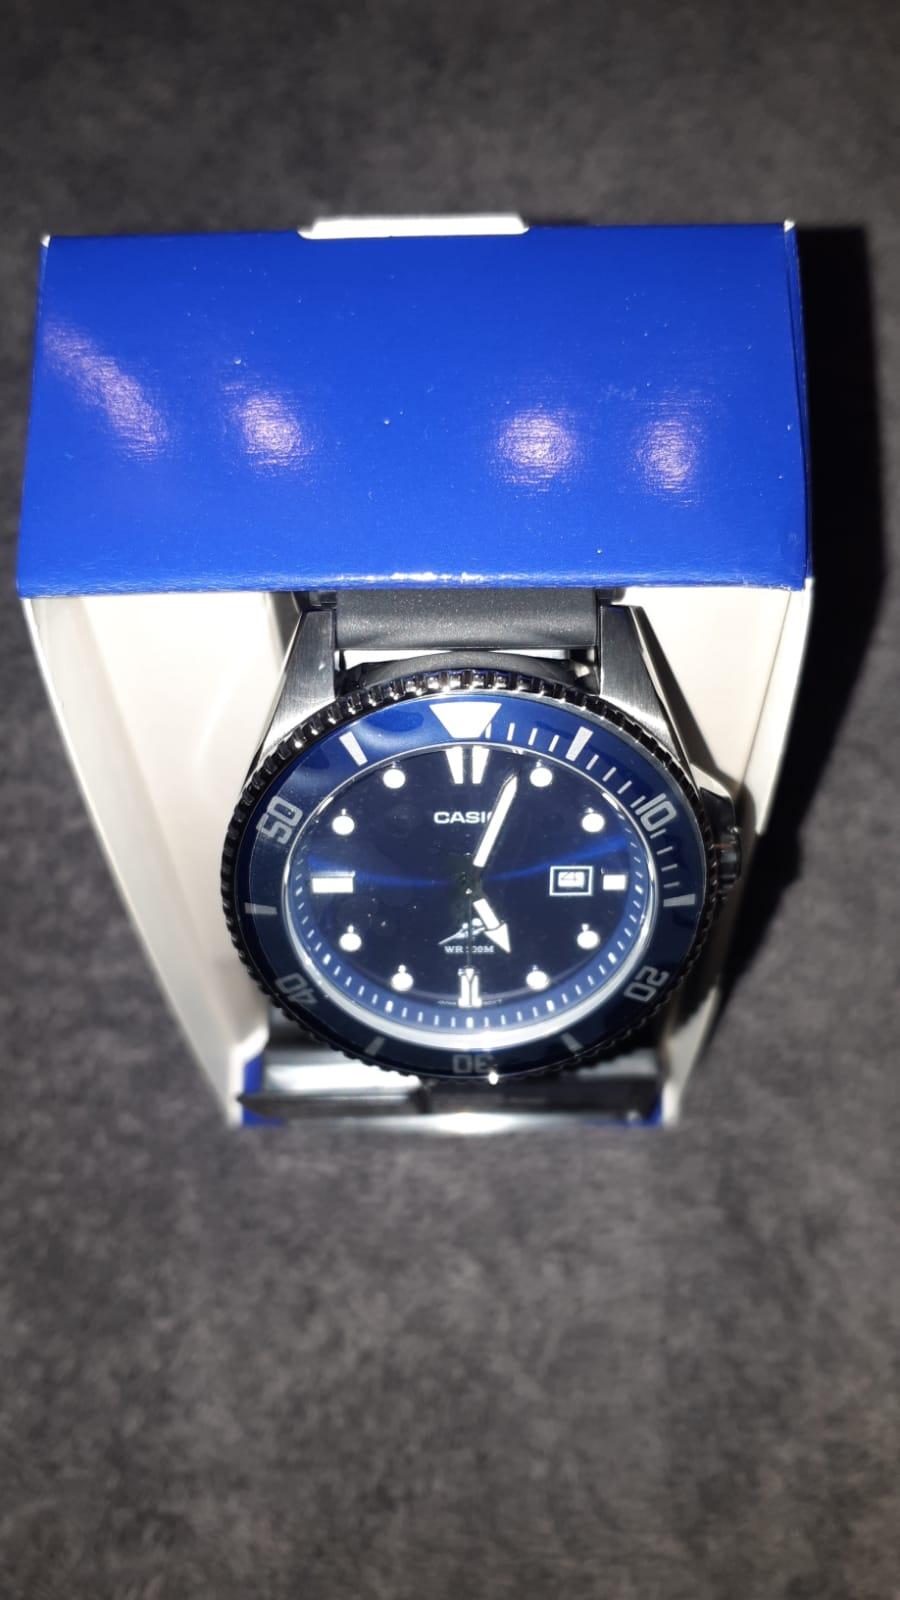
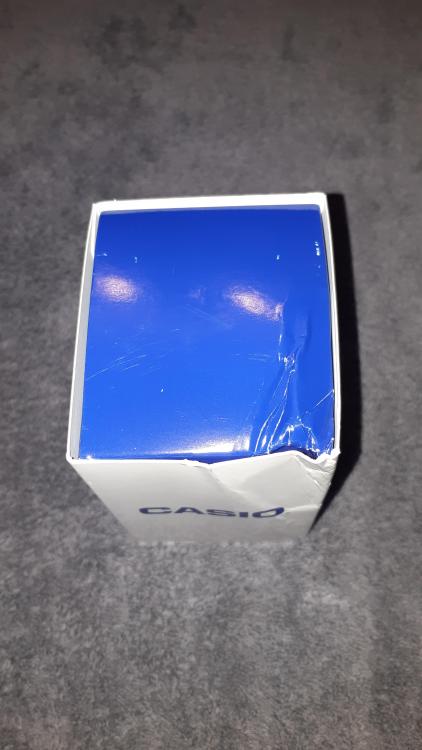
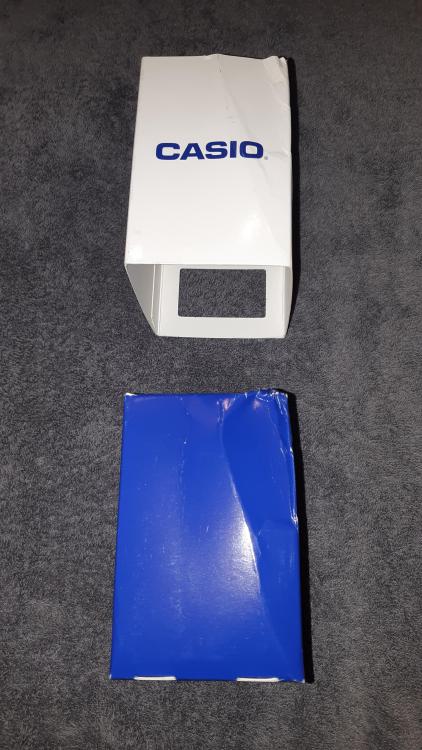
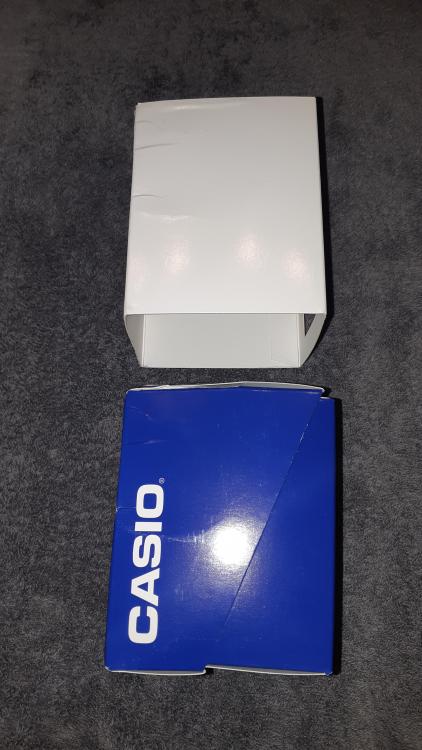
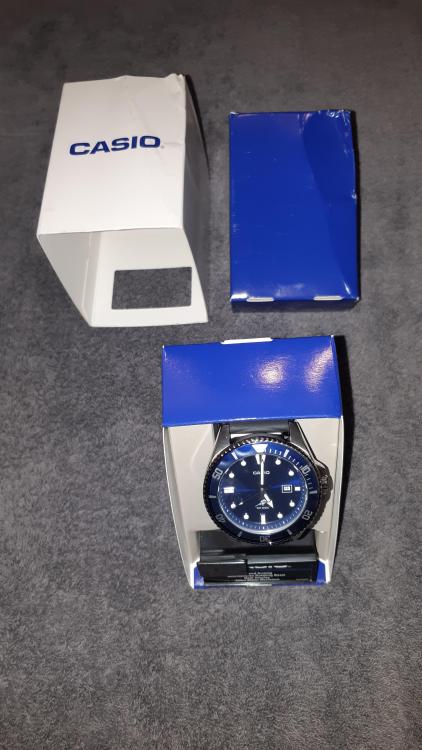
I ordered a CASIO Duro: https://www.casio.com/us/watches/casio/product.MDV-106B-2AV/ From AMAZON (no affiliation): https://www.amazon.com/dp/B083VMFR4C/ref=twister_B09S4VHC1B?_encoding=UTF8&th=1 The wrist watch arrived a little beat up, so I am a little unhappy about the level of abuse that package must have experienced for it to arrive in such poor condition (see attached images). I plan fill it with oil, and do a video on oil-filled wrist watches. I bought some .65 cTs oil from the mainland and it is making its way to me right now. After I create the video I will put a link to it here, if that's allowed? (Is posting video links allowed here @Mark?) g. ----


 1 point
 -
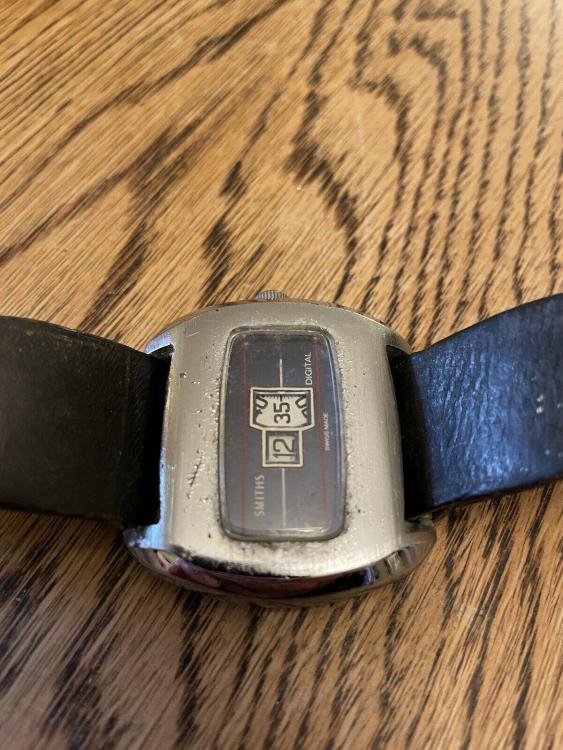
A slightly scruffy looking Smiths Jump Hour is on its way into the 404 club.

 1 point
 -
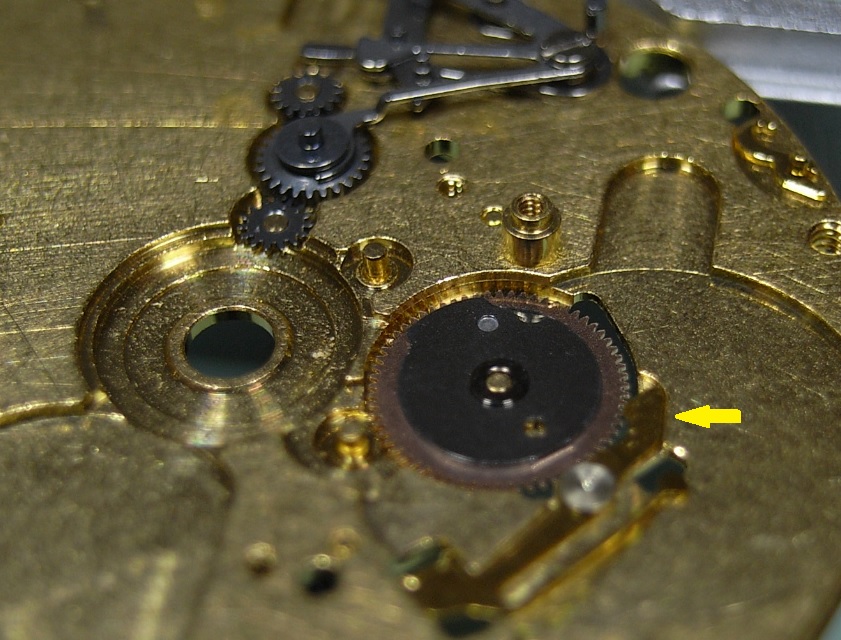
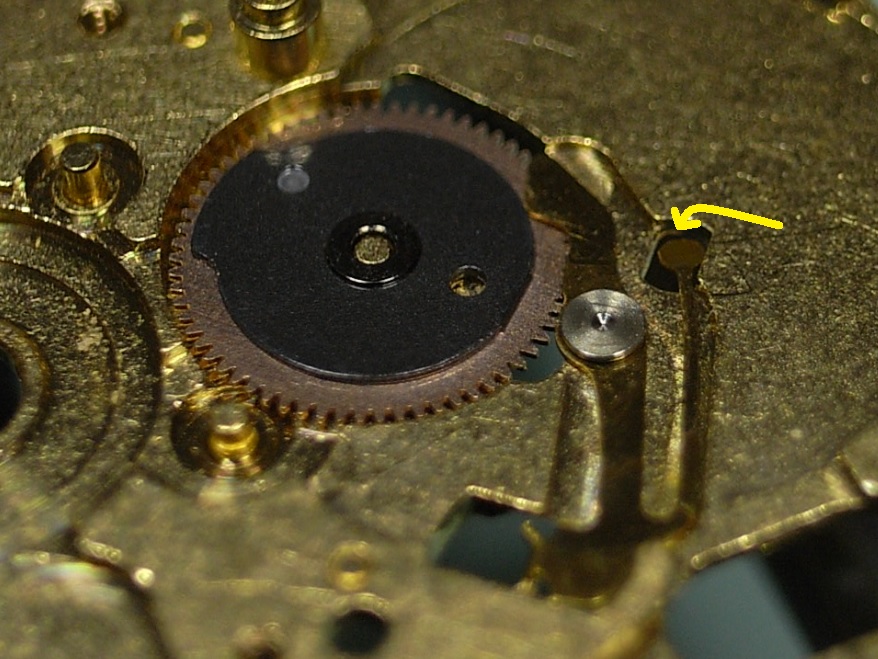
If you look very carefully at the Arbor at one end is a square that goes into the barrel itself. The basically the whole thing has to be together and in the watch to work otherwise it has a habit of falling apart. Then the mainspring Replacement springs are usually a problem because the end with the hole Isn't the right shape to catch on the hook that's in the barrel wall. It needs to have a little bend and a little bit of taper. This is where sometimes fighting an original new spring is a better way to go.1 point
-
As a semi-pro musician and luthier, I did much worse in apartments in my youth... Put some good pads under the feet of the bench to prevent sound from traveling mechanically through the floor, keep it off the wall, and that aspect at least shouldn't be an issue.1 point
-
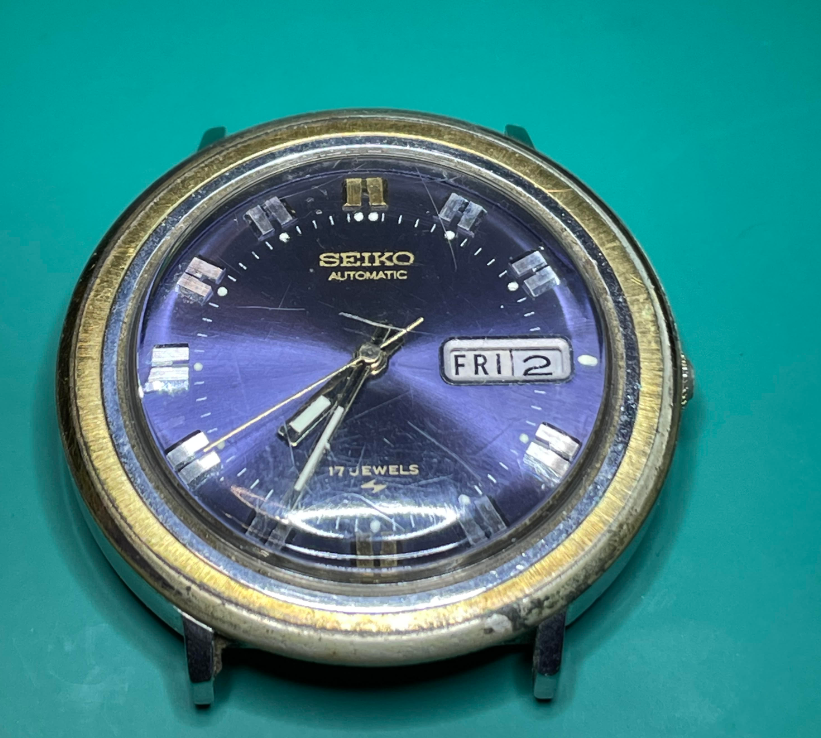
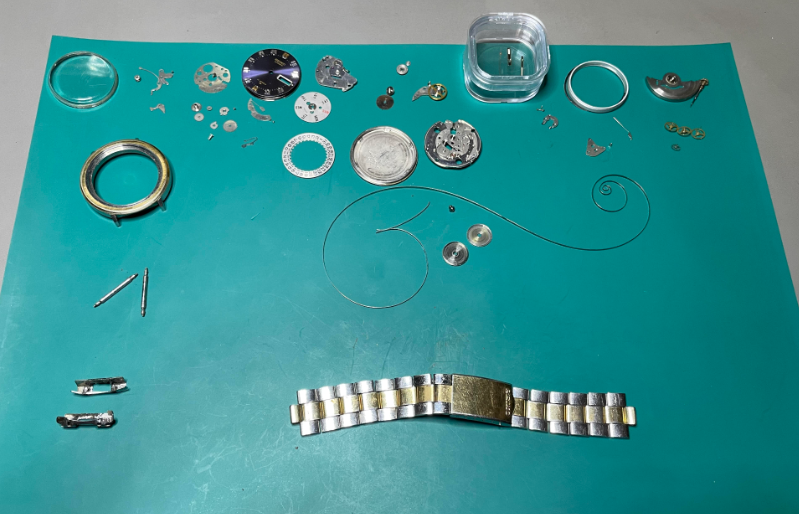
It's not much in the big scheme of things, but I'm pretty happy with the results thus far. I've purchased a small watch lot on eBay and have been messing around inside one of the non-functioning watches just to get the feel of things, practicing steady hand techniques with the tweezers and screwdrivers, etc. BTW, the tweezer manipulation seem to come naturally for me, but screwdrivers are another skill entirely! I felt confident enough after messing around with the throw away watch in the lot that I decided it was time to tackle my first full service. This little Seiko Automatic dates to June of 1974, and I thought it looked pretty cool. It did function, barely, and the keyless works felt sluggish (speaking kindly). Nevertheless, I thought this watch had character and decided to make it my first. I got through the full disassembly without losing a single screw, without a single spring flying away, etc. Needless to say I am pretty proud of myself! I laid everything out on the mat, with all of the hardware sitting beside each individual component. I still don't understand how watchmakers can put all of the screws together, get them all mixed up while cleaning, and then remember where everything goes. They make it look so easy. I'm definitely not at that point, and have a plan in place to keep all of the screws and other parts organized throughout the process. It will be tedious, but it will provide me with the comfort that I'll know exactly where everything goes without have to find the correct screw during re-assembly. On a side note, I had considered leaving the barrel assembled, as I've read that Seiko said that they should not be serviced, but rather replaced as a whole unit. Well what fun would that be? I found an excellent short video that Mark uploaded showing how to separate these Seiko barrels. It's a good thing I did take it apart as it was filthy with remnants of that old graphite grease that Seiko used. For now everything is getting organized into parts trays and stored for a few days while my new cleaning solution comes in. I've now done a rough first cleaning by hand already, but have some L&R cleaning and rinse solutions on the way. I also have plans to build myself a crude, but I believe it will be effective, cleaning machine using an old drill press motor I have laying around. I've got some properly sized square jars already, and am waiting on the cleaning basket to arrive. I am leaving for a work trip next weekend, but hopefully in a few weeks I'll be able to post pictures of my first full service on this good looking 70's Seiko.
 1 point
 -
Get the flex shaft extension for the dremel. Allows fine control.1 point
-
Bench top will always be better for larger surfaces (like a watch case). But space is an issue in my mancave, so I only have a dremel and get acceptable results. I'll probably get a bench top one at some point though1 point
-
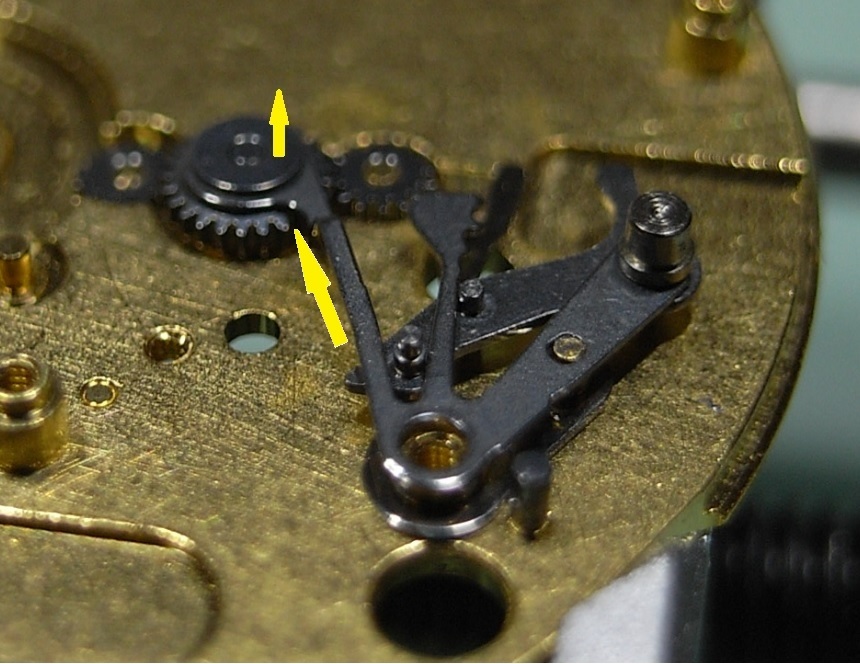
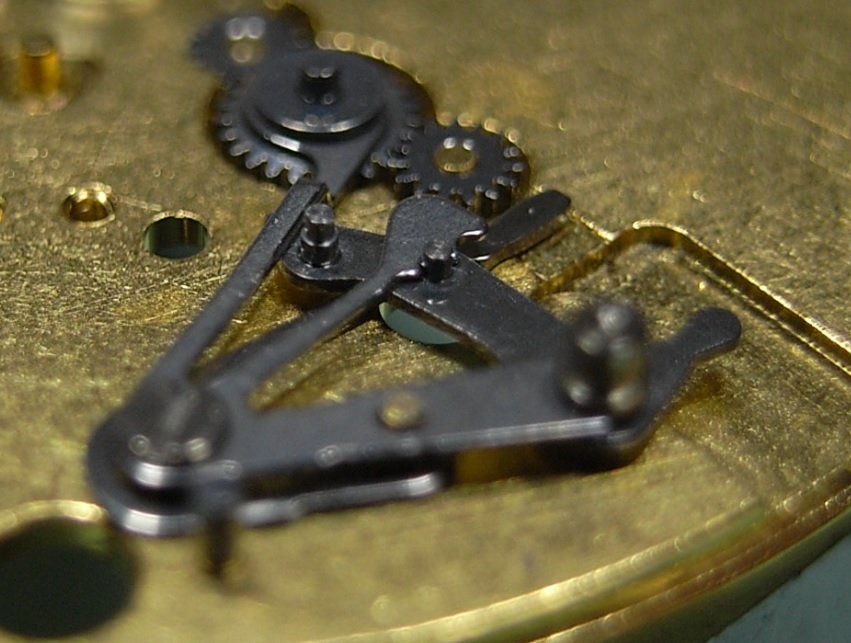
That's where the maltese cross would be mounted. It limits the number of turns you can wind up and also allows prearming the batrel1 point
-
Checked Jules borel and Caravelle 11dp . Found out the balance is in lots of movements . http://cgi.julesborel.com/cgi-bin/matcgi2?ref=[^[DXGXF Pallet fork even more. http://cgi.julesborel.com/cgi-bin/matcgi2?ref=T__BYM Only thing i can't find new parts. But will have to do with a donor if the balance is okay.1 point
-
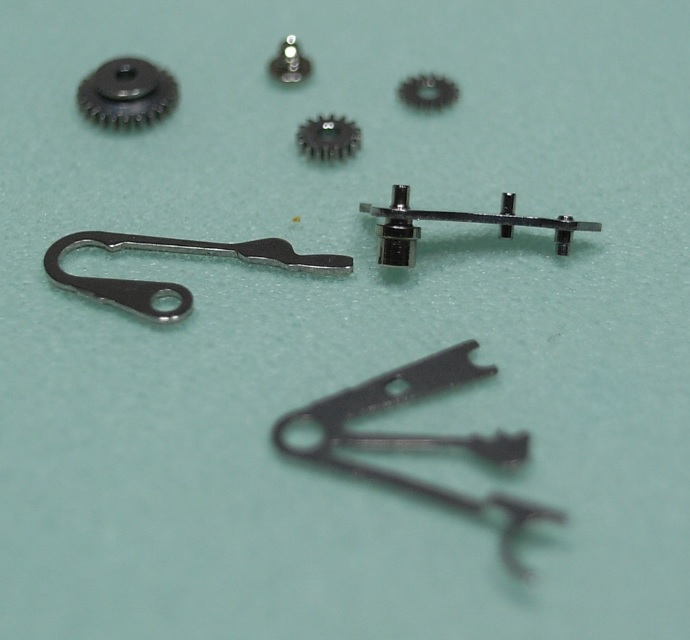
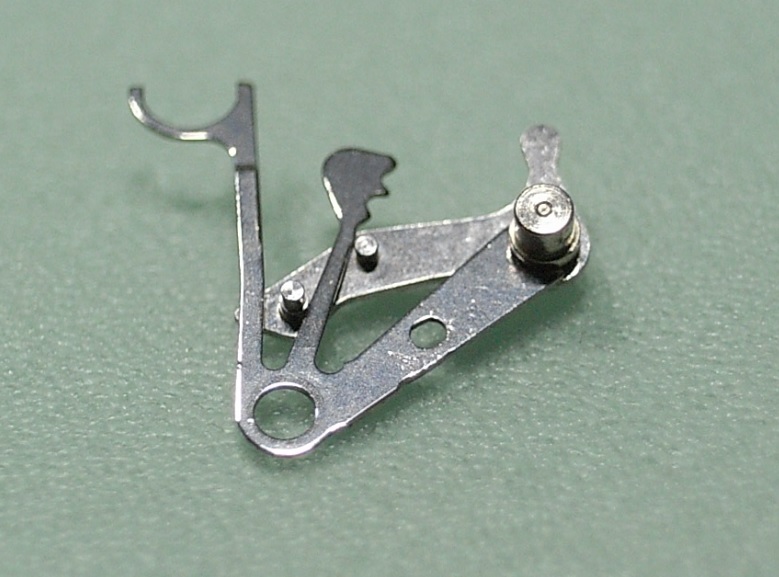
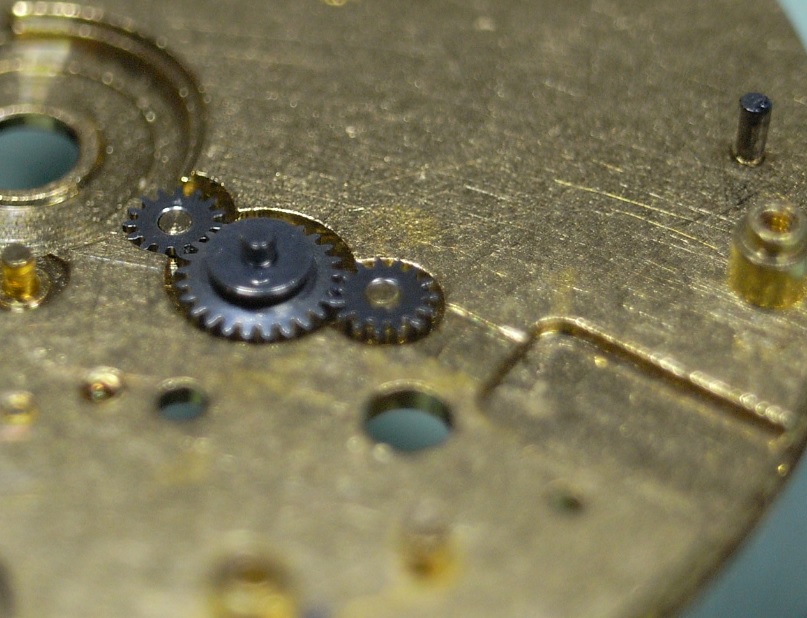
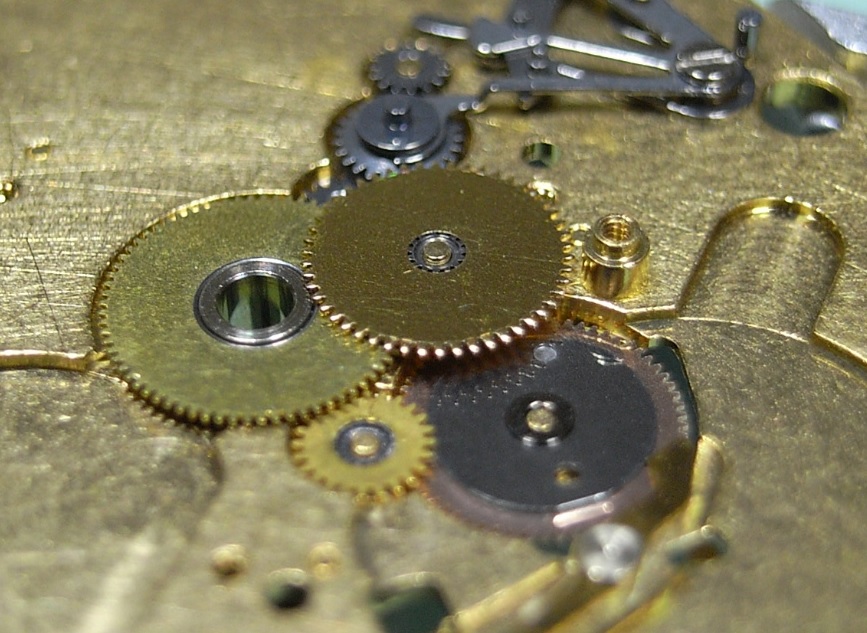
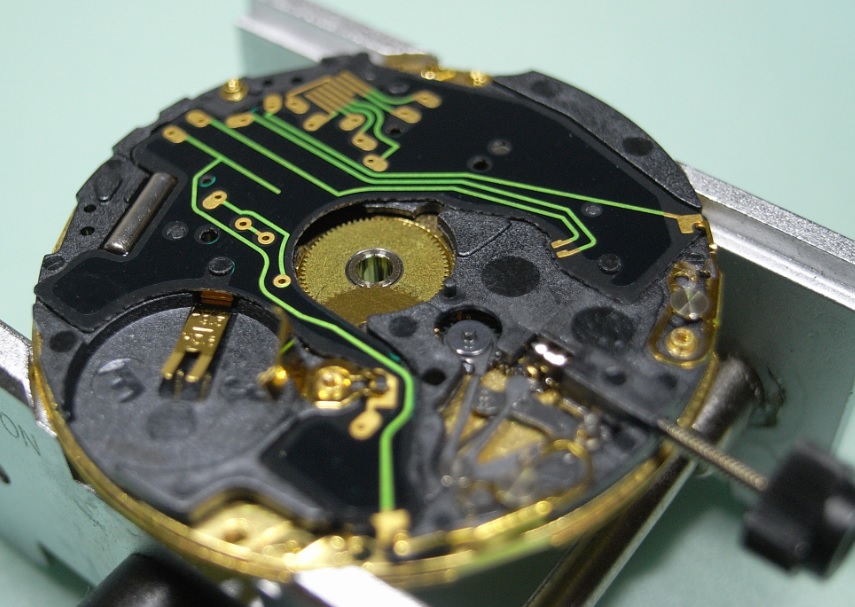
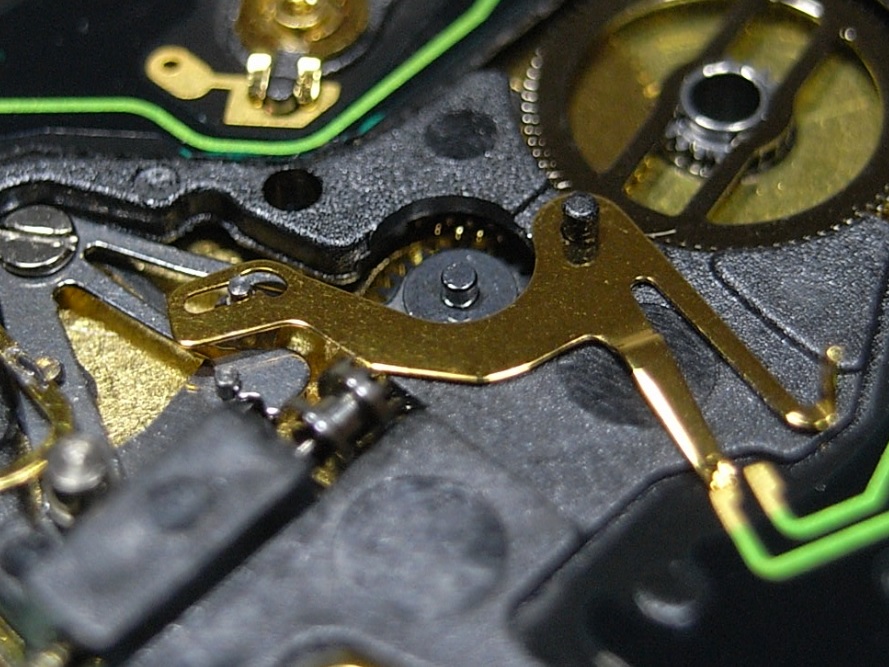
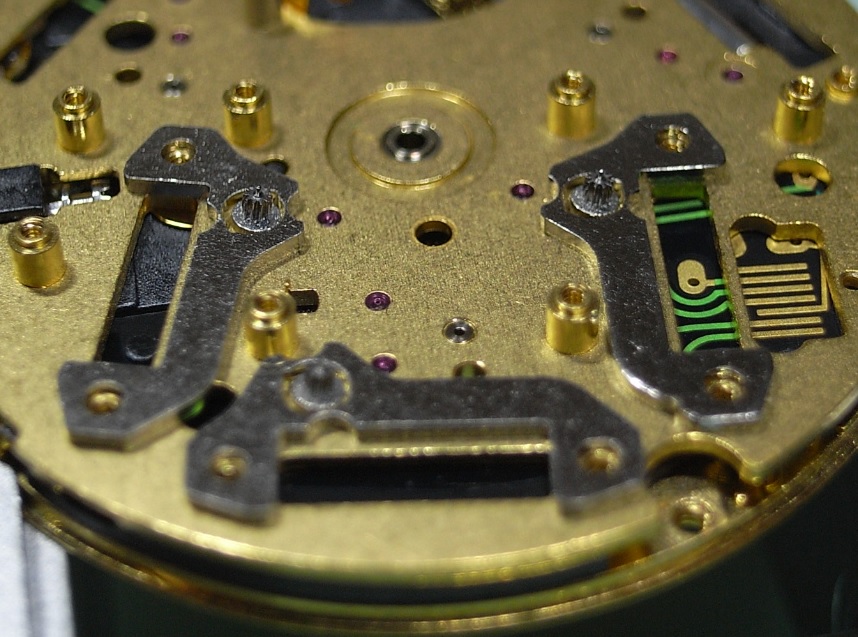
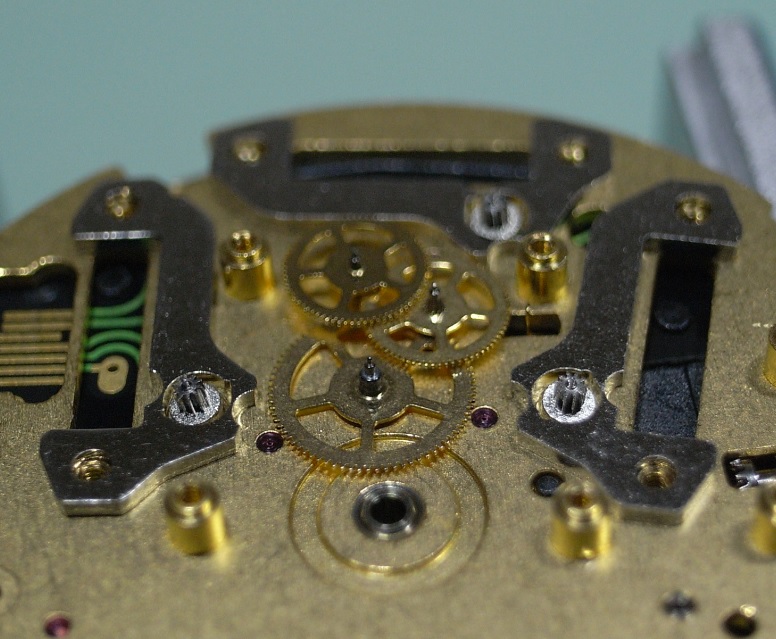
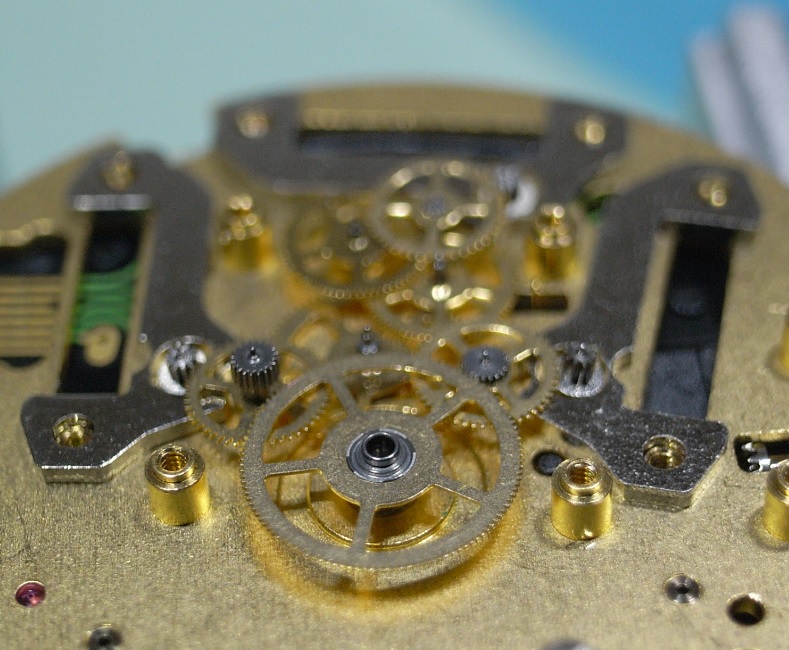
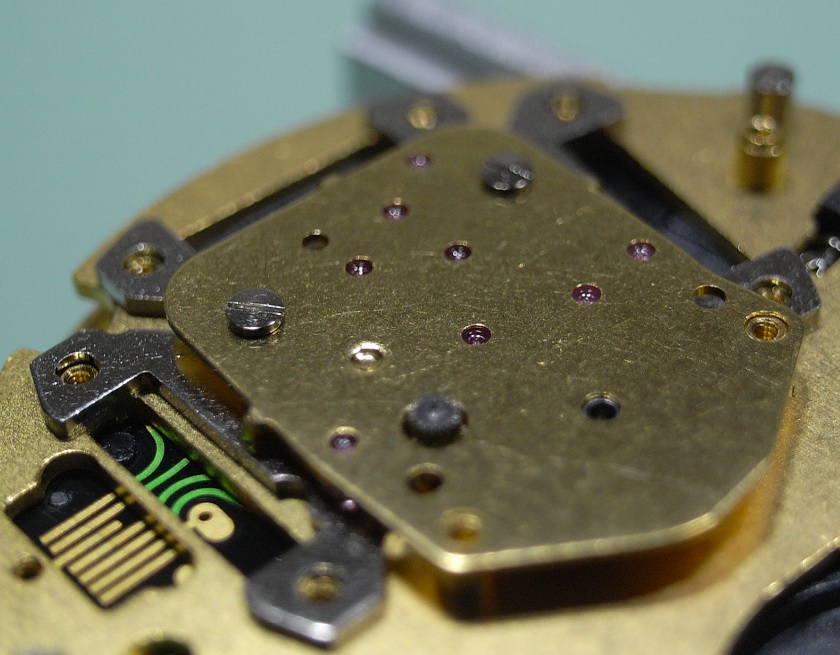
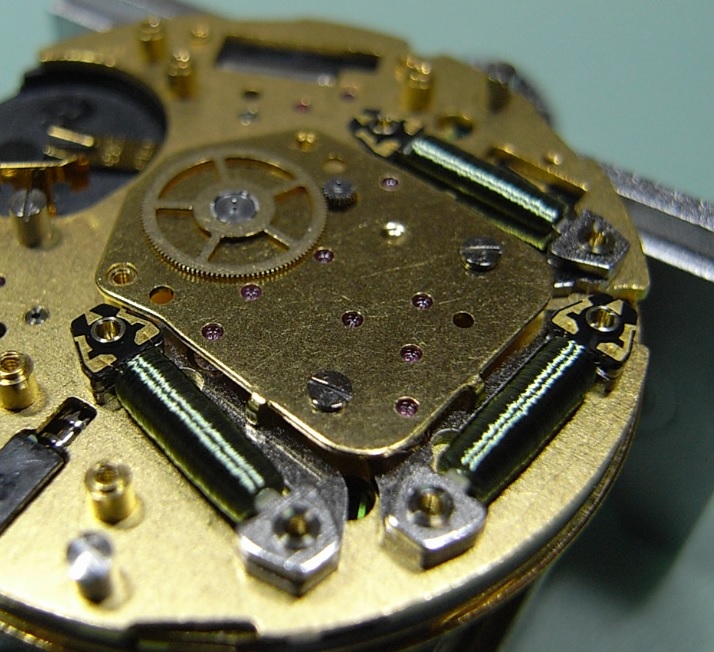
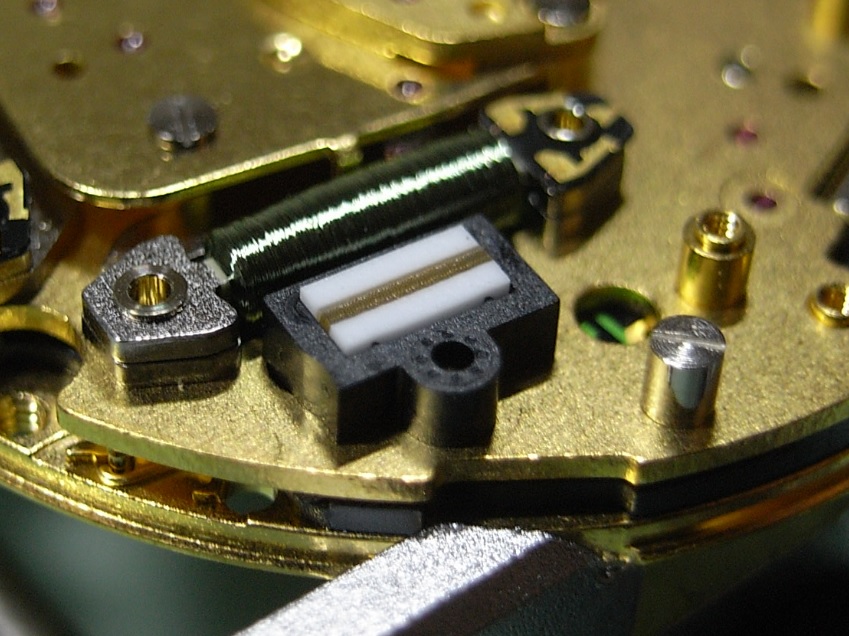
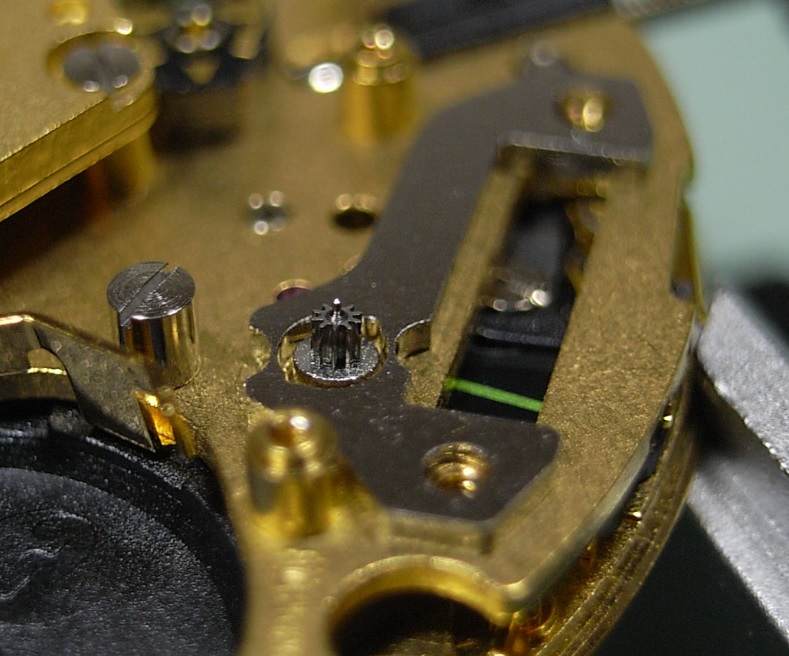
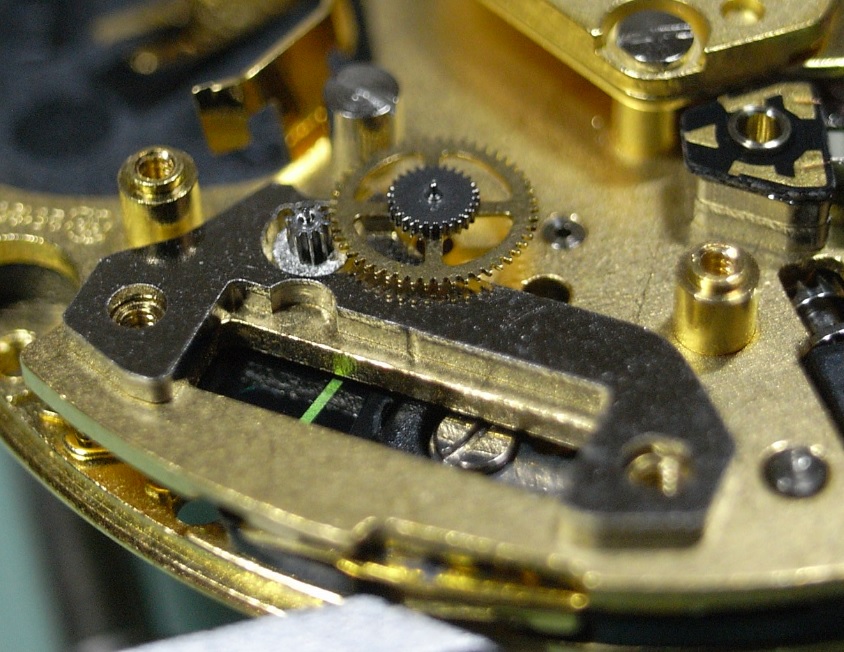
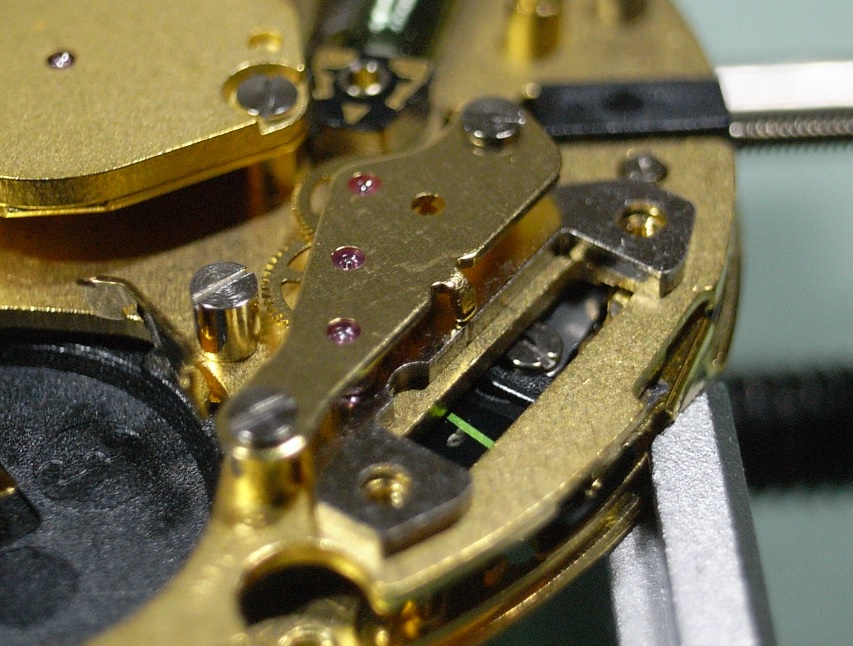
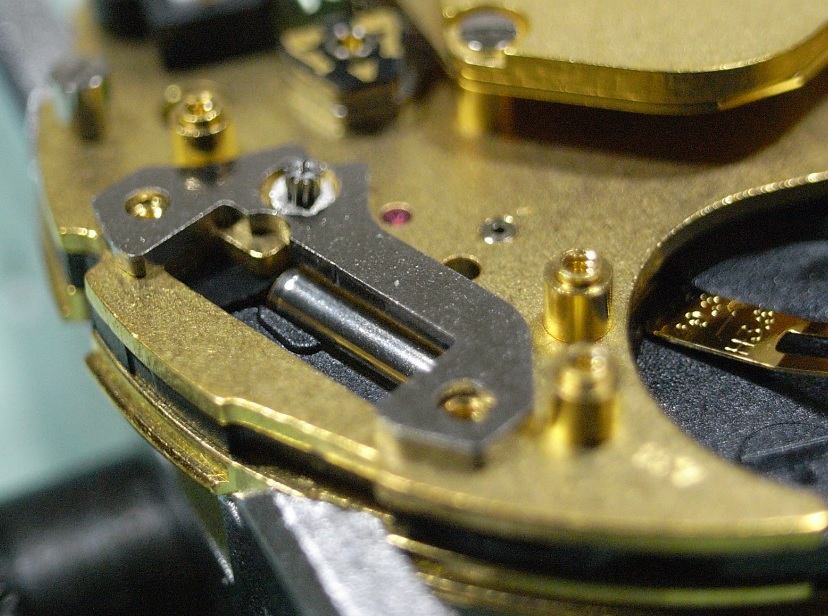
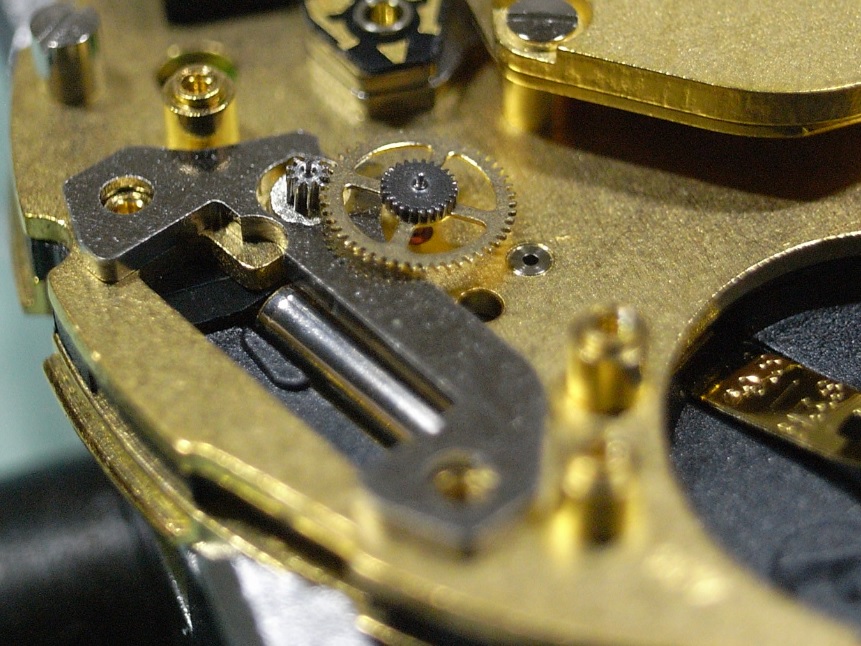
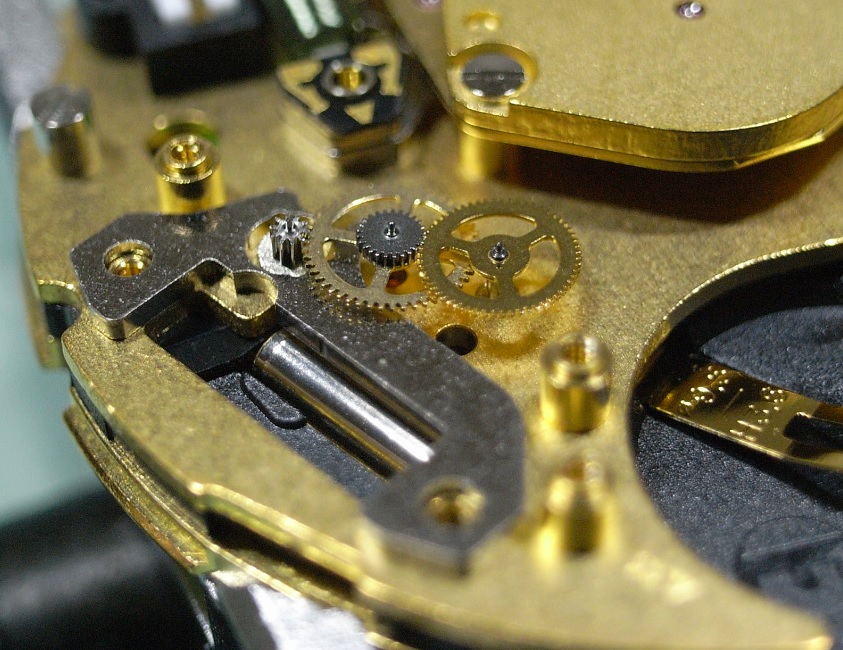
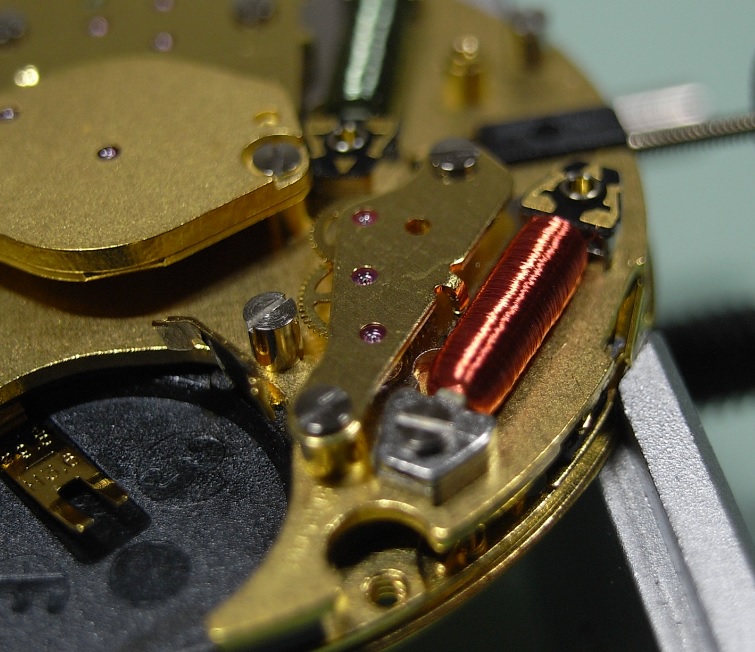
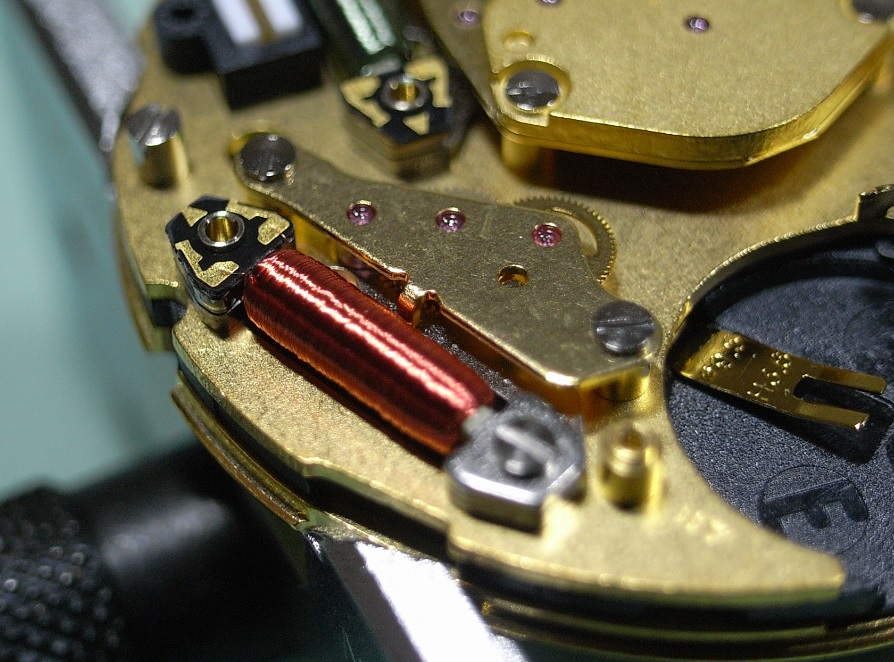
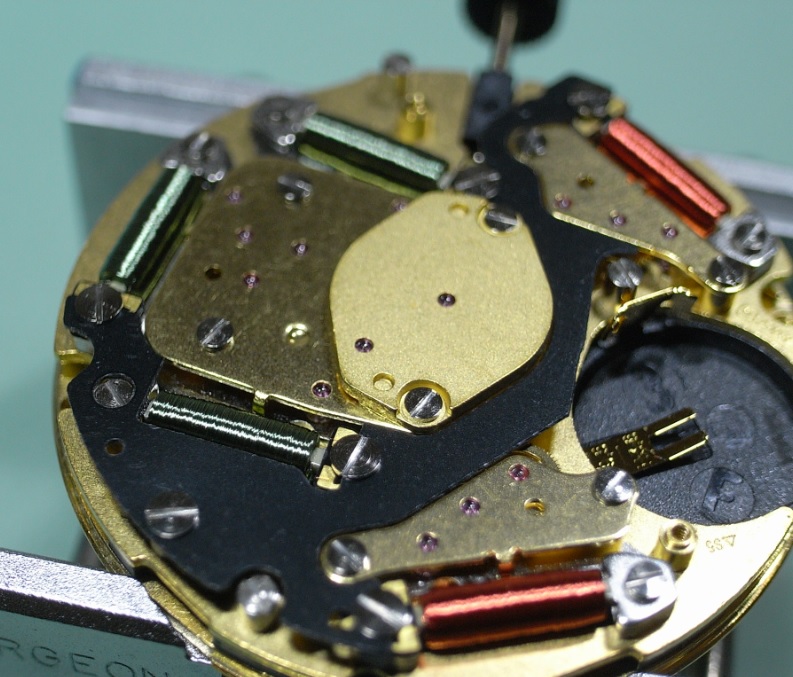
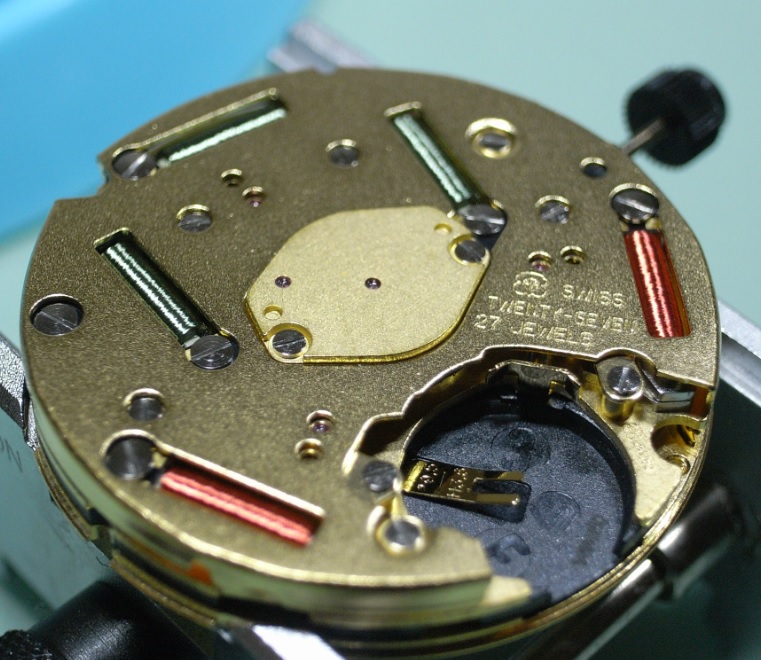
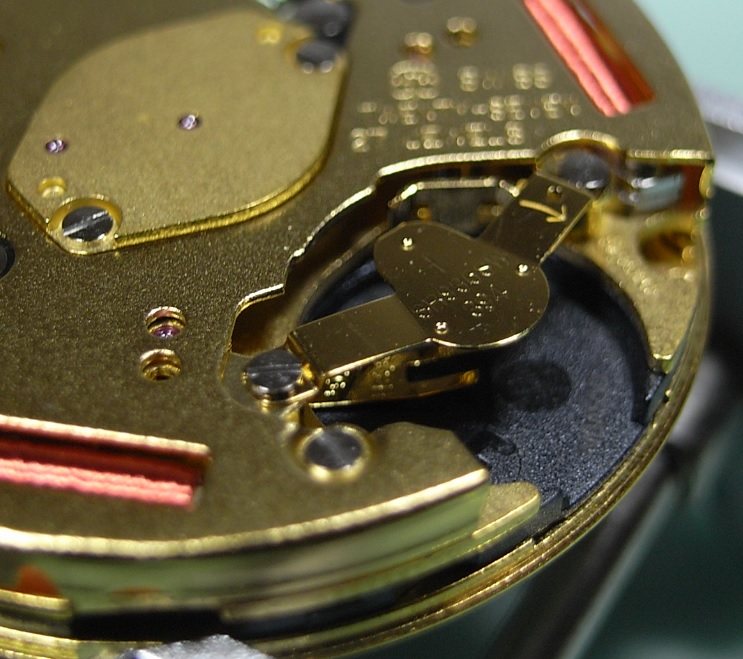
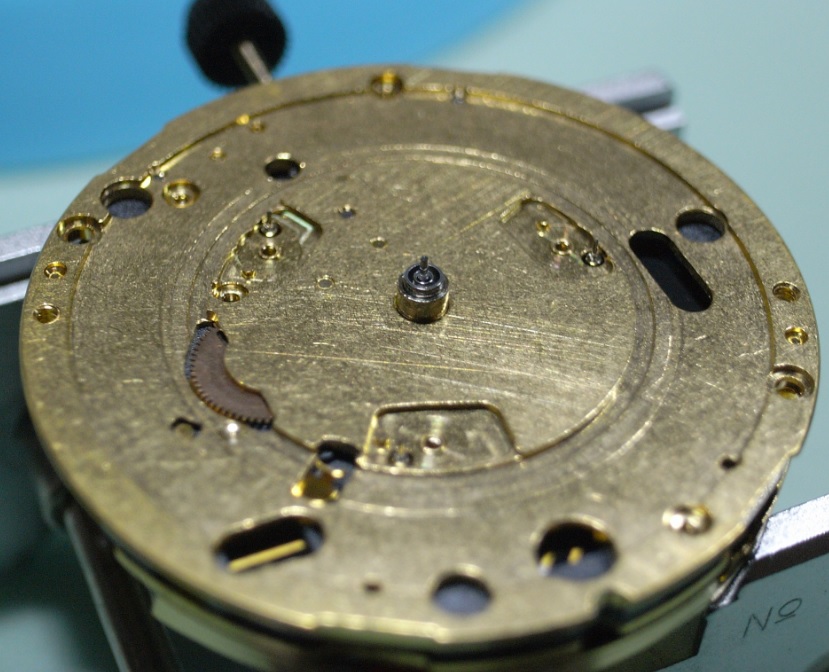
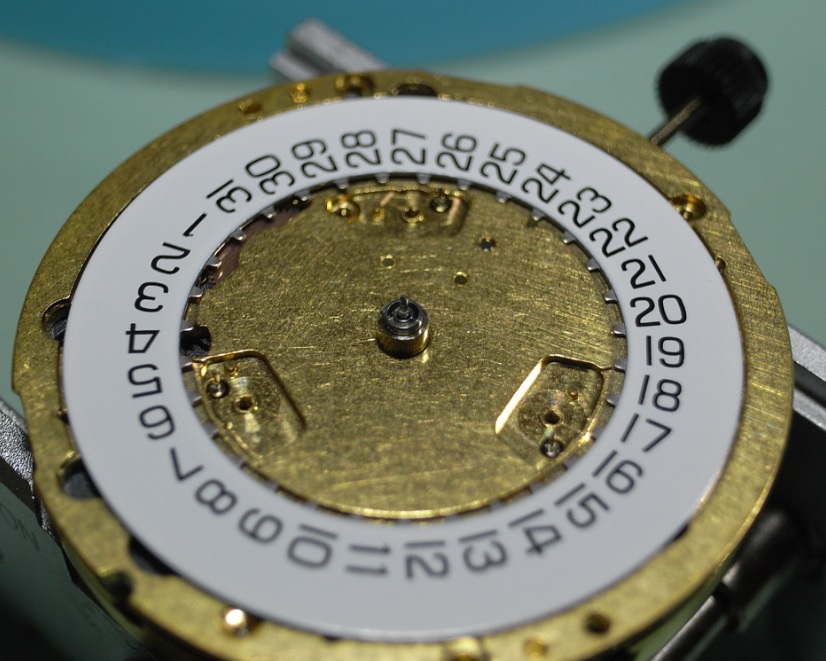
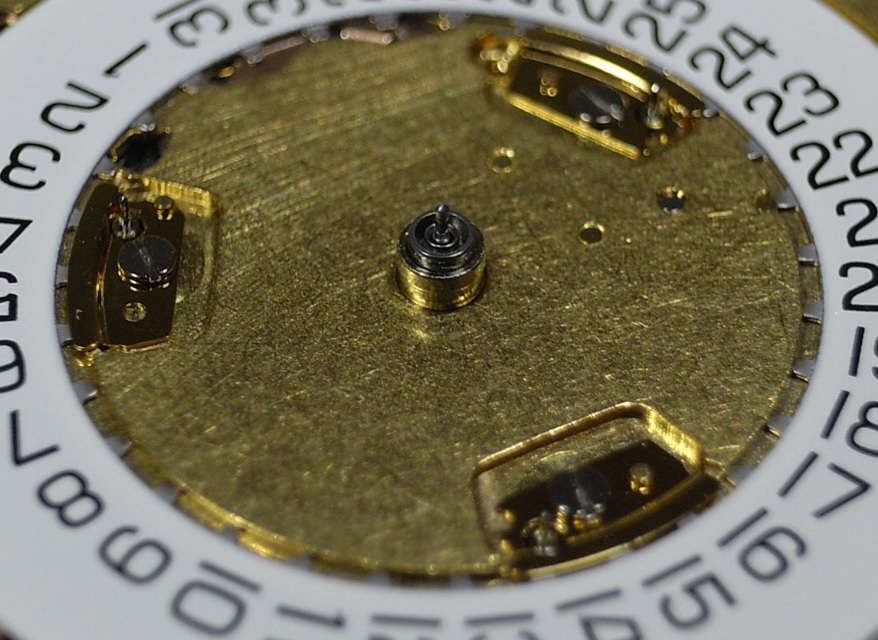
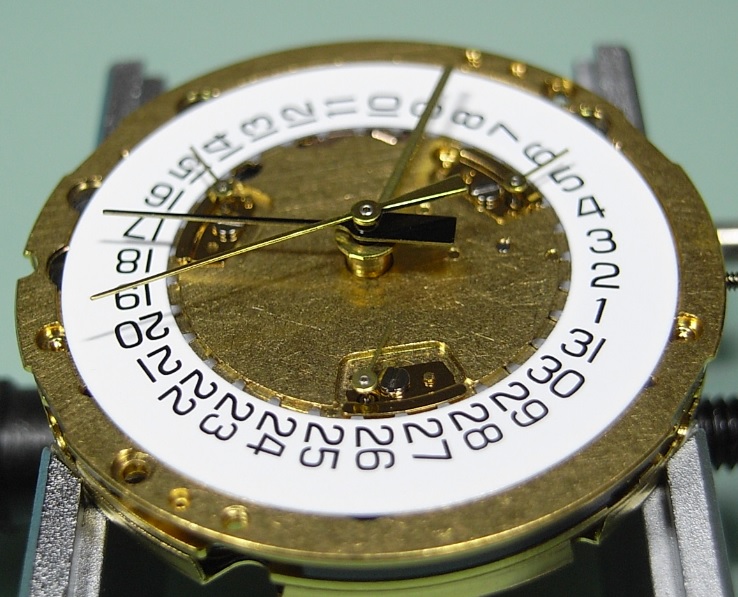
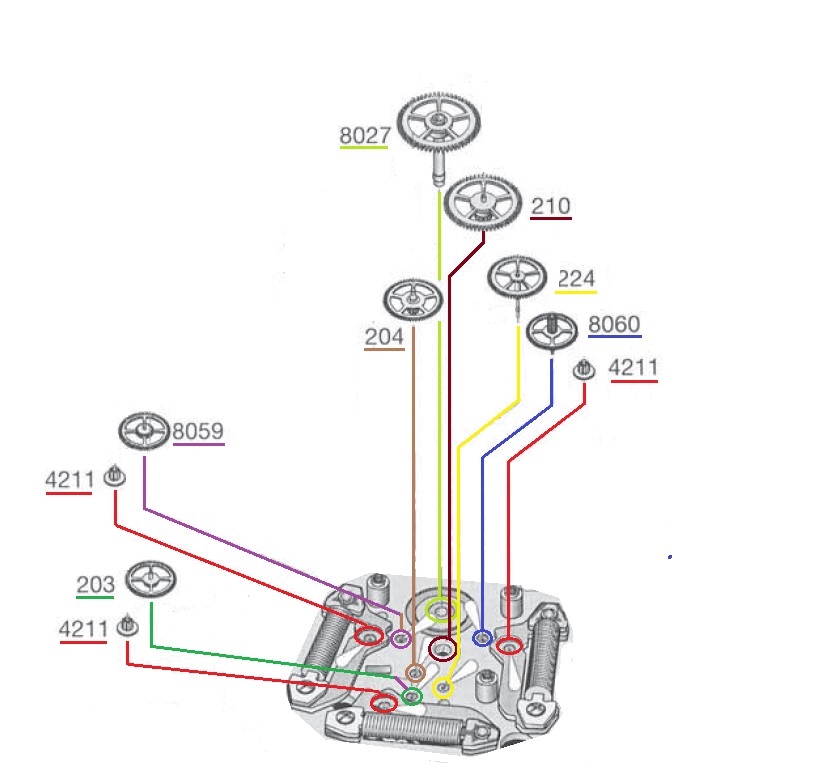
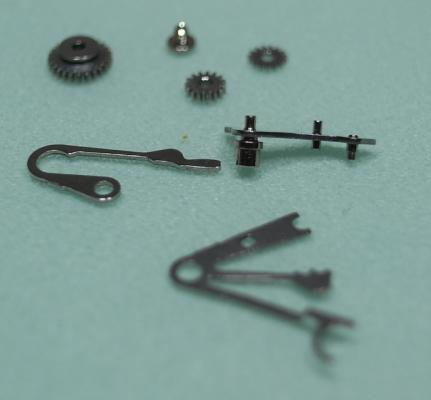
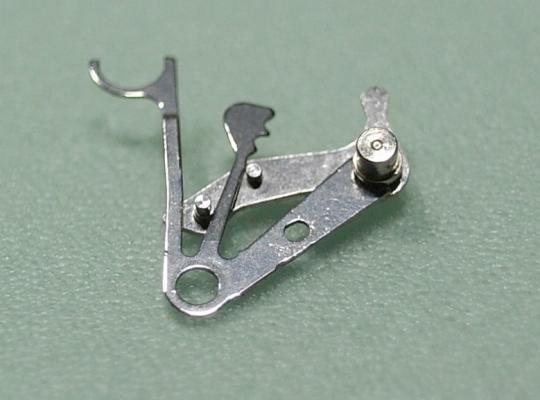
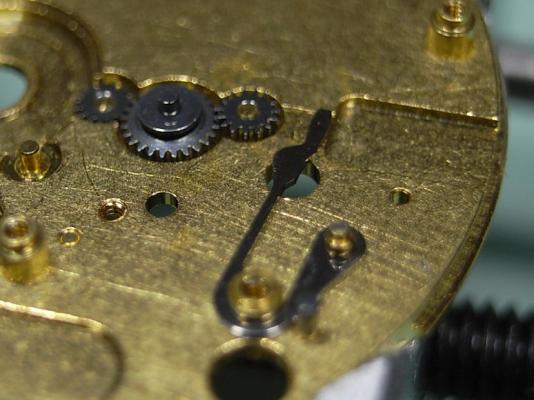
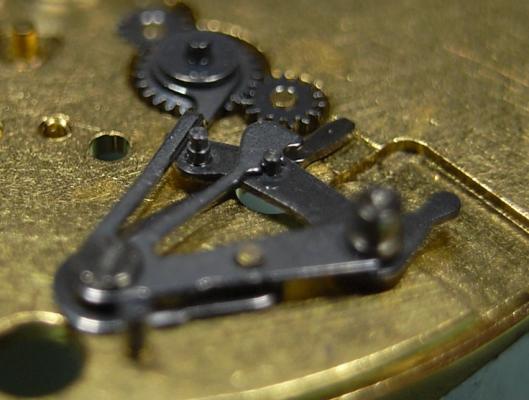
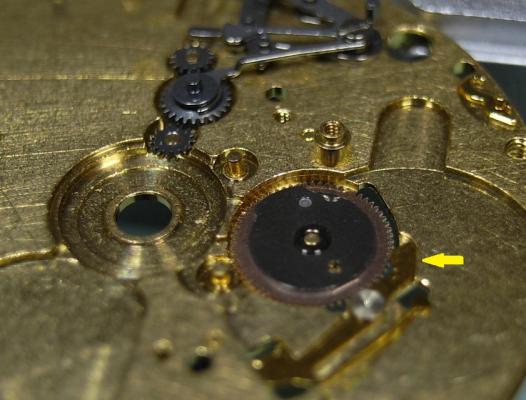
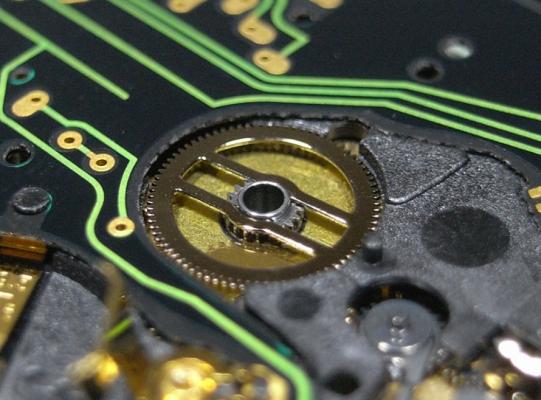
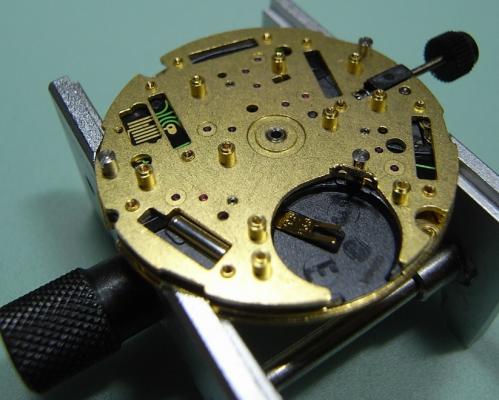
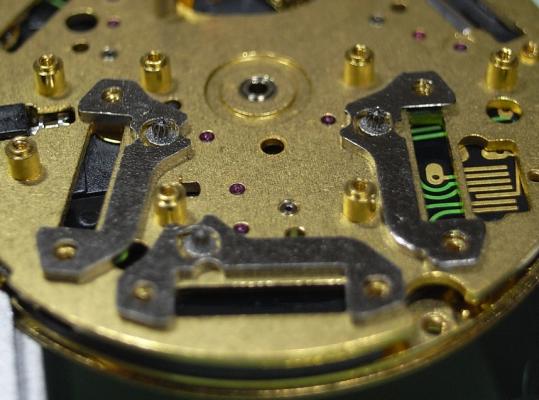
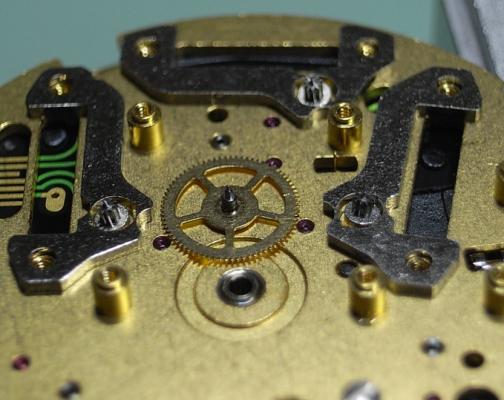
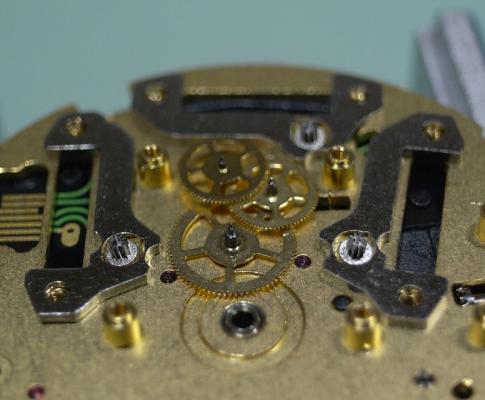
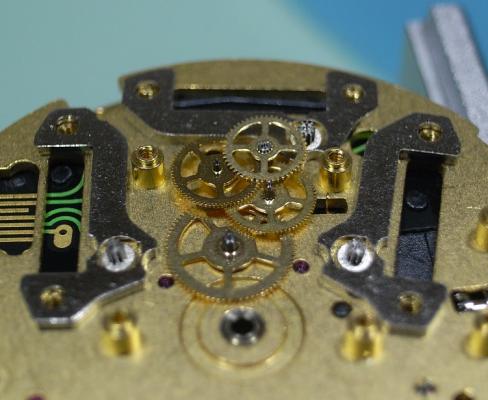
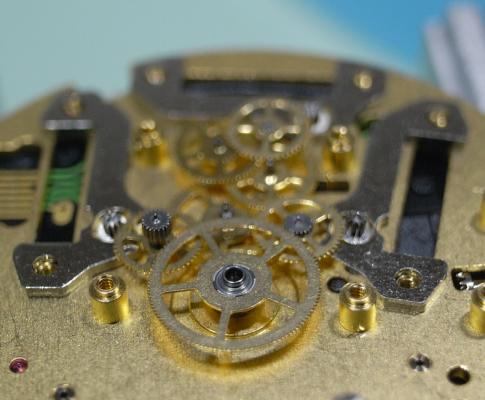
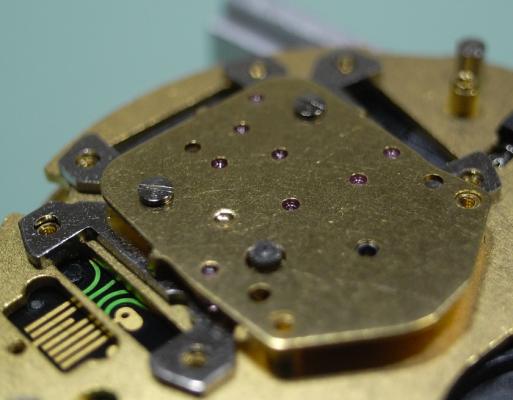
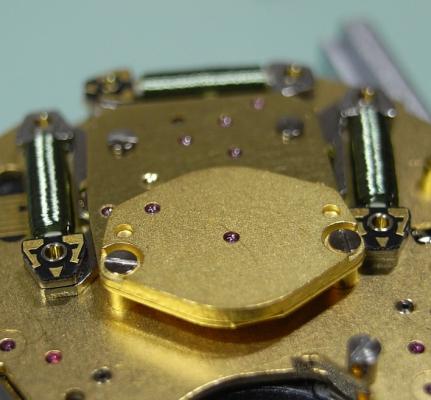
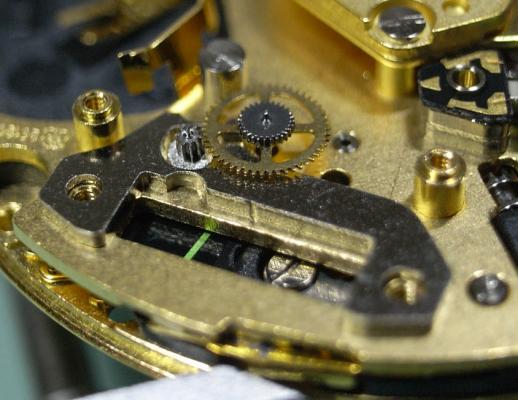
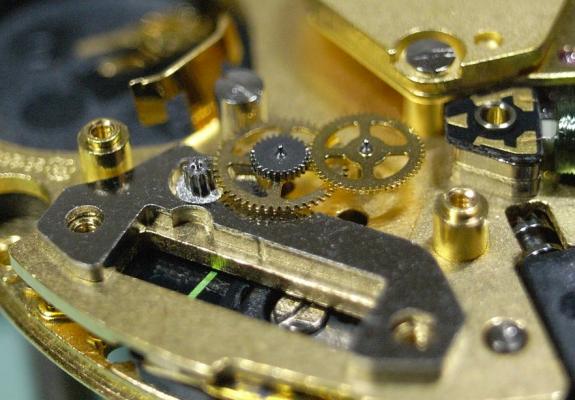
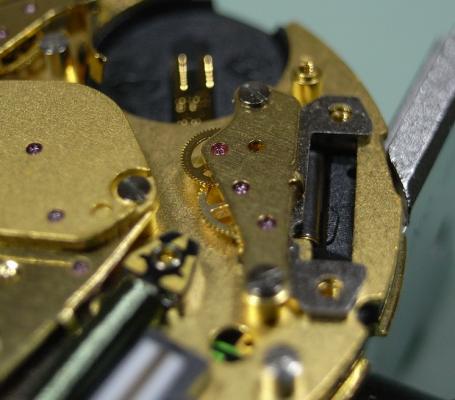
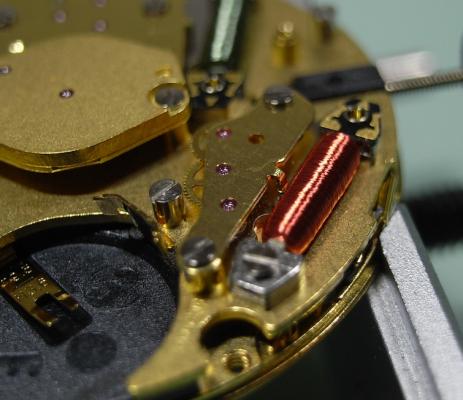
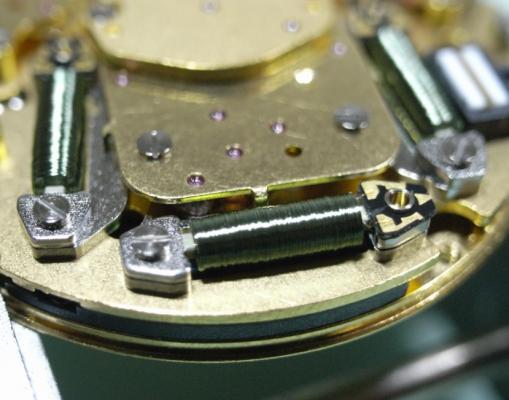
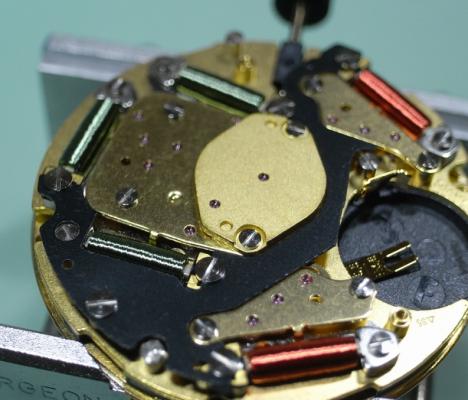
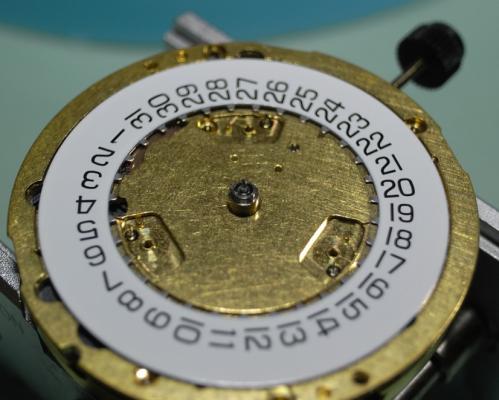
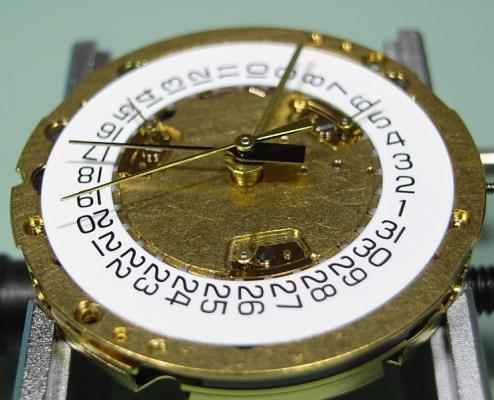
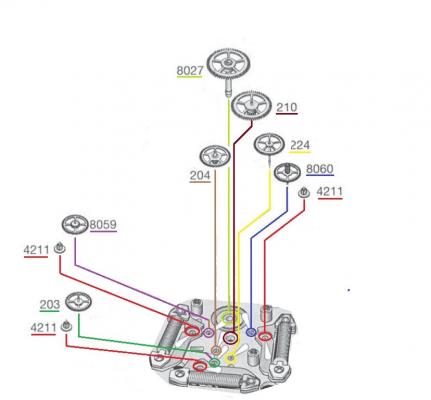
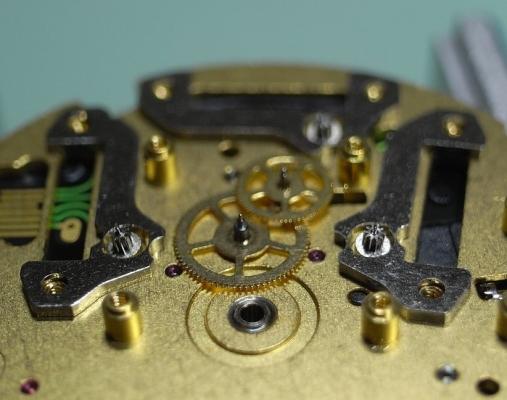
ETA 251.626 Service Walkthrough Part 2 Assembly We begin the assembly with the keyless work. Fit together the Setting Lever and Setting Lever Jumper. Then install the Driving Wheel, Intermediate Setting Wheel No.1, and the Setting Wheel Install the Yoke Then slide the saddle at the end of the Setting Lever Jumper Arm into the groove in the Intermediate Setting Wheel No.1. You will have to then lift the Intermediate Setting Wheel No.1 slightly to position the Setting Lever Assembly as shown below. Then locate the Setting Lever and Jumper onto their respective posts and slots. Once screwed down engage the position arm of the jumper onto it's post on the Setting Lever. Next install the Date Indicator Driving Wheel. Remember that you need to slide back the Date Jumper Once the Date Jumper is back in position check that the spring arm is once again down in it's correct position. Install the Contact Intermediate Wheel, the Hour Wheel and then the Minute Wheel. Replace the Electronic Module, then fit the Sliding Pinion and the Stem. Install the Cannon Pinion with Driver. Replace the Stop Lever/Switch. Then gently place the Upper Plate back on the movement, making sure the Yoke and Setting Lever are positioned correctly, and that you do not disturb any of the other components underneath. Refit the bank of Stators and Rotors which have the Green Coils. Now we come to the trickiest part of this service: installing the Main Gear Train. To assist in the order in which to install the wheels I will give the part numbers, and colour code the text, to match that of the diagram above. Start with the Third Wheel [210]. Then the Additional Intermediate Wheel [204] Then the Second Wheel [224] Then the Intermediate Wheel [203] Then the Driving Wheel for Second Counter [8059] Then the Driving Wheel for Chronograph Wheel 60s [8060] And lastly replace the Counting Wheel for Seconds or Minutes [8027] Once the train is in place, take some time to tweak the wheels so that are standing up as straight as possible. Remember that you have 10 pivots to align with their respective jewels, so taking some time to position the wheels and rotors now can save you a LOT of frustration fitting the Train Wheel Bridge. I would go so far as to take a little break, have a drink, relax your muscles and mind before proceeding to the next step. Fit the Train Wheel Bridge and align all the pivots to their jewels, and check the free running of all wheels before tightening down only the 2 rear screws. Install the Chronograph Wheel. Next fit the Chronograph Bridge and align the 2 pivot points to their jewels. This has to be done without the ability to manipulate the wheels directly, so make sure you inspect the jewels with high magnification to be sure the pivots are in their holes. And again, check the free running of the train. Replace the Connector Next we will install the small trains for the Counting Wheel, 1/10s and Hour Counters. These are the ones with the Red Coils driving them. Remember that the wheels are specific for each train and should have always been separated ... DO NOT MIX THEM UP. We shall begin with the right side. Install the right side Stator and Rotor for the 1/10s Counter. Next replace the Driving Wheel for Counting 1/10s [8059/1] Then replace the Counting Wheel, 1/10s [8027/1] Note this has 4 spokes to the wheel. Fit the Counting Wheel Bridge, making sure to align the pivots and test the free running before tightening. We repeat the process for the left side Hour/Minute Counting Train. Install the right side Stator and Rotor for the Hour/Minute Counter. Replace the Hour/Minute Counter Driving Wheel [8630/1] Then replace the Hour/Minute Counting Wheel [8600/1] Note this has 3 spokes to the wheel. Fit the Hour/Minute Wheel Bridge, making sure to align the pivots and test the free running before tightening. Fit the Red Coil to the right side Counting Wheel Assembly and screw down. Fit the Red Coil to the left side Counting Wheel Assembly and screw down. At this stage also screw down the 3 Green Coils. Refit the Additional Printed Circuit. Replace the Magnetic Screen. Secure the Battery Clamp. Then turn over the movement to the dial side. Fit the Date Indicator. And secure the Date Indicator with the 3 Indicator Maintaining Small Plates. Then fit the dial and hands and test all the functions of the movement. ETA 251.262 operating instructions.pdf The service is complete. As always, I hope this walkthrough was informative and instructive, and gives you the confidence to complete this service on your ETA 251.626


 1 point