

-
Similar Content
-
-
Recently Browsing
- No registered users viewing this page.
-
Topics
-
-
Posts
-
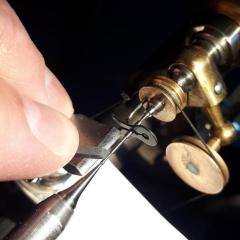 Well I would think that depends on many factors. This was the same Potence clip my father made when he attended the Bulova School after WWII, so maybe it's just that different places teach differently
 -
 I said it was a learning effort...I learned a TON!!! It was a great learning effort. Your time was much appreciated and led to a much deeper understanding on my part of many many things. I'm sorry if what I said gave a different impression. When I said it didn't work out, I meant in the sense that I wasn't able to repair the problem on the pocket watch I'm trying to service! More later... 😁
 -

By FabioBastardo · Posted
Here are the photos of the mystery watch. Grateful for any help with identifying it. Thanks everyone. Your knowledge is invaluable -

By luiazazrambo · Posted
Checked already it is 1.9mm. Meanwhile I came also to the same conclusion that the MS I am looking for is numbered as 2230 which is 2.05 mm in height (and made in different strengths), that's the reason why I double checked.. maybe it is the correct height. The barrel lid is actually not the press in type but the one which sits on the top so maybe the 2.05 what we are looking for. I put the barrel arbor and lid together and I think the gap and the 1.9mm adds together to 2.05mm: 2230 here which is for size 0s & 3/0s: https://pocketwatchdatabase.com/reference/mainsprings -
 That would actually be very clever and it would probably wash off the lubrication. You're supposed to apply it to clean parts then let it run a little bit and then apply the lubrication. Software-based timing solutions is a interesting term because you do require some hardware. As the world of timing machines have gotten more complicated even things like which he timing machines that might appear to be a physical timing machine are not they're basically a PC running well the machine at work is running Windows CE. Which from time to time has to be rebooted because it decides it doesn't want to work. Currently witschi decided that probably the intelligent move that they really not in the manufacturing and now they microphones with USB typically so expensive microphone because they have all sorts of nifty electronics buried in the thing and software in use apply the PC. Then as this image was convenient here's an example of what I was talking about how other methods of showing things can show things.This image was convenient I have others that are way more dramatic but you can see the effect of the gear train having some power fluctuations not bad though for 17 size vintage Elgin watch. In any case you can see the effect of the power and the gear train producing Uneven power and yes all gear trains are going to do this to a certain degree it's just the way they work and then we can see the output changes a little bit but not enough to be really concerned about for watch like this. Then the lift angle is probably not correct for this particular watch either So basically for any software you get your going to need a microphone and that will require some electronics fortunately some other people making software grasp this and they will supply a microphone. Here's a program that I've used. This is their US websites I do find websites for timing machine software or even timing machines quite interesting because apparently whoever comes here is supposed to grasp everything about whatever it is there purchasing where typically they may not especially if the software has enhanced features. https://www.etimer.net/ Then we have PCTM As you see highly recommended by others on the group. I think you going to need the enhanced version which you have to pay for I only have the free version. Frank's website is a bit hard to find and does seem to lack pretty pictures and descriptions of how the software works although he does of a PDF that explains this if you could find his website that is.
-


Recommended Posts
Join the conversation
You can post now and register later. If you have an account, sign in now to post with your account.
Note: Your post will require moderator approval before it will be visible.